In this guide, we will show you the steps to fix the “FAIL! SHA256 is invalid” error while trying to flash firmware via Odin on Samsung devices. Samsung devices have long adopted quite a different path in custom development. Be it the difference in firmware [having files like AP, BL, CP, CSC], firmware flashing [Download Mode instead of Fastboot] or rooting [flashing patched AP instead of patched boot], they seem to have taken an altogether different route.
When it comes to flashing firmware, then Odin is the preferred choice for tech enthusiasts [although we don’t have much choice in this either but even if we had, this tool would still occupy the top-most position in the priority queue]. With that said, a few users have voiced their concern that whenever they flash firmware via Odin on their Samsung, they are greeted with the “FAIL! SHA256 is invalid” error. If you are also getting bugged by this issue, then this guide will help you out. Follow along.
In order to rectify this issue, you will have to use patched Odin software. This patched version of Odin “ignores” any and every type of sha256 fails, carrier mismatches, and model mismatches. So you will be able to easily flash the desired firmware onto your device without having to worry about any SHA256 error. So download it from the below link [Credits: realbbb] and then flash the firmware as you do so using the normal Odin software. For instructions, you could refer to this guide.
Odin3 v3.14.1_3B_PatcheD.zip [LATEST]
Older Versions Here

These were the steps to fix the “FAIL! SHA256 is invalid” error while flashing firmware via Odin on Samsung devices. If you have any queries concerning the aforementioned steps, do let us know in the comments. We will get back to you with a solution at the earliest.
- How to Nand Erase and Re-Partition Samsung via Odin
- Download NetOdin: Flash Samsung Firmware Wirelessly
- How to Create Samsung Combination Firmware and Flash it via Odin
- How to Root any Samsung device via Magisk and Odin
About Chief Editor

Sadique Hassan
administrator
A technical geek by birth, he always has a keen interest in the Android platform right since the birth of the HTC Dream. The open-source environment always seems to intrigue him with the plethora of options available at his fingertips. “MBA by profession, blogger by choice!”
Hi friends, this tutorial will detail the troubleshooting steps to resolve Odin flash failed error on your Samsung Galaxy Smartphone.
All you might have encountered a at least a single error from the Odin app if tried to flash a firmware, root your Galaxy etc. But do how to resolve/fix each and every Odin errors. Even if you don’t never mind because we have compiled all the common Odin flash errors out there and came up with a solution for all.
The Odin Errors covered in this tutorial (Updated regularly with new errors);
- Odin error: “Firmware upgrade encountered an issue. Please select recovery mode in Kies & try again”.
- “Can’t open the serial(com) port”
- Odin error: Complete(write) operation failed
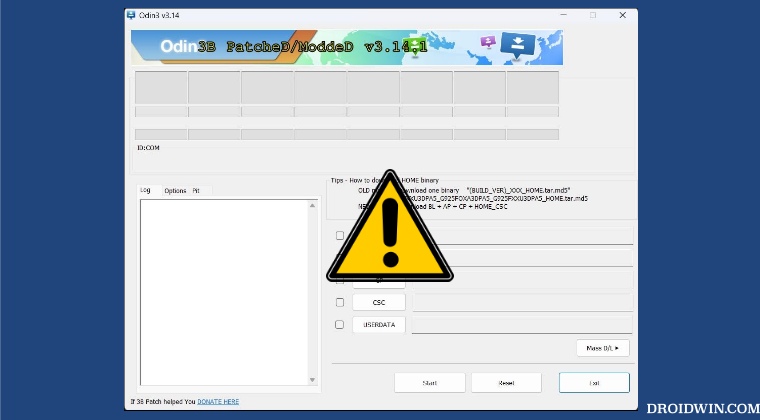
- Please get approval to use factory binary (Pit)
- Odin error: FAIL! SHA256 is invalid
- md5 error! Binary is invalid
Now lets start with the errors and solutions.
1. Odin flash failed error: “Firmware upgrade encountered an issue. Please select recovery mode in Kies & try again”.
Do you know what is the most annoying and scary (in the case of smartphones) thing in your life? I will say absolutely with no doubt that it is when you see the below screen on your Samsung Galaxy Smartphone, “Firmware upgrade encountered an issue. Please select recovery mode in Kies & try again”.
So, what is this and when will you get this error?
This normally happens on your Galaxy Smartphone when you try to downgrade your firmware, install custom ROM, install firmware using the Odin app etc. But why is this so annoying? It is because you feel completely helpless in that situation and have noting to do. I have myself gone through this recently and it lead me to write this tutorial.

I was trying to downgrade my Galaxy Smartphone OS from the latest to the previous one using Odin and no matter what I did I got this error which stayed on my phone, “Firmware upgrade encountered an issue. Please select recovery mode in Kies & try again”. The phone will never go to the recovery mode and will not boot up at all. And you will get the below message from the Odin which says “FAIL!” with a scary red background. Now the only thing we can do with your phone is to enter into the bootloader mode or the Download Mode.
The thing is that you may get this error even if you try to install the official stock firmware or any official firmware. The only option as per the phone to resolve this issue is using the Samsung Kies software, but trust me guys in most cases the Kies even doesn’t recognize your device, so nothing will be possible further.
So how can we resolve the error “Firmware upgrade encountered an issue. Please select recovery mode in Kies & try again” on your Galaxy Smartphone.
a. To resolve this first you need to enter your Galaxy Smartphone into the “Download Mode“. To enter your Galaxy Smartphone into the download mode please press and hold “Vol Down”+”Home”+”Power” buttons at the same time until you see your phone’s model number on the screen. When you see the model number release the “Power” button while holding the other buttons. Now you will get a warning screen, now release all the buttons and press the “Vol Up” button to continue and enter into the download mode.
You may also try the below download mode help tutorials.
- How To Enter Download Mode On Galaxy Smartphones Without Home Button?
- How To Enter Samsung Galaxy Smartphone Into Download Mode?
b. So lets assume you have entered into the download now. So lets proceed to downloading the necessary files. First you need to download the custom recovery and the Odin files from the below given links.
- Download TWRP Custom Recovery
If you are not able to find your device there, please search for the file using Google.
Now once the TWRP is downloaded please download the Odin app from the below link.
- Download Odin
Or you may download the latest Odin version from this link.
Once you have downloaded the files please unzip the archived files.
c. Now open the Odin executable file from the extracted Odin folder and connect your phone using USB cable to your PC. If you get an “Added” message from Odin then the connection is successful, if not try to install the Samsung USB drivers for your phone using the below link.
- Download All Samsung Galaxy Smartphone USB/ADB Drivers (Links)
d. Once done please click the “AP” in the Odin app and select the “tar.md5” recovery file you have already downloaded. Now click start to initiate the custom recovery installation.
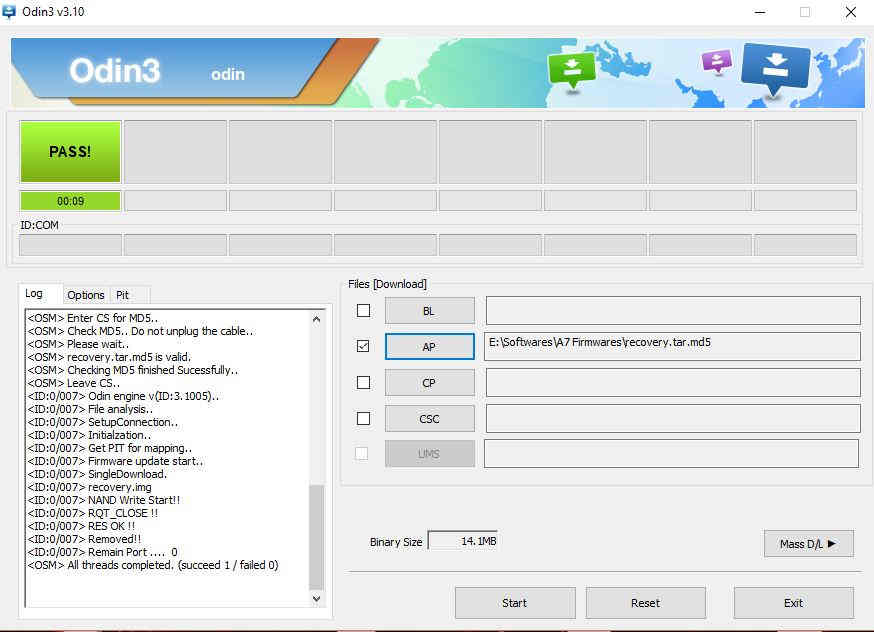
Once done you will get a “Pass” message from the Odin like given in the screenshot above. Now once your Galaxy Smartphone is restarted it will boot normally.
More Odin flashing errors, issues and solutions:
2. Odin flash failed error: “Can’t open the serial(com) port”
Cause: Most probably this issue arises due USB driver issues.
Solution: Install the latest Samsung USB driver from here;
- Download All Samsung Galaxy Smartphone USB/ADB Drivers (Links)
Once installed remove the USB cable and restart your PC and try the flashing steps again.
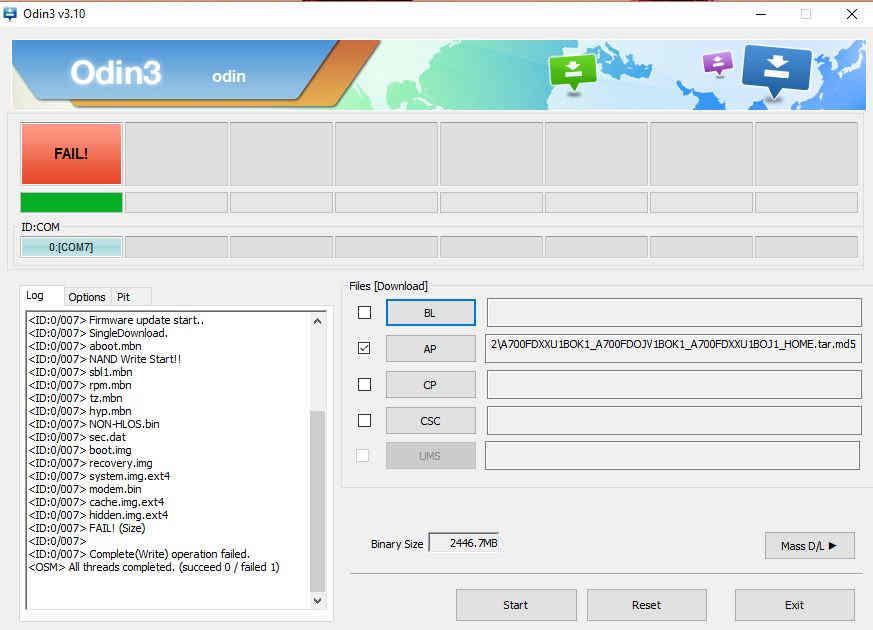
3. Odin flash failed error: “Complete(write) operation failed”
Cause: This is a general error. Causes can be a lot.
Solution: So first try the above step first. If it’s not working please double check whether you have enabled USB debugging and OEM unlock in developer options.
If none of the above solutions are working try using the patched Odin. Please download the patched Odin Odin 3.13.1.3B from here.
4. Odin flash failed error: “Please get approval to use factory binary (Pit)”
Actually this is the worst error of all. Some solution works for some phones while some not. There are phones which doesn’t even have any solution for this error yet.
Cause: New security feature in Android firmware which strictly block the installation of custom roms and combination firmwares.
Solution: You may download and try the patched Odin from the above link to resolve this. If that doesn’t help try the below steps.
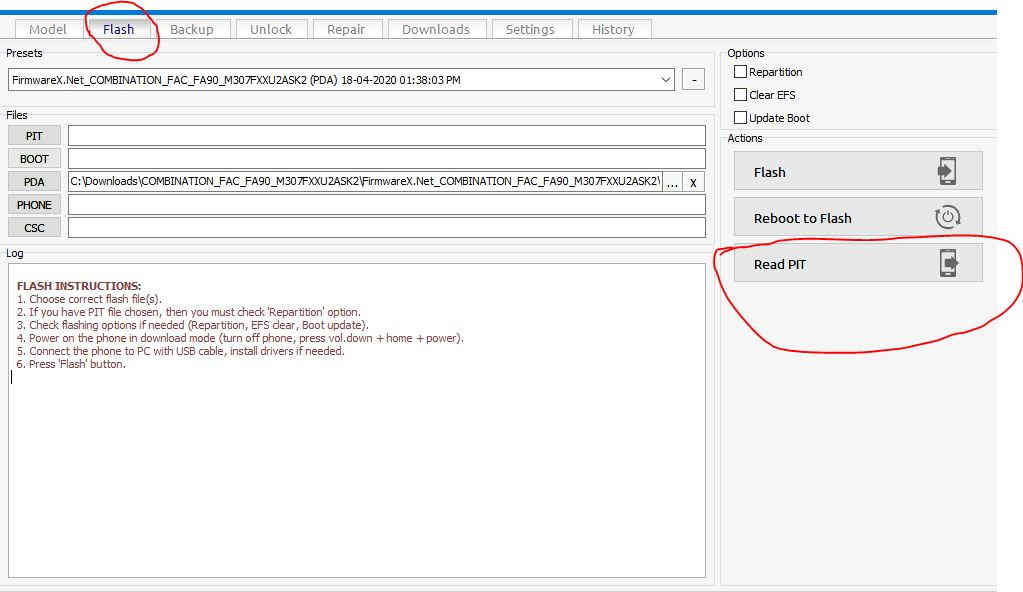
First you need to take a backup of your “PIT” file using the “Samsung Tool Pro” (it’ a payed windows software) app and insert the same in the Odin by going to the “PIT” tab in the Odin and by clicking the PIT button. This should be done while trying to flash with the combination firmware.
If the baked up PIT file didn’t work try searching Google for a PIT file which is compatible with for your phone.
5. Odin flash failed error: “FAIL! SHA256 is invalid”
Cause: This is normally due to the cross compatibility of the firmware you are trying to flash.
Solution: Try flashing using the below Odin patched versions.
- Patched Odin Odin 3.13.1.3B
- Odin.Prince.Comsy_SHA256
- Odin3_v3.13.1_3B_SHA256
6. Odin flash failed error: “md5 error! Binary is invalid”
Cause: This is a md5 error from Odin when binaries on the phone and the current one trying to flash are different. However sometimes you will get the error even if the binaries are matching. As you all know you need to have a binary equal or higher than the current binary on your Galaxy Smartphone to make a successful flash with the Odin.
Solution: To resolve this you need to change the file extension from “.tar.md5” to “.tar”. Just remove the “.md5” from it.
Hope your issue is resolved now.
However if you are having the following error ““An error occurred while updating the device software, use the emergency recovery function in the smart switch pc software”” after flashing with Odin the please follow the below tutorial;
- How To Fix “An Error Occurred While Updating The Device Software” On Galaxy Smartphone?
Normal queries for this tutorial
- How To Resolve Odin Flash Failed error On A Samsung Galaxy Smartphone?
- Resolve “Firmware upgrade encountered an issue. Please select recovery mode in Kies & try again” error On A Samsung Galaxy Smartphone.
- How to resolve not able to boot up after installing firmware using Odin?
- Resolve not able to boot up after downgrading firmware using Odin
- How To Resolve “Can’t open the serial(com) port” Odin error?
- Resolve “Complete(write) operation failed” Odin error
- How To Resolve “Please get approval to use factory binary (Pit)” Odin error?
- Resolve “FAIL! SHA256 is invalid” Odin error.
- How To Resolve “md5 error! Binary is invalid” Odin error?
If “How To Resolve Odin Flash Failed On Galaxy Smartphone?” tutorial really helped you, please give a like/share on social networking websites by using the below given buttons.

Ошибки при прошивки Samsung телефонов в ODIN. И так вы созрели до момента, что необходимо прошить свой Samsung. Скачали программу Odin, прочитали статью как прошить свой Android, нашли прошивку, но в момент ее установки все время выбивает ошибки? Как это все исправить и понять что происходит? Все ответы в данной статье!

1. После каждой выявленной ошибки, отключите смартфон или планшет от компьютера, выключите его и снова переведите в режим прошивки.
2. Перезапустите программу для прошивки Odin и подключите смартфон или планшет к компьютеру! Можете снова пробовать шить прошивку!
3. Самое главное! Только новые драйвера и только ОРИГИНАЛЬНЫЕ, ЦЕЛЫЕ и ДОРОГИЕ КАБЕЛИ (50% от всех ошибок являются кабели)!
Типичные ошибки при прошивки Samsung в ODIN
Ошибка подключения устройства
Вариант 1
<ID:0/005> File analysis..
<ID:0/005> SetupConnection..
<OSM> All threads completed. (succeed 0 / failed 1)
Вариант 2
<ID:0/005> File analysis..
<ID:0/005> SetupConnection..
<ID:0/005> Complete(Write) operation failed.
<OSM> All threads completed. (succeed 0 / failed 1)
Решение:
- Убедиться что устройство переведено в специальный режим обновления Downloading, если это не так то перевести;
- Убедиться в целостности используемого USB-шнура (при необходимости заменить), если кабель не оригинальный заменить на оригинальный. Кабель вставить в задний порт USB 2.0 системного блока компьютера.
Samsung «не виден» в Odin
В Odin не отображается ID и COM подключенного смартфона или планшета Samsung

Решение:
1. Убедиться что устройство переведено в специальный режим обновления Downloading, если это не так то перевести;
{rutube}27820823767eb149d68fcb23575e2fa7{/rutube}
2. Убедиться в целостности используемого USB-шнура (при необходимости заменить), если кабель не оригинальный заменить на оригинальный. Кабель вставить в задний порт USB 2.0 системного блока компьютера;
3. Скачать другую версию Odin;
4. Запустить Odin от имени администратора;
5. Перезагрузить компьютер;
6. Удалить программу Kies и драйверы Samsung, перезагрузить компьютер и снова их установить;
7. Временно отключить антивирусник;
8. Если на компьютере установлена еще одна ОС Windows, то попробовать произвести прошивку с нее или прошить на другом ПК;
9. Произвести прошивку на другом компьютере;
10. Убедиться что ваш Samsung не является китайской поделкой, если это не так то повторить пункты 1-9.
Процесс прошивки остановлен на процессе инициализации (проверка подключения)
Если при прошивке Samsung в программе ODIN появиться ошибка:
Вариант 1
<ID:0/004> SetupConnection..
<ID:0/004> Can’t open the serial(COM) port.
<OSM> All threads completed. (succeed 0 / failed 1)
Вариант 2
<ID:0/004> Odin v.3 engine (ID:4)..
<ID:0/004> File analysis..
<ID:0/004> SetupConnection..
<ID:0/004> Initialzation..
Решение: Необходимо подключить устройство в другой USB порт, либо попробовать прошить Samsung на другом компьютере.
Файл Прошивки битый: MD5 hash value is invalid
Если Odin не дает прошить Android и выдает подобную ошибку:
Added!!
Enter CS for MD5..
Check MD5.. Do not unplug the cable..
Please wait..
MD5 hash value is invalid
xxxxxxxxxxx.tar.md5 is invalid.
End…
Это означает что, вы скачали битый файл (недокачанный) или файл не верно подписан.
Решение: Стоит убедиться действительно ли файл прошивки скачанный полностью, если нет, то перекачать. Если файл скачан полностью, удалить с файла расширение .md5
Ошибки при прошивке разделов system.img, boot.img, recovery.img, sboot.bin, cache.img и других разделов
<ID:0/017> system.img
<ID:0/017> FAIL!
или
<ID:0/017> recovery.img
<ID:0/017> FAIL!
или
<ID:0/003> sboot.bin
<ID:0/003> NAND Write Start!!
<ID:0/003> FAIL!
или
FAIL!
Re-Partition operation failed.
All threads completed. (succeed 0 / failed 1)
и другие похожие варианты, но с разными разделами.
Может возникнуть из-за того, что вы пытаетесь прошить либо битый файл прошивки или от другого устройства Samsung ( у вас модель i9100, а прошиваете от i9300). Также это может быть следствие попытки понизить версию ОС Android.
Решение:
- Скачать прошивку с альтернативного источника, если присутствует какое либо описание к файлу, то прочитать;
- Убедиться что прошивка предназначена для вашего устройства Samsung;
- В случае необходимости понижения версии ОС Android, пересобрать прошивку удалив файл sboot.bin;
- В случае перехода с кастомной прошивки на официальную, в начале выполнить сброс (wipe data и wipe system).
Ошибки связанные с повреждением разделов памяти Samsung
Вариант 1
<ID:0/004> Get PIT for mapping..
<ID:0/004> Complete(Write) operation failed.
<OSM> All threads completed. (succeed 0 / failed 1)
Вариант 2
<ID:0/004> FAIL!
<ID:0/004>
<ID:0/004> Re-Partition operation failed.
<OSM> All threads completed. (succeed 0 / failed 1)
Вариант 3
<ID:0/004> Get PIT for mapping..
<ID:0/004> Complete(Write) operation failed.
<OSM> All threads completed. (succeed 0 / failed 1)
Данные проблемы могут возникнуть в следствие повреждения разметки секторов внутренних разделов флеш-памяти устройства, попытки прошить чужой или модифицированный PIT файл, либо поврежден загрузчик
Решение:
- Попытаться найти 4-х файловую сервисную прошивку в интернете, а также PIT файл для вашего устройства и произвести прошивку в Odin;
- В случае не удачной попытки обратиться в СЦ.
Ошибки с отсутствием возможности доступа к записи разделов
FAP LOCK:ON
Custom Binary(RECOVERY) Blocked By FAP Lock
Изменить несколько параметров в настройках:
1. Включить «Отладку по USB» и там в же настройках включить «Разблокировка OEM»;

2. Отключить «Удаленное управление» Samsung;

Samsung не запускается
Если у вас на экране похожее соображение, то это означает что предыдущая прошивка была прервана:

Решение:
- Найдите прошивку Samsung для своего устройства, скачайте ее, после чего установите с помощью Odin, после чего попробуйте снова загрузить девайс (если не сработает переходим ко второму пункту);
- Выполните сброс данных (wipe data/factory reset), после чего попробуйте снова загрузить девайс.