Failed To Mount Data may be the most annoying error that your Android device may come up any moment when you are trying to play around. The reason for this error to pop up is something going wrong with the internal storage partition of your phone. This can happen when you are applying any tweaks or trying to modify your phone using something custom. Once this error comes up, it will not let your phone boot up and it will stay stuck in the boot-screen unless you fix it. 
Fixing this error is not as easy as it seems. Simply wiping the cache will not be good enough. You have to try multiple workarounds and see which one suits the situation. Simply factory resetting your device might fail as well. This error is more of bad news because while trying to fix it, you will lose all your data. If you have a backup previously, then you are on a safe side. Let’s have a look at the available solutions and see which one works out for fixing Failed To Mount Data (Invalid Argument) error.
Method #1 Wipe Data/Factory Reset
- Boot your Android phone into recovery mode. You may use the Volume Down + Home button for Google Nexus and other smartphones. Use Volume Up + Power + Home button for Samsung phones and for other phones use Volume Up + Volume Down + Home button.
- Once you are in recovery mode, use Volume Up and Down keys to navigate to “Wipe Cache Partition” option. Press Power Key to select it and then wipe it.
- Reboot the device and see if it boots up. This is just a try, it won’t boot up though.
- Now boot into recovery mode again and this time select “Wipe Data/Factory Reset”. This will wipe the partition from your phone.
- Now reboot and your phone should boot up fine.
Method #2 Wipe Data/Factory Reset using a Custom Recovery
For this method to work, you need to have a custom recovery like TWRP, CWM or Philz Advanced CWM installed on your phone.
- Install TWRP recovery or any other recovery depending on your convenience.
- Now boot into the recovery that you just installed.
- If you have TWRP recovery, then do this.
- Boot into TWRP and tap Wipe > Advanced Wipe > Select the Data partition, cache and Dalvik cache > Wipe > Swipe to confirm wipe.
- Reboot your device and it should just boot up right.

- If you have Philz Advanced CWM, do this.
- Boot into Philz Advanced CWM recovery and tap Wipe Cache/Data Partition and then wipe it. With Philz Advanced CWM, you can go to Wipe Cache/Data Partition options > Wipe for flashing new ROM option might work as well.
- If you have CWM, then boot into it and select the Wipe Data/Factory Reset option and do it.
- Reboot your phone now and it should boot up. In case if it fails, you will have to flash new stock firmware on your phone.

Method #3: Install Stock Firmware
At this point, you are completely out of luck and the only option that you are left with is the installation of a brand new Stock Firmware. Various guides for different brands are available on our site. Pick up the one that suits you and do it now.
- How to Install Stock firmware on LG devices using KDZ Flash Tool
- How To Flash Stock Firmware On Samsung Galaxy With Odin
- How To Unroot & Restore Stock Firmware On Sony Xperia Devices
That’s all. Let us know which method works for you. If you need any further help, reach us out through the comment box below.
Сегодня на рынке можно найти широкий спектр электронных устройств, с мобильными телефонами на подъеме . Эти новые технологии предлагают каждому множество бесплатных и простых в использовании инструментов. Адаптируемые к потребностям пользователя, они стали незаменимыми технологиями, которыми пользуется каждый.
Благодаря этим новым технологиям, которые с каждым днем становятся все более и более инновационными, мы можем вести лучший образ жизни. Поскольку они позволяют нам поддерживать удаленную связь, мы можем чувствовать себя комфортно вдали от любимых.
Также очень важно отметить, что они стали отличными инструментами во многих областях, особенно в области здравоохранения, одним из которых является кровяное давление . Мы находим смартфоны с широким спектром бесплатных, доступных и изменяемых приложений как для медицинского персонала, так и для пациентов.
Из’ приложения, позволяющие ознакомиться со специализированным медицинским центром , специально разработан для пациентов с социальным дисбалансом. А также приложения, которые предоставляют терапевтические функции для нужд, которые в данном случае нужны пользователю.
Это обеспечило большие успехи в медицине и установило приятные, комфортные и безопасные отношения между врачом и пациентом, а также помогло в диагностике многих заболеваний, избегая осложнений. Из вышесказанного можно сказать, что эти технологии вышли на первое место по закупкам во всем мире.
С другой стороны, не менее интересно, очень важно сообщать об ошибках, которые также могут возникать в этих смартфонах. Например, ошибка в конфигурации телефона при открытии приложения, проблемы при использовании Android и другие. Эти и многие другие проблемы можно найти на наших смартфонах и во всех виды приложений.
Что такое ошибка TWRP «Не удалось смонтировать (недопустимый аргумент)»?
В какой-то момент у нас наверняка возникла проблема с нашим смартфоном, это может быть неудобно, если вы не знаете, как ее исправить. По этой причине важно иметь подробные сведения обо всех ошибках, которые мы можем найти на нашем смартфоне.
TWRP стал наиболее часто используемым средством восстановления этого времени, поскольку он дает нам различные варианты, например, он позволяет нам устанавливать новые ПЗУ, очищать систему, отформатируйте свой мобильный , Среди других.
Эта ошибка связана с тем, что некоторые ненужные файлы на нашем смартфоне автоматически блокировать использование разделов. Это мешает нам очистить файл на нашем смартфоне, а использование других приложений доставляет нам дискомфорт.
![]()
Учитывая все это, хорошо знать, что у вас есть решение этой проблемы легко, просто и в пределах досягаемости.
Что мне делать, чтобы исправить ошибку TWRP «Не удалось смонтировать (неверный аргумент)»?
Ошибка «Не удалось смонтировать (недопустимый аргумент)» сгенерировала полемика для многих из-за того, что полностью останавливает развитие TWRP. Это может появиться при удалении или очистке некоторых данных из-за нежелательного файла, вызывающего сбой. Здесь мы покажем вам несколько очень простых способов исправить ошибку TWRP «Не удалось смонтировать (недопустимый аргумент)».
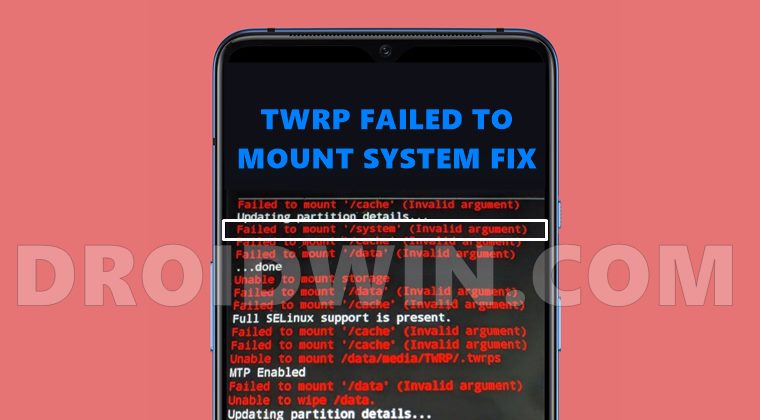
Среди разделов «Wipe», которые могут отображаться как « Не удалось смонтировать / разделить (недопустимый аргумент) «Это System, Data и Caché, теперь для устранения ошибки мы поместим, например, как если бы ошибка была в« Faliled to mount / system (недопустимый аргумент) ».
Когда эта ошибка появляется на экране, вам нужно перейти в «Wipe» и сделать клип в опции «Advanced Wipe». Затем нам нужно выбрать раздел ошибок (только один), который в данном случае мы используем в качестве примера «Система».
Затем нам нужно перейти к опции «Перейти к» » Восстановить или изменить файловую систему «, Затем« Изменить файловую систему », здесь мы выбираем вариант преобразования в FAT, и перетаскиваем кнопку, затем преобразуем в EXT4 и снова перетаскиваем.
Таким образом, мы можем устранить эту ошибку, но мы должны делать это с каждым разделом, в котором есть ошибка аргумента, после чего возвращаемся в «Wipe» , очищаем нужный раздел и все пройдет успешно, без ошибок.
Наконец, мы можем быть уверены в использовать эти инновационные технологии с комфортом адаптированы к нашим потребностям. У нас также есть безопасность, чтобы разрешить любые проблемы, которые могут возникнуть, бесплатно, легко и эффективно.
![]()
-
Home
-
Forums
New posts
Forum list
Search forums
Sign up
-
Software
-
Android
You should upgrade or use an alternative browser.
TWRP: OrangeFox: Data partition cannot mount as well as cannot be formatted.
-
Thread starterAbhiram Shibu
-
Start dateJul 27, 2021
-
-
Tags -
android
data partition
-

Abhiram Shibu
Veteran
![]()
![]()
![]()
![]()
-
- Jan 1, 2017
-
- 223
-
- 10
-
- 9,350
Jul 27, 2021
#1
-
Jul 27, 2021
-
#1

If you have experienced something like:
Failed to mount ‘/data’ (Invalid argument)
or
Failed to wipe dalvik
or
Unable to mount storageClick to expand…
This might be due to stock rom encryption which does not play well with dm-verity in TWRP and orangefox. If you want to fix this situation,
1. Connect the phone to PC
2. Boot phone to fastboot
3. Open Terminal/CMD with fastboot binary in path.
4. Type command fastboot erase userdata
5. Reboot to recovery directly.
6. Enjoy

Reactions:
Sili and pr0ph3t
•••
More options
Share

pr0ph3t
Expert
![]()
![]()
![]()
![]()
-
- Dec 30, 2016
-
- 877
-
- 22
-
- 19,400
Jul 27, 2021
#2
-
Jul 27, 2021
-
#2
Reactions:
Abhiram Shibu
•••
More options
Share
Abhiram Shibu
Veteran
![]()
![]()
![]()
![]()
-
- Jan 1, 2017
-
- 223
-
- 10
-
- 9,350
Jul 27, 2021
#3
-
Jul 27, 2021
-
#3
pr0ph3t said:
Thanks a lot this will save a lot of time and travel for me Click to expand…
I always used to fix your device via anydesk using a different method, today only u traveled.. and not for this.. mainly echo issue..
•••
More options
Share
Share:
Facebook
Twitter
Reddit
Pinterest
Tumblr
WhatsApp
Email
Link
Sponsored
Topics You Missed
-
J
FIX Redmi Note 9 Pro «The system has been destroyed»
- Latest: Jameswalter
- Today at 9:51 AM
Redmi Note 9 Pro -
J
Unable to find start docker containers
- Latest: Jameswalter
- Today at 9:50 AM
Linux -
J
How to recover computer lost data from hard drive?
- Latest: Jameswalter
- Today at 9:49 AM
Windows -
J
Solved Capcut No internet connection. Connect to the internet and try again.
- Latest: Jameswalter
- Today at 9:49 AM
Software & Apps -
J
How to convert old OST to PST file for MS outlook 2016
- Latest: Jameswalter
- Today at 9:47 AM
Software & Apps
Latest Posts
-
J
FIX Redmi Note 9 Pro «The system has been destroyed»
- Latest: Jameswalter
- Today at 9:51 AM
Redmi Note 9 Pro -
J
Unable to find start docker containers
- Latest: Jameswalter
- Today at 9:50 AM
Linux -
J
How to recover computer lost data from hard drive?
- Latest: Jameswalter
- Today at 9:49 AM
Windows -
J
Solved Capcut No internet connection. Connect to the internet and try again.
- Latest: Jameswalter
- Today at 9:49 AM
Software & Apps -
J
How to convert old OST to PST file for MS outlook 2016
- Latest: Jameswalter
- Today at 9:47 AM
Software & Apps
-
Software
-
Android
Bottom
-
Don’t miss the fun!Sign up now and enjoy the perks of being a community member. It’s free.
-
This site uses cookies to help personalise content, tailor your experience and to keep you logged in if you register.
By continuing to use this site, you are consenting to our use of cookies.Accept
Learn more…
I’ve rooted my Nexus 7 using the SO instructions How do I root my Nexus 7?. I’m trying to install LineageOS using its instructions https://wiki.lineageos.org/devices/flo/install#installing-lineageos-from-recovery. But steps 4 and 6 fail (making a backup, and wipe / advanced wipe). Both failures include the messages Failed to mount '/data' (Invalid argument) and Unable to mount storage.
So /data may be corrupt.
From adb shell, ls /data shows that it’s an empty directory; mount /data fails with the same error Invalid argument.
From adb shell, the Nexus 7’s /etc/fstab mentions /dev/block/mmcblk0p30 /data ext4 rw 0 0. But when I try to repair that device with e2fsck, it finds no superblock, even with -b 8193.
From adb reboot bootloader, the screen shows SECURE BOOT - enabled and LOCK STATE - unlocked. From that fastboot screen, if I select recovery mode, I see the teamwin TWRP 3.1.1-0 splash screen for 30 seconds, then I «swipe to allow modifications,» and then I see TWRP’s 8 big buttons.
Well, the backup and wipe buttons fail, so just for giggles, I tapped the button Install (LineageOS steps 7-10), and chose the lineage and open_gapps .zip files that I’d adb pushed to /sdcard. To prevent the install from working, checked the checkbox «verify zip signature» without copying over the md5 files containing the signatures. Besides the expected failure to verify the signatures, I saw these errors:
Failed to mount '/data' (Invalid argument)
Unable to recreate /data/media folder
E:Could not create /cache/recovery/
Unable to mount storage.
Can't open destination log file: '/cache/recovery/log'
Unable to mount /data/media/TWRP/.twrps
E:DataManager::Output_Version -- Unable to make /cache/recovery
Again, /data seems to be the problem. I probably shouldn’t attempt a real install before taking care of that.
How should I recover from these errors, to install LineageOS or, failing that, to restore the device to factory defaults? (If it helps, I have another Nexus 7, unrooted.)
В этом руководстве мы покажем вам шаги по исправлению невозможности смонтировать хранилище в TWRP Recovery. Экосистема Android, благодаря своей природе с открытым исходным кодом, допускает множество настроек.
Единственное требование — разблокировать загрузчик устройства. Как только вы этого добьетесь, вы сможете запустить множество пользовательских двоичных файлов, модов, пользовательских ПЗУ и даже Magisk для рутирования вашего устройства. Однако стандартное восстановление не может установить эти файлы. Вам нужно будет установить кастомное рекавери, например TWRP.
После того, как ваше устройство загрузится в это восстановление, вы можете стереть различные разделы устройства, выполнить резервное копирование Nandroid и, конечно, прошить вышеупомянутые файлы. Однако несколько раз вы можете столкнуться с ошибкой или двумя.
Среди них самые распространенные и пугающие, похоже, не могут смонтировать ошибку хранилища при отображении TWRP. В этом руководстве мы рассмотрим различные причины этой ошибки, а затем перечислим возможные исправления для исправления этой ошибки. Следуйте.
Первая причина, по-видимому, связана с тем, что внутреннее хранилище вашего устройства зашифровано. В результате TWRP не может расшифровать его на ходу и, следовательно, не может получить доступ к файлам, хранящимся на вашем устройстве.
Это причина, по которой эта ошибка чаще всего возникает, когда вы собираетесь прошить файл с помощью этого восстановления.
В других случаях ваш раздел данных может быть поврежден из-за того, что мигает неправильный файл или файл в неправильном разделе. Во всех этих сценариях ваш TWRP может отображать внутреннее хранилище как имеющее 0 МБ занятого места.
Но не волнуйтесь, это не так, и ваши данные на данный момент могут быть все еще нетронутыми. Итак, с учетом сказанного, вот различные методы исправления невозможности монтировать хранилище в TWRP Recovery.
Как исправить невозможность смонтировать хранилище в TWRP Recovery
Мы поделимся тремя разными способами решения этой проблемы. Следуйте инструкциям в том же порядке, как указано. Просто убедитесь, что ваше устройство уже загружено в TWRP. Е
Исправление 1: удалить экран блокировки
Если вы используете графический ключ на своем устройстве, TWRP не сможет его расшифровать. Рекомендуется переключиться на пин-код или пароль.
- Для этого, если вы загружены в TWRP, перезагрузите устройство в Системе.
- После загрузки перейдите в Настройки > Безопасность и экран блокировки > Блокировка экрана.
- Выберите из списка PIN-код или пароль. Теперь перезагрузите устройство обратно в TWRP.
- Теперь программа восстановления попросит вас ввести PIN-код / пароль. Введите его, и ваше хранилище будет зашифровано.
Теперь попробуйте прошить нужные файлы и посмотрите, исправлена ли проблема с невозможностью монтировать хранилище в TWRP Recovery.
Исправление 2: восстановить или изменить файловую систему
Вы также можете попробовать восстановить или изменить файловую систему вашего устройства. Все это можно было сделать прямо из самого TWRP.
- Итак, загрузите ваше устройство в TWRP Recovery.
- Затем перейдите в Wipe > Advanced Wipe, нажмите Wipe и нажмите Advanced Wipe.
- Теперь выберите раздел данных и нажмите на опцию «Восстановить» или «Изменить файловую систему». Затем нажмите «Восстановить файловую систему» и дождитесь завершения процесса. Проверьте, может ли он исправить проблему с монтированием.
- Если он все еще там, то снова зайдите в «Восстановить или изменить файловую систему» и на этот раз нажмите «Изменить файловую систему».
- В появившемся меню выберите EXT 2 и проведите пальцем вправо для подтверждения.
- После этого вернитесь к EXT 4 и проведите пальцем вправо, чтобы подтвердить это.
- Теперь перейдите в главное меню TWRP и перейдите к опции Mount
- Выберите раздел Data и попробуйте прошить нужные файлы.
Убедитесь, что вы по-прежнему получаете сообщение об ошибке «Невозможно смонтировать хранилище при восстановлении TWRP».
Исправление 3: форматирование внутренней памяти
Если ни один из вышеперечисленных методов не помог устранить проблему с монтированием, возможно, вам придется выбрать ядерный вариант. Форматирование внутреннего хранилища кажется единственным выходом. Это, в свою очередь, сотрет все данные, имеющиеся на вашем устройстве.
Убедитесь, что вы создали эту резервную копию на SD-карте или USB OTG, а не в памяти телефона, так как мы собираемся полностью стереть этот раздел. Когда вы закончите резервное копирование, выполните следующие действия.
- Загрузите устройство в TWRP Recovery.
- Перейдите в Wipe > Advanced Wipe и выберите Internal Storage.
- Наконец, проведите пальцем вправо, чтобы отформатировать этот раздел (все данные будут стерты).
- Как только это будет сделано, ошибка монтирования будет исправлена. Имейте в виду, что внутреннее хранилище может по-прежнему отображаться как 0 МБ. Но на этот раз это данные в реальном времени (ваше внутреннее хранилище очищается, следовательно, используется 0 МБ пространства).
Мы поделились тремя разными методами для одного и того же, дайте нам знать, какой из них сработал за вас.
В этом руководстве мы покажем вам, как исправить ошибку «Не удалось смонтировать / system (недопустимый аргумент)» в TWRP. Каждое устройство имеет довольно много разделов. Некоторые из них включают в себя загрузку, восстановление (только для устройства A), поставщика, vbmeta, пользовательские данные, систему и т. д. Хотя количество, тип и размер разделов могут различаться на разных устройствах, вышеупомянутые разделы можно найти почти на всех устройствах. о каждом устройстве.
И хотя каждый из этих разделов важен сам по себе, именно системный раздел можно отнести к категории наиболее важных. Причина довольно проста: он содержит вашу ОС. Однако, если есть проблема с этим разделом, обязательно будут проблемы. Среди различных проблем наиболее распространенная связана с TWRP.
Многие заинтересованные пользователи жалуются, что не могут смонтировать системный раздел на своем устройстве. В результате каждый раз, когда они собираются прошить пользовательское ПЗУ, TWRP отображает сообщение об ошибке не удалось смонтировать /систему (недопустимый аргумент). Хотя эта проблема по праву вызывает беспокойство, к счастью, ее можно решить с помощью нескольких обходных путей. Итак, без лишних слов, давайте проверим их.
Прежде чем попробовать какое-либо из перечисленных ниже исправлений, настоятельно рекомендуется сделать резервную копию всех данных на вашем устройстве. Droidwin и его участники не будут нести ответственность в случае термоядерной войны, если ваш будильник не разбудит вас, или если что-то случится с вашим устройством и данными, выполнив следующие шаги.
Исправление 1: установите стандартную прошивку через TWRP
В этом методе мы будем стирать все разделы устройства, а затем прошивать стандартную ОС через TWRP. Хотя большинство устройств поставляются с ПЗУ для восстановления (включая OxygenOS от OnePlus и ПЗУ для восстановления MIUI от Xiaomi), есть некоторые, у которых нет специального флэш-ПЗУ с поддержкой восстановления.
Для этого набора устройств им следует обратиться к нашему руководству по Flash Stock Firmware с помощью команд Fastboot. В то время как для других пользователей, которые могут прошить стандартную прошивку через TWRP, им следует выполнить следующие инструкции:
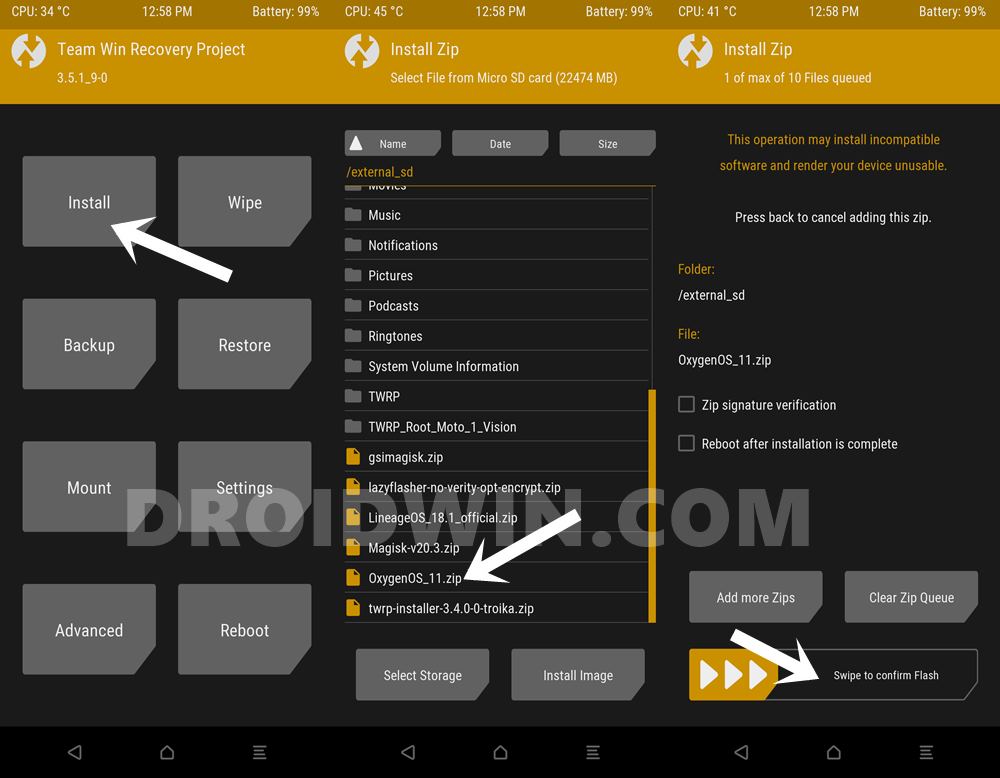
- Для начала загрузите свое устройство в TWRP Recovery. Затем перейдите к Wipe и нажмите Advanced Wipe.
- Выберите разделы Dalvik/ART Cache, System, Data и Vendor и проведите пальцем вправо, чтобы стереть их. [if you cannot select the System partition, then refer to the FAQ at the end of this guide].
- Как только это будет сделано, перенесите Recovery ROM на свое устройство. Для этого перейдите в «Монтировать» и нажмите «Включить MTP». Точно так же вы можете использовать боковую загрузку ADB или попробовать через USB-OTG. Все это было объяснено в руководстве: 3 метода передачи или установки файлов через TWRP Recovery.
- После того, как файл будет передан, перейдите в «Установить». Выберите ZIP-файл ROM и проведите пальцем вправо, чтобы прошить его.
- После этого вы можете перезагрузить устройство в ОС. Для этого перейдите в «Перезагрузить» и выберите «Система». Проверьте, может ли он исправить ошибку не удалось смонтировать /систему (недопустимый аргумент) в TWRP.
Исправление 2: восстановить системный раздел через TWRP
Вы также можете использовать встроенную функцию восстановления файловой системы TWRP для восстановления системного раздела на вашем устройстве. Вот как:
- Загрузите свое устройство в TWRP Recovery и перейдите к Wipe.
- Затем выберите Advanced Wipe и отметьте системный раздел.
- После этого нажмите «Восстановить или изменить файловую систему», а затем нажмите кнопку «Восстановить файловую систему».
- Наконец, проведите пальцем вправо, чтобы восстановить системный раздел.
- После этого перейдите в «Перезагрузить» и выберите «Система». Теперь ваше устройство должно быть загружено в ОС и посмотреть, была ли исправлена ошибка неудавшегося монтирования / системы (недопустимый аргумент) в TWRP или нет.
Исправление 3: обновить файловую систему EXT4 через TWRP
По умолчанию ваше устройство будет иметь файловую систему EXT4. В этом разделе мы изменим его на EXT2, а затем вернемся к исходному EXT4. Вот как это можно сделать:
- В TWRP перейдите в Wipe и выберите Advanced Wipe.
- Выберите системный раздел и нажмите «Восстановить» или «Изменить файловую систему».
- Проверьте верхнюю часть меню, если файловая система говорит: EXT4 (как и в случае с большинством устройств, тогда мы переключимся на EXT2, а затем обратно на EXT4).
- С другой стороны, если написано EXT2, то вам следует переключиться на EXT4 и обратно на EXT2. Что касается этого руководства, мы продолжим с первым (поскольку наше устройство имеет EXT4 по умолчанию).
- Поэтому нажмите кнопку «Изменить файловую систему», выберите EXT2 и проведите пальцем вправо, чтобы подтвердить это.
- После этого снова перейдите на этот экран и на этот раз нажмите на EXT4, чтобы переключиться на исходную файловую систему.
- Как только это будет сделано, перезагрузите устройство в ОС через Reboot > System. Теперь проблема должна быть исправлена.
Итак, на этом мы завершаем руководство о том, как исправить ошибку «Не удалось смонтировать / system (недопустимый аргумент)» в TWRP. Если у вас есть какие-либо вопросы относительно вышеупомянутых шагов, сообщите нам об этом в комментариях. Мы вернемся к вам с решением в ближайшее время.
Часто задаваемые вопросы: очистка системного раздела с помощью команд Fastboot
Если вы не можете выбрать системный раздел через TWRP, вам придется стереть его с помощью команд Fastboot. Вот как это можно сделать:
- Для начала заходим в раздел Reboot TWRP и выбираем System.
- Затем установите Android SDK Platform Tools на свой компьютер.
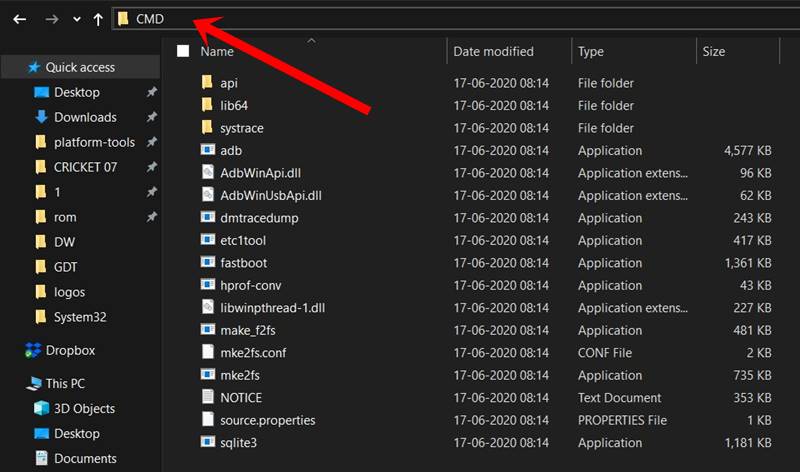
- Перейдите в папку с инструментами платформы, введите CMD в адресной строке и нажмите Enter. Это запустит окно CMD.
- Подключите ваше устройство к ПК через USB-кабель.
- Теперь введите приведенную ниже команду в окне CMD, чтобы стереть системный раздел: fastboot format system
- После этого вам нужно будет перезагрузить устройство в TWRP. Для этого используйте следующую команду: fastboot reboot recovery
- Как только ваше устройство загрузится в TWRP, сотрите другие разделы (Dalvik/ART Cache, Data и Vendor).
- Теперь вы можете прошить ZIP-файл ПЗУ, как указано выше, и исправить ошибку «Не удалось смонтировать / system (недопустимый аргумент)» в TWRP.
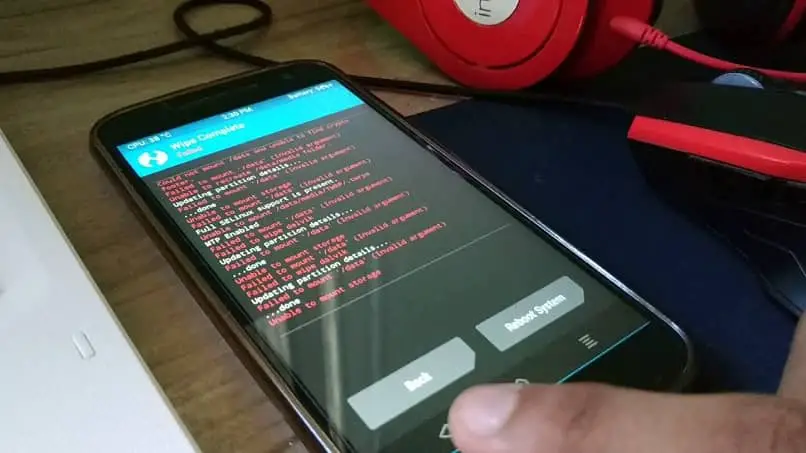
My phone (Nexus 5) is constantly rebooting to the TWRP screen where it crashes, shuts down and repeats.
TWRP error:
Could not mount /data and unable to find crypto footer
Failed to mount '/data' (Invalid argument)
Unable to recreate /data/media folder.
Updating partition details...
Failed to mount '/data' (Invalid argument)
...done
Unable to mount storage
Failed to mount '/data' (Invalid argument)
Full SELinux support is present.
Running Recovery Commands
Failed to mount '/data' (Invalid argument)
Formatting Cache using make_ext4fs...
Done processing script file
Renamed stock recovery file in /system to prevent the stock ROM from replacing TWRP.
Failed to mount '/data' (Invalid argument)
Failed to mount '/data' (Invalid argument)
What I did before I broke it:
-
Shut down the phone.
-
Booted the phone into the fastboot mode. (Pow + Vol Down)
-
On PC (through USB cable) I ran these commands:
-
fastboot oem unlock-> which asks for an agreement and deletes the whole system -
fastboot flash recovery Downloads/twrp.img— I had the file renamed and it was located in the Downloads folder
-
-
Rebooted to the Recovery mode (2x Vol Up and Pow)
So what am I supposed to do to successfully flash a custom recovery if not this way?
asked Mar 4, 2018 at 16:08
![]()
KesiKesi
771 silver badge4 bronze badges
3
I also faced with this issue and I found solution.
Go to bootolader and then execute:
fastboot -w
to wipe the data from the phone (it will erase all user data and internal storage)
after that go to recovery by calling:
fastboot reboot
answered Mar 22, 2018 at 12:50
![]()
redred
5641 gold badge4 silver badges12 bronze badges
3
What worked for me: I held the volume-up button during the loop, swiped when prompted to allow modifications, then got to the TWRP main screen. I had already downloaded a purportedly-stock image from https://firmwarefile.com/blu-dash-x2-d110l, so I then did:
adb push ../Blu_D110L_MT6580_V22_GENERIC/Firmware/recovery.img /tmp/
And from TWRP, Install, Flash image, located /tmp/recovery.img, swiped. Rebooted,
and had a brand-new phone again.
answered Oct 27, 2020 at 20:41
![]()
jcomeau_ictxjcomeau_ictx
37.3k6 gold badges92 silver badges105 bronze badges
- Forum
- Samsung Android Phones
- More Samsung Phones
- Samsung Galaxy S3
- AT&T Galaxy S III
-

Hi guys.
My solution is simples. but you will
LOSE EVERY FILE on userdata.
Step 1: Install TWRP
Step 2: Go to Wipe box
Step 3: Select Advanced Wipe
Step 4: Check «DATA» and tap on «Repair or Change File System».
Step 5: Tap Change File System
Step 6: See original format on file system (In my S6 is EXT4). So turn to other and switch back to originalNow /data is mounted back.
Install a custom and later a stock.09-12-2016 09:43 AM
-
Originally Posted by Ofir Forsht
Hello,
I have the same problem — wiped cache partition and ever since my phone is stuck in Galaxy opening pic (whatever it’s called — showing the phone model).
I tried to reload my firmware using Odin (as I did several times before) but the problem hasn’t been solved.
I can access recovery but not the rom, and if I try to do factory reset I still get the same result — failure to mount /data.
I suggestion or explanation to this problem?
ThanksI’ve been having the same issue except my phone runs and works perfectly. Idk what’s been causing it but on a fresh wipe and stock install it still will not mount data. But in rooted and running xposed. I tried wiping data so if someone could help me… But a solution to not being able to boot. If what he said does not work, in twerp factory reset.. More than once. I do it about three times and then advanced wipe I wipe, system, data, cache and dalvik cache… More than once. After I do it twice I start seeing less errors. Last night I did it 5 times to be sure. At first I’d get 15 or so errors and by the end I don’t get any. I hope this helps. I usually give it one more wipe after I get no errors just in case. But as I said, after I did that, as of lastnight I flash my stock Rom with Odin. Use chain fire root and set up xposed and when I do xposed it gives me the cannot mount data error but xposed works beautifully.
11-11-2016 09:53 AM
-
Please help me sgh-t599v problem
11-12-2016 07:36 PM
-
thanks man, it really worked.
11-25-2016 04:21 AM
-
I need help, I have this problem wih my S7 sm-g930f.
I have read a lot, but I think this is te solution, buto I don’t know what is twrp, and how can I install it, I have never heard about it. Please, help me I’m tired to look for a solution. My cel has 3 months and I loose warranty because I rooted, Know say WARRANTY VOID: 1 (0X0500)
I have flash about 20 roms, but the phone frezzes and restarts but doesnt run completely and it says failed to mount/dada (invalid argument), so I think this is the problem.
12-12-2016 01:27 PM
-
can you fix this? My phone have a same problem, can you help me>?
02-10-2017 02:09 AM
-
Thanks a lot for Your solution. It’s been exactly what I needed and it really worked fine.
04-04-2017 03:47 AM
-
Hi guys I have the same problem here my phone shows up only in logo and then turns off. I have done Flashing It’s firmware Using SP Flash Tool But still the same. And when I go to the Backup User Data In Recovery Mode It says «Error: Mount /data error«.Can Anyone Please Help.
05-20-2017 02:00 AM
-
Hello I have a problem with my mobile phone
A samsung S DUOS 2
I coildnt do a hard reset with a no command error messge
And these messages
Also while booting my phone it stays on the Samsung animated first screen
And it took forever on that screen!
Please help
The other messages are:E:failed to mount /data (Invalid argument)
can’t mount ‘/data’ (Invalid argument)
E:failed to mount /data (Invalid argument)
E:Can’t mount /data/log/recovery_log.txt06-08-2017 07:12 PM
-
Originally Posted by Chebaane007
Hello I have a problem with my mobile phone
A samsung S DUOS 2
I coildnt do a hard reset with a no command error messge
And these messages
Also while booting my phone it stays on the Samsung animated first screen
And it took forever on that screen!
Please help
The other messages are:E:failed to mount /data (Invalid argument)
can’t mount ‘/data’ (Invalid argument)
E:failed to mount /data (Invalid argument)
E:Can’t mount /data/log/recovery_log.txtYou may need to consider reflashing the ROM. Are you in the United States?
06-08-2017 08:27 PM
-
Originally Posted by Ofir Forsht
Hello,
I have the same problem — wiped cache partition and ever since my phone is stuck in Galaxy opening pic (whatever it’s called — showing the phone model).
I tried to reload my firmware using Odin (as I did several times before) but the problem hasn’t been solved.
I can access recovery but not the rom, and if I try to do factory reset I still get the same result — failure to mount /data.
I suggestion or explanation to this problem?
ThanksI’m having a similar problem with my Samsung Galaxy Ace, I’m getting a bootrepeat (boot screen repeating) and when I go into Android System Recovery and reboot it, it says ‘E: failed to mount data’ every time. Also I’ve tried installing Samsung Kies for Windows 7, but all it’s saying is ‘Connecting’, please try and help! :-
08-18-2017 01:13 PM
-
The answer below helped did the trick for me
Originally Posted by nPzinho
Hi guys.
My solution is simples. but you will
LOSE EVERY FILE on userdata.
Step 1: Install TWRP
Step 2: Go to Wipe box
Step 3: Select Advanced Wipe
Step 4: Check «DATA» and tap on «Repair or Change File System».
Step 5: Tap Change File System
Step 6: See original format on file system (In my S6 is EXT4). So turn to other and switch back to originalNow /data is mounted back.
Install a custom and later a stock.However whatever ROM you have, if you just WIPE ALL DATA, that should do the trick (it worked for me)
08-23-2017 02:10 PM
-
Maybe it was because it wiped the /data first and later the /cache..?
08-28-2017 05:28 PM
-
Can you help me how can i know what the original format on file system in my s7 ??
09-19-2017 04:29 AM
-
I hve meizu m2 mini last time i intall twrp recovery and create backup but i lost my back accidentally and now i hve no os in my phone and internal storage also showing 0mb no any wipe and or other method working for me i trying to install frimware file .zip with using microSD card but won’t done it called E: unable to mount storage.
I also want to try wipe using twrp recovery but same error.
Anyone help plz12-17-2017 10:24 AM
-
Guys, we save my life. tks a lot.
01-19-2018 10:53 AM
-
I know how to fix that…
05-02-2018 08:34 AM
-
I had the same problem which started with my phone losing my wallpaper all the time within minutes, then going to a black background and being really slow, & slow to reboot until it finally wouldn’t get past the SAMSUNG logo when rebooted, seems it’s from corruption of the partitions. Biggest problem was that since USB debuggingg wasn’t enabled, I had a hard time connecting to my pc. Was able to with ODIN & proper drivers. Found many bogus or old drivers and roms out there that were useless. This fixed it after flashing a the latest rom for my SCH-T999L rom via ODIN as here https://www.theandroidsoul.com/t999l…lte-sgh-t999l/, but I still had the bad E: partition & it wuld now get to the T-Mobile screen and hang. The below fix that. Seems that the stock recovery doesn’t wipe and format all the cache & partitions, TWRP did. All in all, except for some loss of data ( keep most on my extSD card) and Google backup supplied a lot of the rest, including reinstalling many of my apps with their data, it turned out to be a good thing because being rooted and with TWRP I can now customize my old S3 with some newer roms and can use Titanium backup and SuperBackup to their full extent. And my device zooms now compared to what it was before. Evidently there was a lot of leftover garbage from old apps, because I have 9 gigs of free space now & 500mb of system space left.
Note especially that you should not mess with the pit file in ODIN when flashing. Also note that this was especially for a TMobile T999L (different from T999), althought the TWRP & Superuser will work on either TMOBILE Galaxy S3.
1. Install Odin & TWRP as stated here https://www.theandroidsoul.com/how-t…ry-using-odin/
2.use TWRP to reformat data, cache, & davlich
3. I rooted at the same time (might as well) using ODIN as here https://www.theandroidsoul.com/how-t…ndroid-device/05-24-2018 03:26 PM
-
Same here tried to install custom kernel and got the same thing that you got
I already installed zombie kernel an tried to install savie duos kernel and twrp
I think twrp ****ed it up
**** twrp
CWM IS THE BEST08-02-2018 11:52 AM


- Forum
- Samsung Android Phones
- More Samsung Phones
- Samsung Galaxy S3
- AT&T Galaxy S III

ERROR on recovery —> E: failed to mount /data (Invalid argument)
Similar Threads
-
Replies: 7
Last Post: 06-14-2014, 01:12 PM
-
Replies: 3
Last Post: 06-14-2014, 07:19 AM
-
Replies: 3
Last Post: 06-14-2014, 03:05 AM
-
Replies: 2
Last Post: 06-14-2014, 03:05 AM
-
Replies: 2
Last Post: 06-14-2014, 01:19 AM
LINK TO POST COPIED TO CLIPBOARD
In this guide, we will show you the steps to fix the failed to mount /system (invalid argument) error in TWRP. Each device has quite a few partitions. Some of them include the boot, recovery (in A-only device), vendor, vbmeta, userdata, system, etc. While the number, type, and size of partitions might vary across various devices, the aforementioned partitions could be found on near about every device.
And while each of these partitions are important in their own rights, it is the system partition that could be categorized as the most important one. The reason is pretty simple: it holds your OS. However, if there’s an issue with this partition, there are bound to be issues. Among the various issues, the most common is associated with TWRP.
Many concerned users have complained that they are unable to mount the system partition on their device. As a result, every time they are about to flash a Custom ROM, TWRP displays the failed to mount /system (invalid argument) error message. While this issue is justifiably concerning, fortunately, it could be fixed via a few workarounds. So without further ado, let’s check them out.
Before trying out any of the below-mentioned fixes, it is highly recommended to take a backup of all the data on your device. Droidwin and its members wouldn’t be held responsible in case of a thermonuclear war, your alarm doesn’t wake you up, or if anything happens to your device and data by performing the below steps.
- How to Fix failed to mount /vendor (invalid argument) in TWRP
- Flash Custom ROM After Wiping Internal Storage Without SD Card or OTG
- Fix TWRP No OS Installed Are you sure you wish to reboot?
- How to Fix TWRP 0MB Internal Memory Issue
Fix 1: Install Stock Firmware via TWRP
In this method, we will be wiping all the device partitions and then flashing the stock OS via TWRP. While most devices come with a Recovery ROM (including OnePlus’s OxygenOS and Xiaomi’s MIUI Recovery ROM), there are some that don’t have a custom recovery-supported flashable ROM.
For those set of devices, they should refer to our guide to Flash Stock Firmware via Fastboot Commands. Whereas for other users who could flash stock ROM via TWRP, they should proceed with the below instructions:
- To begin with, boot your device to the TWRP Recovery. Then go to Wipe and tap on Advanced Wipe.
- Select Dalvik/ART Cache, System, Data, and Vendor partitions and perform a right swipe to wipe them. [if you cannot select the System partition, then refer to the FAQ at the end of this guide].

- Once that is done, transfer the Recovery ROM to your device. For that, go to Mount and tap on Enable MTP. Likewise, you may use the ADB Sideload or try via the USB-OTG. All these have been explained in the guide: 3 Methods To Transfer or Install Files via TWRP Recovery.
- Once the file has been transferred, go to Install. Select the ROM ZIP file and perform a right swipe to flash it.
- After this, you may now reboot the device to the OS. For that, go to Reboot and select System. Check if it is able to fix the failed to mount /system (invalid argument) error in TWRP.

Fix 2: Repair System Partition via TWRP
You could also use the TWRP’s built-in Repair File System feature to repair the system partition on your device. Here’s how:

- Boot your device to the TWRP Recovery and go to Wipe.
- Then select Advanced Wipe and checkmark the System partition.
- After that, tap on Repair or Change File System and then tap on the Repair File System button.

- Finally, perform a right swipe to repair the System partition.
- Once done, go to Reboot and select System. Your device shall now be booted to OS and see if the failed to mount /system (invalid argument) error in TWRP has been fixed or not.

Fix 3: Refresh EXT4 File System via TWRP
By default, your device would be having the EXT4 File System. In this section, we would change it to EXT2 and then revert to the original EXT4. Here’s how it could be done:

- From TWRP, go to Wipe and select Advanced Wipe.
- Select the System partition and tap on Repair or Change File System
- Check the top of the menu, if File System says: EXT4 (as will be the case with most devices, then we would switch to EXT2 and then back to EXT4).

- On the other hand, if it says EXT2, then you should switch to EXT4 and back to EXT2. As for this guide, we are going ahead with the former (since our device has EXT4 by default).
- So tap on the Change File System button and select EXT2 and perform a right swipe to confirm it.
- Once done, again go to this screen, and this time tap on EXT4 to switch to your original file system.
- Once that is done, reboot the device to the OS via Reboot > System. The issue should now have been fixed.

So with this, we conclude the guide on how to fix the failed to mount /system (invalid argument) error in TWRP. If you have any queries concerning the aforementioned steps, do let us know in the comments. We will get back to you with a solution at the earliest.
FAQs: Wipe System Partition via Fastboot Commands
If you cannot select the System Partition via TWRP, then you would have to wipe it via Fastboot Commands. Here’s how it could be done:
- To begin with, go to the Reboot section of TWRP and select System.
- Then install the Android SDK Platform Tools on your PC.
- Go to this platform-tools folder, type in CMD in the address bar, and hit Enter. This will launch the CMD window.

- Connect your device to the PC via USB cable.
- Now type in the below command in the CMD window to wipe the system partition:
fastboot format system
- After this, you will have to reboot your device to TWRP. Use the below command for that:
fastboot reboot recovery
- Once your device boots to TWRP, wipe the other partitions (Dalvik/ART Cache, Data, and Vendor).
- You may now flash the ROM ZIP file as mentioned above and fix the failed to mount /system (invalid argument) error in TWRP.
About Chief Editor

Sadique Hassan
administrator
A technical geek by birth, he always has a keen interest in the Android platform right since the birth of the HTC Dream. The open-source environment always seems to intrigue him with the plethora of options available at his fingertips. “MBA by profession, blogger by choice!”