

Введение
Flash messages are used to notify the user about the state of actions he/she made or simply show information to the users. These kinds of messages can be generated using this component.
Adapters
This component uses adapters that dictate how messages are displayed or sent to the view. There are two adapters available but you can easily create your own adapter using the PhalconFlashFlashInterface interface.
| Адаптер | Описание |
|---|---|
| PhalconFlashDirect | Directly outputs the messages passed to the flasher |
| PhalconFlashSession | Temporarily stores the messages in session, then messages can be printed in the next request |
Direct
PhalconFlashDirect can be used to directly output messages set in the component. This is useful in instances where you need to show data back to the user in the current request that does not employ any redirects.
<?php

use PhalconEscaper;
use PhalconFlashDirect;

$escaper = new Escaper();
$flash   = new Direct($escaper);

$flash->error('Something went wrong');
Session
PhalconFlashSession can be used to output messages set in the component. The component transparently stores the messages in the session to be used after a redirect.
<?php

use PhalconEscaper;
use PhalconFlashSession as FlashSession;
use PhalconSessionAdapterStream;
use PhalconSessionManager;

$session = new Manager();
$files = new Stream(
    [
        'savePath' => '/tmp',
    ]
);
$session->setHandler($files);

$escaper = new Escaper();
$flash   = new FlashSession($escaper, $session);

$flash->error('Something went wrong');
and in your view
<?php echo $flash->output(); ?>
or when using Volt
Imagine a login form that you need to validate the username and password and inform the user if their credentials are correct. The PhalconFlashSession can be used to perform this task as follows:
- User enters credentials and clicks
Login— The application posts the data to theloginActionof our controller — The application checks the data and the combination is not correct — The application stores theIncorrect Credentialsmessage in the flash messenger — The application redirects the user back to the login page (/login) — The Flash messenger still holds the messageIncorrect Credentialsand will display it on the screen.
The example below displays this behavior in the controller. If an error occurs, whether this is an actual application error or a result of incorrect credentials, the code sets the messages using $this->flash->error().
<?php

namespace MyApp;

use PhalconFlashSession;
use PhalconHttpRequest;
use PhalconHttpResponse;
use PhalconMvcController;
use PhalconMvcView;
use VokuroAuthAuth;
use VokuroModelsUsers;
use VokuroModelsResetPasswords;

/**
 * Controller used handle non-authenticated session actions like
 * login/logout, user signup, and forgotten passwords
 *
 * @property Auth     $auth
 * @property Request  $request
 * @property Response $response
 * @property Session  $flashSession
 * @property View     $view
 */
class SessionController extends Controller
{
    /**
     * Starts a session in the admin backend
     */
    public function loginAction()
    {
        $form = new LoginForm();

        try {
            if (true !== $this->request->isPost()) {
                // ....
            } else {
                $postData = $this->request->getPost();
                if (true !== $form->isValid($postData)) {
                    // Flash
                    foreach ($form->getMessages() as $message) {
                        $this->flashSession->error($message);
                    }
                } else {
                    $email    = $this->request->getPost('email');
                    $password = $this->request->getPost('password');
                    $remember = $this->request->getPost('remember');

                    $this->auth->check(
                        [
                            'email'    => $email,
                            'password' => $password,
                            'remember' => $remember,
                        ]
                    );

                    return $this->response->redirect('users');
                }
            }
        } catch (AuthException $e) {
            // Flash
            $this->flashSession->error($e->getMessage());
        }

        $this->view->form = $form;
    }
}
and in your view
<?php echo $flashSession->output(); ?>
or when using Volt
{{ flashSession.output() }}
NOTE: In the above example, the
flashSessionservice has been already registered in the DI container. For more information about this please check the relevant section below.
Styling
The component (irrespective of adapter) offers automatic styling of messages on screen. This means that messages will be wrapped in <div> tags. There is also a mapping of message type to CSS class that you can take advantage of based on the stylesheet you use in your application. By default the component uses the following mapping:
| Тип | Name of CSS class |
|---|---|
error |
errorMessage |
notice |
noticeMessage |
success |
successMessage |
warning |
warningMessage |
By using the default classes, you can style errorMessage accordingly in the stylesheet of your application to make it appear the way you want it to. It is common for error messages to have a red background for instance so that they stand out.
An error message:
$flash->error('Error message');
will produce:
<div class="errorMessage">Error message</div>
If you do not wish to use the default classes, you can use the setCssClasses() method to replace the mapping of type of message to class name.
<?php

use PhalconEscaper;
use PhalconFlashDirect;

$escaper = new Escaper();
$flash   = new Direct($escaper);

var_dump(
    $flash->getCssClasses()
);

// [
//     "error"   => "errorMessage",
//     "notice"  => "noticeMessage",
//     "success" => "successMessage",
//     "warning" => "warningMessage",
// ];


$cssClasses = [
    'error'   => 'alert alert-danger',
    'success' => 'alert alert-success',
    'notice'  => 'alert alert-info',
    'warning' => 'alert alert-warning',
];

$flash->setCssClasses($cssClasses);
and then calling
$flash->error('Error message');
will produce:
<div class="alert alert-danger">Error message</div>
NOTE: The
setCssClasses()returns back the object so you can use in a more fluent interface by chaining calls.
The component also allows you to specify a different template, so that you can control the HTML produced by the component. The setCustomTemplate() and getCustomTemplate() expose this functionality. The template needs to have two placeholders:
%cssClass%— where the CSS class will be injected%message%— where the message will be injected
<?php

use PhalconEscaper;
use PhalconFlashDirect;

$escaper = new Escaper();
$flash   = new Direct($escaper);

$template = '<span class="%cssClass%">%message%</span>';

$flash->setCustomTemplate($template);
and then calling
$flash->error('Error message');
will produce:
<span class="myErrorClass">Error message</span>
NOTE: The
setCustomTemplate()returns back the object so you can use in a more fluent interface by chaining calls.
Messages
As mentioned above, the component has different types of messages. To add a message to the component you can call message() with the type as well as the message itself. The types of messages are:
errornoticesuccesswarning
<?php

use PhalconEscaper;
use PhalconFlashDirect;

$escaper = new Escaper();
$flash   = new Direct($escaper);

$flash->message('error', 'Error message');
While you can pass the type as the first parameter when calling message() you can also use the relevant helper methods that do that for you:
<?php

use PhalconEscaper;
use PhalconFlashDirect;

$escaper = new Escaper();
$flash   = new Direct($escaper);

$flash->error('Error message');
$flash->notice('Notice message');
$flash->success('Success message');
$flash->warning('Warning message');
If your application requires it, you might want to clear the messages at some point when building the response. To do so you can use the clear() method.
<?php

use PhalconEscaper;
use PhalconFlashDirect;

$escaper = new Escaper();
$flash   = new Direct($escaper);

$flash->error('Error message');

$flash->clear();
NOTE:
clear()works only when the implicit flush is disabled (setImplicitFlush(false))
Implicit Flush
By default implicit flushing is set to true. You can however turn it off by using setImplicitFlush(false). The purpose of this method is to set whether the output must be implicitly flushed to the output or returned as string
<?php

use PhalconEscaper;
use PhalconFlashDirect;

$escaper = new Escaper();
$flash   = new Direct($escaper);

echo $flash->getImplicitFlush(); // true

$flash->error('Error'); // No output

echo $flash
    ->setImplicitFlush(false)
    ->error('Error Message') // 'Error Message'
;
NOTE: The
setImplicitFlush()returns back the object so you can use in a more fluent interface by chaining calls.
NOTE: When using the PhalconFlashDirect component, to directly show results on the page you must set
setImplicitFlush()tofalse.
Escaping
By default, the component will escape the contents of the message. There might be times however that you do not wish to escape the contents of your messages. You can use the setAutoescape(false);
<?php

use PhalconEscaper;
use PhalconFlashDirect;

$escaper = new Escaper();
$flash   = new Direct($escaper);

echo $flash->getAutoescape(); // true

$flash
    ->setAutoescape(false)
    ->error('<h1>Error</h1>')
;
will produce
<div class="errorMessage"><h1>Error</h1></div>
NOTE: The
setAutoescape()returns back the object so you can use in a more fluent interface by chaining calls.
Dependency Injection
If you use the PhalconDiFactoryDefault container, the PhalconFlashDirect is already registered for you with the name flash. Additionally the PhalconFlashSession is already registered for you with the name flashSession.
An example of the registration of the service as well as accessing it is below:
Direct
<?php

use PhalconDi;
use PhalconEscaper;
use PhalconFlashDirect;

$container = new Di();
$escaper   = new Escaper();

$container->set(
    'flash',
    function () use ($escaper) {
        return new Direct($escaper);
    }
);
Session
<?php

use PhalconDi;
use PhalconEscaper;
use PhalconFlashSession as FlashSession;
use PhalconSessionAdapterStream;
use PhalconSessionManager;

$container = new Di();
$escaper   = new Escaper();
$session   = new Manager();
$files     = new Stream(
    [
        'savePath' => '/tmp',
    ]
);
$session->setHandler($files);

$container->set(
    'flashSession',
    function () use ($escaper, $session) {
        return new FlashSession($escaper, $session);
    }
);
NOTE You do not need to pass the escaper or the session in the constructor. If you use the Di container and those services are already register in it, they will be used internally. This is another way of instantiating the components.
You can now use the component in a controller (or a component that implements PhalconDiInjectable)
<?php

namespace MyApp;

use PhalconFlashDirect;
use PhalconMvcController;

/**
 * Invoices controller
 *
 * @property Direct $flash
 */
class InvoicesController extends Controller
{
    public function indexAction()
    {

    }

    public function saveAction()
    {
        $this->flash->success('The post was correctly saved!');
    }
}
Laravel 8 shows a flash message example; This tutorial will provide you a complete guide on how to show flash messages with redirect in laravel 8 app.
Flash messages are very important things in any laravel 8 web or app. Alert messages are considered valuable from a user experience perspective. Sometimes, you need to use various types of flash message notification like alert-success, alert danger, alert info, alert warning messages with bootstrap in laravel 8 app. So, here, you will learn the various method to show or display flash error, warning, info, and success message in laravel 8 applications.
This laravel 8 flash message example tutorial will add several ways to give a flash message like redirect with success message, redirect with an error message, redirect with a warning message, and redirect with info message. And as well as, use a bootstrap flash alert layout that way it displays a pretty layout.
Flash Messages in Laravel 8
- Success Flash Message
- Error Flash Message
- Warning Flash Message
- Info Flash Message
- Sweet Alert Flash Success Message
- Sweet Alert Flash Error Message
1 – Success Flash Message
First of all, we need to add the below code in your HTML files:
@if(Session::has('success'))
    <div class="alert alert-success">
        {{Session::get('success')}}
    </div>
@endif
The second thing, When you send the success message. So you can use the below code in your controller:
return Redirect::to("/")->withSuccess('Success message');
The success flash message will look like:

2 – Error Flash Message
If you want to display an error message in your blade views, so you can add the below code in your blade file:
@if(Session::has('fail'))
    <div class="alert alert-danger">
       {{Session::get('fail')}}
    </div>
@endif
The second thing, add the below code in your controller, where you want to send the warning message:
return Redirect::to("/")->withFail('Error message');
The error flash message will look like:

3 – Warning Flash Message
To display an warning message in your blade views, so you can add the below code in your blade file:
@if(Session::has('warning'))
    <div class="alert alert-danger">
       {{Session::get('warning')}}
    </div>
@endif
The second thing, add the below code in your controller, where you want to send the error message:
return Redirect::to("/")-->with('warning',"Don't Open this link");
The warning flash message will look like:

4 – Info Flash Message
To display an info message in your blade views, so you can add the below code in your blade file:
@if(Session::has('info'))
    <div class="alert alert-danger">
       {{Session::get('info')}}
    </div>
@endif
The second thing, add the below code in your controller, where you want to send the info message:
return Redirect::to("/")-->with('info',"Don't Open this link");
The Info flash message will look like:

Now, you will learn how to use sweet alert message in your laravel application. So, first of all, you need to include sweet alert CDN or sweet alert js library in your laravel 8 application:
5 – Sweet Alert Flash Success Message
If you want to show a success message with sweet alert. So you can use the below code in your blade view files:
   @if(Session::has('success'))
     <script type="text/javascript">
        swal({
            title:'Success!',
            text:"{{Session::get('success')}}",
            timer:5000,
            type:'success'
        }).then((value) => {
          //location.reload();
        }).catch(swal.noop);
    </script>
    @endif
If you use the above code for a success message, this message automatically hides after 5 seconds.
The sweet alert-success message will look like:

6 – Sweet Alert Flash Error Message
If you want to show an error message with a sweet alert. So you can use the below code in your blade view files:
@if(Session::has('fail'))
<script type="text/javascript">
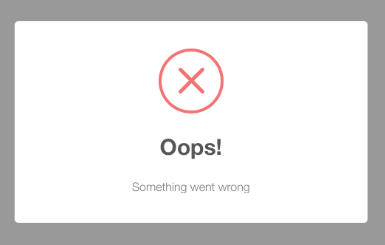
swal({
title:'Oops!',
text:"{{Session::get('fail')}}",
type:'error',
timer:5000
}).then((value) => {
//location.reload();
}).catch(swal.noop);
</script>
@endif
If you use the above code for an error message, this message automatically hides after 5 seconds.
The sweet alert error message will look like:
Conclusion
Laravel 8 flash message tutorial, you have learned how to implement flash messages in laravel 8 applications.
Recommended Laravel Posts
GOOGLE TRANSLATE
привет (жаль я только говорить по-английски Используя Google translatefor говорим сейчас)
я получил заранее 8gb флэш-диска, которые говорят на 8gb, но на самом деле 4 Гб
об использовании H2testw 1.4 выяснилось, что вспышка только 4 Гб
так что я использовал чип гений он показал это
VID 0011
PID 7788
Чип Производитель: Alcor
Чип Часть-номер: f8308
я также открыл крышку флэш-диска было написано там
вспышка контроллер: fc8908
NAND-память: ничего не написано
так что я скачал этот инструмент: Alcor_FC8908_FCMpTool_v05.00.05
он обнаружил мою вспышку и нажал на кнопку запуска он отформатирован вспышкой, но VID PID были изменены и вспышка не работает должным образом показывает, пожалуйста, вставьте диск в дисковод
Теперь чип гений показывает
PnP Device ID: VID = 058F PID = 1234
Серийный номер: 5 & & & & E4D4C9B 0 & & 5
Редакция: 7,76
Тип устройства: стандартное устройство USB — USB2.0 High-Speed
Чип Производитель: Alcor
Чип Часть-номер: AU6981 ~ AU6985
Продукт Vendor: (N / A)
Модель продукта: (N / A)
Сейчас я получаю эту ошибку, когда я подключить вспышку в Alcor_FC8908_FCMpTool_v05.00.05 30400: неизвестный ID ошибки вспышки [0]: 0x45, 0xD7, 0xD8, 0xC2, 0x76, 0xD5
это beacause PID VID были изменены и чип гений показывает другой контроллер вспышки
оригинальный контроллер вспышки напечатаны на вспышки
вспышка контроллер: fc8908 на флэшку wriiten на черный квадрат
Заранее спасибо за любую помощь
ENGLISH
hello (sorry i only speak english using google translatefor talking now )
i got a advance 8gb flash drive which say’s 8gb but actually is a 4gb
on using H2testw 1.4 it found out that the flash is only a 4gb
so i used chip genius it showed this
vid 0011
pid 7788
Chip Vendor: Alcor
Chip Part-Number: f8308
i also opened the flash drive cover it was written in there
flash controller: fc8908
nand memory: nothing is written
so i downloaded this tool: Alcor_FC8908_FCMpTool_v05.00.05
it detected my flash and clicked on the start button it formatted the flash but vid pid got changed and flash does not work properly shows please insert disk into drive
now chip genius shows
PnP Device ID: VID = 058F PID = 1234
Serial Number: 5&&E4D4C9B&&0&&5
Revision: 7.76
Device Type: Standard USB device — USB2.0 High-Speed
Chip Vendor: Alcor
Chip Part-Number: AU6981~AU6985
Product Vendor: (N/A)
Product Model: (N/A)
now i get this error when i plug the flash in Alcor_FC8908_FCMpTool_v05.00.05 30400: unknown flash error ID[0]: 0x45,0xD7,0xD8,0xC2,0x76,0xD5
Is it beacause the vid pid got changed and chip genius shows a different flash controller orginal flash controller printed on flash is flash controller: fc8908 on flash drive wriiten on black square
thanks in advance for any help
Summary: in this tutorial, you’ll learn about the PHP flash messages and define a reusable flash() function to manage the flash messages effectively.
Introduction to the PHP flash messages
A flash message allows you to create a message on one page and display it once on another page. To transfer a message from one page to another, you use the $_SESSION superglobal variable.
For example, you can add a message to the $_SESSION on the first page:
Code language: PHP (php)
<?php session_start(); $_SESSION['flash_message'] = "I'm a flash message';
Later, on another page, you can get the flash message from the $_SESSION variable and assign it to a variable. Then, you delete the message from the $_SESSION and display the message:
<?php session_start(); if(isset($_SESSION['flash_message'])) { $message = $_SESSION['flash_message']; unset($_SESSION['flash_message']); echo $message; }Code language: PHP (php)
This is a simple flash message example.
In practice, a flash message has a name (or an ID) for reference later. Also, a flash message has a type such as error, success, information, and warning. The message type allows you to make a specific style for the message
In the following section, we’ll define a set of functions that do the following:
- Create a flash message with a name.
- Format a flash message.
- Display a flash message specified by a name.
- Display all the flash messages.
Create a flash message
First, define a constant as a key for all the flash messages:
Code language: PHP (php)
const FLASH = 'FLASH_MESSAGES';
Second, define constants that define the type of flash messages including error, information, warning, and success:
Code language: PHP (php)
const FLASH_ERROR = 'error'; const FLASH_WARNING = 'warning'; const FLASH_INFO = 'info'; const FLASH_SUCCESS = 'success';
Third, define a function that creates a flash message which has a name, a message, and a type:
Code language: PHP (php)
<?php /** * Create a flash message * * @param string $name * @param string $message * @param string $type * @return void */ function create_flash_message(string $name, string $message, string $type): void { // remove existing message with the name if (isset($_SESSION[FLASH][$name])) { unset($_SESSION[FLASH][$name]); } // add the message to the session $_SESSION[FLASH][$name] = ['message' => $message, 'type' => $type]; }
Format a flash message
The following format_flash_message() function formats a flash message:
Code language: PHP (php)
/** * Format a flash message * * @param array $flash_message * @return string */ function format_flash_message(array $flash_message): string { return sprintf('<div class="alert alert-%s">%s</div>', $flash_message['type'], $flash_message['message'] ); }
In this function, we use the following HTML with the class alert and alert-$type to format the message. The message type can be an error, info, warning, and success.
The following example shows an error message:
Code language: HTML, XML (xml)
<div class="alert alert-error"> This is an error! </div>
Display a flash message
To display a flash message by a name, you check if the message name exists in the $_SESSION[FLASH] variable. If so, you get the flash message in the $_SESSION['FLASH'], remove it from the $_SESSION['FLASH'], and display the flash message:
Code language: PHP (php)
<?php /** * Display a flash message * * @param string $name * @return void */ function display_flash_message(string $name): void { if (!isset($_SESSION[FLASH][$name])) { return; } // get message from the session $flash_message = $_SESSION[FLASH][$name]; // delete the flash message unset($_SESSION[FLASH][$name]); // display the flash message echo format_flash_message($flash_message); }
Display all flash messages
The following function displays all flash messages from the $_SESSION['FLASH'] variable:
Code language: PHP (php)
<?php /** * Display all flash messages * * @return void */ function display_all_flash_messages(): void { if (!isset($_SESSION[FLASH])) { return; } // get flash messages $flash_messages = $_SESSION[FLASH]; // remove all the flash messages unset($_SESSION[FLASH]); // show all flash messages foreach ($flash_messages as $flash_message) { echo format_flash_message($flash_message); } }
Define the flash() function
It would be more convenient if we define a single flash() function that:
- Create a flash message
- Display a flash message
- Display all flash messages
The following flash() function reuses the above functions:
Code language: PHP (php)
<?php /** * Flash a message * * @param string $name * @param string $message * @param string $type (error, warning, info, success) * @return void */ function flash(string $name = '', string $message = '', string $type = ''): void { if ($name !== '' && $message !== '' && $type !== '') { create_flash_message($name, $message, $type); } elseif ($name !== '' && $message === '' && $type === '') { display_flash_message($name); } elseif ($name === '' && $message === '' && $type === '') { display_all_flash_messages(); } }
To create a flash message, you pass three arguments: name, message, and type to the flash() function like this:
Code language: PHP (php)
flash('greeting', 'Hi there', FLASH_INFO);
To display a flash message by a name, you need to pass a name to the flash() function:
Code language: PHP (php)
flash('greeting');
To display all flash messages, you don’t pass any arguments to the flash() function:
Code language: PHP (php)
flash();
Put it all together
The following places all the functions in the flash.php file:
Code language: HTML, XML (xml)
<?php const FLASH = 'FLASH_MESSAGES'; const FLASH_ERROR = 'error'; const FLASH_WARNING = 'warning'; const FLASH_INFO = 'info'; const FLASH_SUCCESS = 'success'; /** * Create a flash message * * @param string $name * @param string $message * @param string $type * @return void */ function create_flash_message(string $name, string $message, string $type): void { // remove existing message with the name if (isset($_SESSION[FLASH][$name])) { unset($_SESSION[FLASH][$name]); } // add the message to the session $_SESSION[FLASH][$name] = ['message' => $message, 'type' => $type]; } /** * Format a flash message * * @param array $flash_message * @return string */ function format_flash_message(array $flash_message): string { return sprintf('<div class="alert alert-%s">%s</div>', $flash_message['type'], $flash_message['message'] ); } /** * Display a flash message * * @param string $name * @return void */ function display_flash_message(string $name): void { if (!isset($_SESSION[FLASH][$name])) { return; } // get message from the session $flash_message = $_SESSION[FLASH][$name]; // delete the flash message unset($_SESSION[FLASH][$name]); // display the flash message echo format_flash_message($flash_message); } /** * Display all flash messages * * @return void */ function display_all_flash_messages(): void { if (!isset($_SESSION[FLASH])) { return; } // get flash messages $flash_messages = $_SESSION[FLASH]; // remove all the flash messages unset($_SESSION[FLASH]); // show all flash messages foreach ($flash_messages as $flash_message) { echo format_flash_message($flash_message); } } /** * Flash a message * * @param string $name * @param string $message * @param string $type (error, warning, info, success) * @return void */ function flash(string $name = '', string $message = '', string $type = ''): void { if ($name !== '' && $message !== '' && $type !== '') { // create a flash message create_flash_message($name, $message, $type); } elseif ($name !== '' && $message === '' && $type === '') { // display a flash message display_flash_message($name); } elseif ($name === '' && $message === '' && $type === '') { // display all flash message display_all_flash_messages(); } }
A flash message example
First, create the following directory and file structure:
Code language: plaintext (plaintext)
├── inc | ├── flash.php | ├── footer.php | └── header.php ├── page1.php └── page2.php
Second, place all the functions above in the flash.php file.
Third, add the following code to the header.php file. The header.php links to the style.css file in the css folder:
Code language: HTML, XML (xml)
<!DOCTYPE html> <html lang="en"> <head> <meta charset="UTF-8"> <meta name="viewport" content="width=device-width, initial-scale=1.0"> <link rel="stylesheet" href="https://www.phptutorial.net/app/css/style.css"> <title>PHP Flash Message</title> </head> <body>
Fourth, add the following HTML to the footer.php file:
Code language: HTML, XML (xml)
</body> </html>
Fifth, create a flash message on the page1.php file by calling the flash() function:
Code language: PHP (php)
<?php session_start(); require __DIR__ . '/inc/flash.php'; require __DIR__ . '/inc/header.php'; flash('greeting', 'Hi there', FLASH_INFO); echo '<a href="page2.php" title="Go To Page 2">Go To Page 2</a>'; require __DIR__ . '/inc/footer.php';
The page1.php file has a link to the page2.php.
Finally, show the greeting message on the page2.php file by calling the flash() function and pass the name into it:
Code language: PHP (php)
<?php session_start(); require __DIR__ . '/inc/flash.php'; require __DIR__ . '/inc/header.php'; flash('greeting'); require __DIR__ . '/inc/footer.php';
If you open the page1.php page and click the link, you’ll see a message on the page2.php page.
PHP flash message use cases
In practice, you’ll use the flash messages on a signup page to redirect users to the login page with a welcome message after they sign up. Also, you’ll use the flash messages in the Post-Redirect-Get pattern, which you’ll learn in the next tutorial.
Summary
- A flash message is created on a page and displayed once on another page.
- Use the
$_SESSIONsuperglobal variable to manage the flash messages. - Use the
flash()developed in this tutorial to manage flash messages.
Did you find this tutorial useful?
- Основы Flask
- Что это такое? Простое WSGI-приложение
- Использование шаблонов страниц сайта
- Контекст приложения и контекст запроса
- Функция url_for и переменные URL-адреса
- Подключение внешних ресурсов и работа с формами
- Мгновенные сообщения — flash, get_flashed_messages
- Декоратор errorhandler, функции redirect и abort
- Главная
- Flask
- Основы Flask
В современном Web-программировании
считается хорошим стилем отправлять пользователю мгновенные сообщения о
результатах взаимодействия с сайтом. Например, при отправке данных формы,
пользователю можно написать, что данные отправлены успешно, или, наоборот, что
произошла ошибка. Этот функционал встроен во фреймворк Flask и реализуется с
помощью двух функций:
-
flash()
– формирование
сообщения пользователю; -
get_flashed_messages() – обработка
сформированных сообщений в шаблоне документа.
Их синтаксис, следующий:
flask.flash(message, category=’message’)
flask.get_flashed_messages(with_categories=False,
category_filter=[])
-
message
– текст
сообщения; -
category – категория
сообщения; -
with_categories – разрешает
использование категорий при извлечении сообщений; -
category_filter – список
разрешенных категорий при выборке сообщений.
Чтобы
воспользоваться функцией flash ее нужно импортировать из модуля flask:
from flask import Flask, render_template, request, flash
И, затем, в
качестве примера сформируем сообщение условно при успешной проверки принятых
данных и при ошибке:
if len(request.form['username']) > 2:
    flash('Сообщение отправлено')
else:
    flash('Ошибка отправки')
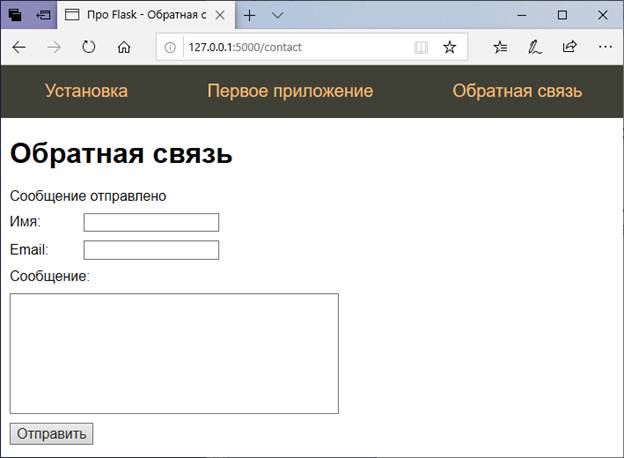
Далее, в шаблоне
contact.html вызовем функцию get_flashed_messages следующим
образом:
{% for msg in get_flashed_messages() %}
<div class="flash">{{msg}}</div>
{% endfor %}
Обратите
внимание, функция get_flashed_messages возвращает
итератор, содержащий сообщения, то есть, их может быть несколько, если flash в обработчике
был вызван несколько раз. Но, в нашем случае, оно будет одно, которое выводится
в блоке div.
Если мы сейчас
попробуем отправить данные формы, то получим ошибку:
RuntimeError:
The session is unavailable
Дело в том, что
функции flash и get_flashed_messages используют
механизм сессий, чтобы отображать сообщения только один раз и при обновлении
страницы более его не показывать. Чтобы активизировать работу сессий,
необходимо в конфигурацию программы прописать секретный ключ. Я сделаю это так:
app.config['SECRET_KEY'] = 'fdgdfgdfggf786hfg6hfg6h7f'
Это не самый
лучший ключ, позже мы еще об этом поговорим, а пока пусть он будет записан в
таком виде. Теперь, при обновлении страницы, увидим следующее:
А если
обратиться к этой же странице еще раз (без отправки формы), то сообщение
пропадет.
Далее, добавим
оформление этому сообщению, причем разное для разных типов: успешных и
ошибочных. В стилях пропишем следующее:
.flash {padding: 10px;}
.flash.success {
         border: 1px solid #21DB56;
         background: #AEFFC5;
}
.flash.error {
         border: 1px solid #FF4343;
         background: #FF9C9C;
}
А в программе
вызовем функцию flash с указанием категории сообщения:
if len(request.form['username']) > 2:
    flash('Сообщение отправлено', category='success')
else:
    flash('Ошибка отправки', category='error')
Имя категории у
нас и будет именем расширения стиля оформления. В шаблоне пропишем следующее:
{% for cat, msg in get_flashed_messages(True) %}
<div class="flash {{cat}}">{{msg}}</div>
{% endfor %}
Здесь параметр True в функции get_flashed_messages разрешает
оперировать категориями мгновенных сообщений. Все, теперь при успешной отправке
увидим сообщение на зеленом фоне, а при ошибке – на красном.
Видео по теме
- Предыдущая
- Следующая