I am using image_picker 0.5.2 package for uploading a picture, after I added that dependency into the project I am unable to build my project, getting an exception which is mentioned below. Please help me out.
D8: Program type already present: android.support.v4.os.ResultReceiver$MyResultReceiver

FAILURE: Build failed with an exception.

* What went wrong:
Execution failed for task ':app:transformDexArchiveWithExternalLibsDexMergerForDebug'.
> com.android.builder.dexing.DexArchiveMergerException: Error while merging dex archives: /Users/harshavardhan/Workspace/cargill_flutter/build/app/intermediates/transforms/dexBuilder/debug/2.jar, /Users/harshavardhan/Workspace/cargill_flutter/build/app/intermediates/transforms/dexBuilder/debug/3.jar, /Users/harshavardhan/Workspace/cargill_flutter/build/app/intermediates/transforms/dexBuilder/debug/4.jar, /Users/harshavardhan/Workspace/cargill_flutter/build/app/intermediates/transforms/dexBuilder/debug/5.jar, /Users/harshavardhan/Workspace/cargill_flutter/build/app/intermediates/transforms/dexBuilder/debug/6.jar, /Users/harshavardhan/Workspace/cargill_flutter/build/app/intermediates/transforms/dexBuilder/debug/7.jar, /Users/harshavardhan/Workspace/cargill_flutter/build/app/intermediates/transforms/dexBuilder/debug/8.jar, /Users/harshavardhan/Workspace/cargill_flutter/build/app/intermediates/transforms/dexBuilder/debug/9.jar, /Users/harshavardhan/Workspace/cargill_flutter/build/app/intermediates/transforms/dexBuilder/debug/10.jar, /Users/harshavardhan/Workspace/cargill_flutter/build/app/intermediates/transforms/dexBuilder/debug/11.jar, /Users/harshavardhan/Workspace/cargill_flutter/build/app/intermediates/transforms/dexBuilder/debug/12.jar, /Users/harshavardhan/Workspace/cargill_flutter/build/app/intermediates/transforms/dexBuilder/debug/13.jar, /Users/harshavardhan/Workspace/cargill_flutter/build/app/intermediates/transforms/dexBuilder/debug/14.jar, /Users/harshavardhan/Workspace/cargill_flutter/build/app/intermediates/transforms/dexBuilder/debug/15.jar, /Users/harshavardhan/Workspace/cargill_flutter/build/app/intermediates/transforms/dexBuilder/debug/16.jar, /Users/harshavardhan/Workspace/cargill_flutter/build/app/intermediates/transforms/dexBuilder/debug/17.jar, /Users/harshavardhan/Workspace/cargill_flutter/build/app/intermediates/transforms/dexBuilder/debug/18.jar, /Users/harshavardhan/Workspace/cargill_flutter/build/app/intermediates/transforms/dexBuilder/debug/19.jar, /Users/harshavardhan/Workspace/cargill_flutter/build/app/intermediates/transforms/dexBuilder/debug/20.jar, /Users/harshavardhan/Workspace/cargill_flutter/build/app/intermediates/transforms/dexBuilder/debug/21.jar, /Users/harshavardhan/Workspace/cargill_flutter/build/app/intermediates/transforms/dexBuilder/debug/22.jar, /Users/harshavardhan/Workspace/cargill_flutter/build/app/intermediates/transforms/dexBuilder/debug/23.jar, /Users/harshavardhan/Workspace/cargill_flutter/build/app/intermediates/transforms/dexBuilder/debug/24.jar, /Users/harshavardhan/Workspace/cargill_flutter/build/app/intermediates/transforms/dexBuilder/debug/25.jar, /Users/harshavardhan/Workspace/cargill_flutter/build/app/intermediates/transforms/dexBuilder/debug/26.jar, /Users/harshavardhan/Workspace/cargill_flutter/build/app/intermediates/transforms/dexBuilder/debug/27.jar, /Users/harshavardhan/Workspace/cargill_flutter/build/app/intermediates/transforms/dexBuilder/debug/28.jar, /Users/harshavardhan/Workspace/cargill_flutter/build/app/intermediates/transforms/dexBuilder/debug/29.jar, /Users/harshavardhan/Workspace/cargill_flutter/build/app/intermediates/transforms/dexBuilder/debug/30.jar, /Users/harshavardhan/Workspace/cargill_flutter/build/app/intermediates/transforms/dexBuilder/debug/31.jar, /Users/harshavardhan/Workspace/cargill_flutter/build/app/intermediates/transforms/dexBuilder/debug/32.jar, /Users/harshavardhan/Workspace/cargill_flutter/build/app/intermediates/transforms/dexBuilder/debug/33.jar, /Users/harshavardhan/Workspace/cargill_flutter/build/app/intermediates/transforms/dexBuilder/debug/34.jar, /Users/harshavardhan/Workspace/cargill_flutter/build/app/intermediates/transforms/dexBuilder/debug/35.jar, /Users/harshavardhan/Workspace/cargill_flutter/build/app/intermediates/transforms/dexBuilder/debug/36.jar, /Users/harshavardhan/Workspace/cargill_flutter/build/app/intermediates/transforms/dexBuilder/debug/37.jar, /Users/harshavardhan/Workspace/cargill_flutter/build/app/intermediates/transforms/dexBuilder/debug/38.jar, /Users/harshavardhan/Workspace/cargill_flutter/build/app/intermediates/transforms/dexBuilder/debug/39.jar, /Users/harshavardhan/Workspace/cargill_flutter/build/app/intermediates/transforms/dexBuilder/debug/40.jar, /Users/harshavardhan/Workspace/cargill_flutter/build/app/intermediates/transforms/dexBuilder/debug/41.jar, /Users/harshavardhan/Workspace/cargill_flutter/build/app/intermediates/transforms/dexBuilder/debug/42.jar, /Users/harshavardhan/Workspace/cargill_flutter/build/app/intermediates/transforms/dexBuilder/debug/43.jar, /Users/harshavardhan/Workspace/cargill_flutter/build/app/intermediates/transforms/dexBuilder/debug/44.jar, /Users/harshavardhan/Workspace/cargill_flutter/build/app/intermediates/transforms/dexBuilder/debug/45.jar, /Users/harshavardhan/Workspace/cargill_flutter/build/app/intermediates/transforms/dexBuilder/debug/46.jar
  Learn how to resolve the issue at https://developer.android.com/studio/build/dependencies#duplicate_classes.
  Program type already present: android.support.v4.os.ResultReceiver$MyResultReceiver

* Try:
Run with --stacktrace option to get the stack trace. Run with --info or --debug option to get more log output. Run with --scan to get full insights.

* Get more help at https://help.gradle.org

BUILD FAILED in 22s
*******************************************************************************************
The Gradle failure may have been because of AndroidX incompatibilities in this Flutter app.
*******************************************************************************************
Gradle task assembleDebug failed with exit code 1
Exited (sigterm)
Question:
I’m currently using these versions:
flutter : 2.16.0
image_picker : ^0.8.4+7
The image picker is not working. After running the app, when I click on the button to activate the pickImage function, running suddenly stops and the app crashes and stops. On debug, the only message I get is:
Lost connection to device.
Here’s the code:
import 'dart:io';
import 'dart:math';

import 'package:flutter/material.dart';
import 'package:cloud_firestore/cloud_firestore.dart';
import 'package:hipocampus_editors/widgets/textformfield_widget.dart';
import 'package:image_picker/image_picker.dart';

class AddSystemPage extends StatefulWidget {
  const AddSystemPage({Key? key}) : super(key: key);

  @override
  _AddSystemPageState createState() => _AddSystemPageState();
}

class _AddSystemPageState extends State<AddSystemPage> {
  final _formKey = GlobalKey<FormState>();
File? image1;

  Future pickImage() async{

final image = await ImagePicker().pickImage(source: ImageSource.gallery);
if (image == null)  return;
final imageTemporary = File(image.path);
setState(() {
  image1 = imageTemporary;
});

    }
  @override
  Widget build(BuildContext context) {
    return GestureDetector(
      onTap: () => FocusManager.instance.primaryFocus?.unfocus(),
      child: Scaffold(
        appBar: AppBar(title: const Text('System',),),

        body: SafeArea(
          child: Padding(
            padding: const EdgeInsets.symmetric(horizontal: 5),
            child: Form(
              key: _formKey,
              child: Container(
                width: MediaQuery.of(context).size.width,
                padding: const EdgeInsets.symmetric(horizontal: 10),
                child: SingleChildScrollView(
                    child: Column(
                  children: [

                    ElevatedButton(onPressed: (){
                      pickImage();
                                          }, child: Text('Select image'))

                  ],
                )),
              ),
            ),
          ),
        ),
      ),
    );
    }
    }
Answer:
Add this to iOS>runner>Info.plist
<key>NSPhotoLibraryUsageDescription</key>
<string>Allow access to photo library</string>
If you have better answer, please add a comment about this, thank you!
In this article, we are going to learn ImagePicker Widget to pick images from the gallery in a flutter.
What is ImagePicker Widget?
A Flutter plugin library for both iOS and Android that is been used to pick an image from a mobile phone gallery or even you can take a new photo with the camera.
Let’s straight away start to implement the flutter ImagePicker Widget in our flutter app.
Get the latest version of the ImagePicker Widget from the official website. When I am writing this article we are using the plugin with version ” image_picker 0.8.5+3“. Let’s follow instructions as per the official document. If there are any changes that occur in the future we need to implement the plugin with new and latest instructions.
Now, put this ” image_picker 0.8.5+3 ” plugin into pubspec.yaml under dependencies.
Step 1: Adding dependencies to project
dependencies:
   image_picker 0.6.7
Step 2: Import image_picker.dart
Now, as we have added the required library in our project now users need to import the picker library wherever required.
import 'package:image_picker/image_picker.dart';
Ways to implement ImagePicker Widget will defer depending on the type of platform the user is implementing.
For Android:
For Android with API 29+ no more configuration required – the plugin should work like a charm.
If a user has API < 29 then follow instructions like below :
Add android:requestLegacyExternalStorage=”true” as an attribute to the tag in AndroidManifest.xml.The attribute is false by default on apps targeting Android Q.
Create a FloatingActionButton Widget which is used to choose an image from the gallery or choose a camera.
The code snippet will look like below :
floatingActionButton: Column(
        mainAxisAlignment: MainAxisAlignment.end,
        children: <Widget>[
          FloatingActionButton(
            onPressed: () {
              isVideo = false;
              _onImageButtonPressed(
                ImageSource.gallery,
                context: context,
              );
            },
            heroTag: 'image0',
            tooltip: 'Pick Image from gallery',
            child: const Icon(Icons.photo_library),
          ),
          Padding(
            padding: const EdgeInsets.only(top: 16.0),
            child: FloatingActionButton(
              onPressed: () {
                isVideo = false;
                _onImageButtonPressed(
                  ImageSource.camera,
                  context: context,
                );
              },
              heroTag: 'image1',
              tooltip: 'Take a Photo',
              child: const Icon(Icons.camera_alt),
            ),
          ),
        ],
      ),
We will get a FAB(FloatingActionButton) button like below :

Image Picker
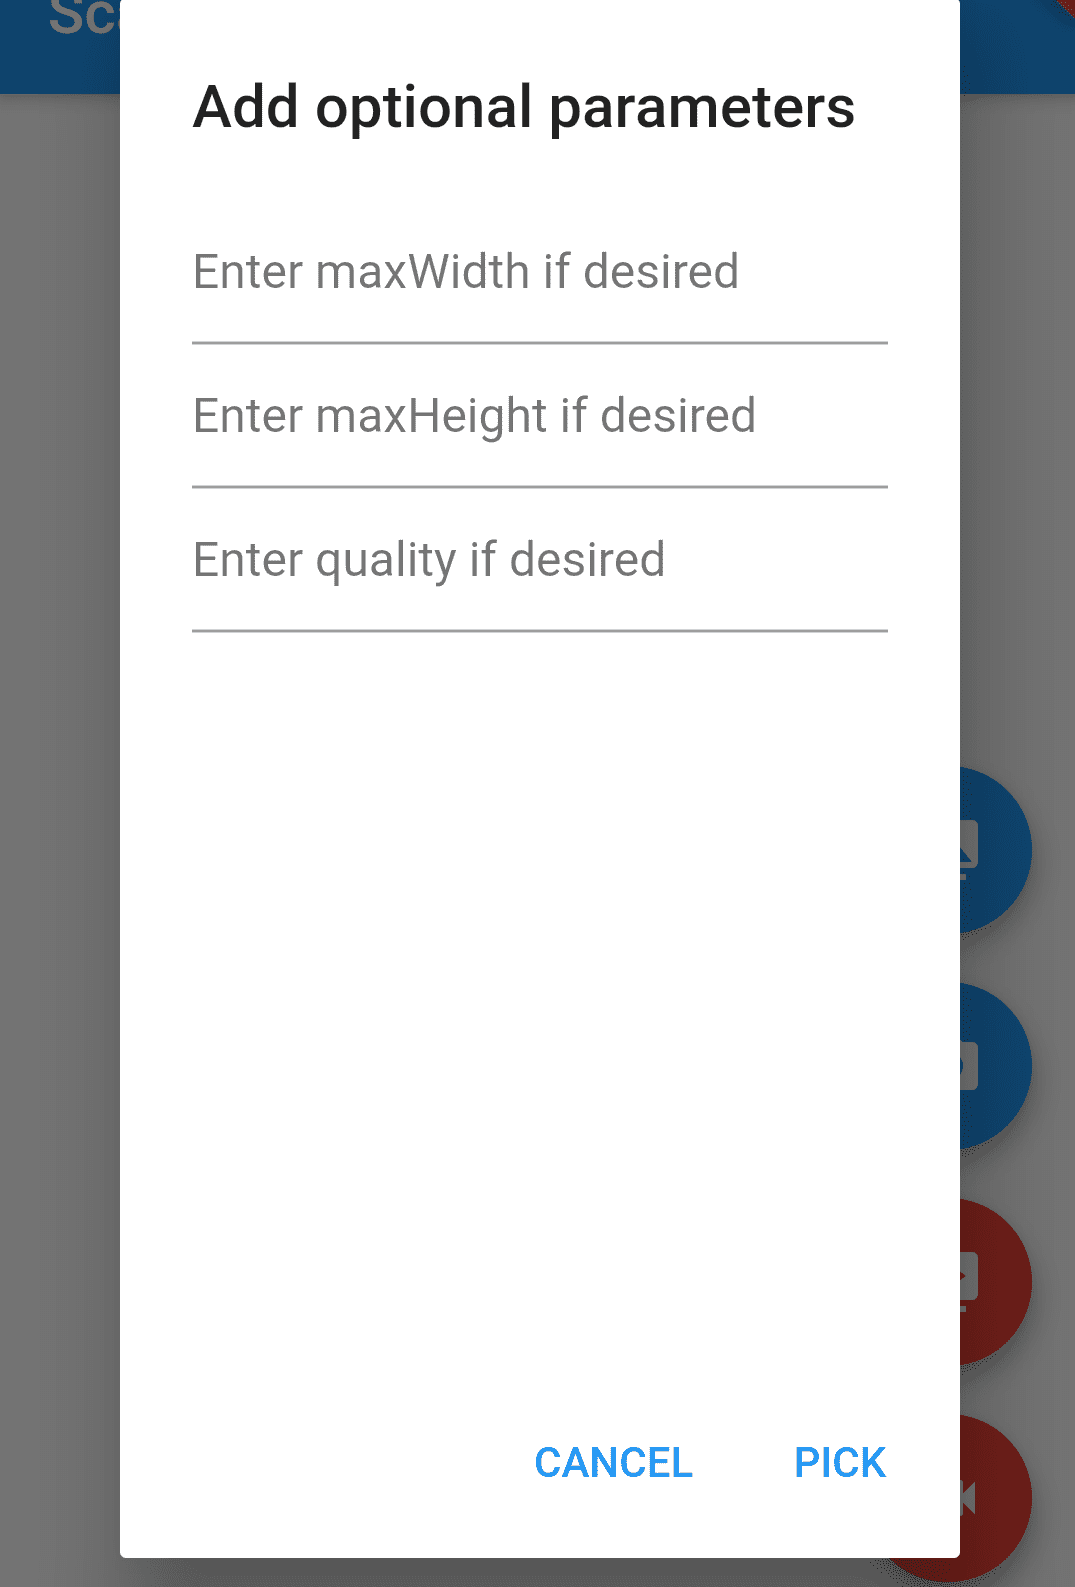
In this example when users click on FAB Button user will get a dialog where users can enter the information like maxWidth, maxHeight, Quality parameters. into TextField Widget The code snippet will look like below :
    Future<void> _displayPickImageDialog(
        BuildContext context, OnPickImageCallback onPick) async {
      return showDialog(
          context: context,
          builder: (context) {
            return AlertDialog(
              title: Text('Add optional parameters'),
              content: Column(
                children: <Widget>[
                  TextField(
                    controller: maxWidthController,
                    keyboardType: TextInputType.numberWithOptions(decimal: true),
                    decoration:
                        InputDecoration(hintText: "Enter maxWidth if desired"),
                  ),
                  TextField(
                    controller: maxHeightController,
                    keyboardType: TextInputType.numberWithOptions(decimal: true),
                    decoration:
                        InputDecoration(hintText: "Enter maxHeight if desired"),
                  ),
                  TextField(
                    controller: qualityController,
                    keyboardType: TextInputType.number,
                    decoration:
                        InputDecoration(hintText: "Enter quality if desired"),
                  ),
                ],
              ),
              actions: <Widget>[
                FlatButton(
                  child: const Text('CANCEL'),
                  onPressed: () {
                    Navigator.of(context).pop();
                  },
                ),
                FlatButton(
                    child: const Text('PICK'),
                    onPressed: () {
                      double width = maxWidthController.text.isNotEmpty
                          ? double.parse(maxWidthController.text)
                          : null;
                      double height = maxHeightController.text.isNotEmpty
                          ? double.parse(maxHeightController.text)
                          : null;
                      int quality = qualityController.text.isNotEmpty
                          ? int.parse(qualityController.text)
                          : null;
                      onPick(width, height, quality);
                      Navigator.of(context).pop();
                    }),
              ],
            );
          });
    }
  }
We will get output like below.
When users click on Pick Button we will call _onImageButtonPressed().
  void _onImageButtonPressed(ImageSource source, {BuildContext context}) async {
    if (_controller != null) {
      await _controller.setVolume(0.0);
    }
    await _displayPickImageDialog(context,
        (double maxWidth, double maxHeight, int quality) async {
      try {
        final pickedFile = await _picker.getImage(
          source: source,
          maxWidth: maxWidth,
          maxHeight: maxHeight,
          imageQuality: quality,
        );
        setState(() {
          _imageFile = pickedFile;
        });
      } catch (e) {
        setState(() {
          _pickImageError = e;
        });
      }
    });
    // }
  }
Once the user clicks on the pick button after inserting desire height/width and quality can select an image from the gallery or camera image will be shown to the user like the below screenshot.
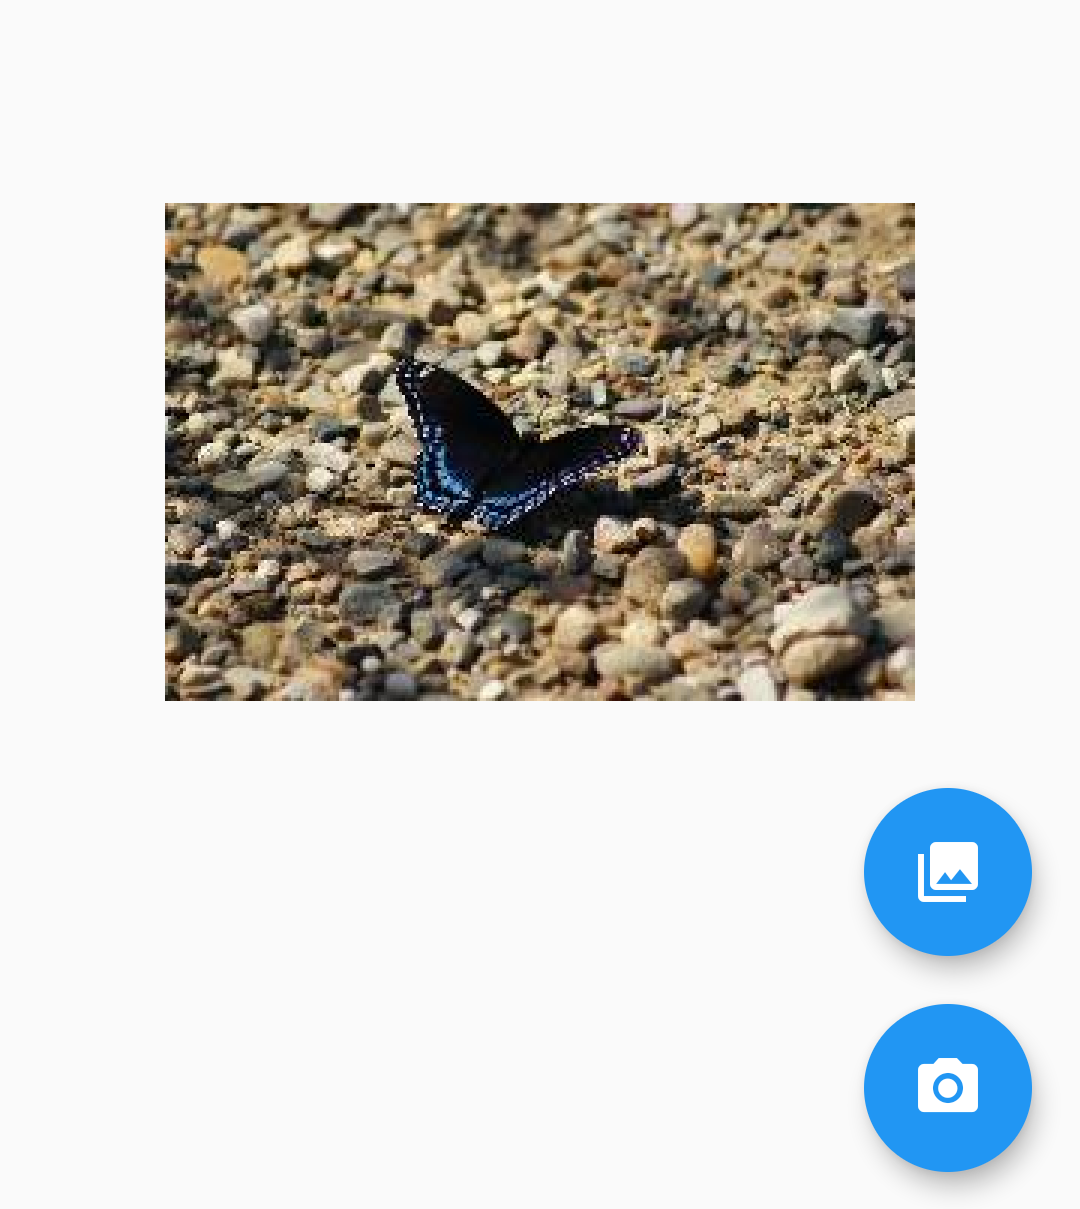
Uploaded Image
Complete source code for this is as below :
class ImagePickerScreen extends StatefulWidget {
  ImagePickerScreen({
    Key? key,
    this.title,
  }) : super(key: key);

  final String? title;

  @override
  _ImagePickerScreenState createState() => _ImagePickerScreenState();
}

class _ImagePickerScreenState extends State {
  PickedFile? _imageFile;

  dynamic _pickImageError;
  bool isVideo = false;
  VideoPlayerController? _controller;
  String? _retrieveDataError;

  final ImagePicker _picker = ImagePicker();
  final TextEditingController maxWidthController = TextEditingController();
  final TextEditingController maxHeightController = TextEditingController();
  final TextEditingController qualityController = TextEditingController();

  Future _playVideo(PickedFile file) async {
    if (file != null && mounted) {
      await _disposeVideoController();
      _controller = VideoPlayerController.file(File(file.path));
      await _controller?.setVolume(1.0);
      await _controller?.initialize();
      await _controller?.setLooping(true);
      await _controller?.play();
      setState(() {});
    }
  }

  void _onImageButtonPressed(ImageSource source,
      {required BuildContext context}) async {
    if (_controller != null) {
      await _controller?.setVolume(0.0);
    }
    await _displayPickImageDialog(context,
        (double maxWidth, double maxHeight, int quality) async {
      try {
        final pickedFile = await _picker.getImage(
          source: source,
          maxWidth: maxWidth,
          maxHeight: maxHeight,
          imageQuality: quality,
        );
        setState(() {
          _imageFile = pickedFile;
        });
      } catch (e) {
        setState(() {
          _pickImageError = e;
        });
      }
    });
  }

  @override
  void deactivate() {
    if (_controller != null) {
      _controller?.setVolume(0.0);
      _controller?.pause();
    }
    super.deactivate();
  }

  @override
  void dispose() {
    _disposeVideoController();
    maxWidthController.dispose();
    maxHeightController.dispose();
    qualityController.dispose();
    super.dispose();
  }

  Future _disposeVideoController() async {
    if (_controller != null) {
      await _controller?.dispose();
      _controller = null;
    }
  }

  Widget _previewImage() {
    final Text? retrieveError = _getRetrieveErrorWidget();
    if (retrieveError != null) {
      return retrieveError;
    }
    if (_imageFile != null) {
      return Image.file(File(_imageFile!.path));
    } else if (_pickImageError != null) {
      return Text(
        'Pick image error: $_pickImageError',
        textAlign: TextAlign.center,
      );
    } else {
      return const Text(
        'You have not yet picked an image.',
        textAlign: TextAlign.center,
      );
    }
  }

  Future retrieveLostData() async {
    final LostData response = await _picker.getLostData();
    if (response.isEmpty) {
      return;
    }
    if (response.file != null) {
      if (response.type == RetrieveType.video) {
        isVideo = true;
        // await _playVideo(response.file);
      } else {
        isVideo = false;
        setState(() {
          _imageFile = response.file;
        });
      }
    } else {
      _retrieveDataError = response.exception?.code;
    }
  }

  @override
  Widget build(BuildContext context) {
    return Scaffold(
      body: Center(
        child: defaultTargetPlatform == TargetPlatform.android
            ? FutureBuilder(
                future: retrieveLostData(),
                builder: (BuildContext context, AsyncSnapshot snapshot) {
                  switch (snapshot.connectionState) {
                    case ConnectionState.none:
                    case ConnectionState.waiting:
                      return const Text(
                        'You have not yet picked an image.',
                        textAlign: TextAlign.center,
                      );
                    case ConnectionState.done:
                      return _previewImage();
                    default:
                      if (snapshot.hasError) {
                        return Text(
                          'Pick image/video error: ${snapshot.error}}',
                          textAlign: TextAlign.center,
                        );
                      } else {
                        return const Text(
                          'You have not yet picked an image.',
                          textAlign: TextAlign.center,
                        );
                      }
                  }
                },
              )
            : (_previewImage()),
      ),
      floatingActionButton: Column(
        mainAxisAlignment: MainAxisAlignment.end,
        children: [
          FloatingActionButton(
            onPressed: () {
              isVideo = false;
              _onImageButtonPressed(
                ImageSource.gallery,
                context: context,
              );
            },
            heroTag: 'image0',
            tooltip: 'Pick Image from gallery',
            child: const Icon(Icons.photo_library),
          ),
          Padding(
            padding: const EdgeInsets.only(top: 16.0),
            child: FloatingActionButton(
              onPressed: () {
                isVideo = false;
                _onImageButtonPressed(
                  ImageSource.camera,
                  context: context,
                );
              },
              heroTag: 'image1',
              tooltip: 'Take a Photo',
              child: const Icon(Icons.camera_alt),
            ),
          ),
        ],
      ),
    );
  }

  Text? _getRetrieveErrorWidget() {
    if (_retrieveDataError != null) {
      final Text result = Text(_retrieveDataError!);
      _retrieveDataError = null;
      return result;
    }
    return null;
  }

  Future _displayPickImageDialog(
      BuildContext context, OnPickImageCallback onPick) async {
    return showDialog(
        context: context,
        builder: (context) {
          return AlertDialog(
            title: Text('Add optional parameters'),
            content: Column(
              children: [
                TextField(
                  controller: maxWidthController,
                  keyboardType: TextInputType.numberWithOptions(decimal: true),
                  decoration:
                      InputDecoration(hintText: "Enter maxWidth if desired"),
                ),
                TextField(
                  controller: maxHeightController,
                  keyboardType: TextInputType.numberWithOptions(decimal: true),
                  decoration:
                      InputDecoration(hintText: "Enter maxHeight if desired"),
                ),
                TextField(
                  controller: qualityController,
                  keyboardType: TextInputType.number,
                  decoration: const InputDecoration(
                      hintText: "Enter quality if desired"),
                ),
              ],
            ),
            actions: [
              TextButton(
                child: const Text('CANCEL'),
                onPressed: () {
                  Navigator.of(context).pop();
                },
              ),
              TextButton(
                  child: const Text('PICK'),
                  onPressed: () {
                    double? width = maxWidthController.text.isNotEmpty
                        ? double.parse(maxWidthController.text)
                        : null;
                    double? height = maxHeightController.text.isNotEmpty
                        ? double.parse(maxHeightController.text)
                        : null;
                    int? quality = qualityController.text.isNotEmpty
                        ? int.parse(qualityController.text)
                        : null;
                    onPick(width ?? 100, height ?? 100, quality ?? 100);
                    Navigator.of(context).pop();
                  }),
            ],
          );
        });
  }
}

typedef void OnPickImageCallback(
    double maxWidth, double maxHeight, int quality);
Do not forget to comment if you need any assistance regarding this.
Keep Fluttering !!!
FlutterAgency.com is our portal Platform dedicated to Flutter Technology and Flutter Developers. The portal is full of cool resources from Flutter like Flutter Widget Guide, Flutter Projects, Code libs and etc.
FlutterAgency.com is one of the most popular online portal dedicated to Flutter Technology and daily thousands of unique visitors come to this portal to enhance their knowledge on Flutter.
[Solved] Flutter Error : Could not resolve all artifacts for configuration ‘:image_picker_android:debugUnitTestRuntimeClasspath’
Question
Asked by Abhishek J on June 05, 2022 (source).
The application which I am working on is debugging fine in emulator or in mobiles but when I try to build the apk it gives the following Error:
**Building without sound null safety
For more information see https://dart.dev/null-safety/unsound-null-safety
Running Gradle task ‘assembleRelease’…
FAILURE: Build failed with an exception.
- What went wrong:
Execution failed for task ‘:app:lintVitalRelease’.
Could not resolve all artifacts for configuration ‘:image_picker_android:debugUnitTestRuntimeClasspath’.
Failed to transform bcprov-jdk15on-1.68.jar (org.bouncycastle:bcprov-jdk15on:1.68) to match attributes {artifactType=processed-jar, org.gradle.category=library, org.gradle.libraryelements=jar, org.gradle.status=release, org.gradle.usage=java-runtime}.
> Execution failed for JetifyTransform: /home/cicada/.gradle/caches/modules-2/files-2.1/org.bouncycastle/bcprov-jdk15on/1.68/46a080368d38b428d237a59458f9bc915222894d/bcprov-jdk15on-1.68.jar.
> Failed to transform ‘/home/cicada/.gradle/caches/modules-2/files-2.1/org.bouncycastle/bcprov-jdk15on/1.68/46a080368d38b428d237a59458f9bc915222894d/bcprov-jdk15on-1.68.jar’ using Jetifier. Reason: IllegalArgumentException, message: Unsupported class file major version 59. (Run with —stacktrace for more details.)
Suggestions:
— Check out existing issues at https://issuetracker.google.com/issues?q=componentid:460323&s=modified_time:desc, it’s possible that this issue has already been filed there.
— If this issue has not been filed, please report it at https://issuetracker.google.com/issues/new?component=460323 (run with —stacktrace and provide a stack trace if possible).
-
Try:
Run with —stacktrace option to get the stack trace. Run with —info or —debug option to get more log output. Run with —scan to get full insights. -
Get more help at https://help.gradle.org
BUILD FAILED in 19s
Running Gradle task ‘assembleRelease’… 20.7s
Gradle task assembleRelease failed with exit code 1
Process finished with exit code 1**
Answer
Question answered by Bilal S (source).
I added following lines in the android section of app level build.gradle of my project.
   lintOptions {
        disable 'InvalidPackage'
        disable "Instantiatable"
        checkReleaseBuilds false
        abortOnError false
    }
And every thing started to work fine.
- Source: Stackoverflow.com
#flutter #null #imagepicker
Вопрос:
Я пытаюсь использовать ImagePicker. Когда изображение выбрано, оно не отображается на экране. Значение кажется равным нулю. Ниже вы найдете полный исходный код. Я провел некоторое исследование, но так и не нашел, какую ошибку я совершаю. Если бы вы могли указать мне правильное направление, это было бы здорово и высоко оценено. Большое спасибо.
 class CaptureV2 extends StatefulWidget {
  CaptureV2({Key key}) : super(key: key);
  @override
  _CaptureV2State createState() => _CaptureV2State();
}

class _CaptureV2State extends State<CaptureV2> {
  GlobalKey<FormState> _captureFormKey = GlobalKey<FormState>();

  bool isOn = true;
  String _valueTaskNameChanged = '';
  String _valueTaskNameToValidate ='';
  String _valueTaskNameSaved='';


  File imageFile;
  _openGallery(BuildContext context) async{
    imageFile = await ImagePicker().getImage(source: ImageSource.gallery) as File;
    this.setState(() {
    });
  }
  _openCamera(BuildContext context) async {
    imageFile = await ImagePicker().getImage(source: ImageSource.camera) as File;
    this.setState(() {
    });
  }

  Widget _showImageView(context){ //Even when I am selecting an image I always get null
    if(imageFile ==null) {
      return Text('No attachment');
    }else{
      return Image.file(imageFile, width: 200, height: 200,);
    }
  }

  @override
  Widget build(BuildContext context) {
    return Material(
      child:   Scaffold(
        drawer: MyMenu(),
        appBar: AppBar(
          centerTitle: true,
          title: Text('CAPTURE'),
          actions: <Widget>[
            Padding(
              padding: const EdgeInsets.fromLTRB(0,22,0,0),
              child: Text("On/Off"),
            ),
            Switch(
              value: isOn,
              onChanged: (value) {
                setState(() {
                  isOn = value;
                });
              },
              activeTrackColor: Colors.green,
              activeColor: Colors.green,
            ),
          ],
        ),

//==================

        body: isOn?
        SingleChildScrollView(
          child: Column(
            // crossAxisAlignment: CrossAxisAlignment.end,
            // mainAxisAlignment: MainAxisAlignment.end,
            children: [
              Form(
                key: _captureFormKey,
                child: Column(
                  // crossAxisAlignment: CrossAxisAlignment.end,
                    mainAxisAlignment: MainAxisAlignment.start,
                    children: <Widget>[
                      Padding(
                        padding: const EdgeInsets.fromLTRB(8.0, 0.0, 15.0, 1.0),
                        child: TextFormField(
                          decoration: InputDecoration(hintText: "Task Name"),
                          maxLength: 100,
                          maxLines: 3,
                          onChanged: (valProjectName) => setState(() => _valueTaskNameChanged = valProjectName),
                          validator: (valProjectName) {
                            setState(() => _valueTaskNameToValidate = valProjectName);
                            return valProjectName.isEmpty? "Task name cannot be empty" : null;
                          },
                          onSaved: (valProjectName) => setState(() => _valueTaskNameSaved = valProjectName),
                        ),
                      ),

                      SizedBox(
                        height: 50.0,
                      ),

 //########ATTACHEMENT amp; PHOTOS
                      Card(
                          child:
                          Container(
                            // color: Colors.red,
                            alignment: Alignment.center,
                            child: Row(
                              mainAxisAlignment: MainAxisAlignment.center,
                              children:[
//Attachement
                                FlatButton(
                                  onPressed: () {
                                    },
                                  child:
                                  InkWell(
                                    child: Container(
                                      //  color: Colors.white,
                                        child: Column(
                                          mainAxisAlignment: MainAxisAlignment.center,
                                          children: [
                                            Icon(Icons.attach_file),
                                            Text('Attachement'),
                                          ],
                                        )
                                    ),
                                    onTap: () {
                                      _openGallery(context);


                                    },
                                  ),
                                ),

//Photo
                                FlatButton(
                                  onPressed: () {(); },
                                  child:
                                  InkWell(
                                    child: Container(
                                      //   color: Colors.white,
                                        child: Column(
                                          mainAxisAlignment: MainAxisAlignment.center,
                                          children: [
                                            Icon(Icons.add_a_photo_rounded),
                                            Text('Photo'),
                                          ],
                                        )
                                    ),
                                    onTap: () {

                                    },
                                  ),
                                ),

//Voice Recording
                                FlatButton(
                                  onPressed: () {  },
                                  child:
                                  InkWell(
                                    child: Container(
                                      //   color: Colors.white,
                                        child: Column(
                                          mainAxisAlignment: MainAxisAlignment.center,
                                          children: [
                                            ConstrainedBox(
                                              constraints: BoxConstraints(
                                                minWidth: iconSize,
                                                minHeight: iconSize,
                                                maxWidth: iconSize,
                                                maxHeight: iconSize,
                                              ),

                                              child: Image.asset('assets/icons/microphone.png', fit: BoxFit.cover),
                                            ),
                                            Text('Recording'),
                                          ],
                                        )
                                    ),
                                    onTap: () {
                                      MyApp_AZERTY();
                                    },
                                  ),
                                ),
                              ],
                            ),
                          )
                      ),
                    ]
                ),
              ),
            Container(
                child:
                 _showImageView(context)
            ),
              SizedBox(
                height: 150.0,
              ),


//CANCEL amp; SAVE
              Container(
                decoration: const BoxDecoration(
                  border: Border(
                    top: BorderSide(width: 1.0, color: Colors.grey),

                  ),
                ),
                child: Row(
                    mainAxisAlignment: MainAxisAlignment.spaceEvenly,
                    children: <Widget>[
                      Container(
                        child:

                        FlatButton(
                          child: Text("Cancel",style: TextStyle(
                              fontSize: 18.0,fontWeight: FontWeight.bold,color: Colors.grey
                          )
                          ),
                          onPressed: (){
                            final loForm = _captureFormKey.currentState;
                            loForm.reset();

                          },
                        ),
                      ),
                      Container(
                        child: FlatButton(
                          child: Text("Save",style: TextStyle(
                              fontSize: 18.0,fontWeight: FontWeight.bold,color: Colors.blue
                          )),
                          //   Border.all(width: 1.0, color: Colors.black),
                          onPressed: (){}


                              loForm.reset();
                              showSimpleFlushbar(context, 'Task Saved',_valueTaskNameSaved, Icons.mode_comment);
                            }
                            loForm.reset();
                          },
                        ),
                      ),
                    ]
                ),
              ),
            ],
          ),
        ) :
Ответ №1:
Проблема в том, что getImage возвращает не тип файла, а тип
Future<PickedFile>
Поэтому вам нужно сделать следующее.
 final image =  await ImagePicker().getImage(source: ImageSource.gallery);
 this.setState(() {
imageFile = File(image.path);
    });
Комментарии:
1. Спасибо. Я обновил свой код и запустил его на своем физическом телефоне против виртуального. Я все еще не могу отобразить изображение. Не знаю почему.
2. Может быть, еще раз взгляните на pub.dev/пакеты/image_picker В зависимости от вашей версии, возможно, произошли некоторые изменения
3. Я посмотрю на это. Я использую image_picker: ^0.8.1 3
4. Я использую эту версию image_picker: ^0.6.7 22, и она отлично работает для меня. ( Я еще не на флаттере 2)
An image picker is one of the most widely used components in any app. Many popular apps, such as Facebook, Twitter, Instagram, WhatsApp, etc., have an image picker that enables users to select files from their device to use as a profile picture or share with their friends.
The most common use case for an image picker in a mobile app is to set an avatar for the user profile. In this tutorial, we’ll show you how to create an image picker in Flutter. We’ll build an example Flutter app that enables the user to either select a photo from the gallery or take a photo from the device’s camera.
Here’s what we’ll cover:
- What is Flutter
image_picker? - Building a Flutter image picker app
- Adding the
image_pickerplugin - Creating widgets
- Testing our Flutter image picker app
What is Flutter image_picker?
Coding an image picker widget in Flutter from scratch would be tedious. Flutter comes with an image picker plugin for picking images from the device gallery or taking new pictures from the camera.
The image_picker plugin exposes some helpful methods from the ImagePicker class it exports:
import 'package:image_picker/image_picker.dart';

ImagePicker picker = ImagePicker();
The picker instance has public methods that we’ll call to open the image selection dialog. Let’s look at these methods.
pickImage
XFile? image = await picker.pickImage(source: ImageSource.gallery);
The pickImage method opens the choose dialog and displays the phone’s gallery from which to select the image. The source arg states where the image is to be picked from.
Here, the source is set to ImageSource.gallery, so the image is selected from the user’s gallery.
XFile? image = await picker.pickImage(source: ImageSource.camera);
In the example above, the image is taken from the device camera. This method opens the camera and picks the picture snapped by the user. The source: ImageSource.camera arg is what opens the device camera.
pickVideo
XFile? image = await picker.pickVideo(source: ImageSource.gallery);
This method opens a choose dialog to pick a video from the phone’s gallery. You would use the pickVideo method when you want a video to be picked either from the gallery or from the phone’s video camera. The arg source: ImageSource.gallery causes the video to be picked from the phone’s gallery.
XFile? photo = await picker.pickVideo(source: ImageSource.camera);
This method allows the user to pick a video from the camera. The arg source: ImageSource.camera opens the phone’s video camera so the user can record the video. The recorded video is then used as the picked video.
pickMultiImage
List<XFile>? images = await picker.pickMultiImage(source: ImageSource.gallery);
pickMultiImage enables the user to pick multiple images. The arg source: ImageSource.gallery allows us to pick the images from the phone’s gallery.
List<XFile>? photos = await picker.pickMultiImage(source: ImageSource.camera);
Building a Flutter image picker app
Now that we’ve reviewed the methods in the image_picker plugin, let’s build an example Flutter image picker app to see how they work in practice.
Before we start, make sure you have the following tools and binaries already installed in your machine.
- Flutter SDK: We’ll use this to compile, create, and run our Flutter project. It has a CLI tool,
flutter, which enables us to do these things from the terminal - VS Code: This is optional but great for coding Flutter projects. VS Code has awesome plugins to enhance your coding experience with Flutter
- Android Studio: This binary is an IDE for building and compiling native Android projects. We can also create, compile, and run Flutter projects using Android Studio. But mostly we need Android Studio to run emulators and compile our Flutter project from VS Code
Scaffolding a Flutter project
Now that we’re done installing the necessary tools and binaries, it’s time to build our Flutter image picker example app.
First, let’s scaffold a Flutter project:
flutter create imagepickerprj
This creates a Flutter project in a folder called imagepickerprj. A series of commands will cascade down our terminal. At the end of the terminal, you’ll see instructions for running the newly generated project:
In order to run your application, type:

  $ cd imagepickerprj
  $ flutter run

To enable null safety, type:

  $ cd imagepickerprj
  $ dart migrate --apply-changes

Your application code is in imagepickerprj/lib/main.dart.
We won’t run it now, but let’s move it inside the folder:
cd imagepickerprj
Adding the image_picker plugin
The next step is to add the image_picker plugin to our Flutter project.
Open the pubspec.yaml file and add the image_picker to the dependencies section:
dependencies:
  flutter:
    sdk: flutter
  image_picker: ^0.8.2
If you’re using VS Code, it will automatically pull in the image_picker once you save the pubspec.yaml file. If you’re not using VS Code run the following command to pull in the latest added dependency:
flutter pub get
In our imagepickerprj project, our main file resides in the lib/ folder. This is the main.dart file, which is the entry point of any Flutter project/app. So that is where we’ll start to add most of our code.
Flutter has some code set for us already, but we won’t need it except in the MyApp widget. Let’s start there:
void main() {
  runApp(MyApp());
}

class MyApp extends StatelessWidget {
  // This widget is the root of your application.
  @override
  Widget build(BuildContext context) {
    return MaterialApp(
      title: 'Flutter Demo',
      theme: ThemeData(
        primarySwatch: Colors.blue,
      ),
      home: HomePage(),
    );
  }
}
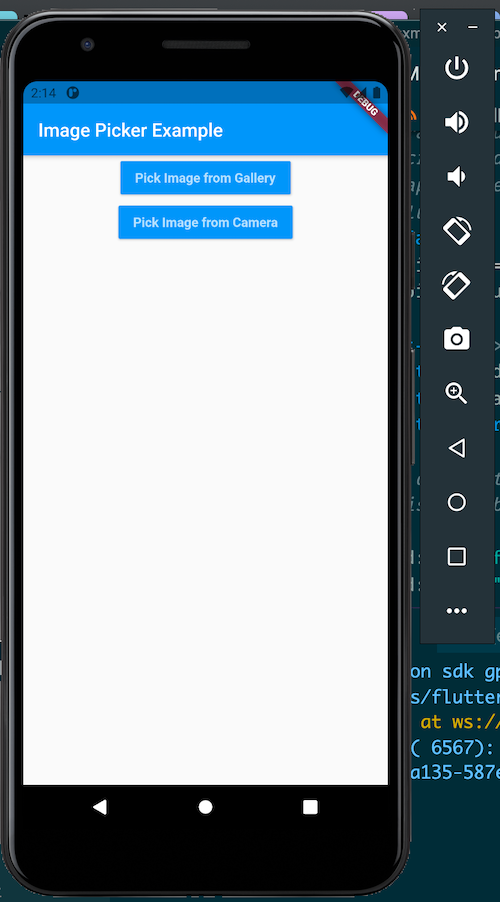
Our Flutter image picker app will have two screens:
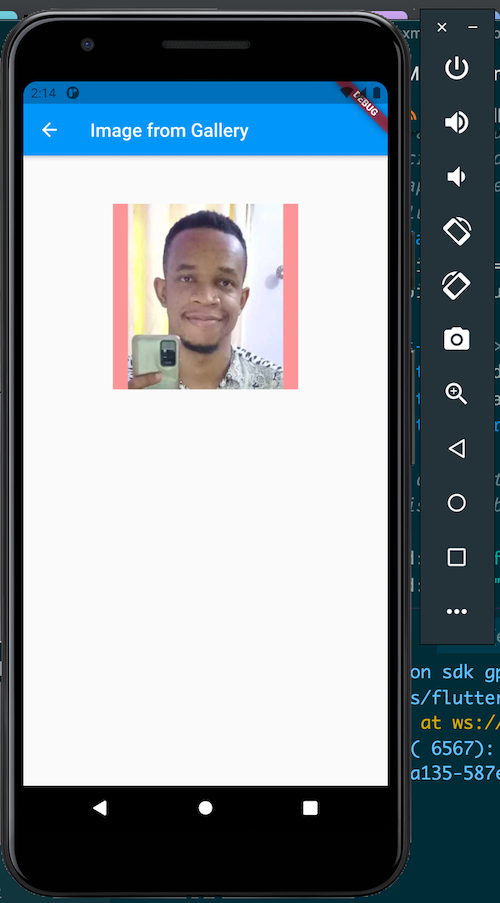
HomePagewill list two buttons:Pick Image from Gallery, andPick Image from Camera. ThePick Image from Gallerywill open anImageFromGalleryExscreen where we can pick an image from our gallery, whilePick Image from Camerawill open anImageFromGalleryExscreen where we can take a picture from our camera and use the image as the picked imageImageFromGalleryExwill handle picking images from both the gallery and the camera. It will know what to handle based on the source type sent to it. It will also display the picked image
Now let’s code them.
HomePage
enum ImageSourceType { gallery, camera }

class HomePage extends StatelessWidget {
  void _handleURLButtonPress(BuildContext context, var type) {
    Navigator.push(context,
        MaterialPageRoute(builder: (context) => ImageFromGalleryEx(type)));
  }

  @override
  Widget build(BuildContext context) {
    return Scaffold(
        appBar: AppBar(
          title: Text("Image Picker Example"),
        ),
        body: Center(
          child: Column(
            children: [
              MaterialButton(
                color: Colors.blue,
                child: Text(
                  "Pick Image from Gallery",
                  style: TextStyle(
                      color: Colors.white70, fontWeight: FontWeight.bold),
                ),
                onPressed: () {
                  _handleURLButtonPress(context, ImageSourceType.gallery);
                },
              ),
              MaterialButton(
                color: Colors.blue,
                child: Text(
                  "Pick Image from Camera",
                  style: TextStyle(
                      color: Colors.white70, fontWeight: FontWeight.bold),
                ),
                onPressed: () {
                  _handleURLButtonPress(context, ImageSourceType.camera);
                },
              ),
            ],
          ),
        ));
  }
}
We have an enum, ImageSourceType, that holds the image source types, gallery, and camera.
In the HomePage widget, we have a method, _handleURLButtonPress. This method uses the arg type, which bears any values of the ImageSourceType. It opens the ImageFromGalleryEx widget, passing in the image source type to the widget class.
In the build method, we see that it renders two buttons, as we stated earlier: Pick Image from Gallery, and Pick Image from Camera. Each button has an onPressed event set on it. The events call the _handleURLButtonPress method when the buttons are pressed.
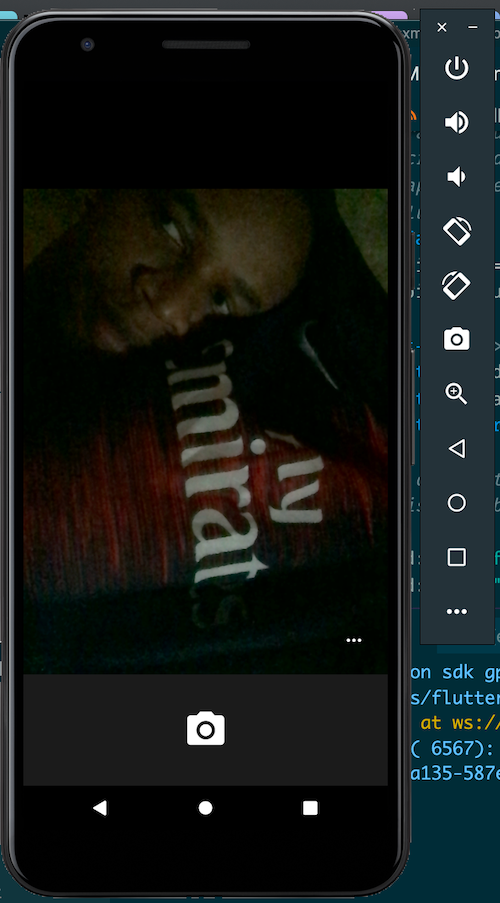
The Pick Image from Gallery button passes the ImageSourceType.gallery to the ImageFromGalleryEx widget, telling it that we will pick an image from the gallery. The Pick Image from Camera button passes the ImageSourceType.camera to the ImageFromGalleryEx widget, telling it to open the camera of the phone and take the snapped picture as the selected image.
Now, let’s code the ImageFromGalleryEx widget.
ImageFromGalleryEx
class ImageFromGalleryEx extends StatefulWidget {
  final type;
  ImageFromGalleryEx(this.type);

  @override
  ImageFromGalleryExState createState() => ImageFromGalleryExState(this.type);
}

class ImageFromGalleryExState extends State<ImageFromGalleryEx> {
  var _image;
  var imagePicker;
  var type;

  ImageFromGalleryExState(this.type);

  @override
  void initState() {
    super.initState();
    imagePicker = new ImagePicker();
  }

  @override
  Widget build(BuildContext context) {
    return Scaffold(
      appBar: AppBar(
          title: Text(type == ImageSourceType.camera
              ? "Image from Camera"
              : "Image from Gallery")),
      body: Column(
        children: <Widget>[
          SizedBox(
            height: 52,
          ),
          Center(
            child: GestureDetector(
              onTap: () async {
                var source = type == ImageSourceType.camera
                    ? ImageSource.camera
                    : ImageSource.gallery;
                XFile image = await imagePicker.pickImage(
                    source: source, imageQuality: 50, preferredCameraDevice: CameraDevice.front);
                setState(() {
                  _image = File(image.path);
                });
              },
              child: Container(
                width: 200,
                height: 200,
                decoration: BoxDecoration(
                    color: Colors.red[200]),
                child: _image != null
                    ? Image.file(
                          _image,
                          width: 200.0,
                          height: 200.0,
                          fit: BoxFit.fitHeight,
                        )
                    : Container(
                        decoration: BoxDecoration(
                            color: Colors.red[200]),
                        width: 200,
                        height: 200,
                        child: Icon(
                          Icons.camera_alt,
                          color: Colors.grey[800],
                        ),
                      ),
              ),
            ),
          )
        ],
      ),
    );
  }
}
Here, we have ImageFromGalleryEx, a stateful widget, and ImageFromGalleryExState, which holds the state of the ImageFromGalleryEx widget.
Inside the ImageFromGalleryExState widget, we have the following variables:
_imageholds the picked image, whether from the gallery or from the cameraimagePickerholds the instance of theImagePickerclasstypeholds the type of image source to be used by the widget. It is passed to the widget from theHomePagewidget
We also have an initState method, which is inserted into the widget tree first. We use this method to initialize and create the instance of the ImagePicker class and then assign it to the imagePicker variable.
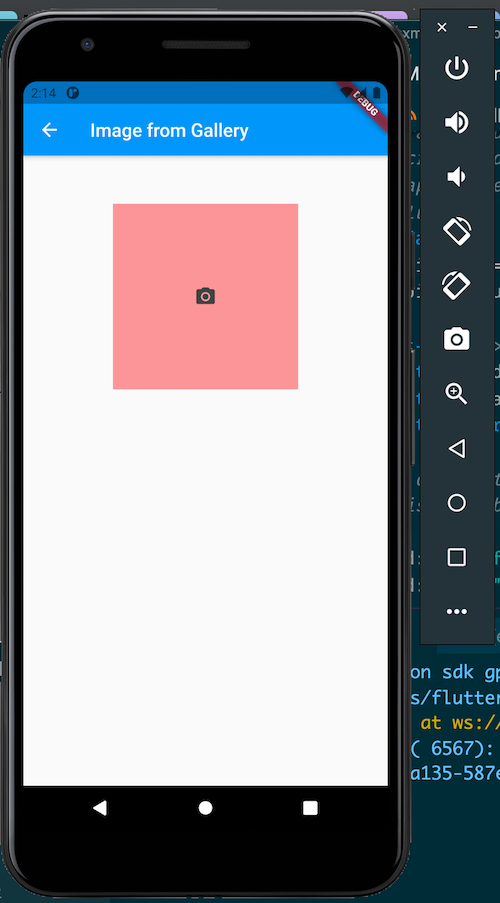
Inside the build method is the Container widget, which is a child to the Center widget. We render the Image.file based on the condition of the _image variable. If the _image is not null or undefined, then we know it has an image then we render the Image.file widget by passing the _image variable to it.
More great articles from LogRocket:
- Don’t miss a moment with The Replay, a curated newsletter from LogRocket
- Learn how LogRocket’s Galileo cuts through the noise to proactively resolve issues in your app
- Use React’s useEffect to optimize your application’s performance
- Switch between multiple versions of Node
- Discover how to animate your React app with AnimXYZ
- Explore Tauri, a new framework for building binaries
- Compare NestJS vs. Express.js
This Image.file is a widget that is used to render images from the local storage of a device.
If there is nothing in the _image variable, we render the Container widget. This Container displays a camera icon.
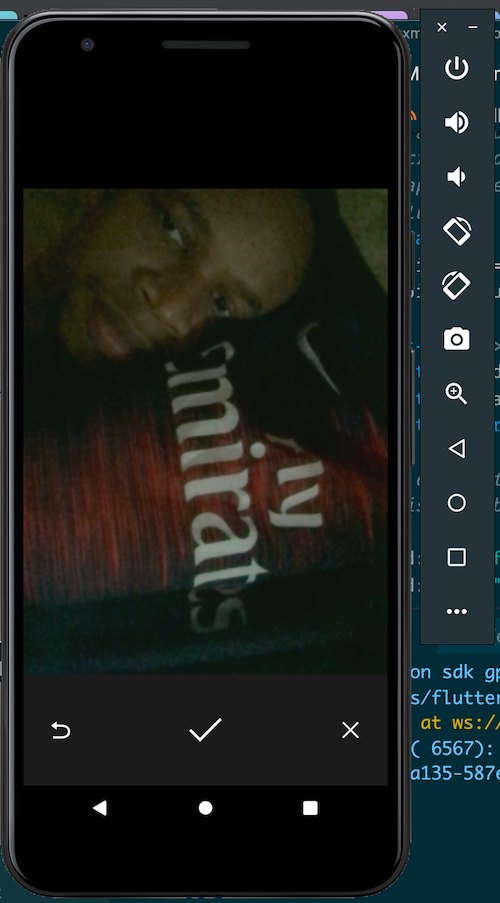
The GestureDetector is the parent to all these widgets. It has an onTap event registered to it. This event is fired when the widgets inside this GestureDetector are tapped on. The onTap handler calls the pickImage method from the imagePicker instance. It deduces the source of the image from the type variable and passes it to the pickImage method. It then passes the quality of the image (imageQuality: 50) and, lastly, the preferred camera device preferredCameraDevice: CameraDevice.front. This causes it to choose the front camera of our phone.
Now, pickImage returns an XFile instance. We reference the image.path from the XFile instance image returned and pass it to File to create a File instance from it. This XFile instance is what we set to the _image state via:
setState(() {
    _image = File(image.path);
});
This will cause the ImageFromGalleryExState to rerender and the Image.file will display the image in the _image variable.
Now that we’re finished with the code, let’s test-run our app.
Testing our Flutter image picker app
Open your Android Emulator and, from your terminal, run the following command:
flutter run
This will compile and build the project and then run the app inside your Android Emulator.
If you’re using VS Code, you can either run the above command or simply right-click the lib/main.dart in your editor and then click either run Without Debugging or Start Debugging.
The app will open up in your Android Emulator.
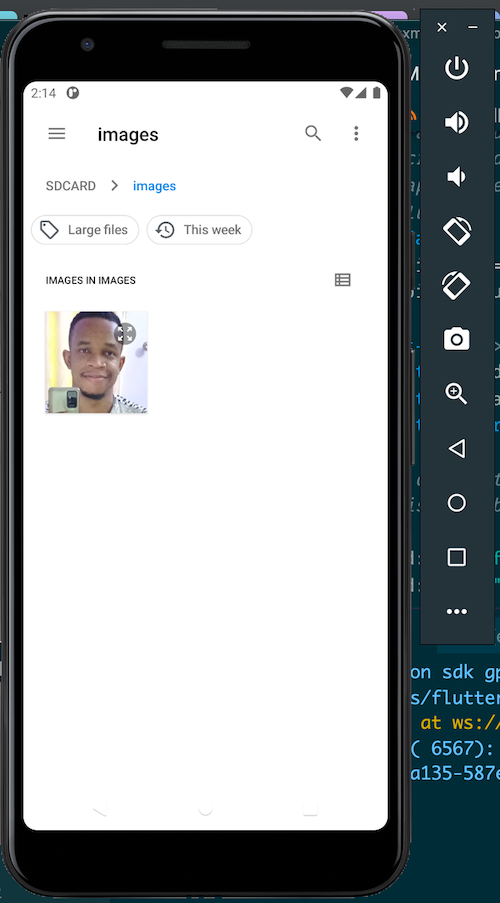
HomePage:
Pick image from gallery:
Pick image from camera:

Conclusion
We learned a lot in this tutorial. We started by introducing common use cases for the Flutter image picker component. Then, we introduced the image_picker plugin for Flutter. We walked through how to initialize the ImagePicker class of the image_picker plugin and reviewed the methods in the ImagePicker class.
Finally, we built a Flutter project to demonstrate how to use the image_picker plugin in a real-world scenario.
Find the source code for this project on GitHub.
LogRocket: Full visibility into your web and mobile apps

LogRocket is a frontend application monitoring solution that lets you replay problems as if they happened in your own browser. Instead of guessing why errors happen, or asking users for screenshots and log dumps, LogRocket lets you replay the session to quickly understand what went wrong. It works perfectly with any app, regardless of framework, and has plugins to log additional context from Redux, Vuex, and @ngrx/store.
In addition to logging Redux actions and state, LogRocket records console logs, JavaScript errors, stacktraces, network requests/responses with headers + bodies, browser metadata, and custom logs. It also instruments the DOM to record the HTML and CSS on the page, recreating pixel-perfect videos of even the most complex single-page and mobile apps.
Try it for free.