-
Home
-
Forums
-
Games
-
Game Modding
-
Fallout 4 Modding
You should upgrade or use an alternative browser.
Tutorial How to use FO4Edit to change weapon stats
-
Thread starter
April 1udgate -
Start date
Nov 30, 2015 -
Views
75,710
-
#1
.: Disclaimer :.
I’m not responsible for any damage taken by your system .
Backup everything before you start editing the files .
.: Downloads :.
Fo4Edit: http://www.nexusmods.com/fallout4/mods/2737/?
.: Installation of FO4Edit :.
1. Download and unpack the archive somewhere (i.e. Desktop)
2. You should now have a folder with some stuff in it

3. Rename the «TES5Edit» folder to «FO4Edit» and the «TES5Edit.exe» to «FO4Edit.exe»

4. Copy the whole folder into your Fallout 4 main directory
.: Using FO4Edit to edit weapon stats :.
1. Start up FO4Edit ( and uncheck all the files except for fallout4.esm
2. Click on the tiny + symbol at the side of fallout4.esm
3. Scroll down to the weapons category
4. Now select the weapon you wanna edit . For this tutorial I used the assault rifle .
5. Now right-click the weapon and select «Copy as override into…»

6. Accept the warning message , check the «new file» box and press OK
7. Now you can give your weapon a name (Not the name used in-game)
8. Scroll upwards and close the fallout4.esm category , you now see that a new <yourweaponname>.esp file appeared.
9. Open the <yourweaponname>.esp and the weapon category inside it .
10. Now you can start editing .

You can edit all the values in the red circle
Here is a list of values and what they change:
EDID — Editor ID : The name shown in the debug console
FULL — Name : shown In-game name (i.e. The Penetrator 3000)
ETYP — Equipment Type : Sets how the weapon is equipped (i.e. Left-handed,Both-handed,..)
DNAM — Data : — Ammo : Sets the ammo which the gun fires (i.e. nukes)
11. When you finished editing press Ctrl+S to save the weapon stats ( you actually made a weapon mod )
12. Enjoy your new weapon .
Thanks to Hlp, Zilav and Sharlikran for updating this program to Fallout 4 and thanks to ElminsterAU for creating it .
-
#2
.: How to use FO4Edit to change weapon stats :.
.: Disclaimer :.
I’m not responsible for any damage taken by your system .
Backup everything before you start editing the files ..: Downloads :.
Fo4Edit: http://www.nexusmods.com/fallout4/mods/2737/?.: Installation of FO4Edit :.
1. Download and unpack the archive somewhere (i.e. Desktop)2. You should now have a folder with some stuff in it

3. Rename the «TES5Edit» folder to «FO4Edit» and the «TES5Edit.exe» to «FO4Edit.exe»
4. Copy the whole folder into your Fallout 4 main directory.: Using of FO4Edit to edit weapon stats :.
1. Start up FO4Edit ( and uncheck all the files except for fallout4.esm2. Click on the tiny + symbol at the side of fallout4.esm
3. Scroll down to the weapons category
4. Now select the weapon you wanna edit . For this tutorial I used the assault rifle .
5. Now right-click the weapon and select «Copy as override into…»
6. Accept the warning message , check the «new file» box and press OK
7. Now you can give your weapon a name (Not the name used in-game)
8. Scroll upwards and close the fallout4.esm category , you now see that a new <yourweaponname>.esp file appeared.
9. Open the <yourweaponname>.esp and the weapon category inside it .
10. Now you can start editing .You can edit all the values in the red circle
Here is a list of values and what they change:
EDID — Editor ID : The name shown in the debug console
FULL — Name : shown In-game name (i.e. The Penetrator 3000)
ETYP — Equipment Type : Sets how the weapon is equipped (i.e. Left-handed,Both-handed,..)
DNAM — Data : — Ammo : Sets the ammo which the gun fires (i.e. nukes)11. When you finished editing press Ctrl+S to save the weapon stats ( you actually made a weapon mod )
12. Enjoy your new weapon .
Thanks to Hlp, Zilav and Sharlikran for updating this program to Fallout 4 and thanks to ElminsterAU for creating it .
Is there a way i can make a minigun shoot mininukes ? Like actual nukes.
-
#3
Is there a way i can make a minigun shoot mininukes ? Like actual nukes.
Yes , just click on Ammo (Not double) in DNAM — Data and a list should open with every ammotype from the game.
You can even shoot the nukes from the cutscene in the beginning of the game.

-
#4
Yes , just click on Ammo (Not double) in DNAM — Data and a list should open with every ammotype from the game.
You can even shoot the nukes from the cutscene in the beginning of the game.
Ahh then I did it wrong. I’ll try again soon.
How do I get the weapon I modified? I am pretty new to stuff like this.
Alright I got the weapon to show up and use the nukes as ammo but the projectiles are still minigun rounds.
-
#5
Ahh then I did it wrong. I’ll try again soon.
How do I get the weapon I modified? I am pretty new to stuff like this.Alright I got the weapon to show up and use the nukes as ammo but the projectiles are still minigun rounds.
Did you change the right value for ammo bc there are multiple values that are named ammo . Or try to use another ammotype to see if it works (like missiles) .
-
#6
Did you change the right value for ammo bc there are multiple values that are named ammo . Or try to use another ammotype to see if it works (like missiles) .
Are there multiple values that I need to change or just the ammo type? I noticed that there are two different things that have to do with ammo. One is like «LL_Ammo» and proceeds to say the type.
-
#7
Are there multiple values that I need to change or just the ammo type? I noticed that there are two different things that have to do with ammo. One is like «LL_Ammo» and proceeds to say the type.
I think that one defines the 3d model of the ammo . Going to check it when I’m home
-
#8
I think that one defines the 3d model of the ammo . Going to check it when I’m home
I’ll keep poking at it and see what I can learn.
-
#9
-
#10
how do i make my gun have infinite ammo? it reloads but has no clips like the never ending plasma rifle
If you mean a gun that never reloads than go to DNAM-Data Magazine size . just put to something about a million and you don’t need to reload anymore
-
#11
-
#12
How do I actually find the gun ingame. Every time I use the code for the gun it show up as the original file. Any help?
Did you change the name of the gun ? Bc if you type «help [changed name] 0» in the debug console and then type in the id (player.additem [id] 1) it gives you , you should get the gun
-
#13
Did you change the name of the gun ? Bc if you type «help [changed name] 0» in the debug console and then type in the id (player.additem [id] 1) it gives you , you should get the gun
Yeah , so here’s an example. I edited the Junk gun and renamed it to Dooms Day, saved and everything. Went to help as you suggested and the only thing that pops up are invalid variables and other IDs for other items. Im gonna try again hopefully I can fix my mistake.
Thanks for replying !
-
#14
Yeah , so here’s an example. I edited the Junk gun and renamed it to Dooms Day, saved and everything. Went to help as you suggested and the only thing that pops up are invalid variables and other IDs for other items. Im gonna try again hopefully I can fix my mistake.
Thanks for replying !
did you also change the editor id
-
#15
did you also change the editor id
Yeah I changed that as well. Same problem. Maybe certain weapons can’t be modded? Im trying to get the junk jet to shoot nukes.
-
#16
Yeah I changed that as well. Same problem. Maybe certain weapons can’t be modded? Im trying to get the junk jet to shoot nukes.
Try another weapon(i.e. shotgun) , I tried the minigun and it also did not work
-
#17
Try another weapon(i.e. shotgun) , I tried the minigun and it also did not work
Maybe the minigun is the reason I couldn’t shoot mini nukes out of it. I gave up.
-
#18
Maybe the minigun is the reason I couldn’t shoot mini nukes out of it. I gave up.
If I remember correctly (I’m in school at the moment so I can’t do much more than guessing what the problem is) there is a value that defines the type of the weapon. It could be that that value is the problem
-
#19
Maybe the minigun is the reason I couldn’t shoot mini nukes out of it. I gave up.
It seems that the minigun can shot cal.50 ammo
-
#20
Similar threads
-
Home
-
Forums
-
Games
-
Game Modding
-
Fallout 4 Modding
 |
- Реклама
|
|
| Модератор форума: ApeX |
|
FO4Edit |
|||||||||
|
|||||||||
|
|||||||||
|
|||||||||
|
|||||||||
|
|||||||||
|
|||||||||
|
|||||||||
|
|||||||||
|
|||||||||
|
|||||||||
|
|||||||||
|
|||||||||
|
|||||||||
|
|||||||||
|
|||||||||
|
|||||||||
|
|||||||||
|
|||||||||
|
|||||||||
|
|||||||||
|
|||||||||
|
|||||||||
|
|||||||||
|
|||||||||
|
|||||||||
|
|||||||||
|
|||||||||
|
|||||||||
|
|||||||||
|
|||||||||


 После этого можем менять любые параметры оружия, в правой ветке (Левая оригинальная Fallout4.esm)


|
|
#1

Posted 04 December 2015 — 05:38 pm
Anyone knows how or which values contain the recoil?
Some weapons have terrible recoil and I would like to change it and edit it. Would greatelly appreciate any help.
- Back to top
 Back to top
#2
NexusFiles
Posted 05 December 2015 — 07:41 am
NexusFiles
-
- Premium Member
-
- 188 posts
Enthusiast

Look in the modification settings.
- Back to top
#3
The6thMessenger
Posted 05 December 2015 — 09:30 am
Yes, try this: http://www.nexusmods…ut4/mods/4227/?
With the latest FO4, if you dissect the file, you should see is:
«Float»
«Multiply»
«AimModelRecoilMaxDegPerShot» and «AimModelRecoilMinDegPerShot»
With the «0.35000000», it adds 35% extra recoil.
Just do the same on any other weapon modifications, it should modify the Recoil.
- Back to top
#4
Whalley42
Posted 05 December 2015 — 10:42 am
Whalley42
-
- Members
-
- 17 posts
Newbie


Of course! As stated in the description, this mod changes some values (modifies or adds) which affect the recoil of the weapon.
It does not, however, modify the weapons themselves.
To be precise, it modifies two properties of the modifications: AimModelRecoilMaxDegPerShot and AimModelRecoilMinDegPerShot.
By using the Multiply function with a negative value lower than 1, you get a recoil reduction.
Here’s an example: http://i.imgur.com/sM4eYtJ.png (Laser Short Barrel reducing AimModelRecoilMaxDegPerShot by 99.1% the same is true for the MinDeg property.)
For example, setting the value to -0.500000 would halve the weapon’s normal recoil, a value of -1.000000 would eliminate it. Be warned though — it seems that a weapon sums up all calls to this value from all its mods and adds them up before applying and gets weird if it goes below 0 through this. I’ve actually gotten negative recoil this way!
It’s for this reason that I’ve also had to change the values of all the other recoil-affecting modifications (such as stocks), funny though the downward-pulling automatic laser rifle was.
If the weapon modification does not affect recoil by itself, you can simply add an additional two properties and set them to do the above mentioned recoil reduction. Do remember to also increase the property count, or else the added values will simply get deleted again. And make sure that when using the multiply function, you’re using a float value.
Here’s an example: http://i.imgur.com/e6TNkOE.png (Increasing Laser Automatic Barrel property count to 20 to accomodate the newly added recoil reducing properties.)
And another: http://i.imgur.com/bRa3pUS.png (Newly added property, Value Type is Float but the Value is Int. Restarting FO4edit seems to fix this, assuming you remember to increase property count.)
TakaruMinari Told me this when I asked him.
- Back to top
#5
Sapling09
Posted 05 December 2015 — 10:47 am
It does not seem to change the way how to weapon behaves when you shoot.
By recoil I meant the stupid way the camera shakes (or the gun shakes) when you shoot.
For example. Is there a way to replace the recoil shooting animation of the semi-automatic fire with the automatic one (Which has no kick)?
Edited by Sapling09, 05 December 2015 — 11:06 am.
- Back to top
#6
Whalley42
Posted 05 December 2015 — 10:56 am
Whalley42
-
- Members
-
- 17 posts
Newbie
It does not seem to change the way how to weapon behaves when you shoot.
By recoil I meant the stupid way the camera shakes (or the gun shakes) when you shoot.
This is an animation. I’ve encountered the same problem in my mod and i’m not sure if the tools are ready to edit these animations at the moment. Hopefully the tools will be available soon.
- Back to top
#7
Sapling09
Posted 05 December 2015 — 12:56 pm
It does not seem to change the way how to weapon behaves when you shoot.
By recoil I meant the stupid way the camera shakes (or the gun shakes) when you shoot.
This is an animation. I’ve encountered the same problem in my mod and i’m not sure if the tools are ready to edit these animations at the moment. Hopefully the tools will be available soon.
Maybe not, but I edited my post (Not sure if you read that).
It should be technically possible to swap the autofire animation with the semi fire animation. Autofire animation by default has no kick and only thing that is visible is the recoil (Which is not a problem).
Does anyone know what part of the weapon contains these infromation or where should I change it?
- Back to top
#8
NexusFiles
Posted 14 December 2015 — 07:17 pm
NexusFiles
-
- Premium Member
-
- 188 posts
Enthusiast
Any progress on this? I would like to swap the animation as well.
- Back to top
#9
brumley53
Posted 18 December 2015 — 10:29 am
brumley53
-
- Members
-
- 20 posts
Journeyman

Does anyone know how to change recoil using perks?
- Back to top
#10

PhoenixKnight13
Posted 26 February 2016 — 05:05 am
So just to be clear on this…
If I was to change AimModelRecoilMaxDegPerShot and AimModelRecoilMinDegPerShot from say -.15 to -.40, it would reduce the visual recoil when firing?
- Back to top
Описание
Файлы2
Скриншоты3
Комментарии191
FO4Edit является межплагиновым детектором конфликтов. Все наверняка сталкивались с сообщениями BOSS/LOOT о “грязных” правках. Это программа поможет всё исправить.
Обновление:4.0.4
Исправление: проблема GitHub № 777 — [Skyrim SE / LE] — исправлено неизвестное значение TNAM маркера карты 59
Исправление: проблема GitHub № 788 — для Oblivion переопределения завершались неудачно для MGEF
Исправление: проблема GitHub № 792 — перевернутые индексы при отображении блоков и подблоков.
Исправление: проблема GitHub # 803 — после очистки некоторые новые мировые пространства из DLC могли некорректно загружать свои временные данные.
Исправление: проблема GitHub № 813 — неизвестное поле в фрагментах скрипта, декодированное журналом ошибок Creation Kit.
Исправление: проблема GitHub № 823 — FO3: Anchorage.esm и PointLookout.esm требовало применения Mark Modified во время QAC.
Исправление: проблема GitHub № 848 — данные с жестко запрограммированными идентификаторами FormID отображались как новые данные, а не переопределялись/вводились.
Исправление: проблема GitHub # 853 — FNV — мастер очистки dead money стирал геометрию карты.
Исправление: проблема GitHub # 855 — после очистки dlcnukaworld.esm предметы на рынке Nuka-Town исчезали.
Исправление: проблема GitHub # 860 — всплывающая подсказка всегда исчезала через секунду.
Исправление: проблема GitHub № 863 — FO4: формы DefaultObject (DFOB) должны переопределяться через EditorID.
Исправление: проблема GitHub № 871 — Обновления для статических коллекций [FO4].
Исправление: проблема GitHub # 875 — TES4Edit 4.0.3 не может копировать данные Magic Effect.
Исправление: проблема GitHub № 886 — сбой при подтверждении добавления * no * master.
Исправление: проблема GitHub № 880 — незначительная проблема с двойным щелчком во время выбора модуля.
Исправление: проблема GitHub № 894 — [Skyrim] Некоторые подзаписи RACE не помечались как обязательные.
Исправление: проблема GitHub # 909 — xEdit должен удваивать апострофы в сгенерированных именах записей главного списка LOOT.
Исправление: проблема GitHub № 912 — TES4Edit вылетал при попытке загрузить Nehrim.esm
Исправление: проблема GitHub № 914 — подзапись RNAM в INFO должна обрабатываться как чувствительная к регистру.
Исправление: проблема GitHub № 916 — DR некорректно отображался в дополнениях Armor и Armor для F3 / NV.
Исправление: проблема GitHub № 919 — для REFR необходимо обновлять количество связанных комнат при изменении связанных комнат.
Исправление: проблема GitHub № 926 — [FO4] Порядок загрузки игнорировался.
Исправление: проблема GitHub № 946 — GetNewFormID допускал только аргумент 0, когда ему нужен IwbFile в качестве входных данных.
Исправление: проблема GitHub № 947 — [FO4 / F76] NPC_ AIDT — Подзапись данных AI 4 Неизвестных байта соответствует «No Slow Approach».
Исправление: проблема GitHub № 949 — [TES4] Oblivion.esm отображался как отредактированный при использовании режима VQSC.
Исправление: проблема GitHub № 953 — время прошло неправильно для долго работающих скриптов.
Исправление: проблема GitHub № 959 — быстрая автоматическая очистка должна принудительно включать «Удалить данные OFST».
Исправление: проблема GitHub # 964 — ссылки SLGM и FLOR полностью действительны для данных пакета.
Исправление: проблема GitHub # 965 — мастер файл игры автоматически повторно добавлялся после того, как чистые мастер файлы удаляли его (когда мастеров не осталось).
Исправление: проблема GitHub # 972 — NPC_ ‘Geared Up Weapons’ должен отображать только 1 байт.
Исправление: проблема GitHub # 973 — условие GetIsID с аргументом опасности отображалось как ошибка.
Исправление: проблема GitHub # 974 — объявления встроенных переменных xNVSE появлялись как ошибка при проверке ошибок.
Исправление: проблема GitHub (о которой сообщалось в Discord) — расширения .esl не всегда принудительно загружались как .ESL правильно, если модуль не отмечен как ESL.
Исправление: проблема GitHub (о которой сообщалось в Discord) — [TES4] EDID и ESCE неправильно сообщали «Ожидается 4 байта, но найдено 0» при запуске «Проверить наличие ошибок» в MGEF.
Исправление: проблема GitHub (о которой сообщалось в Discord) — режим EnderalSE неправильно выполнял точное, а не частичное сопоставление при загрузке .bsa для загруженных модулей.
Исправление: проблема GitHub (о которой сообщалось в Discord) — длительные операции, такие как фильтры и скрипты, не могли быть прерваны.
Исправление: проблема GitHub (о которой сообщалось в Discord) — 64-разрядная версия не обрабатывала расширенный диапазон FormID в FO4 правильно.
Исправление: проблема GitHub (о которой сообщалось в Discord) — сохранение файла без изменений могло отбросить ранее поставленные в очередь сохранения для этого файла, что приводило к потере данных.
Исправление: проблема GitHub (о которой сообщалось в Discord) — загрузка одного файла без мастер файла могла привести к сбою xEdit, если он содержал данные на жестко закодированные записи.
Исправление: проблема GitHub (обнаружена разработчиком) — необходимо принудительно использовать InternalEdit для обработчиков AfterSet.
Новое: проблема GitHub № 827 — разрешено сворачивание SSEEdit во время обработки.
Новое: проблема GitHub № 901 — параметр «Показать все …» в контекстном меню столбца.
Новое: проблема GitHub № 902 — возможность игнорировать конфликты MHDT при использовании очень быстрых конфликтов отображения (используйте параметр -IgnoreWorldMHDT).
Новое: добавлена начальная поддержка Enderal Special Edition.
Новое: при запуске xEdit с параметром -quickedit: somefile.esp только этот файл (и необходимые ему мастера) будет изначально выбраны в форме выбора модуля.
Возможности:
— Просмотр конфликтов плагинов
— Объединение плагинов в один
— Создание патчей
— Правка имеющихся плагинов
— Русификация плагинов
— Примечание: т.к. программа является на 99% для разработчиков/модмейкеров, в этой инструкции я расскажу только о чистке “грязных” правок, которые могут усложнять жизнь простому геймеру.
Требования:
Fallout 4
Установка:
— Все содержимое из архива кидаем в папку с игрой, то есть туда, где находится игровой файл Fallout4.exe
— Примечание: если вы пользуетесь Wrye Bash, то значок запуска FO4Edit появится внизу на панели программ
ЗДЕСЬ ПОЛНОЕ НОВЕЙШЕЕ РУКОВОДСТВО ПО ИСПОЛЬЗОВАНИЮ FO4Edit С ТУТОРИАЛАМИ И ВИДЕО УРОКАМИ (учтите, это машинный перевод, так как туториал на 190 страниц, поэтому отредактированы только те разделы, которые использую я) (СПАСИБО kwenda_kutomba)
ТРИ ПРОСТЫХ ШАГА ДЛЯ ОЧИСТКИ МОДОВ ОТ “ГРЯЗНЫХ” ПРАВОК:
Для начала лирическое отступление. Рассмотрим типы грязных правок:
— ITM — записи, идентичные мастер-файлу. У каждого плагина есть мастер-файл или даже несколько. Обычно это Fallout4.esm. Бывает, что в плагине встречаются записи, абсолютно идентичные аналогичным записям в его мастер-файле. Эти записи и есть ITM и в плагине они нафиг не нужны, ибо будут загружаться из мастер-файла.
— UDR — удалённые ссылки. Когда в Creation Kit из плагина удаляется какой-нибудь объект, ссылка на этот удалённый объект все равно остаётся и обращение к уже несуществующему объекту по этой ссылке может привести к вылетам, глюкам и прочим неприятным моментам.
* Сначала установите последнюю версию xEdit, после установки для очистки модов нужно использовать новый файл FO4EditQuickAutoClean.exe (смотрите скриншот).
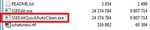
1. Запустите исполняемый файл TES5EditQuickAutoClean.exe (для Skyrim LE) или SSEEditQuickAutoClean.exe (для Skyrim SE) или FO4EditQuickAutoClean.exe (для Fallout 4)
2. Выберите файл из нужного вам мода или DLC для очистки
• После выбора файла для очистки xEdit автоматически выполнит всю необходимую очистку.
• При использовании для Skyrim LE или Skyrim SE включены любые специальные требования к чистке для DLC Dawnguard.
3. Закройте xEdit, чтобы сохранить очищенный файл.
4. (Необязательно, но полезно) вы можете предоставить отчет об очистке в конце процесса команде LOOT в официальной ветке LOOT

После того как вы запустите исполняемый файл FO4EditQuickAutoClean.exe вы увидите окно выбора плагинов. Выберите плагин для очистки, дважды щелкнув по имени файла или поставьте галочку рядом с именем файла и нажмите кнопку ОК.
По завершении вы увидите отчет LOOT, а xEdit сообщит, что процесс очистки завершен на вкладке Сообщения (Messages).
После завершения процесса очистки просто закройте xEdit, чтобы сохранить файл. Затем вы можете очистить другие DLC или моды таким же образом.
Примечание:
Fallout4.esm чистить нельзя!!!
DLC (все) чистить можно. Besethda слишком ленива оказалась, что бы подчистить свои хвосты
Если не уверены в результате – сделайте сначала копию изменяемого плагина
Объединение модов:
Внимание! Объединять моды следует на свой страх и риск! Тяжеловесные, ёмкие моды объединять категорически не рекомендую.
1. Качаем Merge Plugins xEdit Script.
2. Содержимое помещаем в папку «Edit Scripts». Она находится в папке с установленным FO4Edit.
3. Запускаем FO4Edit, выбираем нужные для объединения плагины.
4. ПКМ на плагине любом – Apply Script.
5. В окошке выбираем Merge Plugins. Жмём OK.
6. Галочками указываем те моды, которые хотим объединить.
7. Вводим название нового мода без расширения esp.
8. Соглашаемся со всем, что всплывёт.
При совпадении записей приоритет будет у записи, находящейся ниже.
Генерация LOD-файлов
Для запуска из FO4Edit ПКМ на плагине – Other – Generate LOD.
Подробную инструкцию смотрите в TES5LodGen. (для Fallout 4 данная утилита видимо не работает)
Поменять местами мастер-файлы.
Способ раз, самый безглючный, но он тоже не застраховывает от краха игры. Внимание! Плагины должны быть расставлены в верном порядке!
1. Открываем плагин в FO4Edit. Подгрузится нужный esp и мастера, нужные для его работы.
2. ПКМ на нужном плагине. Выбираем — Sort masters.
Примечание: следующие 2 пункта многие говорят выполнять обязательно, сразу с пункта 5 не выйдет. Ну что ж, так и поступим.
3. Сохраняем. Настоятельно рекомендую оставить галочку Backup Plugins.
4. Открываем опять нужный уже изменённый плагин в FO4Edit.
5. ПКМ на нём — выбираем Check for errors.
6. Раскрываем плюсик рядом с плагином.
Вот расшифровка цветов:
Цвет фона:
Белый — одиночная запись
Зелёный — множественная запись, но без конфликтов.
Желтый — перезаписано без конфликта
Красный — конфликт
Цвет текста:
Чёрный — одиночная запись
Пурпурный — мастер
Серый — идентичная мастеру запись
Оранжевый — идентичная мастеру запись, будет записана именно она
Зелёный — перезаписано без конфликта
Оранжевый — именно она перезапишет конфликтующую запись
Красный — перезаписываемая запись в конфликте.
Тут надо хотя бы отдалённо понимать, что на что влияет и должно ли быть так. Обратите внимание, оранжевые записи это норма часто. Особенно, в патчах — когда что-то переписывает одну ячейку, тем самым исправляя её. Если понимания нет — поможет только тест в игре. Будьте осторожны.
Способ два. Внимание! На свой страх и риск, часто ведёт к краху игры. Это совсем радикальный способ, который требует дальнейших ручных правок путей и записей.
1. Открываем нужный плагин в FO4Edit.
2. Раскрываем плюсик у плагина. Выделяем строчку File Header.
3. Справа, на вкладке View ищем раздел Master Files.
4. В самой колонке, где написано Master File ПКМ на нужном Master File и выбираем вниз передвинуть или вверх.
5. Сохраняем.
6. Выполняем пункт 5 из первого варианта. А далее самостоятельно, руками восстанавливаем утраченные пути, если таковые имеются.
ВАЖНО!!!
— Антивирусные программы вызывают нежелательное поведение и проблемы с FO4Edit. Отключите антивирусник, если вы испытываете какое-либо необычное поведение или добавьте папку с игрой в исключения в антивируснике. Kaspersky antivirus — как известно только он вызывает проблемы
Не знаю насколько актуально это:
— Чтобы не было «крякозябров» в отображении русских символов, нужно назначить ему кодовую страницу (utf-8) для русского языка в свойствах ярлыка (-cp:utf-8).
— Создаёте ярлык и в поле объект (в свойствах ярлыка) пишете: «C:GamesFallout 4FO4Edit.exe» -cp:utf-8
— Теперь должно всё работать.
Версия 4.0.4 скачать с Нексуса в разделе MAIN FILES (14 mb)Сервер №1
Версия 4.0.4 скачать с Гугл-дискаСервер №2
Mod Organizer (MO) — это инструмент для управления коллекциями модов произвольного размера. Он специально разработан для людей, которые любят экспериментировать с модами и поэтому нуждаются в простом и надежном способе их установки и удаления.
Mod Organizer 2-это менеджер модов, созданный Tannin для поддержки 64-битных игр, таких как Skyrim Special Edition и Fallout 4, в дополнение ко всем 32-битным играм, которые уже поддерживаются MO1.
Tannin забросил проект, когда он был нанят командой Nexus для разработки своего нового менеджера Vortex mod.
MO2 не был завершен и остался со многими проблемами. LePresidente удалось исправить его до пригодного для использования состояния после выхода SkyrimSE, добавив поддержку для него и выпустив v2.0.8.
Проект снова набрал скорость после того, как в конце 2017 года появилось еще несколько кодеров, и был проделан невероятный объем работы!
Изюминка MO2 заключается в том, что он использует виртуальную файловую систему (VFS) вместо фактической установки ваших модов в папку Data игры.
MO2 использует это VFS, чтобы обмануть игру и другие программы, «думающие» что моды установлены в папке Data, в то время как они фактически установлены в своих собственных отдельных папках. Этот VFS называется USVFS (User Space VFS), который отличается от VFS, который использовал MO1, поскольку старый не поддерживал 64-битные программы, но он работает на аналогичной концепции.
Это означает, что только программы, запущенные через MO2, увидят моды, в то время как для остального мира игра останется ванильной.
Поддерживаемые игры:
Morrowind
Oblivion(*)
Fallout 3
Fallout NV
Tale of Two Wastelands (TTW)
Skyrim
Skyrim SE
Skyrim VR
Fallout 4
Fallout 4 VR
Enderal (Steam Edition)
(*) Чтобы использовать OBSE с Mo2, вам нужно выполнить следующие
Скрытое содержимое
Для просмотра скрытого содержимого необходима РЕГИСТРАЦИЯ на сайте.
, так как в противном случае вы не сможете загрузить его.
Установка:
Mo2-это 64-битное приложение и, поэтому, для его запуска требуется 64-битная операционная система.
Mod Organizer 2 не должен быть установлен в системной защищенной папке, такой как Program Files (x86).
Также избегайте установки MO2 внутри папки игры, так как это вызывает проблемы с библиотекой vfs.
Существует два способа установки: обычным инсталлятором и распаковкой архива портативной версии.
После установки убедитесь, что каталог MO2 и/или файлы внесены в исключения вашего антивируса. Система виртуализации MO2 подключается к запущенным приложениям и изменяет системные вызовы и многим антивирусам это не нравится.
Совместимость:
Mod Organizer 2 работает с подавляющим большинством инструментов. Это означает, что их можно заставить работать с «виртуальным» деревом данных.
Среди протестированных приложений: OBMM (хотя сценарии OMOD могут компилироваться неправильно), FOMM, MLOX, LOOT, Wrye Bash, FNIS, xEdit, DynDOLOD… и многое другое.
Если вы нашли приложение, которое не работает, пожалуйста, сообщите об этом авторам.
Последние версии МО2 требуют обновлённые библиотеки
Скрытое содержимое
Для просмотра скрытого содержимого необходима РЕГИСТРАЦИЯ на сайте.
+
Скачать
Скрытое содержимое
Для просмотра скрытого содержимого необходима РЕГИСТРАЦИЯ на сайте.
Если вы впервые установили игру (здесь и далее-Fallout 4) и/или никогда не устанавливали моды,вам потребуется произвести некоторые манипуляции.Первый запуск игры нужно произвести значком Настройки Fallout 4.Именно тогда создаются файлы настроек,которые необходимы для работы игры и модов.
Скрытое содержимое
Для просмотра скрытого содержимого необходима РЕГИСТРАЦИЯ на сайте.
Далее :
1. Идём по пути «Мои документы/My Games/Fallout 4». В этой папке будет несколько файлов .ini
2. Открываем файл Fallout4Prefs.ini и ищем строку [Launcher]. Непосредственно под ней должна быть строка: (если нет, то добавьте)
[Launcher]
bEnableFileSelection=1
3. Сохранить и закрыть документ
4. Открываем файл Fallout4Custom.ini, если такого нет, то создайте и откройте с помощью вашего текстового редактора
5. Добавьте следующие строки
[Archive]
bInvalidateOlderFiles=1
sResourceDataDirsFinal=
6. Открыть файл Fallout4.ini , ищем раздел [Archive], в этом разделе ниже смотрим строчку sResourceDataDirsFinal= и после знака = удалите все записи типа STRINGS, TEXTURES, MESHES, SOUND, и так далее и сохраните файл.
Закрываем все файлы и устанавливаем МО2.При первом запуске (запускаем от имени Администратора) выбираем расположение папки с данными и начинаем работу с менеджером.
Скрытое содержимое
Для просмотра скрытого содержимого необходима РЕГИСТРАЦИЯ на сайте.
Когда появится такое окно,всегда выбирайте пункт Portable
Скрытое содержимое
Для просмотра скрытого содержимого необходима РЕГИСТРАЦИЯ на сайте.
Вверху программы находятся кнопки с настройками:Жмём на ключ с отвёрткой и устанавливаем русский язык.
Скрытое содержимое
Для просмотра скрытого содержимого необходима РЕГИСТРАЦИЯ на сайте.
Больше никаких изменений в настройках (пока вам не понадобится) делать не нужно.
Так выглядит менеджер с установленными модами.
В левом окне мы можем двигать папки вверх/вниз и виртуально перезаписывать моды.Именно виртуально-физически,как в NMM или при ручной установке,моды не перезаписываются и остаются в целости и сохранности.Щёлкнув 2 раза по моду,можно открыть его окно и посмотреть,какой мод и что именно перезаписывает.
В правом окне мы можем создавать необходимый нам порядок загрузки модов.
Моды устанавливаются значком с диском или совсем просто-распакованную папку копируем в папку Mods менеджера(где и расположены все моды).
Скрытое содержимое
Для просмотра скрытого содержимого необходима РЕГИСТРАЦИЯ на сайте.
Вверху программы расположены значки(можно открыть папки и сохранить или загрузить порядок установленных модов).
Скрытое содержимое
Для просмотра скрытого содержимого необходима РЕГИСТРАЦИЯ на сайте.
Скрытое содержимое
Для просмотра скрытого содержимого необходима РЕГИСТРАЦИЯ на сайте.
Иногда бывает и такая ситуация-решается просто : ПКМ жмём на моде и выбираем верхнюю строчку из выпадающего меню.
Скрытое содержимое
Для просмотра скрытого содержимого необходима РЕГИСТРАЦИЯ на сайте.
И так до тех пор,пока не будет выглядеть хорошо).
Скрытое содержимое
Для просмотра скрытого содержимого необходима РЕГИСТРАЦИЯ на сайте.
Далее про красные крестики.Иногда плагин устанавливается не в папку Data,поэтому нужно просто открыть мод и переместить плагин вниз.
Теперь главное-игра запускается непосредственно из МО2 кнопкой Запустить.
Скрытое содержимое
Для просмотра скрытого содержимого необходима РЕГИСТРАЦИЯ на сайте.
Чтобы внести значок в менеджер,нужно нажать вверху на значок с шестерёнками и откроется такое окно.Указываем исполняемый файл и местоположение игры,даём название значку и жмём Закрыть(соглашаемся с изменениями).
Теперь значок запуска появится в списке и мы можем запускать игру.
Скрытое содержимое
Для просмотра скрытого содержимого необходима РЕГИСТРАЦИЯ на сайте.
Чтобы мы могли работать с модом BodySlide ,нужно произвести иную манипуляцию.Открываем вкладку Данные и ищем там строку Tools и в ней жмём ПКМ на строку BodySlide x64.
В выпадающем меню выбираем Добавить,как исполняемый файл.
Скрытое содержимое
Для просмотра скрытого содержимого необходима РЕГИСТРАЦИЯ на сайте.
Значок мода появится в списке запуска.
Скрытое содержимое
Для просмотра скрытого содержимого необходима РЕГИСТРАЦИЯ на сайте.
Существует ещё и папка Overwrite.В неё помещаются файлы для перезаписи.Её можно синхронизировать с модами или создавать отдельные моды или просто оставить,как есть.
Я объяснил только самые необходимые настройки для работы менеджера.Поправки и дополнения (и вопросы) приветствуются.
Приятной игры).
Обновлено: 08.02.2023
Автоматическая программа для применения тегов почти к любой модификации.
Прощай ручная тягомотина с добавлением тегов, текстов и иконок к своим любимым модификациям. Автоматически добавляет текст, теги и прочее к недостающим элементам.
Требования: FO4edit, MXPF(Mator’s xEdit Patching Framework) версия скайрима, да-да, вы не ослышались, скайрима, Ruddy88’s simple sorter (нужен только третий необязательный файл R88_SimpleSorter.esp) и все его требования. Как минимум DefUI и библиотека значков нужна, иначе иконок со значками в игре не будет.
Установка: установить FO4edit вручную в любую папку, затем скопировать файлы из этого мода в F04Edit Edit Scripts . далее установить содержимое архива MXPF в папку Fo4Edit..
FO4Edit
Возможности:
— Просмотр конфликтов плагинов
— Объединение плагинов в один
— Создание патчей
— Правка имеющихся плагинов
— Русификация плагинов
— Примечание: т.к. программа является на 99% для разработчиков/модмейкеров, в этой инструкции я расскажу только о чистке “грязных” правок, которые могут усложнять жизнь простому геймеру.
Требования:
Fallout 4
Установка:
— Все содержимое из архива кидаем в папку с игрой, то есть туда, где находится игровой файл Fallout4.exe
— Примечание: если вы пользуетесь Wrye Bash, то значок запуска FO4Edit появится внизу на панели программ
ЗДЕСЬ ПОЛНОЕ НОВЕЙШЕЕ РУКОВОДСТВО ПО ИСПОЛЬЗОВАНИЮ FO4Edit С ТУТОРИАЛАМИ И ВИДЕО УРОКАМИ (учтите, это машинный перевод, так как туториал на 190 страниц, поэтому отредактированы только те разделы, которые использую я) (СПАСИБО kwenda_kutomba)
ТРИ ПРОСТЫХ ШАГА ДЛЯ ОЧИСТКИ МОДОВ ОТ “ГРЯЗНЫХ” ПРАВОК:
Для начала лирическое отступление. Рассмотрим типы грязных правок:
— ITM — записи, идентичные мастер-файлу. У каждого плагина есть мастер-файл или даже несколько. Обычно это Fallout4.esm. Бывает, что в плагине встречаются записи, абсолютно идентичные аналогичным записям в его мастер-файле. Эти записи и есть ITM и в плагине они нафиг не нужны, ибо будут загружаться из мастер-файла.
— UDR — удалённые ссылки. Когда в Creation Kit из плагина удаляется какой-нибудь объект, ссылка на этот удалённый объект все равно остаётся и обращение к уже несуществующему объекту по этой ссылке может привести к вылетам, глюкам и прочим неприятным моментам.
* Сначала установите последнюю версию xEdit, после установки для очистки модов нужно использовать новый файл FO4EditQuickAutoClean.exe (смотрите скриншот).
1. Запустите исполняемый файл TES5EditQuickAutoClean.exe (для Skyrim LE) или SSEEditQuickAutoClean.exe (для Skyrim SE) или FO4EditQuickAutoClean.exe (для Fallout 4)
2. Выберите файл из нужного вам мода или DLC для очистки
• После выбора файла для очистки xEdit автоматически выполнит всю необходимую очистку.
• При использовании для Skyrim LE или Skyrim SE включены любые специальные требования к чистке для DLC Dawnguard.
3. Закройте xEdit, чтобы сохранить очищенный файл.
4. (Необязательно, но полезно) вы можете предоставить отчет об очистке в конце процесса команде LOOT в официальной ветке LOOT
После того как вы запустите исполняемый файл FO4EditQuickAutoClean.exe вы увидите окно выбора плагинов. Выберите плагин для очистки, дважды щелкнув по имени файла или поставьте галочку рядом с именем файла и нажмите кнопку ОК.
После завершения процесса очистки просто закройте xEdit, чтобы сохранить файл. Затем вы можете очистить другие DLC или моды таким же образом.
Примечание:
Fallout4.esm чистить нельзя.
DLC (все) чистить можно. Besethda слишком ленива оказалась, что бы подчистить свои хвосты
Если не уверены в результате – сделайте сначала копию изменяемого плагина
Внимание! Объединять моды следует на свой страх и риск! Тяжеловесные, ёмкие моды объединять категорически не рекомендую.
1. Качаем Merge Plugins xEdit Script.
2. Содержимое помещаем в папку «Edit Scripts». Она находится в папке с установленным FO4Edit.
3. Запускаем FO4Edit, выбираем нужные для объединения плагины.
4. ПКМ на плагине любом – Apply Script.
5. В окошке выбираем Merge Plugins. Жмём OK.
6. Галочками указываем те моды, которые хотим объединить.
7. Вводим название нового мода без расширения esp.
8. Соглашаемся со всем, что всплывёт.
При совпадении записей приоритет будет у записи, находящейся ниже.
Генерация LOD-файлов
Для запуска из FO4Edit ПКМ на плагине – Other – Generate LOD.
Подробную инструкцию смотрите в TES5LodGen. (для Fallout 4 данная утилита видимо не работает)
Поменять местами мастер-файлы.
Способ раз, самый безглючный , но он тоже не застраховывает от краха игры. Внимание! Плагины должны быть расставлены в верном порядке!
1. Открываем плагин в FO4Edit. Подгрузится нужный esp и мастера, нужные для его работы.
2. ПКМ на нужном плагине. Выбираем — Sort masters.
Примечание: следующие 2 пункта многие говорят выполнять обязательно, сразу с пункта 5 не выйдет. Ну что ж, так и поступим.
3. Сохраняем. Настоятельно рекомендую оставить галочку Backup Plugins.
4. Открываем опять нужный уже изменённый плагин в FO4Edit.
5. ПКМ на нём — выбираем Check for errors.
6. Раскрываем плюсик рядом с плагином.
Вот расшифровка цветов:
Цвет фона:
Белый — одиночная запись
Зелёный — множественная запись, но без конфликтов.
Желтый — перезаписано без конфликта
Красный — конфликт
Цвет текста:
Чёрный — одиночная запись
Пурпурный — мастер
Серый — идентичная мастеру запись
Оранжевый — идентичная мастеру запись, будет записана именно она
Зелёный — перезаписано без конфликта
Оранжевый — именно она перезапишет конфликтующую запись
Красный — перезаписываемая запись в конфликте.
Тут надо хотя бы отдалённо понимать, что на что влияет и должно ли быть так. Обратите внимание, оранжевые записи это норма часто. Особенно, в патчах — когда что-то переписывает одну ячейку, тем самым исправляя её. Если понимания нет — поможет только тест в игре. Будьте осторожны.
Способ два. Внимание! На свой страх и риск, часто ведёт к краху игры. Это совсем радикальный способ, который требует дальнейших ручных правок путей и записей.
1. Открываем нужный плагин в FO4Edit.
2. Раскрываем плюсик у плагина. Выделяем строчку File Header.
3. Справа, на вкладке View ищем раздел Master Files.
4. В самой колонке, где написано Master File ПКМ на нужном Master File и выбираем вниз передвинуть или вверх.
5. Сохраняем.
6. Выполняем пункт 5 из первого варианта. А далее самостоятельно, руками восстанавливаем утраченные пути, если таковые имеются.
ВАЖНО.
— Антивирусные программы вызывают нежелательное поведение и проблемы с FO4Edit. Отключите антивирусник, если вы испытываете какое-либо необычное поведение или добавьте папку с игрой в исключения в антивируснике. Kaspersky antivirus — как известно только он вызывает проблемы
Вопрос к знающим тонкости и общее использование FO4Edit.

Doberrman699
That involves more understanding what each field does. Fixing it is mostly a drag and drop from all the mods to a merged patch. You must know what to drag and drop though. I recommend the FNVEdit manuals (you can find them here). They will help you a lot.
вот коллега с нексуса предложил прогу (FNVEdit) и сказал про некий объединенный патч.. ты не пользовался ли этой прогой и не знаешь ли что за патч он имеет ввиду?
Читайте также:
- Палатка с громоотводом геншин импакт где взять
- Как слепые люди видят этот мир
- Ричард льюис cs go кто это
- Как рожают в майнкрафте зомби
- Можно ли пить белое вино каждый день

Ты скрины то хоть выкинь.Как хорошо что я так и не слез с предпоследней версии сего плагина.😁
- пожаловаться
- скопировать ссылку
![]()
Doberrman699
ты вот как знал, я после обновления так и не смог в игру попасть))

- пожаловаться
- скопировать ссылку
![]()
Doberrman699
а у тебя какая версия? и ставил ли ты AWKCR, просто, вроде как, он всегда нужен был для работы арморсмита, но я вот его первый раз поставил с последним обновлением
- пожаловаться
- скопировать ссылку
![]()
Александр Грол
скрин сжат для кома, выложи на мэйл или ядиск, нихрен не ви.кейвордс стоит,потом гляну какой
- пожаловаться
- скопировать ссылку
![]()
Doberrman699
https://yadi.sk/i/kiR_eNcXniGBe
- пожаловаться
- скопировать ссылку
![]()
Doberrman699
That involves more understanding what each field does. Fixing it is mostly a drag and drop from all the mods to a merged patch. You must know what to drag and drop though. I recommend the FNVEdit manuals (you can find them here). They will help you a lot.
вот коллега с нексуса предложил прогу (FNVEdit) и сказал про некий объединенный патч.. ты не пользовался ли этой прогой и не знаешь ли что за патч он имеет ввиду?
- пожаловаться
- скопировать ссылку

Даааа… Вот все эти танцы с бубнами в итоге и становятся основной частью гемплея в играх от беседки!))
- пожаловаться
- скопировать ссылку
![]()
San226
танцы кстати довольно занимательные😁
- пожаловаться
- скопировать ссылку
![]()
Doberrman699
вот этот, признаюсь, был ничешный весьма, интерес появился)
- пожаловаться
- скопировать ссылку
Из даты в смысле,а то еше доту полезешь качать😁
- пожаловаться
- скопировать ссылку

у меня первый идет concealed armor, затем armorkeyword. я тоже сначала испугался, думаю «сейчас еще и дотанчика себе качну, вообще кайф будет»))
а где взять nifку?
- пожаловаться
- скопировать ссылку
у меня первый идет concealed armor, затем armorkeyword. я тоже сначала испугался, думаю «сейчас еще и дотанчика себе качну, вообще кайф будет»))
а где взять nifку?
- пожаловаться
- скопировать ссылку
Armorkeywords первым грузи,у меня так.а вообще кинь все esm и esp этих трех модов на ядиск,ради интереса попробую запустится с них.погодь с нифкой,выкладывай.у меня седня тырнет тупит малость, так что может ток завтра посмотрю,хотя мож и седня,хз
- пожаловаться
- скопировать ссылку
![]()
Doberrman699
сейчас замучу, но я тебе уже безумно благодарен, что не оставил в беде) а то я заметил тенденцию, что тут охотней вопросы задают, нежели отвечают, особенно если что-то сложное)
- пожаловаться
- скопировать ссылку
![]()
Doberrman699
armorsmith keywords.esm https://yadi.sk/d/PtFEdwxAnj3TL
armorsmith extended.esp https://yadi.sk/d/6Nvu_Aegnj3Xn
cocealed armor.esm https://yadi.sk/d/H8Fx0B6Lnj3bG
concealed armor.esp https://yadi.sk/d/6UOR0gpEnj3dR
crafting workbenchhttps://yadi.sk/d/Jf1ygRhJnj3gh его тоже присобачу из-за странной взаимосвязи. если убрать арморсмит или воркбенч (один из) — игра вылетает в меню)
- пожаловаться
- скопировать ссылку
![]()
Doberrman699
а какая у тебя версия арморсмита?
- пожаловаться
- скопировать ссылку
![]()
Doberrman699
бль, а я сейчас подумал. я посмотрел какие у меня плагины в FO4Edit с меткой «warning» в начальной загрузке, и думаю сейчас их отключить/откатить, и я все эти плаггины намедни вылетов обновлял.. и вот я прикинул, что, возможно, они все идут с адаптацией для нового патча, а я то сейчас сижу на 1.2.37
- пожаловаться
- скопировать ссылку
![]()
Александр Грол
в общем, по моему скромному мнению конфликтуют термооптическая броня из armorsmith с чем то из concealed armor, скорее всего одинакова реализация этой невидимой брони,пойду пробовать качать и смотреть
- пожаловаться
- скопировать ссылку
убери свой ворк бенч и вставь этот https://yadi.sk/d/JNznt45lnjCPF
- пожаловаться
- скопировать ссылку
моды на погоду и многоспавна отключи, трусторм тож.у тебя по названиям на погоду два мода, мож они как то конфликтуют.арморсмит передвинь в самый верх списка есп.больше хз
- пожаловаться
- скопировать ссылку
Meshes exact for bodyslide,открой ка ее, и если там внутри есть папка просто meshes , то копирни ее в дату,а bodyslide удали
- пожаловаться
- скопировать ссылку
![]()
Doberrman699
есть две папки (как два стула звучит)) ) — LODsettings и meshes..
- пожаловаться
- скопировать ссылку
это генератор мира при загрузке,точнее его настройки
- пожаловаться
- скопировать ссылку
![]()
Doberrman699
вот без всего тоже вылетает, ИЧСХ — папка с лодами осталась. неужели в ней трабла.. лады, завтра тебе отпишу!
- пожаловаться
- скопировать ссылку
![]()
Александр Грол
склоняюсь к ним, но вставать и сравнивать со своими не буду, тупо лень😁 давай, удачи
- пожаловаться
- скопировать ссылку
![]()
Doberrman699
кароч! вручную вернув папкам фэллаута девственный вид — игра продолжала вылетать. отчаявшись я запустил более раннее сохранение (гораздо более раннее) — и все работало! но были текстуры странные, будто бы не все элементы присутствовали, загрузив последнее сохранение — снова вылет при выходе в содружество)
на текущий момент я переустановил фэл, последнее сохранение работает, с содружеством все гуд..
я думаю одно из двух — либо с .INI что-то не так (я еще до переустановки обратил внимание, что после запуска игры автоматически стирается строчка со стрингс и т.д.), либо какой-нибудь мод подтер системный файл, но, черт возьми, какой и почему — понятия не имею) так что, скорее всего, какие-нибудь системные файлы/путь не так стоит или еще что.. чертовщина полная, разбит, не знаю что делать))
- пожаловаться
- скопировать ссылку
![]()
Doberrman699
после полной переустановки потихоньку (ничего не перенося в папку дата) активировал моды и следил.. в итоге все работает.. интересно, в чем же была проблема? все же, видимо, какой-то мод повредил что-то, иначе я не знаю как объяснить весь этот нонсенс
- пожаловаться
- скопировать ссылку
![]()
Александр Грол
в торопливости ,и в «хочу хочу хочу» 😁
- пожаловаться
- скопировать ссылку
Quick Links
- Modding Terms
- Finding Mods
- Installing Mods
- Load Order
- Modding Tools
- ENBs
- Troubleshooting
Bethesda games are known for many things, ranging from their immersive worlds to the plethora of bugs each game seems to have. Despite all of that, what keeps games like Skyrim relevant for years well after its release boils down to one thing: mods.
The modding community has radically changed the face of Morrowind, Oblivion, Skyrim, Fallout 3, and is starting to make some major overhauls for Fallout 4. Mods have become so integral to these games that Bethesda has added a modding platform for console players to use, allowing all players to experience the joys of modding. Today, we’ll be going over how you can mod Fallout 4 and some useful modding tools you should be aware of.
Updated September 15th, 2021, by Charles Burgar: Fallout 4’s modding scene slowly grows with each passing year. As the community becomes more adept at creating high-quality mods, so too does the demand for mod knowledge rise. We’ve updated this guide with clearer directions, better organization, and a section dedicated to ENBs for PC users that want to make Fallout 4 look as photorealistic as possible.
Modding Terms
Before you start modding your game, there are a few terms you might stumble across while browsing various guides or forums. Here’s a quick rundown of what certain terms and acronyms mean.
|
Cleaning |
Refers to removing duplicate and unused entries from certain files, done through a tool named FO4Edit |
|
CC |
Creation Club |
|
CTD |
Crash to desktop |
|
ENB |
Short for «Enhanced Natural Beauty,» these mods implement post-processing effects and other graphical tweaks to Fallout 4. |
|
F4SE |
Short for «Fallout 4 Script Extender.» This mod is required for many advanced PC mods to function. Console modders do not have script extenders. |
|
Load Order |
The order in which your mods load. |
|
Mod Manager |
A tool used to install, manage, and organize mods. Only PC users use mod managers. |
|
Root Directory |
Where Fallout 4 is installed to. |
Return to Quick Links
Finding Mods
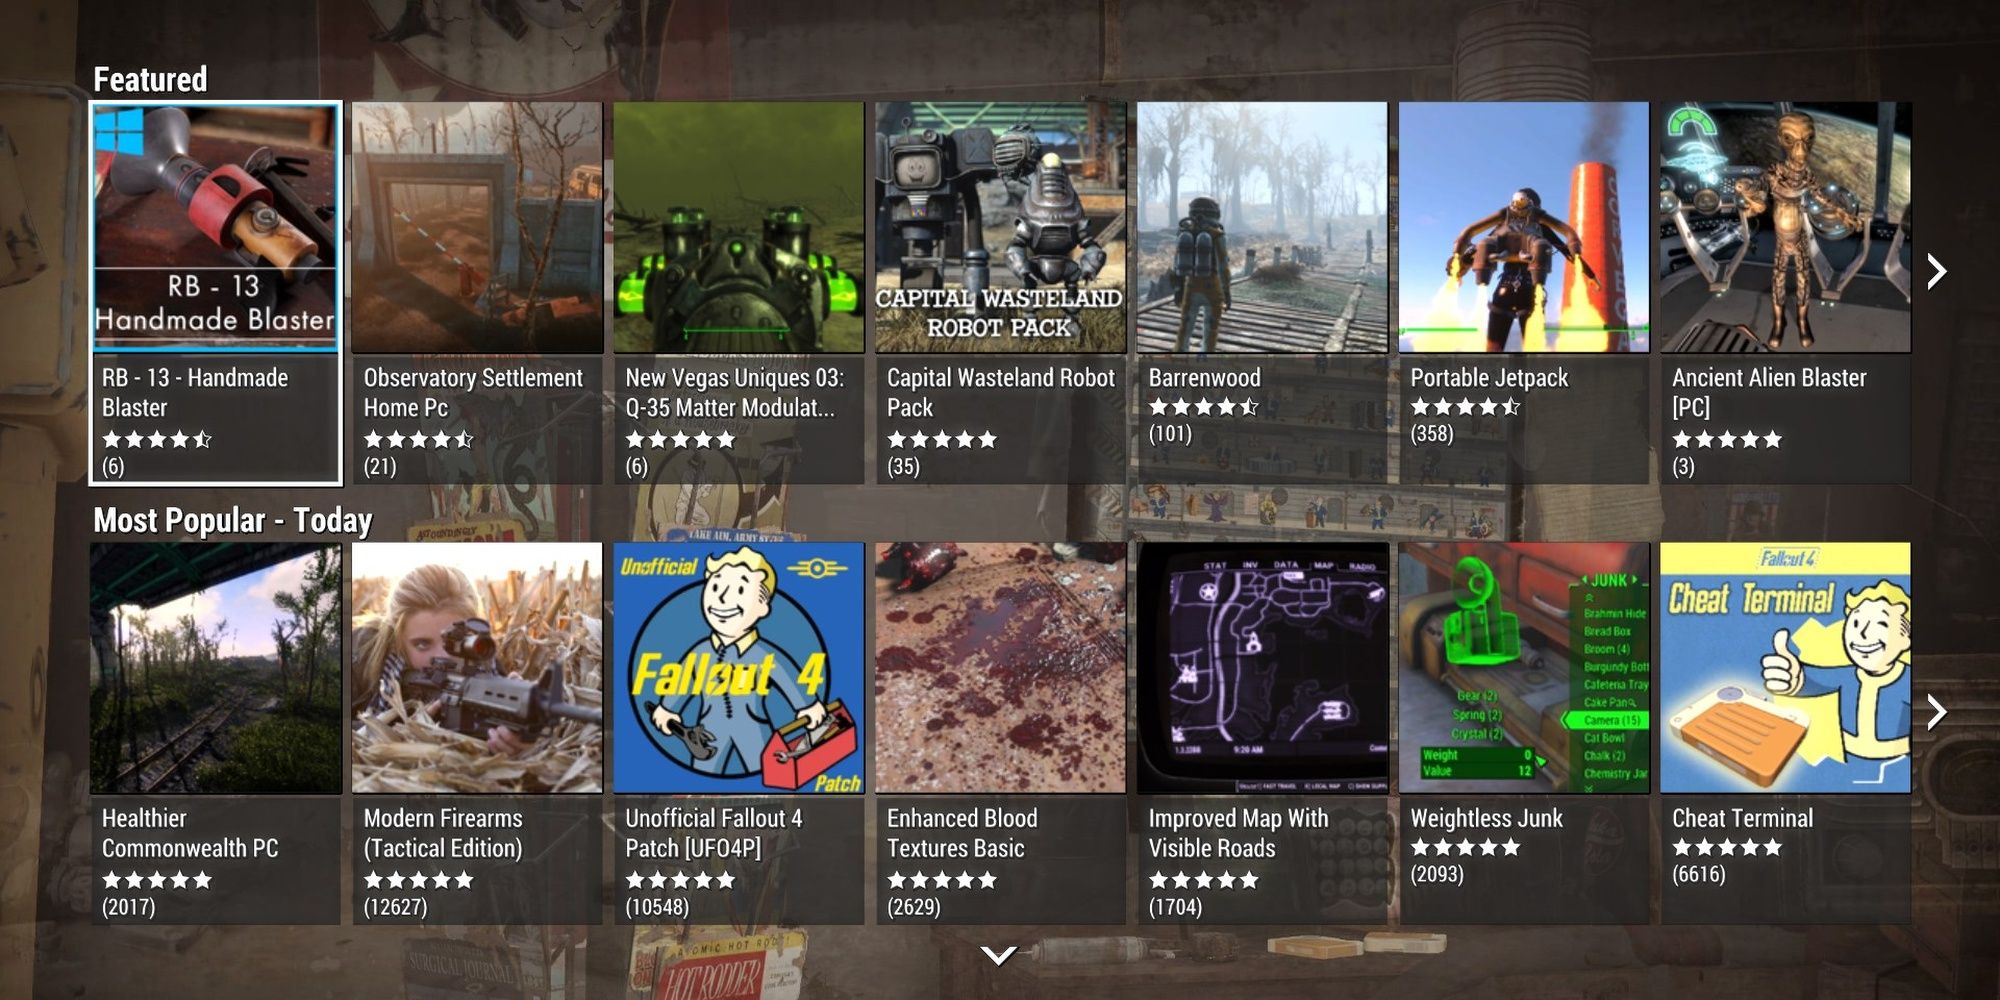
Your main source of mods will depend on the platform you’re playing on. PC players have many more options than console users, but most users generally go to one of two places:
- Nexus Mods (PC): This is the hotspot for PC Fallout 4 mods. If you plan to obtain your mods here, use a mod manager (explained in the «Modding Tools» section).
- Bethesda.net (Everyone): Console players and some PC users get their mods from Bethesda.net. All mods that appear in Fallout 4’s in-game modding menu are pulled from this website.
Return to Quick Links
Installing Mods

Installing mods is a little different depending on your platform of choice. Let’s go over what the installation process is like for both PC and console platforms.
Installing Mods On Console
Fortunately, installing mods on a console is surprisingly easy. The only requirement is that you have a Bethesda.net account. If you don’t have one, selecting the «Creation Club» or «Mods» options in the main menu should give you a prompt for making one.
Installing a mod on your console looks something like this:
- Browse Bethesda.net (in-game or online) for a mod you wish to install.
- Select the «Add to Library» option and wait for the installation to complete.
That’s it. It’s incredibly easy on a console. Uninstalling or disabling a mod is just as easy, both of which can be done from the load order submenu. Installing and uninstalling a Creation Club mod—premium mods sold by Bethesda—is done the same way.
There can be some potential conflicts you’ll experience if multiple mods alter the same thing (for example, if you install two mods that alter the game’s performance). You can typically fix these issues with either compatibility patches or an updated load order. Check a mod’s description to see if there are any compatibility issues with other mods you’re thinking of using. We’ll cover mod load order in the next section.
Return to Quick Links
Installing Mods On PC

PC users get multiple options on how they wish to install mods into their game.
- Install mods through a mod manager.
- Use Bethesda.net to install mods, using the same process as console users.
- Install mods to their root directory manually.
- Not recommended
Most PC users stick with the first option, as it gives you the most flexibility with where your mods can come from. Mods that originate from Nexus Mods typically use the first option, so let’s cover what that process looks like.
Using a mod manager and downloading from Nexus Mods, here’s what installing a mod would look like:
- Install a mod manager of your choice to your PC.
- Link your mod manager to your Nexus Mods account (most mod managers guide you through this).
- Find a mod that interests you.
- Click the «Download with Manager» button. Confirm any on-screen prompts.
- Enter your mod manager and double-click on the mod you download.
- Wait for the install process to complete.
- Boot Fallout 4 from your mod manager.
- This is extremely important.
You’ll only need to complete the first two steps once. After you’ve installed a manager and linked it, you only need to complete steps three through seven. As with console modding, you’ll also have to keep track of your game’s load order as you add mods.
Return to Quick Links
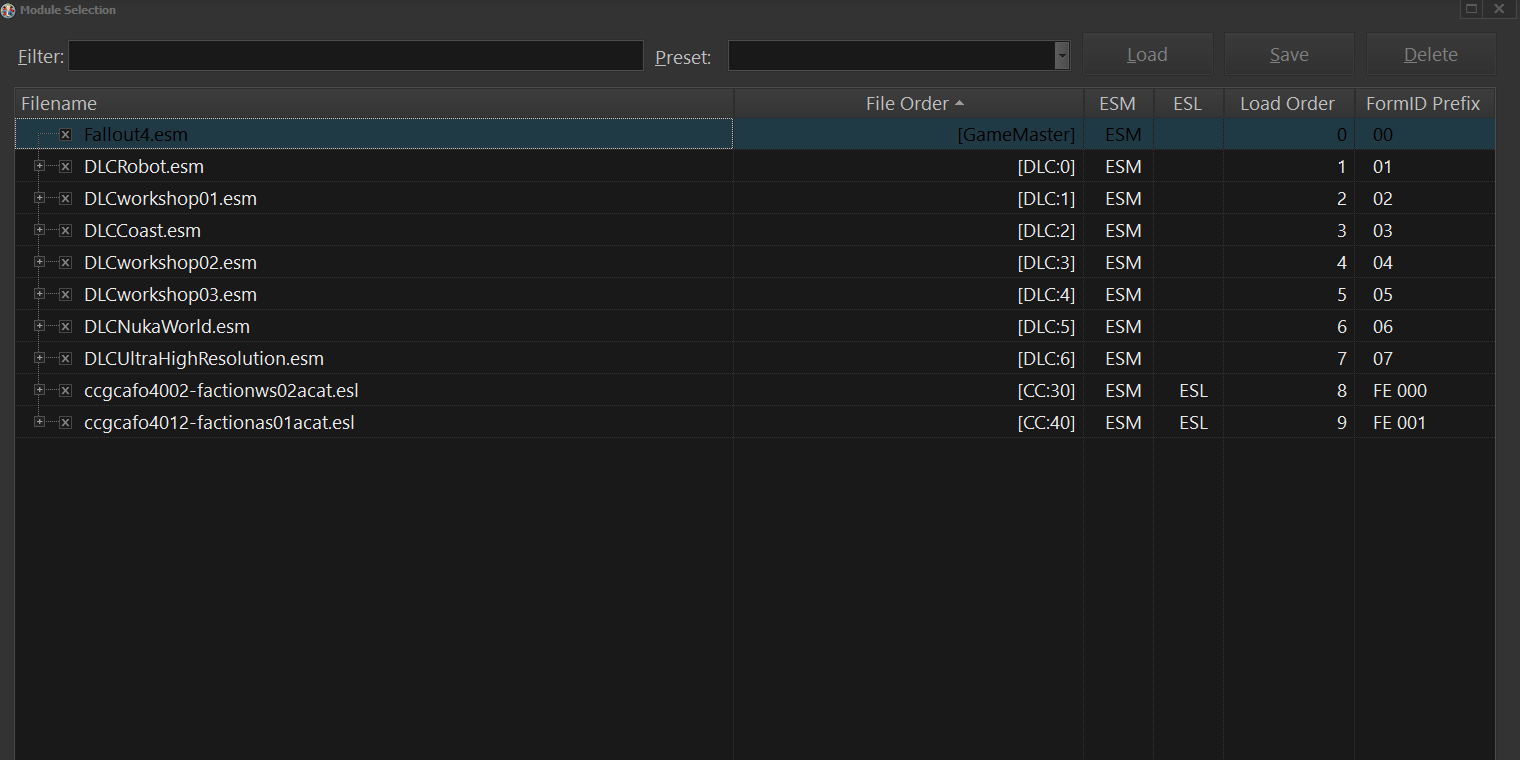
Load Order

In essence, a load order displays the sequence of how Fallout 4 will load its content. Nearly every mod you install will come with a .esp file that must be loaded when Fallout 4 is booted. The order in which your mods load can be particularly important.
Bethesda games load files sequentially, meaning the file lowest in the load order gets priority. This can be problematic if two mods override the same content. If you want a certain mod to override another, make its file lower in your load order. Load order isn’t an end-all solution to mod conflicts, but many stability issues and unintended effects stem from a bad load order.
How Do I Change My Load Order?
Bethesda.net mods can be managed from the «Mods» menu. A button prompt will let you access your load order, allowing you to sort your mods as you see fit.
PC users that use mod managers can alter their load order through their mod manager. Certain tools, most notably LOOT, were made specifically for managing your load order. Only PC users can use LOOT, so console players need to be especially conscious of their load order.
In general, read the description of your mods before installing them to see if there are any major incompatibility issues you need to account for. If a mod needs to be placed in a certain spot in your load order, chances are the mod author stated as much in the mod’s description.
Return to Quick Links

This section is for PC users only.
Console players don’t have external modding tools, so this section will just focus on PC users. Unlike Skyrim, Fallout 4 doesn’t have many external tools you’ll need to mess with. We’ll cover three notable tools: mod managers, Fallout 4 Script Extender, and FO4Edit.
Mod Managers
Every PC user that wants to mod Fallout 4 should have a mod manager. This piece of software will download, install, and maintain your mods without breaking your Fallout 4 installation.
There are two major mod managers that most PC players use:
- Mod Organizer 2: Most consider this the gold standard. It supports mod profiles, .ini tweaking, load order sorting, and has many tutorials on how to use it.
- Vortex: Nexus’ take on a mod manager, Vortex aims to be more user-friendly than Mod Organizer 2.
Most players would recommend that you use Mod Organizer 2 due to its stability and frequent support. Vortex is fantastic for users that want a simple mod manager that’s incredibly easy to use.
Note: If you use either of these managers, you’ll need to boot Fallout 4 from your mod manager directly from now on. Otherwise, your game will launch without any mods installed.
Fallout 4 Script Extender

Known as F4SE, this allows more script-heavy mods to work for Fallout 4. You can download it with the link below. Drop the contents of the file to your Fallout 4 root directory. Launch the script extender instead of the Fallout4.exe file whenever you want to use its features. Should you use a mod manager like MO2, you’ll need to add F4SE as an executable file and launch it through your mod manager.
Download F4SE Here
FO4Edit
This tool is incredibly powerful, letting you tinker with virtually everything tied to Fallout 4. Most notably, FO4Edit lets you «clean» Fallout 4’s master files and other «dirty» mods you install. Cleaning these files is useful for increasing your game’s stability, as it removes duplicate and unreferenced data that is prone to making your game crash. A tutorial on how to use this tool can be found here.
Download F04Edit Here
Return to Quick Links
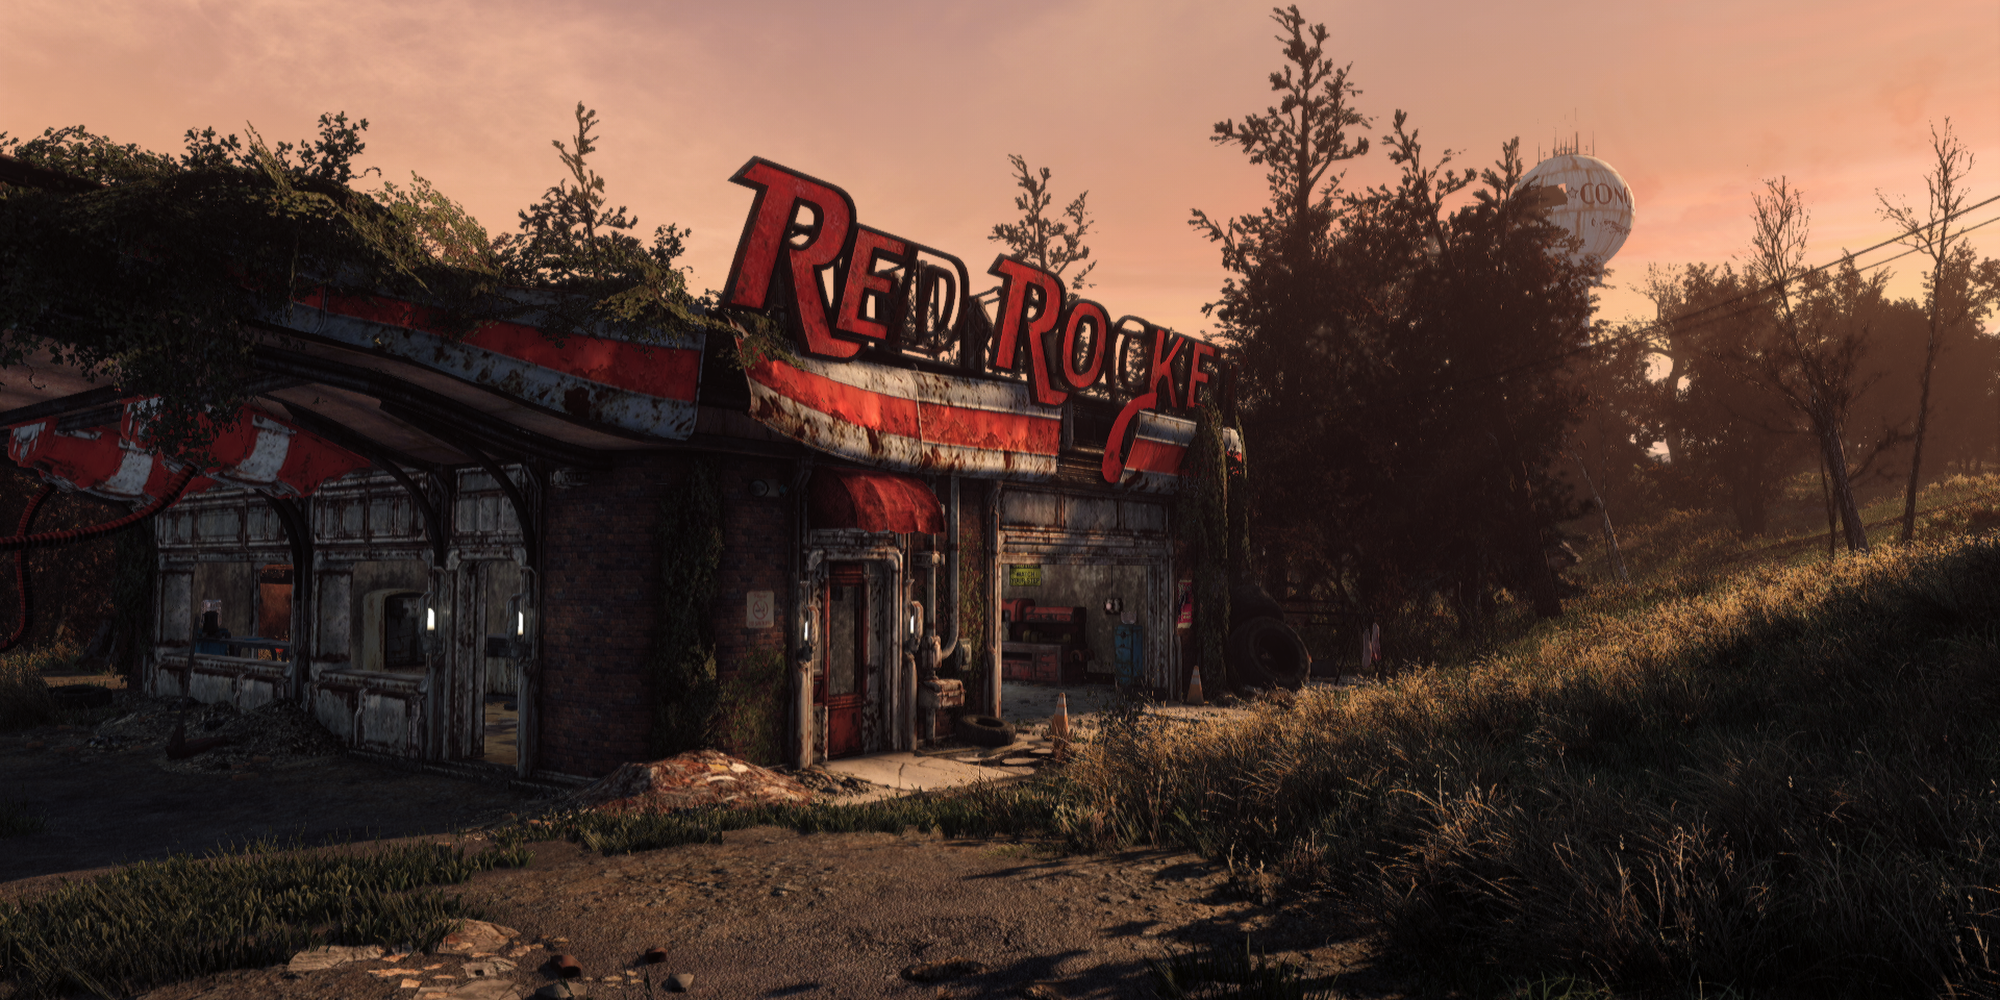
ENBs
Note: ENBs are PC only. Console players should skip to the next section.
An ENB, short for Enhanced Natural Beauty, is a suite of graphic modifications that aim to increase the visual fidelity of a specific game—in this case, Fallout 4. These modifications range from new post-processing effects to complete overhauls of a game’s lighting. Most Fallout 4 ENBs focus on changing the game’s lighting to make it look more realistic. The results (like the image above) speak for themselves.
ENBs have a reputation of being resource hungry and somewhat tough to install. The former varies wildly based on your ENB of choice and its settings, while the latter isn’t true anymore. Installing an ENB has never been easier. If you’re concerned about the performance impact of an ENB, pay close attention to the ENB you’re interested in using.
Bear in mind that you’ll need to manually install an ENB; installing them through a mod manager doesn’t work.
Installing An ENB
You’ll need three things to install an ENB:
- A mod manager
- ENB binary files
- An ENB of your choice
ENB binary files are what every Fallout 4 ENB is based on. These files are not optional; no ENB will work unless these are installed. You can find these files at enbdev.com (link to Fallout 4 ENB binaries). Download the most recent version at the bottom of the webpage.
With these binary files, you’ll want to head to your Fallout 4 root directory. Open up the binary files you downloaded. Double-click on the «WrapperVersion» folder. Drop the following files into your Fallout 4 root directory:
- d3d11.dll
- d3dcompiler_46e.dll
The ENB you’ll install through your mod manager will take care of the remaining files.
Now that your binaries are installed, download an ENB off the Nexus website. You want to select «Manual Download» for an ENB. Once downloaded, open up the ENB. You’ll want to drop all of the mod’s files into your Fallout 4 root directory. If it needs to override any files, allow the ENB to do so.
Your ENB is now installed. Launch Fallout 4 through your mod manager to see how it looks.
Configuring ENBs
Suppose you install an ENB that has some settings you don’t like, fret not. You can manually alter an ENB’s properties yourself. In-game, press «shift» and «enter» to open the ENB menu. You can tweak with any setting you want in here.
The most common settings players tweak is «LETERBOX_BARS,» a setting that enables black bars on the top and bottom of your screen. If you don’t like them, set this value to «0» either in-game or by tweaking the enbeffect.fx file in your root directory. Either method will work. Use this same method to tweak any setting that isn’t to your preference.
Return to Quick Links
Troubleshooting

Once you get deep into modding Fallout 4, you might start experiencing some serious stability issues or unintended effects with certain mods. These instances will require you to troubleshoot the issue. While each person’s mod setup is unique, there are a few tips you can use to figure out the issue quickly.
Read Mod Descriptions
You can save yourself hours of headache by spending a few minutes reading the mod description of each mod you install. These descriptions will tell you of any known issues, compatibility problems, or other issues you should be aware of.
Disable Half Of Your Mods
If you have a massive load order and need to quickly boil down which mod is causing an issue, disable half of your currently active mods. Should the problem persist, disable half of your remaining mods. Repeat this until the problem goes away. This lets you quickly narrow down which mods could be causing issues with your game.
Check Your .INI Files
Your game can perform exponentially worse if you’re using certain .ini settings after installing multiple graphic or script-heavy mods. In these situations, it’s best to check your .ini files. BethINI is a fantastic tool for configuring your .ini files quickly, giving a noticeable performance increase for older PCs. You can download BethINI here.
Reinstall The Mod Or Fallout 4
When something simply refuses to work, a simple reinstall of that mod or Fallout 4 itself can fix your issues. This should only be done as a last resort, but a clean install can do wonders for convoluted issues you can’t find a solution to.
Return to Quick Links
Next: The Biggest Fallout 4 Mods Ever Made (By File Size)
Quick Links
- Modding Terms
- Finding Mods
- Installing Mods
- Load Order
- Modding Tools
- ENBs
- Troubleshooting
Bethesda games are known for many things, ranging from their immersive worlds to the plethora of bugs each game seems to have. Despite all of that, what keeps games like Skyrim relevant for years well after its release boils down to one thing: mods.
The modding community has radically changed the face of Morrowind, Oblivion, Skyrim, Fallout 3, and is starting to make some major overhauls for Fallout 4. Mods have become so integral to these games that Bethesda has added a modding platform for console players to use, allowing all players to experience the joys of modding. Today, we’ll be going over how you can mod Fallout 4 and some useful modding tools you should be aware of.
Updated September 15th, 2021, by Charles Burgar: Fallout 4’s modding scene slowly grows with each passing year. As the community becomes more adept at creating high-quality mods, so too does the demand for mod knowledge rise. We’ve updated this guide with clearer directions, better organization, and a section dedicated to ENBs for PC users that want to make Fallout 4 look as photorealistic as possible.
Modding Terms
Before you start modding your game, there are a few terms you might stumble across while browsing various guides or forums. Here’s a quick rundown of what certain terms and acronyms mean.
|
Cleaning |
Refers to removing duplicate and unused entries from certain files, done through a tool named FO4Edit |
|
CC |
Creation Club |
|
CTD |
Crash to desktop |
|
ENB |
Short for «Enhanced Natural Beauty,» these mods implement post-processing effects and other graphical tweaks to Fallout 4. |
|
F4SE |
Short for «Fallout 4 Script Extender.» This mod is required for many advanced PC mods to function. Console modders do not have script extenders. |
|
Load Order |
The order in which your mods load. |
|
Mod Manager |
A tool used to install, manage, and organize mods. Only PC users use mod managers. |
|
Root Directory |
Where Fallout 4 is installed to. |
Return to Quick Links
Finding Mods
Your main source of mods will depend on the platform you’re playing on. PC players have many more options than console users, but most users generally go to one of two places:
- Nexus Mods (PC): This is the hotspot for PC Fallout 4 mods. If you plan to obtain your mods here, use a mod manager (explained in the «Modding Tools» section).
- Bethesda.net (Everyone): Console players and some PC users get their mods from Bethesda.net. All mods that appear in Fallout 4’s in-game modding menu are pulled from this website.
Return to Quick Links
Installing Mods
Installing mods is a little different depending on your platform of choice. Let’s go over what the installation process is like for both PC and console platforms.
Installing Mods On Console
Fortunately, installing mods on a console is surprisingly easy. The only requirement is that you have a Bethesda.net account. If you don’t have one, selecting the «Creation Club» or «Mods» options in the main menu should give you a prompt for making one.
Installing a mod on your console looks something like this:
- Browse Bethesda.net (in-game or online) for a mod you wish to install.
- Select the «Add to Library» option and wait for the installation to complete.
That’s it. It’s incredibly easy on a console. Uninstalling or disabling a mod is just as easy, both of which can be done from the load order submenu. Installing and uninstalling a Creation Club mod—premium mods sold by Bethesda—is done the same way.
There can be some potential conflicts you’ll experience if multiple mods alter the same thing (for example, if you install two mods that alter the game’s performance). You can typically fix these issues with either compatibility patches or an updated load order. Check a mod’s description to see if there are any compatibility issues with other mods you’re thinking of using. We’ll cover mod load order in the next section.
Return to Quick Links
Installing Mods On PC
PC users get multiple options on how they wish to install mods into their game.
- Install mods through a mod manager.
- Use Bethesda.net to install mods, using the same process as console users.
- Install mods to their root directory manually.
- Not recommended
Most PC users stick with the first option, as it gives you the most flexibility with where your mods can come from. Mods that originate from Nexus Mods typically use the first option, so let’s cover what that process looks like.
Using a mod manager and downloading from Nexus Mods, here’s what installing a mod would look like:
- Install a mod manager of your choice to your PC.
- Link your mod manager to your Nexus Mods account (most mod managers guide you through this).
- Find a mod that interests you.
- Click the «Download with Manager» button. Confirm any on-screen prompts.
- Enter your mod manager and double-click on the mod you download.
- Wait for the install process to complete.
- Boot Fallout 4 from your mod manager.
- This is extremely important.
You’ll only need to complete the first two steps once. After you’ve installed a manager and linked it, you only need to complete steps three through seven. As with console modding, you’ll also have to keep track of your game’s load order as you add mods.
Return to Quick Links
Load Order
In essence, a load order displays the sequence of how Fallout 4 will load its content. Nearly every mod you install will come with a .esp file that must be loaded when Fallout 4 is booted. The order in which your mods load can be particularly important.
Bethesda games load files sequentially, meaning the file lowest in the load order gets priority. This can be problematic if two mods override the same content. If you want a certain mod to override another, make its file lower in your load order. Load order isn’t an end-all solution to mod conflicts, but many stability issues and unintended effects stem from a bad load order.
How Do I Change My Load Order?
Bethesda.net mods can be managed from the «Mods» menu. A button prompt will let you access your load order, allowing you to sort your mods as you see fit.
PC users that use mod managers can alter their load order through their mod manager. Certain tools, most notably LOOT, were made specifically for managing your load order. Only PC users can use LOOT, so console players need to be especially conscious of their load order.
In general, read the description of your mods before installing them to see if there are any major incompatibility issues you need to account for. If a mod needs to be placed in a certain spot in your load order, chances are the mod author stated as much in the mod’s description.
Return to Quick Links
This section is for PC users only.
Console players don’t have external modding tools, so this section will just focus on PC users. Unlike Skyrim, Fallout 4 doesn’t have many external tools you’ll need to mess with. We’ll cover three notable tools: mod managers, Fallout 4 Script Extender, and FO4Edit.
Mod Managers
Every PC user that wants to mod Fallout 4 should have a mod manager. This piece of software will download, install, and maintain your mods without breaking your Fallout 4 installation.
There are two major mod managers that most PC players use:
- Mod Organizer 2: Most consider this the gold standard. It supports mod profiles, .ini tweaking, load order sorting, and has many tutorials on how to use it.
- Vortex: Nexus’ take on a mod manager, Vortex aims to be more user-friendly than Mod Organizer 2.
Most players would recommend that you use Mod Organizer 2 due to its stability and frequent support. Vortex is fantastic for users that want a simple mod manager that’s incredibly easy to use.
Note: If you use either of these managers, you’ll need to boot Fallout 4 from your mod manager directly from now on. Otherwise, your game will launch without any mods installed.
Fallout 4 Script Extender
Known as F4SE, this allows more script-heavy mods to work for Fallout 4. You can download it with the link below. Drop the contents of the file to your Fallout 4 root directory. Launch the script extender instead of the Fallout4.exe file whenever you want to use its features. Should you use a mod manager like MO2, you’ll need to add F4SE as an executable file and launch it through your mod manager.
Download F4SE Here
FO4Edit
This tool is incredibly powerful, letting you tinker with virtually everything tied to Fallout 4. Most notably, FO4Edit lets you «clean» Fallout 4’s master files and other «dirty» mods you install. Cleaning these files is useful for increasing your game’s stability, as it removes duplicate and unreferenced data that is prone to making your game crash. A tutorial on how to use this tool can be found here.
Download F04Edit Here
Return to Quick Links
ENBs
Note: ENBs are PC only. Console players should skip to the next section.
An ENB, short for Enhanced Natural Beauty, is a suite of graphic modifications that aim to increase the visual fidelity of a specific game—in this case, Fallout 4. These modifications range from new post-processing effects to complete overhauls of a game’s lighting. Most Fallout 4 ENBs focus on changing the game’s lighting to make it look more realistic. The results (like the image above) speak for themselves.
ENBs have a reputation of being resource hungry and somewhat tough to install. The former varies wildly based on your ENB of choice and its settings, while the latter isn’t true anymore. Installing an ENB has never been easier. If you’re concerned about the performance impact of an ENB, pay close attention to the ENB you’re interested in using.
Bear in mind that you’ll need to manually install an ENB; installing them through a mod manager doesn’t work.
Installing An ENB
You’ll need three things to install an ENB:
- A mod manager
- ENB binary files
- An ENB of your choice
ENB binary files are what every Fallout 4 ENB is based on. These files are not optional; no ENB will work unless these are installed. You can find these files at enbdev.com (link to Fallout 4 ENB binaries). Download the most recent version at the bottom of the webpage.
With these binary files, you’ll want to head to your Fallout 4 root directory. Open up the binary files you downloaded. Double-click on the «WrapperVersion» folder. Drop the following files into your Fallout 4 root directory:
- d3d11.dll
- d3dcompiler_46e.dll
The ENB you’ll install through your mod manager will take care of the remaining files.
Now that your binaries are installed, download an ENB off the Nexus website. You want to select «Manual Download» for an ENB. Once downloaded, open up the ENB. You’ll want to drop all of the mod’s files into your Fallout 4 root directory. If it needs to override any files, allow the ENB to do so.
Your ENB is now installed. Launch Fallout 4 through your mod manager to see how it looks.
Configuring ENBs
Suppose you install an ENB that has some settings you don’t like, fret not. You can manually alter an ENB’s properties yourself. In-game, press «shift» and «enter» to open the ENB menu. You can tweak with any setting you want in here.
The most common settings players tweak is «LETERBOX_BARS,» a setting that enables black bars on the top and bottom of your screen. If you don’t like them, set this value to «0» either in-game or by tweaking the enbeffect.fx file in your root directory. Either method will work. Use this same method to tweak any setting that isn’t to your preference.
Return to Quick Links
Troubleshooting
Once you get deep into modding Fallout 4, you might start experiencing some serious stability issues or unintended effects with certain mods. These instances will require you to troubleshoot the issue. While each person’s mod setup is unique, there are a few tips you can use to figure out the issue quickly.
Read Mod Descriptions
You can save yourself hours of headache by spending a few minutes reading the mod description of each mod you install. These descriptions will tell you of any known issues, compatibility problems, or other issues you should be aware of.
Disable Half Of Your Mods
If you have a massive load order and need to quickly boil down which mod is causing an issue, disable half of your currently active mods. Should the problem persist, disable half of your remaining mods. Repeat this until the problem goes away. This lets you quickly narrow down which mods could be causing issues with your game.
Check Your .INI Files
Your game can perform exponentially worse if you’re using certain .ini settings after installing multiple graphic or script-heavy mods. In these situations, it’s best to check your .ini files. BethINI is a fantastic tool for configuring your .ini files quickly, giving a noticeable performance increase for older PCs. You can download BethINI here.
Reinstall The Mod Or Fallout 4
When something simply refuses to work, a simple reinstall of that mod or Fallout 4 itself can fix your issues. This should only be done as a last resort, but a clean install can do wonders for convoluted issues you can’t find a solution to.
Return to Quick Links
Next: The Biggest Fallout 4 Mods Ever Made (By File Size)