In this article, we will show you how to fix «the format did not complete successfully RAW» issue when formatting your micro SD card, memory card, USB drive or external hard drive. If you receive such an error in Windows 7/8/10, you can find a solution here.
Format Disk Error Description
As is well known, Windows has a built-in tool called Disk Management which can be used to free manage your disk and partition. However, sometimes Windows Disk Management can’t work in some cases, for example, Extend Volume is grayed out; Convert to MBR/GPT Disk only works after deleting all volumes; Windows fails to format and more.
Here a disk formatting error with DM will be introduced in detail. This format disk issue is always discussed in many forums like Reddit.
Probably Windows fails to format your disk with «the format did not complete successfully» error in Windows 10/8/7, especially when you attempt to format a RAW partition of the removable drive like micro SD card, memory card, USB flash drive, pen drive, SSD or external hard drive storage device.
In Windows DM, «Virtual Disk Manager The format did not complete successfully» error message appears.
Or sometimes you want to format the exFAT partition in Windows DM, but still, receive such an format error.
If you are experiencing the issue, you may be curious why this issue happens to you? In general, there are some reasons leading to not completing disk formatting, such as virus infection, corrupted system files, bad blocks, and outdated BIOS or Windows Service Pack.
Well then, what should you do to fix it? Let’s focus on the methods about the format disk error according to the specific causes.
Tip: Usually, in addition to Windows DM, some of you choose to format drive via Windows Explorer. However, «Windows was unable to complete the format» error message appears in all probability.
Solved — The Format Did Not Complete Successfully
If your disk becomes raw and fails to be formatted with the error message, but there are some important data, firstly you had better recover data from the corrupted or damaged drive and then start to fix the issue following the methods below.
Recover Data at First
Warning: If your disk becomes raw and fails to be formatted with the error message, but there are some important data, firstly you had better recover data from the corrupted or damaged drive and then start to fix the issue following the methods below.
To do this work, you can ask MiniTool Partition Wizard for help. As a professional partition manager, it has a feature called Data Recovery, enabling you to recover files and folders from RAW volume easily. Its Pro Ultimate Edition or an advanced one can be used for file recovery, so get it from the following button now. It also allows you to recover data from the unallocated space.
Buy Now
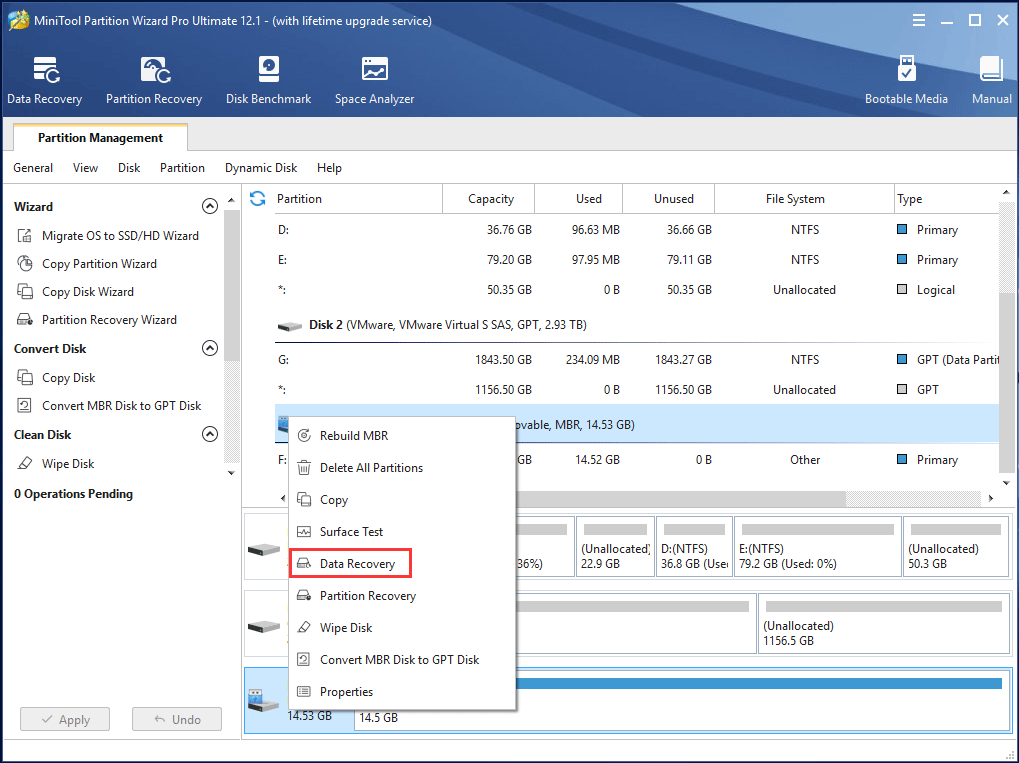
Step 1: Launch MiniTool Partition Wizard to its main interface and then right click on your target USB drive, SD card, pen drive or any removable drive to choose Data Recovery from the context menu.
Step 2: Then this tool will start to scan your removable drive. Please wait patiently.
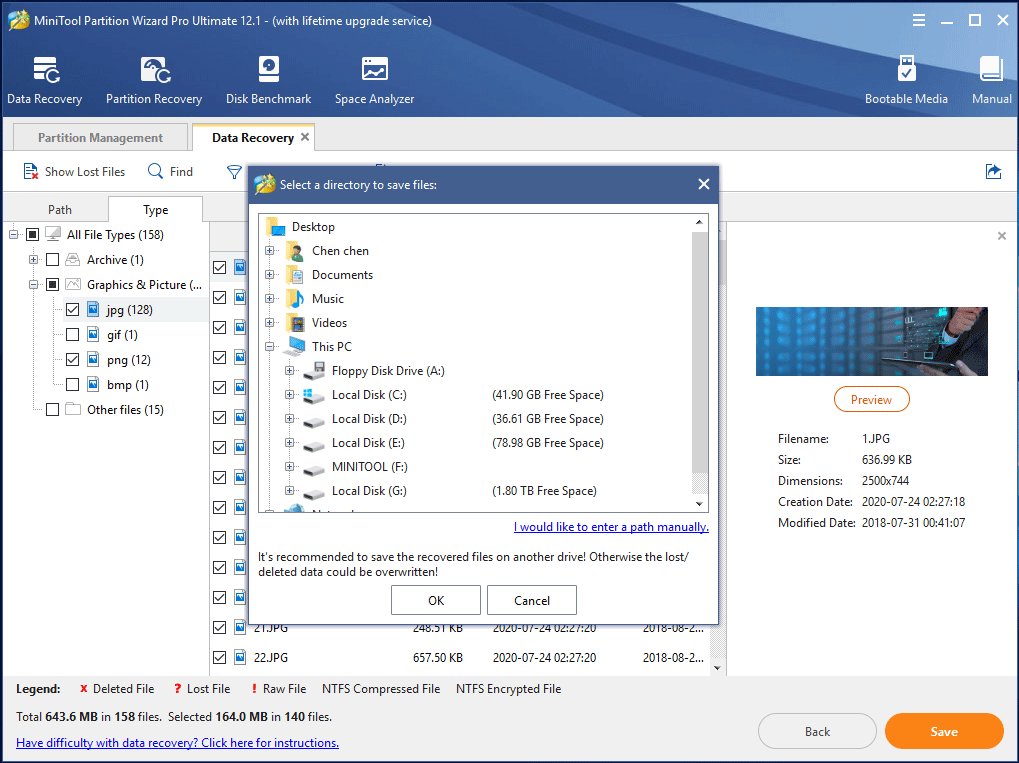
Step 3: Find your needed files or folders and select all the items, and then click the Save button to recover them to the specified path or free space.
Related article: How To Recover Data From RAW File System, RAW Partition & RAW Drive
Solution 1: Remove Virus
To a large extent, unknown viruses may stop you formatting your removable drive, therefore, please download a piece of antivirus software or use Windows built-in antivirus software — Windows Defender to scan and kill those viruses firstly. Then try to format your disk with the Format feature of Windows built-in tool. If you are still unable to format micro SD card, SD card or USB key, try the next way.
Solution 2: Check Bad Sectors
Usually, a simple virus checking and killing may be not useful to fix «the format did not complete successfully micro SD» issue. Actually, the bad block is one of the main factors. Thus, it is necessary to do a disk surface test to identify whether there are some bad sectors or other physical defects.
In order to do this job, we advise you to adopt a professional tool. When searching for such a program on the internet, you will find it’s variety. Which one to choose?
MiniTool Partition Wizard is worthy of being recommended to test disk bad sectors with Surface Test feature. If «the format did not complete successfully» issue appears on a micro SD card or a memory card, please use a card reader to connect it to your computer for disk checking.
This professional partition manager has multiple editions, thereinto, its Free Edition can be used here for personal users. Before you do, please download MiniTool Partition Wizard Free Edition, then install it on your computer and launch it.
Free Download
Then do as the following guidance shows:
Step 1: After double-clicking this free partition software, you will enter an interface. Click Launch Application to go to the main interface.
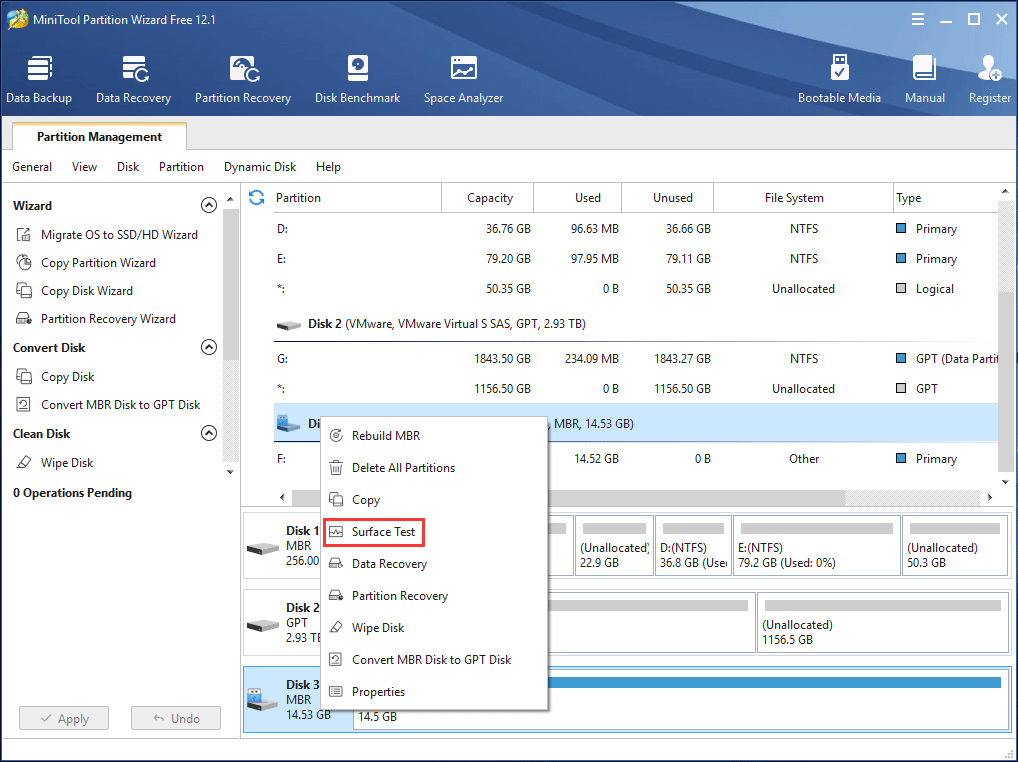
Step 2: Next select the micro SD card, memory stick or any removable device you want to identify, and click Surface Test from Check Disk menu. Or choose this feature from the context menu.
Step 3: Then click Start Now to begin this process. After a few minutes, all sectors of the target disk will be checked. From the figure, as follows, you know MiniTool Partition Wizard will mark Disk block without read error green and mark Read error in this block red.

After finishing this process, if no bad sectors are found, you can skip to solution 3. If there are, what should you do to shield these bad blocks to avoid experiencing «the format did not complete successfully RAW SD card» issue again?
Tip: Some of you may ask why not use MiniTool Partition Wizard to shield bad blocks. It is a pity that this free tool doesn’t have such a function. As we know, there is a tool called CHKDSK which enables you to scan your drives for bad blocks, mark disk sectors as bad and shield them so as to make your disk usable again. Read this post — What to Do If I Find Bad Sectors on Hard Drive in Windows 10/8/7 to learn the fixes.
Now, after shielding bad blocks, you can try to format your removable drive, then «the format did not complete successfully SD card» issue won’t occur.
Solution 3: Use Diskpart to Complete Formatting
Apart from the above tools, there is another built-in tool called Command Prompt that enables you to format your SD card or USB drive. How to fix “the format did not complete successfully” by using command? Follow the guide now:
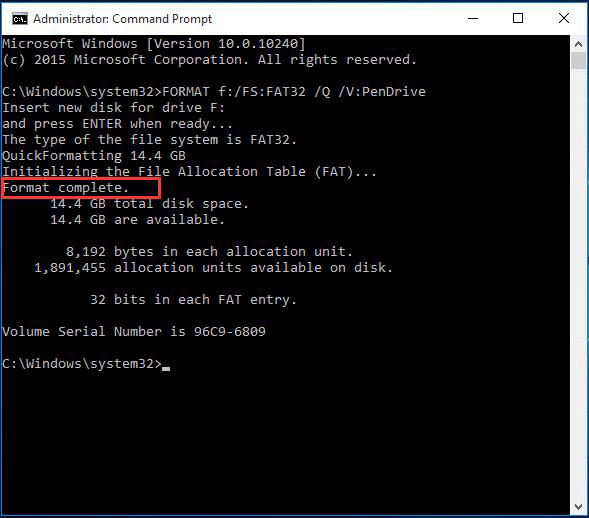
- Open Command Prompt as administrator.
- Finally, type FORMAT X: /FS:FAT32 /Q /V:PenDrive (X refers to the drive letter of your drive.). And wait for the formatting process to be finished.
This way comes from a Microsoft forum, check it to learn much.
Solution 4: Use MiniTool Partition Wizard to Format
If you fail to format your USB key or SD card with last method, «the format did not complete successfully RAW USB» issue is still not solved. Now try to use a professional formatting tool. Here MiniTool Partition Wizard Free Edition is also useful for disk formatting.
Free Download
Tip: Some of you may report that you can create a volume but when you try to format drives it says «The volume was created successfully but it was not formatted. Retry the format using the format task» or “the operation did not complete because a quick format is not possible”. If you are also bothered by these error messages, MiniTool Partition Wizard can also be helpful.
How to perform the formatting operation with this free partition manager? Look at the step-by-step guidance as follows:
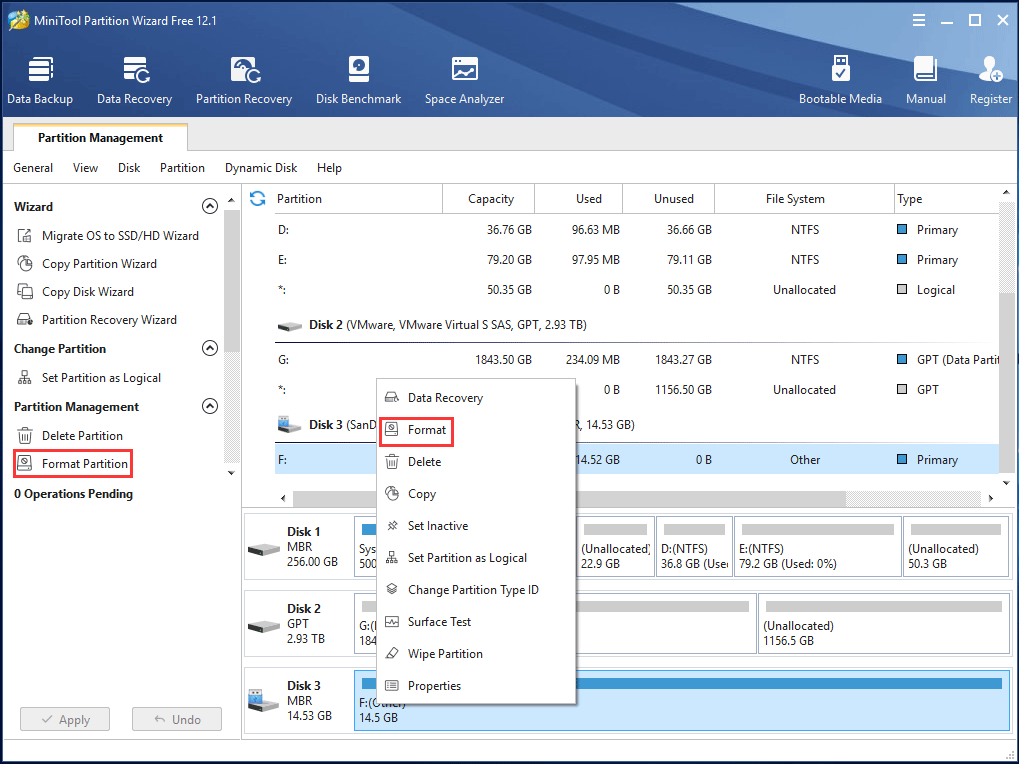
Step 1: Launch MiniTool Partition Wizard Free Edition. Then select the partition of your SD card, USB key, external hard drive, SSD or memory stick in the main interface, and click Format Partition from Partition Management menu in the left pane. Or right click on the target drive to select the Format feature.
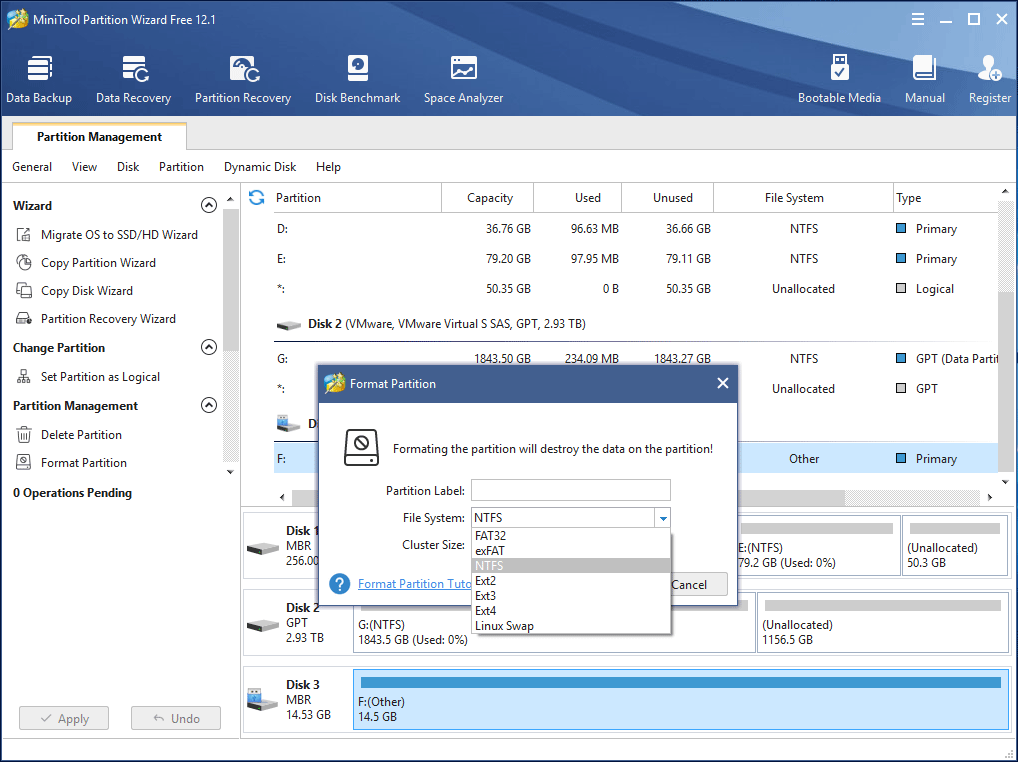
Step 2: Then in the pop-up window, select FAT32 as the file system of your target partition or set the cluster size by yourself. Click OK to return to the main interface.
Step 3: Finally, click Apply to make this change effective.
If there is more than one partition on your removable drive, external hard drive or SSD, please repeat the above steps to format the entire disk. With this tool, «the format did not complete successfully micro SD card» error can be fixed.
Solution 5: Wipe the Entire Disk
If Windows DM tool is unable to format your micro SD card or any removable drive, in addition to using the third-party software to format it, there is another option for you to choose, that is to wipe the entire disk.
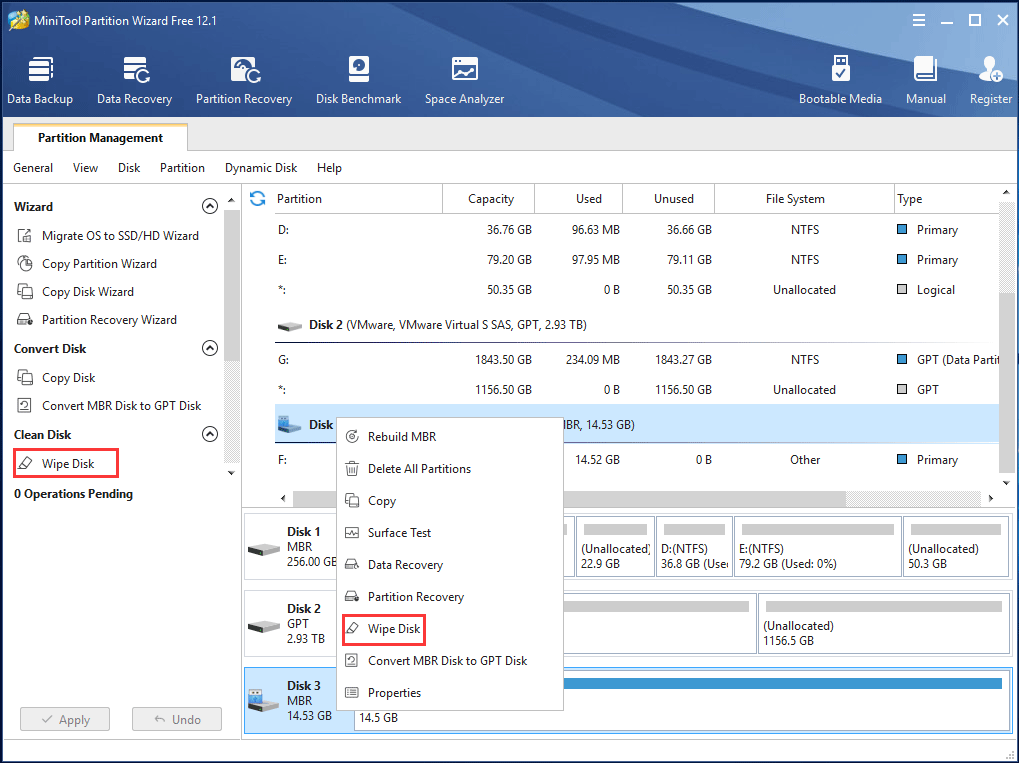
Step 1: After entering MiniTool Partition Wizard main interface, right click on the target disk and select Wipe Disk.
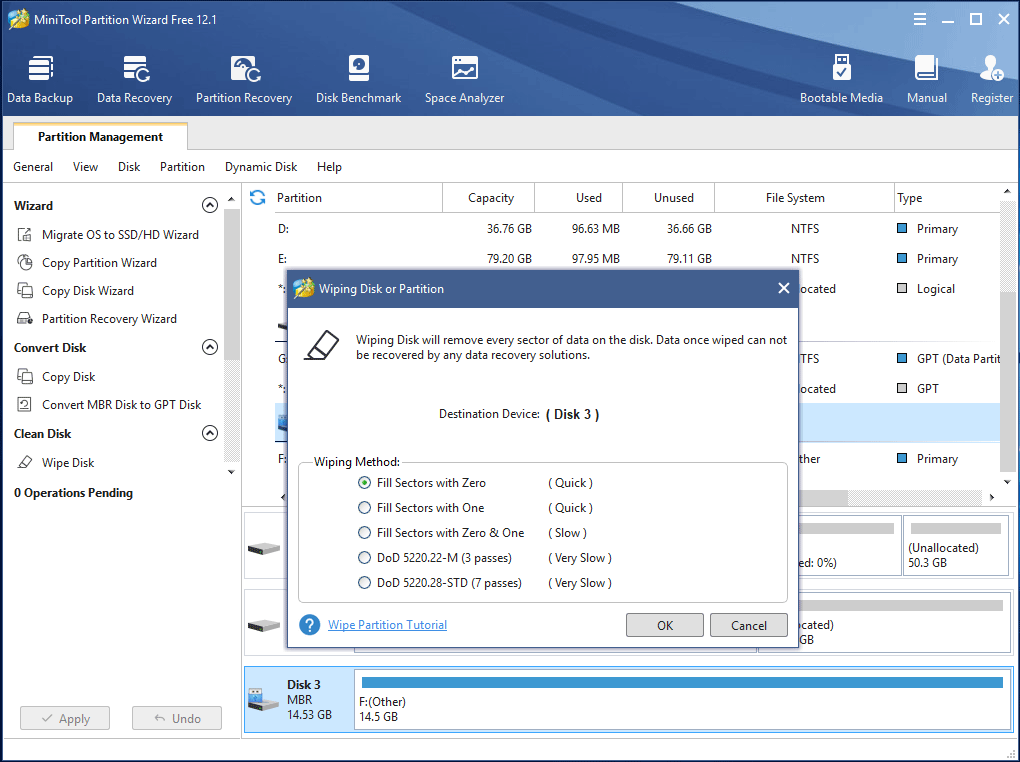
Step 2: Then you can see there are five wiping choices, and here we recommend you to choose the first or second method with fast speed. Next hit the OK button.
Step 3: At last, execute this wiping operation by hitting Apply.
Solution 6: Recreate Partition
In addition to the above ways to fix «virtual disk manager the format did not complete successfully SD card» issue, you can also delete the target partition and create a new partition by Windows DM.
If you have «the format did not complete successfully external hard drive» issue and decide to delete the partition on an SSD or external hard drive, you can use Delete Volume to delete the RAW volume. And then use New Simple Volume to create a new partition. During the process of recreating the partition, formatting will be done.
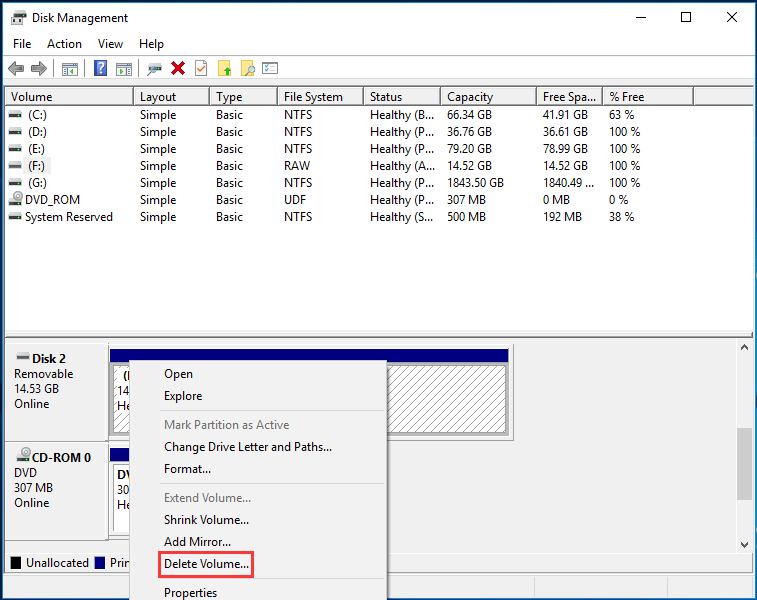
Sometimes, when deleting the RAW volume of the removable disk, for example, a micro SD card, memory stick or USB key, Windows DM tool may not work with the gray Delete Volume feature.
In this case, what should you do to fix «the format did not complete successfully RAW SD card/RAW USB» issue? Fortunately, you can also use MiniTool Partition Wizard to do this work.
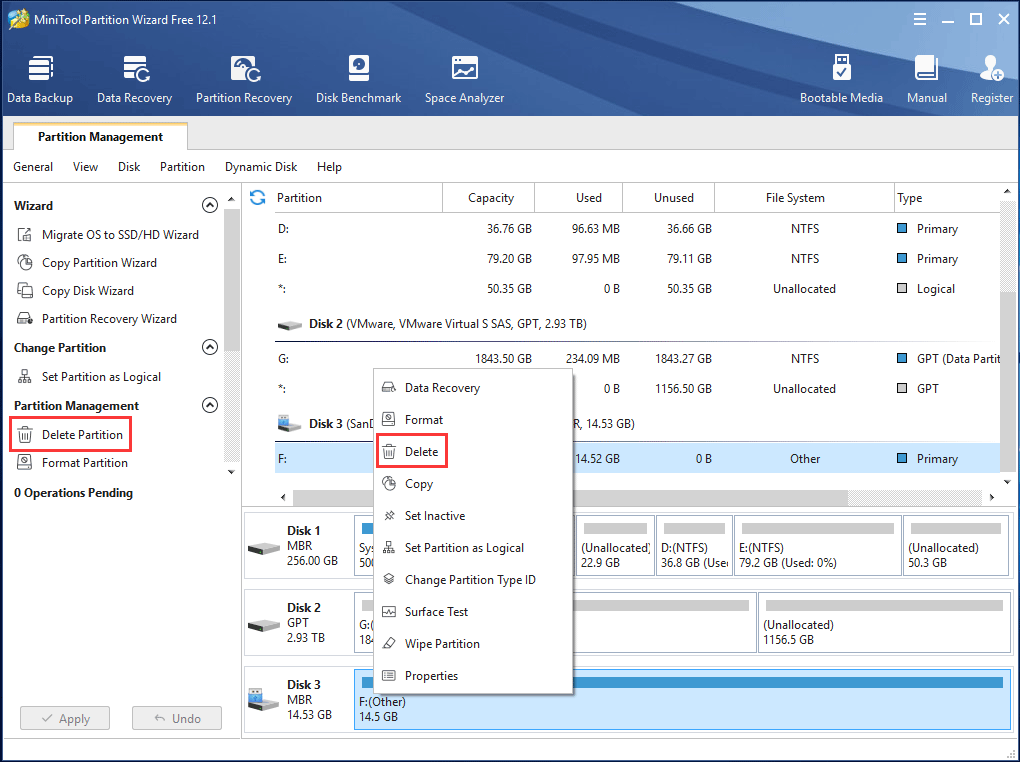
Step 1: Open MiniTool Partition Wizard Free Edition, and then select the partition you want to delete and click Delete Partition in the left pane.
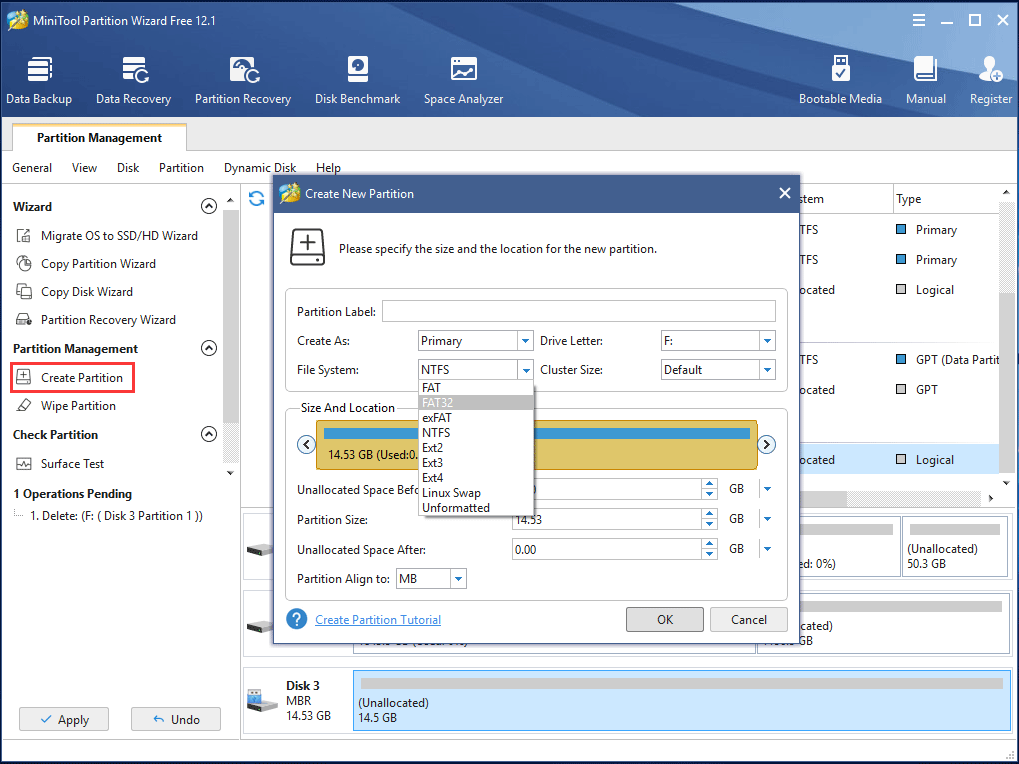
Step 2: Then select Create Partition from Partition Management menu. Here set the file system of the target partition as FAT32. (USB drives use it by default.)
Step 3: Then let all changes effectual by hitting Apply. By recreating the partition, it is useful to fix this formatting error.
“I want to format my USB flash drive but I receive the error ‘the format did not complete successfully’ in Disk Management. This post is very helpful to me.”Click to Tweet
Bottom Line
In this post, we show you what the error «format did not complete successfully in Disk Management» is, the specific situations about this issue on an SSD, external hard drive, USB drive, micro SD card or memory stick and how to fix Windows 10/8/7 Disk Management the format did not complete successfully error, especially MiniTool Partition Wizard helps a lot.
Free Download
On the other hand, we welcome any question or suggestion for this post or our software from you. Please leave one comment in the following text box or send us an email via [email protected]. Much appreciated!
The Format Did Not Complete Successfully FAQ
How do I fix format did not complete successfully?
- Remove virus
- Check bad sectors
- Use Diskpart to complete formatting
- Use MiniTool Partition Wizard to format
- Wipe the entire removable disk
- Recreate the partition
Why is my hard drive not formatting?
Infection of virus, file system corruption, bad blocks, missing system files, incorrect drive format, etc. can lead to hard drive not formatting.
How do I force a hard drive to format?
You can use a professional partition manager – MiniTool Partition Wizard to force a hard drive to format.
How do I fix my flash drive unable to format?
MiniTool Partition Wizard, a professional and free partition manager, has a feature called Format Partition that can be used to easily format your flash drive that is unable to format.
In this article, we will show you how to fix «the format did not complete successfully RAW» issue when formatting your micro SD card, memory card, USB drive or external hard drive. If you receive such an error in Windows 7/8/10, you can find a solution here.
Format Disk Error Description
As is well known, Windows has a built-in tool called Disk Management which can be used to free manage your disk and partition. However, sometimes Windows Disk Management can’t work in some cases, for example, Extend Volume is grayed out; Convert to MBR/GPT Disk only works after deleting all volumes; Windows fails to format and more.
Here a disk formatting error with DM will be introduced in detail. This format disk issue is always discussed in many forums like Reddit.
Probably Windows fails to format your disk with «the format did not complete successfully» error in Windows 10/8/7, especially when you attempt to format a RAW partition of the removable drive like micro SD card, memory card, USB flash drive, pen drive, SSD or external hard drive storage device.
In Windows DM, «Virtual Disk Manager The format did not complete successfully» error message appears.
Or sometimes you want to format the exFAT partition in Windows DM, but still, receive such an format error.
If you are experiencing the issue, you may be curious why this issue happens to you? In general, there are some reasons leading to not completing disk formatting, such as virus infection, corrupted system files, bad blocks, and outdated BIOS or Windows Service Pack.
Well then, what should you do to fix it? Let’s focus on the methods about the format disk error according to the specific causes.
Tip: Usually, in addition to Windows DM, some of you choose to format drive via Windows Explorer. However, «Windows was unable to complete the format» error message appears in all probability.
Solved — The Format Did Not Complete Successfully
If your disk becomes raw and fails to be formatted with the error message, but there are some important data, firstly you had better recover data from the corrupted or damaged drive and then start to fix the issue following the methods below.
Recover Data at First
Warning: If your disk becomes raw and fails to be formatted with the error message, but there are some important data, firstly you had better recover data from the corrupted or damaged drive and then start to fix the issue following the methods below.
To do this work, you can ask MiniTool Partition Wizard for help. As a professional partition manager, it has a feature called Data Recovery, enabling you to recover files and folders from RAW volume easily. Its Pro Ultimate Edition or an advanced one can be used for file recovery, so get it from the following button now. It also allows you to recover data from the unallocated space.
Buy Now
Step 1: Launch MiniTool Partition Wizard to its main interface and then right click on your target USB drive, SD card, pen drive or any removable drive to choose Data Recovery from the context menu.
Step 2: Then this tool will start to scan your removable drive. Please wait patiently.
Step 3: Find your needed files or folders and select all the items, and then click the Save button to recover them to the specified path or free space.
Related article: How To Recover Data From RAW File System, RAW Partition & RAW Drive
Solution 1: Remove Virus
To a large extent, unknown viruses may stop you formatting your removable drive, therefore, please download a piece of antivirus software or use Windows built-in antivirus software — Windows Defender to scan and kill those viruses firstly. Then try to format your disk with the Format feature of Windows built-in tool. If you are still unable to format micro SD card, SD card or USB key, try the next way.
Solution 2: Check Bad Sectors
Usually, a simple virus checking and killing may be not useful to fix «the format did not complete successfully micro SD» issue. Actually, the bad block is one of the main factors. Thus, it is necessary to do a disk surface test to identify whether there are some bad sectors or other physical defects.
In order to do this job, we advise you to adopt a professional tool. When searching for such a program on the internet, you will find it’s variety. Which one to choose?
MiniTool Partition Wizard is worthy of being recommended to test disk bad sectors with Surface Test feature. If «the format did not complete successfully» issue appears on a micro SD card or a memory card, please use a card reader to connect it to your computer for disk checking.
This professional partition manager has multiple editions, thereinto, its Free Edition can be used here for personal users. Before you do, please download MiniTool Partition Wizard Free Edition, then install it on your computer and launch it.
Free Download
Then do as the following guidance shows:
Step 1: After double-clicking this free partition software, you will enter an interface. Click Launch Application to go to the main interface.
Step 2: Next select the micro SD card, memory stick or any removable device you want to identify, and click Surface Test from Check Disk menu. Or choose this feature from the context menu.
Step 3: Then click Start Now to begin this process. After a few minutes, all sectors of the target disk will be checked. From the figure, as follows, you know MiniTool Partition Wizard will mark Disk block without read error green and mark Read error in this block red.
After finishing this process, if no bad sectors are found, you can skip to solution 3. If there are, what should you do to shield these bad blocks to avoid experiencing «the format did not complete successfully RAW SD card» issue again?
Tip: Some of you may ask why not use MiniTool Partition Wizard to shield bad blocks. It is a pity that this free tool doesn’t have such a function. As we know, there is a tool called CHKDSK which enables you to scan your drives for bad blocks, mark disk sectors as bad and shield them so as to make your disk usable again. Read this post — What to Do If I Find Bad Sectors on Hard Drive in Windows 10/8/7 to learn the fixes.
Now, after shielding bad blocks, you can try to format your removable drive, then «the format did not complete successfully SD card» issue won’t occur.
Solution 3: Use Diskpart to Complete Formatting
Apart from the above tools, there is another built-in tool called Command Prompt that enables you to format your SD card or USB drive. How to fix “the format did not complete successfully” by using command? Follow the guide now:
- Open Command Prompt as administrator.
- Finally, type FORMAT X: /FS:FAT32 /Q /V:PenDrive (X refers to the drive letter of your drive.). And wait for the formatting process to be finished.
This way comes from a Microsoft forum, check it to learn much.
Solution 4: Use MiniTool Partition Wizard to Format
If you fail to format your USB key or SD card with last method, «the format did not complete successfully RAW USB» issue is still not solved. Now try to use a professional formatting tool. Here MiniTool Partition Wizard Free Edition is also useful for disk formatting.
Free Download
Tip: Some of you may report that you can create a volume but when you try to format drives it says «The volume was created successfully but it was not formatted. Retry the format using the format task» or “the operation did not complete because a quick format is not possible”. If you are also bothered by these error messages, MiniTool Partition Wizard can also be helpful.
How to perform the formatting operation with this free partition manager? Look at the step-by-step guidance as follows:
Step 1: Launch MiniTool Partition Wizard Free Edition. Then select the partition of your SD card, USB key, external hard drive, SSD or memory stick in the main interface, and click Format Partition from Partition Management menu in the left pane. Or right click on the target drive to select the Format feature.
Step 2: Then in the pop-up window, select FAT32 as the file system of your target partition or set the cluster size by yourself. Click OK to return to the main interface.
Step 3: Finally, click Apply to make this change effective.
If there is more than one partition on your removable drive, external hard drive or SSD, please repeat the above steps to format the entire disk. With this tool, «the format did not complete successfully micro SD card» error can be fixed.
Solution 5: Wipe the Entire Disk
If Windows DM tool is unable to format your micro SD card or any removable drive, in addition to using the third-party software to format it, there is another option for you to choose, that is to wipe the entire disk.
Step 1: After entering MiniTool Partition Wizard main interface, right click on the target disk and select Wipe Disk.
Step 2: Then you can see there are five wiping choices, and here we recommend you to choose the first or second method with fast speed. Next hit the OK button.
Step 3: At last, execute this wiping operation by hitting Apply.
Solution 6: Recreate Partition
In addition to the above ways to fix «virtual disk manager the format did not complete successfully SD card» issue, you can also delete the target partition and create a new partition by Windows DM.
If you have «the format did not complete successfully external hard drive» issue and decide to delete the partition on an SSD or external hard drive, you can use Delete Volume to delete the RAW volume. And then use New Simple Volume to create a new partition. During the process of recreating the partition, formatting will be done.
Sometimes, when deleting the RAW volume of the removable disk, for example, a micro SD card, memory stick or USB key, Windows DM tool may not work with the gray Delete Volume feature.
In this case, what should you do to fix «the format did not complete successfully RAW SD card/RAW USB» issue? Fortunately, you can also use MiniTool Partition Wizard to do this work.
Step 1: Open MiniTool Partition Wizard Free Edition, and then select the partition you want to delete and click Delete Partition in the left pane.
Step 2: Then select Create Partition from Partition Management menu. Here set the file system of the target partition as FAT32. (USB drives use it by default.)
Step 3: Then let all changes effectual by hitting Apply. By recreating the partition, it is useful to fix this formatting error.
“I want to format my USB flash drive but I receive the error ‘the format did not complete successfully’ in Disk Management. This post is very helpful to me.”Click to Tweet
Bottom Line
In this post, we show you what the error «format did not complete successfully in Disk Management» is, the specific situations about this issue on an SSD, external hard drive, USB drive, micro SD card or memory stick and how to fix Windows 10/8/7 Disk Management the format did not complete successfully error, especially MiniTool Partition Wizard helps a lot.
Free Download
On the other hand, we welcome any question or suggestion for this post or our software from you. Please leave one comment in the following text box or send us an email via [email protected]. Much appreciated!
The Format Did Not Complete Successfully FAQ
How do I fix format did not complete successfully?
- Remove virus
- Check bad sectors
- Use Diskpart to complete formatting
- Use MiniTool Partition Wizard to format
- Wipe the entire removable disk
- Recreate the partition
Why is my hard drive not formatting?
Infection of virus, file system corruption, bad blocks, missing system files, incorrect drive format, etc. can lead to hard drive not formatting.
How do I force a hard drive to format?
You can use a professional partition manager – MiniTool Partition Wizard to force a hard drive to format.
How do I fix my flash drive unable to format?
MiniTool Partition Wizard, a professional and free partition manager, has a feature called Format Partition that can be used to easily format your flash drive that is unable to format.
Содержание
- Почему файловая система стала RAW и как вернуть предыдущую
- Способ 1: DMDE
- Способ 2: MiniTool Power Data Recovery
- Способ 3: Утилита chkdsk
- Вопросы и ответы

Иногда при подключении флешки к компьютеру можно столкнуться с сообщением о необходимости ее форматирования, и это при том, что раньше она работала без сбоев. Накопитель может открываться и показывать файлы, однако со странностями (непонятные символы в названиях, документы в диковинных форматах, и т. д.), а если зайти в свойства, можно увидеть, что файловая система превратилась в непонятный RAW, и флешка не форматируется стандартными средствами. Сегодня мы расскажем вам, как справиться с проблемой.
В общих чертах, проблема носит тот же характер, что и появление RAW на жестких дисках — вследствие сбоя (программного или аппаратного) ОС не может определить тип файловой системы флешки.
Забегая наперед, отметим, что единственный способ вернуть накопителю работоспособность — отформатировать его сторонними приложениями (более функциональными, нежели встроенные средства), однако при этом сохраненные на нем данные будут потеряны. Поэтому, прежде чем приступать к радикальным мерам, стоит попытаться вытащить оттуда информацию.
Способ 1: DMDE
Несмотря на небольшой размер, эта программа обладает как мощными алгоритмами поиска и восстановления утерянных данных, так и солидными возможностями по управлению накопителями.
Загрузить DMDE
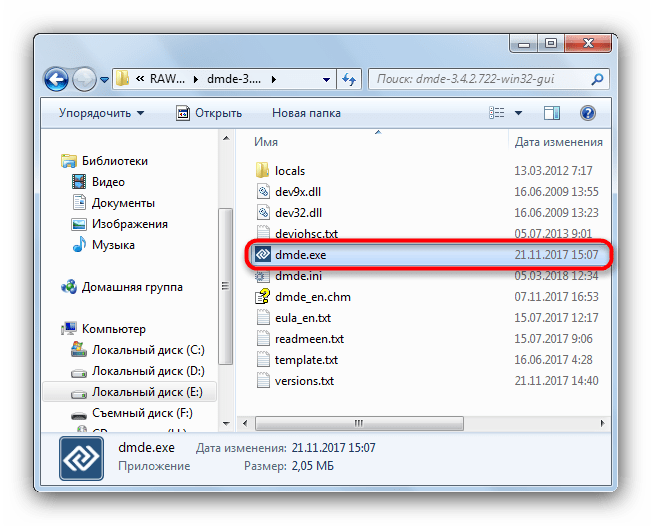
- Программа не требует установки, поэтому сразу же запускайте её исполняемый файл — dmde.exe.

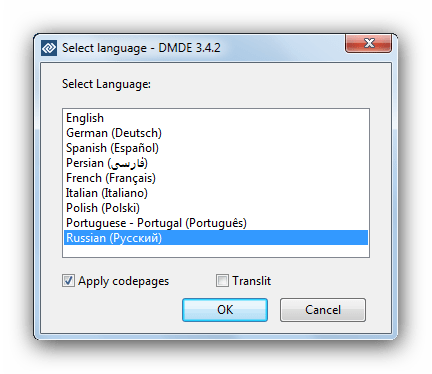
При запуске выберите язык, русский обычно обозначен по умолчанию.

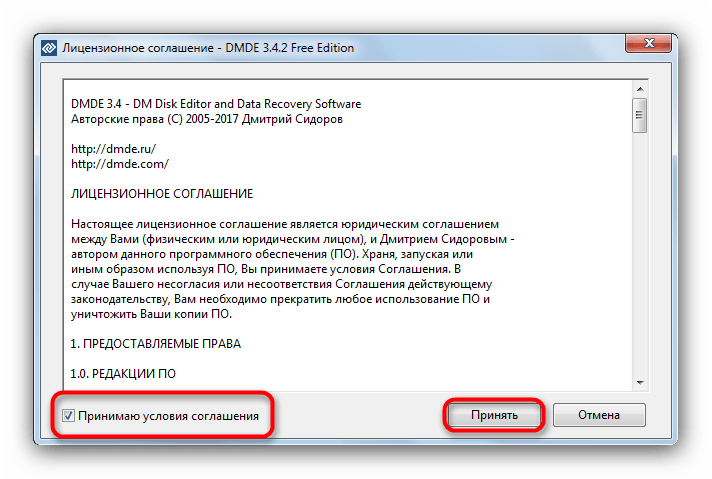
Затем потребуется принять лицензионное соглашение, чтобы продолжить работу.
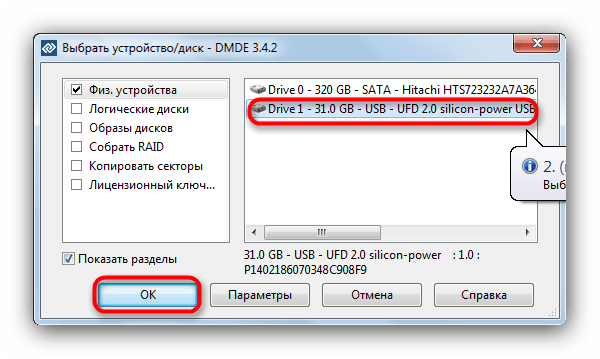
- В главном окне приложения выберите ваш накопитель.

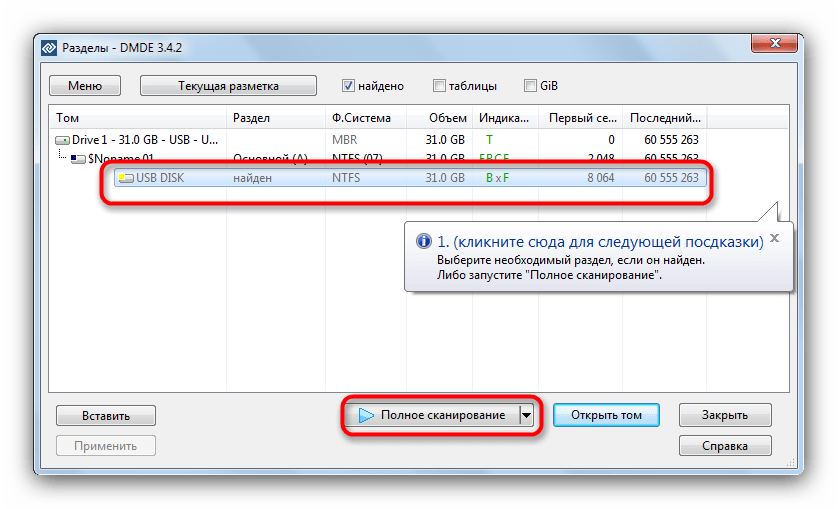
Ориентируйтесь по объему. - В следующем окошке откроются распознанные программой разделы.

Кликните по кнопке «Полное сканирование». - Начнется проверка носителя на наличие утерянных данных. В зависимости от емкости флешки, процесс может занять долгое время (до нескольких часов), так что запаситесь терпением и старайтесь не использовать компьютер для других задач.
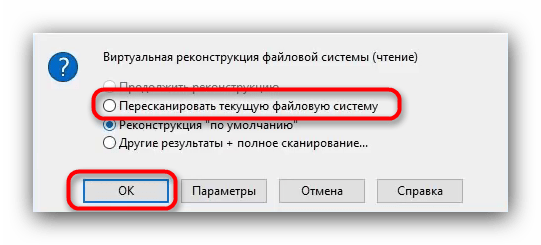
- По окончании процедуры появится диалоговое окно, в котором нужно отметить пункт «Пересканировать текущую файловую систему» и подтвердить нажатием на «ОК».
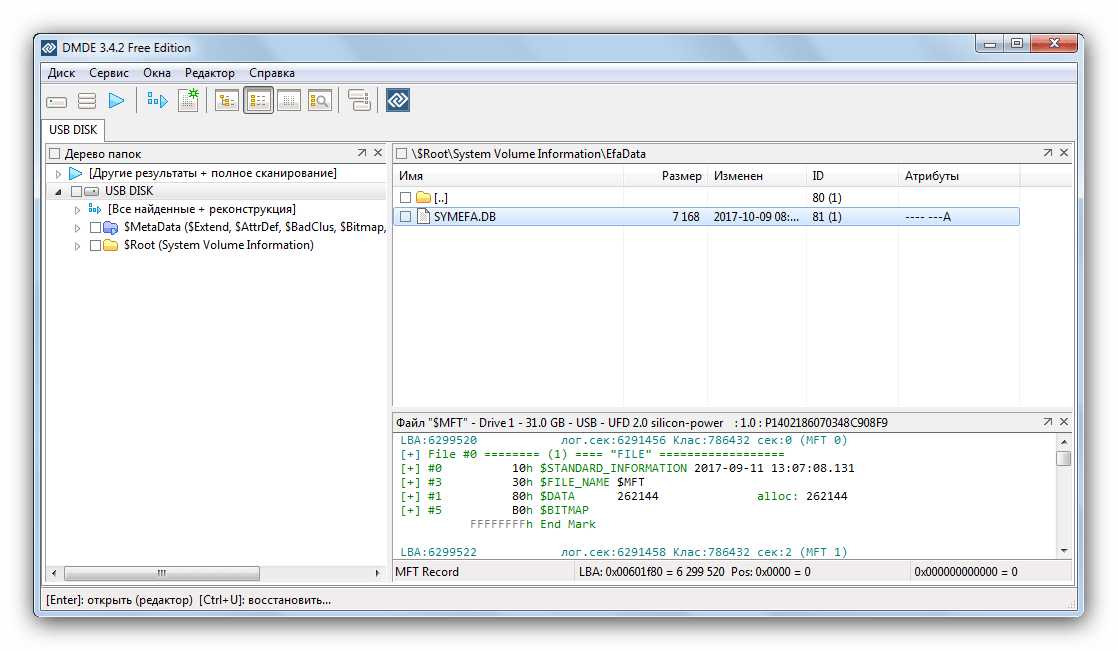
- Это также довольно длительный процесс, но он должен закончиться быстрее, чем первичное сканирование. В результате появится окошко со списком найденных файлов.

Из-за ограничений бесплатной версии восстановление по директориям невозможно, поэтому придется выделять по одному файлу, вызывать контекстное меню и оттуда уже восстанавливать, с выбором места хранения.
Будьте готовы к тому, что некоторые файлы восстановить не выйдет — участки памяти, где они хранились, были безвозвратно перезаписаны. Кроме того, восстановленные данные наверняка придется переименовывать, поскольку DMDE дает таким файлам случайно сгенерированные имена.
- Закончив с восстановлением, можно форматировать флешку средствами ДМДЕ либо любым способом из предложенных в статье ниже.
Подробнее: Не форматируется флешка: способы решения проблемы
Единственным недостатком этого способа можно считать ограничение возможностей бесплатной версии программы.
Способ 2: MiniTool Power Data Recovery
Еще одна мощная программа для восстановления файлов, которая способна помочь решить и нашу сегодняшнюю задачу.
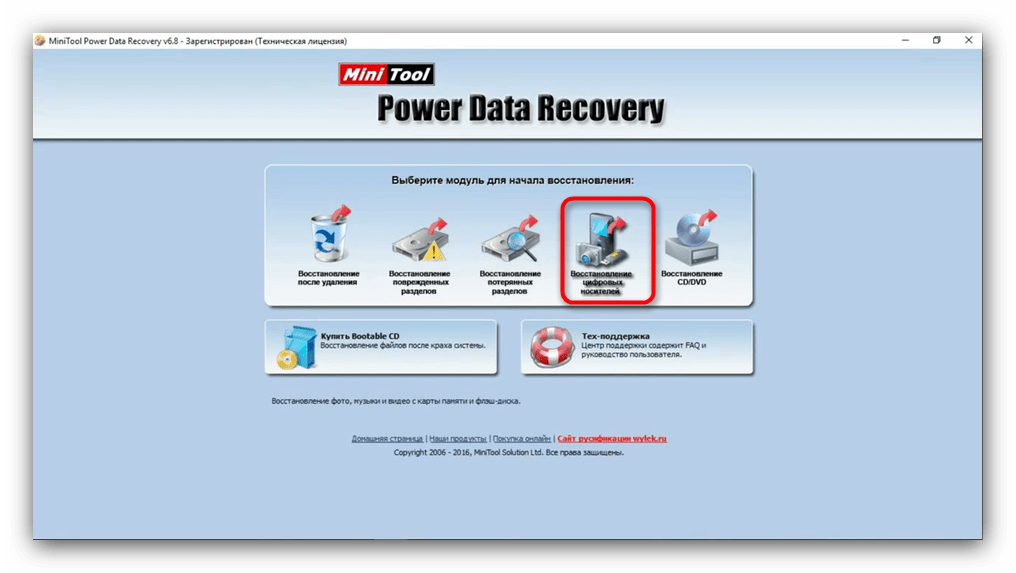
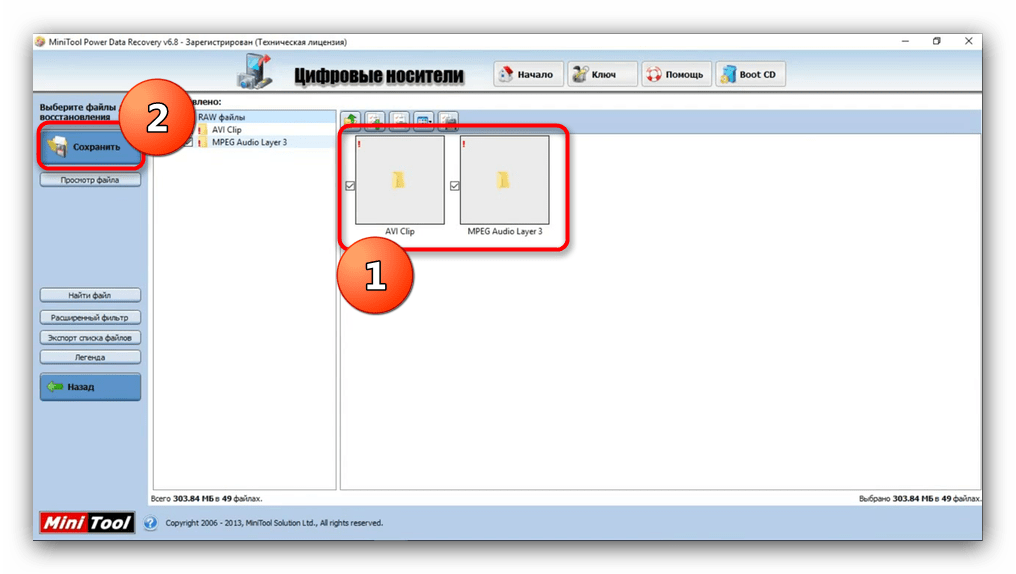
- Запускайте программу. Первым делом нужно выбрать тип восстановления — в нашем случае «Восстановление цифровых носителей».
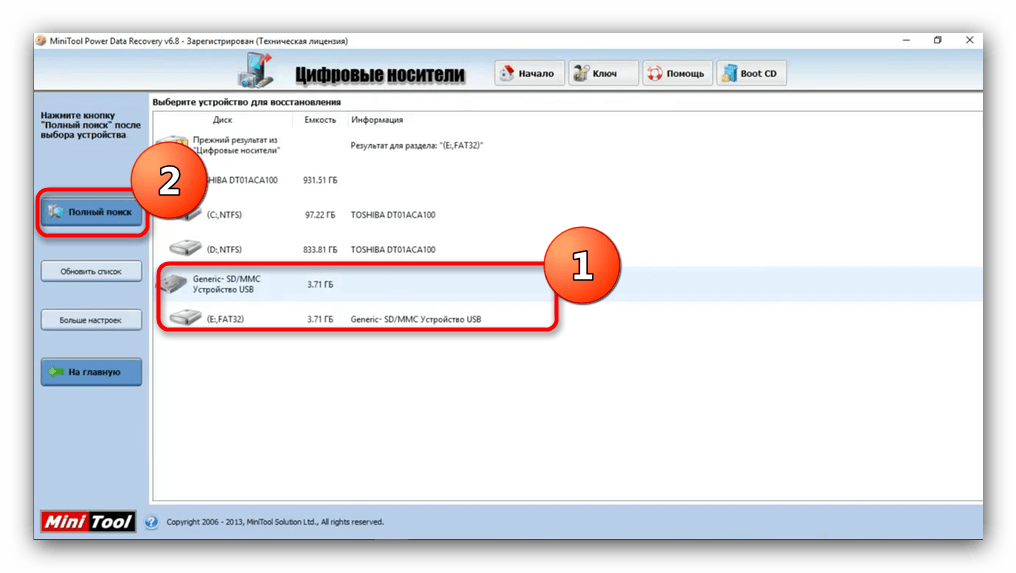
- Затем выделяйте вашу флешку – как правило, съемные флеш-накопители выглядят в программе так.

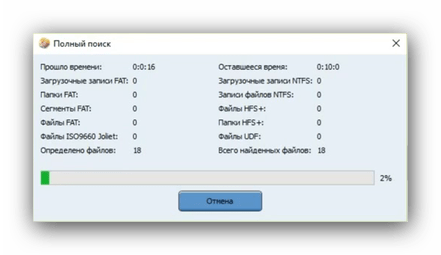
Выделив флешку, нажимайте «Полный поиск». - Программа начнет глубокий поиск хранившейся на накопителе информации.

Когда процедура закончится, выберите нужные вам документы и нажимайте на кнопку «Сохранить».

Обратите внимание – вследствие ограничений бесплатной версии максимальный доступный размер восстанавливаемого файла равен 1 Гб! - Следующий шаг – выбор места, куда нужно сохранить данные. Как подсказывает вам сама программа, лучше воспользоваться жестким диском.
- Проделав необходимые действия, закрывайте программу и форматируйте флешку в любую подходящую вам файловую систему.
Читайте также: Какую файловую систему выбрать для флешки

Как и DMDE, MiniTool Power Data Recovery – программа платная, в свободной версии присутствуют ограничения, однако для быстрого восстановления файлов небольших объемов (текстовых документов или фотографий) возможностей бесплатного варианта вполне достаточно.
Способ 3: Утилита chkdsk
В некоторых случаях отображение файловой системы RAW может произойти из-за случайного сбоя. Его можно ликвидировать, восстановив карту разделов памяти флешки с помощью «Командной строки».
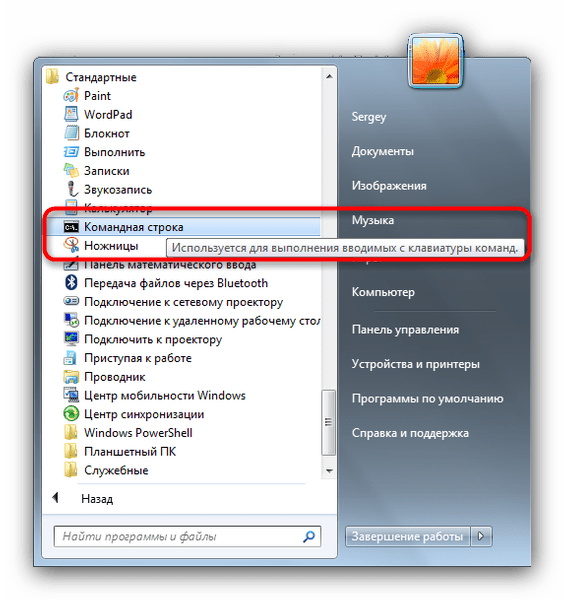
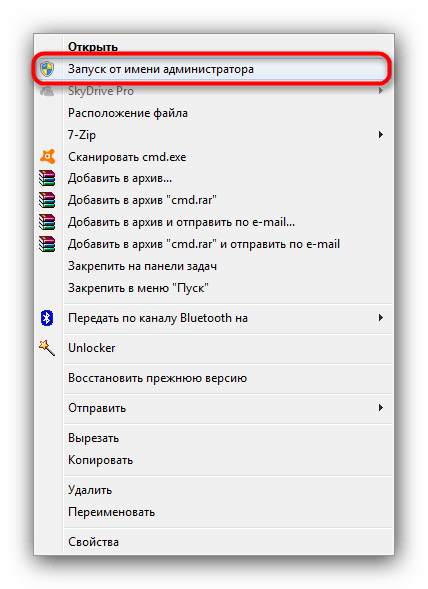
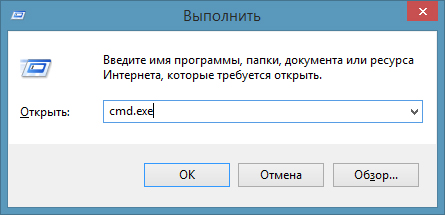
- Запустите «Командную строку». Для этого пройдите по пути «Пуск»—«Все программы»—«Стандартные».

Щелкните правой кнопкой мыши по «Командная строка» и выберите в контекстном меню опцию «Запуск от имени администратора».

Также можно воспользоваться методами, описанными в этой статье. - Пропишите команду
chkdsk X: /r, только вместо «X» напишите букву, под которой в Виндовс отображается ваша флешка. - Утилита проверит флешку, и если проблема заключается в случайном сбое, то сможет устранить последствия.

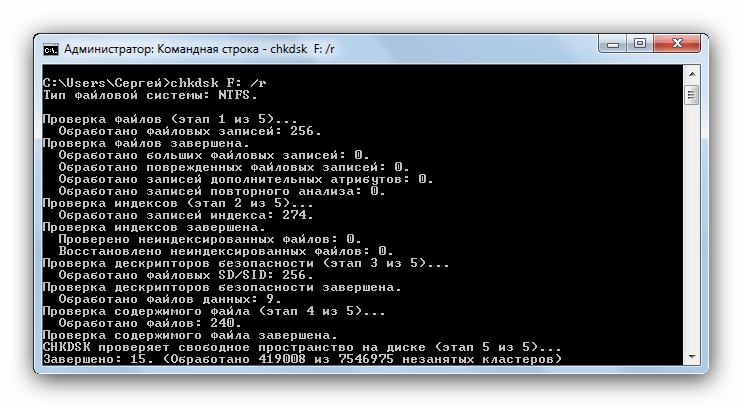
В случае если вы видите сообщение «Chkdsk недопустим для дисков RAW», стоит попробовать использовать Способы 1 и 2, рассмотренные выше.
Как видим, убрать файловую систему RAW на флешке очень просто — манипуляции не требуют каких-то запредельных навыков.
Еще статьи по данной теме:
Помогла ли Вам статья?
Если в один прекрасный момент подключения своего съёмного накопителя с кучей важной информации к компьютеру вы увидите надпись «Чтобы использовать диск в дисководе n:, сначала отформатируйте его. Вы хотите его отформатировать?», то эта статья именно для вас.

Восстановление флешки после её преображения в RAW-формат.
Что такое RAW-формат флешки
Для начала давайте разберёмся в том, что же такое RAW. Ведь все привыкли видеть на своих накопителях привычные файловые системы, такие как NTFS, FAT32. Они применяются как для твердотельных накопителей SSD, так и для жёстких дисков и флешек.
Файловая система нужна для того, чтобы диски могли функционировать и сообщаться с компьютером. Благодаря ей компьютер переводит информацию в двоичный код, который ему понятен и с которым он может работать, а пользователь уже видит результат этой работы: фотографии, текст, видеозаписи, аудиозаписи, игры и приложения. А что же собственно такое RAW? Если не особо вдаваться в подробности, RAW — это сбой, ошибка системы. Давайте разберёмся, почему возникает эта проблема.
Почему флешка стала RAW
Если файловая система на вашей флешке вдруг стала RAW, значит, в работе с ней или компьютером произошли сбои разного характера. Начиная от банальных сбоев работы системы, заканчивая работой вредоносной программы, так называемого вируса. Если вы уверены, что сбой произошёл из-за вируса — при подключении флешки антивирус сообщал вам, что на ней есть угроза, но вы игнорировали эти предупреждения — то для начала стоит произвести сканирование системы и ликвидировать первоисточник проблемы, а именно вирус, который и доставил вам много проблем.

Вирус мог попасть также и через интернет на ваш компьютер, для предотвращения заражения в будущем вам стоит более избирательно выбирать сайты в поисках той или иной информации, делать акцент на проверенных сайтах. Ещё вполне возможно физическое повреждение накопителя, например, при падении, перепада напряжения в компьютере, неправильном извлечении флешки.
Итак, теперь вам известно почему возникает такая проблема. Главное, не спешите форматировать флешку, вы потеряете все файлы на ней. Можно попробовать «оживить» её встроенной утилитой Windows либо другими сторонними программами, которые находятся в общем доступе в интернете.
Как исправить RAW формат на флешке
Если данные на флешке вам не нужны, то вы можете смело форматировать её встроенными инструментами. Но если на ней находятся ценные данные, вам надо исправить эту проблему. Тут возникает вопрос: как исправить флешку в RAW-формате?
Не нужно отчаиваться, всё можно восстановить без потери, однако, не всегда всё так легко и безоблачно. Если вы слабо представляете, что делать, если флешка стала в RAW-формате, то вам всё-таки стоит обратиться в специализированный сервисный центр, где за определённую плату восстановят все данные. Если же вы уверены в себе, тогда можете провести восстановление флешки самостоятельно. Существуют специальные программы для решения этой проблемы.
Как же исправить RAW-формат на флешке? Начать следует со встроенной программы, которая запускается через командную строку. Достаточно всего лишь ввести в поле командной строки команду: chkdsk n: /n, где n — это буква, обозначающая диск, который вы хотите «вылечить», а вторая /n — это функция исправления файловой системы при сканировании. Если встроенная программа не справится с этой проблемой, то она выведет сообщение «Chkdsk недопустим для дисков RAW». Но не стоит расстраиваться, имеется ещё много сторонних программ, которые помогут в борьбе с этим злополучным RAW.

В случае бессилия встроенной программы придёт на помощь относительно бесплатная программа DMDE, скачать которую можно с официального сайта. Запустить и установить эту утилиту не составляет большого труда, так что подробно останавливаться на этом не будем. После установки и запуска приложения вы увидите два окна. В левом выберите пункт «Физ. Устройство», в правом — проблемную флешку. Щёлкните по ней двойным кликом. В этот момент произойдёт экспресс-сканирование содержимого флешки.
Перейдите в папу «Найденные», далее в папку «Все найденные + реконструкции», потом нажмите «Пересканировать весь том» и подтвердите свои действия. Теперь запаситесь терпением, ведь чем больше объём вашей флешки, тем дольше будет проходить сканирование. После окончания этой процедуры в окне вы увидите все файлы, содержащиеся на флешке до сбоя в её работе, но учтите, что они будут иметь совершенно иные названия. Далее можете приступать к их восстановлению.

Если после всего проделанного у вас ничего не вышло или функционал этой программы не соответствует вашим требованиям, следует рассмотреть ещё один вариант, а именно MiniTool Power Data Recovery. Есть бесплатная версия программы, функционал которой ограничен лишь максимальным весом восстанавливаемого файла (до 1 ГБ).

- После установки и запуска этой утилиты необходимо указать диск, данные с которого вы хотите восстановить.
- Выберите флешку. MiniTool Power Data Recovery покажет вам содержащиеся в ней файлы. Можно выбрать все или только необходимые.
- Для того чтобы сохранить файлы, надо нажать кнопку Save Files (находится слева, голубого цвета).
- Далее программа попросит вас указать директорию (диск), на который вы хотите сохранить файлы со злополучной флешки. И ещё она вас предупредит, чтобы вы не вздумали сохранять данные на флешку, с которой вы их восстанавливаете.
С этого момента начнётся процесс копирования, длительность может составить приличное время, которое зависит от объёма файлов и вычислительной мощности компьютера. После всех ваших манипуляций ожидайте завершения копирования. Вот и всё, осталось только проверить необходимые файлы в папке, куда вы их сохранили, читабельны ли они. И собственно начать «воскрешать» флешку. То есть попросту её отформатировать.
Что делать, если не форматируется флешка в формате RAW
Нелишним будет затронуть ещё один аспект этой проблемы, а именно: что делать, если не форматируется флешка в формате RAW? Если вам удалось извлечь файлы с помощью указанной выше программы, надо теперь задуматься, как восстановить флешку, которая стала RAW-формата, вернуть ей прежнюю работоспособность. Зайдите в «Мой компьютер», щёлкните правой кнопкой мыши по накопителю и выберите пункт «Форматировать». Если после этого остаётся тот же злополучный формат RAW, то не всё так радужно и придётся немного «попотеть».
В этом случае для восстановления флешки необходимо выполнить так называемое низкоуровневое «глубокое» форматирование накопителя. К сожалению, Windows сам не умеет делать такое, но на помощь придёт замечательная утилита NDD Low Level Format, которая распространяется условно бесплатно.
Работать с этой утилитой просто:
- Запустите её в режиме «Continue for free», чтобы продолжить бесплатное использование. В этом случае нам хватит и функционала бесплатной версии.
- В открывшемся окне выберите накопитель.
- Далее в открывшемся окне перейдите на вкладку «LOW-LEVEL FORMAT», нажмите «Format this device» и подтвердите выполнение этого действия.

После завершения процесса низкоуровневого форматирования, длительность которого зависит от вычислительной мощности компьютера и объёма флешки, появится сообщение, что вам нужно отформатировать флешку встроенными утилитами Windows для того, чтобы восстановить «нормальную» файловую систему. При форматировании укажите предпочтительный именно для вас формат NTFS или FAT32, но помните, что файловая система FAT32 не позволяет хранить одиночные файлы крупного размера, поэтому если вы будете скачивать фильмы, игры и тому подобные «тяжёлые» файлы, вам отлично подойдёт файловая система NTSF.
Подведя итог всему вышесказанному, хочется сказать, что в этой проблеме нет ничего страшного и всё решаемо. Если даже на вашей флешке находятся очень важные файлы, документы и так далее, не нужно вешать нос. Если всё сделаете правильно, вы без потерь восстановите все свои файлы.
Иногда файловая система наших накопителей по определенным причинам может быть повреждена и становится не читаемой внутри операционной системы Windows, она приобретает формат RAW. Windows не сможет открыть содержимое устройства и предложит вам отформатировать карту. В противном случае, если вы не подтвердите данное предложение, система будет уведомлять вас об ошибке всякий раз при попытке посмотреть какой-либо файл.

Содержание статьи:
- Использование CMD для исправления RAW файловой системы без необходимости форматирования
- Восстановление данных и подготовка SD-карты к форматированию
Многие пользователи могут впасть в панику, если у них случается данная неполадка, однако не стоит расстраиваться раньше времени. Ниже мы приведем простую инструкцию, пройдя по которой, вы быстро восстановите не только свой накопитель, но и все ценные данные. Эти методы могут быть полезны как для SD-карты, так и для любого другого накопителя.
Использование CMD для исправления RAW файловой системы
без необходимости форматирования
Классический способ восстановления накопителя в случае любого логического повреждения, в том числе RAW, — это исправление неполадки на нем при помощи утилиты chkdsk через командную строку cmd. Будучи бесплатным инструментом Windows по ремонту разделов диска, chkdsk становится первым способом по решению вопроса с неисправным устройством.
- 1. Откройте командную строку:
Меню Пуск > Выполнить > cmd.exe (Окно выполнить вы можете вызвать комбинацией клавиш Win + R) - 2. В открывшейся командной строке наберите
chkdsk /F X:
(Предположив, что ваш диск отмечен буквой Х, введите соответственно chkdsk /F X: )
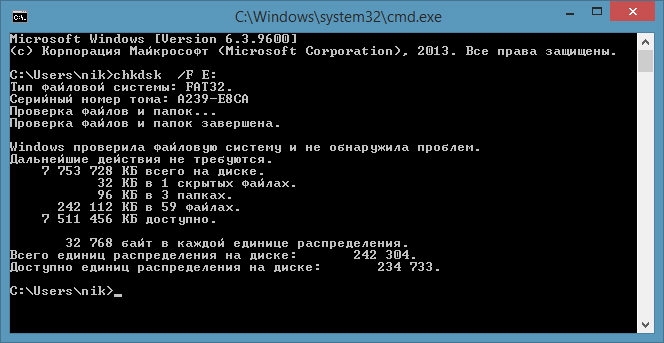
По завершению вышеописанных двух шагов, CMD исправит ошибку на вашей SD-карте, при везении сохранив все имевшиеся на ней данные. К сожалению, периодически в процессе выполнения первого метода восстановления вы можете получить сообщение об ошибке “Файловая система RAW” или “CHKDSK недоступен для RAW-приводов”. Как справиться с такой ошибкой мы писали в этой статье.
Если все прошло не так гладко, как этого хотелось, воспользуйтесь другим методом при помощи программного обеспечения Starus Partition Recovery.
Восстановление данных и подготовка SD-карты к форматированию
Еще одним способом восстановления данных и файловой системы накопителя является использование стороннего программного обеспечения. Благодаря мощной встроенной функции по восстановлению информации и удобному, интуитивно понятному интерфейсу, Starus Partition Recovery станет отличным выбором в этом деле. Приложение поможет эффективно восстановить данные с жесткого диска, USB-накопителя, SD-карты и любого носителя в два клика.
Воспользуйтесь следующей инструкцией для восстановления данных:
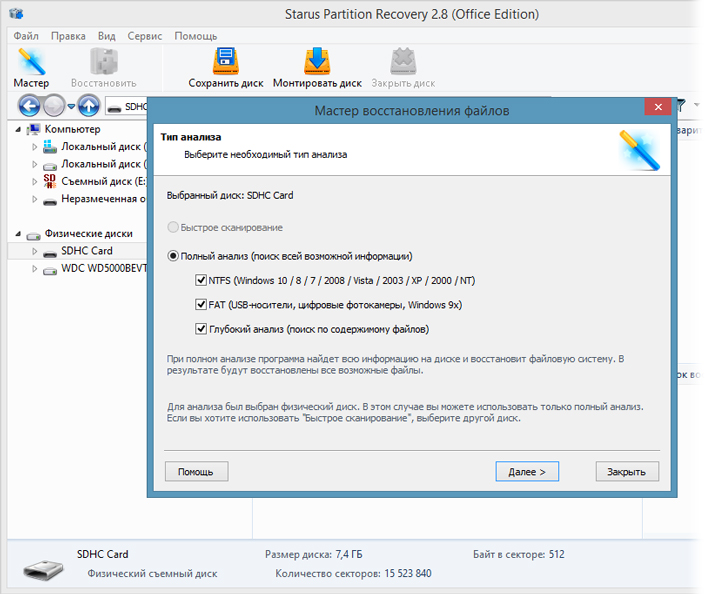
1. Подключите карту памяти с ошибкой RAW к своему компьютеру и запустите программу Partition Recovery. Кликните левой кнопкой мыши по диску, который необходимо проанализировать, и выберите подходящий метод сканирования. Вы можете провести Быстрый анализ для беглого просмотра программой ваших данных и Полный анализ, чтобы она могла подробно изучить каждый сектор. Второй способ потребует больше времени.
2. По завершению сканирования, выберите все необходимые к восстановлению данные, нажмите по окну правой кнопкой мыши и выберите Восстановить.
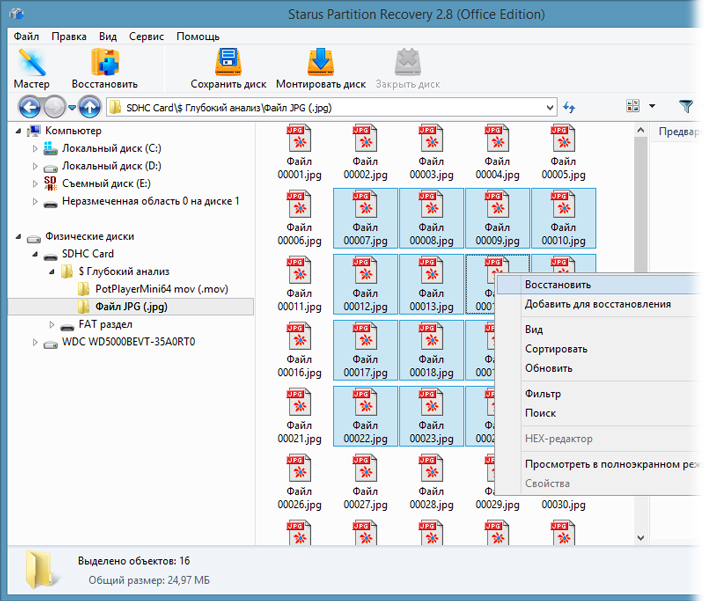
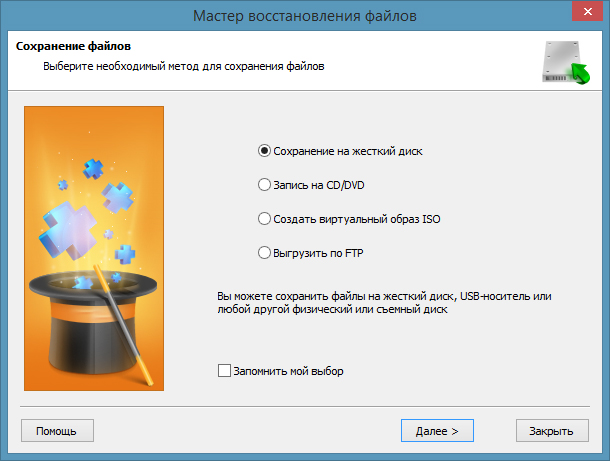
3. Вам будет предложено несколько методов для сохранения информации, выберите наиболее подходящий.
Скачать и опробовать программу для исправления файловой системы RAW можно совершенно бесплатно. Все функции, включая пред-просмотр восстановленных файлов, доступны в пробной версии. Окно пред-просмотра дает возможность убедится, что конкретный файл не поврежден и не перезаписан и подлежит полному восстановлению. Для сохранения восстановленных файлов необходимо приобрести лицензионный ключ и зарегистрировать программу.
Похожие статьи про восстановление данных:
Дата: 04/05/2018
Теги: RAW диск, RAW раздел, Как восстановить, Форматирование