Модераторы: Connie, Модераторы форумов Диа-клуба
Re: Устройство флеш-мониторинга СК Freestyle Libre
Поставили новый сенсер работает больше 12 часов.И все время занижает сахар,вот сейчас на ридере lo на глюкометре 4.9. С утра разница была в 7 единиц. Что делать ?
[ Пост написан с помощью Android ] 
- АлтушкА
- Новичок

- Сообщения: 4
- Зарегистрирован: 02 янв 2017, 19:48

Re: Устройство флеш-мониторинга СК Freestyle Libre
![]() Yaomama » 31 янв 2017, 12:42
Yaomama » 31 янв 2017, 12:42
АлтушкА писал(а):И все время занижает сахар,вот сейчас на ридере lo на глюкометре 4.9. С утра разница была в 7 единиц. Что делать ?
Не сравнивать показания ридера с показаниями глюкометра. Это бесполезное занятие.
АлтушкА писал(а): на ридере lo на глюкометре 4.9
Возможно, глюкометр показывает уже растущий СК, после падения…т.н. откат. А может руки не чистые и глюкометр завышает показания.
В сотый раз удивляюсь людям. Вы зачем начинаете пользоваться прибором, который все время сверяете с другим прибором, который также неточен?
Если страшно, надо либо учиться понимать динамику СК…либо сверить показания с лабораторией.
Sapiens sat…
-

Yaomama - Сообщения: 3172
- Зарегистрирован: 16 дек 2013, 14:14
- Откуда: Ессентуки
- Возраст: 41

Re: Устройство флеш-мониторинга СК Freestyle Libre
![]() АлтушкА » 31 янв 2017, 12:50
АлтушкА » 31 янв 2017, 12:50
До этого на других сенсерах всегда расхождение было единица.И привыкли уже не мерить глюкометром. Только вот на этом сенсере ридер показывает lo или 2.3. А два глюкометра от 5 до 6. И так на протяжение нескольких часов
[ Пост написан с помощью Android ]
- АлтушкА
- Новичок
- Сообщения: 4
- Зарегистрирован: 02 янв 2017, 19:48
Re: Устройство флеш-мониторинга СК Freestyle Libre
![]() Yaomama » 31 янв 2017, 13:20
Yaomama » 31 янв 2017, 13:20
АлтушкА писал(а):И так на протяжение нескольких часов
Показывает LO ? Я бы испугалась:-)
А в динамику СК вписывается 5-6 или 2,3, состояние какое?
Может там по любому подкармливать надо?
Если сенсор установлен неправильно и жало вошло под кожу лишь частично, тогда могут быть занижения постоянные тоже. Но это редкость.
Sapiens sat…
-
Yaomama - Сообщения: 3172
- Зарегистрирован: 16 дек 2013, 14:14
- Откуда: Ессентуки
- Возраст: 41
Re: Устройство флеш-мониторинга СК Freestyle Libre
![]() АлтушкА » 31 янв 2017, 13:43
АлтушкА » 31 янв 2017, 13:43
В графики за все время использования либо lo либо до 3,2.
Может попробовать переставить ? Или ещё подождать
[ Пост написан с помощью Android ]
- АлтушкА
- Новичок
- Сообщения: 4
- Зарегистрирован: 02 янв 2017, 19:48
Re: Устройство флеш-мониторинга СК Freestyle Libre
![]() turtle_cherry » 31 янв 2017, 14:09
turtle_cherry » 31 янв 2017, 14:09
АлтушкА писал(а):Поставили новый сенсер работает больше 12 часов.И все время занижает сахар,вот сейчас на ридере lo на глюкометре 4.9. С утра разница была в 7 единиц. Что делать ?
Пока продолжать наблюдение. Еще хотя бы сутки. 12ч это маловато, могут еще быть изменения. А как вел себя сахар в течение калибривочного часа после установки? Падал?
На 7 единиц — тоже занижал? Я тут неоднократно писала о своих наблюдениях, по-разному датчики встают — иногда точно показывают, иногда врут. Если врут — всегда отклонение только в одну сторону. Либо на определенное кол-во единиц, либо, бывало, чем больше сахар, тем больше отклонение в значениях. Это можно учесть и с этим жить. Я обычно находила закономерность и приспосабливалась таким образом к датчику. Т.е. возможно, ваш сенсор занижает постоянно на 3. На нем 2 (лоу), на глюкометре 5. Если занижал на 7 ночью — ребенок мог лежать на датчике и это еще добавилось к ошибке.
Если же закономерности нет, то даже не знаю — есть ли смысл в таком датчике… Если он фиг знает что показывает.
Да, кстати, еще постоянное LO может говорить о воспалении (за 12 ч — навряд ли) или о выпадении жала.
Добавлено спустя 1 час 7 минут 56 секунд:
Если не постоянно lo, а чередуется с низкими значениями, то датчик не выпал, стоит, просто врет. Когда выпал — линия вниз и все, lo навсегда.
[ Пост написан с помощью Android ]
- За это сообщение автора turtle_cherry поблагодарили: 2
- Александра73 (01 фев 2017, 22:01) • datura (31 янв 2017, 19:22)
-

turtle_cherry - Сообщения: 388
- Зарегистрирован: 30 июл 2015, 20:51
- Откуда: Москва
- Возраст: 50

Re: Устройство флеш-мониторинга СК Freestyle Libre
![]() АлтушкА » 31 янв 2017, 15:18
АлтушкА » 31 янв 2017, 15:18
Во время колибровочного часа. Сахар опустился до 4. Выпили половину маленького пакета сока стал 6.5. А сенсер запустился с сахором 2.5.
Вот щас провираем разница пока вроде получается около 3 ед. Но так пугает сахар 5 а на сенсере lo.
[ Пост написан с помощью Android ]
- АлтушкА
- Новичок
- Сообщения: 4
- Зарегистрирован: 02 янв 2017, 19:48
Re: Устройство флеш-мониторинга СК Freestyle Libre
![]() Yaomama » 31 янв 2017, 15:55
Yaomama » 31 янв 2017, 15:55
turtle_cherry писал(а):Если не постоянно lo, а чередуется с низкими значениями, то датчик не выпал,
Не совсем так…..Жало может быть частично, но неполностью под кожей…и тогда показатели будут низкими…и могут чередоваться с LO.
Добавлено спустя 3 минуты 8 секунд:
АлтушкА писал(а):Но так пугает сахар 5 а на сенсере lo.
По сенсору вообще динамики нет? Т.е. вы едите/пьете, колете инсулин, а мониторинг показывает низы, перемежающиеся с супернизами? Тогда тут что-то явно с установкой не то.
А если динамика соответствует происходящему, но при этом несколько ниже нормальной планки, значит есть смысл подождать….возможно сенсор адаптируется и начнет показывать нормально. А пока просто мерить глюкметром. Не сравнивать, а пока просто полагаться на значения глюка.
Sapiens sat…
- За это сообщение автора Yaomama поблагодарил:
- Nikole (31 янв 2017, 16:02)
-
Yaomama - Сообщения: 3172
- Зарегистрирован: 16 дек 2013, 14:14
- Откуда: Ессентуки
- Возраст: 41
Re: Устройство флеш-мониторинга СК Freestyle Libre
![]() turtle_cherry » 31 янв 2017, 16:12
turtle_cherry » 31 янв 2017, 16:12
АлтушкА писал(а):Во время колибровочного часа. Сахар опустился до 4. Выпили половину маленького пакета сока стал 6.5. А сенсер запустился с сахором 2.5.
Понятно. Калибровался сенсор на скачках, вот и врёт теперь.
Ну, что тут скажешь, если вы живете на низких сахарах, то сенсор, показывающий lo на 5 (т.е. занижающий на 3), для вас, наверное, не вариант, ни о чем, гипы не покажет. Вам можно было бы приспособиться к завышающему (то есть лучше ставить на растущем сахаре, чем на падающем — в этом случае, по нашему опыту, сенсор будет завышать).
Но нужно еще подождать, может, что-то изменится. И посмотреть, что он показывает на других сахарах.
Yaomama писал(а):Не совсем так…..Жало может быть частично, но неполностью под кожей…и тогда показатели будут низкими…и могут чередоваться с LO.
У нас последние сенсоры практически наполовину торчат — стоят поверх толстого коллоидного пластыря — вполне точны…
Последний раз редактировалось turtle_cherry 31 янв 2017, 16:26, всего редактировалось 1 раз.
-
turtle_cherry - Сообщения: 388
- Зарегистрирован: 30 июл 2015, 20:51
- Откуда: Москва
- Возраст: 50
Re: Устройство флеш-мониторинга СК Freestyle Libre
![]() Yaomama » 31 янв 2017, 16:19
Yaomama » 31 янв 2017, 16:19
turtle_cherry писал(а):У нас последние сенсоры практически наполовину торчат — стоят поверх толстого коллоидного пластыря — вполне точны…
Не такую ситуацию я имела ввиду….а именно тот вариант, когда жало практически вышло из тела, но маленький кусочек еще остается там….остальное прижато…Вот тогда может показывать низы…но потом чуть дернуться если, вырубится.
Sapiens sat…
-
Yaomama - Сообщения: 3172
- Зарегистрирован: 16 дек 2013, 14:14
- Откуда: Ессентуки
- Возраст: 41
Re: Устройство флеш-мониторинга СК Freestyle Libre
![]() maryall » 31 янв 2017, 21:41
maryall » 31 янв 2017, 21:41
Здравствуйте, форумчане!
Осилила 120 страниц этой темы  , пока готовила себя к своему первому сенсору. Спасибо всем вам за такую энциклопедию знаний.
Справилась со стрессом — поставила себе первый сенсор сейчас, все работает — уже 3 замера 
Но вот не увидела в теме информацию вот какого рода:
мой ридер, на мой взгляд, плохо реагирует на нажатие экрана, приходится буквально вжимать палец, чтобы среагировал. У вас также?
Или я просто сравниваю с экраном телефона и планшета, и на контрасте мне кажется, что у меня брак экрана ридера.
Также, не совсем поняла, librelink (официальное приложение от Abbott) нельзя установить c playmerket’a россияне никаким образом? Может у кого-то есть сам файл с приложением?
Или есть ссылки, как можно обойти запрет?
Про glimp и liapp здесь прочитала, телефон с NFC, android.
- maryall
- Сообщения: 153
- Зарегистрирован: 20 май 2015, 12:43
- Откуда: Москва
- Возраст: 34
Re: Устройство флеш-мониторинга СК Freestyle Libre
![]() turtle_cherry » 31 янв 2017, 21:46
turtle_cherry » 31 янв 2017, 21:46
maryall писал(а):мой ридер, на мой взгляд, плохо реагирует на нажатие экрана, приходится буквально вжимать палец, чтобы среагировал. У вас также?
Или я просто сравниваю с экраном телефона и планшета, и на контрасте мне кажется, что у меня брак экрана ридера.
Да, так же. На контрасте с телефонами-планшетами надо сильно жать.
maryall писал(а):Также, не совсем поняла, librelink (официальное приложение от Abbott) нельзя установить c playmerket’a россияне никаким образом? Может у кого-то есть сам файл с приложением?
Здесь в теме несколько раз давали ссылку на скачивание либрелинка с другого ресурса, правда, там предыдущая версия, но у нас именно она и стоит, она не имеет функционала передачи данных на другой телефон, но если у вас не у ребенка Либра, вам это и не надо.
Вот
https://m.apkpure.com/librelink/com.librelink.app
- За это сообщение автора turtle_cherry поблагодарил:
- maryall (31 янв 2017, 21:57)
-
turtle_cherry - Сообщения: 388
- Зарегистрирован: 30 июл 2015, 20:51
- Откуда: Москва
- Возраст: 50
Re: Устройство флеш-мониторинга СК Freestyle Libre
![]() datura » 01 фев 2017, 12:31
datura » 01 фев 2017, 12:31
turtle_cherry писал(а):На контрасте с телефонами-планшетами надо сильно жать.
На наших ридерах все очень легко нажимается 
-

datura - Сообщения: 1850
- Зарегистрирован: 20 сен 2014, 14:45
- Откуда: Великий Новгород
- Возраст: 37

Re: Устройство флеш-мониторинга СК Freestyle Libre
![]() OlegS » 01 фев 2017, 14:11
OlegS » 01 фев 2017, 14:11
Здравствуте всем! Подскажите пожалуйста, был ли у кого опыт установки сенсора на ногу, например, внешнюю часть бедра? Испытывал ли кто дискомфорт при ношении по сравнению с рекомендуемым Abbot местом на руке ниже плеча?
- OlegS
- Сообщения: 11
- Зарегистрирован: 31 янв 2017, 17:16
- Откуда: Россия, Московская область
- Возраст: 49
-
- ICQ
Re: Устройство флеш-мониторинга СК Freestyle Libre
![]() Фантик » 01 фев 2017, 14:58
Фантик » 01 фев 2017, 14:58
OlegS писал(а):был ли у кого опыт установки сенсора на ногу, например, внешнюю часть бедра?
http://dia-club.ru/forum_ru/search.php?keywords=бедр*&t=17643&sf=msgonly
OlegS писал(а):на руке ниже плеча?
Часть руки между плечевым суставом и локтевым суставом называется плечо. Ниже плеча — это куда?
Жизнь делится на два этапа — сначала нет ума, потом здоровья.
-

Фантик - Сообщения: 13119
- Зарегистрирован: 08 сен 2006, 11:18
- Откуда: Москва, Россия
- Возраст: 58

Вернуться в Системы флеш-мониторинга СК
Кто сейчас на конференции
Сейчас этот форум просматривают: нет зарегистрированных пользователей и гости: 4
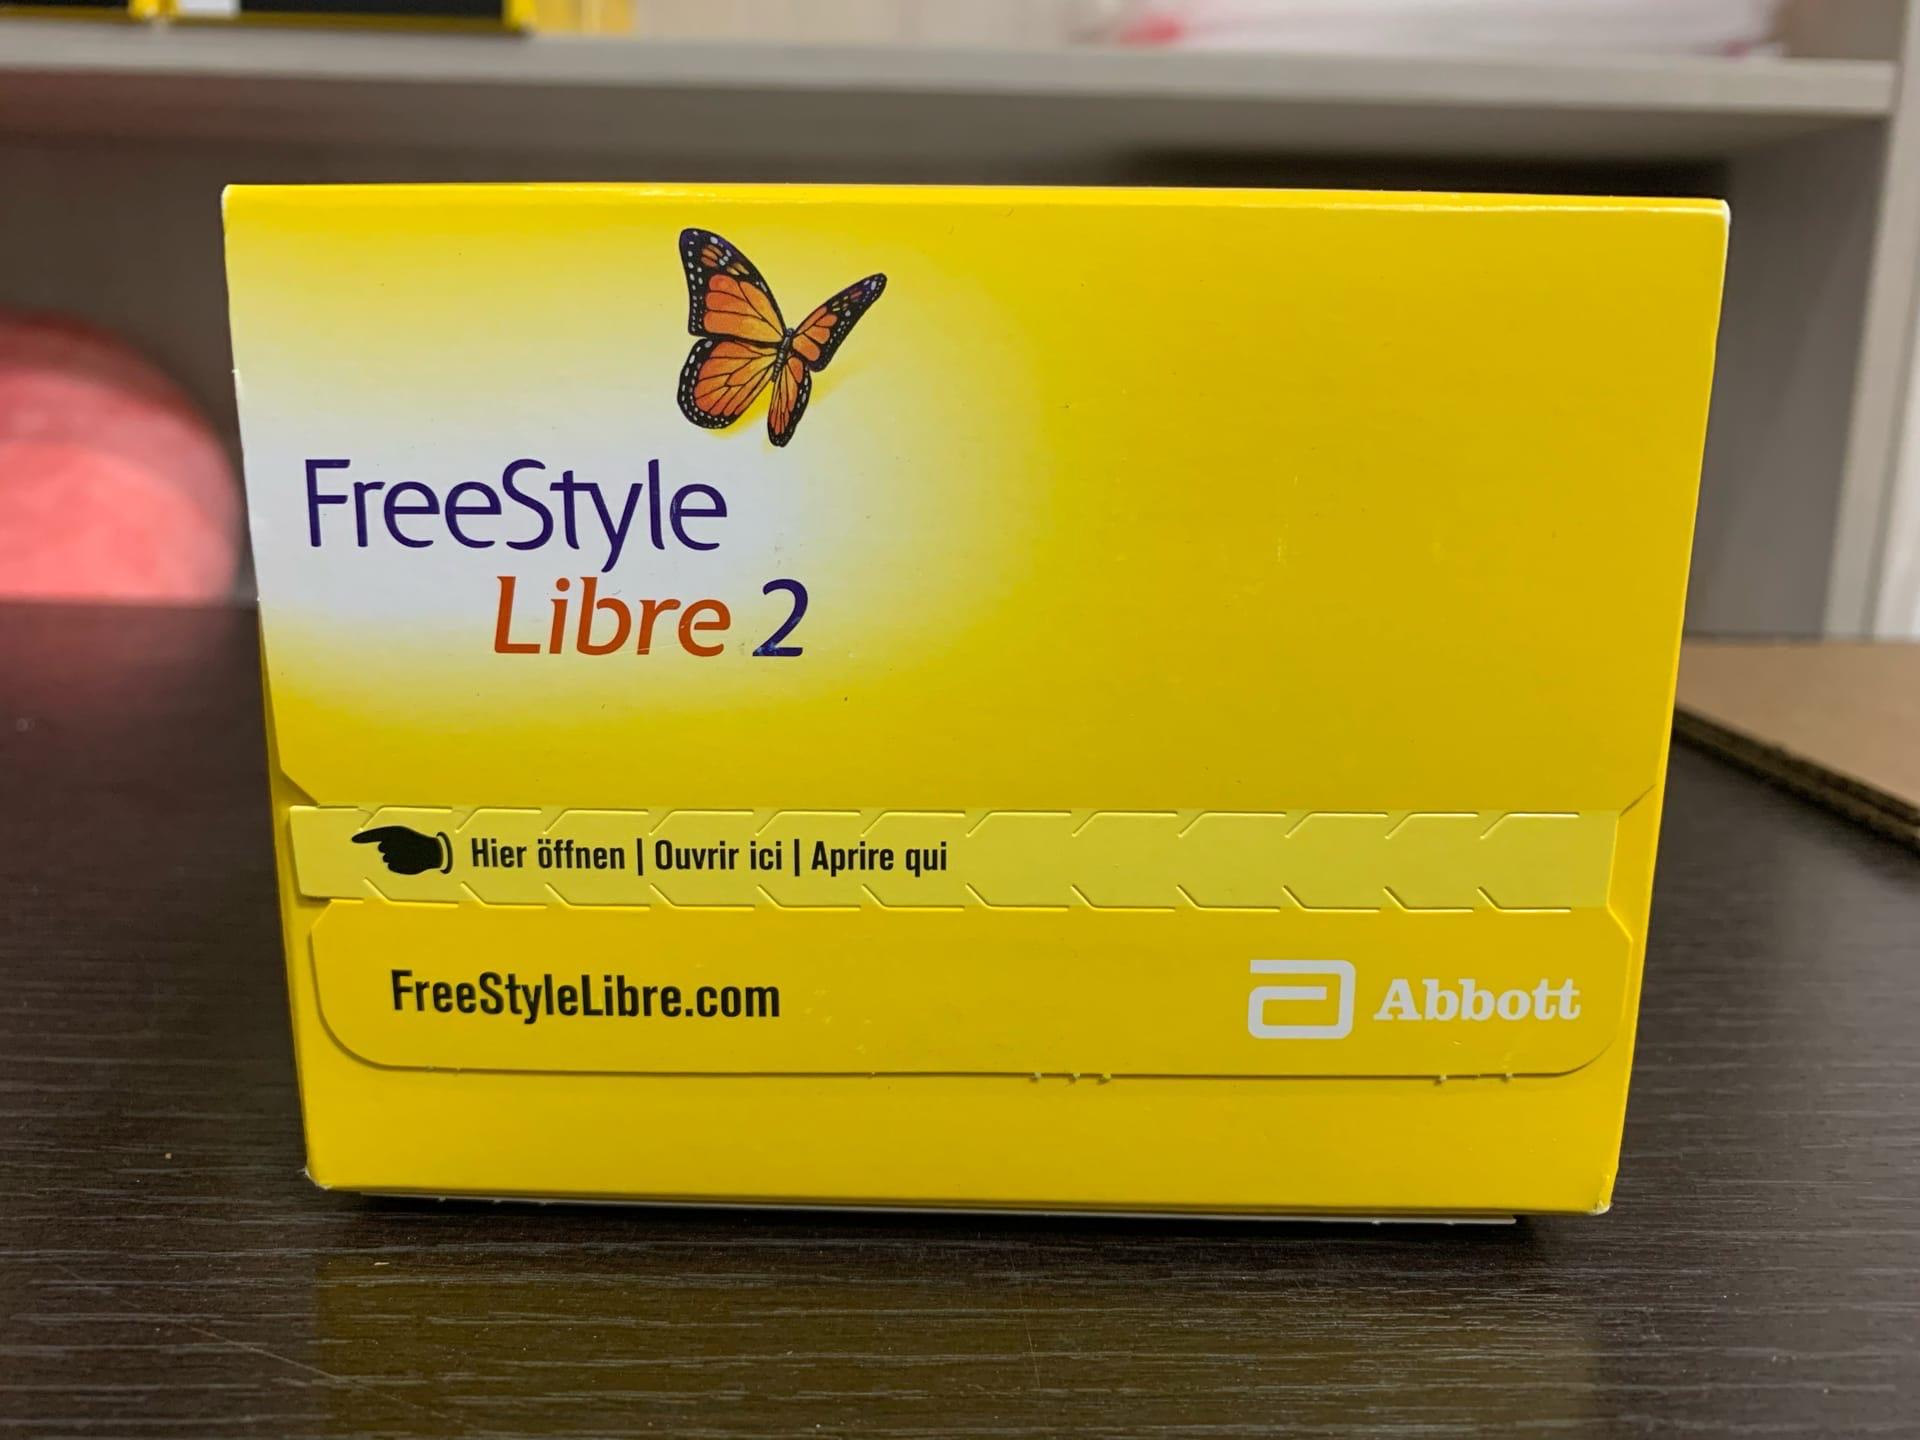
Как правило, при обнаружении каких либо проблем в работе и эксплуатации сенсоров ФриСтайл Либре — первое на что «грешат» пользователи, это человеку попалась «бракованная партия»! Это самая распространённая фраза, которую покупатели сенсоров пишут продавцам. Всегда одно и тоже: «Мне попалась бракованная партия! Скорее всего и у других такая проблема, да?» Как показывает практика и мой личный опыт — проблема с работой датчика не является такая причина как «бракованная партия». Не ожиданно? Но это факт, и в данной статье я расскажу Вам о самых популярных и самых не популярных проблемах связанных с работой сенсора FreeStyle Libre.
И самое важное, расскажу как исправить проблемы и наладить качественную работу датчика.
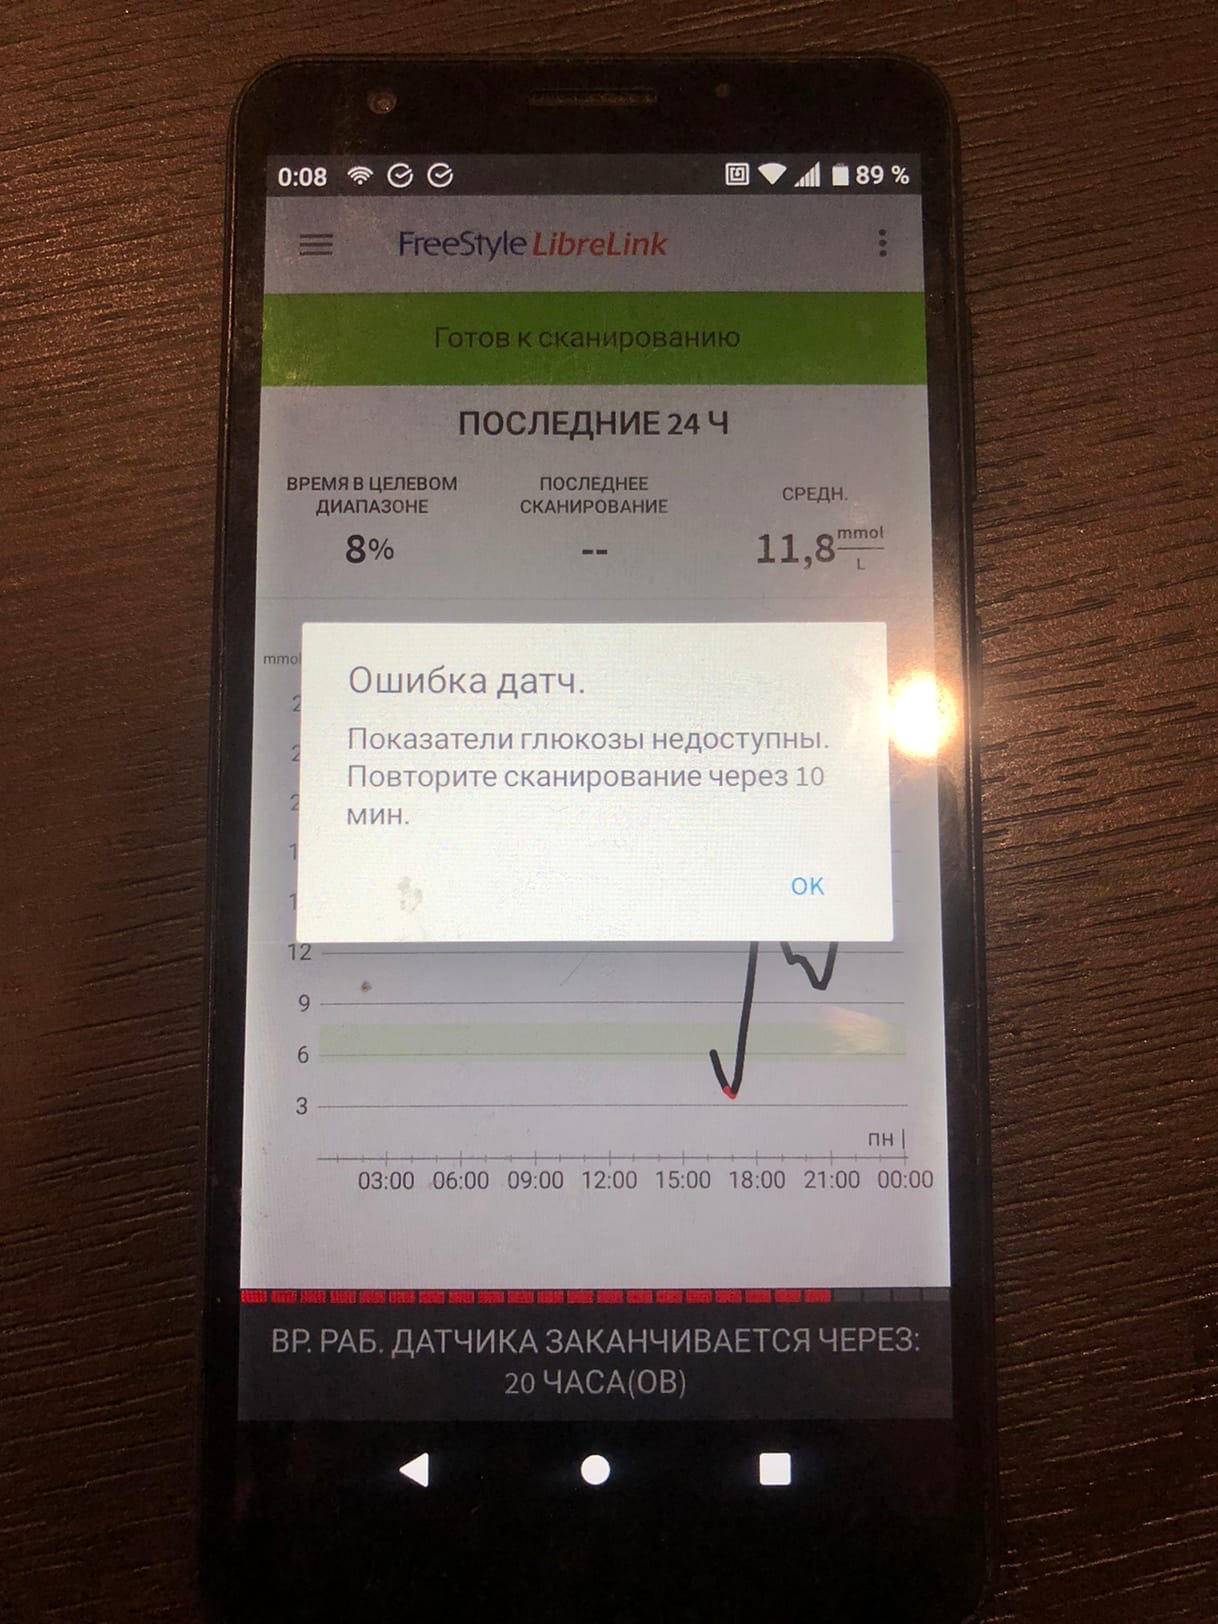
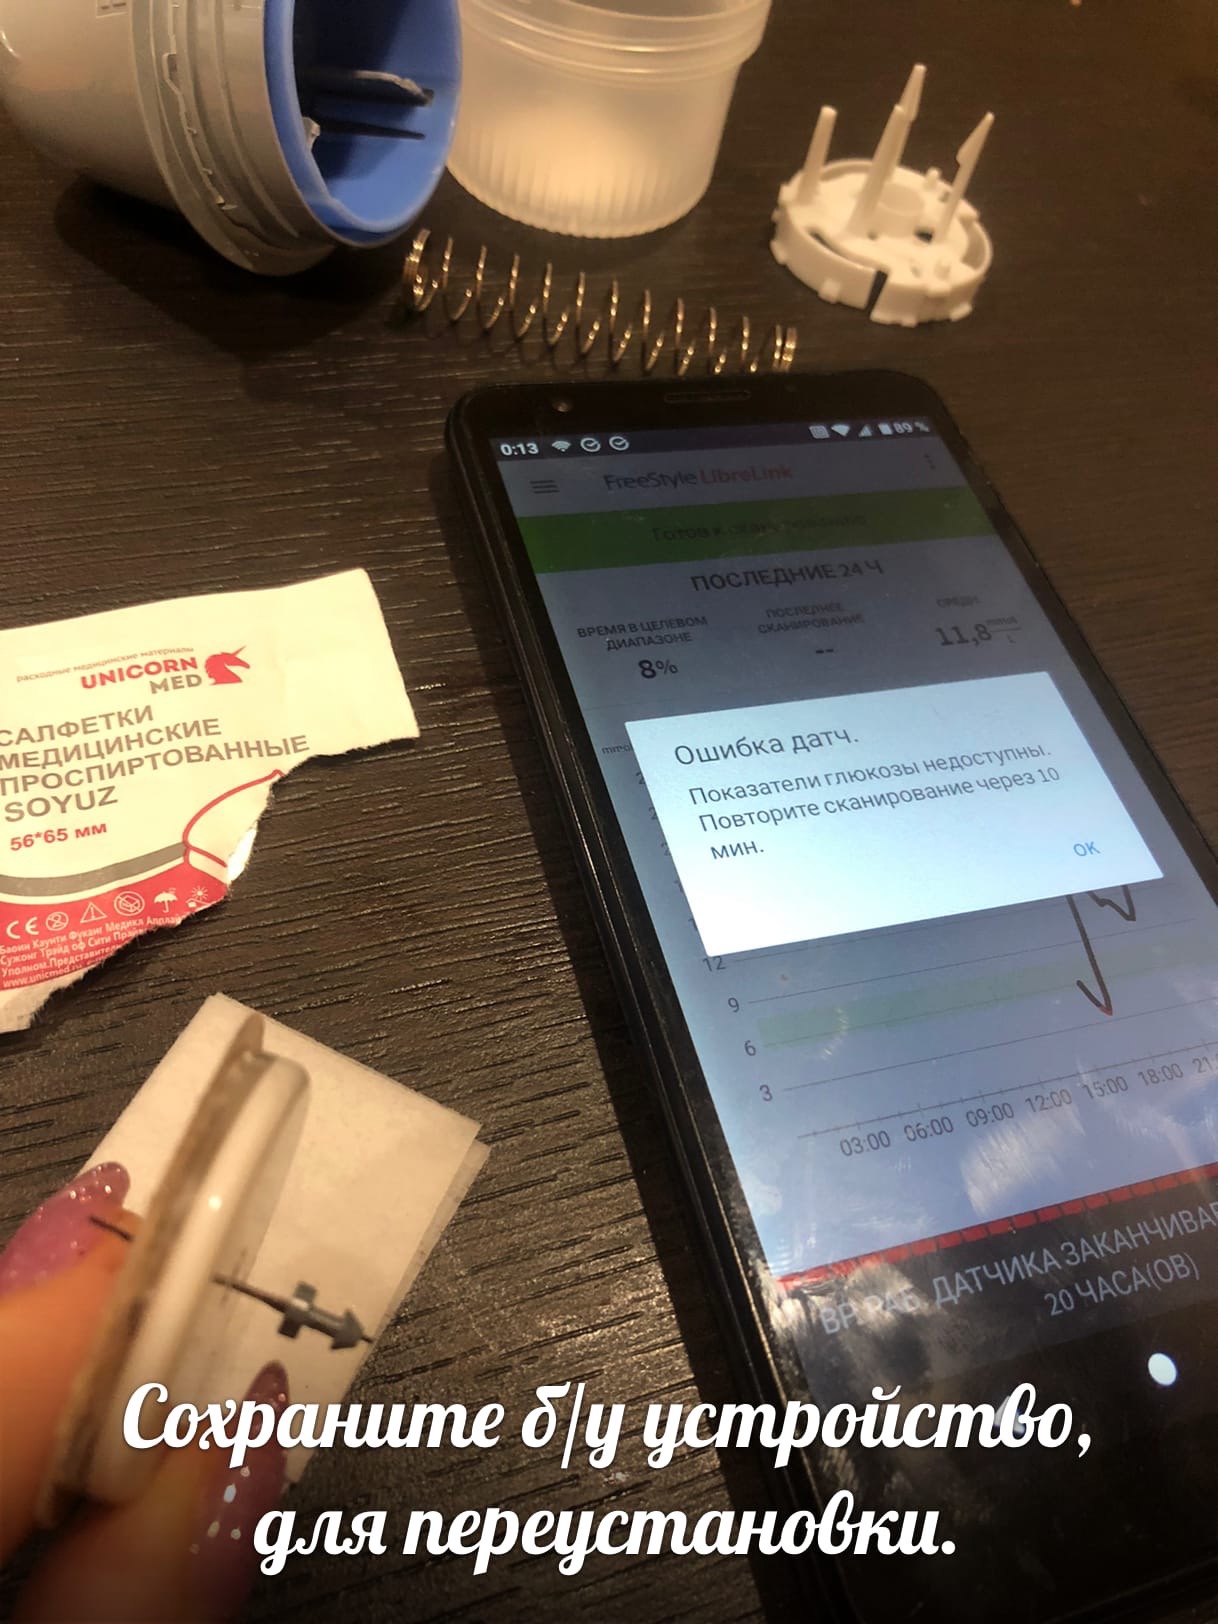
 Плохо встал в тело — идёт на второй круг 60 минут. Решение: Переустановить сенсор в то же или новое место.Вышел из тела в процессе эксплуатации — ошибка «Подождите 10 минут». Решение: Переустановить сенсор в то же или новое место. Но есть нюанс, такое же уведомление появляется когда сахар крови резко идёт вверх или резко «падает». Как правило, реально через 5-10-15 минут сахара снова отображаются. А вот если уведомление «Подождите 10 минут» слишком долго высвечивается на экране ридера либо приложения. Значит только переустановка сенсора.Аллергия — может резко перестать работать. Можно переустановить в новое место. Но, поможет или нет, в каждом индивидуальном случае по разному. Не сошлись 2 части датчика. Ридер или приложение не может запустить сенсор на 60 минут «прогрева». Можно поправить.Гормональный сбой. Беременность. Начало менструального цикла, итд. Раз был выявлен сбой у девочки в период первых трёх месяцев менструального цикла, гормоны. Видимо по этому производитель не рекомендует ее беременным. У одной беременной правда сенсор сходил с ума — гормоны.Высокие лейкоциты. Был и такой случай в моей практике. 3 сенсора сразу уходили в «LO», что само по себе нонсенс. В итоге ребенок попал в больницу, где был выявлен воспалительный процесс в организме, не из за сенсора, не из за аллергии и не из за гипо или гиппер.Загиб датчика, попали в мышцу (смотрите при снятии). Решение: Устанавливать в другое место, рука опущена вниз, небольшая складка.Попали в сосуд-кровь (промыть физ раствором)Прием парацетамола может влиять на показания (возможно и других лекарств).Был случай. сенсор престал работать совсем после процедуры физиотерапии дарсанваль.
Сенсор не запустится. Не сошлись до конца две части датчика при сборке.
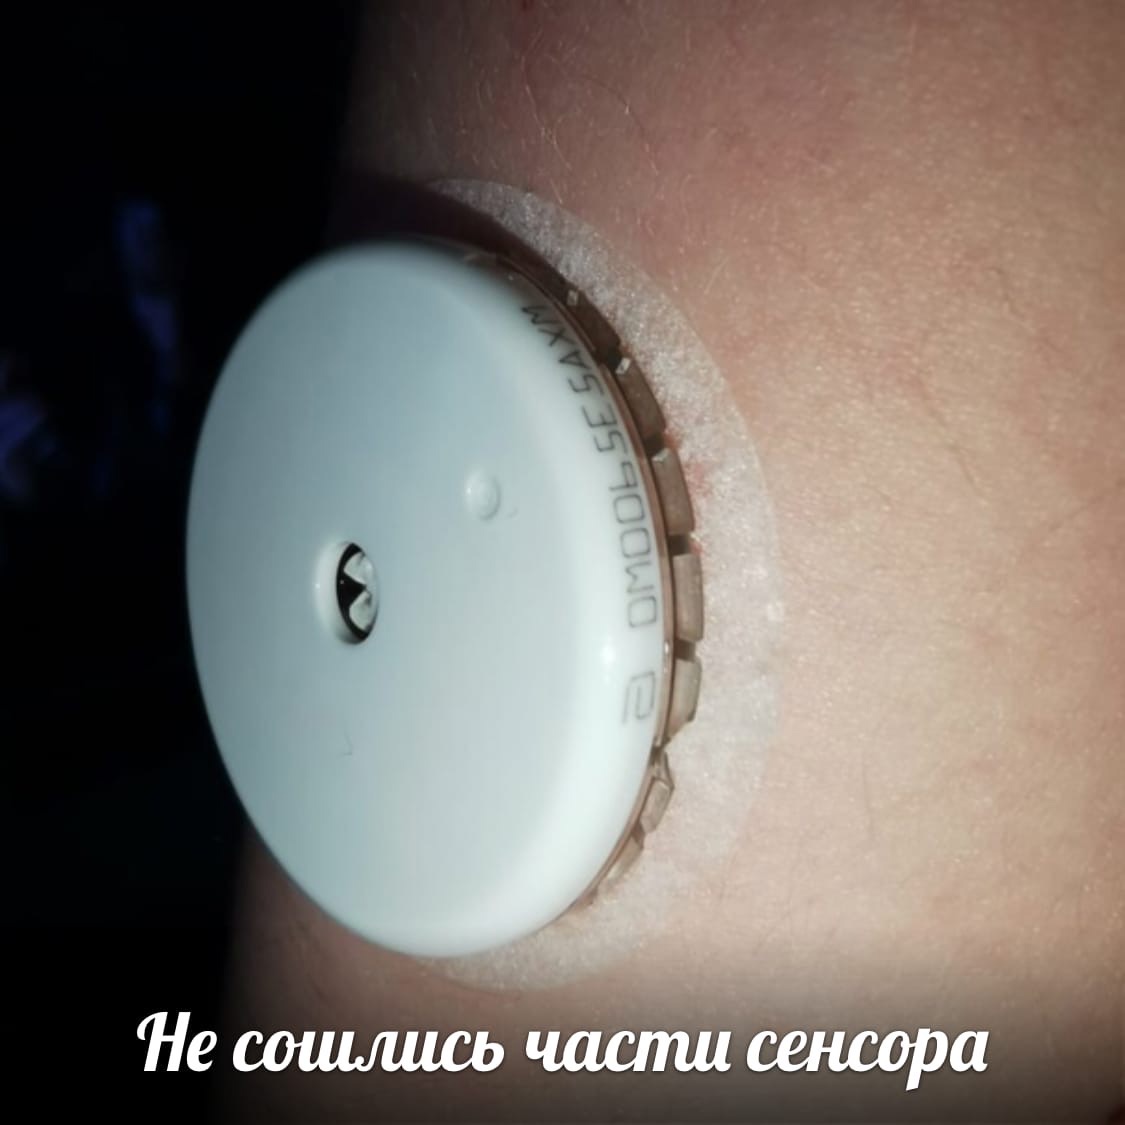
Ошибка которую выдает считывающее устройство при проблеме на фото 1
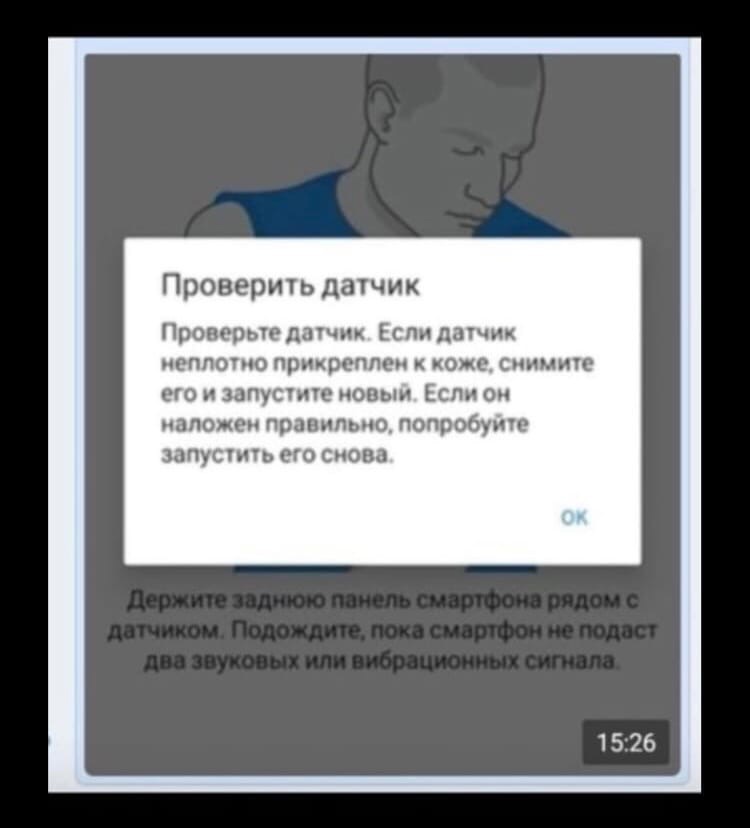
Если речь о сенсоре который отработал 14 дней, все понятно. Если же раньше срока, пытаемся возродить как птицу феникс, данное развитие событий может быть актуальным , как для либра 1 так и для либра 2.
Причины могут быть разными, в одних случаях просто подождать указанное время, лучше сверить глюкометром. В других нужна переустановка.
Как правило, при переустановке используется б/у пристреливатель датчика.
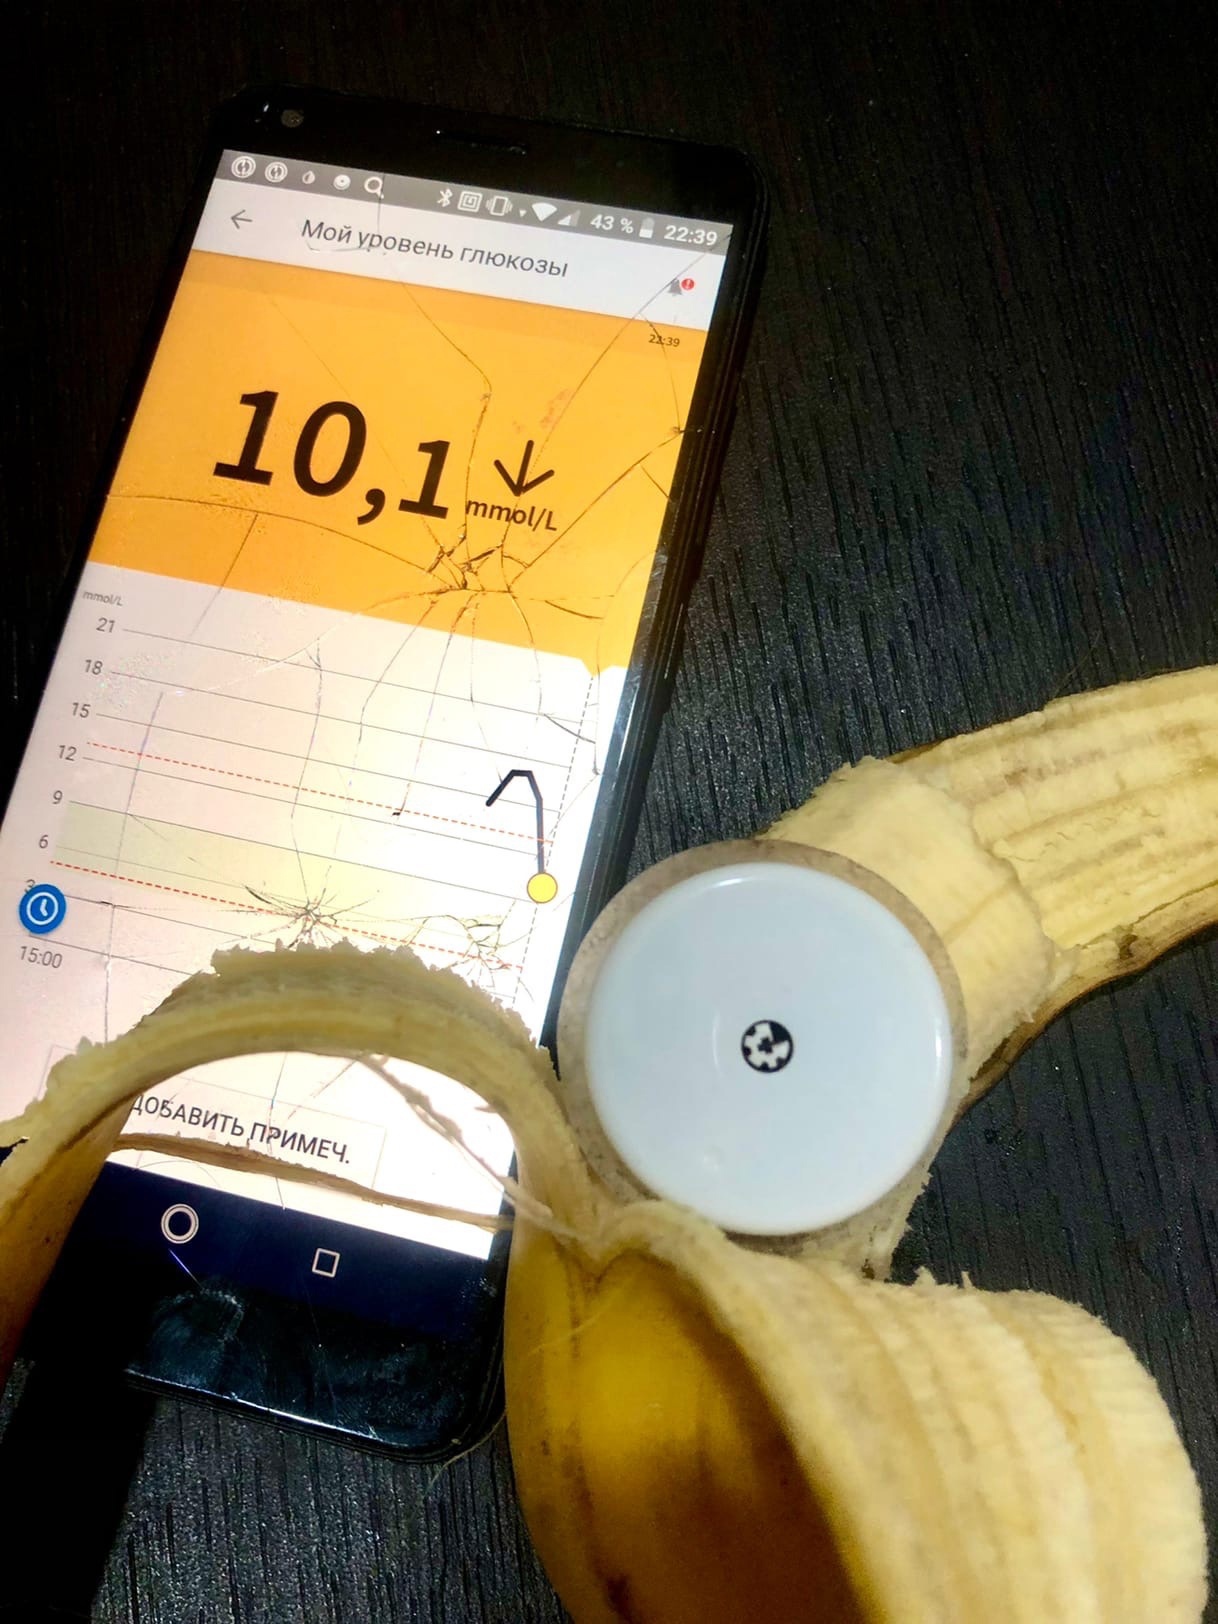
Сделана переустановка на банан. И спустя минут 10 сахара пошли.
Честно, редкое явление, как понимаю в сенсоре есть датчик температуры, который блокирует его как в очень холодной атмосфере, так и в горячей, скажем в бане. В холоде и ридер может выдать ошибку, ридер сам по себе себе даже не включится. Выход согреть то или другое устройство. У меня данная ошибка появилась в теплом помещении, видимо сам банан так охладил сенсор. Однако я на этом не остановилась 
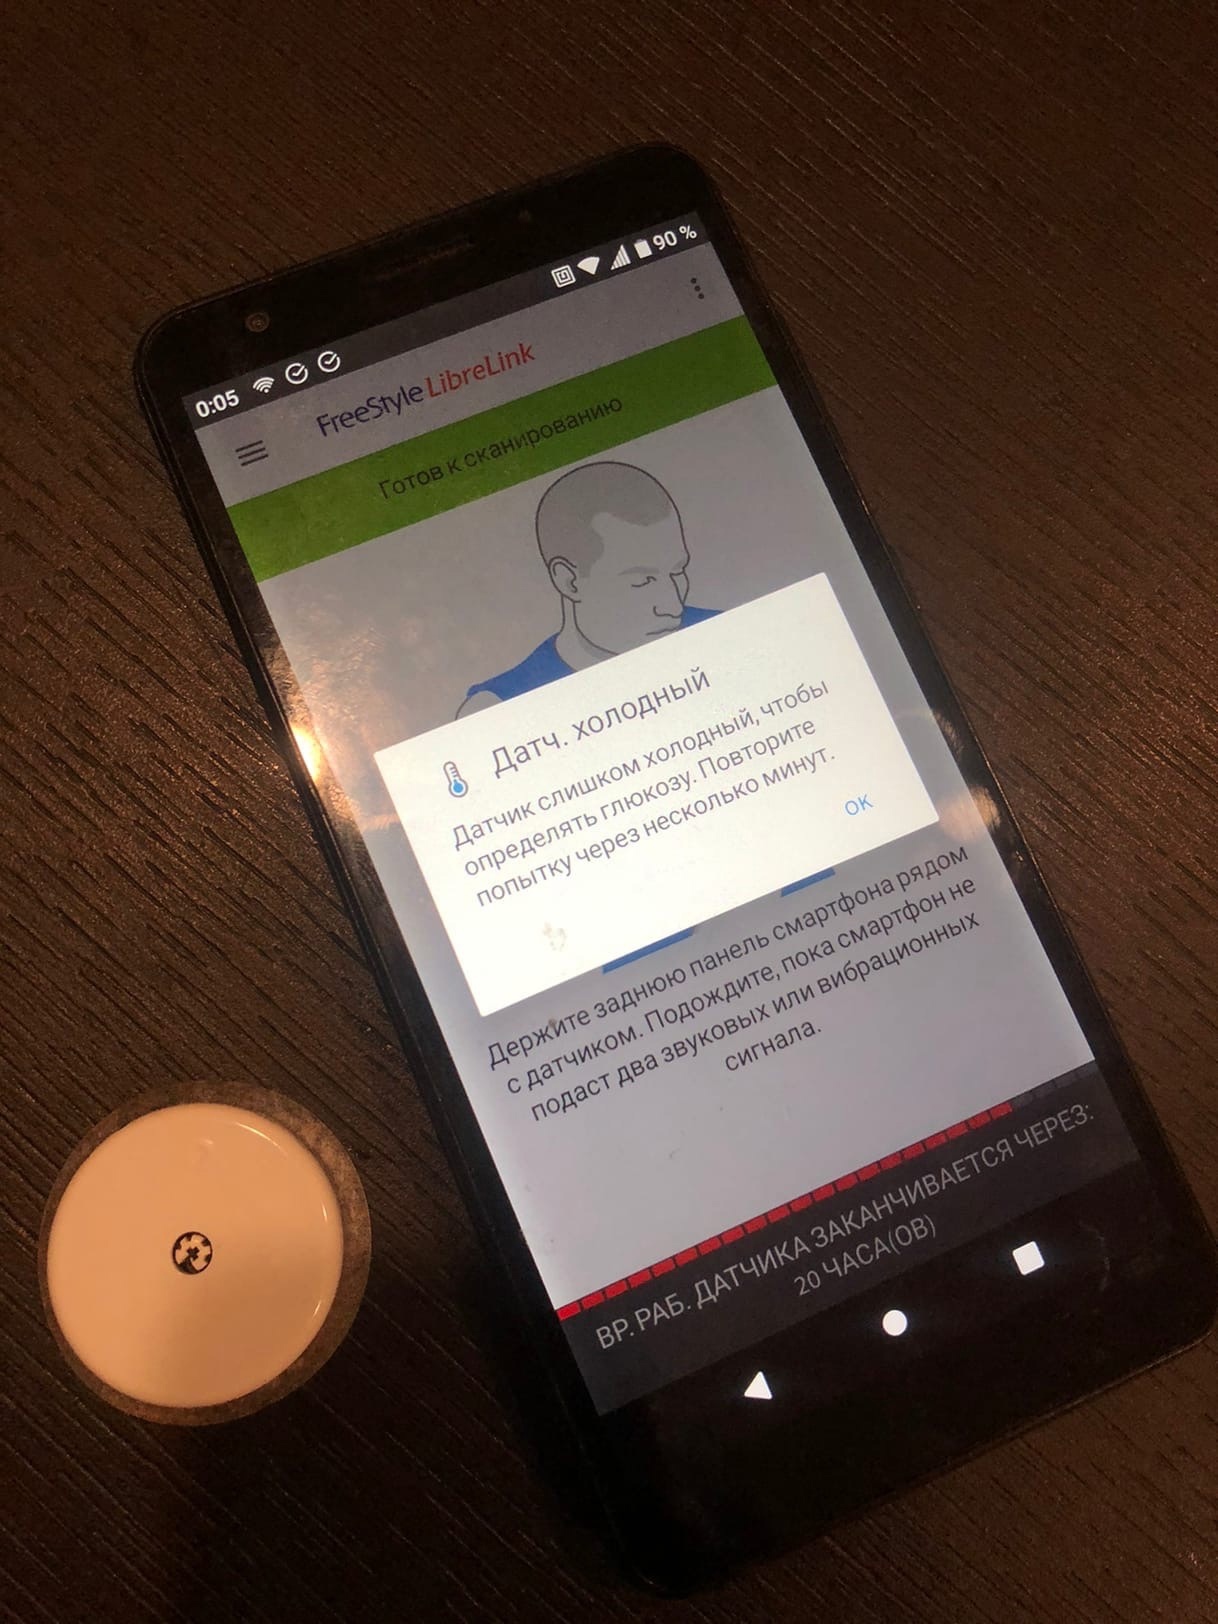
Хорошенько обработав датчик после дочки и банана. Я поставила сенсор на себя. Сначала был небольшой загиб, но и с этим справилась. Пришлось хорошо его потереть что б согреть, данные пошли сначала разнились показания в 1 ммоль, потом хорошо пошли.
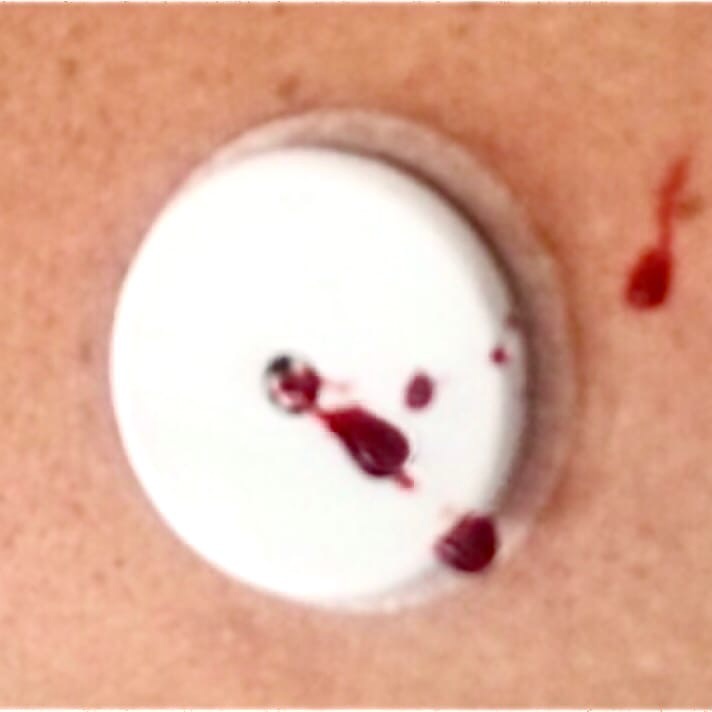
Кровь при установке попали в сосуд, промыть физ раствором или тёплой водой.
И так подведем итог. Даже если у вас огромный опыт с либра. Любая из причин возможна. Если у вас не один сенсор, а несколько подряд дают сбой ищите причину у себя, телефон, программы, настройки, антивирусы, игры и тд.
Возможны е проблемы работы сенсора:
В бане может перегреться
В бассейне переохладиться
Задержка на скачках сахара
Пережали пластырем/тейпом/повязкой
Спали на сенсоре, нарушилось кровообращение
Спали на сенсоре и не шёл блютус. Особенно в первые сутки у Либра 2, разрывы связи лучше минимизировать, а ночью это не так то просто.
Старый телефон
Новый телефон
Не совместное приложение с сенсором
Маленький заряд. Телефон будет экономить на датчике NFC
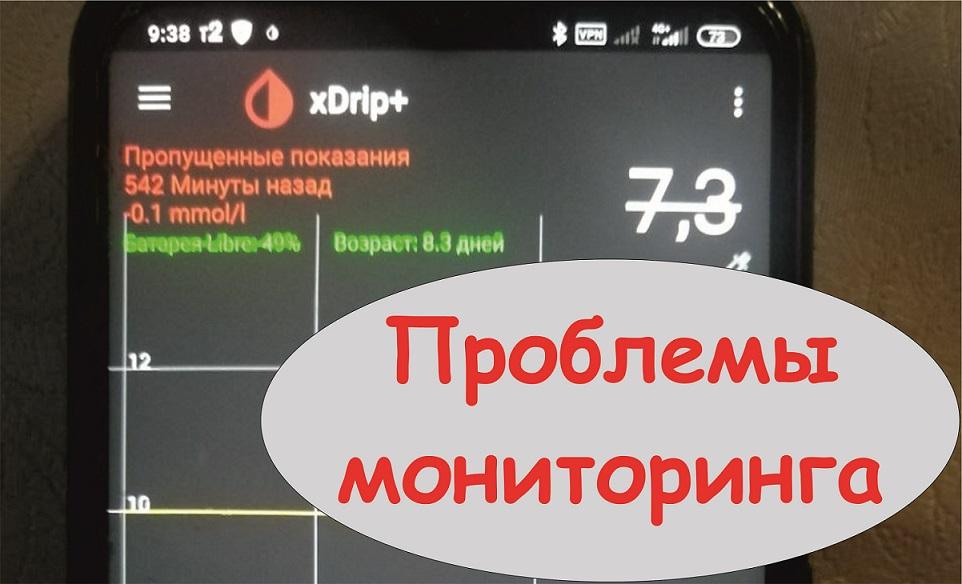
Не идут данные в хдрип из Либра Линк? Скачайте другую версию хдрип более раннюю ССЫЛКА. Более стабильную и поставьте запрет на обновления. Новый телефон, удалите антивирус!
 Не обновляйте телефон до последнего андроида, программы как привило написаны под тот который уже есть, лучше переждать. Иначе могут быть сбои.
 Передайте автоматически настройки на телефоны фолловеры.
 Время у всех телефонов должно быть одно.
 Энергосбережение выберете в настройке телефона приложения по сахарам в приоритете.
У меня дочка когда гостит у бабушки, так там видимо диван мягче и ночью идут разрывы связи, хотя телефон в 2х метрах. Приехала домой и о чудо проблемы нет. А сенсор тот же.
Могут быть толстые стены в квартире.
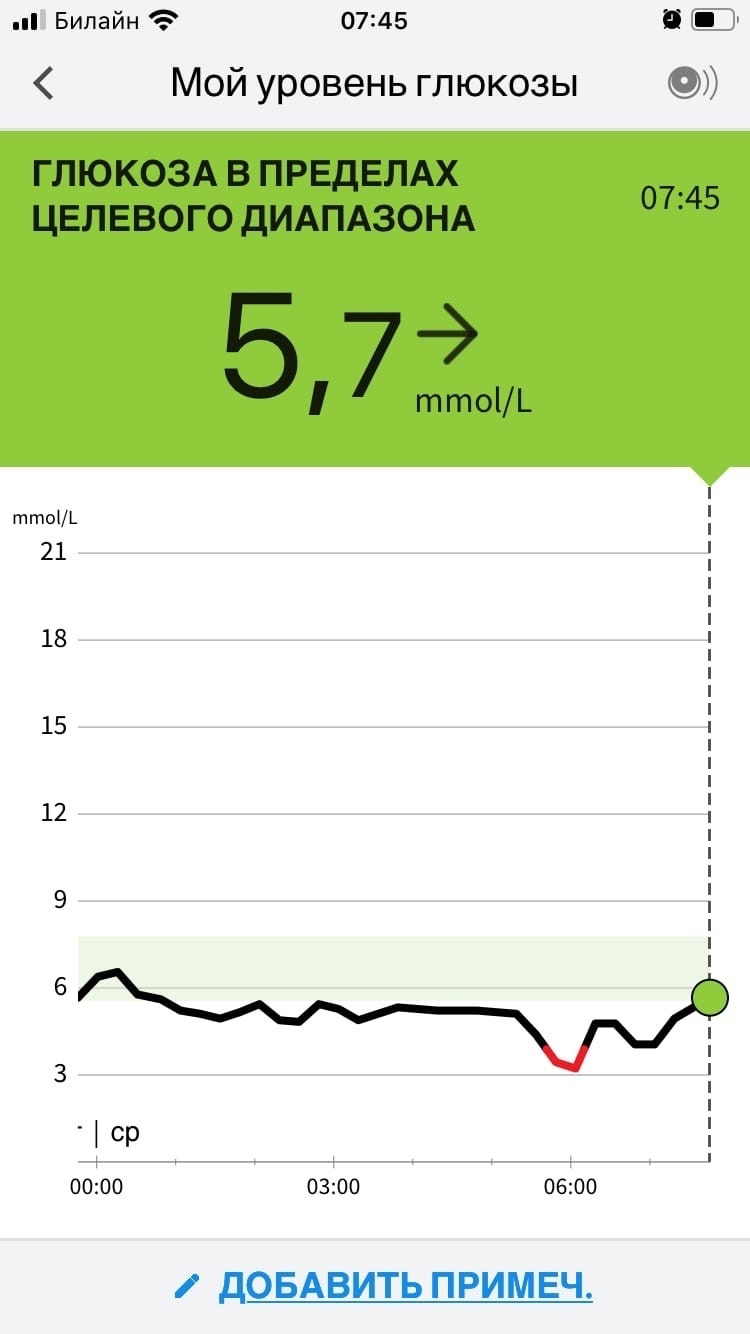
Прямая линия, как правило говорит, что датчику не от куда взять информацию.
Калибровки: я не делаю ими можно навредить.
Ранее с Либра 1 были телефоны, которые портили сенсоры, возможно и со второй либра такое.
Про партию Россия я не пишу, нет опыта личного, а сплетни и домыслы писать не стану.
Попробуйте сами и сделайте выводы.
Я говорю о Либра 2 и Либра 1 Европа
Личный опыт 6 лет и обратная связь от продаж.
Здесь представлена информация общая для всех поколений Либра.
Либра 1 Европа есть возможность перезапуска. Скоро планирую выпустить статью в журнале о новых возможностях и сбоях в работе поколение Либра два, следите за лентой новостей.
С уважением, Никонорова Екатерина.
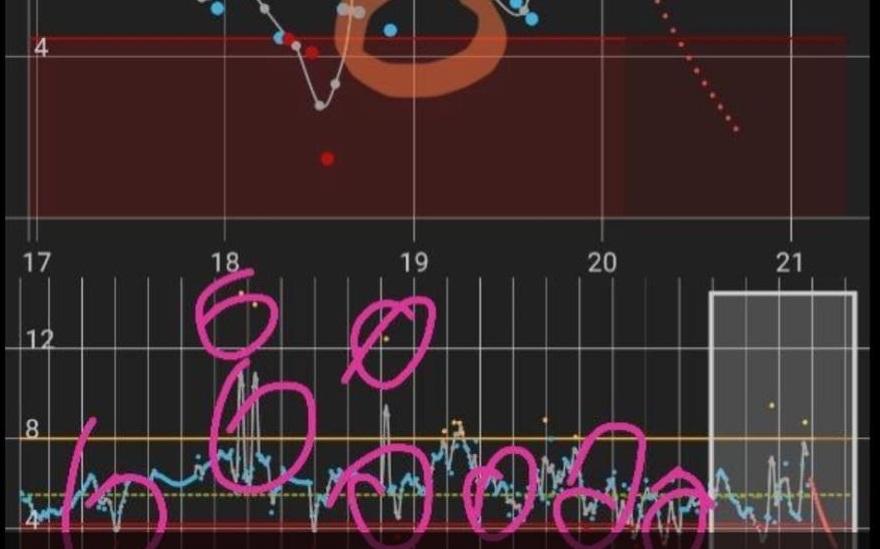
Если сенсор показывает сильно не точно показания сахара крови:
Резко вверх потом вниз.
Это явление называют шумом.
Так скажем не звуковой шум, который мы приняли понимать это слово до встречи с диабетом и мониторингом сахара крови.
А визуальную

Мы новички, и понятия не имеем с чего начать нам мониторить сахара нашего ребёнка…
Самый частый вопрос и самая главная делема. Кто то, что то рассказал в больнице, о мониторинге сахара крови, но врачи о мониторинге или не слышали, или же ни чего
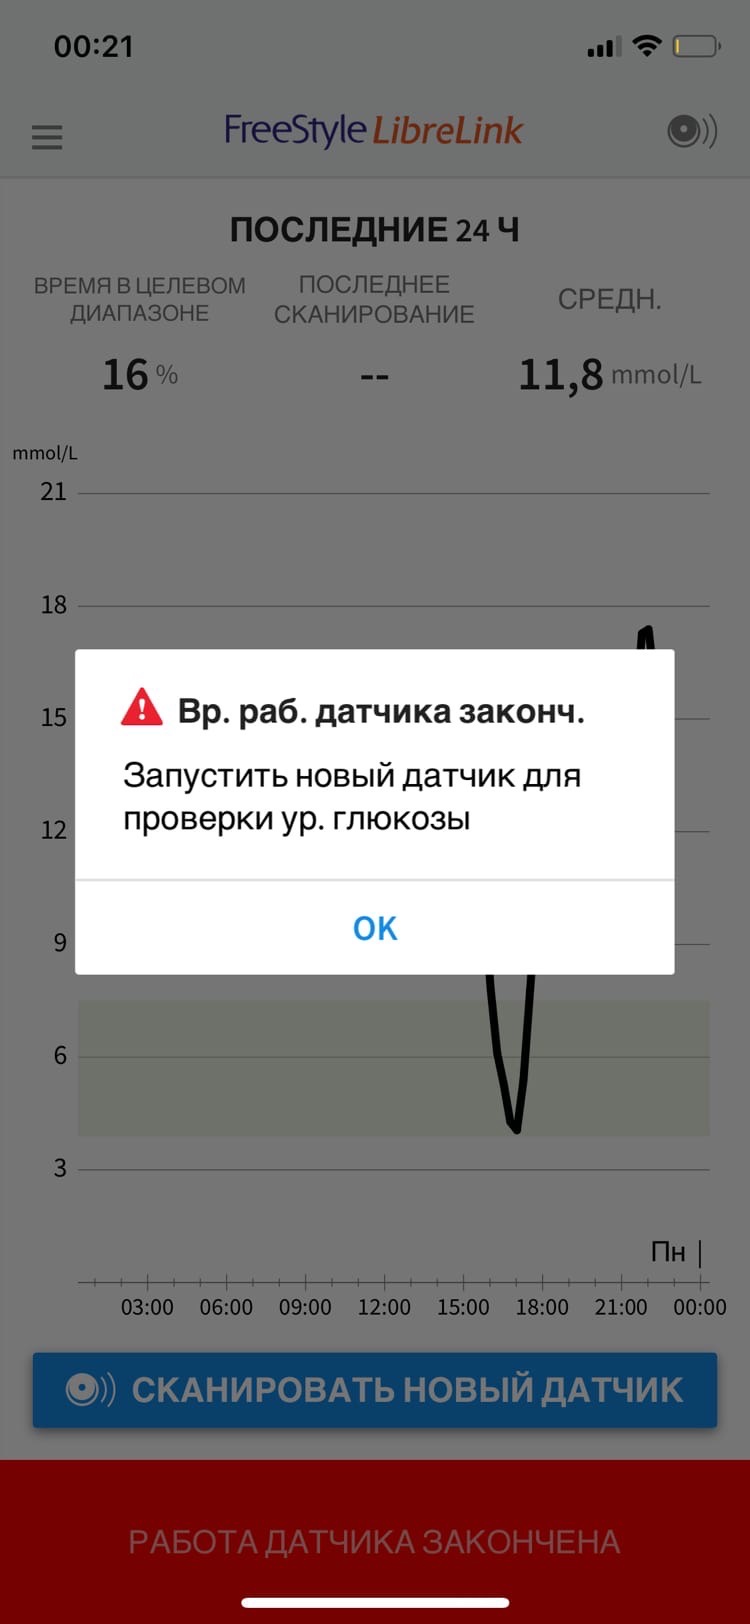
Суть этой статьи — показать пользователям сенсоров FreeStyle Libre 2, что если даже сенсор закончил свою работу, не важно, произошло это через 7 дней или через 14, то есть возможность продлить работу сенсора минимум на 8-12 часов и максимум

Сейчас в связи дефицитом на сенсоры и с ростом цен на Либра 1 думаю данная тема очень актуальна.
Плюсом партии Европа является перезапуск как правило в дополнительные 2 недели работы. А так же более надежный пластырь на сенсоре.
И так перезапуск на
Данная статья будет расширяться и публиковаться снова — как только будет пополняться новым контентом
Либра врет!!! Я никогда не буду ей пользоваться! Такое часто можно услышать от пользователей фристайл либре. Я тоже так иногда думаю, особенно тогда, когда показания расходятся больше одного ммоль, но несмотря ни на что мы все равно еще продолжаем пользоваться фристайл либре. Эту тема так же поднималась в комментариях на сайте, посмотреть можно здесь. Мысль о том, что стоит ли вообще доверять либре или остаться с глюкометром иногда приходила и уходила, но сравнивать показаний либры и глюкометра я все равно продолжал.

Если Вы так же как и мы используете либру, то наверное часто видели, что показания глюкометра отличаются от показаний либре. Не то чтобы отличаются, а практически не совпадают никогда. Ответ достаточно прост: когда мы измеряем сахар глюкометром, мы измеряем сахар в крови, а сенсор измеряет сахар в экзистенциальной жидкости. Именно поэтому отставания сенсора от глюкометра составляют около 10-15 минут, хотя все индивидуально. Мы измеряем показания глюкометром в крови, а либра в экзистенциальной жидкости 10-15 минут. Для лучшего понимания почему показания либры отличаются от значений сенсора посмотрите это видео. Видео взято из группы Семена Кейзера (vk.com/saharmonitor).
Хотя этим трудно успокоить себя когда на экране ридера LO, а ты думаешь что это 2+2, и на самом деле у ребенка 4 ммоль, а не два.
Не стоит так же забывать о том, что при установке Вы можете попасть в сосуд, или в уплотнение, которое появилось от уколов.
Если попали в сосуд, то вполне возможно пойдет кровь, смойте ее в душе под теплой струей воды. У нас однажды так было, правда кровь то мы смыли, а вот сенсор пришлось переустанавливать заново.
И при измерениях сенсором всегда учитывайте, что цифры на экране — это цифры из прошлого, то есть он показывает наш сахар, который был 10-15 минут назад. Чем хороша либра, так это тем, что она показывает, тренд изменения глюкозы. Поэтому, если у Вас показания сенсора 16,2 и стрелка вниз, то вполне возможно либра «догонит» глюкометр, поскольку значения, которые дает сенсор всегда завышены на высокий сахарах и занижены на низких.
Так почему же я продолжаю пользоваться либрой? Во-первых, это дает возможность делать многократные замеры в любое время суток, что очень удобно, быстро и безболезненно. Самое главное: стрелка показывает движение уровня глюкозы вверх или вниз, что лично мне сильно бережет нервы. Во-вторых, тот факт, что значения, которые дает сенсор всегда завышены на высокий сахарах и занижены на низких, дает возможность “испугаться” и принять своевременные меры. Ну и в-третьих, прибор можно везде брать с собой (на прогулку, в гости) и не привлекая особого внимания снимать показания.
- Manuals
- Brands
- Abbott Manuals
- Blood Glucose Meter
- FreeStyle Libre
- User manual
-
Contents
-
Table of Contents
-
Troubleshooting
-
Bookmarks
Quick Links
User’s Manual
FLASH GLUCOSE MONITORING SYSTEM
Related Manuals for Abbott FreeStyle Libre
Summary of Contents for Abbott FreeStyle Libre
-
Page 1
User’s Manual FLASH GLUCOSE MONITORING SYSTEM… -
Page 2: Table Of Contents
FreeStyle Libre Software . . . . . . . . . . . . . . . . . . .
-
Page 3
Changing the Reader Settings . . . . . . . . . . . . . . . . . . . . . . . . . 64 Living With Your FreeStyle Libre System . . . . . . . . . . . . . . . 67… -
Page 4
Troubleshooting . . . . . . . . . . . . . . . . . . . . . . . . . . . . . . . . . . . . . . . 70 Reader Does Not Power On . -
Page 5: Reader Symbols
Reader Symbols Symbol What It Means Active sensor Direction your glucose is going . See Checking Your Glucose section for more information Caution View previous/next screen Notes Add more information to notes Food note Rapid-acting insulin note Time changed on Reader Reminders…
-
Page 6
Symbol What It Means Blood glucose or ketone test Settings Control solution test result Rapid-acting insulin calculator Details of your suggested insulin dose Estimated rapid-acting insulin remaining in body Low battery Battery charging Sensor too cold Sensor too hot… -
Page 7: Important Safety Information
. It is designed to replace blood glucose testing in the self-management of diabetes with the exceptions listed below . Under the following circumstances, use a blood glucose meter to check the current glucose readings from the FreeStyle Libre Flash Glucose Monitoring System Sensor: •…
-
Page 8: Contraindications
Contraindications The FreeStyle Libre Flash Glucose Monitoring System must be removed prior to Magnetic Resonance Imaging (MRI) . WARNING: • The FreeStyle Libre Flash Glucose Monitoring System contains small parts that may be dangerous if swallowed . • During times of rapidly changing glucose (more than 0 .1 mmol/L…
-
Page 9
CAUTION: • On rare occasions, you may get inaccurate Sensor glucose readings . If you believe your glucose readings are not correct or are inconsistent with how you feel, perform a blood glucose test on your finger to confirm your glucose . If the problem continues, remove the current Sensor and apply a new one . -
Page 10
System-Related Information • The FreeStyle Libre Flash Glucose Monitoring System is designed to be used only with FreeStyle Optium blood glucose and blood ketone test strips and MediSense control solution . • Avoid getting dust, dirt, blood, control solution, water or other substances in the Reader’s USB and test strip ports . -
Page 11
The effect of these types of procedures on the performance of the system has not been evaluated . • The FreeStyle Libre Flash Glucose Monitoring System has not been evaluated for use in pregnant women, persons on dialysis, or people less than 18 years of age . -
Page 12: Getting To Know Your System
Getting to Know Your System The FreeStyle Libre Flash Glucose Monitoring System has two main parts: a handheld Reader and a disposable Sensor, which you wear on your body . You use the Reader to wirelessly scan the Sensor and get your glucose readings .
-
Page 13: Reader Kit
Reader Kit The Reader Kit includes: • • • 1 FreeStyle Libre Reader 1 Power Adapter Quick Start Guide • • 1 USB Cable User’s Manual Touchscreen USB Port Used to charge the Reader and connect it to a computer.
-
Page 14: Sensor Kit
Sensor Kit The Sensor Kit includes: • • 1 Sensor Pack 1 Alcohol wipe • • 1 Sensor Applicator Product insert Sensor Pack Sensor Applicator Used with the Sensor Applicator to Applies the Sensor to your body . prepare the Sensor for use . The Sensor measures and stores glucose readings when worn on your body .
-
Page 15: Home Screen
The Reader Home Screen provides access to information about your glucose and the System . You can press the Home Button to get to the Home Screen . Home Screen Time Battery Level Current time set on Battery charge remaining. the Reader.
-
Page 16: Sensor Glucose Readings
The Sensor Glucose Readings screen appears after you use the Reader to scan your Sensor . Your Reading includes your Current Glucose, a Glucose Trend Arrow indicating which way your glucose is going, and a graph of your current and stored glucose readings . Sensor Glucose Readings Message Add Notes…
-
Page 17: Freestyle Libre Software
FreeStyle Libre Software FreeStyle Libre software can be used to view reports and change Reader settings . The software is compatible with most Windows and Mac operating systems . Go to www .FreeStyleLibre .com and follow onscreen instructions to download and install the software .
-
Page 18: Setting Up Your Reader For The First Time
Setting up Your Reader for the First Time Before using the System for the first time, the Reader must be set up . Step Action Press the Home Button to turn on the Reader . If prompted, use the touchscreen to select your preferred language for the Reader .
-
Page 19
Step Action Set the Current Time . Touch next to continue . Current Time CAUTION: It is very important to set the time and date correctly . These values affect the Reader data and settings . back next Set your Target Glucose Range . Work with your Target Glucose Range health care professional to determine your Target… -
Page 20
Step Action The Reader now displays important information about two key topics to help you use the system: • How to understand the Glucose Trend Arrow included on the Glucose Reading screen . • How to return to the Home Screen from any other screen . When you scan your Sensor an arrow will indicate your recent glucose trend:… -
Page 21: Using Your Sensor
The Sensor Pack and Sensor Applicator are packaged as a set (separately from the Reader) and have the same Sensor code . Check that the Sensor codes match FreeStyle Libre before using your Sensor Pack and Sensor Sensor Pack Applicator . Sensor Packs and Sensor…
-
Page 22: Applying Your Sensor
Applying Your Sensor Action Step Apply Sensors only on the back of your upper arm . Avoid areas with scars, moles, stretch marks or lumps . Select an area of skin that generally stays flat during your normal daily activities (no bending or folding) .
-
Page 23
Action Step Open the Sensor Pack by peeling the lid off completely . Unscrew the cap from the Sensor Applicator and set the cap aside . CAUTION: Do NOT use if the Sensor Pack or the Sensor Applicator seem to be damaged or already opened . -
Page 24
Action Step The Sensor Applicator is prepared and ready to apply the Sensor . CAUTION: The Sensor Applicator now contains a needle . Do NOT touch inside the Sensor Applicator or put it back into the Sensor Pack . Place the Sensor Applicator over the prepared site and push down firmly to apply the Sensor to your body . -
Page 25
Action Step Gently pull the Sensor Applicator away from your body . The Sensor should now be attached to your skin . Sensor Note: Applying the Sensor may cause bruising or bleeding . If there is bleeding that does not stop, remove the Sensor, and apply a new one at a different site . -
Page 26: Starting Your Sensor
Starting Your Sensor Action Step Press the Home Button to turn on the Reader . Touch Start New Sensor . 22:23 No Active Sensor Start New Review Sensor History Hold the Reader within 4 cm (1 .5 inches) of the Sensor to scan it .
-
Page 27: Checking Your Glucose
Checking Your Glucose Step Action Turn the Reader on by pressing 22:23 the Home Button or touch Ends in 14 days Check Glucose from the Home Check Review Screen . Glucose History Hold the Reader within 4 cm (1 .5 inches) of your Sensor to scan it .
-
Page 28
Step Action The Reader displays your current glucose reading along with your glucose graph and an arrow Glucose Going indicating the direction your glucose is going . mmol 14:00 18:00 22:00… -
Page 29: Sensor Glucose Readings
Sensor Glucose Readings Glucose Going Glucose Trend Arrow mmol Current Glucose Target Glucose Range 14:00 18:00 22:00 Notes: • The graph displays glucose readings up to 21 mmol/L . Glucose readings above 21 mmol/L are displayed at 21 mmol/L . •…
-
Page 30
The Glucose Trend Arrow gives you an indication of the direction your glucose is going . Glucose is rising quickly (more than 0 . 1 mmol/L per minute) Glucose is rising (between 0 .06 and 0 . 1 mmol/L per minute) Glucose is changing slowly (less than 0 .06 mmol/L per minute) Glucose is falling… -
Page 31
The following table shows messages you may see with your glucose readings . Display What To Do If LO appears on the Reader, your reading is lower Low Glucose than 2 .2 mmol/L . If HI appears on the Reader, your reading is higher than 27 .8 mmol/L . -
Page 32
Display What To Do If your glucose is projected to be higher than Glucose Going 13 .3 mmol/L or lower than 3 .9 mmol/L within 15 minutes, you will see a message on the screen . mmol You can touch the message button for more Glucose Going information and set a reminder to check your High… -
Page 33: Adding Notes
Adding Notes Notes can be saved with your glucose readings . You can add a note at the time of your glucose reading or within 15 minutes after your reading was obtained . You can track food, insulin, exercise and any medication you take .
-
Page 34
Step Action After you tick the box for food and Add Notes insulin notes, the symbol appears Rapid-Acting Insulin to the right of the Note . You can touch Long-Acting Insulin it to add more specific information to Enter Rapid-Acting Insulin Food your note . -
Page 35: Reviewing Your History
Reviewing Your History Reviewing and understanding your glucose history can be an important tool for improving your glucose control . The Reader stores about 90 days of information and has several ways to review your past glucose readings, notes, and other information . Step Action Press the Home Button to turn on…
-
Page 36
Step Action Use the arrows to view the available options . Review History Logbook Daily Graph Daily Patterns Average Glucose Time In Target 1 / 2 Low-Glucose Events Sensor Usage IMPORTANT: Work with your health care professional to understand your glucose history . -
Page 37: Logbook
Notes you entered . You can add or edit (change) Notes for the most recent Logbook entry, provided your glucose reading was within the last 15 minutes and you have not used FreeStyle Libre software to create reports .
-
Page 38: Daily Graph
Daily Graph A graph of your Sensor glucose readings by day . Daily Graph The graph shows your Target Glucose Range and (mmol/L) symbols for food or rapid-acting insulin notes you have entered . Notes: 00:00 12:00 24:00 • 22 Feb The graph displays glucose readings up to Wednesday 21 mmol/L .
-
Page 39: Other History Options
Other History Options Use the arrows to view information about your last 7, 14, 30 or 90 days . Information about the average of your Sensor Average Glucose glucose readings . The overall average for the time Average: mmol/L is displayed above the graph . The average is also shown for four different 6-hour periods of the day .
-
Page 40
A graph showing the percentage of time your Time In Target Sensor glucose readings were above, below or Above within your Target Glucose Range . In Target Below Target Range 4.4-10.0 mmol/L Last 7 Days Time In Target Information about the number of low glucose Low Glucose events measured by your Sensor . -
Page 41: Removing Your Sensor
Removing Your Sensor Step Action Pull up the edge of the adhesive that keeps your Sensor attached to your skin . Slowly peel away from your skin in one motion . Note: Any remaining adhesive residue on the skin can be removed with warm soapy water or isopropyl alcohol .
-
Page 42: Replacing Your Sensor
Sensor currently in use . Taking action early can keep small problems from turning into larger ones . CAUTION: If the glucose readings from the FreeStyle Libre Flash Glucose Monitoring System do NOT seem to match with how you feel, check to make sure that your Sensor has not come loose .
-
Page 43: Using Reminders
Using Reminders You can use Reminders to help you remember to check your glucose, take insulin or as a general alarm . Step Action From the Home Screen, touch the symbol . 22:23 Ends in 14 days Check Review Glucose History Touch to select which Type of reminder you want Set Reminder…
-
Page 44
Step Action Set the reminder Time using the arrows on the touchscreen . Touch save . From the Reminders screen, you can turn the Reminders reminder On/Off or add new reminders . 08:30 Touch done to return to the Home Screen . 12:30 00:00:00 add new… -
Page 45: Using The Built-In Meter
Using the Built-in Meter The Reader has a built-in meter that can be used to test your blood glucose and blood ketone or to test the meter and strips with control solution . WARNING: Do NOT use the built-in meter while the Reader is connected to an electrical outlet or a computer .
-
Page 46
IMPORTANT: • Use the Reader within the test strip operating temperature range as blood glucose and ketone results obtained outside the range may be less accurate . • Use only FreeStyle Optium test strips . • Use a test strip immediately after removing from its foil packet . -
Page 47: Blood Glucose Testing
Blood Glucose Testing You can use the built-in meter to check your blood glucose, whether you are wearing a Sensor or not . You can perform a blood glucose test on your fingertip or approved alternate site . Be sure to read the test strip instructions for use prior to using the built-in meter .
-
Page 48
Step Action Check the test strip expiry date . 13758 2016/ 03 E .g . Expiry date: March 31, 2016 Open the foil test strip packet at the notch and tear down to remove the test strip . Use the test strip immediately after removing from the foil packet . -
Page 49
Step Action You will see a butterfly on the screen while you wait for your result . If sounds are turned on, the Reader beeps once when your result is ready . After reviewing your result, remove and discard the used test strip according to local regulations . -
Page 50
Display What To Do If LO appears on the Reader, your result is lower Low Glucose than 1 .1 mmol/L . If HI appears on the Reader, your result is higher than 27 .8 mmol/L . You can touch mmol the message button for more information . -
Page 51: Blood Ketone Testing
After you get your blood glucose result, you can add Notes by touching symbol . If you do not want to add a Note, press the Home Button to go to the Home Screen or hold the Home Button to turn the Reader off . Blood Ketone Testing You can use the built-in meter to check your blood ketone (β-hydroxybutyrate) .
-
Page 52
Step Action Check the test strip expiry date . 13758 2016/ 03 E .g . Expiry date: March 31, 2016 Open the foil test strip packet at the notch and tear down to remove the test strip . Use the test strip immediately after removing from the foil packet . -
Page 53
Step Action Use your lancing device to obtain a blood drop Apply Blood and apply blood to the white area at the end of the test strip . If sounds are turned on, the Reader beeps once Ketone Test to let you know you have applied enough blood . Note: See test strip instructions for use for re-application instructions . -
Page 54
Your Blood Ketone Results 22:23 Blood ketone results are marked on the results screen and in the Logbook with the word Ketone . mmol Ketone Test Notes: • Blood ketone is expected to be lower than 0 .6 mmol/L . •… -
Page 55
Display What To Do If your blood ketone is high, you will see a High Ketone message on the screen . You can touch the message button for more information . mmol Ketone Test If HI appears on the Reader, your ketone result is High Ketone higher than 8 mmol/L . -
Page 56: Control Solution Testing
Control Solution Testing You should do a control solution test when you are not sure of your test strip results and want to check that your Reader and test strips are working properly . You can do a control solution test with a blood glucose or ketone test strip .
-
Page 57: Control Solution Test
Action Step From the Home Screen, touch the Settings 22:23 Ends in 14 days . Touch Control Solution Test to do symbol a control solution test . Check Review Glucose History Settings Sounds Target Range Control Solution Test 1 / 3 Check the test strip expiry date .
-
Page 58
Action Step Insert the test strip with the three black lines facing up . Push the strip until it stops . Shake the control solution bottle to mix the Apply Control Solution solution . Apply a drop of control solution to the white area at the end of the test strip . -
Page 59
Control Solution Results 22:23 Compare the control solution result to the range printed on the test strip instructions for use . The result on your screen should be mmol in this range . Control solution results are marked on Control Solution Test the results screen and in the Logbook with a symbol . -
Page 60: Using The Rapid-Acting Insulin Calculator
Using the Rapid-Acting Insulin Calculator This optional feature requires an understanding of the use of insulin . Misuse or misunderstanding of this feature and the suggested dose may lead to inappropriate insulin dosing . The calculator suggests doses for rapid-acting insulin only . The calculator is only for use with fingerstick blood glucose results from the built-in meter .
-
Page 61
CAUTION: The rapid-acting insulin calculator cannot account for all the factors that may affect your insulin dose . These include incorrectly entered data, incorrectly set date or time, un-logged insulin, smaller or larger meals, sickness, exercise, etc . It is important that you review your suggested dose and account for these factors before taking insulin . -
Page 62
Step Action Enter information about any Have you forgotten to log any rapid-acting rapid-acting insulin you may have insulin you have taken since X:XX? forgotten to log . Touch next . Enter any rapid- acting insulin you have forgotten to log. units How long ago was back… -
Page 63
Step Action If your calculator was programmed with Easy Breakfast Setup, touch the meal you plan to eat now . Touch Lunch next . Dinner No meal back next If your calculator was programmed with Enter Carbs Advanced Setup, enter the grams of carbohydrates or carbohydrate portions you grams plan to eat now . -
Page 64
Step Action Review your suggested dose . If needed, use the Suggested Dose arrow buttons to adjust your suggested dose for Adjust if needed any planned activity, a smaller or larger meal, sickness, etc . Touch the symbol to see details of what is included in your suggested dose . -
Page 65
Step Action Touch log dose to save to your Logbook and take your dose . Your dose is only saved to the Logbook if you touch log dose . CAUTION: It is important to log all your rapid-acting insulin doses so your Reader can account for active insulin when calculating your suggested doses . -
Page 66
If your health care professional turned on the Active 22:23 Ends in 3 days Insulin feature, the symbol may appear on your Home Screen . It shows an estimate of the amount of rapid-acting insulin left in your body and how much Check Review longer it may be active . -
Page 67: Charging The Reader
Charging the Reader A fully charged Reader battery should last up to 7 days . Your battery life may vary depending on your usage . A Low Battery message accompanies your result when you have enough charge remaining for about one day of Low Battery use .
-
Page 68: Changing The Reader Settings
Changing the Reader Settings You can go to the Settings menu to change many settings on the Reader, like Time & Date or Sounds . The Settings menu is also where you go to do a Control Solution Test or to check the System Status . Action Step To get to the Settings menu, touch the Settings…
-
Page 69
Action Step Touch the setting you want to change: Sounds – Set tones and vibrations Target Range – Set range displayed on Reader glucose graphs Control Solution Test – Perform a Control Solution test Time & Date – Change the Time or Date Language –… -
Page 70
Action Step • View Event Logs: A list of events recorded by the Reader, which may be used by Customer Service to help (cont.) troubleshoot your System • Perform a Reader Test: The Reader Test will perform internal diagnostics and allow you to check that the Display is showing all pixels, Sounds (including both tones and vibrations) are working and the Touchscreen is responding when touched… -
Page 71: Living With Your Freestyle Libre System
Living With Your FreeStyle Libre System Your FreeStyle Libre Flash Glucose Monitoring System can be used during a wide variety of activities . Activity What You Need To Know Bathing, The Reader is not water-resistant and should Showering and NEVER be submerged in water or other liquids .
-
Page 72
Activity What You Need To Know Travelling by Air Check with the airline prior to departure as rules and regulations may change without notice . Follow these guidelines when travelling: • Notify security personnel of the presence of the device when going through security systems . • Do not scan your Sensor or power on the Reader using the Home Button while flying, if restricted by flight regulations . -
Page 73: Maintenance And Disposal
Avoid getting dust, dirt, blood, control solution, water or any other substance in the test strip or USB ports . Maintenance The FreeStyle Libre Flash Glucose Monitoring System has no serviceable parts . Disposal This product should be disposed of in accordance with all applicable local regulations related to the disposal of electronic equipment, batteries, sharps, and materials potentially exposed to body fluids .
-
Page 74: Troubleshooting
Troubleshooting This section lists problems or observations that you may have, the possible cause(s) and recommended actions . If the Reader experiences an error, a message will appear on the screen with directions to resolve the error . Reader Does Not Power On Problem What It May Mean What To Do…
-
Page 75: Problems At The Sensor Application Site
Problems at the Sensor Application Site Problem What It May Mean What To Do The Sensor is The site is not free 1 . Remove the Sensor . not sticking of dirt, oil, hair or 2 . Consider shaving and/or to your skin .
-
Page 76: Problems Starting Your Sensor Or Receiving Sensor
Problems Starting Your Sensor or Receiving Sensor Readings Display What It May Mean What To Do New Sensor Sensor is not ready Wait until the 60 minute Sensor Starting Up to read glucose . start-up period has completed . Scan The Reader is not Hold the Reader within Timeout…
-
Page 77
Display What It May Mean What To Do New Sensor You scanned a new Your Reader can only be used Found Sensor before your with one Sensor at a time . If previous Sensor you start a new Sensor, you will ended . -
Page 78
Display What It May Mean What To Do Glucose Your Sensor is too Move to a location where the Reading hot or too cold . temperature is appropriate and Unavailable scan again in a few minutes . Sensor The Sensor was A Sensor can only be scanned Already in started by another… -
Page 79: Blood Glucose Or Ketone Error Messages
Blood Glucose or Ketone Error Messages Error What It May Mean What To Do Message The temperature is 1 . Move the Reader and test too hot or too cold strips to a location where the for the Reader to temperature is within the test work correctly .
-
Page 80
Error What It May Mean What To Do Message Blood drop is too 1 . Review the testing small . instructions . 2 . Repeat the test using a new test strip . Incorrect test 3 . If the error reappears, contact procedure . -
Page 81
Error What It May Mean What To Do Message Blood was applied 1 . Review the testing to the test strip too instructions . soon . 2 . Repeat the test using a new test strip . 3 . If the error reappears, contact Customer Service . -
Page 82
Error What It May Mean What To Do Message Test strip may be 1 . Check that you are using damaged, used or the correct test strip for the Reader does not the Reader . (See test strip recognise it . instructions for use to verify your strip is compatible with the Reader) . -
Page 83: Problems Checking Your Blood Glucose Or Ketone
Problems Checking Your Blood Glucose or Ketone Problem What It May Mean What To Do The Reader Test strip is not 1 . With the 3 black lines facing does not inserted correctly up, insert the test strip into start a or not inserted fully the strip port until it stops .
-
Page 84
Problem What It May Mean What To Do The test Blood sample is too 1 . See test strip instructions does not small . for use for re-application start after instructions . applying 2 . Repeat the test using a new the blood test strip . -
Page 85: Perform A Reader Test
. Customer Service Customer Service is available to answer any questions you may have about your FreeStyle Libre Flash Glucose Monitoring System . Please go the back cover of this manual for your Customer Service phone number .
-
Page 86: Professional Options
Professional Options This section is only meant for health care professionals . It describes the access code-protected features of the Reader . Health care professionals can change dose increments or set up the insulin calculator . From the Home Screen, touch the Settings symbol .
-
Page 87: Changing Dose Increments
Changing Dose Increments You can set the insulin dose increments to either 1 .0 or 0 .5 units for use with the Rapid-acting insulin calculator and insulin notes . From the Professional Options screen, select Dose Increment Dose Increment . Then choose 1 unit or 0.5 unit . 1 unit Touch done .
-
Page 88: Setting Up The Insulin Calculator
Setting up the Insulin Calculator The insulin calculator can help your patients calculate their rapid-acting insulin doses based on meal and fingerstick blood glucose level information . From the Professional Options screen, select Insulin Calculator . CAUTION: This feature requires an understanding of the use of insulin .
-
Page 89
You can set up the insulin calculator using the Easy or Advanced settings . The Easy Setup is for patients who start with a fixed dose of rapid-acting insulin for meals . The Advanced Setup is for patients who count carbohydrates (in grams or carbohydrate portions) to adjust their rapid-acting insulin dose for meals . -
Page 90: Easy Setup Of The Insulin Calculator
Easy Setup of the Insulin Calculator Action Step Choose the Easy option on the slide bar and Choose Setup Option touch next . Easy Note: You need to know your patient’s For patients who start with a fixed dose of rapid-acting mealtime insulin doses, target glucose range insulin at meals.
-
Page 91
Action Step Enter the Correction Factor (for example: if 1 unit Correction Factor of insulin lowers blood glucose 2 . 8 mmol/L, then 1 u insulin for the correction factor is 2 .8) . If the blood glucose mmol value is outside the blood glucose target, the calculator will use the correction target and factor to calculate a correction dose . -
Page 92
Notes about the Easy Option: • The calculator estimates the amount of rapid-acting insulin still in the body and how much longer it may be active (if the correction factor is set to “no correction insulin”, active insulin is not calculated) . The active insulin estimate is based on a 4-hour insulin duration calculated from the time and amount of the last logged rapid-acting insulin dose . -
Page 93
Calculator Settings — Easy Option This page can be used to record insulin calculator settings . This is the insulin Breakfast Lunch Dinner Dose Dose Dose required to cover food . units of insulin units of insulin units of insulin 0-50 0-50 0-50… -
Page 94: Advanced Setup Of The Insulin Calculator
Advanced Setup of the Insulin Calculator Action Step Choose the Advanced option on the slide bar Choose Setup Option and touch next . Advanced Note: You need to know your patient’s For patients who count carbs (in grams or portions) to adjust mealtime insulin settings, target glucose their rapid-acting insulin dose at meals.
-
Page 95
Action Step If you chose to enter Grams of carbs in Step 2: Carbohydrate Ratio The rapid-acting insulin dose suggestion is based 1 u insulin for on grams of carbs . grams carbs Enter the Carbohydrate Ratio (1 unit of rapid- by time Optional: of day… -
Page 96
Action Step If you chose to enter Carb Portions in Step 2: Carb Portions Definition The rapid-acting insulin dose suggestion is based 1 portion = on carbohydrate portions . grams carbs Enter the Carb Portions (10 to 15 grams of carbs) and touch next . Enter the Carb Carb Portion Ratio back next… -
Page 97
Action Step Select how you want your patient to correct their How does your patient correct their glucose . Touch next glucose? To a single target To a target range back next Enter the Correction Target value or range . This Correction Target is the desired target value or range for blood glucose values before meals . -
Page 98
Action Step Enter the Correction Factor (for example: if 1 Correction Factor unit of insulin lowers blood glucose 2 .8 mmol/L, 1 u insulin for then the correction factor is 2 .8) . If the blood mmol glucose reading is outside the blood glucose by time target, the calculator will use the correction Optional:… -
Page 99
Action Step Enter the Insulin Duration . This is the amount of Insulin Duration time that rapid-acting insulin remains active in 4:30 the patient’s body . hrs:min Touch next . back next IMPORTANT: In general, the insulin duration for rapid- acting insulin ranges from 3-5 hours, and can vary for each person . -
Page 100
Action Step Select whether or not to show the Active Insulin Do you want the Active Insulin symbol symbol on the Home Screen . to be displayed on the Home Screen? This symbol shows an estimate of the amount of rapid-acting insulin still in the body and how much longer it may be active . -
Page 101
Notes about the Advanced Option: • The calculator estimates the amount of rapid-acting insulin still in the body and how much longer it may be active . The active insulin estimate is calculated from the set insulin duration, the time, and amount of the last logged rapid-acting insulin dose . -
Page 102
This graph shows how the insulin calculator estimates the amount of active insulin as a function of logged insulin dose and insulin duration over time . It also shows the relationship between the symbol and amount of active insulin . Active insulin curvilinear model % insulin duration Adapted from Mudaliar et al . -
Page 103
Calculator Settings — Advanced Option This page can be used to record insulin calculator settings . This is the number of grams Carbohydrate Ratio of carbs that one unit of 1 unit of insulin for rapid-acting insulin will cover OR the number of units of rapid-acting insulin grams of carbs that will cover one carb… -
Page 104
This is the estimated Correction Factor amount blood glucose will 1 unit of insulin for drop by taking one unit of insulin . (Option to enter by mmol/L time of day .) 0.1-5.5 This is the amount of time Insulin Duration that a dose of rapid-acting Insulin is active in the body for insulin remains active in the… -
Page 105: Changing The Insulin Calculator Settings
Changing the Insulin Calculator Settings Action Step From the Home Screen, touch the Settings symbol . Scroll down using the arrows and System Status touch Professional Options . Enter the access code . Touch Insulin Calculator . Calculator Settings Reader Basics Professional Options Touch Turn Off Calculator to turn off the insulin Calculator Settings…
-
Page 106: System Specifications
System Specifications See test strip and control solution instructions for use for additional specifications . Sensor Specifications Sensor glucose assay Amperometric electrochemical sensor method Sensor glucose reading 2 .2 to 27 .8 mmol/L range Sensor size 5 mm height and 35 mm diameter Sensor weight 5 grams Sensor power source…
-
Page 107
Sensor life Up to 14 days 8 hours (glucose readings stored every Sensor memory 15 minutes) Operating temperature 10 °C to 45 °C Sensor Applicator and Sensor Pack storage 4 °C to 30 °C temperature Operating and storage 10-90%, non-condensing relative humidity IP27: Can withstand immersion into Sensor water resistance… -
Page 108
Reader Specifications Blood glucose assay 1 .1 to 27 .8 mmol/L range Blood ketone assay range 0 .0 to 8 .0 mmol/L Reader size 95 mm x 60 mm x 16 mm Reader weight 65 grams Reader power source One lithium-ion rechargeable battery Reader battery life 7 days of typical use Reader memory… -
Page 109
System must only be used with Requirements EN60950-1 rated computers Mean service life 3 years of typical use Abbott Diabetes Care PRT25612 Power Adapter Operating temperature: 10 °C to 40 °C Abbott Diabetes Care PRT21373 USB Cable Length: 94 cm (37 inches) -
Page 110: Rapid-Acting Insulin Calculator Specifications
Rapid-Acting Insulin Calculator Specifications Parameter Unit Range or Value Correction target mmol/L 3 . 9 to 10 . 0 1 unit per X grams Carbohydrate ratio 1 to 50 of carbs Units of insulin per Carb portion ratio 0 . 5 to 15 carb portion Carb portions definition Grams of carbs…
-
Page 111
Parameter Unit Range or Value Dose increments Units of insulin 0 . 5 or 1 Maximum insulin dose Units of insulin… -
Page 112: Labelling Symbols
Labelling Symbols Consult instructions for Use-by date Temperature limit Catalogue number Manufacturer Serial number Do not use if package is CE Mark damaged Batch code Keep dry Type BF applied part Non-ionizing radiation Sensor code Caution CODE Sterilised using Do not re-use irradiation This product must not be disposed of via municipal waste collection .
-
Page 113: Electromagnetic Compatibility
Electromagnetic Compatibility • The System needs special precautions regarding EMC and needs to be installed and put into service according to the EMC information provided in this manual. • Portable and mobile RF communications equipment can affect the System. • The use of accessories, transducers and cables other than those specified by Abbott Diabetes Care may result in increased EMISSIONS or decreased IMMUNITY of the System. • The System should not be used adjacent to or stacked with other equipment and that if adjacent or stacked use is necessary, the System should be observed to verify normal operation in the configuration in which it will be used.
-
Page 114: Electromagnetic Emissions
Guidance and manufacturer’s declaration – electromagnetic emissions The System is intended for use in the electromagnetic environment specified below. The customer or the user of the System should assure that it is used in such an environment. Electromagnetic Emissions test Compliance environment – guidance RF emissions Group 1 The System uses RF energy CISPR 11 only for its internal function. Therefore, its RF emissions are very low and are not likely to cause any interference in nearby electronic equipment. RF emissions Class B The System is suitable for use CISPR 11 in all establishments, including domestic establishments and Harmonic emissions Class A those directly connected to the IEC 61000-3-2 public low voltage power supply network that supplies buildings Voltage fluctuations / Complies used for domestic purposes. flicker emissions IEC 61000-3-3…
-
Page 115
Guidance and manufacturer’s declaration – electromagnetic immunity The System is intended for use in the electromagnetic environment specified below. The customer or the user of the System should assure that it is used in such an environment. IMMUNITY IEC 60601 Compliance Electromagnetic test test level Level environment – guidance Electrostatic ± 6 kV contact ± 6 kV contact Floors should be wood, concrete or discharge (ESD) ceramic tile. If floors are covered ± 8 kV air ± 8 kV air with synthetic material, the relative IEC 61000-4-2 humidity should be at least 30 %. Electrical fast ± 2 kV for ± 2 kV for Mains power quality should be that transient/burst power supply power supply of a typical domestic, commercial or lines lines hospital environment. -
Page 116
IMMUNITY IEC 60601 Compliance Electromagnetic test test level Level environment – guidance Surge ±1 kV ±1 kV Mains power quality should be that differential differential of a typical domestic, commercial or IEC 61000-4-5 mode mode hospital environment. ±2 kV common ±2 kV common mode mode Voltage <5 % U <5 % U Mains power quality should be that dips, short (>95 % dip in (>95 % dip in of a typical domestic, commercial interruptions and ) for 0.5 cycle ) for 0.5 cycle or hospital environment. If the user voltage variations of the System requires continued… -
Page 117
IMMUNITY IEC 60601 Compliance Electromagnetic test test level Level environment – guidance Power frequency 3 A/m 3 A/m Power frequency magnetic fields (50/60 Hz) should be at levels characteristic magnetic field of a typical location in a typical domestic, commercial or hospital IEC 61000-4-8 environment. NOTE U is the a.c. mains voltage prior to application of the test level. -
Page 118
IMMUNITY IEC 60601 Compliance Electromagnetic test test level Level environment – guidance Conducted RF 3 Vrms 3 Vrms Portable and mobile RF communications equipment should IEC 61000-4-6 150 kHz to be used no closer to any part of the 80 MHz System, including cables, than the recommended separation distance calculated from the equation applicable to the frequency of the transmitter. Recommended separation distance… -
Page 119
IMMUNITY IEC 60601 Compliance Electromagnetic test test level Level environment – guidance Radiated RF 3 V/m 3 V/m Recommended separation distance IEC 61000-4-3 80 MHz to 2.5 GHz 80 MHz to 800 MHz 800 MHz to 2.5 GHz P is the maximum output power rating of the transmitter in watts (W) according to the transmitter manufacturer and d is the recommended separation distance in metres (m). Field strengths from fixed RF transmitters, as determined by an electromagnetic site survey, should be less than the compliance level in each frequency range. Interference may occur in the vicinity of equipment marked with the following symbol: NOTE 1 At 80 MHz and 800 MHz, the higher frequency range applies. NOTE 2 These guidelines may not apply in all situations. Electromagnetic propagation is affected by absorption and reflection from structures, objects and people. -
Page 120
Field strengths from fixed transmitters, such as base stations for radio (cellular/cordless) telephones and land mobile radios, amateur radio, AM and FM radio broadcast and TV broadcast cannot be predicted theoretically with accuracy. To assess the electromagnetic environment due to fixed RF transmitters, an electromagnetic site survey should be considered. If the measured field strength in the location in which the System is used exceeds the applicable RF compliance level above, the System should be observed to verify normal operation. If abnormal performance is observed, additional measures may be necessary, such as re-orienting or relocating the System. Over the frequency range 150 kHz to 80 MHz, field strengths should be less than 3 V/m. -
Page 121
Recommended separation distances between portable and mobile RF communications equipment and the System The System is intended for use in an electromagnetic environment in which radiated RF disturbances are controlled. The customer or the user of the System can help prevent electromagnetic interference by maintaining a minimum distance between portable and mobile RF communications equipment (transmitters) and the System as recommended below, according to the maximum output power of the communications equipment. Rated maximum Separation distance according to frequency of transmitter output power of transmitter 150 kHz to 80 MHz to 800 MHz to 80 MHz 800 MHz 2.5 GHz… -
Page 122
For transmitters rated at a maximum output power not listed above, the recommended separation distance d in metres (m) can be estimated using the equation applicable to the frequency of the transmitter, where P is the maximum output power rating of the transmitter in watts (W) according to the transmitter manufacturer. NOTE 1 At 80 MHz and 800 MHz, the separation distance for the higher frequency range applies. NOTE 2 These guidelines may not apply in all situations. Electromagnetic propagation is affected by absorption and reflection from structures, objects and people. -
Page 123
Flash Glucose Monitoring System is in compliance with the essential requirements and other relevant provisions of the R&TTE Directive . A copy of the original declaration of conformity may be obtained from Abbott Diabetes Care Ltd ., Range Road, Witney, Oxon, OX29 0YL, UK . Font Licence ©2013 Abbott Licensed under the Apache Licence, Version 2 .0 (the “Licence”);… -
Page 124
SL6 4UD 0500 467 466 FreeStyle and related brand marks are trademarks of Abbott Diabetes Care Inc. in various jurisdictions. Other trademarks are the property of their respective owners. This product(s) and/or its manufacture and/or use are protected by one or more of the following patents: US6,134,461;…
This manual is also suitable for:
Freestyle libre