About username changes
You can change your username to another username that is not currently in use. If the username you want is not available, consider other names or unique variations. Using a number, hyphen, or an alternative spelling might help you find a similar username that’s still available.
If you hold a trademark for the username, you can find more information about making a trademark complaint on our Trademark Policy page.
If you do not hold a trademark for the name, you can choose another username or keep your current username. GitHub Support cannot release the unavailable username for you. For more information, see «Changing your username.»
After changing your username, your old username becomes available for anyone else to claim. Most references to your repositories under the old username automatically change to the new username. However, some links to your profile won’t automatically redirect.
GitHub cannot set up redirects for:
- @mentions using your old username
- Links to gists that include your old username
If you’re a member of an enterprise with managed users, you cannot make changes to your username. For more information, see «Types of GitHub accounts.»
If the account namespace includes any public repositories that contain an action listed on GitHub Marketplace, or that had more than 100 clones or more than 100 uses of GitHub Actions in the week prior to you renaming your account, GitHub permanently retires the old owner name and repository name combination (OLD-OWNER/REPOSITORY-NAME) when you rename your account. If you try to create a repository using a retired owner name and repository name combination, you will see the error: «The repository <REPOSITORY_NAME> has been retired and cannot be reused.»
If the account namespace includes any packages or container images stored in a GitHub Packages registry, GitHub transfers the packages and container images to the new namespace. By renaming your account, you may break projects that depend on these packages. If the namespace includes any container images that are public and have more than 5,000 downloads, the full former name of these container images (OLD-NAMESPACE/IMAGE-NAME) is permanently retired when you rename the account to ensure the container image name cannot be reused in the future.
Repository references
After you change your username, GitHub will automatically redirect references to your repositories.
- Web links to your existing repositories will continue to work. This can take a few minutes to complete after you make the change.
- Command line pushes from your local repository clones to the old remote tracking URLs will continue to work.
If the new owner of your old username creates a repository with the same name as your repository, that will override the redirect entry and your redirect will stop working. Because of this possibility, we recommend you update all existing remote repository URLs after changing your username. For more information, see «Managing remote repositories.»
Links to your previous profile page
After changing your username, links to your previous profile page, such as https://github.com/previoususername, will return a 404 error. We recommend updating any links to your account on GitHub.com from elsewhere, such as your LinkedIn or Twitter profile.
Your Git commits
Git commits that were associated with your GitHub-provided noreply email address won’t be attributed to your new username and won’t appear in your contributions graph. If your Git commits are associated with another email address you’ve added to your GitHub account, including the ID-based GitHub-provided noreply email address, they’ll continue to be attributed to you and appear in your contributions graph after you’ve changed your username. For more information on setting your email address, see «Setting your commit email address.»
Your gists
After changing your username, the URLs to any public or secret gists will also change and previous links to these will return a 404 error. We recommend updating the links to these gists anywhere you may have shared them.
Changing your username
-
In the upper-right corner of any page, click your profile photo, then click Settings.

-
In the left sidebar, click Account.
-
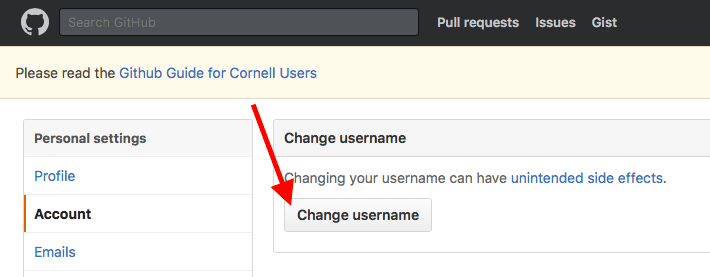
In the «Change username» section, click Change username.
-
Read the warnings about changing your username. If you still want to change your username, click I understand, let’s change my username.
-
Type a new username.
-
If the username you’ve chosen is available, click Change my username. If the username you’ve chosen is unavailable, you can try a different username or one of the suggestions you see.


Further reading
- «Why are my commits linked to the wrong user?»
- «GitHub Username Policy»

Your Github login username could be changed to another username that is not in use. You might have to consider some unique usernames if the username you want is not available. You can use the different signs like hyphens, numbers, or alternative spellings to get a similar username that is still available.
Your old GitHub login username can be claimed by anyone after you have changed your username. Except for some links to your profile that wouldn’t redirect automatically, most of the other references to your repositories that were under the old username are changed automatically to the new username.
Redirects cannot be set up for:
- @mentions that use your old username
- The links to gits that include your old username
Steps To Change Your Github Login Username
- First, click your profile photo, then click Settings.
- In the left sidebar, click Account.
- Under the «Change username» section, click on Change username.
- Make sure that you read the warnings about changing your username and then click I understand, let’s change my username.
- Type a new username.
- Make sure that the username that you have chosen is available and then click Change my username.
Where To Make Changes

- Go to the GitHub account settings and change the username.
- If you are using GitHub Pages, you could just change the name of your “username.github.io” repository
- Other services that point to your “username.github.io” repository address should now be updated.
- You might want to sign in and reconnect your repositories when using Netlify.
- You can sign in to Travis CI and other integrations as it will update your username there.
- Make sure that your local files and repository links are updated and the changes to GitHub are pushed back.
- With your updated GitHub link redeploy any websites that you may have.
- You can then fix any links around the web to your profile, Gists, or your repositories.
Local File Updates
We have for you some suggestions for strings, which you can use to search and replace your username.
- github.com/username ( you get the references to your GitHub page in READMEs or in website copy)
- username.github.io ( you will get links to your GitHub Page)
- git@github.com:username ( you get Git config remote ssh URLs)
- travis-ci.com/username (Travis badges in READMEs)
- shields.io/github/…/username ( the shield badges would be in READMEs, types include stars, tags, contributors, and more)
You can use this command for each string after you identify where the above strings are located:
grep -rnw -e ‘foobar’
It will search all files for strings matching the whole (w) pattern (e) recursively (r) provided and prefix results with the line numbers (n) so you can find them easily.
Your Github login username could be changed to another username that is not in use. You might have to consider some unique usernames if the username you want is not available. You can use the different signs like hyphens, numbers, or alternative spellings to get a similar username that is still available.
Your old GitHub login username can be claimed by anyone after you have changed your username. Except for some links to your profile that wouldn’t redirect automatically, most of the other references to your repositories that were under the old username are changed automatically to the new username.
Redirects cannot be set up for:
- @mentions that use your old username
- The links to gits that include your old username
Steps To Change Your Github Login Username
- First, click your profile photo, then click Settings.
- In the left sidebar, click Account.
- Under the «Change username» section, click on Change username.
- Make sure that you read the warnings about changing your username and then click I understand, let’s change my username.
- Type a new username.
- Make sure that the username that you have chosen is available and then click Change my username.
Where To Make Changes
- Go to the GitHub account settings and change the username.
- If you are using GitHub Pages, you could just change the name of your “username.github.io” repository
- Other services that point to your “username.github.io” repository address should now be updated.
- You might want to sign in and reconnect your repositories when using Netlify.
- You can sign in to Travis CI and other integrations as it will update your username there.
- Make sure that your local files and repository links are updated and the changes to GitHub are pushed back.
- With your updated GitHub link redeploy any websites that you may have.
- You can then fix any links around the web to your profile, Gists, or your repositories.
Local File Updates
We have for you some suggestions for strings, which you can use to search and replace your username.
- github.com/username ( you get the references to your GitHub page in READMEs or in website copy)
- username.github.io ( you will get links to your GitHub Page)
- git@github.com:username ( you get Git config remote ssh URLs)
- travis-ci.com/username (Travis badges in READMEs)
- shields.io/github/…/username ( the shield badges would be in READMEs, types include stars, tags, contributors, and more)
You can use this command for each string after you identify where the above strings are located:
grep -rnw -e ‘foobar’
It will search all files for strings matching the whole (w) pattern (e) recursively (r) provided and prefix results with the line numbers (n) so you can find them easily.
there are 3 ways we can fix this issue
method-1 (command line)
To set your account’s default identity globally run below commands
git config --global user.email "you@example.com"
git config --global user.name "Your Name"
git config --global user.password "your password"
To set the identity only in current repository , remove --global and run below commands in your Project/Repo root directory
git config user.email "you@example.com"
git config user.name "Your Name"
git config user.password "your password"
Example:
email -> organization email Id
name  -> mostly <employee Id> or <FirstName, LastName>
**Note: ** you can check these values in your GitHub profile or Bitbucket profile
method-2 (.gitconfig)
create a .gitconfig file in your home folder if it doesn’t exist.
and paste the following lines in .gitconfig
[user]
    name = FirstName, LastName
    email = FirstName.LastName@company.com
    password = abcdxyz
[http]
    sslVerify = false
    proxy =
[https]
    sslverify = false
    proxy = https://corp\<uname>:<password>@<proxyhost>:<proxy-port>
[push]
    default = simple
[credential]
    helper = cache --timeout=360000000
[core]
    autocrlf = false
Note: you can remove the proxy lines from the above , if you are not behind the proxy
Home directory to create .gitconfig file:
windows : c/users/< username or empID >
Mac or Linux : run this command to go to home directory cd ~
or simply run the following commands one after the other
git config --global --edit
git commit --amend --reset-author
method-3 (git credential pop up)
windows :
Control Panel >> User Account >> Credential Manager >> Windows Credential >> Generic Credential
>> look for any github cert/credential and delete it.
then running any git command will prompt to enter new user name and
password (Note: some times you will not be prompted for password for git pull).
Mac :
command+space >> search for "keychain Access" and click ok >>
search for any certificate/file with gitHub >> delete it.
then running any git command will prompt to enter new user name and
password(Note:some times you will not be prompted for password for git pull).
После того, как мы установили Git, пришло время внести некоторые изменения в конфигурационный файл Git и настроить учетные данные с помощью Git Bash.
Когда мы устанавливаем Git в нашей системе, конфигурационный файл принимает значения по умолчанию для некоторых полей. Это означает, что Git начинает с установки одинаковых файлов для каждого пользователя. Таким образом, при первом запуске Git общие файлы по умолчанию (которые являются общими для каждого пользователя) ищутся внутри файла /etc/gitconfig.
После того, как они установлены, Git должен видеть файлы, относящиеся к конкретному пользователю. Эти конкретные файлы доступны в разделе ~/.gitconfig или ~/.config/git/config. Конкретный файл включает в себя ваше имя пользователя, ваше имя и т. д.
Откройте свой Git Bash и введите следующую команду, чтобы просмотреть личные настройки конфигурации.
vi ~/.gitconfig

Нажмите enter и просмотрите файл конфигурации.
Пример
Давайте рассмотрим пример, чтобы понять, почему нам нужно настроить эти значения во время работы в проекте. Многие люди работают над одним проектом, но единственное, что может идентифицировать вас, — это ваше имя пользователя или адрес электронной почты. Если вы не настроили эти значения в файле конфигурации, эти значения (имя, адрес электронной почты и т. д.) берутся случайным образом. Поэтому, когда вы совершаете какое-либо изменение, это изменение отражается вместе с вашим именем пользователя и электронной почтой, которые являются случайными, и никто не сможет распознать или запомнить ваши учетные данные. Это создает много проблем в команде. Следовательно, мы должны изменить этот конфигурационный файл.
Как настроить учетные данные по умолчанию для git Config?
Задайте имя пользователя в конфигурации Git
Первое изменение, которое мы сделаем внутри нашего конфигурационного файла, будет изменение нашего имени пользователя в Git. Чтобы изменить имя пользователя, выполните следующие действия.
Откройте Git Bash в вашей системе. Введите следующую команду с вашим именем пользователя:
git config --global user.name “Your UserName”
Примечание: изменение имени пользователя повлияет только на ваши будущие коммиты и ни на один из ваших прошлых коммитов.
Это изменит имя пользователя на значение, указанное в команде. Нажмите enter, и если ничего не произошло, имя было успешно изменено.
Настройка электронной почты пользователя в git Config
После успешного выполнения вышеуказанной команды мы изменим нашу электронную почту. Введите следующую команду
git config --global user.email “YourEmailID.com”
Это изменит идентификатор электронной почты в конфигурации Git на идентификатор электронной почты, указанный в команде.
Как просмотреть список пользовательских настроек git Config?
После того, как вы установили все значения в файле конфигурации, вы можете просмотреть все настройки также через Git Bash.
Просмотреть полный список настроек в git Config
Для этого перейдите в Git Bash и введите эту команду.
git config --list
Нажмите enter, и вы увидите все настройки, включая те, которые мы только что установили в предыдущем разделе.

Просмотр определенного параметра в конфигурации Git

Вы также можете проверить наличие определенного параметра в файле конфигурации вместо того, чтобы открывать полный список. Чтобы увидеть это, выполните следующие простые шаги.
В Git Bash введите следующую команду:
git config --global <key>
здесь <key> относится к имени параметра, который вы хотите видеть. Например user.name. Вам нужно запомнить значение ключа именно таким, как оно есть. Если вы не можете вспомнить, то всегда можете отобразить полный список конфигурационных файлов.
Нажмите клавишу enter, чтобы увидеть значение ключа.
https://git-scm.com/docs/git-config — больше информации о git-config.