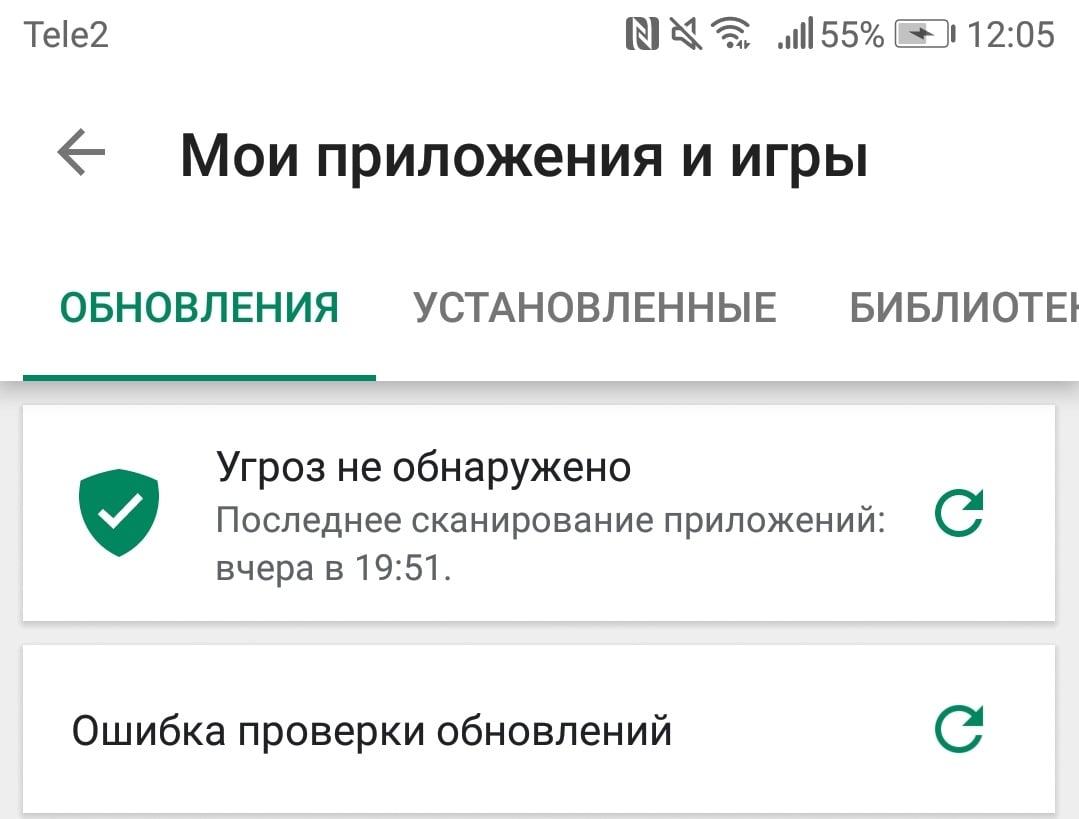
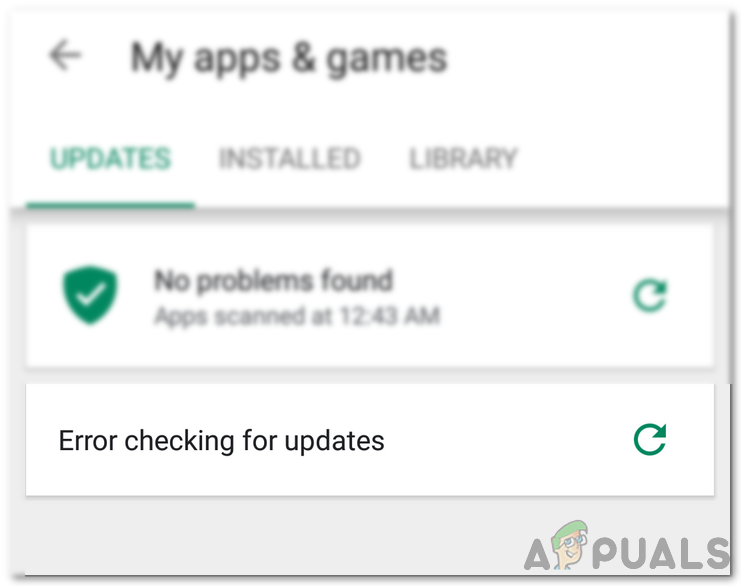
Во время проверки обновления для приложений в Google Play можно увидеть сообщение «Ошибка проверки обновлений». В этой статье мы расскажем вам, что вызывает данную ошибку и каким образом от нее можно избавиться в кратчайшие сроки.
Содержание
- Что вызывает «Ошибка проверки обновлений»?
- Исправление «Ошибка проверки обновлений»
- Решение №1 Очистка кеша
- Решение №2 Стереть данные
- Решение №3 Удаление обновлений
Что вызывает «Ошибка проверки обновлений»?
- Поврежденный кэш.
- Поврежденные данные приложения Google Play.
- Проблемы с Интернет-подключением на Android-устройстве.
- Недостаточное количество свободного места на Android-устройстве.
- Неполадки с установленной SD-картой.
- «Кривое» последнее обновление для приложения Google Play.
Исправление «Ошибка проверки обновлений»
Решение №1 Очистка кеша
Кэш приложения Google Play частенько вызывает проблемы при обновлении или установке прочих приложений на Android-устройство пользователя. Вам нужно избавиться от кэша GP, перезагрузить свое устройство, а затем проверьте наличие ошибки «Ошибка проверки обновлений».
Чтобы удалить кэш Google Play, сделайте следующее:
- откройте Настройки;
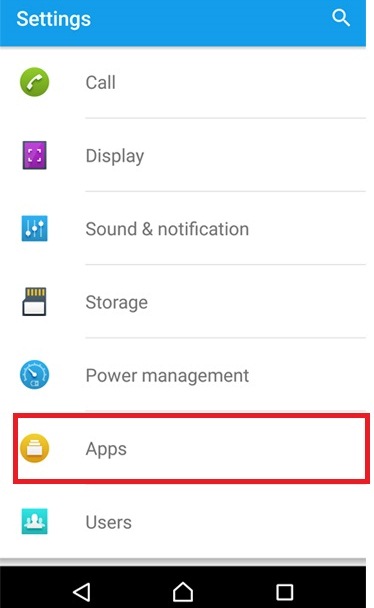
- перейдите в раздел «Приложения и уведомления», затем — «Приложения»;
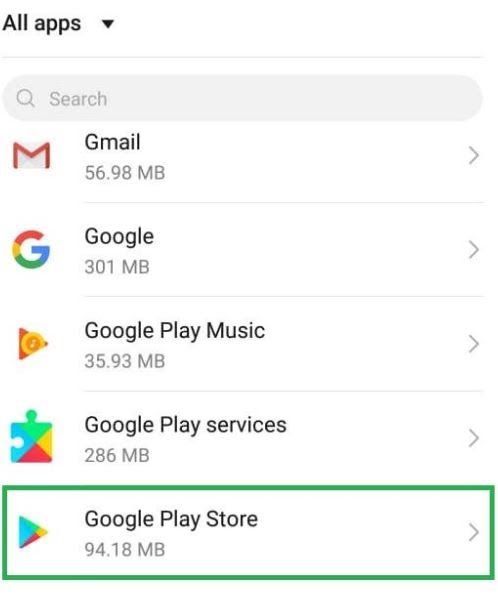
- найдите в списке установленных приложений «Google Play Маркет» и выберите его;
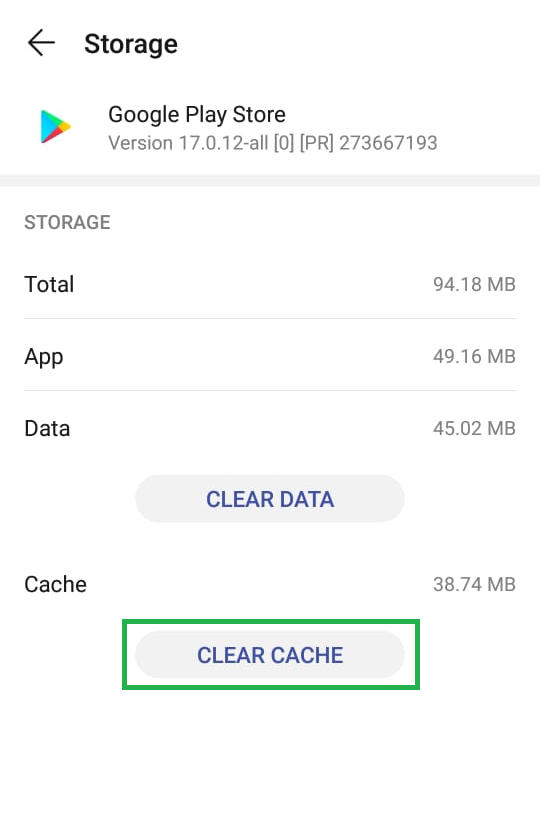
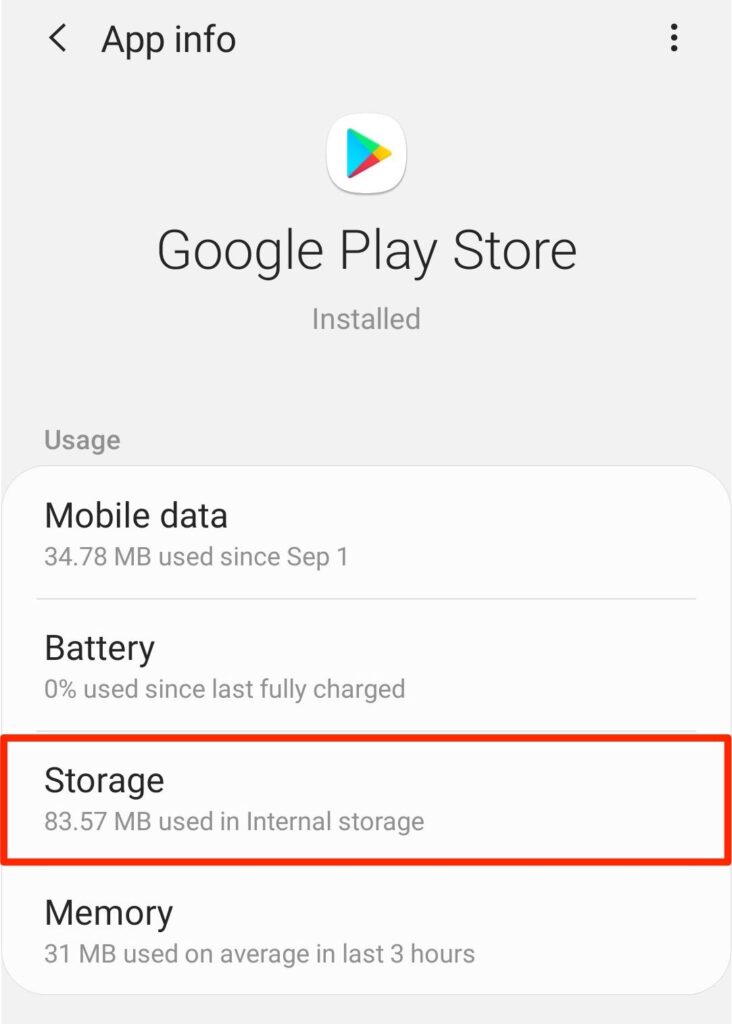
- далее перейдите в «Хранилище» и нажмите на кнопку «Очистить кеш»;
- перезагрузите свое устройство.
Решение №2 Стереть данные
Если обычная очистка кеша не помогла, то можно попробовать стереть данные Google Play. Верно, вам после этого потребуется снова войти в аккаунт Google, дабы получить доступ к магазину, но это малая цена за решение неполадки.
Чтобы стереть данные Google Play, вам нужно сделать следующее:
- снова откройте Настройки;
- перейдите в «Приложения и уведомления», потом — в «Приложения»;
- найдите приложение «Google Play Маркет» и выберите его;
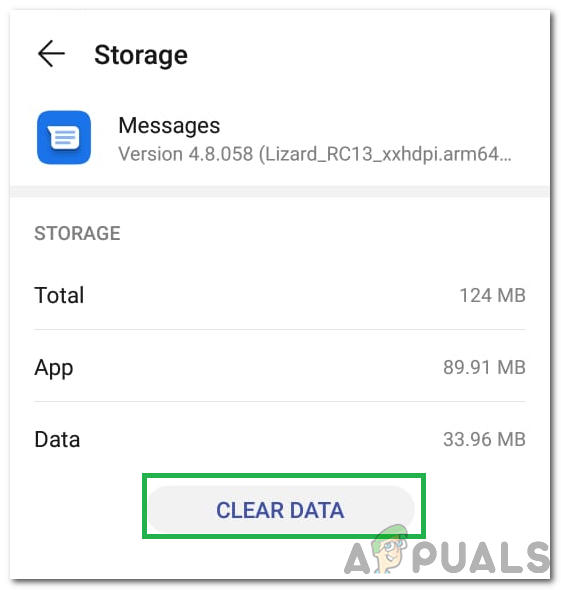
- далее перейдите в «Хранилище» и нажмите на кнопку «Стереть данные».
Откройте Google Play и проверьте наличие сообщения «Ошибка проверки обновлений».
Решение №3 Удаление обновлений
Возможно, вы столкнулись с проблемами обновлений приложений в Google Play из-за того, что недавно для магазина было установлено не самое «удачное» обновление. Вам нужно сбросить Google Play до начальной версии, а затем еще раз установить для него все доступные обновления.
- перейдите в Настройки своего устройства;
- пройдите путем: Приложения и уведомления→Приложения→Google Play Маркет;
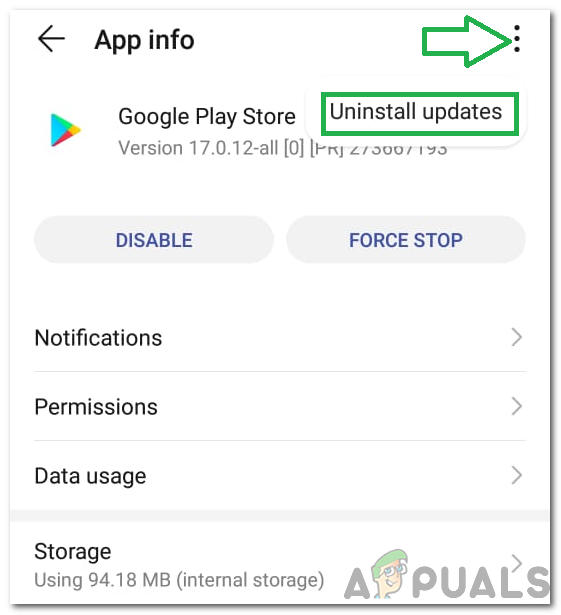
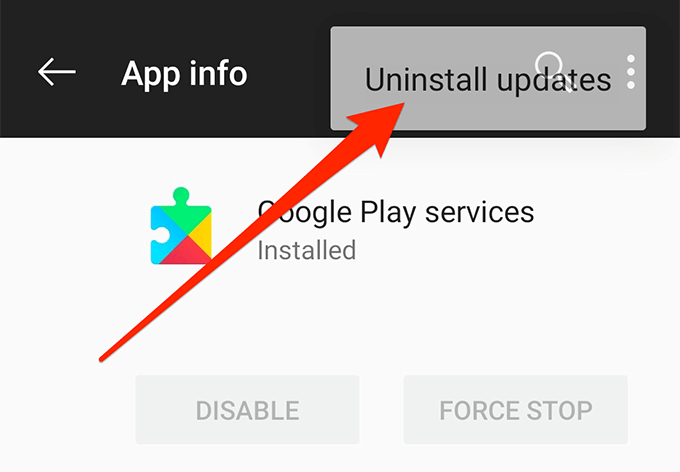
- нажмите на три точки в правом верхнем углу и выберите опцию «Удалить обновления»;
- перезагрузите Android-устройство, после чего дождитесь установки всех доступных обновления для магазина.
Зайдите в Google Play и проверьте, исчезло ли сообщение «Ошибка проверки обновлений». Хочется верить, что эта статья была полезна для вас.
Android app makers push regular app updates for users to help them explore new features which are generally available on Google Play Store. However, it is quite annoying to experience various instances where the Play Store is unable to update the apps you want. Because of this, you might miss out on using various new features, important bug fixes. We understand this because we often come across these issues on an almost daily basis. But we were able to fix it somehow and want you to know all the methods that we have tried and tested for the same.
In this troubleshooting guide, we will walk you through various methods that can help fix issues where the Play Store doesn’t update apps.
You can also try these methods to fix the following issues:
- Google Play Store not Updating Apps Automatically
- Google Play Store not Working
- Google Play Store not Downloading Apps
Disclaimer: Proceed at your own risk, TechieTechTech will not be responsible if anything goes wrong with your device.
14 Best ways to fix Google Play Store Not Updating Apps Error
1. Check your internet connection
The first and foremost thing you have to do when the Play Store won’t update apps is to check if your device has an active and stable internet connection. However, if it is active and has weak internet connectivity, it is possible that Google Play Store won’t update or download the apps. Usually, the app downloading process goes in a loop and the app just does not download. You need to connect your device to a stable Wi-Fi or mobile network and check if the Google Play Store not updating apps issue is resolved.
Note: If you’re using a VPN, make sure to disable it as well.
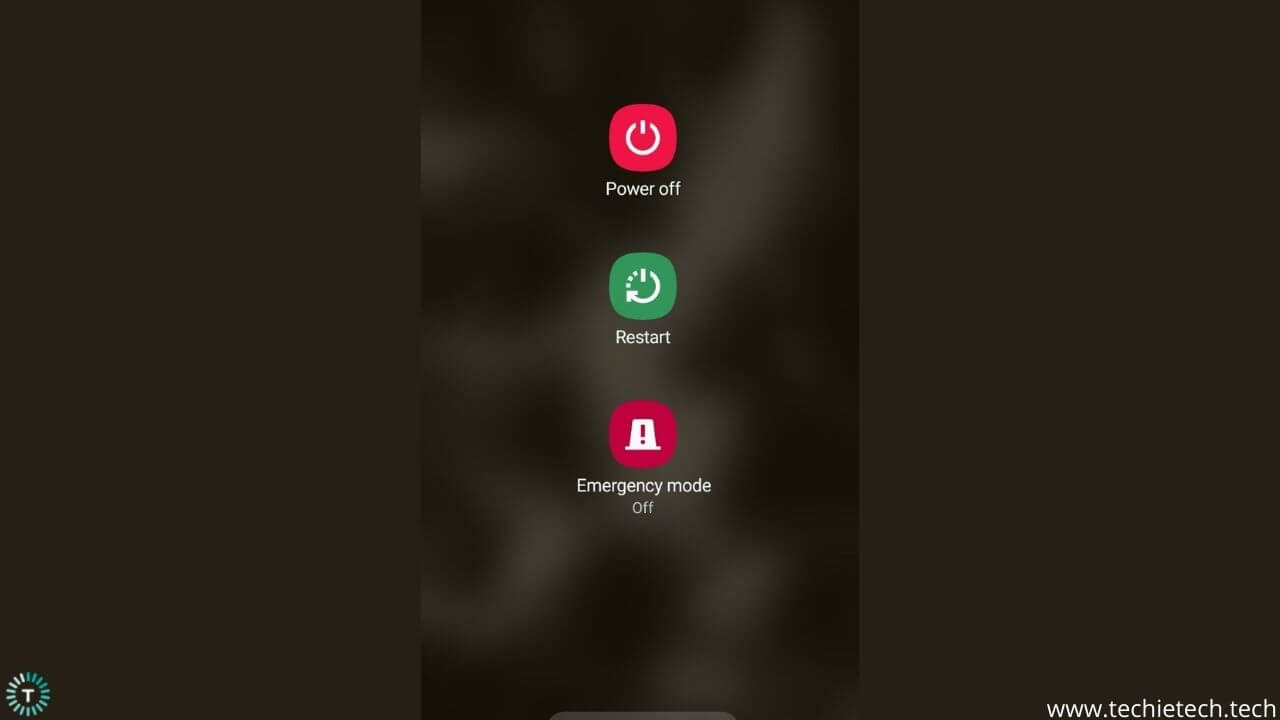
2. Restart your device
Before we move onto any of the following methods, we strongly urge you to restart your device and see if the problem of Play Store can’t update apps is fixed. It is because a simple restart can fix some minor bugs or glitches that are causing Google Play Store to not update apps automatically.
Also read: How to fix 5G not working on Galaxy S21 series
3. Check your phone’s storage
Another method to fix the Google Play Store not updating app issue is to check whether or not the storage space is enough on your phone. Remember, if the phone doesn’t have enough space, you can’t download new or update existing apps from Google Play Store. Generally, your device must have at least 15% storage space for flawless functioning.
You can check the storage space on your phone by opening Settings > Storage. In the storage section, you’ll get detailed information about storage (free or occupied).
To fix the storage space problem, you can remove or uninstall apps, and media files that you don’t want. Also, you can simply transfer files and apps to some external storage like a pen drive or MicroSD cards. Eventually, this will ease the storage space and fix the problem of Google Play Store not updating apps.
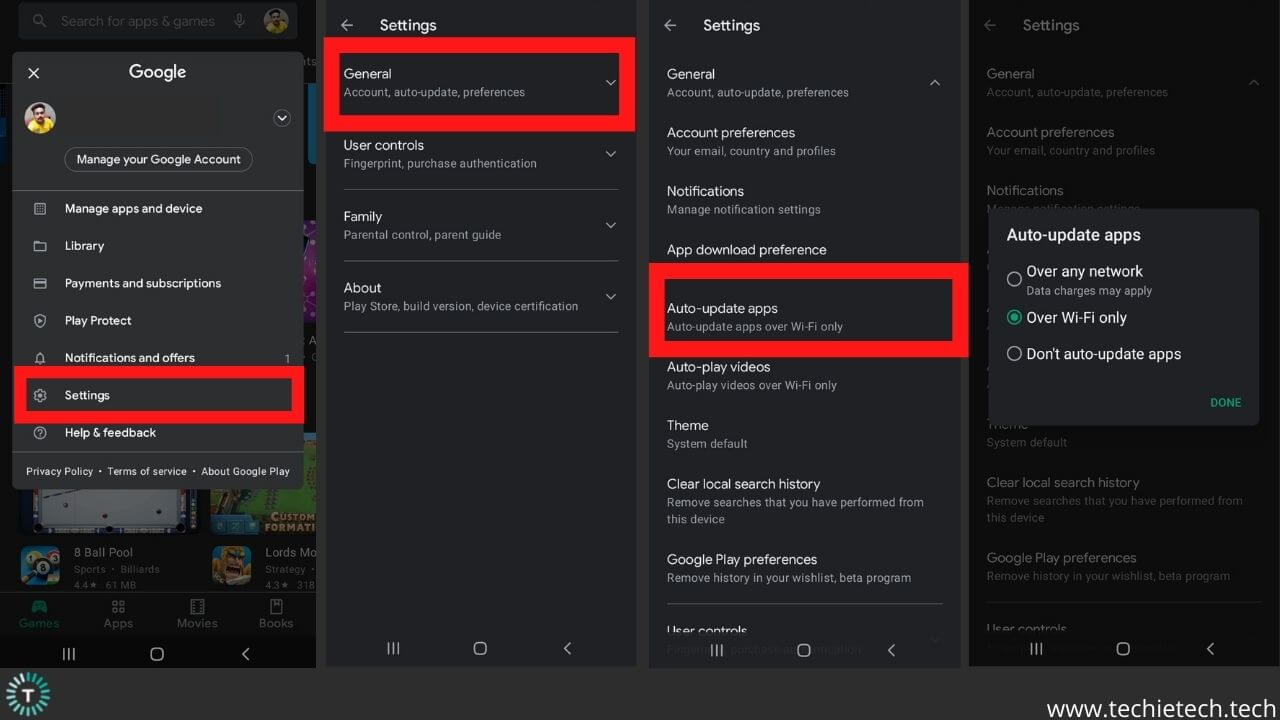
4. Check auto-update settings
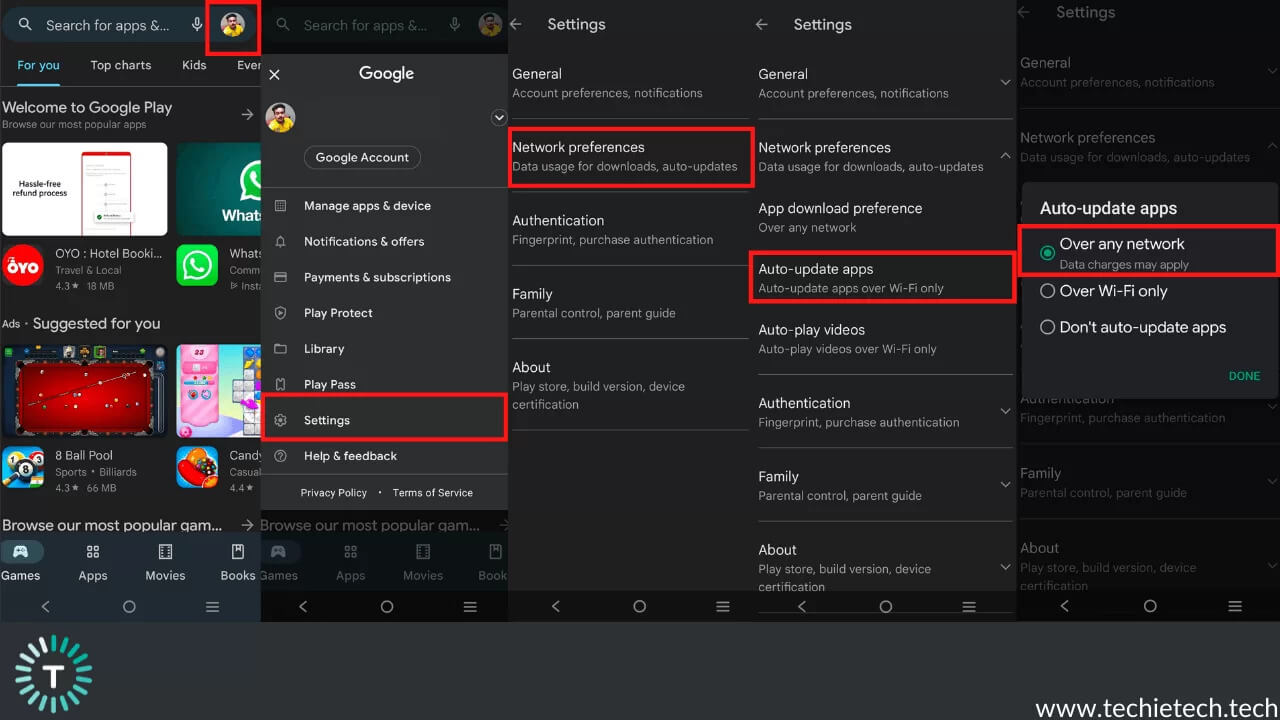
If you can’t update apps from Google Play Store, it is advised to check auto-update settings. You may have opted for the “Don’t auto-update apps” in the auto-update settings. That’s the reason why your apps are not getting updated automatically. Also, the problem could exist if you’ve opted for “update over Wi-Fi only” and using the mobile data to update apps.
If the Google Play Store is unable to update apps automatically, make sure to follow these steps:
- Launch Play Store app
- From the home page, go to the hamburger button (displayed as ≡), or tap on the Google account associated with Play Store on the extreme right of the search bar.
- Then, tap on Settings options
- And, choose auto-update settings
- From the three different options, make sure to choose the option that says “Update over any network”
After you’re done with this, your apps will be updated automatically over any network. Suppose you’re on mobile data, then Google Play Store uses mobile data to update the apps and vice-versa.
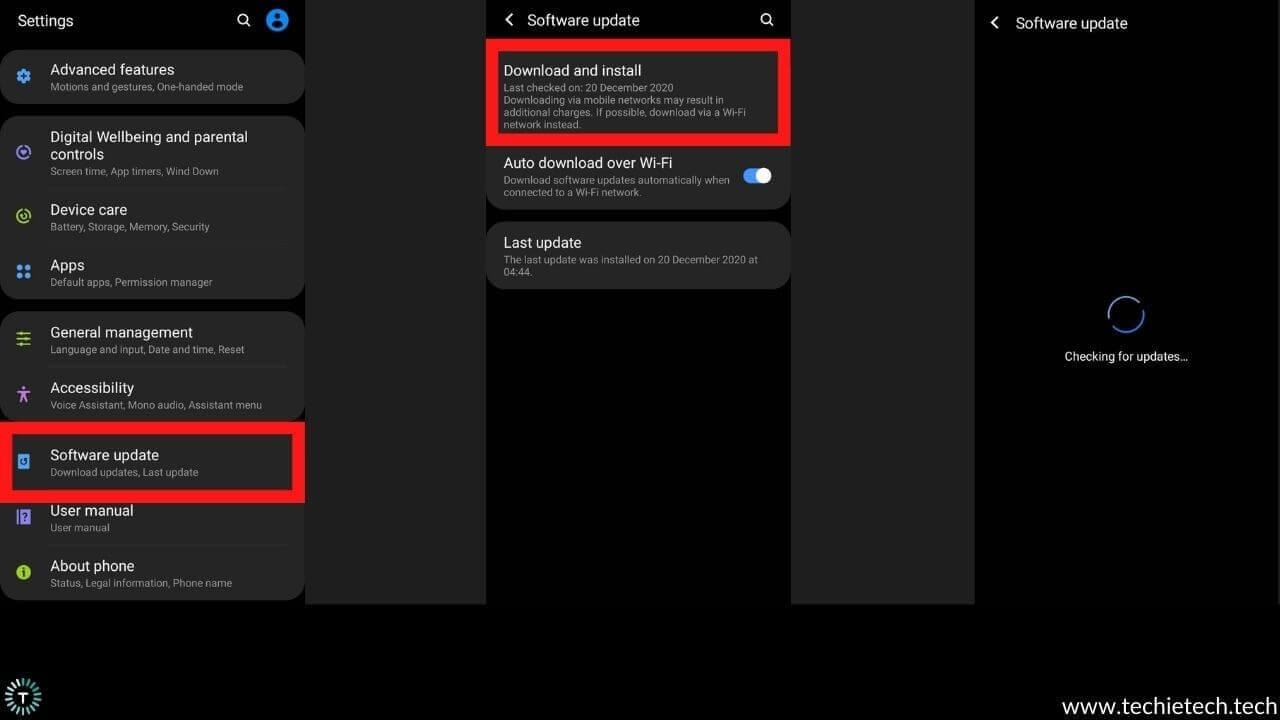
5. Check for Android system updates
If you are not the only one who can’t update apps from the Play Store, then it is very likely that Google will push an update to fix this. So, it is up to you to stay tuned for such updates and make sure that you install them. If you are not aware of how to check and install the Android system update, make sure to follow the steps given as under:
- Go to Settings
- Scroll through and tap on the Software update
- Tap on Download and install
- Next, your device will automatically check for Android system updates available.
- If there’s one, you need to tap on download and then install it.
A system update is one of the best answers to your question “why my Play Store is not updating apps.” That’s because system updates are always useful in fixing bugs and various issues result in problems where apps do not update on Android phones.
Also read: How to fix overheating problem on Galaxy S21 smartphones
6. Clear cache & data from Download Manager
Android Download Manager acts as a supporting staff that helps Google Play Store to download and update apps on your phone. By any chance, if this built-in Android Download Manager app malfunctioned or is disabled, you will be unable to update apps from Google Play Store. You can try resetting the Download Manager by clearing its cache and data to fix Google Play can’t update apps.
Here’s how to clear the cache and data of the download manager:
- Head to Settings
- Then, tap on the Apps (Now, enable a filter that shows System Apps)
- Tap on the Download Manager
- Now, select Storage
- Then, tap on the Clear data and Clear cache, and you’re done.
Now launch the Google Play Store again, and see if it is updating apps or not. Just in case this doesn’t help you, make sure to follow the necessary methods discussed below.
7. Disable battery optimization for Google Play Store
In order to help Google Play Store work well, you shouldn’t impose any restrictions whether it be battery usage or anything else. Remember, enabling battery optimization restricts background usage by the Google Play Store. Eventually, Google Play Store will not update apps in the background. To fix this issue, you need to disable battery optimization for the Google Play Store.
Here’s how to disable battery optimization for Google Play Store:
- Go to Settings
- Scroll through and tap on Apps
- Now, enable the “Show system apps” switch
- Then, tap on Google Play Store
- Tap on battery and choose Optimise battery usage
- On the next screen, if you find the option enabled for Google Play Store, make sure to disable it by tapping on the switch.
Also read: How to fix OnePlus 9 Pro overheating issues
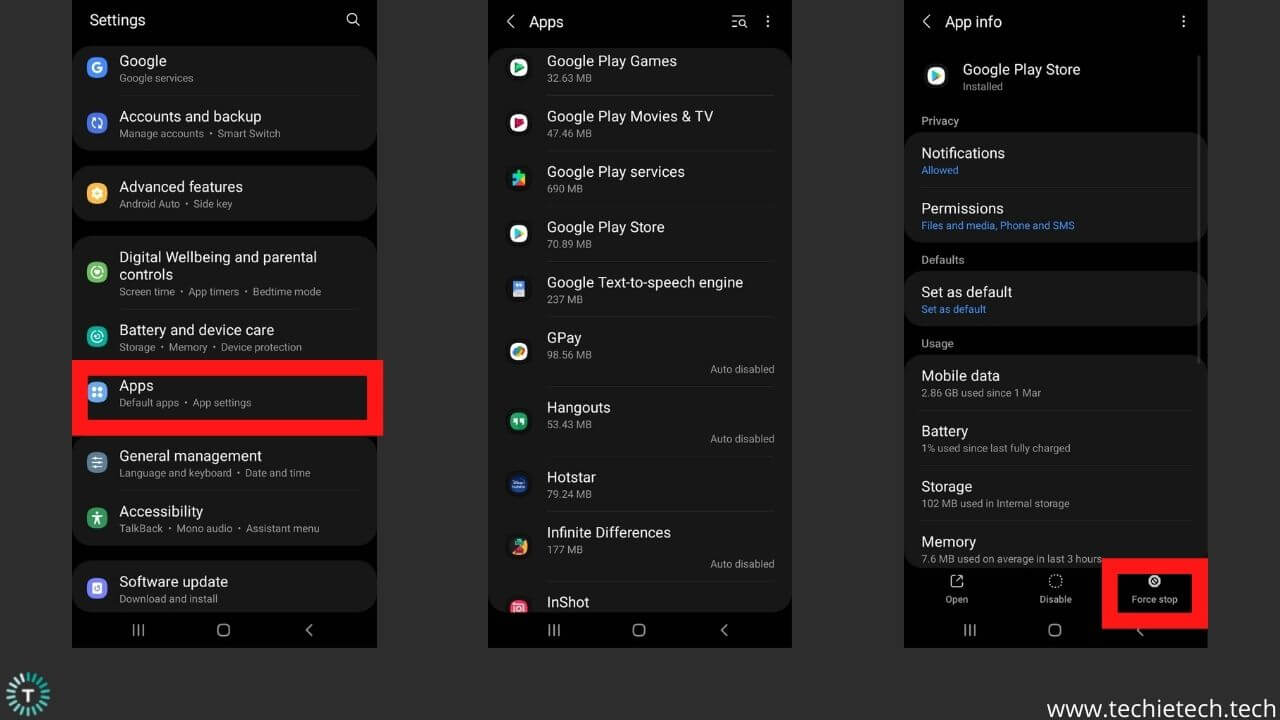
8. Force stop Google Play Store
If the above methods didn’t fix the Play Store not updating apps’ issue, it’s time to force stop the Google Play Store. Force stopping is a method available in every Android device that kills an app and services associated with it. This helps in fixing any persisting app issues that are causing Play Store not to update apps.
Here’s how to force stop the Google Play Store on your Android device:
- From the home screen, go to Settings
- Tap on Apps
- Then, enable the “Show system apps” filter
- Now, tap on Google Play Store
- On the bottom right corner, you’ll see the Force Stop option, simply tap on it.
If Android apps are not updating in Google Play Store even after the app is force stopped, we recommend following various steps below.
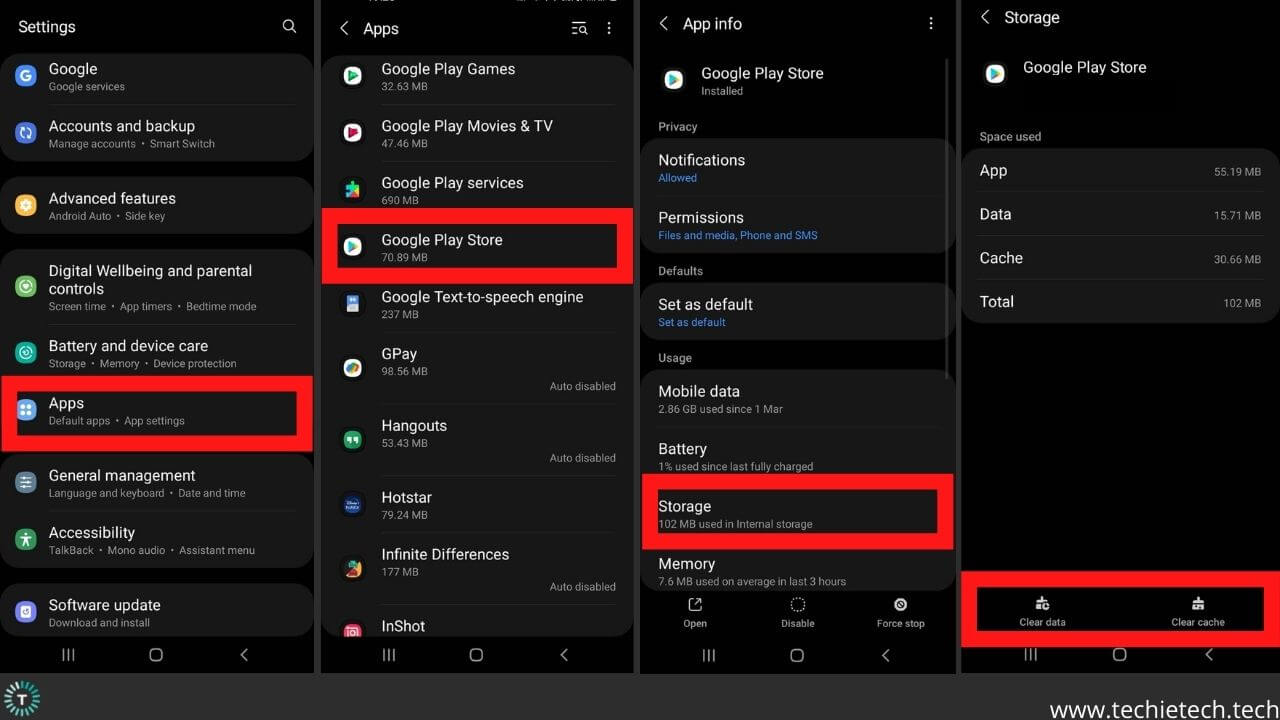
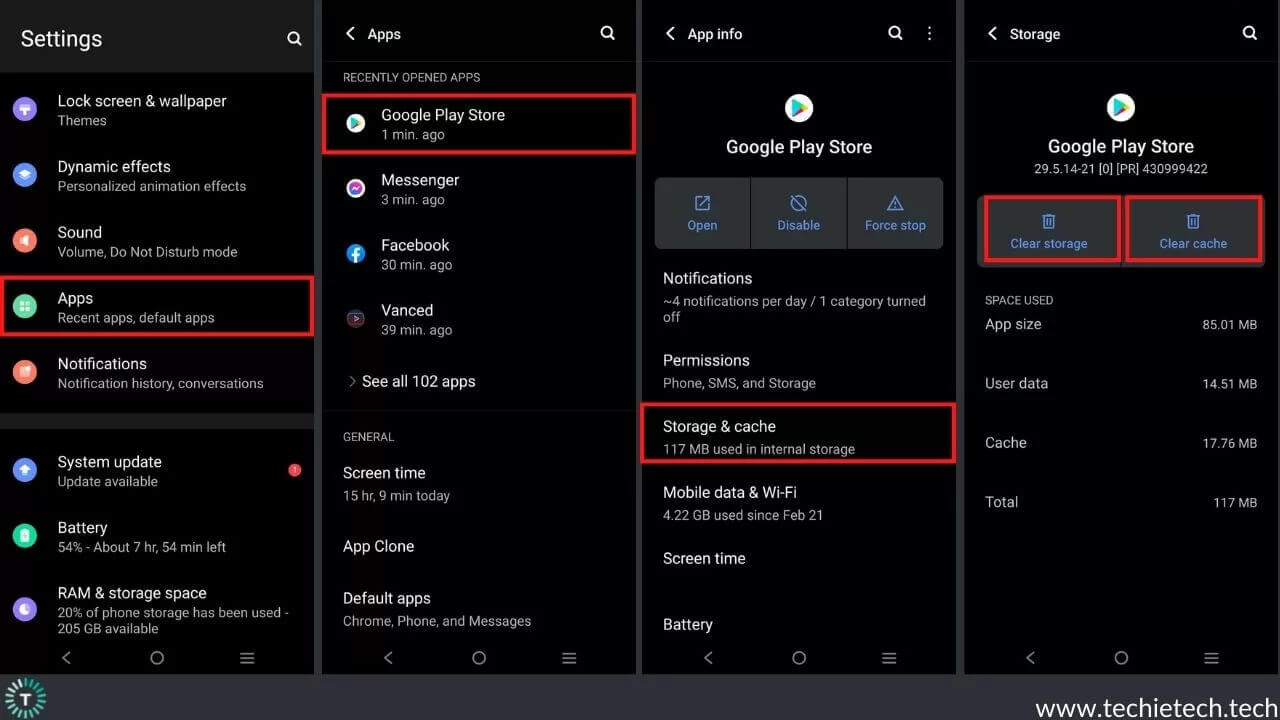
9. Clear cache & data of Google Play Store
Clearing cache and app data is another solution to fix the Google Play Store not updating apps automatically. In simple terms, cache is temporary files of an app that are stored on your device. Even though it is a temporary solution, it is worth the try. With time cache can build up again causing issues sometimes, so it is best to clear it on a regular basis.
Here’s how to clear cache and data of Google Play Store on an Android device:
- Head to Settings
- Scroll down and tap on Apps
- Once you’ve selected the Google Play Store, tap on the Storage option on the next screen
- Now, tap on the Clear data and Clear cache option on the bottom left and right of your device screen.
After you’re done doing this, make sure to relaunch the Google Play Store and check if the issue is fixed.
10. Uninstall & reinstall Google Play Store updates
Sometimes these issues can be the result of faulty update installations. So, it is best to uninstall the Google Play Store updates and reinstall them.
Here’s how to uninstall Google Play Store updates:
- From the Settings menu, tap on Apps
- Choose Google Play Store
- Now, tap on the Vertical Ellipsis “⋮” on the top right corner of the screen, and tap on uninstall updates
After you’re done, make sure to re-install the latest version available by launching the Google Play Store app.
To re-install updates, you need to go to Settings of Google Play Store> About>Play Store version, and the device will automatically install the latest version of Google Play Store on your device.
11. Reset all settings
Resetting app preferences is another method you can try next to fix if you are not able to update apps in the Store. Remember, performing this step won’t delete any of your personal data, rather it will revert various settings like permissions, restrictions, etc. to the default.
Resetting app preferences fixes any settings that are possibly hindering the Google Play Store to update your apps. However, you’ll have to set all the settings again once asked.
Here’s how to reset all the settings on an Android device if you can’t update apps from the Google Play Store:
- Go to Settings
- Tap on the General Management
- Now, tap on the Reset option
- Again, tap on the Reset all settings
- If prompted, input your pin/password/biometric to confirm the selection.
Also read: How to fix battery drain of Galaxy S21, S21 Plus, and S21 Ultra
12. Remove and add your Google account
If the previous method didn’t help to fix the issue, try removing the Google account from your device and add it back after a while. Doing this will probably fix any issues related to your Google account which is restricting Play Store to update or download apps on your device.
Here’s how to remove and add back Google account on an Android device:
- Head to Settings on the phone
- Scroll through the list and tap on Accounts
- Choose Google and then remove the Google account
- Then, restart the phone and add back the account
In most cases, this helps to fix most of Google Play Store problems whether it’s unable to update or download apps or not working at all.
13. Disable and re-enable the Google Play Store
Disabling an app makes it unavailable for operation and fixes different issues related to the concerned app. You can try to disable and re-enable the Play Store app to see if this fixes the issue. In the below pointer, we have mentioned steps to disable and re-enable the Google Play Store app on any Android device, have a look.
- Head towards the Settings menu on your device
- Then, tap on Apps
- Now, choose Google Play Store by enabling the “Show system apps” filter
- On the bottom of the screen, you’ll see the “Disable” option, just tap it.
After some time, re-enable the app and see if the problem is fixed. Remember, this is the last option you can do to solve Play Store not updating apps issues. Further, you can factory reset your device and see if that helps.
14. Factory-reset your Android phone
If nothing helps, there’s no other option than performing a factory reset to fix the issue where Play Store is not updating apps. In the below steps we have mentioned how to factory reset an Android device:
- Head to Settings
- Tap on General management
- Now, choose Reset
- Then, tap on the Factory data reset
- Once you tap the option, a prompt will appear asking you to enter your password/pin/biometrics to confirm the reset option.
Note: After you perform this step all the data will get wiped from your device. We highly recommend you to backup your device before factory resetting it.
FAQs Why Play Store not Updating Apps on Android devices
Why is the Play Store not downloading any app?
If you are among some unfortunate Android users who are unable to download apps using Google Play Store or experience app download errors on Play Store, you should understand this can be caused by corrupted temporary files of the Play Store app. In this case, you should try deleting the app cache i.e. temporary files, viz. app cache.
In the steps given below, we have mentioned different methods on how to fix the Play Store not downloading any application on the Android smartphone.
- Go to Settings
- Tap on “My apps”
- Next, tap on the “Play Store”
- Then, visit the “Storage” option
- At last, tap on the “Clear cache.”
How do I fix Google Play stuck on pending?
If the Play Store apps are stuck at “pending for download” status then make sure to check the following items:
- Check if the app download preference section has “Over Any Network” selected and not “Over Wi-Fi only.” It is important because choosing the latter will restrict the Play Store to download any app on your device over Mobile Data, therefore you see the status of your app “Pending” while downloading it from Google Play Store.
- Try deleting the search history of the Google Play Store. We recommend doing this because clearing the Google Play search history improves the responsiveness of the search experience on the Play Store. You can do this by simply following these steps:
- Go to Settings
- Tap on the General
- From the drop-down menu, tap on the Account and Device preferences
- On the next screen, tap on the Clear device search history, and you’re done.
If that helps fix Google Play stuck on pending, you’re good to go, if it doesn’t, try force stopping method or simply clear the app cache and app data by going to Settings > Apps > Google Play Store > Storage > Clear App Cache/ Clear App Data.
Note: If you are on Android 11 or earlier, you will experience a similar issue, but with a “waiting for download” error message. Therefore, you can also try the above method if the Play Store is stuck waiting for a download.
Why are my apps not updating on the Play Store?
If you are unable to update apps on the Play Store, you should understand that there’s something that is bothering the normal function of the Android app store. Some of the reasons that prevent apps from updating on the Play Store are as follows:
- Google Play Services might be down
- Faulty system updates
- Issues within the Play Store app
Now that we know the primary reasons why Play Store fails to update apps, it’s time to look at the solutions:
- If the Google Play Services is down, you have no other option than to just sit and wait for services to resume smoothly.
- Restart the device
- Force restart the Play Store
- Clear cache and data of the Download Manager
- Clear cache and data of the Google Play Store
- Try removing and adding your Gmail account
- Factory resetting your device stays the last viable option if nothing works out for you. But, before you do that make sure to backup your data.
These methods should be handy if you are looking to fix apps not updating problems on any Android smartphones.
Why is my Google Play Store not auto-updating?
If you are facing trouble when it comes to auto-updating apps on Play Store, we recommend paying attention to the auto-update settings. It is possible that you may have opted for the “Don’t auto-update apps” in the auto-update settings, which could be the only reason behind Google Play Store not auto-updating apps problem. This problem can still haunt mobile data users if they have set auto-update settings to “update over Wi-Fi only.” In that case, Play Store won’t auto-update apps using mobile data. For that, you need to choose an option that says “Update over any network.” Here’s how to do it:
If the Google Play Store is unable to update apps automatically, please follow the steps given below: make sure to follow these steps:
- Launch Play Store app
- Tap on the Google Account Avatar that you have used to log in to the Play Store.
- Now, tap on Settings options
- Then, choose Auto-update settings
- From the three different options, choose an option that says “Update over any network”
- Once you are done, apps will auto-update over any network accordingly.
Why can’t I update my apps on the Play Store?
We recommend ensuring the following things before you try all the methods listed above in this troubleshooting guide if you can’t update apps on Google Play Store.
Things you need to ensure if Play Store won’t update apps:
- Check if the device has an active internet connection
- Make sure your device is not running on low storage space or RAM
- Check date and time of your device
- Disable data saver and power saver mode, if enabled
- Clear Play Store app cache
This suggestion is useful for anyone who is unable to update apps from the Play Store.
Why some apps are not updating in Play Store
If you can’t update some apps in Google Play Store, here we have a few answers that you need to look at. Play Store users find it difficult updating apps from time to time and it is mostly associated with internet speed or an older version of the Play Store. But, there are few more things that make users not able to update apps in the Play Store.
- Corrupted or old app cache can also be responsible behind Google Play not updating apps. Cache files are basically temporary files of an app that are stored in your device. Sometimes these cache files get corrupted and prevent you from updating apps smoothly. The “Play Store can’t update apps” problem can be fixed by clearing the app cache and app data.
- Further, you can uninstall corrupted Google Play updates and reinstall it again to check if this resolves the issue.
For more information on this, you can jump to the above section.
That’s all for now in our troubleshooting guide to fix Play Store not updating apps issues. If you were able to solve the issue, do let us know which of these methods helped you. Also, make sure to check our troubleshooting guide to fix the phone app not working on Android.
Google Play Store is one of the main applications that come pre-installed with almost all mobile phones that are running Android. It contains thousands of applications that the users can download and install on their mobiles. The app is also responsible for keeping all the applications on the mobile up to date. However, quite recently, a lot of reports have been coming in where users are unable to update the applications on their mobiles.
According to the reports, an “Error Checking for Updates” message is received whenever an app update is qued. In this article, we will discuss some of the reasons due to which this error is triggered and also inform you of viable solutions to eradicate it. Make sure to follow the instructions carefully and in the exact order in which they are represented.
What Causes the “Error Checking for Updates” Error on Google Play Store?
After receiving numerous reports from multiple users, we decided to investigate the issue and devised a set of solutions to fix to completely. Also, we looked into the reasons due to which it is triggered and listed them as follows.
- Corrupt Cache: Certain data is cached by all applications to increase performance and decrease the loading times. This data can sometimes be corrupted which can prevent certain features of the application from working properly.
- Corrupt Data: In some cases, certain data related to the app might get corrupted due to which this error might be triggered. This data is usually regenerated every once in a while so there isn’t any data loss if you delete it.
- Internet Connection: Make sure that the connection that you are using is stable and that there isn’t a proxy or VPN active. Because, if the connection is detected as insecure, the updating process might get delayed.
- Storage Space: The updating process can also be derailed if there isn’t enough space available on the mobile. Therefore, it is recommended to free up some space if there is less than 200MB of space available.
- Corrupt SD Card: In some cases, the SD card inside the mobile can prevent the updating process from working properly. Therefore, it is recommended to temporarily remove the SD card and check if it fixes the issue.
- Playstore Updates: The issue can also be caused due to the malfunctioning of a recently installed update. The update might not have been installed properly which might have corrupted some features of the application.
Now that you have a basic understanding of the nature of the problem, we will move on towards the solutions. Make sure to implement these in the specific order in which they are provided to avoid conflict.
Solution 1: Clearing Cache
If certain cached data has been corrupted, it can prevent the applications from being updated. Therefore, in this step, we will be clearing this cached data from the settings. For that:
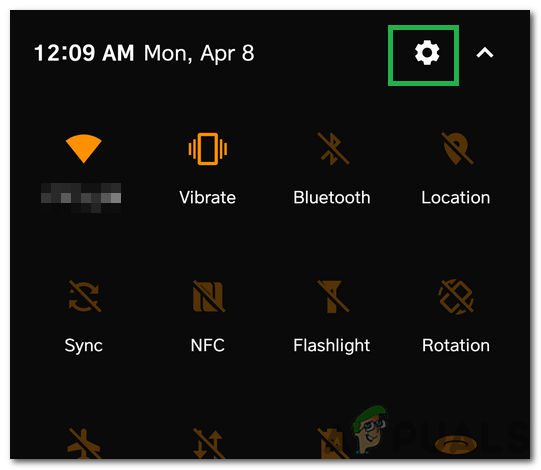
- Drag down the notifications panel and click on the “settings” icon.
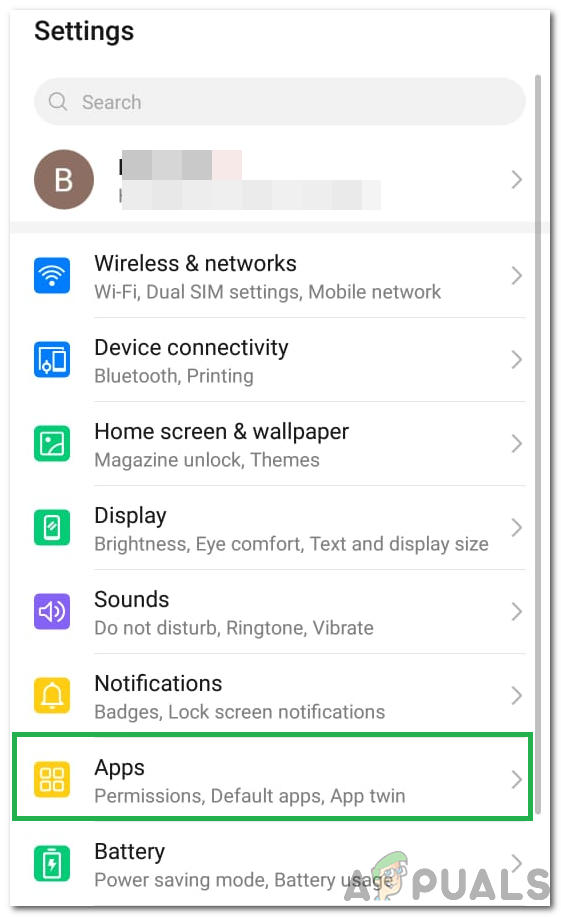
Clicking on the Settings Cog - Scroll down and click on “Applications”.
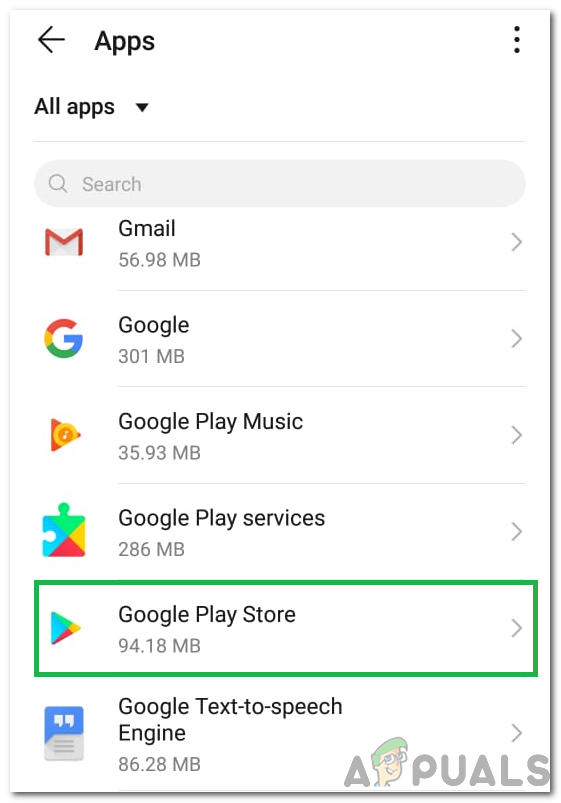
Clicking on the “Applications” option - Click on “Apps” and click on the “Google Play Store” app from the list.
Selecting Google Play Store from the list Note: If you don’t see the Google Play Store app, click on the three dots in the top right corner and click on “Show System Apps”.
- Click on “Storage” and select the “Clear Cache” option
Clicking on the “Clear Cache” button - Wait for the cache to be cleared and check to see if the issue persists.
Solution 2: Clearing Data
In case clearing the cache doesn’t fix the issue, in this step, we will be clearing the data for the Google Play Store app. Clearing this data might prompt you to sign in to your account again but it won’t cause any other important data loss. To clear the data, just repeat the process indicated in the first method and opt for the “Clear Data” option instead of the “Clear Cache” one.
Solution 3: Uninstalling Updates
If a certain update hasn’t been applied properly, it can prevent some important features of the application from working properly. Therefore, in this step, we will be uninstalling all updates to the Google Play Store application. For that:
- Drag down the notifications panel and click on the “settings” icon.
- Scroll down and click on “Applications”.
- Click on “Apps” and click on the “Google Play Store” app from the list.
Selecting Google Play Store from the list Note: If you don’t see the Google Play Store app, click on the three dots in the top right corner and click on “Show System Apps”.
- Click on the “Three Dots” in the top right corner and select the “Uninstall Updates” option.
Clicking on the three dots in the top right corner and selecting “Uninstall Updates” - Check to see if the issue persists.
Before moving on with the solutions, remove the SD card (after powering off your phone) and then power on your phone to check if that resolves the issue. If so, then make sure to transfer back the apps on the SD card (if installed on the SD card) to your internal storage. Also, check the Play Protect status (in the Google Play menu, tap on Play Protect). If it is showing some error or warning (e.g., Device is not Certified), clear that error/warning and then check if the Google Play works fine.
Solution 4: Update the OS of Your Device to the Latest Build
You may encounter the updates issue if the OS of your phone is outdated. In this case, updating the OS of your phone to the latest build may solve the problem. The instructions slightly may differ for different users (depending on the make and model of your phone).
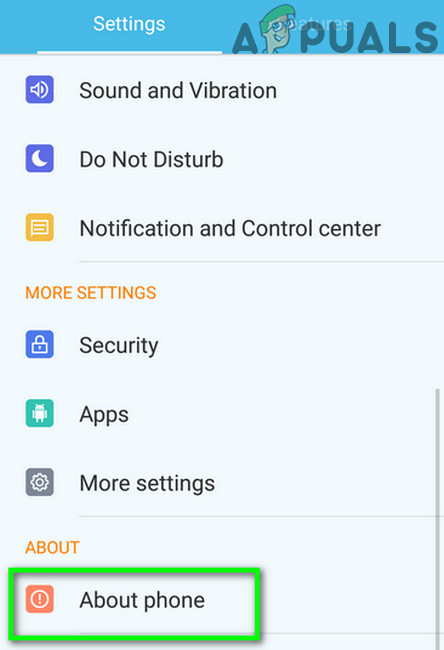
- Launch Settings of your phone and select About Phone.
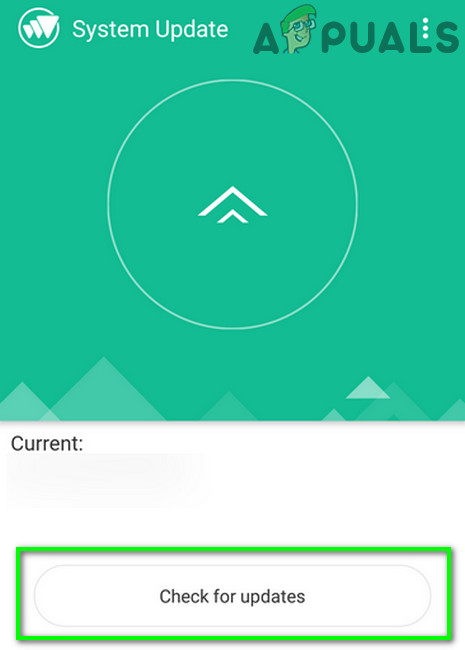
Tap on About Phone in Settings - Now open System Update and then tap on Check for Updates.
Check for Updates of Your Android Phone - If an update of the OS is available, then apply it and reboot your phone.
- Upon reboot, check if the Google Play’s updating issue is resolved.
Solution 5: Allow Google Play Store to Update on Any Network
You may fail to check for updates on Google Play if the Google Play Store is configured to update the apps on Wi-Fi only but you are trying to update the apps on a mobile network (or a Wi-Fi network considered by your device as mobile e.g., from a mobile broadband device). In this case, allowing the Google Play Store to update over any network may solve the problem.
- Launch the Google Play Store and open its menu (by tapping the hamburger menu, near the top left).
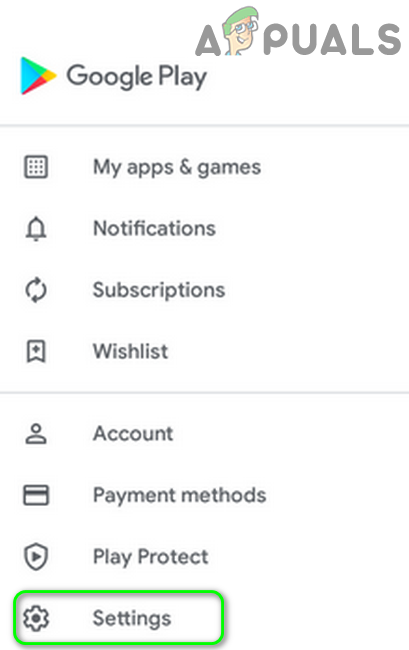
- Now, near the bottom of the menu, open Settings, and select Auto-Update Apps.
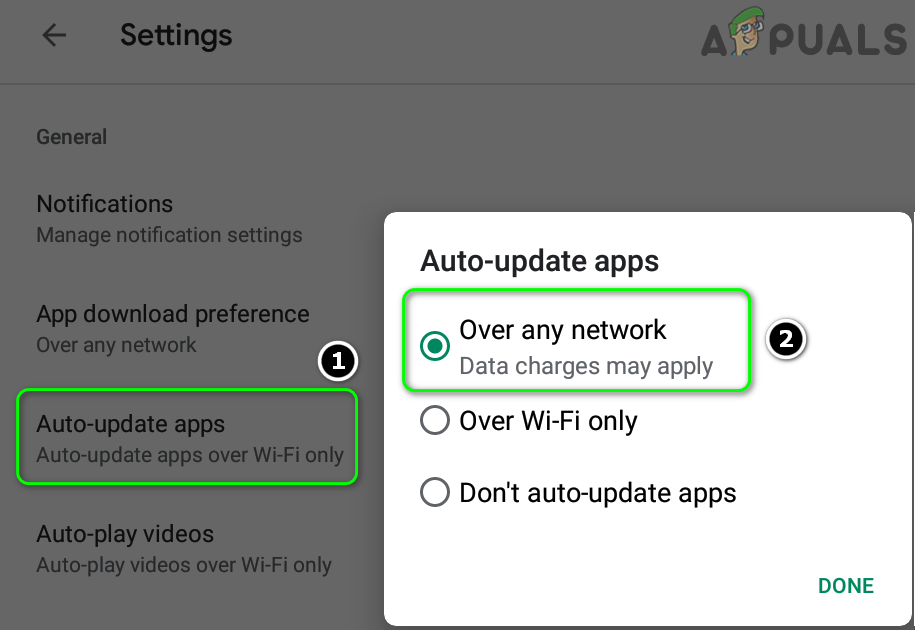
Open Settings of the Google Play Store - Then choose the option of ‘Over Any Network’ and tap on Done.
Set Google Play to Update Apps Over Any Network - Then check if the Google Play’s updating error is resolved.
If the issue persists, then check if a VPN client can be used to update the Google Play apps.
Solution 6: Enable Notifications for Google Play
You may encounter the issue at hand if the Google Play Store is not allowed to show notifications on your screen. In this context, allowing the Google Play Store to show notifications on your screen may solve the problem.
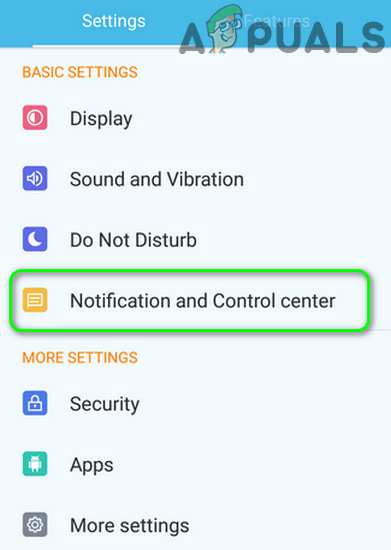
- Launch the Settings of your phone and open the Notifications Center.
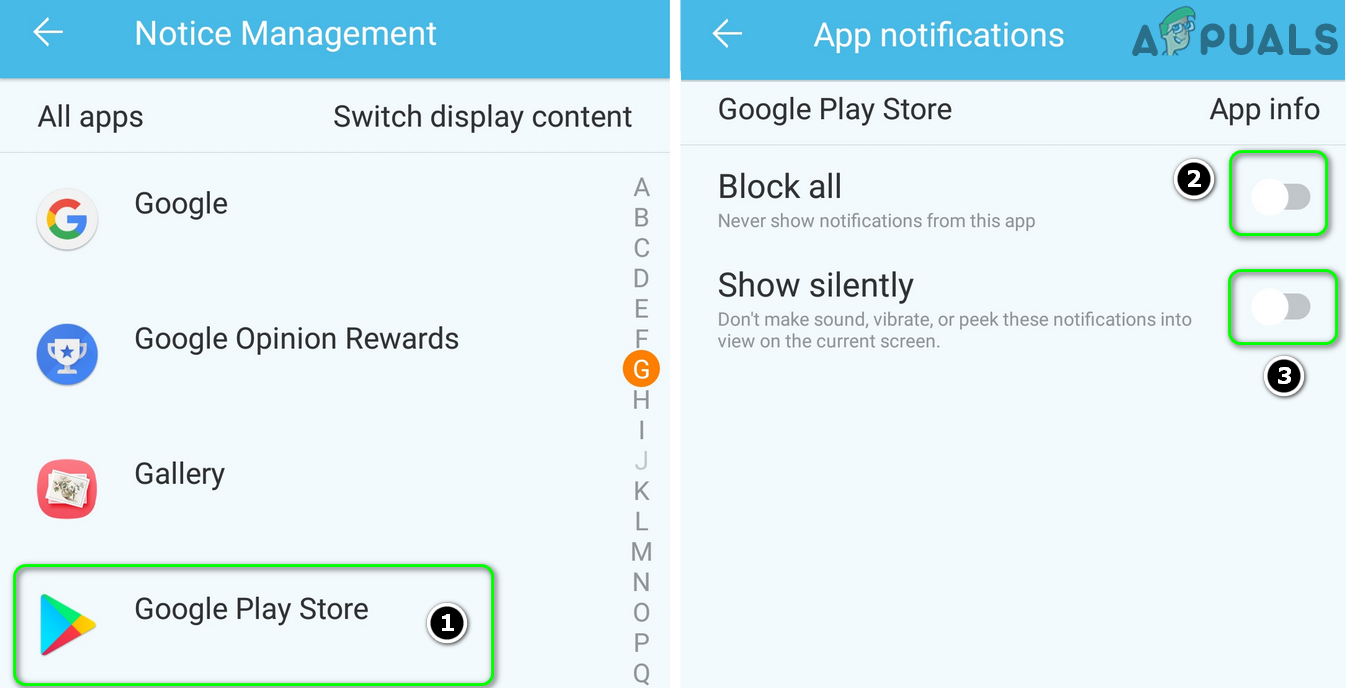
Open Notifications and Control Center - Then select Google Play Store and disable the option of Block All.
- Now disable the option of Show Silently and then reboot your phone.
Enable Notifications for the Google Play Store - Upon reboot, check if the Google Play is clear of the update error.
Solution 7: Adjust the Date/Time of Your Device
You may fail to update the apps on Google Play if the date/time of your phone is not properly configured (or set). In this case, properly configuring the date/time of your phone may solve the problem.
- Launch the Settings of your phone and open Date & Time.
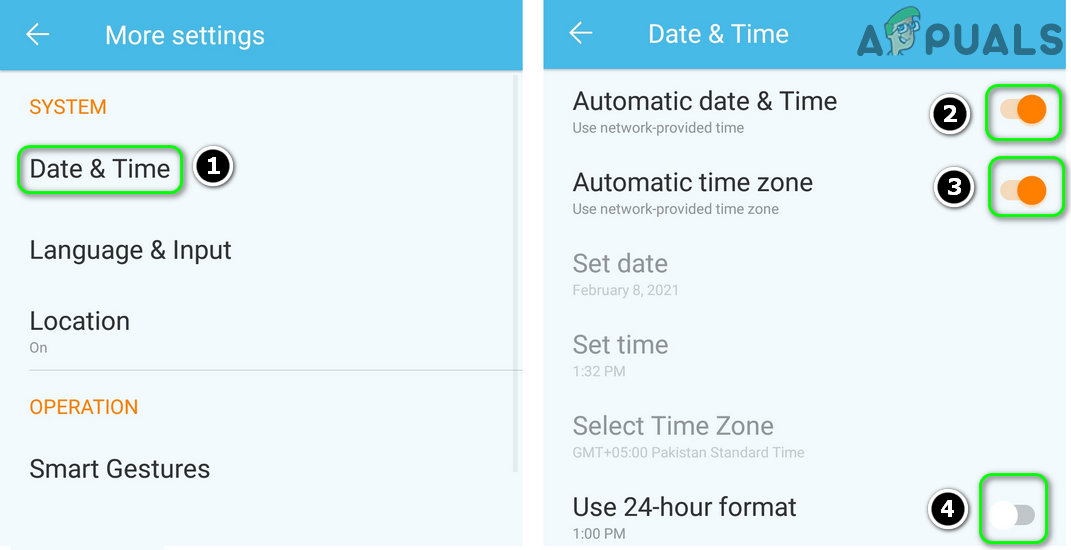
- Now enable the options of Automatic Date & Time and Automatic Time Zone.
- Then disable the option of Use of 24-Hour Format and then reboot your phone.
Enable Automatic Time and Time Zone and Disable 24-hour Format - Upon reboot, check if Google Play is successfully updating the apps.
Solution 8: Grant All the Required Permissions to Google Play Store and Services
The Google Play Store may fail to update the apps if the permissions essential for the Google Play Store to operate are not configured properly. In this context, granting all the permissions required by the Google Play Store and Service may solve the problem. But before that, make sure ‘Google Play Services’ are updated to the latest build.
- Clear the Cache and Data of the Google Play Store (as discussed above).
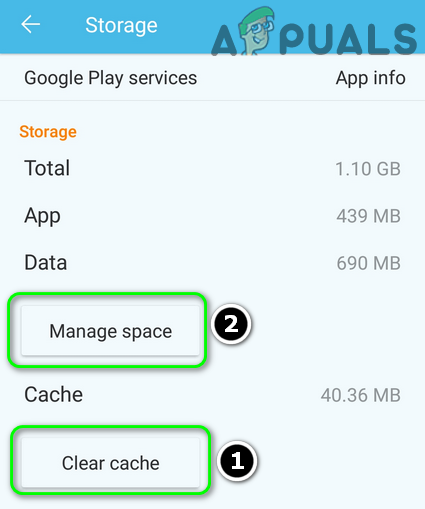
- Then clear the Cache and Data (in Manage Space) of Google Play Services, Google Services Framework, and Google App.
Clear Cache and Data of the Google Play Services - Now reboot your device and upon reboot, launch the Settings of your phone.
- Then select Apps and open Google Play Store.
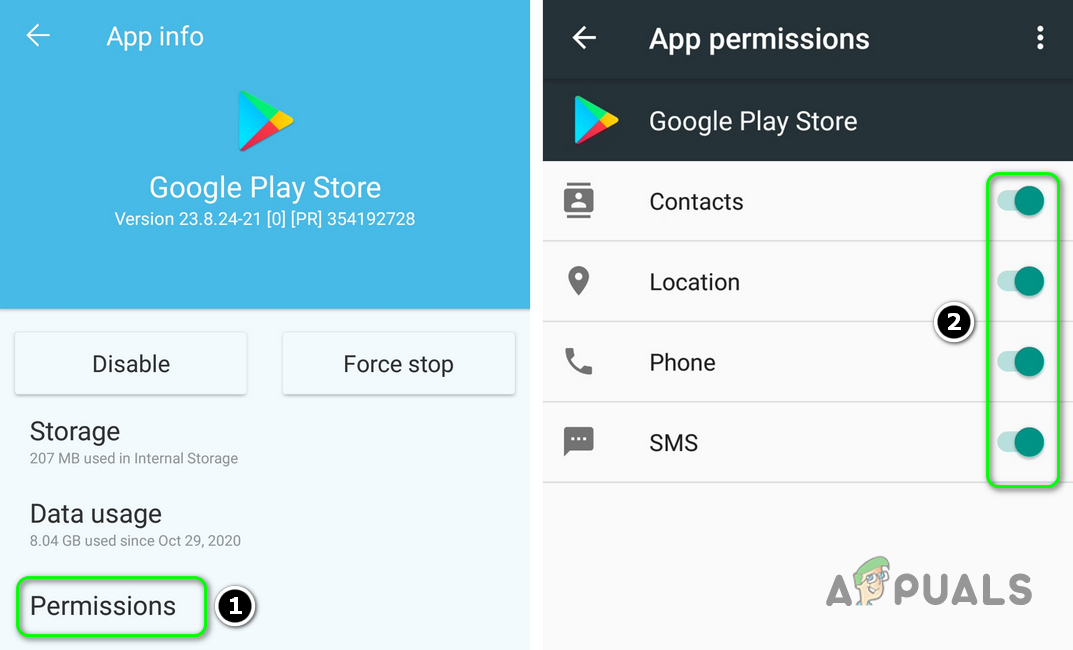
- Now select Permissions and make sure all the permissions are enabled.
Enable Permissions of the Google Play Store - Then repeat the same to enable all the permissions for the Google Play Services.
- Now launch the Google Play Store and configure it (if asked to).
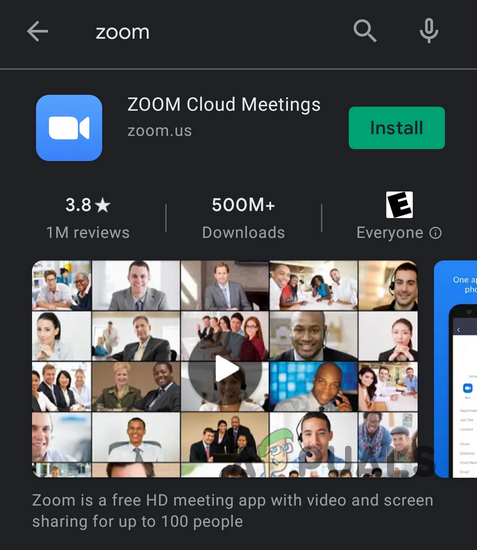
- Then install a new app (e.g., Zoom or Skype) from the Play Store and then check if the updates issue is resolved.
Install Zoom from the Play Store - If not, let the phone charge overnight and on the next morning, check if the updates are working fine.
Solution 9: Manually Update Some Apps in the Play Store
The issue at hand could be a temporary glitch of the Android OS and manually updating some of your phone’s apps may clear the glitch and thus solve the problem.
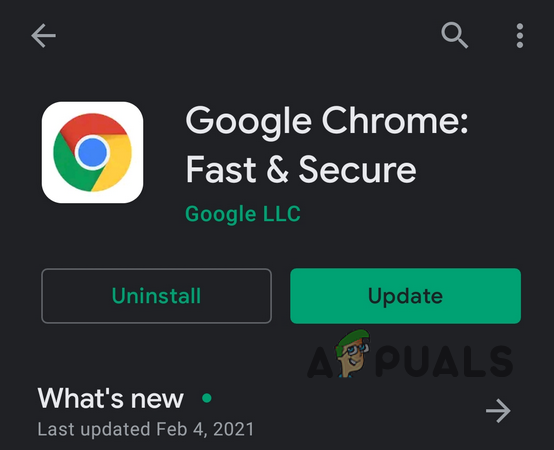
- Launch the Play Store and search for any of your installed apps (in the search bar) e.g., Chrome.
- Now update the App e.g., Chrome (if an update is available), and repeat the same to update some of the apps (preferably, apps by Google). You may update the apps in alphabetical order (or you can use the Reviews tab in the My Apps & Games section in the Play Store). You may try a 3rd party application (like Update Software Fast Update for All Android) to update the apps.
Update Google Chrome from the Play Store - After updating the apps, check if the Play Store’s updates issue is resolved.
Solution 10: Remove Some of the Apps from the Device
You may fail to update the apps in the Google Play Store if some of your phone’s apps are hindering the operation of the update modules of the Play Store (e.g., a corrupt installation of an app or an app has become incompatible with your device). In this case, removing some of the apps from your device may solve the problem.
Remove the Problematic Apps
- Launch the Google Play Store and open its menu.
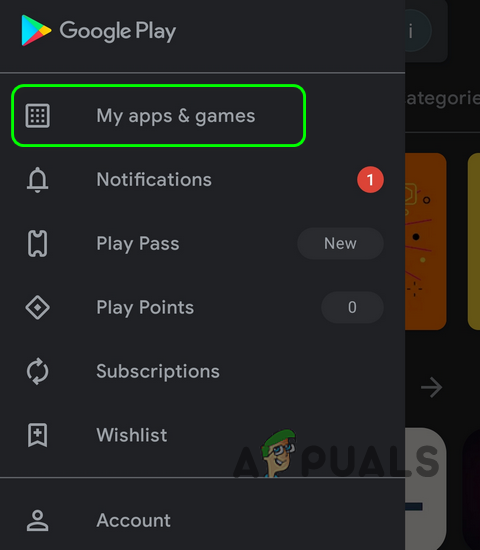
- Now open My Apps & Games and steer to the Installed tab.
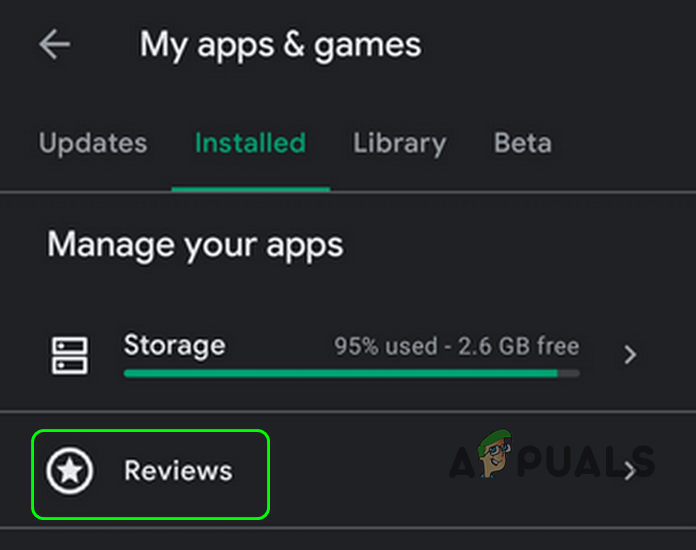
Open My Apps & Games - Then select Reviews and then uninstall the applications (in the Unreviewed or Posted tab) that are not essential or critical for you (some users reported that uninstalling Alexa, OnePlus Notes App or AdClear applications resolved the issue).
Open Reviews in the Installed tab - Now check if the updates issue is resolved.
Uninstall the Apps That Have not Been Updated for a Long Time
- If the issue persists, then steer to the Installed tab of My Apps & Games in the Play Store (as discussed above).
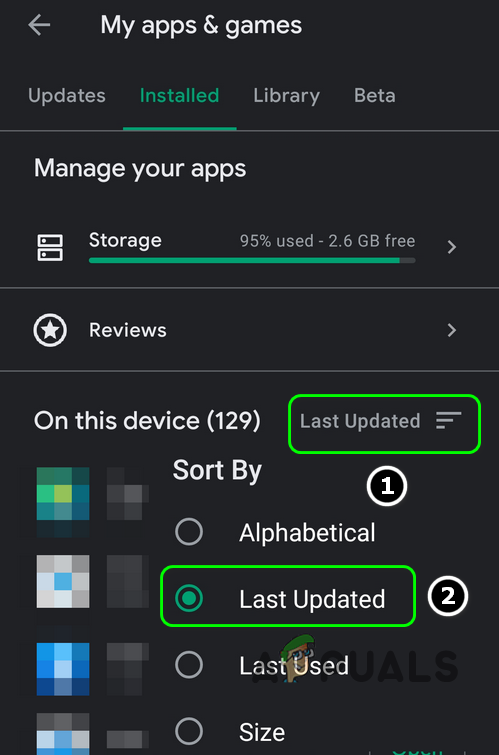
- Now change the sorting of ‘This Device by‘ to Last Updated and then scroll to the end of the list.
Sort Installed Applications by Last Updated - Then remove a few of the apps that have not been updated for a long update and check if the issue is resolved.
Remove the Incompatible Apps
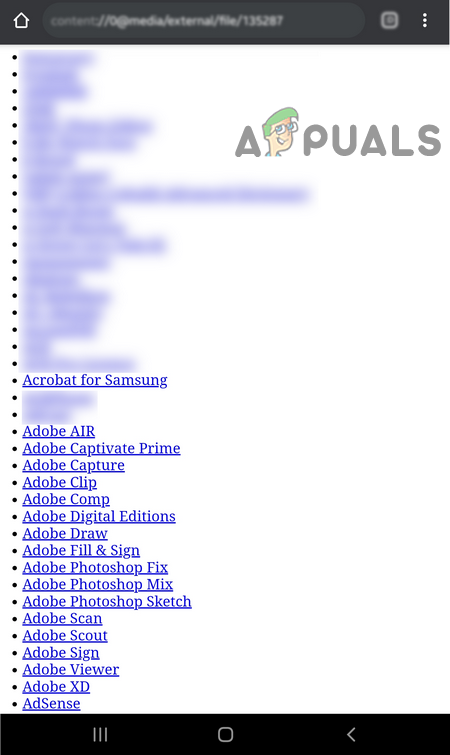
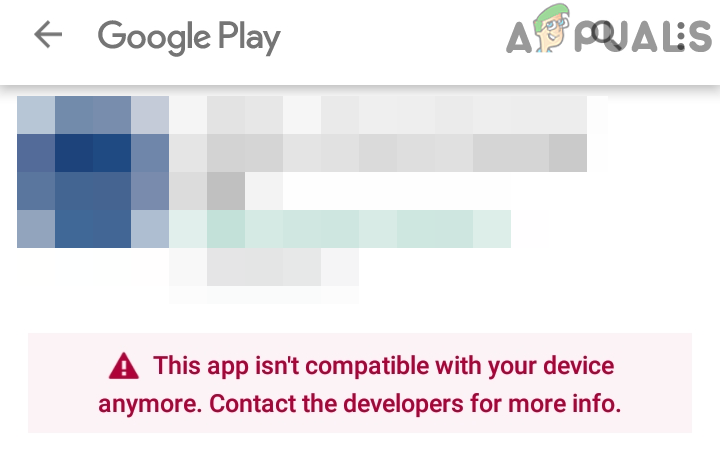
- If the issue is still there, then open all the installed apps one by one (you can try a 3rd party app like Update Software List or List My Apps and export the apps list with the hyperlinks to their Play Store page as HTML. Then you can use that HTML in the Chrome browser of your phone to check for the apps one by one) in the Play Store and check if the app shows Open, Update, Enable, No Longer Compatible With The Device.
Open HTML Exported File of Your Apps in Chrome - If Enable is shown, enable the app. If No Longer Compatible with The Device is shown, remove the app and then check if the updates issue is resolved.
This Device isn’t Compatible With Your Device Anymore
Uninstall the Apps that Have Been Removed from the Play Store
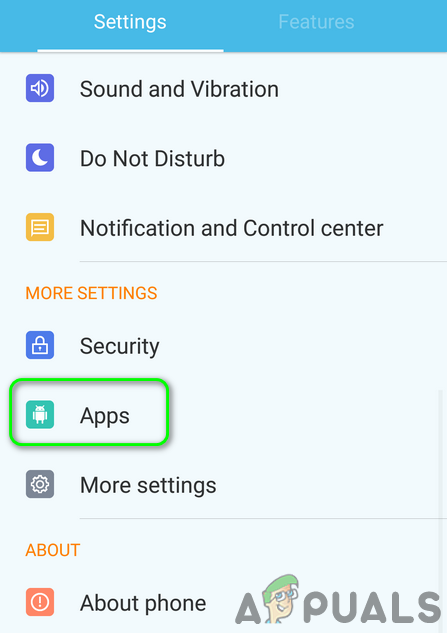
- If the issue persists, then launch Settings of your phone and open Apps.
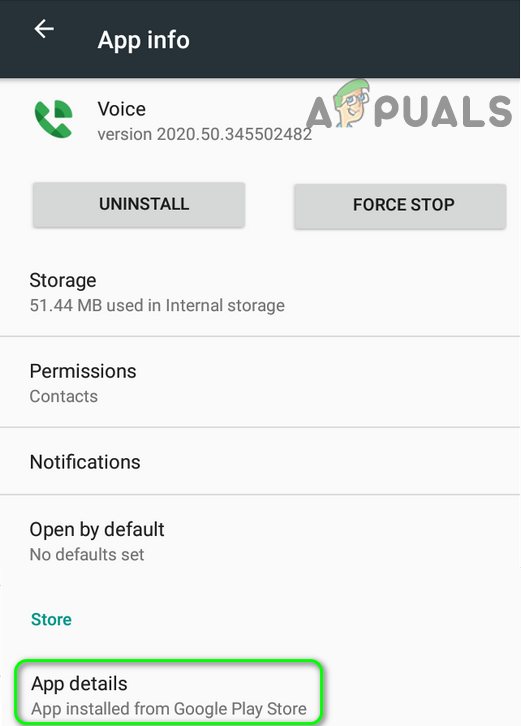
Open Apps in the Settings of Your Phone - Now open the installed app one by one and tap on App Details which will open the app’s page of the Play Store. Now check if the app is removed from the Play Store (the system’s apps might not show the App Details option). If so, then remove the app from your phone and check if it resolves the updates issue.
Open App Details in the App’s Settings
Solution 11: Remove Some of the Google Accounts from the Phone
You may encounter the issue at hand if any of your Google accounts are not properly configured (e.g., a password change on the account but the password of the problematic account did not update in the Accounts on the phone). In this scenario, removing some of the Google accounts for your device may solve the problem. Before proceedings, make sure to remove the Family Link (if installed) and also, check if you remember the password of the account. If you are using your phone to approve the sign-in to the account, then make sure you can use an alternate method (e.g., SMS to your registered phone number) to sing-in to the account.
Enable the Sync for the Google Play Store
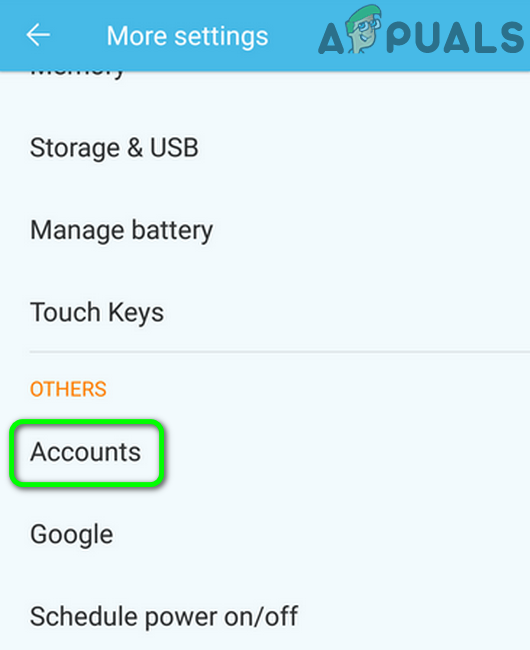
- Launch the Settings of your phone and open Accounts (you may have to look into More Settings).
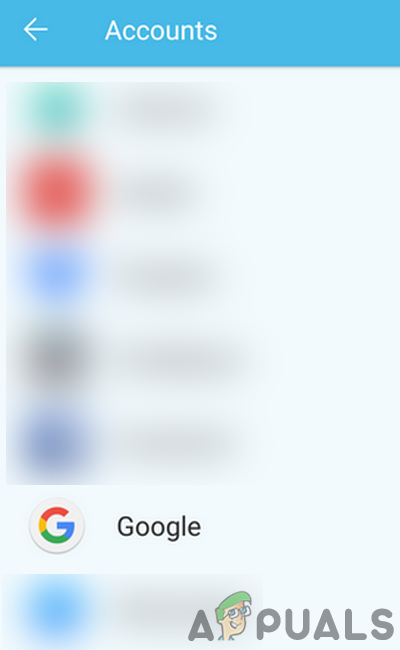
Open Accounts in the Phone’s Settings - Now, select Google and make sure all accounts are properly syncing to Google.
Open Google in the Accounts of Phone’s Settings - If there is an account that is not syncing, then tap on that account.
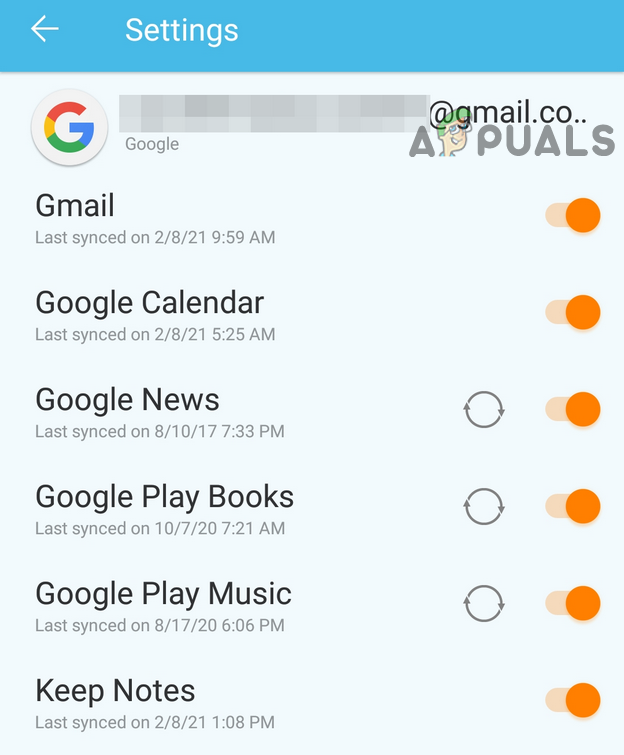
- Now check if all the sync options are enabled, if not, then enable the Sync (especially related to Google Play) and check if that resolves the update issue.
Enable Sync for the Google Play in Accounts
Remove Some of the Accounts
- If that did not do the trick or the account is not required, then tap on that account (in Settings>>Accounts>>Google) and then tap on the More button.
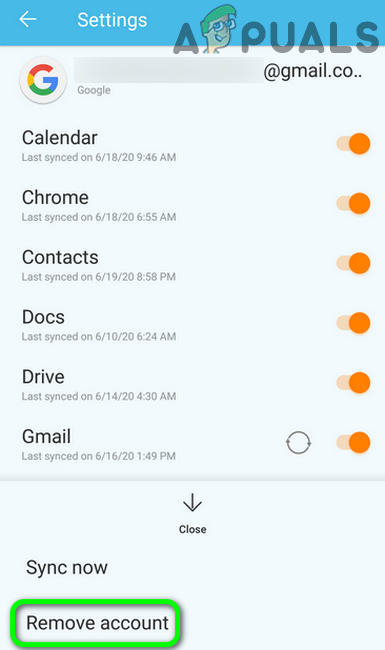
- Now tap on Remove Account and then confirm to remove the account.
Remove the Problematic Google - Then reboot your device and check if the updates issue is resolved.
Remove All the Google Accounts
- If not, then remove all the Google Accounts (as discussed above) and reboot your device.
- Upon reboot, re-add one of the accounts to the device and then check if the issue is resolved.
- If that did not do the trick, then remove the account once again and reboot your device.
- Upon reboot, create a new Gmail account (on the device) and use that account to sign-in to the device which hopefully, resolves the updates issue. If you want to use the old account on the device, then change the passwords of the old accounts and then add them to the device.
If the issue persists, then you may have to perform a full factory reset of your device.
Мобильное приложение Play Market периодически проводит проверку обновлений приложений и выдает ошибку проверки обновлений Play Market — что же делать в таком случае? В чём может быть причина и как решать эту проблему, прочитайте в подробностях далее.
Содержание
- Очистка кэша Play Market
- Настройка даты и времени при появлении ошибки проверки обновлений
- Проверка версии Android на устройстве
- Что делать для обновления приложения из Play Market
- Видео-инструкция
Очистка кэша Play Market
Для быстрой работы программ в телефоне им необходим кэш. Эти данные хранят важную информацию, такую как историю выбора пользователя, сохранённые материалы и важные для системы данные. В некоторых ситуациях кэш может не только помогать, но и вредить стабильной работе программы. Каждое приложение или игра хранит на мобильном устройстве такой тип файлов. При сбоях и ошибках рекомендуется очищать их.
Попробуем сделать это для мобильного магазина приложений Google:
- Выбираем кнопку настроек на главном экране телефона;
- Находим в списке пункт «Память»;
- Выберите «Память устройства» на следующем этапе;
- Выбираем в списке строку «Кэшированные данные»;
- Во всплывающем окне выбираем пункт «Удалить».
Затем окно настроек можно закрыть. Чтобы приложения заработали с новыми параметрами, мобильное устройство необходимо перезагрузить. Выберите кнопку питания и подтвердите перезагрузку. Если такой кнопки нет, выберите «Выключить» и через некоторое время снова включите телефон. В мобильных устройствах с Android поставщик ПО включает в список системных приложений программы для очистки памяти. Воспользуйтесь ими, эта процедура лишней не будет.
Читайте также: как сделать говорящую зарядку на Android.
Настройка даты и времени при появлении ошибки проверки обновлений
Система обновлений в смартфонах и планшетах опирается на дату, которая установлена в мобильном устройстве. Если она будет некорректной, это может быть причиной разных ошибок в мобильном телефоне. Это происходит из-за ручных настроек пользователем.
Чтобы решить проблему с ошибкой проверки обновлений приложения Play Market, используйте настройки автоматического определения даты и времени:
- Снова переходим в меню настроек мобильного устройства;
- Находим среди прочих настроек пункт «Дата и время»;
- Далее нужно найти параметр «Автоопределение даты» и поставить на нём флажок.
Если есть пункт «Автоопределение времени», его также следует активировать. Для того, чтобы смартфон автоматически определял время и дату, необходимо подключение к сети Интернет по Wi-Fi или мобильному Интернету. После первого выхода в сеть дата будет обновлена и ошибка проверки обновлений на телефоне в Google Play Market будет устранена. Если же автоматическая настройка даты и времени были уже активированы, используйте другие инструкции.
Это интересно: как посмотреть экранное время на Android.
Проверка версии Android на устройстве
Практически каждый год компания Google выпускает новую версию прошивки Android для всех устройств на базе этой ОС. Соответственно более старые версии перестают поддерживаться. Этому есть несколько причин. Во-первых, в ранних версиях недостаёт тех технологий, которые появились в новых релизах Андроид. Во-вторых, реализация поддержки занимает дополнительные расходы, которые ни одной современной компании ни к чему. И в-третьих, корпорация стимулирует пользователей приобретать новые более дорогие модели устройств.
Телефоны с Android ниже 5 версии уже не поддерживаются многими приложениями. Это можно увидеть при попытке найти новую версию нужной программы в Play Market. На странице с загрузкой приложения появляется сообщение с таким текстом.
Чтобы проверить, какая версия системы на вашем мобильном телефоне:
- Необходимо открыть настройки смартфона;
- Выбрать пункт «О телефоне»;
- И найти версию Android.
Если версия ниже 5, то большинство мобильных приложений не смогут получить обновления. А некоторые не получится даже установить на телефон. Чтобы всё же это сделать, можно использовать сторонние источники программ и игр.
Что делать для обновления приложения из Play Market
Когда удастся устранить проблему с обновлениями, можно приступать к ручному обновлению приложений в магазине Google.
Со временем они автоматически могут быть обновлены, но в некоторых случаях нет времени и необходимо сделать это быстрее.
- Для этого откройте приложение Play Market на телефоне;
- Затем нужно найти кнопку меню вверху;
- Выберите «Мои приложения и игры»;
- В списке укажите программу, которую следует обновить и нажмите на иконку для поиска и установки обновлений.
В меню также есть кнопка для обновлений всех установленных на телефоне пользователя приложений и игр. Телефон в этот момент должен быть подключен к сети Интернет через Wi-Fi. Если вы пользуетесь мобильным Интернетом, то в настройках нужно включить возможность обновления через этот способ подключения.
Видео-инструкция
Инструкция из видео демонстрирует, что делать, если появляется ошибка во время проверки обновлений приложения Play Market.
На чтение 12 мин. Просмотров 100 Опубликовано 28.04.2021
Google Play Store – одно из основных приложений, которые предустановлены почти на всех мобильных телефонах под управлением Android. Он содержит тысячи приложений, которые пользователи могут загрузить и установить на свои мобильные устройства. Приложение также отвечает за поддержание всех приложений на мобильном телефоне в актуальном состоянии. Однако совсем недавно стало поступать много сообщений о том, что пользователи не могут обновлять приложения на своих мобильных телефонах.
Согласно отчетам, « Проверка ошибок для обновлений ”сообщение появляется каждый раз, когда запрашивается обновление приложения. В этой статье мы обсудим некоторые причины, из-за которых возникает эта ошибка, а также проинформируем вас о жизнеспособных решениях для ее устранения. Обязательно следуйте инструкциям в точности и в том порядке, в котором они представлены.
Содержание
- Что вызывает ошибку« Ошибка проверки обновлений »в магазине Google Play?
- Решение 1. Очистка кеша
- Решение 2. Очистка данных
- Решение 3. Удаление обновлений
- Решение 4. Обновите ОС вашего устройства до последней сборки
- Решение 5. Разрешить Google Play Store обновляться в любой сети
- Решение 6. Включите уведомления для Google Play
- Решение 7. Настройте дату/время на вашем устройстве
- Решение 8. Предоставьте все необходимые разрешения для магазина и служб Google Play
- Решение 9. Обновите некоторые приложения в Play Маркете вручную
- Решение 10. Удалите некоторые из приложений с устройства
- Удаление проблемных приложений
- Удалите приложения, которые Давно не обновлялись.
- Удалите несовместимые приложения
- Удалите приложения, которые были удалены из Play Store
- Решение 11. Удалите некоторые из учетных записей Google с телефона
- Включите синхронизацию для магазина Google Play
- Удаление некоторых учетных записей
- Удалить все учетные записи Google
Что вызывает ошибку« Ошибка проверки обновлений »в магазине Google Play?
Получив многочисленные отчеты от нескольких пользователей, мы решили чтобы исследовать проблему и разработал набор решений, чтобы ее полностью устранить. Кроме того, мы изучили причины, из-за которых он срабатывает, и перечислили их следующим образом.
- Corrupt Cache: Некоторые данные кэшируются всеми приложениями для повышения производительности и сокращения времени загрузки. Эти данные иногда могут быть повреждены, что может помешать правильной работе определенных функций приложения.
- Поврежденные данные: в некоторых случаях некоторые данные, относящиеся к приложению, могут быть поврежденным, из-за чего может быть вызвана эта ошибка. Эти данные обычно регенерируются время от времени, поэтому при их удалении не будет потери данных.
- Подключение к Интернету: Убедитесь, что подключение, которое вы используете стабильный и что нет активного прокси или VPN. Потому что, если соединение определяется как небезопасное, процесс обновления может быть отложен.
- Место для хранения: процесс обновления также может быть сорван, если нет достаточно места на мобильном телефоне. Поэтому рекомендуется освободить место, если доступно менее 200 МБ.
- Поврежденная SD-карта: в некоторых случаях SD-карта внутри мобильный телефон может помешать правильной работе процесса обновления. Поэтому рекомендуется временно извлечь SD-карту и проверить, устраняет ли она проблему.
- Обновления Playstore: Проблема также может быть вызвана неисправностью недавно установленного обновления. Обновление могло быть установлено неправильно, что могло повредить некоторые функции приложения.
Теперь, когда вы получили общее представление о природе проблемы, мы перейдем к решениям. Обязательно реализуйте их в том порядке, в котором они предоставлены, чтобы избежать конфликтов..
Решение 1. Очистка кеша
Если определенные кэшированные данные были повреждены, это может помешать обновлению приложений. Поэтому на этом этапе мы очистим эти кешированные данные из настроек. Для этого:
- Потяните панель уведомлений вниз и щелкните значок «настройки» .
- Прокрутите вниз и нажмите « Приложения ».
- Щелкните « Приложения » и щелкните « Магазин Google Play » приложение из списка.
Примечание. Если вы не видите Google В приложении “Play Маркет” нажмите на три точки в правом верхнем углу и нажмите «Показать системные приложения».
- Нажмите «Хранилище» и выберите параметр «Очистить кеш»
- Подождите , пока кеш будет очищен, и проверьте, сохраняется ли проблема.
Решение 2. Очистка данных
Если очистка кеша не решит проблему, на этом этапе мы будем очистка данных для приложения Google Play Store. Очистка этих данных может побудить вас снова войти в свою учетную запись, но не приведет к другой важной потере данных. Чтобы очистить данные, просто повторите процесс, указанный в первом методе, и выберите параметр « Очистить данные ». вместо « Очистить Cache ».
Решение 3. Удаление обновлений
Если определенное обновление не было применено должным образом, оно может помешать работе некоторых важных функций приложения. от правильной работы. Поэтому на этом этапе мы удалим все обновления для приложения Google Play Store. Для этого:
- Потяните панель уведомлений вниз и щелкните значок «настройки» .
- Прокрутите вниз и нажмите
- Нажмите «Приложения» и нажмите « Магазин Google Play » из списка.
Примечание. Если вы не видите приложение “Google Play Маркет”, нажмите на три точки в правом верхнем углу и выберите «Показать системные приложения».
- Щелкните «Три точки» в правом верхнем углу и выберите параметр «Удалить обновления» .
- Проверьте , сохраняется ли проблема.
Прежде чем перейти к решениям, извлеките SD-карту (после выключения телефона), а затем включите телефон, чтобы проверить, решает ли это проблему.. Если да, то обязательно перенесите приложения с SD-карты (если они установлены на SD-карту) во внутреннее хранилище. Также проверьте статус Play Protect (в меню Google Play нажмите Play Protect). Если отображается ошибка или предупреждение (например, Устройство не сертифицировано ), удалите эту ошибку/предупреждение, а затем проверьте, нормально ли работает Google Play.
Решение 4. Обновите ОС вашего устройства до последней сборки
Вы можете столкнуться с проблемой обновления, если ОС вашего телефона устарела. В этом случае обновление ОС вашего телефона до последней сборки может решить проблему. Инструкции могут немного отличаться для разных пользователей (в зависимости от марки и модели вашего телефона).
- Запустите Настройки вашего телефона и выберите О телефоне .
- Теперь откройте систему . Обновить , а затем нажмите Проверить наличие обновлений .
- Если доступно обновление ОС, то примените его и перезагрузите ваш телефон.
- После перезагрузки установите флажок если проблема с обновлением Google Play решена.
Решение 5. Разрешить Google Play Store обновляться в любой сети
Вы можете не проверить наличие обновлений в Google Play, если Google Play Store настроен на обновление приложений только по Wi-Fi, но вы пытаетесь обновить приложения в мобильной сети (или сети Wi-Fi, которую ваше устройство считает мобильной, например, из мобильного широкополосного доступа устройство). В этом случае разрешение Google Play Store на обновление через любую сеть может решить проблему.
- Запустите Google Play Store и откройте его меню (нажав гамбургер-меню в левом верхнем углу).
- Теперь в нижней части меню откройте Настройки и выберите Автообновление приложений .
- Затем выберите вариант « По любой сети » и нажмите Готово .
- Затем проверьте, устранена ли ошибка обновления Google Play.
Если проблема не исчезнет, проверьте, не возникла ли ошибка VPN-клиент можно использовать для обновления приложений Google Play.
Решение 6. Включите уведомления для Google Play
Вы можете столкнуться с проблемой, если в магазине Google Play не разрешено отображать уведомления на вашем экране. В этом контексте разрешение Google Play Store показывать уведомления на вашем экране может решить проблему.
- Запустите Настройки вашего телефона и откройте Центр уведомлений .
- Затем выберите Google Play Store и отключите параметр Блокировать все .
- Теперь отключите параметр Показывать беззвучно , а затем перезагрузите свой телефон. .
- После перезагрузки проверьте, нет ли в Google Play ошибки обновления.
Решение 7. Настройте дату/время на вашем устройстве
Вы можете не обновить приложения в Google Play, если дата/время на вашем телефоне неверны. настроен (или установлен). В этом случае правильная настройка даты/времени на вашем телефоне может решить проблему.
- Запустите Настройки телефона и откройте Дата и время .
- Теперь включите параметры Автоматическая дата и время и Автоматический часовой пояс .
- Затем отключите параметр Использование 24- Формат часов , а затем перезагрузите телефон.
- После перезагрузки проверьте, успешно ли Google Play обновляет приложения.
Решение 8. Предоставьте все необходимые разрешения для магазина и служб Google Play
Магазин Google Play может не обновлять приложения, если разрешения, необходимые для работы магазина Google Play, не настроены должным образом. В этом контексте предоставление всех разрешений, необходимых для магазина и службы Google Play, может решить проблему. Но перед этим убедитесь, что «Сервисы Google Play» обновлены до последней сборки.
- Очистить кеш и данные в Google Play Store (как описано выше ).
- Затем очистите кэш и данные (в разделе «Управление пространством») Сервисов Google Play , Google Services Framework и Google App .
- Теперь перезагрузите ваше устройство и после перезагрузки запустите Настройки вашего телефона.
- Затем выберите Apps и откройте Google Play Store .
- Теперь выберите Permissions и убедитесь, что все разрешения включены .
- Затем повторите то же самое, чтобы включить все разрешения для Go ogle Play Services .
- Теперь запустите Google Play Store и настройте его (если попросят).
- Затем установите новое приложение (например, Zoom или Skype) из Play Store, а затем проверьте, решена ли проблема с обновлениями.
- В противном случае оставьте телефон заряжаться на ночь , а на следующее утро проверьте, нормально ли работают обновления.
Решение 9. Обновите некоторые приложения в Play Маркете вручную
Проблема может заключаться во временном сбое в ОС Android, и ручное обновление некоторых приложений вашего телефона может очистить сбой и, таким образом, решит проблему.
- Запустите Play Store и найдите любой из установленных приложения (в строке поиска), например, Chrome .
- Теперь обновите приложение, например, Chrome (если доступно обновление) и повторите то же самое, чтобы обновить некоторые приложения (предпочтительно apps by Google ). Вы можете обновить приложения в в алфавитном порядке (или вы можете использовать вкладку «Обзоры» в разделе «Мои приложения и игры» в Play Маркете). Вы можете попробовать стороннее приложение 3 rd (например, Update Software Fast Upd ate for All Android), чтобы обновить приложения.
- После обновления приложений проверьте, есть ли в Play Маркете проблема с обновлениями решена.
Решение 10. Удалите некоторые из приложений с устройства
Вы можете не обновить приложения в Google Play Store если некоторые из приложений вашего телефона препятствуют работе модулей обновления Play Store (например, поврежденная установка приложения или приложение стало несовместимым с вашим устройством). В этом случае удаление некоторых приложений с вашего устройства может решить проблему.
Удаление проблемных приложений
- Запустите Google Play Store и откройте его меню .
- Теперь откройте Мои приложения и Игры и перейдите на вкладку Установлено .
- Затем выберите Reviews , а затем удалите приложения (на вкладке «Непроверенные» или «Опубликованные»), которые не являются важными или важными для вас (некоторые пользователи сообщили, что удаление Alexa , OnePlus Notes или AdClear ).
- Теперь проверьте, решена ли проблема с обновлениями.
Удалите приложения, которые Давно не обновлялись.
- Если проблема не исчезнет, перейдите к Установлено на вкладке Мои приложения и игры в Play Маркете (как описано выше).
- Теперь измените сортировку ‘ Это устройство от ‘до Последнее обновление , а затем прокрутите список до конца .
- Затем удалите несколько приложений , которые не обновлялись для длительного обновления, и проверьте, проблема решена.
Удалите несовместимые приложения
- Если проблема все еще существует , затем откройте все установленные приложения одно за другим (вы можете попробовать стороннее приложение 3 rd , такое как Обновить список программного обеспечения или Список моих приложений, и экспортировать список приложений с гиперссылками на их страницу Play Store в виде HTML. Затем вы можете использовать этот HTML-код в браузере Chrome вашего телефона, чтобы проверить приложения одно за другим) в Play Store и проверить, показывает ли приложение Open, Update, Enable, No Более длительная совместимость с устройством.
- Если отображается Включить , включите приложение. Если отображается Больше не совместимо с устройством , удалите приложение, а затем проверьте, решена ли проблема с обновлениями.
Удалите приложения, которые были удалены из Play Store
- Если проблема не исчезнет, тогда запустите Настройки вашего телефона и откройте Приложения .
- Теперь откройте установленное приложение одно за другим и нажмите Сведения о приложении , чтобы открыть страницу приложения в Play Store. Теперь проверьте, удалено ли приложение из Play Store (в приложениях системы может не отображаться опция «Сведения о приложении»). В таком случае удалите приложение со своего телефона и проверьте, решает ли оно проблему с обновлениями.
Решение 11. Удалите некоторые из учетных записей Google с телефона
Вы можете столкнуться с проблемой, если какая-либо из ваших учетных записей Google не настроена должным образом (например, изменение пароля для учетной записи но пароль проблемной учетной записи не обновлялся в Аккаунтах на телефоне). В этом случае удаление некоторых учетных записей Google для вашего устройства может решить проблему. Перед процедурой обязательно удалите Family Link (если он установлен), а также проверьте, помните ли вы пароль учетной записи. Если вы используете свой телефон для подтверждения входа в учетную запись, убедитесь, что вы можете использовать альтернативный метод (например, SMS на зарегистрированный номер телефона) для входа в учетную запись.
Включите синхронизацию для магазина Google Play
- Запустите Настройки вашего телефона и откройте Учетные записи (возможно, вам придется изучить дополнительные настройки).
- Теперь выберите Google и убедитесь, что все учетные записи правильно синхронизируются с Google.
- Если есть учетная запись, которая не синхронизируется , то нажмите на нее .
- Теперь проверьте, все ли параметры синхронизации включены, если нет, то включите синхронизацию (особенно в отношении Google Play) и проверьте, решает ли это проблему с обновлением.
Удаление некоторых учетных записей
- Если это не помогло или учетная запись не требуется, то нажмите на эту учетную запись (в Настройки >> Учетные записи >> Google), а затем нажмите на кнопке Еще .
- Теперь нажмите Удалить учетную запись , а затем подтвердите , чтобы удалите учетную запись.
- Затем перезагрузите ваше устройство и проверьте, проблема с обновлениями решена.
Удалить все учетные записи Google
- Если нет, затем удалить все учетные записи Google (как описано выше) и перезагрузите ваше устройство.
- После перезагрузки повторно добавьте одну из учетных записей на устройстве, а затем проверьте, решена ли проблема.
- Если это не помогло, удалите учетную запись еще раз и перезагрузите ваше устройство.
- После перезагрузки создайте новую учетную запись Gmail (на устройстве) и используйте эту учетную запись для подписи – в устройство, которое, надеюсь, решит проблему с обновлениями. Если вы хотите использовать старую учетную запись на устройстве, то измените пароли старых учетных записей, а затем добавьте их на устройство.
Если проблема не исчезнет, возможно, вам придется выполнить полный сброс настроек устройства до заводских.
Google Play Store is one such app that comes preinstalled with Android devices and has its own special place and importance on the device. This app doesn’t only provides users with thousands of apps but is also responsible for keeping the installed apps up to date.
However, in recent times, users are experiencing Google Play Store Error Checking for Updates while updating the apps.
There are a lot of Android users who have reported about this issue of being unable to update their applications on Android mobile. As per these reports, the Error Checking for Updates message appears whenever an app update is qued.
However, it is not any critical issue and can be fixed easily by following the simple solutions I am going to share with you through this article.
But, before heading directly to the fixes, make sure to take a quick glimpse at the causes responsible for confronting this error on your Android device. It will help you to choose the right solution as per your circumstance.
What Causes the “Error Checking for Updates” Error Message on Google Play Store?
After reviewing the numerous reports from several discussions/forums and multiple users, I found the below given major reasons for getting this error:
- Corrupted Data and Cache: Corrupted cache and data of the Google Play Store app can prevent the apps from being updated.
- Incorrect Date & Time: If the date and time of your Android are not configured correctly, then also you may experience this error.
- Slow Internet Connection: While updating any app on Google Play Store, make sure your internet connection is stable and has high speed, otherwise will give you the “Error Checking for Updates” error message on Google Play Store.
- Corrupt SD Card: Using the corrupted SD card on your Android mobile will also lead you to these kinds of issues.
- Outdated OS: If you haven’t updated your Android phone for a long time, then it will affect the functionalities of other apps installed on your system.
- Google Play Store Updates: The recent Google Play Store update might be corrupted or malfunctioned and this is why you are getting the Error Checking for Updates.
- Storage Space: The app’s updating process may also get derailed if there is not enough space available on your Android mobile.
- Recommended Solution to Fix Google Play Store Error Checking for Updates on Android
- Clear Google Play Store Cache and Data
- Uninstall Google Play Store Updates
- Disable and Re-enable Google Play Store
- Check Date and Time of Your Device
- Update Your Android Phone/Tablet
- Let Google Play Store Update Over Any Network
- Enable Google Play Store Notification
- Grant Required Permissions to Google Play Store
- Manually Update Apps in the Google Play Store
- Remove the Incompatible/Problematic Apps
- Remove Google Accounts
Solution 1: Recommended Solution to Fix Google Play Store Error Checking for Updates on Android
If you experiencing any error or issue on your Android phone/tablet and are unable to fix it, then here is an easy and best solution for you. Try the Android Repair Tool.
It is a repairing tool that will help you to fix a wide range of Android errors and issues. With the help of this professional repair tool, you can fix Android errors, such as being stuck on a boot loop, black screen of death, apps keep crashing, and several other issues.
To use this tool you don’t require any technical skills. The Android Repair tool can be accessed easily without any hassle.
btn_img
Note: It is recommended to download and use the software on your PC or laptop only.
Solution 2: Clear Google Play Store Cache and Data
If the cached data of the Google Play Store has been corrupted, then it may prevent the app from being updated and as a result, you will run into the error Checking for Updates on Play Store.
So, in the first step of resolving this Google Play Store error, we will clear the app cache. To do so, you may follow the below-given steps:
- Open your device Settings.
- Scroll down and click on the Apps/App Manager.
- Now, search for the Google Play Store in the list of installed apps and tap on it. If you can’t see the Google Play Store in the list, then tap on the three vertical dots located at the top-right corner of the screen and click on the Show System Apps option.
- Next, tap on the Storage button.
- Tap on the Clear Data and Clear Cache buttons.
- Wait until the cache is cleared.
Now, check whether the Google Play Store Error Checking for Updates has been removed or not. If not, then proceed with the other solutions discussed in this article.
Solution 3: Uninstall Google Play Store Updates
Sometimes, certain updates don’t go well with the apps and prevent some major features from functioning properly. So, if the same happened with your Google Play Store, then no wonder why you are getting the Google Play Store Error Checking for Updates.
In this case, the best workaround would be to uninstall the latest update of the Google Play Store installed on your system. For that, you need to do the following:
- Open your Android phone’s Settings.
- Go to the Apps/App Manager.
- Select the Google Play Store from the list of installed apps.
- Now, click on the Uninstall Updates button.
- Now, try to update apps on the Google Play store and check if the error is fixed or not.
Solution 4: Disable and Re-enable Google Play Store
If the above-given solutions didn’t help to fix Error Checking for Updates on Google Play Store, then disabling the Play Store for a while can rescue you from this situation.
First, disable the Google Play Store, and after some time re-enable it. It should fix the error on your device. To do so, follow these instructions:
- Open the phone’s Settings.
- Go to the Apps.
- Select the Google Play Store.
- Tap on the Disable button.
- Once the app is disabled, the Google Play Store icon will vanish from the phone screen.
- Now, again follow the above-given steps, and then tap on the Enable button.
Solution 5: Check Date and Time of Your Device
If the date and time of your Android phone are not configured properly, then also you wouldn’t be able to update apps on Play Store. So, here you need to set the date and time correctly on the device.
- Launch Settings of your Android phone.
- Go to the Additional Settings.
- Select the Date & Time option.
- Now, make sure to enable the Automatic Date & Time and Automatic Time Zone options.
- Next, disable the Use of 24-Hour Format option.
- Lastly, Reboot your Android device.
Solution 6: Update Your Android Phone/Tablet
An outdated device can also be the reason for getting the Error Checking for Updates message on Google Play Store. In this case, updating your Android OS to the latest build can resolve the issue while updating the apps. Here are steps you need to follow to do the same:
- Launch your Android device’s Settings.
- Go to the About phone and tap on the System update.
- Click on the Check for Updates.
- If there is a new update available for your Android, then download it.
- After completing the system update, restart your phone.
Now, try to update apps in the Google Play Store and check if it fixed the Error Checking for Updates. If not, then go ahead with the next solutions.
Solution 7: Let Google Play Store Update Over Any Network
As I have already mentioned, Google Play Store Checking for Updates error may appear due to missing the updates. So, if you have set the Google Play Store to update over only the Wi-Fi network and you are trying to update it on your mobile data, then it will skip the update.
In this case, you need to configure the Google Play Store settings to let it allow to update over any network. For this, you need to do the following:
- Open the Google Play Store app on your Android phone.
- Tap on the Menu button (hamburger icon on the top-left corner).
- Select the Settings option from the list.
- Next, select the Auto-Update Apps option.
- Choose the Over Any Network option and tap on the Done button.
Now, check if the Google Play error Checking for Updates has been resolved or not. If not, then move to the next solution.
Solution 8: Enable Google Play Store Notification
Another way to fix this Google Play Store error is to enable the Google Play Store notification to show on your device’s screen. Many Android users confirmed that doing this helped them in fixing this error. So, to perform this troubleshooting method, follow these steps:
- Open Settings of your phone.
- Tap on the Notification and Control center.
- Go to the Google Play Store.
- Disable the Block All option.
- Next, disable the Show silently option.
- Lastly, restart your phone and check if it resolved the issue.
Solution 9: Grant Required Permissions to Google Play Store
Your Google Play Store will be failed to update the apps if it doesn’t have all the required permissions to work properly on your Android device. Hence, you need to provide all the required permissions to Google Play Store and its services to work in an intended way.
You can do this by following the below-given instructions:
- First, make sure your Google Play Store app is updated.
- Now, clear the cache and data of the Google Play Store.
- Clear the cache and data of the Google Services Framework, Google app, andGoogle Play Services.
- Restart your phone.
- Open the phone Settings.
- Go to the Apps or App Manager.
- Search for the Google Play Store and tap on it.
- Now, go to the Permissions option.
- Ensure all the permissions are enabled.
- Now, do the same and make sure all the permissions are enabled for the Google Play Services.
Solution 10: Manually Update Apps in the Google Play Store
If Google Play Store failed to update the apps, then try to update some of the apps manually. Doing this may resolve the Google Play Store error checking for updates on Android.
- Open the Google Play Store.
- Tap on the profile icon given at the top-right corner of the screen.
- Select the Manage apps and devices.
- Go to the Updates available option.
- Now, update some of the apps by tapping on the Update button given next to them.
- After completing the updates, check if the error is removed.
Solution 11: Remove the Incompatible/Problematic Apps
If there is an app that is hindering the operation of the Google Play Store, then you need to find them and remove it from the device so that you don’t face this error anymore.
There could be some apps on your phone that haven’t been updated for so long or apps that are currently experiencing some issues or incompatible apps. Such apps may affect the other installed apps performance. So, it is better to remove them.
To find out and remove the problematic app on your Android phone, follow these steps:
- Launch the Google Play Store.
- Go to the profile icon > tap on the Manage apps and device.
- Now, go to the Manage > Installed tab.
- Select the problematic apps and tap on the Bin icon.
- Tap on the Uninstall button.
Coming to uninstalling the incompatible apps, follow these instructions:
- Open all the apps in Google Play Store one by one.
- Now, check if that app shows the No Longer Compatible With The Device message. If yes, then uninstall it.
To uninstall all those apps that haven’t received any new updates for a long time, follow these steps:
- If the error still persists, then you must go to the Installed tabs under the Manage apps and device section.
- Now, sort the list of the apps according to the last updated date. For this, select the Recently updated option from the Sort by list.
- Then, scroll down and go to the bottom of the list.
- Finally, uninstall some of the last apps in the list that haven’t been updated for a long time.
- Now, check if doing this fixed the Google Play Store checking for updates error.
If you are still getting this error, then it’s time to uninstall the apps that have been already removed from the Google Play Store.
- Launch the Settings of your Android phone.
- Go to the Apps.
- Now, open each of the installed apps one after other > go to the App Details.
- It will open the Play Store page of the app.
- Now, see if that app is removed from the Google Play Store. If it is removed, then uninstall those apps and then check whether the error is fixed or not.
Solution 12: Remove Google Accounts
You can also get the Google Play Store error checking for updates if the Google accounts on your Android phone are not configured properly. For example, you have changed the password of the account and didn’t update it on the phone.
In this case, removing the Google accounts from your device and re-adding it may resolve the issues. Now, let’s proceed with troubleshooting steps. First, we need to enable the Google Play Store sync option:
- Open the phone’s Settings.
- Go to the Accounts.
- Choose Google from the list.
- Now, ensure all the accounts are synced with Google.
- If any of the accounts are not synced, then enable the sync option.
If your accounts are well synced with Google and you are still facing this problem, then remove some of the accounts from your phone:
- Go to the Settings > Account > Google.
- Tap on the More button.
- Now, tap on the Remove Account button.
- Tap on the Confirm button.
- Finally, restart your phone.
If removing some of the accounts is not enough, then try to remove all the accounts to fix the error.
- Before removing all Google accounts, reboot your phone.
- Now, remove the Google account (follow the steps given above).
- Again reboot your phone and then re-add the Google account.
- Now, check if the issue has been resolved.
- If you are still getting the error, then create a new Google account for signing in to your Android device.
- Hopefully, doing this will resolve your Google Play Store checking for updates error.
Conclusion
Well, these were the several options you can go with if you are getting the error Checking for Updates on Play Store. All of the solutions outlined in this article should ideally resolve the error for you.
So, use the methods described above and check which of them works for you. If this guide helped you in resolving the mentioned issue, then do share it with the users going through the same.
Also, don’t forget to share your experience with us on Facebook or Twitter.
James Leak is a technology expert and lives in New York. Previously, he was working on Symbian OS and was trying to solve many issues related to it. From childhood, he was very much interested in technology field and loves to write blogs related to Android and other OS. So he maintained that and currently, James is working for androiddata-recovery.com where he contribute several articles about errors/issues or data loss situation related to Android. He keeps daily updates on news or rumors or what is happening in this new technology world. Apart from blogging, he loves to travel, play games and reading books.
С конца 2020 года пользователи смартфонов Андроид столкнулись с проблемой при обновлении программ и игр в Play Market: на экране постоянно высвечивается уведомление «Ошибка проверки обновлений». Мы разобрались почему появляется данная ошибка и нашли несколько рабочих способов как решить ее быстро самостоятельно.
Почему появляется «Ошибка проверки обновлений»?
Чаще всего сбой происходит из-за обновления самого Play Маркета разработчиками. Реже из-за нелицензионных программ и игр скачанных из Интернета. В остальных случаях сбой вызывают:
- Устаревшее кешированное содержимое и временные данных программ.
- При загрузке новых версий утилит из маркета пропало Интернет-соединение.
- На внутренней памяти смартфона не хватает свободного места.
- Битые сектора, физическая неисправность или ошибка на SD флеш-карте в телефоне.
- Недокачанное или «битое» обновление приложения Play Market.
Способы исправить «Ошибка проверки обновлений»
Перечисленные способы помогают решить проблему на 100%. Возможно у вас сработает один из них, но лучше пробовать каждый поэтапно следуя инструкциям.
Решение №1 Чистка временных файлов и кеша
В кэше зачастую хранятся полезные в работе программы Play Market файлы для быстрого доступа. Но со временем это только забивает память, замедляет работу телефона и приводит к ошибкам. Особенно часто это бывает если в памяти Android-смартфона установлено по 50 и более программ и игр. Что бы очистить кеш проделайте пункты ниже:
- Откройте Настройки смартфона;
- Зайдите в пункт меню «Приложения», «Все приложения». На вашей модели может быть пункт «Системные приложения» – можно сразу перейти туда;
- Ищите в поиске или пролистайте вручную до Google Play Маркет и нажмите на название или его иконку;
- Далее откройте «Хранилище» или «Данные» и кликните «Очистить кеш»;
- Перезагрузите смартфон и зайдите в Маркет что бы проверить ушла ли проблема.
Внимание! В зависимости от версии Андроида, модели смартфона и оболочки некоторые пункты могут иметь другие названия. Но общий план действий похож для большинства моделей.
Решение №2 Стереть данные(очистить данные)
Если простая чистка кеша не помогает – будем очищать все данные у Play Маркет. В этом случае потребуется зайти в свой аккаунт заново используя почту и пароль. Такая очистка равносильна переустановке программы.
- Возвращаемся в раздел «Настройки»;
- Переходим к списку «Все приложения» или «Системные приложения;
- Находим программу Play Маркет и выбираем её;
- Листаем вниз, ищем кнопку «Хранилище». В моделях Xiaomi может называться просто «Очистить» или «Стереть данные». Нажимаем её.
Если после нажатия кнопки «Очистить» у вас выскакивает окошко с пунктами как на скриншоте ниже – выбирайте «Очистить все». На вашей модели смартфона этот пункт может находится в разделе «Расширенные настройки».
После можно перезагрузить смартфон и посмотреть появляется ли уведомление о сбое.
Решение №3 Удаление обновлений
Если после предыдущего способа всё заработало удалять обновления не потребуется. Удаление обновлений помогает когда разработчики не успевают протестировать хранилище утилит и выкатывают новую версию в общий доступ.
- Открываем «Настройки»;
- Аналогично примерам выше переходим во «Все приложения» или «Системные».
- В настройках Google Play Маркет нужно нажать на иконку меню (три точки в верхнем правом углу) и нажать «Удалить обновления». Иногда этот пункт будет внизу списка.
- Перезагрузите Андроид-смартфон и запустите Плей Маркет для загрузки ваших программ.
Обычно удаление обновлений крайняя мера, поскольку после «багов» разработчики оперативно решают проблему. Но в связи с праздниками ждать выхода новой версии можно от нескольких дней до 1-2 месяцев. По этому проще «откатить» программу до рабочей версии.

