
Участник с: 10 октября 2012
Сабж, теоретически, позволяет связать образ hdd/fdd/cd с именем устройства и произвести с него загрузку ОС. Имеется команда map рядом параметров. Заинтересованные личности обитают на http://reboot.pro и предлагают различные варианты использования сабжа для загрузки с образа, в частности для винды. Однако есть ряд проблем
Проблема 1.
Error 60: File for drive emulation must be in one contiguous disk area
Проявляет себя при выполнении map для образов, конвертированных из vdi в vhc, а так же для raw-образов, созданных qemu-img. В руководстве сказано, что файл образ может быть дефрагментирован и предлагают юзать утилиты Русиновича contig или wincontig для исправления ситуации. Только вот мне неясно, и четкого ответа на то, что означает термин contiguous disk area я не нашел. Перевод с англиского дает значения «последовательный, непрерывный». Что под этим понимается.
Использование contig и wincontig ситуацию не решает, к тому же геморройно из-за необходимости таскать образ в ВМ с виндой и обратно — через shared folders работать утилита не желает, под вайном естественно тоже.
Мапятся через раз фиксированные образы сразу созданные в vbox в формате VirtualPC, а так же vhc созданные средствами Win7 Ultimate (они же прекрасно грузятся bootmgr-ом)
Вопрос: что означает физически данная проблема, и есть ли средства для линукс, решающие её?
Проблема 2.
error 25: Disk reading error
видимо связазна с тем, что загрузчик не распознает на образе файловую систему. Думаю решаемо, но после разбора полетов с первой проблемой
P.S.: Собственно, начиная с Win7 Ultimate в ней имеется возможность создать виртуальный hdd, установить на неё семерку же и запустить на реальном железе. Сабж я опробовал в экспериментах на виртуальной машине. Загрузчик bootmgr приспособлен для решения такой задачи.
Хочется сделать такое же самое в нашем случае, пользуясь открытыми средствами. Grub2 такое не умеет, а вот Grub4dos использует прерывание int 13h для эмуляции hdd из образа, и теоретически может подобное. Недавно на форуме мелькнул трэд, где ТС намекнул на то, что он реализовал данную задачу. Вот я и загорелся идеей.
Перелопатил кучу инфы и три дня поколупался с различными вариантами, но пока не шевелится.
Да пребудет с нами Сила…!
CPU Intel Core i9 10900-KF/RAM DDR4 128 Gb/NVidia GForce GTX 1080 Ti Turbo 11Gb/SSD M2 512 Gb/HDD Seagate SATA3 2 Tb/HDD Toshiba 3Tb/HDD Toshiba 6Tb
http://rusrailsim.org
Содержание
- Команда «MAP»
- Прямой Маппинг
- Загрузка образов дисков
- Подмена диска
- Маппинг памяти
- Загрузка из .ISO образа
- Вложеный Маппинг
- Error 60 / Contiguous ISOs
- #1 Nick Marques
- #2 pscEx
- #3 Icecube
- #4 steve6375
- #5 Nick Marques
- #6 Icecube
- #7 steve6375
- #8 Motasem
- #9 steve6375
- #10 Motasem
- #11 steve6375
- #12 Motasem
- #13 steve6375
- #14 Motasem
- #15 steve6375
- #16 Motasem
- #17 steve6375
- #18 Motasem
- #19 steve6375
- #20 Motasem
- #21 Motasem
- #22 steve6375
- #23 Motasem
- #24 Wonko the Sane
- #25 Motasem
Команда «MAP»
Есть два типа маппинга, это прямой маппинг и маппинг памяти. Прямой маппинг обычно используется для больших образов/устройств. Если использовать прямой маппинг, то чтобы создать виртуальное устройство из образа диска, файл образа должен быть непрерывным (не фрагментированным). Эти утилиты — contig или wincontig могут дефрагментировать файл образа.
Попытка замапить фрагментированный файл приведёт к результату — Error 60: File for drive emulation must be in one contiguous disk area , при таком сообщении нужно делать маппинг в память или дефрагментировать образ и пробовать снова.
Маппинг памяти, это значит, что устройство/образ переносится в оперативную память, обычно используется для маленьких образов — Например образов флоппи дисков. При маппинге в память образ диска может быть и фрагментированным. Размер имеющейся оперативной памяти, будет определять максимальный размер образа который можно загрузить.
Процесс «map» осуществляется с помощью INT 13 — и эмулируемый диск будет доступен из других ОС которые используют совместный доступ к файлам, Например DOS и Windows 9x. Не будет доступа к дискам образов ОС, которые используют защищённый режим драйверов (Windows NT/2000/XP/Vista, Linux, FreeBSD) как только режим защиты вступит в работу.
Прямой Маппинг
Загрузка образов дисков
Пример прямого маппинга образа флоппи диска уже приводился ранне в этом руководстве:
Вот что мы видим, когда делаем всё это в командной строке:
grub> map (hd0,0)/win98.ima (fd0)
FAT12 BPB found with 0xEB (jmp) leading the boot sector.
probed C/H/S =80/2/18, probed total sectors = 2880
floppies_orig=0, harddrives_orig=2, floppies_curr=1, harddrives_curr=2
grub> chainloader (fd0)+1
grub> rootnoverify (fd0)
grub> map —floppies=1
Когда используется прямой маппинг, образ диска должен иметь работоспособную MBR. Образ с несколькими разделами должен мапироваться как (hd) устройство. Если образ диска состоит из одного раздела (без MBR), тогда надо мапить его как флоппи.
Ряд примеров маппинга можно встретить в файле README_GRUB4DOS.txt .
Подмена диска
Например можно исползовать команду map для подмены дисков, когда мы загружаемся с USB устройства (Например флешка или УСБ-жёсткий диск). Когда настройки BIOS выставлены на загрузку с USB, жёсткий диск станет (hd1). DOS и Windows 9x не смогут грузиться с этого жёсткого диска. Windows NT системы теоретически могут грузиться не с первого диска, но пути в boot.ini будут не верны, когда произойдёт загрузка с USB устройства. Если windows установлена на жёсткий диск, она не будет грузиться.
Например мы ставим в компьютер новый жёсткий диск. А старый жёсткий диск с установленной Windows XP — превращаем из первичного (master) во вторичный (slave) (он становится (hd1)). Новый диск становится первичным (master) (hd0) на нём установлена Vista и теперь нет никакой возможности грузить Windows XP со старого диска.
В подобном случае мы можем загрузить систему не с первого раздела путём подмены дисков (Например: поменяем (hd1) на (hd0)).
(hd0,0) содержит файл-метку hd0.tag и (hd1,0) содержит файл-метку hd1.tag . Программа MBR Wizard находится на (hd1,0), чтобы проверить какой диск будет доступен из ДОС после экспериментов с командой map .
В результате получим ошибку,
ПРИМЕЧАНИЕ — используя вышеуказанный набор команд, замена (hd1) на (hd0) не будет иметь эффекта пока команда boot не выполнена. Хотя устройство (hd1) было замаплено как (hd0), все ссылки на фактические устройства остаются к (hd1) в Grub4dos. Введение команды find /hd0.tag из командной строки, вернёт устройство (hd0,0), введение команды find /hd1.tag из командной строки, вернёт устройство (hd1,0) — смотрим пример ниже:
grub> map (hd1) (hd0)
grub> find /hd0.tag
(hd0,0)
grub> find /hd1.tag
(hd1,0)
grub> root (hd1,0)
Filesystem type is fat, partition type 0xe
grub> chainloader /io.sys
Will boot MS-DOS 7.x from drive=0x81, partition=0x0(hidden sectors=0x3f)
Обратите внимание на то, что выводит команда chainloader — . from drive=0x81 . После загрузки ДОС выполняем команду mbrwizd.exe /list . Теперь вы можете увидеть по размеру и типу файловой системы на Фото 1 — перед нами устройство (hd1) отображается как Disk:0 и Disk:1 — а устройство (hd0) не видимо.
ПРИМЕЧАНИЕ — использование вышеперечисленного набора команд, заменит (hd1) на (hd0) немедленно, после того как команда map —hook будет выполнена. Ввод команды find /hd0.tag из командной строки будет иметь результат — «File not found» (файл не найден), ввод команды find /hd1.tag из командной строки вернёт устройства (hd0,0) и (hd1,0) — смотрим пример ниже:
grub> map (hd1) (hd0)
grub> find /hd0.tag
Error 15: File not found
grub> find /hd1.tag
(hd0,0)
(hd1,0)
grub> root (hd0,0)
Filesystem type is fat, partition type 0xe
grub> chainloader /io.sys
Will boot MS-DOS 7.x from drive=0x80, partition=0x0(hidden sectors=0x3f)
Обратите внимание на то, что выводит команда chainloader — . from drive=0x80 . После загрузки ДОС выполняем команду mbrwizd.exe /list . Результат будет таким же как и в предидущем примере, устройство (hd1) отобразится как Disk:0 и Disk:1 — а устройство (hd0) опять не видимо.
ПРИМЕЧАНИЕ — после введения команды map (hd1) (hd0) и map (hd0) (hd1) , введение команды find /hd0.tag из командной строки вернёт устройство (hd0). Введение команды find /hd1.tag вернёт устройство (hd1). Когда ДОС будет загружен, оба диска будут доступны, хотя физическое устройство (hd1) будет отображено как Disk: 0, и устройство (hd0) будет Disk: 1 — смотрим Фото 2.
Запомните, что эмулируемые диски доступны только из ОС использующих INT 13. В примере показанном выше, Windows-подобная система увидит устройство (hd0) как «disk 0» и устройство (hd1) как «disk 1».
Когда маппинг раздела выполнен в следующем синтаксисе (hdm,n)+1 он используется для представления целого раздела (Где m=номер диска, и n=номер раздела), а не только первого сектора.
Пример ответа Grub4dos на команды приведённые выше:
grub> map (hd1,0)+1 (hd0)
FAT16 BPB found with 0xEB (jmp) leading the boot sector.
probed C/H/S =40/16/63, probed total sectors = 40257
Try to locate extended partition (hd1)0+40320 for the virtual (hd0).
probed C/H/S =40/16/63, probed total sectors = 40320
grub> map (hd1) (hd0)
grub> chainloader /io.sys
Will boot MS-DOS 7.x from drive=0x80, partition=0x0(hidden sectors=0x3f)
grub> rootnoverify (hd0)
Отрывок с предупреждением из README_GRUB4DOS.txt :
Маппинг памяти
Мапинг памяти используется с комадами как и на примерах выше, и добавился параметр —mem.
Когда мы используем маппинг памяти, допускается, что образ диска может быть фрпагментированым. Устройство преносится в оперативную память — Например: map —mem (hd0,0)+1 (fd0) (как говорилось ранее, +1 используется с командой map чтобы обозначить целый диск). Если замапить образа диска без MBR в память, он может быть в качестве (hd) устройства, а MBR будет создан в рамках Grub4dos — основываясь на данных раздела.
Сжатый образ тоже можно использовать при маппинге памяти. Образ должен быть сжат gzip-ом (получится файл с расширением .gz ), это бесплатный «opensource» архиватор. Т.к многие образы дисков не являются «заполнеными», их сжатие, может освободить достаточно много места. Стандартные образы дискет (1440 Кб) обычно оставляют как есть. Сжимать образы рекомендуется т.к это позволяет экономить место и ускорять их запуск.
gzip можно скачать Здесь. Если будем давить gzip-ом образ флоппи диска bcdl201a.ima 1440Кб, то в сжатом виде он будет весить 10.4Кб.
Grub4dos поддерживает только .gz формат, а ядро memdisk (часть пакета syslinux) поддерживает .zip формат — Например Winimage .imz формат. Ядро memdisk может быть сжато gzip-ом и загружено с помощью Grub4dos.
- find —set-root /memdisk.gz [enter]
- kernel /memdisk.gz [enter]
- initrd /win98.ima.gz [enter]
- boot [enter]
- find —set-root /memdisk.gz [enter]
- kernel /memdisk.gz [enter]
- initrd /win98.ima.zip [enter]
- boot [enter]
ПРИМЕЧАНИЕ — на вышеприведённых примерах win98.ima должен находиться в том же разделе, что и memdisk.gz .
Загрузка из .ISO образа
Есть несколько типов эмуляции загрузки с CD, включая флоппи эмуляцию — в которой загрузочный сектор CD это образ загрузочной дискеты. Загрузочный сектор нельзя увидеть при просмотре содержимого CD в файловых менеджерах таких как Windows Explorer, может показаться, что диск пуст и нет на нём никаких файлов и образов.
В следующем примере был взят образ CD содержащий в себе загрузочный сктор в виде ДОС-загрузочной дискеты, с различными ДОС программами на диске CD (не в загрузочной области). Когда мы загружаемся с этого (реального) CD, образ в загрузочном секторе определяется как диск A:, и сам CD-ROM (и программы в его корне) занимают следующую доступную букву диска. Файл образа CD (hd0,0)/dos.iso будет грузиться используя команды приведённые выше, вот то что покажет Grub4dos в результате этих команд:
grub> map (hd0,0)/dos.iso (hd32)
grub> root (hd32)
Filesystem type is iso9660, using the whole disk
grub> chainloader (hd32)
Load segment: 0x0 System Type: 0x0 Sector Count: 0x1
Load RBA: 0x3E Boot Type: 2 = 1.44M floppy
С виду CD загрузился нормально. Загрузочный сектор CD определился как A:, а CD-ROM определился как E:.
Но к сожалению попытка дострупа к файлам на диске E: (корень CD образа) заканчивается ошибкой.
Файл README_GRUB4DOS.txt гласит:
ПРИМЕЧАНИЕ — Если команда mkisofs –iso-level 4 была использована для создания .iso образа (как это делается в PE билдах), MSCDEX.EXE не должна использоваться — удалите её с SHSUCDX
(Подробности Здесь).
Отредактированные config.sys и autoexec.bat и с добавленным в загрузочный образ файлом eltorito.sys , записали в dos.iso .
Этот переделанный CD загрузился как и ранее с доступным как A: загрузочным образом и с недоступным корнем CD.
Когда мы мапим .iso содержащий eltorito.sys в загрузочном секторе устройства (0xFF), CD-ROM загружается и теперь обе части, загрузочный образ (А:) и корень CD доступны!
Этот пример показывает какие сложности случаются при эмуляции CD-ROM. Если хотите посмотреть на рабочие примеры, то это можно сделать Здесь
Вложеный Маппинг
Используя последние версии Grub4dos можно замапить образ из другого замапленного образа — Иногда это называют двойной маппинг.
UBCD проект, например, использует загрузочный CD содержащий загрузочный образ дискеты. Используя эмуляцию CDROM, мы можем замапить файл UBCD .iso как (hd32),
затем замапить образ флоппи диска из (hd32) как устройство (fd0), затем загрузиться со свежезамапленного образа флоппи диска.
Например:
- map —mem (hd0,0)/ubcd34-basic.iso (hd32) [enter]
- map —hook [enter]
- map —mem (hd32)/IMAGES/MAXBLAST.IGZ (fd0) [enter]
- map —hook [enter]
- root (fd0) [enter]
- chainloader +1 [enter]
- boot [enter]
ПРИМЕЧАНИЕ для Grub4dos, автор tinybit — При использования этой формы маппинга, нет ограничения на число вложений. По примеру выше,
можно замапить ещё один образ из последнего замапленного как (fd0).
Источник
Error 60 / Contiguous ISOs
#1 Nick Marques
I am attempting to make a flash drive with Windows 7 x64 and x86, and XP x86.
I am having an issue with one ISO giving me «Error 60: File for drive emulation must be in one contiguous disk area».
I have tried WinContig, but there isn’t enough free space for it to do anything, even if I remove XP. When I remove the problem ISO, nothing else is fragmented. Is there a way to copy the ISO to the drive ensuring that it doesn’t fragment in the copy process?
I have already tried removing everything, re-doing the RMPrepUSB, installing Grub4DOS, and then copying back.
The flash drive is an 8GB Patriot Xporter XT, so all of the ISOs will fit.
#2 pscEx

- Location: Korschenbroich, Germany
- Interests: What somebody else cannot do.
- European Union
I have already tried removing everything, re-doing the RMPrepUSB, installing Grub4DOS, and then copying back.
Try to use a disk defragmenter, and «rebuild» your disk (after deleting «everything»).
#3 Icecube

- Belgium
- Start from scratch
- Add the biggest iso first
- Check if it is fragmented. If it is, defragment it.
- Repeat 2 and 3
#4 steve6375

- Location: UK
- Interests: computers, programming (masm,vb6,C,vbs), photography,TV,films
- United Kingdom
#5 Nick Marques
Try to use a disk defragmenter, and «rebuild» your disk (after deleting «everything»).
I tried a couple defrag tools and they instantly said there was no fragmentation since there was no files.
- Start from scratch
- Add the biggest iso first
- Check if it is fragmented. If it is, defragment it.
- Repeat 2 and 3
This I did do. I added the largest. No frags. Then added the next, which is the problematic one. It has 2 fragments but can’t be repaired because there isn’t free space to fix it. Is there a way to create a virtual USB drive of a larger size, lay it out fragment free and then shrink it down to size, make the image and send it over?
Use RMPrepUSB and tick the Copy Files box and set the source folder to point to your folder of iso’s. After it has all finished run grub4dos install.
Did you use FAT32 or NTFS?
#6 Icecube
- Belgium
#7 steve6375
- Location: UK
- Interests: computers, programming (masm,vb6,C,vbs), photography,TV,films
- United Kingdom
#8 Motasem

- Interests: War Make’s Men And Problems Make’s You Expert
MooT® - Jordan
still no fix for this problem ? im watching this thread and waiting help i have same problem and tried everything
#9 steve6375
- Location: UK
- Interests: computers, programming (masm,vb6,C,vbs), photography,TV,films
- United Kingdom
Give details! Did you try fresh format? FAT32 or NTFS? what size is the volume, what size are the files, how much free space is there, what have you tried.
#10 Motasem
- Interests: War Make’s Men And Problems Make’s You Expert
MooT® - Jordan
yes sir i did fresh format for sure with RMPrepUSB ( NTFS ) and did all steps and i add hirens 15 and it works great and windows xp setup working good
my flash is kingsone datatraveler G3 8G used space 5g
i tried to defrag with windows and it give me this http://grabout.com/cCNNNz3q
and i also delete the iso file for win7 and copy it again
Edited by Motasem, 05 February 2013 — 01:58 AM.
#11 steve6375
- Location: UK
- Interests: computers, programming (masm,vb6,C,vbs), photography,TV,films
- United Kingdom
Use WinContig (Ctrl+F2 in RMPrepUSB).
Add largest file first after reformat — see here
#12 Motasem
- Interests: War Make’s Men And Problems Make’s You Expert
MooT® - Jordan
i did it sir before and after defragment with wincontig i get the same outpot
http://grabout.com/q1ngMLPu
wincontig still reports that i must defrag this file it just wont go from that list
Edited by Motasem, 05 February 2013 — 02:08 AM.
#13 steve6375
- Location: UK
- Interests: computers, programming (masm,vb6,C,vbs), photography,TV,films
- United Kingdom
Read the blog please! see here
#14 Motasem
- Interests: War Make’s Men And Problems Make’s You Expert
MooT® - Jordan
ok m back did all u told me in that blog and it didnt work
i even get new flash disk same as other format it again and copy files with TeraCopy pro
same problem ? what to do now
#15 steve6375
- Location: UK
- Interests: computers, programming (masm,vb6,C,vbs), photography,TV,films
- United Kingdom
You are just saying ‘I tried it and it doesn’t work’ — this tells us nothing! What if I said my car wouldn’t work — would you know what was wrong from just that!
Please describe what you are doing in detail, step by step. Do not use TeraCopy Pro — just use Windows Explorer.
Try copying one large file first, then run WinContig, then next largest file, then run WinContig, etc. — report back details
#16 Motasem
- Interests: War Make’s Men And Problems Make’s You Expert
MooT® - Jordan
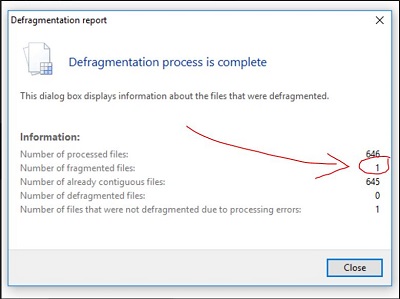
i did format again and copy the win7 larg file then check the flash with WinContig and it refer no error or drgragment files but after i copy the rest of files i scan it again i find the win7 file is need defrag and WinContig report as the first pic i upload it here
im using widownxp and now i want to try this way
1. Erase all ptns on the 8GB flash drive
2. Make a small 20MB NTFS PRIMARY ptn using EHPM — or RMPrepUSB if you want a special bootloader
3. Re-Size the ptn using EHPM to ALMOST the full drive capacity — e.g. 7.8GB
4. Now add a small 2nd FAT PRIMARY partition (this is to improve boot compatibility with some BIOSes — the ptn is not actually used)
5. Copy over your large 6GB file and check it is contiguous using WinContig.
but sorry what is ( EHPM ) could you explain more in the steps ?
Edited by Motasem, 05 February 2013 — 10:43 AM.
#17 steve6375
- Location: UK
- Interests: computers, programming (masm,vb6,C,vbs), photography,TV,films
- United Kingdom
It tells you in the blog = Easeus Home Partition Master.
What you describe makes no sense — if you copy the ISO and it is not defragmented, and then copy more file and the same file is suddenly fragmented, then that should not happen !
Are you using Windows Explorer to copy the files?
Are you sure your USB drive is reliable?
Can you take a CRC or MD5 hash checksum of the ISO (first from a good copy on your HDD and then from the USB) — use RMPrepUSB — Ctrl-C to get the MD5.
Is the ISO still correct MD5?
#18 Motasem
- Interests: War Make’s Men And Problems Make’s You Expert
MooT® - Jordan
i installed EHPM and resize the partion to full cap and befor that i made 20m ntfs partion with RMPrepUSB
now how come if i make the step ##3. Re-Size the ptn using EHPM to ALMOST the full drive capacity — e.g. 7.8GB
how can i make step #4 add a small 2nd FAT PRIMARY partition
i already take all the space there sir .
#19 steve6375
- Location: UK
- Interests: computers, programming (masm,vb6,C,vbs), photography,TV,films
- United Kingdom
That is why I say ALMOST the full drive capacity.
i.e. leave some space so you can make the 2nd partition. But you don’t always need the 2nd partition and you certainly don’t need it to check if the files will be contiguous or not.
#20 Motasem
- Interests: War Make’s Men And Problems Make’s You Expert
MooT® - Jordan
ok i start from scratch this is what i did sir
start RMPrepUSB format the usb 20m ntfs partion then start EaseUS Partition Master 9.2.1 Home Edition and resize the partion to FULL capacity
next copy the win7 file and check the contiguous
after copying the win7 iso file i check md5 and looks great ( md5 check first line in my hdd and second line in my flash disk http://grabout.com/QfWtvgVp )
after copy win7 file i check for contiguous http://grabout.com/SHd17SWc
next i copy the boot files ( menu.lst etc etc etc ) to the usb
after copying the boot files all files still contiguous http://grabout.com/lRQOUE42
i reboot my pc and boot from flash and start win7 ( CHEERS IT WORKS ) i start setup correctly
next i back to windows and copy xp iso and check and still contiguous
next i copy hirens iso and still contiguous
So now every thing seems to work great i want to thank you for your time and help and i also saw ( Wonko the sane ) watching this thread thank you to — to show some concern
best regards for you all
PS: i hope any one have this problem read what i did carefully and ask admins and dev’s and respect them
#21 Motasem
- Interests: War Make’s Men And Problems Make’s You Expert
MooT® - Jordan
i have another question
how can i use the win2flash winxp setup with your way of grub4dos ? $WIN_NT$.
because loading the iso file into memory on step 2 is taking along time and every day i have like 30 pc to format some speed and some slow like 512 ram
Edited by Motasem, 05 February 2013 — 05:35 PM.
#22 steve6375
- Location: UK
- Interests: computers, programming (masm,vb6,C,vbs), photography,TV,films
- United Kingdom
If you are not using the network to install XP, then the quickest way to local install is to start with the i386 files zipped up on the USB drive.
Then you can boot to DOS+smartdrv (or WinPE), partition the target HDD (if DOS then you need to reboot and format the volume), then unzip the file to the target HDD and reboot to the HDD. Now you can remove the USB drive and let the system carry on installing XP on it’s own from the HDD (which is much faster) whilst you use the USB drive on the next system.
Because you are unzipping from a zip file on the USB drive, the slow file access times from the USB drive is kept to a minimum (decompressing from a large zip file is faster than reading lots of small uncompressed files).
Of course, the best thing to do is boot to WinPE in RAM from a USB drive (or PXE boot), (disconnect USB drive), connect to the network and partition/format the HDD, copy over the files from a network share (or run winnt32 across the n/w) and reboot to the HDD.
If you are interesting in PXE booting, try Serva (see Tut 76 on my site).
#23 Motasem
- Interests: War Make’s Men And Problems Make’s You Expert
MooT® - Jordan
thanks steve for this answer but it didnt answer my question i try before the win2flash for winxp setup and it was faster without loading the iso into memory where u give the setup from flash disk ( extracted )
the boot.ini after creation is like this
[Boot Loader]
Timeout=30
Default=multi(0)disk(0)rdisk(1)partition(1)WINDOWS
[Operating Systems]
C:$WIN_NT$.
BTBOOTSECT.DAT = «1st, text mode setup (Boot from flash again after finished)»
multi(0)disk(0)rdisk(1)partition(1)WINDOWS=»2nd, GUI mode setup, continue setup + 1st start of Windows» /fastdetect
C: = «—> DEBUG, in case of HAL.DLL or NTOSKRNL.EXE not found errors
#24 Wonko the Sane

- Location: The Outside of the Asylum (gate is closed)
- Italy
Motasem,
please read the TITLE of this thread: Error 60 / Contiguous ISOs
Are you (still) in that situation/having that issue?
If NO (as you are NOT) you should start a NEW thread instead of hijacking this one.
Threads tend to be made on specific topics, not as «help user xxxxxx with whatever issues he may have».
Wonko
#25 Motasem
- Interests: War Make’s Men And Problems Make’s You Expert
MooT® - Jordan
Источник
#Так же способ установки виндов с флешки
#http://clsv.livejournal.com/12234.html
Всем привет.
Дома валялся компьютер без винта CPU AMD Athlon 64 3200+, MB ASUS AM2(хрен знает какая, лень искать марку), VGA Asus Geforce 6600GT, RAM 1024mb, 3 сетевухи, одна из них встроенная, нашелся винт 250gb WD. Привода не имеется, а операционку какую нибудь вкорячить надо. Ставил Debian используя tftp, не очень она меня порадовала, старый софт и прочие баги при работе с сетью(не люблю пингвинов). Не долго думая поставил PC-BSD 7.1-BETA1 Released(используя 2gb flashdrive и PCBSD7.1-BETA1-x86-USB.img), не знаю в чем была трабла но работала просто ужасно, все томрозило и прочая ересь, не стал разбираться…решил поставить чистый и красивый FreeBSD Release 7.1 AMD64.(установка i386 и прочих ничем не отличается)
В наличие имеем все ту же 2gb flash drive + 2cd образа скаченных с официального ресурса (7.1-RELEASE-amd64-bootonly.iso && 7.1-RELEASE-amd64-disc1.iso) если интернет медленный и грустный то хватит одного образа 7.1-RELEASE-amd64-disc1.iso.
Начинаем подготовку флешки из WINDOWS. Если вы используете другую ОС то думаю вы разберетесь как установить на flashdrive Grub4Dos, если не разберетесь то пишите попробую разъяснить что куда.
Спасибо сайту http://greenflash.su/, очень помог.
Можете там зарегистрироваться и прочесть статью Установка GRUB4DOS, ну а если лень регистрироваться то читаем и качаем все здесь.
1.Перед началом операции флешку рекомендуется отформатировать программой HPUSBFW(369Кб)(ссылка 1,ссылка 2), предварительно сохранив с неё всё необходимое (если есть).
P.S. Я форматировал в FAT32
2. Скачиваем этот файл:GRUB4DOS_GUI(336Кб)(ссылка 1,ссылка 2)
3. Запускаем его. После запуска выбираем (кнопкой Обзор) цель, то есть то устройство на которое будем устанавливать Загрузчик.
Это либо Жёсткий диск, либо Флешка.
Если собираемся ставить на Флешку, значит выбираем корень флешки Х:
(Х — Буква вашей флешки)
Если собираемся ставить на Жёсткий диск, значит выбираем корень диска C: (или на какой вы хотите, главное чтоб был Активным) 
4. Нажимаем кнопку «Извлечь». После этого программа Grub4Dos Installer 1.1 установится к вам в C:Program Files и выбросит ярлык на Рабочий Стол. Одновременно с этим на выбранный вами носитель распакуются файлы загрузчика (Папка — Boot; Файлы — grldr, MEMDISK, MENU.LST) и откроется окно программы Grub4Dos Installer 1.1.
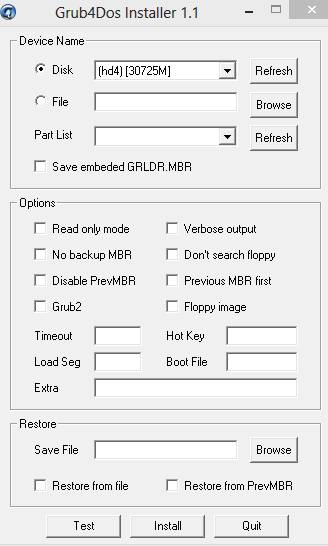
5. В окне программы Grub4Dos Installer 1.1, в самой верхней строчке (выпадающем меню), выбираем цель для установки загрузчика
(HDD или Флешка) Больше ничего выбирать не надо.
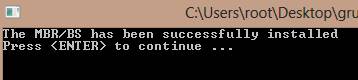
7.Если всё успешно, то вы увидите окно консоли с предложением нажать Enter, Нажимаем Enter.
Добрые люди даж на видео засняли что как делать)
З.Ы.:На сайте еще много полезных статей(не реклама)
Поехали далее….
Если мы все проделали правильно, то при загрузке наша флешка может выдать нечто подобное как:
Осталась маленькая часть всей работы….
####################2 образа####################
Если у нас есть 2 образа FreeBSD: 7.1-RELEASE-amd64-bootonly.iso И 7.1-RELEASE-amd64-disc1.iso
1. На флешке создаем каталог freebsd и копируем туда 7.1-RELEASE-amd64-bootonly.iso с переименованием в bootonly.iso
2. Из образа 7.1-RELEASE-amd64-disc1.iso в корень флешки копируем директории «7.1-RELEASE» и «packages»(если хорошо разбираетесь в дистрибутиве можете порезать то что ненужно)
3. Завершающий этап. Открываем файл MENU.LST он находится в корне флешки и добавляем туда строки:
title FreeBSD 7.1 install
map /freebsd/bootonly.iso (hd32)
map —hook
chainloader (hd32)
boot
сохраняем.
####################1 образ####################
Если у нас есть 1 образ FreeBSD: 7.1-RELEASE-amd64-disc1.iso
1. Открываем образ 7.1-RELEASE-amd64-disc1.iso ISO редактором.
2. Вынимаем оттуда папки «7.1-RELEASE» и «packages» и сохраняем их в корень нашей флешки и сохраняем ISO образ без папок(«7.1-RELEASE» и «packages») с именем bootonly.iso
3.На флешке создаем каталог freebsd и копируем туда наш образ bootonly.iso
4. Завершающий этап. Открываем файл MENU.LST он находится в корне флешки и добавляем туда строки:
title FreeBSD 7.1 install
map /freebsd/bootonly.iso (hd32)
map —hook
chainloader (hd32)
boot
сохраняем.
Все флешка полностью готова для установки с нее FreeBSD 7.1 Release.
1.При загрузке компьютера вызываем boot menu(это где указываем откуда грузиться)
2.Выбираем там нашу флешку, если все верно и компьютер поддерживает загрузку то мы увидим Grub4Dos(вроде скелетон какой то на заднем фоне)
3.В окне выбираем пункт «FreeBSD 7.1 install»
4.Eсли вы сделали все правильно то начнется загрузка установщика freebsd(sysinstall). 5.Проходим все стандартные пункты http://www.lissyara.su/?id=1043
6.В финале выбираем пункт где выбирается путь установки 
7.Выбираем DOS(Флешка у нас формата Fat32 и в корне ее лежат все необходимые файлы для установки FreeBSD 7.1
8.Откидываемся на спинку стула и ждем окончания установки.
Все вопросы сюда или в аську: 173320
Всем спасибо всем удачи.
UPD 10.04.10
Столкнулся вчера с ошибками.
1. При выборе Install FreeBSD образ отказывался грузиться и выдавал следующую ошибку
Error 60: File for drive emulation must be in one contiguous disk area
Вся проблема в том, что образ записался в разные сектора и он не считается непрерывным(не фрагментированным).
Должны были помочь данные утилиты contig и wincontig но не помогли)
2. Ошибка когда я все таки запустил sysinstall из за природы материнской платы, флешка не определилась сразу, поэтому привыборе источника установки возникли проблемы, нажава ctrl+alt+delete я перезапустил устнаовку выбрав Restart, флека определилась, но в конечном счете при копирование файлов, установка падала)
UPD 16.04.10
Решение проблемы с невиденьем флешки в sysinstall
sysinstall — options
Re-scan Devices <*>
Продолжаем спокойно установку)
Приветствую, собственно, всех и вся. Сегодня у нас крайне интересная тема, — загрузочная флешка, — которую давно и часто многие из Вас просили, используя как форму обратной связи, так и специальную предлагалку тем.
Это статья для тех, кто хочет сделать мультизагрузочную флешку с установочниками операционных систем Windows, Linux, а возможно даже, что с несколькими LiveCD и вообще всяческими утилитами, вроде проверки диска, оперативной памяти и всего такого прочего.
Загрузочный USB Flash или HDD накопитель удобен тем, что можно отказаться от использования CD/DVD для установки операционной системы и использования диагностических программ типа Memtest, MHDD, Acronis TI. «Мультизагрузочная» же флешка или жесткий диск хороши тем, что можно не форматировать весь диск для каждой программы, а один раз установить туда всё необходимое и при загрузке выбирать нужное через собственноручно созданное меню.
Особенно эта вещь актуальна для тех, у кого нет CD/DVD читалки, а надо то установить систему, то провериться на вирусы, то что-то еще.
Впрочем, давайте приступим.
-
Видеоформат
-
Немного про загрузчик
-
Загрузочная флешка — что нужно
-
Как с этим взлетать
-
Конфиг для загрузки
-
Послесловие
Видеоформат
Хотя нет, перед тем как приступим, давайте мы покажем Вам наш интересный цикл видеороликов про создание такой штуки как загрузочная флешка системного администратора:
Ну, а дальше, собственно, можете читать статью 
Немного про загрузчик
В лесу родилась ёлочка. Существует достаточно много программ, позволяющих создать загрузочная флешку, каждая из которых имеет свои преимущества и недостатки. Однако самым универсальным и гибким средством является такая штука, как Grub4Dos.
Расскажу кратенько, что это за зверь такой:
GRUB4DOS — это универсальный загрузчик на основе GNU GRUB. Он может управляться в режиме командной строки или с помощью конфигурационного файла, в его возможности входят:
- Загрузка из MBR
- Загрузка из раздела
- Загрузка DOS 6.22/7.x/8.0 (Windows 9x/Me) загрузчиком (io.sys)
- Загрузка FREEDOS загрузчиком (kernel.sys)
- Загрузка Windows NT/2000/XP загрузчиком (ntldr)
- Загрузка Windows Vista/7/8 загрузчиком (bootmgr)
- Загрузка Linux загрузкой ядра (kernel)
- Поддержка нескольких файловых систем
- Загрузка с любого устройства доступного в BIOS‘е
- Загрузка образов дисков (HDD, Floppy, ISO)
- Изменение очерёдности загрузки (используя маппинг)
- Загрузка образов по сети
- Поддержка режима LBA
Этот загрузчик является, по сути, небольшой консольной операционной системой, поддерживающей командную строку, множество команд управления, работы с файлами, управление доступом, модификации разделов, кроме того, поддерживает множество файловых систем, умеет читать данные с любого из определяемых BIOS устройств, поддерживает загрузку по сети, не зависит от геометрии дисков, умеет работать с удалёнными терминалами и т.д.
И это при размере чуть больше 200 килобайт! Чувствуете? Загрузочная флешка скажет Вам спасибо. С точки зрения места, как минимум.
Еще Grub имеет встроенную систему помощи, которая в ответ на <help> всегда выведет список доступных к выполнению команд, а в ответ на <help имя_команды> выдаст дополнительную информацию. Автозаполнение строки (клавиша TAB) подскажет не только синтаксис команды, но и, в некоторых случаях, варианты её продолжения (доступные устройства, разделы).
Ну что ж, начнём.
к содержанию ↑
Загрузочная флешка — что нужно
Список таков:
- Флешка, объём которой удовлетворяет Вашим потребностям.
- Сам grub4dos. Скачать можно по этой ссылке.
- Установщик grubinst. Скачать можно по этой ссылке.
- В качестве утилит, скажем, образ Memtest, Victoria и Partition magic для проверки оперативной памяти и жесткого диска соответственно, а так же работы с разделами диска. Скачать можно все одним архивом по этой ссылке.
- Из операционных систем давайте возьмём, скажем, Linux Mint 15 Olivia. Качается вот так (на странице надо просто выбрать один из серверов в любой стране). Скачанный файл-образ (на момент написания статьи он назывался linuxmint-15-cinnamon-dvd-32bit.iso) переименовываем в mint.iso
Любые другие программы и операционные системы Вы, прочитав данную статью, сможете легко добавлять самостоятельно. Цель материала — показать Вам, как всё это выглядит и работает, дать базис, а дальше уже справитесь. Загрузочная флешка почти в Ваших руках.
к содержанию ↑
Как с этим взлетать
Давайте в деталях:
- Распаковываем скачанный архив grubinst. Запускаем из полученной папки файл grubinst_gui.exe. Важно! Запуск надо производить от имени администратора, т.е. «Правая кнопка мышки по файлу — Запустить от имени администратора«, иначе Вы рискуете столкнуться с проблемами.
- В появившемся окне, а именно в строке «Disk«, очень внимательно указываем нашу флешку. В случае ошибки Вы рискуете перезаписать загрузочный сектор жесткого диска, что чревато.
- Жмём кнопочку Install. Если всё пройдёт хорошо, то Вы увидите такое вот сообщение:
- Закрываем это окно нажатием кнопочки Enter. Идем распаковывать архив grub4dos, скачанный нами ранее. Внутри будет одноименная папка. Заходим внутрь неё. Копируем всё её содержимое в корень на флешку (еще раз — не папку, а её содержимое).
- Собственно, флешка готова, однако в неё еще надо бы добавить всякие утилиты, которые нам хотелось бы с неё загружать. Давайте сделаем это.
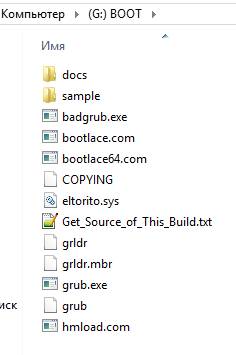
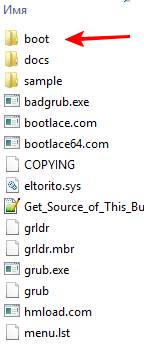
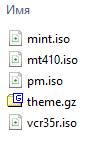
- Здесь же, в корне флешки, куда мы копировали содержимое архива grub4dos, создаём папку boot
- Далее скачиваем этот архив. Это тема оформления для нашего меню, дабы всё было симпатичненько, а не просто буковками на черном экране. Скачанный архив, не распаковывая, копируем в папку boot.
- Туда же копируем, скачанные нами ранее pm.iso, vcr35r.iso, mt420.iso и mint.iso. В результате внутри папки boot получается примерно такая картина:
- Готово! Собственно, Вам остается только перезагрузиться, выставить в BIOS загрузку с USB-носителей и опробовать флешку.
Теперь несколько слов о всяких там установочных архивах и прочем. Глобально, Вы можете подключать практически все .iso, которые предполагают загрузку, т.е. всё, что ранее грузилось с CD/DVD, теперь можно закинуть на флешку в виде .iso образа и грузиться подобным образом.
Я специально не стал приводить пример с установщиками систем, дабы не выкладывать образы Windows и не способствовать пиратству в совсем уж его явном проявлении. Поверьте, никакая загрузочная флешка не стоит.. Неудобств.
Однако расскажу как в принципе подключаются все эти образы вообще.
В корне флешки, куда мы копировали grub4dos есть файлик menu.lst. Открыть его можно в блокноте или notepad++, или чем Вы там пользуетесь для открытия обычных .txt (собственно, здесь не .txt, но открывается методом «Правая кнопка мышки — Открыть с помощью«).
к содержанию ↑
Конфиг для загрузки
Этот самый файл представляет собой своеобразный конфиг, где прописано, что запускать и из какой папки, какую тему использовать и всё такое прочее. Текущее содержание этого файла настроено мной (если Вы, конечно, качали grub4dos по ссылке выше) и выглядит так:
timeout 30
gfxmenu /boot/theme.gz
default 0title Загрузка с жёсткого диска
find —set-root —ignore-floppies —ignore-cd /bootmgr || find —set-root —ignore-floppies —ignore-cd /ntldr
map (hd0) (hd1)
map (hd1) (hd0)
map —hook
rootnoverify (hd0)
chainloader (hd0)+1title Загрузка linuxmint
map —unmap=0:0xff
map —unhook
root (hd0,0)
map /boot/mint.iso (0xff) || map —mem /boot/mint.iso (0xff)
map —hook
root (0xff)
kernel /casper/vmlinuz file=/cdrom/preseed/mint.seed boot=casper iso-scan/filename=/boot/mint.iso quiet splash — locale=ru_RU
errorcheck off
initrd /casper/initrd.lz
initrd /casper/initrd.gz
errorcheck on
map —unmap=0:0xfftitle Загрузка Partition Magic — Работа с разделами жёстких дисков
map /boot/pm.iso (0xff) || map —mem /boot/pm.iso (0xff)
map —hook root (0xff)
chainloader (0xff)title Загрузка vcr35r.iso — Тест жесткого диска [Victoria]
map /boot/vcr35r.iso (0xff) || map —mem /boot/vcr35r.iso (0xff)
map —hook root (0xff)
chainloader (0xff)title Загрузка mt410.iso — Тест оперативной памяти [Memtest]
map /boot/mt410.iso (0xff) || map —mem /boot/mt410.iso (0xff)
map —hook root (0xff)
chainloader (0xff)title Перезагрузка компьютера
reboottitle Выключение компьютера
halt
Очень кратенько поясню, что тут к чему:
- timeout задаёт время до выбора Вами какого-либо пункта (если оный сделан не будет, то выбор произойдет автоматически)
- gxmenu задаёт путь до темы (фоновое изображение и шрифты) оформления меню нашей флешки
- title — собственно задаёт названия пункта в меню
- map — используется для эмуляции диска путём указания пути к образу
Это такой суровый минимум знаний, чтобы у Вас было хоть какое-то общее понимание написанного. Соответственно, как я уже говорил, любые образы подключаются вот через этот самый файлик menu.lst, что делается либо по аналогии с вышепредставленным, либо используя полную документацию на русском языке, которую можно прочитать по этой ссылке.
Ну, а далее.. Разобраться, думаю, несложно, благо загрузочная флешка это не сервер
Качаем необходимый нам .iso, закидываем в папку boot, прописываем новую строку меню с новым путём и вперёд.. Хоть Windows PE грузите, хоть Linux, хоть установщики, хоть антивирусы.
В двух словах как-то вот так.
к содержанию ↑
Послесловие
Прогнозируя возможную тонну вопросов, традиционно говорю, что все их, а так же дополнения, мнения, отзывы, критику, благодарности и прочее, Вы можете оставлять в комментариях к этой самой статье. Попробую ответить.
Но прежде всего, конечно, попробуйте сделать хотя бы то, что представлено в материале, потестировать, а так же потом почитать вышепредставленную документацию.
Спасибо за внимание. Оставайтесь с проектом! 

Загрузочный USB Flash или HDD накопитель удобен тем, что можно отказаться от использования CD/DVD для установки ОС и использования диагностических программ типа Memtest, MHDD, Acronis TI.
«Мультизагрузочная» флешка или HDD хороши тем, что можно не форматировать весь диск для каждой программы, а один раз установить туда все необходимые программы и при загрузке с него выбирать нужную через красивое меню. В случае с HDD удобно создать для этого отдельный небольшой раздел.
Существует множество решений для флешек (например, http://eee-pc.ru/wiki/софт:usb_multiboot), но, как правило, они не работают с USB HDD. На хабре я нашел только статью об установке Win7 с USB HDD, но год назад попытки воспроизвести это не увенчались успехом. Для установки Windows 7 с флешки существует MS Win7 DVD Tool, но он опять же не работает с HDD. Поэтому давайте создадим свой мультизагрузочный USB HDD с помощью GRUB4DOS.
Нам понадобится:
- USB HDD (все описанное должно работать и для флешек).
- ОС Windows (естественно можно аналогично сделать это и из ОС на базе Linux, но у меня сейчас нет возможности проверить работоспособность и наличие «подводных камней»).
- Материнская плата (BIOS) с поддержкой загрузки с USB накопителей. Если загрузка с USB не поддерживается, можно использовать Plop, об этом ниже.
Начнем
- Скачиваем HP USBFW и форматируем наш накопитель. Обычно все, в том числе и я, пропускают этот шаг. Возможно, будет работать и без него, но лично я перепробовал все стандартные варианты форматирования из Windows 7, однако загрузка с моей 320ГБ Тошибы не работала (зависала сразу после выбора в Boot menu) до использования этой утилиты.
- Если воспользовались HP USBFW из прошлого пункта, то можно удалить созданный им на весь диск раздел и создать свой, поменьше (желательно FAT32, иначе могут возникнуть проблемы с некоторыми программами и ОС), а оставшееся место оставить для «файлопомойки».
- Устанавливаем загрузчик GRUB4DOS в MBR. Рекомендуется использовать первый вариант, чтобы не ошибиться с выбором диска или раздела.
- Можно воспользоваться GUI: для этого скачиваем grubinst-1.1-bin-w32-2008-01-01, запускаем grubinst_gui.exe, выбираем диск, жмем Refresh в Part list и выбираем нужный раздел. Остальные настройки можно не трогать.
- Либо в консоли командой:
grubinst.exe hd(номер диска, номер раздела)Номер диска можно узнать в «Управлении дисками» (diskmgmt.msc).
- Копируем файлы grldr и Menu.lst из архива grub4dos-0.4.4.zip в корень раздела.
Можно перезагружаться и проверять работоспособность нашего мультизагрузочного накопителя.
Для проверки работоспособности многих программ необязательно каждый раз ребутать компьютер. Можно использовать виртуальные машины: MobaLiveCD или VirtualBox. Для VB выполняем в консоли:
"C:Program FilesOracleVirtualBoxVBoxManage" internalcommands createrawvmdk -filename "C:USBHDD.VDI" -rawdisk \.PhysicalDrive1где число в PhysicalDrive — номер нашего загрузочного диска, и указываем полученный файл (C:USBHDD.VDI) в качестве жесткого диска при создании машины. Однако некоторые ОС (например, Windows 7) могут не работать таким способом.
Примеры установки некоторых ОС и программ
Memters86+
Скачиваем ISO образ с офф. сайта memtest.org/download/4.20/memtest86+-4.20.iso.zip и кидаем его на наш загрузочный HDD (не забываем распаковать .zip архив).
Открываем Menu.lst текстовым редактором, добавляем туда следующее:
title Memtest
find --set-root /mt420.iso
map /mt420.iso (hd32)
map --hook
root (hd32)
chainloader ()
И попробуем разобраться, что эти команды означают.
title Memtest — название пункта (Memtest), которое будет отображаться в меню.
map /mt420.iso (hd32) — загрузка ISO образа, находящегося в корне загрузочного диска (эмуляция CD-ROM).
root (hd32)— делает виртуальный CD-ROM корневым.
chainloader () — передает управление другому загрузчику (если в скобках ничего не указано, то используется корневой, в данном случае hd32).
Ubuntu 10.4
Также кидаем ISO образ с ubuntu.com на HDD и прописываем в Menu.lst (образ переименован в ubuntu1.iso):
title Ubuntu
map /ubuntu1.iso (hd32)
map --hook
root (hd32)
kernel /casper/vmlinuz iso-scan/filename=/ubuntu1.iso boot=casper quiet splash -- locale=ru_RU
initrd /casper/initrd.lz
Windows 7
А вот с Win 7 немного сложнее.
Способ 1:
Копируем все файлы с диска (образа) Windows 7 и добавляем в Menu.lst:
title Install Windows 7
find --set-root /bootmgr
chainloader /bootmgr
В некоторых случаях работает, но могут возникнуть различные ошибки во время установки. К тому же таким способом будет работать только если на hdd находится одна Windows 7, иначе (например, если хотим поместить туда х86 и х64) запустится установка первой найденной.
Способ 2:
Небольшой скрипт автоматизирующий некоторые операции (в т.ч. добавление пункта в Menu.lst) по изменению образа. Источник — greenflash.su/forum/5-661-1, там же ссылки на подробное описание того, что он делает.
Способ 3:
Качаем imdisk, запускаем, копируем полученную папку imdisk на наш диск.
Создаем в этой папке файлы со следующим содержанием:
SetupImDisk.cmd
@ECHO ON
rundll32.exe setupapi.dll,InstallHinfSection DefaultInstall 132 .imdisk.inf
SetupCDROM7.cmd
@ECHO ON
Set fullname=%srcdrv%win7.iso
imdisk -a -f %srcdrv%win7.iso -m #:
Setup.bat
@ECHO OFF
for %%x in (C D E F G H I J K L M N O P Q R S T U V W X Y Z) do if exist %%x:imdiskSetupImDisk.cmd set srcdrv=%%x:
echo Find the USB in %srcdrv%
echo.
cd
%srcdrv%
cd imdisk
echo Begin with SetupImDisk.cmd
echo.
call %srcdrv%imdiskSetupImDisk.cmd
@ECHO OFF
echo.
echo Now going to SetupCDROM.cmd
echo.
pause
echo.
call %srcdrv%imdiskSetupCDROM7.cmd
@ECHO OFF
echo.
echo Done. Have Fun.....
echo.
pause
for %%y in (C D E F G H I J K L M N O P Q R S T U V W X Y Z) do if exist %%y:look.win set install=%%y:
cd
%install%
cd sources
setup.exe
exit
Либо берем здесь уже готовую папку.
Кидаем образ Windows 7 в корень диска (не забываем переименовать его в win7.iso или соответственно изменить имена во всех файлах) и в Menu.lst добавляем:
Title Install Win7
map /win7.iso (hd32)
map --hook
chainloader (hd32)
И во время установки Win 7, когда попросит драйвер CD-ROM, открываем консоль (SHIFT+F10) и запускаем setup.bat:
pushd E:imdisk — вместо Е буква нашего раздела HDD
setup.bat
Источник — chapaty.org/kasha/software/usb-hdd-install-iso-win-7-xp-ubuntu.html.
UPD: автоматизация этого способа: rghost.ru/20467691 либо greenflash.su/_fr/7/7487664.7z. Файлы из архива (кроме menu.lst и seven.iso) необходимо скопировать в корень раздела (либо соответственно изменить пути в Menu.lst).
Возможные проблемы и ошибки
Error 60: File for drive emulation must be in one contiguous disk area
Решение: нужно дефрагментировать образ. Например, с помощью программы Contig от Марка Руссиновича. Использование: contig.exe g:ubuntu1.iso в консоли.
BIOS не поддерживает загрузку с USB, зависает, долго грузится и другие проблемы, связанные с загрузкой с USB HDD
Решение: Plop boot manager. Вариантов использования много и на их описание не хватит места, поэтому инструкцию на русском можно найти, например, тут.
Надеюсь, эта статья помогла вам разобраться в создании мультизагрузочного жесткого диска или флешки.
Более подробный мануал по GRUB4DOS есть здесь (перевод на русский язык, местами кривой) либо в README_GRUB4DOS из архива с GRUB4DOS.
UPD1: перезалит скрипт из 2 способа вин7: ошибся и выложил старую версию, в ней были проблемы с х64.
UPD1.1: добавлен автоматизированный 3 способ вин7.
- Главная
- Форум
- Загрузчики.
- Grub4DOS
![]()
![]()
|
19711
Buka1214, Grub4DOS — это не DOS. Для работы Volcov Commander или Far Manager (1.70.2087) нужен DOS. Т.е., Grub4DOS должен запустить DOS, а уж в автозагрузке последнего должен быть файлменеджер. Спасибо, я почти все понял. А как этот DOS запустить? Хотелось бы не слепо следовать за кем-то, а самому разобраться. |
Отправлено: 29-Фев-2016 15:37
(спустя 1 час 12 минут)
 Отправлено: 29-Фев-2016 15:37
(спустя 1 час 12 минут)
Гость |
19910
А как этот DOS запустить Чтобы запустить DOS — понадобится загрузочная дискетка DOS. А потом нужно в конфигурационных файлах (CONFIG.SYS, AUTOEXEC.BAT) прописать запуск необходимого. Ну и то, что нужно, естественно, нужно добавить в эту дискету. |
Отправлено: 29-Фев-2016 18:18
(спустя 2 часа 40 минут)
Отправлено: 29-Фев-2016 18:18
(спустя 2 часа 40 минут)
zdoba |
19875
В Grub4dos тоже можно получить UUID uuid () set uuid= Не работает. Проверил и на виртуалке и на реальном железе. Когда прописываю UUID — всё грузиться и работает. Версии Grub4 пробовал менять. Что-то недоработано…. |


Отправлено: 29-Фев-2016 21:45
(спустя 3 часа)
Отправлено: 29-Фев-2016 21:45
(спустя 3 часа)
nikzzzz |
19933
Что-то недоработано…. Да, посмотрел, нормально работает второй вариант. |


Отправлено: 01-Мар-2016 17:18
(спустя 19 часов)
Отправлено: 01-Мар-2016 17:18
(спустя 19 часов)
zdoba |
|
Отправлено: 07-Мар-2016 15:26
(спустя 5 дней)
Отправлено: 07-Мар-2016 15:26
(спустя 5 дней)
Buka1214 |
19921
19910
А как этот DOS запустить Чтобы запустить DOS — понадобится загрузочная дискетка DOS. А потом нужно в конфигурационных файлах (CONFIG.SYS, AUTOEXEC.BAT) прописать запуск необходимого. Ну и то, что нужно, естественно, нужно добавить в эту дискету. Спасибо, кнопок благодарности не нашел. Экспериментировал. |
Отправлено: 07-Мар-2016 16:16
(спустя 50 минут)
Отправлено: 07-Мар-2016 16:16
(спустя 50 минут)
nikzzzz |
19960
В батниках первый вариант проскакивал, не знаю почему не работает, надо будет посмотреть. Моя невнимательность, поправил пост. |
Отправлено: 06-Фев-2017 12:54
(спустя 10 месяцев 29 дней)
Отправлено: 06-Фев-2017 12:54
(спустя 10 месяцев 29 дней)
xakerok2012 |
|
Отправлено: 06-Фев-2017 13:07
(спустя 13 минут)
Отправлено: 06-Фев-2017 13:07
(спустя 13 минут)
vovan1982 |
|

Отправлено: 06-Фев-2017 13:57
(спустя 50 минут)
Отправлено: 06-Фев-2017 13:57
(спустя 50 минут)
xakerok2012 |
|
Отправлено: 06-Фев-2017 14:24
(спустя 26 минут)
Отправлено: 06-Фев-2017 14:24
(спустя 26 минут)
vovan1982 |
Кодtitle Try Ubuntu without installing Примечание: если вы хотите иметь возможность только устанавливать и/или запускать Ubuntu, то удалите из корня вашего USB накопителя все папки, кроме casper и preseed, а из menu.lst удалите последние 3 пункта. Кодdefault live и сохраняем его под тем же именем Кодtitle Ubuntu 10.10 Примечание: если при загрузке Ubuntu, от Grub4Dos версии ниже 0.4.6а вы получили вот такое сообщение: Error 60: File for drive emulation must be in one contiguous disk area, то используйте утилиту Contig для дефрагментации ISO образа. |
Отправлено: 07-Фев-2017 10:54
(спустя 20 часов)
Отправлено: 07-Фев-2017 10:54
(спустя 20 часов)
Отправлено: 14-Фев-2017 13:47
(спустя 7 дней)
Отправлено: 14-Фев-2017 13:47
(спустя 7 дней)
dimkappk |
|
Отправлено: 14-Фев-2017 13:59
(спустя 12 минут)
Отправлено: 14-Фев-2017 13:59
(спустя 12 минут)
Joker-2013 |
Как правильно добавить win xp chip,7.8.1.10? Продолжить читать форум и потихоньку осознавать… |

Отправлено: 14-Фев-2017 14:12
(спустя 12 минут)
Отправлено: 14-Фев-2017 14:12
(спустя 12 минут)
dimkappk |
37488
Как правильно добавить win xp chip,7.8.1.10? Продолжить читать форум и потихоньку осознавать… Спасибо. Вопрос в том почему после добавления 7,8.1,10 сыпятся ошибки? Может нужно сохранить образ в UDF? Если делаю просто загрузочную флешку. то все работает. |
Страница 4 из 8
Текущее время: 09-Фев 22:27
Часовой пояс: UTC + 3
Вы не можете начинать темы
Вы не можете отвечать на сообщения
Вы не можете редактировать свои сообщения
Вы не можете удалять свои сообщения
Вы не можете голосовать в опросах
Вы не можете прикреплять файлы к сообщениям
Вы можете скачивать файлы

Note: The text ‘(hd0,0)304+8,993472+232,16776+292624,311320+292864’ shows that the file is split into four fragments.
Error 60: File for drive emulation must be in one contiguous disk area
Most (but not all) E2B payload files need to be contiguous (in sequential sectors/clusters on the disk). If you see this error reported by E2B, then that file may not boot or work correctly! This error most often occurs if you have been deleting and adding several files to the E2B drive and it is very full.
The easiest way to fix this error is to double-click on MAKE_THIS_DRIVE_CONTIGUOUS.cmd on the E2B USB drive. This will run WinContig and make the files on the volume contiguous (the drive is not ‘defragged’, only the payload files on the E2B volume are defragmented).
Tip: Most Windows Installer .ISO files, .VHD and .WIM files do not need to be contiguous, but all .imgPTN files need to be contiguous.
When WinContig does not seem to work…
Not all files need to be contiguous – so try E2B anyway in case it works.
I recommend you install Piriform Defraggler – then you can right-click on an individual file in Windows Explorer to make it contiguous.
To consolidate all free space on the E2B USB drive use Defraggler – Action – Advanced – Defrag Freespace.
Click here to learn more about fragmented files.
Note: You can also receive this error if your BIOS has the 137GB USB bug. If your drive partition is over 137GB, the BIOS may not be able to access any file located past the 137GB (128GiB) point on the drive. If QEMU or VBox+VMUB works OK, but a real system gives an error – suspect that the BIOS has this bug! E2B should warn you when it boots that you have a buggy BIOS.
WinContig will require at least as much contiguous free space on the USB drive as the size of the file it is trying to make contiguous. e.g. to make a 5GB file contiguous, you will need at least 5GB of contiguous free space on the USB drive. Note that you may have enough free space on the drive, but it may not be in sequential contiguous clusters!
Note: It is almost impossible for an 8GB NTFS USB drive to contain a contiguous 6GB file (see bottom of this page for an explanation)!
Under linux, try a defrag program such as defragfs for FAT32 or udefrag for NTFS (see _ISOdocslinux_utils folder) (other filesystems such as ext2/3/4 and exFAT may not defrag files properly under linux). Note that due to the nature of the file sytem itself, it is almost impossible to have contiguous files on an ext2/3/4 filesystem, so it is really not suitable for use with Easy2Boot USB drives.
WinContig doesn’t work even though there is enough unused space?
WinContig requires contiguous free space. If the free space on the drive is scattered all over the drive, you must use defraggler Defrag Free Space option to consolidate the unused space – see the section further down for details.
Not enough free space available and/or WinContig is too slow?
If you need to add many ISO and other payload files onto your USB drive and make them all contiguous, simply add the payload files to the extracted E2B download folder on your Windows hard drive and then run the MAKE_E2B_USB_DRIVE.cmd script to make a new E2B USB drive. If you have a fragmented drive with little free space then this will be a lot faster than trying to run WinContig on the drive. if you are having problems with some large files then read my blog posts here and here.
Corrupt file or Read-only?
WARNING: If you are using Plop! to boot from the USB drive then you may see this error a lot. Plop! uses a read-only USB 2.0 driver and it is not compatible with E2B because E2B requires read/write access to the USB drive. If you need to use Plop! then please add a set GRUB_USB=Y line to _ISOMyE2B.cfg file. This will load grub4dos 0.4.6a and use it’s own USB 2.0 driver to replace the Plop! USB driver, and it does support write operations to the USB drive. Alternatvely, hold down the SHIFT key as E2B boots, to load the grub4dos USB driver.
If you still get this error, even though you are sure it is contiguous – this error can also occur if the file is corrupt or if it is not of the correct type or if the E2B USB drive is read-only.
Tip: If the file is in a normal menu folder (e.g. MAINMENU or LINUX or AUTO, etc.) – you can hold down the CTRL+SHIFT keys whilst pressing ENTER to run the ISO and keep the SHIFT+CTRL keys held down – E2B will then calculate and display the CRC32 value of the ISO file for you and you can compare it with the original file’s value.
Note: E2B may permanently modify Windows Install ISOs on the E2B drive, so that they do not ask the user to ‘press a key to boot from CDDVD’ – therefore the checksums of these files may be different from the original files.
Check also that your BIOS does not have the 137GB USB bug!
Why are the files always fragmented whenever I copy them?
If you USB drive has had a lot of deleted files on it, the unused free space can become fragmented. When you copy over any file, it will be written to the unused areas of the volume and so will be fragmented.
Another reason for fragmentation is due to the copy program you may be using. Downloading files from the internet directly onto the USB drive can cause the file to be heavily fragmented. Also, some multi-threaded file copy programs (e.g. robocopy) can also fragment the files. I recommend you always download files onto your internal hard disk first and then use a single Explorer copy session to copy the files to the E2B USB drive. Do not use more than one Explorer copy session to the same USB drive at the same time – if the E2B USB drive has never been filled to capacity, the copied files will usually be contiguous.
What are contiguous files?

- In the diagram, FILE 4 is 1.3GB in size and is not contiguous.
- Since there is not 1.3GB of contiguous free space on the drive, WinContig cannot copy the file to an area of contiguous free space.
- If you copy a new 1.3GB ‘FILE 6’ file to this drive, it will have to occupy the unused free space and so FILE 6 will also be non-contiguous
Most ISO files will need to be contiguous for E2B to work. In most filesystems, files are stored in ‘clusters’. So a single file can occupy for instance, clusters 234, 235 and 236 on a disk or it could occupy clusters 99, 278 and 1081 on the disk. In the first case (234-236) we have a contiguous file because all the clusters are sequential. In the second case (99,278,1081) the file is not contiguous as it is spread across the disk in ‘chunks’ with gaps inbetween. To make all files on your USB drive contiguous, run RMPrepUSB and select the USB drive in the drive list, then press Ctrl+F2 to run WinContig. Alternatively download and run WinContig.
Another very useful program is Piriform Defraggler – this shows you a ‘cluster map’ of fragmented and unfragmented files and you can select and defragment single files by clicking on a square on the map. This is really useful for showing you where the files are located on the drive. Defraggler can also consolidate free space too. See also the blog post here.
Under linux, the defragfs utility (see _ISOdocs folder) is able to make files on a FAT32 volume contiguous, however it does not work on NTFS or ext2/3/4 volumes. Also, even if you use E2B on a freshly formatted ext2/3/4 volume, all the files seem to be non-contiguous (which is why I recommend FAT32 only for linux users – if there was a working file-defrag utility for linux, you could use NTFS).
WinContig fails to make all file(s) contiguous (use Defraggler)
Sometimes WinContig or Defraggler may be unable to make all the files contiguous. This is usually because there is not enough contiguous free space on the volume. At least as much free space as the size of the file being defragmented is required – e.g. a 5GB file will require at least 5GB of contiguous free disk space so that it can be copied to a contiguous space on the disk.
Note: Defraggler can make contiguous all the unused free blocks on a drive. Use the Action – Advanced – Defrag Freespace option in Defraggler to consolidate the free space before running WinContig.
In this case, you can either delete some large, unwanted files (e.g. _ISOCONTIG.ISO can be deleted) and run WinContig again OR it is often much quicker to:
1. Copy all files from you USB drive to an empty folder on your hard drive
2. Re-partition your USB drive and re-install grub4dos
3. Copy all the files back again (use Explorer but do not use multiple copy sessions at the same time)
Defraggler also adds a right-click function to Windows – select the file, right-click and select ‘Defraggler – defrag’ to defragment (make contiguous) a single file. This is quicker than having to run WinContig/RMPrepUSB.
You can also make a ‘master folder’ on your system disk by adding your payload files to the extracted E2B files, and then run MAKE_E2B_USB_DRIVE.cmd to make a fresh USB drive.
If this still doesn’t work, make a new E2B USB drive, copy on your largest payload file and then run WinContig. Repeat this for the next largest files until you only have files <2GB. Then copy all the other files over.
Making files contiguous on a small NTFS drive
In some cases, if using NTFS, you may find that you cannot get a large ISO file to be contiguous on a smallish drive (e.g. a 6GB ISO file on an 8GB USB NTFS flash drive cannot be made contiguous!), even if you copy over the files to a freshly formatted NTFS USB Flash drive.
Here is how to make a bootable 8GB USB drive containing a 6GB contiguous file using the partitioning tool EaseUS Home Partition Master (EHPM):
1. Erase all partitions on the flash drive
2. Make a small 20MB NTFS PRIMARY partition using EHPM – or RMPrepUSB if you want a special bootloader
3. Re-size the partition using EHPM to ALMOST the full drive capacity – e.g. 7.8GB
4. Now add a small 2nd FAT PRIMARY partition (this is to improve boot compatibility with some BIOSes – the partition is not actually used)
5. Copy over your large file first and check it is contiguous using WinContig.
6. Use RMPrepUSB to install grub4dos to the MBR and PBR and copy over all the E2B files.
If you have Vista or Win7/8/10, then you can use Disk Manager instead of EaseUS Home Partition Master to resize the partition in Step 3.
More details on my blog post here.
#1
![]()
r4ymonf
-
- Members
-
- 17 posts
Newbie

-
United States

Posted 17 January 2013 — 10:58 PM
Hi! I… uh… installed Windows XP onto a VHD with VirtualBox following this tutorial. I put it onto a flash drive but I’m getting Error 60! I already tried WinContig, and then it failed with «The volume does not have a group of contigous, free clusters that is large enough to contain the entire file.», I’ve tried changing the cluster size from default to 64K and I’ve tried 4 times already. I’d really appreciate some help. Thanks.
- Back to top
#2
![]()
r4ymonf
r4ymonf
-
- Members
-
- 17 posts
Newbie
-
United States
Posted 18 January 2013 — 01:34 AM
P.S. I’ve tried NTFS and FAT32, both are the same. [Same error in wincontig]
- Back to top
#3
![]()
Wonko the Sane
Wonko the Sane
-
-
Advanced user
-
- 16065 posts
The Finder

- Location:The Outside of the Asylum (gate is closed)
-
Italy

Posted 18 January 2013 — 03:34 PM
Basically what you are experiencing is that you have (either before you started fiddling with it or because of your fiddling with it) such a heavily fragmented filesystem on the USB stick and/or not enough «spare» contiguous space that Wincontig has not enough «workspace».
Cluster size or filesystems used (in the .vhd) is totally irrelevant.
You can either «start form scratch» after having re-formatted the USB stick or use a «complete disk» defragment program on it (before copying to it the .vhd).
HOW exactly (under which OS and through which specific tool) you are copying the .vhd to the stick may be part of the issue.
Additionally how BIG is the resulting .vhd?
Which size is the USB stick?

Wonko
- Back to top
#4
![]()
r4ymonf
r4ymonf
-
- Members
-
- 17 posts
Newbie
-
United States
Posted 18 January 2013 — 06:42 PM
What program can I use for a «complete disk» defragment?
1] TeraCopy Pro and the included windows copier
2] About 6GB
3] 8GB — 7.4GB recognised
- Back to top
#5
![]()
Wonko the Sane
Wonko the Sane
-
-
Advanced user
-
- 16065 posts
The Finder
- Location:The Outside of the Asylum (gate is closed)
-
Italy
Posted 19 January 2013 — 11:31 AM
Good so you have no issues with Ram (you have plenty of it).
You can use either a third party such as UltraDefrag:
http://ultradefrag.s…t/en/index.html
or the Windows built-in defragmenter.
The issue is that a USB stick will normally be seen as Removable and normal Windows may have issues with it.
You can then use a filter driver:
http://www.msfn.org/…os/page__st__54
to have it be seen as «Fixed». (I normally flip the bit directly on the hardware but it is an operation that is not «easy»).
Wonko
- Back to top
#6
![]()
r4ymonf
r4ymonf
-
- Members
-
- 17 posts
Newbie
-
United States
Posted 19 January 2013 — 02:54 PM
Okay, I’ll try that. Thanks. I wouldn’t even know how to start opening a cruzer edge flash drive.
Oh noes, the link is dead for the filter I believe.
Oh, and I formatted everything and then I defragged but there were no files. 
Edited by r4ymonf, 19 January 2013 — 03:15 PM.
- Back to top
#7
![]()
Wonko the Sane
Wonko the Sane
-
-
Advanced user
-
- 16065 posts
The Finder
- Location:The Outside of the Asylum (gate is closed)
-
Italy
Posted 19 January 2013 — 03:48 PM
Well, there is no need to «physically open» the thingy.
WHICH link is dead?
Any problem with the meaning of «either/or»? 
Wonko
- Back to top
#8
![]()
Sha0
Sha0
-
-
Developer
-
- 1682 posts
WinVBlock Dev

- Location:reboot.pro Forums
- Interests:Booting
-
Canada

Posted 19 January 2013 — 08:00 PM
Oh, and I formatted everything and then I defragged but there were no files.
The simplest way to have the best chance of success with a contiguous file is to backup all files from the target, reformat the target, copy only the desired file back to the target, run a tool to make it contiguous, then restore the rest of the files from the backup.
- Back to top
#9
![]()
Wonko the Sane
Wonko the Sane
-
-
Advanced user
-
- 16065 posts
The Finder
- Location:The Outside of the Asylum (gate is closed)
-
Italy
Posted 19 January 2013 — 08:16 PM
The simplest way to have the best chance of success with a contiguous file is to backup all files from the target, reformat the target, copy only the desired file back to the target, run a tool to make it contiguous, then restore the rest of the files from the backup.
Which BTW, expecially if the file that is copied is a «largish» one is also the perfect recipe to hit a CHS limit for loading the system files such as NTLDR or IO.SYS  and more generally all kind of issues with limited LBA access from bootsector code.
JFYI:
https://www.virtualbox.org/ticket/959
Seriously, the «old school» way is to copy to a newly formatted disk ALL loaders/system files that may be needed/used in a boot environment, and only later copy the largish .VHD file that needs to be kept defragmented.
Wonko
- Back to top
#10
![]()
r4ymonf
r4ymonf
-
- Members
-
- 17 posts
Newbie
-
United States
Posted 19 January 2013 — 08:31 PM
I don’t understand, should I do the «old-school» way (which I have no idea on how that’d work because I’ve already tried that ) or Sha0’s way?
- Back to top
#11
![]()
Wonko the Sane
Wonko the Sane
-
-
Advanced user
-
- 16065 posts
The Finder
- Location:The Outside of the Asylum (gate is closed)
-
Italy
Posted 19 January 2013 — 08:42 PM
I don’t understand, should I do the «old-school» way (which I have no idea on how that’d work because I’ve already tried that
It depends on how big is the .vhd image and how big is the device and how (with which geometry) the BIOS recognize it.
Normally there won’t be any difference, as the USB stick (which is roughly 8 Gb in size) will be detected as having a H/S geometry of 255/63 and the LBA limit for 255/63 is actually around 8 Gb.
Your .vhd is surely smaller than 8 Gb (around 6 Gb) so you should have no issues using either approach.
Simply copy only the .vhd (i.e. do NOT multi-select a number of files) and check with wincontig if it is «delivered unfragmented».
Report what happens.
Wonko
- Back to top
#12
![]()
Sha0
Sha0
-
-
Developer
-
- 1682 posts
WinVBlock Dev
- Location:reboot.pro Forums
- Interests:Booting
-
Canada
Posted 19 January 2013 — 08:42 PM
Which BTW, expecially if the file that is copied is a «largish» one is also the perfect recipe to hit a CHS limit for loading the system files such as NTLDR or IO.SYS
JFYI:
https://www.virtualbox.org/ticket/959
Seriously, the «old school» way is to copy to a newly formatted disk ALL loaders/system files that may be needed/used in a boot environment, and only later copy the largish .VHD file that needs to be kept defragmented.
While I agree that your post is true and useful to mention for this scenario, it stands on its own and has no bearing on the truth of what I said. I always use the precise method you’ve described as «old school,» but that is not relevant to the problem of making a contiguous file.
I have a problem with your post, and that is that it could have gone like this, instead:
And in this case, since you will be needing NTLDR, IO.SYS or other system files to be at a «low place» on the disk to prevent C/H/S issues, you will want to copy just those files first, then the desired «big» file, then make the big file contiguous, then copy the rest of the files.
Instead, my post is portrayed as «a perfect recipe [for issues]», when in fact, it’s perfectly valid as-is. You can argue that it is irresponsible to «mislead» someone with information that, while true, might not be the whole story, but I’d argue that lessons are sometimes best learned by experience («NTLDR is missing») than by theory. 
- Back to top
#13
![]()
Wonko the Sane
Wonko the Sane
-
-
Advanced user
-
- 16065 posts
The Finder
- Location:The Outside of the Asylum (gate is closed)
-
Italy
Posted 19 January 2013 — 08:49 PM
@Sha0
Besides the fact that I was (ad still am) joking, you have to admit that the thread is not about «making a file contiguous» but rather about «making contiguous a large .vhd file that I want to boot following this tutorial http://www.linuxbyex…n-usb-disk.html BUT I have an error about the file not being contiguous».
I am looking at the wider scenario .
Wonko
- Back to top
#14
![]()
r4ymonf
r4ymonf
-
- Members
-
- 17 posts
Newbie
-
United States
Posted 20 January 2013 — 01:44 AM
I:
1) Formatted to NTFS and then checked for any fragmented files.
2) Copied the VHD only.
3) IT’S FRAGMENTED AND SAME ERROR [in grub4dos and wincontig].
D;<
Grub is mean.
- Back to top
#15
![]()
Sha0
Sha0
-
-
Developer
-
- 1682 posts
WinVBlock Dev
- Location:reboot.pro Forums
- Interests:Booting
-
Canada
Posted 20 January 2013 — 04:18 AM
I:
1) Formatted to NTFS and then checked for any fragmented files.
2) Copied the VHD only.
3) IT’S FRAGMENTED AND SAME ERROR [in grub4dos and wincontig].
D;<
Grub is mean.
Then you don’t have enough space.
- Back to top
#16
![]()
Wonko the Sane
Wonko the Sane
-
-
Advanced user
-
- 16065 posts
The Finder
- Location:The Outside of the Asylum (gate is closed)
-
Italy
Posted 20 January 2013 — 11:22 AM
Hmmm.
A 6 Gb .vhd is very big for an XP install, but still, it shouldn’t get fragmented during copy operation.
Is the «original» (on the hard disk) fragmented or contiguous?
HOW exactly are you copying the .vhd?
Are you running an antivirus or some form of «online/background» file scanning?
Idea 
How many fragments do you get?
If they are just a few it is possible that the issue is the $MFT (and/or some other NTFS system files) that break the image.
In theory it should be possible to move the $MFT and all other system files to the beginning of the partition, though right now I can remember no «automated» tool capable of doing it.
I need the EXACT size of that stick and partition (in bytes).
Get Hdhacker:
http://dimio.altervista.org/eng/
make a backup of BOTH the first sector of the Physicaldrive and of the first sector of the Logicaldrive.
Compress them together to a .zip file, upload the .zip to *any* free file hosting service and post a link to it.
I can try making manually a suitable «blank» filesystem for your stick this way.
Wonko
- Back to top
#17
![]()
r4ymonf
r4ymonf
-
- Members
-
- 17 posts
Newbie
-
United States
Posted 20 January 2013 — 07:06 PM
1) The original seems to be fragmented even though I’ve defragged it from VBox a LOT of times.
2) I’m using TeraCopy Pro.
3) Avast, I had that off while I was copying because it was conflicting with Trickster Online [I was playing that while I was copying].
4) 2 fragments.
5) Um, I don’t know how to add an attachment, so: mediafire link here.
- Back to top
#18
![]()
steve6375
steve6375
-
-
Developer
-
- 7565 posts
Platinum Member

- Location:UK
- Interests:computers, programming (masm,vb6,C,vbs), photography,TV,films
-
United Kingdom

Posted 20 January 2013 — 09:39 PM
It would be interesting to know the size of each fragment (and position). If you can copy the vhd over and then install grub4dos, boot to grub4dos to the command console, and then type
blocklist /my6gb.vhd
and report what you get. Then repeat the format, copy VHD, add grub4dos, do blocklist command again and see if you get the same size for each of the 2 fragments.
If the size of each fragment varies, then you have some sort of ‘random’ process which is causing the file to be split.
If the fragments are the exact same size each time, then you have a repeatable, deterministic problem. As it occurs on both FAT32 and NTFS then it may be some other process.
TeraCopy uses dynamically adjusted buffers to reduce the seek times. Asynchronous copying speeds up the file transfer between two physical hard drives.
TeraCopy Pro may actually split the copy into two parts in some way to speed it up (e.g. make a sparse file of the same size as the vhd, then copy from beginning to middle and from middle to end — at the same time, asynchronously) — can you just use normal OS copy instead?
Also try the vhd copy in safe mode (and not doing anything else whilst you are waiting)?
P.S. In post #2 you said you tried copying the VHD to both FAT32 and NTFS — but if the VHD is 6GB, how did you copy a 6GB file to a FAT32 volume (the max filesize is 4GB)?
- Back to top
#19
![]()
r4ymonf
r4ymonf
-
- Members
-
- 17 posts
Newbie
-
United States
Posted 20 January 2013 — 10:10 PM
P.S. In post #2 you said you tried copying the VHD to both FAT32 and NTFS — but if the VHD is 6GB, how did you copy a 6GB file to a FAT32 volume (the max filesize is 4GB)?
I actually made the VHD smaller, as I had 2 versions of the VHD: 3.9GB and 6GB.
TeraCopy Pro may actually split the copy into two parts in some way to speed it up (e.g. make a sparse file of the same size as the vhd, then copy from beginning to middle and from middle to end — at the same time, asynchronously) — can you just use normal OS copy instead?
Oh, I never noticed that. I’ll try that, thanks!
- Back to top
#20
![]()
r4ymonf
r4ymonf
-
- Members
-
- 17 posts
Newbie
-
United States
Posted 20 January 2013 — 10:58 PM
Still didn’t work, perhaps it’s because it’s fragged on my disk, and WinContig gives me the same error on my C:.
- Back to top
#21
![]()
steve6375
steve6375
-
-
Developer
-
- 7565 posts
Platinum Member
- Location:UK
- Interests:computers, programming (masm,vb6,C,vbs), photography,TV,films
-
United Kingdom
Posted 20 January 2013 — 11:23 PM
No, source should not matter.
Can you try running blocklist on the file from grub4dos as requested?
re. drive C: — do you have lots of spare space on drive C: and was it defragged recently?
- Back to top
#22
![]()
r4ymonf
r4ymonf
-
- Members
-
- 17 posts
Newbie
-
United States
Posted 21 January 2013 — 12:07 AM
Oh, sorry about the blocklist part, I forgot about that.
The output was (hd0,0)7817512+7815832,536,4767081.
No, and no. :/
- Back to top
#23
![]()
steve6375
steve6375
-
-
Developer
-
- 7565 posts
Platinum Member
- Location:UK
- Interests:computers, programming (masm,vb6,C,vbs), photography,TV,films
-
United Kingdom
Posted 21 January 2013 — 12:23 AM
The output was (hd0,0)7817512+7815832,536,4767081.
Are you sure that is accurate? There should be two + signs in the line????
e.g. 
- Back to top
#24
![]()
r4ymonf
r4ymonf
-
- Members
-
- 17 posts
Newbie
-
United States
Posted 21 January 2013 — 12:57 AM
Oh, my mistake. It was (hd0,0)7817512+7815832,536+4767081.
- Back to top
#25
![]()
steve6375
steve6375
-
-
Developer
-
- 7565 posts
Platinum Member
- Location:UK
- Interests:computers, programming (masm,vb6,C,vbs), photography,TV,films
-
United Kingdom
Posted 21 January 2013 — 08:57 AM
That is an odd result in that it lists the furthest-most sequential cluster run first. Was this a copy made using Windows Explorer or TeraCopy?
I really want to see just a plain Windows Explorer COPY blocklist.
Did you try the other experiments, i.e. repeat it and see if blocklist result is identical, try safe mode copy, etc.?
- Back to top