Содержание
- HackWare.ru
- Этичный хакинг и тестирование на проникновение, информационная безопасность
- Как установить Greenbone Vulnerability Management (GVM) (бывший OpenVAS) в Kali Linux
- OpenVAS теперь переименована в Greenbone Vulnerability Management (GVM)
- Ошибки при установке и запуске GVM, OpenVAS
- Как установить OpenVAS (GVM)
- Настройка OpenVAS
- Настройка Greenbone Vulnerability Management (GVM)
- Заключение
- Статья Установка openvas на Kali Linux
- mrtyrel
- ImFelix
- NOMAD
- Ronin
- Dallas system
- Ethical hacking and penetration testing
- InfoSec, IT, Kali Linux, BlackArch
- How to install Greenbone Vulnerability Management (GVM) (formerly OpenVAS) on Kali Linux
- OpenVAS is now renamed Greenbone Vulnerability Management (GVM)
- Errors when installing and starting GVM, OpenVAS
- How to install OpenVAS (GVM)
- Setting up OpenVAS
- Configuring Greenbone Vulnerability Management (GVM)
- Conclusion
- Related articles:
- Recommended for you:
- 7 Comments to How to install Greenbone Vulnerability Management (GVM) (formerly OpenVAS) on Kali Linux
HackWare.ru
Этичный хакинг и тестирование на проникновение, информационная безопасность
Как установить Greenbone Vulnerability Management (GVM) (бывший OpenVAS) в Kali Linux
OpenVAS теперь переименована в Greenbone Vulnerability Management (GVM)
Когда создавался проект OpenVAS, он состоял только из движка для сканирования уязвимостей. Вскоре после этого Greenbone Networks получила финансирование для оказания профессиональной поддержки в области сканирования уязвимостей. Гринбоун начал руководить разработкой, добавил несколько программных компонентов и превратил OpenVAS в решение для многосторонней работы с уязвимостями, по-прежнему сохраняющее ценности открытого и бесплатного программного обеспечения.
Через несколько лет стало очевидно, что использование OpenVAS в качестве торговой марки для проекта с открытым исходным кодом и финансирование почти всей разработки проекта не было оценено извне. Поэтому после выпуска платформы OpenVAS 9 она была переименована в Greenbone Vulnerability Management (GVM) и выпущена как Greenbone Source Edition (GSE). Начиная с GVM 10 термин OpenVAS используется только для компонента сканера, как это было в начале проекта.
Пакеты Greenbone Vulnerability Management (GVM): https://github.com/greenbone
Ошибки при установке и запуске GVM, OpenVAS
В процессе установки и запуска у меня возникло довольно много ошибок, которые, тем не менее, удалось решить. Исходя из того предположения, что эти ошибки являются общими для всех (а не только для моей конкретной установки), я описал эти ошибки прямо в процессе установки, в результате чего инструкция стала загромождённой.
Если в процессе установки вы не столкнётесь с описываемыми ошибками, напишите, пожалуйста, об этом в комментариях — если ошибки не появляются у всех, то я вынесу их в самый конец статьи, благодаря чему в целом инструкция станет более ясной.
Как установить OpenVAS (GVM)
Поскольку авторы переименовали openvas в gvm (точнее, разделили на разные пакеты), то теперь основным пакетом является gvm, при его установке в качестве зависимостей также будут получены все другие необходимые пакеты.
Установка делается так:
Настройка OpenVAS
Начнём с настройки Open Vulnerability Assessment Scanner (OpenVAS), то есть открытого сканера оценки уязвимостей для Greenbone Vulnerability Management (GVM).
Он используется в Greenbone Security Manager и представляет собой полнофункциональный модуль сканирования, который выполняет постоянно обновляемую и расширенную подачу Network Vulnerability Tests (NVTs), то есть тестов сетевых уязвимостей.
Сканеру нужен запущенный сервер Redis для временного хранение собранной информации по сканированным хостам. Настройка сервера Redis делается так (эти команды нужно выполнить один раз):
Запуск сервера Redis (нужно делать после каждой перезагрузки компьютера):
Или, если хотите, добавьте его в автозагрузку:
Служба Greenbone Vulnerability Management (gvmd) действует как клиент OSP для подключения к сканерам и управления ими. openvas не действует как служба OSP — для этого вам понадобится модуль OSPD-OpenVAS. Фактические пользовательские интерфейсы (например, GSA или GVM-Tools) будут взаимодействовать только с gvmd и/или ospd-openvas, но не со сканером. Вы можете запустить openvas, чтобы загрузить плагины в Redis, используя следующую команду:
но ospd-openvas выполнит обновление автоматически.
Обратите внимание: хотя вы можете запускать openvas от имени пользователя без повышенных прав, рекомендуется запускать openvas от имени пользователя root, поскольку для выполнения ряда тестов на уязвимость сети (NVT) требуются привилегии root для выполнения определённых операций, таких как подделка пакетов. Если вы запускаете openvas от имени пользователя без разрешения на выполнение этих операций, результаты сканирования, скорее всего, будут неполными.
Поскольку openvas будет запускаться из процесса ospd-openvas с помощью sudo, в файле sudoers требуется следующая конфигурация:
добавьте эту строку, чтобы позволить пользователю, запускающему ospd-openvas, запускать openvas с правами root
Замените ПОЛЬЗОВАТЕЛЬ на имя вашего пользователя Linux.
Узнать имя пользователя можно командой:
Если что-то не работает, то посмотреть журнал можно командой:
Настройка Greenbone Vulnerability Management (GVM)
Greenbone Vulnerability Manager — это центральная служба управления между сканерами безопасности и пользовательскими клиентами.
Он управляет хранением любых конфигураций работы с уязвимостями и результатов сканирования. Доступ к данным, командам управления и рабочим процессам обеспечивается через протокол управления Greenbone Management Protocol (GMP) на основе XML. Управление сканерами, такими как OpenVAS, осуществляется через протокол открытого сканера (OSP).
Скрипт развёртывания (вместо openvas-setup):
Этот скрипт нужно запустить только один раз.
Работа скрипта завершилась ошибкой:

также показала наличие ошибки на четвёртом шаге:

Для исправления ошибки «ERROR: CERT data are missing. FIX: Run the CERT synchronization script greenbone-feed-sync.» выполните следующую команду:
Повторный запуск проверки показал ошибку на пятом шаге:

Там сразу несколько ошибок, но ключевой является «ERROR: No users found. You need to create at least one user to log in.», для её исправления выполните команду вида:
Например, для создания пользователя с именем mial и паролем 2:
Предыдущая команда завершилась неудачей:

Суть ошибки в том, что у команды не хватает прав на запись в файл /var/log/gvm/gvmd.log даже не смотря на то, что предыдущая команда запущена с sudo. Для исправления ошибки выполните следующую команду:
Затем вновь запустите создание нового пользователя.

И ещё одна ошибка на седьмом шаге:

Я не знаю как её решить до конца, но знаю как обойти.
Перейдём к запуску необходимых служб.
Не забывайте, что перед запуском службы вам нужно запустить сервер Redis, то есть перед выполнить команду:
И получаем следующее:

Суть сообщений в том, что всё нормально запустилось, кроме greenbone-security-assistant, то есть gsa, то есть Web UI (Greenbone Security Assistant), ну то есть веб-интерфейса.
Можно посмотреть содержимое журнала:
Не удалось запустить https демон.
У gsad есть опция —http-only которая запускает только HTTP без HTTPS. Воспользуемся ею:
Опять будет выведено очередное сообщение, что что-то не так:
Тем не менее, теперь веб-интерфейс доступен по адресу http://127.0.0.1:9392 (но не доступен по https://127.0.0.1:9392!).

Войдите в него используя учётные данные, которые вы придумали при создании нового пользователя.

В будущем для обновления сигнатур запускайте иногда команду:
Если что-то не работает, то посмотреть журнал можно командой:
Заключение
О том, как работать в Greenbone Vulnerability Management (GVM) (бывшем OpenVAS) будет посвящена одна из следующих инструкций.
А вы не забудьте написать — возникали ли у вас при установке описанные ошибки.
Источник
Статья Установка openvas на Kali Linux
Привет, мой дорогой читатель. Видел на форуме несколько проблем с установкой сканера openvas на kali linux. Решил написать полный мануал по установке этого детища, плюсом немного задену сканирование.
Перейдем непосредственно к установке openvas. Считается, что kali уже установлена и обновлена. Вводим незамысловатую команду:
apt install openvas
Отвечаем «y» на вопрос о том, что мы в трезвом сознании пытаемся установить эти пакеты и ждем окончания установки :=)

Следующей командой запустим сервис новоиспеченного openvas:
Откроется браузер поумолчанию (обычно это firefox) с панелью управления. Но так, как мы еще не все настроили надо будет его закрыть и перейти обратно в консоль. Вводим для создания пользователя:
И для создания пароля к этому пользователю:
Я надеюсь вместо USER и Password вы поняли, что надо подставить свои значения :=). Переходим к самой настройке. Вводим:
Как видно на скриншоте, после проверки имеются проблемы, устраняем их:
Работа этого скрипта займет примерно 5 минут. Вводим еще раз проверку установки:
Необходимо пофиксить еще одну проблему:
Опять проверка, и еще один скрипт необходимо запустить для достижения цели:
Можете расслабиться, откинуться на спинку стула, и наслаждаться зелеными цифрами на черном экране. Это действие будет выполняться не менее часа. Советую далеко от системы не отходить, так как возможно образование ошибки, после чего работа остановится, и необходимо будет заново ее запустить.
После окончания работы скрипта, необходимо запустить проверку еще раз, и снова запустить тот же скрипт на отработку. Да, вот такая штука эти компьютеры :=)
Теперь запускаем openvas еще раз, и еще раз проверяем установку:
В этот раз необходимо установить приложение nsis:
Смотрим еще раз, и устанавливаем rpm:
Следом, после проверки, нам проверка скажет, что необходимо установить alien:
Следом советую сразу обновить nmap

mrtyrel

ImFelix
New member

NOMAD
Member
ERROR: Your OpenVAS-9 installation is not yet complete!
Ronin
Member

Dallas system
В связи с частыми ошибками и нестабильной работы openvas от себя могу порекомендовать обратить на другое детище greenbone: The GSM Community Edition ссылка на сайт
По ссылке найдете комьюнити версию и достаточно подробный мануал по установке. ссылка на скачивание образа (526 MB)
Далее вольный перевод страницы по установке для тех, кто не может или не хочет читать ин.яз.:
Настройка GCE
Версия: 6.0.3
Совместимость: VirtualBox, ESXi
Минимальные требования: 2 ядра процессора, 4 ГБ ОЗУ
GSM Community Edition является производным от GSM ONE и позволяет быстро и легко выбрать Windows, Linux или Mac, чтобы испытать решение. Никаких особых ноу-хау не требуется.
В отличие от коммерческого решения, вместо Greenbone Security Feed используется Community Feed. Также некоторые функции управления, такие как сертификаты TLS, не включены. Обновления источников баз происходят регулярно, но сама система не может быть обновлена. Коммерческая версия может быть обновлена целиком и также включает доступ к поддержке Greenbone.
Community Edition, а также GSM ONE предназначены для использования с ноутбуком. Полный набор функций для процесса управления уязвимостями доступен только для более крупных моделей GSM и может быть получен от Greenbone дополнительно.
Установка Community Edition:
Создайте виртуальный образ:
Hyper-V через “New – Virtual Computer”:
Generation: Generation 1
Startup memory: 4096 MB
Use Dynamic Memory: deactivate
Network: выберите соединение с доступом к Интернету. Системе необходим доступ к интернету для настройки. Для использования системного веб-интерфейса вам необходим доступ к системе, из которой работает ваш веб-браузер.
Виртуальный жесткий диск: создайте новый, минимум 15 ГБ
Варианты установки: теперь выберите загруженный ISO-образ в качестве носителя.
После сохранения измените количество процессоров на 2
ESXi / VMWare: в основном следуйте подсказкам, как в «VirtualBox».
VirtualBox через «New»:
Тип: Linux
Версия: Другой Linux (64bit)
Память: 4096 МБ
Жесткий диск: 18 ГБ
Процессоры: 2
Создайте новый жесткий диск для виртуальной машины.
Позаботьтесь о том, чтобы сетевое соединение работало изнутри и снаружи VM: Системе необходим доступ к интернету для настройки. Для использования веб-интерфейса системы вам необходимо получить доступ к системе, из которой работает ваш веб-браузер.
Аудио, USB и дискета должны быть отключены.
Теперь выберите загруженный iso-образ в качестве носителя для CD-привода и запустите виртуальный компьютер.
В меню выберите пункт «Настройка» и подтвердите, что жесткий диск может быть перезаписан.
Процесс установки займет некоторое время. Вам будет предложено ввести имя пользователя и пароль для учетной записи администратора. Обратите внимание на эту учетную запись, потому что не будет другого способа администрирования системы.
Следуйте инструкциям до перезагрузки. Система автоматически перезагрузится во второй раз.
Как только появится приглашение «Welcome to Greenbone OS», войдите в систему с помощью ранее созданной учетной записи администратора.
Теперь вы входите в мастер настройки, который проведет вас через последние шаги:
Веб-пользователь: создание учетной записи администратора для веб-интерфейса. Там вы можете позже создать дополнительную учетную запись по мере необходимости.
Обновите базы записей (feed): без ленты вы не можете выполнять сканирование, а раздел SecInfo остается пустым. Поэтому загрузка настоятельно рекомендуется, но требует доступа в Интернет.
Обновление ленты работает в фоновом режиме, вы находитесь в главном меню администрации. Через «About» вы можете просмотреть ключевые свойства вашей установки, в частности адрес веб-интерфейса и то, запущен ли процесс обновления базы записей.
Войдите в веб-интерфейс с учетной записью веб-администратора.
Только после завершения обновления базы записей вся информация в области SecInfo будет доступна и возможно первое сканирование. Это может занять полчаса или даже дольше.
Во время установки был создан самозаверяющий сертификат TLS. Ваш браузер будет считать его небезопасным, и вы должны указать браузеру принять его как исключение.
Документация и руководства доступны на портале Techboc Greenbone. Тем не менее, пользовательский интерфейс говорит само за себя. Просто начните. Мастер поможет вам создать и запустить вашу первую задачу сканирования.
Обратите внимание: завершение работы виртуальной машины должно осуществляться только через меню «Обслуживание-> Питание», чтобы гарантировать, что важные системные процессы, такие как обновление ленты, не прерываются.
Авторское право, лицензии и источники:
Операционная система Feed и Greenbone состоит из различных компонентов с различными авторскими правами и лицензиями (с открытым исходным кодом). По сути, продукт может быть использован для любых целей, но для перераспределения необходимо учитывать условия лицензий. Подробности приведены в информации о лицензии. Там вы также найдете предложение для доступа к исходному коду в соответствии с GNU GPL.
Источник
Ethical hacking and penetration testing
InfoSec, IT, Kali Linux, BlackArch
How to install Greenbone Vulnerability Management (GVM) (formerly OpenVAS) on Kali Linux
OpenVAS is now renamed Greenbone Vulnerability Management (GVM)
When the OpenVAS project was created, it only consisted of a vulnerability scanning engine. Greenbone Networks received funding shortly thereafter to provide professional vulnerability scanning support. Greenbone took over development leadership, added a few software components, and turned OpenVAS into a multi-pronged vulnerability management solution that still retains the value of open and free software.
Over the years, it became apparent that the use of OpenVAS as a trademark for an open source project and funding for almost all of the project’s development had not been appreciated from outside. Therefore, after the release of the OpenVAS 9 platform, it was renamed Greenbone Vulnerability Management (GVM) and released as Greenbone Source Edition (GSE). Since GVM 10, the term OpenVAS is used only for the scanner component, as it was at the beginning of the project.
Greenbone Vulnerability Management (GVM) packages: https://github.com/greenbone
Errors when installing and starting GVM, OpenVAS
During the installation and launch process, I encountered quite a few errors, which, nevertheless, were resolved. Under the assumption that these errors are common to everyone (not just my particular installation), I described these errors right during the installation process, as a result of which the instructions became cluttered.
If during the installation process you do not encounter the described errors, please write about it in the comments – if the errors do not appear for everyone, then I will put them at the very end of the article, due to which, in general, the instruction will become clearer.
How to install OpenVAS (GVM)
Since the authors renamed openvas to gvm (more precisely, divided it into different packages), now the main package is gvm, when it is installed, all other necessary packages will also be obtained as dependencies.
Installation is done like this:
Setting up OpenVAS
Let’s start by setting up the Open Vulnerability Assessment Scanner (OpenVAS) for Greenbone Vulnerability Management (GVM) solution.
It is used in Greenbone Security Manager and is a full-fledged scan engine that performs constantly updated and expanded submissions of Network Vulnerability Tests (NVTs).
The scanner needs a running Redis server to temporarily store the collected information on the scanned hosts. Configuring the Redis server is done like this (these commands need to be executed once):
Starting the Redis server (must be done after every computer restart):
Or, if you like, add it to startup:
The Greenbone Vulnerability Management (gvmd) service acts as an OSP client to connect to and manage scanners. openvas does not act as an OSP service – you need the OSPD-OpenVAS module for that. Actual user interfaces (like GSA or GVM-Tools) will only interact with gvmd and/or ospd-openvas, not the scanner. You can run openvas to load plugins in Redis using the following command:
but ospd-openvas will update automatically.
Please note that although you can run openvas as a non-elevated user, it is recommended that you run openvas as root because some network vulnerability tests (NVTs) require root privileges to perform certain operations, such as package spoofing. If you run openvas as a user without permission to perform these operations, the scan results are likely to be incomplete.
Since openvas will be launched from the ospd-openvas process using sudo, the following configuration is required in the sudoers file:
add this line to allow the user running ospd-openvas to run openvas as root
Replace USERNAME with your Linux username.
You can find out the username with the command:
If something does not work, then you can view the log with the command:
Configuring Greenbone Vulnerability Management (GVM)
Greenbone Vulnerability Manager is the central management service between security scanners and user clients.
It manages the storage of any vulnerability management configuration and scan results. Data, control commands, and workflows are accessed through the XML-based Greenbone Management Protocol (GMP). Scanners such as OpenVAS are controlled through the Open Scanner Protocol (OSP).
Deployment script (instead of openvas-setup):
This script needs to be run only once.
The script ended with an error:

also showed an error in the fourth step:

To fix the error “ERROR: CERT data are missing. FIX: Run the CERT synchronization script greenbone-feed-sync” run the following command:
Re-running the check showed an error at the fifth step:

There are several errors at once, but the key one is “ERROR: No users found. You need to create at least one user to log in.”, To fix it, run a command like this:
For example, to create a user named mial and password 2:
The previous command failed:

The essence of the error is that the command does not have enough permissions to write to the /var/log/gvm/gvmd.log file, even though the previous command was run with sudo. To fix the error, run the following command:
Then run the new user creation again.

And one more mistake at the seventh step:

I don’t know how to solve it completely, but I know how to get around it.
Let’s move on to starting the necessary services.
Do not forget that before starting the service you need to start the Redis server, that is, type following before executing the primary command:
Main service start:
And we get the following:

The essence of the messages is that everything started fine, except for the greenbone-security-assistant, that is, gsa, that is, Web UI (Greenbone Security Assistant), that is, the web interface.
You can see the contents of the log file:
gsad has a —http-only option which only runs HTTP without HTTPS. Let’s use it:
Again, the next message will be displayed that something is wrong:
However, the web interface is now available at http://127.0.0.1:9392 (but not available at https://127.0.0.1:9392!).

Log in using the credentials that you came up with when creating a new user.

To stop the service:
In the future, sometimes run the command to update signatures:
If something does not work, then you can view the log with the command:
Conclusion
One of the following instructions will be devoted to how to work in Greenbone Vulnerability Management (GVM) (formerly OpenVAS).
And do not forget to write – have you encountered the described errors during installation?
Related articles:
Recommended for you:
I found feed status are «update in progress» and «scap database is required» on my Open VAS GVM platform.I have tried may option to update feeds but notings works.
This is log OPEN VAS:
libgvm util:MESSAGE:2022-09-11 06h52.30 utc:5664: Updated NVT cache from version 0 to 202209101034
libgvm util:MESSAGE:2022-09-11 09h04.08 utc:1213: Updated NVT cache from version 0 to 202209101034
libgvm util:MESSAGE:2022-09-11 09h48.54 utc:1297: Updated NVT cache from version 0 to 202209101034
libgvm util:MESSAGE:2022-09-11 10h09.17 utc:1168: Updated NVT cache from version 0 to 202209101034
libgvm util:MESSAGE:2022-09-11 13h05.31 utc:1220: Updated NVT cache from version 0 to 202209101034
libgvm util:MESSAGE:2022-09-11 13h23.30 utc:1159: Updated NVT cache from version 0 to 202209101034
libgvm util:MESSAGE:2022-09-11 13h55.51 utc:1148: Updated NVT cache from version 0 to 202209101034
libgvm util:MESSAGE:2022-09-11 15h45.48 utc:1197: Updated NVT cache from version 0 to 202209101034
libgvm util:MESSAGE:2022-09-11 17h46.23 utc:1712: Updated NVT cache from version 0 to 202209101034
libgvm util:MESSAGE:2022-09-11 18h09.25 utc:1194: Updated NVT cache from version 0 to 202209101034
libgvm util:MESSAGE:2022-09-13 15h31.07 utc:1204: Updated NVT cache from version 0 to 202209101034
libgvm util:CRITICAL:2022-09-13 15h31.17 utc:2876: redis_find: redis connection error to /run/redis-openvas/redis.sock: No such file or directory
libgvm util:CRITICAL:2022-09-13 15h31.17 utc:2876: get_redis_ctx: redis connection error to /run/redis-openvas/redis.sock: No such file or directory
libgvm util:CRITICAL:2022-09-13 15h31.17 utc:2876: get_redis_ctx: redis connection error to /run/redis-openvas/redis.sock: No such file or directory
libgvm util:CRITICAL:2022-09-13 15h37.41 utc:3412: redis_find: redis connection error to /run/redis-openvas/redis.sock: No such file or directory
libgvm util:CRITICAL:2022-09-13 15h37.41 utc:3412: get_redis_ctx: redis connection error to /run/redis-openvas/redis.sock: No such file or directory
libgvm util:CRITICAL:2022-09-13 15h37.41 utc:3412: get_redis_ctx: redis connection error to /run/redis-openvas/redis.sock: No such file or directory
libgvm util:MESSAGE:2022-09-13 16h25.01 utc:3395: Updated NVT cache from version 0 to 202209131026
libgvm util:MESSAGE:2022-09-13 16h34.58 utc:1214: Updated NVT cache from version 0 to 202209131026
Hi! thanks for the tutorial!
on «sudo gvm-setup» i get this:
rsync: [generator] failed to set permissions on «/var/lib/openvas/plugins/2014/gb_fedora_2014_5004_httpd_fc19.nasl»: Function not implemented (38)
rsync: [generator] failed to set permissions on «/var/lib/openvas/plugins/2014/gb_fedora_2014_5006_json-c_fc20.nasl»: Function not implemented (38)
rsync: [generator] failed to set permissions on «/var/lib/openvas/plugins/2014/gb_fedora_2014_5015_elfutils_fc20.nasl»: Function not implemented (38)
Источник
-
#1
Установил Openvas при заходе в админку вылезает такое предупреждение, как я понял не может обновить базу, но решения не нашел.
Warning: SecInfo Database Missing
Выполнил check-setup лог ниже
Код:
openvas-check-setup 2.3.7
  Mode:  desktop
  Date:  Wed, 30 May 2018 08:32:02 +0300

Checking for old OpenVAS Scanner <= 2.0 ...
/usr/bin/openvas-check-setup: 184: /usr/bin/openvas-check-setup: openvasd: not found

Checking presence of OpenVAS Scanner ...
OpenVAS Scanner 5.1.1
Most new code since 2005: (C) 2016 Greenbone Networks GmbH
Nessus origin: (C) 2004 Renaud Deraison <deraison@nessus.org>
License GPLv2: GNU GPL version 2
This is free software: you are free to change and redistribute it.
There is NO WARRANTY, to the extent permitted by law.


Checking OpenVAS Scanner version ...

        OK: OpenVAS Scanner is present in version 5.1.1.
plugins_folder = /var/lib/openvas/plugins
cache_folder = /var/cache/openvas
include_folders = /var/lib/openvas/plugins
max_hosts = 30
max_checks = 10
be_nice = no
logfile = /var/log/openvas/openvassd.messages
log_whole_attack = no
log_plugins_name_at_load = no
dumpfile = /var/log/openvas/openvassd.dump
cgi_path = /cgi-bin:/scripts
optimize_test = yes
checks_read_timeout = 5
network_scan = no
non_simult_ports = 139, 445
plugins_timeout = 320
scanner_plugins_timeout = 36000
safe_checks = yes
auto_enable_dependencies = yes
use_mac_addr = no
nasl_no_signature_check = yes
drop_privileges = no
unscanned_closed = yes
unscanned_closed_udp = yes
vhosts =
vhosts_ip =
report_host_details = yes
kb_location = /var/run/redis-openvas/redis-server.sock
timeout_retry = 3
config_file = /etc/openvas/openvassd.conf
Checking presence of redis ...
        OK: redis-server is present in version v=4.0.9.

Checking if redis-server is configured properly to run with openVAS ...
        OK: scanner (kb_location setting) is configured properly using the redis-server socket: /var/run/redis-openvas/redis-server.sock
Checking if redis-server is running ...
        OK: redis-server is running and listening on socket: /var/run/redis-openvas/redis-server.sock.
        OK: redis-server configuration is OK and redis-server is running.

Checking NVT collection ...

        OK: NVT collection in /var/lib/openvas/plugins contains 45187 NVTs.
Checking status of signature checking in OpenVAS Scanner ...
        WARNING: Signature checking of NVTs is not enabled in OpenVAS Scanner.
        SUGGEST: Enable signature checking (see http://www.openvas.org/trusted-nvts.html).

        OK: The NVT cache in /var/cache/openvas contains 45187 files for 45187 NVTs.

Checking presence of OpenVAS Manager ...
OpenVAS Manager 7.0.2
Manager DB revision 184
Copyright (C) 2010-2016 Greenbone Networks GmbH
License GPLv2+: GNU GPL version 2 or later
This is free software: you are free to change and redistribute it.
There is NO WARRANTY, to the extent permitted by law.


        OK: OpenVAS Manager is present in version 7.0.2.
Checking OpenVAS Manager database ...

        OK: OpenVAS Manager database found in /var/lib/openvas/mgr/tasks.db.
Checking access rights of OpenVAS Manager database ...

        OK: Access rights for the OpenVAS Manager database are correct.
Checking sqlite3 presence ...
        OK: sqlite3 found, extended checks of the OpenVAS Manager installation enabled.

Checking OpenVAS Manager database revision ...
        OK: OpenVAS Manager database is at revision 184.
Checking database revision expected by OpenVAS Manager ...
        OK: OpenVAS Manager expects database at revision 184.
        OK: Database schema is up to date.
Checking OpenVAS Manager database (NVT data) ...
        OK: OpenVAS Manager database contains information about 45183 NVTs.
Checking if users exist ...
        OK: At least one user exists.

Checking OpenVAS SCAP database ...
        ERROR: No OpenVAS SCAP database found. (Tried: /var/lib/openvas/scap-data/scap.db)
        FIX: Run a SCAP synchronization script like greenbone-scapdata-sync.
хотелось бы найти решение без переустановки Openvas, есть ли решение?

-
#2
Установил Openvas при заходе в админку вылезает такое предупреждение, как я понял не может обновить базу, но решения не нашел.
Warning: SecInfo Database Missing
Выполнил check-setup лог ниже
Код:
openvas-check-setup 2.3.7
  Mode:  desktop
  Date:  Wed, 30 May 2018 08:32:02 +0300

Checking for old OpenVAS Scanner <= 2.0 ...
/usr/bin/openvas-check-setup: 184: /usr/bin/openvas-check-setup: openvasd: not found

Checking presence of OpenVAS Scanner ...
OpenVAS Scanner 5.1.1
Most new code since 2005: (C) 2016 Greenbone Networks GmbH
Nessus origin: (C) 2004 Renaud Deraison <deraison@nessus.org>
License GPLv2: GNU GPL version 2
This is free software: you are free to change and redistribute it.
There is NO WARRANTY, to the extent permitted by law.


Checking OpenVAS Scanner version ...

        OK: OpenVAS Scanner is present in version 5.1.1.
plugins_folder = /var/lib/openvas/plugins
cache_folder = /var/cache/openvas
include_folders = /var/lib/openvas/plugins
max_hosts = 30
max_checks = 10
be_nice = no
logfile = /var/log/openvas/openvassd.messages
log_whole_attack = no
log_plugins_name_at_load = no
dumpfile = /var/log/openvas/openvassd.dump
cgi_path = /cgi-bin:/scripts
optimize_test = yes
checks_read_timeout = 5
network_scan = no
non_simult_ports = 139, 445
plugins_timeout = 320
scanner_plugins_timeout = 36000
safe_checks = yes
auto_enable_dependencies = yes
use_mac_addr = no
nasl_no_signature_check = yes
drop_privileges = no
unscanned_closed = yes
unscanned_closed_udp = yes
vhosts =
vhosts_ip =
report_host_details = yes
kb_location = /var/run/redis-openvas/redis-server.sock
timeout_retry = 3
config_file = /etc/openvas/openvassd.conf
Checking presence of redis ...
        OK: redis-server is present in version v=4.0.9.

Checking if redis-server is configured properly to run with openVAS ...
        OK: scanner (kb_location setting) is configured properly using the redis-server socket: /var/run/redis-openvas/redis-server.sock
Checking if redis-server is running ...
        OK: redis-server is running and listening on socket: /var/run/redis-openvas/redis-server.sock.
        OK: redis-server configuration is OK and redis-server is running.

Checking NVT collection ...

        OK: NVT collection in /var/lib/openvas/plugins contains 45187 NVTs.
Checking status of signature checking in OpenVAS Scanner ...
        WARNING: Signature checking of NVTs is not enabled in OpenVAS Scanner.
        SUGGEST: Enable signature checking (see http://www.openvas.org/trusted-nvts.html).

        OK: The NVT cache in /var/cache/openvas contains 45187 files for 45187 NVTs.

Checking presence of OpenVAS Manager ...
OpenVAS Manager 7.0.2
Manager DB revision 184
Copyright (C) 2010-2016 Greenbone Networks GmbH
License GPLv2+: GNU GPL version 2 or later
This is free software: you are free to change and redistribute it.
There is NO WARRANTY, to the extent permitted by law.


        OK: OpenVAS Manager is present in version 7.0.2.
Checking OpenVAS Manager database ...

        OK: OpenVAS Manager database found in /var/lib/openvas/mgr/tasks.db.
Checking access rights of OpenVAS Manager database ...

        OK: Access rights for the OpenVAS Manager database are correct.
Checking sqlite3 presence ...
        OK: sqlite3 found, extended checks of the OpenVAS Manager installation enabled.

Checking OpenVAS Manager database revision ...
        OK: OpenVAS Manager database is at revision 184.
Checking database revision expected by OpenVAS Manager ...
        OK: OpenVAS Manager expects database at revision 184.
        OK: Database schema is up to date.
Checking OpenVAS Manager database (NVT data) ...
        OK: OpenVAS Manager database contains information about 45183 NVTs.
Checking if users exist ...
        OK: At least one user exists.

Checking OpenVAS SCAP database ...
        ERROR: No OpenVAS SCAP database found. (Tried: /var/lib/openvas/scap-data/scap.db)
        FIX: Run a SCAP synchronization script like greenbone-scapdata-sync.
хотелось бы найти решение без переустановки Openvas, есть ли решение?
Вы пробовали делать то,что советует сделать сканер?
greenbone-scapdata-sync
-
#3
Да я выполнил рекомендации, но ошибка остается

-
#4
Да я выполнил рекомендации, но ошибка остается
Посмотреть вложение 18834
Так же можно попробовать:
greenbone-certdata-sync
greenbone-scapdata-syn
Если не поможет проще переустановить:
apt-get purge openvas
apt-get install openvas
openvas-setup
Вы ничего не потеряете. Все настройки и сканы сохранятся.
-
#5
Вы пробовали делать то,что советует сделать сканер?
greenbone-scapdata-sync
Так же можно попробовать:
greenbone-certdata-sync
greenbone-scapdata-syn
Если не поможет проще переустановить:
apt-get purge openvas
apt-get install openvas
openvas-setup
Вы ничего не потеряете. Все настройки и сканы сохранятся.
Благодарю, как я понял после выполнения команд которые вы написали база создалась, просто уведомление не исчезает, а так все работает коректно. Спасибо за помощь.

-
#6
При запуске Openvas на Kali Linux получаю ошибку:
Код:
greenbone-security-assistant.service: Failed with result 'exit-code'.При этом не удается залогиниться, получаю ошибку: Unknown Error
Лог при запуске команды gvm-check-setup чистый
Код:
gvm-check-setup 1.0.0
  Test completeness and readiness of GVM-11
Step 1: Checking OpenVAS (Scanner)...
        OK: OpenVAS Scanner is present in version 7.0.1.
        OK: Server CA Certificate is present as /var/lib/gvm/CA/servercert.pem.
Checking permissions of /var/lib/openvas/gnupg/*
        OK: _gvm owns all files in /var/lib/openvas/gnupg
        OK: redis-server is present.
        OK: scanner (db_address setting) is configured properly using the redis-server socket: /var/run/redis-openvas/redis-server.sock
        OK: redis-server is running and listening on socket: /var/run/redis-openvas/redis-server.sock.
        OK: redis-server configuration is OK and redis-server is running.
        OK: _gvm owns all files in /var/lib/openvas/plugins
        OK: NVT collection in /var/lib/openvas/plugins contains 61819 NVTs.
Checking that the obsolete redis database has been removed
        OK: No old Redis DB
        OK: OpenVAS Scanner is present in version 1.0.1.
Step 2: Checking GVMD Manager ...
        OK: GVM Manager (gvmd) is present in version 9.0.1.
Step 3: Checking Certificates ...
        OK: GVM client certificate is valid and present as /var/lib/gvm/CA/clientcert.pem.
        OK: Your GVM certificate infrastructure passed validation.
Step 4: Checking data ...
        OK: SCAP data found in /var/lib/gvm/scap-data.
        OK: CERT data found in /var/lib/gvm/cert-data.
Step 5: Checking Postgresql DB and user ...
        OK: Postgresql version and default port are OK.
could not change directory to "/root": Permission denied
 gvmd      | _gvm     | UTF8     | en_US.UTF-8 | en_US.UTF-8 |
        OK: At least one user exists.
Step 6: Checking Greenbone Security Assistant (GSA) ...
Oops, secure memory pool already initialized
        OK: Greenbone Security Assistant is present in version 9.0.1.
Step 7: Checking if GVM services are up and running ...
        Starting ospd-openvas service
        Waiting for ospd-openvas service
        OK: ospd-openvas service is active.
        Starting gvmd service
        Waiting for gvmd service
        OK: gvmd service is active.
        Starting greenbone-security-assistant service
        Waiting for greenbone-security-assistant service
        OK: greenbone-security-assistant service is active.
Step 8: Checking GVM database ...
could not change directory to "/root": Permission denied
        OK: portnames are in database.
Step 9: Checking few other requirements...
        OK: nmap is present in version 9.0.1.
        OK: ssh-keygen found, LSC credential generation for GNU/Linux targets is likely to work.
        OK: nsis found, LSC credential package generation for Microsoft Windows targets is likely to work.
        OK: xsltproc found.
        OK: The password policy file at /etc/gvm/pwpolicy.conf contains entries.

It seems like your GVM-11 installation is OK.
Может кто сталкивался?
Переустановка не помогла.
Building the Greenbone Community Edition from source requires knowledge about:
-
Using a terminal
-
Shell programming basics
-
Installing software via apt or dnf
-
Using a C compiler
-
Using CMake and make
-
The Linux File System Hierarchy
-
Running services via systemd
Additionally, a basic knowledge about the architecture
of the Greenbone Community Edition is required to follow this guide.
Note
This guide is intended for developers who want to try out the newest features
and/or want to get familiar with the source code. It is not intended for
production setups.
Currently the docs support the following distributions
-
Debian stable (bullseye)
-
Ubuntu 22.04 LTS
-
Fedora 35 and 36
-
CentOS 9 Stream
Most likely, other Debian derivatives like Mint and Kali will also work with
only minor adjustments required.
Hardware Requirements#
Minimal:
-
CPU Cores: 2
-
Random-Access Memory: 4GB
-
Hard Disk: 20GB free
Recommended:
-
CPU Cores: 4
-
Random-Access Memory: 8GB
-
Hard Disk: 60GB free
Prerequisites#
Note
Please follow the guide step by step. Later steps might require settings or
output of a previous command.
The command sudo is used for executing commands that require privileged
access on the system.
Creating a User and a Group#
The services provided by the Greenbone Community Edition should run as a dedicated user and
group. Therefore a gvm user and a group with the same name will be created.
Creating a gvm system user and group#
sudo useradd -r -M -U -G sudo -s /usr/sbin/nologin gvm
Adjusting the Current User#
To allow the current user to run gvmd he must be added to the gvm group.
To make the group change effective either logout and login again or use
su.
Add current user to gvm group#
sudo usermod -aG gvm $USER

su $USER
Setting the PATH#
On Debian systems the locations /sbin, /usr/sbin and
/usr/local/sbin are not in the PATH of normal users. To run
gvmd which is located in /usr/local/sbin the PATH
environment variable should be adjusted.
Adjusting PATH for running gvmd#
export PATH=$PATH:/usr/local/sbin
Choosing an Install Prefix#
Before building the software stack, a (root) directory must be chosen where
the built software will finally be installed. For example, when building packages,
the distribution developers set this path to /usr.
By default, it is /usr/local which is also used in this guide. This
directory will be stored in an environment variable INSTALL_PREFIX
to be able to reference it later.
Setting an install prefix environment variable#
export INSTALL_PREFIX=/usr/local
Creating a Source, Build and Install Directory#
To separate the sources and the build artifacts, a source and a build directory
must be created.
This source directory will be used later in this guide via
an environment variable SOURCE_DIR. Accordingly, a variable
BUILD_DIR will be set for the build directory. Both can be set to any
directory to which the current user has write permissions. Therefore
directories in the current user’s home directory are chosen in this guide.
Choosing a source directory#
export SOURCE_DIR=$HOME/source
mkdir -p $SOURCE_DIR
Choosing a build directory#
export BUILD_DIR=$HOME/build
mkdir -p $BUILD_DIR
Additionally, an install directory will be set as an environment variable
INSTALL_DIR. It is used as a temporary installation directory
before moving all built artifacts to the final destination.
Choosing a temporary install directory#
export INSTALL_DIR=$HOME/install
mkdir -p $INSTALL_DIR
Choosing the Installation Source#
For building the GVM software stack, three different sources can be chosen
depending on the desired stability:
-
Building from release tarballs
-
Building from git tags
-
Building from release branches
Linux distributions use the release tarballs because it is the most common
and well known method to share source code.
Newer build systems may stick with the git tags.
If you are a developer and very familiar with building from source already, you
may also try out using the git release branches. These have the
advantage that they contain the newest fixes which may not yet be included in the
release tarballs or git tags. As a downside, the release branches may
contain only partially fixed issues and need to be updated more often.
This guide will use the tarballs to build the software.
Installing Common Build Dependencies#
For downloading, configuring, building and installing the Greenbone Community
Edition components, several tools and applications are required. To install this
requirements the following commands can be used:
Installing common build dependencies#
sudo apt update
sudo apt install --no-install-recommends --assume-yes
  build-essential
  curl
  cmake
  pkg-config
  python3
  python3-pip
  gnupg
Importing the Greenbone Signing Key#
To validate the integrity of the downloaded source files,
GnuPG is used. It requires downloading the
Greenbone Community Signing public key and importing it into the current user’s
keychain.
Importing the Greenbone Community Signing key#
curl -f -L https://www.greenbone.net/GBCommunitySigningKey.asc -o /tmp/GBCommunitySigningKey.asc
gpg --import /tmp/GBCommunitySigningKey.asc
For understanding the validation output of the gpg tool, it is best to mark the
Greenbone Community Signing key as fully trusted.
Setting the trust level for the Greenbone Community Signing key#
echo "8AE4BE429B60A59B311C2E739823FAA60ED1E580:6:" > /tmp/ownertrust.txt
gpg --import-ownertrust < /tmp/ownertrust.txt
Setup Python#
To allow loading the to be installed Python packages the installation path must
be made available for your system wide installed Python version.
Add installation directory to Python’s module path#
export PYTHON_VERSION=$(python3 -c "import sys; print(f'{sys.version_info[0]}.{sys.version_info[1]}');")

echo "$INSTALL_PREFIX/lib/python$PYTHON_VERSION/site-packages" | sudo tee /usr/lib/python3/dist-packages/greenbone.pth
Setting the Version#
To make the downloading easier, an environment variable for the desired release
version will be set. Using a variable allows adjusting the version easily after
a new release.
Setting a GVM version as environment variable#
export GVM_VERSION=22.4.1
Building and Installing the Components#
Note
The components should be build and installed in the listed order.
gvm-libs#
gvm-libs is a C library providing basic functionality like XML parsing and
network communication. It is used in openvas-scanner, gvmd, gsad and pg-gvm.
Setting the gvm-libs version to use#
export GVM_LIBS_VERSION=22.4.4
Required dependencies for gvm-libs#
sudo apt install -y
  libglib2.0-dev
  libgpgme-dev
  libgnutls28-dev
  uuid-dev
  libssh-gcrypt-dev
  libhiredis-dev
  libxml2-dev
  libpcap-dev
  libnet1-dev
  libpaho-mqtt-dev
Optional dependencies for gvm-libs#
sudo apt install -y
  libldap2-dev
  libradcli-dev
Downloading the gvm-libs sources#
curl -f -L https://github.com/greenbone/gvm-libs/archive/refs/tags/v$GVM_LIBS_VERSION.tar.gz -o $SOURCE_DIR/gvm-libs-$GVM_LIBS_VERSION.tar.gz
curl -f -L https://github.com/greenbone/gvm-libs/releases/download/v$GVM_LIBS_VERSION/gvm-libs-$GVM_LIBS_VERSION.tar.gz.asc -o $SOURCE_DIR/gvm-libs-$GVM_LIBS_VERSION.tar.gz.asc
Verifying the source file#
gpg --verify $SOURCE_DIR/gvm-libs-$GVM_LIBS_VERSION.tar.gz.asc $SOURCE_DIR/gvm-libs-$GVM_LIBS_VERSION.tar.gz
The output of the last command should be similar to:
gpg: Signature made Fri Apr 16 08:31:02 2021 UTC
gpg:                using RSA key 9823FAA60ED1E580
gpg: Good signature from "Greenbone Community Feed integrity key" [ultimate]
If the signature is valid, the tarball can be extracted.
tar -C $SOURCE_DIR -xvzf $SOURCE_DIR/gvm-libs-$GVM_LIBS_VERSION.tar.gz
Afterwards, gvm-libs can be build and installed.
Building gvm-libs#
mkdir -p $BUILD_DIR/gvm-libs && cd $BUILD_DIR/gvm-libs

cmake $SOURCE_DIR/gvm-libs-$GVM_LIBS_VERSION
  -DCMAKE_INSTALL_PREFIX=$INSTALL_PREFIX
  -DCMAKE_BUILD_TYPE=Release
  -DSYSCONFDIR=/etc
  -DLOCALSTATEDIR=/var

make -j$(nproc)
Installing gvm-libs#
mkdir -p $INSTALL_DIR/gvm-libs

make DESTDIR=$INSTALL_DIR/gvm-libs install

sudo cp -rv $INSTALL_DIR/gvm-libs/* /
gvmd#
The Greenbone Vulnerability Management Daemon (gvmd) is the main service of the
Greenbone Community Edition. It handles authentication, scan management, vulnerability
information, reporting, alerting, scheduling and much more. As a storage backend,
it uses a PostgreSQL database.
Setting the gvmd version to use#
export GVMD_VERSION=22.4.2
Required dependencies for gvmd#
sudo apt install -y
  libglib2.0-dev
  libgnutls28-dev
  libpq-dev
  postgresql-server-dev-13
  libical-dev
  xsltproc
  rsync
  libbsd-dev
  libgpgme-dev
Optional dependencies for gvmd#
sudo apt install -y --no-install-recommends
  texlive-latex-extra
  texlive-fonts-recommended
  xmlstarlet
  zip
  rpm
  fakeroot
  dpkg
  nsis
  gnupg
  gpgsm
  wget
  sshpass
  openssh-client
  socat
  snmp
  python3
  smbclient
  python3-lxml
  gnutls-bin
  xml-twig-tools
Details about the optional dependencies can be found at
https://github.com/greenbone/gvmd/blob/stable/INSTALL.md#prerequisites-for-optional-features
Downloading the gvmd sources#
curl -f -L https://github.com/greenbone/gvmd/archive/refs/tags/v$GVMD_VERSION.tar.gz -o $SOURCE_DIR/gvmd-$GVMD_VERSION.tar.gz
curl -f -L https://github.com/greenbone/gvmd/releases/download/v$GVMD_VERSION/gvmd-$GVMD_VERSION.tar.gz.asc -o $SOURCE_DIR/gvmd-$GVMD_VERSION.tar.gz.asc
Verifying the source file#
gpg --verify $SOURCE_DIR/gvmd-$GVMD_VERSION.tar.gz.asc $SOURCE_DIR/gvmd-$GVMD_VERSION.tar.gz
The output of the last command should be similar to:
gpg: Signature made Fri Apr 16 08:31:02 2021 UTC
gpg:                using RSA key 9823FAA60ED1E580
gpg: Good signature from "Greenbone Community Feed integrity key" [ultimate]
If the signature is valid the tarball can be extracted.
tar -C $SOURCE_DIR -xvzf $SOURCE_DIR/gvmd-$GVMD_VERSION.tar.gz
Building gvmd#
mkdir -p $BUILD_DIR/gvmd && cd $BUILD_DIR/gvmd

cmake $SOURCE_DIR/gvmd-$GVMD_VERSION
  -DCMAKE_INSTALL_PREFIX=$INSTALL_PREFIX
  -DCMAKE_BUILD_TYPE=Release
  -DLOCALSTATEDIR=/var
  -DSYSCONFDIR=/etc
  -DGVM_DATA_DIR=/var
  -DGVMD_RUN_DIR=/run/gvmd
  -DOPENVAS_DEFAULT_SOCKET=/run/ospd/ospd-openvas.sock
  -DGVM_FEED_LOCK_PATH=/var/lib/gvm/feed-update.lock
  -DSYSTEMD_SERVICE_DIR=/lib/systemd/system
  -DLOGROTATE_DIR=/etc/logrotate.d

make -j$(nproc)
Installing gvmd#
mkdir -p $INSTALL_DIR/gvmd

make DESTDIR=$INSTALL_DIR/gvmd install

sudo cp -rv $INSTALL_DIR/gvmd/* /
pg-gvm#
pg-gvm is a PostgreSQL server extension that adds several functions used by gvmd, e.g., iCalendar and host range evaluation.
In previous versions, these functions were managed directly by gvmd while pg-gvm uses the extension management built into PostgreSQL.
Setting the pg-gvm version to use#
export PG_GVM_VERSION=22.4.0
Required dependencies for pg-gvm#
sudo apt install -y
  libglib2.0-dev
  postgresql-server-dev-13
  libical-dev
Downloading the pg-gvm sources#
curl -f -L https://github.com/greenbone/pg-gvm/archive/refs/tags/v$PG_GVM_VERSION.tar.gz -o $SOURCE_DIR/pg-gvm-$PG_GVM_VERSION.tar.gz
curl -f -L https://github.com/greenbone/pg-gvm/releases/download/v$PG_GVM_VERSION/pg-gvm-$PG_GVM_VERSION.tar.gz.asc -o $SOURCE_DIR/pg-gvm-$PG_GVM_VERSION.tar.gz.asc
Verifying the source file#
gpg --verify $SOURCE_DIR/pg-gvm-$PG_GVM_VERSION.tar.gz.asc $SOURCE_DIR/pg-gvm-$PG_GVM_VERSION.tar.gz
The output of the last command should be similar to:
gpg: Signature made Fri Apr 16 08:31:02 2021 UTC
gpg:                using RSA key 9823FAA60ED1E580
gpg: Good signature from "Greenbone Community Feed integrity key" [ultimate]
If the signature is valid the tarball can be extracted.
tar -C $SOURCE_DIR -xvzf $SOURCE_DIR/pg-gvm-$PG_GVM_VERSION.tar.gz
Afterwards, pg-gvm can be build and installed.
Building pg-gvm#
mkdir -p $BUILD_DIR/pg-gvm && cd $BUILD_DIR/pg-gvm

cmake $SOURCE_DIR/pg-gvm-$PG_GVM_VERSION
  -DCMAKE_BUILD_TYPE=Release

make -j$(nproc)
Installing pg-gvm#
mkdir -p $INSTALL_DIR/pg-gvm

make DESTDIR=$INSTALL_DIR/pg-gvm install

sudo cp -rv $INSTALL_DIR/pg-gvm/* /
Greenbone Security Assistant#
The Greenbone Security Assistant (GSA) sources consist of two parts:
-
Web server gsad
-
Web application GSA
GSA#
The web application is written in JavaScript and uses the
react framework. It requires
nodejs for building the application and yarn (or npm)
for maintaining the JavaScript dependencies.
Setting the GSA version to use#
export GSA_VERSION=$GVM_VERSION
Note
GSA is a JavaScript based web application. For maintaining the JavaScript
dependencies, yarn is used.
Install nodejs 14#
export NODE_VERSION=node_14.x
export KEYRING=/usr/share/keyrings/nodesource.gpg
export DISTRIBUTION="$(lsb_release -s -c)"

curl -fsSL https://deb.nodesource.com/gpgkey/nodesource.gpg.key | gpg --dearmor | sudo tee "$KEYRING" >/dev/null
gpg --no-default-keyring --keyring "$KEYRING" --list-keys

echo "deb [signed-by=$KEYRING] https://deb.nodesource.com/$NODE_VERSION $DISTRIBUTION main" | sudo tee /etc/apt/sources.list.d/nodesource.list
echo "deb-src [signed-by=$KEYRING] https://deb.nodesource.com/$NODE_VERSION $DISTRIBUTION main" | sudo tee -a /etc/apt/sources.list.d/nodesource.list


sudo apt update
sudo apt install -y nodejs
Install yarn#
curl -sS https://dl.yarnpkg.com/debian/pubkey.gpg | sudo apt-key add -
echo "deb https://dl.yarnpkg.com/debian/ stable main" | sudo tee /etc/apt/sources.list.d/yarn.list

sudo apt update
sudo apt install -y yarn
Building the web application GSA requires the installation of several JavaScript
dependencies. These dependencies have to be downloaded automatically by yarn
(or npm) during the build process.
Downloading the gsa sources#
curl -f -L https://github.com/greenbone/gsa/archive/refs/tags/v$GSA_VERSION.tar.gz -o $SOURCE_DIR/gsa-$GSA_VERSION.tar.gz
curl -f -L https://github.com/greenbone/gsa/releases/download/v$GSA_VERSION/gsa-$GSA_VERSION.tar.gz.asc -o $SOURCE_DIR/gsa-$GSA_VERSION.tar.gz.asc
Verifying the source files#
gpg --verify $SOURCE_DIR/gsa-$GSA_VERSION.tar.gz.asc $SOURCE_DIR/gsa-$GSA_VERSION.tar.gz
The output of both commands should be similar to:
gpg: Signature made Fri Apr 16 08:31:02 2021 UTC
gpg:                using RSA key 9823FAA60ED1E580
gpg: Good signature from "Greenbone Community Feed integrity key" [ultimate]
If the signatures are valid, the two tarballs can be extracted.
tar -C $SOURCE_DIR -xvzf $SOURCE_DIR/gsa-$GSA_VERSION.tar.gz
Building gsa#
cd $SOURCE_DIR/gsa-$GSA_VERSION

rm -rf build

yarn
yarn build
Installing gsa#
sudo mkdir -p $INSTALL_PREFIX/share/gvm/gsad/web/
sudo cp -rv build/* $INSTALL_PREFIX/share/gvm/gsad/web/
gsad#
The web server gsad is written in the C programming language. It serves
static content like images and provides an API for the web application.
Internally it communicates with gvmd using GMP.
Setting the GSAd version to use#
export GSAD_VERSION=$GVM_VERSION
Required dependencies for gsad#
sudo apt install -y
  libmicrohttpd-dev
  libxml2-dev
  libglib2.0-dev
  libgnutls28-dev
Downloading the gsad sources#
curl -f -L https://github.com/greenbone/gsad/archive/refs/tags/v$GSAD_VERSION.tar.gz -o $SOURCE_DIR/gsad-$GSAD_VERSION.tar.gz
curl -f -L https://github.com/greenbone/gsad/releases/download/v$GSAD_VERSION/gsad-$GSAD_VERSION.tar.gz.asc -o $SOURCE_DIR/gsad-$GSAD_VERSION.tar.gz.asc
Verifying the source files#
gpg --verify $SOURCE_DIR/gsad-$GSAD_VERSION.tar.gz.asc $SOURCE_DIR/gsad-$GSAD_VERSION.tar.gz
The output of both commands should be similar to:
gpg: Signature made Fri Apr 16 08:31:02 2021 UTC
gpg:                using RSA key 9823FAA60ED1E580
gpg: Good signature from "Greenbone Community Feed integrity key" [ultimate]
If the signatures are valid, the two tarballs can be extracted.
tar -C $SOURCE_DIR -xvzf $SOURCE_DIR/gsad-$GSAD_VERSION.tar.gz
Building gsad#
mkdir -p $BUILD_DIR/gsad && cd $BUILD_DIR/gsad

cmake $SOURCE_DIR/gsad-$GSAD_VERSION
  -DCMAKE_INSTALL_PREFIX=$INSTALL_PREFIX
  -DCMAKE_BUILD_TYPE=Release
  -DSYSCONFDIR=/etc
  -DLOCALSTATEDIR=/var
  -DGVMD_RUN_DIR=/run/gvmd
  -DGSAD_RUN_DIR=/run/gsad
  -DLOGROTATE_DIR=/etc/logrotate.d

make -j$(nproc)
Installing gsad#
mkdir -p $INSTALL_DIR/gsad

make DESTDIR=$INSTALL_DIR/gsad install

sudo cp -rv $INSTALL_DIR/gsad/* /
openvas-smb#
openvas-smb is a helper module for openvas-scanner. It includes libraries
(openvas-wmiclient/openvas-wincmd) to interface with Microsoft Windows Systems
through the Windows Management Instrumentation API and a winexe binary to
execute processes remotely on that system.
It is an optional dependency of openvas-scanner but is required for scanning
Windows-based systems.
Note
openvas-smb is released independently of the Greenbone Community Edition.
Therefore, the newest compatible version is used.
Warning
openvas-smb doesn’t work on CentOS at the moment!
It is not a hard requirement.
Setting the openvas-smb version to use#
export OPENVAS_SMB_VERSION=22.4.0
Required dependencies for openvas-smb#
sudo apt install -y
  gcc-mingw-w64
  libgnutls28-dev
  libglib2.0-dev
  libpopt-dev
  libunistring-dev
  heimdal-dev
  perl-base
Downloading the openvas-smb sources#
curl -f -L https://github.com/greenbone/openvas-smb/archive/refs/tags/v$OPENVAS_SMB_VERSION.tar.gz -o $SOURCE_DIR/openvas-smb-$OPENVAS_SMB_VERSION.tar.gz
curl -f -L https://github.com/greenbone/openvas-smb/releases/download/v$OPENVAS_SMB_VERSION/openvas-smb-$OPENVAS_SMB_VERSION.tar.gz.asc -o $SOURCE_DIR/openvas-smb-$OPENVAS_SMB_VERSION.tar.gz.asc
Verifying the source file#
gpg --verify $SOURCE_DIR/openvas-smb-$OPENVAS_SMB_VERSION.tar.gz.asc $SOURCE_DIR/openvas-smb-$OPENVAS_SMB_VERSION.tar.gz
The output of the last command should be similar to:
gpg: Signature made Fri Apr 16 08:31:02 2021 UTC
gpg:                using RSA key 9823FAA60ED1E580
gpg: Good signature from "Greenbone Community Feed integrity key" [ultimate]
If the signature is valid, the tarball can be extracted.
tar -C $SOURCE_DIR -xvzf $SOURCE_DIR/openvas-smb-$OPENVAS_SMB_VERSION.tar.gz
Building openvas-smb#
mkdir -p $BUILD_DIR/openvas-smb && cd $BUILD_DIR/openvas-smb

cmake $SOURCE_DIR/openvas-smb-$OPENVAS_SMB_VERSION
  -DCMAKE_INSTALL_PREFIX=$INSTALL_PREFIX
  -DCMAKE_BUILD_TYPE=Release

make -j$(nproc)
Installing openvas-smb#
mkdir -p $INSTALL_DIR/openvas-smb

make DESTDIR=$INSTALL_DIR/openvas-smb install

sudo cp -rv $INSTALL_DIR/openvas-smb/* /
openvas-scanner#
openvas-scanner is a full-featured scan engine that executes a continuously
updated and extended feed of Vulnerability Tests (VTs). The feed consist of
thousands of NASL (Network Attack Scripting Language) scripts which implement
all kind of vulnerability checks.
Setting the openvas-scanner version to use#
export OPENVAS_SCANNER_VERSION=$GVM_VERSION
Required dependencies for openvas-scanner#
sudo apt install -y
  bison
  libglib2.0-dev
  libgnutls28-dev
  libgcrypt20-dev
  libpcap-dev
  libgpgme-dev
  libksba-dev
  rsync
  nmap
  libjson-glib-dev
  libbsd-dev
Debian optional dependencies for openvas-scanner#
sudo apt install -y
  python3-impacket
  libsnmp-dev
Downloading the openvas-scanner sources#
curl -f -L https://github.com/greenbone/openvas-scanner/archive/refs/tags/v$OPENVAS_SCANNER_VERSION.tar.gz -o $SOURCE_DIR/openvas-scanner-$OPENVAS_SCANNER_VERSION.tar.gz
curl -f -L https://github.com/greenbone/openvas-scanner/releases/download/v$OPENVAS_SCANNER_VERSION/openvas-scanner-$OPENVAS_SCANNER_VERSION.tar.gz.asc -o $SOURCE_DIR/openvas-scanner-$OPENVAS_SCANNER_VERSION.tar.gz.asc
Verifying the source file#
gpg --verify $SOURCE_DIR/openvas-scanner-$OPENVAS_SCANNER_VERSION.tar.gz.asc $SOURCE_DIR/openvas-scanner-$OPENVAS_SCANNER_VERSION.tar.gz
The output of the last command should be similar to:
gpg: Signature made Fri Apr 16 08:31:02 2021 UTC
gpg:                using RSA key 9823FAA60ED1E580
gpg: Good signature from "Greenbone Community Feed integrity key" [ultimate]
If the signature is valid, the tarball can be extracted.
tar -C $SOURCE_DIR -xvzf $SOURCE_DIR/openvas-scanner-$OPENVAS_SCANNER_VERSION.tar.gz
Building openvas-scanner#
mkdir -p $BUILD_DIR/openvas-scanner && cd $BUILD_DIR/openvas-scanner

cmake $SOURCE_DIR/openvas-scanner-$OPENVAS_SCANNER_VERSION
  -DCMAKE_INSTALL_PREFIX=$INSTALL_PREFIX
  -DCMAKE_BUILD_TYPE=Release
  -DSYSCONFDIR=/etc
  -DLOCALSTATEDIR=/var
  -DOPENVAS_FEED_LOCK_PATH=/var/lib/openvas/feed-update.lock
  -DOPENVAS_RUN_DIR=/run/ospd

make -j$(nproc)
Installing openvas-scanner#
mkdir -p $INSTALL_DIR/openvas-scanner

make DESTDIR=$INSTALL_DIR/openvas-scanner install

sudo cp -rv $INSTALL_DIR/openvas-scanner/* /
ospd-openvas#
ospd-openvas is an OSP server implementation to allow
gvmd to remotely control an openvas-scanner. It is running as a daemon
and waits for incoming OSP requests from gvmd.
Setting the ospd and ospd-openvas versions to use#
export OSPD_OPENVAS_VERSION=22.4.6
Required dependencies for ospd-openvas#
sudo apt install -y
  python3
  python3-pip
  python3-venv
  python3-setuptools
  python3-packaging
  python3-wrapt
  python3-cffi
  python3-psutil
  python3-lxml
  python3-defusedxml
  python3-paramiko
  python3-redis
  python3-gnupg
  python3-paho-mqtt
Downloading the ospd-openvas sources#
curl -f -L https://github.com/greenbone/ospd-openvas/archive/refs/tags/v$OSPD_OPENVAS_VERSION.tar.gz -o $SOURCE_DIR/ospd-openvas-$OSPD_OPENVAS_VERSION.tar.gz
curl -f -L https://github.com/greenbone/ospd-openvas/releases/download/v$OSPD_OPENVAS_VERSION/ospd-openvas-$OSPD_OPENVAS_VERSION.tar.gz.asc -o $SOURCE_DIR/ospd-openvas-$OSPD_OPENVAS_VERSION.tar.gz.asc
Verifying the source files#
gpg --verify $SOURCE_DIR/ospd-openvas-$OSPD_OPENVAS_VERSION.tar.gz.asc $SOURCE_DIR/ospd-openvas-$OSPD_OPENVAS_VERSION.tar.gz
The output of the last command should be similar to:
gpg: Signature made Fri Apr 16 08:31:02 2021 UTC
gpg:                using RSA key 9823FAA60ED1E580
gpg: Good signature from "Greenbone Community Feed integrity key" [ultimate]
If the signatures are valid, the tarballs can be extracted.
tar -C $SOURCE_DIR -xvzf $SOURCE_DIR/ospd-openvas-$OSPD_OPENVAS_VERSION.tar.gz
Installing ospd-openvas#
cd $SOURCE_DIR/ospd-openvas-$OSPD_OPENVAS_VERSION

mkdir -p $INSTALL_DIR/ospd-openvas

python3 -m venv $BUILD_DIR/ospd-openvas-build-env --system-site-packages &&
  source $BUILD_DIR/ospd-openvas-build-env/bin/activate &&
  python3 -m pip install --prefix $INSTALL_PREFIX --root=$INSTALL_DIR/ospd-openvas --no-warn-script-location . &&
  deactivate

sudo cp -rv $INSTALL_DIR/ospd-openvas/* /
notus-scanner#
notus-scanner is used for detecting vulnerable products by evaluating
internal system information gathered by openvas-scanner.
It communicates with openvas-scanner and ospd-openvas via
MQTT. It is running as a daemon.
Setting the notus version to use#
export NOTUS_VERSION=22.4.4
Required dependencies for notus-scanner#
sudo apt install -y
  python3
  python3-pip
  python3-venv
  python3-setuptools
  python3-paho-mqtt
  python3-psutil
  python3-gnupg
Downloading the notus-scanner sources#
curl -f -L https://github.com/greenbone/notus-scanner/archive/refs/tags/v$NOTUS_VERSION.tar.gz -o $SOURCE_DIR/notus-scanner-$NOTUS_VERSION.tar.gz
curl -f -L https://github.com/greenbone/notus-scanner/releases/download/v$NOTUS_VERSION/notus-scanner-$NOTUS_VERSION.tar.gz.asc -o $SOURCE_DIR/notus-scanner-$NOTUS_VERSION.tar.gz.asc
Verifying the source files#
gpg --verify $SOURCE_DIR/notus-scanner-$NOTUS_VERSION.tar.gz.asc $SOURCE_DIR/notus-scanner-$NOTUS_VERSION.tar.gz
The output of the last command should be similar to:
gpg: Signature made Fri Apr 16 08:31:02 2021 UTC
gpg:                using RSA key 9823FAA60ED1E580
gpg: Good signature from "Greenbone Community Feed integrity key" [ultimate]
If the signatures are valid, the tarballs can be extracted.
tar -C $SOURCE_DIR -xvzf $SOURCE_DIR/notus-scanner-$NOTUS_VERSION.tar.gz
Installing notus-scanner#
cd $SOURCE_DIR/notus-scanner-$NOTUS_VERSION

mkdir -p $INSTALL_DIR/notus-scanner

python3 -m venv $BUILD_DIR/notus-scanner-build-env --system-site-packages &&
  source $BUILD_DIR/notus-scanner-build-env/bin/activate &&
  python3 -m pip install --prefix $INSTALL_PREFIX --root=$INSTALL_DIR/notus-scanner --no-warn-script-location . &&
  deactivate

sudo cp -rv $INSTALL_DIR/notus-scanner/* /
greenbone-feed-sync#
The greenbone-feed-sync tool is a Python based script to download all
feed data from the Greenbone Community Feed to your local
machine. It is an improved version of two former shell scripts.
Note
greenbone-feed-sync is released independently of the Greenbone Community
Edition. Therefore, the newest version is used.
Required dependencies for greenbone-feed-sync#
sudo apt install -y
  python3
  python3-pip
  python3-venv
The latest version of greeenbone-feed-sync can be installed by using standard
Python installation tool pip.
To install it system-wide for all users without running pip as root user, the
following commands can be used:
Installing greenbone-feed-sync system-wide for all users#
mkdir -p $INSTALL_DIR/greenbone-feed-sync

python3 -m venv $BUILD_DIR/greenbone-feed-sync-build-env --system-site-packages &&
  source $BUILD_DIR/greenbone-feed-sync-build-env/bin/activate &&
  python3 -m pip install --prefix $INSTALL_PREFIX --root=$INSTALL_DIR/greenbone-feed-sync --no-warn-script-location greenbone-feed-sync &&
  deactivate

sudo cp -rv $INSTALL_DIR/greenbone-feed-sync/* /
gvm-tools#
The Greenbone Vulnerability Management Tools, or gvm-tools in short, are a
collection of tools that help with controlling Greenbone Community Edition
installations or Greenbone Enterprise Appliances remotely.
Essentially, the tools aid accessing the communication protocols
Greenbone Management Protocol (GMP) and
Open Scanner Protocol (OSP).
gvm-tools are optional and not required for a functional GVM stack.
Note
gvm-tools is released independently of the Greenbone Community Edition.
Therefore, the newest version is used.
Required dependencies for gvm-tools#
sudo apt install -y
  python3
  python3-pip
  python3-venv
  python3-setuptools
  python3-packaging
  python3-lxml
  python3-defusedxml
  python3-paramiko
The latest version of gvm-tools can be installed for each user via the
standard Python installation tool pip.
Installing gvm-tools for the current user#
python3 -m pip install --user gvm-tools
To install it system-wide without running pip as root user, the following
commands can be used:
Installing gvm-tools system-wide#
mkdir -p $INSTALL_DIR/gvm-tools

python3 -m venv $BUILD_DIR/gvm-tools-build-env --system-site-packages &&
  source $BUILD_DIR/gvm-tools-build-env/bin/activate &&
  python3 -m pip install --prefix $INSTALL_PREFIX --root=$INSTALL_DIR/gvm-tools --no-warn-script-location gvm-tools &&
  deactivate

sudo cp -rv $INSTALL_DIR/gvm-tools/* /
Performing a System Setup#
Setting up the Redis Data Store#
Looking at the Architecture, the Redis key/value
storage is used by the scanner (openvas-scanner and ospd-openvas) for handling
the VT information and scan results.
Installing the Redis server#
sudo apt install -y redis-server
After installing the Redis server package, a specific configuration for the
openvas-scanner must be added.
Adding configuration for running the Redis server for the scanner#
sudo cp $SOURCE_DIR/openvas-scanner-$GVM_VERSION/config/redis-openvas.conf /etc/redis/
sudo chown redis:redis /etc/redis/redis-openvas.conf
echo "db_address = /run/redis-openvas/redis.sock" | sudo tee -a /etc/openvas/openvas.conf
Start redis with openvas config#
sudo systemctl start redis-server@openvas.service
Ensure redis with openvas config is started on every system startup#
sudo systemctl enable redis-server@openvas.service
Additionally the gvm user must be able to access the redis unix socket at
/run/redis-openvas/redis.sock.
Adding the gvm user to the redis group#
sudo usermod -aG redis gvm
Setting up the Mosquitto MQTT Broker#
The Mosquitto MQTT broker is used for communication between
ospd-openvas, openvas-scanner and notus-scanner.
Installing the Mosquitto broker#
sudo apt install -y mosquitto
After installing the Mosquitto broker package, the broker must be started
and the server uri must be added to the openvas-scanner configuration.
Starting the broker and adding the server uri to the openvas-scanner configuration#
sudo systemctl start mosquitto.service
sudo systemctl enable mosquitto.service
echo "mqtt_server_uri = localhost:1883ntable_driven_lsc = yes" | sudo tee -a /etc/openvas/openvas.conf
Adjusting Permissions#
For a system-wide multi-user installation, it must be ensured that the
directory permissions are set correctly and are matching the group setup.
All users of the group gvm should be able to read and write logs, lock files
and data like VTs.
Adjusting directory permissions#
sudo mkdir -p /var/lib/notus
sudo mkdir -p /run/gvmd

sudo chown -R gvm:gvm /var/lib/gvm
sudo chown -R gvm:gvm /var/lib/openvas
sudo chown -R gvm:gvm /var/lib/notus
sudo chown -R gvm:gvm /var/log/gvm
sudo chown -R gvm:gvm /run/gvmd

sudo chmod -R g+srw /var/lib/gvm
sudo chmod -R g+srw /var/lib/openvas
sudo chmod -R g+srw /var/log/gvm
To allow all users of the group gvm access to the postgres database via the
various gvmd commands, the permissions of the gvmd executable will be adjusted
to always run as the gvm user and under the gvm group.
Adjusting gvmd permissions#
sudo chown gvm:gvm /usr/local/sbin/gvmd
sudo chmod 6750 /usr/local/sbin/gvmd
Additionally the feed sync script permissions should be adjusted to allow
gvm user to execute them. The feed sync should always be run as the gvm user
otherwise the permissions of the synced files may be broken.
Adjusting feed sync script permissions#
sudo chown gvm:gvm /usr/local/bin/greenbone-feed-sync
sudo chmod 740 /usr/local/bin/greenbone-feed-sync
Feed Validation#
For validating the feed content, a GnuPG keychain with the Greenbone Community
Feed integrity key needs to be created.
Creating a GPG keyring for feed content validation#
export GNUPGHOME=/tmp/openvas-gnupg
mkdir -p $GNUPGHOME

gpg --import /tmp/GBCommunitySigningKey.asc
gpg --import-ownertrust < /tmp/ownertrust.txt

export OPENVAS_GNUPG_HOME=/etc/openvas/gnupg
sudo mkdir -p $OPENVAS_GNUPG_HOME
sudo cp -r /tmp/openvas-gnupg/* $OPENVAS_GNUPG_HOME/
sudo chown -R gvm:gvm $OPENVAS_GNUPG_HOME
Setting up sudo for Scanning#
For vulnerability scanning, it is required to have several capabilities for which
only root users are authorized, e.g., creating raw sockets. Therefore, a
configuration will be added to allow the users of the gvm group to run the
openvas-scanner application as root user via sudo.
sudo visudo

...

# allow users of the gvm group run openvas
%gvm ALL = NOPASSWD: /usr/local/sbin/openvas
Setting up PostgreSQL#
The PostgreSQL database management system is
used as a central storage for user and scan information. gvmd connects to
a PostgreSQL database and queries the data. This database must be created
and configured.
Installing the PostgreSQL server#
sudo apt install -y postgresql
If necessary the PostgreSQL database server needs to be started manually
Starting the PostgreSQL database server#
sudo systemctl start postgresql@13-main
For setting up the PostgreSQL database it is required to become the postgres
user.
Changing to the postgres user#
Setting up PostgreSQL user and database for the Greenbone Community Edition#
createuser -DRS gvm
createdb -O gvm gvmd
Setting up database permissions and extensions#
psql gvmd -c "create role dba with superuser noinherit; grant dba to gvm;"

exit
Setting up an Admin User#
For accessing and configuring the vulnerability data, an administrator user needs
to be created. This user can log in via the Greenbone Security Assistant (GSA)
web interface. They will have access to all data and will later be configured to
act as the Feed Import Owner.
Creating an administrator user with generated password#
/usr/local/sbin/gvmd --create-user=admin
The new administrator user’s password is printed on success. An administrator user can
later create further users or administrators via the GSA web interface.
To create the administrator user with a password of your choice instead of the generated
password, the following command can be used:
Creating an administrator user with provided password#
/usr/local/sbin/gvmd --create-user=admin --password=<password>
If the output doesn’t show
you need to look at the /var/log/gvm/gvmd.log for errors.
Setting the Feed Import Owner#
Certain resources that were previously part of the gvmd source code are now
shipped via the feed. An example is the scan configuration “Full and Fast”.
Currently every resource needs an owner to apply the permissions and manage
the access to the resources.
Therefore, gvmd will only create these resources if a Feed Import Owner is
configured. Here the previously created admin user will be used as the
Feed Import Owner.
Setting the Feed Import Owner#
/usr/local/sbin/gvmd --modify-setting 78eceaec-3385-11ea-b237-28d24461215b --value `/usr/local/sbin/gvmd --get-users --verbose | grep admin | awk '{print $2}'`
Setting up Services for Systemd#
Systemd is used to start the daemons ospd-openvas,
notus-scanner, gvmd and gsad. Therefore, service files are required.
Systemd service file for ospd-openvas#
cat << EOF > $BUILD_DIR/ospd-openvas.service
[Unit]
Description=OSPd Wrapper for the OpenVAS Scanner (ospd-openvas)
Documentation=man:ospd-openvas(8) man:openvas(8)
After=network.target networking.service redis-server@openvas.service mosquitto.service
Wants=redis-server@openvas.service mosquitto.service notus-scanner.service
ConditionKernelCommandLine=!recovery

[Service]
Type=exec
User=gvm
Group=gvm
RuntimeDirectory=ospd
RuntimeDirectoryMode=2775
PIDFile=/run/ospd/ospd-openvas.pid
ExecStart=/usr/local/bin/ospd-openvas --foreground --unix-socket /run/ospd/ospd-openvas.sock --pid-file /run/ospd/ospd-openvas.pid --log-file /var/log/gvm/ospd-openvas.log --lock-file-dir /var/lib/openvas --socket-mode 0o770 --mqtt-broker-address localhost --mqtt-broker-port 1883 --notus-feed-dir /var/lib/notus/advisories
SuccessExitStatus=SIGKILL
Restart=always
RestartSec=60

[Install]
WantedBy=multi-user.target
EOF
Install systemd service file for ospd-openvas#
sudo cp -v $BUILD_DIR/ospd-openvas.service /etc/systemd/system/
Systemd service file for notus-scanner#
cat << EOF > $BUILD_DIR/notus-scanner.service
[Unit]
Description=Notus Scanner
Documentation=https://github.com/greenbone/notus-scanner
After=mosquitto.service
Wants=mosquitto.service
ConditionKernelCommandLine=!recovery

[Service]
Type=exec
User=gvm
RuntimeDirectory=notus-scanner
RuntimeDirectoryMode=2775
PIDFile=/run/notus-scanner/notus-scanner.pid
ExecStart=/usr/local/bin/notus-scanner --foreground --products-directory /var/lib/notus/products --log-file /var/log/gvm/notus-scanner.log
SuccessExitStatus=SIGKILL
Restart=always
RestartSec=60

[Install]
WantedBy=multi-user.target
EOF
Install systemd service file for notus-scanner#
sudo cp -v $BUILD_DIR/notus-scanner.service /etc/systemd/system/
Systemd service file for gvmd#
cat << EOF > $BUILD_DIR/gvmd.service
[Unit]
Description=Greenbone Vulnerability Manager daemon (gvmd)
After=network.target networking.service postgresql.service ospd-openvas.service
Wants=postgresql.service ospd-openvas.service
Documentation=man:gvmd(8)
ConditionKernelCommandLine=!recovery

[Service]
Type=exec
User=gvm
Group=gvm
PIDFile=/run/gvmd/gvmd.pid
RuntimeDirectory=gvmd
RuntimeDirectoryMode=2775
ExecStart=/usr/local/sbin/gvmd --foreground --osp-vt-update=/run/ospd/ospd-openvas.sock --listen-group=gvm
Restart=always
TimeoutStopSec=10

[Install]
WantedBy=multi-user.target
EOF
Install systemd service file for gvmd#
sudo cp -v $BUILD_DIR/gvmd.service /etc/systemd/system/
Systemd service file for gsad#
cat << EOF > $BUILD_DIR/gsad.service
[Unit]
Description=Greenbone Security Assistant daemon (gsad)
Documentation=man:gsad(8) https://www.greenbone.net
After=network.target gvmd.service
Wants=gvmd.service

[Service]
Type=exec
User=gvm
Group=gvm
RuntimeDirectory=gsad
RuntimeDirectoryMode=2775
PIDFile=/run/gsad/gsad.pid
ExecStart=/usr/local/sbin/gsad --foreground --listen=127.0.0.1 --port=9392 --http-only
Restart=always
TimeoutStopSec=10

[Install]
WantedBy=multi-user.target
Alias=greenbone-security-assistant.service
EOF
Install systemd service file for gsad#
sudo cp -v $BUILD_DIR/gsad.service /etc/systemd/system/
Afterwards, the services need to be activated and started.
Making systemd aware of the new service files#
sudo systemctl daemon-reload
Ensuring services are run at every system startup#
sudo systemctl enable notus-scanner
sudo systemctl enable ospd-openvas
sudo systemctl enable gvmd
sudo systemctl enable gsad
Performing a Feed Synchronization#
For the actual vulnerability scanning, Vulnerability Test scripts,
security information like CVEs, port lists and scan configurations
are required. All this data is provided by the Greenbone Community Feed
and should be downloaded initially before starting the services.
A synchronization always consists of two parts:
-
Downloading the changes via rsync
-
Loading the changes into memory and a database by a daemon
Both steps may take a while, from several minutes up to hours, especially for the
initial synchronization. Only if both steps are finished, the synchronized data
is up-to-date and can be used.
The first step is done via the greenbone-feed-sync script. The second
step is done automatically when the daemons are started.
Downloading the Data#
Note
Downloading the data during the synchronization may take a while
depending on the network connection and server resources.
The downloaded data consist of four different kind of data:
-
VT data
-
SCAP data
-
CERT data
-
GVMD data
VT data contain .nasl and .notus files for creating results
during a vulnerability scan. The .nasl files are processed by the OpenVAS
Scanner and the .notus files by the Notus Scanner.
SCAP data contains CPE and CVE information.
CERT data contain vulnerability information from the German DFN-CERT
and CERT-Bund agencies.
GVMD data (or also called “data objects”) are scan configurations, compliance
policies, port lists and report formats.
Downloading the data from the Greenbone Community Feed#
sudo /usr/local/bin/greenbone-feed-sync
Vulnerability Tests Data#
If the log file of ospd-openvas (/var/log/gvm/ospd-openvas.log)
contains the following output, the OpenVAS Scanner starts to load the new VT
data:
ospd-openvas VT loading log message#
Loading VTs. Scans will be [requested|queued] until VTs are loaded. This may
take a few minutes, please wait ...
The loading of the VT data is finished if the following log message can be found:
ospd-openvas VTs loading finished log message#
Finished loading VTs. The VT cache has been updated from version X to Y.
After the scanner is aware of the VT data, the data will be requested by gvmd. This
will result in the following log message in /var/log/gvm/gvmd.log:
gvmd VTs loading log message#
OSP service has different VT status (version X) from database (version (Y), Z VTs). Starting update ...
When gvmd has finished loading all VTs, the following message appears:
gvmd VTs loading finished log message#
Updating VTs in database ... done (X VTs).
SCAP Data#
gvmd starts loading the SCAP data containing CPE and CVE
information when the following message can be found in the logs
(/var/log/gvm/gvmd.log):
gvmd SCAP data loading log message#
update_scap: Updating data from feed
The SCAP data is loaded and the synchronization is finished when the (gvmd) log
contains the following message:
gvmd SCAP data loading finished log message#
update_scap_end: Updating SCAP info succeeded
CERT Data#
gvmd starts loading the CERT data containing DFN-CERT and CERT-Bund advisories
when the following message can be found in the logs (/var/log/gvm/gvmd.log):
gvmd CERT data loading log message#
sync_cert: Updating data from feed
The CERT data is loaded and the synchronization is finished when the (gvmd) log
contains the following message:
gvmd CERT data finished loading log message#
sync_cert: Updating CERT info succeeded.
GVMD Data#
The log (/var/log/gvm/gvmd.log) contains several messages when the gvmd
data is loaded. For port lists, these messages are similar to:
gvmd port list loaded log message#
Port list All IANA assigned TCP (33d0cd82-57c6-11e1-8ed1-406186ea4fc5) has been created by admin
For report formats:
gvmd report format loaded log message#
Report format XML (a994b278-1f62-11e1-96ac-406186ea4fc5) has been created by admin
Hint
Scan Configs can only be loaded if the VT data is available in gvmd and a Feed
Import Owner is set.
For scan configs:
gvmd scan config loaded log message#
Scan config Full and fast (daba56c8-73ec-11df-a475-002264764cea) has been created by admin
Starting the Vulnerability Management#
After the services have started and all data has been loaded, the Greenbone
Security Assistant web interface – GSA – can be opened in the browser.
Opening Greenbone Security Assistant in the browser#
xdg-open "http://127.0.0.1:9392" 2>/dev/null >/dev/null &
The browser will show the login page of GSA and after using the credentials
created in the Setting Up an Admin User chapter,
it is possible to start with the vulnerability scanning.
Greenbone Security Assistant after logging in for the first time#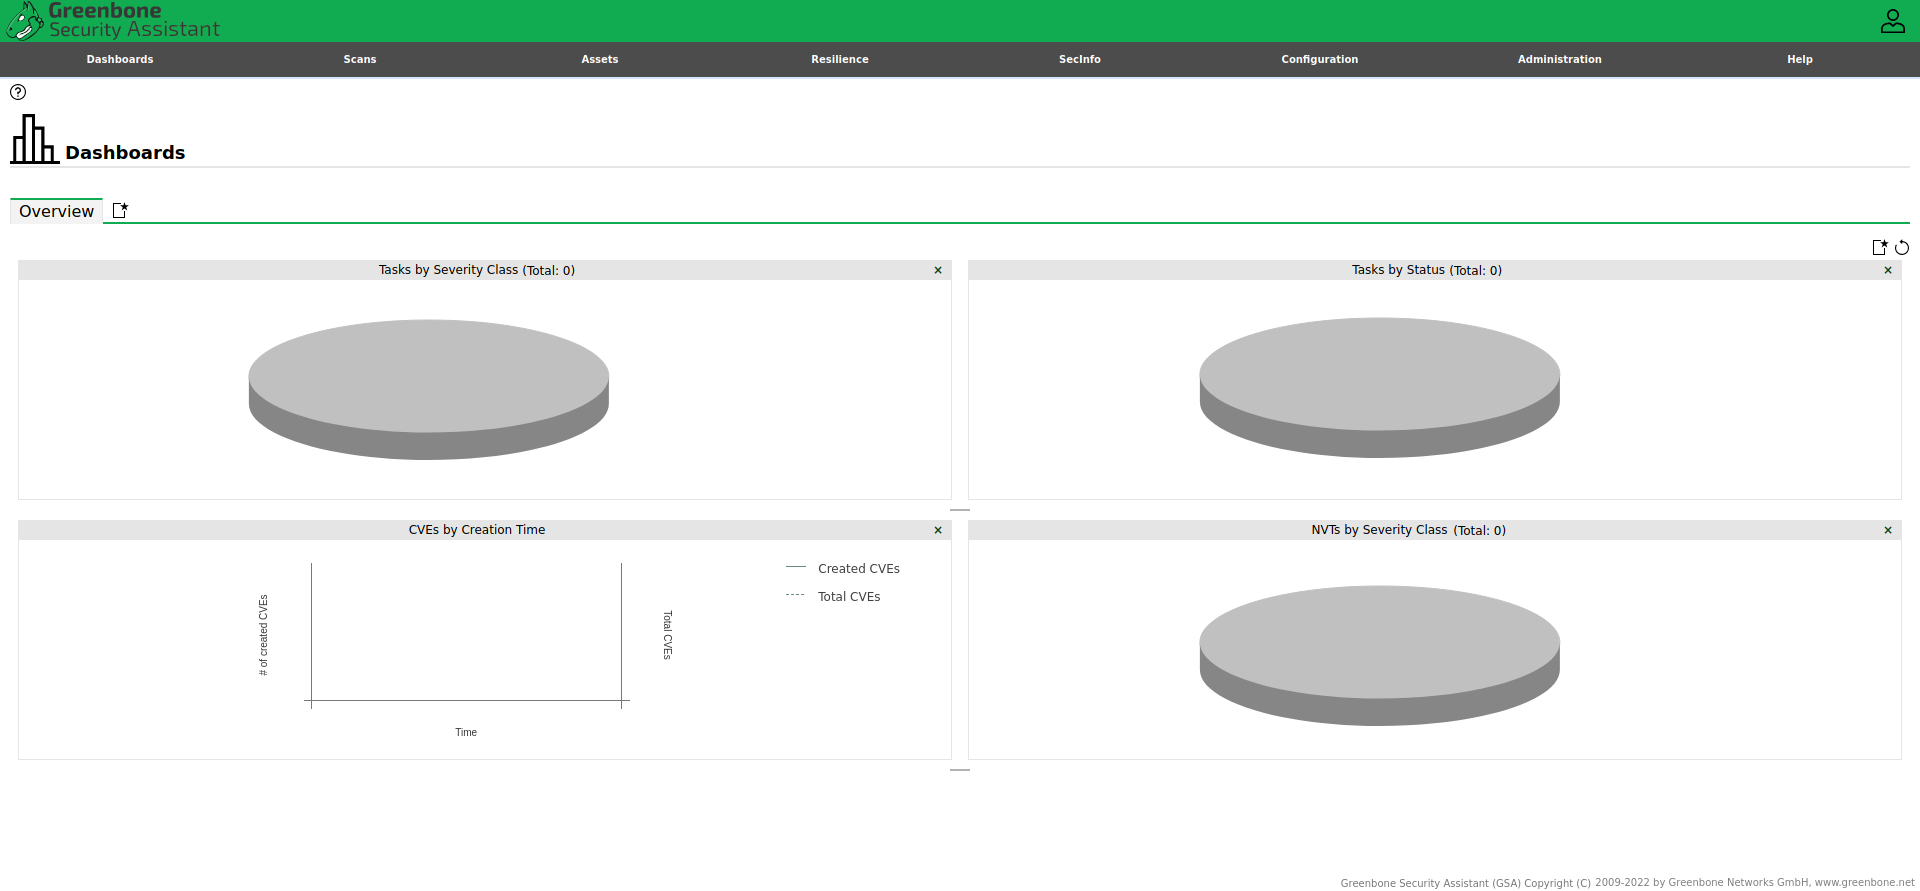
Содержание
- Install OpenVAS (GVM) on Kali 2019
- Install
- Config
- OpenVAS Web Client (Green Security Assistant)
- Task Wizard
- Modify gsad to listen on all interfaces
- OpenVAS Command Line Client (omp or gvm-cli)
- Ethical hacking and penetration testing
- InfoSec, IT, Kali Linux, BlackArch
- How to install Greenbone Vulnerability Management (GVM) (formerly OpenVAS) on Kali Linux
- OpenVAS is now renamed Greenbone Vulnerability Management (GVM)
- Errors when installing and starting GVM, OpenVAS
- How to install OpenVAS (GVM)
- Setting up OpenVAS
- Configuring Greenbone Vulnerability Management (GVM)
- Conclusion
- Related articles:
- Recommended for you:
- 2 Comments to How to install Greenbone Vulnerability Management (GVM) (formerly OpenVAS) on Kali Linux
Install OpenVAS (GVM) on Kali 2019
In this setup guide, we step through the process of getting OpenVAS (GVM) running on Kali 2019. Installing OpenVAS into a Kali-based system is made much easier by the inclusion of a quick setup script.
When using Kali Linux for OpenVAS scanning, resource usage should always be taken into account. Whether running Kali in a virtual machine or on bare metal, you will want to have sufficient memory and cpu available for the scanner to be optimised for speed (4 cores & 8GB should be a minimum). If you are hoping to run large numbers of parallel scans, then you will need more resources. Several performance tuning options are available in the OpenVAS scanner configuration file to better use the resources you have available. See our OpenVAS tutorial for details on modifying the configuration file.
Install
First step is to install the packages through apt install openvas .
Config
It is then a simple matter of running the configuration script to get OpenVAS configured with required services, user accounts and the latest NVT updates from the Greenbone Community Feed.
The output shown here is a bit daunting, however it is all automated. Assuming all goes well you should soon have a working and up to date OpenVAS installation. The actual time taken for this script will vary depending on download speeds as it is grabbing a fair amount of data for the signatures and CVE data.
By utilising the prebuilt configuration script we can get up and running with OpenVAS in a very short amount of time.
OpenVAS Web Client (Green Security Assistant)
Access the Greenbone Web Client using your web browser. Login with admin and the password in the script output and you will be launching a scan of your target systems within a few minutes.
Lets first check that gsad is running and listening.
Now browse to https://localhost:9392/. The Greenbone Security Assistant is a web portal front end to the GVM and OpenVAS scanner.
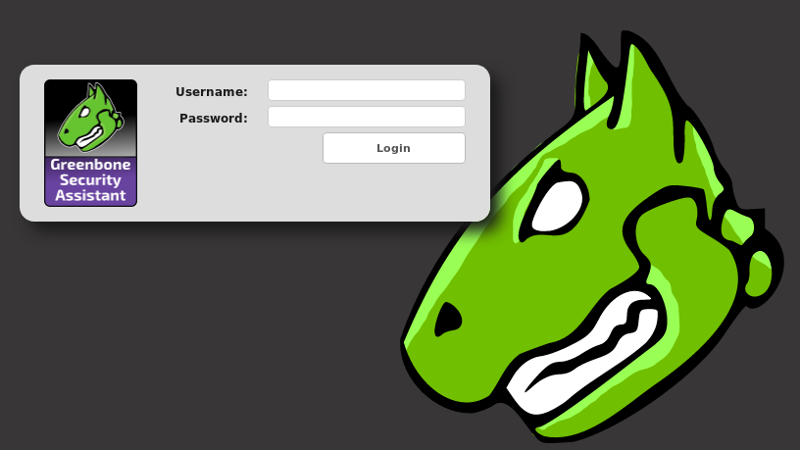
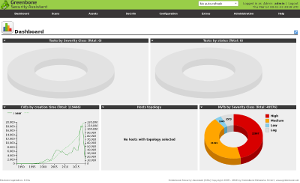
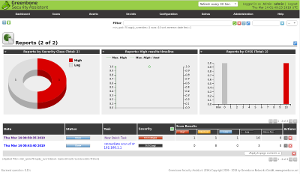
Task Wizard
The quickest way to fire off a scan is using the Task Wizard.
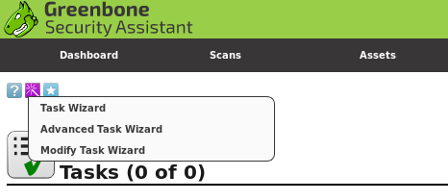
Enter the target and scan profile. Launch. Results are available under the reports option.

Modify gsad to listen on all interfaces
In the netstat output above, we can see that gsad is only listening on localhost . Here is how to change it so you can access the web interface over your local network.
Kali 2019 is using systemd for its services so we have to edit the following file to make the web interface listen on all interfaces.
Now change the 127.0.0.1 to 0.0.0.0 , we also need to add a new parameter to the ExecStart line. This allows remote hosts to connect to our IP address (or hostname). Otherwise, we will get the following error in the browser:
If your IP address is 192.168.1.100 then make the changes as shown below.
Now restart the service and check with netstat or ss .
Looks like we are up and running, now you can access the OpenVAS web interface from any system on your network.
OpenVAS Command Line Client (omp or gvm-cli)
Accessing OpenVAS from the command line is a powerful feature that gives you full control over scan tasks, reports and other management tasks. The current client in Kali is the omp client. Newer versions of GVM will use the gvm-cli command that is part of the gvm-tools package.
Both clients use XML to perform actions on the GVM server. The omp client has a number of command line switches, but the XML is where the real power lies.
# omp —help Usage: omp [OPTION…] — OpenVAS OMP Command Line Interface Help Options: -?, —help Show help options Application Options: -h, —host= Connect to manager on host -p, —port= Use port number -V, —version Print version. -v, —verbose Verbose messages (WARNING: may reveal passwords). —use-certs Use client certificates to authenticate. —client-cert= Client certificate. Default: /usr/var/lib/openvas/CA/clientcert.pem —client-key= Client key. Default: /usr/var/lib/openvas/private/CA/clientkey.pem —client-ca-cert= Client CA certificate. Default: /usr/var/lib/openvas/CA/cacert.pem -u, —username= OMP username -w, —password=
OMP password —config-file= Configuration file for connection parameters. -P, —prompt Prompt to exit. -O, —get-omp-version Print OMP version. -n, —name= Name for create-task. -C, —create-task Create a task. -m, —comment= Comment for create-task. -c, —config= Config for create-task. -t, —target= Target for create-task. -E, —delete-report Delete one or more reports. -D, —delete-task Delete one or more tasks. -R, —get-report Get report of one task. -F, —get-report-formats Get report formats. (OMP 2.0 only) -f, —format=
Источник
Ethical hacking and penetration testing
InfoSec, IT, Kali Linux, BlackArch
How to install Greenbone Vulnerability Management (GVM) (formerly OpenVAS) on Kali Linux
OpenVAS is now renamed Greenbone Vulnerability Management (GVM)
When the OpenVAS project was created, it only consisted of a vulnerability scanning engine. Greenbone Networks received funding shortly thereafter to provide professional vulnerability scanning support. Greenbone took over development leadership, added a few software components, and turned OpenVAS into a multi-pronged vulnerability management solution that still retains the value of open and free software.
Over the years, it became apparent that the use of OpenVAS as a trademark for an open source project and funding for almost all of the project’s development had not been appreciated from outside. Therefore, after the release of the OpenVAS 9 platform, it was renamed Greenbone Vulnerability Management (GVM) and released as Greenbone Source Edition (GSE). Since GVM 10, the term OpenVAS is used only for the scanner component, as it was at the beginning of the project.
Greenbone Vulnerability Management (GVM) packages: https://github.com/greenbone
Errors when installing and starting GVM, OpenVAS
During the installation and launch process, I encountered quite a few errors, which, nevertheless, were resolved. Under the assumption that these errors are common to everyone (not just my particular installation), I described these errors right during the installation process, as a result of which the instructions became cluttered.
If during the installation process you do not encounter the described errors, please write about it in the comments – if the errors do not appear for everyone, then I will put them at the very end of the article, due to which, in general, the instruction will become clearer.
How to install OpenVAS (GVM)
Since the authors renamed openvas to gvm (more precisely, divided it into different packages), now the main package is gvm, when it is installed, all other necessary packages will also be obtained as dependencies.
Installation is done like this:
Setting up OpenVAS
Let’s start by setting up the Open Vulnerability Assessment Scanner (OpenVAS) for Greenbone Vulnerability Management (GVM) solution.
It is used in Greenbone Security Manager and is a full-fledged scan engine that performs constantly updated and expanded submissions of Network Vulnerability Tests (NVTs).
The scanner needs a running Redis server to temporarily store the collected information on the scanned hosts. Configuring the Redis server is done like this (these commands need to be executed once):
Starting the Redis server (must be done after every computer restart):
Or, if you like, add it to startup:
The Greenbone Vulnerability Management (gvmd) service acts as an OSP client to connect to and manage scanners. openvas does not act as an OSP service – you need the OSPD-OpenVAS module for that. Actual user interfaces (like GSA or GVM-Tools) will only interact with gvmd and/or ospd-openvas, not the scanner. You can run openvas to load plugins in Redis using the following command:
but ospd-openvas will update automatically.
Please note that although you can run openvas as a non-elevated user, it is recommended that you run openvas as root because some network vulnerability tests (NVTs) require root privileges to perform certain operations, such as package spoofing. If you run openvas as a user without permission to perform these operations, the scan results are likely to be incomplete.
Since openvas will be launched from the ospd-openvas process using sudo, the following configuration is required in the sudoers file:
add this line to allow the user running ospd-openvas to run openvas as root
Replace USERNAME with your Linux username.
You can find out the username with the command:
If something does not work, then you can view the log with the command:
Configuring Greenbone Vulnerability Management (GVM)
Greenbone Vulnerability Manager is the central management service between security scanners and user clients.
It manages the storage of any vulnerability management configuration and scan results. Data, control commands, and workflows are accessed through the XML-based Greenbone Management Protocol (GMP). Scanners such as OpenVAS are controlled through the Open Scanner Protocol (OSP).
Deployment script (instead of openvas-setup):
This script needs to be run only once.
The script ended with an error:
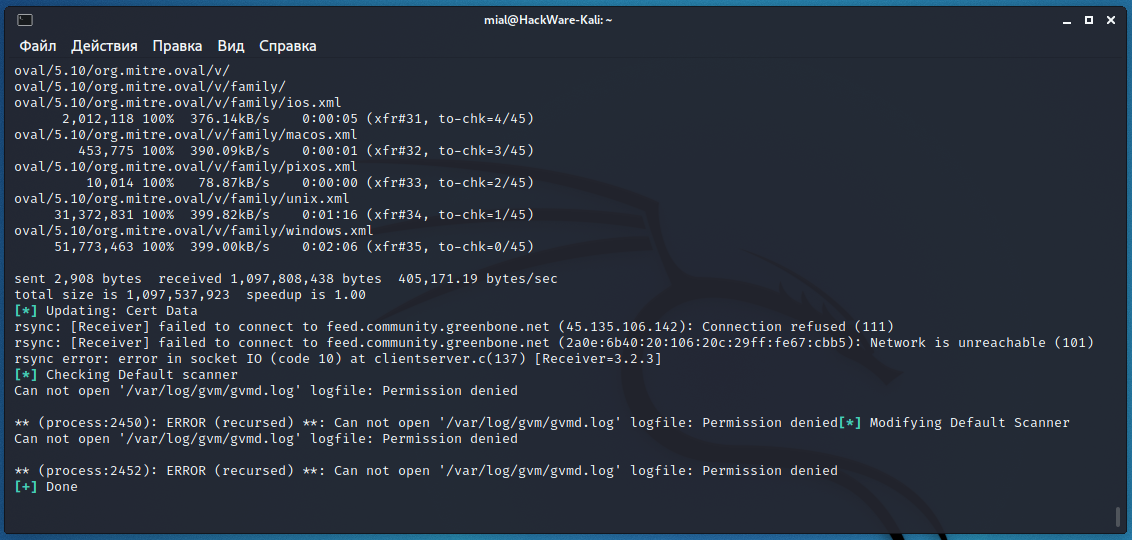
also showed an error in the fourth step:
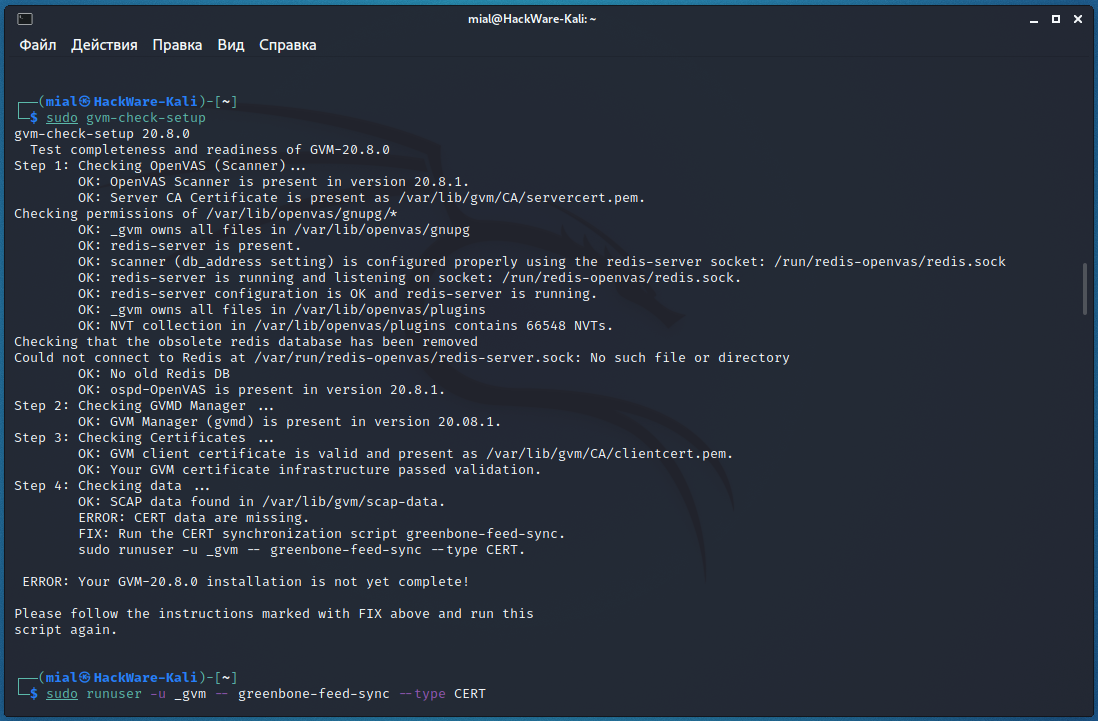
To fix the error “ERROR: CERT data are missing. FIX: Run the CERT synchronization script greenbone-feed-sync” run the following command:
Re-running the check showed an error at the fifth step:

There are several errors at once, but the key one is “ERROR: No users found. You need to create at least one user to log in.”, To fix it, run a command like this:
For example, to create a user named mial and password 2:
The previous command failed:
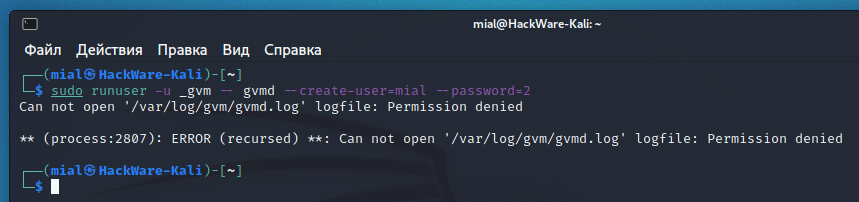
The essence of the error is that the command does not have enough permissions to write to the /var/log/gvm/gvmd.log file, even though the previous command was run with sudo. To fix the error, run the following command:
Then run the new user creation again.

And one more mistake at the seventh step:
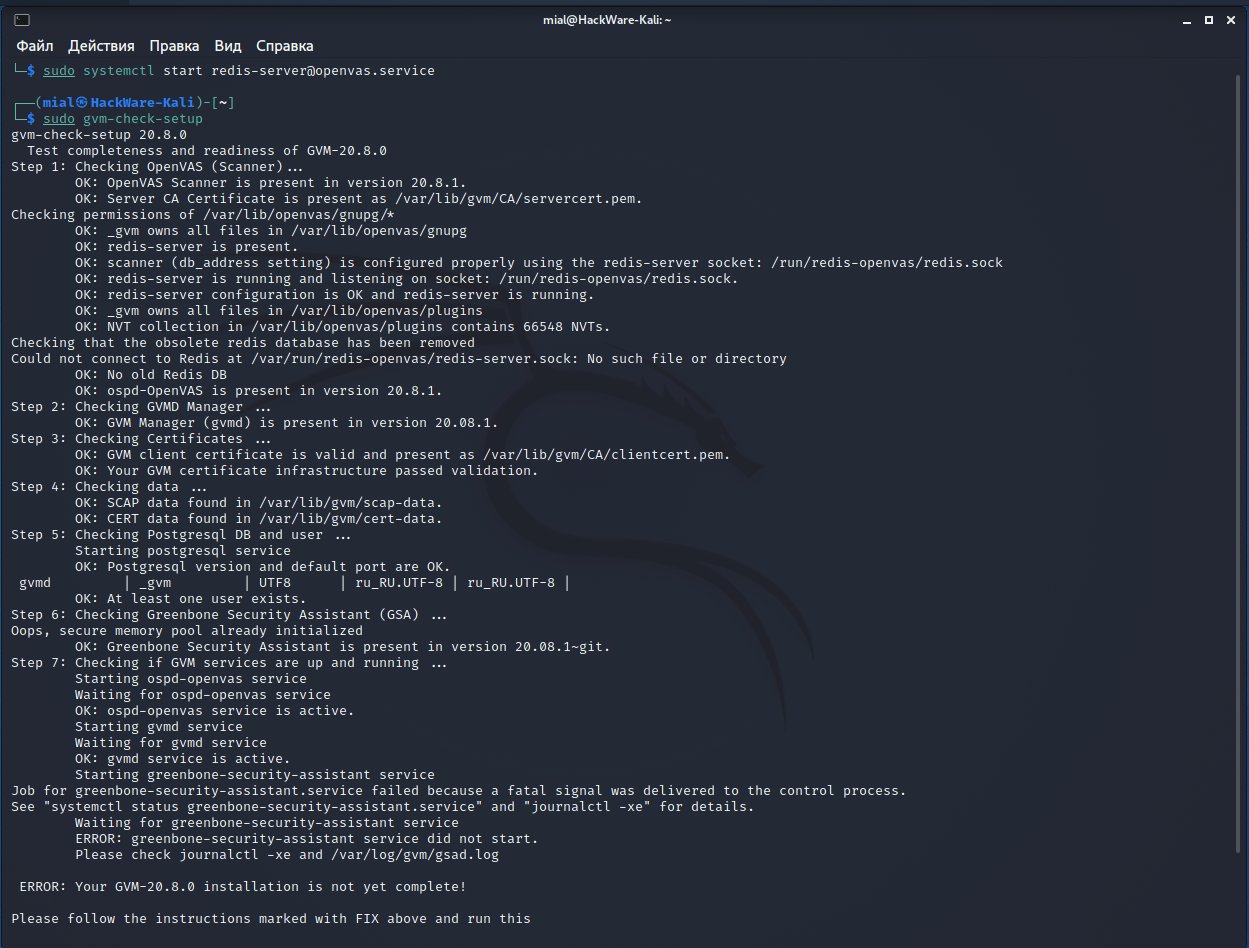
I don’t know how to solve it completely, but I know how to get around it.
Let’s move on to starting the necessary services.
Do not forget that before starting the service you need to start the Redis server, that is, type following before executing the primary command:
Main service start:
And we get the following:

The essence of the messages is that everything started fine, except for the greenbone-security-assistant, that is, gsa, that is, Web UI (Greenbone Security Assistant), that is, the web interface.
You can see the contents of the log file:
https daemon failed to start .
gsad has a —http-only option which only runs HTTP without HTTPS. Let’s use it:
Again, the next message will be displayed that something is wrong:
However, the web interface is now available at http://127.0.0.1:9392 (but not available at https://127.0.0.1:9392!).
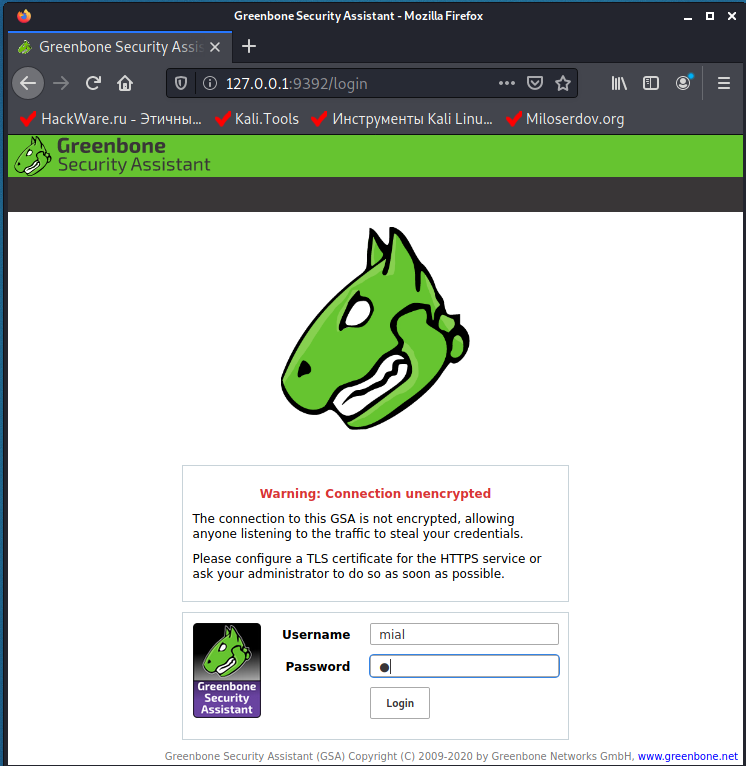
Log in using the credentials that you came up with when creating a new user.
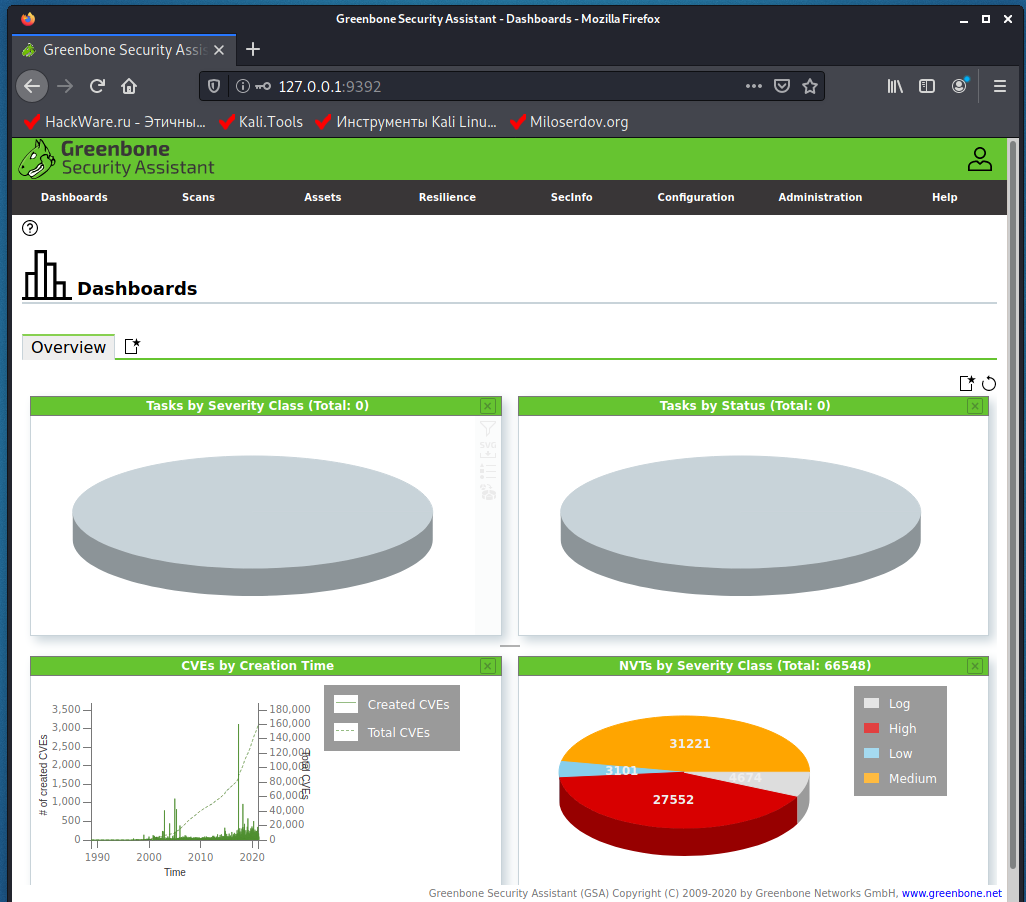
To stop the service:
In the future, sometimes run the command to update signatures:
If something does not work, then you can view the log with the command:
Conclusion
One of the following instructions will be devoted to how to work in Greenbone Vulnerability Management (GVM) (formerly OpenVAS).
And do not forget to write – have you encountered the described errors during installation?
Related articles:
- Default passwords in Kali Linux (100%)
- Kali Linux Rolling post install tips (51.2%)
- How to install OWASP Mutillidae II and Damn Vulnerable Web Application (DVWA) in Kali Linux (51.2%)
- How to install and run VLC, Google Chrome, and Chromium on Kali Linux (51.2%)
- How to update Kali Linux (51.2%)
- How to install Java (JDK) on Windows and Linux (RANDOM — 50%)
Recommended for you:
I found feed status are «update in progress» and «scap database is required» on my Open VAS GVM platform.I have tried may option to update feeds but notings works.
This is log OPEN VAS:
libgvm util:MESSAGE:2021-09-11 06h52.30 utc:5664: Updated NVT cache from version 0 to 202109101034
libgvm util:MESSAGE:2021-09-11 09h04.08 utc:1213: Updated NVT cache from version 0 to 202109101034
libgvm util:MESSAGE:2021-09-11 09h48.54 utc:1297: Updated NVT cache from version 0 to 202109101034
libgvm util:MESSAGE:2021-09-11 10h09.17 utc:1168: Updated NVT cache from version 0 to 202109101034
libgvm util:MESSAGE:2021-09-11 13h05.31 utc:1220: Updated NVT cache from version 0 to 202109101034
libgvm util:MESSAGE:2021-09-11 13h23.30 utc:1159: Updated NVT cache from version 0 to 202109101034
libgvm util:MESSAGE:2021-09-11 13h55.51 utc:1148: Updated NVT cache from version 0 to 202109101034
libgvm util:MESSAGE:2021-09-11 15h45.48 utc:1197: Updated NVT cache from version 0 to 202109101034
libgvm util:MESSAGE:2021-09-11 17h46.23 utc:1712: Updated NVT cache from version 0 to 202109101034
libgvm util:MESSAGE:2021-09-11 18h09.25 utc:1194: Updated NVT cache from version 0 to 202109101034
libgvm util:MESSAGE:2021-09-13 15h31.07 utc:1204: Updated NVT cache from version 0 to 202109101034
libgvm util:CRITICAL:2021-09-13 15h31.17 utc:2876: redis_find: redis connection error to /run/redis-openvas/redis.sock: No such file or directory
libgvm util:CRITICAL:2021-09-13 15h31.17 utc:2876: get_redis_ctx: redis connection error to /run/redis-openvas/redis.sock: No such file or directory
libgvm util:CRITICAL:2021-09-13 15h31.17 utc:2876: get_redis_ctx: redis connection error to /run/redis-openvas/redis.sock: No such file or directory
libgvm util:CRITICAL:2021-09-13 15h37.41 utc:3412: redis_find: redis connection error to /run/redis-openvas/redis.sock: No such file or directory
libgvm util:CRITICAL:2021-09-13 15h37.41 utc:3412: get_redis_ctx: redis connection error to /run/redis-openvas/redis.sock: No such file or directory
libgvm util:CRITICAL:2021-09-13 15h37.41 utc:3412: get_redis_ctx: redis connection error to /run/redis-openvas/redis.sock: No such file or directory
libgvm util:MESSAGE:2021-09-13 16h25.01 utc:3395: Updated NVT cache from version 0 to 202109131026
libgvm util:MESSAGE:2021-09-13 16h34.58 utc:1214: Updated NVT cache from version 0 to 202109131026
Hi! thanks for the tutorial!
on «sudo gvm-setup» i get this:
rsync: [generator] failed to set permissions on «/var/lib/openvas/plugins/2014/gb_fedora_2014_5004_httpd_fc19.nasl»: Function not implemented (38)
rsync: [generator] failed to set permissions on «/var/lib/openvas/plugins/2014/gb_fedora_2014_5006_json-c_fc20.nasl»: Function not implemented (38)
rsync: [generator] failed to set permissions on «/var/lib/openvas/plugins/2014/gb_fedora_2014_5015_elfutils_fc20.nasl»: Function not implemented (38)
Источник
In this guide, you will learn how to install and setup GVM 20.08 on Debian 10. Greenbone Vulnerability Management (GVM), previously known as OpenVAS, is a network security scanner which provides a set of network vulnerability tests (NVTs) to detect security loopholes in systems and applications. As of this writing, GVM 20.08 is the current stable release and is the first release that uses a calendar based versioning (August of 2020).
With the release of GVM 20.08, GVM 10 and GVM 11 were set to retire by end of 2020.
Prerequisites
In this demo, we will install and setup GVM 20.08 on Debian 10 from source code. As such, below are the system requirements I would personally recommend.
- At least 4 GB RAM
- At least 4 vCPUs
- More than 8 GB disk space (We used 16 GB in this demo)
These requirements will vary depending on your use cases, however. Just be sure to provide “enough”.
Run System Update
To begin with, update and upgrade your system packages;
apt update
apt upgrade
Create GVM User on Ubuntu
In this demo, we will run GVM 20.08 as a non privileged system user. Thus, create gvm system user account.
useradd -r -d /opt/gvm -c "GVM User" -s /bin/bash gvm
Create the GVM user directory as specified by option -d in the command above and set the user and group ownership to gvm.
mkdir /opt/gvm
chown gvm: /opt/gvm
Install Required Build Tools
In order to successfully build GVM 20.08 on Debian 10, you need to install a number of required dependencies and build tools.
apt install gcc g++ make bison flex libksba-dev curl redis libpcap-dev
cmake git pkg-config libglib2.0-dev libgpgme-dev nmap libgnutls28-dev uuid-dev
libssh-gcrypt-dev libldap2-dev gnutls-bin libmicrohttpd-dev libhiredis-dev
zlib1g-dev libxml2-dev libradcli-dev clang-format libldap2-dev doxygen
gcc-mingw-w64 xml-twig-tools libical-dev perl-base heimdal-dev libpopt-dev  libunistring-dev graphviz
libsnmp-dev python3-setuptools python3-paramiko python3-lxml python3-defusedxml python3-dev gettext python3-polib xmltoman
python3-pip texlive-fonts-recommended texlive-latex-extra --no-install-recommends xsltproc sudo vim rsync
Install Yarn on Debian 10
Next, install Yarn JavaScript package manager
curl -sS https://dl.yarnpkg.com/debian/pubkey.gpg | apt-key add -
echo "deb https://dl.yarnpkg.com/debian/ stable main" | tee /etc/apt/sources.list.d/yarn.list
apt update
apt install yarn -y
Install PostgreSQL on Debian 10
GVM 20.08 uses PostgreSQL as the backend database. Therefore, run the command below to install PostgreSQL on Debian 10;
apt install postgresql postgresql-contrib postgresql-server-dev-all
Create PostgreSQL User and Database
Once the installation is done, create the PostgreSQL user and database for Greenbone Vulnerability Management Daemon (gvmd). Note that the database and user should be created as PostgreSQL user, postgres.
sudo -Hiu postgres
createuser gvm
createdb -O gvm gvmd
Grant PostgreSQL User DBA Roles
psql gvmd
create role dba with superuser noinherit;
grant dba to gvm;
create extension "uuid-ossp";
create extension "pgcrypto";
q
exit
Once that is done, restart PostgreSQL;
systemctl restart postgresql
systemctl enable postgresql
Want to get started in CyberSecurity? Check the link below;
Cybersecurity: The Beginner’s Guide: A comprehensive guide to getting started in cybersecurity
Building GVM 20.08 from Source Code
There are different tools required to install and setup GVM 20.08 on Debian 10. These include;
- GVM Libraries
- OpenVAS Scanner
- OSPd
- ospd-openvas
- Greenbone Vulnerability Manager
- Greenbone Security Assistant
- Python-GVM
- GVM-Tools
- OpenVAS SMB
Every component has README.md and a INSTALL.md file that explains how to build and install it.
Since we are running GVM as non-privileged user, gvm, then we will install all the GVM configuration files and libraries under, /opt/gvm.
Update the PATH environment variable on /etc/environment, to include the GVM binary path such that it looks like;
echo "PATH=$PATH:/opt/gvm/bin:/opt/gvm/sbin:/opt/gvm/.local/bin" > /etc/profile.d/gvm.sh
Add GVM library path to /etc/ld.so.conf.d.
echo "/opt/gvm/lib" > /etc/ld.so.conf.d/gvm.conf
Build and Install GVM 20.08 on Debian 10
Switch to GVM user, gvm and create a temporary directory to store GVM source files.
su - gvm
mkdir gvm-source
Download GVM 20.08 Source Files
Navigate to temporary directory created above and run the subsequent commands to clone the GVM github branch files.
cd gvm-source
git clone -b gvm-libs-20.08 https://github.com/greenbone/gvm-libs.git
git clone -b master https://github.com/greenbone/openvas-smb.git
git clone -b openvas-20.08 https://github.com/greenbone/openvas.git
git clone -b ospd-20.08 https://github.com/greenbone/ospd.git
git clone -b ospd-openvas-20.08 https://github.com/greenbone/ospd-openvas.git
git clone -b gvmd-20.08 https://github.com/greenbone/gvmd.git
git clone -b gsa-20.08 https://github.com/greenbone/gsa.git
Once the source files are in place, proceed to build and install GVM 20.08 on Debian 10.
Note the current working directory;
pwd
/opt/gvm/gvm-source
ls -1
gsa
gvmd
gvm-libs
openvas
openvas-smb
ospd
ospd-openvas
Note that we will install all GVM 20.08 files and libraries to a non-standard location, /opt/gvm. As such, you need to set the PKG_CONFIG_PATH environment variable to the location of your pkg-config files before configuring:
export PKG_CONFIG_PATH=/opt/gvm/lib/pkgconfig:$PKG_CONFIG_PATH
Be sure to replace the path, /opt/gvm, accordingly.
I would suggest you take a snapshot of your machine at this point, just in case things don’t work out, you can revert to this stage without having to start from scratch!
Build and Install GVM 11 Libraries
From within the source directory, /opt/gvm/gvm-source, in this setup, change to GVM libraries directory;
cd gvm-libs
Create a build directory and change into it;
mkdir build
cd build
Configure the build;
cmake .. -DCMAKE_INSTALL_PREFIX=/opt/gvm
Next, compile and install GVM libraries
make
make install
Build and Install OpenVAS scanner and OpenVAS SMB
Open Vulnerability Assessment Scanner (OpenVAS) is a full-featured scan engine that executes a continuously updated and extended feed of Network Vulnerability Tests (NVTs).
OpenVAS SMB provides modules for the OpenVAS Scanner to interface with Microsoft Windows Systems through the Windows Management Instrumentation API and a winexe binary to execute processes remotely on that system.
Build and install openvas-smb;
cd ../../openvas-smb/
mkdir build
cd build
cmake .. -DCMAKE_INSTALL_PREFIX=/opt/gvm
make
make install
Build and install OpenVAS scanner;
cd ../../openvas
Proceed to build and install openvas.
mkdir build
cd build
cmake .. -DCMAKE_INSTALL_PREFIX=/opt/gvm
make
make install
Configuring OpenVAS Scanner
The host scan information is stored temporarily on Redis server. The default configuration of Redis server is /etc/redis/redis.conf.
Switch back to privileged user and proceed.
exit
To begin run the command below to create the cache to the installed shared libraries;
ldconfig
Next, copy OpenVAS scanner Redis configuration file, redis-openvas.conf, to the same Redis config directory;
cp /opt/gvm/gvm-source/openvas/config/redis-openvas.conf /etc/redis/
Update the ownership of the configuration.
chown redis:redis /etc/redis/redis-openvas.conf
Update the path to Redis unix socket on the /opt/gvm/etc/openvas/openvas.conf using the db_address parameter as follows;
echo "db_address = /run/redis-openvas/redis.sock" > /opt/gvm/etc/openvas/openvas.conf
Note, the Unix socket path is defined on /etc/redis/redis-openvas.conf file.
chown gvm:gvm /opt/gvm/etc/openvas/openvas.conf
Add gvm user to redis group;
usermod -aG redis gvm
You can also optimize Redis server itself improve the performance by making the following adjustments;
Increase the value of somaxconn in order to avoid slow clients connections issues.
echo "net.core.somaxconn = 1024" >> /etc/sysctl.conf
Redis background save may fail under low memory condition. To avoid this, enable memory overcommit (man 5 proc).
echo 'vm.overcommit_memory = 1' >> /etc/sysctl.conf
Reload sysctl variables created above.
sysctl -p
To avoid creation of latencies and memory usage issues with Redis, disable Linux Kernel’s support for Transparent Huge Pages (THP). To easily work around this, create a systemd service unit for this purpose.
cat > /etc/systemd/system/disable_thp.service << 'EOL'
[Unit]
Description=Disable Kernel Support for Transparent Huge Pages (THP)

[Service]
Type=simple
ExecStart=/bin/sh -c "echo 'never' > /sys/kernel/mm/transparent_hugepage/enabled && echo 'never' > /sys/kernel/mm/transparent_hugepage/defrag"

[Install]
WantedBy=multi-user.target
EOL
Reload systemd configurations;
systemctl daemon-reload
Start and enable this service to run on system boot.
systemctl enable --now disable_thp
Restart OpenVAS Redis server
systemctl enable --now [email protected]
A number of Network Vulnerability Tests (NVTs) require root privileges to perform certain operations. Since openvas is launched from an ospd-openvas process, via sudo, add the line below to sudoers file to ensure that the gvm user used in this demo can run the openvas with elevated rights using passwordless sudo.
echo "gvm ALL = NOPASSWD: /opt/gvm/sbin/openvas" > /etc/sudoers.d/gvm
Also, update the secure_path to include the GVM /sbin paths, /opt/gvm/sbin.
visudo
Defaults secure_path="/usr/local/sbin:/usr/local/bin:/usr/sbin:/usr/bin:/sbin:/bin:/snap/bin:/opt/gvm/sbin"
Also, enable gvm user to run GSA web application daemon, gsad, with passwordless sudo.
echo "gvm ALL = NOPASSWD: /opt/gvm/sbin/gsad" >> /etc/sudoers.d/gvm
Update NVTs
Update Network Vulnerability Tests feed from Greenbone Security Feed/Community Feed using the greenbone-nvt-sync command.
The greenbone-nvt-sync command must not be executed as privileged user root, hence switch back to GVM user we created above and update the NVTs.
su - gvm
Next, update the NVTs as openvas user;
greenbone-nvt-sync
Once the update is done, you need to update Redis server with the same VT info from VT files;
sudo openvas --update-vt-info
Build and Install Greenbone Vulnerability Manager
export PKG_CONFIG_PATH=/opt/gvm/lib/pkgconfig:$PKG_CONFIG_PATH
cd gvm-source/gvmd
mkdir build
cd build
cmake .. -DCMAKE_INSTALL_PREFIX=/opt/gvm
make
make install
Build and Install Greenbone Security Assistant
cd ../../gsa
mkdir build
cd build
cmake .. -DCMAKE_INSTALL_PREFIX=/opt/gvm
make
make install
Generate GVM Certificates
Next, run the command below to generate certificates gvmd. Server certificates are used for authentication while client certificates are primarily used for authorization. More on man gvm-manage-certs.
gvm-manage-certs -a
Keeping the feeds up-to-date
The gvmd Data, SCAP and CERT Feeds should be kept up-to-date by calling the greenbone-feed-sync script regularly (e.g. via a cron entry):
sudo -Hiu gvm greenbone-feed-sync --type GVMD_DATA
sudo -Hiu gvm greenbone-feed-sync --type SCAP
sudo -Hiu gvm greenbone-feed-sync --type CERT
Please note: The CERT feed sync depends on data provided by the SCAP feed and should be called after syncing the later.
Also, in case the commands fail with such an error;
rsync: read error: Connection reset by peer (104)
rsync error: error in socket IO (code 10) at io.c(794) [receiver=3.1.3]
rsync: connection unexpectedly closed (1047 bytes received so far) [generator]
rsync error: error in rsync protocol data stream (code 12) at io.c(235) [generator=3.1.3]
Try adding --rsync option to the command, for example;
sudo -Hiu gvm greenbone-feed-sync --type CERT --rsync
Build and Install OSPd and OSPd-OpenVAS
Open Scanner Protocol (OSP) creates a unified interface for different security scanners and makes their control flow and scan results consistently available under the central Greenbone Vulnerability Manager service.
As much as you can build them from the source, it has been made such that you can install using Python package manager, pip as shown below;
su - gvm
pip3 install wheel
pip3 install python-gvm gvm-tools
Build and install OSPd and OSPd-openvas:
cd /opt/gvm/gvm-source/ospd
python3 -m pip install .
cd /opt/gvm/gvm-source/ospd-openvas
python3 -m pip install .
Running OpenVAS Scanner, GSA and GVM services
In order to make the management of OpenVAS scanner, GSA (WebUI service) and GVM daemon, create systemd service unit files for each of them as follows.
Log out as gvm user and execute the commands below as a privileged user.
exit
Creating Systemd Service units for GVM services
Create OpenVAS systemd service
cat > /etc/systemd/system/openvas.service << 'EOL'
[Unit]
Description=Control the OpenVAS service
After=redis.service
After=postgresql.service

[Service]
ExecStartPre=-rm -rf /opt/gvm/var/run/ospd-openvas.pid /opt/gvm/var/run/ospd.sock /opt/gvm/var/run/gvmd.sock
Type=simple
User=gvm
Group=gvm
Environment=PATH=/usr/local/sbin:/usr/local/bin:/usr/sbin:/usr/bin:/sbin:/bin:/usr/games:/usr/local/games:/opt/gvm/bin:/opt/gvm/sbin:/opt/gvm/.local/bin
ExecStart=/usr/bin/python3 /opt/gvm/.local/bin/ospd-openvas
--pid-file /opt/gvm/var/run/ospd-openvas.pid
--log-file /opt/gvm/var/log/gvm/ospd-openvas.log
--lock-file-dir /opt/gvm/var/run -u /opt/gvm/var/run/ospd.sock
RemainAfterExit=yes

[Install]
WantedBy=multi-user.target
EOL
Reload systemd service unit configurations.
systemctl daemon-reload
systemctl start openvas
Check the status of the service;
systemctl status openvas
● openvas.service - Control the OpenVAS service
   Loaded: loaded (/etc/systemd/system/openvas.service; disabled; vendor preset: enabled)
   Active: active (exited) since Thu 2021-02-11 04:22:34 EST; 12s ago
  Process: 2785 ExecStartPre=/usr/bin/rm -rf /opt/gvm/var/run/ospd-openvas.pid /opt/gvm/var/run/ospd.sock /opt/gvm/var/run/gvmd.sock (code=exited, status=0/SUCCESS)
  Process: 2786 ExecStart=/usr/bin/python3 /opt/gvm/.local/bin/ospd-openvas --pid-file /opt/gvm/var/run/ospd-openvas.pid --log-file /opt/gvm/var/log/gvm/ospd-openvas.log --
 Main PID: 2786 (code=exited, status=0/SUCCESS)
    Tasks: 6 (limit: 2359)
   Memory: 61.4M
   CGroup: /system.slice/openvas.service
           ├─2788 /usr/bin/python3 /opt/gvm/.local/bin/ospd-openvas --pid-file /opt/gvm/var/run/ospd-openvas.pid --log-file /opt/gvm/var/log/gvm/ospd-openvas.log --lock-fil
           ├─2790 /usr/bin/python3 /opt/gvm/.local/bin/ospd-openvas --pid-file /opt/gvm/var/run/ospd-openvas.pid --log-file /opt/gvm/var/log/gvm/ospd-openvas.log --lock-fil
           ├─2798 openvas --update-vt-info
           └─2799 openvas --update-vt-info

Feb 11 04:22:34 debian systemd[1]: Starting Control the OpenVAS service...
Feb 11 04:22:34 debian systemd[1]: Started Control the OpenVAS service.
Enable OpenVAS scanner to run on system boot;
systemctl enable openvas
Create GSA systemd service Unit file
cat > /etc/systemd/system/gsa.service << 'EOL'
[Unit]
Description=Control the OpenVAS GSA service
After=openvas.service

[Service]
Type=simple
User=gvm
Group=gvm
Environment=PATH=/usr/local/sbin:/usr/local/bin:/usr/sbin:/usr/bin:/sbin:/bin:/usr/games:/usr/local/games:/opt/gvm/bin:/opt/gvm/sbin:/opt/gvm/.local/bin
ExecStart=/usr/bin/sudo /opt/gvm/sbin/gsad
RemainAfterExit=yes

[Install]
WantedBy=multi-user.target
EOL
cat >  /etc/systemd/system/gsa.path << 'EOL'
[Unit]
Description=Start the OpenVAS GSA service when gvmd.sock is available

[Path]
PathChanged=/opt/gvm/var/run/gvmd.sock
Unit=gsa.service

[Install]
WantedBy=multi-user.target
EOL
Create GVM Systemd Service unit file
cat > /etc/systemd/system/gvm.service << 'EOL'
[Unit]
Description=Control the OpenVAS GVM service
After=openvas.service

[Service]
Type=simple
User=gvm
Group=gvm
Environment=PATH=/usr/local/sbin:/usr/local/bin:/usr/sbin:/usr/bin:/sbin:/bin:/usr/games:/usr/local/games:/opt/gvm/bin:/opt/gvm/sbin:/opt/gvm/.local/bin
ExecStart=/opt/gvm/sbin/gvmd --osp-vt-update=/opt/gvm/var/run/ospd.sock
RemainAfterExit=yes

[Install]
WantedBy=multi-user.target
EOL
cat > /etc/systemd/system/gvm.path << 'EOL'
[Unit]
Description=Start the OpenVAS GVM service when opsd.sock is available

[Path]
PathChanged=/opt/gvm/var/run/ospd.sock
Unit=gvm.service

[Install]
WantedBy=multi-user.target
EOL
Reload system unit configs and start the services;
systemctl daemon-reload
systemctl enable --now gvm.{path,service}
systemctl enable --now gsa.{path,service}
Checking the status;
systemctl status gvm.{path,service}
● gvm.path - Start the OpenVAS GVM service when opsd.sock is available
   Loaded: loaded (/etc/systemd/system/gvm.path; enabled; vendor preset: enabled)
   Active: active (waiting) since Thu 2021-02-11 04:24:50 EST; 31s ago

Feb 11 04:24:50 debian systemd[1]: Started Start the OpenVAS GVM service when opsd.sock is available.

● gvm.service - Control the OpenVAS GVM service
   Loaded: loaded (/etc/systemd/system/gvm.service; enabled; vendor preset: enabled)
   Active: active (exited) since Thu 2021-02-11 04:24:50 EST; 31s ago
 Main PID: 2885 (code=exited, status=0/SUCCESS)
    Tasks: 8 (limit: 2359)
   Memory: 336.5M
   CGroup: /system.slice/gvm.service
           ├─2886 gvmd: Waiting for incoming connections
           ├─2938 gpg-agent --homedir /opt/gvm/var/lib/gvm/gvmd/gnupg --use-standard-socket --daemon
           ├─2947 gvmd: Reloading NVTs
           ├─2948 gvmd: Syncing SCAP: Updating CPEs
           ├─2949 gvmd: OSP: Updating NVT cache
           ├─2950 gvmd: Syncing CERT
           ├─2957 sh -c xml_split -s40Mb split.xml && head -n 2 split-00.xml > head.xml && echo '</cpe-list>' > tail.xml && for F in split-*.xml; do    awk 'NR>3 {print las
           └─2958 /usr/bin/perl -w /usr/bin/xml_split -s40Mb split.xml

Feb 11 04:24:50 debian systemd[1]: Started Control the OpenVAS GVM service
systemctl status gsa.{path,service}
● gsa.path - Start the OpenVAS GSA service when gvmd.sock is available
   Loaded: loaded (/etc/systemd/system/gsa.path; enabled; vendor preset: enabled)
   Active: active (running) since Thu 2021-02-11 04:24:51 EST; 55s ago

Feb 11 04:24:51 debian systemd[1]: Started Start the OpenVAS GSA service when gvmd.sock is available.

● gsa.service - Control the OpenVAS GSA service
   Loaded: loaded (/etc/systemd/system/gsa.service; enabled; vendor preset: enabled)
   Active: active (exited) since Thu 2021-02-11 04:24:51 EST; 55s ago
  Process: 2907 ExecStart=/usr/bin/sudo /opt/gvm/sbin/gsad (code=exited, status=0/SUCCESS)
 Main PID: 2907 (code=exited, status=0/SUCCESS)
    Tasks: 4 (limit: 2359)
   Memory: 3.9M
   CGroup: /system.slice/gsa.service
           ├─2909 /opt/gvm/sbin/gsad
           └─2910 /opt/gvm/sbin/gsad

Feb 11 04:24:51 debian systemd[1]: Started Control the OpenVAS GSA service.
Feb 11 04:24:52 debian sudo[2907]:      gvm : TTY=unknown ; PWD=/ ; USER=root ; COMMAND=/opt/gvm/sbin/gsad
Feb 11 04:24:52 debian sudo[2907]: pam_unix(sudo:session): session opened for user root by (uid=0)
Feb 11 04:24:52 debian sudo[2907]: Oops, secure memory pool already initialized
Feb 11 04:24:52 debian sudo[2907]: pam_unix(sudo:session): session closed for user root
Various Log files are located under the /opt/gvm/var/log/gvm directory.
ls /opt/gvm/var/log/gvm
gsad.log gvmd.log openvas.log ospd-openvas.logCreate GVM Scanner
Since we launched the scanner and set it to use our non-standard scanner host path (/opt/gvm/var/run/ospd.sock), we need to create and register our scanner;
sudo -Hiu gvm gvmd --create-scanner="Kifarunix-demo OpenVAS Scanner" --scanner-type="OpenVAS" --scanner-host=/opt/gvm/var/run/ospd.sock
Next, you need to verify your scanner. For this, you first need to get the scanner identifier;
sudo -Hiu gvm gvmd --get-scanners
08b69003-5fc2-4037-a479-93b440211c73  OpenVAS  /var/run/ospd/ospd.sock  0  OpenVAS Default
6acd0832-df90-11e4-b9d5-28d24461215b  CVE    0  CVE
50afbf2b-d854-4b6d-879f-c62aa62254d2  OpenVAS  /opt/gvm/var/run/ospd.sock  9390  Kifarunix-demo OpenVAS Scanner
Based on the output above, our scanner UUID is, 50afbf2b-d854-4b6d-879f-c62aa62254d2.
Verify the scanner;
sudo -Hiu gvm gvmd --verify-scanner=50afbf2b-d854-4b6d-879f-c62aa62254d2
Command output;
Scanner version: OpenVAS 20.8.2.
Create OpenVAS (GVM) Admin User
Create OpenVAS administrative user by running the command below;
sudo -Hiu gvm gvmd --create-user admin
This command generates a random password for the user. See sample output below;
User created with password 'fee42e66-117c-42f8-9b48-429e51194a13'.If you want to create a user and at the same time create your own password;
sudo -Hiu gvm gvmd --create-user gvmadmin [email protected]
Otherwise, you can reset the password of an already existing user;
sudo -Hiu gvm gvmd --user=<USERNAME> --new-password=<PASSWORD>
An administrator user can later create further users or administrators via clients like the Greenbone Security Assistant (GSA).
If you want to reset the GVM admin password, simply run the command below;
sudo -Hiu gvm gvmd --user=admin --new-password=<new-password>
Replace the <new-password> with your password.
Set the Feed Import Owner
According to gvmd/INSTALL.md, certain resources that were previously part of the gvmd source code are now shipped via the feed. An example is the config “Full and Fast”.
gvmd will only create these resources if a “Feed Import Owner” is configured:
sudo -Hiu gvm gvmd --modify-setting 78eceaec-3385-11ea-b237-28d24461215b --value <uuid_of_user>The UUIDs of all created users can be found using
sudo -Hiu gvm gvmd --get-users --verboseSample output;
admin 9a9e5070-d2f0-4802-971e-c9d61e682c21Then modify the gvmd settings with the user UUID.
sudo -Hiu gvm gvmd --modify-setting 78eceaec-3385-11ea-b237-28d24461215b --value 9a9e5070-d2f0-4802-971e-c9d61e682c21Accessing GVM 20.08 (OpenVAS)
Greenbone Security Assistant (GSA) WebUI daemon opens port 443 and listens on all interfaces. If firewall is running, open this port to allow external access.
ufw allow 443/tcp
You can now access GSA via the url https:<serverIP-OR-hostname>. Accept the self-signed SSL warning and proceed.

Login with the administrative credentials generated above.


Port lists

And there you go. That is all it take to install and Setup GVM 20.08 on Debian 10. You can now start running your scans.
In case you see The SCAP database is required, upon accessing the NVTs, CVEs, then the SCAP database might still being rebuild. Check the gvmd.log file;
tail -f /opt/gvm/var/log/gvm/gvmd.log
md manage:MESSAGE:2021-02-12 06h17.42 utc:11210: No SCAP database found
util gpgme:MESSAGE:2021-02-12 06h17.46 utc:11210: Setting GnuPG dir to '/opt/gvm/var/lib/gvm/gvmd/gnupg'
util gpgme:MESSAGE:2021-02-12 06h17.46 utc:11210: Using OpenPGP engine version '2.2.12'
md manage:WARNING:2021-02-12 06h17.47 utc:11237: update_scap: No SCAP db present, rebuilding SCAP db from scratch
md manage:   INFO:2021-02-12 06h17.53 utc:11237: update_scap: Updating data from feed
md manage:   INFO:2021-02-12 06h17.53 utc:11237: Updating CPEs
...
The error will disappear once the SCAP database rebuild completes and such logs appear on gvmd.log file;
md manage:   INFO:2021-02-12 06h48.36 utc:13337: Updating CVSS scores for OVAL definitions
md manage:   INFO:2021-02-12 06h48.45 utc:13337: Updating placeholder CPEs
md manage:   INFO:2021-02-12 06h54.31 utc:13337: Updating Max CVSS for DFN-CERT
md manage:   INFO:2021-02-12 06h54.57 utc:13337: Updating DFN-CERT CVSS max succeeded.
md manage:   INFO:2021-02-12 06h54.57 utc:13337: Updating Max CVSS for CERT-Bund
md manage:   INFO:2021-02-12 07h05.02 utc:13337: Updating CERT-Bund CVSS max succeeded.
md manage: INFO:2021-02-12 07h05.14 utc:13337: update_scap_end: Updating SCAP info succeededNOTE: When creating a scan task, be sure to select the Scanner we created above.

You can now create your target hosts to scan and schedule the scans to run at your own preferred time.
That marks the end of our tutorial on how to install and setup GVM 20.08 on Debian 10.
Did I miss anything, drop it in the comments section!! Enjoy
Reference
Source files README.md and INSTALL.md files
Related Tutorials
Install OpenVAS 10 (GVM) on Debian 10 Buster
Install OpenVAS 9 with PostgreSQL in Ubuntu 18.04
How to Add and Scan a Target for Vulnerabilities on OpenVAS Scanner
How to Install and Setup OpenVAS 9 Vulnerability Scanner on Ubuntu 18.04
How to Install and Use WPScan WordPress Vulnerability Scanner Ubuntu 18.04
It’s time to cover some vulnerability scanning! What better way to start this than with the installation of OpenVAS? Today I will show you how to install OpenVAS on Kali Linux in a step-by-step guide for you to follow along.
Table of Contents
- What is OpenVAS?
- Step 1 – Install OpenVAS on Kali Linux
- Step 2 – Configuring OpenVAS
- Step 3 – Running your first Scan
- Finding Exploits with OpenVAS
- Troubleshooting
- PostgreSQL Version Errors v13 and v14
- PostgreSQL Version Errors v14 and v15
- OpenVAS failed to find config
- Conclusion
⚠️ Kali Linux Wiki
➡️ Download Kali Linux Safe & Easy
➡️ Install Kali Linux on VirtualBox
➡️ Install Kali Linux on VMWare Workstation
➡️ Dual Boot Kali Linux with Windows
➡️ Install Kali Linux on WSL 2
➡️ Install Kali Linux on a Laptop
➡️ Install VSCode on Kali Linux
➡️ Install OpenVAS on Kali Linux
➡️ Install Docker on Kali Linux
➡️ WiFi Adapter for Kali Linux
What is OpenVAS?
OpenVAS is an open-source vulnerability scanner. OpenVAS started under the name of GNessUs, a fork of the previously open-source Nessus scanning tool (which costs you money now). OpenVAS is also under the GNU General Public License (GPL).
I personally used this software in many different kinds of assessments and was always satisfied with the results I got (keeping in mind that it is completely free).
Of course, tools like Nessus and NeXpose are more feature-rich, but they come with a high price tag too.
For starters, OpenVAS is simply perfect and gives you a good idea of how a vulnerability scanner works. I also found it very intuitive to work with.
So without further ado, let’s dive right into the installation.
The first thing we want to do is to make sure that our Kali installation is up-to-date. So open a terminal window and run:
Code language: Bash (bash)
sudo apt update && sudo apt upgrade -y
This will update your repository and upgrade your Kali, the -y at the end saves you a press of the button “Y” in the process.
The next thing we want to do is to install OpenVAS. Again in the Terminal type:
Code language: Bash (bash)
sudo apt install openvas
Confirm that you are aware that an additional ~1,2 Gigabyte of Disk Space will be used by pressing Y.
Now this will take a good while. Grab a coffee or prepare some Yerba Mate while we are waiting 🙂
Once that is done we will run another command in the terminal window:
Code language: Bash (bash)
sudo gvm-setup
Note: In case you run into a PostgreSQL error – check out the troubleshooting section at the end of this article.
This is going to take very long.
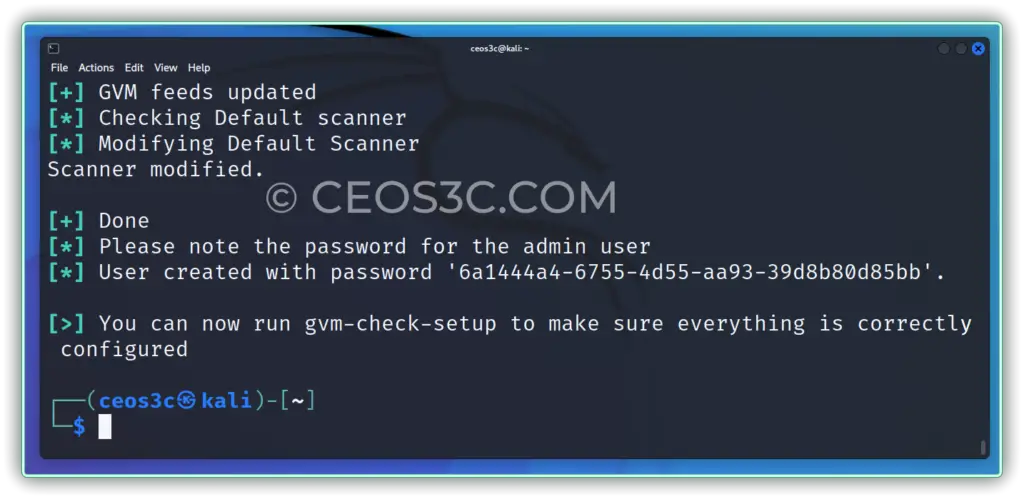
Phew… That took about 2 hours for me to finish. I still didn’t get why it takes so long, but just go for a long walk and come back later…
After the setup process is finished, don’t forget to note down your password that was generated at the end, you need it to log in for the first time.
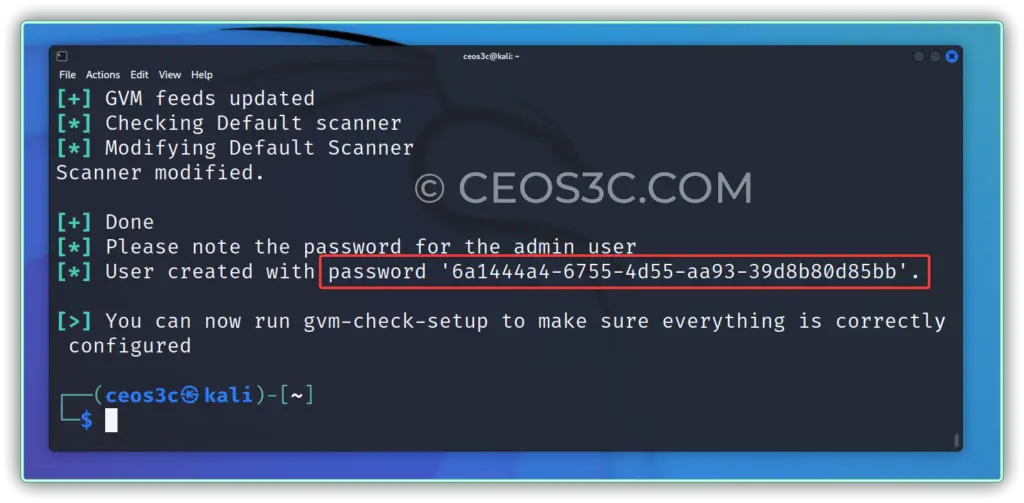
Step 2 – Configuring OpenVAS
The installation is now finished. Next, we verify if our installation is working.
Code language: Bash (bash)
sudo gvm-check-setup
I got an error (SCAP DATA are missing), but if you look through the error message, you can see that you can fix it by running:
Code language: Bash (bash)
sudo runuser -u _gvm -- greenbone-feed-sync --type SCAP
This fixed my issue.
First, we are starting the OpenVAS Service.
Code language: Bash (bash)
sudo gvm-start
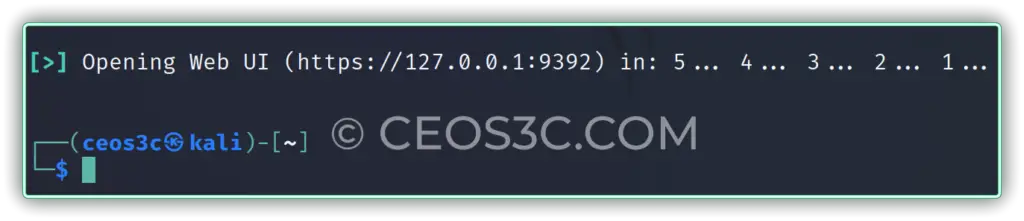
Now your OpenVAS Service should be up and running. OpenVAS listens on the Ports: 9390, 9391, 9392, and on Port 80. Your web browser should automatically open and lead to the OpenVAS Login Page.
If not, open a web browser manually and enter the URL
Code language: Bash (bash)
https://127.0.0.1:9392
The first time you want to open this URL you will get a security warning. Click on Advanced and Add an Exception.
Remember the password you noted down before? Now we are going to need it.
Forgot your Admin Password?
Reset it by typing:
sudo gvmd --user=admin --new-password=passwd;
Log in to OpenVAS with admin // your password

First things first – Navigate to To your User Profile / My Settings / Click on Edit and change the password.
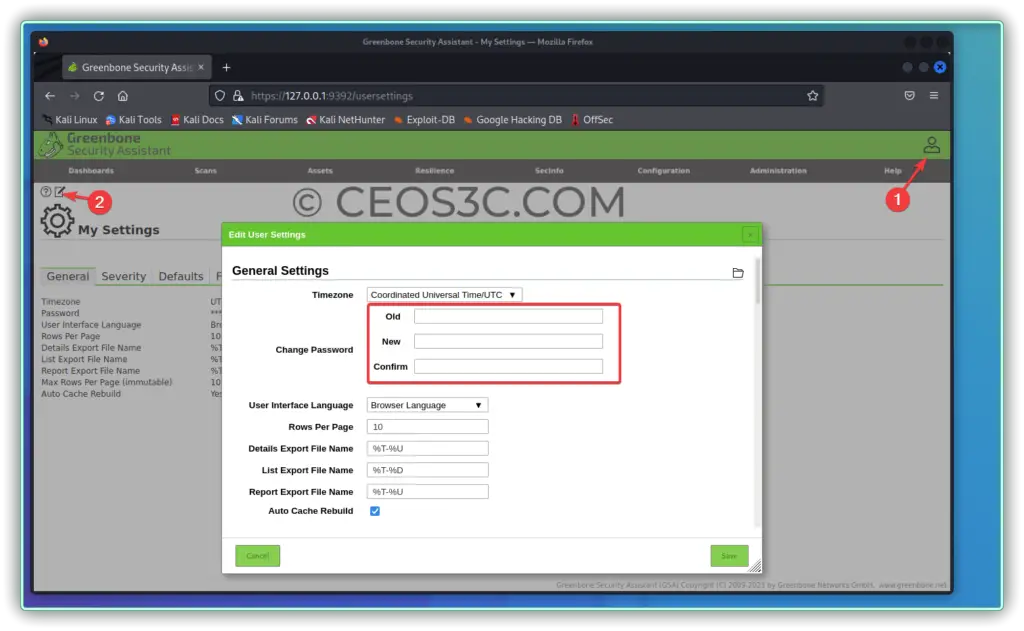
This is basically all you need to do. OpenVAS is now running and ready for use.
Step 3 – Running your first Scan
Now it’s time to run our first scan.
As this is just the installation part I won’t go into details, but I will show you quickly how to run your first scan. There will be more articles covering OpenVAS and we will continue looking into all of the different options we have and how to process scan results.
So the easiest way is simply to Navigate to Scans / Tasks and click on the little Magic Wand icon and start the Task Wizard.
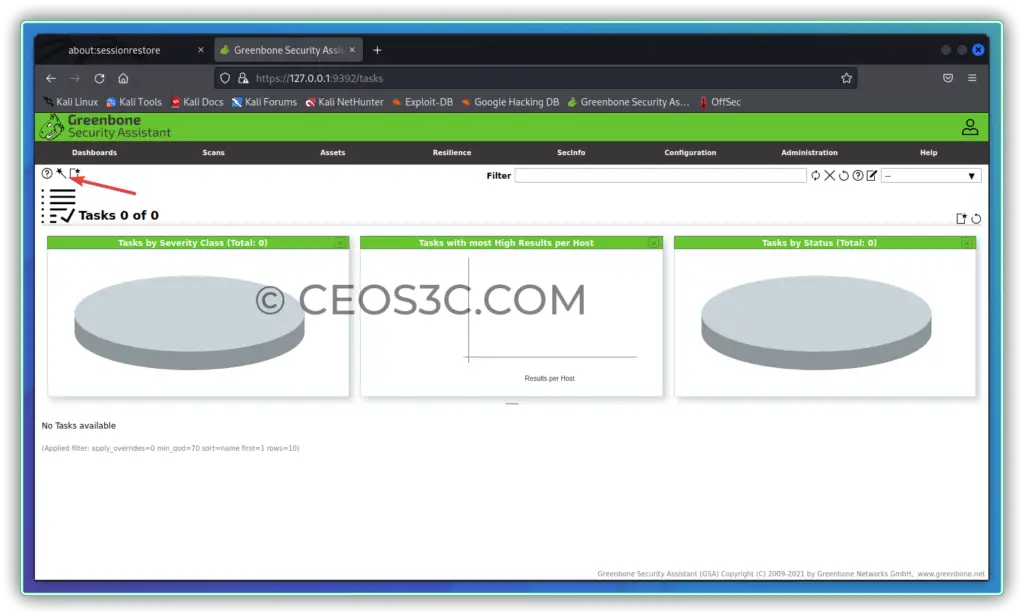
Now you can enter either a single IP, a whole subnet, a range of IP Addresses, or a domain.
This will start a default-depth scan. Depending on the scale of the Network you want to scan this can take from a few minutes up to several hours or even days if the network is large enough and you choose a deep scan.
This and more will be covered in the next article for OpenVAS, which is coming soon.
Finding Exploits with OpenVAS
I created a video a while ago on how to find Exploits using OpenVAS, which basically goes through the whole process of scanning and then finding Exploits for your findings. The video is a bit older but still valid. Give it a watch if you want to learn how to use OpenVAS in-depth.
Troubleshooting
There is a lot that can go wrong during the installation of OpenVAS as some of our readers has pointed out, therefore, we decided to create a little extra section here, covering the most common errors.
PostgreSQL Version Errors v13 and v14
There are multiple possible version errors for PostgreSQL. As our reader Tom has pointed out, the first one is:
[>] Starting PostgreSQL service
[-] ERROR: The default PostgreSQL version (13) is not 14 that is required by libgvmd
[-] ERROR: Use pg_upgradecluster to update your PostgreSQL cluster
Solution:
Open the postgresql.conf file of version 14 and change the port to 5432:
sudo nano /etc/postgresql/14/main/postgresql.conf
Then open the postgresql.conf file of version 13 and check if the port is the same as in version 14. If it is the same – change it to 5433:
sudo nano /etc/postgresql/13/main/postgresql.conf
Restart the PostgreSQL service:
sudo systemctl restart postgresql
PostgreSQL Version Errors v14 and v15
During my installation, I got the following error affecting v14 and v15 of PostgreSQL:
[>] Starting PostgreSQL service
[-] ERROR: The default PostgreSQL version (14) is not 15 that is required by libgvmd
[-] ERROR: Use pg_upgradecluster to update your PostgreSQL cluster
Gladly, the solution to this problem was easier than the one above and might as well work for the problem above:
Code language: CSS (css)
sudo systemcctl stop postgresql@14-main sudo /usr/bin/pg_dropcluster --stop 14 main
OpenVAS failed to find config
Another common error is the failed to find config ‘long-string-value’ message. There are multiple possible solutions for this issue. The one that worked for me is the following:
Code language: JavaScript (javascript)
sudo runuser -u _gvm – gvmd --get-scanners
Note down the scanner ID.
Then run:
Code language: JavaScript (javascript)
sudo runuser -u _gvm – gvmd --get-users --verbose
This gives you the users, including their IDs. You are probably an admin. To solve the issue, enter:
Code language: CSS (css)
sudo runuser -u _gvm – gvmd --modify-scanner [scanner id] --value [user id]
Conclusion
This is how easy it is to install OpenVAS on Kali Linux and start a basic scan. There is a lot more to learn about OpenVAS, but this should get you up and running in no time!
👀 This Tutorial has some related Articles!
👉 How to get started in Cyber Security – The Complete Guide
👉 How to get started with Bug Bounties
👉 Terminal Customization Series
👉 Best Ethical Hacking Books
👉 Download Kali Linux Safe & Easy
👉 Best Ethical Hacking Tools
👉 Install VSCode on Kali Linux
👉 Dual Boot Kali Linux with Windows
👉 Install Kali Linux on VirtualBox – Complete Beginner Guide
👉 Top Things to do after installing Kali Linux
👉 WiFi Adapter for Kali Linux – The Ultimate Guide
👉 Nmap Beginner Guide Series
👉 Metasploit Tutorial Series
👉 Burp Suite Beginner Guide
Stefan
Stefan is the founder & creative head behind Ceos3c.
Stefan is a self-taught Software Engineer & Cyber Security professional and he helps other people to learn complicated topics.