- Manuals
- Brands
- LG Manuals
- Washer
- F1*20TD(1~9) Series
- Service manual
-
Contents
-
Table of Contents
-
Troubleshooting
-
Bookmarks
Quick Links
WASHING MACHINE
SERVICE MANUAL
CAUTION
READ THIS MANUAL CAREFULLY TO DIAGNOSE TROUBLE
CORRECTLY BEFORE OFFERING SERVICE.
MODEL : F1*20TD(1~9) / F1*22TD(1~9) / WF-770**TD
website : http://biz.lgservice.com
e-mail : http://LGEservice.com/techsup.html
Related Manuals for LG F1*20TD(1~9) Series
Summary of Contents for LG F1*20TD(1~9) Series
-
Page 1: Washing Machine
website : http://biz.lgservice.com e-mail : http://LGEservice.com/techsup.html WASHING MACHINE SERVICE MANUAL CAUTION READ THIS MANUAL CAREFULLY TO DIAGNOSE TROUBLE CORRECTLY BEFORE OFFERING SERVICE. MODEL : F1*20TD(1~9) / F1*22TD(1~9) / WF-770**TD…
-
Page 2
FEB. 2007 PRINTED IN KOREA P/No.: MFL30574749… -
Page 3: Table Of Contents
CONTENTS 1. SPECIFICATIONS ……………………..3 2. FEATURES & TECHNICAL EXPLANATION ………………4 3. PARTS IDENTIFICATION ……………………. 6 4. INSTALLATION ……………………..7 5. OPERATION ……………………… 12 5-1. F1*22TD(1~9) …………………….. 12 5-2. F1*20TD(1~9) …………………….. 14 6. WIRING DIAGRAM / PCB LAYOUT / PROGRAM CHART …………16 7.
-
Page 4: Specifications
1. SPECIFICATION F1*20TD(1~9) / F1*22TD(1~9) / WF-770**TD ITEM POWER SUPPLY 220-240V~, 50Hz PRODUCT WEIGHT 64kg WASHING 135W SPIN (1400rpm) 530W ELECTRICITY DRAIN MOTOR CONSUMPTION WASH HEATER 2000W REVOLUTION WASH 50rpm SPEED SPIN F10**TD No Spin~1000 rpm F12**TD No Spin~1200 rpm F14**TD No Spin~1400 rpm OPERATION WATER PRESSURE…
-
Page 5: Features & Technical Explanation
2. FEATURES & TECHNICAL EXPLANATION 2-1. FEATURES Anti Crease function With the alternate rotation of the drum, creasing in the laundry is minimized. More economical by Fuzzy Logic System FUZZY Logic System detects the amount of load and water temperature, and then determines the optimum water level and washing time to minimize energy and water consumption.
-
Page 6: Water Level Control
2-2. DETERMINE WASHING TIME BY FUZZY LOGIC To get the best washing performance optimal time is determined by sensing of water temperature, selected washing temperature and laundry amount. water temperature washing time the best selected FUZZY washing rinse time washing LOGIC temperature performance…
-
Page 7: Parts Identification
3. PARTS IDENTIFICATION Power Plug If the supply cord is damaged, it must be replaced by the manufacturer or its service agents or a similarly qualified Drawer person in order to (For datergent and avoid a hazard. fabric softener) Control Panel Drum Door Drain Pump Filter…
-
Page 8: Installation
4. INSTALLATION INSTALLATION The appliance should be installed as follows. Check the conditions of installation area. 1. Check level ground. horizontal On raised foundations or upper level homes, the vibrations can be caused by the type of flooring. It may be necessary to move machine to a different area in the home or have the floor…
-
Page 9
Use spanner to remove transit bolts. Without removal of transit bolts Spin noise and shaking. X 4 EA Transit bolts Confirm the distance between the appliance and the wall. If the distance is less than 2cm, More than 2cm the water supply hose will kink or fold. -
Page 10: Connect Drain Hose
Connect Drain Hose. If the drain hose is not installed properly, the unit will not drain properly. This allows water to back flow into the unit which can cause odors. Refer to Owner Manual for proper drain hose installation. The odor could also be coming from the home’s drain to which the drain hose is attached. Laundry tub about 100 cm Hose…
-
Page 11
Check the horizontality with a level (Gage). 1 Step If washing machine legs are loose or not screwed, then screw up with the spanner wrench. Using the level, level the washing machine from front to back and side to side. A level Higher Tighten… -
Page 12: Test Operation
Test operation Preparation Press the power button. Press the START/PAUSE for washing. button. · Connect the power plug to the · In case of cotton program. outlet. · Connect the inlet hose. Check the water heating. Check automatic reverse turn. Check the water supply.
-
Page 13: Operation
5. OPERATION 5-1. F1*22TD(1~9) Option Child -Lock • Medic Rinse : Function that offers more purity in rinse operation by • Child Lock system can maintaining the optimum temperature for elimination of be set and canceled by remnant detergent. It can be selected in all courses with the pressing and holding exception of Quick 30.
-
Page 14
F1*22TD(1~9) LOAD TEST MODE Page 19 — Press and Hold ‘Temp.’ & ‘Spin’ buttons and then press ‘Power’ button. Water level frequency — Press and Hold ‘Temp.’ & ‘Medic Rinse’ buttons simultaneously. Time Delay & Beep ON/OFF LED display • Press the button when reservation washing •… -
Page 15: F1*20Td(1~9)
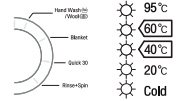
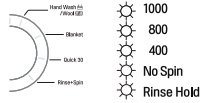
5-2. F1*20TD(1~9) Wash program selector LED display • 9 program can be set depending on the type of the • Display the estimated remaining time laundry. (Hour : Minute) to finish. • If the power button is pressed, Cotton program is •…
-
Page 16
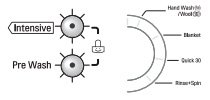
F1*20TD(1~9) LOAD TEST MODE Page 19 — Press and Hold ‘Option’ & ‘Spin’ buttons and then press ‘Power’ button. Water level frequency — Press and Hold ‘Intensive’ button. Time Delay & Beep ON/OFF • Press the button when delayed washing is needed. •… -
Page 17: Wiring Diagram / Pcb Layout / Program Chart
6. WIRING DIAGRAM / PCB LAYOUT / PROGRAM CHART Wiring Diagram [Note] RD : Red YL : Yellow BL : Blue WH : White GY : Gray BK : Black VL : Violet OR : Orange SBL : Sky Blue NA : Natural…
-
Page 18
PCB Layout Display Drain Pump & Door & Inlet Valve Drain Pump (160~177Ω) Common Pressure Switch & Door Switch Heater Thermistor Measure R impossible here Measure Hz impossible here Just check cut-off. Main Valve (3.5~4.5kΩ) Pre. Valve (3.5~4.5kΩ) Common Pressure Switch Display Heater Thermistor (44~53KΩ, 25°C) -
Page 19
Program Chart… -
Page 20: Troubleshooting
7. TROUBLESHOOTING 7-1. BEFORE PERFORMING SERVICE Before servicing ask the customer what the trouble is. Check the adjustments. (Power supply :220-240V~, Removal of transit bolts etc..) Check the troubles referring to the troubleshooting. Decide service steps referring to disassembly instructions. F1*22TD Then, service and repair.
-
Page 21: 7-4.Error Display
7-4. ERROR DISPLAY If you press the [Start/Pause] button when an error in displayed, any error except software ERROR will disappear and the machine will change into pause status. In case of , if the error is not resolved within 15 sec. In case of other errors, if the error is not resolved within 4 min.
-
Page 22: 7-5.Troubleshooting With Error
7-5. TROUBLESHOOTING WITH ERROR Water Inlet Error (IE) [Note] Environmental safety check list 1. No water tap leakage & freeze. 2. No entanglement of water supply hose. 3. No water shortage. 4. No water supply hose leakage. 5. No the inlet filter clogged. Is the water tap closed? Check the Water tap…
-
Page 23: Ue (Unbalanced Error)
Unbalanced Error (UE) The few items of clothing will clump together Does the load lean toward one and their weight will be in one place on the drum, side, or is the load a few items? throwing the weight off during spin mode. So add some laundry to overcome UE error.
-
Page 24: Oe (Water Outlet Error)
Water Outlet Error (OE) Check drain hose for kink and straighten the Hose. Is the drain hose kinked ? Drain Hose Check & Clean Pump Filter. Is the Pump filter clogged ? This kind of accumulation on the drain filter not only prevents proper drainage, but also will promote bacteria growth and cause odors.
-
Page 25
Is the Standpipe Height greater Observe Standpipe Height requirements than 1.0 m above the floor? of 1.0m maximum. — Your washer will not be able to drain out water adequately, if the standpipe exceeds 1.0 m. In this case, water may flow back into the washer. When there is not water in the Check the Air Chamber… -
Page 26: Fe (Flow Over Error)
Over Flow Error (FE) Replace the Inlet Valve assembly. Is the water coming in drawer continuously? After power off for 10 sec. and power on. Does the water level over reference line and Is the water level frequency 25.5Khz or 26.1Khz ? Or does the water level over reference line and is the water level frequency 25.5Khz or 26.1Khz? F1*22TD…
-
Page 27: Pe (Pressure Sensor S/W Error)
Pressure Sensor S/W Error (PE) Is the Connector connected correctly to Reconnect or repair the Connector. Main PCB and the Pressure Switch Or replace the Harness. Or is the Harness alright ? Is the resistance of the Pressure Switch Replace the Pressure Switch.
-
Page 28: De (Door Open Error)
Door Open Error (dE) Close the door totally. Is the door closed? Is the Door assembly in line with door Lift up & Close the door. switch ? If the dE is displayed, Replace the Door Bracket. Scratch by Latch Hook Touching Does the Spring…
-
Page 29: Te (Thermistor (Heating) Error)
Thermistor (Heating) Error (tE) Is the Connector connected correctly to Reconnect or repair the Connector. Main PCB and the Thermistor Or replace the Harness. the Heater? Or is the Harness alright ? Is the resistance of the Thermistor Replace the Thermistor. of range 44 ~ 53 KΩ…
-
Page 30: Le (Motor Lock Error)
Motor Locked Error (LE) [Pre Check] • Gentle wash cycles, such as Perm Press, Delicates, Hand Wash, and Wool/Silk should only be used for smaller loads. Because these cycles are more gentle in tumbling and spinning, putting too much in the drum can register an issue with the motor.
-
Page 31
Disassemble the Hall Sensor 1) Disassemble the hook of Hall Sensor by (-) driver. 2) Pull up Hall Sensor slowly as shown in picture. Caution If you disassemble by force,not following the directions, the hooks of stator(red circled) might broke up. Hence need change of stator assembly. -
Page 32: Troubleshooting Without Error Codes
8. TROUBLESHOOTING WITHOUT ERROR CODES No Power Is the Power Plug connected Reconnect Power Plug firmly. firmly to the power outlet? Check the fuse or And is the supply voltage reset the circuit breaker. 220~240V AC? Is Multi-plug socket used ? Don’t use Multi-plug socket.
-
Page 33: Vibation & Noise In Spin
Vibration & Noise In Spin Have all the Transit Bolts and the Base Packing Remove the Transit Bolts been removed? Base Packing. Washer Base Packing Packing Support Refer to INSTALLATION. (Page 7)
-
Page 34: Detergent & Softener Does Not Flow In
Detergent & Softener does not flow in Refer to [Water Inlet Error (IE)] Is water supplied? (page 21) Is detergent & softener put in the correct compartment of the drawer? Put it in the Correct Position. Main Wash Main Wash Only Only Pre Wash…
-
Page 35: Water Leak
Water Leak 1. Water Leak from Dispenser Is the Dispenser Tray Damaged or warped? Replace the Dispenser Tray. Is detergent & softener put in Put it in the Correct Position. the correct compartment of the drawer? Reference (Amount of Detergent & Softener) Main Wash Only Pre Wash…
-
Page 36
2. Water Leak from Dispenser Are the gasket (seal) Clean the periphery of Gasket Door regularly. and door cleaned regularly? Is the door or gasket damaged? Replace the damaged parts. 3. Unknown – Water on Floor Are the inlet hoses loose or cracked/split? Replace the Inlet Hoses. -
Page 37: Disassembly Instructions
9. DISASSEMBLY INSTRUCTIONS Be sure to unplug the machine out of the outlet before disassembling and repairing the parts. CONTROL PANEL PLATE ASSEMBLY (TOP) Unscrew 2 screws on the back of the top plate. Pull the top plate backward and upward as shown.
-
Page 38
DISPENSER ASSEMBLY Disassemble the top plate assembly. Pull out the drawer to arrow direction. Unscrew 2 screws. PUSH DRAWER The hose clamps and the hose are disassembled. Option DISPENSER ASSEMBLY The ventilation bellows and the water inlet bellows are disassembled on the tub. -
Page 39
INLET VALVE Disconnect the wiring receptacle. Unscrew 2 screws from the back. When reconnecting the connector VALVE #1 (MAIN) White / Black — Black VALVE #2 (PRE) Gray / White — Black VALVE #3 (HOT) Blue / Red — Black •… -
Page 40
GASKET ASSEMBLY Take apart the cabinet gasket clamp. Unscrew 2 screws from the cabinet cover. Open the lower cover cap and unscrew 1 screw inside. Take apart the lower cover. Disassemble the control panel. (page 24) Unscrew all the screws on the upper and lower sides of the cabinet cover. -
Page 41
ROTOR ASSEMBLY, STATOR ASSEMBLY, FRICTION DAMPER ASSEMBLY Remove the BACK COVER. Unscrew the bolt to pull out the ROTOR Rotor assembly. Bolt (ROTOR ASSEMBLY) Disconnect the wiring connector. Unscrew 6 bolts from the STATOR. Remove the STATOR. Note : Hook of connector (1) is on the backside Pull out the hinge, pressing its snap. -
Page 42
PUMP Pump Outlet Hose Remove pump outlet hose. Remove tub pump bellows. Remove cap (Remaining Hose.) Disconnect the wiring. Unscrew 2 screws. Remove the pump. Tub Pump • Rating : 220~240V 50HZ 30W Bellows • Resistant : 160~177Ω HEATER Loosen the M6 heater nut to pull out the heater. -
Page 43
SWITCH ASSEMBLY, DOOR LOCK Take apart the cabinet cover clamp and release the gasket. Unscrew 2 screws holding the door lock. Disconnect the door lock from the wiring connector. • Just check cut-off. • Check the operating time. * Door Locking time : sec. -
Page 44: Exploded View
10. EXPLODED VIEW 10-1.THE EXPLODED VIEW OF CABINET ASSEMB LY A154 A153 A110 A140 A152 A151 A150 A101 A141 A131 A100 A102 A104 A430 A103 A130 A485 A134 A440 A410 A133 A200 A201 A300 A303 A310 A220 COLD (BLUE) A276 HOT (RED) A275…
-
Page 45
10-2 THE EXPLODED VIEW OF CONTROL PANEL & DISPENSER ASSEMBLY F321 F462 F170 F300 F160 F464 F310 F432 F225 F430 F220 F441 F120 A450 F215 F110 F210… -
Page 46
10-3 THE EXPLODED VIEW OF DRUM & TUB ASSEMBLY K351 K350 K360 K143 K123 F140 K411 K121 K122 K410 K125 F320 K320 K111 F466 K110 K141 K105 K140 K572 K571 K115 K570 K610 K130 K135 K510 K611 K131 K530 K170 F468 K340 F467…
The history of LG, the Korean company, started in 1947. Then its founder, Koo In-Hwoi, engaged in the production of hygienic cleansers. The reorientation to electrical products was done somewhat later, in 1958. Nowadays, the goods, made under the LG brand, have received a worldwide acclaim. The affiliates of the company are located in many countries. It never stops developing. The firm introduces innovations and improves design all the time.

There is a number of goods, released under this brand. Washing machines are also included in their number. The models are different: the budget variant is equipped with the most necessary functions, and the more expensive ones are multifunctional. For example, the washer model F1294TD5 has been at the peak of popularity in the USA for 7 years. It’s drum capacity is quite big even for such laundry as large blankets. In addition, it is equipped with a steam function for the quick refreshment of clothes, and the TurboWash option, aimed at reducing of washing cycles and saving the water and electricity.
If the washer is broken, the screen will show you an error code. It is a very important information. Each code corresponds to a specific problem. Having known the reason of fault, you would be able to fix the machine by yourself without calling a specialist. Sometimes all you need to do it too close the washer`s door more tightly or flush the drain filter. Error codes of LG washers describe all the information. In more complicated cases you will be recommended to call a repair service.
Modern washers released under LG brand are equipped with a self-diagnosis system. An electronic display shows the description “error” and a code. It often happens when a device does not work. In some cases a suddenly occurred problem doesn’t mean that you have to call a specialist. Probably, a filter is littered and you can get rid of the breakage by your own.
Let’s find out more about system errors and its meaning, which are typical for LG washing machines. The table is filled with an error description, its meaning, the reason of occurrence and possible ways of problem’s elimination.
WF-T10(~3)0(~2,6)1(~5)TP(H, E, F)(S,3) washer error codes
| Error | Determination | Expected cause | Remedy |
|---|---|---|---|
lamp blinks. |
Water supply doesn’t reach set level within 60 minutes. | 1. Locked or frozen water tap. | • Open water tappet for water supply. |
| 2. Obstructed water supply. | • Wash at supply condition. | ||
| 3. Top filter of supply valve is clogged with dregs. | • Clean or change filter. | ||
| 4. Connector of supply valve is disassembled or wrongly contacted. | • Reconnect connector or adjust wrong contact. | ||
| 5. Yellow 2 pin connector of controller ASM is disassembled or wrongly contacted. | • Reconnect connector and adjust wrong contact. | ||
| 6. TR3 (hot), TR4 (cool), TR5 (shower) are not ON at load drive part of controller ASM. | • Check load drive parts of TR3, TR4 and TR5, and replace related parts. | ||
| 7. Drain hose is not hung up.(Pump Model) | • Hung up drain hose. | ||
lamp blinks. |
When drain is not finished within 12 minutes at drain course. | 1 .Drain hose is not put down (Non Pump Model) | • Put down drain hose properly. (0.9-1.3m high) |
| 2. Drain hose is bent or clogged (Frozen or clogged with dregs). | • Clean clogged drain hose. | ||
| 3. Connector of drain motor or white 2 pin connector of controller ASM is disassembled or wrongly contacted. | • Reconnect connector and adjust wrong contact. | ||
| 4. Wrong drain motor (As AC 220V is applied to both ends of drain motor, the link opens the drain valve.) | • Replace drain motor. | ||
| 5. TR8 is not ON at load drive part of controller ASM. | • Check load drive part of TR8. Replace related parts. | ||
| 6. Wrong drain pump. (Pump Model) | • Check drain pump. | ||
| 7. Drain hose is hung up highly (over 1.3m) | • Hang up drain hose properly (0.9-1.3m high) | ||
lamp blinks. |
Unbalanced water for spin procedure. | 1. Water is partially filled in inner tub asm. | • Fill water evenly into inner tub asm.(horizontally) |
| 2. Machine is slopped (Check drop position of leveler). | • Adjust machine height horizontally. | ||
| 3. Safety switch is too closer to inner tub asm or safety switch contacted wrongly. | • Check and replace safety switch. | ||
| 4. Is the CONNECTOR of Ball Pressure Sensor disconnected or badly touched? | • Check B.P SENSOR CONNECTOR or replace B.P sensor | ||
lamp blinks and continuous buzz |
Opened lid during washing procedure, (wash, rinse and spin) | 1. Lid is opened during all washing procedure. | • Close lid. |
| 2. Lid is opened during reservation program. | • Close lid. | ||
| 3. Connector of safety switch or violet (VI) 2 pin of controller asm is disassembled or left wrong contact. | • Connect connector again or adjust wrong contact. | ||
| Opened lid during delay finish program. | 4. The safety switch is wrong. (It is ON in case of the lid closed.) | • Check and replace safety switch. | |
| 5. Ball Pressure Sensor is bad or bad contact. | • Check and replace Ball Pressure Sensor. | ||
displayed |
Frequency generated by recognizing water level at pressure switch is out of reference value (below 15kHz) | 1. The connector of Ball Pressure Sensor (Pressure Switch) or the blue 3 pin connector of the controller ASM is disassembled or connected wrongly. | • Connect connector again and adjust wrong contact. |
| 2. Wrong Ball Pressure Sensor (Pressure Switch). | • Replace Ball Pressure Sensor (Pressure Switch). | ||
| 3. Wrong controller asm. | • Replace controller asm. | ||
displayed |
Frequency generated by recognizing water level at pressure switch is out of reference value (below 22KHz) | 1. Defect of inlet valve. | • Replace the inlet valve. |
| 2. Defect of PWB asm. | • Replace the PWB asm. |
| Symptom | Possible Cause | Solution |
|---|---|---|
(“No water supply”) |
• Water supply is not adequate in area. | Check another tap in the house. |
| • Water supply taps are not completely open. | Fully open tap. | |
| • Water inlet hose(s) are kinked. | Straighten hose(s). | |
| • The filter of the inlet hose(s) are clogged. | Check the filter of the inlet hose. | |
(“Not draining”) |
• Drain hose is kinked or clogged. | Clean and straighten the drain hose. |
| • The drain filter is dogged. | Clean the drain filter. | |
(“No spinning”) |
• Load is too small. | Add 1 or 2 similar items to help balance the load. |
| • Load is out of balance. | Rearrange load to allow proper spinning. | |
| • The appliance has an imbalance detection and correction system. If individual heavy articles are loaded (ex. bath mat, bath robe, etc.) this system may stop spinning or even interrupt the spin cycle altogether. | If the laundry is still too wet at the end of the cycle, add smaller articles of laundry to balance the load and repeat the spin cycle. | |
(“Door open”) |
• Is the door opened? | Close the door. If «dE» is not released, call for service. |
| • The thermistor is out of order. | Unplug the power plug and call for service. | |
| • Water overfills due to the faulty water valve. | Close the water tap. Unplug the power plug. Call for service. |
|
| • Water level sensor has malfunctioned. | ||
| • Over load in motor. | ||
| • Over load in motor. | ||
| • The washer experienced a power failure. | Restart the cycle. | |
| • Disconnection of card reader wire. | Check the card reader wire. | |
| Does not dry | Call for service. |
LG F1403FD(5) washer error codes
| ERROR | SYMPTOM | CAUSE |
|---|---|---|
| WATER INLET ERROR | • Not reached to the water level (246) within 8 minutes after water supplied or not reached to the preset water level within 25 minutes. | |
| DRAIN ERROR | • Not fully drained within 10 minutes. | |
| OVERFLOW ERROR | • Water is over flowing (over 8 level). If “FE” is displayed, drain pump operates to drain water automatically. | |
| SENSOR PRESSURE S/W ERROR | • The sensor pressure switch is out of order. | |
| DOOR OPEN ERROR | • In case of operating the reservation function or the other function with door opened. Close the door, then the error display is resolved. • The door switch is out of order. |
|
| IMBALANCE ERROR | • The appliance is tilted. • Laundry is gatherd to one side. |
|
| HEATING ERROR | • The THERMISTOR is out of order. | |
| LOCKED MOTOR ERROR | • The connector in the LEAD WIRE ASSEMBLY is not connected to the connector of STATOR ASSEMBLY. Reconnect or repair the connector • The hall sensor is out of order/defective. Replace the STATOR ASSEMBLY |
|
| • Water leaks | ||
| POWER FAILURE | • The washer experienced a power failure | |
| CURRENT ERROR | PWB ASSEMBLY (Main) is out of order Replace the PWB assembly (Main) Winding in the MOTOR is short-circuited. |
|
| SENSOR ERROR | The connector (5-pin, male, white) in the wire harness is not connected to the connector (5-pin, female) of hall sensor in the MOTOR. Reconnect or repair the contact in the connector. |
LG F14A7FDS Series washer error codes
| Symptom | Possible Cause | Solution |
|---|---|---|
 or |
• Water supply is not adequate in area. | Check another tap in the house. |
| • Water supply taps are not completely open. | Fully open tap. | |
| • Water inlet hose(s) are kinked. | Straighten hose(s). | |
| • The filter of the inlet hose(s) are clogged. | Check the filter of the inlet hose. | |
 or |
• Drain hose is kinked or clogged. • The drain filter is clogged. |
Clean and straighten the drain hose. Clean the drain filter. |
 or |
• Load is too small. • Load is out of balance. • The appliance has an imbalance detection and correction system. If individual heavy articles are loaded (e.g. bath mat, bath robe, etc.) this system may stop spinning or even interrupt the spin cycle altogether. • If the laundry is still too wet at the end of the cycle, add smaller articles of laundry to balance the load and repeat the spin cycle. |
Add 1 or 2 similar items to help balance the load. Rearrange load to allow proper spinning. |
 or 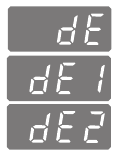 |
• Ensure door is not open. | Close the door completely. |
 |
Unplug the power plug and call for service. | |
 |
• Water overfills due to the faulty water valve. | Close the water tap. Unplug the power plug. Call for service. |
 |
• Water level sensor has malfunctioned. | |
 |
• Over load in motor. | Allow the washer to stand for 30 minutes to allow the motor to cool; then restart the cycle. |
 |
• The washer experienced a power failure. | Restart the cycle. |
 |
• Water leaks. | Call for service. |
LG WT-R10(~3)3(7)1(3,5)TP(H) washer error codes
| Error | Error Decision Basis | Cause For Error Occurrence | Remedy |
|---|---|---|---|
| Water Supply | • Water level does not rise to the set level in 30 minutes. «NO INLET» lamp blinks |
• Water faucet is closed? | • Open water faucet. |
| • Water supply is interrupted. | • Wait until water supply is resumed. | ||
| • Inlet VA/ is clogged with dirts. | • Clean or replace filter. | ||
| • Connector has bad contact to the inlet valve. | • Correct the connector contact. | ||
| • Natural 4-pin connector has bad contact to the P.W.B ASM. | • Same as above. | ||
| Drainage | • Water is not completely drained in 12 minutes. «NO DRAIN» lamp blinks |
• Is the drain hose located properly? | • Hung up drain hose at 0.9-1.2m high. (For pump) |
| • Drain hose is folded or clogged due to freeze or dirt. | • Put the drain hose lower (For non-pump) | ||
| • Bad Drain Pump part or | • Unclose the foreign objects within drain hose. | ||
| BLUE (WHITE) 3-pin connector to the P.W.B ASM has bad connection. | • Replace drain pump or correct the connector contact. | ||
| Unbalance | • Laundry unbalance during spin. “UE” display and signal continuously ringing |
• Laundry in the INNER TUB is filled unevenly. | • Try to fill laundry uniformly in the inner tub. |
| • Washer is tilted. | • Adjust the leg. | ||
| Door Open | • LID is opened in the course of intermittent spin, normal spin or processing reservation. • SIGNAL continuously ringing. “DOOR OPEN” lamps blinks. |
• Lid is opened during intermittent spin or normal spin? | • Closed the lid. |
| • Lid is opened while processing reservation? | • Closed the lid. | ||
| • Connector to the Reed S/W or RED(ORANGE or PINK) 4 pin connector to the P.W.B ASM has bad connection. | • Correct the connector contact. • Check and replace Lead Wire Asm. |
||
| Pressure Sensor | • Water Pressure Switch is off. | • Connector the PRESSURE S/W ASM or RED (ORANGE or PINK) 4 pin connector to P.W.B ASM has bad connection. | • Correct the connector contact. |
| • PRESSURE S/W is bad. (In the initial state of QC TEST MODE, For WT-R80(5) 1, the number on the DISPLAY is less than 63 or more than 70. Except for WT-R80(5) 1 the number on the DISPLAY is less than 60 or more than 104) |
• Replace PRESSURE S/W ASM. | ||
| Auto Off | 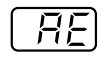 • AUTO OFF relay S/W is out of order. |
• Change P.W.B ASM. | |
| Over Flooding Error | 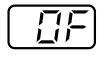 |
• Check water leakage or whether the drain hose is hung on to drainage, which is 0.9 m above from floor. • Check blockage of air hole or air tube. • Check & repair air leakage at the air hole of outer tub the air tube or connection parts. |
• Hang drain hose, which is minimum 0.9m above from floor. • Replace pressure sensor switch • Remove the foreign objects in pressure sensor switch |
| Motor Error | 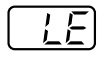 |
• Connector the HALL Sensor or Natural 6 Pin connector to P.W.B ASM had bad connection. • Connector the stator ASM, and YELLOW(GREEN) 3 Pin or Natural 6 Pin connector to P.W.B ASM had bad connection • Hall sensor is bad. • Locked by Bearing Housing |
• Correct the connect contact. • Change Stator ASM. • Change Bearing Housing ASM. • Change P.W.B ASM. • Change Stator ASM. |
| Current Error | |
• IPM is bed • Motor is short |
• Change PWB ASM • Change Stator ASM |
LG FE**C3*D Series washer error codes
| Symptoms | Reason | Solution |
|---|---|---|
 |
Water supply is not adequate in area. | • Check another tap in the house. |
| Water supply taps are not completely open. | • Fully open tap. | |
| Water inlet hose(s) are kinked. | • Straighten hose(s). | |
| The filter of the inlet hose(s) are clogged. | • Check the filter of the inlet hose. | |
 |
Drain hose is kinked or clogged. | • Clean and straighten the drain hose. |
| The drain filter is clogged. | • Clean the drain filter. | |
 |
Load is too small. | • Add 1 or 2 similar items to help balance the load. |
| Load is out of balance. | • Add 1 or 2 similar items to help balance the load. | |
| The appliance has an imbalance detection and correction system. If individual heavy articles are loaded (e.g. bath mat, bathrobe, etc.) this system may stop spinning or even interrupt the spin cycle altogether. | • Rearrange load to allow proper spinning. | |
| If the laundry is still too wet at the end of the cycle, add smaller articles of laundry to balance the load and repeat the spin cycle. | • Rearrange load to allow proper spinning. | |
 |
Ensure door is not open. | • Close the door completely. If error is not released, call for service. |
 |
• Unplug the power plug and call for service. | |
 |
Water overfills due to the faulty water valve. | • Close the water tap. • Unplug the power plug. • Call for service. |
 |
Water level sensor has malfunctioned. | • Close the water tap. • Unplug the power plug. • Call for service. |
 |
Over load in motor. | • Close the water tap. • Unplug the power plug. • Call for service. |
LG WD(M)-10130(5)F washer error codes
| ERROR | SYMPTOM | CAUSE |
|---|---|---|
| WATER INLET ERROR |  |
Water has not reached to the pre-set level within 4 min. since inlet valve operated, or water has not reached to the normal level within 25 min. |
| IMBALANCE ERROR |  |
The appliance is tilted. Laundry is gathered to one side. Non-distributable things are put into the drum. |
| DRAIN ERROR |  |
Water has not drained enough within 5 min. |
| OVERFLOW ERROR | Water is automatically being pumped out because too much water is in the tub. | |
| SENSOR PRESSURE S/W ERROR |  |
The sensor pressure switch is out of order. |
| DOOR OPEN ERROR |  |
The [Start/Pause] button is pressed with the door open; The door switch is out of order. |
| HEATING ERROR |  |
The thermistor is out of order. |
LG T1732AFPS5 washer error codes
| Symptom Error Message | Error Message | Check up |
|---|---|---|
| Water Supply Failure |  |
• Is the water tap shut off? |
| • Is the water supply cut off? | ||
| • Is the tap or water supply hose frozen? | ||
| • Is the water pressure low or is the filter of the inlet valve clogged with impurities? | ||
| • Is the I lot hose connected to cold? | ||
| • Is the Cold hose connected to hot? | ||
| Drainage Failure |  |
• Is the drain hose positioned correctly? |
| • Is the drain hose bent or placed too high? | ||
| • Is the internal part of the hose or drain pump (only pump model) clogged with impurities? | ||
| • Check if electric pow er has gone off. | ||
| Spin Failure |  |
• Is the laundry evenly balanced? |
| • Is the washing machine placed on a flat surface? | ||
| Door(Lid) Open |  |
• Is the lid closed? |
| Door(Lid) Close | • Is the lid closed? | |
| • Make sure that the lid is closed properly and press the START/PAUSE button. The washer will not operate unless the lid is locked. | ||
| • Make sure that nothing is caught under the lid, including shipping material or clothing. | ||
| Foreign objects | • Are there foreign objects. Such as coins, pins, etc., caught between the wash plate and the inner basket? | |
| • Turn off the washer and then press the Power button. Press the spin speed button without selecting a cycle to drain and spin the load. When the spin is complete, remove the clothes, then find, and remove any objects caught in the wash plate. | ||
| The washer experienced a power failure. | • Restart the cycle. | |
 |
• Please call your nearest LG Electronics service center for help. | |
| Abnormal water level sensing | ||
| Overflow failure | ||
| Abnormal motor | ||
| Brake Resister Error | ||
| Clutching Error |
LG WT5075CW washer error codes
| Message | Possible Causes | Solutions |
|---|---|---|
| Water in the washer drains slowly or not at all, or the display shows: OE | Drain hose is bent, pinched, or clogged. | Make sure the drain hose is free of clogs, kinks, etc., and is not pinched behind or under the washer. |
| Washer fills with water slowly or not at all, or the display shows: IE | Water supply taps are not open fully. | Make sure that the water taps are open fully. |
| Water line hoses are kinked, pinched, or bent. | Make sure the hoses are not kinked or pinched. Be careful when moving the washer. | |
| Water inlet filters are clogged. | Clean the inlet filters. | |
| Water pressure to tap or house is too low. | Check another faucet in the house to make sure that household water pressure is adequate. | |
| Washer will not turn on | Power cord is not properly plugged in. | Make sure that the plug is plugged securely into a grounded. 3-prong, 120-VAC, 60-Hz. outlet. |
| House fuse is blown, circuit breaker has tripped, or power outage has occurred. | Reset circuit breaker or replace fuse. Do not increase fuse capacity. If the problem is a circuit overload, have it corrected by a qualified electrician. | |
| The display shows: dE | The lid is not closed properly. | — Make sure that the lid is closed properly and press the START/PAUSE button. After starting a cycle, it may take a few moments before the drum begins to turn or spin. The washer will not spin unless the lid is locked (LID LOCK light will turn on). — If the lid is closed and locked and the open lid error message is displayed, call for service. — If you press the START button while the lid is open, DE error message will be displayed. |
| The display shows: dL | Lid lock switch error | — Make sure that the lid is closed properly and press the START/PAUSE button. The washer will not spin unless the lid is locked (LID LOCK light will turn on). — If the lid is closed and the lid lock error message is displayed, call for service. |
| The display shows: FE | Water level is too high due to a faulty water valve. | Close the water taps, unplug the washer, and call for service. |
| The display shows: E6 | Clutch error | Unplug the washer, and call for service. |
| The display shows: uE | The washer has detected an out of balance load. | If the washer detects a load that is too far out of balance to spin, it will display this code while it is attempting to rebalance the load. The washer will add water and try to redistribute the load automatically. This display is for your information only, and no action is required. |
| The display shows: UE | If the UE rebalance is not successful, this error will be displayed. | The automatic attempt to rebalance the load was not successful. The cycle has been paused to allow the load to be manually adjusted. |
| The load is too small. | Small loads may need additional items to be added to allow the washer to balance the loads. | |
| Heavy articles are mixed with lighter items. | The load may have heavy items loaded with lighter items. Always try to wash articles of somewhat similar weight to allow the washer to evenly distribute the weight of the load for spinning. | |
| The load is out of balance. | Manually redistribute the load if articles have become tangled preventing the automatic distribution from working properly. | |
| The display shows: tE | Thermistor error | Unplug the washer and call for service. |
| The display shows: PE | The water level sensor is not working correctly. | Close the water taps, unplug the washer, and call for service. |
| The display shows: LE | Thermal overload protection circuit in the motor has been tripped. | Allow the washer to stand for 30 minutes to allow the motor to cool; then restart the cycle. If the LE error code still appears, unplug the washer and call for service. |
| The display shows: dr | If an error message is displayed for 4 minutes, the water in the tub will automatically drain, DR will appear on the display. You may restart the washer at this time. However, once the washer initiates draining, all functions will be suspended, and DR will be displayed until draining is complete. | This is normal. |
LG tromm washer error codes
| Symptom | Possible Cause | Solution |
|---|---|---|
| Rattling and clanking noise | Foreign objects such as coins or safety pins maybe in drum or pump. | Stop washer and check drum and drain filter. If the noise continues after the washer is restarted, call your authorized service center. |
| Thumping sound | Heavy wash loads may produce a thumping sound. This is usually normal | If sound continues, the washer is probably out of balance. Stop and redistribute wash load. |
| Vibrating noise | — Have all the transit bolts and packing been removed? — Are all the feet resting firmly on the ground |
— Wash load may be unevenly distributed in a drum. Stop washer and rearrange wash load. |
| Water leaks. | — Fill hoses or drain hose are loose at tap or washer — House drain pipes are clogged |
— Check and tighten hose connections — Unclog drain pipe. Contact plumber if necessary |
| Oversudsing | Too much detergent or unsuitable detergent may cause excessive foaming which may result in water leaks. | |
| Water does not enter washer or it enters slowly | — Water supply is not adequate in the area. — Water supply tap is not completely open — Water inlet hose are kinked. — The filter of the inlet hose is clogged. |
— Check another tap in the house — Fully open tap. — Straighten hose(s). — Check the filter of the inlet hose(s) |
| Water in the washer does not drain or drains slowly. | — The drain hose is kinked or clogged. — The drain filter is clogged. |
— Clean and straighten the drain hose. — Clean the drain filter. |
| Washer does not start | — The electrical power cord may not be plugged in or connection may be loose. — House fuse blown, circuit breaker tripped, or a power outage has occurred. — Water supply tap is not turned on. |
— Make sure plug fits tightly in the wall outlet. — Reset circuit breaker or replace a fuse. Do not increase fuse capacity. If the problem is a circuit overload, have it corrected by a qualified electrician. — Turn on water supply tap. |
| Washer won’t spin | — Check that the door is firmly shut | Close the door and press the Start/Pause button. After pressing the Start/Pause button, it may take a few moments before the clothes washer begins to spin. The door must lock before spin can be achieved |
| Door does not open | Once started, the door can not be opened for safety reasons. Wait one or two minutes before opening the door to give the electric locking mechanism time to release. |
|
| Wash cycle time delayed | The washing time may vary by the amount of laundry, water pressure, water temperature and other using conditions. If the imbalance is detected or if the suds removing program works, the wash time shall be increased |
|
| Dry problem | Does not dry | Do not overload. Check that the washer is draining properly to extract adequate water from the load. Clothes load is too small to tumble properly. Add a few towels. |
| IE | — Water supply is not adequate in the area — Water supply taps are not completely open. — Water inlet hose(s) are kinked. — The filter of the inlet hose(s) are clogged |
— Check another tap in the house. — Fully open tap. — Straighten hose(s). — Check the filter of the inlet hose(s). |
| OE | — The drain hose is kinked or clogged. — The drain filter is clogged. |
— Clean and straighten the drain hose — Clean the drain filter. |
| UE | — The load is too small. — The load is out of balance. — The appliance has an unbalance detection and correction system. If individual heavy articles are loaded (ex. bath mat, bath robe, etc.), this system may stop spinning or even interrupt the spin cycle altogether. — If the laundry is still too wet at the end of the cycle, add smaller articles of laundry to balance the load and repeat the spin cycle. |
— Add 1 or 2 similar items to help balance the load. — Rearrange load to allow proper spinning |
| dE | Is the door opened? | Close the door. — If «dE» «is not released, call for service. |
| bE | Unplug the power plug and call for service | |
| FE | Water overfills due to the faulty water valve | Close the water tap. Unplug the power plug. Call for service |
| PE | Water level sensor has malfunctioned. | |
| CE | Over load in the motor. | |
| LE | Over load in the motor. | |
| dHE | Check water supply. | Turn the tap on. If «dHE» is not released, unplug power plug and call for service. |
LG WM3677HW washer error codes
| ERROR | SYMPTOM | CAUSE |
|---|---|---|
| WATER INLET ERROR | IE | • Correct water level (246) is not reached within 8 minutes after water is supplied or it does not reach the preset water level within 25 minutes. |
| IMBALANCE ERROR | UE | • The load is too small. • The appliance is tilted. • Laundry is gathered to one side. • Non distributable things are put into the drum. |
| DRAIN ERROR | OE | • Not fully drained within 10 minutes. |
| OVER FLOW ERROR | FE | • Water is overflowing (water level frequency is over 213). |
| PRESSURE SENSOR ERROR | PE | • The SENSOR SWITCH ASSEMBLY is out of order. |
| DOOR OPEN ERROR | dE | • Door not all the way closed. • Loose electrical connections at Door switch and PWB Assembly. • The DOOR SWITCH ASSEMBLY is out of order. |
| HEATING ERROR | tE | • The THERMISTOR is out order. |
| OVER CURRENT ERROR | CE | • MAIN PWB ASSEMBLY is out of order. • Winding in the STATOR ASSEMBLY is short-circuited. |
| LOCKED MOTOR ERROR | LE | • The connector (3-pin, male, white) in the MOTOR HARNESS is not connected to the connector (3-pln, female, white) of STATOR ASSEMBLY. • The electric contact between the connectors (3-pin, male, white) in the MOTOR HARNESS and 4-pin, female, white connector in the MAIN PWB ASSEMBLY is bad or unstable. • The MOTOR HARNESS between the STATOR ASSEMBLY and MAIN PWB ASSEMBLY is cut (open circuited). • The hall sensor is out of order/defective. |
| BALL SENSOR ERROR | bE | • Loose Ball Sensor Connector. • Ball Sensor is out of order. • Displayed only when the START/PAUSE button is first pressed in the QC Test Mode. |
| EEPROM ERROR | EE | • EEPROM is out of order. • Displayed only when the START/PAUSE button is first pressed in the QC Test Mode. |
| POWER FAILURE | PF | • The washer experienced a power failure. |
| DRY HEATER ERROR | dHE | • The Dry Heater is out of order. — Replace the Dry Heater • The connector of the Dry Heater is not connected properly to the connector in the main PWB ASSEMBLY. — Reconnect or repair the connector. • The Dry Fan Motor is out of order. -Replace the fan motor. |
LG WM9000HVA washer error codes
| Message | Possible Causes | Solutions |
|---|---|---|
| UE | Item of clothing has gathered on one side of the tub. • There are not enough items in the machine. • Have your items gathered in one area, or is the load too small? • Did you wash a stuffed animal, a mat, or knitwear? • Did you wash two different blankets together? |
• Rearrange items to help balance the load. • Stuffed animals or mats can become unbalanced during spinning and the washing machine may fail to drain. Rearrange the knitwear to help balance the load and drain it again. • Put one blanket in at a time. |
| IE (1E) | Water is not supplied or the water pressure is low • Is the faucet turned off? • Is the water supply stopped or the faucet frozen? • Is the water pressure low or is an inlet filter clogged? • Is the water line properly connected with the cold water inlet? • Is the water line pinched or bent? |
• Turn on the faucets. • If a faucet is frozen, thaw it with warm water. • If the inlet filter is clogged, clean it. • Connect the water line properly with the cold water inlet • Check that the water lines are not pinched or bent. Take extra care that water lines are not twisted or pinched by other objects. |
| Water line leaks in connection • Are the water lines connected with the faucets properly? |
• Connect the water lines properly with the faucets | |
| dEI(dE1) dE2 |
The tub does not rotate • Is the door secured? |
• Close and secure the door. If the message keeps appearing, unplug the power and contact your nearest LG service center. |
| OE | The washing machine drains slowly or not at all • Is the drain hose installed over 3 1/4 feet (1 m) beyond the end of the elbow bracket? • Is the drain hose pinched or clogged inside? • Is the drain hose frozen? • Is the drain hose clogged with foreign objects? |
• Lower the drain hose within 3 feet below the end of the elbow bracket. • Place the drain hose on a smooth surface to prevent bending. • If the drain hoses are frozen, thaw them in warm water. • Open the drain pump plug cap and remove the dirt. |
| PF | A power failure has occurred. | • Press POWER to turn off the washing machine and press it again to turn it on. |
| tE | Control Error. | • Unplug the power cord and contact your nearest LG service center. |
| FE | The water supply does not stop • Do the water supply and the drain keep repeating in turn? | • Unplug the power cord and contact your nearest LG service center |
| PE | The water level is not controlled • Is the water level too low or high compared with the size of the load? |
• The water level sensor is not working correctly. • Unplug the power cord and contact your nearest LG service center. |
| LE | The tub does not rotate • Is the washing machine overloaded? |
• Rearrange the load size and restart the washing machine. • If the load size is big, the tub may not rotate due to an overheated motor. Allow the washing machine to stand for a while and restart the cycle. Unplug the power cord and contact your nearest LG service center if the same error message appears. |
| tCL | • Time to run the Tub Clean cycle. | • Empty the tub, insert bleach into the detergent dispenser and select the Tub Clean cycle. • To skip the Tub Clean cycle, turn the cycle selector knob or push option buttons to select desired cycle. The reminder message reappears for a few wash cycles then disappears until the next scheduled tub clean cycle. |
| Sud | • If the washing machine detects too many suds, it displays this error code and adds a Suds Reducing cycle. This adds about two hours to the cycle time. If too many suds are detected during spinning, the washing machine stops to help prevent leaking. | • Do not add more than the manufacturer’s recommended amount of detergent. |
| dE3 | Lid is not closed properly | Open the drawer and make sure the latch area is free of clothing or other obstructions. Close the lid, shut the drawer, and press START/PAUSE to start the cycle. If the lid is closed and the lid error message is displayed, call for service |
| E7 | Pedestal washer is being operated without a full-size washer. Stacking switch is not working properly |
The pedestal washer will not operate as a standalone unit. It must be stacked under a full-size LG appliance. The stacking switch will not operate properly if the unit is stacked under a non-LG appliance, or an LG appliance manufactured before 2009. |
The typical errors of LG washer, described in the table, will allow detecting a derangement quickly. But there is another way to decipher the errors of LG washer. To do this, use special diagnostic software, installed on a smartphone. Pressing the keys for turning on the self-diagnostics and bringing the microphone of the smartphone to the machine, we will give information about the errors of the software and it will show the cause of the derangement.
In addition, some advanced LG washing machines are able to transmit diagnostic information via the NFC protocol. The possibility of diagnosing the machine through the LG hot line cannot go unnoticed. For this, you need to call the number indicated in the technical brochure, activate the self-diagnostics and wait for the response of the operator, who will not only tell you about the derangement but also will tell you how to fix it. There are few manufacturers who can boast of such a service.
You also need to understand that error codes are not a ‘panacea’, they will not tell you what the problem is, they just suggest the right direction for finding the problem and they will not replace the diagnostic skills of professionals for you. In most cases, using the error codes, you can learn enough to study and diagnose the cause of the failure.
Подогреватели двигателя Webasto позволяют легко запустить двигатель, прогреть салон и освободить от снега и льда стекла перед поездкой в морозную погоду. Проходит время и даже у такого надежного оборудования как Вебасто возникают различные неисправности и проблемы в работе.
В данной статье мы рассмотрим неисправности и коды ошибок предпусковых подогревателей двигателя Webasto и способы их устранения.
Читайте также: Неисправности воздушных отопителей Webasto
Общие признаки неисправности жидкостных подогревателей двигателя Webasto
| Неисправность | Рекомендации по устранению |
|---|---|
| Нет горения после первого и повторного пуска либо горение прекращается во время работы. | Выключить подогреватель на короткое время и затем ещё один раз включить. |
| Пжд перегревается, индикатор работы мигает. | Проверить воздуховод на проходимость, остудить подогреватель, ненадолго выключить его, затем ещё один раз включить. |
| Сработал ограничитель нагрева: перегрев из-за утечки охлаждающей жидкости. | Устранить утечку, долить охлаждающую жидкость до уровня, предписанного производителем автомобиля, и нажать кнопку ограничителя нагрева. |
| Слишком низкое бортовое напряжение в течение более 20 секунд. | Зарядить аккумулятор. Выключить подогреватель на короткое время и затем ещё один раз включить. |
| Забит трубопровод воздуха для горения или выхлопной трубопровод. | Проверить трубопровод воздуха для горения и выхлопной трубопровод на проходимость. |
Если эти меры не привели к устранению неисправностей, подогреватель необходимо предоставить в сервисный центр Webasto.
Webasto Thermo 50/90S/90ST/230/300/350
При появлении неисправности срабатывает электронная блокировка, и подогреватель выдаёт код неисправности. Проверьте предохранители и штекерные разъёмы на их исправность и прочность крепления.
Снять блокировку можно перезапустив подогреватель или вынув ненадолго при включенном пдж синий предохранитель 15 А на кабельном жгуте подогревателя.
После установки предохранителя подогреватель включается. Если блокировка не снялась, нужно определить причину неисправности.
Примечание! Блокировка подогревателя Wesasto является специальным режимом его работы. Блокировка включается, если система самодиагностики фиксирует неисправность (одну или несколько), дальнейшая работа с которыми может быть небезопасна, как для самого подогревателя, так и для транспортного средства, на котором пжд установлен. Сама по себе блокировка не является неисправностью, а является следствием одной или нескольких неисправностей. Причем, причина неисправности может быть совсем не в подогревателе.

Webasto таймер 1531
Если подогреватель оборудован таймером 1531 (с будильником), после аварийной блокировки на дисплей таймера выводится следующие коды ошибок.
| Код | Неисправность |
|---|---|
| F01 | Пуск отсутствует. |
| F02 | Обрыв пламени (повторяется более 5 раз). |
| F03 | Падение напряжения ниже допустимого или повышение выше допустимого. |
| F04 | Преждевременное распознавание пламени. |
| F05 | Обрыв цепи или короткое замыкание датчика пламени. |
| F06 | Обрыв цепи или короткое замыкание датчика температуры. |
| F07 | Обрыв цепи или короткое замыкание дозирующего насоса. |
| F08 | Обрыв цепи, короткое замыкание или неправильное число оборотов мотора нагнетателя воздуха. |
| F09 | Обрыв цепи или короткое замыкание штифта накаливания. |
| F10 | Перегрев подогревателя. |
| F11 | Обрыв цепи или короткое замыкание циркуляционного насоса. |
| F12* | Аварийная блокировка вследствие повторяющихся неисправности или обрыва пламени: такая блокировка снимается путём повторного включения отопителя и его отключения от аккумулятора автомобиля в процессе запуска. |
* — только для предпусковых подогревателей Webasto Thermo 230/300/350
Если подогреватель в качестве органа управления оснащён выключателем или таймером 1529 (без будильника), то коды ошибок передаются в виде световых сигналов (миганий). Отключите подогреватель, после коротких 5 миганий, выдаются длинные импульсы.
Количество импульсов соответствуют числу после буквы F приведенных в таблице выше.
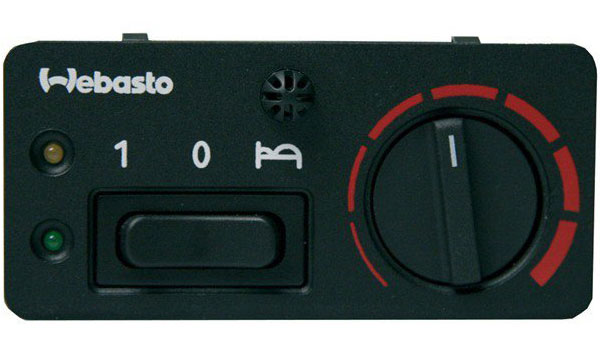
Webasto HL32 Heater Room Thermostat
Webasto Thermo Pro 90
Мигание индикаторной лампочки выключателя во время продувки подогревателя показывает вид неисправности подогревателя. После пяти коротких миганий отображаются длинные импульсы. Количество длинных импульсов соответствует коду ошибки из таблицы.
| Код | Неисправность | Возможные причины | Рекомендации по устранению |
|---|---|---|---|
| 0 | Подогреватель не работает (только пять коротких импульсов). |
Предохранители. Электрические жгуты. Блокировка подогревателя. Неисправен блок управления. |
Проверьте предохранители F1, F2 и F3. Проверьте подключения к аккумулятору: + на пин 12, — на пин 9 и + на пин 3 (сигнал на включение) разъем X8. Снимите блокировку. Замените блок управления в составе нагнетателя в сборе. |
| 1 | Нет запуска (после двух попыток). |
Топливная система. Магистрали подвода воздуха для горения и отвода выхлопных газов. Горелка. |
Проверьте уровень топлива. Проверьте состояние топливного фильтра. Проверьте забор топлива и топливные магистрали на герметичность. Удалите воздух из топливной системы. Проверьте магистрали подвода воздуха для горения и отвода выхлопных газов на наличие закупориваний и при необходимости очистите. Очистите горелку и при необходимости замените. |
| 2 | Обрыв пламени. |
Топливная система. Горелка. |
Проверьте уровень топлива. Проверьте состояние топливного фильтра. Проверьте забор топлива и топливные магистрали на герметичность. Удалите воздух из топливной системы. Очистите горелку и при необходимости замените. |
| 3 | Пониженное или повышенное напряжение. | Электроснабжение. |
Проверьте аккумулятор. Проверьте электрические подключения. |
| 4 | Преждевременное распознавание пламени. | Неисправен датчик температуры выхлопных газов. | Функциональная проверка датчика температуры выхлопных газов, при необходимости замените. |
| 5 | Не задано. | Не задано. | Не задано. |
| 6 | Датчик температуры охлаждающей жидкости неисправен. |
Электрические жгуты. Неисправен датчик температуры охлаждающей жидкости. |
Проверьте электрические жгуты на наличие повреждений, обрывов и коротких замыканий. Проверьте сопротивление датчика температуры охлаждающей жидкости, при необходимости замените. |
| 7 | Неисправен топливный насос. |
Электрические жгуты. Неисправен топливный насос. |
Проверьте электрические жгуты на наличие повреждений, обрывов и коротких замыканий. Функциональная проверка топливного насоса, при необходимости замените. |
| 8 | Неисправен нагнетатель. |
Электрические жгуты. Защитная блокировка нагнетателя. Неисправен нагнетатель. |
Проверьте электрические жгуты на наличие повреждений, обрывов и коротких замыканий. Функциональная проверка нагнетателя, при необходимости замените. Замените нагнетатель. |
| 9 | Неисправен штифт накала. |
Электрические жгуты. Неисправен штифт накала. |
Проверьте электрические жгуты на наличие повреждений, обрывов и коротких замыканий. Функциональная проверка штифта накала, при необходимости замените. |
| 10 | Перегрев. |
Подогреватель перегрет. Неисправен датчик температуры охлаждающей жидкости. Неисправен датчик перегрева. |
Проверьте уровень охлаждающей жидкости, удалите воздух из жидкостного контура. Проверьте работоспособность циркуляционного насоса. Проверьте электрические жгуты на наличие повреждений, обрывов и коротких замыканий. Функциональная проверка датчика температуры охлаждающей жидкости, при необходимости замените. Проверьте электрические жгуты на наличие повреждений, обрывов и коротких замыканий. Функциональная проверка датчика перегрева, при необходимости замените. |
| 11 | Неисправность циркуляционного насоса. |
Электрические жгуты. Неисправен циркуляционный насос. |
Проверьте электрические жгуты на наличие повреждений, обрывов и коротких замыканий. Замените циркуляционный насос. |
| 12 | Неисправен выключатель массы. |
Электрические жгуты. Неисправен выключатель массы. |
Проверьте электрические жгуты на наличие повреждений, обрывов и коротких замыканий. Замените электронный выключатель массы. |
| 13 | Неисправность управления салонным отопителем. |
Электрические жгуты. Неисправно реле включения салонного отопителя. |
Проверьте электрические жгуты на наличие повреждений, обрывов и коротких замыканий. Функциональная проверка реле, при необходимости замените. |
| 14 | Неисправен датчик перегрева. |
Электрические жгуты. Неисправен датчик перегрева. |
Проверьте электрические жгуты на наличие повреждений, обрывов и коротких замыканий. Функциональная проверка датчика перегрева, при необходимости замените. |
| 15 | Не достигается заданное значение сопротивления штифта накала. |
Электрические жгуты. Неисправен штифт накала. |
Проверьте электрические жгуты на наличие повреждений, обрывов и коротких замыканий. Функциональная проверка штифта, при необходимости замените. |
| 16 | Слишком высокая температура выхлопных газов. |
Неисправен датчик температуры выхлопных газов. Подогреватель закоксован. |
Проверьте электрические жгуты на наличие повреждений, обрывов и коротких замыканий. Проверьте сопротивление датчика температуры выхлопных газов, при необходимости замените. Визуальный контроль и чистка горелки, жаровой трубы и теплообменника, при необходимости замените узлы. |
| 17 | Неисправен датчик температуры выхлопных газов. |
Электрические жгуты. Неисправен датчик температуры выхлопных газов. |
Проверьте электрические жгуты на наличие повреждений, обрывов и коротких замыканий. Функциональная проверка датчика температуры выхлопных газов, при необходимости замените. |
Внимание! Неквалифицированный монтаж или ремонт оборудования Webasto может стать причиной пожара или привести к выбросу ядовитого моноксида углерода. Тем самым это может стать причиной тяжелых или смертельных травм.
Webasto DBW 2010/2012/2020/2022/300/350
Предварительная диагностика неисправностей предпусковых подогревателей двигателя Webasto DBW 2010/12, 2020/22 и Webasto 300/350.
| Неисправность | Проверить, в случае необходимости отремонтировать или заменить |
|---|---|
| После включения подогреватель не работает. | Электроснабжение. Предохранители. Электрические провода и соединения. Выключатель. Блок управления. |
| Индикация режимов работы гаснет приблезительно через 25 секунд. | Температурный предохранитель или ограничитель нагрева. Детектор пламени. Блок управления. Электроды зажигания. Источник искры зажигания, кабель зажигания. Привод (двигатель). Топливное обеспечение. Топливный насос. Топливный магнитный клапан. Распылительное сопло. |
| Двигатель в подогревателе не работает. | Электроснабжение. Предохранители. Электрические провода и соединения. Термостат регулировки обогрева или температурный датчик. Блок управления. Привод (двигатель). |
| Двигатель в подогревателе – отсутствие начальной фазы, предшествующей сгоранию. | Электроснабжение. Блок управления. |
| Двигатель в подогревателе – отсутствие продувки после окончания работы. | Блок управления. |
| Циркуляционный насос – не работает. | Электроснабжение. Предохранители. Электрические провода и соединения. Блок управления. Привод (двигатель). |
| Искра зажигания – отсутствует. | Предохранители. Электрические провода и соединения. Детектор пламени. Блок управления. Источник искры зажигания, кабель зажигания. |
| Сгорание – не начинается по прошествию 15 секунд. | Температурный предохранитель или ограничитель нагрева. Детектор пламени. Блок управления. Электроды зажигания. Источник искры зажигания, кабель зажигания. Топливный насос. Топливный магнитный клапан. Распылительное сопло. |
| Сгорание – сгорание прекращается по прошествию 25 секунд. | Электроснабжение. Электрические провода и соединения. Детектор пламени. Блок управления. |
| Сгорание – невозможно отключить. | Выключатель. Блок управления. Топливный магнитный клапан. |
| Сгорание – со светлым дымлением. | Топливное обеспечение. Топливный насос. Распылительное сопло. |
| Сгорание – с тёмным дымлением. | Электроснабжение. Электрические провода и соединения. Привод (двигатель). Топливное обеспечение. Подачу воздуха для горения. Отвод отработавших газов. |
| Предпусковой подогреватель перегрет. |
Электрические провода и соединения. Температурный предохранитель или ограничитель нагрева. Температурный предохранитель или ограничитель нагрева. Термостат регулировки обогрева или температурный датчик. Блок управления. Распылительное сопло. Система отопления. |
Webasto Thermo E 200/320
Вид неисправности выдается с помощью мигающего индикатора режима работы. Индикатор начинает мигать с соответствующей частотой сразу после обнаружения неисправности, а при включении подогревателя мигает до проведения деблокировки.
| Импульсов | Описание неисправности |
|---|---|
| 0 | Неисправность блока управления. |
| 1 | Отсутствие запуска после 2-х попыток. |
| 2 | Обрыв пламени во время работы, неудачный повторный пуск. |
| 3 | Повышенное/пониженное напряжение. |
| 4 | Преждевременное распознавание пламени. |
| 5 | Неисправность датчика пламени. |
| 6 | Неисправность датчика температуры или реле защиты от перегрева. |
| 7 | Неисправность электромагнитного клапана. |
| 8 | Неисправность мотора нагнетателя воздуха / подогревателя держателя форсунки. |
| 9 | Неисправность циркуляционного насоса. |
| 10 | Сработало реле защиты от перегрева. |
| 11 | Неисправность катушки зажигания. |
| 12 | Блокировка подогревателя (повторяющийся сбой или повторяющийся обрыв пламени). |
Неисправности Webasto Thermo Top Evo Start, которые можно устранить самостоятельно
При появлении неисправности проверьте состояние предохранителей и штекерных соединений, а также их правильную установку и подключение. При неисправности подогреватель переходит в состояние блокировки, которая не отображается на органах управления.
Предупреждение! Работы по ремонту и техобслуживанию подогревателя требуют профессиональных знаний и применения специальных инструментов. Неправильно выполненная регулировка или техническое обслуживание могут привести к повреждению подогревателя и к несчастным случаям с серьёзными последствиями.
Прежде чем обратиться в сервисный центр Webasto, попытайтесь сами снять блокировку по неисправности.
Вы можете сами устранить следующие неисправности.
| Описание неисправности | Возможные причины | Меры по устранению |
|---|---|---|
| Происходит автоматическое выключение подогревателя (аварийное отключение). | Отсутствует горение после пуска и его повторения, пламя гаснет во время работы. | Выключите и включите подогреватель (не более двух раз). |
| Подогреватель не включается. | Нет подачи электроэнергии к подогревателю. | Проверьте электропитание подогревателя, а также его соединение на массу. |
| Подогреватель выключается в режиме отопления (аварийное отключение). | Подогреватель перегрелся из-за недостатка охлаждающей жидкости. | Долейте охлаждающую жидкость в соответствии с рекомендациями изготовителя. |
Webasto Thermo Top Evo Start c таймером MultiControl Car
Если во время работы предпускового подогревателя возникает неисправность, то он выдаёт на дисплей таймера код ошибки.
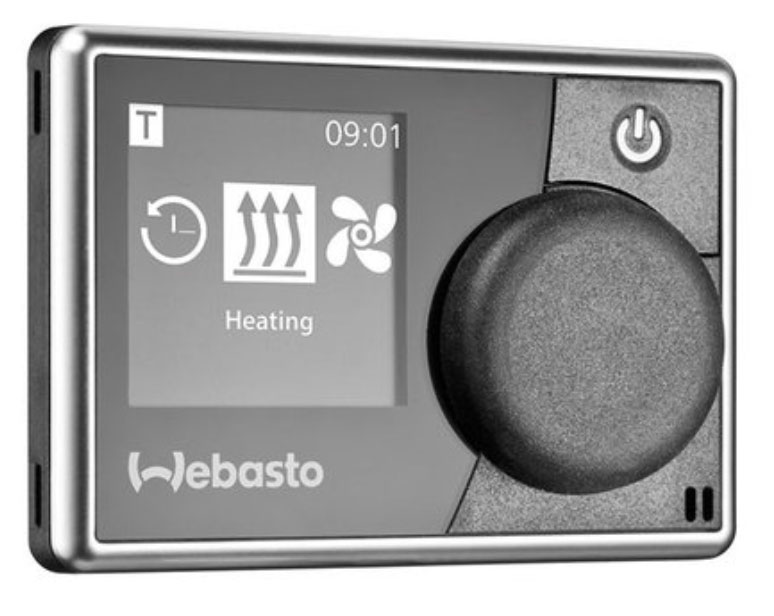
Таймер MultuControl Car
Возникшая ошибка выводится на дисплей таймера в виде Txx (ошибки таймера) или Fxx (ошибки подключенного подогревателя), а также сигнализируется красным мигающим светодиодом.
| Код | Неисправность | Рекомендации по устранению |
|---|---|---|
| Ted | Высокое напряжение. Питающее напряжение больше 36 В. | Проверьте электрику автомобиля. |
| Te3 | Неисправна подсветка дисплея. Питающее напряжение больше 36 В. | Свяжитесь с сервисной службой. |
| Te4 | Неисправен светодиодный индикатор состояния. Питающее напряжение больше 36 В. | Свяжитесь с сервисной службой. |
| Te5 | Ошибка датчика температуры. Неисправен температурный датчик пульта MultiControl/SmartControl. | Свяжитесь с сервисной службой. |
| Te6 | Ошибка датчика температуры на W-шине. Невозможно правильно прочитать температуру с внешнего датчика (Wшина). | Проверьте подключение. При необходимости замените датчик. |
| T5d | Ошибка температурного датчика UniBox. Невозможно правильно прочитать температуру с внешнего датчика, подключенного к UniBox. | Проверьте подключение. При необходимости замените датчик. |
| T12 | Нарушение связи на W-шине. | Проверьте подключение. |
| Te7/Te8 | Flash. Неудачное чтение/запись в/на внутреннюю память. | Свяжитесь с сервисной службой. |
| Tea | Неправильный ответный сигнал от отопителя (ST). | Проверьте подключение. |
| Tec | Заедание ручки управления. Ручка управления нажата дольше 10 секунд. | Свяжитесь с сервисной службой. |
| T46к | Высокий ток/короткое замыкание на выходе SAU1. Ток больше 500 мА. | Проверьте подключение. Убедитесь, что потребители на выходе SAU1 не требуют ток более 500 мА. |
| T49 | Высокий ток/короткое замыкание на выходе SAU2. Ток больше 20 мА. | Проверьте подключение. Убедитесь, что выход подключен только к соответствующему отопителю. |
| Te0 | Пониженное напряжение. Питающее напряжение ниже установленного техником значения. | Зарядите аккумуляторную батарею и проверьте электрику автомобиля. |
| T84 | Низкое напряжение. Питающее напряжение меньше 8 В. | Зарядите аккумуляторную батарею и проверьте электрику автомобиля. |
| Te1 | Низкая/высокая температура окружающей среды. Температура окружающей среды вне рабочего диапазона -20 °C … +70 °C. | Ошибка исчезает автоматически, когда температура возвращается в допустимые пределы -20°C … +70°C. |
| Teb | Ошибка RTC. Сбросились настройки внутреннего чипа времени MultiControl/SmartControl. | При перерыве в электропитании более 8 минут: заново введите день и время. Если ошибка появляется без сбоев электропитания: обратитесь в сервисную службу. |
| Tee |
Неисправный выходной транзистор в MultiControl/SmartControl. Внимание: при появлении этой ошибки отопитель не может выключиться. Сразу же выньте предохранитель и обратитесь в сервисный центр для ремонта. |
Свяжитесь с сервисной службой. |
Ошибки при подключенном через W-шину Thermo Top Evo Start
| Код (HEX) | Расшифровка кода | Дополнительная информация по ошибке |
|---|---|---|
| 01 | Ошибка блока управления. | Неисправен блок управления, оффлайн. Программирование не выполняетсяили неисправен датчик температуры ОЖ. Датчик неисправен. |
| 02 | Нет запуска. | После повторной попытки запуска горение не зафиксировано. |
| 04 | Повышенное напряжение. | Напряжение питания слишком долго превышало пороговое значение. |
| 05 | Преждевременное распознавание пламени. | Датчик пламени сигнализирует о наличии пламени до фазы горения. |
| 06 | Перегрев подогревателя. | Сработала защита от перегрева. |
| 08 | Короткое замыкание в цепи насоса-дозатора. | Замыкание на массу в цепи насоса-дозатора. |
| 0B | Короткое замыкание циркуляционного насоса. | Замыкание на массу в цепи циркуляционного насоса или перегрузка мотора. |
| 10 | Короткое замыкание клапана переключения ОЖ. | Замыкание на массу в цепи клапана переключения ОЖ. |
| 11 | Неправильно запрограммированный блок управления. | Неверный параметр блока управления или неправильно установленный отопитель (относительно вида топлива). |
| 12 | Сбой связи по W-шине. | Неисправность шины или ошибка протокола. |
| 13 | Короткое замыкание в штатном вентиляторе автомобиля. | Короткое замыкание или повышенный ток в цепи зелено-белого провода. |
| 15 | Нагнетатель воздуха для горения заблокирован. | Нагнетатель воздуха для горения не может вращаться. |
| 19 | Короткое замыкание в цепи штифта накала. | Замыкание на массу в цепи штифта накала. |
| 1B | Короткое замыкание датчика перегрева. | Замыкание на массу в цепи датчика перегрева. |
| 2D | Неисправность в цепи нагнетателя. | Скорость вращения нагнетателя воздуха ниже необходимого значения. |
| 2E | Неисправность в цепи штифта накала. | Сопротивление штифта накала находится вне допустимых значений. |
| 2F | Обрыв пламени. | Пламя погасло в процессе подогрева. Выполняется повторная попытка запуска, |
| 37 | Слишком высокая температура ОЖ при первом вводе в эксплуатацию. | Дополнительная информация недоступна. |
| 38 | Первая попытка запуска неудачная. | Дополнительная информация недоступна. |
| 39 | Первая попытка запуска неудачна – нет повторного запуска. | Дополнительная информация недоступна. |
| 3A | Короткое замыкание в шине W-Bus/LIN-Bus. | Дополнительная информация недоступна. |
| 3C | Внутренняя ошибка блока управления 60. | Дополнительная информация недоступна. |
| 3D | Внутренняя ошибка блока управления 61. | Дополнительная информация недоступна. |
| 3E | Внутренняя ошибка блока управления 62. | Дополнительная информация недоступна. |
| 3F | Загружено неправильное программное обеспечение. | Дополнительная информация недоступна. |
| 40 | Обрыв штифта накала. | Обрыв цепи штифта накала. |
| 4C | Высокое напряжение при защите компонентов. | Произошло отключение для защиты внутренних компонентов по причине экстремально высокого напряжения питания. |
| 4E | Специальная ошибка 3. | Дополнительная информация недоступна. |
| 81 | Ошибка контрольной суммы EOL. | Ошибка контрольной суммы EOL. |
| 82 | Нет запуска в тестовом режиме. | Нет запуска в тестовом режиме. |
| 83 | Обрыв пламени. | Количество обрывов пламени в процессе горения превысило значение счетчика FAZ (значение счетчика записано в EEPROM). |
| 84 | Пониженное напряжение. | Напряжение питания слишком долго было ниже порогового значения. |
| 86 | Слишком высокая температура ОЖ без процесса горения. | Ошибка записывается если температура ОЖ превысит 145 °C в регулировочной паузе. |
| 87 | Постоянная блокировка отопителя. | Включилась постоянная блокировка отопителя. Сбросить блокировку и произвести попытку включения отопителя. |
| 88 | Обрыв насоса-дозатора. | Обрыв цепи насоса-дозатора или замыкание ее на +12 В. |
| 89 | Обрыв нагнетателя. | Обрыв цепи нагнетателя воздуха или замыкание ее на +12 В. |
| 8B | Обрыв циркуляционного насоса. | Обрыв цепи циркуляционного насоса или замыкание ее на +12 В. |
| 90 | Обрыв в клапане переключения ОЖ. | Обрыв цепи клапана переключения ОЖ или замыкание ее на +12 В. |
| 92 | Нет команды продолжения работы. | Нет команды продолжения работы от органа управления. |
| 94 | Обрыв температурного датчика. | Обрыв цепи температурного датчика или замыкание ее на +12 В. |
| 99 | Обрыв штифта накала. | Обрыв цепи штифта накала или замыкание ее на +12 В. |
| 9C | Время подогрева превысило время поездки. | Расчетное желательное время работы отопителя превышено (защита от разряда АКБ). |
| A9 | Недостаточный поток охлаждающей жидкости. | Ошибка возникает, если температура охлаждающей жидкости превышает пороговое значение перехода в регулировочную паузу во время фазы Start/Glow Plug Ramp/Flame Monitor Measuring (слишком быстрый нагрев ОЖ). |
| AA | S on W-Bus not succeed. | S on W-Bus not succeed (nor or faulty response, even after repeating telegram four times). |
| AB | Обрыв датчика перегрева. | Обрыв цепи датчика перегрева или замыкание ее на +12 В. |
Сброс блокировки Thermo Top Evo Start
Пошаговая инструкция сброса блокировки предпускового подогревателя двигателя Webasto TT Evo Start:
- Нажать кнопку быстрого старта.
- В течение 10 секунд после этого извлечь из колодки в подкапотном пространстве предохранитель F1–20A (желтый).
- Через 10 секунд вставить предохранитель обратно.
- Произвести пробный запуск подогревателя, нажав кнопку быстрого старта.
- Если в процессе запуска/работы подогревателя вновь будет зафиксирована ошибка, она будет отражена на дисплее таймера.
Надеемся данная статья помогла вам решить проблему с вашим предпусковым подогревателем. Оставляйте свои комментарии и вопросы ниже.
Рекомендуем регулярно проводить техническое обслуживание и проверку автомобиля в сервисных центрах Webasto. Техническое обслуживание и любые ремонтные работы должны всегда выполняться в специализированных сервисных центрах Webasto. Там помогут определить объём необходимых работ и выполнят их на высшем уровне.
Поделиться:
13
163138
11 сентября 2018
Похожие публикации
Воздушные отопители Прамотроник отличное решение для обогрева салона транспортного средства. В процессе эксплуатации как и у любой другой техники могу…
2 сентября 2018
Планар – самый популярный отечественный воздушный отопитель, выпускается в городе Самара на заводе ООО «Адверс». В данной статье мы рассмотрим возможн…
16 сентября 2018
Eberspaecher – компания основана в 1865 году в городе г. Эсслинген-на-Неккаре мастером жестянщиком Якобом Эберспехером. Eberspaecher производит климат…
17 сентября 2018
Бинар – самый популярный отечественный предпусковой подогреватель двигателя, производится в Самарской области на заводе ООО «Адверс». Производство обе…
15 сентября 2018
Прамотроник – современный отечественный предпусковой подогреватель не уступающий по своим характеристикам зарубежным аналогам, тем не менее это не иск…
25 июля 2018
Воздушные отопители Webasto одни из самых лучших и известных устройств в своем классе. Отопители работают на жидком топливе, существуют как дизельные …
10 сентября 2018
- heat flow
-
- поток тепла
поток тепла
—
[Я.Н.Лугинский, М.С.Фези-Жилинская, Ю.С.Кабиров. Англо-русский словарь по электротехнике и электроэнергетике, Москва, 1999 г.]Тематики
- электротехника, основные понятия
EN
- heat flow
Англо-русский словарь нормативно-технической терминологии.
.
2015.
Смотреть что такое «heat flow» в других словарях:
-
heat flow — šilumos srautas statusas T sritis Standartizacija ir metrologija apibrėžtis Šilumos kiekis, pereinantis per tam tikrą paviršių per vienetinį laiko tarpą. atitikmenys: angl. heat flow; heat flow rate; heat flux; thermal flow; thermal flux vok.… … Penkiakalbis aiškinamasis metrologijos terminų žodynas
-
heat flow — šilumos srautas statusas T sritis fizika atitikmenys: angl. heat flow; heat flux; thermal flow; thermal flux vok. Wärmefluß, m; Wärmeströmung, f; Wärmestrom, m rus. поток тепла, m; тепловой поток, m pranc. flux de chaleur, m … Fizikos terminų žodynas
-
heat flow — šilumos srautas statusas T sritis ekologija ir aplinkotyra apibrėžtis Šilumos kiekis, praeinantis per tam tikrą paviršių per vienetinį laiko tarpą. SI vienetas – W/m². atitikmenys: angl. heat flow; heat flux vok. Wärmefluss, m; Wärmestrom, m rus … Ekologijos terminų aiškinamasis žodynas
-
heat flow-rate — šilumos srautas statusas T sritis Standartizacija ir metrologija apibrėžtis Šilumos kiekis, pereinantis per tam tikrą paviršių per vienetinį laiko tarpą. atitikmenys: angl. heat flow; heat flow rate; heat flux; thermal flow; thermal flux vok.… … Penkiakalbis aiškinamasis metrologijos terminų žodynas
-
heat flow line — šilumos srauto linija statusas T sritis fizika atitikmenys: angl. heat flow line; line of heat flow; line of heat flux vok. Wärmestromlinie, f rus. линия теплового потока, f pranc. ligne du flux de chaleur, f … Fizikos terminų žodynas
-
heat flow density — šilumos srauto tankis statusas T sritis fizika atitikmenys: angl. heat flow density; heat flux density vok. Wärmestromdichte, f rus. плотность теплового потока, f pranc. densité de courant thermique, f; densité de flux de chaleur, f … Fizikos terminų žodynas
-
Rate of heat flow — The rate of heat flow between two systems is measured in watts (joules per second).ExampleAssume there are two systems with the same mass and specific heat. System A has an average temperature of 500 kelvins and system B has an average… … Wikipedia
-
line of heat flow — šilumos srauto linija statusas T sritis fizika atitikmenys: angl. heat flow line; line of heat flow; line of heat flux vok. Wärmestromlinie, f rus. линия теплового потока, f pranc. ligne du flux de chaleur, f … Fizikos terminų žodynas
-
areic heat flow rate — šilumos srauto tankis statusas T sritis Standartizacija ir metrologija apibrėžtis Šilumos srautas, padalytas iš ploto, kurį tas srautas statmenai kerta. atitikmenys: angl. areic heat flow rate; density of heat flow rate vok. Wärmestromdichte, f… … Penkiakalbis aiškinamasis metrologijos terminų žodynas
-
density of heat flow rate — šilumos srauto tankis statusas T sritis Standartizacija ir metrologija apibrėžtis Šilumos srautas, padalytas iš ploto, kurį tas srautas statmenai kerta. atitikmenys: angl. areic heat flow rate; density of heat flow rate vok. Wärmestromdichte, f… … Penkiakalbis aiškinamasis metrologijos terminų žodynas
-
radiant heat flow-rate — šiluminės spinduliuotės srautas statusas T sritis Standartizacija ir metrologija apibrėžtis Tam tikros sistemos elektromagnetinių bangų pavidalu išspinduliuotas, praleistas arba sugertas šilumos srautas. atitikmenys: angl. radiant heat flow rate… … Penkiakalbis aiškinamasis metrologijos terminų žodynas
| Код | Описание | Комментарии |
|---|---|---|
| 01 | Defective control unit Неисправность блока управления (неисправен блок управления, ошибка в программе EOL или неисправен датчик температуры ОЖ) |
Стереть ошибку, снять блокировку на подогревателе повторно запустить подогреватель |
| 02 | No start Не запускается (за установленное время пламя не обнаружено) |
1) Причина в заборе воздуха или в магистрали отвода выхлопных газов. 2) Причина в топливной системе. 3) Проверьте насосдозатор. 4) Проверьте электрическую систему штифта накала. |
| 03 | Flame failure Обрыв пламени (срыв горения) |
|
| 04 | Supply voltage too high Напряжение питания слишком высокое |
Проверьте энергоснабжение бортовой сети автомобиля |
| 05 | Flame was detected prior to combustion Пламя обнаружено до начала подачи топлива |
1) Причина в заборе воздуха или в магистрали отвода выхлопных газов.2) Причина в топливной системе. 3) Проверьте электрическую систему штифта накала |
| 06 | Heating unit overheated Отопитель перегрет |
|
| 07 | Heating unit interlocked Отопитель заблокирован |
|
| 08 | Metering pump short circuit Дозирующий (топливный) насос — короткое замыкание |
Проверьте электрическую систему топливоподачи |
| 09 | Combustion air fan short circuit Вентилятор каммеры сгорания — короткое замыкание |
|
| 0A | Glow plug / flame monitor short circuit Штифт накаливания / датчик пламени — короткое замыкание |
|
| 0B | Circulation pump short circuit Циркуляционный (водяной) насос — короткое замыкание (или произошла перегрузка мотора) |
Circulation pump short circuit |
| 0C | No comunication to air condition Нет связи с блоком кондиционера |
|
| 0D | Green LED short circuit Зеленый светодиод — короткое замыкание |
|
| 0E | Yellow LED short circuit Желтый светодиод — короткое замыкание |
|
| 0F | No configuraton signal Нет конфигурационного сигнала |
|
| 10 | Solenoid valve short circuit Электромагнитный клапан (водяной) — короткое замыкание |
Проверьте электрическую систему клапана переключения ОЖ |
| 11 | ECU wrong coded ECU — неверно закодирован или неправильно установленный подогреватель (относительно вида топлива) |
Эта ошибка может появиться только в автомобилях оснащенных шиной СAN или LIN: сравните данные на заводской табличке с видом топлива автомобиля. Действуйте далее согласно данных производителя автомобиля. http://altox.ru/ |
| 12 | W-Bus comunication failure W-Bus — ошибка связи |
|
| 13 | Vehicle fan relay short circuit Реле вентилятора салона — короткое замыкание |
Причина в области вентилятора автомобиля |
| 14 | Temperature sensor short circuit Датчик температуры ОЖ — короткое замыкание |
|
| 15 | Combustion air fan blocked Вентилятор камеры сгорания — заблокирован |
Причина в нагнетателе или в системе забора воздуха для горения (засорен трубопровод) |
| 16 | Battery main switch short circuit Главный выключатель питания — короткое замыкание |
|
| 17 | Invalid air flow reduction Ошибка сокращения воздушного потока |
|
| 18 | Comunication failure on customer specific bus Сбой связи на шине данных заказчика |
|
| 19 | Glow plug / electronic ignition short circuit Штифт накаливания / электронный поджиг — короткое замыкание |
Проверьте электрическую систему штифта накала |
| 1A | Flame sensor short circuit Датчик пламени — Короткое замыкание |
|
| 1B | Overheat short circuit Датчик перегрева — короткое замыкание |
Проверьте электрическую систему температурных датчиков. http://altox.ru/ |
| 1C | Fault 28 Ошибка 28 |
|
| 1D | Solenoid valve shed test short circuit Электромагнитный клапан — обнаружено короткое замыкание |
|
| 1E | Fuel sensor short circuit Датчик топлива — короткое замыкание |
|
| 1F | Nozzle stock heating short circuit Подогреватель топливной форсунки — короткое замыкание |
|
| 20 | Operation indicator short circuit Индикатор работы — короткое замыкание |
|
| 21 | Flame indicator short circuit Интикатор пламени — короткое замыкание |
|
| 22 | Reference resistance wrong Образцовое сопротивление — неверное значение |
|
| 23 | Crash interlock activated Блокировка при аварии — активирована |
|
| 24 | Car is almost out of fuel Низкий уровень топлива |
|
| 25 | Fuel pre heating short circuit Предварительный подогреватель топлива — короткое замыкание |
|
| 26 | PCB temperatur sensor short circuit Датчик температуры блока управления — короткое замыкание |
|
| 27 | Ground contact to the ECU broken Заземление блока управления — нарушено |
|
| 28 | Board net energy manager low power voltage Бортовой распределить энергии — низкое напряжение |
|
| 29 | Fuel priming still not done Заливка топлива еще выполняется |
|
| 2A | Error in the radio telegram Ошибка в радиотелеграмме (ошибка в радиопакете данных) |
|
| 2B | Telestart still not programmed Телестарт еще не запрограммирован |
|
| 2C | The pressure sensor has short circuit Датчик давления имеет короткое замыкание |
|
| 2D | The combustion air fan power circuit is defective Неисправность в цепи нагнетателя (число оборотов вращения мотора нагнетателя ниже необходимого значения) |
Стереть ошибку, снять блокировку на подогревателе повторно запустить подогреватель |
| 2E | The glow / ignition- element power circuit is defective Неисправность в цепи штифта накала (сопротивление штифта накала находится вне допустимых значений) |
При повторном возникновении (>3): причина в заборе воздуха или в магистрали отводе выхлопных газов. Проверьте электрическую цепь штифта накала. http://altox.ru/ |
| 2F | Flame abort Обрыв пламени |
В случае частого возникновения (>10 раз): 1) Причина в заборе воздуха или в магистрали отвода выхлопных газов. 2) Причина в топливной системе. 3) Проверьте насосдозатор. 4) Проверьте электрическую систему штифта накала. |
| 30 | Fault 48 Ошибка 48 |
|
| 31 | Fault 49 Ошибка 49 |
|
| 32 | No start from control idle period Не запускается из режима Регулируемой паузы |
|
| 33 | Flame monitor signal invalid Датчик пламени — неверное значение |
|
| 34 | Default values entered Значения по-умолчанию введены |
|
| 35 | EOL programming has not been carried out Программирование EOL не было выполнено |
|
| 36 | Thermal fuse short circuit Короткое замыкание плавкого предохранителя |
|
| 37 | Coolant temperature during initial start-up too high лишком высокая температура ОЖ при первом вводе в эксплуатацию |
Данная ошибка может появляться только при первом вводе подогревателя в эксплуатацию (у производителя автомобиля): 1) Дайте остыть контуру ОЖ и попробуйте повторно ввести подогреватель в работу. 2) Проверьте электрическую систему температурных датчиков |
| 38 | Initial starting attempt failed Первая попытка запуска неудачная |
В случае частого возникновения (>10 раз): 1) Причина в заборе воздуха или в магистрали отвода выхлопных газов. 2) Причина в топливной системе. 3) Проверьте насосдозатор. 4) Проверьте электрическую систему штифта накала. |
| 39 | Initial starting attempt failed – not restarting Первая попытка запуска неудачная (нет повторного запуска) |
В случае частого возникновения (>3 раз): 1) Причина в заборе воздуха или в магистрали отвода выхлопных газов. 2) Причина в топливной системе. 3) Проверьте насосдозатор. 4) Проверьте электрическую систему штифта накала. http://altox.ru/ |
| 3A | W-bus / LIN-bus shortcircuit to earth Короткое замыкание в шине W-Bus / LIN-Bus |
Неисправность в области коммутации шины W-Bus |
| 3B | Fault 59 Ошибка 59 |
|
| 3C | Internal control unit error 60 Внутренняя ошибка блока 60 управления |
Стереть ошибку, снять блокировку на подогревателе повторно запустить подогреватель |
| 3D | Internal control unit error 61 Внутренняя ошибка блока 61 управления |
Стереть ошибку, снять блокировку на подогревателе повторно запустить подогреватель |
| 3E | Internal control unit error 62 Внутренняя ошибка блока 62 управления |
Стереть ошибку, снять блокировку на подогревателе повторно запустить подогреватель |
| 3F | Wrong version dataset loaded Загружена неправильное программное обеспечение |
Стереть ошибку, снять блокировку на подогревателе повторно запустить подогреватель |
| 40 | Fault 64 Ошибка 64 |
|
| 41 | Fault 65 Ошибка 65 |
|
| 42 | Fault 66 Ошибка 66 |
|
| 43 | Fault 67 Ошибка 67 |
|
| 44 | Fault 68 Ошибка 68 |
|
| 45 | Short circuit / open circuit of heating relay Ошибка блока реле (обрыв / замыкание реле нагревателя) |
|
| 46 | Fault 70 Ошибка 70 |
|
| 47 | Fault 71 Ошибка 71 |
|
| 48 | Fault 72 Ошибка 72 |
|
| 49 | Fault 73 Ошибка 73 |
|
| 4A | Fault 74 Ошибка 74 |
|
| 4B | Fault 75 Ошибка 75 |
|
| 4C | Overvoltage component protection Высокое напряжение при защите компонентов |
Проверьте энергоснабжение бортовой сети автомобиля. http://altox.ru/ |
| 4D | Fault 77 Ошибка 77 |
|
| 4E | Fault 78 Ошибка 78 |
|
| 4F | Fault 79 Ошибка 79 |
|
| 50 | User interface idle-Mode (no-communication) Пульт управления не имеет связи |
|
| 51 | User interface has communication fault Пульт управления имеет ошибку связи |
|
| 52 | User interface send no defined operating mode Пульт управления посылает не определенный режим работы |
|
| 53 | Heater fan status message negative Вентилятор нагревателя — негативное сообщение |
|
| 54 | Heater fan status bus has short circuit to UB Вентилятор нагревателя — замыкание на массу |
|
| 55 | Temperature water sensor failure Датчик температуры ОЖ — неисправен |
|
| 56 | Temperature water sensor short circuit to UB Датчик температуры ОЖ — замыкание на массу |
|
| 57 | Overheating water temperature sensor Датчик температуры ОЖ — перегрев |
|
| 58 | Overstepping water temperature sensor gradient Датчик температуры ОЖ — неверный градиент |
|
| 59 | Overheating blow temperature sensor Датчик температуры вентилятора — перегрев |
|
| 5A | Overstepping low temperature sensor gradient Датчик температуры — низкий градиент |
|
| 5B | Overheating PCB temperature sensor Датчик температуры печатной платы — перегрев |
|
| 5C | Overstepping PCB temp sensor gradient Датчик температуры печатной платы — неверный градиент |
|
| 5D | Cabin temperature sensor failure Неисправность датчика температуры салона |
|
| 5E | Flame detector gradient failure Неправильный градиент датчика пламени |
|
| 5F | Emergency cooling Аварийное охлаждение |
|
| 60 | Customer specific fault 1 Ошибка заказчика 1 |
|
| 61 | Customer specific fault 2 Ошибка заказчика 2 |
|
| 62 | Customer specific fault 3 Переполнение значение таймера DP_max |
В случае частого возникновения (>3 раз): 1) Причина в заборе воздуха или в магистрали отвода выхлопных газов. 2) Причина в топливной системе. 3) Проверьте насосдозатор. 4) Проверьте электрическую систему штифта накала. http://altox.ru/ |
| 63 | Customer specific fault 4 Ошибка заказчика 4 |
|
| 64-7E | Customer specific fault 5-31 Ошибки заказчика 5-31 |
|
| 7F | Customer specific fault 32 Ошибка заказчика 32 |
|
| 80 | Fault 128 Ошибка 128 |
|
| 81 | EOL checksum error Ошибка контрольной суммы EOL |
Стереть ошибку, снять блокировку на подогревателе повторно запустить подогреватель |
| 82 | No start during test-run Не запускается во время тестового запуска |
Данная ошибка может появляться только при первом вводе подогревателя в эксплуатацию (у производителя а/м): 1) Причина в заборе воздуха или в магистрали отвода выхлопных газов. 2) Причина в топливной системе. 3) Проверьте насосдозатор. 4) Проверьте электрическую систему штифта накала |
| 83 | Flame failure Плохое пламя (Во время цикла прогрева пламя гасло больше число раз (FAZ), чем запрограммировано в EEPROM) |
В случае частого возникновения (>3 раз): 1) Причина в заборе воздуха или в магистрали отвода выхлопных газов. 2) Причина в топливной системе. 3) Проверьте насосдозатор. 4) Проверьте электрическую систему штифта накала. http://altox.ru/ |
| 84 | Operating voltage too low Напряжение питания слишком низкое |
1) Проверьте простой формулой: время прогрева длиннее времени поездки? 2) Проверьте энергоснабжение бортовой сети автомобиля |
| 85 | Flame was detected after combustion Обнаружение пламени после сгорания |
|
| 86 | Fault 134 Ошибка 134 |
|
| 87 | Heater lock-out permanent Постоянная блокировка отопителя |
1) Снять блокировку, попытаться повторно запустить подогреватель. 2) Считать дальнейшие сообщения обошибках и следовать рекомендациям |
| 88 | Fuel pump failure Дозирующий (топливный) насос – обрыв (или цепь замыкается на +) |
Проверьте электрическую систему топливоподачи |
| 89 | Combustion air fan interruption Вентилятор камеры сгорания – обрыв (или цепь замыкается на +) |
Проверьте электрическую систему нагнетателя |
| 8A | Glow plug / flame monitor interruption Штифт накаливания/датчик пламени — обрыв |
|
| 8B | Circulation pump interruption Циркуляционный (водяной) насос – обрыв (или цепь замыкается на +) |
Проверьте электрическую систему контура ОЖ |
| 8C | Fault 140 Ошибка 140 |
|
| 8D | Green LED interruption зеленый светодиод — обрыв |
|
| 8E | Yellow LED interruption Желтый светодиод — обрыв |
|
| 8F | Fault 143 Ошибка 143 |
|
| 90 | Solenoid valve interruption Электромагнитный клапан – обрыв (или цепь замыкается на +) |
Проверьте электрическую систему клапана переключения ОЖ |
| 91 | Control unit locked or coded as neutral Блок управления азаблокирован или закодирован как нейтральный |
|
| 92 | Command refresh failure Ошибка обновления команды (Ошибка в обработке команд. При возникновении нет функционирования , или отключение по ошибке) |
Неисправность в области коммутации шины W-Bus |
| 93 | Fault 147 Ошибка 147 |
|
| 94 | Temperature sensor interruption Датчик температуры – обрыв (или цепь замыкается на +) |
Проверьте электрическую систему температурных датчиков. http://altox.ru/ |
| 95 | Combustion air fan tight Вентилятор камеры сгорания — трудное проворачивание |
|
| 96 | Fault 150 Ошибка 150 |
|
| 97 | Overheat sensor position wrong Датчик перегрева — неверное значение |
|
| 98 | Fault 152 (Power supply interruption) Прерывание электропитания |
|
| 99 | Glow plug / electronic ignition unit interruption Штифт накаливания / электронный поджиг – обрыв (или цепь замыкается на +) |
Проверьте электрическую систему штифта накала |
| 9A | Flame sensor interruption Датчик пламени — обрыв |
|
| 9B | Setpoint transmitter invalid Ошибка передатчика Setpoint |
|
| 9C | Intelligent undervoltage detection Интеллектуальное обнаружение низкого напряжения |
1) Проверьте простой формулой: время прогрева длиннее времени поездки? 2) Проверьте энергоснабжение бортовой сети автомобиля. http://altox.ru/ |
| 9D | Solenoid valve shed test interruption Электромагнитный клапан — во времяиспытания обнаружен обрыв |
|
| 9E | Fuel sensor interruption Датчик топлива — прерывание |
|
| 9F | Nozzle stock heating interruption Подогреватель топливной форсунки — обрыв |
|
| A0 | Operating indicator interruption Индикатор работы — прерывание |
|
| A1 | Flame indicator interruption Индикатор пламени — прерывание |
|
| A2 | Fault 162 Ошибка 162 |
|
| A3 | Fault 163 Ошибка 163 |
|
| A4 | Fault 164 Ошибка 164 |
|
| A5 | Fuel pre heating interruption Предварительный подогрев топлива — прерывания |
|
| A6 | PCB temperature sensor interruption Датчик температуры блока управления — прерывание |
|
| A7 | Fault 167 Ошибка 167 |
|
| A8 | Communication board net energy manager error Распределитель бортовой энергии — ошибка |
|
| A9 | Fault 169 Ошибка 169 |
|
| AA | Send on W-Bus not succeed Отправка данных по W-Bus — не выполнена (даже после 4-хкратного повтора, нет ответа или ответ с помехами) |
Неисправность в области коммутации шины W-Bus |
| AB | Overheat sensor interruption Датчик перегрева – обрыв (или цепь замыкается на +) |
Проверьте электрическую систему температурных датчиков. http://altox.ru/ |
| AC | The pressure sensor failure Датчик давления — ошибка |
|
| AD | Fault 173 Ошибка 173 |
|
| AE-B4 | Fault 174-180 Ошибки 174-180 |
|
| B5 | Fault 181 Ошибка 181 |
|
| B6 | Thermal fuse interrupted Плавкий предохранитель прерван |
|
| B7 | Fault 183 Ошибка 183 |
|
| B8-D0 | Fault 184-208 Ошибки 184-208 |
|
| E0-FE | Customer specific fault 33-63 Ошибки заказчика 33-63 |
|
| FF | Unknown error code Неизвестная ошибка |
В ТТС существует 3 ячейки для хранения ошибок, при ответе FF — ошибки отсутствуют. |