Найдите решения для устранения ошибок, указываемых определенными сочетаниями мигающих индикаторов и номеров ошибок на принтере.
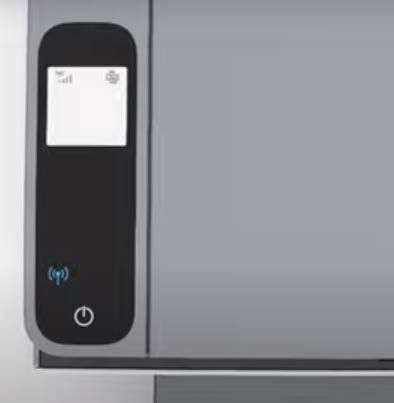
Панель управления
Индикаторы тонера
Отображается ошибка Er/07, Er/27 или Er/28, мигает индикатор внимания и горит индикатор «Барабан переноса изображений»
Барабан передачи изображений установлен неправильно, слежался тонер, или датчики закрыты лентой.
-
Поднимите сканер, откройте верхнюю крышку и затем за ручку извлеките барабан переноса изображений из принтера.
CAUTION:
Не дотрагивайтесь до зеленого ролика на барабане переноса изображений.
-
Убедитесь, что из принтера удалена вся упаковочная лента.
-
Встряхните барабан не менее 5 раз, чтобы разрыхлить тонер и установите барабан переноса изображений обратно в принтер.
-
Закройте верхнюю крышку, опустите сканер, а затем нажмите кнопку Возобновить печать
для сброса ошибки.
Отображается ошибка Er/30 или Er/50–Er/55 и горит индикатор внимания
Принтер находится в состоянии ошибки. Перезагрузите принтер, чтобы решить проблему.
-
Когда принтер включен, отсоедините от него кабель питания.
-
Отсоедините кабель питания от источника питания.
-
Подождите 60 секунд.
-
Снова подключите кабель питания к электрической розетке и принтеру.
NOTE:
Компания HP рекомендует подключать принтер напрямую к электрической розетке.
Отображается Er/31–Er/34 и индикатор «Дозаправка тонера» быстро мигает
В данный момент загрузить тонер в барабан переноса изображений невозможно.
-
Er/31 и Er/34. Невозможно загрузить тонер в барабан переноса изображений, так как барабан полон, уровень тонера неизвестен или принтер занят. Прежде чем загружать тонер, продолжите печать и подождите, пока цвет индикатора «Дозаправка тонера»
не станет белым. При необходимости поместите открытый комплект загрузки тонера в его оригинальную упаковку и храните в сухом прохладном месте.
-
Er/32. Барабан переноса изображений вскоре потребует замены, поэтому загрузка в него тонера невозможна. Продолжите печать, пока качество печати остается приемлемым или пока не появится сообщение Замените барабан переноса изображений барабана, затем замените барабан передачи изображений.
-
Er/33. Предыдущий комплект загрузки тонера не был полностью опорожнен в принтер. Повторно вставьте предыдущий комплект загрузки тонера и нажмите плунжер до щелчка.
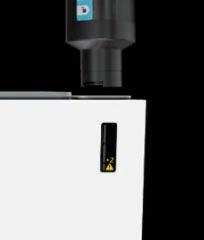
Если предыдущий комплект загрузки тонера недоступен, используйте принтер, пока барабан переноса изображений не опустеет. Загрузите тонер, когда на индикаторе «Уровень тонера» появятся +2 и значок предупреждения «Уровень тонера»
.
Для получения дополнительных сведений перейдите к статье Загрузка тонера.
Отображается сообщение об ошибке Er/81, мигает индикатор внимания и горит индикатор «Возобновить печать»
Была установлена неправильная версия микропрограммы. Установите правильную микропрограмму.
-
Нажмите кнопку Возобновить печать
, чтобы сбросить ошибку.
-
Убедитесь, что принтер включен и подключен к компьютеру, используя локальную сеть или кабель USB.
-
Убедитесь, что выбрана правильная операционная система, затем загрузите и запустите Утилиту обновления микропрограммы.
-
Когда утилита откроется, выберите свой принтер в раскрывающемся меню и нажмите кнопку Отправить микропрограмму.
-
Для завершения установки следуйте инструкциям на экране, затем закройте утилиту.
hp-concentra-wrapper-portlet
Actions
Review solutions to blinking or flashing light patterns on the printer control panel for HP Neverstop Laser MFP 1200 printers.
This document is for HP Neverstop Laser MFP 1200a, 1200n, 1200nw, 1200w, 1201n, 1202nw and 1202w printers.
Find solutions to errors indicated by specific blinking light combinations and error numbers on the printer.
Control panel
|
Callout number |
Description |
|---|---|
|
1 |
Paper light |
|
2 |
Attention light |
|
3 |
Imaging Drum light |
|
4 |
Lid Open light |
|
5 |
Control panel display |
|
6 |
Menu buttons |
|
7 |
ID Copy button |
|
8 |
Copy button |
|
9 |
Resume button |
|
10 |
Cancel button |
|
11 |
Wi-Fi Direct button (wireless models only) |
|
12 |
Wireless button (wireless models only) |
|
13 |
Power button |
Toner indicators
|
Callout number |
Description |
|---|---|
|
1 |
Toner Reload indicator |
|
2 |
Toner Level indicator |
Er/01 displays and the Attention and Paper lights blink
The input tray is empty.
Load paper in the input tray.
Load paper
For more information, go to Loading Paper, Envelopes.
Er/02 displays and the Attention light blinks
The top cover is open.
Make sure the top cover is completely closed.
Close the top cover
Er/04 displays, the Attention light blinks, and the Paper and Resume lights are on
Paper is jammed in the input tray.
Clear the jam with both hands, and then press the Resume button to clear the error.
Clear jammed paper from the input tray
For more information, go to Er/04 or Er/05 Displays (Paper Jam).
Er/05 displays, the Attention light blinks, and the Paper light is on
Paper is jammed in the imaging drum area.
Open the printer, remove the imaging drum, clear the jam with both hands, replace the imaging drum, and then close the printer.
Clear jammed paper from the imaging drum area
For more information, go to Er/04 or Er/05 Displays (Paper Jam).
Er/07 or Er/28 displays, the Attention light blinks, and the Imaging Drum light is on
The imaging drum is incorrectly installed, the toner has settled, or the sensors are covered by tape.
-
Lift the scanner, open the top cover, and then use the handle on the imaging drum to remove it from the printer.
CAUTION:
Do not touch the green roller on the imaging drum.
Remove the imaging drum
-
Make sure all sealing tape is removed from the printer.
-
Shake the imaging drum at least 5 times to loosen the toner, and then reinsert the drum into the printer.
-
Close the top cover, lower the scanner, and then press the Resume button
to clear the error.
Er/08 displays, the Toner Reload indicator blinks, and the Imaging Drum light is on
The printer is out of toner. Use a Toner Reload Kit to reload toner.
Note:
Purchase the following Toner Reload Kits and other supplies from the HP Store or local retailers.
-
HP 103A Black Original Neverstop Laser Toner Reload Kit
-
HP 103AD Dual Pack Black Original Neverstop Laser Toner Reload Kit
For more information, go to Reloading Toner.
Er/09 displays and the Attention and Imaging Drum lights blink
The imaging drum needs to be replaced. Remove and recycle the imaging drum, and then replace it with a new one.
Note:
Purchase replacement imaging drums and other supplies from the HP Store or local retailers. This printer uses HP 104A Black Original Laser Imaging Drums.
For more information, go to Replacing the Imaging Drum.
Er/11 displays and the Toner Reload indicator blinks quickly
There might be an issue with the Toner Reload Kit you inserted. Try using a different Toner Reload Kit.
For more information, go to Reloading Toner.
Er/12 displays, the Attention light blinks, and the Imaging Drum light is on
There might be an issue with the imaging drum.
Remove the imaging drum, and then install a different one.
For more information, go to Replacing the Imaging Drum.
Er/20 or Er/36 displays and the Attention light is on
The printer is in an error state.
Skip to the step to Service or replace the printer.
Er/27 or Er/59 displays, the Attention light blinks, and the Imaging Drum light is on
The sensors might be covered with tape, or there might be an issue with the Toner Reload Kit.
-
Lift the scanner and open the top cover.
Lift the scanner and open the top cover
-
Using the handle, pull the imaging drum up and out to remove it, and then set it aside.
CAUTION:
Do not touch the green roller on the imaging drum.
Remove the imaging drum
-
Make sure all sealing tape is removed from the printer.
-
If the sealing tape is already removed but this error recurs, use a Toner Reload Kit to reload toner.
More information
If the issue persists after completing the steps above, service or replace your HP product.
Go to Contact HP Customer Support to schedule a product repair or replacement. If you are in Asia Pacific, you will be directed to a local service center in
your area.
To confirm your warranty status, go to HP Product Warranty Check.
Note:
Repair fees might apply for out-of-warranty products.
Er/30 or Er/50 to Er/55 displays and the Attention light is on
The printer is in an error state. Reset the printer to resolve the issue.
-
With the printer turned on, disconnect the power cord from the printer.
-
Unplug the power cord from the power source.
-
Wait 60 seconds.
-
Reconnect the power cord to a wall outlet and to the printer.
Note:
HP recommends plugging the printer directly into a wall outlet.
Er/31 to Er/34 displays and the Toner Reload indicator blinks quickly
The imaging drum cannot be reloaded with toner at this time.
-
Er/31 and Er/34: The imaging drum cannot be reloaded because the imaging drum is full, the toner level is unknown, or the printer is busy.
Continue printing and wait for the Toner Reload indicator
to turn white before reloading toner. If necessary, place the opened Toner Reload Kit in the original box and store it in
a cool, dry place. -
Er/32: The imaging drum needs to be replaced soon and cannot be reloaded. Continue printing until print quality becomes unacceptable
or a Replace Imaging Drum message displays, and then replace the imaging drum.For more information, go to Replacing the Imaging Drum.
-
Er/33: The previous Toner Reload Kit was not completely emptied into the printer. Reinsert the previous Toner Reload Kit, and then
push the plunger down until it clicks.If the previous Toner Reload Kit is not available, use the printer until the imaging drum is empty. Reload toner when +2 and the Toner Level Warning icon
display on the Toner Level indicator.
For more information, go to Reloading Toner.
Er/35 displays, the Toner Reload indicator blinks quickly, and an Alert triangle displays on the Toner Level indicator
Debris in the toner reload port is preventing the printer from connecting to the Toner Reload Kit.
Remove the Toner Reload Kit, clear any debris from the reload port, and then reinsert the kit.
For more information, see the Frequently asked questions (FAQs) in Reloading Toner.
Er/61 displays, the Wireless button is amber, and the Cancel button is blinking
An error occurred during Wi-Fi Protected Setup (WPS) and the printer was not able to connect to the network.
Press the Cancel button to clear the error, and then try again.
For more information and wireless troubleshooting steps, go to Wireless Printer Setup.
Er/66 displays, the Attention light blinks, and the Resume light is on
The printer cannot detect the wireless hardware.
Skip to the step to Service or replace the printer.
If you want to continue printing without a wireless connection, press the Resume button to clear the error, download the printer software, if necessary, and then connect your printer to your computer with a USB
cable.
Er/81 displays, the Attention light blinks, and the Resume light is on
The incorrect firmware was installed. Install the correct firmware.
-
Press the Resume button
to clear the error.
-
Make sure the printer is on and connected to your computer through your local network or a USB cable.
-
Make sure you have the correct operating system selected, and then download and run the Firmware Update Utility.
-
When the utility opens, select your printer from the drop-down menu, and then click Send Firmware.
-
Follow the on-screen instructions to complete the installation, and then close the utility.
Go/01, Go/02, or Go/04 displays and the Resume light is on
The printer is processing a job and requires user action.
-
Go/01: The printer is in manual feed mode. Load the correct paper type and size into the input tray, and then press the Resume button
.
-
Go/02: The printer is processing a manual duplex job. Load the printed pages into the input tray with the side to be printed on
facing down and the top toward the back of the printer, and then press the Resume button.
-
Go/04: The printer received a request for Google Cloud Print registration. Press the Resume button
to accept.
Go/03 displays, the Attention light blinks, and the Paper and Resume lights are on
The actual paper size does not match the paper settings.
Load the correct paper size into the input tray, or change the paper settings in the printer software, and then press the
Resume button .
Go/06 displays and the Wi-Fi Direct light blinks
The printer has received a request to connect using Wi-Fi Direct.
Press the Wi-Fi Direct button to accept the connection.
P2 displays and the Lid Open light blinks
The printer completed the first side of an ID Card copy job.
Open the scanner lid, turn over the card, close the lid, and then press the Resume button to copy the other side.
The Power light blinks and a busy indicator displays
The printer is too hot to continue printing.
Wait 3 to 15 minutes for the printer to cool. Printing resumes automatically when cooling is complete.
CAUTION:
Do not turn off the printer off while it is cooling.
Busy indicator and blinking power light on the product control panel
For more information, go to HP Laser, LaserJet Printers — ‘Printer Cooling’ Message Displays.
Service or replace the printer
If the issue persists after completing the steps above, service or replace your HP product.
Go to Contact HP Customer Support to schedule a product repair or replacement. If you are in Asia Pacific, you will be directed to a local service center in
your area.
To confirm your warranty status, go to HP Product Warranty Check.
Note:
Repair fees might apply for out-of-warranty products.
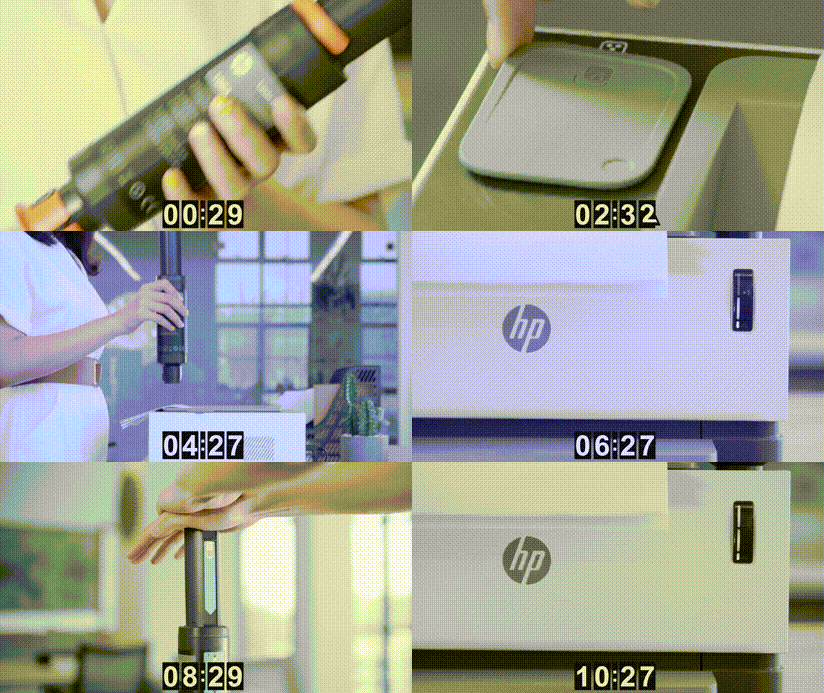
Относительно недавно HP выпустила линейку печатающих устройств NeverStop, в которых тонер засыпается самим пользователем с помощью специальной тубы. То есть принтеру или МФУ NeverStop заправка картриджа, в классическом его смысле, теперь не нужна.
Несмотря на новизну устройств пользователи уже столкнулись с некоторыми проблемами, которые связаны с этой технологией, а именно, после заправки принтера тонером, он начинает сигнализировать об ошибках.
Рассмотрим эти ошибки и способы их решения на принтере HP Laser NS 1020 и МФУ MFP 1005.
Сразу после заправке тонером может наблюдаться следующая индикация:
1. На принтере быстро мигает индикатор около загрузочного отверстия.
При этом индикатор уровня тонера (+1 +2), пропадает с дисплея.
На МФУ MFP 1005 при этом на экране горит ошибка Er31 или Er34.
Индикатор около загрузочного отверстия также быстро мигает, и пропадает индикатор уровня тонера (+1 +2) на экране.
Эти ошибки указывают на то, что заправку тонером провели неправильно. А именно извлекли заправочный комплект до того, как его поршень опустил весь тонер внутри принтера. Из-за этого принтер не смог правильно измерить уровень тонера и просигнализировал ошибкой.
Чтобы исправить эту ошибку нужно взять заправочный комплект и поместить его обратно в заправочное отверстие, далее повернуть его вокруг своей оси на 180 градусов по часовой стрелке и нажать на поршень до щелчка:
2. При установке заправочного комплекта индикатор заправочного отверстия загорается и начинает быстро мигать желтым светом.
Эта индикация означает, что заправочный комплект не распознается принтером (МФУ).
Как вариант загрязнились контакты чипа (попробуйте очистить их ластиком), или заправочный комплект не от этой модели принтера.
Необходимо заменить заправочный комплект.
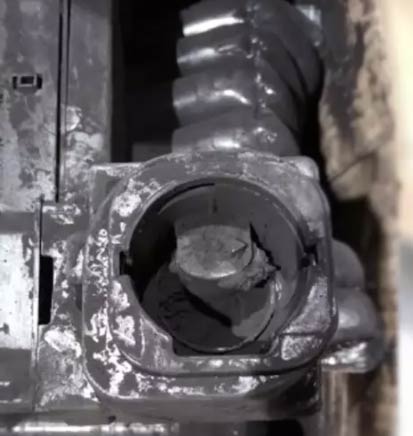
3. При установке заправочного комплекта и повороте его на 180 градусов, проворачивается также и ответная часть заправочного отверстия в самом принтере.
В результате тонер не попадает внутрь принтера и просыпается.
Это происходит оттого, что не дожидаясь сообщения об окончании тонера, пользователь пытается заранее добавить тонер в принтер, что приводит к поломке механизма заправочного устройства.
Так делать ни в коем случае нельзя! Ремонт возможет только в сервис центре.
Заправляете тонер, только когда на принтере появится соответствующая индикация +1 или +2.


 для сброса ошибки.
 не станет белым. При необходимости поместите открытый комплект загрузки тонера в его оригинальную упаковку и храните в сухом прохладном месте.
 .
.


