Выключить принтер из сети.
Снять правую крышку.
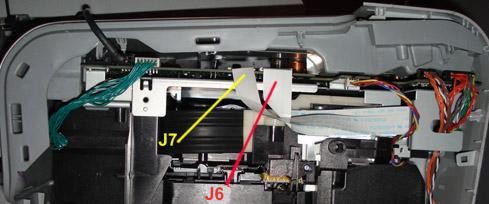
Вынуть из платы шлейф J7 (ближний к передней стенке).
Включить принтер.
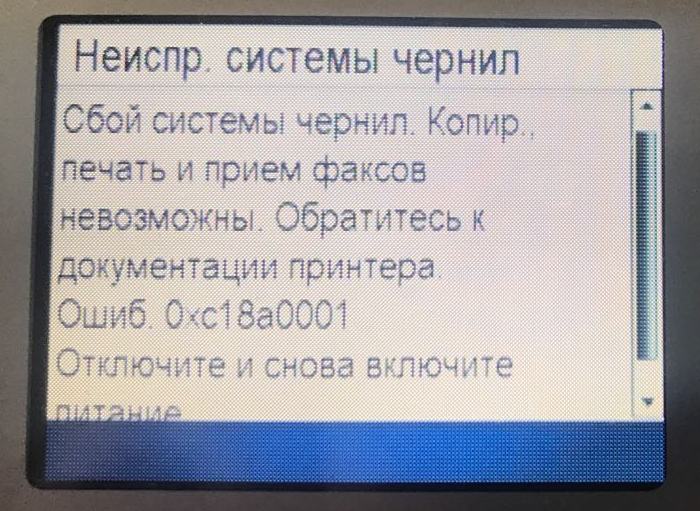
Дождаться ошибки 0xc19a0002.
Выключить принтер.
Вставить шлейф.
Включить принтер и дождаться окончания инициализации системы печати.
Не вынимать ни в коем случае шлейф J6 от системы позиционирования головки!!!
В результате при инициализации произойдет удар головки об левый упор.
Более серьезная ошибка «перепишет» менее серьезную в памяти принтера.
Работоспособность принтера будет восстановлена!
Есть вариант сброса любой ошибки на принтерах:
HP Photosmart 3210, 3213 All-in-One, HP C5180,
HP Photosmart D7160, D7163, D7168, D7363, D8250,D8253
HP C7180 — без механического вмешательства, без разбора принтера.
Приводим текст пользователя dark_xor без изменения:
«Нашел решение для обнуления ЛЮБОГО КОДА ОШИБКИ для принтеров HP Photosmart (возможно, и не только для них, не пробовал):
Как работает у меня:
1) Зажимаем [стрелку Влево], потом нажимаем [кнопку «Настройка»(Setup)], посли этого отпускаем их обоих. Появляется меню «Enter Special Key Combo».
если не помогло, то переходим к следующиму пункту
1.5) (мне это не понадобилось) Зажать обе кнопки «Печать фото»(«Print Photos») и «Коррекция фотографии»(«Red Eye Removal»), потом отпустить их. После этого нажать и отпустить по очереди «Коррекция фотографии»(«Red Eye Removal»),»Печать фото»(«Print Photos»),»Коррекция фотографии»(«Red Eye Removal»).
2) Теперь нажимаем [стрелку Вправо], пока не перейдем на пункт «System Configuration».
3) Нажимаем OK.
4) Нажимаем вправо, пока не дойдем до «Hardware failure status: Clear. Press OK to clear».
Нажимаем «OK». Если у Вас принтер работает нормально, то этого пункта в меню не будет.
НЕ ПЕЧАТАТЬ ПОСЛЕ ЭТОГО, А ВЫКЛЮЧИТЬ ПРИНТЕР ЧЕРЕЗ КНОПКУ ВЫКЛЮЧЕНИЯ!!!
5) Выключаем принтер, включаем снова. Все, код ошибки сброшен.
Первоисточник на английском: Если что-то не получается — ЧИТАЙТЕ ПЕРВОИСТОЧНИК!!! Это лог общения человека со службой поддержки HP.
OK I had the hp error code 0xc18a0001 problem and here is the conversation I had with the tech…..
james cowan: hp error code 0xc18a0001
Earnest: I will assist you in this regard
james cowan: great
Earnest: I understand that a error code with 0xc18a0001 with «Ink System failure» is displayed on the front panel of the All-In-One printer. Am I correct?
james cowan: correct
Earnest: Thank you for confirmation
Earnest: May I have the model number of All-In-One you are using?
james cowan: c6250
Earnest: Thank you for information.
Earnest: James, please let me know the room temperature in which printer is replaced
james cowan: 67 degrees f
Earnest: Okay
Earnest: Please perform the below steps on the front panel of the printer to resolve the issue
james cowan: ok
Earnest: Press and hold the «left arrow» key.
Press the «Setup» key and release both keys, Display should say «Enter Special Key Combo»
Press and release the «OK» button.
Earnest: Please ignore the above steps, James
james cowan: ok yes nothing seemed to do anything
Earnest: Please perform the below steps on the front panel of the printer
Earnest: Press and Hold the «Print Photos» &»Red Eye Removal» buttons. Release both buttons. Display should say»Enter Special Key Combo»
Press and release in sequence»Red Eye Removal»,»Print Photos»,»Red Eye Removal»
Earnest: Display should say “Support” and display the FW rev (something like R0616R)
james cowan: COxxFN0723BR
Earnest: Okay
Earnest: 2. Press and release the right arrow button until the display says “System Configuration Menu
james cowan: ok
Earnest: 3. Press and release the «OK» button.
james cowan: ok and it says hardware failure status
Earnest: Display should say «Hardware failure status: Clear. Press OK to clear».
Earnest: Press and release the «OK» Button. Message changes to «Hardware failure status Cleared. Press Cancel to continue».
Earnest: Press and release the «CANCEL» button as many times as necessary, so that, either the «Welcome to Photosmart Express» screen appears, or, the «Ink System Failure» screen appears. PLEASE DO NOT TRY TO PRINT AT THIS STAGE. james cowan: ok
Earnest: Using the Power Button, turn the unit OFF and unplug the power cable from back of the printer and wall outlet.
Earnest: Let me know once you are done with the above steps
james cowan: ok its unplugged
Earnest: Wait 30 seconds for the power to get discharged and then plug the power cable into the wall outlet first and then into the back of the printer
Earnest: Turn the unit on. The printer may display message «USE POWER BUTTON TO SHUTDOWN THE PRINTER» followed by «PRESS OK TO CONTINUE». Press OK.
james cowan: ok
Earnest: Let me know the message displaying on the front panel of the printer
james cowan: printer preparation occuring — do not interrupt
Earnest: Okay
james cowan: ok its done
Earnest: Let us print a self test page from the printer now
james cowan: ok deal
Earnest: 1) Load letter, A4, or legal unused plain, white paper into the input tray.
2) Make sure that the printer is on and loaded with unused plain, white paper.
3) Press Setup . The Setup menu appears.
4) Press the down arrow button to select Tools , and then press OK .
5) Press the down arrow button to select Self-test Report , and press OK . The self-test report prints.
james cowan: ok printing
Earnest: Okay, please check whether all the colors pritned perfectly on the test page
james cowan: perfect
Earnest: Great..Cheers!!!
james cowan: thank you very much
Earnest: James, now you can continue using the printer
Earnest: I appreciate your efforts and patience in trying to resolve the issue.»
Thank you for your response, however I have tried the Ciara B printer reset. I never get the message to Insert Cartridges. After waiting a day (gave up and went to bed) The next day, I continued on without it but the error never clears. I guess I could try bringing it in for service, but the last six times I brought something in out of warranty, the advice from the service department is to buy a new one (two notebooks, two desktops, a flat screen and a printer — come to think of it, that’s how I got this printer).
That is why I put in the post. The printer had gone to college and back with one of my kids. Since it really did not get used, they brought it home and decided not to take it back. Since it was sitting here and I needed to make copies, I hooked it up on the network and attempted to use it. I was unaware of expiration dates on the cartridges. When I got the error, it was also showing that I needed to replace several cartridges. There was a sealed pack of cartridges sitting here with it so I opened them up and did a total swap out. However, the expiration date on the replaced cartridges was still 2010 03/05.
I was trying to find out if the problem I am facing is due to the expiration dates. If so, I would go out and buy a new set, however, if I remember right, a complete set costs around $70.00. That is half the price of a new printer and I don’t know that the new printer would even use the same cartridge set. So before I go to the store and buy new cartridges, I was trying to see if that could be what was causing the error. If not, it looks like I will be getting a new printer. It would be nice if the error message actually appeared somewhere to verify what it means. It actully says to refer to printer documentation.
The computer is a HP m9340f running Windows Vista Home Premium with Service Pack 2. The printer is a HP Photosmart C7250 All-In-One if that helps.
Hi @chiquita101,
Hi! Thank you for visiting the HP Forums! A great place where you can find solutions for your issues with help from the community!
As I understand that the printer is giving Ink system failure error message even after installing new ink cartridges.
Don’t worry as I’ll be glad to help with your HP Photosmart C6280 All-in-One Printer.
Please follow the below steps to troubleshoot the issue.
Step 1: Use genuine HP ink cartridges.
Step 2: Reset the printer.
In some cases, removing the ink cartridges and resetting the printer can clear the error message.
-
Turn on the printer.
-
Wait until the printer is idle and silent before you continue.
-
Disconnect the USB cable from the rear of the printer. If your printer has a network or wireless connection, leave your printer connected to the network.
-
Remove the ink cartridges from the printer.
-
With the printer turned on, disconnect the power cord from the rear of the printer and from the wall outlet or power strip.
-
Wait at least 60 seconds.
-
Plug the power cord back into the wall outlet.
-
NOTE: HP recommends connecting the printer power cord directly to a wall outlet.
-
Reconnect the power cord to the rear of the printer.
-
Turn on the printer, if it does not automatically turn on.
The printer might go through a warm-up period. The printer lights might flash, and the carriage might move.
-
Wait until the warm-up period finishes and your printer is idle and silent before you proceed.
-
Reinsert the ink cartridges, and then close the ink cartridge access door.
-
If you receive a prompt to print a calibration page, do so.
-
If you disconnected the USB cable, reconnect it to the rear of the printer.
-
Try to print.
If the issue persists I would personally suggest you contact our HP Phone Support for further assistance. If your product is Out of warranty then remember to choose the paid options to get the tech support number.
They might have multiple options to help you on this.
Please use the following link to create yourself a case number, then call and it may help speed up the call process:
Step 1. Open link: www.hp.com/contacthp/
Step 2. Enter Product number or select to auto detect
Step 3. Scroll down to «Still need help? Complete the form to select your contact options»
Step 4. Scroll down and click: HP contact options — click on Get phone number and phone number appear.
They will be happy to assist you immediately.
Let me know how it goes.
To simply say thanks, please click the «Thumbs Up» button to give me a Kudos to appreciate my efforts to help. If this helps, please mark this as “Accepted Solution” as it will help several others with the same issue to get it resolved without hassles.
Have a great day!
Jeet_Singh
I am an HP Employee
Принтеры на 177 картриджах умеют определять электропроводность чернил. При применении несовместимых чернил или если принтер долго стоял и чернила в его системе подачи краски подсохли, устройство может выдать ошибку “Сбой системы чернил” с кодами: 0xc18a0507, 0xc18a0001, 0xc052281, 0xc18a030a, 0xc05d0281, 0xc19a003f, 0xc18a0306, 0xc18a0201, 0xc19ac3ff, 0xc19a0003, 0xc18a0101, 0xc05d1281, 0xc19a0031, 0xc18a0307, 0xc18a0007, 0xc18a101, 0xc18a506.
Для устранения подобных ошибок нужно сбросить настройки и вернуть устройство к заводскому состоянию. После этого он запустит прочистку системы и если тест краски на электропроводность будет пройден, ошибка исчезнет.
Статья актуальна для принтеров HP Photosmart:
- 3110, 3210, 3213, 3310, 3313, 8253,
- C5175, C5180, C5183, C5185, C6175, C6180, C6183, C6283, C7183, C7283, C8183, C8250, C8253,
- D6160, D6163, D6168, D7160, D7163, D7168, D7180, D7183, D7260, D7263, D7283, D7363, D7463.
Примечание: на принтерах HP D7163, D7260, D7263 D7363 не предусмотрено программных способов сброса настроек до заводского состояния. Избавиться от ошибки можно только способом 4.
Способ 1
- Отключить шнур питания устройства;
- Нажать и удерживать одновременно две кнопки «OK» и «Справка»;
- Продолжая удерживать обе кнопки, включить шнур питания;
- Не отпускать кнопки до того момента, пока принтер не отключится или на дисплее не появится информация о начале инициализации устройства.
Способ 2
- Одновременно нажмите клавиши «ОК», «Cancel», «Black», «Color» с выдернутым кабелем питания;
- Подождите 1 минуту и включите принтер;
- Подождите пока пройдёт прокачка и рекалибровка устройства.
Вполне возможно, что все это придётся повторить 2-3 раз. При данной процедуре насос прокачивает очень много чернил. Способ был проверен на HP Photosmart C3210 и HP Photosmart C3310
Способ 3А
- Чтобы попасть в «Support Menu» необходимо нажать «*» и удерживая ее, нажать клавишу «#».
- Когда Вы отпустите обе клавиши, на дисплее появится запрос на ввод сервисного ключа: «Enter Special Key Combo». По умолчанию это «123».
- После приёма пароля на дисплее будет показана версия прошивки. Нажимая правую или левую стрелочку, выберите пункт меню «System Configuration Menu». Нажмите «OK».
- На дисплее должно появиться сообщение: «Hardware failure status». Если оно не появилось, то необходимо, прокрутить меню стелками до этого пункта. Нажмите «OK».
- На дисплее появится предложение сбросить настройки: «Hardware failure status: Clear. Press OK to clear», нажмите «OK».
- На дисплее появится предложение нажать «Cancel» для продолжения: «Hardware failure status Cleared. Press Cancel to continue». Нажмите «CANCEL» столько раз, сколько необходимо. На дисплее должно появиться приветствие или сообщение о сбросе настроек: «Welcome to Photosmart Express» или «Ink System Failure». НЕ ПЕЧАТАЙТЕ НА ЭТОЙ СТАДИИ!
- Выключите аппарат кнопкой Power и выдерните кабель питания из розетки.
- Подождите 1 минуту и подключите кабель питания сначала в розетку, а только потом в МФУ. Нажмите Power. Может появиться «USE POWER BUTTON TO SHUTDOWN THE PRINTER» и «PRESS OK TO CONTINUE». Нажмите OK. Если принтер инициализировался, переходите к следующему этапу. Если нет, то принтер начнет инициализацию «ONE TIME INK INITIALIZATION PROCESS». Дождитесь завершения. После этого принтер должен напечатать тестовую страницу.
Этот способ сработал на HP Photosmart C6180, C7180.
Способ 3Б (другая комбинация для сервисного меню)
- Зажимаем клавишу ← (стрелка влево на панели управления) и не отпуская жмём SETUP (настройка)
- Отпускаем обе клавиши и ждём появления надписи “Enter Special Key Combo”.
- Зажимаем одновременно кнопки PRINT PHOTOS (“Печать фото”) и RED EYE REMOVAL (“Коррекция красных глаз”), затем отпускаем.
- По очереди нажимаем и отпускаем RED EYE REMOVAL (“Коррекция красных глаз”), PRINT PHOTOS (“Печать фото”), “RED EYE REMOVAL (“Коррекция красных глаз”).
- Нажимаем → (листаем меню стрелкой вправо), пока не дойдём до пункта “System Configuration” и жмём OK.
- Листаем меню стрелкой вправо, пока не дойдем до “Hardware failure status: Clear. Press OK to clear”. Жмём OK. (Примечание: если ошибок нет, то и пункта такого не будет).
- Выключаем принтер, включаем снова. (Важно: после сброса ошибки и до перезагрузки принтера печатать на нём нельзя).
Способ 4 (сброс ошибки выниманием шлейфа печатающей головки)
- Выключить принтер из сети.
- Снять правую крышку.
- Вынуть из платы шлейф J7 (ближний к передней стенке).
- Включить принтер, дождаться ошибки 0xc19a0002, выключить принтер, вставить шлейф.
- Включить принтер и дождаться окончания инициализации системы печати.
Связаны со статьей
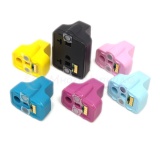
Картриджи для HP C5183, C6283, D7163, D7263, D7363, 3213, C6183, 3313, 3310, C8183, C5180, 6 цветов
Перезаправляемые картриджи для HP C5183, C6283, D7163, D7263, D7363, 3213, C6183, 3313, 3310, C8183, C5180
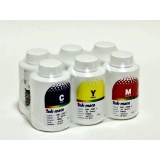
Чернила для HP C5183, C6283, D7163, D7263, D7363, 3213, C6183, 3313, 3310, C8183, C5180, 6х70 мл
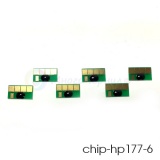
Чипы для HP C5183, C6283, D7163, D7263, D7363, 3213, C6183, 3313, 3310, C8183, C5180, 6 цветов
Комплэйс выполняет ремонт ремонт HP Photosmart C5183 обычно в течение одного дня. Гарантия 2 месяца.
МФУ hp photosmart c5183 является высококачественным продуктом: имеет сканер повышенного разрешения, надежный принтер с высоким качеством печати и реалистичной цветопередачей. Ремонт имеет смысл — сейчас не встретишь таких качественных недорогих фотопринтеров HP.
Приводим типичные неисправности C5183 и способы их устранения.
Ошибка 0xc18a0206
Эта ошибка принтера HP 0xc18a0206 — сбой системы чернил возникла после длительного простоя и связана с тем, что насос не может прокачать чернила через печатающую головку.
Решение проблемы. Разборка принтера. Прочистка печатающей головки, прокачка дюз. Сброс ошибок принтера.
Разборка photosmart C5183
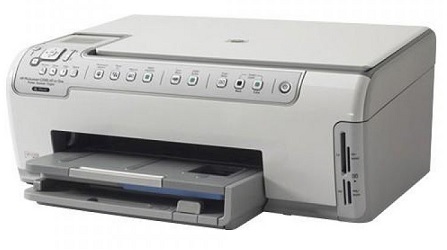
Далее снимается сканер, который крепится на защелках. Снимать нужно осторожно, чтобы не сломать правое крепление. С левого крепления сканер снимается с большим усилием. Далее снимается левый амортизатор, верхняя крышка. Открывается доступ к головке.
Чтобы снять головку, нужно отщелкнуть крепящую скобу, отвинтить 2 винта крынки, 2 винта крепления головки, отсоединить шланги чернил, шлейфы головки.
Далее головку нужно прочистить. Сначала отмочить в очищающей жидкости, затем прокачать дюзы. Давление нельзя прикладывать большим, поскольку разрушатся клапана.
Ремонт сканера МФУ Photosmart C5183
Сначала снимаем сканер, как описано в предыдущем разделе. Разборка сканера HP Photosmart 5183 осложняется скрытым винтом под серебристой наклейкой HP. После отвинчивания всех винтов отщелкиваем защелку и снимаем верхнюю крышку.
Обычно ремонт сканера МФУ HP заключается в замене сканирующего модуля. Этих модулей несколько типов. Нужно подобрать подходящий.
Часто при сканировании слышен сильный скрип и скрежет из-за отсутствия смазки на оси шестерни сканирующего модуля. Нужно снимать, разбирать сканер и смазывать редуктор. Цена 1000 руб.
Ремонт чистка головки Photosmart C5183
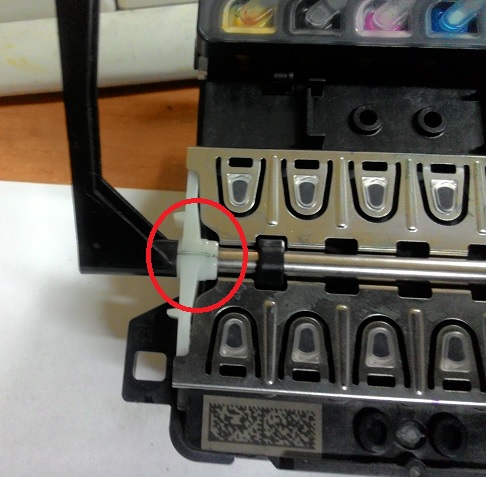
Печатающая головка в принтере hp photosmart C5183 является сложным узлом, который включает в себя также клапанный механизм с насосом, приводящийся в движение с помощью пластикового коромысла. При большой нагрузке это коромысло может треснуть. Трещина обведена кружком. В результате некоторые клапаны перестают открываться, насос не прокачивает дюзы головки, головка подсыхает, некоторые цвета пропадают. Часто принтер заливает тем цветом, клапан которого не открывается.
Решение: можно заменить весь рычаг с донора. Затем нужно отмочить дюзы головки в специальном растворе для прочистки головок и выполнить прочистку под небольшим давлением.
Чистка головки
Поскольку все чернила в hp photosmart c5183 водорастворимые для чистки головки используются чистящие средства для водных чернил: снимаем головку, отмачиваем в течение 5-8 часов в чистящем растворе, прокачиваем ее, ставим на место.
Кстати, чистка головки в hp photosmart c5183 — это очень сложное дело. Нужно не только прочистить дюзы и каналы головки, но и заполнить демпферные камеры. А заполняются они вручную, причем очень сложно. Чтобы хоть как-то ориентироваться в этом, прочтите про устройство головок HP.
Цена ремонта головки 2000 руб. Стоимость чистки головки 2000 руб. Если все вместе, то 3500 руб.
Нет подачи бумаги
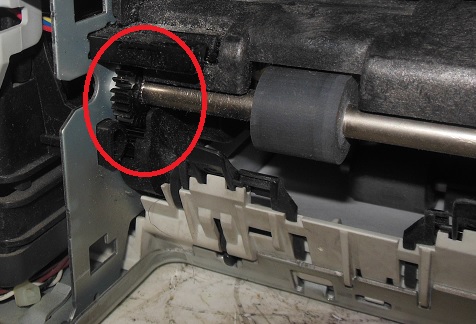
Чаще всего сломана шестерня на заднем валу подачи бумаги
Очень геморройная работа, нужно разбирать весь принтер. Цена замены шестерни 3000 руб., шестерню ставим повышенной прочности.
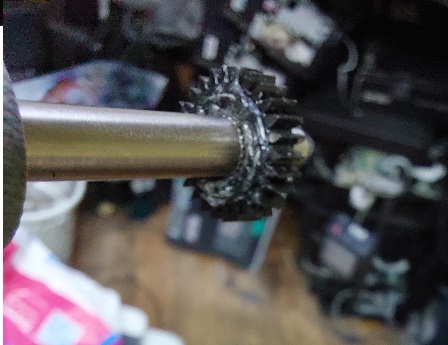
Если новых шестеренки нет, то возможен ее ремонт, который заключается в армировании железным кольцом. После этой работы шестерня сидит очень крепко.
Но цена восстановления та же — 3000 руб.
Иногда неисправен маятник — редуктор, который переключает режимы работы принтера.

