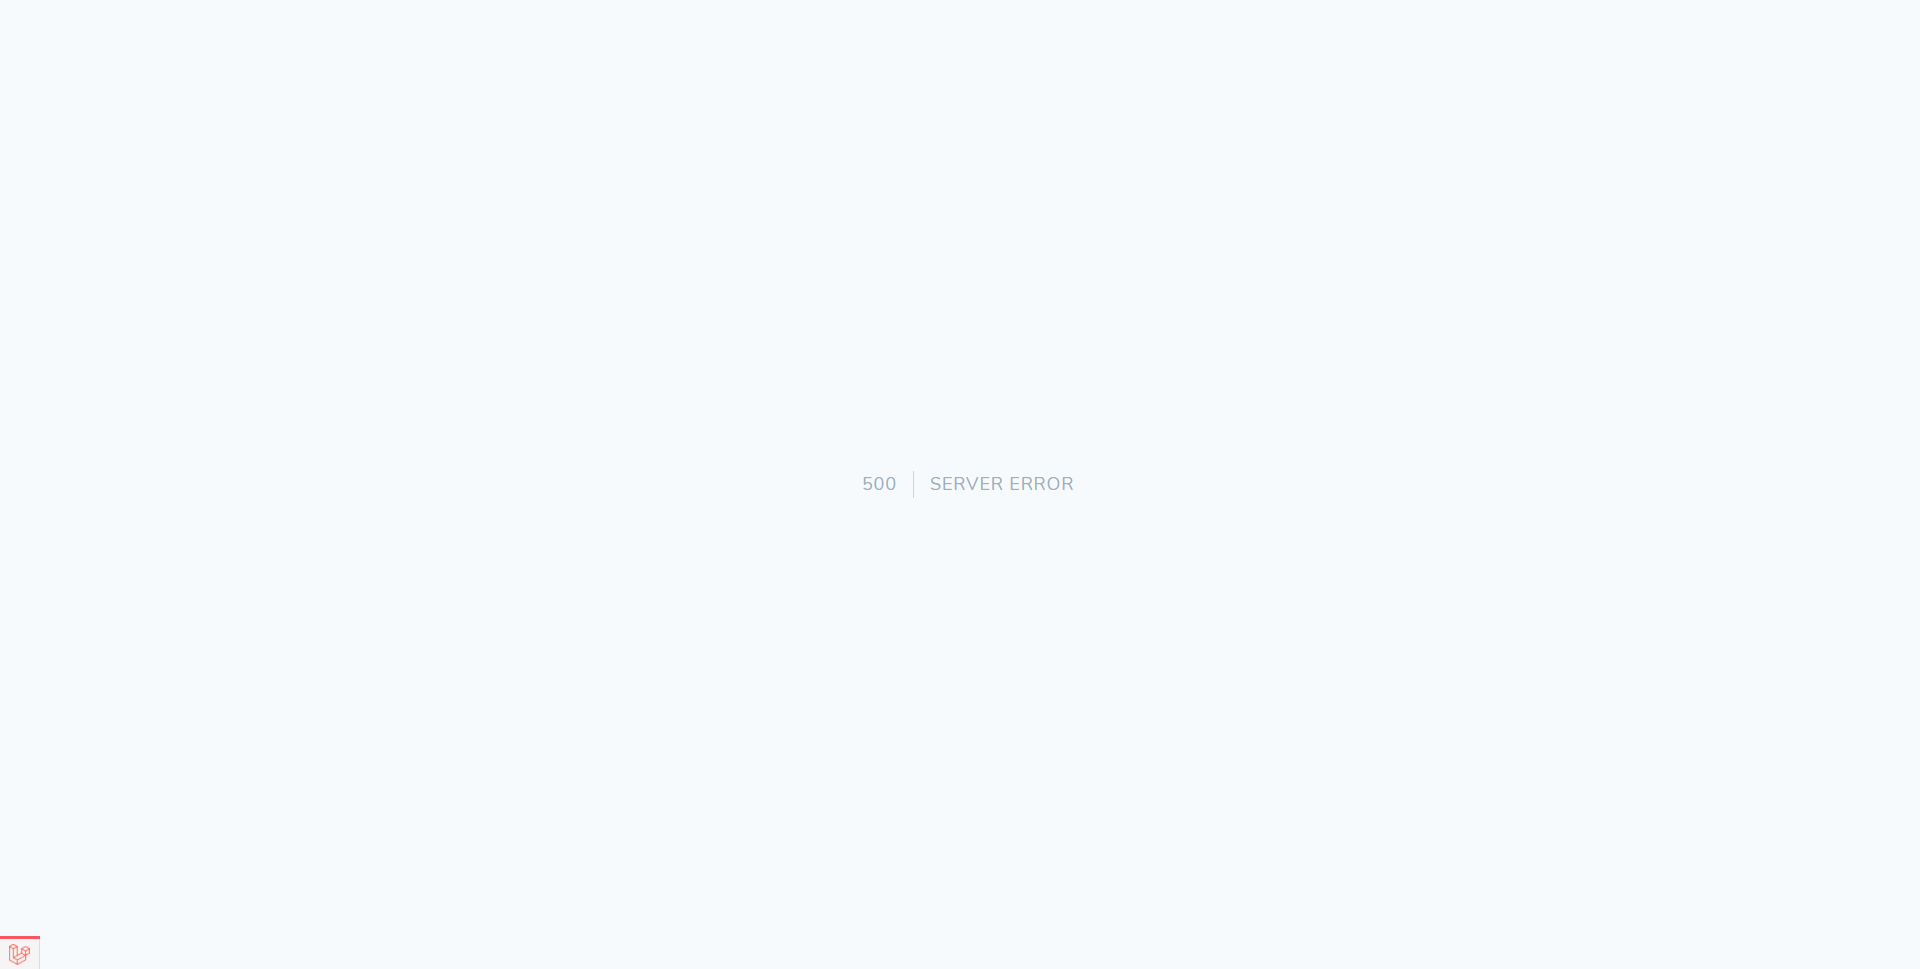
An often overlooked aspect of creating a Statamic or Laravel application is customizing the 500 Server Error page. By default, a Statamic site will display an error page similar to this when a catastrophic error occurs:
Granted, this is much nicer to look at than the default error page that is often provided by web servers such as Apache or nginx, but it still does not communicate a clear message of what has happened to a visitor; the general public probably does not know, or care, about the difference between a 404 error and a 500 error. By customizing these types of error pages we can provide additional details to the visitor about what happened, what they can try next, and emphasize site branding, amongst numerous other things.
Statamic Views Directory Structure
Overriding these error pages in a Statamic project is incredibly simple. If we look at the default file listing in resources/views/ we will find something similar to the following:
1errors/
2 404.antlers.html
3default.antlers.html
4home.antlers.html
5layout.antlers.html
The errors directory allows us to override the template or view that is displayed to site visitors by simply creating a new file with the name of the HTTP status code. To override the 500 Server Error page we can create a new file named 500.html.
You may have noticed that we did not use the .antlers.html or the .blade.html extension. The reason for this is that those two extensions rely on the server-side stack to parse the template and create a response that the user will see. If we have encountered a 500 Server Error page, we cannot assume that our server-side code is working at all, and will fallback to a plain HTML document.
Creating the Template File
To override the 500 Server Error page, we can simply create a new 500.html file within the errors directory. The contents of this file can be anything, but remember that you are not guaranteed to have access to any server-side languages, such as PHP.
This article will utilize the following as an example 500 error page template:
1<!DOCTYPE html>
2<html>
3<head>
4 <title>Our Custom Error Page</title>
5</head>
6<body>
7
8<h1>Something bad happened!</h1>
9
10</body>
11</html>
Testing the Error Page
Now that we have our custom server error page, we need a good way to test it. To do this, we will create a custom Statamic Antlers tag that we can add to our templates to force a server error whenever we want.
Statamic’s please command line utility will be utilized to scaffold the necessary tag file. The please utility contains a command called make:tag that will create the tag’s PHP file for us within our project’s app/Tags/ directory (the Tags directory will be created if it does not already exist). The command accepts the name of our new tag; in the following example ServerError is the name of our new Antlers tag (make sure to run this command from project’s root directory, which should contain the please file):
1php please make:tag ServerError
A new file should now be located at app/Tags/ServerError.php with the following contents:
1<?php
2
3namespace AppTags;
4
5use StatamicTagsTags;
6
7class ServerError extends Tags
8{
9 /**
10 * The {{ server_error }} tag.
11 *
12 * @return string|array
13 */
14 public function index()
15 {
16 //
17 }
18
19 /**
20 * The {{ server_error:example }} tag.
21 *
22 * @return string|array
23 */
24 public function example()
25 {
26 //
27 }
28}
Statamic will automatically load the tag classes from this directory for us, so there are no extra steps involved to actually hook it up to the Antlers template engine. Each public method within a Statamic tag class can be accessed from a template using the <TAG_NAME>:<METHOD_NAME> syntax, and the index method can be used by just supplying the tag’s name. For our new tag, we will only be using the index method so we can write something like this in our template:
1{{ server_error }}
In our template we use server_error instead of ServerError — all CamelCased names must be converted to snake_cased names when they are used in our Antlers template. We now need to add some code to our index method that will trigger an error allowing us to test our new error page. This can be done by simply throwing an Exception:
1<?php
2
3namespace AppTags;
4
5use Exception;
6use StatamicTagsTags;
7
8class ServerError extends Tags
9{
10 /**
11 * The {{ server_error }} tag.
12 *
13 * @return string|array
14 * @throws Exception
15 */
16 public function index()
17 {
18 throw new Exception('This is a test exception.');
19 }
20
21}
After this change, whenever the Antlers templating engine encounters the {{ server_error }} tag a new Exception will be thrown, allowing us to test our error page whenever we want. While our new tag works, the {{ server_error }} can be shortened to something more convenient by making use of a tag alias.
Statamic allows tag authors to provide different names for their tags through the use of the alias feature. We will take advantage of this feature to give our tag a simpler name of {{ 500 }}. In doing so, our tag will also feel more natural when comparing it to the built-in {{ 404 }} tag. To add a tag alias, we simply have to define a static $aliases property with a list of all the tag’s aliases:
1<?php
2
3namespace AppTags;
4
5use Exception;
6use StatamicTagsTags;
7
8class ServerError extends Tags
9{
10 // Anything that appears in this list can be used
11 // in our templates in place of server_error.
12 protected static $aliases = ['500'];
13
14 /**
15 * The {{ server_error }} tag.
16 *
17 * @return string|array
18 * @throws Exception
19 */
20 public function index()
21 {
22 throw new Exception('This is a test exception.');
23 }
24
25}
After adding this, we can now use the {{ 500 }} tag in our Antlers templates to trigger a server error whenever we want.
Preparing the Local Project
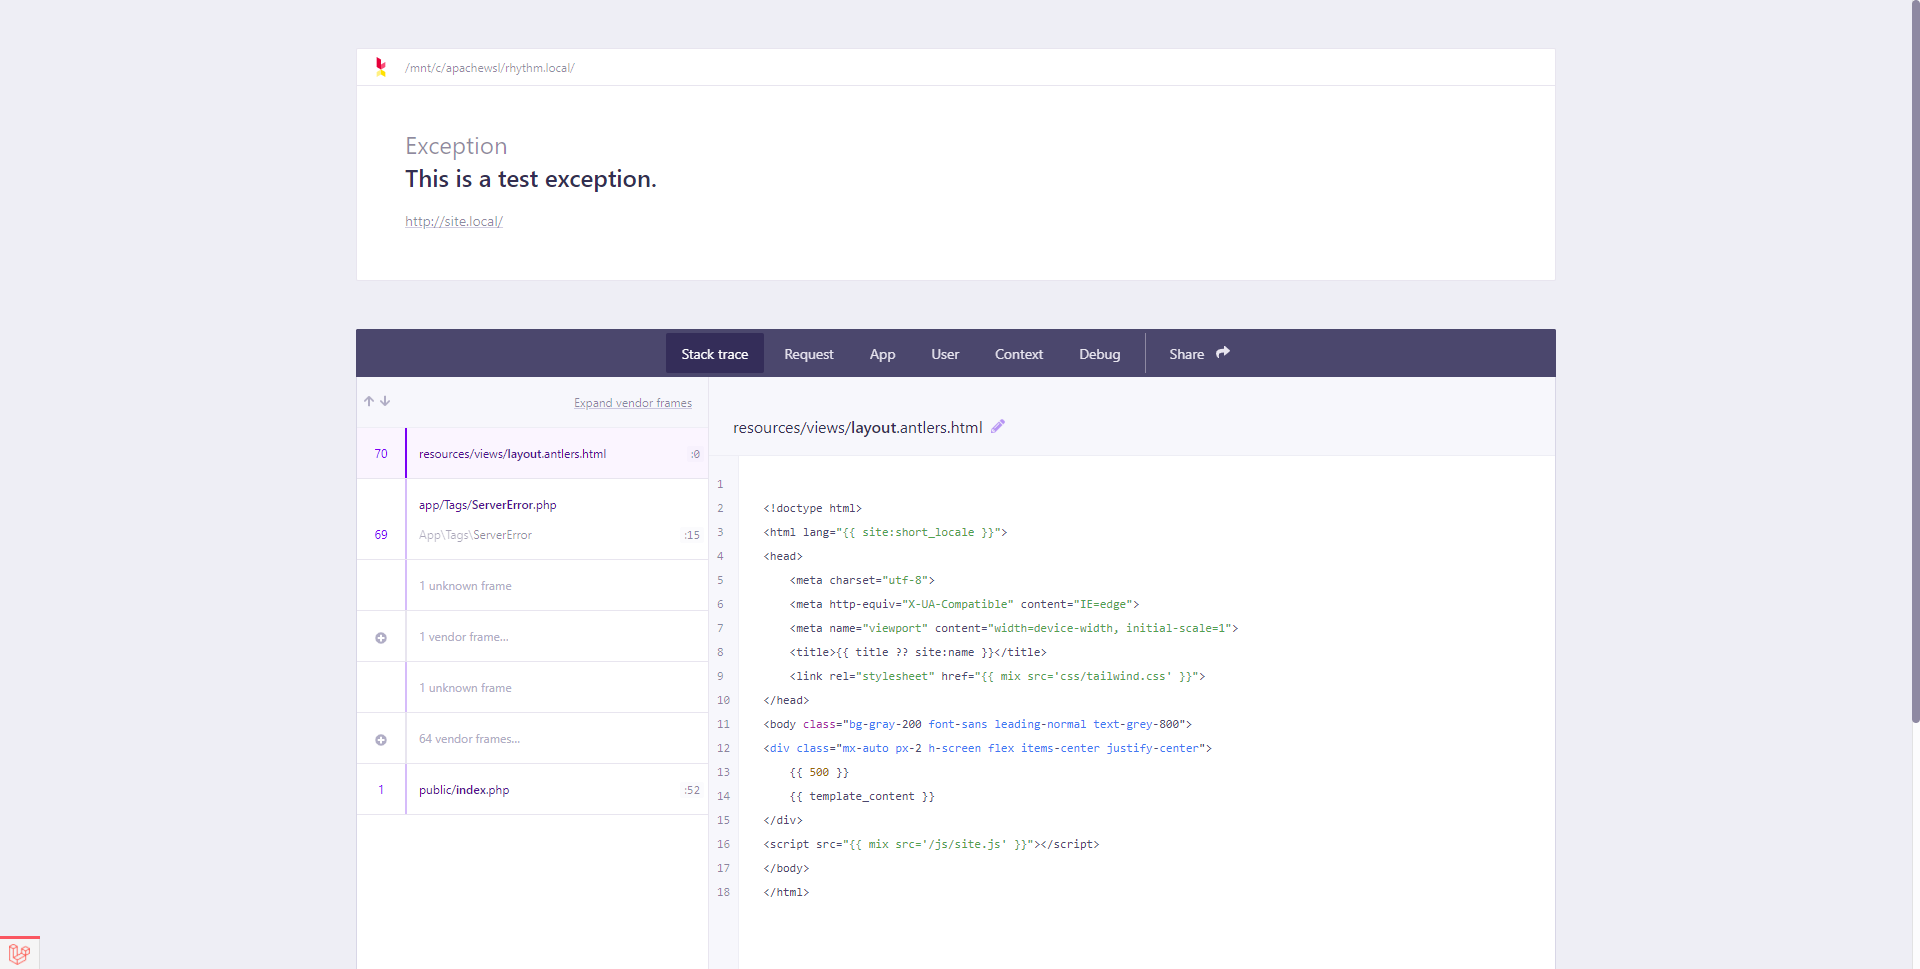
It is often that when working on projects locally, the project is in debug mode. Because of this, we will see screens like this instead of our custom error page:
To have our custom error page show up we need to temporarily update our .env file and adjust the value of the APP_DEBUG entry to false:
1...
2APP_DEBUG=false
3...
If your custom error page still does not appear, it is likely that your project’s configuration values have been cached. To solve this issue, simply run the following command line utility from the root directory of your project (where the artisan file is located):
1php artisan config:clear
After this command has finished your custom error page should now appear once the page is refreshed. If your custom error page still does not appear, the next most common reason is that the config/app.php configuration file has been modified to not load the configuration value from the .env file.
To resolve this issue, open the config/app.php file in your editor and locate the debug entry:
1<?php
2
3return [
4
5 // ...
6
7 /*
8 |--------------------------------------------------------------------------
9 | Application Debug Mode
10 |--------------------------------------------------------------------------
11 |
12 | When your application is in debug mode, detailed error messages with
13 | stack traces will be shown on every error that occurs within your
14 | application. If disabled, a simple generic error page is shown.
15 |
16 */
17
18 'debug' => true,
19
20 // ...
21
22];
Adjust the value of your debug entry to false and then clear the application’s configuration cache by using the config:clear command mentioned earlier.
After getting our local project setup and configured to test the error page, we should now see something similar to the following in the web browser:
Working With Projects Like TailWind CSS
If your project is utilizing tools like TailWind CSS that produce a production CSS build based on the classes your template files actually use, you may run into situations where some classes used on your custom error pages are not included in the final build. The following steps will target TailWind CSS 2 and the default Statamic site setup, but similar steps may be used for other CSS purging utilities.
To have custom error pages included when producing production asset builds locate your tailwind.config.js file at the root of your site’s project and find the purge section. By default it should contain entries similar to the following:
1
2module.exports = {
3 purge: {
4 content: [
5 './resources/**/*.antlers.html',
6 './resources/**/*.blade.php',
7 './content/**/*.md'
8 ]
9 },
10 // ...
11 }
The content array contains the filename patterns that will be used when determining which files to analyze the CSS classes of. On a fresh Statamic installation it will scan all filenames that end with .antlers.html, .blade.php, or .md (within the content/ directory). Because our custom error page is named 500.html, it will not be picked up by the purge process. To remedy this we can add a single entry for this one file:
1module.exports = {
2 purge: {
3 content: [
4 './resources/**/*.antlers.html',
5 './resources/views/errors/500.html',
6 './resources/**/*.blade.php',
7 './content/**/*.md'
8 ]
9 },
10 // ...
11 }
Alternatively, we can also add a new pattern that will match all .html files within the resources directory:
1module.exports = {
2 purge: {
3 content: [
4 './resources/**/*.antlers.html',
5 './resources/**/*.html',
6 './resources/**/*.blade.php',
7 './content/**/*.md'
8 ]
9 },
10 // ...
11 }
Referencing Public CSS and JavaScript Assets
When building our site’s template using Antlers, we usually add our site’s CSS or JavaScript assets using the {{ mix }} Antlers tag. Because we are assuming that all server-side languages are not an option, we can simply reference our public assets directly from within our error page’s template.
When referencing a public assets in this way we need to be sure to prefix the asset paths with / so that they are resolved relative to the site’s domain name:
1<!DOCTYPE html>
2<html>
3<head>
4 <title>Our Custom Error Page</title>
5 <link rel="stylesheet" type="text/css" href="/css/tailwind.css">
6</head>
7<body>
8
9<h1>Something bad happened!</h1>
10
11</body>
12</html>
If you have changed the name of your build files, make sure to use those names instead.
Conclusion
Customizing your project’s error pages are a great way to provide additional details to your site’s visitors, and are often a great place to demonstrate some of a brand’s personality. The default Statamic error pages can be changed in a similar way to overriding Laravel’s error pages. We also developed a custom Antlers tag to generate server errors whenever we want to make it easier to test our custom error page.
∎
Пользователи интернета и владельцы сайтов периодически сталкиваются с различными ошибками на веб-страницах. Одной из самых распространенных ошибок является error 500 (ошибка 500). Поговорим в нашей статье о том, что это за ошибка и как ее исправить.
Где и когда можно встретить ошибку 500
Вы можете увидеть ошибку на любом веб-ресурсе, браузере и устройстве. Она не связана с отсутствием интернет-соединения, устаревшей версией операционной системы или браузера. Кроме того, эта ошибка не указывает на то, что сайта не существует или он больше не работает.
Ошибка 500 говорит о том, что сервер не может обработать запрос к сайту, на странице которого вы находитесь. При этом браузер не может точно сообщить, что именно пошло не так.
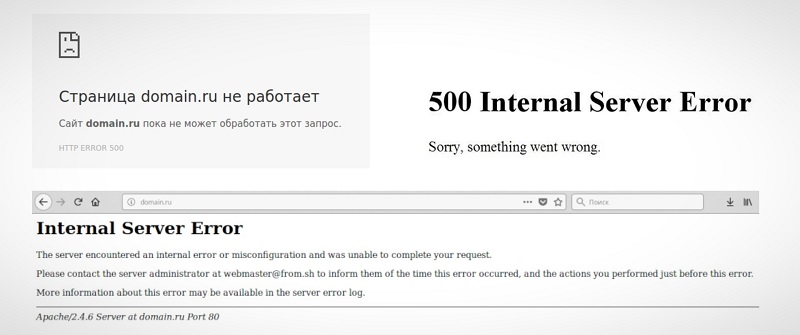
Отображаться ошибка может по-разному. Вот пример:
Если вы решили купить что-то в любимом интернет-магазине, но увидели на сайте ошибку 500, не стоит сильно огорчаться – она лишь сообщает о том, что вам нужно подождать, пока она будет исправлена.
Если ошибка появилась на вашем сайте, то нужно скорее ее исправлять. Далее я расскажу, как это можно сделать.
Комьюнити теперь в Телеграм
Подпишитесь и будьте в курсе последних IT-новостей
Подписаться
Причины возникновения ошибки
Итак, ошибка 500 возникает, когда серверу не удается обработать запрос к сайту. Из-за этого пользователи не могут попасть на сайт, а поисковые системы полноценно с ним работать. Очевидно, что ошибка нуждается в исправлении. В первую очередь необходимо найти проблему.
Основной причиной ошибки 500 может быть:
- Неверный синтаксис файла .htaccess. htaccess – это файл, в котором можно задавать настройки для работы с веб-сервером Apache и вносить изменения в работу сайта (управлять различными перенаправлениями, правами доступа к файлам, опциями PHP, задавать собственные страницы ошибок и т.д.).
Узнать больше о файле .htaccess можно в статье «Создание и настройка .htaccess». - Ошибки в скриптах сайта, то есть сценариях, созданных для автоматического выполнения задач или для расширения функционала сайта.
- Нехватка оперативной памяти при выполнении скрипта.
- Ошибки в коде CMS, системы управления содержимым сайта. В 80% случаев виноваты конфликтующие плагины.
Год хостинга в подарок при заказе лицензии 1С-Битрикс
Выбирайте надежную CMS с регулярными обновлениями системы и профессиональной поддержкой.
Заказать
Как получить больше данных о причине ошибки
Что означает ошибка 500, мы теперь знаем. Когда она перестала быть таким загадочным персонажем, не страшно копнуть глубже — научиться определять причину ошибки. В некоторых случаях это можно сделать самостоятельно, так что обращаться за помощью к профильному специалисту не понадобится.
Отображение ошибки бывает разным. Ее внешний облик зависит от того, чем она вызвана.
Самые частые причины ошибки 500 можно распознать по тексту ошибки или внешнему виду страницы.
- Сообщение Internal Server Error говорит о том, что есть проблемы с файлом .htaccess (например, виновата некорректная настройка файла). Убедиться, что .htaccess является корнем проблемы, поможет следующий прием: переименуйте файл .htaccess, добавив единицу в конце названия. Это можно сделать с помощью FTP-клиента (например, FileZilla) или файлового менеджера на вашем хостинге (в Timeweb такой есть, с ним довольно удобно работать). После изменения проверьте доступность сайта. Если ошибка больше не наблюдается, вы нашли причину.
- Сообщение HTTP ERROR 500 или пустая страница говорит о проблемах со скриптами сайта. В случае с пустой страницей стоит учесть, что отсутствие содержимого сайта не всегда указывает на внутреннюю ошибку сервера 500.
Давайте узнаем, что скрывается за пустой страницей, обратившись к инструментам разработчика. Эта браузерная панель позволяет получить информацию об ошибках и другие данные (время загрузки страницы, html-элементы и т.д.).
Как открыть панель разработчика
- Нажмите клавишу F12 (способ актуален для большинства браузеров на Windows). Используйте сочетание клавиш Cmd+Opt+J, если используете Google Chrome на macOS. Или примените комбинацию Cmd+Opt+C в случае Safari на macOS (но перед этим включите «Меню разработки» в разделе «Настройки» -> «Продвинутые»). Открыть инструменты разработчика также можно, если кликнуть правой кнопкой мыши в любом месте веб-страницы и выбрать «Просмотреть код» в контекстном меню.
- Откройте вкладку «Сеть» (или «Network») и взгляните на число в поле «Статус». Код ответа об ошибке 500 — это соответствующая цифра.

Простыми словами: лог — это журнал, в который записывается информация об ошибках, запросах к серверу, подключениях к серверу, действиях с файлами и т.д.
Как вы видите, данных в логи записывается немало, поэтому они разделены по типам. За сведениями о нашей ошибке можно обратиться к логам ошибок (error_log). Обычно такие логи предоставляет служба поддержки хостинга, на котором размещен сайт. В Timeweb вы можете включить ведение логов и заказать необходимые данные в панели управления. Разобраться в полученных логах поможет статья «Чтение логов».
Как устранить ошибку
Теперь поговорим о том, как исправить ошибку 500. Вернемся к популярным причинам этой проблемы и рассмотрим наиболее эффективные способы решения.
Ошибки в файле .htaccess
У этого файла довольно строгий синтаксис, поэтому неверно написанные директивы (команды) могут привести к ошибке. Попробуйте поочередно удалить команды, добавленные последними, и проверьте работу сайта.
Также найти проблемную директиву можно с помощью логов ошибок (через те же инструменты разработчика в браузере). На ошибку в директиве обычно указывает фраза «Invalid command». Информацию о верном написании директивы или способе исправления ошибок в .htaccess вы можете найти в интернете. Не нужно искать, почему сервер выдает ошибку 500, просто введите в строку поиска название нужной команды или текст ошибки из логов.
Ошибки в скриптах сайта
Скрипт не запускается
Обычно это происходит, когда существует ошибка в скрипте или функция, которая не выполняется. Для успешного запуска скрипта функция должна быть верно прописана, поддерживаться сервером и выполняться от используемой версии PHP. Бывают ситуации, когда функция несовместима с определенными версиями PHP. Получить более подробную информацию о той или иной функции можно в интернете.
Не хватает оперативной памяти
Если в логах вы видите ошибку «Allowed memory size», для устранения ошибки 500 стоит оптимизировать работу скрипта. Вы можете воспользоваться специальными расширениями для анализа производительности скрипта или обратиться за помощью к специалисту, который поработает над его оптимизацией.
Если ваш сайт размещен на отдельном физическом или виртуальном сервере, можно попробовать увеличить максимальное использование оперативной памяти на процесс (memory_limit). На шаред хостинге этот параметр обычно не изменяется, но есть возможность купить хостинг помощнее.
Ошибки в CMS
Если код CMS содержит неверный синтаксис, это может вывести сайт из строя. В таком случае логи сообщат вам об ошибке 500 текстом «PHP Parse error: syntax error, unexpected». Так происходит, когда некорректно работает плагин (или тема, используемая в CMS, но реже) либо есть ошибки в коде. Ошибка может быть допущена случайно, произойти при обновлении плагина или версии CMS.
При чтении логов обратите внимание на путь, который следует за сообщением об ошибке, ведь он может указать на проблемную часть кода или плагин. Если проблема в плагине, для восстановления работы сайта переименуйте на время папку, в которой он расположен. Попробуйте обновить плагин или откатить его до прежней версии. Если ситуацию не удается исправить, от расширения стоит отказаться либо заменить его аналогом.

Информацию о других распространенных ошибках вы можете найти в статье «6 наиболее часто возникающих ошибок HTTP и способы их устранения».
Удачи!
Troubleshooting an HTTP 500 internal server error is like solving a mystery.
You don’t know what exactly happened or why it happened — all you know is that something’s wrong and you need to fix it.
To guide you through the hassle of troubleshooting the dreaded HTTP 500 internal server error, let’s go over what it exactly means and its most common causes and solutions.
An HTTP 500 internal server error is a general error message. It covers unexpected issues that don’t fit into existing error codes. HTTP 500 errors are difficult to troubleshoot because a range of issues on the server side can trigger them.
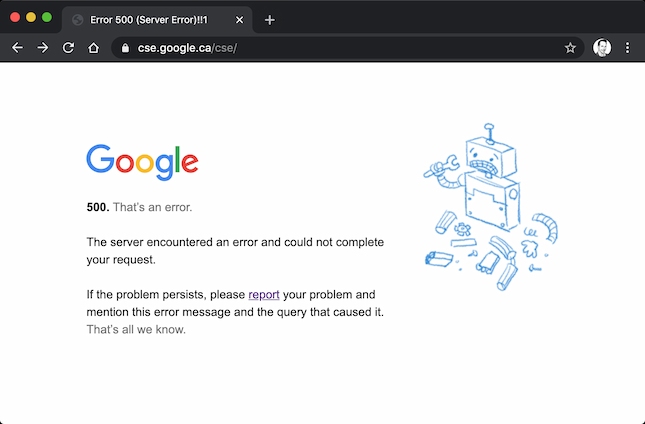
Here are some examples of what a 500 error page might look like in your browser:
Image Source
Image Source
HTTP 500
HTTP 500 errors aren’t problems with your computer, browser, or internet connection. Instead, they’re a generic response that catches any unexplainable server error. You’ll see the HyperText Transfer Protocol (HTTP) 500 Internal Server Error when your server issue doesn’t fit another error code.
Other Common Error Codes
HTTP codes show you how your web browser and website communicate. These are some other common error codes you might see on your website:
HTTP 200
This is a standard status code for websites that are performing well.
HTTP 301
This is the code for permanent redirects. For example, say you have two site pages about widgets with duplicate information and one gets more traffic than the other. It makes sense to redirect the low-traffic page to the high-traffic page to improve SEO for your site.
HTTP 302
This code is for temporary redirects. This is for situations where you want to send users to an alternate page for a short amount of time.
HTTP 304
This code shows up when the website you’re requesting hasn’t seen an update since your last visit.
HTTP 403
This code comes from the server when you’re trying to access a restricted URL.
HTTP 404
A 404 code tells your users that your server can’t find that page they requested with their browser. 404 errors are common, and some sites use this to their advantage.
HTTP 405
This is an HTTP response status code error. It tells you that a web browser wants to access your web page and your server has rejected that specific HTTP method. This means that the browser can’t access the requested web page.
HTTP 410
This is a permanent code that tells site visitors that the page they’re looking for doesn’t exist.
HTTP 413
This code appears when a user tries to upload a file that exceeds the server’s file size limit.
HTTP 429
This error is a server response to stop sending requests because of overloaded resources. This code might show up if your site needs to make too many API calls to meet a request.
HTTP 503
This code tells users that the server is temporarily unable to load the page they’re looking for.
Check out this post for a comprehensive overview of error codes.
Potential Causes of a 500 Internal Server Error
A 500 internal server error is, as the name implies, a general problem with the website’s server. More than likely, this means there’s an issue or temporary glitch with the website’s programming.
Some potential causes of a 500 internal server error include:
Corrupted or Broken .Htaccess File
A .htaccess file is a text file with important server instructions. These instructions tell your software to enable or disable specific functions. They might help you protect passwords in a directory or restrict user access.
There are many ways to corrupt a .htaccess file. It can happen during plugin installation, file configuration, or while you are working on your server.
A Permissions Error
Permission errors come with file protection. Permissions errors might be bugs, user mistakes, or networking problems. Usually, this error means that the user isn’t allowed to perform the action they’re trying.
Faulty Third-Party Plugins or Themes
To increase user features and functionality, you might add a third-party theme or plugin to your website. These plugins can be great for your site, but they can also impact site security, bugs, and performance.
These plugins and themes are often created by individuals or small groups. This can be challenging because they may need more time to address bug fixes and vulnerabilities.
Exceeding the PHP Memory Limit
PHP is a server-side scripting language embedded in HTML. PHP is for managing content, databases, session tracking, and more. Each PHP process uses memory, and your hosting account has a limit for each one of these processes.
If a website needs more than this memory limit, you may see an HTTP 500 error.
HTTP Error 500 Browser Compatibility
Most businesses design their websites for maximum browser compatibility. This means that your website is easy to access and use on any browser or operating system. But your site may work perfectly in one browser and have issues or errors in others.
Because HTTP 500 is a catch-all error, you can see this error on any browser and in any operating system.
How an HTTP 500 Error Might Appear
This error can come up on any site you try to visit on a browser. Because it’s such a common error, there are many ways to communicate this code.
- Internal server error
- The page isn’t working
- 500 Internal Server Error
- 500 Server Error
- 500. That’s an error.
- HTTP 500.0 — Internal Server Error
- Error 500
- Error code: 500
- The server returned a 500 Internal Server Error
- Temporary Error (500)
How to Fix a 500 Internal Server Error
Unlike other server-side errors like a 502 code, a 500 internal server error is it doesn’t immediately tell you what the problem is, nor does it tell you how to fix it. If the error persists for too long on your site, it could even negatively impact your SEO.
So, let’s dive into some solutions so you can try to fix the issue.
If You’re Trying to Load a Page with a 500 Internal Server Error:
1. Refresh the page.
This might seem obvious, but if it’s a temporary loading issue, you might find success if you refresh the page. Before trying anything else in this list, reload the page and see what happens.
2. Come back later.
Since the error is on the server side, I’m willing to bet the website owners are working as quickly as possible to resolve the issue. Give it a few minutes or up to an hour or so, and then reload the URL and see if the development team has fixed the issue.
3. Delete your browser’s cookies.
If clearing the browser history doesn’t work, you might try deleting your browser’s cookies. If the cookies are associated with the error-prone webpage, deleting the cookies might help reload the page.
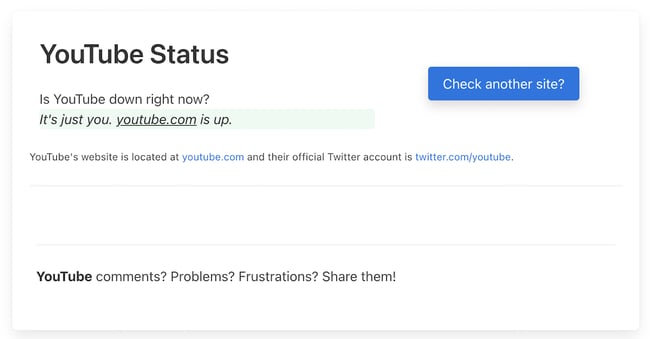
4. Paste your URL into the website «Down for Everyone or Just Me.»
Head to downforeveryoneorjustme.com and paste in the URL where you’re seeing the internal server error. You’ll either be told that the website is only down for you, or that the website is down for everyone.
If the 500 Internal Server Error is on Your Own Website:
1. Deactivate a plugin or theme.
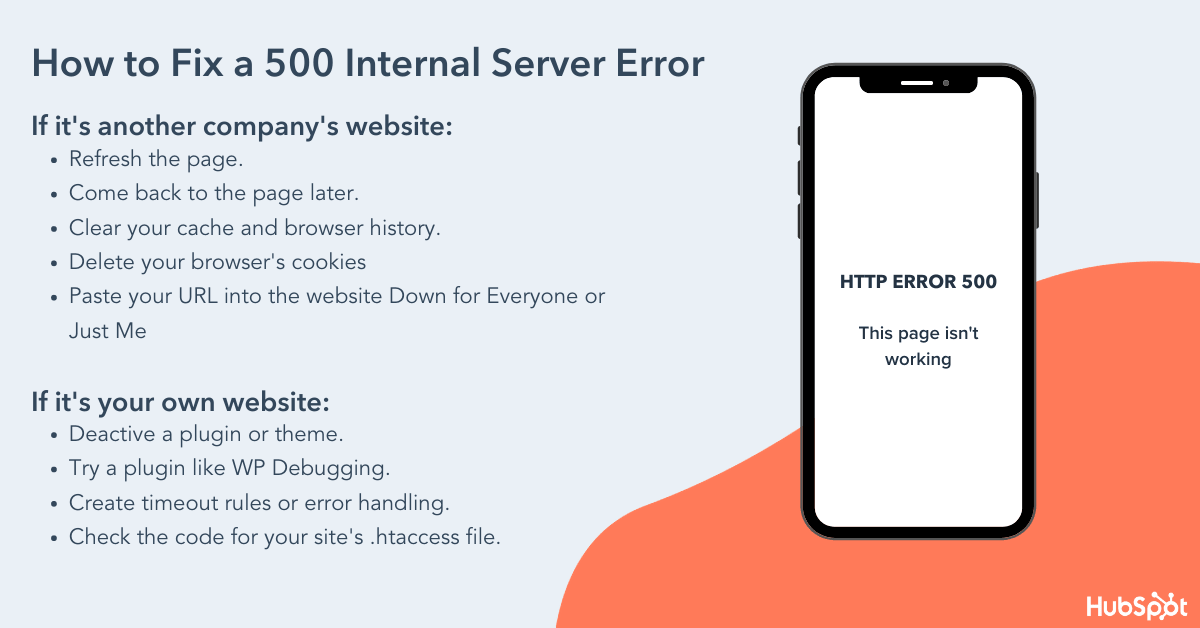
Newly activated software, add-ons, or third-party scripts might be conflicting with your current server configuration. To determine this, try (carefully) deactivating or uninstalling your software add-ons one at a time to identify what exactly is causing the internal server error.
If you run a WordPress website, this is easy to do with plugins. From your dashboard, choose Plugins > Installed Plugins, then deactivate the first plugin. If the error resolves, you know this plugin is part of the issue. Reactivate the first plugin, then repeat this deactivate-reactivate process one at a time for all plugins to determine which ones are causing your error.
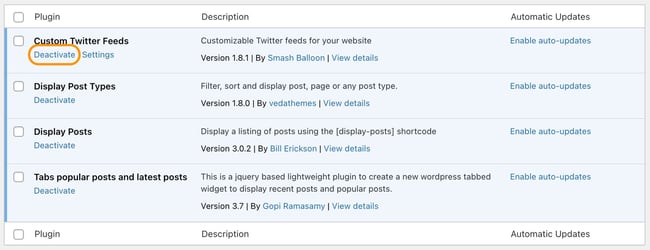
Alternatively, if you just upgraded your software, your current plugins or themes might not be compatible with the new upgrade. Deactivating plugins or themes one at a time until the error disappears is the best way to find the root cause of your problem.
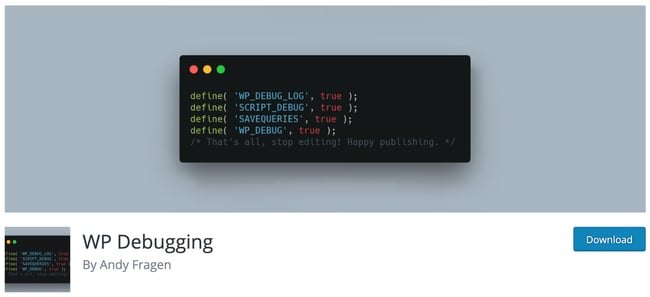
2. Use a plugin like WP Debugging to identify the issue.
If your site is powered by WordPress and you’re comfortable with WordPress debugging processes, consider installing a plugin to help you identify the issue with your server.
The debug plugin WP Debugging, for instance, helps you figure out exactly what’s wrong with your site, which will result in a speedier fix.
Image Source
3. Ensure your PHP setup is configured correctly.
If the issue is related to a PHP timeout, consider creating timeout rules or error handling in your script to resolve the issue. Here’s a full list of php.ini directives to configure your PHP setup.
Additionally, wrong permissions on a file or folder that has a script, like a PHP or CGI script, won’t allow the script to run. Check your permissions and make sure you set them correctly on your server.
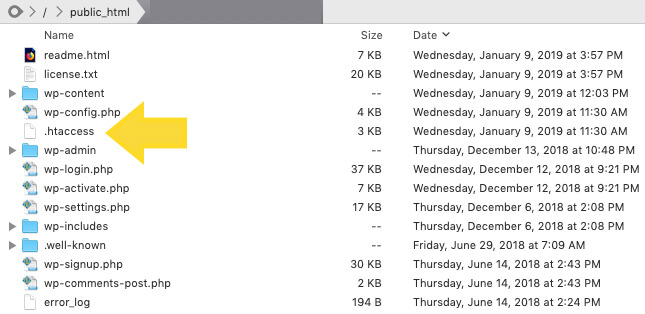
4. Check the code for your site’s .htaccess file.
Incorrect coding or improper structure with your .htaccess file could be the reason you’re seeing the 500 internal error. The .htaccess file helps you manage how long resources should be stored in a browser’s cache. Try editing the file if you’re seeing a 500 internal server error.
To locate your .htaccess file, access your website files through a file manager like cPanel or via FTP/SFTP. The file will probably be located in your public_html directory. There’s a good chance your server will hide this file from view by default and you’ll need to toggle hidden files on to see it.
Image Source
Coding errors in .htaccess and custom scripts can also cause an HTTP 500 internal server error.
5. Ensure your new software is installed correctly.
Finally, check to see if your recently installed or upgraded software actually failed to install or upgrade. To refresh your software, check the vendor’s website for instructions.
Last Resort: Ask a Server Administrator for Help
If troubleshooting popular software problems or debugging server-side scripts doesn’t fix your HTTP 500 internal server error, you should read about the most common causes for this type of issue in your server’s documentation — an HTTP 500 internal server error can occur in different operating systems for a multitude of reasons.
You can also ask your service provider to access your error logs and find evidence of the root cause of your problem.
Internal server errors are irritating because they’re unhelpful — it’s basically the web server’s way of saying, «Eh, I’m not sure.» Hopefully, one of the above steps will resolve the problem so you can get back to life as usual.
Editor’s note: This post was originally published in October 2018 and has been updated for comprehensiveness.
nginx |
Apache HTTPD |
Lighttpd |
express.js |
koa.js |
Caddy |
Customization
Simple HttpErrorPages
Simple HTTP Error Page Generator. Create a bunch of custom error pages — suitable to use with Lighttpd, Nginx, expressjs, koajs ,Apache-Httpd or any other Webserver.
Features
- Static pages (for webservers)
- Multi-Language (i18n) support
- Generator script to customize pages
- Native express.js middleware
- Native koa.js middleware
Demo
- HTTP400
- HTTP401
- HTTP403
- HTTP404
- HTTP500
- HTTP501
- HTTP502
- HTTP503
- HTTP520
- HTTP521
Download
Just clone/download the git repository or use the prebuild packages (only the generated html files are included)
Download Prebuild Packages (Pages only, en_US)
- Download Single Files
NGINX Integration
NGINX supports custom error-pages using multiple error_page directives.
File: default.conf
Example — assumes HttpErrorPages are located into /var/ErrorPages/.
server {
    listen      80;
    server_name localhost;
    root        /var/www;
    index       index.html;

    location / {
        try_files $uri $uri/ =404;

        # add one directive for each http status code
        error_page 400 /ErrorPages/HTTP400.html;
        error_page 401 /ErrorPages/HTTP401.html;
        error_page 402 /ErrorPages/HTTP402.html;
        error_page 403 /ErrorPages/HTTP403.html;
        error_page 404 /ErrorPages/HTTP404.html;
        error_page 500 /ErrorPages/HTTP500.html;
        error_page 501 /ErrorPages/HTTP501.html;
        error_page 502 /ErrorPages/HTTP502.html;
        error_page 503 /ErrorPages/HTTP503.html;
    }

    # redirect the virtual ErrorPages path the real path
    location /ErrorPages/ {
        alias /var/ErrorPages/;
        internal;
    }
Apache Httpd Integration
Apache Httpd 2.x supports custom error-pages using multiple ErrorDocument directives.
File: httpd.conf or .htaccess
Example — assumes HttpErrorPages are located into your document root /var/www/...docroot../ErrorPages.
ErrorDocument 400 /ErrorPages/HTTP400.html
ErrorDocument 401 /ErrorPages/HTTP401.html
ErrorDocument 403 /ErrorPages/HTTP403.html
ErrorDocument 404 /ErrorPages/HTTP404.html
ErrorDocument 500 /ErrorPages/HTTP500.html
ErrorDocument 501 /ErrorPages/HTTP501.html
ErrorDocument 502 /ErrorPages/HTTP502.html
ErrorDocument 503 /ErrorPages/HTTP503.html
Lighttpd Integration
Lighttpd supports custom error-pages using the server.errorfile-prefix directive.
File: lighttpd.conf
Example — assumes HttpErrorPages are located into /var/www/ErrorPages/.
server.errorfile-prefix = "/var/www/ErrorPages/HTTP"
expressjs Integration
HttpErrorPages are available as NPM-Package — just install http-error-pages via npm/yarn
Installation
yarn add http-error-pages
Example
A ready-to-use example can be found in examples/express.js
const _express = require('express');
const _webapp = _express();
const _httpErrorPages = require('http-error-pages');

async function bootstrap(){
    // demo handler
    _webapp.get('/', function(req, res){
        res.type('.txt').send('HttpErrorPages Demo');
    });

    // throw an 403 error
    _webapp.get('/my403error', function(req, res, next){
        const myError = new Error();
        myError.status = 403;
        next(myError);
    });

    // throw an internal error
    _webapp.get('/500', function(req, res){
        throw new Error('Server Error');
    });

    // use http error pages handler (final statement!)
    // because of the asynchronous file-loaders, wait until it has been executed
    await _httpErrorPages.express(_webapp, {
        lang: 'en_US',
        payload: {
            footer: 'Hello <strong>World</strong>',
            myvar: 'hello world'
        }
    });

    // start service
    _webapp.listen(8888);
}

// invoke bootstrap operation
bootstrap()
    .then(function(){
        console.log('Running Demo on Port 8888');
    })
    .catch(function(e){
        console.error(e);
    });
Options
Syntax: Promise _httpErrorPages.express(expressWebapp [, options:Object])
template(type:string) — the path to a custom EJS template used to generate the pages. default assets/template.ejscss(type:string) — the path to a precompiled CSS file injected into the page. default assets/layout.csslang(type:string) — language definition which should be used (available in thei18n/directory). default en_USpayload(type:object) — additional variables available within the templatepayload.footer(type:string) — optional page footer content (html allowed). default nullfilter(type:function) — filter callback to manipulate the variables before populated within the templateonError(type:function) — simple debug handler to print errors to the console (not to be used in production!)
koajs Integration
HttpErrorPages are available as NPM-Package — just install http-error-pages via npm/yarn
Installation
yarn add http-error-pages
Example
A ready-to-use example can be found in examples/koa.js.
Keep in mind that the following example has to be executed within an async context!
const _koa = require('koa');
const _webapp = new _koa();
const _httpErrorPages = require('http-error-pages');

// use http error pages handler (INITIAL statement!)
// because of the asynchronous file-loaders, wait until it has been executed - it returns an async handler
_webapp.use(await _httpErrorPages.koa({
    lang: 'en_US',
    payload: {
        footer: 'Hello <strong>World</strong>',
        myvar: 'hello world'
    }

}));

// add other middleware handlers
_webapp.use(async (ctx, next) => {
    if (ctx.path == '/'){
        ctx.type = 'text';
        ctx.body = 'HttpErrorPages Demo';
    }else{
        return next();
    }
});

// start service
_webapp.listen(8888);
Options
Syntax: Promise _httpErrorPages.koa([options:Object])
template(type:string) — the path to a custom EJS template used to generate the pages. default assets/template.ejscss(type:string) — the path to a precompiled CSS file injected into the page. default assets/layout.csslang(type:string) — language definition which should be used (available in thei18n/directory). default en_USpayload(type:object) — additional variables available within the templatepayload.footer(type:string) — optional page footer content (html allowed). default nullfilter(type:function) — filter callback to manipulate the variables before populated within the templateonError(type:function) — simple debug handler to print errors to the console (not to be used in production!)
Caddy Integration
Caddy supports custom error-pages using errors directive.
File: Caddyfile
Example — assumes HttpErrorPages are located into /var/www/error.
www.yoursite.com {

    // Other configurations

    errors {
        404 /var/www/error/HTTP404.html
    }

    // Other configurations

}
Customization
First of all, clone
or download the http-error-pages repository.
Install Dependencies
You have to install the node dev dependencies to build the pages:
# run the yarn command within the cloned repository
yarn install

# or if you more familiar with npm..
npm install
To customize the pages, you can edit any of the template files and finally run the generator-script.
All generated html files are located into the dist/ directory by default.
If you wan’t to add custom pages/additional error-codes, just put a new entry into the i18n/pages-en_US.json file (its recommended to copy the file).
The generator-script will process each entry and generates an own page.
Files
- config.json — basic configuration options
- assets/layout.scss — the SCSS based styles
- assets/template.ejs — the EJS based page template
- i18n/pages-.json — the page definitions (multilanguage)
- dist/*.html — generator output directory
Change page styles
To modify the page styles, just edit the SCSS based layout assets/layout.scss and finally run gulp to generate the css code.
The new layout file is stored in assets/layout.css — run the page generator to create the pages.
Example
# start gulp sccs via npm
$ npm run gulp

> http-error-pages@0.6.0 gulp HttpErrorPages
> gulp

[08:40:33] Using gulpfile HttpErrorPages/gulpfile.js
[08:40:33] Starting 'sass'...
[08:40:34] Finished 'sass' after 108 ms
[08:40:34] Starting 'default'...
[08:40:34] Finished 'default' after 40 μs

# generate http-error-pages using modified stylesheet
$ npm run static

> http-error-pages@0.6.0 static HttpErrorPages
> node bin/generator.js static

Paths
 |- Config: HttpErrorPages/config.json
 |- Template: HttpErrorPages/assets/template.ejs
 |- Styles: HttpErrorPages/assets/layout.css
 |- Pages: HttpErrorPages/i18n/pages-en_US.json

Generating static pages
 |- Page <HTTP404.html>
 |- Page <HTTP403.html>
 |- Page <HTTP400.html>
 |- Page <HTTP500.html>
 |- Page <HTTP501.html>
 |- Page <HTTP502.html>
 |- Page <HTTP520.html>
 |- Page <HTTP503.html>
 |- Page <HTTP521.html>
 |- Page <HTTP533.html>
 |- Page <HTTP401.html>
Static files generated
Multi language (i18n)
To use a different language just provide a custom page definition — in case the file is located in i18n you can use the --lang option
Example
$ npm run static -- --lang pt_BR

> http-error-pages@0.6.0 static HttpErrorPages
> node bin/generator.js static "--lang" "pt_BR"

Paths
 |- Config: HttpErrorPages/config.json
 |- Template: HttpErrorPages/assets/template.ejs
 |- Styles: HttpErrorPages/assets/layout.css
 |- Pages: HttpErrorPages/i18n/pages-pt_BR.json

Generating static pages
 |- Page <HTTP404.html>
 |- Page <HTTP400.html>
 |- Page <HTTP401.html>
 |- Page <HTTP403.html>
 |- Page <HTTP500.html>
 |- Page <HTTP501.html>
 |- Page <HTTP502.html>
 |- Page <HTTP520.html>
 |- Page <HTTP503.html>
 |- Page <HTTP521.html>
 |- Page <HTTP533.html>
Static files generated
Add custom pages
Create custom error codes/pages used by e.g. CloudFlare
Example
// webserver origin error
"520": {
    "title": "Origin Error - Unknown Host",
    "message": "The requested hostname is not routed. Use only hostnames to access resources."
},

// webserver down error
"521": {
    "title": "Webservice currently unavailable",
    "message": "We've got some trouble with our backend upstream cluster.nOur service team has been dispatched to bring it back online."
},
Change footer message
The footer message can easily be changed/removed by editing config.json.
Example — customm footer
{
    //  Output Filename Scheme - eg. HTTP500.html
    "scheme": "HTTP%code%.html",

    // Footer content (HTML Allowed)
    "footer": "Contact <a href="mailto:info@example.org">info@example.org</a>"
}
Example — no footer
{
    //  Output Filename Scheme - eg. HTTP500.html
    "scheme": "HTTP%code%.html"
}
Placeholders/Variables
The following set of variables is exposed to the ejs template (404 page example):
{
  title: 'Resource not found',
  message: 'The requested resource could not be found but may be available again in the future.',
  code: '404',
  language: 'en',
  scheme: 'HTTP%code%.html',
  pagetitle: "We've got some trouble | %code% - %title%",
  footer: 'Tech Contact <a href="mailto:info@example.org">info@example.org</a>',
  myvar: 'Hello World'
}
To generate dynamic titles/content based on the current variable set, each variable is exposed as placeholder (surrounded by %).
You can also define custom variable within the page definitions, everything is merged togehter.
Modify the HTML template
The HTML template is based on ejs and located in assets/template.ejs — you can apply any kind of changes.
<!DOCTYPE html>
<html lang="<%= vars.language %>">
<head>
    <!-- Simple HttpErrorPages | MIT License | https://github.com/HttpErrorPages -->
    <meta charset="utf-8" /><meta http-equiv="X-UA-Compatible" content="IE=edge" /><meta name="viewport" content="width=device-width, initial-scale=1" />
    <title><%= vars.pagetitle %></title>
    <style type="text/css"><%- vars.inlinecss %></style>
</head>
<body>
    <div class="cover"><h1><%= vars.title %> <small><%= vars.code %></small></h1><p class="lead"><%= vars.message %></p></div>
    <% if (vars.footer){ %><footer><p><%- vars.footer %></p></footer><% } %>
</body>
</html>
Command line options
The http-error-pages generator allows you to use custom template/config files directly. This is the recommended method to create full-customized pages.
$ npm run static -- --help

> http-error-pages@0.6.0 static HttpErrorPages
> node bin/generator.js static "--help"

  Usage: static [options] [config]

  run http-error-pages generator

  Options:

    -t, --template <path>  path to your custom EJS template file
    -s, --styles <path>    path to your custom stylesheet (precompiled as CSS!)
    -p, --pages <path>     path to your custom page definition
    -l, --lang <lang>      the language of the default page definition
    -o, --out <path>       output directory
    -h, --help             output usage information
Example — use custom files
We assume you’ve created a folder named example_org which contains all relevant template files
# via npm run-script (cross platform)
$ npm run static -- -t example_org/template.ejs -s example_org/styles.css -p example_org/pages.json -o example_org/output

# .. or directly (linux only)
$ http-error-pages -t example_org/template.ejs -s example_org/styles.css -p example_org/pages.json -o example_org/output
License
HttpErrorsPages is OpenSource and licensed under the Terms of The MIT License (X11) — your’re welcome to contribute
7 июня, 2022 12:03 пп
373 views
| Комментариев нет
LEMP Stack, Ubuntu
Nginx – это высокопроизводительный веб-сервер, способный гибко и качественно обслуживать контент. Оформляя страницы своего сайта, вы наверняка захотите создать пользовательский стиль для каждого его элемента, включая и страницы об ошибках, которые появляются, если контент недоступен. В этом руководстве мы покажем, как настроить такие страницы на Nginx.
Требования
- Виртуальный сервер с пользователем sudo (мы используем сервер Ubuntu 22.04, настроенный по этому мануалу).
- Предварительно установленный веб-сервер Nginx (инструкции по установке вы найдете здесь).
Создание пользовательской страницы об ошибке
Пользовательские страницы ошибок, которые мы используем здесь, предназначены для демонстрационных целей. Если у вас есть свои страницы, используйте их.
Поместите пользовательские страницы ошибок в каталог /usr/share/nginx/html, корневой каталог Nginx по умолчанию. Там мы создадим страницу для ошибки 404 под названием custom_404.html и для общих ошибок уровня 500 под названием custom_50x.html.
Примечание: Дальнейшие строки можно использовать, если вы тренируетесь на наших страницах. В противном случае не забудьте указать свои данные.
Сначала создайте HTML-файл для своей пользовательской страницы 404 с помощью nano или другого текстового редактора:
sudo nano /usr/share/nginx/html/custom_404.html
Вставьте туда код, который определяет пользовательскую страницу:
<h1 style='color:red'>Error 404: Not found :-(</h1>
<p>I have no idea where that file is, sorry. Are you sure you typed in the correct URL?</p>
Сохраните и закройте файл.
Теперь создайте файл HTML для страницы 500:
sudo nano /usr/share/nginx/html/custom_50x.html
Вставьте в файл следующее:
<h1>Oops! Something went wrong...</h1>
<p>We seem to be having some technical difficulties. Hang tight.</p>
Сохраните и закройте файл.
В данный момент у вас есть две пользовательские страницы ошибок, которые будут отображаться на сайте, когда запросы клиентов приводят к различным ошибкам.
Настройка Nginx для поддержки пользовательских страниц
Итак, пора сообщить Nginx, что он должен использовать эти страницы всякий раз, когда возникают соответствующие ошибки. Откройте тот файл server-блока в каталоге /etc/nginx/sites-enabled, который вы хотите настроить. Здесь мы используем стандартный файл по имени default. Если вы настраиваете свои собственные страницы, пожалуйста, убедитесь, что используете правильный файл:
sudo nano /etc/nginx/sites-enabled/default
Теперь нужно направить Nginx на соответствующие страницы.
Настройка пользовательской страницы 404
Используйте директиву error_page, чтобы при возникновении ошибки 404 (когда запрошенный файл не найден) обслуживалась созданная вами пользовательская страница. Создайте location-блок для вашего файла, где вы сможете установить его правильное расположение в файловой системе и указать, что файл доступен только через внутренние перенаправления Nginx (не запрашиваемые клиентами напрямую):
server {
    listen 80 default_server;


    . . .

    error_page 404 /custom_404.html;
    location = /custom_404.html {
        root /usr/share/nginx/html;
        internal;
    }
}
Обычно устанавливать root в новом блоке location не нужно, так как он совпадает с root в блоке server. Однако здесь мы явно указываем, что страницы ошибок нужно обслуживать, даже если вы перемещаете свой обычный веб-контент и связанный с ним root в другое место.
Настройка страницы ошибок 50х
Затем добавьте новые директивы, чтобы Nginx, столкнувшись с ошибками уровня 500 (это проблемы, связанные с сервером), мог обслуживать другую пользовательскую страницу, которую вы создали. Здесь мы будем следовать той же формуле, которую вы использовали в предыдущем разделе. На этот раз мы насторим несколько ошибок уровня 500, чтобы все они использовали страницу custom_50x.html.
Внизу мы также добавим фиктивный FastCGI, чтобы вы могли протестировать свою страницу с ошибкой уровня 500. Это выдаст ошибку, потому что бэкэнд на самом деле не существует. Так вы можете убедиться, что ошибки уровня 500 обслуживают вашу пользовательскую страницу.
Отредактируйте файл /etc/nginx/sites-enabled/default следующим образом:
server {
    listen 80 default_server;


    . . .

    error_page 404 /custom_404.html;
    location = /custom_404.html {
        root /usr/share/nginx/html;
        internal;
    }

    error_page 500 502 503 504 /custom_50x.html;
    location = /custom_50x.html {
        root /usr/share/nginx/html;
        internal;
    }

    location /testing {
        fastcgi_pass unix:/does/not/exist;
    }
}
Сохраните и закройте файл, когда закончите.
Перезапуск Nginx и тестирование
Чтобы проверить синтаксис ваших файлов, введите:
sudo nginx -t
Если команда обнаружила какие-либо ошибки, исправьте их, прежде чем продолжить. Перезапустите Nginx, если ошибок нет:
sudo systemctl restart nginx
Теперь, если вы перейдете на домен или IP-адрес вашего сервера и запросите несуществующий файл, вы должны увидеть настроенную вами страницу 404:
http://server_domain_or_IP/thiswillerror
Перейдите в расположение вашего FastCGI и вы получите ошибку 502 Bad Gateway, что является ошибкой уровня 50х:
http://server_domain_or_IP/testing
Вернитесь в конфигурационный файл и удалите фиктивный FastCGI.
Заключение
Теперь ваш веб-сервер может обслуживать пользовательские страницы ошибок. Это простой способ персонализировать ваш сайт и обеспечить лучший пользовательский опыт даже при возникновении ошибок. Один из способов оптимизировать эти страницы – разместить на них дополнительную информацию или полезные ссылки для пользователей. Если вы сделаете это, убедитесь, что ссылки доступны даже при возникновении соответствующих ошибок.
Tags: NGINX, Ubuntu 22.04

