Communicating with backend services using HTTP
Most front-end applications need to communicate with a server over the HTTP protocol, to download or upload data and access other back-end services.
Angular provides a client HTTP API for Angular applications, the HttpClient service class in @angular/common/http.
The HTTP client service offers the following major features.
- The ability to request typed response objects
- Streamlined error handling
- Testability features
- Request and response interception
Prerequisites
Before working with the HttpClientModule, you should have a basic understanding of the following:
- TypeScript programming
- Usage of the HTTP protocol
- Angular application-design fundamentals, as described in Angular Concepts
- Observable techniques and operators.
See the Observables guide.
Setup for server communication
Before you can use HttpClient, you need to import the Angular HttpClientModule.
Most apps do so in the root AppModule.
You can then inject the HttpClient service as a dependency of an application class, as shown in the following ConfigService example.
The HttpClient service makes use of observables for all transactions.
You must import the RxJS observable and operator symbols that appear in the example snippets.
These ConfigService imports are typical.
You can run the that accompanies this guide.
The sample app does not require a data server.
It relies on the Angular in-memory-web-api, which replaces the HttpClient module’s HttpBackend.
The replacement service simulates the behavior of a REST-like backend.
Look at the AppModule imports to see how it is configured.
Requesting data from a server
Use the HttpClient.get() method to fetch data from a server.
The asynchronous method sends an HTTP request, and returns an Observable that emits the requested data when the response is received.
The return type varies based on the observe and responseType values that you pass to the call.
The get() method takes two arguments; the endpoint URL from which to fetch, and an options object that is used to configure the request.
options: {
headers?: HttpHeaders | {[header: string]: string | string[]},
observe?: ‘body’ | ‘events’ | ‘response’,
params?: HttpParams|{[param: string]: string | number | boolean | ReadonlyArray<string | number | boolean>},
reportProgress?: boolean,
responseType?: ‘arraybuffer’|’blob’|’json’|’text’,
withCredentials?: boolean,
}
Important options include the observe and responseType properties.
- The observe option specifies how much of the response to return
- The responseType option specifies the format in which to return data
Use the options object to configure various other aspects of an outgoing request.
In Adding headers, for example, the service set the default headers using the headers option property.
Use the params property to configure a request with HTTP URL parameters, and the reportProgress option to listen for progress events when transferring large amounts of data.
Applications often request JSON data from a server.
In the ConfigService example, the app needs a configuration file on the server, config.json, that specifies resource URLs.
To fetch this kind of data, the get() call needs the following options: {observe: 'body', responseType: 'json'}.
These are the default values for those options, so the following examples do not pass the options object.
Later sections show some of the additional option possibilities.
The example conforms to the best practices for creating scalable solutions by defining a re-usable injectable service to perform the data-handling functionality.
In addition to fetching data, the service can post-process the data, add error handling, and add retry logic.
The ConfigService fetches this file using the HttpClient.get() method.
The ConfigComponent injects the ConfigService and calls the getConfig service method.
Because the service method returns an Observable of configuration data, the component subscribes to the method’s return value.
The subscription callback performs minimal post-processing.
It copies the data fields into the component’s config object, which is data-bound in the component template for display.
Starting the request
For all HttpClient methods, the method doesn’t begin its HTTP request until you call subscribe() on the observable the method returns.
This is true for all HttpClient methods.
You should always unsubscribe from an observable when a component is destroyed.
All observables returned from HttpClient methods are cold by design.
Execution of the HTTP request is deferred, letting you extend the observable with additional operations such as tap and catchError before anything actually happens.
Calling subscribe() triggers execution of the observable and causes HttpClient to compose and send the HTTP request to the server.
Think of these observables as blueprints for actual HTTP requests.
In fact, each subscribe() initiates a separate, independent execution of the observable.
Subscribing twice results in two HTTP requests.
const req = http.get<Heroes>(‘/api/heroes’);
// 0 requests made — .subscribe() not called.
req.subscribe();
// 1 request made.
req.subscribe();
// 2 requests made.
Requesting a typed response
Structure your HttpClient request to declare the type of the response object, to make consuming the output easier and more obvious.
Specifying the response type acts as a type assertion at compile time.
Specifying the response type is a declaration to TypeScript that it should treat your response as being of the given type.
This is a build-time check and doesn’t guarantee that the server actually responds with an object of this type.
It is up to the server to ensure that the type specified by the server API is returned.
To specify the response object type, first define an interface with the required properties.
Use an interface rather than a class, because the response is a plain object that cannot be automatically converted to an instance of a class.
Next, specify that interface as the HttpClient.get() call’s type parameter in the service.
When you pass an interface as a type parameter to the HttpClient.get() method, use the RxJS map operator to transform the response data as needed by the UI.
You can then pass the transformed data to the async pipe.
The callback in the updated component method receives a typed data object, which is easier and safer to consume:
To access properties that are defined in an interface, you must explicitly convert the plain object you get from the JSON to the required response type.
For example, the following subscribe callback receives data as an Object, and then type-casts it in order to access the properties.
.subscribe(data => this.config = {
heroesUrl: (data as any).heroesUrl,
textfile: (data as any).textfile,
});
observe and response types
The types of the observe and response options are string unions, rather than plain strings.
options: {
…
observe?: ‘body’ | ‘events’ | ‘response’,
…
responseType?: ‘arraybuffer’|’blob’|’json’|’text’,
…
}
This can cause confusion.
For example:
// this works
client.get(‘/foo’, {responseType: ‘text’})
// but this does NOT work
const options = {
responseType: ‘text’,
};
client.get(‘/foo’, options)
In the second case, TypeScript infers the type of options to be {responseType: string}.
The type is too wide to pass to HttpClient.get which is expecting the type of responseType to be one of the specific strings.
HttpClient is typed explicitly this way so that the compiler can report the correct return type based on the options you provided.
Use as const to let TypeScript know that you really do mean to use a constant string type:
const options = {
responseType: ‘text’ as const,
};
client.get(‘/foo’, options);
Reading the full response
In the previous example, the call to HttpClient.get() did not specify any options.
By default, it returned the JSON data contained in the response body.
You might need more information about the transaction than is contained in the response body.
Sometimes servers return special headers or status codes to indicate certain conditions that are important to the application workflow.
Tell HttpClient that you want the full response with the observe option of the get() method:
Now HttpClient.get() returns an Observable of type HttpResponse rather than just the JSON data contained in the body.
The component’s showConfigResponse() method displays the response headers as well as the configuration:
As you can see, the response object has a body property of the correct type.
Making a JSONP request
Apps can use the HttpClient to make JSONP requests across domains when a server doesn’t support CORS protocol.
Angular JSONP requests return an Observable.
Follow the pattern for subscribing to observables and use the RxJS map operator to transform the response before using the async pipe to manage the results.
In Angular, use JSONP by including HttpClientJsonpModule in the NgModule imports.
In the following example, the searchHeroes() method uses a JSONP request to query for heroes whose names contain the search term.
/* GET heroes whose name contains search term */
searchHeroes(term: string): Observable {
term = term.trim();
const heroesURL = ${this.heroesURL}?${term};
return this.http.jsonp(heroesUrl, ‘callback’).pipe(
catchError(this.handleError(‘searchHeroes’, [])) // then handle the error
);
}
This request passes the heroesURL as the first parameter and the callback function name as the second parameter.
The response is wrapped in the callback function, which takes the observables returned by the JSONP method and pipes them through to the error handler.
Requesting non-JSON data
Not all APIs return JSON data.
In this next example, a DownloaderService method reads a text file from the server and logs the file contents, before returning those contents to the caller as an Observable<string>.
HttpClient.get() returns a string rather than the default JSON because of the responseType option.
The RxJS tap operator lets the code inspect both success and error values passing through the observable without disturbing them.
A download() method in the DownloaderComponent initiates the request by subscribing to the service method.
Handling request errors
If the request fails on the server, HttpClient returns an error object instead of a successful response.
The same service that performs your server transactions should also perform error inspection, interpretation, and resolution.
When an error occurs, you can obtain details of what failed in order to inform your user.
In some cases, you might also automatically retry the request.
Getting error details
An app should give the user useful feedback when data access fails.
A raw error object is not particularly useful as feedback.
In addition to detecting that an error has occurred, you need to get error details and use those details to compose a user-friendly response.
Two types of errors can occur.
-
The server backend might reject the request, returning an HTTP response with a status code such as 404 or 500.
These are error responses. -
Something could go wrong on the client-side such as a network error that prevents the request from completing successfully or an exception thrown in an RxJS operator.
These errors havestatusset to0and theerrorproperty contains aProgressEventobject, whosetypemight provide further information.
HttpClient captures both kinds of errors in its HttpErrorResponse.
Inspect that response to identify the error’s cause.
The following example defines an error handler in the previously defined ConfigService.
The handler returns an RxJS ErrorObservable with a user-friendly error message.
The following code updates the getConfig() method, using a pipe to send all observables returned by the HttpClient.get() call to the error handler.
Retrying a failed request
Sometimes the error is transient and goes away automatically if you try again.
For example, network interruptions are common in mobile scenarios, and trying again can produce a successful result.
The RxJS library offers several retry operators.
For example, the retry() operator automatically re-subscribes to a failed Observable a specified number of times.
Re-subscribing to the result of an HttpClient method call has the effect of reissuing the HTTP request.
The following example shows how to pipe a failed request to the retry() operator before passing it to the error handler.
Sending data to a server
In addition to fetching data from a server, HttpClient supports other HTTP methods such as PUT, POST, and DELETE, which you can use to modify the remote data.
The sample app for this guide includes an abridged version of the «Tour of Heroes» example that fetches heroes and enables users to add, delete, and update them.
The following sections show examples of the data-update methods from the sample’s HeroesService.
Making a POST request
Apps often send data to a server with a POST request when submitting a form.
In the following example, the HeroesService makes an HTTP POST request when adding a hero to the database.
The HttpClient.post() method is similar to get() in that it has a type parameter, which you can use to specify that you expect the server to return data of a given type.
The method takes a resource URL and two additional parameters:
| Parameter | Details |
|---|---|
| body | The data to POST in the body of the request. |
| options | An object containing method options which, in this case, specify required headers. |
The example catches errors as described above.
The HeroesComponent initiates the actual POST operation by subscribing to the Observable returned by this service method.
When the server responds successfully with the newly added hero, the component adds that hero to the displayed heroes list.
Making a DELETE request
This application deletes a hero with the HttpClient.delete method by passing the hero’s ID in the request URL.
The HeroesComponent initiates the actual DELETE operation by subscribing to the Observable returned by this service method.
The component isn’t expecting a result from the delete operation, so it subscribes without a callback.
Even though you are not using the result, you still have to subscribe.
Calling the subscribe() method executes the observable, which is what initiates the DELETE request.
You must call subscribe() or nothing happens.
Just calling HeroesService.deleteHero() does not initiate the DELETE request.
Making a PUT request
An app can send PUT requests using the HTTP client service.
The following HeroesService example, like the POST example, replaces a resource with updated data.
As for any of the HTTP methods that return an observable, the caller, HeroesComponent.update() must subscribe() to the observable returned from the HttpClient.put() in order to initiate the request.
Adding and updating headers
Many servers require extra headers for save operations.
For example, a server might require an authorization token, or «Content-Type» header to explicitly declare the MIME type of the request body.
Adding headers
The HeroesService defines such headers in an httpOptions object that are passed to every HttpClient save method.
Updating headers
You can’t directly modify the existing headers within the previous options
object because instances of the HttpHeaders class are immutable.
Use the set() method instead, to return a clone of the current instance with the new changes applied.
The following example shows how, when an old token expires, you can update the authorization header before making the next request.
Configuring HTTP URL parameters
Use the HttpParams class with the params request option to add URL query strings in your HttpRequest.
The following example, the searchHeroes() method queries for heroes whose names contain the search term.
Start by importing HttpParams class.
import {HttpParams} from «@angular/common/http»;
If there is a search term, the code constructs an options object with an HTML URL-encoded search parameter.
If the term is «cat», for example, the GET request URL would be api/heroes?name=cat.
The HttpParams object is immutable.
If you need to update the options, save the returned value of the .set() method.
You can also create HTTP parameters directly from a query string by using the fromString variable:
const params = new HttpParams({fromString: ‘name=foo’});
Intercepting requests and responses
With interception, you declare interceptors that inspect and transform HTTP requests from your application to a server.
The same interceptors can also inspect and transform a server’s responses on their way back to the application.
Multiple interceptors form a forward-and-backward chain of request/response handlers.
Interceptors can perform a variety of implicit tasks, from authentication to logging, in a routine, standard way, for every HTTP request/response.
Without interception, developers would have to implement these tasks explicitly for each HttpClient method call.
Write an interceptor
To implement an interceptor, declare a class that implements the intercept() method of the HttpInterceptor interface.
Here is a do-nothing noop interceptor that passes the request through without touching it:
The intercept method transforms a request into an Observable that eventually returns the HTTP response.
In this sense, each interceptor is fully capable of handling the request entirely by itself.
Most interceptors inspect the request on the way in and forward the potentially altered request to the handle() method of the next object which implements the HttpHandler interface.
export abstract class HttpHandler {
abstract handle(req: HttpRequest<any>): Observable<HttpEvent<any>>;
}
Like intercept(), the handle() method transforms an HTTP request into an Observable of HttpEvents which ultimately include the server’s response.
The intercept() method could inspect that observable and alter it before returning it to the caller.
This no-op interceptor calls next.handle() with the original request and returns the observable without doing a thing.
The next object
The next object represents the next interceptor in the chain of interceptors.
The final next in the chain is the HttpClient backend handler that sends the request to the server and receives the server’s response.
Most interceptors call next.handle() so that the request flows through to the next interceptor and, eventually, the backend handler.
An interceptor could skip calling next.handle(), short-circuit the chain, and return its own Observable with an artificial server response.
This is a common middleware pattern found in frameworks such as Express.js.
Provide the interceptor
The NoopInterceptor is a service managed by Angular’s dependency injection (DI) system.
Like other services, you must provide the interceptor class before the app can use it.
Because interceptors are optional dependencies of the HttpClient service, you must provide them in the same injector or a parent of the injector that provides HttpClient.
Interceptors provided after DI creates the HttpClient are ignored.
This app provides HttpClient in the app’s root injector, as a side effect of importing the HttpClientModule in AppModule.
You should provide interceptors in AppModule as well.
After importing the HTTP_INTERCEPTORS injection token from @angular/common/http, write the NoopInterceptor provider like this:
Notice the multi: true option.
This required setting tells Angular that HTTP_INTERCEPTORS is a token for a multiprovider that injects an array of values, rather than a single value.
You could add this provider directly to the providers array of the AppModule.
However, it’s rather verbose and there’s a good chance that you’ll create more interceptors and provide them in the same way.
You must also pay close attention to the order in which you provide these interceptors.
Consider creating a «barrel» file that gathers all the interceptor providers into an httpInterceptorProviders array, starting with this first one, the NoopInterceptor.
Then import and add it to the AppModule providers array like this:
As you create new interceptors, add them to the httpInterceptorProviders array and you won’t have to revisit the AppModule.
There are many more interceptors in the complete sample code.
Interceptor order
Angular applies interceptors in the order that you provide them.
For example, consider a situation in which you want to handle the authentication of your HTTP requests and log them before sending them to a server.
To accomplish this task, you could provide an AuthInterceptor service and then a LoggingInterceptor service.
Outgoing requests would flow from the AuthInterceptor to the LoggingInterceptor.
Responses from these requests would flow in the other direction, from LoggingInterceptor back to AuthInterceptor.
The following is a visual representation of the process:

The last interceptor in the process is always the HttpBackend that handles communication with the server.
You cannot change the order or remove interceptors later.
If you need to enable and disable an interceptor dynamically, you’ll have to build that capability into the interceptor itself.
Handling interceptor events
Most HttpClient methods return observables of HttpResponse<any>.
The HttpResponse class itself is actually an event, whose type is HttpEventType.Response.
A single HTTP request can, however, generate multiple events of other types, including upload and download progress events.
The methods HttpInterceptor.intercept() and HttpHandler.handle() return observables of HttpEvent<any>.
Many interceptors are only concerned with the outgoing request and return the event stream from next.handle() without modifying it.
Some interceptors, however, need to examine and modify the response from next.handle(); these operations can see all of these events in the stream.
Although interceptors are capable of modifying requests and responses, the HttpRequest and HttpResponse instance properties are readonly, rendering them largely immutable.
They are immutable for a good reason:
An app might retry a request several times before it succeeds, which means that the interceptor chain can re-process the same request multiple times.
If an interceptor could modify the original request object, the re-tried operation would start from the modified request rather than the original.
Immutability ensures that interceptors see the same request for each try.
Your interceptor should return every event without modification unless it has a compelling reason to do otherwise.
TypeScript prevents you from setting HttpRequest read-only properties.
// Typescript disallows the following assignment because req.url is readonly
req.url = req.url.replace(‘http://’, ‘https://’);
If you must alter a request, clone it first and modify the clone before passing it to next.handle().
You can clone and modify the request in a single step, as shown in the following example.
The clone() method’s hash argument lets you mutate specific properties of the request while copying the others.
Modifying a request body
The readonly assignment guard can’t prevent deep updates and, in particular, it can’t prevent you from modifying a property of a request body object.
req.body.name = req.body.name.trim(); // bad idea!
If you must modify the request body, follow these steps.
- Copy the body and make your change in the copy.
- Clone the request object, using its
clone()method. - Replace the clone’s body with the modified copy.
Clearing the request body in a clone
Sometimes you need to clear the request body rather than replace it.
To do this, set the cloned request body to null.
TIP:
If you set the cloned request body to undefined, Angular assumes you intend to leave the body as is.
newReq = req.clone({ … }); // body not mentioned => preserve original body
newReq = req.clone({ body: undefined }); // preserve original body
newReq = req.clone({ body: null }); // clear the body
Http interceptor use-cases
Following are a number of common uses for interceptors.
Setting default headers
Apps often use an interceptor to set default headers on outgoing requests.
The sample app has an AuthService that produces an authorization token.
Here is its AuthInterceptor that injects that service to get the token and adds an authorization header with that token to every outgoing request:
The practice of cloning a request to set new headers is so common that there’s a setHeaders shortcut for it:
An interceptor that alters headers can be used for a number of different operations, including:
- Authentication/authorization
- Caching behavior; for example,
If-Modified-Since - XSRF protection
Logging request and response pairs
Because interceptors can process the request and response together, they can perform tasks such as timing and logging an entire HTTP operation.
Consider the following LoggingInterceptor, which captures the time of the request,
the time of the response, and logs the outcome with the elapsed time
with the injected MessageService.
The RxJS tap operator captures whether the request succeeded or failed.
The RxJS finalize operator is called when the response observable either returns an error or completes and reports the outcome to the MessageService.
Neither tap nor finalize touch the values of the observable stream returned to the caller.
Custom JSON parsing
Interceptors can be used to replace the built-in JSON parsing with a custom implementation.
The CustomJsonInterceptor in the following example demonstrates how to achieve this.
If the intercepted request expects a 'json' response, the responseType is changed to 'text' to disable the built-in JSON parsing.
Then the response is parsed via the injected JsonParser.
You can then implement your own custom JsonParser.
Here is a custom JsonParser that has a special date reviver.
You provide the CustomParser along with the CustomJsonInterceptor.
Caching requests
Interceptors can handle requests by themselves, without forwarding to next.handle().
For example, you might decide to cache certain requests and responses to improve performance.
You can delegate caching to an interceptor without disturbing your existing data services.
The CachingInterceptor in the following example demonstrates this approach.
-
The
isCacheable()function determines if the request is cacheable.
In this sample, only GET requests to the package search API are cacheable. -
If the request is not cacheable, the interceptor forwards the request to the next handler in the chain
-
If a cacheable request is found in the cache, the interceptor returns an
of()observable with the cached response, by-passing thenexthandler and all other interceptors downstream -
If a cacheable request is not in cache, the code calls
sendRequest().
This function forwards the request tonext.handle()which ultimately calls the server and returns the server’s response.
Notice how sendRequest() intercepts the response on its way back to the application.
This method pipes the response through the tap() operator, whose callback adds the response to the cache.
The original response continues untouched back up through the chain of interceptors to the application caller.
Data services, such as PackageSearchService, are unaware that some of their HttpClient requests actually return cached responses.
Using interceptors to request multiple values
The HttpClient.get() method normally returns an observable that emits a single value, either the data or an error.
An interceptor can change this to an observable that emits multiple values.
The following revised version of the CachingInterceptor optionally returns an observable that immediately emits the cached response, sends the request on to the package search API, and emits again later with the updated search results.
The cache-then-refresh option is triggered by the presence of a custom x-refresh header.
A checkbox on the PackageSearchComponent toggles a withRefresh flag, which is one of the arguments to PackageSearchService.search().
That search() method creates the custom x-refresh header and adds it to the request before calling HttpClient.get().
The revised CachingInterceptor sets up a server request whether there’s a cached value or not, using the same sendRequest() method described above.
The results$ observable makes the request when subscribed.
- If there’s no cached value, the interceptor returns
results$. - If there is a cached value, the code pipes the cached response onto
results$. This produces a recomposed observable that emits two responses, so subscribers will see a sequence of these two responses: - The cached response that’s emitted immediately
- The response from the server, that’s emitted later
Tracking and showing request progress
Sometimes applications transfer large amounts of data and those transfers can take a long time.
File uploads are a typical example.
You can give the users a better experience by providing feedback on the progress of such transfers.
To make a request with progress events enabled, create an instance of HttpRequest with the reportProgress option set true to enable tracking of progress events.
TIP:
Every progress event triggers change detection, so only turn them on if you need to report progress in the UI.
When using HttpClient.request() with an HTTP method, configure the method with observe: 'events' to see all events, including the progress of transfers.
Next, pass this request object to the HttpClient.request() method, which returns an Observable of HttpEvents (the same events processed by interceptors).
The getEventMessage method interprets each type of HttpEvent in the event stream.
The sample app for this guide doesn’t have a server that accepts uploaded files.
The UploadInterceptor in app/http-interceptors/upload-interceptor.ts intercepts and short-circuits upload requests by returning an observable of simulated events.
Optimizing server interaction with debouncing
If you need to make an HTTP request in response to user input, it’s not efficient to send a request for every keystroke.
It’s better to wait until the user stops typing and then send a request.
This technique is known as debouncing.
Consider the following template, which lets a user enter a search term to find a package by name.
When the user enters a name in a search-box, the PackageSearchComponent sends a search request for a package with that name to the package search API.
Here, the keyup event binding sends every keystroke to the component’s search() method.
The type of $event.target is only EventTarget in the template.
In the getValue() method, the target is cast to an HTMLInputElement to let type-safe have access to its value property.
The following snippet implements debouncing for this input using RxJS operators.
The searchText$ is the sequence of search-box values coming from the user.
It’s defined as an RxJS Subject, which means it is a multicasting Observable that can also emit values for itself by calling next(value), as happens in the search() method.
Rather than forward every searchText value directly to the injected PackageSearchService, the code in ngOnInit() pipes search values through three operators, so that a search value reaches the service only if it’s a new value and the user stopped typing.
| RxJS operators | Details |
|---|---|
debounceTime(500) |
Wait for the user to stop typing, which is 1/2 second in this case. |
distinctUntilChanged() |
Wait until the search text changes. |
switchMap() |
Send the search request to the service. |
The code sets packages$ to this re-composed Observable of search results.
The template subscribes to packages$ with the AsyncPipe and displays search results as they arrive.
See Using interceptors to request multiple values for more about the withRefresh option.
Using the switchMap() operator
The switchMap() operator takes a function argument that returns an Observable.
In the example, PackageSearchService.search returns an Observable, as other data service methods do.
If a previous search request is still in-flight, such as when the network connection is poor, the operator cancels that request and sends a new one.
NOTE:
switchMap() returns service responses in their original request order, even if the server returns them out of order.
If you think you’ll reuse this debouncing logic, consider moving it to a utility function or into the PackageSearchService itself.
Security: XSRF protection
Cross-Site Request Forgery (XSRF or CSRF) is an attack technique by which the attacker can trick an authenticated user into unknowingly executing actions on your website.
HttpClient supports a common mechanism used to prevent XSRF attacks.
When performing HTTP requests, an interceptor reads a token from a cookie, by default XSRF-TOKEN, and sets it as an HTTP header, X-XSRF-TOKEN.
Because only code that runs on your domain could read the cookie, the backend can be certain that the HTTP request came from your client application and not an attacker.
By default, an interceptor sends this header on all mutating requests (such as POST)
to relative URLs, but not on GET/HEAD requests or on requests with an absolute URL.
To take advantage of this, your server needs to set a token in a JavaScript readable session cookie called XSRF-TOKEN on either the page load or the first GET request.
On subsequent requests the server can verify that the cookie matches the X-XSRF-TOKEN HTTP header, and therefore be sure that only code running on your domain could have sent the request.
The token must be unique for each user and must be verifiable by the server; this prevents the client from making up its own tokens.
Set the token to a digest of your site’s authentication cookie with a salt for added security.
To prevent collisions in environments where multiple Angular apps share the same domain or subdomain, give each application a unique cookie name.
HttpClient supports only the client half of the XSRF protection scheme.
Your backend service must be configured to set the cookie for your page, and to verify that the header is present on all eligible requests.
Failing to do so renders Angular’s default protection ineffective.
Configuring custom cookie/header names
If your backend service uses different names for the XSRF token cookie or header, use HttpClientXsrfModule.withOptions() to override the defaults.
Testing HTTP requests
As for any external dependency, you must mock the HTTP backend so your tests can simulate interaction with a remote server.
The @angular/common/http/testing library makes it straightforward to set up such mocking.
Angular’s HTTP testing library is designed for a pattern of testing in which the app executes code and makes requests first.
The test then expects that certain requests have or have not been made, performs assertions against those requests, and finally provides responses by «flushing» each expected request.
At the end, tests can verify that the app made no unexpected requests.
You can run these sample tests in a live coding environment.
The tests described in this guide are in src/testing/http-client.spec.ts.
There are also tests of an application data service that call HttpClient in src/app/heroes/heroes.service.spec.ts.
Setup for testing
To begin testing calls to HttpClient, import the HttpClientTestingModule and the mocking controller, HttpTestingController, along with the other symbols your tests require.
Then add the HttpClientTestingModule to the TestBed and continue with the setup of the service-under-test.
Now requests made in the course of your tests hit the testing backend instead of the normal backend.
This setup also calls TestBed.inject() to inject the HttpClient service and the mocking controller so they can be referenced during the tests.
Expecting and answering requests
Now you can write a test that expects a GET Request to occur and provides a mock response.
The last step, verifying that no requests remain outstanding, is common enough for you to move it into an afterEach() step:
Custom request expectations
If matching by URL isn’t sufficient, it’s possible to implement your own matching function.
For example, you could look for an outgoing request that has an authorization header:
As with the previous expectOne(), the test fails if 0 or 2+ requests satisfy this predicate.
Handling more than one request
If you need to respond to duplicate requests in your test, use the match() API instead of expectOne().
It takes the same arguments but returns an array of matching requests.
Once returned, these requests are removed from future matching and you are responsible for flushing and verifying them.
Testing for errors
You should test the app’s defenses against HTTP requests that fail.
Call request.flush() with an error message, as seen in the following example.
Alternatively, call request.error() with a ProgressEvent.
Passing metadata to interceptors
Many interceptors require or benefit from configuration.
Consider an interceptor that retries failed requests.
By default, the interceptor might retry a request three times, but you might want to override this retry count for particularly error-prone or sensitive requests.
HttpClient requests contain a context that can carry metadata about the request.
This context is available for interceptors to read or modify, though it is not transmitted to the backend server when the request is sent.
This lets applications or other interceptors tag requests with configuration parameters, such as how many times to retry a request.
Creating a context token
Angular stores and retrieves a value in the context using an HttpContextToken.
You can create a context token using the new operator, as in the following example:
The lambda function () => 3 passed during the creation of the HttpContextToken serves two purposes:
-
It lets TypeScript infer the type of this token:
HttpContextToken<number>
The request context is type-safe —reading a token from a request’s context returns a value of the appropriate type. -
It sets the default value for the token.
This is the value that the request context returns if no other value was set for this token.
Using a default value avoids the need to check if a particular value is set.
Setting context values when making a request
When making a request, you can provide an HttpContext instance, in which you have already set the context values.
Reading context values in an interceptor
Within an interceptor, you can read the value of a token in a given request’s context with HttpContext.get().
If you have not explicitly set a value for the token, Angular returns the default value specified in the token.
Contexts are mutable
Unlike most other aspects of HttpRequest instances, the request context is mutable and persists across other immutable transformations of the request.
This lets interceptors coordinate operations through the context.
For instance, the RetryInterceptor example could use a second context token to track how many errors occur during the execution of a given request:
@reviewed 2022-02-28
Below is a quick set of examples to show how to send HTTP POST requests from Angular to a backend API.
Other HTTP examples available:
- Angular: GET, PUT, DELETE
- React + Fetch: GET, POST, PUT, DELETE
- React + Axios: GET, POST, PUT, DELETE
- Vue + Fetch: GET, POST, PUT, DELETE
- Vue + Axios: GET, POST
- Blazor WebAssembly: GET, POST
- Axios: GET, POST, PUT, DELETE
- Fetch: GET, POST, PUT, DELETE
Simple POST request with a JSON body and response type <any>
This sends an HTTP POST request to the Reqres api which is a fake online REST api that includes a /api/posts route that responds to POST requests with the contents of the post body and an id property. The id from the response is assigned to the local postId property in the subscribe callback function.
The response type is set to <any> so it can handle any properties returned in the response.
ngOnInit() {
    this.http.post<any>('https://reqres.in/api/posts', { title: 'Angular POST Request Example' }).subscribe(data => {
        this.postId = data.id;
    })
}
Example Angular component at https://stackblitz.com/edit/angular-post-request-examples?file=src/app/components/post-request.component.ts
POST request with strongly typed response
This sends the same request as the above but sets the response type to a custom Article interface that defines the expected response properties.
ngOnInit() {
    this.http.post<Article>('https://reqres.in/api/posts', { title: 'Angular POST Request Example' }).subscribe(data => {
        this.postId = data.id;
    })
}

...

interface Article {
    id: number;
    title: string;
}
Example Angular component at https://stackblitz.com/edit/angular-post-request-examples?file=src/app/components/post-request-typed.component.ts
POST request with headers set
This sends the same request again with a couple of headers set, the HTTP Authorization header and a custom header My-Custom-Header.
The below headers are created as a plain javascript object, they can also be created with the HttpHeaders class, e.g. const headers = new HttpHeaders({ 'Authorization': 'Bearer my-token', 'My-Custom-Header': 'foobar' })
To set or update headers on an existing HttpHeaders object call the set() method, e.g. const headers = new HttpHeaders().set('Authorization', 'Bearer my-token')
ngOnInit() {
    const headers = { 'Authorization': 'Bearer my-token', 'My-Custom-Header': 'foobar' };
    const body = { title: 'Angular POST Request Example' };
    this.http.post<any>('https://reqres.in/api/posts', body, { headers }).subscribe(data => {
        this.postId = data.id;
    });
}
Example Angular component at https://stackblitz.com/edit/angular-post-request-examples?file=src/app/components/post-request-headers.component.ts
POST request with error handling
The below examples show two different ways of handling an error from an HTTP POST request in Angular. They both send the same request to an invalid url on the api then assign the error to the errorMessage component property and log it to the console. The difference is how the error is caught, the first uses the subscribe error callback, the second uses the catchError operator.
Using the error callback to the RxJS subscribe method
The subscribe() method is passed an observer object with two callback functions, the next() function is called if the request is successful, the error() function is called if the request fails.
There is also a complete() function that we’re not using here, it gets called after an Observable successfully emits its final value, i.e. after the next() function for an HTTP request. In this case it wouldn’t be called because the Observable errors out.
ngOnInit() {
    this.http.post<any>('https://reqres.in/invalid-url', { title: 'Angular POST Request Example' }).subscribe({
        next: data => {
            this.postId = data.id;
        },
        error: error => {
            this.errorMessage = error.message;
            console.error('There was an error!', error);
        }
    })
}
Example Angular component at https://stackblitz.com/edit/angular-post-request-examples?file=src/app/components/post-request-error-handling-callback.component.ts
Using the RxJS catchError operator
The Observable response from the POST request is piped to the catchError operator which handles the error and returns a new Observable that doesn’t emit any values.
The function passed to subscribe() is called if the request is successful, it’s the equivalent of passing an observer object with only a next() function. It isn’t called here because no values are emitted after the error is handled, the Observable simply completes.
RxJS Operators
Operators in RxJS accept an input Observable and return an output Observable, multiple can be piped together in the Observable chain and they are executed before values are emitted to subscribers. With the catchError operator you have the added options of returning a fallback value to subscribers when there is an error, or rethrowing a custom error using the RxJS throwError() function. For more info on RxJS operators see https://rxjs.dev/guide/operators.
ngOnInit() {
    this.http.post<any>('https://reqres.in/invalid-url', { title: 'Angular POST Request Example' })
        .pipe(catchError((error: any, caught: Observable<any>): Observable<any> => {
            this.errorMessage = error.message;
            console.error('There was an error!', error);

            // after handling error, return a new observable
            // that doesn't emit any values and completes
            return of();
        }))
        .subscribe(data => {
            this.postId = data.id;
        });
}
Example Angular component at https://stackblitz.com/edit/angular-post-request-examples?file=src/app/components/post-request-error-handling-catch-error.component.ts
Prerequisites for making HTTP requests from Angular
Before making HTTP requests from your Angular app you need to do a couple of things.
1. Add the HttpClientModule to the imports array of your AppModule like below on lines 3 and 10.
import { NgModule } from '@angular/core';
import { BrowserModule } from '@angular/platform-browser';
import { HttpClientModule } from '@angular/common/http';

import { AppComponent } from './app.component';

@NgModule({
    imports: [
        BrowserModule,
        HttpClientModule
    ],
    declarations: [
        AppComponent
    ],
    bootstrap: [AppComponent]
})
export class AppModule { }
2. Import the HttpClient into your component and add it to the constructor() params like below on lines 2 and 8.
import { Component, OnInit } from '@angular/core';
import { HttpClient } from '@angular/common/http';

@Component({ selector: 'app', templateUrl: 'app.component.html' })
export class AppComponent implements OnInit {
    postId;

    constructor(private http: HttpClient) { }

    ngOnInit() {
        // Simple POST request with a JSON body and response type <any>
        this.http.post<any>('https://reqres.in/api/posts', { title: 'Angular POST Request Example' }).subscribe(data => {
            this.postId = data.id;
        })
    }
}
Update History:
- 8 Nov 2022 — Updated examples to Angular 14.2.9. The previous version (Angular 8.0.1) is still available at https://stackblitz.com/edit/angular-http-post-examples.
- 7 Nov 2022 — Added error handling example with RxJS catchError operator
- 22 Apr 2021 — Replaced JSONPlaceholder API with Reqres API because JSONPlaceholder stopped allowing CORS requests
- 28 May 2020 — Posted video to YouTube of HTTP POST request examples with Angular at https://youtu.be/w2HFuzxxkRs
- 16 Jan 2020 — Added example of how to set HTTP headers on the request
- 21 Nov 2019 — Created Angular HTTP POST request examples
Subscribe to my YouTube channel or follow me on Twitter, Facebook or GitHub to be notified when I post new content.
I’m currently attempting to travel around Australia by motorcycle with my wife Tina on a pair of Royal Enfield Himalayans. You can follow our adventures on YouTube, Instagram and Facebook.
August 19, 2021
This page will walk through Angular HttpClient.post() example. The HttpClient performs HTTP requests. The HttpClient.post() constructs an Observable with configured HTTP POST request and when the Observable instance is subscribed, POST request is executed on the server. In HttpClient.post() method, we need to pass URL, request body and optional HTTP options such as headers, response type etc. The HttpClient.post() returns Observable instance of given response type.
On this page we will see injecting HttpClient, creating request body and passing HTTP options. We will also look into error handling. For the demo we will use Angular In-Memory Web API to post data.
Contents
- Technologies Used
- HttpClient.post
- HttpClientModule
- Subscribe to Post Method
- HttpClient.post Body
- HttpClient.post with Headers
- HttpClient.post with
observeOption - HttpClient.post and Response Type
- Error Handling
- Angular In-Memory Web API
- Complete Example
- Run Application
- References
- Download Source Code
Technologies Used
Find the technologies being used in our example.
1. Angular 12.1.0
2. Node.js 12.14.1
3. NPM 7.20.3
4. Angular-in-memory-web-api 0.11.0
HttpClient.post
HttpClient is an Angular class to performs HTTP requests. HttpClient.post method performs POST request over HTTP. Find the HttpClient.post method signature from Angular Doc.
post(url: string, body: any | null, options: {
    headers?: HttpHeaders | {
        [header: string]: string | string[];
    };
    observe?: HttpObserve;
    params?: HttpParams | {
        [param: string]: string | string[];
    };
    reportProgress?: boolean;
    responseType?: 'arraybuffer' | 'blob' | 'json' | 'text';
    withCredentials?: boolean;
} = {}): Observable<any>
HttpClient.post has following arguments.
1. url: Pass URL as string where we want to post data.
2. body: Pass data of any type as body to be posted.
3. options: We can pass options such as headers, parameters etc. This argument is optional.
The response type of HttpClient.post is RxJS Observable which represents values over any amount of time.
Find the attributes that can be passed as options argument in HttpClient.post request.
headers: Defines HttpHeaders for http POST request.
observe: Defines whether we want complete response or body only or events only.
params: Defines parameters in URL.
reportProgress: Defines whether we want progress report or not.
responseType: Defines response type such as arraybuffer, blob, json and text.
withCredentials: Defines whether we want to pass credentials or not.
HttpClientModule
To use HttpClient we need to import HttpClientModule in our application module. Find the code snippet.
import { HttpClientModule } from '@angular/common/http';
@NgModule({
  imports: [
      HttpClientModule,
      ------
  ],
  ------
})
export class AppModule { }
Now we can inject HttpClient in injectable classes such as components and services.
Inject HttpClient and Post Request
We inject HttpClient using constructor into our components or services. HttpClient is imported from @angular/common/http library as following.
import { HttpClient } from '@angular/common/http';
Inject HttpClient using constructor as following.
constructor(private http: HttpClient) {
}
Now we are ready to call HttpClient methods using http instance. For example, find the code below.
createArticle(article: Article): Observable<Article> {
     return this.http.post<Article>(this.url, article);
}
We need to provide generic return type to HttpClient.post method.
Subscribe to Post Method
All HttpClient methods return instance of Observable and they begin when we subscribe to them or use async pipe. So to begin our HttpClient.post method, we will call subscribe() method on it. Find the sample post method in our service.
createArticle(article: Article): Observable<Article> {
     return this.http.post<Article>(this.url, article);
}
Find the code snippet from the component to subscribe our post method.
createArticle(article: Article) {
  this.articleService.createArticle(article).subscribe(
      article => {
        console.log(article);
      }
  );
}
HttpClient.post Body
The body argument of HttpClient.post method is of any type. Find the sample example to post an object of Article type.
createArticle(article: Article): Observable<Article> {
     return this.http.post<Article>(this.url, article);
}
We can also create body as following.
createArticle(): Observable<Article> {
  return this.http.post<Article>(this.url,
     {
	id: 100,
	title: 'Java Functional Interface',
	category: 'Java 8',
	writer: 'Krishna'
     }
  );
}
Angular provides HttpHeaders class to create request headers. HttpHeaders is immutable set of http headers with lazy parsing. It is imported as given below.
import { HttpHeaders } from '@angular/common/http';
We can instantiate HttpHeaders by passing headers into constructor or by using its set or append method. Find the sample code to instantiate HttpHeaders using constructor.
let httpHeaders = new HttpHeaders({
     'Content-Type' : 'application/json',
     'Cache-Control': 'no-cache'
});
Find the sample code to instantiate HttpHeaders using set method.
let httpHeaders = new HttpHeaders()
     .set('Content-Type', 'application/json')
     .set('Cache-Control', 'no-cache');
Now create http options.
let options = {
     headers: httpHeaders
};
Pass it to HttpClient.post method as third argument.
this.http.post<Article>(this.url, article, options);
Our complete post request method will look as following.
createArticle(article: Article): Observable<Article> {
     let httpHeaders = new HttpHeaders({
	'Content-Type' : 'application/json',
	'Cache-Control': 'no-cache'
     });
     let options = {
	headers: httpHeaders
     };
     return this.http.post<Article>(this.url, article, options);
}
HttpClient.post with observe Option
The HttpClient.post method can use observe property in http options to define whether we want complete response or body only or events only. We need to assign values for observe property as following.
observe : ‘response’ for complete response.
observe : ‘body’ for response with body.
observe : ‘events’ for response with events.
Suppose we want complete response for our request, then we will use observe property. Find the code snippet from the service.
postArticle(article: Article): Observable<HttpResponse<Article>> {
	let httpHeaders = new HttpHeaders({
		 'Content-Type' : 'application/json'
	});
	return this.http.post<Article>(this.url, article,
		{
		  headers: httpHeaders,
		  observe: 'response'
		}
	);
}
The HttpResponse is from @angular/common/http library. Now we will fetch body as well as headers of the response. Find the code snippet from the component.
saveArticle() {
 let article = {id: '2', title: 'Java Functional Interface',
          category: 'Java 8', writer: 'Krishna'};
 this.articleService.postArticle(article).subscribe(res => {
	  let artcl: Article = res.body;
	  console.log(artcl.title);
	  console.log(res.headers.get('Content-Type'));
	},
	err => {
	  console.log(err);
	}
 );
}
HttpClient.post and Response Type
In HttpClient.post method we can provide responseType as http options and accordingly we need to provide return type to post method. The values of responseType are arraybuffer, blob, json and text.
Case-1: Default observe value is body and default responseType is json.
postArticle(article: Article): Observable<Article> {
  return this.http.post<Article>(this.url, article,
    {
	observe: 'body',
	responseType: 'json'
    }
  );
}
If default observe value is body and default responseType is json, we can also write above method as following.
postArticle(article: Article): Observable<Article> {
    return this.http.post<Article>(this.url, article);
}
Case-2: Suppose observe value is response and responseType is json. We will provide return type to HttpClient.post method as following.
postArticle(article: Article): Observable<HttpResponse<Article>> {
   return this.http.post<Article>(this.url, article,
     {
	observe: 'response',
	responseType: 'json'
     }
   );
}
Error Handling
We can handle error while subscribing Observable instance returned from HttpClient.post. Find the sample code.
createArticle(article: Article) {
   this.articleService.createArticle(article).subscribe(
      article => {
        console.log(article);
      },
      err => {
        console.log(err);
      }
   );
}
We can also use Angular HttpErrorResponse to handle error. It contains useful information regarding error. We need to import it from @angular/common/http library. Find the sample example.
saveArticle() {
     const article = {id: '2', title: 'Java Functional Interface',
          category: 'Java 8', writer: 'Krishna'};
     this.articleService.postArticle(article).subscribe(res => {
          const artcl: Article = res.body;
          console.log(artcl?.title);
          console.log(res.headers.get('Content-Type'));
        },
	(err: HttpErrorResponse) => {
          if (err.error instanceof Error) {
            //A client-side or network error occurred.
            console.log('An error occurred:', err.error.message);
          } else {
            //Backend returns unsuccessful response codes such as 404, 500 etc.
            console.log('Backend returned status code: ', err.status);
            console.log('Response body:', err.error);
          }
        }
     );
}
Angular In-Memory Web API
Angular provides In-Memory Web API for dummy Web Service URL to test application. Find the steps to use Angular In-Memory Web API.
1. Open the command prompt and navigate to the directory where package.json resides and run following command.
npm i angular-in-memory-web-api@0.11.0 --save
2. Create a class that will implement InMemoryDbService. Define createDb() method with dummy data.
test-data.ts
import { InMemoryDbService } from 'angular-in-memory-web-api';

export class TestData implements InMemoryDbService {
  createDb() {
    let articleDetails = [
      {id: 1, title: 'Angular Tutorials', category: 'Angular', writer: 'Mahesh'}
    ];
    return { articles: articleDetails };
  }
}
We will get following Web Service URL.
3. Before using In-Memory Web API we need to import InMemoryWebApiModule in AppModule and configure TestData class as following.
import { InMemoryWebApiModule } from 'angular-in-memory-web-api';
import { TestData } from './test-data';

@NgModule({
  imports: [
      ------
      InMemoryWebApiModule.forRoot(TestData)
  ],
  ------
})
export class AppModule { }
Find the link for more information on In-Memory Web API.
Complete Example
Find the project structure.
my-app
|
|--src
|   |
|   |--app
|   |   |
|   |   |--article.ts
|   |   |--article.service.ts
|   |   |--article.component.ts
|   |   |--article.component.html
|   |   |
|   |   |--test-data.ts
|   |   |
|   |   |--app.component.ts
|   |   |--app.module.ts
|   |
|   |--main.ts
|   |--index.html
|   |--styles.css
|
|--node_modules
|--package.json
Now find the complete code.
article.ts
export interface Article {
    id: string;
    title: string;
    category: string;
    writer: string;
}
article.service.ts
import { Injectable } from '@angular/core';
import { HttpClient, HttpHeaders, HttpResponse } from '@angular/common/http';
import { Observable } from 'rxjs';
import { Article } from './article';

@Injectable({
    providedIn: 'root'
})
export class ArticleService {
    url = "/api/articles";
    constructor(private http: HttpClient) { }

    createArticle(article: Article): Observable<Article> {
        let httpHeaders = new HttpHeaders()
            .set('Content-Type', 'application/json');
        let options = {
            headers: httpHeaders
        };
        return this.http.post<Article>(this.url, article, options);
    }
    postArticle(article: Article): Observable<HttpResponse<Article>> {
        let httpHeaders = new HttpHeaders({
            'Content-Type': 'application/json'
        });
        return this.http.post<Article>(this.url, article,
            {
                headers: httpHeaders,
                observe: 'response'
            }
        );
    }
    getAllArticles(): Observable<Article[]> {
        return this.http.get<Article[]>(this.url);
    }
}
article.component.ts
import { Component, OnInit } from '@angular/core';
import { FormGroup, FormBuilder, Validators } from '@angular/forms';
import { of } from 'rxjs';
import { HttpErrorResponse } from '@angular/common/http';
import { ArticleService } from './article.service';
import { Article } from './article';

@Component({
  selector: 'app-article',
  templateUrl: './article.component.html'
})
export class ArticleComponent implements OnInit {
  dataSaved = false;
  articleForm = {} as FormGroup;
  allArticles$ = of([] as Article[]);
  constructor(private formBuilder: FormBuilder, private articleService: ArticleService) {
  }
  ngOnInit() {
    this.articleForm = this.formBuilder.group({
      title: ['', [Validators.required]],
      category: ['', [Validators.required]],
      writer: ['', [Validators.required]]
    });
    //this.loadAllArticles();
    this.saveArticle();
  }
  onFormSubmit() {
    this.dataSaved = false;
    let article = this.articleForm.value;
    this.articleService.getAllArticles().subscribe(articles => {
      let maxIndex = articles.length - 1;
      let maxIndexItem = articles[maxIndex];
      article.id = parseInt(maxIndexItem.id) + 1;
      this.createArticle(article);
    });
    this.articleForm.reset();
  }
  createArticle(article: Article) {
    this.articleService.createArticle(article).subscribe(
      article => {
        console.log(article);
        this.dataSaved = true;
        this.loadAllArticles();
      },
      err => {
        console.log(err);
      }
    );
  }
  loadAllArticles() {
    this.allArticles$ = this.articleService.getAllArticles();
  }
  get title() {
    return this.articleForm.get('title');
  }
  get category() {
    return this.articleForm.get('category');
  }
  get writer() {
    return this.articleForm.get('writer');
  }
  saveArticle() {
    const article = {
      id: '2', title: 'Java Functional Interface',
      category: 'Java 8', writer: 'Krishna'
    };
    this.articleService.postArticle(article).subscribe(res => {
      const artcl = res.body;
      console.log(artcl?.title);
      console.log(res.headers.get('Content-Type'));
      this.loadAllArticles();
    },
      (err: HttpErrorResponse) => {
        if (err.error instanceof Error) {
          //A client-side or network error occurred.
          console.log('An error occurred:', err.error.message);
        } else {
          //Backend returns unsuccessful response codes such as 404, 500 etc.
          console.log('Backend returned status code: ', err.status);
          console.log('Response body:', err.error);
        }
      }
    );
  }
}
article.component.html
<h3>Create Article</h3>
<p *ngIf="dataSaved && articleForm.pristine" ngClass="success">
	Article created successfully.
</p>
<form [formGroup]="articleForm" (ngSubmit)="onFormSubmit()">
	<table>
		<tr>
			<td>Title: </td>
			<td>
				<input formControlName="title">
				<div *ngIf="title?.dirty && title?.errors" class="error">
					<div *ngIf="title?.errors?.required">
						Title required.
					</div>
				</div>
			</td>
		</tr>
		<tr>
			<td>Category: </td>
			<td>
				<input formControlName="category">
				<div *ngIf="category?.dirty && category?.errors" class="error">
					<div *ngIf="category?.errors?.required">
						Category required.
					</div>
				</div>
			</td>
		</tr>
		<tr>
			<td>Writer: </td>
			<td>
				<input formControlName="writer">
				<div *ngIf="writer?.dirty && writer?.errors" class="error">
					<div *ngIf="writer?.errors?.required">
						Writer required.
					</div>
				</div>
			</td>
		</tr>
		<tr>
			<td colspan="2">
				<button [disabled]="articleForm.invalid">Submit</button>
			</td>
		</tr>
	</table>
</form>
<h3>Article Details</h3>
<p *ngFor="let article of allArticles$ | async">
	{{article.id}} | {{article.title}} |
	{{article.category}} | {{article.writer}}
</p>
app.component.ts
import { Component } from '@angular/core';

@Component({
   selector: 'app-root',
   template: `
	 <app-article></app-article>
    `
})
export class AppComponent {
}
styles.css
table {
    border-collapse: collapse;
}
table, th, td {
    border: 1px solid black;
}
.error {
    color: red;
}
.success {
    color: green;
}
app.module.ts
import { NgModule } from '@angular/core';
import { BrowserModule } from '@angular/platform-browser';
import { ReactiveFormsModule } from '@angular/forms';
import { HttpClientModule } from '@angular/common/http';

import { AppComponent } from './app.component';
import { ArticleComponent } from './article.component';

//For InMemory testing
import { InMemoryWebApiModule } from 'angular-in-memory-web-api';
import { TestData } from './test-data';

@NgModule({
    imports: [
        BrowserModule,
        ReactiveFormsModule,
        HttpClientModule,
        InMemoryWebApiModule.forRoot(TestData)
    ],
    declarations: [
        AppComponent,
        ArticleComponent
    ],
    providers: [
    ],
    bootstrap: [
        AppComponent
    ]
})
export class AppModule { }
Run Application
To run the application, find the steps.
1. Download source code using download link given below on this page.
2. Use downloaded src in your Angular CLI application. To install Angular CLI, find the link.
3. Install angular-in-memory-web-api@0.11.0
4. Run ng serve using command prompt.
5. Access the URL http://localhost:4200 and create some article.
Find the print screen of the output.

References
Communicating with backend services
Angular Doc: HttpClient
Angular HttpClient get Example
Download Source Code
Содержание
- Angular — HTTP POST Request Examples
- Simple POST request with a JSON body and response type This sends an HTTP POST request to the Reqres api which is a fake online REST api that includes a /api/posts route that responds to POST requests with the contents of the post body and an id property. The id from the response is assigned to the local postId property in the subscribe callback function. POST request with strongly typed response This sends the same request as the above but sets the response type to a custom Article interface that defines the expected response properties. POST request with headers set This sends the same request again with a couple of headers set, the HTTP Authorization header and a custom header My-Custom-Header . The below headers are created as a plain javascript object, they can also be created with the HttpHeaders class, e.g. const headers = new HttpHeaders(< ‘Authorization’: ‘Bearer my-token’, ‘My-Custom-Header’: ‘foobar’ >) To set or update headers on an existing HttpHeaders object call the set() method, e.g. const headers = new HttpHeaders().set(‘Authorization’, ‘Bearer my-token’) POST request with error handling The below examples show two different ways of handling an error from an HTTP POST request in Angular. They both send the same request to an invalid url on the api then assign the error to the errorMessage component property and log it to the console. The difference is how the error is caught, the first uses the subscribe error callback, the second uses the catchError operator. Using the error callback to the RxJS subscribe method The subscribe() method is passed an observer object with two callback functions, the next() function is called if the request is successful, the error() function is called if the request fails. There is also a complete() function that we’re not using here, it gets called after an Observable successfully emits its final value, i.e. after the next() function for an HTTP request. In this case it wouldn’t be called because the Observable errors out. Using the RxJS catchError operator The Observable response from the POST request is piped to the catchError operator which handles the error and returns a new Observable that doesn’t emit any values. The function passed to subscribe() is called if the request is successful, it’s the equivalent of passing an observer object with only a next() function. It isn’t called here because no values are emitted after the error is handled, the Observable simply completes. RxJS Operators Operators in RxJS accept an input Observable and return an output Observable, multiple can be piped together in the Observable chain and they are executed before values are emitted to subscribers. With the catchError operator you have the added options of returning a fallback value to subscribers when there is an error, or rethrowing a custom error using the RxJS throwError() function. For more info on RxJS operators see https://rxjs.dev/guide/operators. Prerequisites for making HTTP requests from Angular Before making HTTP requests from your Angular app you need to do a couple of things. 1. Add the HttpClientModule to the imports array of your AppModule like below on lines 3 and 10 . 2. Import the HttpClient into your component and add it to the constructor() params like below on lines 2 and 8 . 8 Nov 2022 — Updated examples to Angular 14.2.9. The previous version (Angular 8.0.1) is still available at https://stackblitz.com/edit/angular-http-post-examples. 7 Nov 2022 — Added error handling example with RxJS catchError operator 22 Apr 2021 — Replaced JSONPlaceholder API with Reqres API because JSONPlaceholder stopped allowing CORS requests 28 May 2020 — Posted video to YouTube of HTTP POST request examples with Angular at https://youtu.be/w2HFuzxxkRs 16 Jan 2020 — Added example of how to set HTTP headers on the request 21 Nov 2019 — Created Angular HTTP POST request examples Subscribe or Follow Me For Updates Subscribe to my YouTube channel or follow me on Twitter, Facebook or GitHub to be notified when I post new content. Other than coding. I’m currently attempting to travel around Australia by motorcycle with my wife Tina on a pair of Royal Enfield Himalayans. You can follow our adventures on YouTube, Instagram and Facebook. Need Some Angular Help? Search fiverr to find help quickly from experienced Angular developers. Источник Name already in use angular / aio / content / guide / http.md Go to file T Go to line L Copy path Copy permalink Copy raw contents Copy raw contents Communicating with backend services using HTTP
- POST request with strongly typed response
- POST request with headers set
- POST request with error handling
- Using the error callback to the RxJS subscribe method
- Using the RxJS catchError operator
- RxJS Operators
- Prerequisites for making HTTP requests from Angular
- Subscribe or Follow Me For Updates
- Other than coding.
- Need Some Angular Help?
- Name already in use
- angular / aio / content / guide / http.md
Angular — HTTP POST Request Examples
Below is a quick set of examples to show how to send HTTP POST requests from Angular to a backend API.
Other HTTP examples available:
- Angular:GET, PUT, DELETE
- React + Fetch:GET, POST, PUT, DELETE
- React + Axios:GET, POST, PUT, DELETE
- Vue + Fetch:GET, POST, PUT, DELETE
- Vue + Axios:GET, POST
- Blazor WebAssembly:GET, POST
- Axios:GET, POST, PUT, DELETE
- Fetch:GET, POST, PUT, DELETE
Simple POST request with a JSON body and response type
This sends an HTTP POST request to the Reqres api which is a fake online REST api that includes a /api/posts route that responds to POST requests with the contents of the post body and an id property. The id from the response is assigned to the local postId property in the subscribe callback function.
POST request with strongly typed response
This sends the same request as the above but sets the response type to a custom Article interface that defines the expected response properties.
This sends the same request again with a couple of headers set, the HTTP Authorization header and a custom header My-Custom-Header .
The below headers are created as a plain javascript object, they can also be created with the HttpHeaders class, e.g. const headers = new HttpHeaders(< ‘Authorization’: ‘Bearer my-token’, ‘My-Custom-Header’: ‘foobar’ >)
To set or update headers on an existing HttpHeaders object call the set() method, e.g. const headers = new HttpHeaders().set(‘Authorization’, ‘Bearer my-token’)
POST request with error handling
The below examples show two different ways of handling an error from an HTTP POST request in Angular. They both send the same request to an invalid url on the api then assign the error to the errorMessage component property and log it to the console. The difference is how the error is caught, the first uses the subscribe error callback, the second uses the catchError operator.
Using the error callback to the RxJS subscribe method
The subscribe() method is passed an observer object with two callback functions, the next() function is called if the request is successful, the error() function is called if the request fails.
There is also a complete() function that we’re not using here, it gets called after an Observable successfully emits its final value, i.e. after the next() function for an HTTP request. In this case it wouldn’t be called because the Observable errors out.
Using the RxJS catchError operator
The Observable response from the POST request is piped to the catchError operator which handles the error and returns a new Observable that doesn’t emit any values.
The function passed to subscribe() is called if the request is successful, it’s the equivalent of passing an observer object with only a next() function. It isn’t called here because no values are emitted after the error is handled, the Observable simply completes.
RxJS Operators
Operators in RxJS accept an input Observable and return an output Observable, multiple can be piped together in the Observable chain and they are executed before values are emitted to subscribers. With the catchError operator you have the added options of returning a fallback value to subscribers when there is an error, or rethrowing a custom error using the RxJS throwError() function. For more info on RxJS operators see https://rxjs.dev/guide/operators.
Prerequisites for making HTTP requests from Angular
Before making HTTP requests from your Angular app you need to do a couple of things.
1. Add the HttpClientModule to the imports array of your AppModule like below on lines 3 and 10 .
2. Import the HttpClient into your component and add it to the constructor() params like below on lines 2 and 8 .
- 8 Nov 2022 — Updated examples to Angular 14.2.9. The previous version (Angular 8.0.1) is still available at https://stackblitz.com/edit/angular-http-post-examples.
- 7 Nov 2022 — Added error handling example with RxJS catchError operator
- 22 Apr 2021 — Replaced JSONPlaceholder API with Reqres API because JSONPlaceholder stopped allowing CORS requests
- 28 May 2020 — Posted video to YouTube of HTTP POST request examples with Angular at https://youtu.be/w2HFuzxxkRs
- 16 Jan 2020 — Added example of how to set HTTP headers on the request
- 21 Nov 2019 — Created Angular HTTP POST request examples
Subscribe or Follow Me For Updates
Subscribe to my YouTube channel or follow me on Twitter, Facebook or GitHub to be notified when I post new content.
Other than coding.
I’m currently attempting to travel around Australia by motorcycle with my wife Tina on a pair of Royal Enfield Himalayans. You can follow our adventures on YouTube, Instagram and Facebook.

Need Some Angular Help?
Search fiverr to find help quickly from experienced Angular developers.
Источник
Name already in use
angular / aio / content / guide / http.md
- Go to file T
- Go to line L
- Copy path
- Copy permalink
Copy raw contents
Copy raw contents
Communicating with backend services using HTTP
Most front-end applications need to communicate with a server over the HTTP protocol, to download or upload data and access other back-end services. Angular provides a client HTTP API for Angular applications, the HttpClient service class in @angular/common/http .
The HTTP client service offers the following major features.
Before working with the HttpClientModule , you should have a basic understanding of the following:
- TypeScript programming
- Usage of the HTTP protocol
- Angular application-design fundamentals, as described in Angular Concepts
- Observable techniques and operators. See the Observables guide.
Setup for server communication
Before you can use HttpClient , you need to import the Angular HttpClientModule . Most apps do so in the root AppModule .
You can then inject the HttpClient service as a dependency of an application class, as shown in the following ConfigService example.
The HttpClient service makes use of observables for all transactions. You must import the RxJS observable and operator symbols that appear in the example snippets. These ConfigService imports are typical.
You can run the that accompanies this guide.
The sample app does not require a data server. It relies on the Angular in-memory-web-api, which replaces the HttpClient module’s HttpBackend . The replacement service simulates the behavior of a REST-like backend.
Look at the AppModule imports to see how it is configured.
Requesting data from a server
Use the HttpClient.get() method to fetch data from a server. The asynchronous method sends an HTTP request, and returns an Observable that emits the requested data when the response is received. The return type varies based on the observe and responseType values that you pass to the call.
The get() method takes two arguments; the endpoint URL from which to fetch, and an options object that is used to configure the request.
options: < headers?: HttpHeaders | <[header: string]: string | string[]>, observe?: ‘body’ | ‘events’ | ‘response’, params?: HttpParams|<[param: string]: string | number | boolean | ReadonlyArray >, reportProgress?: boolean, responseType?: ‘arraybuffer’|’blob’|’json’|’text’, withCredentials?: boolean, >
Important options include the observe and responseType properties.
- The observe option specifies how much of the response to return
- The responseType option specifies the format in which to return data
Use the options object to configure various other aspects of an outgoing request. In Adding headers, for example, the service set the default headers using the headers option property.
Use the params property to configure a request with HTTP URL parameters, and the reportProgress option to listen for progress events when transferring large amounts of data.
Applications often request JSON data from a server. In the ConfigService example, the app needs a configuration file on the server, config.json , that specifies resource URLs.
To fetch this kind of data, the get() call needs the following options: . These are the default values for those options, so the following examples do not pass the options object. Later sections show some of the additional option possibilities.
The example conforms to the best practices for creating scalable solutions by defining a re-usable injectable service to perform the data-handling functionality. In addition to fetching data, the service can post-process the data, add error handling, and add retry logic.
The ConfigService fetches this file using the HttpClient.get() method.
The ConfigComponent injects the ConfigService and calls the getConfig service method.
Because the service method returns an Observable of configuration data, the component subscribes to the method’s return value. The subscription callback performs minimal post-processing. It copies the data fields into the component’s config object, which is data-bound in the component template for display.
Starting the request
For all HttpClient methods, the method doesn’t begin its HTTP request until you call subscribe() on the observable the method returns.
This is true for all HttpClient methods.
You should always unsubscribe from an observable when a component is destroyed.
All observables returned from HttpClient methods are cold by design. Execution of the HTTP request is deferred, letting you extend the observable with additional operations such as tap and catchError before anything actually happens.
Calling subscribe() triggers execution of the observable and causes HttpClient to compose and send the HTTP request to the server.
Think of these observables as blueprints for actual HTTP requests.
In fact, each subscribe() initiates a separate, independent execution of the observable. Subscribing twice results in two HTTP requests.
const req = http.get (‘/api/heroes’); // 0 requests made — .subscribe() not called. req.subscribe(); // 1 request made. req.subscribe(); // 2 requests made.
Requesting a typed response
Structure your HttpClient request to declare the type of the response object, to make consuming the output easier and more obvious. Specifying the response type acts as a type assertion at compile time.
Specifying the response type is a declaration to TypeScript that it should treat your response as being of the given type. This is a build-time check and doesn’t guarantee that the server actually responds with an object of this type. It is up to the server to ensure that the type specified by the server API is returned.
To specify the response object type, first define an interface with the required properties. Use an interface rather than a class, because the response is a plain object that cannot be automatically converted to an instance of a class.
Next, specify that interface as the HttpClient.get() call’s type parameter in the service.
When you pass an interface as a type parameter to the HttpClient.get() method, use the RxJS map operator to transform the response data as needed by the UI. You can then pass the transformed data to the async pipe.
The callback in the updated component method receives a typed data object, which is easier and safer to consume:
To access properties that are defined in an interface, you must explicitly convert the plain object you get from the JSON to the required response type. For example, the following subscribe callback receives data as an Object, and then type-casts it in order to access the properties.
The types of the observe and response options are string unions, rather than plain strings.
This can cause confusion. For example:
// but this does NOT work const options = < responseType: ‘text’, >; client.get(‘/foo’, options)
In the second case, TypeScript infers the type of options to be . The type is too wide to pass to HttpClient.get which is expecting the type of responseType to be one of the specific strings. HttpClient is typed explicitly this way so that the compiler can report the correct return type based on the options you provided.
Use as const to let TypeScript know that you really do mean to use a constant string type:
Reading the full response
In the previous example, the call to HttpClient.get() did not specify any options. By default, it returned the JSON data contained in the response body.
You might need more information about the transaction than is contained in the response body. Sometimes servers return special headers or status codes to indicate certain conditions that are important to the application workflow.
Tell HttpClient that you want the full response with the observe option of the get() method:
Now HttpClient.get() returns an Observable of type HttpResponse rather than just the JSON data contained in the body.
The component’s showConfigResponse() method displays the response headers as well as the configuration:
As you can see, the response object has a body property of the correct type.
Making a JSONP request
Apps can use the HttpClient to make JSONP requests across domains when a server doesn’t support CORS protocol.
Angular JSONP requests return an Observable . Follow the pattern for subscribing to observables and use the RxJS map operator to transform the response before using the async pipe to manage the results.
In Angular, use JSONP by including HttpClientJsonpModule in the NgModule imports. In the following example, the searchHeroes() method uses a JSONP request to query for heroes whose names contain the search term.
/* GET heroes whose name contains search term */ searchHeroes(term: string): Observable < term = term.trim();
const heroesURL = $?$ ; return this.http.jsonp(heroesUrl, ‘callback’).pipe( catchError(this.handleError(‘searchHeroes’, [])) // then handle the error ); >
This request passes the heroesURL as the first parameter and the callback function name as the second parameter. The response is wrapped in the callback function, which takes the observables returned by the JSONP method and pipes them through to the error handler.
Requesting non-JSON data
Not all APIs return JSON data. In this next example, a DownloaderService method reads a text file from the server and logs the file contents, before returning those contents to the caller as an Observable .
HttpClient.get() returns a string rather than the default JSON because of the responseType option.
The RxJS tap operator lets the code inspect both success and error values passing through the observable without disturbing them.
A download() method in the DownloaderComponent initiates the request by subscribing to the service method.
Handling request errors
If the request fails on the server, HttpClient returns an error object instead of a successful response.
The same service that performs your server transactions should also perform error inspection, interpretation, and resolution.
When an error occurs, you can obtain details of what failed in order to inform your user. In some cases, you might also automatically retry the request.
Getting error details
An app should give the user useful feedback when data access fails. A raw error object is not particularly useful as feedback. In addition to detecting that an error has occurred, you need to get error details and use those details to compose a user-friendly response.
Two types of errors can occur.
The server backend might reject the request, returning an HTTP response with a status code such as 404 or 500. These are error responses.
Something could go wrong on the client-side such as a network error that prevents the request from completing successfully or an exception thrown in an RxJS operator. These errors have status set to 0 and the error property contains a ProgressEvent object, whose type might provide further information.
HttpClient captures both kinds of errors in its HttpErrorResponse . Inspect that response to identify the error’s cause.
The following example defines an error handler in the previously defined ConfigService.
The handler returns an RxJS ErrorObservable with a user-friendly error message. The following code updates the getConfig() method, using a pipe to send all observables returned by the HttpClient.get() call to the error handler.
Retrying a failed request
Sometimes the error is transient and goes away automatically if you try again. For example, network interruptions are common in mobile scenarios, and trying again can produce a successful result.
The RxJS library offers several retry operators. For example, the retry() operator automatically re-subscribes to a failed Observable a specified number of times. Re-subscribing to the result of an HttpClient method call has the effect of reissuing the HTTP request.
The following example shows how to pipe a failed request to the retry() operator before passing it to the error handler.
Sending data to a server
In addition to fetching data from a server, HttpClient supports other HTTP methods such as PUT, POST, and DELETE, which you can use to modify the remote data.
The sample app for this guide includes an abridged version of the «Tour of Heroes» example that fetches heroes and enables users to add, delete, and update them. The following sections show examples of the data-update methods from the sample’s HeroesService .
Making a POST request
Apps often send data to a server with a POST request when submitting a form. In the following example, the HeroesService makes an HTTP POST request when adding a hero to the database.
The HttpClient.post() method is similar to get() in that it has a type parameter, which you can use to specify that you expect the server to return data of a given type. The method takes a resource URL and two additional parameters:
| Parameter | Details |
|---|---|
| body | The data to POST in the body of the request. |
| options | An object containing method options which, in this case, specify required headers. |
The example catches errors as described above.
The HeroesComponent initiates the actual POST operation by subscribing to the Observable returned by this service method.
When the server responds successfully with the newly added hero, the component adds that hero to the displayed heroes list.
Making a DELETE request
This application deletes a hero with the HttpClient.delete method by passing the hero’s ID in the request URL.
The HeroesComponent initiates the actual DELETE operation by subscribing to the Observable returned by this service method.
The component isn’t expecting a result from the delete operation, so it subscribes without a callback. Even though you are not using the result, you still have to subscribe. Calling the subscribe() method executes the observable, which is what initiates the DELETE request.
You must call subscribe() or nothing happens. Just calling HeroesService.deleteHero() does not initiate the DELETE request.
Making a PUT request
An app can send PUT requests using the HTTP client service. The following HeroesService example, like the POST example, replaces a resource with updated data.
As for any of the HTTP methods that return an observable, the caller, HeroesComponent.update() must subscribe() to the observable returned from the HttpClient.put() in order to initiate the request.
Adding and updating headers
Many servers require extra headers for save operations. For example, a server might require an authorization token, or «Content-Type» header to explicitly declare the MIME type of the request body.
The HeroesService defines such headers in an httpOptions object that are passed to every HttpClient save method.
You can’t directly modify the existing headers within the previous options object because instances of the HttpHeaders class are immutable. Use the set() method instead, to return a clone of the current instance with the new changes applied.
The following example shows how, when an old token expires, you can update the authorization header before making the next request.
Configuring HTTP URL parameters
Use the HttpParams class with the params request option to add URL query strings in your HttpRequest .
The following example, the searchHeroes() method queries for heroes whose names contain the search term.
Start by importing HttpParams class.
import from «@angular/common/http»;
If there is a search term, the code constructs an options object with an HTML URL-encoded search parameter. If the term is «cat», for example, the GET request URL would be api/heroes?name=cat .
The HttpParams object is immutable. If you need to update the options, save the returned value of the .set() method.
You can also create HTTP parameters directly from a query string by using the fromString variable:
Intercepting requests and responses
With interception, you declare interceptors that inspect and transform HTTP requests from your application to a server. The same interceptors can also inspect and transform a server’s responses on their way back to the application. Multiple interceptors form a forward-and-backward chain of request/response handlers.
Interceptors can perform a variety of implicit tasks, from authentication to logging, in a routine, standard way, for every HTTP request/response.
Without interception, developers would have to implement these tasks explicitly for each HttpClient method call.
Write an interceptor
To implement an interceptor, declare a class that implements the intercept() method of the HttpInterceptor interface.
Here is a do-nothing noop interceptor that passes the request through without touching it:
The intercept method transforms a request into an Observable that eventually returns the HTTP response. In this sense, each interceptor is fully capable of handling the request entirely by itself.
Most interceptors inspect the request on the way in and forward the potentially altered request to the handle() method of the next object which implements the HttpHandler interface.
export abstract class HttpHandler < abstract handle(req: HttpRequest): Observable ; >
Like intercept() , the handle() method transforms an HTTP request into an Observable of HttpEvents which ultimately include the server’s response. The intercept() method could inspect that observable and alter it before returning it to the caller.
This no-op interceptor calls next.handle() with the original request and returns the observable without doing a thing.
The next object
The next object represents the next interceptor in the chain of interceptors. The final next in the chain is the HttpClient backend handler that sends the request to the server and receives the server’s response.
Most interceptors call next.handle() so that the request flows through to the next interceptor and, eventually, the backend handler. An interceptor could skip calling next.handle() , short-circuit the chain, and return its own Observable with an artificial server response.
This is a common middleware pattern found in frameworks such as Express.js.
Provide the interceptor
The NoopInterceptor is a service managed by Angular’s dependency injection (DI) system. Like other services, you must provide the interceptor class before the app can use it.
Because interceptors are optional dependencies of the HttpClient service, you must provide them in the same injector or a parent of the injector that provides HttpClient . Interceptors provided after DI creates the HttpClient are ignored.
This app provides HttpClient in the app’s root injector, as a side effect of importing the HttpClientModule in AppModule . You should provide interceptors in AppModule as well.
After importing the HTTP_INTERCEPTORS injection token from @angular/common/http , write the NoopInterceptor provider like this:
Notice the multi: true option. This required setting tells Angular that HTTP_INTERCEPTORS is a token for a multiprovider that injects an array of values, rather than a single value.
You could add this provider directly to the providers array of the AppModule . However, it’s rather verbose and there’s a good chance that you’ll create more interceptors and provide them in the same way. You must also pay close attention to the order in which you provide these interceptors.
Consider creating a «barrel» file that gathers all the interceptor providers into an httpInterceptorProviders array, starting with this first one, the NoopInterceptor .
Then import and add it to the AppModule providers array like this:
As you create new interceptors, add them to the httpInterceptorProviders array and you won’t have to revisit the AppModule .
There are many more interceptors in the complete sample code.
Angular applies interceptors in the order that you provide them. For example, consider a situation in which you want to handle the authentication of your HTTP requests and log them before sending them to a server. To accomplish this task, you could provide an AuthInterceptor service and then a LoggingInterceptor service. Outgoing requests would flow from the AuthInterceptor to the LoggingInterceptor . Responses from these requests would flow in the other direction, from LoggingInterceptor back to AuthInterceptor . The following is a visual representation of the process:

The last interceptor in the process is always the HttpBackend that handles communication with the server.
You cannot change the order or remove interceptors later. If you need to enable and disable an interceptor dynamically, you’ll have to build that capability into the interceptor itself.
Handling interceptor events
Many interceptors are only concerned with the outgoing request and return the event stream from next.handle() without modifying it. Some interceptors, however, need to examine and modify the response from next.handle() ; these operations can see all of these events in the stream.
Although interceptors are capable of modifying requests and responses, the HttpRequest and HttpResponse instance properties are readonly , rendering them largely immutable. They are immutable for a good reason: An app might retry a request several times before it succeeds, which means that the interceptor chain can re-process the same request multiple times. If an interceptor could modify the original request object, the re-tried operation would start from the modified request rather than the original. Immutability ensures that interceptors see the same request for each try.
Your interceptor should return every event without modification unless it has a compelling reason to do otherwise.
TypeScript prevents you from setting HttpRequest read-only properties.
// Typescript disallows the following assignment because req.url is readonly req.url = req.url.replace(‘http://’, ‘https://’);
If you must alter a request, clone it first and modify the clone before passing it to next.handle() . You can clone and modify the request in a single step, as shown in the following example.
The clone() method’s hash argument lets you mutate specific properties of the request while copying the others.
Modifying a request body
The readonly assignment guard can’t prevent deep updates and, in particular, it can’t prevent you from modifying a property of a request body object.
req.body.name = req.body.name.trim(); // bad idea!
If you must modify the request body, follow these steps.
- Copy the body and make your change in the copy.
- Clone the request object, using its clone() method.
- Replace the clone’s body with the modified copy.
Clearing the request body in a clone
Sometimes you need to clear the request body rather than replace it. To do this, set the cloned request body to null .
TIP:
If you set the cloned request body to undefined , Angular assumes you intend to leave the body as is.
newReq = req.clone(< … >); // body not mentioned => preserve original body newReq = req.clone(< body: undefined >); // preserve original body newReq = req.clone(< body: null >); // clear the body
Http interceptor use-cases
Following are a number of common uses for interceptors.
Setting default headers
Apps often use an interceptor to set default headers on outgoing requests.
The sample app has an AuthService that produces an authorization token. Here is its AuthInterceptor that injects that service to get the token and adds an authorization header with that token to every outgoing request:
The practice of cloning a request to set new headers is so common that there’s a setHeaders shortcut for it:
An interceptor that alters headers can be used for a number of different operations, including:
- Authentication/authorization
- Caching behavior; for example, If-Modified-Since
- XSRF protection
Logging request and response pairs
Because interceptors can process the request and response together, they can perform tasks such as timing and logging an entire HTTP operation.
Consider the following LoggingInterceptor , which captures the time of the request, the time of the response, and logs the outcome with the elapsed time with the injected MessageService .
The RxJS tap operator captures whether the request succeeded or failed. The RxJS finalize operator is called when the response observable either returns an error or completes and reports the outcome to the MessageService .
Neither tap nor finalize touch the values of the observable stream returned to the caller.
Custom JSON parsing
Interceptors can be used to replace the built-in JSON parsing with a custom implementation.
The CustomJsonInterceptor in the following example demonstrates how to achieve this. If the intercepted request expects a ‘json’ response, the responseType is changed to ‘text’ to disable the built-in JSON parsing. Then the response is parsed via the injected JsonParser .
You can then implement your own custom JsonParser . Here is a custom JsonParser that has a special date reviver.
You provide the CustomParser along with the CustomJsonInterceptor .
Interceptors can handle requests by themselves, without forwarding to next.handle() .
For example, you might decide to cache certain requests and responses to improve performance. You can delegate caching to an interceptor without disturbing your existing data services.
The CachingInterceptor in the following example demonstrates this approach.
The isCacheable() function determines if the request is cacheable. In this sample, only GET requests to the package search API are cacheable.
If the request is not cacheable, the interceptor forwards the request to the next handler in the chain
If a cacheable request is found in the cache, the interceptor returns an of() observable with the cached response, by-passing the next handler and all other interceptors downstream
If a cacheable request is not in cache, the code calls sendRequest() . This function forwards the request to next.handle() which ultimately calls the server and returns the server’s response.
Notice how sendRequest() intercepts the response on its way back to the application. This method pipes the response through the tap() operator, whose callback adds the response to the cache.
The original response continues untouched back up through the chain of interceptors to the application caller.
Data services, such as PackageSearchService , are unaware that some of their HttpClient requests actually return cached responses.
Using interceptors to request multiple values
The HttpClient.get() method normally returns an observable that emits a single value, either the data or an error. An interceptor can change this to an observable that emits multiple values.
The following revised version of the CachingInterceptor optionally returns an observable that immediately emits the cached response, sends the request on to the package search API, and emits again later with the updated search results.
The cache-then-refresh option is triggered by the presence of a custom x-refresh header.
A checkbox on the PackageSearchComponent toggles a withRefresh flag, which is one of the arguments to PackageSearchService.search() . That search() method creates the custom x-refresh header and adds it to the request before calling HttpClient.get() .
The revised CachingInterceptor sets up a server request whether there’s a cached value or not, using the same sendRequest() method described above. The results$ observable makes the request when subscribed.
- If there’s no cached value, the interceptor returns results$ .
- If there is a cached value, the code pipes the cached response onto results$ . This produces a recomposed observable that emits two responses, so subscribers will see a sequence of these two responses:
- The cached response that’s emitted immediately
- The response from the server, that’s emitted later
Tracking and showing request progress
Sometimes applications transfer large amounts of data and those transfers can take a long time. File uploads are a typical example. You can give the users a better experience by providing feedback on the progress of such transfers.
To make a request with progress events enabled, create an instance of HttpRequest with the reportProgress option set true to enable tracking of progress events.
TIP:
Every progress event triggers change detection, so only turn them on if you need to report progress in the UI.
When using HttpClient.request() with an HTTP method, configure the method with observe: ‘events’ to see all events, including the progress of transfers.
Next, pass this request object to the HttpClient.request() method, which returns an Observable of HttpEvents (the same events processed by interceptors).
The getEventMessage method interprets each type of HttpEvent in the event stream.
The sample app for this guide doesn’t have a server that accepts uploaded files. The UploadInterceptor in app/http-interceptors/upload-interceptor.ts intercepts and short-circuits upload requests by returning an observable of simulated events.
Optimizing server interaction with debouncing
If you need to make an HTTP request in response to user input, it’s not efficient to send a request for every keystroke. It’s better to wait until the user stops typing and then send a request. This technique is known as debouncing.
Consider the following template, which lets a user enter a search term to find a package by name. When the user enters a name in a search-box, the PackageSearchComponent sends a search request for a package with that name to the package search API.
Here, the keyup event binding sends every keystroke to the component’s search() method.
The type of $event.target is only EventTarget in the template. In the getValue() method, the target is cast to an HTMLInputElement to let type-safe have access to its value property.
The following snippet implements debouncing for this input using RxJS operators.
The searchText$ is the sequence of search-box values coming from the user. It’s defined as an RxJS Subject , which means it is a multicasting Observable that can also emit values for itself by calling next(value) , as happens in the search() method.
Rather than forward every searchText value directly to the injected PackageSearchService , the code in ngOnInit() pipes search values through three operators, so that a search value reaches the service only if it’s a new value and the user stopped typing.
| RxJS operators | Details |
|---|---|
| debounceTime(500) | Wait for the user to stop typing, which is 1/2 second in this case. |
| distinctUntilChanged() | Wait until the search text changes. |
| switchMap() | Send the search request to the service. |
The code sets packages$ to this re-composed Observable of search results. The template subscribes to packages$ with the AsyncPipe and displays search results as they arrive.
See Using interceptors to request multiple values for more about the withRefresh option.
Using the switchMap() operator
The switchMap() operator takes a function argument that returns an Observable . In the example, PackageSearchService.search returns an Observable , as other data service methods do. If a previous search request is still in-flight, such as when the network connection is poor, the operator cancels that request and sends a new one.
NOTE:
switchMap() returns service responses in their original request order, even if the server returns them out of order.
If you think you’ll reuse this debouncing logic, consider moving it to a utility function or into the PackageSearchService itself.
Security: XSRF protection
Cross-Site Request Forgery (XSRF or CSRF) is an attack technique by which the attacker can trick an authenticated user into unknowingly executing actions on your website. HttpClient supports a common mechanism used to prevent XSRF attacks. When performing HTTP requests, an interceptor reads a token from a cookie, by default XSRF-TOKEN , and sets it as an HTTP header, X-XSRF-TOKEN . Because only code that runs on your domain could read the cookie, the backend can be certain that the HTTP request came from your client application and not an attacker.
By default, an interceptor sends this header on all mutating requests (such as POST) to relative URLs, but not on GET/HEAD requests or on requests with an absolute URL.
To take advantage of this, your server needs to set a token in a JavaScript readable session cookie called XSRF-TOKEN on either the page load or the first GET request. On subsequent requests the server can verify that the cookie matches the X-XSRF-TOKEN HTTP header, and therefore be sure that only code running on your domain could have sent the request. The token must be unique for each user and must be verifiable by the server; this prevents the client from making up its own tokens. Set the token to a digest of your site’s authentication cookie with a salt for added security.
To prevent collisions in environments where multiple Angular apps share the same domain or subdomain, give each application a unique cookie name.
HttpClient supports only the client half of the XSRF protection scheme. Your backend service must be configured to set the cookie for your page, and to verify that the header is present on all eligible requests. Failing to do so renders Angular’s default protection ineffective.
Configuring custom cookie/header names
If your backend service uses different names for the XSRF token cookie or header, use HttpClientXsrfModule.withOptions() to override the defaults.
Testing HTTP requests
As for any external dependency, you must mock the HTTP backend so your tests can simulate interaction with a remote server. The @angular/common/http/testing library makes it straightforward to set up such mocking.
Angular’s HTTP testing library is designed for a pattern of testing in which the app executes code and makes requests first. The test then expects that certain requests have or have not been made, performs assertions against those requests, and finally provides responses by «flushing» each expected request.
At the end, tests can verify that the app made no unexpected requests.
You can run these sample tests in a live coding environment.
The tests described in this guide are in src/testing/http-client.spec.ts . There are also tests of an application data service that call HttpClient in src/app/heroes/heroes.service.spec.ts .
Setup for testing
To begin testing calls to HttpClient , import the HttpClientTestingModule and the mocking controller, HttpTestingController , along with the other symbols your tests require.
Then add the HttpClientTestingModule to the TestBed and continue with the setup of the service-under-test.
Now requests made in the course of your tests hit the testing backend instead of the normal backend.
This setup also calls TestBed.inject() to inject the HttpClient service and the mocking controller so they can be referenced during the tests.
Expecting and answering requests
Now you can write a test that expects a GET Request to occur and provides a mock response.
The last step, verifying that no requests remain outstanding, is common enough for you to move it into an afterEach() step:
Custom request expectations
If matching by URL isn’t sufficient, it’s possible to implement your own matching function. For example, you could look for an outgoing request that has an authorization header:
As with the previous expectOne() , the test fails if 0 or 2+ requests satisfy this predicate.
Handling more than one request
If you need to respond to duplicate requests in your test, use the match() API instead of expectOne() . It takes the same arguments but returns an array of matching requests. Once returned, these requests are removed from future matching and you are responsible for flushing and verifying them.
Testing for errors
You should test the app’s defenses against HTTP requests that fail.
Call request.flush() with an error message, as seen in the following example.
Alternatively, call request.error() with a ProgressEvent .
Passing metadata to interceptors
Many interceptors require or benefit from configuration. Consider an interceptor that retries failed requests. By default, the interceptor might retry a request three times, but you might want to override this retry count for particularly error-prone or sensitive requests.
HttpClient requests contain a context that can carry metadata about the request. This context is available for interceptors to read or modify, though it is not transmitted to the backend server when the request is sent. This lets applications or other interceptors tag requests with configuration parameters, such as how many times to retry a request.
Creating a context token
Angular stores and retrieves a value in the context using an HttpContextToken . You can create a context token using the new operator, as in the following example:
The lambda function () => 3 passed during the creation of the HttpContextToken serves two purposes:
It lets TypeScript infer the type of this token: HttpContextToken The request context is type-safe —reading a token from a request’s context returns a value of the appropriate type.
It sets the default value for the token. This is the value that the request context returns if no other value was set for this token. Using a default value avoids the need to check if a particular value is set.
Setting context values when making a request
When making a request, you can provide an HttpContext instance, in which you have already set the context values.
Reading context values in an interceptor
Within an interceptor, you can read the value of a token in a given request’s context with HttpContext.get() . If you have not explicitly set a value for the token, Angular returns the default value specified in the token.
Contexts are mutable
Unlike most other aspects of HttpRequest instances, the request context is mutable and persists across other immutable transformations of the request. This lets interceptors coordinate operations through the context. For instance, the RetryInterceptor example could use a second context token to track how many errors occur during the execution of a given request:
Источник
In this Angular Http Post Example, we will show you how to make an HTTP Post Request to a back end server. We use the HttpClient module in Angular. The Angular introduced the HttpClient Module in Angular 4.3. It is part of the package @angular/common/http. We will create a Fake backend server using JSON-server for our example. We also show you how to add HTTP headers, parameters or query strings, catch errors, etc.
Table of Contents
- HTTP Post Example
- Import HttpClientModule
- Faking Backend
- Model
- HTTP Post Service
- Component
- Template
- Code
- HTTP Post in Action
- HTTP Post syntax
- observe
- Complete Response
- events
- Response Type
- Strongly typed response
- String as Response Type
- Catching Errors
- Transform the Response
- URL Parameters
- HTTP Headers
- Send Cookies
- Summary
Create a new Angular App.
Import HttpClientModule
Import the HttpClientModule & FormsModule in app.module.ts. Also, add it to the imports array.
|
1 2 3 4 5 6 7 8 9 10 11 12 13 14 15 16 17 18 19 20 21 22 23 24 25 |
import { BrowserModule } from ‘@angular/platform-browser’; import { NgModule } from ‘@angular/core’; import { HttpClientModule } from ‘@angular/common/http’; import { FormsModule } from ‘@angular/forms’ import { AppRoutingModule } from ‘./app-routing.module’; import { AppComponent } from ‘./app.component’; @NgModule({ declarations: [ AppComponent ], imports: [ BrowserModule, AppRoutingModule, HttpClientModule, FormsModule, ], providers: [], bootstrap: [AppComponent] }) export class AppModule { } |
Faking Backend
In the HTTP Get example, we made use of the publicly available GitHub API. For this example, we need a backend server, which will accept the post request.
There are few ways to create a fake backend. You can make use of an in-memory web API or the JSON server. For this tutorial, we will make use of the JSON Server.
Install the JSON-server globally using the following npm command
|
npm install —g json—server |
create a db.json file with some data. The following example contains data of people with id & name fields.
|
{ «people»: [ { «id»: 1, «name»: «Don Bradman» }, { «id»: 2, «name»: «Sachin Tendulkar» } ] } |
Start the server
|
json—server —watch db.json |
The json-server starts and listens for requests on port 3000.
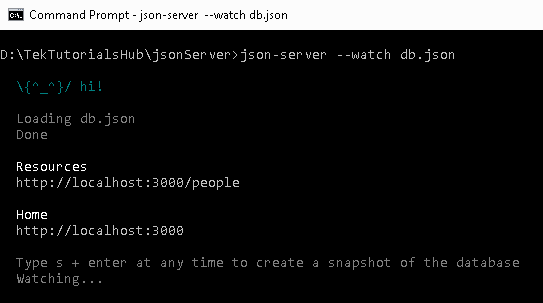
Browse the URL http://localhost:3000/ and you should be able to see the home page
The URL http://localhost:3000/people lists the people from the db.json. You can now make GET POST PUT PATCH DELETE OPTIONS against this URL
Model
Now, back to our app and create a Person model class under person.ts
|
export class Person { id:number name:string } |
HTTP Post Service
Now, let us create a Service, which is responsible to send HTTP Requests. Create a new file api.service.ts and copy the following code
|
1 2 3 4 5 6 7 8 9 10 11 12 13 14 15 16 17 18 19 20 21 22 23 24 25 26 27 28 |
import { HttpClient, HttpHeaders } from ‘@angular/common/http’; import { Person } from ‘./person’; import { Injectable } from ‘@angular/core’; import { Observable } from ‘rxjs’; @Injectable({providedIn:‘root’}) export class ApiService { baseURL: string = «http://localhost:3000/»; constructor(private http: HttpClient) { } getPeople(): Observable<Person[]> { console.log(‘getPeople ‘+this.baseURL + ‘people’) return this.http.get<Person[]>(this.baseURL + ‘people’) } addPerson(person:Person): Observable<any> { const headers = { ‘content-type’: ‘application/json’} const body=JSON.stringify(person); console.log(body) return this.http.post(this.baseURL + ‘people’, body,{‘headers’:headers}) } } |
The URL endpoint of our json-server is hardcoded in our example, But you can make use of a config file to store the value and read it using the APP_INITIALIZER token
|
baseURL: string = «http://localhost:3000/»; |
We inject the HttpClient using the Dependency Injection
|
constructor(private http: HttpClient) { } |
The getPeople() method sends an HTTP GET request to get the list of persons. Refer to the tutorial Angular HTTP GET Example to learn more.
|
getPeople(): Observable<Person[]> { console.log(‘getPeople ‘+this.baseURL + ‘people’) return this.http.get<Person[]>(this.baseURL + ‘people’) } |
In the addPerson method, we send an HTTP POST request to insert a new person in the backend.
Since we are sending data as JSON, we need to set the 'content-type': 'application/json' in the HTTP header. The JSON.stringify(person) converts the person object into a JSON string.
Finally, we use the http.post() method using URL, body & headers as shown below.
|
addPerson(person:Person): Observable<any> { const headers = { ‘content-type’: ‘application/json’} const body=JSON.stringify(person); console.log(body) return this.http.post(this.baseURL + ‘people’, body,{‘headers’:headers}) } |
The post() method returns an observable. Hence we need to subscribe to it.
Component
Template
The template is very simple.
We ask for the name of the person, which we want to add to our backend server. The two-way data binding ([(ngModel)]="person.name") keeps the person object in sync with the view.
|
1 2 3 4 5 6 7 8 9 10 11 12 13 14 15 16 17 18 19 20 21 22 23 24 25 26 27 28 |
<h1>{{title}}</h1> <div> <div> <label>Name: </label> <input [(ngModel)]=«person.name» /> </div> <div> <button (click)=«addPerson()»>Add</button> </div> </div> <table class=‘table’> <thead> <tr> <th>ID</th> <th>Name</th> </tr> </thead> <tbody> <tr *ngFor=«let person of people;»> <td>{{person.id}}</td> <td>{{person.name}}</td> </tr> </tbody> </table> |
Code
In the refreshPeople() method, we subscribe to the getPeople() method of our ApiService to make an HTTP get() request to get the list of people.
Under the addPerson() method, we subscribe to the apiService.addPerson(). Once the post request finishes, we call refreshPeople() method to get the updated list of people.
|
1 2 3 4 5 6 7 8 9 10 11 12 13 14 15 16 17 18 19 20 21 22 23 24 25 26 27 28 29 30 31 32 33 34 35 36 37 38 39 40 41 |
import { Component, OnInit } from ‘@angular/core’; import { ApiService } from ‘./api.service’; import { Person } from ‘./person’; @Component({ selector: ‘app-root’, templateUrl: ‘./app.component.html’, styleUrls: [‘./app.component.css’] }) export class AppComponent implements OnInit { title = ‘httpGet Example’; people:Person[]; person = new Person(); constructor(private apiService:ApiService) {} ngOnInit() { this.refreshPeople() } refreshPeople() { this.apiService.getPeople() .subscribe(data => { console.log(data) this.people=data; }) } addPerson() { this.apiService.addPerson(this.person) .subscribe(data => { console.log(data) this.refreshPeople(); }) } } |
HTTP Post in Action
HTTP Post syntax
The above code is a very simple example of the HTTP post() method. The complete syntax of the post() method is as shown below. The first two arguments are URL and body. It has the third argument options, where we can pass the HTTP headers, parameters, and other options to control how the post() method behaves.
|
post(url: string, body: any, options: { headers?: HttpHeaders | { [header: string]: string | string[]; }; observe?: «body|events|response|»; params?: HttpParams | { [param: string]: string | string[]; }; reportProgress?: boolean; responseType: «arraybuffer|json|blob|text»; withCredentials?: boolean; } ): Observable |
headers :use this to send the HTTP Headers along with the requestparams:set query strings / URL parametersobserve:This option determines the return type.responseType:The value of responseType determines how the response is parsed.reportProgress:Whether this request should be made in a way that exposes progress events.withCredentials:Whether this request should be sent with outgoing credentials (cookies).
observe
The POST method returns one of the following
- Complete
response bodyof the responseevents.
By default, it returns the body.
Complete Response
The following code will return the complete response and not just the body
|
addPerson(person:Person): Observable<any> { const headers = { ‘content-type’: ‘application/json’} const body=JSON.stringify(person); return this.http.post(this.baseURL + ‘people’, body,{‘headers’:headers , observe: ‘response’}) } |
events
You can also listen to progress events by using the { observe: 'events', reportProgress: true }. You can read about observe the response
|
return this.http.post(this.baseURL + ‘people’, body,{‘headers’:headers, observe: ‘response’,reportProgress: true}) |
Response Type
The responseType determines how the response is parsed. it can be one of the arraybuffer, json blob or text. The default behavior is to parse the response as JSON.
Strongly typed response
Instead of any, we can also use a type as shown below
|
addPerson(person:Person): Observable<Person> { const headers = { ‘content-type’: ‘application/json’} const body=JSON.stringify(person); console.log(body) return this.http.post<Person>(this.baseURL + ‘people’, body,{‘headers’:headers}) } |
String as Response Type
The API may return a simple text rather than a JSON. Use responsetype: 'text' to ensure that the response is parsed as a string.
|
addPerson(person:Person): Observable<Person> { const headers = { ‘content-type’: ‘application/json’} const body=JSON.stringify(person); return this.http.post<Person>(this.baseURL + ‘people’, body,{‘headers’:headers, responsetype: ‘text’}) } |
Catching Errors
The API might fail with an error. You can catch those errors using catchError. You either handle the error or throw it back to the component using the throw err
|
addPerson(person:Person): Observable<Person> { const headers = { ‘content-type’: ‘application/json’} const body=JSON.stringify(person); return this.http.post<Person>(this.baseURL + ‘people’, body,{‘headers’:headers}) .pipe( catchError((err) => { console.error(err); throw err; } ) } |
Read more about error handling from Angular HTTP interceptor error handling
Transform the Response
You can make use of the map, filter RxJs Operators to manipulate or transform the response before sending it to the component.
|
1 2 3 4 5 6 7 8 9 10 11 12 13 14 15 16 17 18 |
addPerson(person:Person): Observable<Person> { const headers = { ‘content-type’: ‘application/json’} const body=JSON.stringify(person); return this.http.post<Person>(this.baseURL + ‘people’, body,{‘headers’:headers}) .pipe( map((data) => { //You can perform some transformation here return data; }), catchError((err) => { console.error(err); throw err; } ) } |
URL Parameters
The URL Parameters or Query strings can be added to the request easily using the HttpParams option. All you need to do is to create a new HttpParams class and add the parameters as shown below.
|
addPerson(person:Person): Observable<Person> { const headers = { ‘content-type’: ‘application/json’} const params = new HttpParams() .set(‘para1’, «value1») .set(‘para2’,«value2»); const body=JSON.stringify(person); return this.http.post<Person>(this.baseURL + ‘people’, body,{‘headers’:headers, ‘params’: params}) } |
The above code sends the GET request to the URL http://localhost:3000/people?para1=value1¶2=value2
The following code also works.
|
addPerson(person:Person): Observable<Person> { const headers = { ‘content-type’: ‘application/json’} const body=JSON.stringify(person); return this.http.post<Person>(this.baseURL + ‘people?para1=value1¶2=value2’, body,{‘headers’:headers)) } |
You can also add HTTP Headers using the HttpHeaders option as shown below. You can make use of the Http Interceptor to set the common headers. Our example code already includes an HTTP header
Send Cookies
You can send cookies with every request using the withCredentials=true as shown below. You can make use of the Http Interceptor to set the withCredentials=true for all requests.
|
return this.http.post<Person>(this.baseURL + ‘people?para1=value1¶2=value2’, body,{‘headers’:headers, withCredentials=true)) |
Summary
This guide explains how to make use of HTTP post in Angular using an example app
You have some options, depending on your needs. If you want to handle errors on a per-request basis, add a catch to your request. If you want to add a global solution, use HttpInterceptor.
Open here the working demo plunker for the solutions below.
tl;dr
In the simplest case, you’ll just need to add a .catch() or a .subscribe(), like:
import 'rxjs/add/operator/catch'; // don't forget this, or you'll get a runtime error
this.httpClient
      .get("data-url")
      .catch((err: HttpErrorResponse) => {
        // simple logging, but you can do a lot more, see below
        console.error('An error occurred:', err.error);
      });

// or
this.httpClient
      .get("data-url")
      .subscribe(
        data => console.log('success', data),
        error => console.log('oops', error)
      );
But there are more details to this, see below.
Method (local) solution: log error and return fallback response
If you need to handle errors in only one place, you can use catch and return a default value (or empty response) instead of failing completely. You also don’t need the .map just to cast, you can use a generic function. Source: Angular.io — Getting Error Details.
So, a generic .get() method, would be like:
import { Injectable } from '@angular/core';
import { HttpClient, HttpErrorResponse } from "@angular/common/http";
import { Observable } from 'rxjs/Observable';
import 'rxjs/add/operator/catch';
import 'rxjs/add/observable/of';
import 'rxjs/add/observable/empty';
import 'rxjs/add/operator/retry'; // don't forget the imports

@Injectable()
export class DataService {
    baseUrl = 'http://localhost';
    constructor(private httpClient: HttpClient) { }

    // notice the <T>, making the method generic
    get<T>(url, params): Observable<T> {
      return this.httpClient
          .get<T>(this.baseUrl + url, {params})
          .retry(3) // optionally add the retry
          .catch((err: HttpErrorResponse) => {

            if (err.error instanceof Error) {
              // A client-side or network error occurred. Handle it accordingly.
              console.error('An error occurred:', err.error.message);
            } else {
              // The backend returned an unsuccessful response code.
              // The response body may contain clues as to what went wrong,
              console.error(`Backend returned code ${err.status}, body was: ${err.error}`);
            }

            // ...optionally return a default fallback value so app can continue (pick one)
            // which could be a default value
            // return Observable.of<any>({my: "default value..."});
            // or simply an empty observable
            return Observable.empty<T>();
          });
     }
}
Handling the error will allow you app to continue even when the service at the URL is in bad condition.
This per-request solution is good mostly when you want to return a specific default response to each method. But if you only care about error displaying (or have a global default response), the better solution is to use an interceptor, as described below.
Run the working demo plunker here.
Advanced usage: Intercepting all requests or responses
Once again, Angular.io guide shows:
A major feature of
@angular/common/httpis interception, the ability to declare interceptors which sit in between your application and the backend. When your application makes a request, interceptors transform it before sending it to the server, and the interceptors can transform the response on its way back before your application sees it. This is useful for everything from authentication to logging.
Which, of course, can be used to handle errors in a very simple way (demo plunker here):
import { Injectable } from '@angular/core';
import { HttpEvent, HttpInterceptor, HttpHandler, HttpRequest, HttpResponse,
         HttpErrorResponse } from '@angular/common/http';
import { Observable } from 'rxjs/Observable';
import 'rxjs/add/operator/catch';
import 'rxjs/add/observable/of';
import 'rxjs/add/observable/empty';
import 'rxjs/add/operator/retry'; // don't forget the imports

@Injectable()
export class HttpErrorInterceptor implements HttpInterceptor {
  intercept(request: HttpRequest<any>, next: HttpHandler): Observable<HttpEvent<any>> {
    return next.handle(request)
      .catch((err: HttpErrorResponse) => {

        if (err.error instanceof Error) {
          // A client-side or network error occurred. Handle it accordingly.
          console.error('An error occurred:', err.error.message);
        } else {
          // The backend returned an unsuccessful response code.
          // The response body may contain clues as to what went wrong,
          console.error(`Backend returned code ${err.status}, body was: ${err.error}`);
        }

        // ...optionally return a default fallback value so app can continue (pick one)
        // which could be a default value (which has to be a HttpResponse here)
        // return Observable.of(new HttpResponse({body: [{name: "Default value..."}]}));
        // or simply an empty observable
        return Observable.empty<HttpEvent<any>>();
      });
  }
}
Providing your interceptor: Simply declaring the HttpErrorInterceptor above doesn’t cause your app to use it. You need to wire it up in your app module by providing it as an interceptor, as follows:
import { NgModule } from '@angular/core';
import { HTTP_INTERCEPTORS } from '@angular/common/http';
import { HttpErrorInterceptor } from './path/http-error.interceptor';

@NgModule({
  ...
  providers: [{
    provide: HTTP_INTERCEPTORS,
    useClass: HttpErrorInterceptor,
    multi: true,
  }],
  ...
})
export class AppModule {}
Note: If you have both an error interceptor and some local error handling, naturally, it is likely that no local error handling will ever be triggered, since the error will always be handled by the interceptor before it reaches the local error handling.
Run the working demo plunker here.
![]()
This post will be a quick practical guide for the Angular HTTP Client module. We will cover how to do HTTP in Angular in general. We will be using the new @angular/common/http module, but a good part of this post is also applicable to the previous @angular/http module.
We will provide some examples of how to use this module to implement some of the most common uses that you will find during development.
Table Of Contents
- Introduction to the new HTTP Client module
- Example of an HTTP GET
- Improved Type Safety
- HTTP Request Parameters (Immutability-based API)
- HTTP Headers (Immutability-based API)
- HTTP PUT, PATCH, POST, DELETE
- Some REST Guidelines (specific to RESTful JSON) for using the multiple HTTP methods
- The use of Generics in the new API enabling more type safe code
- How To Avoid Duplicate HTTP Requests
- How to do HTTP Requests in Parallel, and combine the Result
- How to do HTTP Requests in sequence, and use the result of the first request to create the second request
- How To get the results of two requests made in sequence
- HTTP error handling
- HTTP Interceptors
- Progress Events
- Summary
Note: The code for this post is also available in this repository, as a running example.
Introduction to the new HTTP module
The multiple versions of the Angular HTTP module all have an RxJS Observable-based API. This means that the multiple calls to the HTTP module will all return an observable, that we need to subscribe to one way or the other.
Here are some key things to bear in mind regarding this particular type of Observables returned by the HTTP module:
- if we don’t subscribe to these observables, nothing will happen
- if we subscribe multiple times to these observables, multiple HTTP requests will be triggered (see this post for more details)
- This particular type of Observables are single-value streams: If the HTTP request is successful, these observables will emit only one value and then complete
- these observables will emit an error if the HTTP request fails, more on this later
With this in mind, let’s have a look at some of the most common tasks that we will come across using the HTTP library.
Installing the new HTTP module
In order to install the HTTP module, we need to import it in our root module HttpClientModule:
The REST API That we will be Querying
Let’s now start using the HTTP module, and use it to perform a simple HTTP GET. Just as a demo, we will be querying a Firebase database using the built-in REST capabilities of Firebase, and displaying some data directly on the screen.
This is not the most common way to query Firebase, as we usually use AngularFire together with the Firebase SDK, but there is also REST support available.
This is the data that we will be querying:

As we can see this data is a JSON structure, with no arrays. Everything is structured as a key-pair dictionary. Those funny looking strings are Firebase unique identifiers, they have some great properties (more about them in this post).
Example of an HTTP GET
And here is an example of a small component that queries the database above using an HTTP GET, and displays the data on the screen.
This example is using the HTTP module in a small component, that is displaying a list of courses. Let’s break down this example step-by-step:
- We are using the new
HttpClientclient module, and injecting it in the constructor - then we are calling the
get()method, which is returning an Observable - This observable returns an
Objectdirectly, so the HTTP library by default assumes that we have queried a JSON API and it internally parses the HTTP response body as JSON - usually, we design our APIs so that they always send an object and not an array, to avoid an attack known as JSON Highjacking
- so we need to convert the object into a list, by taking only the object values
- We are then mapping the response we got from Firebase into an array, using the lodash
valuesutility method - this defines an observable named
courses$, which is consumed by the template - the
asyncpipe will subscribe to the HTTP observable, and it’s that implicit subscription that triggers the HTTP request
The end result is that the descriptions of all the courses in the database will show up listed on the screen, in a bulleted list.
Improved Type Safety
Notice in the call to get() that we are passing a generic parameter: we are specifying that the result of the get() call will be an Observable of Course[], meaning that this observable emits values which are arrays of courses.
If we don’t specify a type parameter, then the result of the call to get() will be an Observable<Object> instead.
HTTP Request Parameters
The HTTP GET can also receive parameters, that correspond to the parameters in the HTTP url. Let’s take for example the following URL with some pagination parameters:
https://angular-http-guide.firebaseio.com/courses.json?orderBy="$key"&limitToFirst=1
This query will take the same results as before, but this time ordered by the $key property. The first URL parameter that we have in this URL is orderBy, and the second is limitToFirst.
This is is how we would do this query using the Angular HTTP Client:
Notice that we are building the HTTPParams object by chaining successive set() methods. This is because HTTPParams is immutable, and its API methods do not cause object mutation.
Instead, a call to set will return a new HttpParams object containing the new value properties. So this means that the following will NOT work:
If we try to populate our parameters like this, we will not have the expected result. Instead, we would have an empty HTTPParams object, and the two calls to set would have add no effect.
If by some reason we already have the Query parameters string prepared, and would like to create our parameters using it, we can use this alternative syntax:
Equivalent request() API
The GET calls that we saw above can all be rewritten in a more generic API, that also supports the other PUT, POST, DELETE methods. For example, here is how we could write the same request using the request() API:
This syntax is more generic because we are passing in an initial argument which defines the HTTP method that we are using, in this case GET.
If we want to add custom HTTP Headers to our HTTP request, in addition to the headers the browser already attaches automatically we can do so using the HttpHeaders class:
As we can see, HttpHeaders also has an immutable API, and we are passing a configuration object as the second argument of the get() call.
This configuration object only has one property named headers, just like the local const that we defined — so we used the object short-hand creation notation to define the configuration object.
HTTP PUT
Just like in the case of GET, we can also use the Angular HTTP Client to do all the other available HTTP methods, namely the methods typically used for data modification such as PUT.
The PUT method should only be used if we want to fully replace the value of a resource. For example, we would use PUT if we want to overwrite a course object with a completely new version of that same course object:
This example method could for example be part of a component class. If we trigger it via a click handler in a button, we would get the following output in the console:
PUT call successful value returned in body

{courseListIcon: "https://angular-academy.s3.amazonaws.com/main-logo/main-page-logo-small-hat.png", description: "Angular Tutorial For Beginners TEST", iconUrl: "https://angular-academy.s3.amazonaws.com/thumbnails/angular2-for-beginners.jpg", longDescription: "...", url: "new-value-for-url"}

The PUT observable is now completed.
So as we can see, the PUT call will replace the whole content of the course path with a new object, even though we usually only want to modify a couple of properties.
Also, the response body of the PUT call will contain the new version of the course object that was created after the upload. In some cases, this might be a lot of data.
HTTP PATCH
Most often than not, instead of providing a completely new version of a resource, what we want to do is to just update a single property. And this is the main use case for the use of the HTTP PATCH method!
For example, here is how we would update only the course description:
This would be the result of calling this PATCH method:
PATCH call successful value returned in body

{description: "Angular Tutorial For Beginners PATCH TEST"}

The PATCH observable is now completed.
As we can see, the PATCH method returns only the new version of the modified values, that we already sent initially.
This is useful in situations where there is some sort of further server-side modification of the patched values, such as for example via a database trigger or a Firebase rule.
HTTP DELETE
Another frequent operation that we want to do is to trigger a logical delete of some data. This operation can completely wipe the data from our database, or simply mark some data as deleted. This is an example of how we would delete a given course:
This call would trigger the following results in the console:
DELETE call successful value returned in body null
The DELETE observable is now completed.
In the case of Firebase, this completely removes the object from the database, but we can imagine other REST APIs where only a logical delete would occur.
HTTP POST
If the operation that we are trying to do does not fit the description of any of the methods above (GET, PUT, PATCH, DELETE), then we can use the HTTP wildcard modification operation: POST.
This operation is typically used to add new data to the database, although there are many other use cases. For example, this is how we would add a new course to the database using it:
And here the results that show in the console when this POST request gets executed:
POST call successful value returned in body {name: "-KolPZIn25aSYCNJfHK5"}
The POST observable is now completed.
When we use the POST method to create data in the database, we usually want to return the unique identifier of the data that we just created, so that the client can reference that new resource if needed.
Avoid Duplicate HTTP Requests
Depending on how you use the HTTP module, a problem that you might come across is the occurrence of multiple HTTP requests. This is actually the normal behavior of the HTTP observables, but it might be surprising the first time that we see it.
Sometimes we want to create an observable, and then subscribe to it straight away to implement some functionality which is local to the place where we created the observable.
For example, we might want to do some logging at the level of the service where the HTTP observable is being created. Let’s have a look at one example, still in the same component that we created above:
In this example, we are creating an HTTP observable, and we are doing some local subscription to it. Then this observable is assigned to the courses$ member variable, which will then also be subscribed to using the async pipe, via the component template.
This means that there will be two HTTP requests, once per each subscription. In this case, these requests are clearly duplicate as we only wanted the data to be queried from the backend once.
A new RxJs operator
There are several ways to avoid this situation, but there was recently an operator added to RxJs specifically to tackle this use case — the shareReplay operator.
According to the author of the operator Ben Lesh:
This makes
shareReplayideal for handling things like caching AJAX results, as it’s retryable
So let’s apply this new operator, and see the results:
With the shareReplay operator in place, we would no longer fall into the situation where we have accidental multiple HTTP requests.
And this covers the main use cases for doing the most typical read and modification operations, that we would implement while doing a custom REST API.
Let’s now see some other very frequent use cases, plus some more new features of the Angular HTTP client.
How to do HTTP Requests in Parallel, and combine the Result
One way of doing HTTP requests in parallel is to use the RxJs forkjoin operator:
In this example, we are taking HTTP GET observables and combining them to create a new observable.
This new observable will only emit a value when the two GET observables emit their value. The value of the combined observable will be an array containing the multiple results of each GET request.
How to do HTTP Requests in sequence, and use the result of the first request to create the second request
Another more common use case is to do one HTTP request and then use the result of that request to build a second HTTP request. One way of doing this is to use the switchMap operator:
Notice the use of a generic parameter in the call to get(). This is optional and it helps to keep out program more type safe.
If we don’t use the generic type, then the inferred type of the course variable would be Object, but using this parameter the inferred type is now Course, which gives us auto-completion inside the function passed to switchMap.
Let’s then break down how this switchMap HTTP request chain works:
- we are defining a source HTTP GET request that reads the data of a course
- once that source observable emits a value, it will trigger the mapping function that will create an inner observable
- the inner observable is an HTTP PUT observable that will then send the course modifications back to the server
- the call to
switchMapreturns a result observable, that we subscribe to - it’s the subscription to the result observable that triggers the subscription to the source GET observable
- the values of the inner observable (that creates a PUT request) are emitted as values of the result observable.
Have a look at this previous post on switchMap, this operator is likely to be helpful in several different use cases (not only this one).
For example, we can also use it in this other closely related use case.
How To get the results of two HTTP requests made in sequence
In the previous case, we used switchMap to chain two HTTP requests together, creating one request based on the results of the first request.
But the result observable did not have the data of the first request, instead it only had access to the data of the second HTTP request.
If we would like to have both the data of the first HTTP request and deliver it together with the data of the second request, we could use a selector function (notice the second argument passed to switchMap):
The emitted values of the outer result observable with then become an array that contains the two value emitted by each HTTP request in the chain.
Notice that selector functions are not unique to the switchMap operator, they can be used in many other operators.
Also, in these examples, we have used switchMapto chain two HTTP calls, but we could continue calling switchMapon the result observable and keep chaining more calls.
HTTP Error Handling
One of the biggest advantages of RxJs is the built-in error handling functionality, which is hard to get right while doing asynchronous programming.
There is support for many common error handling use cases, but in the case of HTTP requests here is a very common functionality for error handling:
- we define an HTTP observable, that then emits an error
- in response, we want to show an error message to the user
- then we want to still emit some sort of default value for the HTTP stream so that the screens consuming the data still display something useful to the user
This is how we would implement this use case using the RxJs catch operator:
To understand this example, let’s have a look first at the console output:
Error catched

HttpErrorResponse {headers: HttpHeaders, status: 404, statusText: "Not Found", url: "http://localhost:4200/api/simulate-error", ok: false, … }

Value emitted successfully {description: "Error Value Emitted"}
HTTP Observable completed...
Based on this output, here is what happened in this scenario:
- The HTTP call occurred and an error was thrown in our test server
- the catch operator caught the exception, and executed the error handling function
- inside that function, we could have for example shown the error to the user
- then the error handling function returns an observable built using the
Observable.of()operator - This operator creates one observable that only emits one value (the object passed to
Observable.of()), and then it completes - this returned observable gets subscribed to, and its values start to get emitted by the results observable, so the default value gets emitted
- the error observable completes, and so the result observable also completes
Notice that by using the catch operator, the error handling function of the result observable would never get called, because the error thrown by the HTTP observable was caught by the catch operator.
HTTP Interceptors
A new feature available in the new HTTP client is HTTP Interceptors. An HTTP Interceptor allows us to add some generic functionality to all our HTTP requests in only one place.
Interceptors are ideal for cross-cutting concerns like for example adding an authentication token header transparently to all the requests made by the HTTP client.
This is an example of how we could implement such an authentication interceptor:
Let’s then break down the implementation of this interceptor:
- this is a normal Angular injectable service, and we can inject any other services via the constructor
- in this case, we are injecting a global singleton authentication service, that has access to the authentication token
- the
interceptmethod takes two arguments: the request being intercepted, and the next handler - the
next.handlemethod needs to be called to continue the interceptor chain, and for the HTTP request to be made - the
next.handlemethod returns an observable, and this is then returned by theinterceptmethod - this API is similar to middleware libraries such as express
- the request object is immutable, so if we want to modify the request for example to add a header, we need to clone it
- the headers object is also immutable, so as we saw before we need to clone it and create a modified copy of it, for example using (
headers.set()) - The cloned request will now have the new HTTP header
X-CustomAuthHeader - The cloned and modified HTTP request is then returned to the middleware chain, and the resulting HTTP call will have the new header included
In order to activate this interceptor and apply it to any HTTP request made using the HTTP client, we need to configure it in our application module by adding it to the HTTP_INTERCEPTORS multi-provider:
Progress HTTP Events
Another new use case that is supported by the HTTP client is Progress events. To receive these events, we create our HTTP request manually in the following way:
This is the console output for this example:
Upload progress event Object {type: 1, loaded: 2, total: 2}
Download progress event Object {type: 3, loaded: 31, total: 31}
Response Received... Object {description: "POST Response"}
By creating the request like this, we are receiving all the following HTTP events:
- an initial upload event when the request gets fully sent to the server
- a download event, for when the reply arrives from the server
- a response event, containing the body of the server response
Summary
The new Angular HTTP Client is a great evolution when compared to the previous HTTP client: it’s more user-friendly and helps to improve the type safety of our code.
It also supports several extra use cases: for example interceptors and progress events.
This new HTTP client will exist side-by-side with the previous HTTP module, to allow an easier migration.
I hope that this post helps in getting started with the new HTTP client, if you have some questions please let me know in the comments below and I will get back to you.
To get notified when more posts like this come out, I invite you to subscribe to our newsletter:
And if you would like to know about more advanced Angular Core features, we recommend checking the Angular Core Deep Dive course, where the HTTP Client is covered in much more detail.
If you are just getting started learning Angular, have a look at the Angular for Beginners Course:

Have also a look also at other popular posts that you might find interesting:
- Getting Started With Angular — Development Environment Best Practices With Yarn, the Angular CLI, Setup an IDE
- Why a Single Page Application, What are the Benefits ? What is a SPA ?
- Angular Smart Components vs Presentation Components: What’s the Difference, When to Use Each and Why?
- Angular Router — How To Build a Navigation Menu with Bootstrap 4 and Nested Routes
- Angular Router — Extended Guided Tour, Avoid Common Pitfalls
- Angular Components — The Fundamentals
- How to build Angular apps using Observable Data Services — Pitfalls to avoid
- Introduction to Angular Forms — Template Driven vs Model Driven
- Angular ngFor — Learn all Features including trackBy, why is it not only for Arrays ?
- Angular Universal In Practice — How to build SEO Friendly Single Page Apps with Angular
- How does Angular Change Detection Really Work ?