Having trouble connecting your FC to Betaflight on a computer, or flashing FC firmware? Very often it’s caused by flight controller driver (either missing driver or the wrong driver is installed). This tutorial hopefully can help you fix it in a few simple steps.

Failed to open serial port
This is perhaps the most common issue when connecting to or flashing a flight controller in Betaflight Configurator.
Failed to open serial port
First thing to try would be a different USB cable, make sure it’s a data cable, not a charging-only cable.
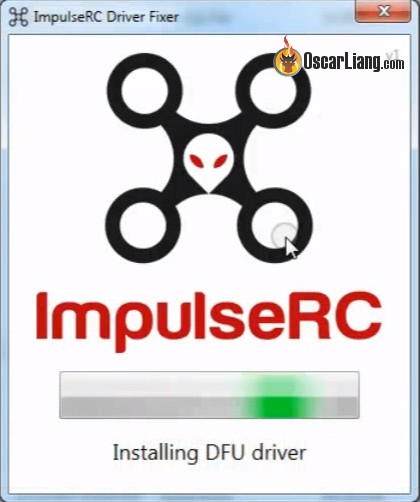
If that didn’t work, try running the ImpulseRC Driver Fixer.
- Connect your FC to the computer via USB Cable
- Download and run ImpulseRC Driver Fixer Tool here (Warning: it’s a 3rd party software, please scan it with AV software before running it)
- This tool will automatically search for your FC, and install whatever driver you need on your computer.
Once that’s completed successfully, fire up Betaflight Configurator and try to connect to or flash your flight controller and it should work.
Wrong DFU Driver Installed
If you can connect to the flight controller, but unable to flash firmware and it gives you the “Failed to open serial port” error even after running the ImpulseRC driver fixer, it’s possible that you have a wrong DFU driver installed e.g. “Guillemot STM DFU Device“. The correct DFU driver should be “STM32 BOOTLOADER“.
To find out if this is the case:
- Put your FC in bootloader mode (aka DFU mode, to do this, power off the FC first by unpluging USB cable and LiPo, hold down the boot button on the FC, then plug in the USB cable)
- Go to Device Manager and see if you can find “Guillemot STM DFU Device” under any Device Type, e.g. “Sound, Video and Game Controller”
- If it’s there, congratulations you have found the problem! It’s the wrong driver
When re-installing driver with Zadig or ImpluseRC driver fixer, it would show up as “STM32 BOOTLOADER” but would then it would always revert back to “Guillemot STM DFU Device”.
To fix this you have to remove Guillemot first:
- Delete these 2 folders:
- C:Program FilesGuillemot
- C:Program Files(x86)Guillemot
- With your FC connected to the computer in bootloader/DFU mode, go to Device Manager, find Guillemot STM DFU Device, right click it and Uninstall it, make sure to check “uninstall driver”
- Now unplug the FC and reboot your computer
- Put your FC in bootloader mode again and run ImpulseRC driver fixer, in Betaflight Configurator’s COM port, it should now show up as “STM32 BOOTLOADER” and it should allow you to flash firmware now
How to Install Driver On MacOS
Driver installation on a Mac is different.
Download the CP210X driver for MacOS, and install that.
During the install your Mac won’t allow you install it because it’s an unauthorised app. Go into SYSTEM PREFERENCES, then SECURITY & PRIVACY, then unlock using padlock at the bottom left, then click (some users are not able to unlock the disk) ENABLE USERS. Then enable SiLabs. Restart your Mac.
Once installed, you need to go back to the same place to allow unauthorised application, Silabs in this case.
Nothing Works?
I had one computer that was never able to flash Betaflight firmware. It connected to Betaflight just fine, but just couldn’t flash. I tried everything, different cables, installed all the possible firmware, tried many things over the course of 6 months to no avail.
If you have a computer like that, just use the Speedybee APP on your smartphone (learn more here). You can change settings and flash firmware just like the computer software.
For android phones, the cheapest way to connect to the Speedybee app is using a OTG cable: https://amzn.to/3kXAWsu (product page, affiliate link). But you can also use the Speedybee Adapter 3 and connect through WiFi.
If you have an iPhone (also works for android phones) which doesn’t support OTG, then your only option is to get the Speedybee adapter: https://oscarliang.com/product-k74v
FAQ
I am having problem flashing the board, I’ve tried everything, and DFU is displayed in the Configurator COM port, but it’s just not flashing and i get the following message: “Read protection not active. USB device successfully closed”.
Try to un-select “Full chip erase” option before flashing, and you could “erase settings” in CLI after the firmware flashing. Type “Default” in CLI to reset all settings.
Edit History
- Jul 2017 – Article created
- Aug 2017 – added fix for CP2102 missing driver
- Feb 2023 – added fix about replacing Guillemot driver with STM32
I’ve just had two very late nights trying to upgrade two quads from old firmware’s and configurator’s.
One was running CleanFlight the other was BetaFlight and both over a year old FW and Config.
Both new configurators instantly kicked me into CLI mode saying I need to upgrade.
So I exited and went to Firmware Flasher, once there I used ImpulseRC Fixer to get into DFU mode which
it does fine «even though I often get errors» (usually 99) I see the Bootloader FC lights come ON.
You need to have your PC Device Manager open then you can quickly check if anything «is» actually changing
in the Universal Serial Bus devices, other wise you are just guessing.
Devices will show up as in DFU or Bootloader.
Anyway the older Configs saw a DFU device, I loaded the .hex files but no-matter what I tried the thing
wouldn’t flash the chip, even though it reported 256KB available etc.
The newer Configs didn’t even detect the DFU device, or if they did it wouldn’t flash just as above.
I also had Zadig open also so could see the drivers being changed. But nothing was working.
I even tried three USB cables (I have been caught by dodgy cables before) and eventually I swapped
PC’s but was still having no luck.
Then BINGO ! !, one of them started to flash the FC Chip, and I really don’t know why, it was just a fluke ??
So the next night I spent trying to get the other quad flashed, I wasn’t going to let it beat me 
But nothing was working.
As a last resort I tried STMicroelectronics, DfuSe Demo. This is a two part process where you firstly need
to generate a .dfu file (using DfuFileMgr.exe) from the appropriate FC .hex file. Chose Action generate then
use the [ S19 or Hex…] button, you’ll work it out. Select the .hex, generate / save the .dfu
Once that’s done use DfuSe Demo.exe When I first tried it I got No DFU devices available.
So I also used, D/L, STM- Virtual comport driver, install the driver, now I had a device in the list up top.
Otherwise try ImpulseRC Fixer.exe to enter DFU mode.
Use [Choose] to select your newly created .dfu file, a confirmation bar should appear, then hit [Upgrade]
You may get a warning saying «it’s flying blind» and can’t verify if the correct file is selected, just hit Yes.
Warning: Make sure you really have selected the correct file you made or it’s on your head if wrong.
The progress bar should do stuff. Congratulations  Unplug the FC and now try BF or Cf config again.
Over in GitHub there were recent posts about No DFU, etc and they shut them down quickly.
Maybe those guys need to have another look Betaflight config because it seems it’s not an isolated
incident as seen above.
BTW I was using two WIN7 machines, one 32bit and one 64bit system.
I know the above steps are a bit involved, not too hard though, better than having a useless FC.
And ignore the ImpulseRC fixer warnings, use Device Manager list, USB mount / dismount sounds
from the PC or the Boot LEDs on your Flight Controller to see if you did actually enter Boot / DFU mode.
Hope this may help some.
Impulserc driver fixer ошибка 99
Любой интернет-банк обладает огромным количеством систем безопасности, взломать которые почти невозможно. Это делается для того, чтобы повысить надежность использования кредитного учреждения во время проведения денежных операций.
Код ошибки 99 — это сигнал о том, что произошла неисправность функционирования такого секретного соединения. Финансовая операция не может быть проведена по причине того, что связь клиентского протокола с серверной частью банка прерывается. Причину необходимо смотреть либо на стороне самого пользователя, либо на стороне банковского учреждения.
Неполадки, вызывающие код ошибки 99, связаны со следующими причинами:
- Установка обновлений ПО со стороны финансовой организации. В таком случае необходимо просто подождать несколько минут, пока загрузится программное обеспечение.
- Техническое обслуживание устройств. Обычно о таком предупреждают заранее, высвечивая расписание проводящихся работ .
- Ошибки в функционировании сторонних утилит и программ, встроенных дополнительно в Сбербанк Бизнес Онлайн.
- Неисправности серверной техники и оборудования.
- Хакерские атаки и взломы со стороны злоумышленников.
Для устранения ошибки необходимо уточнить на горячей линии Сбербанка о наличии возможных проблем со стороны самой компании. Если они присутствуют, оператор обязательно уведомит об этом и сообщит о возможных сроках устранения неисправности.
Если же все сервисы работают исправно, необходимо искать причину у себя. Так как код ошибки сигнализирует о возможном нарушении соединения, вероятнее всего проблема связана с подключением к интернету. Как правило, это происходит по причине:
- Взлома сетевого подключения вирусом.
- Временной приостановки предоставления услуг интернета.
- Поломки маршрутизатора.
Ниже представлен пошаговый алгоритм устранения ошибки 99, возникающей в приложении Сбербанк Бизнес Онлайн:
Если вышеприведенные способы устранения не сработали, то стоит обратиться за помощью к сотрудникам самой компании или провести перевод в офисе Сбербанка. Штат специалистов поможет определить проблему и решит ее в кратчайшие сроки.
«Сигнал» выводится в формате цифрового кода для снижения объема занимаемой памяти. Ошибка сообщает о нарушении контакта с пин-падом. Причинами неисправности может быть окисление контактов, физическое повреждение кабеля или сетевого порта, конфликт портов, ненадежно-разработанное программное обеспечение. В любом случае для решения проблемы необходимо обращаться к сотрудникам банка. Они смогут определить неисправность и устранить ее в кратчайшие сроки.
Если вы пытаетесь загрузить или перезагрузить устройство Windows, но застряли на черном экране с кодом ошибки 99 , отображаемым в правом нижнем углу, это означает, что что-то не работает должным образом.
Нет, это не сбой системы Windows, а аппаратная проблема, которая не позволяет операционной системе загружаться должным образом, и поэтому последовательность загрузки/перезагрузки не может быть завершена. Проще говоря, ОС Windows не может быть инициирована.
Код отладки 99 даже не является реальной ошибкой. Он показывает, на каком этапе он запущен, и в этом случае мы обсуждаем проблемы в рамках инициализации Super IO.
В нескольких словах, код отладки 99 говорит о проблеме, связанной с процессом загрузки и, более конкретно, с основным жестким диском. Конечно, материнская плата может вызвать проблемы, но это может быть что-то с настройкой BIOS тоже.
В любом случае, мы постараемся найти правильное исправление для кода ошибки компьютера 99 в этой статье.
Если вы можете перейти в BIOS, вы должны начать процесс устранения неполадок, убедившись, что режим SATA установлен в AHCI вместо IDE. Более того, порядок загрузки должен соответствовать протоколу UEFI по умолчанию.
Обратите внимание, что в зависимости от производителя параметры BIOS могут отличаться. Обновление BIOS без загрузки в Windows возможно только для более новых материнских плат, в то время как выполнить сброс можно с помощью доступа к заводским настройкам.
Вы также можете перезагрузить материнскую плату, удалив и повторно применив батарею BIOS, хотя это сложный процесс, который подразумевает разборку вашего ПК, поэтому будьте осторожны и постарайтесь не испортить ситуацию даже в худшем случае.
Подсказка : не бойтесь обращаться за более опытной помощью, если вы не являетесь техническим экспертом.
- ЧИТАЙТЕ ТАКЖЕ : как получить доступ к BIOS на ПК с Windows 7/Windows 10
Другие применяемые решения для устранения неполадок:
Как уже было сказано, код отладки 99 описывает проблемы инициализации Super IO. Итак, исправления должны быть сосредоточены на этой конкретной области.
Надеемся, что удалось решить эту проблему с помощью перечисленных выше решений.
Некоторые пользователи ПК, использующие материнские платы MSI, сталкиваются с проблемой, когда при загрузке или перезагрузке своего устройства Windows код ошибки 99 появляется в правом нижнем углу черного экрана. В этом посте мы определим потенциальные причины, а также предложим наиболее подходящие решения проблемы.

Ниже приведены потенциальные виновники:
- Поврежденные временные данные ядра.
- Несоответствие BIOS / UEFI.
- Недостаточный БП.
- Проблема ввода-вывода с портами USB.
- Проблема с оборудованием.
Код ошибки материнской платы 99
Если вы столкнулись с этой проблемой, вы можете попробовать наши рекомендуемые решения ниже и посмотреть, поможет ли это решить проблему.
- Проверьте время и дату в BIOS
- Измените режим контроллера диска на AHCI
- Удалите внешние периферийные устройства (если применимо)
- Очистите батарею CMOS
- Сбросить BIOS
- Подключите мышь и / или клавиатуру через порты PS / 2
- Заменить MOBO.
Давайте посмотрим на описание процесса, связанного с каждым из перечисленных решений.
1]Проверьте время и дату в BIOS
- Загрузитесь в BIOS. Следуйте этим советам, если вы не можете загрузиться в BIOS.
- На Главное менюс помощью клавиш со стрелками перейдите к Время и дата раздел.
- Добравшись до места, проверьте время и дату.
- Выбирать Сохранить и выйти выходить.
Теперь попробуйте загрузить компьютер и посмотрите, появляется ли ошибка по-прежнему. Если да, попробуйте следующее решение.
2]Измените режим контроллера диска на AHCI.
Когда режим контроллера жесткого диска установлен на IDE или RAID и в системе отсутствуют соответствующие драйверы, в системе может возникнуть ошибка. Чтобы устранить проблему, необходимо заменить контроллер диска на AHCI. Для этого вам необходимо войти в BIOS и внести необходимые изменения, следуя надлежащим инструкциям. Вы можете найти соответствующие инструкции в инструкции по эксплуатации материнской платы, поставляемой во время ее покупки, или проверить в Интернете.
Примечание: Перед изменением режима на AHCI выполните приведенную ниже команду в командной строке с повышенными привилегиями и перезагрузите компьютер:
После того, как вы установили режим AHCI, выполните приведенную ниже команду в командной строке CMD с повышенными привилегиями и снова перезагрузите компьютер.
Если проблема не исчезнет, попробуйте следующее решение.
3]Удалите внешние периферийные устройства (если применимо)
4]Очистите батарею CMOS
Вам могут потребоваться услуги специалиста по аппаратному обеспечению.
- Выключите все периферийные устройства, подключенные к компьютеру.
- Отсоедините шнур питания от источника переменного тока.
- Снимите кожух компьютера.
- Найдите аккумулятор на плате. Батарея может быть в горизонтальном или вертикальном держателе батареи или подключена к бортовой сети с помощью провода.
Если аккумулятор подключен к бортовой колодке с помощью провода, отсоедините провод от бортовой колодки.
- Подождите один час, затем снова подключите аккумулятор.
- Закройте кожух компьютера.
- Снова подключите компьютер и все устройства.
Проблема все еще не решена? Попробуйте следующее решение.
5]Сбросить BIOS
Это решение требует, чтобы вы сбросили настройки BIOS до значений по умолчанию и посмотрите, поможет ли это.
6]Подключите мышь и / или клавиатуру через порты PS / 2
Вы можете столкнуться с этой ошибкой MOBO, если используете старую материнскую плату MSI, на которой все еще есть слоты PS / 2, потому что у вас может быть проблема ввода-вывода, вызванная периферийными устройствами, подключенными через USB. В этом случае вы можете отключить USB-мышь и клавиатуру и подключить более старые периферийные устройства через устаревший порт PS / 2.
7]Заменить MOBO
На этом этапе вы можете столкнуться с коротким замыканием, которое привело к повреждению ваших внутренних компонентов. Итак, если устройство все еще находится на гарантии, вы можете сдать материнскую плату или сам ПК на замену.
Если срок гарантии истек, а у вас другая материнская плата, совместимая с вашим процессором, графическим процессором и оперативной памятью, вы можете заменить неисправный MOBO и посмотреть, загрузится ли ваш компьютер без проблем.
| Конфигурация компьютера |
| Процессор: i7-8700 @3.20GHz |
| Материнская плата: ASUS B360M-K |
| Память: Patriot DDR4 1333 2x4Gb |
| HDD: KINGSTON SV300S37A120G, ST1000DM003-1ER162, WD10EZEX-08WN4A0, WD5000AZLX-75K2TA0 |
| Видеокарта: MSI GTX1050Ti 4Gb |
| Звук: ASUS XonarDX PCI-E |
| Блок питания: Thermaltake Hamburg 530Watts |
| CD/DVD: TSST SH-S223C |
| Монитор: 23′ DELL U2312HM |
| Ноутбук/нетбук: DELL N510 |
| ОС: Win10 x64, Mint 20 |
| Индекс производительности Windows: 5.9 |
| Прочее: CANON Ixus 30 digital camera |
Автор: dmitryst
Дата: 13-11-2021
Описание: Добавлены варианты решения
Для отключения данного рекламного блока вам необходимо зарегистрироваться или войти с учетной записью социальной сети.
Я так понимаю создаёт в реестре ветку «RpcAuthnLevelPrivacyEnabled»=dword:00000000. Я пробовал руками создавать не сработало. Может что не так сделал. Попробую сделать так.
——-
Люди вон чё и то ни чё, а я чуть чё так вон чё.
На восьми серверах с Win2019 Server помогло.
Может быть кто-то знает, как это должно было работать по задумке Microsoft со значением «1»?
Вот нашёл описание этого ключа:
Подменю реестра
HKEY_LOCAL_MACHINESystemCurrentControlSetControlPrint
Значение
RpcAuthnLevelPrivacyEnabled
Тип данных
REG_DWORD
Данные
1.Включает режим обеспечения соблюдения. Перед тем как включить режим принуживания для серверов, убедитесь, что на всех клиентских устройствах установлено обновление Windows от 12 января 2021 г. или Windows более поздней версии. Это исправление увеличивает уровень авторизации для принтера IRemoteWinspool RPC и добавляет новое значение политики и реестра на стороне сервера, чтобы принудительно использовать новый уровень авторизации, если применяется режим принудительного применения. Если на клиентском устройстве не применено обновление для системы безопасности от 12 января 2021 г. или более поздней версии Windows, печать будет нарушена при подключении клиента к серверу с помощью интерфейса IRemoteWinspool.
0:не рекомендуется. Отключает увеличение уровня проверки подлинности для принтера IRemoteWinspool,а ваши устройства не защищены.
По умолчанию
Поведение по умолчанию после установки обновлений, когда не за установлена клавиша реестра:
В обновлениях от 12 января 2021 г. и более поздних версий по умолчанию установлено значение 0 (ноль).
В обновлениях от 14 сентября 2021 г. и более поздних версий по умолчанию за установлено значение 1 (один).
Источник
Downloads
Essential utilities, firmware and models for use with ImpulseRC products.
ImpulseOSD Software Download
Windows — Full featured, drag and drop screen designer, configuration of all settings.
Mac — Simple tool for backup/restore and firmware update.
Full documentation will be maintained as a Wiki on Github — https://github.com/ImpulseRC/OSD
Driver Fixer
This application will attempt to install the correct serial port and DFU drivers for using STM32 F3, F4 and F7 based flight controllers on Windows. If you have trouble running the Driver Fixer you may need to install the Microsoft .NET Framework v4.5
Apex Frame Accessory 3D Printable Files
STL files for the injection moulded pieces as well as various antenna mounts, plus a DXF file for a HD camera mount base, are available for free download under the Creative Commons license.
Micro Apex Frame Accessory 3D Printable Files
STL files for the injection moulded pieces as well as antenna mounts, plus a DXF file for a HD camera mount base, are available for free download under the Creative Commons license.
Helix / Mercury Video Transmitter
Since the custom VTX/OSD firmware changes certain defaults you must use this version of the MWOSD GUI to configure!
Australian firmware locked to legal frequencies and 25mW output power. If you ordered your Helix in Australia you already have this flashed.
Fully unlocked international firmware, gives all supported channels and selectable 25/200/500mW output power . If you ordered your Helix from outside of Australia you already have this flashed.
Reverb 3D Printable GoPro Couch Mount
These files are provided solely for personal use. The design remains the property of Brain3D and most not be offered for sale as a printed part.
Источник
Fix Flight Controller Driver Issues – Can’t Connect to Betaflight or Flash Firmware

Having trouble connecting your FC to Betaflight on a computer, or flashing FC firmware? Very often it’s an issue with flight controller driver. This tutorial hopefully can help you fix it in a few simple steps.
Errors when flashing FC firmware
Often when there is a driver issue with the flight controller in Windows, you might get errors when press the button “Flash Firmware”. One common error is:
Then the FC COM disappears, and it appears again when you unplug the FC and plug it back in… The same problem keeps happening when you try to flash the FC.
The first thing you should do is to try a different USB cable. Sometimes an USB cable might be designed for charging and not for data connection, or the cable is simply damaged.
Or you might be getting this error:
No response from bootloader, programming failed
If you are able to connect your flight controller to Betaflight GUI, but you just cannot flash firmware. In which case please follow these steps to resolve the problem.
If you cannot connect to GUI at all, please try the “bootloader fix” first to flash the firmware. If that doesn’t help then read on.
Try restarting your computer and repeat the above before moving on.
2 Types of Flight Controller Driver Issues
There are two types of flight controllers by the way they connect to a computer:
You can find out whether your FC is the CP2102 or VCP in order to choose the suitable solution to fix your driver issue.
VCP Boards: ImpulseRC Driver Tool
Connect your FC to the computer with USB cable.
Download and run ImpulseRC Driver Fixer Tool here (it’s a 3rd party software, please scan it with AV software before running it)
This tool will automatically search for your FC, and install whatever driver you need on your computer.
Once that’s completed successfully, the driver should be installed. Now fire up Betaflight Chrome App GUI, and you should see “DFU” next to the connect button, rather than the usual COM port in the text box.

You should now be able to flash the FC as you normally would.
Once done, your COM port will reappear in the text box. And you should be able to flash the FC from now on without any issues on this computer.
CP2102 Driver Fix
If you have a flight controller with CP2102, you need to install the CP2102 driver.
Note that with SPRF3 boards, you might want to try changing the baud rate to 256000 first, maybe that would do the trick.
First of all, connect your FC to the computer via USB. Without proper driver it’s difficult to tell where it is in Device Manager. The easiest thing to do is to use Zadigto find it.
You can download both the CP2102 and Zadig drivers on the front page of the Betaflight Configurator.

Run Zadig, choose your flight controller in the drop down list (1). There are going to be many options but choose the one that is more likely to be your FC.
After the green arrow select WinUSB (2), and press replace driver (3).

After that you should find the “CP2102 USB to UART Bridge Controller” under “Universal Serial Bus devices”. The one that isn’t greyed out. Right click on it and click Update Driver Software.

Select the driver you want to install, Silicon Labs, CP210x USB to UART Bridge.
And that’s it, the COM port of your FC should now appear in the FC configurator.
How to Install Driver On MACOS
If you have a Mac and not windows machine, installing driver is slightly different.
Download the CP210X driver for MacOS, and install it.
During the install your Mac won’t allow you install it because it’s an unauthorised app. Go into SYSTEM PREFERENCES, then SECURITY & PRIVACY, then unlock using padlock at the bottom left, then click (some users are not able to unlock the disk) ENABLE USERS. Then enable SiLabs. Restart your Mac.
Once installed, you need to go back to the same place to allow unauthorised application, Silabs in this case.
Nothing Works?
I had one computer that was never able to flash Betaflight firmware. It connected to Betaflight just fine, but just couldn’t flash. I tried everything, different cables, installed all the possible firmware, tried many things over the course of 6 months to no avail.
If you have a computer like that, just use the Speedybee APP on your smartphone (learn more here). You can change settings and flash firmware just like the computer software.
For android phones, the cheapest way to connect to the app is using a OTG cable: https://amzn.to/3kXAWsu (product page, affiliate link).
If you have an iPhone (also works for android phones) which doesn’t support OTG, get the Speedybee wireless adapter: https://oscarliang.com/product-k74v
I am having problem flashing the board, I’ve tried everything, and DFU is displayed in GUI COM port, but it’s just not flashing and i get the following message:
Read protection not active. USB device successfully closed
Try to un-select “Full chip erase” option before flashing, and you could “erase settings” in CLI after the firmware flashing. Type “Default” in CLI to reset all settings.
Источник
На чтение 3 мин. Просмотров 11.3k. Опубликовано 03.09.2019
Если вы пытаетесь загрузить или перезагрузить устройство Windows, но застряли на черном экране с кодом ошибки 99 , отображаемым в правом нижнем углу, это означает, что что-то не работает должным образом.
Нет, это не сбой системы Windows, а аппаратная проблема, которая не позволяет операционной системе загружаться должным образом, и поэтому последовательность загрузки/перезагрузки не может быть завершена. Проще говоря, ОС Windows не может быть инициирована.
Код отладки 99 даже не является реальной ошибкой. Он показывает, на каком этапе он запущен, и в этом случае мы обсуждаем проблемы в рамках инициализации Super IO.
В нескольких словах, код отладки 99 говорит о проблеме, связанной с процессом загрузки и, более конкретно, с основным жестким диском. Конечно, материнская плата может вызвать проблемы, но это может быть что-то с настройкой BIOS тоже.
В любом случае, мы постараемся найти правильное исправление для кода ошибки компьютера 99 в этой статье.
Как исправить ошибку ПК с кодом 99
Если вы можете перейти в BIOS, вы должны начать процесс устранения неполадок, убедившись, что режим SATA установлен в AHCI вместо IDE. Более того, порядок загрузки должен соответствовать протоколу UEFI по умолчанию.
Вы также можете проверить время и дату из BIOS, и вы даже можете сбросить или обновить CMOS, поскольку это может легко исправить код ошибки 99.
Обратите внимание, что в зависимости от производителя параметры BIOS могут отличаться. Обновление BIOS без загрузки в Windows возможно только для более новых материнских плат, в то время как выполнить сброс можно с помощью доступа к заводским настройкам.
Вы также можете перезагрузить материнскую плату, удалив и повторно применив батарею BIOS, хотя это сложный процесс, который подразумевает разборку вашего ПК, поэтому будьте осторожны и постарайтесь не испортить ситуацию даже в худшем случае.
Подсказка : не бойтесь обращаться за более опытной помощью, если вы не являетесь техническим экспертом.
- ЧИТАЙТЕ ТАКЖЕ : как получить доступ к BIOS на ПК с Windows 7/Windows 10
Другие применяемые решения для устранения неполадок:
- Проверьте кабели питания и убедитесь, что жесткий диск SATA правильно подключен.
- Проверьте все остальные соединения с вашей материнской платы и убедитесь, что все работает по книге.
- Зайдите в BIOS и проверьте, обнаружен ли жесткий диск или нет; если жесткий диск не отображается, возможно, у вас неисправный жесткий диск.
- Перед началом новой перезагрузки отключите периферийные устройства – просто удалите все внешние устройства, подключенные к вашему устройству Windows.
- Попробуйте загрузить только материнскую плату – отключите все остальное, кроме клавиатуры. Также удалите ОЗУ и все остальное, что может не потребоваться для начальной загрузки (включая аудио и USB с материнской платы). Примечание: звуковые и ник-карты также должны быть отключены.
- Если вы создали свой собственный компьютер, убедитесь, что все подключено так, как должно, и что вы больше ничего не забыли. Опять же, не стесняйтесь и спросите опытного мнения, в зависимости от конфигурации вашей собственной системы.
Как уже было сказано, код отладки 99 описывает проблемы инициализации Super IO. Итак, исправления должны быть сосредоточены на этой конкретной области.
Надеемся, что удалось решить эту проблему с помощью перечисленных выше решений.
Impulse rc смотреть последние обновления за сегодня на .
ApexLR 7″ NEW FPV Frame
![]()
13263
![]()
580
![]()
![]()
112
![]()
00:04:18
![]()
07.12.2022
Check out the new 7″ ApexLR from ImpulseRC, for longer range and cinematic!
Massive shout out and thank you to the pilots who gave their time and skills to help make this video possible with their awesome flying. Special mention for FPV G for his ideas and editing mastery! Check them all out below, some hidden gems in here who need more subs for sure:
Addtocart — 🤍
babang_des — 🤍
FPV G — 🤍
LongRangeJames — 🤍
Mr Steele — 🤍
MystikSquash — 🤍
R.eyvprdctn — 🤍
► Apex here: 🤍
► 🤍
► 🤍
► 🤍
#ImpulseRC #ImpulseRC_FPV #Drone #FPV #Apex
Impulse RC Driver Fixing Tool (for flight controller USB connection problems)
![]()
49894
![]()
491
![]()
![]()
96
![]()
00:03:19
![]()
29.01.2017
Hopefully this will be the last time I have to make a driver fix video to make you flight controllers connect to Betaflight, Cleanflight, or anything else through the USB. This time we will be using the Impulse RC driver fixer.
Link to download — 🤍
If this doesn’t work then try my other way of manually changing drivers — 🤍
All my playlists — 🤍
Video editor — 🤍
My personal vlog channel — 🤍
Cinematic Build Video | Premium 5″ Freestyle FPV Drone | ImpulseRC Apex DC
![]()
9961
![]()
203
![]()
![]()
50
![]()
00:10:24
![]()
01.07.2022
*Heres what it takes to build a premium 5″ freestyle FPV drone!
If you enjoyed the video, please sub and leave a comment and like! In the future I will have a show-and-tell series to speak to all the new modifications I have done to all my quads.
Video mistake log or suggestions:
*Ignore my prop direction! Do not copy! Way too late for me filming these and maybe sniffing too much lead solder at the time! XD*
—
This is the ImpulseRC Apex DC Mr Steele edition purchased from 🤍GetFPV early on in 2022. I’ve been thoroughly enjoying this quad, and it does live up to the hype! The quad feels super responsive, and rock solid. The kit comes with 7075 lightweight aluminum screws and coyote brown feet and bumpers. I decided on Ethix V4 Stout tumbled edition motors because it’s lighter without paint, and the raw/matte aluminum just looks so cool and classy against the coyote brown. I used small strips of rp10 3M VHB tape 0.2mm thick to stick on the motor wire arm guards and the LED light strips! I prefer this over electrical or fabric tape because the quad can now retain it’s sleek look throughout (still removeable by a little bit of prying). I also go over all the soldered electrical connections with black liquid tape to prevent any shorting of the electronics if landing in wet grass. I added a custom gps print that also doubles up as a clean way to mount the TBS immortal antenna without the use of zip ties. It was my first time using an iFlight AIO STD board. Although most of the board is plug in play style, It was a huge learning experience (I’m use to soldering everything on). I spent hours of frustration just re-pinning terminals. In the end though, it worked out. Most of the quad can come apart like a little car/motorcycle with plugs with exception to the motors. I hid all the wires underneath the board, so when you remove the top plate, you are greeted with a beautiful green and gold iFlight FC. There are some details still left out in this video, such as my LED wiring set up combined with Buzzer wiring hook up to FC (total mess of wires), plus Blheli_32, betaflight 4.3 tuning, binding with goggles and remote etc.
—
My Build Specifications:
Impulse RC Apex DC 5″ Mr Steele Edition
7075 aircraft aluminum screws
Beast STD F7 45A AIO MPU6000 — BF4.3
Ethix Stout V4 Tumbled Edition
Ethix P3 Peanut Butter & Jelly 5.1″ props
Caddx Vista w/Nebula Pro pearl white
True RC Singularity Antenna U.fl
TBS Rx nano w/ Immortal T v2 Antenna
6 chip WS2812 LED x4
Vifly mini buzzer finder
BN 180 GPS w/custom rear mount by 🤍kibbycabbit
Weight: 406.83 grams (no gopro or lipo)
🤍ImpulseRC
🤍MrSteeleFPV
ImpulseRC Apex HD DJI FPV — Full Build Tutorial
![]()
132433
![]()
1915
![]()
![]()
247
![]()
01:23:03
![]()
24.10.2020
The ImpulseRC Apex HD is one of the best freestyle frames you can buy. Here’s a complete step by step build and setup video showing how to build an ImpulseRC Apex HD with DJI FPV system.
This build video was made as part of FLOWSTATE: The FPV Drone Documentary, a feature-length documentary about FPV in the shadow of RemoteID. Watch the trailer at: 🤍
— VIDEO LINKS —
How to install Betaflight and BLHeli:
🤍
How to remap motors and correct FC board alignment:
🤍
How to set endpoints and channel center:
🤍
— PRODUCT LINKS —
All the tools and supplies you need to build a quad are listed at:
* Tools — 🤍
* Supplies — 🤍
I receive a commission (at no extra cost to you) if you make a purchase after clicking one of the affiliate links below.
DJI Goggles and Air Unit kit
* Rotor Riot — 🤍
* GetFPV — 🤍
* Banggood — 🤍 (be sure to select 2 air units 1 goggle!!!)
* Amazon — 🤍
Apex HD Frame kit (by Impulse RC)
* RaceDayQuads — 🤍
* GetFPV — 🤍
* Newbeedrone — 🤍
4x Blaster 2207 1800KV motors
* Rotor Riot — 🤍
T-Motor F7 F55A Pro II HD (DJI compatible) Stack
* RaceDayQuads — 🤍
* Banggood — 🤍
* Amazon — 🤍
Batteries (buy several!)
* RaceDayQuads — 🤍
* GetFPV — 🤍
* Banggood — 🤍
TBS Crossfire Starter Set (module, receiver, antenna)
* GetFPV — 🤍
* Team Blacksheep — 🤍
Ethix Lemon lime propellers
* GetFPV — 🤍
* RaceDayQuads — 🤍
* NewBeeDrone — 🤍
Purchase the ViFly ShortSaver 2 at
* Amazon (ViFly store) — 🤍
* GetFPV — 🤍
* RaceDayQuads — 🤍
* NewBeeDrone — 🤍
* Banggood — 🤍
Okay now the awkward part. The radio that we used in the tutorial is James’s QX7. But that radio has since gone out of production. The radio that I recommend to replace it is the RadioMaster TX16S. The screen is bigger and the buttons are nicer. But the hard part is that the screens won’t look exactly like they do in the tutorial, even though both radios ARE running the same operating system and the setup steps are more or less the same.
RadioMaster TX16S
* RaceDayQuads — 🤍
* NewBeeDrone — 🤍
* Banggood — 🤍
* Amazon — 🤍
3d printed mounts are on Thingiverse. You can print yourself or you can order them printed from a 3D printing service like RaceDayQuads, GetFPV, Brain3D, or BMC3D.
Apex HD Frame — GoPro Mount — 30 Deg: 🤍
APEX HD — Air Unit & Immortal T Adapter: 🤍
MANDATORY DISCLAIMER: I am a participant in the Amazon Services LLC Associates Program, an affiliate advertising program designed to provide a means for me to earn fees by linking to Amazon.com and affiliated sites.
Most or all links above are affiliate links, and I will receive compensation if you use them.
— TABLE OF CONTENTS —
0:00 — Intro
2:44 — Parts used in the build
5:47 — Assemble the arms and bottom plate of the frame
13:27 — Install the motors
20:21 — Mount the Air Unit and antennas
24:57 — Mount the ESC and tin the pads
31:57 — Prep and solder the XT60 lead
34:01 — Smoke check
36:12 — Solder the motor wires
39:28 — Solder and mount the receiver
43:25 — Mount the camera
46:58 — Bind receiver and set up model in radio
49:24 — Betaflight Setup
1:11:18 — DJI system activation and firmware update
1:14:27 — Final assembly
1:18:23 — Flight test!
ImpulseRC ApexDC Review & Flight Comparison vs Standard 5″ Apex || Food For Flight
![]()
3909
![]()
95
![]()
![]()
28
![]()
00:18:52
![]()
31.03.2022
Opening chase shots provided by Optique Video
🤍
— ApexDC Build —
Frame: ImpulseRC ApexDC 5″
FC: FETtec F7 KISS FC
ESC: FETtec 45A 4in1 ESC
Motors: Ethix Stout V4 2306 1750kv
Props: Gemfan F3S 5.1x3x3
Cam: Foxeer Cat 3 Micro
OSD: Apex OSD
Power: ImpulseRC Apex regulator
VTx: TBS Unify Pro 5G8 v3
Antenna: TBS Triumph Pro
Receiver: TBS Crossfire Nano RX
LiPo: GNB 1000mAh 6S 120C
— Standard Apex Build —
Frame: ImpulseRC Apex 5″
FC: FETtec F7 KISS FC
ESC: FETtec 45A 4in1 ESC
Motors: Ethix Stout V4 2306 1750kv
Props: Gemfan F3S 5.1x3x3
Cam: Foxeer Falkor 2 Mini
OSD: Apex OSD
Power: ImpulseRC Apex regulator
VTx: TBS Unify Pro 5G8 v3
Antenna: TBS Triumph Pro
Receiver: TBS Crossfire Nano RX
LiPo: GNB 1000mAh 6S 120C
— HD Video gear —
GoPro HERO5 Session
Camera Butter Black Diamond ND filters
— OTG —
Radio: RadioMaster TX16S w/ Crossfire Micro TX
Goggles: Fatshark HDO2 w/ TrueRC X-Air Mk.II & VAS MadMushroom V2
— Chapters —
0:00 Intro
1:10 No props in view
2:28 Center of gravity
3:11 ApexDC frame overview
4:00 Ground isolation for digital
4:55 Build overview
5:19 LiPo space
5:37 Innovative — Uses standard arms
6:28 Possible as 6″
6:53 Weight
7:27 GoPro tab mount
8:45 Compared to standard Apex
10:25 Geometry difference
11:39 Standard Apex flight footage
14:00 ApexDC flight footage
15:47 In flight commentary
17:34 Luna approved
17:45 Conclusion
— 🎶🎶🎶 —
Song: Fabian Mazur & Arcando — Elevate [NCS Release]
Music provided by NoCopyrightSounds
Free Download/Stream: 🤍
Watch: 🤍
Impulse RC Apex DC Rip | FPV
![]()
966
![]()
14
![]()
![]()
9
![]()
00:02:34
![]()
25.04.2022
Giving the Impulse RC Apex DC Mr Steele Edition some love!! (4th time flying her) It’s Senday Baby!!
Location: 49.345728, -123.151386
We were mainly just feeling out this new random spot we found. I really like this location for it’s multi-level geography with limited entry points. Something we look for when practicing FPV freestyle safely! Last thing you want is to bump into some random person walking into the scene.
My Gopro settings were a bit whack, forgot to change the settings from a night run!! So it’s a bit extra fast blurry looking! 
Camera Gopro Hero 9 Black — 4K 30fps / 1/30 ISO3200
ImpulseRC Apex Vibration analysis. Find out why the Apex is so good to fly.
![]()
16054
![]()
839
![]()
![]()
209
![]()
00:16:25
![]()
09.04.2021
It’s finally here! The much awaited vibration analysis of the ImpulseRC Apex. I think I figured out the unicorn magic that makes this frame so good to fly.
I take a look at a Blackbox log of the Apex, as well as the results of a resonance simulation. Then speak about vibration damping, how it works and why it is important for our quadcopter frames.
I explain why I think Coulomb damping gives the Apex such good flight performance and why the performance on roll is better than on pitch.
Support future videos here:
🤍
Slides: 🤍
Song: Markvard — Sky (Vlog No Copyright Music)
Music provided by Vlog No Copyright Music.
Video Link: youtube.com/watch?v=TMkK38PaJbo
Official ImpulseRC Micro Apex: Introduction
![]()
7526
![]()
200
![]()
![]()
58
![]()
00:04:35
![]()
28.01.2021
This video is about the Micro Apex 3inch and 4inch frame by ImpulseRC.
Useful Links:
GUI for Windows available here: 🤍
GitHub: 🤍
For more ImpulseRC Content:
Facebook: 🤍
Flyers Club: 🤍
Instagram: 🤍
Discord Chat: 🤍
Subscribe to our NewsLetter: 🤍
And keep pushing everyone!
ImpulseRC Apex LR 7” Testing in the Snow
![]()
488
![]()
![]()
![]()
12
![]()
00:04:16
![]()
17.12.2022
ImpulseRC ApexLR
Fettec G4
Fettec 45A 4-in-1
Fettec OSD
Crossfire Nano Diversity RX
Unify Pro32 HV
Runcam Phoenix V2
T-Motor F80 1900Kv
BN-880 GPS
GoPro 11 Black
4200mAh 4S Li-Ion
#fpv #drones #uav #quadcopters #racingdrones #impulserc #runcam #kiss #fettec #fettecg4 #fettec45a #tmotorf80 #tmotor #tbs #teamblacksheep #tbscrossfire #flyduino_permit #dji #gopro #hero11 #fyp
Mr Steele ImpulseRC APEX DC Build Video 2022 Fettec/Crossfire/DJI
![]()
85813
![]()
2052
![]()
![]()
233
![]()
02:07:49
![]()
12.05.2022
Questions Check here V
New HD Dead Cat Frame — 🤍
NEW V4 Motor — 🤍
New Radio — 🤍
NEW MR STEELE DISCORD SERVER 🤍
Ready To Fly Mr Steele Drone — 🤍
ETHiX is my Company & we aim to refine FPV.
Please check us out — 🤍
_ ETHIX APPAREL _
— Triple E Hat — 🤍
— Black Ethix — 🤍
— T Shirt — 🤍
— Hoody — 🤍
— Beanie — 🤍
— Stickers — 🤍 — (Vinyl) 🤍
MY personal Amazon Shop.
🤍
Please Follow me on other platforms
TIkTokP: 🤍
Instagram: 🤍
Facebook: 🤍
*🤍
My PODCAST (CHECK IT OUT)
🤍
_MUSIC _
MIss Li — «Stuck in the Sand»
_ ANALOG DRONE_
— Drone Frame — 🤍
— 6S motors — 🤍
— Flight controller — 🤍
— ESC — 🤍
— Props — 🤍
— FPV Cam (camera tilt 25°) — 🤍
— Video transmitting antenna — 🤍
— Video Transmitter (800mW) — 🤍
— Lightweight 6S Battery — 🤍
— Ethix Battery Straps — 🤍 & 🤍
— Lightweight HD cam — 🤍
— New HD Cam — 🤍
— Action 2 Lens protector MUST HAVE! — 🤍
— GoPro Lens protector MUST HAVE! — 🤍
— Ethic GoPro Strap — 🤍
— NEW* ALL UP WEIGHT — 613g —
_ ETHIX Packing Gear _
— NEW Back Pack — 🤍
— Radio Bag — 🤍
— Heated Battery Bag — 🤍
— Tool Kit — 🤍
— PROP Bag — 🤍
_ Radio Gear _
— Ethix V2 Neck Strap — 🤍
— Radio — Ethix Mambo — New Radio — 🤍
— Radio Transmitter (long range) — 🤍
— Radio Receiver — 🤍
_ Goggles _
Ethix Goggle Strap — 🤍
— NEW FPV Goggles — 🤍
— Goggle Pouch — 🤍
— FPV Goggle Receiver — 🤍
(Antennas)
— NEW FPV Receiving antenna (omni) — 🤍
— FPV Receiving antenna (directional) — 🤍
— Ear Bud (for Quad Audio) — 🤍
_ Battery Charging Setup _
— Charger- 🤍
— Power Supply — 🤍
— Parallel Charging Board — 🤍
— Battery Checker — 🤍
_ Home Camera SETUP_
— Sony A7siii — 🤍
— Macro — 🤍
— Wide angle — 🤍
— fluffy critter — 🤍
_ Tools/parts _
— ETHIX Prop Tool — 🤍
— Tool Kit — 🤍
— ETHIX builders cable set — 🤍
— Field Soldering Iron (literally, best thing I have ever purchased)
🤍
— *Soldering Iron Cable (need) — 🤍
— Quality solder — 🤍
— Quality Electrical Tape — 🤍
— Quality Heat Shrink -🤍
#FPVFreestyle #Ethix #MrSteeleV4
Impulse Rc Reverb Frame Build Part 1.
![]()
1630
![]()
35
![]()
![]()
6
![]()
00:18:50
![]()
06.05.2019
Impulse Rc Frame: 🤍 My mailing address: 3335 Horseshoe Road Seaford Delaware 19973 My personal email: emarvel09🤍gmail.com My Facebook group please join: 🤍 My Drone Business Facebook page: 🤍 If you would like to help support my channel: 🤍 Edrone Channel Merchandise: 🤍 Follow me on Instagram:#edrone09fpv
MY IMPULSERC APEX FPV DRONE SETUP? (PIDS!) 😯🔥💀 | FPV FREESTYLE
![]()
17746
![]()
385
![]()
![]()
147
![]()
00:07:52
![]()
26.09.2019
OTHER CONTENT👇🏽😀
Instagram : 🤍
Facebook: 🤍
Word of caution — always do a walkthrough at any spot before you fly and have a spotter.
Thanks to these companies for making great products and keeping me in the sky:
TEAM BLACKSHEEP: 🤍
IMPULSERC 🤍
TMOTOR: 🤍
HQPROP 🤍
FPV-DIRECT 🤍
FOXEER 🤍
STIKIT SKIN 🤍
FLYDUINO KISS: 🤍
TATTU LIPOS: 🤍
ImpulseRC APEX:
Kiss v2 FC
Kiss 25 amp 4-1 ESC
T-Motor F40Pro V3 2600kv 🔥
HQPROP ETHIX S4 PROPS😎
GOPRO HERO5 Session
Foxeer Predator (25 TILT)
CROSSFIRE MICRO V2 (DOPE!)
UNIFY PRO 😈
TBS TRIUMPH PRO 😈
Tattu R-Line 1300 (NEWEST VERSION 3.0)
_
HDO Fatshark RapidFire Module
Taranis Special Edition Carbon Fiber (Mode 3 Stick Layout)
Crossfire Full TX MODULE (Love IT!)
This video is not monetized and I DO NOT own the rights to this music. The main focus of this video is my drone footage.
Logo art created by Florian Le Priol 🙌🏽🙌🏽
#ImpulseRCApex #GoingStreetFPV #VIKFPV
Apex HD — Impulse RC Freestyle drone frame — Mr Steele tries DJI, so I try the Apex
![]()
6552
![]()
119
![]()
![]()
46
![]()
00:17:29
![]()
06.11.2020
Apex HD Frame —
RDQ — 🤍
Apex Standard frame (Caddx vista or analog)
RDQ — 🤍
Ethix Moon boot motors — 🤍
Stack — Tmotor DJI F7
🤍
DJI Air Unit — 🤍
Crossfire nano rx SE — 🤍
#impulseRCApex #GoproHero9 #MrSteele
join the FPV Sales Alerts FB Group: 🤍
My Perfect Racing and Freestyle build parts list
🤍
Best FPV Shops
Heli-Nation — 🤍
RacedayQuads — 🤍?aff=34
GetFPV — 🤍
Airblade — 🤍
International
Banggood — 🤍
Amazon — 🤍
Buy a drone — best bind and flys
3″ — Diatone GT R349 — 🤍
Most or all links above are affiliate links, and I will receive compensation if you use them.
music by — Lakey Inspired — 🤍
How To Assemble The Apex Frame by ImpulseRC
![]()
16039
![]()
236
![]()
![]()
21
![]()
00:15:39
![]()
08.11.2019
In today’s video we assemble the Apex Frame by ImpulseRC — This frame is a well built — High quality frame for sure, when I opened the package i realized it was not going to be the easiest frame I’ve ever assembled. So we build it step by step together just in case you need help building it.
Where to get your very own Apex Frame:
🤍
If you liked this video go ahead and subscribe and hit the like button.
Special Thanks To My Sponsors
Use My Coupon Code 🤍 MyFPVStore.com to get 5% off all the latest FPV Drone Gear!!
Coupon Code «DrainMan5»
How To Set Up A Throttle Cap:
🤍
Best Pack I’ve Ever Flown:
4s : 🤍
6s : 🤍
Flight Controllers:
🤍
Quadcopter Frames:
🤍
The Goggles I use:
🤍
Video Module That I use:
🤍
Face Plate For Goggles:
🤍
ESCs:
🤍
Favorite 4-in-1:
🤍
Quadcopter Motors:
🤍
Best Motor Ever:
🤍
Video Transmitters:
🤍
All Day Video:
🤍
Crossfire Equipment:
🤍
Frsky Gear:
🤍
FPV Antennas:
🤍
My Favorite Antenna:
🤍
+ or
🤍
My Radio:
🤍
Best PNP Off The Shelf:
🤍
Favorite Toothpick:
Tiny Hawk Freestyle:
🤍
+ or
🤍
Favorite Micro:
Baby Hawk R Pro:
🤍
+ or
🤍
Fast Little Mother:
🤍
Quad Building/Repairing Equipment:
Field Soldering Iron:
🤍
+ or
🤍
Screw/Hex Driver I use:
🤍
+ or
🤍
Hot Air Station:
🤍
#Apex #ImpulseRC
ImpulseRC Apex: Can You Even Sbang 1700kv Motors on PB&Js? // 4K FPV Freestyle // MurdersFPV
![]()
1452
![]()
104
![]()
![]()
35
![]()
00:03:53
![]()
03.08.2022
Yes.
KISS Firmware
ImpulseRC Apex 5″ Frame
FETtec G4 FC
RushFPV 60A Extreme 128khz ESC
T-Motor Slattfpv 2306.3 1700kv Motors
Ethix P3 Peanut Butter Jelly Props
Caddx Vista w/ Nebula Pro
TBS Tracer Nano RX
Radio Master TX16S Max AG01 gimbals
TBS Tracer Micro TX
DJI FPV V2 Goggles
R-Line Tattu V5.0 1400mah 150c 6s
Filmed on a GoPro Session 5 (no stabilization)
Edited in Adobe Premiere Pro
#fpv #fpvfreestyle #sbang #fettec #kissfpv #impulserc #ethixltd #rushfpv #caddx #teamblacksheep #radiomaster #dji #djifpv #gopro #tattulipos #4k #nostab
ImpulseRC APEX Build Tutorial (WOLF v3)
![]()
15697
![]()
439
![]()
![]()
117
![]()
00:44:22
![]()
19.09.2019
In this video, I will go over every detail of building up the APEX frame, using the new Wolf PDB v3 witch uses a graphical OSD.
The ImpulseRC APEX frame details can be seen here: 🤍
(it has 2 years warranty for carbon and metal parts)
Take your beer, coffee or preferred drink and sit back cause this one is LOOONG 
For supporting me on Patreon follow this link: 🤍
Gear used:
ImpulseRC APEX frame
ImpulseRC WOLF PDB v3
Flyduino KISS FC v2
Flyduino KISS 25A Single ESC’s
TBS/Ethix Stout V3 1750kv
TBS Unify HV
TBS Crossfire Nano RX
Foxeer Predator Mini v3
Foxeer Lolipop Antenna
I hope this video will help you guys building your own frame.
Please press that subscribe button, Thanks!
#FPV #TUTORIAL #IMPULSERCAPEX
ImpulseRC Apex 7″ — Betaflight 4.3
![]()
78
![]()
5
![]()
![]()
6
![]()
00:04:20
![]()
12.08.2022
Mostly been flying my FR7 but here is a pack with my Apex 7″ updated to BF4.3.
4.3 improved the zero throttle stability quite a bit. Flies better than 4.2 with same PIDs for sure.
(Quad specs on bottom page).
Current-meter shows about 150mah too much drawn but i think i leave it like that, better to have some margin of error on freestyle when not looking much at the amps.
Also installed a «Vifly GPS mate» so i can power the GPS before i fly. Its nice to have the Sats locked and ready when plugging in the flight-pack. Very good buy!
Quadcopter:
Frame ImpulseRC Apex 7″
Brotherhobby Avenger 2806.5 — 1300Kv
Props HQProp J75
TBS Crossfire Diversity Nano RX
Aikon AK32 Pro 50A 20x20mm
Aikon F7 Mini V3 Flight Controller
Panasonic FM 50V 680uF
Matek M8Q-5883 GPS
VIFLY GPS-mate
Caddx Vista
GoPro Hero8 (ND-filter lost in a field somewhere…)
CNHL 2200mah 22.2V 6S 70C Lipo
Impulse RC Apex HD DJI FPV Freestyle Rig Rundown
![]()
4936
![]()
149
![]()
![]()
31
![]()
00:13:03
![]()
09.05.2020
I have gotten tons of questions about my Impulse RC DJI FPV Air Unit rig. This is the one that flies on FlightOne Falco X. I’ve decided to do a rundown on the rig and explain what the parts are as well as my thought process behind everything on it. I hope this helps with your own builds. By the way, just today I saw that T-Motor is finally releasing the F40 Pro IV after having the F60 Pro IV out for a number of months. That would likely be my preferred motor for this rig when it’s time to update it or build a new one.
Here are some videos I referenced in this one:
T-Motor Pacer Motors: 🤍
NewBeeDrone Smoov Motors: 🤍
My DJI FPV Antenna Setup: 🤍
Matek PDBs: 🤍
iFlight SucceX 50A Slick ESCs: 🤍
My Sweet Hat: 🤍
Brain3D Immortal T Mounts: 🤍
Please be sure to subscribe and follow me on Instagram: 🤍
Visit my FPV website: 🤍
Impulse RC Reverb @ Bando City / 6s Fpv Freestyle
![]()
430
![]()
43
![]()
![]()
19
![]()
00:05:10
![]()
11.01.2021
Check out my Tik Tok: 🤍edrone83
My personal email: emarvel09🤍gmail.com
My Facebook group please join: 🤍
If you would like to help support my channel: 🤍
My Paypal: emarvel09🤍gmail.com
Edrone Channel Merchandise: 🤍
Follow me on Instagram:
🤍instagram.com/edrone09fpv
#impulserc #reverb #fpvfreestyle #fpv
Come aggiornare i Driver del Flight Controller (ImpulseRC Driver Fixer — CP210x)
![]()
7636
![]()
213
![]()
![]()
72
![]()
00:04:22
![]()
15.03.2019
Flight Controller:
🤍
🤍
ImpulseRC Driver Fixer:
🤍
CP210x Driver:
🤍
=
🇮🇹 GRUPPO FACEBOOK 🇮🇹
Per supporto o condividere esperienze iscrivetevi a
Droni Racing e Freestyle ITALIA
🤍
=
📣 Best FPV Deals & Coupon
⭐ 🤍
⭐ 🤍
=
🔥 RELATED VIDEO: 🔥
ESC Calibration: 🤍
Turtle Mode: 🤍
Betaflight Softserial: 🤍
Betaflight GPS Setup: 🤍
=
🙏 Join my Patreon! 🙏
🤍
=
🎵 MUSIC: Wonder — LAKEY INSPIRED 🎵
🤍
=
Impulse RC Apex — FPV Drone at Grace Dieu Priory in UK
![]()
150
![]()
8
![]()
![]()
8
![]()
00:03:13
![]()
13.08.2021
Time to re-engage with the world and get back in to my hobbies. Not flown anything for 8 months but it felt so good to be out in the world again, meeting up with friends (safely) and having a laugh. Didn’t realise how insular I’ve become over this pandemic, I really needed this session.
Really looking forward to working on new videos and upping my game both filming and flying. Quality took a dive on this as it was getting very dark towards the end.
Be safe out there people, but don’t destroy yourself in the process!
ImpulseRC Micro Apex 3 inch — Grassy Park Fun
![]()
1482
![]()
27
![]()
![]()
20
![]()
00:02:24
![]()
04.01.2022
Light FPV Freestyle session with the ImpulseRC Micro Apex 3 inch
Recorded on Caddx Orca
Settings:
— Resolution/Frame Rate: 4k 🤍 30fps
— Shutter speed: 1/60s
— Exposure: -2
— ISO: 100
— LDC: off
— EIS: off (turning this on causes frames/segments to skip)
— No ND filter ☹️ (need to get some)
Build Details
All Components:
ImpulseRC Micro Apex 3 inch Frame
🤍
Furibee/Cyclone F4 Flytower Mini flight controller
Furibee/Cyclone 35A 4IN1 ESC
iFlight Xing2 1404 4600kv motors
Radiomaster r81 receiver
Cyclone XF5806 400mw VTX
Runcam Nano 2 camera
Foxeer Lollipop 3 RHCP antenna
Gemfan 3028 Windancer propellers
ImpulseRC Micro APEX 4″ Full Build
![]()
9394
![]()
128
![]()
![]()
69
![]()
00:51:30
![]()
02.05.2021
Support DATfpv for all his hard work:
🤍
🤍
paypal.me/datfpv
Join my Channel: 🤍
#ImpulseRC #ImpulseRCapex #microapex
ImpulseRC Micro APEX 4″ Full Build — this video is the build of the 4inch Apex frame from ImpulseRC, full build
Impulserc Apex Micro 4inch Frame
Mamba Mini stack
Caddx Vista
Mamba f7 Mini Dji FC stack
TBS Crossfire Nano
BrotherHobby Avenger SE 2004 Motor — 3150kV
HQ Durable Prop T4x2x3 Grey (2CW + 2CCW)
Brain 3D Antenna Mount:
🤍
THE IMPULSERC MICRO APEX TAKES EVERYTHING YOU KNOW AND LOVE FROM THE WILDLY POPULAR FULL-SIZE APEX, THEN SHRINKS IT DOWN WITHOUT COMPROMISE TO DELIVER BY FAR THE BIGGEST LITTLE FRAME ON THE MARKET.
The meticulous transformation and extreme attention to detail has created a frame which incorporates years of design experience.
Equally comfortable as a sub-250g long range explorer, or a full-blooded freestyle machine capable of handling the harshest environments.
The Micro Apex incorporates all of the unique innovations pioneered by ImpulseRC and now widely imitated. From the compressed-X arm geometry, integrated camera tilt, front box-section and split main plate design, to our custom shoulder bolts and arm locking key. At the centre of mass where the arms meet there is a massive 8mm of carbon fibre, taking the stiffness of a micro frame to a new dimension so you can enjoy unsurpassed flight characteristics at this prop size.
You can expect zero arm slop or movement, zero vibration or resonance, and of course that proven ImpulseRC durability you can always trust. All backed up with our full crash damage warranty that covers all carbon fibre and metal parts for 1 year from the date of purchase.
Full crash damage warranty on all parts for 1 year
Perfect for Caddx Vista, 4K Tarsier or classic analog setup
No props in shot of flight camera with 3” arms
Dual stack, 20×20 M3 and M2 centre, 20×20 M2 rear
Fits M2 9x9mm motors and M2 12x12mm motors
Injection moulded arm skids and front bumper
Injection moulded fitted wire guards to protect from prop strikes
Two battery pads included, 2mm rubber and ultra-light hook pad
Custom fitted Racewire available for 4” arms
3” frame weight 58g, carbon fibre + hardware
4” frame weight 61g, carbon fibre + hardware
4mm thick arms, single shoulder bolt per arm
2mm thick upper and lower main plates
1.5mm thick top and camera plates
Help and Support DATfpv:
🤍
418 driftday Chasing with the ImpulseRC ApexDC
![]()
330
![]()
12
![]()
![]()
7
![]()
00:03:33
![]()
06.06.2022
🤍circuitriversidespeedwayst186
🎶 Devil — Polvere, Gloomy & Bodykit
— Build —
Frame: ImpulseRC ApexDC 5″
FC: FETtec F7 KISS FC
ESC: FETtec 45A 4in1 ESC
Motors: Ethix Stout V4 2306 1750kv
Props: Gemfan Vannystyle 5136
Cam: Foxeer Cat 3 Micro
OSD: Apex OSD
Power: Apex regulator
VTx: TBS Unify Pro 5G8 v3
Antenna: TBS Triumph Pro
Receiver: TBS Crossfire Nano RX
LiPo: GNB 1350mAh 6S 100C
— HD Video gear —
GoPro HERO9 Black
Camera Butter Black Diamond ND filters
— OTG —
Radio: RadioMaster TX16S w/ Crossfire Micro TX
Goggles: Fatshark HDO2 w/ TrueRC X-Air Mk.II & VAS MadMushroom V2
Impulse RC Reverb Review
![]()
504
![]()
14
![]()
![]()
5
![]()
00:14:42
![]()
05.11.2018
This video has been a long time coming but I finally feel ready to review the Impulse RC Reverb. Ive spent 10 months flying and tuning this frame and feel like I have enough of a grasp on this frame to finally review it. I hope this video is informative and entertaining. Enjoy!
Impulse osd pdb link:
🤍
Songs:
Song: Infinite
Artist: Valence
Fun Time by Dj Quads: 🤍
Music promoted by Audio Library 🤍
Setup:
Impulse Rc Reverb 5in kit build
Reverb arms 5in: 🤍
Reverb screw kit: 🤍
Reverb body kit: 🤍
Motors:
Mr. Steele Silks 2306 2345kv: 🤍
Props:
HQ 5×4.3×3 v1s PC Props: 🤍
Escs:
Spedix 25a dshot 600 blheli s esc: 🤍
Flight Controller:
Kiss V1 1.03 : 🤍
PDB:
ImpulseRC Reverb standard PDB: 🤍
Reciever:
Frsky X4R SB: 🤍
FPV Camera:
Rotor Riot Runcam Swift 2: 🤍
Video Transmitter:
Immersion RC Tramp HV: 🤍
Vtx Antenna:
Foxeer Pagoda Pro: 🤍
HD Cam:
Go Pro Hero 5 Session: 🤍
HD Cam Mount:
ImpulseRC Reverb Go Pro Session 5 30 degree Mount: 🤍
Battery
Tattu 4s 1300mah 75c: 🤍
Battery Pad:
Ummagrip battery pad: 🤍
Battery Strap:
Tattu battery strap: 🤍
Ground station Setup:
Radio Transmitter:
Frsky QX7: 🤍
Gimbals:
Frsky M7 Hall Effect Gimbals (only come as a single set. Not pairs): 🤍
FPV Goggles:
Fatshark HD3: 🤍
Receiver Module
Laforge v4 diversity receiver: 🤍
Receiving omnidirectional antenna:
TBS Triumph Stubby antenna: 🤍
Receiving Directional patch antenna:
Immersionrc 8dbi patch antenna: 🤍
Arial Photography setup
DJI Mavic Air Fly More Combo: 🤍
Vlogging Setup:
Sony DXC HX80: 🤍
Tripod:
Joby flexible tripod: 🤍
Flight Control Firmware:
Kiss RC34C
Esc Firmware
Bl heli s 16.7
Rates
Roll RC Rate: 1.65
Pitch RC Rate: 1.65
Yaw RC Rate: 1.65
Roll Super Rate: 0.70
Pitch Super Rate: 0.70
Yaw Super Rate: 0.70
Roll Expo: 0.04
Pitch Expo: 0.04
Yaw Expo: 0.04
PIDs
Roll P: 4
Pitch P: 6
Yaw P: 8
Roll I: 0.055
Pitch I: 0.065
Yaw I: 0.055
Roll D: 15.4
Pitch D: 21.5
Yaw D: 0
Roll TPA: 0.39
Pitch TPA: 0.18
Yaw TPA: 0.18
Filters:
LPF: high
Adaptive Filter: enabled
Why I love flying the Reverb!? 👿🔥ImpulseRC Reverb Frame Review
![]()
13398
![]()
337
![]()
![]()
101
![]()
00:05:23
![]()
19.12.2017
Questions? write them below I will do my best to answer 😀Just to let everyone know i am sponsored pilot in the ImpulseRC Family, but I wouldn’t put my opinion out there or help anyone if I didn’t like the product. Sorry if I forgot to mention anyone else that took part in the design process for this frame. More technical information is here: 🤍 Get it here: 🤍
IMPULSERC 🤍
DALPROP 🤍
FPV-DIRECT 🤍
PULSE: 🤍
FOXEER 🤍
FPVLIFE 🤍
STIKIT SKIN 🤍
Reverb:
ImpulseRC Reverb
Stikit Skin (GET A SKIN MAKE IT YOURS)!
KISS FLIGHT CONTROLLER (KISS v1.3 RC30 With Adaptive Filter)
24 KISS ESC
T-Motor F40v3 2400kv
DALPROP Cyclone T5046C or 5040 TriBlade (love the Power)
GOPRO HERO5 Session
HS1177 With Gopro 2 Lens (32.73883 angle)
CROSSFIRE MICRO V2
UNIFY PRO
Foxeer Antenna
Matek pdb osd
Pulse 1350 75c or 90c Graphene 4S (Trust in Pulse)
_
Dominator v3 LaForge
Taranis Special Edition Carbon Fiber (Mode 3 Stick Layout)
Crossfire Micro — DOPE!
Impulse Rc Reverb Build Maiden Flight LIVE!
![]()
232
![]()
19
![]()
![]()
12
![]()
00:14:31
![]()
06.06.2019
Impulse Rc Reverb Frame: 🤍
Rcx 2207 2700kv Motors: 🤍
Raceday Quads Steel Hardware Kit: 🤍
Dal Rc Engine 40amp 4in1 Esc: 🤍
Brain 3d Parts for Reverb Frame: 🤍
Dal Rc F405 Flight Controller: 🤍
Runcam Robin Xilo Edition: 🤍
Lumenier Axii RHCP SMA Fpv Antennas: 🤍
Tbs Unify Pro Hv Race Vtx: 🤍
Tbs Crossfire Nano Receiver: 🤍 mailing address: 3335 Horseshoe Road Seaford Delaware 19973 My personal email: emarvel09🤍gmail.com My Facebook group please join: 🤍 My Drone Business Facebook page: 🤍 If you would like to help support my channel: 🤍 Edrone Channel Merchandise: 🤍 Follow me on Instagram:#edrone09fpv
Step By Step Build Video | ImpulseRC APEX 6S | (Mr Steele) ✅ FPV 2019
![]()
594163
![]()
9248
![]()
![]()
977
![]()
02:08:58
![]()
02.10.2019
Sorry for the wait guys Here it is a step by step Build video of my new setup with the 6S APEX and the new stout v3 motors.
— Apex build guide — 🤍
— KISS APEX — PID dump — 🤍
— Soft mount O rings — 🤍
— Kiss FW RC40i — 🤍
Time Stamps
— Intro/Parts used — 00:00 — 06:45
— Frame Assembly 06:46 — 21:10
— ESC prep/soldering. — 21:11 — 30:21
— PDB/regulators — 30:22 — 37:36
— FC Prep/Install — 37:36 — 39:24
— PDB/Wiring install — 39:25 — 50:10
— Receiver prep install — 50:10 — 55:45
— FPV cam/VTX install — 55:46 — 01:17:05
— Receiver Antenna Build/install — 01:17:06 — 01:21:14
— Motor Install — 01:21:15 — 01:42:22
— Configuration/computer setup — 01:42:23 — 01:51:50
— Final Assembly — 01:51:51 — 02:05:09
— Test flight — 02:05:10 — 02:06:15
— Final thoughts — 02:06:15 — 02:08:57
The APEX Is available for Preorder here — 🤍
Mr Steele V3 Motors available Here —
6S — 🤍
4S — 🤍
ETHiX is my brand and we are aiming to refine and simplify this amazing hobby. Please check us out — 🤍
Mr Steele personal Amazon Shop.
🤍
Please Follow me
Instagram: 🤍
Facebook: 🤍
*🤍
My Weekly PODCAST (CHECK IT OUT)
🤍
_MUSIC _
Outro Tune
— Satara «Eclipse»
MR STEELE ALIEN Complete QUAD KIT- 🤍
_ Kwad Gear _
— NEW* Frame — 🤍
— NEW* 6S motors — 🤍
— NEW* 4S Motors — 🤍
— FC — 🤍
— NEW* ESC — 🤍
— Props — 🤍
— NEW* FPV Cam (camera tilt 25°) — 🤍
— FPV Cam Lens — 🤍
— NEW* Video transmitting antenna — 🤍
— Video Transmitter 800mW — 🤍
— 6S Battery — 🤍
— Old HD camera — 🤍
— Better HD camera — 🤍
— Old cam Lens protector MUST HAVE! — 🤍
— New cam Lens protector MUST HAVE! — 🤍
— NEW* ALL UP WEIGHT — 596g —
_ Packing Gear _
Back Pack — 🤍
GoPro carry case — 🤍
_ Radio Gear _
— Radio — 🤍
— Radio Transmitter (long range) — 🤍
— Radio Receiver — 🤍
_ Goggles _
— FPV Goggles- 🤍
— FPV Goggles Receiver — 🤍
(Antennas)
— FPV Receiving antenna (omni) — 🤍
— FPV Receiving antenna (patch) — 🤍
— Ear Bud (for Quad Audio) — 🤍
_ Battery Charging Setup _
— Charger- 🤍
— Power Supply — 🤍
— Parallel Charging Board — 🤍
— Battery Checker — 🤍
_ New VLOG SETUP_
— Sony A7 cam — 🤍
— Macro — 🤍
— Wide angle — 🤍
— fluffy critter — 🤍
— BEST Tripod — 🤍
_TRAVEL CAMs_
— GoPro — 🤍
— Chesty — 🤍
— Head Strap — 🤍
— SD card — 🤍
— Epic USB Charger — 🤍
_ Tools/parts _
— Prop Ratcheting Wrench — 🤍
— Tool Kit — 🤍
— Hex tool kit — 🤍
— Field Soldering Iron (literally, best thing I have ever purchased)
🤍
— Soldering Iron Cable (need) — 🤍
— Solder — 🤍
— Electrical Tape — 🤍
— Zipties — 🤍
— Heat Shrink -🤍
— USB tuning cable — 🤍
— USB field charger — 🤍
— Velcro — 🤍
#buildvideo #help #APEX
Impulse Rc Reverb @ My new Favorite FPV Spot / 6s Freestyle!
![]()
204
![]()
27
![]()
![]()
11
![]()
00:04:32
![]()
09.12.2020
My new favorite fpv spot please forgive my nervous thumbs on this one lol session 5 did a great job but I was nervous flying here!
Check out my Tik Tok: 🤍edrone83
My personal email: emarvel09🤍gmail.com
My Facebook group please join: 🤍
If you would like to help support my channel: 🤍
My Paypal: emarvel09🤍gmail.com
Edrone Channel Merchandise: 🤍
Follow me on Instagram:
🤍instagram.com/edrone09fpv
#impulserc #reverb #fpvfreestyle
It was a great day full send initiated! #sendit #senditsunday #impulserc #reverb
![]()
2394
![]()
61
![]()
![]()
1
![]()
00:00:13
![]()
21.02.2022
My personal email: 📬
emarvel09🤍gmail.com
My Facebook group please join: 📧
🤍
If you would like to help support my channel: 💰
🤍
My Paypal: 💵
emarvel09🤍gmail.com
Edrone Hats! 🧢
🤍
Edrone Channel Merchandise: 👕
🤍
Follow me on Instagram: 📸
🤍instagram.com/edrone09fpv
Check out my Tik Tok: 🎵
🤍edrone83
Impulse Rc Reverb Build Maiden Fpv Flight
![]()
490
![]()
21
![]()
![]()
11
![]()
00:09:51
![]()
13.06.2019
Impulse Rc Reverb Frame: 🤍
Rcx 2207 2700kv Motors: 🤍
Raceday Quads Steel Hardware Kit: 🤍
Dal Rc Engine 40amp 4in1 Esc: 🤍
Brain 3d Parts for Reverb Frame: 🤍
Dal Rc F405 Flight Controller: 🤍
Runcam Robin Xilo Edition: 🤍
Lumenier Axii RHCP SMA Fpv Antennas: 🤍
Tbs Unify Pro Hv Race Vtx: 🤍
Tbs Crossfire Nano Receiver: 🤍
My mailing address: 3335 Horseshoe Road Seaford Delaware 19973 My personal email: emarvel09🤍gmail.com My Facebook group please join: 🤍 My Drone Business Facebook page: 🤍 If you would like to help support my channel: 🤍 Edrone Channel Merchandise: 🤍 Follow me on Instagram:#edrone09fpv
Impulse RC Helix ZX5 Completed Build
![]()
3647
![]()
41
![]()
![]()
32
![]()
00:05:22
![]()
14.10.2016
This is a introduction to my Impulse RC Helix ZX5 mini quad build. I ordered during their blind pre-order and received my kit a little over a week ago. While some guys build them out really quickly, I take my time. So far, I’m really impressed with the quality of the design and the parts.
After I was done I took the time to take some nice pro photos of it. I mention that in the video. I also wrote a bit more about it and included all the specs. You can find those here: 🤍
Что ищут прямо сейчас на