
Некоторые пользователи сообщают, что не могут посетить определенные веб-сайты из своего веб-браузера. Чаще всего возникает ошибка «Код ошибки 15: этот запрос был заблокирован правилами безопасности«. Эта ошибка означает, что браузер запроса пытается инициировать (то есть доступ к сайту) запрещен действующими правилами безопасности. Проблема не связана с браузером (она возникает во всех популярных браузерах, включая Chrome, Edge, Firefox и Opera), и подтверждено, что она возникает во всех последних версиях Windows (Windows 7, Windows 8.1 и Windows 10.

Что вызывает ошибку «Код ошибки 15 — этот запрос был заблокирован правилами безопасности»?
Мы изучили эту конкретную проблему, просмотрев различные отчеты пользователей и стратегии восстановления, которые они успешно использовали для решения проблемы. Из того, что мы смогли собрать, существует несколько довольно распространенных сценариев, которые могут вызвать эту конкретную проблему:
- Дата и время неверны — Эта проблема может возникнуть, если веб-сервер устанавливает для доступа правильные настройки времени и даты. Несколько затронутых пользователей сообщили, что проблема больше не возникала после того, как они изменили правильную дату через панель управления.
- Ваш диапазон IP-адресов заблокирован — Также возможно, что конкретный веб-сервер, к которому вы пытаетесь получить доступ, имеет некоторые предопределенные правила относительно местоположения IP посетителя. В этом случае использование решения VPN должно позволить вам обойти проблему.
- Сторонний антивирус / брандмауэр не позволяет вам получить доступ к веб-сайту — Как сообщили несколько пользователей, эта конкретная проблема также может быть вызвана чрезмерно защищенным пакетом безопасности. Некоторые пользователи сообщают, что сайт снова стал доступен после того, как они отключили или удалили сторонний пакет безопасности.
Если вы сейчас ищете способ обойти «Код ошибки 15: этот запрос был заблокирован правилами безопасности”, Эта статья предоставит вам набор проверенных шагов по устранению неполадок. Ниже вы найдете несколько стратегий восстановления, которые успешно использовали другие пользователи в аналогичной ситуации, чтобы разобраться в проблеме.
Если вы хотите добиться максимальной эффективности, следуйте приведенным ниже методам в том порядке, в котором они представлены. В конечном итоге вы обнаружите исправление, эффективное в вашем конкретном сценарии. Давай начнем!
Метод 1. Установите правильное время и дату.
Существует не так много условий, которым вы (как посетитель) должны соответствовать, чтобы получить доступ к большинству веб-сайтов. Конечно, эти правила меняются от сервера к серверу, но одна из наиболее распространенных причин, по которым пользователи не могут получить доступ к определенным веб-сайтам из-за «Код ошибки 15: этот запрос был заблокирован правилами безопасности», Потому что их дата и время неверны.
Чаще всего это происходит с Microsoft Edge, но нам удалось найти несколько отчетов с посетителями, использующими другой браузер, которому удалось решить проблему после установки правильного времени и даты. Это эффективно в тех ситуациях, когда веб-сервер запрограммирован на обработку входа по дате и времени. В большинстве случаев это делается для того, чтобы боты не могли получить доступ к конкретному веб-сайту.
Вот краткое руководство, как убедиться, что вы используете правильное время и дату:
- Нажмите Клавиша Windows + R , чтобы открыть диалоговое окно «Выполнить». Затем введите «timedate.cpl»И нажмите Войти открыть Дата и время панель.

- Внутри Дата и время окно, перейдите к Интернет-время вкладка и нажмите Изменить настройки.
- В настройках времени в Интернете установите флажок, связанный с Синхронизация с сервером времени в Интернете, установить Сервер к time.windows.com и нажмите на Обновить сейчас.
- Перейти к Дата и время вкладку, нажмите на Изменить часовой пояс и убедитесь, что вы используете правильный. Затем нажмите на Изменить дату и время и убедитесь, что дата выбрана правильно.
- Перезагрузите компьютер и посмотрите, решена ли проблема, и теперь вы можете получить доступ к веб-сайту при следующем запуске.


Если вы все еще сталкиваетесь с «Код ошибки 15: этот запрос был заблокирован правилами безопасности”, Перейдите к следующему способу ниже.
Метод 2: использование VPN решение
В большинстве случаев эта конкретная ошибка возникает из-за того, что администратор веб-сайта использует какое-то приложение безопасности, которое активно блокирует ваш диапазон IP-адресов. Чаще всего это делается с помощью Incapsula или аналогичной службы. Несколько пользователей, которые боролись с одним и тем же сценарием, сумели обойти проблему, используя решение VPN для сокрытия своего реального IP-адреса.
Это можно сделать с помощью ряда различных сервисов (премиум-класса или бесплатных), но чтобы сделать это руководство доступным для всех, мы покажем вам, как это сделать с помощью бесплатного сервиса VPN. Однако, если у вас есть средства, не стесняйтесь использовать любой премиум-сервис VPN, который вам нужен.
Вот краткое руководство, как избежать «Код ошибки 15: этот запрос был заблокирован правилами безопасности”Ошибка при использовании решения VPN (Hide.me):
- Посетите эту ссылку (Вот) и нажмите кнопку Загрузить сейчас, затем нажмите регистр (в разделе Free), чтобы загрузить бесплатную версию Спрячь меня.
- Введите свой адрес электронной почты в следующее поле для регистрации. Убедитесь, что он действительный, потому что вы получите письмо с подтверждением.
- Перейдите к электронному письму с подтверждением и нажмите Активировать мою учетную запись для начала.
- На следующем экране выберите Имя пользователя и пароль для вашей учетной записи и нажмите Регистрация.
- После того, как вы войдете в свою учетную запись, перейдите на Цены> Бесплатно и нажмите на Применить сейчас.
- Затем перейдите к Скачать клиентов и нажмите кнопку «Загрузить», связанную с вашей операционной системой.
- После завершения загрузки откройте исполняемый файл установки и установите Спрячь меня применение. Затем следуйте инструкциям на экране, чтобы завершить установку.
- После завершения установки войдите в свою учетную запись и нажмите Начните бесплатный пробный период.
- Щелкните значок + Изменить в правом нижнем углу, чтобы выбрать удобное для вас место. Затем просто нажмите на Включить VPN изменить свой IP.
- Посетите сайт, на котором ранее отображался значок «Код ошибки 15: этот запрос был заблокирован правилами безопасности»И посмотрите, решена ли проблема.


Способ 3. Деактивировать решение безопасности
Как подтвердили некоторые пользователи, эта конкретная проблема также может возникнуть, если вы используете чрезмерно защищающий антивирус или брандмауэр. Большинство этих сторонних пакетов безопасности теперь содержат автономный список веб-сайтов, занесенных в черный список. Но, как вы понимаете, некоторые из них более точны, чем другие.
Если сайт, к которому вы пытаетесь получить доступ, был внесен в черный список вашим решением внешней безопасности, вы можете внезапно потерять возможность доступа к сайту. В этом конкретном случае отключение стороннего решения безопасности должно помочь вам определить, является ли ваша AV / брандмауэр причиной проблемы.
Однако с большинством брандмауэров одни и те же правила останутся в силе, даже если вы отключите клиент. В этом случае полное удаление клиента поможет вам выяснить, вызвана ли проблема внутренними или внешними причинами. Вы можете следовать этому руководству (Вот), чтобы убедиться, что вы полностью удалили защитное решение.
I am trying to implement G+ sign in, in our app, however, despite having repeatedly updating the client id, and recreating a new one as well, I keep on getting an error saying
I/GLSUser﹕ GLS error: INVALID_CLIENT_ID myemail@domain.com oauth2:https://www.googleapis.com/auth/plus.login
Not sure what’s wrong. I can see the account list popup, and everything else seems to work as well. I have double checked my client id as well.
[EDIT]
Here is the code I am using
    private void getGoogleAccessToken() {
        Bundle appActivities = new Bundle();
        appActivities.putString(GoogleAuthUtil.KEY_REQUEST_VISIBLE_ACTIVITIES, "AddActivity BuyActivity");
        String scopes = "oauth2:server:client_id:number-randomness.apps.googleusercontent.com" + ":api_scope:"+ Scopes.PLUS_LOGIN;
        mGoogleToken = null;

        try {
            mGoogleToken = GoogleAuthUtil.getToken(this, mPlusClient.getAccountName(), scopes, appActivities);
        } catch (IOException transientEx) {
            // network or server error, the call is expected to succeed if you try again later.
            // Don't attempt to call again immediately - the request is likely to
            // fail, you'll hit quotas or back-off.
            Crouton.makeText(this, R.string.google_bad_boy, Style.ALERT).show();
        } catch (UserRecoverableAuthException e) {
            // Recover
            Crouton.makeText(this, R.string.google_bad_boy, Style.ALERT).show();
        } catch (GoogleAuthException authEx) {
            // Failure. The call is not expected to ever succeed so it should not be
            // retried.
            Crouton.makeText(this, R.string.google_not_allow_login, Style.ALERT).show();
        } catch (Exception e) {
            Crouton.makeText(this, R.string.google_not_allow_login, Style.ALERT).show();
//          throw new RuntimeException(e);
        }
    }
[EDIT 2]
Seemingly I an getting a not successful result for Activity in this code:
    mGoogleButton.setOnClickListener(new View.OnClickListener() {
            @Override
            public void onClick(View view) {
                if (!mPlusClient.isConnected()) {
                    mConnectionProgressDialog.show();
                    if (mConnectionResult != null) {
                        try {
                            mConnectionResult.startResolutionForResult(SplashActivity.this, REQUEST_CODE_RESOLVE_ERR);
                        } catch (IntentSender.SendIntentException e) {
                            // Try connecting again.
                            mPlusClient.connect();
                        }
                    } else {
                        mPlusClient.connect();
                    }
                }
            }
        });
При попытке зарегистрировать устройства IOS в моем первом мобильном приложении я получаю исключение MFPRESTException с жалобой на INVALID_CLIENT_ID.
Мне удалось успешно настроить проверку безопасности, и я могу видеть устройство под устройствами в консоли MF, но функция push в MF не работает из-за указанной выше проблемы, возникшей во время registerDevice ()
Logs from XCODE [ios device]
 Cannot retrieve a valid authorization header for header. Check resource and authorization server configuration.

Logs from Mobile First Sever
[1/8/19 22:54:27:534 GST] 00036238 p.server.security.internal.context.ClientSecurityContextImpl E FWLSE4050E: Invalid client data
[1/8/19 22:54:27:534 GST] 00036238 internal.services.TokenValidationAndIntrospectionServiceImpl E FWLSE4056E: Introspection failed with exception
com.ibm.mfp.server.core.shared.MFPRESTException: 400; headers=[]; body = { errorCode=INVALID_CLIENT_ID errorMsg=Invalid client ID.}
    at com.ibm.mfp.server.security.internal.context.ClientSecurityContextImpl.load(ClientSecurityContextImpl.java:196)
    at sun.reflect.GeneratedMethodAccessor1533.invoke(Unknown Source)
    at sun.reflect.DelegatingMethodAccessorImpl.invoke(DelegatingMethodAccessorImpl.java:43)
    at java.lang.reflect.Method.invoke(Method.java:606)
    at org.springframework.aop.support.AopUtils.invokeJoinpointUsingReflection(AopUtils.java:317)
    at org.springframework.aop.framework.ReflectiveMethodInvocation.invokeJoinpoint(ReflectiveMethodInvocation.java:190)
    at org.springframework.aop.framework.ReflectiveMethodInvocation.proceed(ReflectiveMethodInvocation.java:157)
    at org.springframework.aop.support.DelegatingIntroductionInterceptor.doProceed(DelegatingIntroductionInterceptor.java:133)
    at org.springframework.aop.support.DelegatingIntroductionInterceptor.invoke(DelegatingIntroductionInterceptor.java:121)
    at org.springframework.aop.framework.ReflectiveMethodInvocation.proceed(ReflectiveMethodInvocation.java:179)
    at org.springframework.aop.framework.JdkDynamicAopProxy.invoke(JdkDynamicAopProxy.java:207)
    at com.sun.proxy.$Proxy232.load(Unknown Source)
    at com.ibm.mfp.server.security.internal.services.TokenValidationAndIntrospectionServiceImpl.introspect(TokenValidationAndIntrospectionServiceImpl.java:136)
    at com.ibm.mfp.server.security.internal.services.TokenValidationAndIntrospectionServiceImpl.introspect(TokenValidationAndIntrospectionServiceImpl.java:110)
    at sun.reflect.GeneratedMethodAccessor1689.invoke(Unknown Source)
    at sun.reflect.DelegatingMethodAccessorImpl.invoke(DelegatingMethodAccessorImpl.java:43)
    at java.lang.reflect.Method.invoke(Method.java:606)
    at org.springframework.aop.support.AopUtils.invokeJoinpointUsingReflection(AopUtils.java:317)
    at org.springframework.aop.framework.ReflectiveMethodInvocation.invokeJoinpoint(ReflectiveMethodInvocation.java:190)
    at org.springframework.aop.framework.ReflectiveMethodInvocation.proceed(ReflectiveMethodInvocation.java:157)
    at org.springframework.aop.support.DelegatingIntroductionInterceptor.doProceed(DelegatingIntroductionInterceptor.java:133)
    at org.springframework.aop.support.DelegatingIntroductionInterceptor.invoke(DelegatingIntroductionInterceptor.java:121)
    at org.springframework.aop.framework.ReflectiveMethodInvocation.proceed(ReflectiveMethodInvocation.java:179)
    at org.springframework.aop.framework.JdkDynamicAopProxy.invoke(JdkDynamicAopProxy.java:207)
    at com.sun.proxy.$Proxy230.introspect(Unknown Source)
    at com.ibm.mfp.server.az.internal.introspection.IntrospectionEndpointImpl$1.call(IntrospectionEndpointImpl.java:73)
    at com.ibm.mfp.server.az.internal.introspection.IntrospectionEndpointImpl$1.call(IntrospectionEndpointImpl.java:70)
    at com.ibm.mfp.server.persistency.internal.transaction.StorageManagerImpl.doWithStorage(StorageManagerImpl.java:49)
    at com.ibm.mfp.server.az.internal.introspection.IntrospectionEndpointImpl.introspect(IntrospectionEndpointImpl.java:70)
    at sun.reflect.GeneratedMethodAccessor1687.invoke(Unknown Source)
    at sun.reflect.DelegatingMethodAccessorImpl.invoke(DelegatingMethodAccessorImpl.java:43)
    at java.lang.reflect.Method.invoke(Method.java:606)
    at org.springframework.web.method.support.InvocableHandlerMethod.doInvoke(InvocableHandlerMethod.java:221)
    at org.springframework.web.method.support.InvocableHandlerMethod.invokeForRequest(InvocableHandlerMethod.java:137)
    at org.springframework.web.servlet.mvc.method.annotation.ServletInvocableHandlerMethod.invokeAndHandle(ServletInvocableHandlerMethod.java:110)
    at org.springframework.web.servlet.mvc.method.annotation.RequestMappingHandlerAdapter.invokeHandleMethod(RequestMappingHandlerAdapter.java:776)
    at org.springframework.web.servlet.mvc.method.annotation.RequestMappingHandlerAdapter.handleInternal(RequestMappingHandlerAdapter.java:705)
    at org.springframework.web.servlet.mvc.method.AbstractHandlerMethodAdapter.handle(AbstractHandlerMethodAdapter.java:85)
    at org.springframework.web.servlet.DispatcherServlet.doDispatch(DispatcherServlet.java:959)
    at org.springframework.web.servlet.DispatcherServlet.doService(DispatcherServlet.java:893)
    at org.springframework.web.servlet.FrameworkServlet.processRequest(FrameworkServlet.java:966)
    at org.springframework.web.servlet.FrameworkServlet.doPost(FrameworkServlet.java:868)
    at javax.servlet.http.HttpServlet.service(HttpServlet.java:595)
    at org.springframework.web.servlet.FrameworkServlet.service(FrameworkServlet.java:842)
    at javax.servlet.http.HttpServlet.service(HttpServlet.java:668)
    at com.ibm.ws.webcontainer.servlet.ServletWrapper.service(ServletWrapper.java:1290)
    at com.ibm.ws.webcontainer.servlet.ServletWrapper.handleRequest(ServletWrapper.java:778)
    at com.ibm.ws.webcontainer.servlet.ServletWrapper.handleRequest(ServletWrapper.java:475)
    at com.ibm.ws.webcontainer.filter.WebAppFilterManager.invokeFilters(WebAppFilterManager.java:1161)
    at com.ibm.ws.webcontainer.servlet.CacheServletWrapper.handleRequest(CacheServletWrapper.java:82)
    at com.ibm.ws.webcontainer.WebContainer.handleRequest(WebContainer.java:945)
    at com.ibm.ws.webcontainer.osgi.DynamicVirtualHost$2.run(DynamicVirtualHost.java:280)
    at com.ibm.ws.http.dispatcher.internal.channel.HttpDispatcherLink$TaskWrapper.run(HttpDispatcherLink.java:967)
    at com.ibm.ws.http.dispatcher.internal.channel.HttpDispatcherLink.wrapHandlerAndExecute(HttpDispatcherLink.java:359)
    at com.ibm.ws.http.dispatcher.internal.channel.HttpDispatcherLink.ready(HttpDispatcherLink.java:318)
    at com.ibm.ws.http.channel.internal.inbound.HttpInboundLink.handleDiscrimination(HttpInboundLink.java:471)
    at com.ibm.ws.http.channel.internal.inbound.HttpInboundLink.handleNewRequest(HttpInboundLink.java:405)
    at com.ibm.ws.http.channel.internal.inbound.HttpInboundLink.processRequest(HttpInboundLink.java:285)
    at com.ibm.ws.http.channel.internal.inbound.HttpICLReadCallback.complete(HttpICLReadCallback.java:66)
    at com.ibm.ws.tcpchannel.internal.WorkQueueManager.requestComplete(WorkQueueManager.java:504)
    at com.ibm.ws.tcpchannel.internal.WorkQueueManager.attemptIO(WorkQueueManager.java:574)
    at com.ibm.ws.tcpchannel.internal.WorkQueueManager.workerRun(WorkQueueManager.java:929)
    at com.ibm.ws.tcpchannel.internal.WorkQueueManager$Worker.run(WorkQueueManager.java:1018)
    at java.util.concurrent.ThreadPoolExecutor.runWorker(ThreadPoolExecutor.java:1145)
    at java.util.concurrent.ThreadPoolExecutor$Worker.run(ThreadPoolExecutor.java:615)
    at java.lang.Thread.run(Thread.java:745)
Here we list the most common errors encountered in Rabobank OAuth 2.0 flow on the client side. These use cases list reason for errors and how to troubleshoot them.
During the Authorization call to get the consent of the user, the TPP may encounter the following:
Invalid client id supplied
You receive an HTTP response of 401 Unauthorized with the message invalid client id or secret while invoking an Authorization flow.
This could be caused by one of the following:
- Invalid client id is supplied in the request.
- Your TPP application is not subscribed to an API using OAuth 2.0.
To solve this issue, your application should be subscribed to an API using OAuth 2.0 and provide a valid client ID.
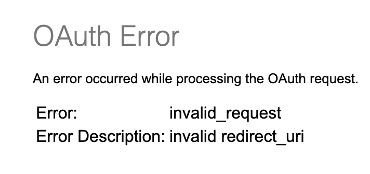
Redirect URI mismatch
When registering an application, you should provide a redirect URI on the Rabobank developer portal.
If you have more than one redirect URLs listed in the developer portal, make sure to provide one of the redirect URI (as provided during registration) in the redirect_uri query parameter during an Authorization call. If the redirect URI from your request does not match with the one registered on the Rabobank developer portal, you get the following error:
Requesting access token
To access the requested resources, you should exchange the received authorization code for an access token. During the retrieval of the access token, you may encounter the following:
Invalid authorization code (grant type code flow)
The authorization code should be sent to the token endpoint to get the access token. Sending an invalid authorization code (expired, invalid, or already used) results in the below error:
Http status:400(Bad request){"error":"invalid_grant"}
To avoid this error, you should pass the correct authorization code before it expires (expiry: 5 minutes). Make sure to not call the token endpoint multiple times using the same authorization code.
Adding a slight delay of 1000ms before calling this endpoint ensures that the authorization code is in sync across our servers.
Invalid refresh token
Sending invalid Refresh token to get access token results in the below error:
Http status:401(Unauthorized){"error":"invalid_grant"}
The Refresh token is valid for 30 days and can be only used once. To avoid this error, you should pass a valid Refresh token and not use the same token multiple times.
Invalid authorization header
While making a call to the token endpoint, an Authorization header should be provided consisting of a client id and client secret. If an invalid combination is passed, it results in the below error:
Http status:401(Unauthorized){"error":"invalid_client"}
To avoid this error, you should use the correct client id and client secret and make sure that the Authorization header is prepared as specified in the OAuth documentation.
Grant type missing
While making a call to the token endpoint, the grant_type query parameter should be provided. The value of this query parameter is based on the type of authorization you are passing to the endpoint.
For example, if you are swapping an authorization code for an access token the value of the parameter should be the authorization_code.
An example of the error message returned is as below:
Http status:400(Bad request){"error":"invalid_request"}
To avoid this error, make sure to provide all the required parameters, including grant_type.
Requesting resources with an access token
Access token invalid
The Access token issued by the authorization server is valid for 60 minutes for PSD2 and 24 hrs for Premium after receiving. Passing an expired or invalid Access token while accessing the resource results in the following error.
{"httpCode":"401","httpMessage":"Unauthorized","moreInformation":"This server could not verify that you are authorized to access the URL"}
To avoid this error, you should always check the expiry time associated with the access token. If the token is expired, use a Refresh token to receive a new Access token.
If you are unable to get a new access token using the refresh token, it could be because the user consent is either expired or revoked. You can validate the consent using the Consent Details Service API.
If this is the case, you should renew the consent before proceeding.
How to check if the user consent is expired (or) revoked?
Using the information you received during the authorization flow, you can retrieve the consent by a specific Id as explained in the API Consent Details Service documentation.
If the consent status is one of the following, the consent is not valid and cannot be used to access the resources:
- expired
- revokedByPsu
- terminatedByTpp
- received
- rejected
Using an invalid consent results in the following error:
{"httpCode":"403","httpMessage":"Forbidden","moreInformation":"CONSENT_INVALID"}
To access the resource gain, you should follow the authorization flow again and ask the user permission(s) to the required resources.
Deactivated or Expired consent
The consent of the user may be expired or revoked by the user, while your access/refresh tokens are still active, this results in a 403 Forbidden CONSENT_INVALID error message.
You may also check the status of the consent by making a call to Consent Details Service API and re-initiate the consent flow if required.
Not having the required permission to access an API
{"httpCode":"403","httpMessage":"Forbidden","moreInformation":"FORBIDDEN"}
A 403 Forbidden FORBIDDEN error can be triggered if the Access token included in the request does not contain the correct scope for the API being used.
Example: You have an access token for the scope paymentRequest, but you are trying to access the Account information API, this API requires a different scope: ‘ais.balances.read’.
To avoid this error, follow the authorization flow with the correct scope required for your API.