Содержание
- Invalid product proplus2021volume specified error configuring products
- Answered by:
- Question
- Answers
- All replies
- Invalid product proplus2021volume specified error configuring products
- Answered by:
- Question
- Answers
- All replies
Invalid product proplus2021volume specified error configuring products
This forum has migrated to Microsoft Q&A. Visit Microsoft Q&A to post new questions.
Answered by:
![]()
Question
![]()
![]()
We have a problem when trying to use 2016 ODT to create an Office 2016 ProPlus App-V package. When running the commands we get an error that we have specified invalid product. However we followed every step on Technet and still get the same result. In powershell we get the following error:
?Invalid product ProPlusVolume specified. ??Error configuring products!?
The configurtion.xml file:
We are using version 16.0.7213.5776 of the 2016 ODT. Released on July 20, 2016. Commands output when running Powershell as administrator:
PS D:TEMPsetup.exe /download D:TEMPconfiguration.xml
PS D:TEMPsetup.exe /packager D:TEMPconfiguration.xml D:TEMPAppV
?Invalid product ProPlusVolume specified. ??Error configuring products!?
Everythings goes fine until we use the packager command. Could some one help us out in what we are doing wrong? We have created a package before (januari 2016) and the methodes should not have changed in the meantime. We have used the following link to create the package:
https://technet.microsoft.com/en-us/library/mt590515.aspx
Answers
![]()
![]()
I have confirmed this with the product group, currently Office 2016 is not supported as App-V Package. Volume license SKUs are blocked in the ODT with the /packager switch.
If volume license should be used, you have to install it classical via MSI.
Sorry for the inconvenience.
Please remember to mark the replies as answers if they help, and unmark the answers if they provide no help. If you have feedback for TechNet Support, contact tnmff@microsoft.com
![]()
![]()
I just did some quick testing and I’ve got the same failure in my lab. There might be something wrong with the Office Deployment Tool or the source file, I will try to pass this to the product group for a confirmation. If there is anything new, I will update here.
Thank you for focusing on Microsoft product.
Please remember to mark the replies as answers if they help, and unmark the answers if they provide no help. If you have feedback for TechNet Support, contact tnmff@microsoft.com
![]()
![]()
although the App-V documentation https://technet.microsoft.com/en-us/library/mt590515.aspx clearly states several ProductIDs to use, the information is incorrect.
is not listed as valid.
NB: also note that the ProductIDs for Visio and Project, are different, compared to the App-V documentation. The date on the App-V documentation is older than the Office documentation.
Don [doesn’t work for MSFT, and they’re probably glad about that ;]
![]()
![]()
![]()
![]()
I have confirmed this with the product group, currently Office 2016 is not supported as App-V Package. Volume license SKUs are blocked in the ODT with the /packager switch.
If volume license should be used, you have to install it classical via MSI.
Sorry for the inconvenience.
Please remember to mark the replies as answers if they help, and unmark the answers if they provide no help. If you have feedback for TechNet Support, contact tnmff@microsoft.com
![]()
![]()
Will ProPlus ever be available for Virtualization? With App-V getting baked right into Windows 10, it would be really nice virtualize Office.
![]()
![]()
Will ProPlus ever be available for Virtualization? With App-V getting baked right into Windows 10, it would be really nice virtualize Office.
Don [doesn’t work for MSFT, and they’re probably glad about that ;]
![]()
![]()
is there an official statement available?
![]()
![]()
![]()
![]()
So we can’t App-V Office 2016? Can we use Office 365 instead to get Office 2016 virtualized?
I would like to see an update on this topic.
![]()
![]()
So we can’t App-V Office 2016? Can we use Office 365 instead to get Office 2016 virtualized?
I would like to see an update on this topic.
![]()
![]()
these threads discuss a possible workaround?
Don [doesn’t work for MSFT, and they’re probably glad about that ;]
![]()
![]()
Try worked for me. I download the my ISO source from the VOL License portal extracted it and placed it local to test and worked like a charm:
![]()
![]()
are there any news on that problem with Volume Licensing and app-v packaging for visio 2016?
![]()
![]()
It’s officially not supported anymore. I don’t know how MS wants us to work. We are a hosting provider, hosting remote desktop servers for customers, both dedicated as well as shared RDS for small companies. We use AppV to deploy and publish software. However, now we can’t use our VLK 2016 Office no more? We don’t want to install it locally, that’s not the idea behond AppV. Well then switch to Office 365 they say. Well, MS decided it’s not allowed to use Office 365 on our shared platforms. Ofcourse, when you host on Azure you ARE allowed to do so. MS is really bullying us and forces everyone onto their own platform. They slowly don’t tolerate anything else no more. Well guess what, Office365 and Outlook.com have have quite some big outages over the last months, and we’ve had customers moving their mail back to our on-premise solution which hasn’t had even a hickup for over a year.
Well anyway, even though it’s not supported I created a new Office 2016 ProPlus VLK package today. I used an old version of the deployment tool, which I’ve uploaded here: https://1drv.ms/u/s!ApkCUv0wQm8UgwFgwRzJXD4N3H-R. That one still works with the VLK editions, given that it ofcourse still has the issues the old deployment tools always had. Like having to use an account with 8 or less characters in its name (yes, I don’t make that up. )
Just edid the configuration.xml as needed. In my case:
run setup.exe /download configuration.xml (add the correct paths if needed)
After that, run Setup.exe /packager configuration.xml D:AppVPackage (again, mind the paths)
This command failed on me this time. Error 30016-7. It has done this before, but that was fixed in a new deployment tool build (but they don’t support VLK anymore). So then I used Trausti’s solution from here: https://social.technet.microsoft.com/forums/en-us/cb0b2b02-bb1f-4609-a230-0f8d71cf73c4/office-2016-appv-through-odt-error-300167 which is after the error:
browse to C:Users AppdataLocalTemp and Copy «Microsoft Office» folder to «C:Temp» and then rename it to MSO
After That run following command: C:TempMSOrootflattenerflattener.exe /Source:»C:TempMSO» /Dest:»C:TempOffice 2016 AppV» /Version:»16.0.6366.2036″ /ProductReleaseIDs:»ProPlusVolume,VisioProVolume» /Cultures:»en-US,x-none» /Platform:»x86″
This worked perfectly fine for me and I now have an Office 2016 VLK package with activated just fine to our VLK server, with version number 16.0.7830.1028.
Ofcourse, we won’t get support from MS on this Office 2016 deployment, but in the past 4-5 years MS Pro support has been as useful as a solar powered torch anyway.
Источник
- Remove From My Forums
-
Question
-
We have a problem when trying to use 2016 ODT to create an Office 2016 ProPlus App-V package. When running the commands we get an error that we have specified invalid product. However we followed every step on Technet and still get the same result. In
powershell we get the following error:?Invalid product ProPlusVolume specified. ??Error configuring products!?
The configurtion.xml file:
<Configuration>
<Add SourcePath=»D:TempOffice» OfficeClientEdition=»32″>
<Product ID=»ProPlusVolume»>
<Language ID=»nl-nl» />
</Product>
</Add>
<Updates Enabled=»FALSE» Channel=»Current» />
<Display Level=»None» AcceptEULA=»TRUE» />
<Property Name=»AUTOACTIVATE» Value=»1″ />
</Configuration>We are using version 16.0.7213.5776 of the 2016 ODT. Released on July 20, 2016. Commands output when running Powershell as administrator:
PS D:TEMPsetup.exe /download D:TEMPconfiguration.xml
PS D:TEMPsetup.exe /packager D:TEMPconfiguration.xml D:TEMPAppV
?Invalid product ProPlusVolume specified. ??Error configuring products!?Everythings goes fine until we use the packager command. Could some one help us out in what we are doing wrong? We have created a package before (januari 2016) and the methodes should not have changed in the meantime. We have used the following link to create
the package:
https://technet.microsoft.com/en-us/library/mt590515.aspx-
Edited by
Thursday, July 21, 2016 2:01 PM
Added link to create appv package
-
Edited by
Answers
-
Hi,
I have confirmed this with the product group, currently
Office 2016 is not supported as App-V Package. Volume license SKUs are blocked in the ODT with the /packager switch.If volume license should be used, you have to install it classical via MSI.
Sorry for the inconvenience.
Regards,
Ethan Hua
Please remember to mark the replies as answers if they help, and unmark the answers if they provide no help. If you have feedback for TechNet Support, contact
tnmff@microsoft.com-
Marked as answer by
Black_
Tuesday, July 26, 2016 10:02 AM
-
Marked as answer by
When we hear that a new version of the utilities we use (operating systems or applications) is launched, we have the expectation of what news it will give us, so now that the next start-up of Office 2021 has been mentioned, we will undoubtedly find news that will help to make daily tasks much easier to cope with, but there are certain aspects that Microsoft has renewed in Office 2021 Preview (for now)..
Microsoft a few days ago announced the commercial preview version of Office 2021 in Microsoft Office Long Term Servicing Channel (LTSC) format for Windows and macOS systems. LTSC is designed as a perpetual version of Office with a focus on commercial customers, as its structure and operation is on the side of companies and organizations where regulated devices are running that are not in the capacity to accept feature updates for a long time. or in process control devices that do not have an Internet connection.
That is why Office 2021 LTSC will deliver the necessary productivity tools, but with better performance and more accessibility. You can preview Office LTSC and Office 2021 for Mac starting today as Office 2021 LTSC will be supported for five years and based on Microsoft’s Fixed Lifecycle Policy..
Preview versions
Microsoft has made the following Preview versions available to us.
- Office LTSC Professional Plus 2021
- Project Professional 2021
- Visio Professional 2021
In Office LTSC Professional Plus 2021 Preview we find Access, Excel, OneNote, Outlook, PowerPoint, Publisher, Skype for Business, Teams and Word.
LTSC Privacy
We must understand that the LTSC versions handle some privacy policies such as:
- Allow the use of connected experiences in Office that are downloaded through online content
- Configure the level of client software diagnostic data sent by Office
- Allow the use of connected experiences in Office that evaluate content
What’s new in Office 2021 Preview
Some of the updates that we will see in Office 2021 Preview are:
- The Office Telemetry Dashboard will no longer be included with your Office installation
- Office LTSC Preview includes the Teams client application, but will only be the free or exploratory service for Microsoft Teams
- New APIs such as CustomFunctionsRuntime 1.3 (Excel), DialogApi 1.2 (Excel, PowerPoint, Word), IdentityAPI 1.3 (Excel, Outlook, PowerPoint, Word), ImageCoercion 1.2 (Excel, PowerPoint, Word), OpenBrowserWindowApi 1.1 (Excel, Outlook, PowerPoint, Word), RibbonApi 1.1 (Excel), SharedRuntime 1.1 (Excel)
- Line focus function, this eliminates distractions in order to move through a Word document line by line
- New XLOOKUP function in Excel, this allows you to find items in a table or range by row in the spreadsheet
- New dark mode
- Support for dynamic arrays in Excel, including new functions that make use of dynamic arrays
Serial
As mentioned above, Microsoft has provided the following keys for its 2021 Preview products:
- Office LTSC Professional Plus 2021 Preview
HFPBN-RYGG8-HQWCW-26CH6-PDPVF
- Project Professional 2021 Preview
WDNBY-PCYFY-9WP6G-BXVXM-92HDV
- Visio Professional 2021 Preview
2XYX7-NXXBK-9CK7W-K2TKW-JFJ7G
The preview versions of Office LTSC are available in 32-bit and 64-bit versions depending on the system we handle, let’s see how to install Office 2021 Preview in Windows 10..
To stay up to date, remember to subscribe to our YouTube channel! SUBSCRIBE
How to install Office 2021 Preview
Step 1
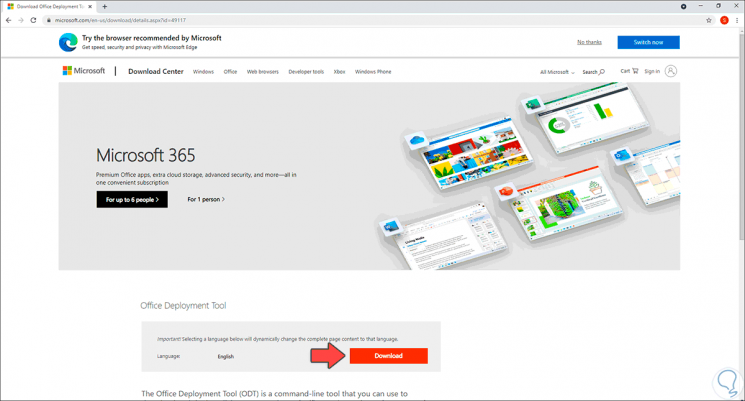
For this we must go to the URL of ODT (Office Deployment Tool) in the following link:
Office Deployment Tool
Step 2
ODT allows us to download and install Office products such as preview products, these use Click-to-Run installation technology.
Step 3
Once downloaded we go to the location where it was downloaded:
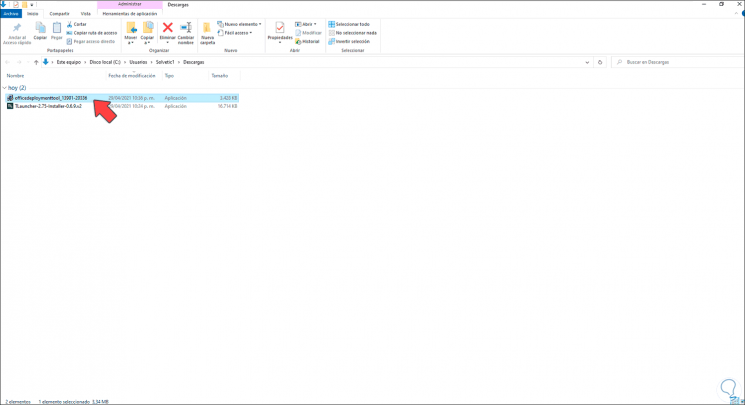
Step 4
We double click to execute it, we will see the following:
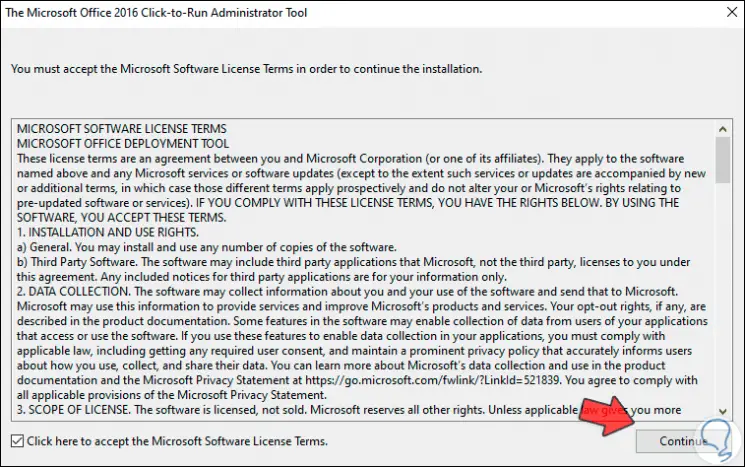
Step 5
We accept the license and after this we select the destination where the content will be extracted:
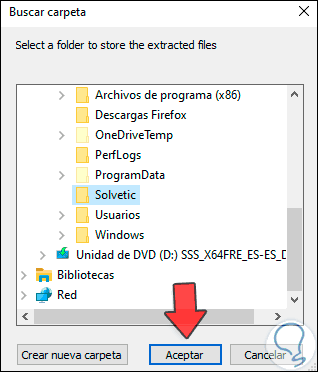
Step 6
Click OK to complete the process:
Step 7
We access the destination where the files are and we will see the following:
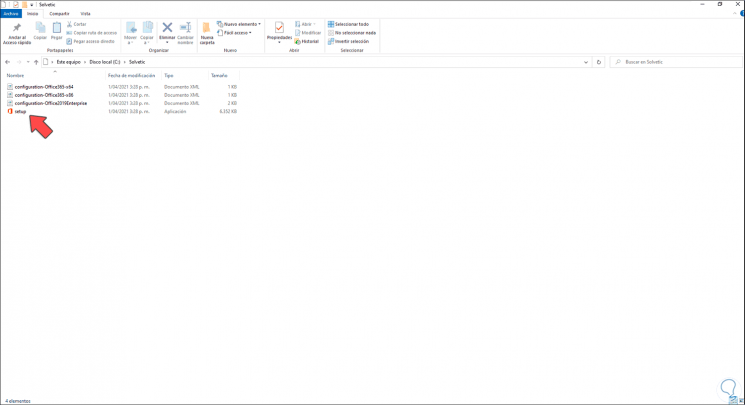
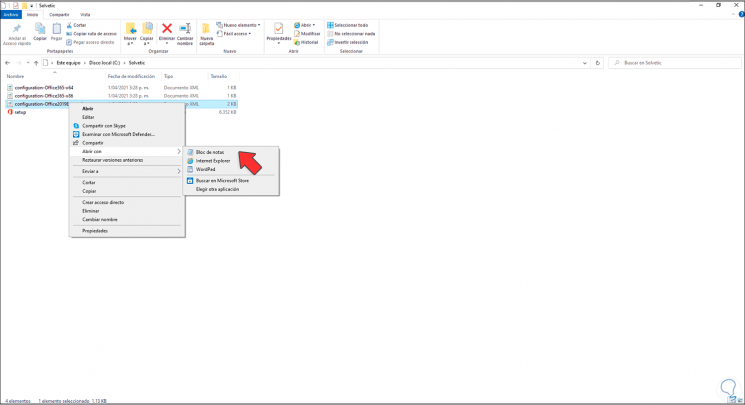
Step 8
We right click on the file «configuration-Office2019Enterprise», we select «Open with — Notepad»:
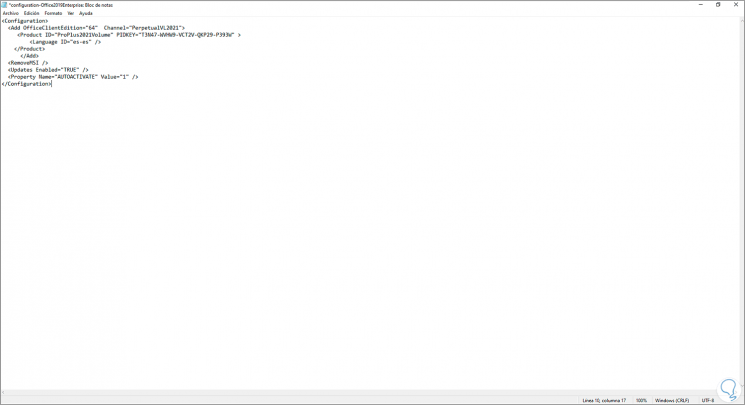
Step 9
The file will contain the following:
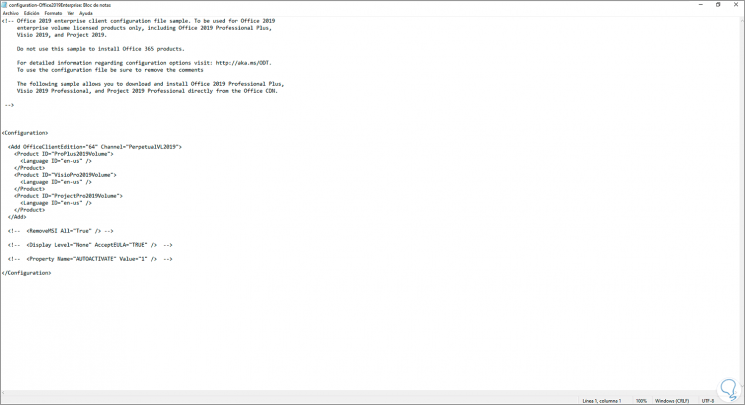
Step 10
We delete the content and enter the following:
<Configuration> <Add OfficeClientEdition = "64" Channel = "PerpetualVL2021"> <Product ID = "ProPlus2021Volume" PIDKEY = "T3N47-WVHW9-VCT2V-QKP29-P393W"> <Language ID = "en-en" /> </ Product> </Add> <RemoveMSI /> <Updates Enabled = "TRUE" /> <Property Name = "AUTOACTIVATE" Value = "1" /> </Configuration>
Step 11
Let us consider the following. Apply the changes.
- <Add OfficeClientEdition, there you specify the architecture to use (32 or 64 bits)
- PIDKEY, we use the keys provided by Microsoft which we describe later
- ID, is the version of Office 2021 Preview to install
- Language ID, indicates the language to be used in Office 2021 Preview, es-es refers to Spanish from Spain (we can use the desired one according to our language)
- RemoveMSI, allows you to remove previous versions of Office
- Updates Enabled, gives us the possibility to activate the updates, TRUE is yes and FALSE is no
- AUTOACTIVATE, if its value is 1 it will be activated with the serial included
Step 12
In the name bar of the Explorer we enter cmd:
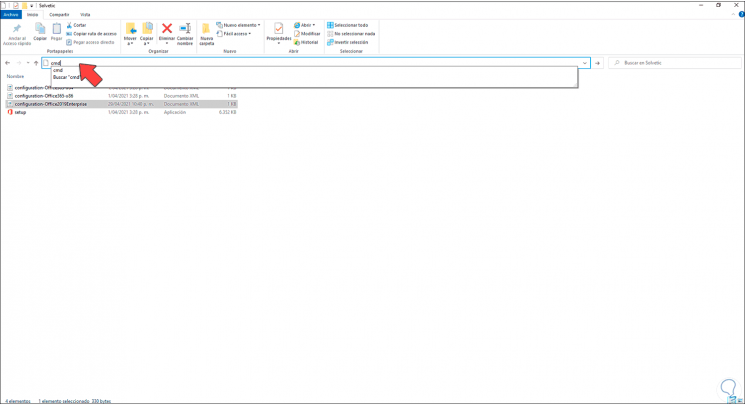
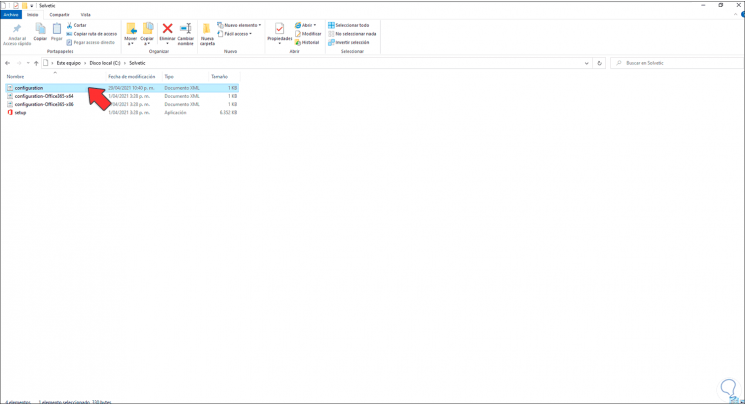
Step 13
This will open the console to this path, but first we rename the XML file «configuration-Office2019Enterprise» to «configuration»:
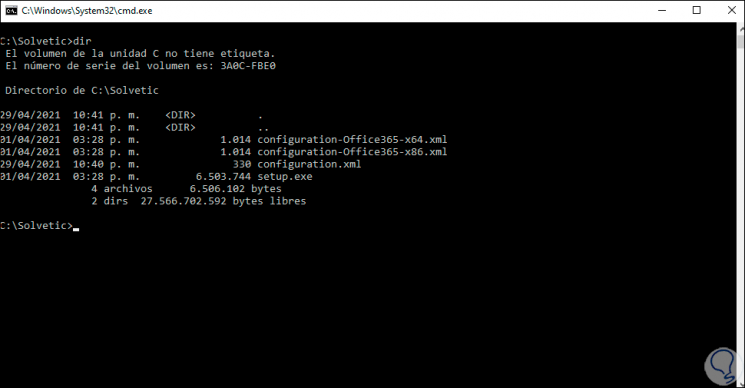
Step 14
Now if we access the terminal and with the command «dir» observe the contents of the folder:
Step 15
We install Office 2021 Preview with the following command:
setup.exe / configure configuration.xml

Step 16
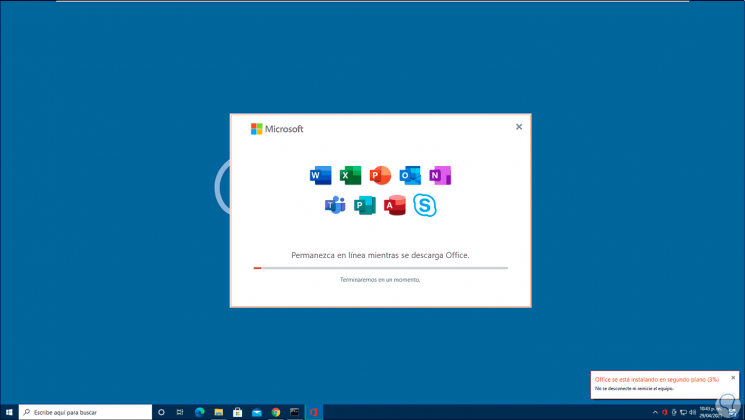
This will open the Office installation wizard:
Step 17
The installation will continue in the background:
Step 18
We can double-click on the icon to see the installation status of Office 2021 Preview:
Step 19
We hope the process ends:
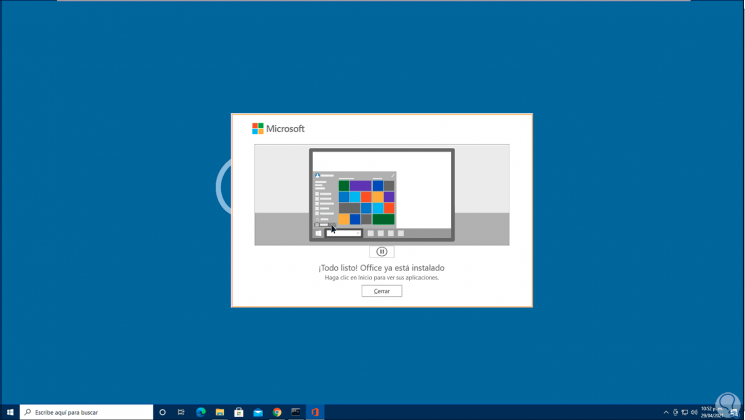
Step 20
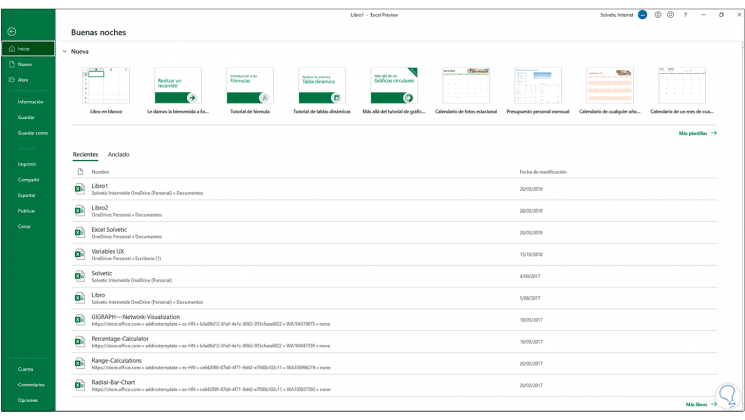
We open some of the Office 2021 Preview applications:
Step 21
Let’s go to «File — Account»:
Step 22
We validate that it is Office 2021 Preview and is active:
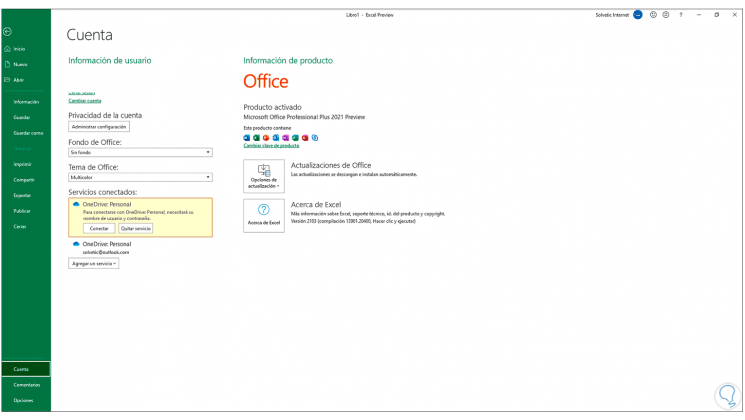
This has been the process to install and enjoy the new version of Office 2021 Preview.
Comments
![]()
satrapu
added a commit
to satrapu/aspnet-core-logging
that referenced
this issue
Aug 5, 2020
![]()
satrapu
added a commit
to satrapu/aspnet-core-logging
that referenced
this issue
Sep 3, 2020
![]()
…by integration tests (#9)

* Prepare the grounds for using Docker Compose when running integration tests

* Improve script used for checking container health state

* Add support for enabling printing info for debugging purposes

* Integration tests are now targeting a database run via Docker Compose

* Fix incorrect YAML property

* Remove comments from YAML fragment as Azure DevOps complains about them

* Fix path pointing to Docker Compose file

* Add pipe symbol as requested by Docker Compose task

* Enable debugging for Docker Compose services

* Use hard-coded sleep to ensure compose services are up when running IT

* Fix YAML indentation

* Give enough time to PostgreSQL DB to start before running IT

* Tweak Docker Compose task parameters

* Ensure compose services are healthy before running IT

* Fix Docker Compose command used for checking service status

* Use PowerShell Core to interact with Docker Compose

* Fix passing environment variables to PowerShell Core script

* Fix PowerShell Core script syntax

* Fix Azure DevOps logging command syntax used for displaying info messages

* Temporarily hard-code host port for the db compose service

* Provide a default database port for the template job file

* Log database host port for debugging purposes

* Identify the Docker host port associated with the 'db' compose service

* Publish test log file for debugging purposes

* Publish test log file for debugging purposes

* Temporarily log IT connection string for debugging purposes

* Fix typo in parameter reference

* Remove logging connection string as CI pipeline has been fixed

* Fix typo

* Use PowerShell script to start compose services used by IT

* Remove no longer needed build step

* Wrap environment variable values with single quotes

* Remove > symbol since PowerShell was misinterpreting it

* Split PowerShell long line via tick symbol

* Un-ingore .env file to be used by Docker Compose

* Avoid breaking build due to Docker Compose writing to standard error

* Fix referencing variables storing connection strings to be used when running IT

* Fix variable name by adding missing dot symbol

* Fix referencing variables in steps related to running IT

* Move PowerShell script used for starting compose service to a better location

* Move PowerShell script used for starting compose service to a better location

* Move PowerShell script used for starting compose service to a better location

* Move PowerShell script used for starting compose service to a better location

* Remove invalid string

* Add comments and validation rules to PowerShell script parameters

* Fix displaying message about mapping container port to host one

* Fix displaying variable value after mapping container port to host one

* Made Docker Compose service names more explicit

* Add macOS agent

* Fail script if Docker Compose writes anything to standard error stream

* Fail build in case compose services fail to start

* Fix handling Docker Compose command standard streams

* Fix redirecting all streams to null

* Fix redirecting success,warning and error streams to null

* Temporarily disable build on macOS agents till the pipeline is working as expected

* Replace redirecting Docker Compose streams with --log-level flag

* Replace redirecting Docker Compose streams with --log-level flag, take 2

* Replace redirecting Docker Compose streams with --log-level flag, take 3

* Replace redirecting Docker Compose streams with --log-level flag, take 4

* Detect errors while running Docker Compose via $LASTEXITCODE

* Fix exit condition when everything it's OK

* Re-enable macOS agent

* Install Docker Compose via brew on macOS agent

* Revert commit since compose issue occurring on macOS agent is caused by older Docker version

* Use compose file v3.7 since macOS agent cannot run a newer version of Docker compatible with v3.8+

* Fix incrementing the counter used when checking whether Docker service has started

* Enable Windows-based agent too

* Fix validating input parameter

* Parameterize the name of the Docker image used for running the DB to be targeted by IT

* Fix passing arguments to PowerShell script

* Explicitly set string properties to avoid issues due to invalid types

* Fix reference to compose variable

* Log more info for debugging purposes

* Log more info for debugging purposes, take 2

* Wrap parameter values with single quotes

* Explicitly set job parameters to avoid pipeline considering them not present

* Remove no longer needed logging messages

* Fix parameter name in XML doc

* Disable ReSharper warning about unused variable since it will be used at some point

* Add new word to project dictionary

* Avoid possible NullReferenceException when running integration tests

* Disable ReSharper warning since I'm testing whether the constructor will throw an exception

* Since compose services are run as part of CI pipeline, no need for attaching a console

* Add extra link to article describing the meaning of 'xmin' property in an EF Core entity

* Remove redundant environment variables

* Cache NuGet packages when requested only

* Remove unused 'databasePort' job parameter

* Remove extra whitespaces

* Restoring NuGet packages happens only in case there is no cache for them

* Fix condition by adding missing round bracket

* Fix condition used for evaluating whether restoring NuGet packages is performed or not

* Remove whitespaces since they break the commands

* Remove job parameters default values since they bring no real value right now

* Update .NET Core SDK to v3.1.302

* Update ReportGenerator to v4.6.4

* Rollback updating ReportGenerator to v4.6.4 since Azure DevOps feed doesn't have it yet

* Try installing latest available version of Docker via homebrew

* Rollback installing latest version of Docker since macOS based agent does not support it

* Replace hard-coded value with variable

* Set default value for job parameter to avoid code duplication

* Log connection string pointing to test database for debugging purposes

* The databaseHost job parameter must be explicitly set

* Experiment with specifying volume for the DB to be targeted by integration tests

* Experiment with specifying volume for the DB to be targeted by integration tests, take 2

See more about this approach here: https://stackoverflow.com/a/55366707

* Experiment with specifying volume for the DB to be targeted by integration tests, take 3

* Fix Docker Compose volume related error occurring on Windows based agents

See more here: docker/compose#5842 (comment).

* Add missing key-value pair separator

* Wrap environment variable in single quotes hoping
things will work out :)

* Experiment with specifying volume for the DB to be targeted by integration tests, take 4

* Set volume path according to the Docker container (Linux or Windows)

* Make script starting compose services more robust

* Fix splitting long line in PowerShell script

* Make script starting compose services more robust, take 2

* Fix creating a custom object in PowerShell

* Fix Docker Compose command broken due to formatting code

* Fix referencing true and false boolean values

* Fix referencing container id when fetching port mappings

* Wrap container port with double quotes hoping port mappings will be fetched on Windows

* Specify host port to avoid Windows-based Azure DevOps agents not fetching any port mappings

* Let again Docker assign a dynamic host port

* Replace identifying ports via 'docker port' with 'docker inspect'

* Fix variable name

* Fix fetching all JSON properties

* Create Docker volume before starting compose services

AFAIK, creating the volume may be needed before starting compose services on Windows-based Azure DevOps agents since PostgreSQL complains that its folder has different permissions than the expected ones

* Fix declaring named volume

* Explicitly set durations used by Docker Compose

* Wrap strings in double quotes

* Rename job parameter to increase code readability

* Display message about creating Docker volume to make the build step more transparent

* Fix passing job parameter as PowerShell script parameter value

* Ignore comments and empty lines found in Docker Compose environment file

* Expose Docker Compose logs as build artifact for debugging purposes

* Let the PowerShell script handle errors

* Publish Docker Compose logs as build artifact

* Publish Docker Compose logs as build artifact, take 2

* Display Docker Compose logs

* Publish Docker Compose logs via build step

* Fix splitting long line into multiple shorter ones

* Fix publishing Docker Compose logs

* Create missing folders if needed when writing Docker Compose log file to disk

* Create missing folders if needed when writing Docker Compose log file to disk, take 2

* Ensure Docker Compose writing to standard error stream does not break script

* Remove no longer needed Azure DevOps command

* Add compose project name to the name of the compose service log file being published

* Add missing parameter when creating Docker volumes

* Print Azure DevOps-style errors when Docker commands fail

* Add timestamps to the published Docker Compose logs

* Avoid checking whether commands have ended with success since they write to stderr

* Fix container path passed as job parameter value

* Publish compose service log files in a folder per Azure DevOps agent OS

* Fix container path

* Fixcommand used for creating compose service volume

* Make use of PGDATA env var in order to fix Windows-based agent error

More specifically, this is the output of the db4it compose service:
2020-08-08T18:00:53.256999700Z  initdb: error: could not access directory "C:/pgsql/data": Permission denied
2020-08-08T18:00:53.292312700Z  Access is denied.
2020-08-08T18:00:53.292312700Z  Access is denied.
2020-08-08T18:00:53.292312700Z  The system cannot find the drive specified.
2020-08-08T18:00:55.477969200Z  psql: error: could not connect to server: could not connect to server: Connection
refused (0x0000274D/10061)
2020-08-08T18:00:55.477969200Z  	Is the server running on host "localhost" (::1) and accepting
2020-08-08T18:00:55.477969200Z  	TCP/IP connections on port 5432?
2020-08-08T18:00:55.477969200Z  could not connect to server: Connection refused (0x0000274D/10061)
2020-08-08T18:00:55.477969200Z  	Is the server running on host "localhost" (127.0.0.1) and accepting
2020-08-08T18:00:55.477969200Z  	TCP/IP connections on port 5432?

* Fix container path

* Fix path pointing to test related artifacts to be published

* Fix container path, take 2

* MOve .artifactignore file to repo root, as recommended by official doc

See more here: https://docs.microsoft.com/en-us/azure/devops/artifacts/reference/artifactignore?view=azure-devops

* Fix container path, take 3

Fix error:
ERROR: for db4it  Cannot create container for service db4it: invalid volume specification: 'db4it_data:C:\db4it:rw'

* Simplify folder path storing published compose service log file

* Tune a little bit the health check durations

* Print message for debugging purposes

* Rephrase message to include compose project name

* Tune a little bit printing message for debugging purposes

* Fix printing message

* Fix printing another message

* Ensure no PowerShell errors goe unnoticed

* Need to set errorActionPreference to Continue and failOnStderr to False to overcome compose issue

See more about this issue here: docker/compose#5590.

* Remove db4it volume - let's see what happens

* Remove any trace of Docker volume since PostgreSQL compose service does not start on Windows

* Polish messages printed for debugging purposes

* Refine publish artifact exclusion and inclusion rules

* Reduce number of if-statements

* Move .artifactignore file under Tests folder to limit what gets published

* Change build step id and name to better reflect its purpose

* Ensure compose project name is unique across each builds

* Use minimum amount of info to ensure unique compose project names across all builds

* Remove no longer used variable

* Rename compose project name to follow the Azure DevOps user-defined variable naming convention

See this convention here: https://docs.microsoft.com/en-us/azure/devops/pipelines/process/variables?view=azure-devops&tabs=yaml%2Cbatch#variable-characters.

* Make compose project name even shorter

* Ensure compose project name contains letters only, as using numbers (e.g. build ID) does not work

* Remove job parameter duplication

* Ensure job parameter is set outside job template file to avoid considering it empty string

* Revert compose project name to last working value

* Specify job parameter value outside job template to ensure it will not be seen as empty string

* Fix variable name used as example

* Change variable name to correctly state its purpose

* Temporarily expose more ports for testing purposes

* Revert multiple ports to just one

* Make use of 'docker container <VERB>' commands

* Declare external volume for the compose service

* Remove volume since build fails on Windows
wilhelmklopp
added a commit
to kolofordjango/kolo-demo-docker
that referenced
this issue
Jun 8, 2021
![]()
UPDATE: Based on the following TechNet Forum Thread, creating Volume Licensing App-V Packages of Office 2016 is no longer supported. See here for a list of supported Product IDs: Product IDs that are supported by the Office Deployment Tool for Click-to-Run
If you are currently deploying Microsoft Office using for example ConfigMgr, you are probably using the MSI based Installation Method. Creating a Custom MSP with the OCT (Office Customization Tool) is pretty simple and was long a Best-Practice.
Since Office 2013, Microsoft has changed the Way, how they deliver Microsoft Office. With the Click-To-Run Installer, there is actually a built-in App-V Client in Office. (To verify that you can search for *AppV* in the Office Installation folder and you will find some EXEs and DLLs that will be very familiar if you know App-V.) With that knowledge that Office Itself is running virtualized when using Click-To-Run, the steps for creating an App-V Package are very straight forward. Microsoft actually recommends to go for a Click-To-Run or App-V based Deployment.
Let’s go trough some facts first:
- You need to use ODT (Office Deployment Toolkit) to generate the App-V Package. Sequencing Office 2016 manually using the App-V Sequencer is not supported!
- It is only supported to run one (1) App-V Package that contains Office Components. If you want to deploy for example Office Professional Plus 2016 and Visio 2016 you have to create 1 Package with both components in it.
- A generated Office App-V Package is supported 1 Year. After that you need to update it to include the latest Office Updates. (Statement of a MSFT Employee)
- It is not supported to edit the generated App-V Package using the App-V Sequencer.
- You can Enable / Disable Shortcuts and Applications to hide some Components.
- You can use AppLocker to lock down some components.
- You can Configure the virtualized Office normally using Group Policy Objects.
- You can use your normal KMS to activate Office.
More Informations about the Packaging, publishing and deployment requirements can be found in the following TechNet Article: Deploying Microsoft Office 2016 by Using App-V
In this Blog Post, we will create an App-V Package, that contains the following Components:
- Office Professional Plus 2016 (Volume License Edition)
- Visio Pro 2016 (Volume License Edition)
- Project Pro 2016 (Volume License Edition)
Creating the App-V Package
1. Create the following two Folders on your C: Drive, using PowerShell:
New-Item -ItemType Directory -Path "C:TempOffice 2016" -Force
New-Item -ItemType Directory -Path "C:TempOffice 2016 AppV" -Force
2. Download the Office 2016 Deployment Tool
3. Run the Setup and extract the Files to C:TempOffice 2016
4. Open the configuration.xml:
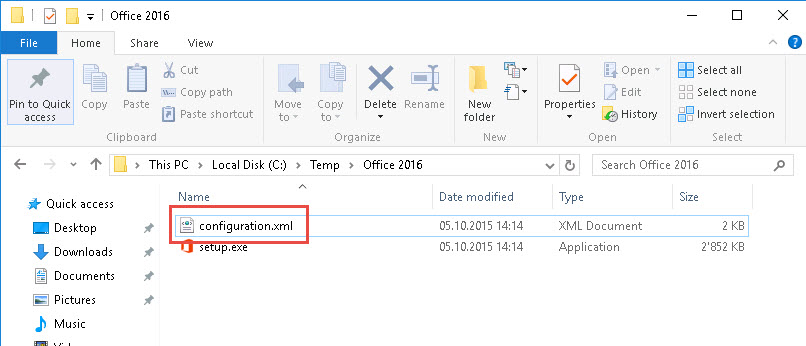
Here you can specify the components which will be included in our App-V Package. You can take my Configuration as Template and adjust it, that it fits your needs. You can also use the following XML Generator, to quickly create your customized template.
<Configuration>
	<Add SourcePath="C:TempOffice 2016" OfficeClientEdition="32" Branch="Current">
		<Product ID="ProPlusVolume">
			<Language ID="en-us" />
		</Product>
		<Product ID="VisioProVolume">
			<Language ID="en-us" />
		</Product>
		<Product ID="ProjectProVolume">
			<Language ID="en-us" />
		</Product>
	</Add>
</Configuration>
Let’s go through each tag.
Add
- SourcePath: Specify here the temporary folder, that you already created in Step 1, which will store the downloaded office data.
- OfficeClientEdition: Specify if you want the 32-bit or the 64-bit Version of Office.
- Branch: Specify the Branch (Current or Business) that you want to download.
Product
Specify here, which components or Products you want to include in your App-V Package. You can choose from the following:
- O365ProPlusRetail
- O365BusinessRetail
- ProPlusVolume (no longer supported, see Note on the Top)
- VisioProRetail
- VisioProVolume (no longer supported, see Note on the Top)
- ProjectProRetail
- ProjectProVolume (no longer supported, see Note on the Top)
- SPDRetail
Project and Visio must be added as separated products, as in the XML Configuration Example above.
Language
Specify the language in which Office should be delivered.
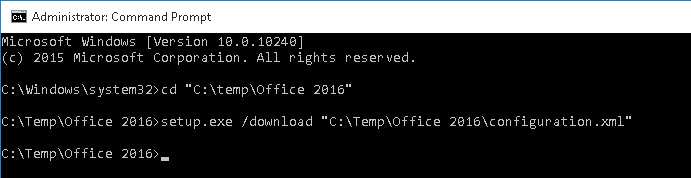
5. Execute the following command in an elevated command prompt to download the Installation Files:
cd "C:TempOffice 2016"
setup.exe /download "C:TempOffice 2016configuration.xml"
Depending on your Internet Connection, your Installation Files will be downloaded within a few minutes. The Download is finished, as soon as the last command was finished executing.
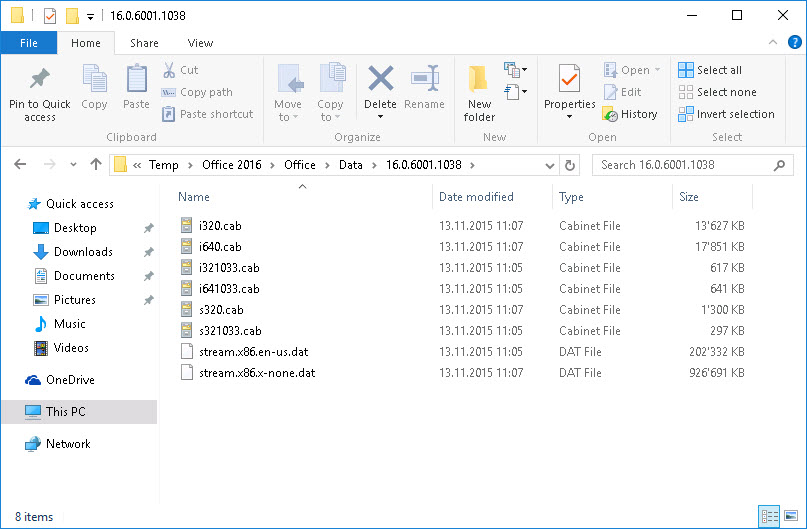
You can view the downloaded files in the folder “C:TempOffice 2016OfficeData{Version}”:
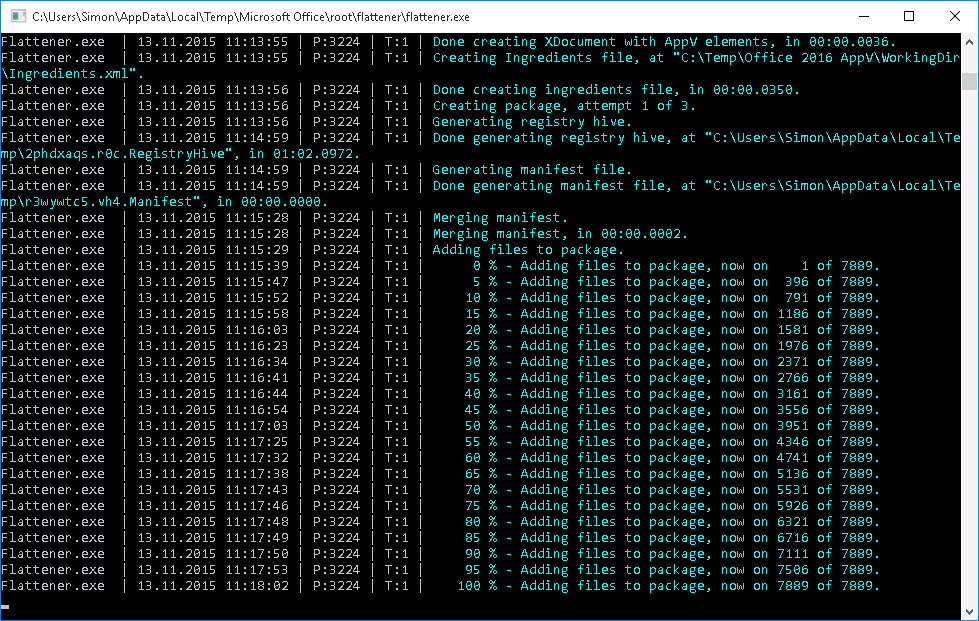
6. Execute the following command in an elevated command prompt, to create the App-V Package from the downloaded files:
cd "C:TempOffice 2016"
setup.exe /packager "C:TempOffice 2016configuration.xml" "C:TempOffice 2016 AppV"
Based on the performance of your Workstation, this step can take up to 10 Minutes. After a short time, you can see the Package getting created. So, sit back and enjoy the Show 🙂
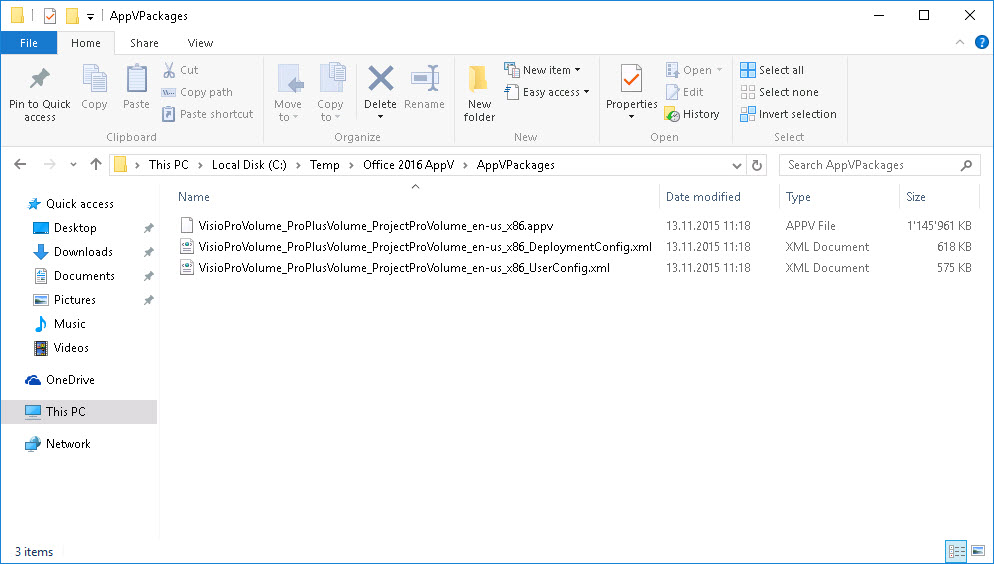
7. Navigate to the folder “C:TempOffice 2016 AppVAppVPackages”, where you will find your App-V Package:
Deploying the App-V Package
For deploying the App-V Package, you can use either ConfigMgr or you can do it manually via PowerShell. The Deploying Process is no different from any other App-V Package. If you want to deploy the Package using an App-V Full Infrastructure, you can checkout my blog post: How to configure an App-V 5.1 Full Infrastructure
My Demo Machine that I use in this Example contains a Windows 10 Enterprise and an App-V 5.1 Client.
1. For the App-V Package to work, you need to enable Package Scripts first! You can do this using Group Policy Objects or PowerShell:
Computer ConfigurationAdministrative TemplatesSystemApp-VScriptingEnable Package Scripts = Enabled
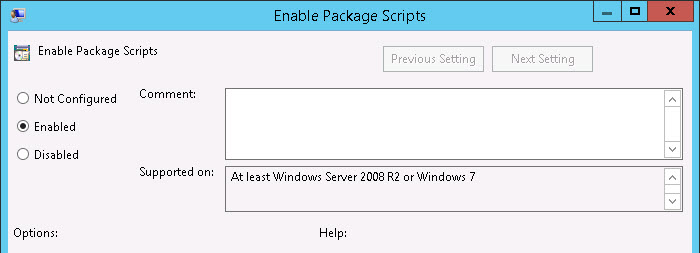
You can also use the following PowerShell Code that must be executed in an Elevated PowerShell Prompt, to configure the Package Scripts locally on a specific client.
Import-Module AppvClient
Set-AppvClientConfiguration -EnablePackageScripts 1
2. Execute the following PowerShell Command in an Elevated PowerShell Prompt, to Add and Publish the Office Package. Adjust the Path to your appv File if necessary.
Add-AppvClientPackage -Path "C:TempOffice 2016 AppVAppVPackagesVisioProVolume_ProPlusVolume_ProjectProVolume_en-us_x86.appv" | Publish-AppvClientPackage
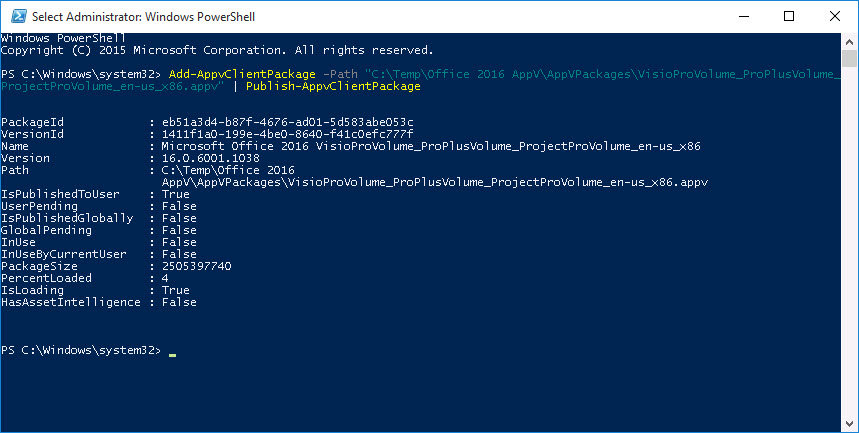
3. You should now find all the Office Shortcuts in the Start Menu and you should be able to Start and use the Products.

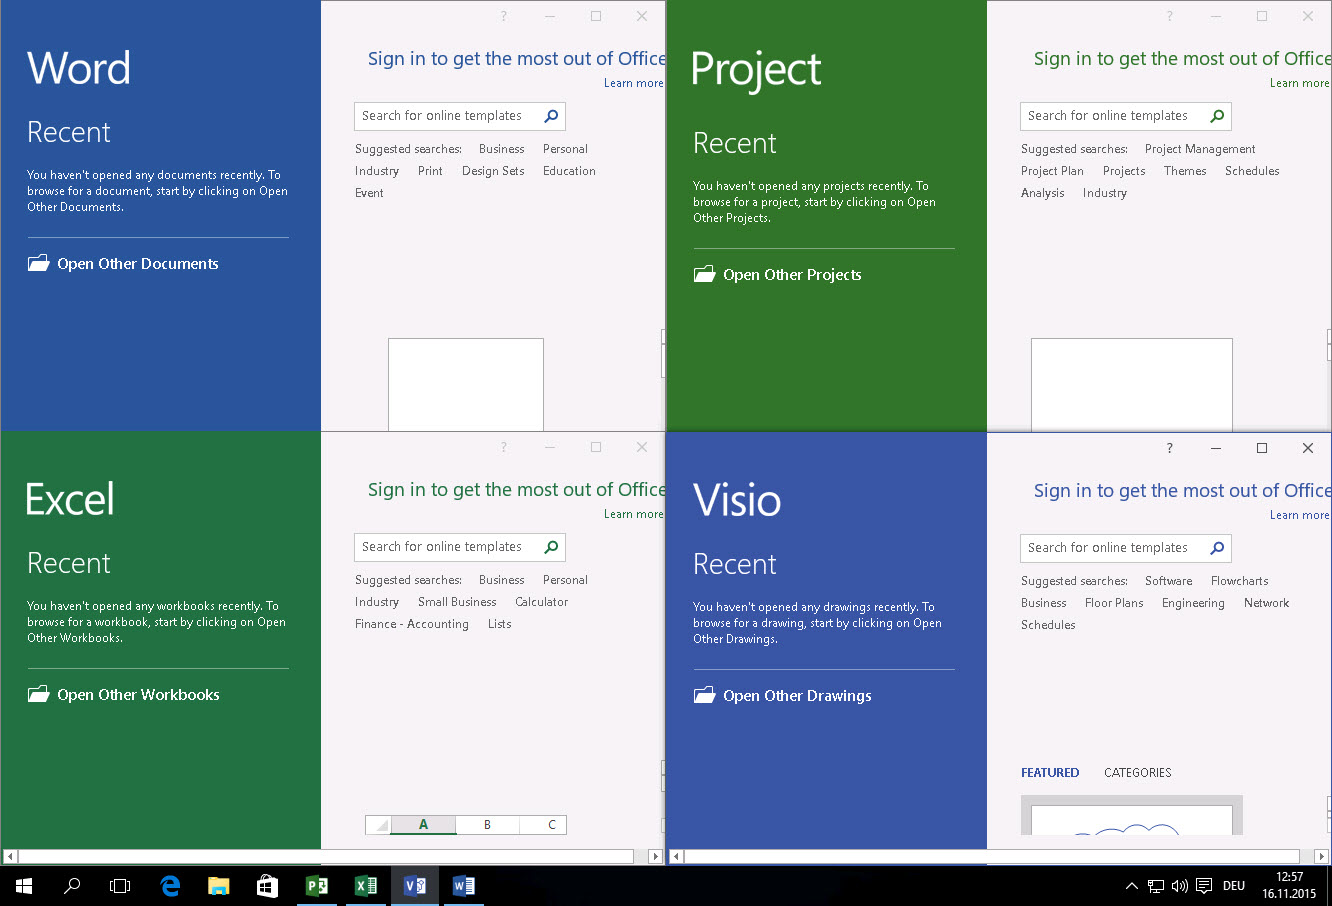
To verify that Office runs virtualized, you can run the following PowerShell Command while some Office Components are started.
Get-AppvVirtualProcess

If you have any question or additional notes, drop them in the comment section below.