Bad Image error’s is an error which comes up when Windows cannot run the programs you tried running mainly due to the files and libraries needed to run the program are corrupted due to an update.
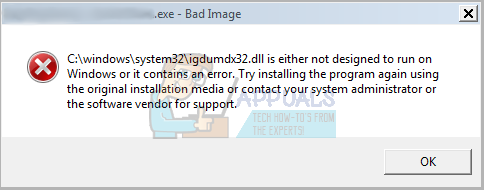
Every version of the Windows Operating System starting with Windows 8 is configured to automatically check for, download and install available updates from time to time. However, sometimes, installing specific Windows updates can lead to different kinds of problems. One of these problems is the (name of application).exe – Bad Image error message that starts appearing very often after either downloading and installing a defective update for Windows or updating a Windows computer to an iteration of Windows 8/10 that has the defective update pre-installed. The entire error message reads, for example:
“Example.exe – Bad Image”

“C:WindowsAppPatchexample.dll is either not designed to run on Windows or it contains an error. Try installing the program again using the original installation media or contact your system administrator or the software vendor for support. Error status 0xc000012f”
Users affected by this issue see quite a large number of these aggravating error 0xc000012f error message in a pretty small window of time, and having a number of the applications on your computer not work, along with having to constantly dismiss each of these messages, can be quite the pickle. Many believe that the only way to fix this issue is to restore your entire Windows computer to an earlier point in time, a point at which the defective update was not installed. However, that is not entirely true as this issue can also be fixed by simply uninstalling the defective update that has given birth to it. In order to solve this problem, you need to:
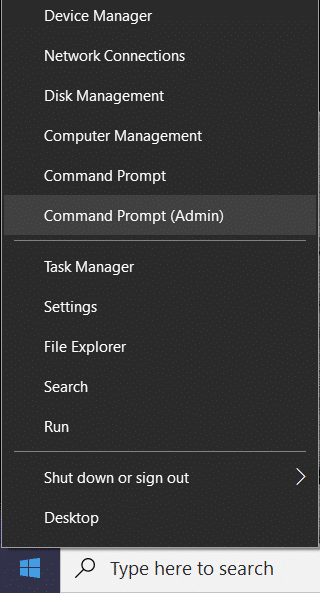
Right-click on the Start Menu button to launch the Win X Menu.
Click on Control Panel.
With the Control Panel configured to Category view, click on Programs.
Click on Programs and Features.
Click on View installed updates in the left pane.
In the right pane, you will now see a list of all the Windows Updates that have been installed on your computer.
Locate and right-click on the Cumulative Security Update for IE 10 for Windows 8 x64 systems (KB2879017), and click on Uninstall
Note: If you find that no such update has been installed on your computer, locate and right-click on the Cumulative Security Update for IE 10 for Windows 8 x64 systems (KB2936068) instead, and then click on Uninstall.
You may not necessarily have the above mentioned updates installed, if that is the case then sort the updates by the date installed and look for any “Security Updates” that were installed and uninstall them.
Go through the update uninstallation wizard, and once the update has been uninstalled, restart your computer.
Once your computer boots up, you will see that those pesky error 0xc000012f error messages no longer pop up on your screen every few minutes.
If you only uninstall the defective update, Windows will simply reinstall it the next time it runs a check for available updates and installs them. In order to make sure that the defective update is not reinstalled later on, simply launch Windows Update, click on Check for updates, wait for Windows Update to display a list of all available updates for your system, sift through the list to locate the defective update, right-click on the defective update and click on Hide update. This will ensure that the defective update is not reinstalled the next time Windows Update checks for and install updates for your system. If you are using Windows 10 then see this (guide) to disable and hide updates.
If the above methodology doesn’t work for you then i do a system restore see steps (here).

Kevin Arrows
Kevin is a dynamic and self-motivated information technology professional, with a Thorough knowledge of all facets pertaining to network infrastructure design, implementation and administration. Superior record of delivering simultaneous large-scale mission critical projects on time and under budget.
As you know, DLL files in the Windows environment contain all the code needed by programs in order to properly function. And like with most other software, the functions in the DLL file have to be compatible with Windows especially if they are using any built-in service. So if you encounter an error that says, “DLL is either not designed to run on Windows or it contains an error”, when you try to launch a program, then this could be due to a compatibility issue. To fix this error, read on as this post will walk you through doing that.
Based on the reports of users who encountered this error, the error pointed to a DLL file that was either designed to run on a different version of Windows. It is also possible that the DLL file itself is the problem. Here’s the complete error message:
“Bad Image – DLL file is either not designed to run on Windows or it contains an error. Try installing the program again using the original installation media or contact your system administrator or the software vendor for support.”
According to security experts, the DLL files that are known to trigger this kind of error message are msvcr100.dll, msvcr110.dll, msvcp140.dll, lmirfsclientnp.dll, and so on. To fix this problem, you can try to update or reinstall the program that’s throwing the error to its latest version. You could also ask the vendor for the latest version of the DLL as well as run a System File Checker scan.
Option 1 – Try to update or reinstall the program to its latest version
The first thing you can do to fix the problem is to update or reinstall the program that’s throwing the error. It is possible that the version of DLL might be using a system call that is deprecated. So if you had updated your Windows 10 computer recently, you might want to check for an update of the software or you could also try to reinstall its latest version.
Option 2 – Try asking the vendor for the latest version of the DLL
The next thing you can do to fix the error is to ask for the latest version of DLL from the vendor. There are times when the software uses an open-source version of DLL so it is better if you ask the vendor if there is a DLL file that has to be updated. If there is, then you need to make sure to register the DLL once you have it.
Option 3 – Try to re-register the problematic DLL file
You can also try to re-register the DLL to resolve the problem. The Regsvr32 tool is a command-line utility that can be used to register and unregister OLE controls like DLL and ActiveX (OCX) controls in the Windows operating system. Follow the steps below to use it.
- Open Command Prompt as admin from the WinX menu.
- Next, type the following commands in the elevated Command Prompt and hit Enter to execute the command. This will re-register the affected DLL file using the Windows operating system tool, regsvr32.exe.
- exe /[DLL file]
- exe [DLL file]
Note: Replace “[DLL file]” with the name of the DLL file that was pointed out in the error.
- After you execute the given commands, you should see a message saying, “DllRegisterServer in vbscript.dll succeeded” if the Regsvr32 tool was able to run successfully. After that, try to install the program again and see if it now works.
Option 4 – Try to replace the DLL file from a trusted source
- First, you need to get the new DLL file from another computer with preferably the same file version number.
- After that, you need to boot your PC into Safe Mode and navigate to the paths listed below and then replace the file using a USB drive or other external storage devices.
- x86: This PC > C:/Windows/System32
- x64: This PC > C:/Windows/SysWOW64
- Next, type “cmd” in the Cortana search box and right-click on Command Prompt, and select “Run as administrator” to open it with administrator privileges.
- Now type the “regsvr32 ntdll.dll” command and hit Enter.
- Restart your PC and check if the error is now fixed.
Option 5 – Run System File Checker scan
If reinstalling the program didn’t work, you can also try running the System File Checker or SFC scan to fix the error. System File Checker is a command utility built into your computer that helps restore corrupted files and missing files. Refer to the following steps to run it:
- Hit the Win + R keys to launch Run.
- Type in cmd in the field and tap Enter.
- After opening Command Prompt, type in sfc /scannow
The command will start a system scan which will take a few whiles before it finishes. Once it’s done, you could get the following results:
- Windows Resource Protection did not find any integrity violations.
- Windows Resource Protection found corrupt files and successfully repaired them.
- Windows Resource Protection found corrupt files but was unable to fix some of them.
Reboot your computer.
Option 6 – Troubleshoot the isDone.dll error in a Clean Boot State
You can also troubleshoot the “DLL is either not designed to run on Windows or it contains an error” in a Clean Boot state. It could be that there are some third-party applications in your computer that are preventing the application from getting installed and to isolate this possibility, you need to boot your computer in a Clean Boot State and then try installing the program again. Putting your computer in this state can help you identify which program is the culprit and thus isolates the problem. In a Clean Boot state, your computer will start using only the pre-selected minimal set of drivers and startup programs. Note that you have to disable and enable one process at a time.
- Log onto your PC as an administrator.
- Type in MSConfig in the Start Search to open the System Configuration utility.
- From there, go to the General tab and click “Selective startup”.
- Clear the “Load Startup items” check box and make sure that the “Load System Services” and “Use Original boot configuration” options are checked.
- Next, click the Services tab and select the “Hide All Microsoft Services” check box.
- Click Disable all.
- Click on Apply/OK and restart your PC. (This will put your PC into a Clean Boot State. And configure Windows to use the usual startup, just simply undo the changes.)
- After you’ve set your computer into a Clean Boot State, make sure that you’re signed in as administrator and then try to install the application again.
Option 7 – Try scanning your computer using Windows Defender
The DLL file might also be infected with malware or virus and to eliminate it which could explain why you’re getting the “DLL is either not designed to run on Windows or it contains an error”. Thus, you have to scan your computer using security programs like Windows Defender.
- Tap the Win + I keys to open Update & Security.
- Then click on the Windows Security option and open Windows Defender Security Center.
- Next, click on Virus & threat protection > Run a new advanced scan.
- Now make sure that Full Scan is selected from the menu and then click the Scan Now button to get started.
Advanced System Repair Pro
One-click automated PC repair solution
![]()
With Advanced System Repair Pro you can easily
DOWNLOAD
Advanced System Repair Pro is compatible with all versions of Microsoft Windows including Windows 11
Share this article:
You might also like
If you encounter the ERR_SSL_VERSION_INTERFERENCE error on your Google Chrome browser then this means that the browser is trying to load a website with SSL protocol but is not able to do so. This error can occur for many reasons and in this post, you will be given potential fixes that could help you in resolving the problem. But bear in mind that these potential fixes are not that straightforward forward so if you encounter an option you don’t understand much, just skip to the options you have the knowledge of.
There is no direct fault in the browser for the ERR_SSL_VERSION_INTERFERENCE error as there are issues with caching the website data locally on your computer. Moreover, this kind of error can also appear when a website is coded incorrectly or if there are conflicting browser extensions installed in the browser that prevents the website to function properly.
Refer to the suggestions given below to fix the ERR_SSL_VERSION_INTERFERENCE error in Chrome on Windows 10.
Option 1 – Try clearing browser data
There are times when some data in the browser is conflicting with the loading of the website and triggers errors like ERR_CACHE_MISS. And so you can try to clear your browser’s data. This might be a very basic solution but oftentimes it works in fixing this kind of error in Google Chrome. Follow the steps below to clear the data in your browser.
- Open your Google Chrome browser.
- After that, tap the Ctrl + H keys. Doing so will open a new panel that allows you to delete the browsing history and other data in your browser.
- Now select every checkbox that you see and click on the Clear browsing data button.
- Then restart your Chrome browser and check if you can now open any website or not.
Option 2 – Try disabling TSL 1.3
If clearing the browser data didn’t fix the problem, you can also try to disable TSL 1.3 in Chrome. To do so, refer to these steps:
- Open Google Chrome.
- Next, type in “chrome://flags/#tls13-variant” in the address bar and tap Enter.
- After that, you should see the experimental features page for Google Chrome where you can set TSL 1.3 to disabled.
- After disabling TSL 1.3, restart your computer and check if the problem is fixed or not.
Option 3 – Reset Winsock, TCP/IP & Flush DNS cache
Resetting Winsock, TCP/IP, and flushing DNS might help in resolving the ERR_SSL_VERSION_INTERFERENCE error just follow these steps:
- Right-click on the Start button and click on Command Prompt (administrator) so you can pull up an elevated Command Prompt.
- After that, execute each one of the commands listed below. And after you typed in one after the other, you have to hit Enter.
- netsh winsock reset – type in this command to reset Winsock
- netsh int ip reset resettcpip.txt – type in this command to reset TCP/IP
- ipconfig /flushdns – type in this command to flush the DNS cache
- Next, restart your PC and check if the problem’s fixed.
Option 4 – Get rid of any conflicting browser extensions
- Open Chrome and press Alt + F keys.
- Go to More tools and click Extensions to look for any suspicious browser extensions or toolbars.
- Click the Recycle bin and select Remove.
- Restart Chrome and press Alt + F keys again.
- Proceed to On Startup and mark Open a specific page or set of pages.
- To check if the browser hijacker is still active, click Set pages, if it is active, overwrite the URL.
Option 5 – Reset Google Chrome
Resetting Chrome can also help you get rid of the error. Resetting Chrome will restore its default settings, disabling all the extensions, add-ons, and themes. Aside from that, the content settings will be reset as well and the cookies, cache, and site data will also be deleted. To reset Chrome, here’s what you have to do:
- Open Google Chrome, then tap the Alt + F keys.
- After that, click on Settings.
- Next, scroll down until you see the Advanced option, once you see it, click on it.
- After clicking the Advanced option, go to the “Restore and clean up option and click on the “Restore settings to their original defaults” option to reset Google Chrome.
- Now restart Google Chrome.
Read More
USB devices are one of the commonly used devices every day – from plugging mobile devices for charging using pen drives, you are making use of USB drives. However, there are times when you might encounter an error message saying, “Unknown USB Device” as you plug your USB device on your Windows 10 computer. So if you encounter this kind of error message followed by either of the following explanations, read on as this post will give you a couple of suggestions you can check out to resolve the issue.
- Device Descriptor Request Failed
- Port reset failed
- The device failed enumeration
- Set address failed
- Error code 43
You can fix this error using several ways. You can try changing the Power Options, update or roll back the USB drivers, turn off Fast Startup, or run the USB troubleshooter. Follow the options given below for more details.
Option 1 – Try to change the Power Options
- Tap the Win + R keys to open the Run utility.
- Then type “powercfg.cpl” and tap Enter to open the Power Options window.
- Next, go to your selected power plan and click the “Change plan settings” option to open a new page.
- From there, click on the “Change advanced power settings” option. This will open a new window where you can see various power consumption options.
- Now look for the USB Settings option and expand it.
- Then set the USB selective suspend setting to “Disabled” for both scenarios: On Battery and Plugged in.
- After that, click on OK and restart your computer to apply the changes made.
Option 2 – Update or reinstall the Universal Serial Bus Controller driver
Since it could be a driver issue, you can try to update or reinstall the Universal Serial Bus Controller drivers using the Device Manager. Refer to the following steps:
- First, click the Start button and type “device manager”.
- Then click on the “Device Manager” from the search results to open it.
- From there, look for the “Universal Serial Bus controllers” option and then right-click on each one of the USB drivers and select the Update Driver from the menu.
Note: If it is a regular USB drive, then it will be listed as a USB Mass Storage Device but if you have a USB 3.0 device, then look for a USB 3.0 Extensible Host Controller.
- Restart your PC and then click the “Search automatically for updated driver software” option.
Note: If updating the USB Controller drivers didn’t work, you can try to reinstall them instead.
Option 3 – Try turning off Fast Startup
- Tap the Win + R keys to open the Run dialog box and type in “control” to open the Control Panel.
- Next, click on the Hardware and Sound section and click on Power Options.
- Afterwards, select the “Choose what the power buttons do” option from the left side menu pane.
- Now click on Change settings that are currently unavailable and uncheck the entry that says, “Turn on fast startup (Recommended).
- Then click on Save Changes and restart your computer and see if it has fixed the problem or not.
Option 4 – Run the Hardware and Devices Troubleshooters
- The first thing you need to do is click on Start and then on the gear-like icon to pull up the window for Settings.
- After opening Settings, look for the Update and Security option and select it.
- From there, go to the Troubleshoot option located on the left-hand side of the list.
- Next, select Hardware and Devices from the list and open the Troubleshooter and run it. Once it is doing its job, wait for it to complete the process and then restart the system.
- After the system restarts, check if the problem’s now fixed. If not, refer to the next option given below.
Read More
The quickest and easiest way to log into your computer is when you use the PIN feature in Windows 10. Even though it is a bit slower compared to biometric logins such as Fingerprint and Iris scanning that comes under Windows Hello, the PIN feature is definitely less complicated. However, just like any other module of the software, it is also prone to some errors. In this post, you will be guided in fixing several PIN errors such as 0xd00000e5, 0x8007139f, and 0x8009003. These errors could be caused at different points in time like when you change or create a PIN or when you log into your computer.
To fix the 0xd00000e5, 0x8007139f and 0x8009003 PIN errors, there are various solutions you can try. You may empty the contents of the NGC folder or remove and change the PIN or the password. You could also use the Group Policy Editor or reset the ACLs in the NGC folder as well as run built-in tools like System File Checker and the DISM tool.
Option 1 – Take ownership of the NGC folder and delete its contents
- Boot your computer first into Safe Mode.
- Next, you need to take ownership of the Ngc folder first and you can do that using Command Prompt.
- Type “command prompt” in the Windows Search bar and then right-click on the relevant search result and select “Run as administrator”.
- After that, if a User Account Control or UAC prompt appears, just click on Yes to proceed.
- Next, type and enter this command: TAKEOWN /F C:WindowsServiceProfilesLocalServiceAppDataLocalMicrosoftNgc
- Note that the <path> is the location of the folder or file in File Explorer.
- Now type and enter this second command: ICACLS C:WindowsServiceProfilesLocalServiceAppDataLocalMicrosoftNgc /grant administrators:F
- Finally, once the command has been executed, restart your computer.
- Once your computer has restarted, delete all the contents in the Ngc folder and check if the error is now fixed.
Option 2 – Try to remove and change the PIN or password
The 0xd00000e5, 0x8007139f, and 0x8009003 PIN errors could be caused by some conflicting issues with the PIN or password you have set for the User Account of your computer. Thus, you have to remove or change the PIN or password to fix these PIN errors.
- Remove the PIN by going to Settings > Accounts > Sign-in options.
- From there, go to the PIN section and click on the Remove button.
- You will be asked to verify your account to proceed in removing the PIN, enter your credentials.
- Restart your computer and then set up a new PIN.
- Once you’re done, restart your computer and check if the error is gone now.
Option 3 – Try to use the Group Policy Editor
- Tap the Win + R keys to open the Run utility and type “gpedit.msc” in the field and tap Enter to open the Group Policy Editor.
- Next, navigate to this policy setting: Computer Configuration > Administrative Templates > System > Logon
- After that, double click on the “Turn on convenience PIN Sign-in” option located on the right-side panel.
- Then set its radio button to Enabled. You will see the following description when you do so:
“This policy setting allows you to control whether a domain user can sign in using a convenience PIN. If you enable this policy setting, a domain user can set up and sign in with a convenience PIN. If you disable or don’t configure this policy setting, a domain user can’t set up and use a convenience PIN. Note: The user’s domain password will be cached in the system vault when using this feature. To configure Windows Hello for Business, use the Administrative Template policies under Windows Hello for Business.”
- After setting the radio button to Enabled, it will turn on the Logins in your computer using the PIN.
- Close the Group Policy Editor and restart your computer for the changes to take effect.
Option 4 – Try to reset the ACLs in the Ngc folder
- Type “command prompt” in the Windows Search bar and then right-click on the relevant search result and select “Run as administrator”.
- After opening Command Prompt with admin privileges, execute this command: C:/Windows/Service/Profiles/Local/Service/AppData/Local/MicrosoftNgc /T /Q /C /RESET
- The command you entered will start checking for errors and fix them automatically.
Option 5 – Run the System File Checker scan and the DISM tool
System File Checker:
- Tap Win + R to launch Run.
- Type in cmd in the field and tap Enter.
- After opening Command Prompt, type in sfc /scannow
The command will start a system scan which will take a few whiles before it finishes. Once it’s done, you could get the following results:
- Windows Resource Protection did not find any integrity violations.
- Windows Resource Protection found corrupt files and successfully repaired them.
- Windows Resource Protection found corrupt files but was unable to fix some of them.
- Now restart your computer.
DISM tool:
- Open Command Prompt.
- Then type in the following commands and make sure to hit Enter right after you type each one of them:
- Dism /Online /Cleanup-Image /CheckHealth
- Dism /Online /Cleanup-Image /ScanHealth
- Dism /Online /Cleanup-image /Restorehealth
- After that, wait until the process is finished and do not close the window as the process will probably take a couple of minutes.
- Once it’s done, restart your computer.
Read More
Call of Duty is a fun and good game, a great time killer with a squad of friends, however sometimes the game crashes, and fun is interrupted.
In this guide, we will address and solve this unpleasant issue.
-
Scan game files
inside launcher choose options and under them, choose scan and repair game files
This process can take 5-30 minutes, as the game is 60GB large. This will look through all your game files and make sure they’re all valid and that none are corrupted, which may cause crashes. When it’s complete, you’ll get a notification that the game is now playable. Try again and see if your crashes continue. -
Update drivers
Keeping drivers updated is crucial for the game to run smoothly, GPU drivers are possibly important. Go to your GPU manufacturer’s website and get the latest drivers.
-
Lower graphic settings
Intensive graphic requirements can overload GPU and cause crashes, try lowering details in-game and see if this will fix the issue.
-
Disable overlays
If you’re using a program like Discordthat has an overlay, you’ll want to disable it as it may be causing the graphic error
Read More
- In your Graphics Settings, select r5apex.exe and change the Graphics performance preference to Classic App, set it to High Performance, and then launch the game as an administrator when you want to play.
- Inside the Nvidia Control Panel, click “Manage 3D Settings”, and select Apex Legends and change it to “Prefer Maximum Power”
- You can also change “pre-rendered frames” to 1, but it will make you lag just a tiny, tiny bit.
- Turning the shader cache on can help improve FPS, but on some systems, it may cause additional negative performance changes.
- If you have the ability to use G-Sync, use that as well (Only available on some monitors and graphics cards)
- From the task manager, change the priority of r5apex.exe to “High” and close out of other applications.
- Update your graphics drivers.
- Ensure your PC complies with the games minimum system requirements:
- OS: 64-bit Windows 10
- CPU: Intel Core i3-6300 3.8GHz / AMD FX-4350 4.2 GHz Quad-Core Processor
- RAM: 6GB
- GPU: NVIDIA GeForce GT 640 / Radeon HD 7700
- GPU RAM: 1 GB
- HARD DRIVE: Minimum 30 GB of free space
- Check to see if your system has the game’s recommended hardware requirements:
- OS: 64-bit Windows 10
- CPU: Intel i5 3570K or equivalent
- RAM: 8GB
- GPU: Nvidia GeForce GTX 970 / AMD Radeon R9 290
- GPU RAM: 8GB
- HARD DRIVE: Minimum 30 GB of free space
- Within the game, try to set the settings to:
- Full Screen
- Disable V-Sync
- Anti-Aliasing to Disabled/TSAA (slight performance difference)
- Use Native Resolution
- Keep Field of View at around 80-100
- Texture Streaming Budget to High
- Texture filtering as low as possible while still being playable
- Ambient occlusion as low as possible
- Shadow all to Low / Lowest
- Model detail low
- Effects detail low
- Volumetric lighting / Dynamic spot shadows Disabled
- Ragdolls low
- Impact marks the lowest
- Make sure other applications are not placing overlays (Discord, GeForce, Xbox Gaming)
- Clean your temporary files and uninstall other games to give your PC room to have the game run.
- Don’t use products like CCleaner as they may remove necessary files from your computer.
- Closeout of Chrome when you’re playing the game or follow our guide on Optimizing Chrome Performance
Read More
If you were trying to install a program on your Windows 10 computer but encounter an error instead that says, “Error 1310, Error writing to file: <PATH>, Verify that you have access to that directory” then read on as this post will guide you on how you can fix it. This kind is a fairly common type of error encountered by many Windows users.
You can get this error when you try to install certain programs like Excel, AutoCAD, Adobe Photoshop, and some other Adobe products on Windows. One of the most likely causes for this error is that the required files or location is already used by some other software which means that Windows finds that you are trying to overwrite a software that is already installed. Aside from that, it could also occur if the program installer does not have access to write to that directory.
To fix Error 1310, here are some potential fixes that could help.
Option 1 – Clear up temporary or junk files
The error could be caused by some temporary or junk files in your computer and so you need to clear them up to fix the problem. You can achieve that using the Storage Sense feature.
- Open Setting > System > Storage from the WinX Menu.
- From there, you will see a list of all the local and connected storage devices along with the details on the free space. Make sure that Storage Sense is on.
- Next, find a link that says “Free Up Space” and click it to open.
- After that, a screen which is the built-in program in Windows 10 will appear and will scan your computer for the following junk files so you can free up disk space:
- Windows Upgrade Log Files
- The system created Windows Error Reporting Files
- Thumbnails
- Temporary Internet Files
- Previous Windows Installation Files
- Delivery Optimisation Files
- DirectX Shader Cache
- Choose the files you want to get rid of and then click on the remove files option. Note that you’ll have an idea of the total size as you select any of the junk files listed above.
- Now go to the “Free Up Space Now” section and click the Clean Now button. This will get rid of all the temporary or junk files in your computer and should hopefully fix Error 1310.
Option 2 – Reinstall the program in a Clean Boot State
You can also troubleshoot Error 1310 in a Clean Boot state. It could be that there are some third-party applications in your computer that’s preventing the program from getting installed and to isolate this possibility, you need to boot your computer in a Clean Boot State and then try installing the program again. Putting your computer in this state can help you identify which program is the culprit and thus isolates the problem. In a Clean Boot state, your computer will start using only the pre-selected minimal set of drivers and startup programs. Note that you have to disable and enable one process at a time.
- Log onto your PC as an administrator.
- Type in MSConfig in the Start Search to open the System Configuration utility.
- From there, go to the General tab and click “Selective startup”.
- Clear the “Load Startup items” check box and make sure that the “Load System Services” and “Use Original boot configuration” options are checked.
- Next, click the Services tab and select the “Hide All Microsoft Services” check box.
- Click Disable all.
- Click on Apply/OK and restart your PC. (This will put your PC into a Clean Boot State. And configure Windows to use the usual startup, just simply undo the changes.)
- After you’ve set your computer into a Clean Boot State, make sure that you’re signed in as administrator and then try to install the program again.
Option 3 – Try to unregister and re-register the Windows Installer Module
- Tap the Win + R keys to open the Run dialog box.
- Then type the “msiexec /unregister” command and hit Enter to unregister the Windows Installer Module.
- Next, type the “msiexec /regserver” command and hit Enter to re-register the Windows Installer Module.
- Now restart your computer and see if un-registering and re-registering the Windows Installer Module fixed the problem or not.
Option 4 – Take ownership of the location where you want to install the app
The next thing you can try to do is to take ownership of the particular folder as this worked for some users who experienced the same problem. But before you do that, you have to create a System Restore Point first, once that’s done, proceed to the given steps below.
- First, locate the concerned folder and right-click on it then select Properties.
- Next, click on the Edit button in the Properties window and click OK to confirm if you got a User Account Control elevation request.
- After that, select user/group from the permission windows or click on the Add button to add another user or group. It would be best if you add “Everyone” to give permission.
- Then check “Full Control” under the “Allow” column to assign full access rights control permissions.
- Now edit the permission to Full Control for “Everyone”.
- Click OK to save the changes made and then exit.
- Finally, try to install the application again.
Read More
There are instances when there are multiple accounts which is the result when there are a lot of users who use the computer. Some may use it more often, while others may seldom use it. Having multiple accounts can be quite confusing and inconvenient especially if it takes a lot of space. Thus, in this post, you will be guided on how you can delete a User Account on your Windows 10 computer, as well as how you can create a backup of the existing profile data and files.
All the data of user accounts can be found at C:/Users, where its folder name will be exactly the same as the name of the user. You can check the exact user’s name by simply using the “net user” command either via Command Prompt or Windows PowerShell. Once you delete a user account, its folder, along with its files, will also be deleted. You can also create a backup for user files and the best way to do that is by copying the folder to other partitions or to an external drive.
Here are two methods you can check out to delete a user account in Windows 10 – you can do it via Windows Account settings or via the command line. For more details, follow each one of the options provided below.
Option 1 – Delete the user account using Windows Account settings
- First, go to Settings > Accounts > Family & other users.
- Next, select the account you want to delete and click on the Remove button. This will open a confirmation window along with a warning message and two buttons that say, “Delete account & data” and “Cancel”.
- Click on the Delete account & data button to delete the user account.
Note: Once you remove a user account, it will also remove all its corresponding data such as items like Documents, Photos, Music, Desktop, and other related folders. Thus, if you have not created a backup, then you won’t be able to recover those files.
Option 2 – Delete the user account using the command line
If you want to delete several user accounts, then doing it via Command Prompt or Windows PowerShell is a lot quicker. To get started, follow these steps:
- In the Start Search, type “command prompt” and from the search results that appear, right-click on Command Prompt and select the “Run as administrator” option.
- Next, type the “net user” command and hit Enter to execute it. This will show you the exact usernames on the computer.
- After that, type the “net user <username> /delete” command and hit Enter to execute it. This will delete the account and all of its data without any warning. You have to replace “<username>” with the name of the user account.
Read More
Error Code 0x80070424 — What is it?
The error code 0x80070424 is a Windows PC error. It may occur when using Windows Update, Microsoft Update or while trying to change Windows Firewall settings. This error does not allow you to enable or disable the Firewall on your PC. It is quite common on Windows 7 and Vista.
Symptoms of error code 0x80070424 include Windows Firewall may not be listed on Services.msc, inability to change Windows Firewall settings and you may come across this error message when restarting your PC, “Base Filtering Engine Service could not be found in the system”.
Solution
 Error Causes
 Error Causes
Some of the common causes of the error code 0x80070424 include:
- Base Filtering Engine Service file corruption
- Registry issues
When you encounter this error code on your system, it is recommended to fix it immediately as this error can lead to serious PC damages.
Further Information and Manual Repair
To resolve the error code 0x80070424 here are some of the best DIY solutions for you. By following these solutions, you can fix the error all by yourself.
These are simple, easy, and quick PC fixers that require no technical expertise. Just follow the simple steps and the error will be resolved in the shortest time.
Re-Install Windows Firewall & Filtering Engine
If the underlying cause of the error 0x80070424 is Base Filtering Engine Service file corruption, then the best way to resolve it is to download the Firewall and register file from a reliable website. Once you download it extract the zip on your desktop.
- Double click on both files one by one to confirm their installation on your PC. Once installed, restart your PC and click on the start button. Search file type and run and then press enter.
- When the Run window opens, type REGEDIT and click OK. After that, from the left sidebar navigate to HKEY_LOCAL_MACHINESYSTEMCurrentControlSetservicesBFE.
- Now simply right-click on BFE folder and choose permission. Once that’s done, click on add button and type everyone then press OK to confirm settings. Here you will see the ‘everyone’ added field.
- After that in the below permission panel, tick the box that says Full Control and confirm. Now close the window and go to the menu and type services MSC.
This will open the service window. From the list search for ‘Base Filtering engine file’ right-click on it. Now search for Windows Firewall and see if you can change the settings. This procedure is most likely to resolve the error code 0x80070424 on your PC. It is time-consuming but worth it.
Use a Registry Cleaner
None the less, if the error is triggered by registry issues, then it is advisable to download Restoro. This is an advanced and highly functional PC fixer integrated with multiple utilities including a powerful registry cleaner.
The registry cleaner utility detects all registry issues on your system and fixes them in seconds. It wipes out the excess, unnecessary, and obsolete registry entries and files corrupting your system cleans, and restores the registry.
It is user-friendly and compatible with all Windows versions. So whether you are using Windows 7, 8, XP or Vista, you can run it on all versions with ease and resolve the error code 0x80070424 generated by registry issues.
This software also includes other functional and value-added features like antivirus and a system optimizer.
Click here to download Restoro and resolve error code 0x80070424 on your PC today!
Read More
What is the Runtime Error R6025?
The runtime error R6025 can be quite annoying for PC users as it pops up randomly anytime. It is a type of runtime error but typically associated with C++ programming. The error is displayed in the following format:
‘Runtime Error! Program: C:…R6025-Pure Virtual Function Call’
Solution
Error Causes
The runtime error R6025 is triggered due to the following reasons:
- Runtime components of Visual C++ libraries are missing
- Microsoft.NET framework damaged
- Registry corrupted with bad files and data overload
- Virus and malware invasion
Further Information and Manual Repair
Try the solutions given below to repair the runtime error R6025 on your system:
Cause: Microsoft.NET framework damaged
Solution: If this is the underlying cause of the error, then it is advisable to reinstall and repair the Microsoft.NET framework on your PC.
To reinstall this framework, go to the start menu, click control panel, programs and then click ‘Turn Windows features on or off’. Here you might be promoted for an administrator password. Insert the password to proceed.
Now locate Microsoft.NET framework 3.5.1 and uncheck this box, press OK and then reboot your system. After that open ‘Turn Windows features on or off’ and check the Microsoft.NET framework 3.5.1 and then restart your PC. This will hopefully resolve the error.
Cause: Runtime components of Visual C++ libraries are missing
Solution: If runtime components of Visual C++ libraries are missing, then you will have to download and install these from different websites. This can be time-consuming and slightly complicated for you if you are not technically sound.
Cause: Malware Attack
Solution: If the runtime error R6025 is triggered due to a malware attack, then you will have to install and run a powerful antivirus on your PC. This will help detect and remove such malicious software affecting your system.
Cause: Registry Issues
Solution: If registry corruption is the underlying cause of the runtime error R6025 on your PC, then you need to clean up the registry and repair it. The best way to clean and repair the registry is to download Restoro.
Restoro is an advanced PC repair tool integrated with powerful and highly functional utilities all in one.
Utilities include a registry cleaner and a system optimizer. It has easy navigation, a user-friendly interface, and is compatible with all Windows versions. Users of all levels can operate it to resolve all kinds of PC errors including the runtime error R6025.
The registry cleaner utility wipes out all the unnecessary, malicious, obsolete files and invalid entries overloading the RAM. It frees up the disk space, repairs the damaged files and the registry.
Furthermore, Restoro also functions as a system optimizer. It detects system instability issues and resolves them while boosting the speed of your PC.
To resolve the runtime Error R6025 on your system in seconds click here to download Restoro PC repair tool now!
Read More
Free Download Manager is a software program developed by FreeDownloadManager.ORG. According to the publisher:
This software downloads files and converts videos. Its features include integration with all browsers, support of downloads from RapidShare, BitTorrent support, adjusting traffic usage, resuming broken downloads, and adds BitTorrent support, flash video download, upload manager, portable mode, and remote control.
During setup, the program creates a startup registration point in Windows in order to automatically start when any user boots the PC. It adds a browser extension to help it cache files you are downloading over your browser. The software is designed to connect to the internet and adds a Windows Firewall exception in order to do so without being interfered with. It also hooks up to start automatically and cache every download even if it’s turned off.
This software comes bundled with video converters that some anti-virus programs marked as malware and therefore it is considered a potentially unwanted program.
About Potentially Unwanted Applications
If you’ve ever downloaded freeware or shareware, odds are high that your computer can get installed with a bunch of unwanted programs. These unwanted applications, officially known as Potentially Unwanted Programs (PUPs), often come bundled with other software and install themselves on user’s computers without their knowledge. They might not look like computer viruses to some individuals, but they can create huge annoyances and lead to serious difficulties for users.
It’s clear by its name – unwanted programs – but did not really constitute “malware” in the traditional sense. What makes a PUP different from malware is the fact that when you download one, you’re doing it with your approval – even though in most cases unconsciously and unwillingly. Nevertheless, there is no doubt that PUPs continue to be bad news for PC users as they can be incredibly detrimental to your computer in several ways.
How does unwanted software affect you?
Unwanted programs come in various forms. Usually, they could be found in adware bundlers that are known to use aggressive and deceptive advertising. The majority of bundlers install multiple adware applications from a number of companies, each of which has its own EULA policy. Safebytes Anti-Malware entirely eliminates this threat and safeguards your PC against PUP or adware infection. They will also come in the form of web browser extension add-ons and toolbars. Not just they needlessly fill up space on your computer screen, toolbars could also manipulate search results, keep an eye on your web browsing activities, decrease your internet browser’s efficiency, and slow down your net connection to a crawl.
Potentially unwanted programs utilize aggressive distribution methods to get in your computer. They will often include things like information gathering code that will collect and send your private information to other companies. Due to this unwanted program, your application may freeze, your security protections may get turned off that can leave your computer susceptible, your system could get damaged, and this list goes on and on.
Tips to prevent PUPs
• Always read the license agreement and privacy statement. Don’t agree unless you understand exactly what you are acknowledging.
• Always choose “Custom” or “Advanced” installation and don’t blindly click the Next button, which will allow you to uncheck any foistware software programs you do not want.
• Install an ad blocker/pop-up blocker; Add anti-malware products such as Safebytes Anti-Malware. These applications could establish a wall between the computer and cybercriminals.
• Be alert if you install freeware, open-source programs, or shareware. Nowadays ‘freeware’ is not really freeware – but ‘crapware’ bundling nonsense.
• Always download software from trusted sources like official websites instead of untrustworthy sharing space. Avoid file-hosting sites wherever possible.
Can’t Install Safebytes Anti-malware due to the presence of Malware? Do This!
Malware could cause plenty of damage to your PC. Some malware types modify browser settings by including a proxy server or change the PC’s DNS configurations. In these cases, you’ll be unable to visit certain or all of the internet sites, and thus not able to download or install the required security software to remove the infection. If you are reading this article, you may have got infected by malware that stops you from installing a computer security program such as Safebytes Anti-Malware. There are some fixes you can attempt to get around with this obstacle.
Get rid of viruses in Safe Mode
In the event the malware is set to load at Windows startup, then booting in safe mode should avoid it. Only minimal required programs and services are loaded whenever you boot your PC in Safe Mode. To launch your Windows XP, Vista, or 7 computers in Safe Mode with Networking, do as instructed below.
1) Tap the F8 key continuously as soon as your PC boots, however, before the large Windows logo appears. This would conjure up the Advanced Boot Options menu.
2) Choose Safe Mode with Networking using arrow keys and hit Enter.
3) Once you get into this mode, you should have an internet connection once again. Now, use your browser normally and navigate to https://safebytes.com/products/anti-malware/ to download and install Safebytes Anti-Malware.
4) Following installation, run a complete scan and let the software program remove the threats it discovers.
Obtain the anti-malware program using an alternate browser
Web-based viruses could be environment-specific, targeting a particular web browser or attacking particular versions of the web browser. In case you suspect that your Internet Explorer has been hijacked by a computer virus or otherwise compromised by online hackers, the most effective thing to do would be to switch to a different browser like Chrome, Firefox, or Safari to download your chosen computer security program – Safebytes Anti-Malware.
Run antivirus from your pen drive
Here’s yet another solution which is creating a portable USB antivirus software package that can scan your computer for malicious software without the need for installation. Try these simple steps to clear up your infected computer by using a portable antivirus.
1) On a virus-free PC, download and install Safebytes Anti-Malware.
2) Put the pen drive into the clean PC.
3) Double click on the downloaded file to open the installation wizard.
4) Choose the drive letter of the flash drive as the location when the wizard asks you where you want to install the antivirus. Follow the directions to finish the installation process.
5) Unplug the pen drive. Now you can utilize this portable anti-virus on the affected computer system.
6) Run the Safebytes Anti-malware directly from the USB drive by double-clicking the icon.
7) Click on “Scan Now” to run a scan on the infected computer for malware.
Features and Benefits of SafeBytes Anti-Malware
If you are looking to purchase anti-malware for your computer system, there are numerous brands and applications for you to consider. A few of them do a good job in getting rid of malware threats while some will ruin your PC by themselves. You must choose a product that has gained a good reputation and detects not only viruses but other kinds of malware too. Among few good programs, SafeBytes Anti-Malware is the strongly recommended software for the security-conscious user.
SafeBytes anti-malware is a very effective and easy-to-use protection tool that is created for users of all levels of IT literacy. Once you’ve got installed this software program, SafeBytes superior protection system will make sure that no viruses or malware can seep through your computer.
SafeBytes anti-malware provides an array of advanced features that sets it aside from all others. The following are some of the good ones:
World-class AntiMalware Protection: Safebytes is made on the very best virus engine in the industry. These engines can detect and remove threats even during the early stages of a malware outbreak.
Real-time Active Protection: SafeBytes provides complete and real-time security for your personal machine. It will monitor your personal computer for suspicious activity at all times and shields your PC from unauthorized access.
Fast Multi-threaded Scanning: Safebytes Anti-Malware, using its advanced scanning engine, provides super-fast scanning that can immediately target any active online threat.
Safe Web Browsing: Through its unique safety rating, SafeBytes notifies you whether a website is safe or not to access it. This will ensure that you’re always certain of your safety when browsing the online world.
Lowest Memory/CPU Usage: This software is lightweight and will work silently in the background, and that does not have an effect on your PC efficiency.
24/7 Live Expert Support: You can obtain high levels of support round the clock if you’re using their paid software.
Technical Details and Manual Removal (Advanced Users)
If you wish to manually remove FreeDownloadManager without the use of an automated tool, it may be possible to do so by removing the program from the Windows Add/Remove Programs menu, or in cases of browser extensions, going to the browsers AddOn/Extension manager and removing it. You will likely also want to reset your browser.
To ensure the complete removal, manually check your hard drive and registry for all of the following and remove or reset the values accordingly. Please note that this is for advanced users only and may be difficult, with incorrect file removal causing additional PC errors. In addition, some malware is capable of replicating or preventing deletion. Doing this in Safe Mode is advised.
The following files, folders, and registry entries are created or modified by FreeDownloadManager
Files:
C:WINDOWSsystem32netmsg.dll
C:DocumentsUserLocalTempfdminst.exe
C:DocumentsUserLocalTempis-FJKMF.tmpfdminst.tmp
C:WINDOWSsystem32msctfime.ime
C:DocumentsUserLocalTempis-FN3E3.tmp_isetup_shfoldr.dll
C:WINDOWSsystem32shfolder.dll
C:DocumentsUserLocalTempis-FN3E3.tmpfdminno.dll
C:DocumentsUserLocalTempis-FN3E3.tmpnsProcessW_modified.dll
C:WINDOWSsystem32shell32.dll
C:Documents and SettingsUserStart Menudesktop.ini
C:Documents and SettingsUserStart MenuProgramsdesktop.ini
C:WINDOWSRegistrationR000000000007.clb
C:WINDOWSwin.ini
Registry:
HKEY_CURRENT_USERSoftwareCodeGearLocales
HKEY_LOCAL_MACHINESoftwareCodeGearLocales
HKEY_CURRENT_USERSoftwareBorlandLocales
HKEY_CURRENT_USERSoftwareBorlandDelphiLocales
HKEY_LOCAL_MACHINESoftwareMicrosoftWindows NTCurrentVersionIMM
HKEY_USERSS-1-5-21-1547161642-507921405-839522115-1004SoftwareMicrosoftWindows NTCurrentVersionAppCompatFlagsLayers
HKEY_CURRENT_USERSOFTWAREMicrosoftCTF
HKEY_LOCAL_MACHINESoftwareMicrosoftCTFSystemShared
HKEY_LOCAL_MACHINESOFTWAREMicrosoftWindows NTCurrentVersionFontSubstitutes
HKEY_LOCAL_MACHINESoftwareMicrosoftWindowsCurrentVersion
HKEY_LOCAL_MACHINESOFTWAREMicrosoftWindows NTCurrentVersion
HKEY_CURRENT_USERSoftwareFreeDownloadManager.ORGFree Download Manager 5
HKEY_LOCAL_MACHINESoftwareMicrosoftWindowsCurrentVersionPoliciesExplorer
HKEY_CURRENT_USERSoftwareMicrosoftWindowsCurrentVersionPoliciesExplorer
HKEY_LOCAL_MACHINESOFTWAREMicrosoftWindowsCurrentVersionShellCompatibilityObjects20D04FE0-3AEA-1069-A2D8-08002B30309D
HKEY_CLASSES_ROOTHKEY_LOCAL_MACHINESoftwareClassesCLSID20D04FE0-3AEA-1069-A2D8-08002B30309DInProcServer32
HKEY_CLASSES_ROOTDriveshellexFolderExtensions
HKEY_CLASSES_ROOTDriveshellexFolderExtensionsfbeb8a05-beee-4442-804e-409d6c4515e9
HKEY_CURRENT_USERSoftwareMicrosoftWindowsCurrentVersionExplorerUser Shell Folders
HKEY_LOCAL_MACHINESoftwareMicrosoftWindowsCurrentVersionExplorerUser Shell Folders
HKEY_LOCAL_MACHINESystemCurrentControlSetControlSession Manager
HKEY_CURRENT_USERSoftwareMicrosoftWindowsCurrentVersionExplorerShell Folders
HKEY_CURRENT_USERSoftwareMicrosoftWindowsCurrentVersionExplorerMountPoints2CPCVolume
HKEY_CURRENT_USERSoftwareMicrosoftWindowsCurrentVersionExplorerMountPoints2CPCVolume475c7950-e3d2-11e0-8d7a-806d6172696f
HKEY_CURRENT_USERSoftwareMicrosoftWindowsCurrentVersionExplorerMountPoints2CPCVolume475c7952-e3d2-11e0-8d7a-806d6172696f
HKEY_CURRENT_USERSoftwareMicrosoftWindowsCurrentVersionExplorerMountPoints2475c7952-e3d2-11e0-8d7a-806d6172696f
HKEY_CURRENT_USERSoftwareMicrosoftWindowsCurrentVersionExplorerMountPoints2475c7950-e3d2-11e0-8d7a-806d6172696f
HKEY_CLASSES_ROOTDirectory
HKEY_CLASSES_ROOTDirectoryCurVer
HKEY_CLASSES_ROOTDirectory
HKEY_CURRENT_USERSoftwareMicrosoftWindowsCurrentVersionExplorer
HKEY_CURRENT_USERSoftwareMicrosoftWindowsCurrentVersionExplorer
HKEY_CURRENT_USERSoftwareMicrosoftWindowsCurrentVersionPoliciesSystem
HKEY_CURRENT_USERSoftwareMicrosoftWindowsCurrentVersionExplorerAdvanced
HKEY_CLASSES_ROOTDirectoryShellExIconHandler
HKEY_CLASSES_ROOTDirectoryClsid
HKEY_CLASSES_ROOTFolder
HKEY_CLASSES_ROOTFolderClsid
HKEY_CURRENT_USERSoftwareMicrosoftwindowsCurrentVersionExplorerAutoComplete
HKEY_LOCAL_MACHINESoftwareMicrosoftwindowsCurrentVersionExplorerAutoComplete
HKEY_CURRENT_USERSoftwareMicrosoftWindowsCurrentVersionExplorerAutoComplete
HKEY_LOCAL_MACHINESoftwareMicrosoftWindowsCurrentVersionExplorerAutoComplete
HKEY_LOCAL_MACHINESoftwareMicrosoftCOM3
HKEY_USERSS-1-5-21-1547161642-507921405-839522115-1004_Classes
HKEY_LOCAL_MACHINESoftwareClassesREGISTRYUSER
HKEY_LOCAL_MACHINESoftwareClassesHKEY_LOCAL_MACHINESoftwareClassesCLSID0BB2765-6A77-11D0-A535-00C04FD7D062
HKEY_LOCAL_MACHINESoftwareClassesHKEY_LOCAL_MACHINESoftwareClassesCLSID0BB2765-6A77-11D0-A535-00C04FD7D062TreatAs
HKEY_LOCAL_MACHINESoftwareClassesHKEY_LOCAL_MACHINESoftwareClassesCLSID0BB2765-6A77-11D0-A535-00C04FD7D062
HKEY_LOCAL_MACHINESoftwareClassesHKEY_LOCAL_MACHINESoftwareClassesCLSID0BB2765-6A77-11D0-A535-00C04FD7D062InprocServer32
HKEY_LOCAL_MACHINESoftwareClassesHKEY_LOCAL_MACHINESoftwareClassesCLSID0BB2765-6A77-11D0-A535-00C04FD7D062InprocServerX86
HKEY_LOCAL_MACHINESoftwareClassesHKEY_LOCAL_MACHINESoftwareClassesCLSID0BB2765-6A77-11D0-A535-00C04FD7D062LocalServer32
HKEY_LOCAL_MACHINESoftwareClassesHKEY_LOCAL_MACHINESoftwareClassesCLSID0BB2765-6A77-11D0-A535-00C04FD7D062InprocHandler32
HKEY_LOCAL_MACHINESoftwareClassesHKEY_LOCAL_MACHINESoftwareClassesCLSID0BB2765-6A77-11D0-A535-00C04FD7D062InprocHandlerX86
HKEY_LOCAL_MACHINESoftwareClassesHKEY_LOCAL_MACHINESoftwareClassesCLSID0BB2765-6A77-11D0-A535-00C04FD7D062LocalServer
HKEY_CLASSES_ROOTHKEY_LOCAL_MACHINESoftwareClassesCLSID0BB2765-6A77-11D0-A535-00C04FD7D062
HKEY_CLASSES_ROOTHKEY_LOCAL_MACHINESoftwareClassesCLSID0BB2765-6A77-11D0-A535-00C04FD7D062TreatAs
HKEY_LOCAL_MACHINESoftwareClassesHKEY_LOCAL_MACHINESoftwareClassesCLSID3C036F1-A186-11D0-824A-00AA005B4383
HKEY_LOCAL_MACHINESoftwareClassesHKEY_LOCAL_MACHINESoftwareClassesCLSID3C036F1-A186-11D0-824A-00AA005B4383TreatAs
HKEY_LOCAL_MACHINESoftwareClassesHKEY_LOCAL_MACHINESoftwareClassesCLSID3C036F1-A186-11D0-824A-00AA005B4383
HKEY_LOCAL_MACHINESoftwareClassesHKEY_LOCAL_MACHINESoftwareClassesCLSID3C036F1-A186-11D0-824A-00AA005B4383InprocServer32
HKEY_LOCAL_MACHINESoftwareClassesHKEY_LOCAL_MACHINESoftwareClassesCLSID3C036F1-A186-11D0-824A-00AA005B4383InprocServerX86
HKEY_LOCAL_MACHINESoftwareClassesHKEY_LOCAL_MACHINESoftwareClassesCLSID3C036F1-A186-11D0-824A-00AA005B4383LocalServer32
HKEY_LOCAL_MACHINESoftwareClassesHKEY_LOCAL_MACHINESoftwareClassesCLSID3C036F1-A186-11D0-824A-00AA005B4383InprocHandler32
HKEY_LOCAL_MACHINESoftwareClassesHKEY_LOCAL_MACHINESoftwareClassesCLSID3C036F1-A186-11D0-824A-00AA005B4383InprocHandlerX86
HKEY_LOCAL_MACHINESoftwareClassesHKEY_LOCAL_MACHINESoftwareClassesCLSID3C036F1-A186-11D0-824A-00AA005B4383LocalServer
HKEY_CLASSES_ROOTHKEY_LOCAL_MACHINESoftwareClassesCLSID3C036F1-A186-11D0-824A-00AA005B4383
HKEY_CLASSES_ROOTHKEY_LOCAL_MACHINESoftwareClassesCLSID3C036F1-A186-11D0-824A-00AA005B4383TreatAs
HKEY_LOCAL_MACHINESoftwareClassesCLSID0BB2763-6A77-11D0-A535-00C04FD7D062
HKEY_LOCAL_MACHINESoftwareClassesCLSID0BB2763-6A77-11D0-A535-00C04FD7D062TreatAs
HKEY_LOCAL_MACHINESoftwareClassesCLSID0BB2763-6A77-11D0-A535-00C04FD7D062
HKEY_LOCAL_MACHINESoftwareClassesCLSID0BB2763-6A77-11D0-A535-00C04FD7D062InprocServer32
HKEY_LOCAL_MACHINESoftwareClassesCLSID0BB2763-6A77-11D0-A535-00C04FD7D062InprocServerX86
HKEY_LOCAL_MACHINESoftwareClassesCLSID0BB2763-6A77-11D0-A535-00C04FD7D062LocalServer32
HKEY_LOCAL_MACHINESoftwareClassesCLSID0BB2763-6A77-11D0-A535-00C04FD7D062InprocHandler32
HKEY_LOCAL_MACHINESoftwareClassesCLSID0BB2763-6A77-11D0-A535-00C04FD7D062InprocHandlerX86
HKEY_LOCAL_MACHINESoftwareClassesCLSID0BB2763-6A77-11D0-A535-00C04FD7D062LocalServer
HKEY_CLASSES_ROOTHKEY_LOCAL_MACHINESoftwareClassesCLSID0BB2763-6A77-11D0-A535-00C04FD7D062
HKEY_CLASSES_ROOTHKEY_LOCAL_MACHINESoftwareClassesCLSID0BB2763-6A77-11D0-A535-00C04FD7D062TreatAs
HKEY_CLASSES_ROOTHKEY_LOCAL_MACHINESoftwareClassesCLSID3C036F1-A186-11D0-824A-00AA005B4383InProcServer32
HKEY_CLASSES_ROOTHKEY_LOCAL_MACHINESoftwareClassesCLSID0BB2763-6A77-11D0-A535-00C04FD7D062InProcServer32
HKEY_CURRENT_USERsoftwareMicrosoftWindowsCurrentVersionExplorerAdvanced
HKEY_LOCAL_MACHINEsoftwareMicrosoftWindowsCurrentVersionExplorerAdvanced
HKEY_LOCAL_MACHINESoftwareMicrosoftWindows NTCurrentVersionFontSubstitutes
HKEY_USERSS-1-5-21-1547161642-507921405-839522115-1004
HKEY_LOCAL_MACHINESOFTWAREMicrosoftWindows NTCurrentVersionLanguagePackSurrogateFallback
HKEY_CURRENT_USERSoftwareMicrosoftWindowsCurrentVersionUninstallFree Download Manager_is1
HKEY_LOCAL_MACHINESoftwareMicrosoftWindowsCurrentVersionUninstallFree Download Manager_is1
HKEY_CURRENT_USERSoftwareFreeDownloadManager.ORGFree Download ManagerSettingsCommunity
HKEY_CURRENT_USERSoftwareFreeDownloadManager.ORGFree Download ManagerSettingsNetworkBittorrent
HKEY_CURRENT_USERKeyboard LayoutToggle
HKEY_CURRENT_USERSOFTWAREMicrosoftCTFLangBarAddIn
HKEY_LOCAL_MACHINESOFTWAREMicrosoftCTFLangBarAddIn
Read More
![]()
Copyright © 2022, ErrorTools. All Rights Reserved
Trademarks: Microsoft Windows logos are registered trademarks of Microsoft. Disclaimer: ErrorTools.com is not affiliated with Microsoft, nor claim direct affiliation.
The information on this page is provided for information purposes only.
![]()
Repair your PC with one click
Please be aware that our software needs to be installed on a PC system with Windows on it, Open this website on a desktop PC and download the software for easy and quick elimination of your issues.
Download PC Repair Tool to quickly find & fix Windows errors automatically
A DLL file in Windows carries all the code that one program can use to function correctly. Like any other software, the functions in the DLL file needs to be compatible with Windows if they are using any inbuilt service. If you receive an error saying “DLL is either not designed to run on Windows or it contains an error,” then it could be a compatibility issue.
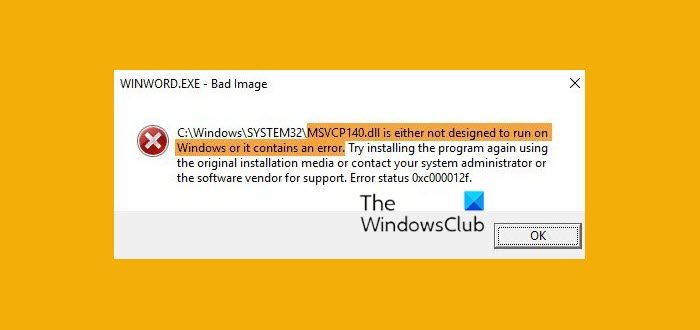
We remember one of our users reported that one of the software stopped working when it was installed on a laptop with the latest version of Windows. The error message pointed to a DLL file. It was either designed to run on a different version of Windows. Or the DLL file is at fault. Here is the complete message
Bad Image – DLL file is either not designed to run on Windows or it contains an error. Try installing the program again using the original installation media or contact your system administrator or the software vendor for support.
DLL files like msvcr100.dll, msvcr110.dll, msvcp140.dll, lmirfsclientnp.dll, etc. are known to throw up this error message.
We suggest you follow these and check if these resolve the problem.
- Update or reinstall the software to the latest version
- Ask the vendor for the latest version of the DLL
- Run System File Checker.
1] Update/Reinstall the software to the latest version
The version of DLL might be using a system call, which is deprecated. If you had recently updated Windows, we would suggest you check for an update of the software. The update should install the latest version of DLL along with it.
You should also install it on a different computer, and check if it’s working there. Make sure to check the version of Windows if it works.
2] Ask the vendor for the latest version of DLL
Sometimes, the software uses an open source version of DLL. E.g., Audacity uses an external DLL to convert audio files to MP3. It is best to ask the vendor if there is a DLL that needs an update. If yes, make sure to register the DLL once you have it. Many a time, it is a version change which blocks the functionality.
If they don’t have it, you need to check if any computer has the older version, and you can replace the file.
Related: Bad Image Error Status 0xc0000006.
3] Run SFC
If the DLL is a corrupt system DLL, you can choose to run System File Checker to fix it. All you need is admin permission to complete it. You can also use our very useful freeware utility FixWin to run SFC with a single click!
I hope these solutions help.

Anand Khanse is the Admin of TheWindowsClub.com, a 10-year Microsoft MVP (2006-16) & a Windows Insider MVP (2016-2022). Please read the entire post & the comments first, create a System Restore Point before making any changes to your system & be careful about any 3rd-party offers while installing freeware.

Fix Bad Image Error – Application.exe is either not designed to run on Windows or it contains an error: Windows 10 Bad Image Error is seriously a very annoying issue because you can’t open any application. And as soon as you open any program the error may appear with a description like: “C:Program FilesWindows Portable Devicesxxxx.dll is either not designed to run on Windows or it contains an error. Try installing the program again using the original installation media or contact your system administrator or the software vendor for support.” Well, that’s a very long message with no or very little information and which leads us to several possibilities as to why this error is occurring.
Contents
- Fix Bad Image Error – Application.exe is either not designed to run on Windows or it contains an error
- Method 1: Run CCleaner and Malwarebytes Anti-Malware
- Method 2: Run System File Checker (SFC) Tool
- Method 3: Run Microsoft safety scanner
- Method 4: Run Startup/Automatic Repair
- Method 5: Fix Chrome.exe Bad Image error message
- Method 6: Repair Microsoft Office Bad Image Error
- Method 7: Run System Restore or Windows Repair Install
Fix Bad Image Error – Application.exe is either not designed to run on Windows or it contains an error
Without wasting any time let’s see how to fix this issue:
Method 1: Run CCleaner and Malwarebytes Anti-Malware
1. Download and install CCleaner.
2. Double-click on the setup.exe to start the installation.

3. Click on the Install button to start the installation of CCleaner. Follow on-screen instructions to complete the installation.

4. Launch the application and from the left-hand side menu, select Custom.
5. Now see if you need to checkmark anything other than the default settings. Once done, click on Analyze.
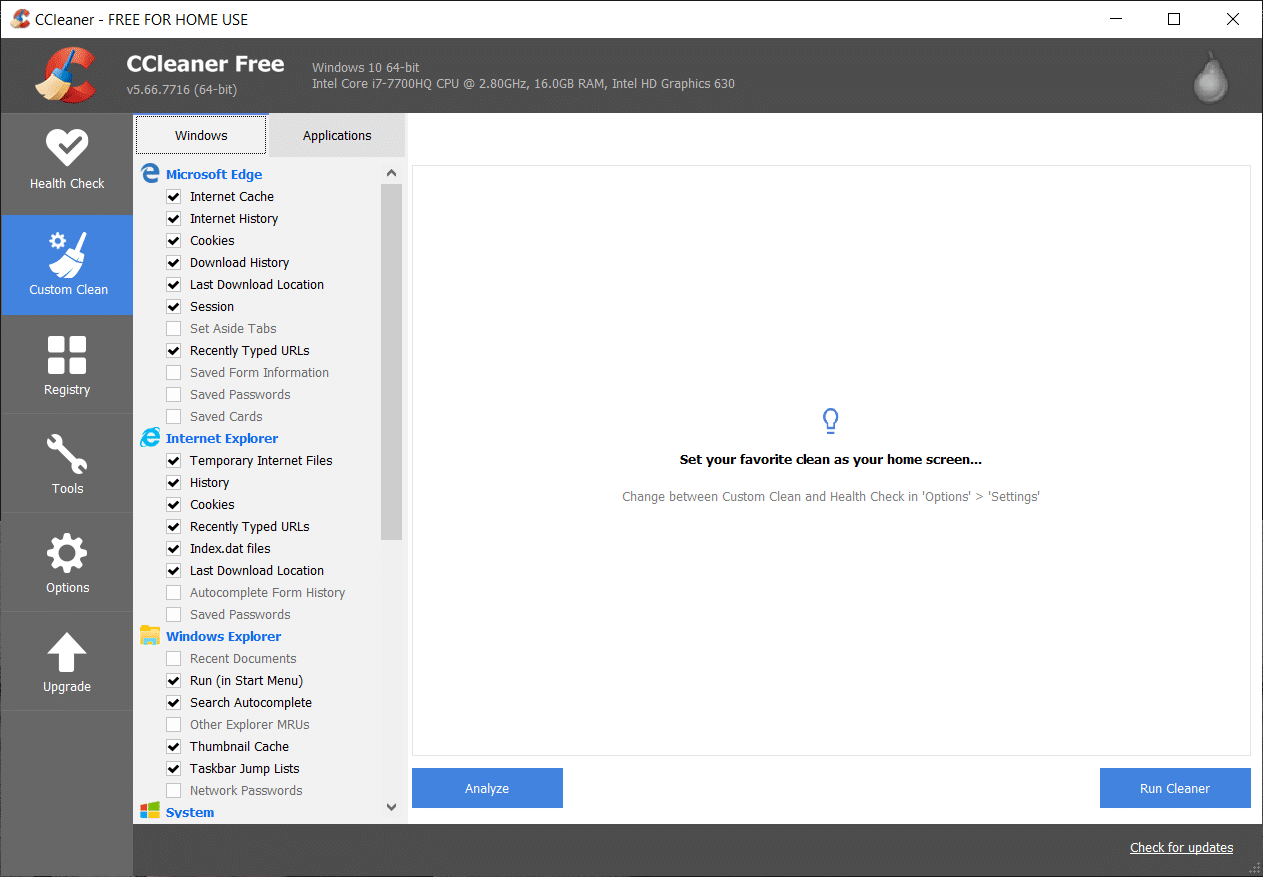
6. Once the analysis is complete, click on the “Run CCleaner” button.

7. Let CCleaner run its course and this will clear all cache and cookies on your system.
8. Now, to clean your system further, select the Registry tab, and ensure the following are checked.

9. Once done, click on the “Scan for Issues” button and allow CCleaner to scan.
10. CCleaner will show the current issues with Windows Registry, simply click on the Fix selected Issues button.

11. When CCleaner asks “Do you want backup changes to the registry?” select Yes.
12. Once your backup has completed, select Fix All Selected Issues.
13. Reboot your PC to save changes.
If this doesn’t fix the issue then run Malwarebytes and let it scan your system for harmful files.
Method 2: Run System File Checker (SFC) Tool
1. Press Windows Key + X then click on Command Prompt (Admin).
2. Now type the following in the cmd and hit enter:
Sfc /scannow

3. Let the system file checker run and then restart your PC.
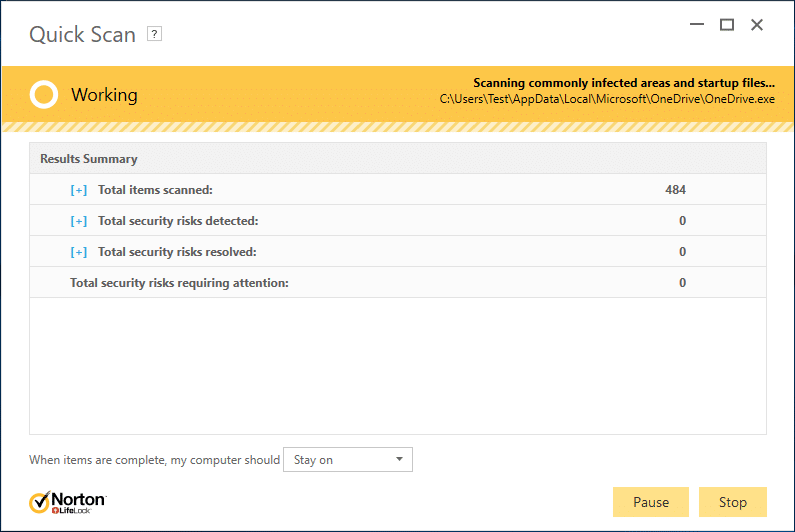
Method 3: Run Microsoft safety scanner
If it’s a virus infection then it is recommended to run the Microsoft safety scanner and check if it helps. Make sure to disable all antivirus and security protection when running the Microsoft safety scanner.
If this doesn’t help then in some cases where the system is affected because of the malware. It is recommended to remove malware from your system.
Method 4: Run Startup/Automatic Repair
1. Insert the Windows 10 bootable installation DVD and restart your PC.
2. When prompted to Press any key to boot from CD or DVD, press any key to continue.

3. Select your language preferences, and click Next. Click Repair your computer in the bottom-left.

4. On choose an option screen, click Troubleshoot.

5. On Troubleshoot screen, click Advanced option.

6. On the Advanced options screen, click Automatic Repair or Startup Repair.

7. Wait till the Windows Automatic/Startup Repairs complete.
8. Restart and you have successfully Fix Bad Image Error – Application.exe is either not designed to run on Windows or it contains an error, if not, continue.
Method 5: Fix Chrome.exe Bad Image error message
Error message: Chrome.exe – Bad Image. A particular file is either not designed to run on Windows or it contains an error.
Error status 0xc000012f.
1. Click on three dots icon available at the top right corner.

2. Click on the Settings button from the menu opens up.
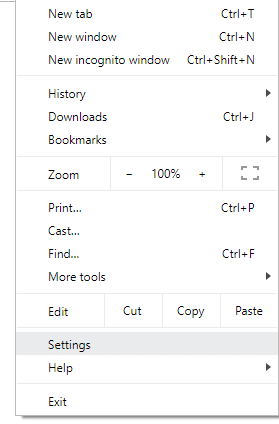
3. Scroll down at the bottom of the Settings page and click Advanced.
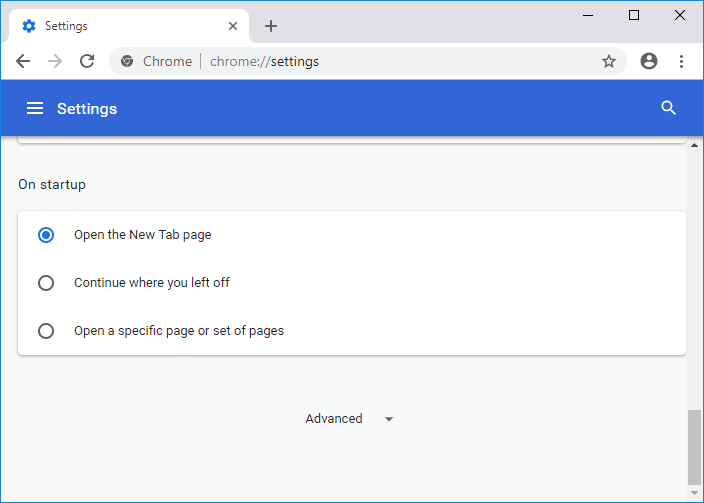
4. As soon as you click on Advanced, from the left-hand side click on “Reset and clean up“.
5. Now under Reset and clean up tab, click on Restore settings to their original defaults.
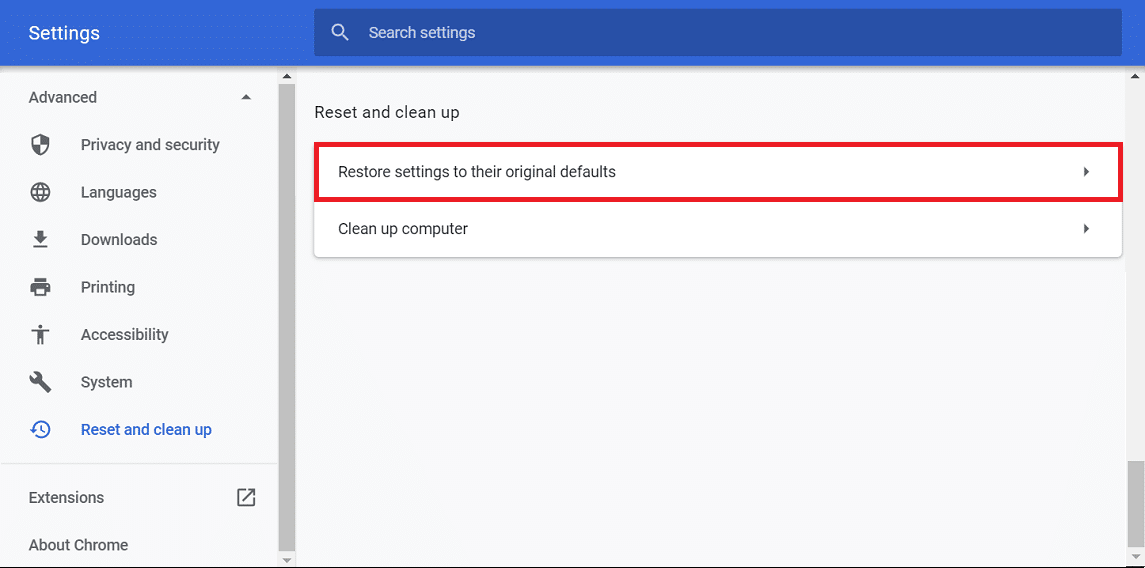
6. Below dialog box will open up which will give you all the details about what restoring Chrome settings will do.
Note: Before proceeding read the given information carefully as after that it may lead to loss of some important information or data.
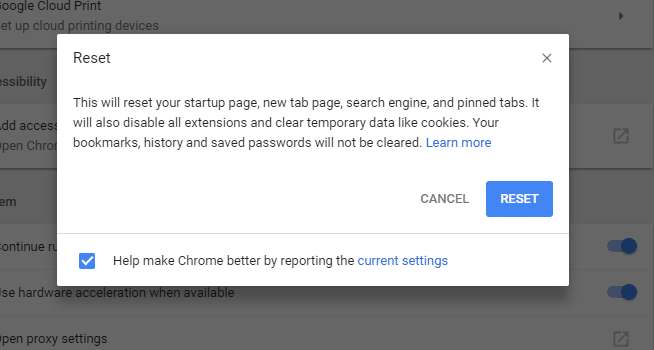
7. After making sure that you want to restore Chrome to its original settings, click on the Reset settings button.
8. If above doesn’t solve your problem then navigate to the following folder:
C:UsersUsernameAppDataLocalGoogleChromeUser Data
9. Next, find the folder Default and rename it to Default backup.

10. Again open Chrome to check if the problem is resolved or not.
11. Click Chrome Menu button then select Help and click on About Google Chrome.

12. Make sure it’s up to date or else update it.

13. If nothing helps, then you may have to consider uninstalling Chrome and installing a fresh copy.
Method 6: Repair Microsoft Office Bad Image Error
1. Search for Control Panel in Windows Search then click on the search result.

2. Now click on Uninstall a program.
3. From there find Microsoft Office and then right-click on it and select Change.
4. Select Repair and click Next.

5. Let the repair run in the background as it can take some time to complete.

6. Once done click close and restart your PC to save changes.
Method 7: Run System Restore or Windows Repair Install
Sometimes using System Restore can help you repair problems with your PC, so follow this guide to restore your computer to an earlier time.

If the System Restore doesn’t work then you need to use Windows Repair Install as a last resort because if nothing works out then this method will surely repair all problems with your PC. Repair Install just using an in-place upgrade to repair issues with the system without deleting user data present on the system. So follow this article to see How to Repair Install Windows 10 Easily.
That’s it you have successfully Fix Bad Image Error – Application.exe is either not designed to run on Windows or it contains an error but if you still have any question regarding this article then please feel free to ask them in the comment’s section.
- Remove From My Forums
-
Вопрос
-
Good day,
We have a few people getting this error with Office 2016 on Windows 10.
When we format the machine and start from scratch, it will be fine for like a week or two then the error starts popping up again.
This is not normal behavior. What should we do to prevent this from happening?
Thanks
Ответы
-
Good day,
We have a few people getting this error with Office 2016 on Windows 10.
When we format the machine and start from scratch, it will be fine for like a week or two then the error starts popping up again.
This is not normal behavior. What should we do to prevent this from happening?
Thanks
-
Объединено
18 октября 2017 г. 8:38
duplicated -
Помечено в качестве ответа
Benette
6 ноября 2017 г. 5:56
-
Объединено
-
Hi Benette,
>> it will be fine for like a week or two then the error starts popping up again.
Are there any detailed steps to trigger the issue?
Which Office application does it affect?If the issue happens to Office applications, please try to
start Office applications in safe mode and check the result. This helps narrow down if the problem is related to any third party add-ins.It this doesn’t help, please collect the detailed build number of both your Office 2016 and Windows 10 then we can do more research.
Please feel free to post back with more details and we are glad to help you.
Best regards,
Yuki Sun
Please remember to mark the replies as answers if they helped.
If you have feedback for TechNet Subscriber Support, contact
tnmff@microsoft.com.-
Помечено в качестве ответа
Benette
6 ноября 2017 г. 5:56
-
Помечено в качестве ответа
-
Hi Benette,
How’s everything going with this issue in safe mode?
>> When we format the machine and start from scratch, it will be fine for like a week or two then the error starts popping up again.
Have you installed any other applications apart from Office? As it can work well for some time after formatting the machine from scratch, I am assuming that it might be related to any conflicts with other softwares.
If the issue persists in safe mode, please try to perform a clean boot in Windows, then have a try and see if issue can be stopped. This helps eliminate whether the issue was caused by any software conflicts.
Please remember to mark the replies as answers if they helped.
If you have feedback for TechNet Subscriber Support, contact
tnmff@microsoft.com.-
Предложено в качестве ответа
Yuki SunMicrosoft contingent staff
3 ноября 2017 г. 9:53 -
Помечено в качестве ответа
Benette
6 ноября 2017 г. 5:56
-
Предложено в качестве ответа