Как собрать мочалку-сетку. Мини-инструкция с фото
Мочалки-сетки не созданы на века. Однако среди них могут попадаться, как более долгоиграющие, так и менее. Моя новая мочалка в форме бантика была куплена в сети «Пятерочка» за 51 рубль. Это не высокая цена, но я все равно рассчитывала, что покупка прослужит мне в душе положенные 3 месяца. К моему сожалению, она полностью распустилась в течение недели использования. Выкидывать ее еще рано, тем более что она не имеет никаких повреждений. Решила я ее починить и заодно создать мини-инструкцию, как собрать мочалку обратно. Надеюсь, она будет вам полезна, а фото помогут быстро уловить суть и облегчить процесс сборки.

Просуньте руку внутрь сетки и наденьте ее на руку как чулок.


Свободной рукой соберите в кучу один край сетки.

Держа за край, снимите конструкцию и второй рукой возьмите другой край сетки. У вас получился упругий «бублик».

Продолжая держать противоположные края, поверните «бублик», чтобы он стал похож на знак бесконечности.

Придерживайте одной рукой получившуюся закорючку. Второй оберните ее шнуром, который изначально скреплял мочалку.

Проденьте один конец шнура в другой и туго затяните.

Расправьте края по окружности, чтобы получилась «розочка».


Мойтесь с удовольствием!
P.S. Чтобы мочалка держалась крепче, завяжите еще один узел. Подсуньте внешний конец шнура под ту его часть, которая намотана на сердцевину мочалки. Получилась петля, в нее просуньте конец шнура и затяните.
![]()
Download Article
![]()
Download Article
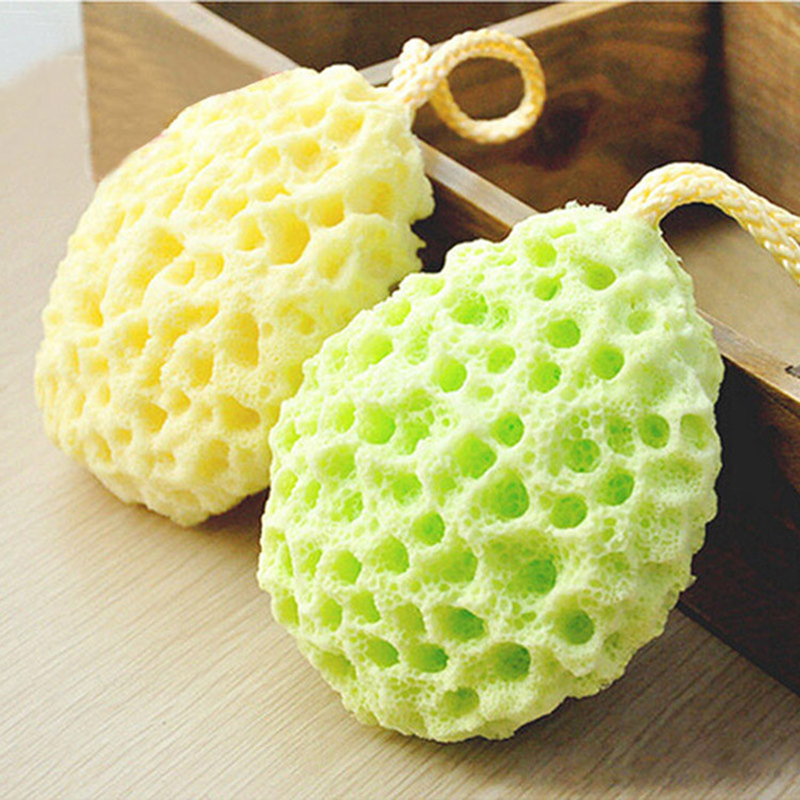
A loofah, also known as a sponge, is used for exfoliating dead skin and as a general-purpose sponge for personal hygiene. There are natural loofahs, which come from the fibrous skeleton of the loofah fruit, and loofahs made from plastic and synthetic material. Over time, a loofah’s tiny nooks and crannies fill with nasty bacteria and fungi. That’s why it’s important to keep your loofah sanitary so it remains safe to use.
-

1
Rinse it well. Rinse your loofah well after each use and squeeze and shake out excess water.[1]
-
2
Keep it dry. Bacteria loves growing in wet places, so keep your loofah dry to prevent it from becoming a breeding ground for nasty germs that cause folliculitis, yeast, and fungal infections.[2]
Once you’ve rinsed your loofah, store it in a cool, dry place.Advertisement
-
3
Disinfect it. Loofahs start out hygienic, but the accumulation of dead skin cells and storage in humid environments turns it into a bacteria haven. Soak your loofah in diluted bleach for five minutes each week to kill bacteria and germs.[3]
-
4
Use essential natural oils. Essential oils have antimicrobial properties that help deter bacterial growth. They also contain no irritants or harsh chemicals, which is good for both your skin and the environment.[4]
- On a weekly basis, soak your loofah in a solution made up of warm water and a few drops of pure essential oils. You can purchase essential oils from most health food stores.
-
5
Microwave it to kill the germs. Your microwave is a powerful weapon in killing germs and infection causing bacteria. You can periodically microwave a synthetic loofah for two minutes to decontaminate it.
- Before placing the loofah in microwave, make sure it is completely wet and does not contain any metal parts to avoid the risk of fire.[5]
- Before placing the loofah in microwave, make sure it is completely wet and does not contain any metal parts to avoid the risk of fire.[5]
-
6
Wash your loofah in the washing machine. Go ahead and give your loofah a spin in your washing machine! You should wash it every week in cold water using a mild or gentle cycle. Do not put the sponge in the dryer as the natural fibers will melt.[6]


Advertisement
-
1
Know when it’s time to throw it away. Avoid becoming so attached to your loofah that you keep it around when it’s no longer safe to use. Discard your loofah if you notice mold growth or if it smells mildewy or musty. Doing so will help prevent you from catching a nasty skin infection.
- Replace a natural loofah every three to four weeks. Synthetic loofahs can be used for up to two months.[7]
- Replace a natural loofah every three to four weeks. Synthetic loofahs can be used for up to two months.[7]
-
2
Decide on whether to purchase a natural or synthetic loofah. There are many different natural and synthetic loofah products on the market. Be aware that loofahs made from natural substances do not last as long as those used in synthetic sponges. Synthetic sponges will last longer on average and require less maintenance.
-
3
Consider an alternative to a loofah. Loofahs are a favorite bath and shower accessory for many people; however, because of all the nooks and crannies in a loofah, it is very susceptible in breeding bacteria. You might want to consider ditching the use of loofahs for a more sanitary alternative instead.
- Washcloths tend to be used more frequently and easier to wash and dry. In addition they accumulate less bacteria due to their physical structure.[8]
If you can’t bare to part with your loofah, then alternate days between using a washcloth and a loofah.
- Washcloths tend to be used more frequently and easier to wash and dry. In addition they accumulate less bacteria due to their physical structure.[8]


Advertisement
Ask a Question
200 characters left
Include your email address to get a message when this question is answered.
Submit
Advertisement
References
About This Article
Article SummaryX
To clean your loofah or natural sponge, rinse and squeeze it out after each use. Then, store it in a cool, dry place so it doesn’t grow bacteria. Once a week, you should also disinfect it. You can do this by soaking it for 5 minutes in diluted bleach or a diluted essential oil. Or, microwave it for 2 minutes while it’s wet, which will kill any bacteria gathered on it. You can also wash your loofah in the washing machine, but don’t put it in the dryer, since this can melt its natural fibers. For more tips from our co-author, including how often to replace your loofah, read on!
Did this summary help you?
Thanks to all authors for creating a page that has been read 185,081 times.
Reader Success Stories
-

«I did not know that you had to replace your loofah that soon after use.»
Did this article help you?
![]()
Download Article
![]()
Download Article
A loofah, also known as a sponge, is used for exfoliating dead skin and as a general-purpose sponge for personal hygiene. There are natural loofahs, which come from the fibrous skeleton of the loofah fruit, and loofahs made from plastic and synthetic material. Over time, a loofah’s tiny nooks and crannies fill with nasty bacteria and fungi. That’s why it’s important to keep your loofah sanitary so it remains safe to use.
-
1
Rinse it well. Rinse your loofah well after each use and squeeze and shake out excess water.[1]
-
2
Keep it dry. Bacteria loves growing in wet places, so keep your loofah dry to prevent it from becoming a breeding ground for nasty germs that cause folliculitis, yeast, and fungal infections.[2]
Once you’ve rinsed your loofah, store it in a cool, dry place.Advertisement
-
3
Disinfect it. Loofahs start out hygienic, but the accumulation of dead skin cells and storage in humid environments turns it into a bacteria haven. Soak your loofah in diluted bleach for five minutes each week to kill bacteria and germs.[3]
-
4
Use essential natural oils. Essential oils have antimicrobial properties that help deter bacterial growth. They also contain no irritants or harsh chemicals, which is good for both your skin and the environment.[4]
- On a weekly basis, soak your loofah in a solution made up of warm water and a few drops of pure essential oils. You can purchase essential oils from most health food stores.
-
5
Microwave it to kill the germs. Your microwave is a powerful weapon in killing germs and infection causing bacteria. You can periodically microwave a synthetic loofah for two minutes to decontaminate it.
- Before placing the loofah in microwave, make sure it is completely wet and does not contain any metal parts to avoid the risk of fire.[5]
- Before placing the loofah in microwave, make sure it is completely wet and does not contain any metal parts to avoid the risk of fire.[5]
-
6
Wash your loofah in the washing machine. Go ahead and give your loofah a spin in your washing machine! You should wash it every week in cold water using a mild or gentle cycle. Do not put the sponge in the dryer as the natural fibers will melt.[6]
Advertisement
-
1
Know when it’s time to throw it away. Avoid becoming so attached to your loofah that you keep it around when it’s no longer safe to use. Discard your loofah if you notice mold growth or if it smells mildewy or musty. Doing so will help prevent you from catching a nasty skin infection.
- Replace a natural loofah every three to four weeks. Synthetic loofahs can be used for up to two months.[7]
- Replace a natural loofah every three to four weeks. Synthetic loofahs can be used for up to two months.[7]
-
2
Decide on whether to purchase a natural or synthetic loofah. There are many different natural and synthetic loofah products on the market. Be aware that loofahs made from natural substances do not last as long as those used in synthetic sponges. Synthetic sponges will last longer on average and require less maintenance.
-
3
Consider an alternative to a loofah. Loofahs are a favorite bath and shower accessory for many people; however, because of all the nooks and crannies in a loofah, it is very susceptible in breeding bacteria. You might want to consider ditching the use of loofahs for a more sanitary alternative instead.
- Washcloths tend to be used more frequently and easier to wash and dry. In addition they accumulate less bacteria due to their physical structure.[8]
If you can’t bare to part with your loofah, then alternate days between using a washcloth and a loofah.
- Washcloths tend to be used more frequently and easier to wash and dry. In addition they accumulate less bacteria due to their physical structure.[8]
Advertisement
Ask a Question
200 characters left
Include your email address to get a message when this question is answered.
Submit
Advertisement
References
About This Article
Article SummaryX
To clean your loofah or natural sponge, rinse and squeeze it out after each use. Then, store it in a cool, dry place so it doesn’t grow bacteria. Once a week, you should also disinfect it. You can do this by soaking it for 5 minutes in diluted bleach or a diluted essential oil. Or, microwave it for 2 minutes while it’s wet, which will kill any bacteria gathered on it. You can also wash your loofah in the washing machine, but don’t put it in the dryer, since this can melt its natural fibers. For more tips from our co-author, including how often to replace your loofah, read on!
Did this summary help you?
Thanks to all authors for creating a page that has been read 185,081 times.
Reader Success Stories
-
«I did not know that you had to replace your loofah that soon after use.»
Did this article help you?
Убираем мочалки в сторону. Дерматологи рассказали, почему лучше использовать другие средства
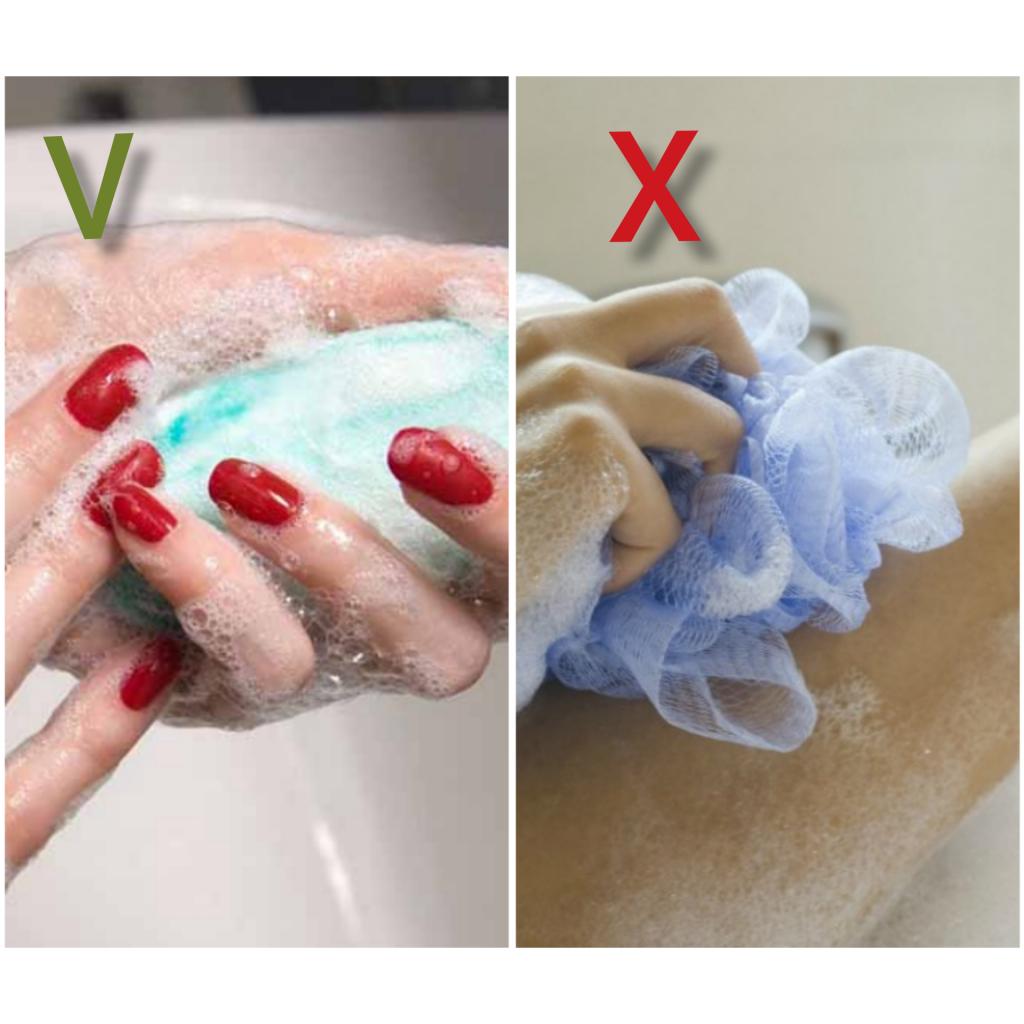
Нет ничего более приятного, чем погрузиться в теплую ванну или принять душ после долгого и сложного дня. В рамках повседневного ухода за собой у вас, вероятно, есть несколько любимых продуктов для заботы о вашей коже. Но в вашей ванной наверняка есть вещь, которая может принести больше вреда, чем пользы, и это ваша мочалка. Люди используют этот аксессуар для удаления омертвевшей кожи с начала двадцатого века, но сегодня дерматологи говорят о том, что он вреден для кожи. Более того, мочалка может стать причиной довольно пугающих инфекций. Вот почему не рекомендуется принимать душ с мочалкой!
Ваша мочалка — питательная среда для бактерий
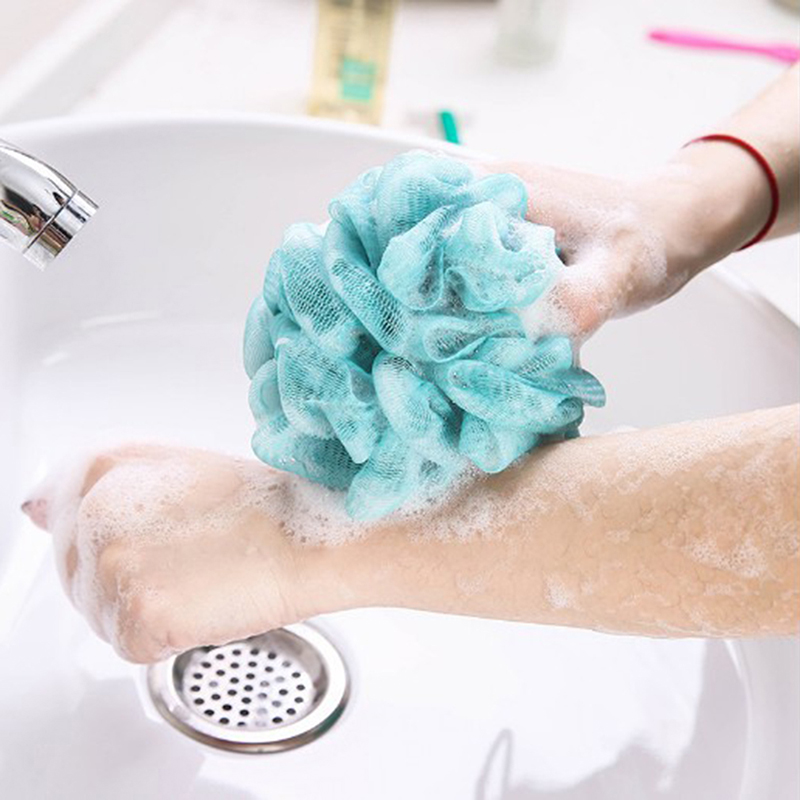
Как отмечают дерматологи, мочалки изготовлены из многослойного материала. Это делает их отличным аксессуаром для чистки, но в то же время превращает их в идеальное место для размножения бактерий.
Плесень может скапливаться как в мочалках, так и в губках, добавьте к этому микробы, отмершие клетки кожи и остатки грязи, жир и грязь, которые мы смываем с наших тел… Неудивительно, что это может вызвать инфекцию.
Найдите другое (лучшее) отшелушивающее средство
Мочалки и губки не единственный вариант отшелушивания клеток кожи. Просто загляните в магазин косметики и подберите подходящий вам вариант очищения. Лучше всего для этой цели подойдут натуральные скрабы и гели для душа. Также подойдут приготовленные собственными руками средства с солью мелкого помола, эфирными маслами.
Что использовать вместо мочалки
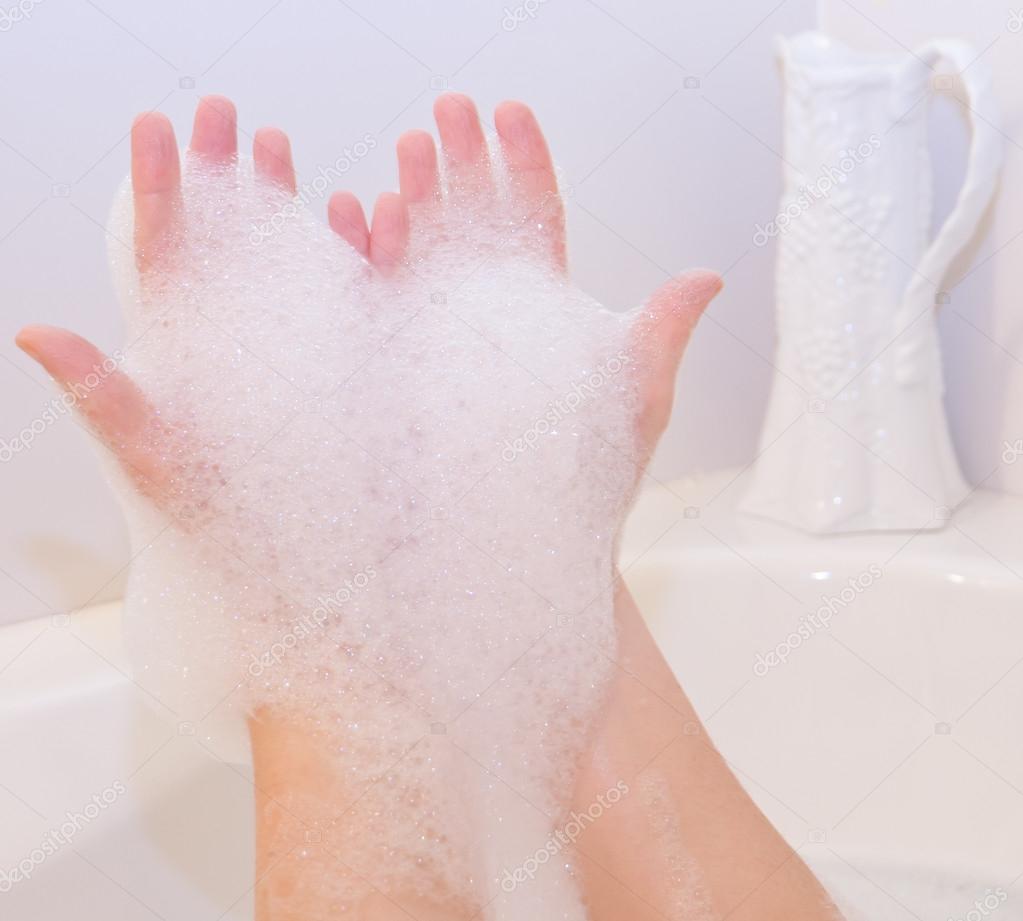
Специалисты говорят: вам вообще не нужно заменять свою мочалку чем-то другим. Вместо этого вы можете сэкономить свои деньги и сберечь свою кожу, используя руки. Это действительно лучший «инструмент» для очищения тела: их легко помыть, а если вы тщательно промоете их перед тем, как мыть свое тело, вы подвергаетесь меньшему риску, чем при использовании губки или мочалки.
Но если вам крайне важно тщательно очищать кожу, дерматологи советуют подобрать щетку для тела средней жесткости. Это лучший вариант, поскольку щетку легче чистить перекисью водорода и спиртом.
Если вы не готовы расстаться со своей мочалкой: полезные советы
Вы можете использовать мочалку и кипятить ее после каждого использования, говорят эксперты. Но даже в этом случае бактерии могут начать размножаться внутри, пока он сохнет после кипячения. Так что этот вариант сложно назвать самым безопасным. Специалисты также рекомендуют покупать мочалки для тела оптом, в больших количествах, и менять их как можно чаще.
Нашли нарушение? Пожаловаться на содержание