На экране Вашего монитора расположено большое количество разных папок и иконок, имеющих стандартный вид. Возможно, вам надоел их привычный вид, и вы захотели бы его сменить. Это возможно! Но для того чтобы это сделать, надо скачать некоторую коллекцию разных иконок для файлов и папок. Например эту.
Скачать набор иконок. В данном наборе иконки в двух форматах.
Как изменить иконку папки.
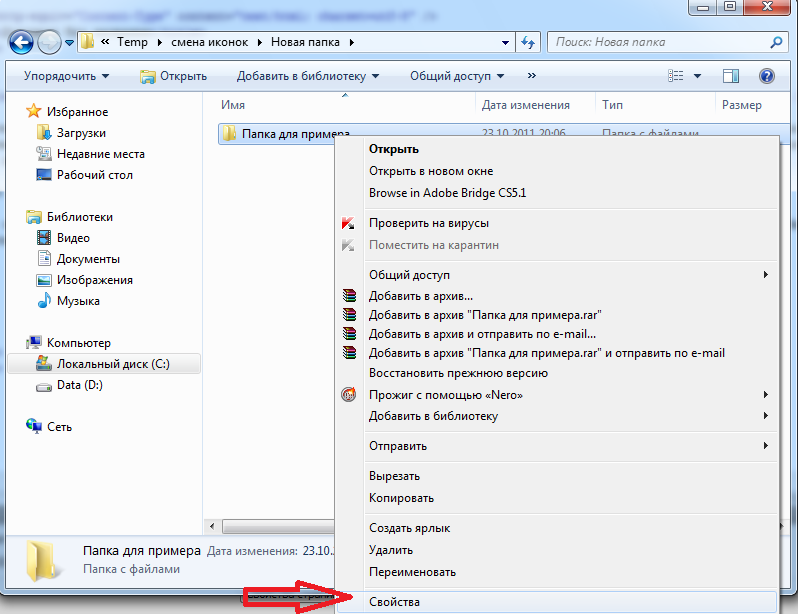
Для замены значка папки, наводим курсор на нужную папку и нажимаем правую кнопку мышки. Появится некоторый список. Выбираем в нем «Свойства».
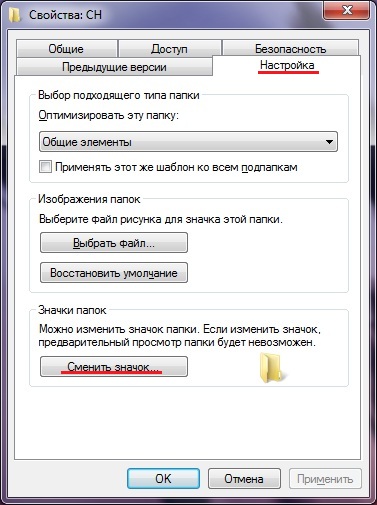
Далее надо перейти на вкладку «Настройка» и нажать «Сменить значок».

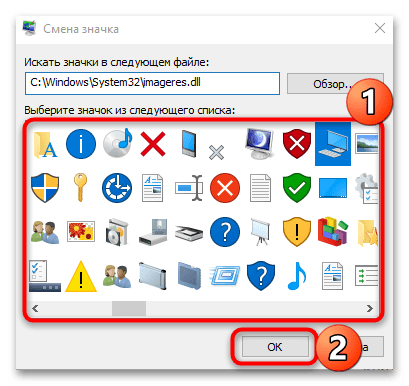
Появится окно с иконками. Вы можете выбрать понравившуюся иконку для папки с этого списка или выбрать иконку среди скаченных иконок.
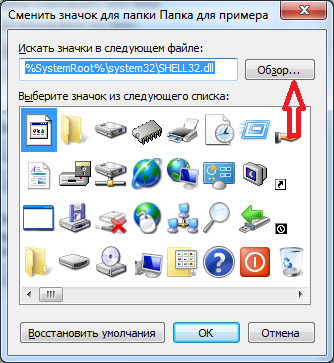
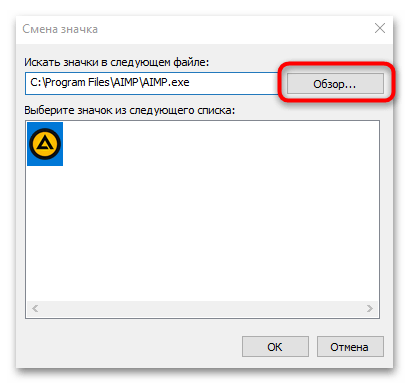
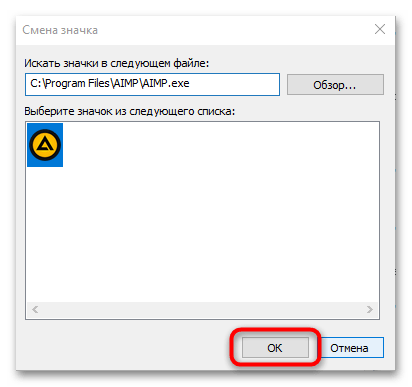
Если вы хотите выбрать иконку среди скаченных вами иконок, то для этого нажмите кнопку «Обзор», зайдите в папку с иконками, выберите среди них понравившуюся и нажмите «Открыть», потом в появляющихся окнах нажимайте «ОК» . Понравившаяся иконка применится для папки.

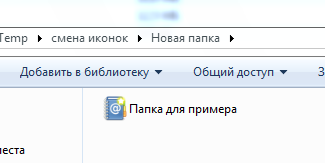
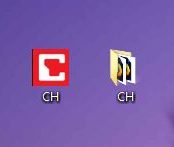
К примеру, привожу папку, которая у меня получилась.
Как изменить иконку файла?
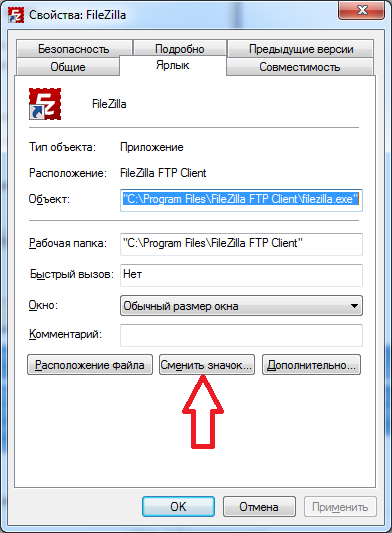
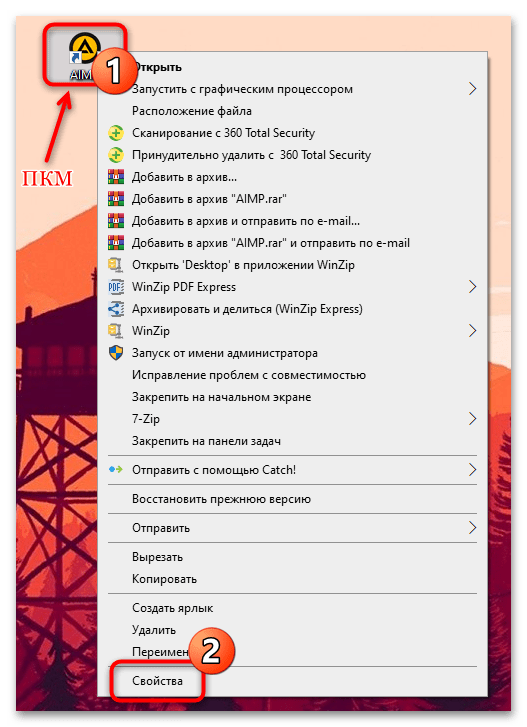
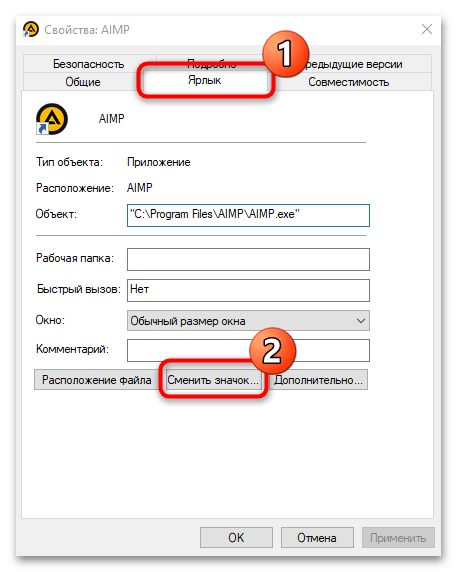
Поступаем аналогичным способом! Кликаете по файлу правой кнопкой мыши, заходите в раздел «Свойства», но здесь переходите на вкладку «Ярлык», нажимаете «Сменить значок».
Следуя этим не сложным правилам, Вы можете постепенно сменить все значки папок и файлов на те, которые вам больше нравятся. Значки папок все одинаковые, поэтому они чаще всего подлежат замене. Тогда Вы сможете отличать их не только по названию, но и по цвету и форме.
Создаем ярлык с относительным путем до программы на Windows
Теперь, когда вы навели порядок в значках для папок, нужно разобраться и с удобством их применения. Некоторые программы лучше использовать в портативной версии, чтобы в случае крайней нужды всегда иметь их под рукой, а именно: на флешке. Однако при этом папки с программами становятся похожими на свалку, а искать в них файл .exe для запуска становится неудобным. Решить эту проблему можно созданием отдельных ярлыков, размещенных в корне флешки. Эти «умные ребята» самостоятельно запускают все необходимые программы абсолютно на любом компьютере, вне зависимости от того, куда бы вы не поставили запоминающее устройство.
Обычные ярлыки, имеющие абсолютные ссылки, для такого ответственного дела не подойдут. Поэтому нам нужно будет попробовать создать ярлык со ссылкой относительной. Иными словами — той, которая будет сделана относительно нужного ярлыка. К счастью, этот способ довольно прост в осуществлении, а потому не поделиться им с вами было бы крайне нечестным. Давайте разберемся с этим на конкретных примерах.
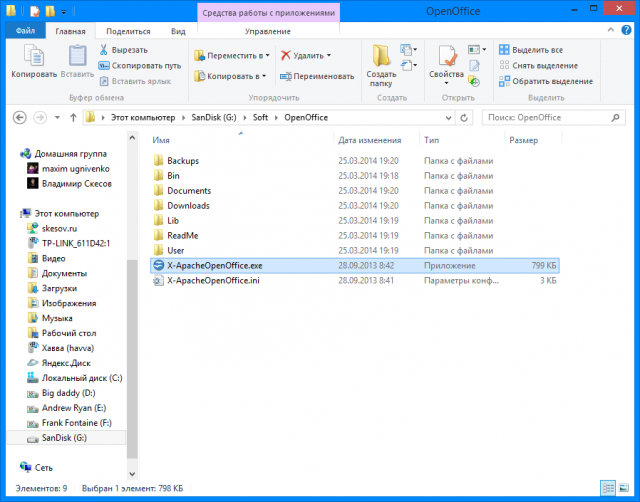
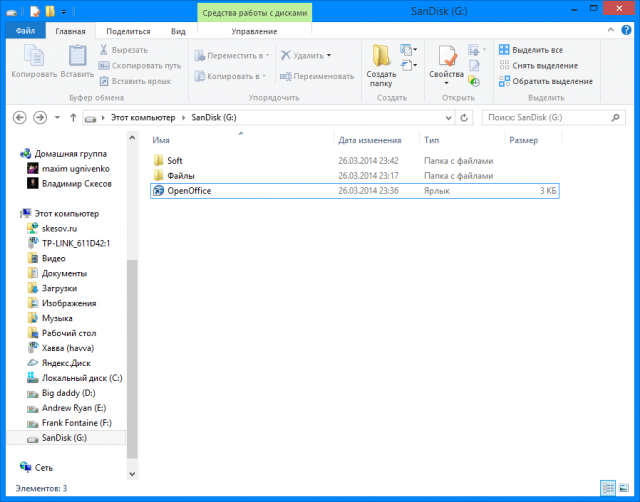
- Итак, мы хотим создать ссылку на определенный файл X-ApacheOpenOffice.exe. Он находится в папке под названием «флеш-карта:SoftOpenOffice». Именно этот ярлык вам и нужен в самой флешке.
- Вернитесь в ее корень и нажмите по пустому месту правой клавишей мышки. Теперь выберите функции «Создать» и «Ярлык».

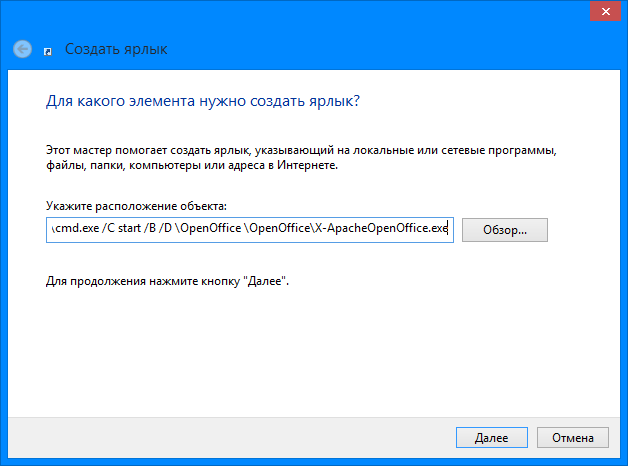
- После этого нам нужно указать путь к нему подобным образом:
%windir%system32cmd.exe /C start /B /D *путь до папки с программой* путь до папки с программой*название файла.exe*
Когда будете его прописывать, не забудьте указать и обратный слеш ««. В нашем случае это выглядит так:
%windir%system32cmd.exe /C start /B /D SoftOpenOffice SoftOpenOfficeX-ApacheOpenOffice.exe
Небольшая сноска: если вы решили расположить все ярлыки в отдельной папке, создав для этого в корне флешки дополнительную, укажите в командной строке, что ей нужно будет вернуться назад, на эту папку. Просто поставьте первым слешом точку «.». В нашем конкретном случае это выглядит так:
%windir%system32cmd.exe /C start /B /D .SoftOpenOffice .SoftOpenOfficeX-ApacheOpenOffice.exe
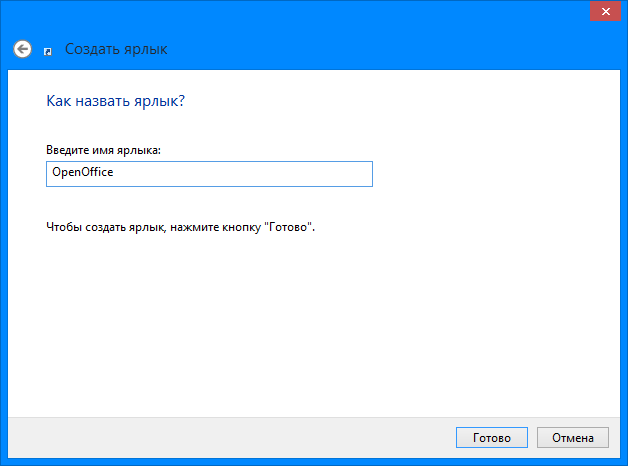
- Переходим в «Далее», затем вводим имя, предназначенное для нового ярлыка, и жмем «Готово».
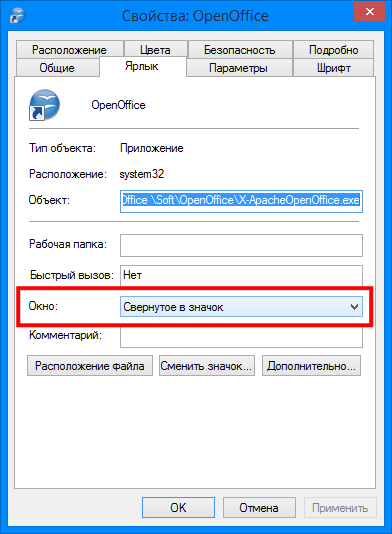
- Далее нужно открыть свойства нового ярлыка и перейти на вкладку «Ярлык«. Сразу же удалите содержимое «Рабочей папки».
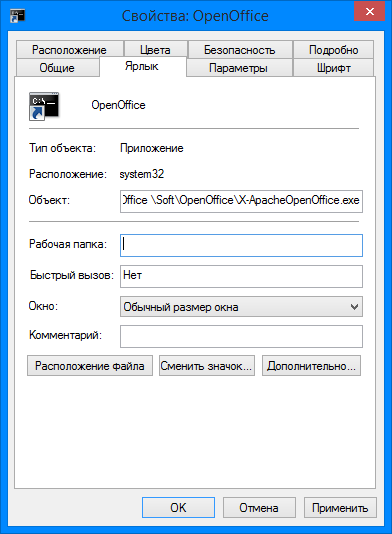
- Чтобы окно командной строки не отображалось при запуске, выберите в поле «Окно» функцию «Свернутое в значок»:
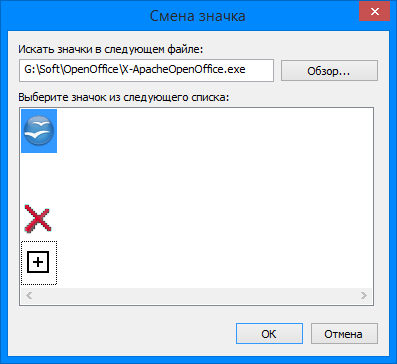
- Прямо на вкладке внизу окна нажимайте кнопку «Сменить значок», а потом в появившемся окошке откройте исполняющий файл программы, поскольку именно на нее мы и создаем ярлык. Отмечаем его и нажимаем «ОК» — так же, как и на окне свойств.
- Теперь ярлык самостоятельно сменит значок, а мы сможем запустить программу из корня флешки. Эту папку, вместе с программой и ярлыком, вы с легкостью перенесете в любое удобное место. При этом они будут нормально работать с сохранением относительного пути от ярлыка к рабочему исполняющему файлу.
Надеемся, что каждая наша статья помогает вам стать уверенней и не бояться никаких действий в работе с компьютером. Позитивного вам трудового настроения!
Содержание
- Вариант 1: Иконки системных приложений
- Вариант 2: Иконки пользовательских программ
- Вопросы и ответы
Вариант 1: Иконки системных приложений
Основные иконки – это системные значки «Этот компьютер», полная или пустая «Корзина», «Сеть». Изменить их можно через «Параметры» Windows 10:
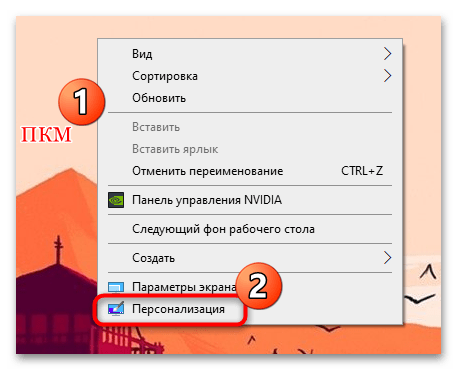
- Щелкните правой кнопкой мыши по свободной области на рабочем столе и из контекстного меню выберите пункт «Персонализация».
- В окне «Параметров» перейдите на вкладку «Темы», затем щелкните по строке «Параметры значков рабочего стола».
- В новом окошке выделите ту иконку, которую нужно сменить, затем нажмите на соответствующую кнопку ниже.
- Подберите понравившийся значок, затем подтвердите действие, нажав на кнопку «ОК».


Также можно найти любые другие значки через «Проводник», если нажать на кнопку «Обзор» и указать путь к файлам. Значки должны быть в формате ICO.

Вариант 2: Иконки пользовательских программ
Обычно на рабочем столе используются ярлыки приложений, поскольку исполняемый файл всегда находится в корневой папке программы и изменять его не следует. Поставить другую иконку для ярлыка можно с помощью штатных средств и сторонних решений. Сперва расскажем о первом методе:
- Щелкните правой кнопкой мыши по ярлыку приложения и из контекстного меню выберите пункт «Свойства».
- Перейдите на вкладку «Ярлык» и нажмите на кнопку «Сменить значок».
- Если приложение подразумевает другие иконки (эта возможность есть далеко не у каждой программы), которые можно применить, то в окне отобразятся варианты. В другом случае нажмите на кнопку «Обзор». Укажите через «Проводник» путь к изображению и выберите его.
- Нажмите на кнопку «ОК», чтобы изменения вступили в силу.
После этого на рабочем столе или в папке ярлык приложения будет тот, который выбрал пользователь через его свойства.
Читайте также: Изменение значков папки на ПК с Windows 10
Если штатное средство не подходят, можно воспользоваться специальными программами, предназначенными для кастомизации ОС, а именно — для установки новых иконок. В нашем отдельном материале есть более подробное описание таких приложений, инструкции по их использованию, а также ссылки на скачивание.
Подробнее: Устанавливаем новые иконки в Windows 10

Еще статьи по данной теме:
Помогла ли Вам статья?
![]()
Download Article
An in-depth guide to editing the size and image of your Windows desktop icons
![]()
Download Article
- Showing or Hiding Desktop Icons
- Resizing Desktop Icons
- Changing System Desktop Icons
- Changing Shortcut and Folder Icons
- Adding Shortcuts to the Desktop
- Creating Icon Images
- Downloading Icons
- Q&A
- Tips
- Warnings
|
|
|
|
|
|
|
|
|
Do you want to customize the appearance of the icons on your Windows desktop? You can adjust icons by using the «Properties» options or you make new desktop icons entirely. You’ll only be able to change the icon for system desktop icons, folders, and shortcuts. This wikiHow will show you how to change a desktop icon’s appearance and how to download or create a custom icon on your Windows computer.
Things You Should Know
- Right-click the desktop. Hover over «View», then uncheck «Show desktop icons» to hide them.
- Right-click the desktop, hover over «View», then select a new icon size.
- To change icons, right-click the folder or shortcut. Click «Properties» → «Customize/Shortcut» → «Change Icon».
-

1
-
2
Hover your cursor over «View». This will be at the very top of the menu.
Advertisement
-
3
Click Show desktop icons. When this option in unchecked, all desktop icons will be hidden.
- To show desktop icons again, click Show desktop icons.
Advertisement
-
1
Right-click your desktop. For easier navigation, be sure to minimize all open windows.
- A pop-up menu will open.
-
2
Hover your cursor over «View». This will be at the very top of the menu.
-
3
Select your icon size. You can click Large icons, Medium icons, or Small icons. After clicking, your desktop icons will be changed immediately.
- You can also hold CTRL and scroll up or down on your mouse to increase or decrease the icon size.
Advertisement
-
1
Open Start
. Click the Windows logo in the bottom-left corner of the screen, or press the Windows key.[2]
-
2
Click Settings
. It’s in the lower-left side of the Start window.
-
3
Click Personalization. This is the monitor-shaped icon on the Windows Settings page.
- You can also access this page by right-clicking a blank space on the desktop and then clicking Personalization in the drop-down menu.
-
4
Click Themes. It’s a tab on the left side of the Personalization window.
-
5
Click Desktop icon settings. This link is in the upper-right side of the Themes page. Clicking it opens the Desktop Icon Settings window.
- If you haven’t edited your theme at all, this link will be in the middle of the page beneath the «Related Settings» heading.
- You can also click Get more themes in the Store below the «Apply a theme» heading to browse desktop themes. Some themes will change your desktop icons’ appearances.
-
6
Click an icon you want to change. This will select the icon.
- For example, you might click This PC or Recycle Bin.
- You can also check the box next to a desktop icon’s name at the top of the window to make it appear on your desktop, or uncheck the box to remove it from the desktop.
- Check the «Allow themes to change desktop icons» box on this window to enable theme-related icon changes.
-
7
Click Change Icon. It’s near the bottom of the window.
-
8
Select an icon. You can select two different types of icons:
- System icon: Click an icon in the window.
- Custom icon: Click Browse, then click the folder that your custom icons are in on the left side of the window. Select the icon you want to use, then click Open.
-
9
Click OK. This will assign your selected icon to the desktop program.
-
10
Click Apply, then click OK. Doing so confirms your decision and changes the desktop program’s icon to your selected icon.


Advertisement
-
1
Open the File Explorer
. You can find this icon at the lower-left side of your taskbar, or you can press the Start menu and search for File Explorer.
- You cannot change the icons of specific files (e.g., Notepad files or .exe files) using this method. You’ll only be able to customize desktop shortcuts and folders with this method.
-
2
Click Desktop. It’s a folder in the left-hand column of options in the File Explorer window.
- This may already be pinned under Quick access.
-
3
Click a shortcut or folder icon. Shortcut icons have a white box with an arrow in their lower-left corners.
-
4
Click the Home tab. It’s in the upper-left corner of the File Explorer window. Doing so will open a toolbar at the top of the window.
-
5
Click Properties. This is a white box with a red checkmark in the «Open» section of the toolbar.
- You can also right-click on the icon on your desktop and then click Properties to get to this menu.
- If the icon is pinned to your task bar, you can right-click it and click Properties to get this menu.
-
6
Click Customize or Shortcut. This will be located at the top of the Properties window.
- Shortcut: Click the Shortcut tab at the top of the Properties window.
- Folder: Click the Customize tab at the top of the Properties window.
-
7
Click Change Icon. This will be near the bottom of the window.
-
8
Select an icon. You can select two different types of icons:
- System icon — Click an icon in the window.
- Custom icon — Click Browse, then click the folder that your custom icons are in on the left side of the window. Select the icon you want to use, then click Open.
-
9
Click OK. This will assign your selected icon.
-
10
Click Apply, then click OK. Doing so confirms your decision and changes the original icon to your selected icon.

Advertisement
-
1
Open the File Explorer
. You can find this icon at the lower-left side of your taskbar, or you can press the Start menu and search for File Explorer.
-
2
Click the Desktop folder. It’s on the left side of the File Explorer window.
- This may already be pinned under Quick access.
-
3
Click the Home tab. You’ll find this tab in the upper-left side of the File Explorer window.
-
4
Click New item. It’s in the «New» section of the tool bar at the top of the window.
-
5
Click Shortcut. This option is in the New item drop-down menu. A window with options for your new shortcut will appear.
-
6
Click Browse. It’s in the middle of the page. Doing so opens a pop-up window.
-
7
Scroll down and click the program’s or file’s folder. For example, if the program or file is in the Documents folder, you’d click My Documents.
- You may have to click through several different folders to find the program or file for which you want to create a shortcut.
-
8
Click OK. Doing so sets the desktop shortcut’s target as your selected item.
- If you rename the desktop icon or move it to a new folder, your shortcut will no longer work.
-
9
Click Next, then enter a name. The default name for the shortcut is the same name as the program itself.
-
10
Click Finish. It’s in the bottom-right corner of the window. This will create your shortcut in the folder you selected.
Advertisement
-
1
Open the Paint application on your computer. If you don’t have the Paint application, you can download it from the Microsoft Store.
- Use this method if you want to create custom icons.
-
2
Click File. It’s a blue button in the upper-left corner of the Paint window.
-
3
Click Open. This option is in the File menu. Doing so opens a window where you can open a file location.
- If you’d rather create your own icon by drawing in Paint, skip this step and instead create your drawing.
-
4
Select a picture. You may have to click a location on the left side of the Open window (e.g., Pictures) to find the picture you want to open.
- Skip this step if you’re drawing your own icon.
-
5
Click Open. This will open your image in the Paint window.
- Skip this step if you’re drawing your own icon.
-
6
Click File again. It’s in the top-left corner of Paint.
-
7
Select Save as. This option is near the top of the File menu.
-
8
Click BMP picture. It’s an option to the right of the Save as button. Doing so opens a Save As window where you can name your file.
-
9
Type in your file’s name followed by
.ico. This will ensure that your file is saved as an icon file.- For example, you might name your file «shortcut.ico».
-
10
Navigate to a save location. Do so in the left-hand pane of the Save As window.
- The Pictures folder is a safe place to save your shortcut file.
-
11
Click Save. It’s at the bottom of the window. Doing so will save your icon in your selected folder.
-
12
Change a program’s icon using your created icon. You’ll use the Browse method and select your custom icon from the folder where you saved it.
Advertisement
-
1
Open a web browser. Microsoft Edge is the official Windows 10 browser, though you can use Google Chrome, Firefox, Opera, or another browser.
-
2
Search for Windows icons. Type «download windows desktop icons» into your browser’s address bar or a search engine and press Enter.
- You can narrow your search by entering the program’s name (e.g., «Windows my computer icon») or by using the icon file type (e.g., «ICO»).
- Some popular icon websites include:
- https://www.flaticon.com/
- https://feathericons.com/
- https://fontawesome.com/
- https://boxicons.com/
-
3
Download the icons you want. You can do this by opening a site that has your icons and clicking the Download button. Doing so will save the icons to your computer.
- If you download multiple icons at once, you may have to extract the icons to a regular folder before continuing.
-
4
Open the File Explorer
. You can find this icon at the lower-left side of your taskbar, or you can press the Start menu and search for File Explorer.
-
5
Click Desktop. This folder is on the left side of File Explorer.
-
6
Click your icons folder. Doing so selects it.
- If you just downloaded one icon, select the icon instead.
-
7
Click Home. This tab is in the upper-left corner of the File Explorer window.
-
8
Click Move to. It’s in the «Organize» section of the toolbar at the top of the File Explorer window.
-
9
Click Pictures. This folder is near the middle of the pop-up window.
- You can select any folder on your computer if you don’t want to place your icons in Pictures.
-
10
Click Move. This will send your icons to a folder where you won’t move or delete them.
-
11
Change a program’s icon using your downloaded icon. You’ll use the Browse method and then select an icon from within the Pictures folder to do this.
Advertisement
Add New Question
-
Question
I lost the icon for my email. How do I get it back on my desktop?

Click on your Windows key and type your email program. Then, just drag it onto your desktop.
-
Question
How do I change the background of icon names on my desktop in XP?
Highlight then right-click, and a list of things should pop up. Click on «change.»
-
Question
How do I put icons on my desktop from a program?
If on windows, search using the windows key for the program and then drag and drop it onto your desktop.
See more answers
Ask a Question
200 characters left
Include your email address to get a message when this question is answered.
Submit
Advertisement
-
Some themes will change your desktop icons. To enable this feature, open the Desktop Icon Settings window from within Personalization, then check the «Allow themes to change desktop icons» box and click OK.
-
You can find themes for Windows 10 in the Store, which is an app that comes preinstalled on Windows 10.
Thanks for submitting a tip for review!
Advertisement
-
If you move or delete an icon file, the program you were using the file with will stop displaying the icon.
Advertisement
About This Article
Article SummaryX
1. Click the Start menu and select Settings.
2. Click Personalization.
3. Click Themes.
4. Click Desktop icon settings.
5. Select an icon to change.
6. Click Change Icon.
7. Select a new icon and click OK.
8. Click OK.
Did this summary help you?
Thanks to all authors for creating a page that has been read 2,287,828 times.
Is this article up to date?
![]()
Download Article
An in-depth guide to editing the size and image of your Windows desktop icons
![]()
Download Article
- Showing or Hiding Desktop Icons
- Resizing Desktop Icons
- Changing System Desktop Icons
- Changing Shortcut and Folder Icons
- Adding Shortcuts to the Desktop
- Creating Icon Images
- Downloading Icons
- Q&A
- Tips
- Warnings
|
|
|
|
|
|
|
|
|
Do you want to customize the appearance of the icons on your Windows desktop? You can adjust icons by using the «Properties» options or you make new desktop icons entirely. You’ll only be able to change the icon for system desktop icons, folders, and shortcuts. This wikiHow will show you how to change a desktop icon’s appearance and how to download or create a custom icon on your Windows computer.
Things You Should Know
- Right-click the desktop. Hover over «View», then uncheck «Show desktop icons» to hide them.
- Right-click the desktop, hover over «View», then select a new icon size.
- To change icons, right-click the folder or shortcut. Click «Properties» → «Customize/Shortcut» → «Change Icon».
-
1
-
2
Hover your cursor over «View». This will be at the very top of the menu.
Advertisement
-
3
Click Show desktop icons. When this option in unchecked, all desktop icons will be hidden.
- To show desktop icons again, click Show desktop icons.
Advertisement
-
1
Right-click your desktop. For easier navigation, be sure to minimize all open windows.
- A pop-up menu will open.
-
2
Hover your cursor over «View». This will be at the very top of the menu.
-
3
Select your icon size. You can click Large icons, Medium icons, or Small icons. After clicking, your desktop icons will be changed immediately.
- You can also hold CTRL and scroll up or down on your mouse to increase or decrease the icon size.
Advertisement
-
1
Open Start
. Click the Windows logo in the bottom-left corner of the screen, or press the Windows key.[2]
-
2
Click Settings
. It’s in the lower-left side of the Start window.
-
3
Click Personalization. This is the monitor-shaped icon on the Windows Settings page.
- You can also access this page by right-clicking a blank space on the desktop and then clicking Personalization in the drop-down menu.
-
4
Click Themes. It’s a tab on the left side of the Personalization window.
-
5
Click Desktop icon settings. This link is in the upper-right side of the Themes page. Clicking it opens the Desktop Icon Settings window.
- If you haven’t edited your theme at all, this link will be in the middle of the page beneath the «Related Settings» heading.
- You can also click Get more themes in the Store below the «Apply a theme» heading to browse desktop themes. Some themes will change your desktop icons’ appearances.
-
6
Click an icon you want to change. This will select the icon.
- For example, you might click This PC or Recycle Bin.
- You can also check the box next to a desktop icon’s name at the top of the window to make it appear on your desktop, or uncheck the box to remove it from the desktop.
- Check the «Allow themes to change desktop icons» box on this window to enable theme-related icon changes.
-
7
Click Change Icon. It’s near the bottom of the window.
-
8
Select an icon. You can select two different types of icons:
- System icon: Click an icon in the window.
- Custom icon: Click Browse, then click the folder that your custom icons are in on the left side of the window. Select the icon you want to use, then click Open.
-
9
Click OK. This will assign your selected icon to the desktop program.
-
10
Click Apply, then click OK. Doing so confirms your decision and changes the desktop program’s icon to your selected icon.
Advertisement
-
1
Open the File Explorer
. You can find this icon at the lower-left side of your taskbar, or you can press the Start menu and search for File Explorer.
- You cannot change the icons of specific files (e.g., Notepad files or .exe files) using this method. You’ll only be able to customize desktop shortcuts and folders with this method.
-
2
Click Desktop. It’s a folder in the left-hand column of options in the File Explorer window.
- This may already be pinned under Quick access.
-
3
Click a shortcut or folder icon. Shortcut icons have a white box with an arrow in their lower-left corners.
-
4
Click the Home tab. It’s in the upper-left corner of the File Explorer window. Doing so will open a toolbar at the top of the window.
-
5
Click Properties. This is a white box with a red checkmark in the «Open» section of the toolbar.
- You can also right-click on the icon on your desktop and then click Properties to get to this menu.
- If the icon is pinned to your task bar, you can right-click it and click Properties to get this menu.
-
6
Click Customize or Shortcut. This will be located at the top of the Properties window.
- Shortcut: Click the Shortcut tab at the top of the Properties window.
- Folder: Click the Customize tab at the top of the Properties window.
-
7
Click Change Icon. This will be near the bottom of the window.
-
8
Select an icon. You can select two different types of icons:
- System icon — Click an icon in the window.
- Custom icon — Click Browse, then click the folder that your custom icons are in on the left side of the window. Select the icon you want to use, then click Open.
-
9
Click OK. This will assign your selected icon.
-
10
Click Apply, then click OK. Doing so confirms your decision and changes the original icon to your selected icon.
Advertisement
-
1
Open the File Explorer
. You can find this icon at the lower-left side of your taskbar, or you can press the Start menu and search for File Explorer.
-
2
Click the Desktop folder. It’s on the left side of the File Explorer window.
- This may already be pinned under Quick access.
-
3
Click the Home tab. You’ll find this tab in the upper-left side of the File Explorer window.
-
4
Click New item. It’s in the «New» section of the tool bar at the top of the window.
-
5
Click Shortcut. This option is in the New item drop-down menu. A window with options for your new shortcut will appear.
-
6
Click Browse. It’s in the middle of the page. Doing so opens a pop-up window.
-
7
Scroll down and click the program’s or file’s folder. For example, if the program or file is in the Documents folder, you’d click My Documents.
- You may have to click through several different folders to find the program or file for which you want to create a shortcut.
-
8
Click OK. Doing so sets the desktop shortcut’s target as your selected item.
- If you rename the desktop icon or move it to a new folder, your shortcut will no longer work.
-
9
Click Next, then enter a name. The default name for the shortcut is the same name as the program itself.
-
10
Click Finish. It’s in the bottom-right corner of the window. This will create your shortcut in the folder you selected.
Advertisement
-
1
Open the Paint application on your computer. If you don’t have the Paint application, you can download it from the Microsoft Store.
- Use this method if you want to create custom icons.
-
2
Click File. It’s a blue button in the upper-left corner of the Paint window.
-
3
Click Open. This option is in the File menu. Doing so opens a window where you can open a file location.
- If you’d rather create your own icon by drawing in Paint, skip this step and instead create your drawing.
-
4
Select a picture. You may have to click a location on the left side of the Open window (e.g., Pictures) to find the picture you want to open.
- Skip this step if you’re drawing your own icon.
-
5
Click Open. This will open your image in the Paint window.
- Skip this step if you’re drawing your own icon.
-
6
Click File again. It’s in the top-left corner of Paint.
-
7
Select Save as. This option is near the top of the File menu.
-
8
Click BMP picture. It’s an option to the right of the Save as button. Doing so opens a Save As window where you can name your file.
-
9
Type in your file’s name followed by
.ico. This will ensure that your file is saved as an icon file.- For example, you might name your file «shortcut.ico».
-
10
Navigate to a save location. Do so in the left-hand pane of the Save As window.
- The Pictures folder is a safe place to save your shortcut file.
-
11
Click Save. It’s at the bottom of the window. Doing so will save your icon in your selected folder.
-
12
Change a program’s icon using your created icon. You’ll use the Browse method and select your custom icon from the folder where you saved it.
Advertisement
-
1
Open a web browser. Microsoft Edge is the official Windows 10 browser, though you can use Google Chrome, Firefox, Opera, or another browser.
-
2
Search for Windows icons. Type «download windows desktop icons» into your browser’s address bar or a search engine and press Enter.
- You can narrow your search by entering the program’s name (e.g., «Windows my computer icon») or by using the icon file type (e.g., «ICO»).
- Some popular icon websites include:
- https://www.flaticon.com/
- https://feathericons.com/
- https://fontawesome.com/
- https://boxicons.com/
-
3
Download the icons you want. You can do this by opening a site that has your icons and clicking the Download button. Doing so will save the icons to your computer.
- If you download multiple icons at once, you may have to extract the icons to a regular folder before continuing.
-
4
Open the File Explorer
. You can find this icon at the lower-left side of your taskbar, or you can press the Start menu and search for File Explorer.
-
5
Click Desktop. This folder is on the left side of File Explorer.
-
6
Click your icons folder. Doing so selects it.
- If you just downloaded one icon, select the icon instead.
-
7
Click Home. This tab is in the upper-left corner of the File Explorer window.
-
8
Click Move to. It’s in the «Organize» section of the toolbar at the top of the File Explorer window.
-
9
Click Pictures. This folder is near the middle of the pop-up window.
- You can select any folder on your computer if you don’t want to place your icons in Pictures.
-
10
Click Move. This will send your icons to a folder where you won’t move or delete them.
-
11
Change a program’s icon using your downloaded icon. You’ll use the Browse method and then select an icon from within the Pictures folder to do this.
Advertisement
Add New Question
-
Question
I lost the icon for my email. How do I get it back on my desktop?
Click on your Windows key and type your email program. Then, just drag it onto your desktop.
-
Question
How do I change the background of icon names on my desktop in XP?
Highlight then right-click, and a list of things should pop up. Click on «change.»
-
Question
How do I put icons on my desktop from a program?
If on windows, search using the windows key for the program and then drag and drop it onto your desktop.
See more answers
Ask a Question
200 characters left
Include your email address to get a message when this question is answered.
Submit
Advertisement
-
Some themes will change your desktop icons. To enable this feature, open the Desktop Icon Settings window from within Personalization, then check the «Allow themes to change desktop icons» box and click OK.
-
You can find themes for Windows 10 in the Store, which is an app that comes preinstalled on Windows 10.
Thanks for submitting a tip for review!
Advertisement
-
If you move or delete an icon file, the program you were using the file with will stop displaying the icon.
Advertisement
About This Article
Article SummaryX
1. Click the Start menu and select Settings.
2. Click Personalization.
3. Click Themes.
4. Click Desktop icon settings.
5. Select an icon to change.
6. Click Change Icon.
7. Select a new icon and click OK.
8. Click OK.
Did this summary help you?
Thanks to all authors for creating a page that has been read 2,287,828 times.
Is this article up to date?
Креативный человек вряд ли согласиться работать с ярлыками, которые повторяются на всех компьютерах. Это только на первый взгляд кажется, что изменить эти маленькие рисуночки достаточно сложно. На самом деле, владея информацией, как поменять картинку ярлыка на рабочем столе, вы сможете впоследствии создавать новое изображение для значков конкретных программ хоть каждый день.

Смена надоевшего значка для ярлыка разнообразит рутину работы в Windows.
Главное, чтобы это не было утомительным для вас, а алгоритм действий, как поставить свою картинку на ярлык, или уже осуществить другое изменение, был понятен. Мы подтверждаем, что сложностей, действительно, нет, а результат работы вас порадует, поскольку рабочий стол станет креативным и не похожим ни на какие другие.
Изучайте рекомендации, как создать значок для ярлыка, и приступайте к действиям.
Процесс создания
Итак, каждая компьютерная программа имеет свой системный маленький рисунок, который появляется на рабочем столе, если вы пожелаете его создать. Однако одна и та же программа на рабочих столах разных компьютеров будет сопровождаться одинаковым изображением. Хорошо, если такое изображение вас полностью устраивает. Однако, к сожалению, некоторые пользователи сталкиваются с тем, что установленные значки вызывают негативные эмоции, раздражение.
Конечно, работать с таким негативом не следует, результативность будет низкой, а настроение постоянно ужасным. Лучше поменять картинку на подходящую иконку для ярлыка, которая будет тешить ваше персональное творческое воображение.
Алгоритм действий
Итак, нет необходимости спрашивать у своих знакомых, как создать иконку для ярлыка, но постоянно при этом натыкаться на безмолвное молчание, поскольку они сами только поверхностно владеют информацией, как изменить картинку ярлыка. Лучше сразу довериться опытным пользователям, изучить их рекомендации, как быстро поменять значок ярлыка.
Вам нужно просто умаститься поудобнее в кресле, прочитать все рекомендации, как создать значок, а затем сразу же приступить к выполнению практических действий. Первоначально следует выбрать тот объект, значок которого вам хочется поменять. Кликните по нему правой клавишей мышки, в открывшемся меню опустите свой взгляд вниз, там вы обнаружите строку «Свойства».

Кликните по этому параметру, чтобы открыть нужное нам диалоговое окно, в котором расположены шесть вкладок. Нам они все не нужны, нас интересует только вкладка «Ярлык», перейдите на эту вкладку.
ВНИМАНИЕ. Хочется отметить, что в большинстве случаев при открытии диалогового окна вы сразу попадаете на эту вкладку, только в самых исключительных случаях могут быть открыты другие вкладки.
Теперь мы вам снова предлагаем взгляд опустить ниже. Там будут расположены три кнопки, среди которых остановите свой выбор на средней кнопке «Сменить ярлык».
Именно эта кнопка нам нужна, если вы решились разобраться, как сменить значок любого ярлыка.
Итак, кликните по этой кнопке, чтобы открыть следующее важное окно, позволяющее приблизиться нам к цели, как сделать значок для ярлыка, ещё на один шаг.

Не спешите расстраиваться, увидев открывшееся окно, в котором система «любезно» предлагает сделать значок по вашему усмотрению, а сама полностью ограничивает выбор, предлагая только один значок, который уже и так установлен к программе.
Ничего страшного в этом нет, раз вы решились разобраться, как изменить, или как создать иконку, значит, следуйте уверенно до конца.

В этом окне вы найдёте кнопку «Обзор», воспользуйтесь ею, чтобы «проложить» путь к нужной нам директории, позволяющей не только разобраться, как сделать новый «рисуночек», но и практически всё это осуществить.

Указать вам придётся путь к подпапке «Shell32.dll», расположенной в системной папке «System32». А уж, где расположена эта папка, мы уверены, вы знаете. Если нет, то на всякий случай подсказываем, она находится в папке «Windows», расположенной на системном диске «C».
Вот теперь, когда вы проследовали по указанному пути, перед вами откроются множественные варианты всевозможных маленьких «рисуночков». Не пытайтесь их сосчитать, это просто отнимет у вас много времени, просто пересмотрите эту «коллекцию», выберите тот вариант, который вам больше всего импонирует.

Дальше, как сделать новый «рисуночек», как изменить его, вам будет совсем просто. Выделяете тот, что вам очень понравился, и нажимаете традиционную кнопку согласия «Ok».
Теперь можете смело закрывать все открытые окна и любоваться тем, что именно вам удалось получить оригинальный значок для программы. Кстати, точно также можно поменять изображение и папок, а не только специфических рисунков к программам.
После того как созданный вами креативный элемент будет приносить моральное удовлетворение, вам будет сложно удержаться от того, чтобы не заменить ещё какие-то ярлыки. Это ваше право, если желается, действуйте, тем более что, как изменить такие значки вы уже разобрались и не нуждаетесь в сторонней помощи.
Каждый хочет добавить индивидуальный подход к своему ПК с Windows или устройству. Некоторые меняют обои или тему Windows, другие добавляют всевозможные гаджеты и приложения. Вы сделали все это, но вы можете чувствовать, что этого недостаточно. Возможно, у некоторых из ваших программ есть какие-то уродливые значки, или вы больше не хотите видеть эти скучные папки. мы покажем, как вы можете изменить значки ваших ярлыков и сделать их лучше:
ПРИМЕЧАНИЕ. Данное руководство относится к Windows 10, Windows 7 и Windows 8.1.
Что такое иконка?
Перед тем, как начать, вам нужно скачать иконки, которые вы хотите использовать или создать свои собственные. Эти статьи могут помочь с поиском правильных значков:
- 5 мест, где вы можете скачать иконки бесплатно
- Где найти большинство собственных значков Windows 10?
- Загрузите логотип Windows 8 и другие значки Windows 8
Наиболее известным форматом файлов, используемым для значков в операционных системах Windows, является «* .ico». Файл «* .ico» хранит только один значок. Однако существуют типы файлов, в которых хранятся значки, которые вы можете использовать:
- «.exe» — значки могут быть встроены в исполняемые файлы программы. Исполняемый файл может хранить один или несколько значков.
- «.dll» — наборы иконок также могут быть встроены в файлы DLL (библиотеки динамической компоновки). «.Dll» может хранить один или несколько значков.
Только некоторые файлы «.exe» и «.dll» хранят значки в зависимости от того, как они были созданы их разработчиком. Напротив, файлы «* .ico» всегда будут содержать значок.
Как изменить значок ярлыка на файл, программу, приложение или папку
Если у вас есть ярлык на рабочем столе для файла, программы, приложения (из Магазина ) или папки, вы можете изменить его значок, выполнив следующие действия:
Если у вас есть значок, который вы хотите использовать, щелкните правой кнопкой мыши или нажмите и удерживайте ярлык, значок которого вы хотите изменить. Затем выберите Свойства .
![]()
На вкладке «Ярлык» нажмите или нажмите кнопку «Изменить значок».
![]()
Откроется окно «Изменить значок». Здесь у вас есть список с некоторыми значками, которые можно найти в Windows.
![]()
Вы можете выбрать другой значок из списка доступных значков и нажать «ОК», либо нажать или нажать кнопку «Обзор», чтобы найти только что загруженный значок. Чтобы выбрать значок из другого файла, перейдите на компьютер, выберите файл, содержащий новый значок, и нажмите «Открыть».
![]()
ПРИМЕЧАНИЕ. Microsoft рекомендует использовать значок размером 256×256 пикселей, чтобы он правильно отображался при использовании представления «Большие значки». Меньшие значки также работают, но они не выглядят великолепно при использовании этого представления.
Когда вы закончите, нажмите кнопку ОК.
![]()
Чтобы подтвердить изменение значка, нажмите кнопку ОК еще раз, на этот раз в окне свойств ярлыка.
![]()
Значок был изменен для вашего ярлыка.
Как поменять значок папки, в Windows
Ярлыки для папок также можно изменить. Перейдите туда, где находится ваша папка, и щелкните по ней правой кнопкой мыши (или нажмите и удерживайте на экране касанием). В контекстном меню выберите « Свойства» .
![]()
Откроется окно Свойства для выбранной папки. Там перейдите на вкладку « Настройка » и нажмите кнопку «Изменить значок» .
![]()
Список показан с иконками, которые доступны в Windows. Вы можете выбрать один из предоставленного вам списка и нажать OK или, вы можете нажать или нажать Обзор, перейти к файлу, содержащему значок, который вы хотите использовать, выбрать его и нажать Открыть.
![]()
Затем в окне «Изменить значок» нажмите «ОК» и еще раз нажмите «ОК», но в окне «Свойства» папки.
![]()
Значок теперь изменен для вашей папки.
Как изменить значок ярлыка, который указывает на сайт
Не многие пользователи знают, что вы можете создавать ярлыки для веб-сайтов на рабочем столе Windows, а также в других местах. Эти ярлыки позволяют быстро получить доступ к веб-сайтам, но они также используют значок веб-браузера по умолчанию. Если вы хотите знать, как создавать такие ярлыки, прочитайте это руководство: Как создавать ярлыки для приложений, файлов, папок и веб-страниц в Windows.
Если вы хотите изменить значок ярлыка на веб-сайт, щелкните правой кнопкой мыши или нажмите и удерживайте его. Затем выберите Свойства .
![]()
В окне « Свойства» убедитесь, что вы находитесь на вкладке « Веб-документ ». Там нажмите кнопку Изменить значок .
![]()
Откроется окно « Изменить значок» . Здесь нажмите или коснитесь Обзор, перейдите на компьютер и выберите файл, содержащий новый значок. Затем нажмите Открыть .
![]()
Нажмите OK дважды: один раз в окне « Изменить значок» и еще раз в окне « Свойства» ярлыка.
![]()
Откуда вы берете свои иконки?
Как вы можете видеть из этого урока, изменить значок любого ярлыка легко. Прежде чем закрыть его, мы бы хотели узнать, откуда у вас иконки, чтобы изменить внешний вид ваших ярлыков и папок.
1 звезда
2 звезды
3 звезды
4 звезды
5 звезд

Если вам надоели скучные папки и стандартные значки в Windows, поменяйте их — а еще лучше, сделайте свои, оригинальные. Мы покажем, как это провернуть.


 Перед тем как делать свои иконки, загляните в набор значков Windows — вдруг там будет то, что вы ищите. Наша инструкция подойдет для Windows 7 и 10.
- Щелкните правой кнопкой мыши на иконку, которую хотите изменить. В выпадающем меню выберите «Свойства» (Properties).
- В меню «Свойства» выберите вкладку «Настроить» (Customize).
- В последнем разделе «Значки папок» нажмите кнопку «Сменить значок» (Change Icon). Вы увидите все доступные иконки, которые можно поставить вместо текущей. Выберите нужную, нажмите «Применить» и «ОК», чтобы изменить значок.
Как сделать иконку для ярлыка Windows
Если вы не найдете ничего подходящего в наборе классических иконок, сделайте ее сами.
-
 Выберите картинку для будущей иконки. Мы взяли логотип CHIP. Откройте любой редактор изображений, можно даже Paint. Измените размер картинки до 64 х 64 пикс. и сохраните ее в формате bmp.
 - Используя нашу инструкцию, откройте настройки нужной папки или программы и в меню выбора нового значка нажмите «Обзор». Выберите созданный bmp-файл и установите его как иконку.
 Выберите картинку для будущей иконки. Мы взяли логотип CHIP. Откройте любой редактор изображений, можно даже Paint. Измените размер картинки до 64 х 64 пикс. и сохраните ее в формате bmp.
Больше советов для настройки Windows:
- Как переустановить Windows и не потерять лицензию?
- Как восстановить поврежденные системные файлы Windows
Была ли статья интересна?
При создании ярлыков иногда появляются значки по умолчанию, стандартные. По не известным причинам ярлык не хочет брать иконку от программы или игры. Также при создании ярлыков сайтов часто иконки создаются в виде белого листа, либо они маленькие на белом фоне, которые выглядят некрасиво. Или может вы просто хотите изменить картинку для ярлыка на собственную. В этом уроке я расскажу, как сделать, изменить и создать картинку для ярлыка на рабочем столе ОС Windows 7. Поехали.
Как сделать иконку для ярлыка
Давайте попробуем сначала создать иконку а потом уже менять. Ведь обычное изображение у формате PNG или JPEG у вас не получится поставить на ярлык, так как они не поддерживаются.
Так, как я хочу себе сделать иконку для ярлыка «одноклассники», я нашел через сервис «гугл картинки» подходящее изображение. Теперь нам нужно эту картинку преобразовать в ICO формат, перед этим сделав ее квадратной. В противном случае, она получится искаженной. Переходим на онлайн сервис http://image.online-convert.com/ru/convert-to-ico. Кликаем обзор и загружаем файл. После в дополнительных настройках выставляем размеры 128 на 128 пикселов. Нажимаем «Преобразовать файл».
Обратите внимание, что значки для ярлыка могут быть только такими размерами: 16х16, 32х32, 64х64 и 128х128 пикселов.

После нескольких секунд ожидания, у вас выскочит диалоговое окно с предложением сохранить уже готовый результат. Теперь обязательно создайте на диске D папку «Картинки для ярлыков» и сохраните или переместите туда все нужные изображения. Ведь, если вы замените иконку ярлыка, а после удалите эту картинку, то после перезагрузки компьютера она с ярлыка пропадет. А так, все будет храниться в одном месте и не удалите по ошибке.
Первый этап закончен. Мы смогли создать иконку для ярлыка и сохранить ее в определенную папку.

Добавляем картинку для ярлыка
В этом разделе урока мы уже будем изменять картинку ярлыка. Как видите на скриншоте ниже, у меня создался ярлык вообще с белым листом. Одним словом, меня это не впечатляет.
Иконку мы уже сделали в формате ICО в уроке выше. Теперь берем нужный ярлык и нам нем кликнем правой кнопкой мыши и выбираем «Свойства».
Читайте также: Как создать ярлык сайта на рабочий стол

Дальше в разделе «Документ Интернета» кликаем на «Сменить значек..»

В окне, что выскочило, вы можете также выбрать стандартные значки, которые присутствуют в системе Windows. Но мы хотим добавить свою иконку, нажимаем «Обзор» и идем в нашу созданную папку за картинкой.

Находим нашу иконку и нажимаем «Открыть»

Дальше нажимаем «ОК», и в следующем окне также применяем.

Вот и все. Теперь картинка «одноклассники» хорошо выглядит на ярлыке и сразу понятно, какая это ссылка.

Урок у видео формате