DigitalOcean provides cloud products for every stage of your journey. Get started with $200 in free credit!
SVG is a great format for icons. Vector formats look crisp and razor sharp, no matter the size or device — and we get tons of design control when using them inline.
SVG also gives us another powerful feature: the ability to manipulate their properties with CSS. As a result, we can make quick and simple interactions where it used to take crafty CSS tricks or swapping out entire image files.
Those interactions include changing color on hover states. It sounds like such a straightforward thing here in 2019, but there are actually a few totally valid ways to go about it — which only demonstrates the awesome powers of SVG more.
First off, let’s begin with a little abbreviated SVG markup:
<svg class="icon">
  <path .../>
</svg>
Target the .icon class in CSS and set the SVG fill property on the hover state to swap colors.
.icon:hover {
  fill: #DA4567;
}
This is by far the easiest way to apply a colored hover state to an SVG. Three lines of code!
SVGs can also be referenced using an <img> tag or as a background image. This allows the images to be cached and we can avoid bloating your HTML with chunks of SVG code. But the downside is a big one: we no longer have the ability to manipulate those properties using CSS. Whenever I come across non-inline icons, my first port of call is to inline them, but sometimes that’s not an option.
I was recently working on a project where the social icons were a component in a pattern library that everyone was happy with. In this case, the icons were being referenced from an <img> element. I was tasked with applying colored :focus and :hover styles, without adjusting the markup.
So, how do you go about adding a colored hover effect to an icon if it’s not an inline SVG?
CSS Filters
CSS filters allow us to apply a whole bunch of cool, Photoshop-esque effects right in the browser. Filters are applied to the element after the browser renders layout and initial paint, which means they fall back gracefully. They apply to the whole element, including children. Think of a filter as a lens laid over the top of the element it’s applied to.
These are the CSS filters available to us:
brightness(<number-percentage>);contrast(<number-percentage>);grayscale(<number-percentage>);invert(<number-percentage>);opacity(<number-percentage>);saturate(<number-percentage>);sepia(<number-percentage>);hue-rotate(<angle>);blur(<length>);drop-shadow(<length><color>);
All filters take a value which can be changed to adjust the effect. In most cases, this value can be expressed in either a decimal or percent units (e.g. brightness(0.5) or brightness(50%)).
Straight out of the box, there’s no CSS filter that allows us to add our own specific color.
We have hue-rotate(), but that only adjusts an existing color; it doesn’t add a color, which is no good since we’re starting with a monochromatic icon.
The game-changing bit about CSS filters is that we don’t have to use them in isolation. Multiple filters can be applied to an element by space-separating the filter functions like this:
.icon:hover {
  filter: grayscale(100%) sepia(100%);
}
If one of the filter functions doesn’t exist, or has an incorrect value, the whole list is ignored and no filter will be applied to the element.
When applying multiple filter functions to an element, their order is important and will affect the final output. Each filter function will be applied to the result of the previous operation.

So, in order to colorize our icons, we have to find the right combination.
To make use of hue-rotate(), we need to start off with a colored icon. The sepia() filter is the only filter function that allows us to add a color, giving the filtered element a yellow-brown-y tinge, like an old photo.
The output color is dependent on the starting tonal value:

In order to add enough color with sepia(), we first need to use invert() to convert our icon to a medium grey:
.icon:hover {
  filter: invert(0.5)
}![]()
We can then add the yellow/brown tone with sepia():
.icon:hover {
  filter: invert(0.5) sepia(1);
}![]()
…then change the hue with hue-rotate():
.icon:hover {
  filter: invert(0.5) sepia(1) hue-rotate(200deg);
}![]()
Once we have the rough color we want, we can tweak it with saturation() and brightness():
.icon:hover {
  filter:
    invert(0.5)
    sepia(1)
    hue-rotate(200deg)
    saturate(4)
    brightness(1);
}![]()
I’ve made a little tool for this to make your life a little easier, as this is a pretty confusing process to guesstimate.
See the Pen CSS filter example by Cassie Evans (@cassie-codes)
on CodePen.
Even with the tool, it’s still a little fiddly, not supported by Internet Explorer, and most importantly, you’re unable to specify a precise color.
Desktop
| Chrome | Firefox | IE | Edge | Safari |
|---|---|---|---|---|
| 18* | 35 | No | 79 | 6* |
Mobile / Tablet
| Android Chrome | Android Firefox | Android | iOS Safari |
|---|---|---|---|
| 109 | 109 | 4.4* | 6.0-6.1* |
So, what do we do if we need a specific hex code?
SVG Filters
If we need more precise control (and better browser support) than CSS filters can offer, then it’s time to turn to SVG.
Filters originally came from SVG. In fact, under the hood, CSS filters are just shortcuts to SVG filters with a particular set of values baked in.
Unlike CSS, the filter isn’t predefined for us, so we have to create it. How do we do this?
This is the syntax to define a filter:
<svg xmlns="<http://www.w3.org/2000/svg>" version="1.1">
  <defs>
    <filter id="id-of-your-filter">
      ...

      ...
    </filter>
    ...
  </defs>
</svg>
Filters are defined by a <filter> element, which goes inside the <defs> section of an SVG.
SVG filters can be applied to SVG content within the same SVG document. Or, the filter can be referenced and applied to HTML content elsewhere.
To apply an SVG filter to HTML content, we reference it the same way as a CSS filter: by using the url() filter function. The URL points to the ID of the SVG filter.
.icon:hover {
  filter: url('#id-of-your-filter');
}
The SVG filter can be placed inline in the document or the filter function can reference an external SVG. I prefer the latter route as it allows me to keep my SVG filters tidied away in an assets folder.
.icon:hover {
  filter: url('assets/your-SVG.svg#id-of-your-filter');
}
Back to the <filter> element itself.
<filter id="id-of-your-filter">
  ...

  ...
</filter>
Right now, this filter is empty and won’t do anything as we haven’t defined a filter primitive. Filter primitives are what create the filter effects. There are a number of filter primitives available to us, including:
[<feBlend>][<feColorMatrix>][<feComponentTransfer>][<feComposite>][<feConvolveMatrix>][<feDiffuseLighting>][<feDisplacementMap>][<feDropShadow>][<feFlood>][<feGaussianBlur>][<feImage>][<feMerge>][<feMorphology>][<feOffset>][<feSpecularLighting>][<feTile>][<feTurbulence>]
Just like with CSS filters, we can use them on their own or include multiple filter primitives in the <filter> tag for more interesting effects. If more than one filter primitive is used, then each operation will build on top of the previous one.
For our purposes we’re just going to use feColorMatrix, but if you want to know more about SVG filters, you can check out the specs on MDN or this (in progress, at the time of this writing) article series that Sara Soueidan has kicked off.
feColourMatrix allows us to change color values on a per-channel basis, much like channel mixing in Photoshop.
This is what the syntax looks like:
<svg xmlns="<http://www.w3.org/2000/svg>" version="1.1">
  <defs>
    <filter id="id-of-your-filter">
      <feColorMatrix
        color-interpolation-filters="sRGB"
        type="matrix"
        values="1 0 0 0 0
                0 1 0 0 0
                0 0 1 0 0
                0 0 0 1 0 "/>
    </filter>
    ...
  </defs>
</svg>
The color-interpolation-filters attribute specifies our color space. The default color space for filter effects is linearRGB, whereas in CSS, RGB colors are specified in the sRGB color space. It’s important that we set the value to sRGB in order for our colors to match up.
Let’s have a closer look at the color matrix values.

The first four columns represent the red, green and blue channels of color and the alpha (opacity) value. The rows contain the red, green, blue and alpha values in those channels.
The M column is a multiplier — we don’t need to change any of these values for our purposes here. The values for each color channel are represented as floating point numbers in the range 0 to 1.
We could write these values as a CSS RGBA color declaration like this:

The values for each color channel (red, green and blue) are stored as integers in the range 0 to 255. In computers, this is the range that one 8-bit byte can offer.
By dividing these color channel values by 255, the values can be represented as a floating point number which we can use in the feColorMatrix.
And, by doing this, we can create a color filter for any color with an RGB value!
Like teal, for example:

See the Pen
SVG filter – teal hover by Cassie Evans (@cassie-codes)
on CodePen.
This SVG filter will only impart color to icons with a white fill, so If we have an icon with a black fill, we can use invert() to convert it to white before applying the SVG filter.
.icon:hover {
  filter: invert(100%) url('assets/your-SVG.svg#id-of-your-filter');
}
If we just have a hex code, the math is a little trickier, although there are plenty of hex-to-RGBA converters out there. To help out, I’ve made a HEX to feColorMatrix converter.
See the Pen
HEX to feColorMatrix converterr by Cassie Evans (@cassie-codes)
on CodePen.
Have a play around, and happy filtering!
DigitalOcean provides cloud products for every stage of your journey. Get started with $200 in free credit!
SVG is a great format for icons. Vector formats look crisp and razor sharp, no matter the size or device — and we get tons of design control when using them inline.
SVG also gives us another powerful feature: the ability to manipulate their properties with CSS. As a result, we can make quick and simple interactions where it used to take crafty CSS tricks or swapping out entire image files.
Those interactions include changing color on hover states. It sounds like such a straightforward thing here in 2019, but there are actually a few totally valid ways to go about it — which only demonstrates the awesome powers of SVG more.
First off, let’s begin with a little abbreviated SVG markup:
<svg class="icon">
  <path .../>
</svg>
Target the .icon class in CSS and set the SVG fill property on the hover state to swap colors.
.icon:hover {
  fill: #DA4567;
}
This is by far the easiest way to apply a colored hover state to an SVG. Three lines of code!
SVGs can also be referenced using an <img> tag or as a background image. This allows the images to be cached and we can avoid bloating your HTML with chunks of SVG code. But the downside is a big one: we no longer have the ability to manipulate those properties using CSS. Whenever I come across non-inline icons, my first port of call is to inline them, but sometimes that’s not an option.
I was recently working on a project where the social icons were a component in a pattern library that everyone was happy with. In this case, the icons were being referenced from an <img> element. I was tasked with applying colored :focus and :hover styles, without adjusting the markup.
So, how do you go about adding a colored hover effect to an icon if it’s not an inline SVG?
CSS Filters
CSS filters allow us to apply a whole bunch of cool, Photoshop-esque effects right in the browser. Filters are applied to the element after the browser renders layout and initial paint, which means they fall back gracefully. They apply to the whole element, including children. Think of a filter as a lens laid over the top of the element it’s applied to.
These are the CSS filters available to us:
brightness(<number-percentage>);contrast(<number-percentage>);grayscale(<number-percentage>);invert(<number-percentage>);opacity(<number-percentage>);saturate(<number-percentage>);sepia(<number-percentage>);hue-rotate(<angle>);blur(<length>);drop-shadow(<length><color>);
All filters take a value which can be changed to adjust the effect. In most cases, this value can be expressed in either a decimal or percent units (e.g. brightness(0.5) or brightness(50%)).
Straight out of the box, there’s no CSS filter that allows us to add our own specific color.
We have hue-rotate(), but that only adjusts an existing color; it doesn’t add a color, which is no good since we’re starting with a monochromatic icon.
The game-changing bit about CSS filters is that we don’t have to use them in isolation. Multiple filters can be applied to an element by space-separating the filter functions like this:
.icon:hover {
  filter: grayscale(100%) sepia(100%);
}
If one of the filter functions doesn’t exist, or has an incorrect value, the whole list is ignored and no filter will be applied to the element.
When applying multiple filter functions to an element, their order is important and will affect the final output. Each filter function will be applied to the result of the previous operation.
So, in order to colorize our icons, we have to find the right combination.
To make use of hue-rotate(), we need to start off with a colored icon. The sepia() filter is the only filter function that allows us to add a color, giving the filtered element a yellow-brown-y tinge, like an old photo.
The output color is dependent on the starting tonal value:
In order to add enough color with sepia(), we first need to use invert() to convert our icon to a medium grey:
.icon:hover {
  filter: invert(0.5)
}![]()
We can then add the yellow/brown tone with sepia():
.icon:hover {
  filter: invert(0.5) sepia(1);
}![]()
…then change the hue with hue-rotate():
.icon:hover {
  filter: invert(0.5) sepia(1) hue-rotate(200deg);
}![]()
Once we have the rough color we want, we can tweak it with saturation() and brightness():
.icon:hover {
  filter:
    invert(0.5)
    sepia(1)
    hue-rotate(200deg)
    saturate(4)
    brightness(1);
}![]()
I’ve made a little tool for this to make your life a little easier, as this is a pretty confusing process to guesstimate.
See the Pen CSS filter example by Cassie Evans (@cassie-codes)
on CodePen.
Even with the tool, it’s still a little fiddly, not supported by Internet Explorer, and most importantly, you’re unable to specify a precise color.
Desktop
| Chrome | Firefox | IE | Edge | Safari |
|---|---|---|---|---|
| 18* | 35 | No | 79 | 6* |
Mobile / Tablet
| Android Chrome | Android Firefox | Android | iOS Safari |
|---|---|---|---|
| 109 | 109 | 4.4* | 6.0-6.1* |
So, what do we do if we need a specific hex code?
SVG Filters
If we need more precise control (and better browser support) than CSS filters can offer, then it’s time to turn to SVG.
Filters originally came from SVG. In fact, under the hood, CSS filters are just shortcuts to SVG filters with a particular set of values baked in.
Unlike CSS, the filter isn’t predefined for us, so we have to create it. How do we do this?
This is the syntax to define a filter:
<svg xmlns="<http://www.w3.org/2000/svg>" version="1.1">
  <defs>
    <filter id="id-of-your-filter">
      ...

      ...
    </filter>
    ...
  </defs>
</svg>
Filters are defined by a <filter> element, which goes inside the <defs> section of an SVG.
SVG filters can be applied to SVG content within the same SVG document. Or, the filter can be referenced and applied to HTML content elsewhere.
To apply an SVG filter to HTML content, we reference it the same way as a CSS filter: by using the url() filter function. The URL points to the ID of the SVG filter.
.icon:hover {
  filter: url('#id-of-your-filter');
}
The SVG filter can be placed inline in the document or the filter function can reference an external SVG. I prefer the latter route as it allows me to keep my SVG filters tidied away in an assets folder.
.icon:hover {
  filter: url('assets/your-SVG.svg#id-of-your-filter');
}
Back to the <filter> element itself.
<filter id="id-of-your-filter">
  ...

  ...
</filter>
Right now, this filter is empty and won’t do anything as we haven’t defined a filter primitive. Filter primitives are what create the filter effects. There are a number of filter primitives available to us, including:
[<feBlend>][<feColorMatrix>][<feComponentTransfer>][<feComposite>][<feConvolveMatrix>][<feDiffuseLighting>][<feDisplacementMap>][<feDropShadow>][<feFlood>][<feGaussianBlur>][<feImage>][<feMerge>][<feMorphology>][<feOffset>][<feSpecularLighting>][<feTile>][<feTurbulence>]
Just like with CSS filters, we can use them on their own or include multiple filter primitives in the <filter> tag for more interesting effects. If more than one filter primitive is used, then each operation will build on top of the previous one.
For our purposes we’re just going to use feColorMatrix, but if you want to know more about SVG filters, you can check out the specs on MDN or this (in progress, at the time of this writing) article series that Sara Soueidan has kicked off.
feColourMatrix allows us to change color values on a per-channel basis, much like channel mixing in Photoshop.
This is what the syntax looks like:
<svg xmlns="<http://www.w3.org/2000/svg>" version="1.1">
  <defs>
    <filter id="id-of-your-filter">
      <feColorMatrix
        color-interpolation-filters="sRGB"
        type="matrix"
        values="1 0 0 0 0
                0 1 0 0 0
                0 0 1 0 0
                0 0 0 1 0 "/>
    </filter>
    ...
  </defs>
</svg>
The color-interpolation-filters attribute specifies our color space. The default color space for filter effects is linearRGB, whereas in CSS, RGB colors are specified in the sRGB color space. It’s important that we set the value to sRGB in order for our colors to match up.
Let’s have a closer look at the color matrix values.
The first four columns represent the red, green and blue channels of color and the alpha (opacity) value. The rows contain the red, green, blue and alpha values in those channels.
The M column is a multiplier — we don’t need to change any of these values for our purposes here. The values for each color channel are represented as floating point numbers in the range 0 to 1.
We could write these values as a CSS RGBA color declaration like this:
The values for each color channel (red, green and blue) are stored as integers in the range 0 to 255. In computers, this is the range that one 8-bit byte can offer.
By dividing these color channel values by 255, the values can be represented as a floating point number which we can use in the feColorMatrix.
And, by doing this, we can create a color filter for any color with an RGB value!
Like teal, for example:
See the Pen
SVG filter – teal hover by Cassie Evans (@cassie-codes)
on CodePen.
This SVG filter will only impart color to icons with a white fill, so If we have an icon with a black fill, we can use invert() to convert it to white before applying the SVG filter.
.icon:hover {
  filter: invert(100%) url('assets/your-SVG.svg#id-of-your-filter');
}
If we just have a hex code, the math is a little trickier, although there are plenty of hex-to-RGBA converters out there. To help out, I’ve made a HEX to feColorMatrix converter.
See the Pen
HEX to feColorMatrix converterr by Cassie Evans (@cassie-codes)
on CodePen.
Have a play around, and happy filtering!
На чтение 3 мин Просмотров 26.7к. Опубликовано 17.04.2021
Содержание
- В предыдущих сериях…
- Подключение через тег <img> в html
- Подключение фона в .css
- Описываем svg-графику inline
- Заключение
В предыдущих сериях…
В прошлой статье мы выяснили, в чем отличие растровых форматов изображения от векторных. Теперь будем работать с векторной графикой. Для начала, научимся подключать эти изображения разными способами.
Возьмем стандартную папку с проектом, в которой есть отдельная папка для изображений, отдельная — для файлов .css, а также файл .html
Подключение через тег <img> в html
Работаем как с обычной картинкой. Тег <img>, атрибут src, прописываем путь к файлу. Можно использовать любые атрибуты <img>, включая атрибут width.
HTML
<h2>Иконки</h2>
<img src="./img/calendar.svg" alt="Calendar" width="102">
Получаем результат.
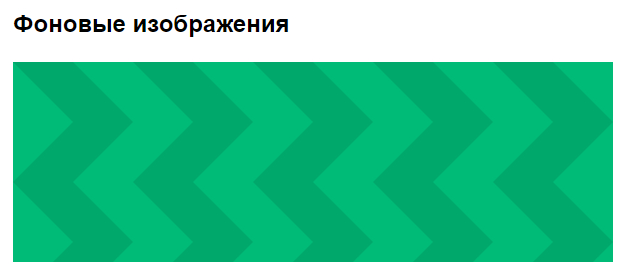
Подключение фона в .css
Можно подключить svg-графику в качестве фона элемента. Часто используются фоновые паттерны. Это небольшой фрагмент, впоследствии повторяющийся и создающий орнамент.
Так выглядит наш паттерн:

Укажите в html нужный класс и пропишите свойства фона background-image в файле css. Используйте функцию url(), чтобы задать путь к файлу с изображением.
HTML
<h2>Фоновые изображения</h2>
<div class="block-bg"></div>
CSS
/* SVG фоновое изображение */
.block-bg {
    width: 600px;
    height: 200px;
    background-image: url('./../img/bg-zigzag.svg');
}
Вот, что у нас получилось:
Описываем svg-графику inline
Существуют специальные теги и атрибуты для описания графики прямо в коде. При этом, изображение становится интерактивным — мы можем, например, менять цвет, или размер по наведению на иконку.
Тег <svg> используется как контейнер для хранения SVG графики. При помощи тега <path> и его атрибутов создается фигура. Посмотрите, как выглядит иконка YouTube в inline формате.
HTML
<svg class="youtube-icon" xmlns="http://www.w3.org/2000/svg" viewBox="0 0 576 512">
   <path d="M549.655 124.083c-6.281-23.65-24.787-42.276-48.284-48.597C458.781 64 288 64 288 64S117.22 64 74.629 75.486c-23.497 6.322-42.003 24.947-48.284 48.597-11.412 42.867-11.412 132.305-11.412 132.305s0 89.438 11.412 132.305c6.281 23.65 24.787 41.5 48.284 47.821C117.22 448 288 448 288 448s170.78 0 213.371-11.486c23.497-6.321 42.003-24.171 48.284-47.821 11.412-42.867 11.412-132.305 11.412-132.305s0-89.438-11.412-132.305zm-317.51 213.508V175.185l142.739 81.205-142.739 81.201z"></path>
</svg>
Стилизуем в файле .css по классу youtube-icon.
Будем менять цвет иконки по наведению при помощи свойства fill.
CSS
/* SVG inline код. Смена цвета по ховеру */
.youtube-icon {
    width: 64px;
    height: 64px;
    fill: black;
}

.youtube-icon:hover {
    fill: red;
}
Взгляните на результат:

Заключение
- Мы разобрали 3 стандартных способа подключения SVG-графики на сайт: тег
<img>, свойства CSS, тег<svg>. - Узнали про то, как можно менять цвет SVG-иконки через CSS и свойство
fill. - В следующей статье продолжим работу с тегам
<svg>,<path>, разберем как можно ещё кастомизировать векторную графику.
DigitalOcean provides cloud products for every stage of your journey. Get started with $200 in free credit!
There are a lot of different ways to use SVG. Depending on which way, the tactic for recoloring that SVG in different states or conditions — :hover, :active, :focus, class name change, etc. — is different.
Let’s look at the ways.
Inline SVG
Inline SVG is my favorite way to use SVG anyway, in part because of how easy it is to access and style the SVG.
See the Pen
bJXNyy by Chris Coyier (@chriscoyier)
on CodePen.
If you’re used to working with icon fonts, one thing you might enjoy about them is how easy it is to change the color. You’re largely limited to a single color with icon fonts in a way that SVG isn’t, but still, it is appealingly easy to change that single color with color. Using inline SVG allows you to set the fill, which cascades to all the elements within the SVG, or you can fill each element separately if needed.
SVG Symbol / Use
There is such thing as an SVG sprite, which is a group of SVGs turned into <symbol> elements such that any given icon can be referenced easily with a <use> element.
See the Pen
Use SVG Hovers by Chris Coyier (@chriscoyier)
on CodePen.
You can still set the fill color from outside CSS rather easily this way, but there are caveats.
- The internal SVG elements (like the
<path>) can have no fill themselves. This allows the fill set from the parent SVG to cascade into the Shadow DOM created by<use>. As soon as you have something like<path fill="blue" ... />in the<symbol>, you’ve lost outside CSS control. - Likewise, the
fillof individual elements cannot be controlled within the SVG like you could with inline SVG. This means you’re pretty firmly in single-color territory. That covers most use cases anyway, but still, a limitation nonetheless.
SVG background images
SVG can be set as a background image just like PNG, JPG, or whatever other graphics format. At this point, you’ve sort of given up on being able to change the fill. One possibility, which I’d argue isn’t a particularly good one, is to have two versions of every icon, in the respective colors, and swap between them:
See the Pen
Background SVG Hovers by Chris Coyier (@chriscoyier)
on CodePen.
I don’t blame you if you’d rather not swap sources, so another possibility is to get gnarly with filters.
See the Pen
Background SVG Hovers with Filters by Chris Coyier (@chriscoyier)
on CodePen.
Trying to finagle the right filters to get the color right is tricky stuff. Fortunately, Barrett Sonntag made a tool to calculate the filters for you! Turning black to red ends up a whacky combination like this: invert(27%) sepia(51%) saturate(2878%) hue-rotate(346deg) brightness(104%) contrast(97%);.
SVG also has object, which is kinda neat in that it had a built-in fallback back in the day — although browser support is so good these days, I honestly have never used it. But if you’re using it, you would probably have to use this filter technique to swap color on hover.
See the Pen
Background SVG Object Hovers by Chris Coyier (@chriscoyier)
on CodePen.
Use a mask instead of a background image
This way, the SVG is still in charge of essentially drawing the shape, but the color comes from the background-color (or image! or gradient!) behind it rather than the SVG itself.
See the Pen
Background SVG Hovers with Mask by Chris Coyier (@chriscoyier)
on CodePen.
SVG background images as data URLs
This doesn’t change that much from above, but it does open up one interesting possibility: Using a variable for the internal fills. Here that is with Sass keeping the URLs as variables:
See the Pen
Background SVG Hovers with Data URL variables by Chris Coyier (@chriscoyier)
on CodePen.
You can also do this with native CSS custom properties!
Creating good user experiences means clearly defining items that are links or otherwise clickable. If you use icons, one way to do that is to change the background color and the icon color on hover.
Hyperlinks are the most fundamental building blocks of the web. They are the elements that people interact with the most. In the earlier days of the web, only text and blue color were used to indicate links. In modern web design, we can be more creative when designing links such as using icons but we need to ensure that the usability of the links doesn’t suffer. When designing icon links we need to make it obvious they are clickable. Using hover effects to change the icon and background color is a good way to indicate they are clickable.
In this tutorial, we’re using FontAwesome icons. Icon fonts are ideal to work with when you want to change the link colors easily. All you have to do is change their color property in your CSS file. If you’re using SVG instead of FontAwesome, you can change the color easily with the fill property. With PNG and JPEG image files, you need to provide two sets of images with different colors for each icon, one for regular state and one for the hover state. This is why links using icon fonts and SVG images are much more practical:
Since we’re not using any a tags for the links and instead relying on Javascript’s onclick function, we also need to indicate links by changing the cursor. This is especially important for color-blind users as they can’t distinguish colors, they need other indicators for links. We need to set the cursor to pointer so that when users hover over the link, the cursor will change from an arrow to a hand, making it clear the element is clickable.
External Links
Let’s start by including the necessary Bootstrap and FontAwesome source links in the HTML file:
HTML
Below we have the code for a Bootstrap container box with three links. Replace the # in the onclick attribute with the link address you want to put. Copy and paste the code below and feel free to customize the layout and the number of links as you need:
Notice that we have an icon and a descriptive heading with an h3 tag under the icon for each link. This is because icons by themselves may not be descriptive enough for the users so we also provide text to make it clear what the link is about. According to the Nielsen Norman group, icons need a text label to clarify their meaning.
CSS
Here’s the complete CSS code. We have a div with a classname of .ct-icon-boxes that contains all the icon boxes. Each icon box in a div with a .ct-icon-box classname. We don’t have to select the icons and the headers separately to set their colors. We simply select the .ct-icon-box element and when we give it a color value, it will set both the icon and the heading color to that value:
And here’s our finished icon links. Hover over the icon boxes to see the hover effect:

От автора: В этой обучающей статье мы рассмотрим создание нескольких красивых (но простых) эффектов для иконок при наведении, созданных при помощи CSS3 переходов и трансформаций.

Иконки. Сегодня они присутствуют везде, в наших приложениях и сайтах, и все они выполняют важные функции. Они указывают пользователям на различные варианты взаимодействия или направляют их по различным внешним ссылкам, например, по ссылкам на социальные сети и другие медиа-сервисы. Иконочные спрайты стали обычным явлением, и важны с точки зрения разработчиков, а также позволяют привлечь внимание пользователей благодаря использованию CSS классов, срабатывающих при наведении. Данные классы способны добавить больше интерактивности и стиля нашим приложениям/сайтам. В этой обучающей статье я планирую показать вам 5 разных состояний иконок, когда на них наведен курсор мыши, для создания которых используются CSS3 переходы и трансформации. Рассмотренные далее состояния иконок будут лучше привлекать внимание конечных пользователей, и, возможно, будут увеличивать показатели кликабельности элементов на сайте или в приложении.
Разметка для наших иконок
Разработчики используют разные варианты разметки при создании структуры для иконок. В этой обучающей статье иконки будут ссылаться на что-нибудь, поэтому я буду использовать для иконок тег <a>. Для разметки иконок, выполняющих только презентационную (визуальную) функцию (например, иконки перед заголовками и т.д.), я очень часто видел, как разработчики используют тег <i>. И хотя это не является семантической разметкой, данный способ очень популярен, т.к. здесь используется тег, состоящий всего из одной буквы.
Для данной обучающей статьи мы будем использовать иконки, которые ссылаются на что-нибудь, потому что ссылки ассоциируются с состояниями, возникающими при наведении курсора мыши. Наиболее частным примером использования набора иконок, который можно встретить в сети, являются социальные иконки. Я буду использовать следующие 5 иконок, чтобы мы могли увидеть разное поведение иконок в действии:

Практический курс по верстке адаптивного сайта с нуля!
Изучите курс и узнайте, как верстать современные сайты на HTML5 и CSS3
Узнать подробнее
facebook*
google plus
github
rss
Каждая из иконок будет иметь по три разных класса:
Класс icon, который является общим для всех иконок
Класс icon-type, который является уникальным для каждого демо-примера
Класс name, который позволит нам позиционировать фоновое изображение, в зависимости от отображаемой иконки, а также использовать различные цвета и т.д.
Итак, в общем у наших иконок будет следующая структура:
|
<a href=«#» class=«icon icon-TYPE facebook»>facebook*</a> <a href=«#» class=«icon icon-TYPE twitter»>twitter</a> <a href=«#» class=«icon icon-TYPE googleplus»>google+</a> <a href=«#» class=«icon icon-TYPE github»>github</a> <a href=«#» class=«icon icon-TYPE rss»>rss</a> |
А теперь давайте посмотрим на общий CSS код.
Общий CSS код для наших иконок
Каждая из иконок будет отображаться в виде инлайн-блока (inline-block), но вы можете сделать иконки и просто блочными элементами, в зависимости от ваших нужд. Поскольку в эстетических целях мы будем использовать псевдо-классы, то по умолчанию свойство overflow будет иметь значение hidden. Нам также не нужно, чтобы отображался текст, поэтому мы его скроем. Вот CSS:
|
.icon { display: inline—block; vertical—align: top; overflow: hidden; margin: 4px; width: 96px; height: 96px; font—size: 0; text—indent: —9999px; } |
Небольшое замечание. Для каждого примера используется спрайт изображений. Спрайты изображений работают фантастически хорошо, особенно когда при наведении курсора мыши нужно показать второй вариант иконки. Все спрайты доступны в исходниках (ссылки есть вверху и внизу статьи). Теперь давайте поближе познакомимся с нашими примерами.
Стиль № 1 – Одноцветная иконка с изменяющимся фоном
В данном примере мы собираемся задействовать два важных момента:
Практический курс по верстке адаптивного сайта с нуля!
Изучите курс и узнайте, как верстать современные сайты на HTML5 и CSS3
Узнать подробнее
Переход для фона у иконки
Использование подходящего иконочного спрайта
Если у нас есть спрайт, и каждая иконка имеет два варианта (в данном случае серый и белый), мы можем применить переход к свойству background, чтобы одна иконка перетекала в другую при наведении. Поскольку мы используем переход для свойства background, мы можем также изменить при наведении и свойство background-color. Вот наш CSS:
|
1 2 3 4 5 6 7 8 9 10 11 12 13 14 15 16 17 18 19 20 21 22 23 24 25 26 27 28 29 30 31 32 33 34 35 36 37 38 39 40 41 42 43 44 45 46 47 48 49 50 51 52 53 54 55 56 57 |
.icon—mono { background: url(«../img/icons1.png»); background—image: url(«../img/icons1.svg»), none; background—color: #595959; —webkit—transition: background 0.3s; transition: background 0.3s; } /* facebook */ .icon—mono.facebook { background—position: 0 0; } .icon—mono.facebook:hover { background—color: #3b5998; background—position: 0 —96px; } /* twitter */ .icon—mono.twitter { background—position: —96px 0; } .icon—mono.twitter:hover { background—color: #4099ff; background—position: —96px —96px; } /* google plus */ .icon—mono.googleplus { background—position: —192px 0; } .icon—mono.googleplus:hover { background—color: #d34836; background—position: —192px —96px; } /* github */ .icon—mono.github { background—position: —288px 0; } .icon—mono.github:hover { background—color: #333333; background—position: —288px —96px; } /* rss */ .icon—mono.rss { background—position: —384px 0; } .icon—mono.rss:hover { background—color: #ee802f; background—position: —384px —96px; } |
Стиль №2 – Приподнятая иконка с изменяющейся границей
По своим предыдущим экспериментам я заметил, что границы не очень плавно изменяются при переходах. Поэтому в данном случае я сымитировал границу, используя псевдо-элемент и анимируя его за счет изменения высоты. Для псевдо-элемента будет задан фоновый цвет, и иконка будет приподниматься на расстояние равное высоте псевдо-элемента, как будто ее «подталкивают» вверх. Вот CSS:
|
1 2 3 4 5 6 7 8 9 10 11 12 13 14 15 16 17 18 19 20 21 22 23 24 25 26 27 28 29 30 31 32 33 34 35 36 37 38 39 40 41 42 43 44 45 46 47 48 49 50 51 52 53 54 55 56 57 58 59 60 61 62 63 64 65 66 67 68 69 70 71 72 73 74 75 76 77 78 79 80 81 82 83 84 85 86 87 88 89 90 91 92 93 |
.icon—nudge { position: relative; background: url(«../img/icons2.png»); background—image: url(«../img/icons2.svg»), none; —webkit—transition: background 0.2s; transition: background 0.2s; } .icon—nudge::after { display: block; position: absolute; bottom: 0; left: 0; width: 100%; height: 0; content: «»; —webkit—transition: height 0.2s; transition: height 0.2s; } .icon—nudge:hover::after { height: 8px; } /* facebook */ .icon—nudge.facebook { background—color: #3b5998; background—position: 0 0; } .icon—nudge.facebook:hover { background—position: 0 —8px; } .icon—nudge.facebook::after { background—color: #1e2e4f; } /* twitter */ .icon—nudge.twitter { background—color: #4099ff; background—position: —96px 0; } .icon—nudge.twitter:hover { background—position: —96px —8px; } .icon—nudge.twitter::after { background—color: #0065d9; } /* google plus */ .icon—nudge.googleplus { background—color: #d34836; background—position: —192px 0; } .icon—nudge.googleplus:hover { background—position: —192px —8px; } .icon—nudge.googleplus::after { background—color: #86291d; } /* github */ .icon—nudge.github { background—color: #333333; background—position: —288px 0; } .icon—nudge.github:hover { background—position: —288px —8px; } .icon—nudge.github::after { background—color: #4d4d4d; } /* rss */ .icon—nudge.rss { background—color: #ee802f; background—position: —384px 0; } .icon—nudge.rss:hover { background—position: —384px —8px; } .icon—nudge.rss::after { background—color: #a9500e; } |
Стиль № 3 – Иконка, появляющаяся слева
В данном примере будет отображаться обычная одноцветная иконка. Когда пользователь наведет курсор мыши на иконку, то будет казаться, что цветной вариант иконки «выплывает» слева и выталкивает одноцветный вариант иконки. Мы снова будем использовать псевдо-элемент, на этот раз для двух состояний (обычного и при наведении), оставив обычный элемент с классом .icon в качестве контейнера. Псевдо-элемент будет плавно перемещаться внутри контейнера благодаря свойству left, и за счет свойства transition «скольжение» элементов будет плавным. Вот CSS:
|
1 2 3 4 5 6 7 8 9 10 11 12 13 14 15 16 17 18 19 20 21 22 23 24 25 26 27 28 29 30 31 32 33 34 35 36 37 38 39 40 41 42 43 44 45 46 47 48 49 50 51 52 53 54 55 56 57 58 59 60 61 62 63 64 65 66 67 68 69 70 71 72 73 74 75 76 77 78 79 80 81 82 83 84 |
.icon—slide { position: relative; } .icon—slide::before, .icon—slide::after { display: block; position: absolute; top: 0; width: 100%; height: 100%; background: url(«../img/icons3.png»); background—image: url(«../img/icons3.svg»), none; content: «»; —webkit—transition: left 0.3s; transition: left 0.3s; } .icon—slide::before { left: 0; background—color: #595959; } .icon—slide::after { left: —100%; } .icon—slide:hover::before { left: 100%; } .icon—slide:hover::after { left: 0; } /* facebook */ .icon—slide.facebook::before, .icon—slide.facebook::after { background—position: 0 0; } .icon—slide.facebook::after { background—color: #3b5998; } /* twitter */ .icon—slide.twitter::before, .icon—slide.twitter::after { background—position: —96px 0; } .icon—slide.twitter::after { background—color: #4099ff; } /* google plus */ .icon—slide.googleplus::before, .icon—slide.googleplus::after { background—position: —192px 0; } .icon—slide.googleplus::after { background—color: #d34836; } /* github */ .icon—slide.github::before, .icon—slide.github::after { background—position: —288px 0; } .icon—slide.github::after { background—color: #333333; } /* rss */ .icon—slide.rss::before, .icon—slide.rss::after { background—position: —384px 0; } .icon—slide.rss::after { background—color: #ee802f; } |
Стиль № 4 – Сплошной фон, анимировано переходящий в тонкую рамку
В данном примере по умолчанию для всех иконок будет задан сплошной фоновый цвет. При наведении будет осуществляться переход фона в тонкую рамку. Как я уже упоминал ранее, я не фанат использования рамок для границ, поэтому на этот раз я воссоздам данный эффект, используя свойство box-shadow, которое будет иметь значение inset. Тень будет указана для псевдо-элемента, расположенного позади иконки. Для самой тени не будет использовано вообще никакого размытия, т.е. будет отображаться сплошной фон. При наведении мы будем уменьшать значение. Вот CSS:
|
1 2 3 4 5 6 7 8 9 10 11 12 13 14 15 16 17 18 19 20 21 22 23 24 25 26 27 28 29 30 31 32 33 34 35 36 37 38 39 40 41 42 43 44 45 46 47 48 49 50 51 52 53 54 55 56 57 58 59 60 61 62 63 64 65 66 67 68 69 70 71 72 73 74 75 76 77 78 79 80 81 82 83 84 85 86 87 88 89 90 91 |
.icon—border { position: relative; } .icon—border::before, .icon—border::after { display: block; position: absolute; top: 0; left: 0; width: 100%; height: 100%; content: «»; } .icon—border::before { z—index: 1; —webkit—transition: box—shadow 0.3s; transition: box—shadow 0.3s; } .icon—border::after { z—index: 2; background: url(«../img/icons4.png»); background—image: url(«../img/icons4.svg»), none; } /* facebook */ .icon—border.facebook::before { box—shadow: inset 0 0 0 48px #3b5998; } .icon—border.facebook:hover::before { box—shadow: inset 0 0 0 4px #3b5998; } .icon—border.facebook::after { background—position: 0 0; } /* twitter */ .icon—border.twitter::before { box—shadow: inset 0 0 0 48px #4099ff; } .icon—border.twitter:hover::before { box—shadow: inset 0 0 0 4px #4099ff; } .icon—border.twitter::after { background—position: —96px 0; } /* google plus */ .icon—border.googleplus::before { box—shadow: inset 0 0 0 48px #d34836; } .icon—border.googleplus:hover::before { box—shadow: inset 0 0 0 4px #d34836; } .icon—border.googleplus::after { background—position: —192px 0; } /* github */ .icon—border.github::before { box—shadow: inset 0 0 0 48px #333333; } .icon—border.github:hover::before { box—shadow: inset 0 0 0 4px #333333; } .icon—border.github::after { background—position: —288px 0; } /* rss */ .icon—border.rss::before { box—shadow: inset 0 0 0 48px #ee802f; } .icon—border.rss:hover::before { box—shadow: inset 0 0 0 4px #ee802f; } .icon—border.rss::after { background—position: —384px 0; } |
Стиль № 5 – Вращение кубической иконки
В данном примере будут использоваться CSS3 перспективы, позволяющие нам создавать фигуры, у которых как будто есть объем и глубина (3D). Я буду использовать стандартный элемент в качестве контейнера и два псевдо-элемента в качестве лицевой и обратной сторон куба. При наведении куб будет вращаться по оси X, создавая классный эффект. Вот CSS:
|
1 2 3 4 5 6 7 8 9 10 11 12 13 14 15 16 17 18 19 20 21 22 23 24 25 26 27 28 29 30 31 32 33 34 35 36 37 38 39 40 41 42 43 44 45 46 47 48 49 50 51 52 53 54 55 56 57 58 59 60 61 62 63 64 65 66 67 68 69 70 71 72 73 74 75 76 77 78 79 80 81 82 83 84 85 86 87 88 89 90 91 92 93 94 95 |
.icon—cube { position: relative; —webkit—perspective: 800px; perspective: 800px; overflow: visible; } .icon—cube::before, .icon—cube::after { display: block; position: absolute; top: 0; left: 0; width: 100%; height: 100%; background: url(«../img/icons5.png»); background—image: url(«../img/icons5.svg»), none; content: «»; —webkit—transition: all 0.3s; transition: all 0.3s; } .icon—cube::before { z—index: 2; background—color: #595959; } .icon—cube::after { z—index: 1; opacity: 0; —webkit—transform: translateY(48px) rotateX(—90deg); transform: translateY(48px) rotateX(—90deg); } .icon—cube:hover::before { opacity: 0; —webkit—transform: translateY(—48px) rotateX(90deg); transform: translateY(—48px) rotateX(90deg); } .icon—cube:hover::after { opacity: 1; —webkit—transform: rotateX(0); transform: rotateX(0); } /* facebook */ .icon—cube.facebook::before, .icon—cube.facebook::after { background—position: 0 0; } .icon—cube.facebook::after { background—color: #3b5998; } /* twitter */ .icon—cube.twitter::before, .icon—cube.twitter::after { background—position: —96px 0; } .icon—cube.twitter::after { background—color: #4099ff; } /* google plus */ .icon—cube.googleplus::before, .icon—cube.googleplus::after { background—position: —192px 0; } .icon—cube.googleplus::after { background—color: #d34836; } /* github */ .icon—cube.github::before, .icon—cube.github::after { background—position: —288px 0; } .icon—cube.github::after { background—color: #333333; } /* rss */ .icon—cube.rss::before, .icon—cube.rss::after { background—position: —384px 0; } .icon—cube.rss::after { background—color: #ee802f; } |
Браузерная поддержка
Данные стили для иконок очень сильно зависят от псевдо-элементов, переходов и трансформаций, поэтому проверьте браузерную поддержку перед их использованием в своем проекте. Конечно, очень легко использовать в качестве запасного варианта обычную квадратную иконку с фоновым изображением, а все переходы/трансформации просто будут проигнорированы в тех браузерах, которые не поддерживают данные свойства.
В заключение
Вот и подошла к концу данная обучающая статья! Не забудьте, что вы можете посмотреть демо-примеры и скачать исходники по нижеприведенным ссылкам. Если у вас есть какие-либо вопросы, пожелания или замечания, поделитесь ими в комментариях.
Автор: Nick Salloum
Источник: //callmenick.com/
Редакция: Команда webformyself.
* Признана экстремистской организацией и запрещена в Российской Федерации.
Практический курс по верстке адаптивного сайта с нуля!
Изучите курс и узнайте, как верстать современные сайты на HTML5 и CSS3
Узнать подробнее

PSD to HTML
Практика верстки сайта на CSS Grid с нуля
Смотреть