I builded another fork of @klewis’ code sample to demonstrate some playing with pure css and gradients by using :before/:after pseudo elements and a hidden radio input button.

HTML:
sample radio buttons:
<div style="background:lightgrey;">
    <span class="radio-item">
        <input type="radio" id="ritema" name="ritem" class="true" value="ropt1" checked="checked">
        <label for="ritema">True</label>
    </span>

    <span class="radio-item">
        <input type="radio" id="ritemb" name="ritem" class="false" value="ropt2">
        <label for="ritemb">False</label>
    </span>
</div>
:
CSS:
.radio-item input[type='radio'] {
    visibility: hidden;
    width: 20px;
    height: 20px;
    margin: 0 5px 0 5px;
    padding: 0;
}
    .radio-item input[type=radio]:before {
        position: relative;
        margin: 4px -25px -4px 0;
        display: inline-block;
        visibility: visible;
        width: 20px;
        height: 20px;
        border-radius: 10px;
        border: 2px inset rgba(150,150,150,0.75);
        background: radial-gradient(ellipse at top left, rgb(255,255,255) 0%, rgb(250,250,250) 5%, rgb(230,230,230) 95%, rgb(225,225,225) 100%);
        content: "";
    }
        .radio-item input[type=radio]:checked:after {
            position: relative;
            top: 0;
            left: 9px;
            display: inline-block;
            visibility: visible;
            border-radius: 6px;
            width: 12px;
            height: 12px;
            background: radial-gradient(ellipse at top left, rgb(245,255,200) 0%, rgb(225,250,100) 5%, rgb(75,175,0) 95%, rgb(25,100,0) 100%);
            content: "";
        }
            .radio-item input[type=radio].true:checked:after {
                background: radial-gradient(ellipse at top left, rgb(245,255,200) 0%, rgb(225,250,100) 5%, rgb(75,175,0) 95%, rgb(25,100,0) 100%);
            }
            .radio-item input[type=radio].false:checked:after {
                background: radial-gradient(ellipse at top left, rgb(255,225,200) 0%, rgb(250,200,150) 5%, rgb(200,25,0) 95%, rgb(100,25,0) 100%);
            }
.radio-item label {
    display: inline-block;
    height: 25px;
    line-height: 25px;
    margin: 0;
    padding: 0;
}
preview:
https://www.codeply.com/p/y47T4ylfib
Improve Article
Save Article
Improve Article
Save Article
In this article, we are going to discuss how to change the color of the radio button using the accent-color CSS property.
The accent-color property in CSS specifies the color of user interface elements/controls like checkboxes, radio buttons, range, and progress elements. As per this article, we are using this accent-color property to change the color of the radio button from a default color. The syntax and its property values are given below
Syntax:
accent-color : auto | color | initial | inherit;
Property values:
- auto: The browser will set the accent color for the control elements.
- color: It will specify the color for an accent color in RGB representation, hex representation, and also with the color name.
- initial: Sets the accent-color property to the default value.
- inherit: Inherits the property from the parent component.
Note: Depending on the browser the color set by auto property value varies.
Example 1: In the below code, we have created a radio button and specified the color of the radio button using the accent-color property.
HTML
<!DOCTYPE html>
<html>
<head>
<style>
#specifyColor {
accent-color: red;
}
</style>
</head>
<body>
<center>
<h3> Red colored radio button </h3>
<input type="radio" id="specifyColor"
name="radio1" value="GFG">
<label for="specifyColor">GFG</label>
</center>
</body>
</html>
Output:

Example 2: In this example program, we have used various kinds of accent-color properties by specifying the color in different forms like the name of color directly, using RGB color value, hex color code, etc. to change the color of radio buttons.
HTML
<!DOCTYPE html>
<html>
<head>
<style>
input[type=radio]#Yellow {
accent-color: pink;
}
input[type=radio]#Green {
accent-color: rgb(0, 255, 0);
}
input[type=radio]#auto {
accent-color: auto;
}
input[type=radio]#Red {
accent-color: #FF0000;
}
</style>
</head>
<body>
<center>
<h3> Radio button color change </h3>
</center>
<input type="radio" id="Yellow" name="colors" value="Yellow">
<label for="Yellow">Yellow</label><br>
<input type="radio" id="Green" name="colors" value="Green">
<label for="Green">Green using RGB</label><br>
<input type="radio" id="auto" name="colors" value="auto">
<label for="auto">auto-color set by browser</label><br>
<input type="radio" id="Red" name="colors" value="Red">
<label for="Red">Red color using hex representation
</label><br>
</body>
</html>
Output:

I builded another fork of @klewis’ code sample to demonstrate some playing with pure css and gradients by using :before/:after pseudo elements and a hidden radio input button.
HTML:
sample radio buttons:
<div style="background:lightgrey;">
    <span class="radio-item">
        <input type="radio" id="ritema" name="ritem" class="true" value="ropt1" checked="checked">
        <label for="ritema">True</label>
    </span>

    <span class="radio-item">
        <input type="radio" id="ritemb" name="ritem" class="false" value="ropt2">
        <label for="ritemb">False</label>
    </span>
</div>
:
CSS:
.radio-item input[type='radio'] {
    visibility: hidden;
    width: 20px;
    height: 20px;
    margin: 0 5px 0 5px;
    padding: 0;
}
    .radio-item input[type=radio]:before {
        position: relative;
        margin: 4px -25px -4px 0;
        display: inline-block;
        visibility: visible;
        width: 20px;
        height: 20px;
        border-radius: 10px;
        border: 2px inset rgba(150,150,150,0.75);
        background: radial-gradient(ellipse at top left, rgb(255,255,255) 0%, rgb(250,250,250) 5%, rgb(230,230,230) 95%, rgb(225,225,225) 100%);
        content: "";
    }
        .radio-item input[type=radio]:checked:after {
            position: relative;
            top: 0;
            left: 9px;
            display: inline-block;
            visibility: visible;
            border-radius: 6px;
            width: 12px;
            height: 12px;
            background: radial-gradient(ellipse at top left, rgb(245,255,200) 0%, rgb(225,250,100) 5%, rgb(75,175,0) 95%, rgb(25,100,0) 100%);
            content: "";
        }
            .radio-item input[type=radio].true:checked:after {
                background: radial-gradient(ellipse at top left, rgb(245,255,200) 0%, rgb(225,250,100) 5%, rgb(75,175,0) 95%, rgb(25,100,0) 100%);
            }
            .radio-item input[type=radio].false:checked:after {
                background: radial-gradient(ellipse at top left, rgb(255,225,200) 0%, rgb(250,200,150) 5%, rgb(200,25,0) 95%, rgb(100,25,0) 100%);
            }
.radio-item label {
    display: inline-block;
    height: 25px;
    line-height: 25px;
    margin: 0;
    padding: 0;
}
preview:
https://www.codeply.com/p/y47T4ylfib
Here’s a pure CSS solution that shouldn’t break screen readers or default user agent actions. Additionally, this is supported in the latest versions of the big 4 browsers (and a few others if you add some additional hacks, but I’ll leave that to you to figure out; probably won’t get more than IE8+ support since it uses pseudo elements).
The idea is to hide the actual form element (because browsers do a hard replace with internal styles and don’t expose all style-ability to css yet) and replace it with one we like. One side effect is that you will want to track change events rather than click events in your JS if you need it (but you were doing that anyway right?).
Because the label is tied to the form element clicking it works like one would expect, so the new, awesome, checkbox (::before) abuses attribute selectors ([checked]) on the original to check if it is checked. When it is checked it will display our awesomer checkmark (::after).
The checkmark (::after) abuses border width for thickness and height/width for making a checkmark like item. Finally, we transform the box 45deg to match the angle up properly.
To change the color of the checkmark, change the border color on the ::after style. Additionally, if you wanted it to always match your text color remove the border color on it altogether. To change the radio, change the radial gradient start color (the one that isn’t white).
Also awesome is that its tied to font size, so if your text is bigger, it should shim right in (though rounding errors can happen when using relative font sizes, so be careful)
I’ve included basic styles for both check-able types (checkbox and radio).
HTML:
<fieldset>
    <legend>Checkbox example</legend>
    <input id="checkbox" type="checkbox"/>
    <label for="checkbox">Some awesome checkbox label</label>
</fieldset>
<fieldset>
    <legend>Radio example</legend>
    <div>
        <input id="radio1" type="radio" name="radio"/>
        <label for="radio1">Some awesome radio option #1</label>
    <div>
    </div>
        <input id="radio2" type="radio" name="radio"/>
        <label for="radio2">Some awesome radio option #2</label>
    </div>
</fieldset>
CSS:
label, input[type="radio"], input[type="checkbox"] {
   line-height: 2.1ex;
}

input[type="radio"],
input[type="checkbox"] {
    position: absolute;
    left: -999em;
}

input[type="radio"] + label,
input[type="checkbox"] + label {
    position: relative;
    overflow: hidden;
    cursor: pointer;
}

input[type="radio"] + label::before,
input[type="checkbox"] + label::before {
   content: "";
   display: inline-block;
   vertical-align: -25%;
   height: 2ex;
   width: 2ex;
   background-color: white;
   border: 1px solid rgb(166, 166, 166);
   border-radius: 4px;
   box-shadow: inset 0 2px 5px rgba(0,0,0,0.25);
   margin-right: 0.5em;
}

input[type="radio"]:checked + label::before {
   background: radial-gradient(circle at center, #1062a4 .6ex, white .7ex);
}

input[type="radio"] + label::before {
   border-radius: 50%;
}

input[type="checkbox"]:checked + label::after {
   content: '';
   position: absolute;
   width: 1.2ex;
   height: 0.4ex;
   background: rgba(0, 0, 0, 0);
   top: 0.9ex;
   left: 0.4ex;
   border: 3px solid #1062a4;
   border-top: none;
   border-right: none;
   -webkit-transform: rotate(-45deg);
   -moz-transform: rotate(-45deg);
   -o-transform: rotate(-45deg);
   -ms-transform: rotate(-45deg);
   transform: rotate(-45deg);
}
Side note: necropost because this was the first question that popped up when I was trying to remember how I pulled this off in the past. 
Here’s a pure CSS solution that shouldn’t break screen readers or default user agent actions. Additionally, this is supported in the latest versions of the big 4 browsers (and a few others if you add some additional hacks, but I’ll leave that to you to figure out; probably won’t get more than IE8+ support since it uses pseudo elements).
The idea is to hide the actual form element (because browsers do a hard replace with internal styles and don’t expose all style-ability to css yet) and replace it with one we like. One side effect is that you will want to track change events rather than click events in your JS if you need it (but you were doing that anyway right?).
Because the label is tied to the form element clicking it works like one would expect, so the new, awesome, checkbox (::before) abuses attribute selectors ([checked]) on the original to check if it is checked. When it is checked it will display our awesomer checkmark (::after).
The checkmark (::after) abuses border width for thickness and height/width for making a checkmark like item. Finally, we transform the box 45deg to match the angle up properly.
To change the color of the checkmark, change the border color on the ::after style. Additionally, if you wanted it to always match your text color remove the border color on it altogether. To change the radio, change the radial gradient start color (the one that isn’t white).
Also awesome is that its tied to font size, so if your text is bigger, it should shim right in (though rounding errors can happen when using relative font sizes, so be careful)
I’ve included basic styles for both check-able types (checkbox and radio).
HTML:
<fieldset>
    <legend>Checkbox example</legend>
    <input id="checkbox" type="checkbox"/>
    <label for="checkbox">Some awesome checkbox label</label>
</fieldset>
<fieldset>
    <legend>Radio example</legend>
    <div>
        <input id="radio1" type="radio" name="radio"/>
        <label for="radio1">Some awesome radio option #1</label>
    <div>
    </div>
        <input id="radio2" type="radio" name="radio"/>
        <label for="radio2">Some awesome radio option #2</label>
    </div>
</fieldset>
CSS:
label, input[type="radio"], input[type="checkbox"] {
   line-height: 2.1ex;
}

input[type="radio"],
input[type="checkbox"] {
    position: absolute;
    left: -999em;
}

input[type="radio"] + label,
input[type="checkbox"] + label {
    position: relative;
    overflow: hidden;
    cursor: pointer;
}

input[type="radio"] + label::before,
input[type="checkbox"] + label::before {
   content: "";
   display: inline-block;
   vertical-align: -25%;
   height: 2ex;
   width: 2ex;
   background-color: white;
   border: 1px solid rgb(166, 166, 166);
   border-radius: 4px;
   box-shadow: inset 0 2px 5px rgba(0,0,0,0.25);
   margin-right: 0.5em;
}

input[type="radio"]:checked + label::before {
   background: radial-gradient(circle at center, #1062a4 .6ex, white .7ex);
}

input[type="radio"] + label::before {
   border-radius: 50%;
}

input[type="checkbox"]:checked + label::after {
   content: '';
   position: absolute;
   width: 1.2ex;
   height: 0.4ex;
   background: rgba(0, 0, 0, 0);
   top: 0.9ex;
   left: 0.4ex;
   border: 3px solid #1062a4;
   border-top: none;
   border-right: none;
   -webkit-transform: rotate(-45deg);
   -moz-transform: rotate(-45deg);
   -o-transform: rotate(-45deg);
   -ms-transform: rotate(-45deg);
   transform: rotate(-45deg);
}
Side note: necropost because this was the first question that popped up when I was trying to remember how I pulled this off in the past.
В этой статье подробно разберём процесс кастомной стилизации чекбоксов и радиокнопок с помощью CSS.
Как осуществляется создание кастомного чекбокса или переключателя
Данный процесс осуществляется посредством скрытия стандартного элемента и создания с помощью CSS другого «поддельного», такого как мы хотим.
Но как же это будет работать, если стандартный input скрыть? Это можно выполнить благодаря тому, что в HTML переключить состояние checked можно не только с помощью самого элемента input, но и посредством связанного с ним label.
В HTML связывание label с input выполняется одним из 2 способов:
1. Посредством помещения элемента input в label:
<label>
  <input type="checkbox" name="happy" value="yes">Happy
</label>
2. Посредством задания элементу input атрибута id, а label – for с таким же значением как у id.
<input type="checkbox" id="happy" name="happy" value="yes">
<label for="happy">Happy</label>
В этой статье мы подробно разберём шаги по кастомизации checkbox и radio, в которых label с input свяжем по 2 варианту. Создание «поддельного» чекбокса выполним с использованием псевдоэлемента ::before, который поместим в label. При этом никакие дополнительные элементы в разметку добавлять не будем.
Создание стильного чекбокса
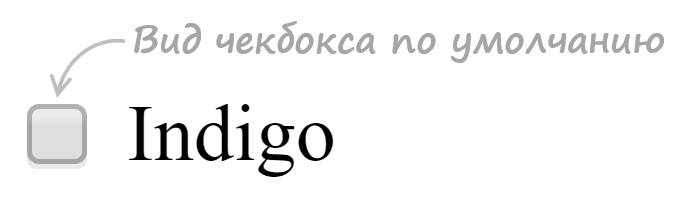
Процесс замены стандартного вида чекбокса на кастомный осуществим посредством выполнения следующей последовательности шагов.
Шаг 1. Создадим разметку.
<input type="checkbox" class="custom-checkbox" id="happy" name="happy" value="yes">
<label for="happy">Happy</label>
При создании разметки очень важно соблюдать последовательность расположения элементов. Это необходимо, потому что в зависимости от того, как они расположены мы будем составлять выражения для выбора элементов в CSS и назначать им стили.
В этом примере элемент label расположен после input. Связь label с input осуществляется посредством соответствия значения for элемента label с id элемента input.
В примере к элементу input добавлен класс custom-checkbox. Данный класс мы будем использовать при составлении селекторов и тем самым с помощью него определять элементы к которым следует добавить стилизованный чекбокс вместо обычного. Т.е. его присутствие или отсутствие будет определять с каким чекбоксом (со стандартным или поддельным) будет выводится элемент input с type="checkbox".
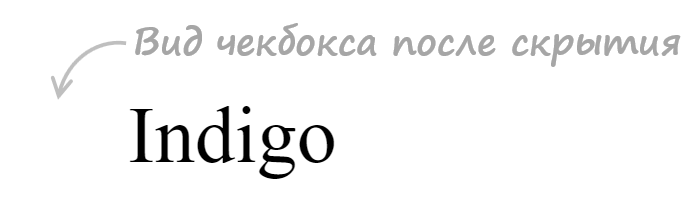
Шаг 2. Напишем стили для скрытия стандартного элемента input.
.custom-checkbox {
  position: absolute;
  z-index: -1;
  opacity: 0;
}
Мы не будем использовать display: none, а установим ему стили, с помощью которых уберём его из потока (position: absolute), поместим его ниже существующих элементов (z-index: -1), а также сделаем его полностью прозрачным (opacity: 0). Зачем это нужно? Это нам необходимо для того, чтобы мы могли получить состояние фокуса, а затем стилизовать «подделный» checkbox или radio, когда он будет находиться в нём.
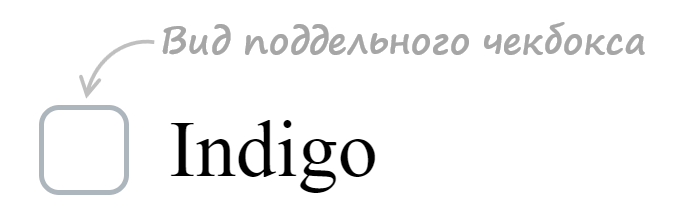
Шаг 3. Создадим поддельный чекбокс.
.custom-checkbox+label {
  display: inline-flex;
  align-items: center;
  user-select: none;
}
.custom-checkbox+label::before {
  content: '';
  display: inline-block;
  width: 1em;
  height: 1em;
  flex-shrink: 0;
  flex-grow: 0;
  border: 1px solid #adb5bd;
  border-radius: 0.25em;
  margin-right: 0.5em;
  background-repeat: no-repeat;
  background-position: center center;
  background-size: 50% 50%;
}
Создание «поддельного» чекбокса выполним с помощью псевдоэлемента ::before. Посредством CSS зададим ему размеры (в данном случае 1emx1em), а затем нарисуем его с помощью border: 1px solid #adb5bd. Свойства начинающие со слова background будут определять положение самого флажка (когда checkbox будет в состоянии checked).
Первое правило необходимо для вертикального центрирования флажка и надписи к нему. Это действие в примере выполнено через CSS Flexbox.
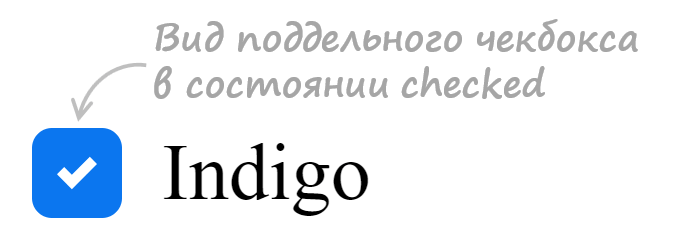
Шаг 4. Создадим стили при нахождении элемента в состоянии checked.
.custom-checkbox:checked+label::before {
  border-color: #0b76ef;
  background-color: #0b76ef;
  background-image: url("data:image/svg+xml,%3csvg xmlns='http://www.w3.org/2000/svg' viewBox='0 0 8 8'%3e%3cpath fill='%23fff' d='M6.564.75l-3.59 3.612-1.538-1.55L0 4.26 2.974 7.25 8 2.193z'/%3e%3c/svg%3e");
}
В этом коде при получении элементом состояния checked применим к псевдоэлементу ::before находящемуся в label стили, посредством которых установим цвет границы, цвет фону и фоновую картинку (флажок) в формате svg.
Шаг 5. Добавим код для стилизации чекбокса при нахождении его в состояниях hover, active, focus и disabled.
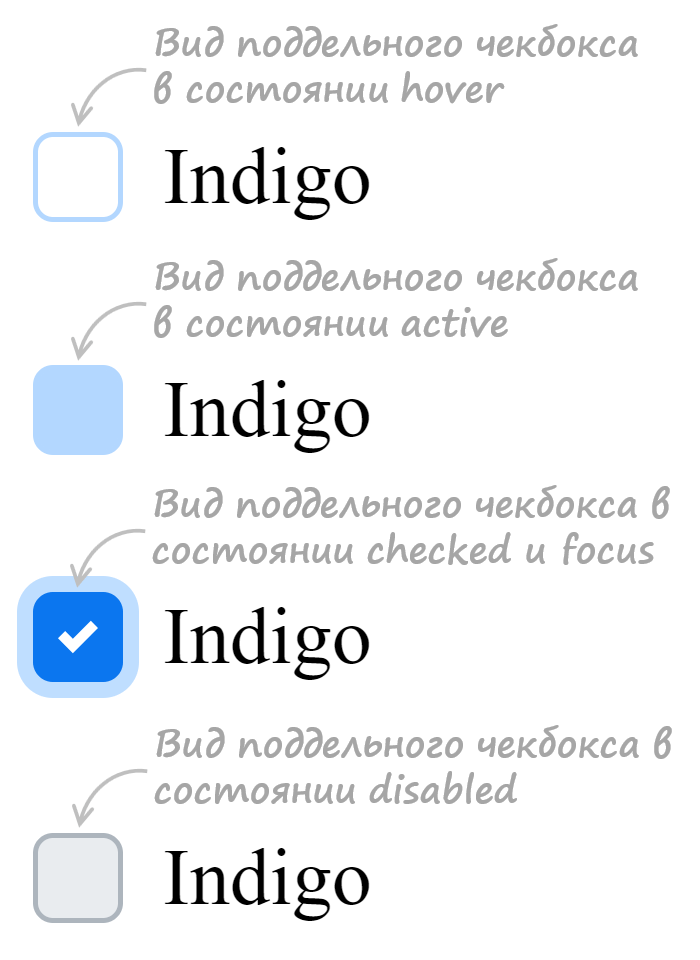
/* стили при наведении курсора на checkbox */
.custom-checkbox:not(:disabled):not(:checked)+label:hover::before {
  border-color: #b3d7ff;
}
/* стили для активного состояния чекбокса (при нажатии на него) */
.custom-checkbox:not(:disabled):active+label::before {
  background-color: #b3d7ff;
  border-color: #b3d7ff;
}
/* стили для чекбокса, находящегося в фокусе */
.custom-checkbox:focus+label::before {
  box-shadow: 0 0 0 0.2rem rgba(0, 123, 255, 0.25);
}
/* стили для чекбокса, находящегося в фокусе и не находящегося в состоянии checked */
.custom-checkbox:focus:not(:checked)+label::before {
  border-color: #80bdff;
}
/* стили для чекбокса, находящегося в состоянии disabled */
.custom-checkbox:disabled+label::before {
  background-color: #e9ecef;
}
Открыть пример
Разработка кастомного переключателя
Стилизация переключателя (input с type="radio") выполняется аналогично, т.е. посредством тех же шагов которые мы применяли при кастомизации чекбокса.
Итоговый набор стилей для кастомного оформления input с type="radio":
<style>
  /* для элемента input c type="radio" */
  .custom-radio {
    position: absolute;
    z-index: -1;
    opacity: 0;
  }
  /* для элемента label связанного с .custom-radio */
  .custom-radio+label {
    display: inline-flex;
    align-items: center;
    user-select: none;
  }
  /* создание в label псевдоэлемента  before со следующими стилями */
  .custom-radio+label::before {
    content: '';
    display: inline-block;
    width: 1em;
    height: 1em;
    flex-shrink: 0;
    flex-grow: 0;
    border: 1px solid #adb5bd;
    border-radius: 50%;
    margin-right: 0.5em;
    background-repeat: no-repeat;
    background-position: center center;
    background-size: 50% 50%;
  }
  /* стили при наведении курсора на радио */
  .custom-radio:not(:disabled):not(:checked)+label:hover::before {
    border-color: #b3d7ff;
  }
  /* стили для активной радиокнопки (при нажатии на неё) */
  .custom-radio:not(:disabled):active+label::before {
    background-color: #b3d7ff;
    border-color: #b3d7ff;
  }
  /* стили для радиокнопки, находящейся в фокусе */
  .custom-radio:focus+label::before {
    box-shadow: 0 0 0 0.2rem rgba(0, 123, 255, 0.25);
  }
  /* стили для радиокнопки, находящейся в фокусе и не находящейся в состоянии checked */
  .custom-radio:focus:not(:checked)+label::before {
    border-color: #80bdff;
  }
  /* стили для радиокнопки, находящейся в состоянии checked */
  .custom-radio:checked+label::before {
    border-color: #0b76ef;
    background-color: #0b76ef;
    background-image: url("data:image/svg+xml,%3csvg xmlns='http://www.w3.org/2000/svg' viewBox='-4 -4 8 8'%3e%3ccircle r='3' fill='%23fff'/%3e%3c/svg%3e");
  }
  /* стили для радиокнопки, находящейся в состоянии disabled */
  .custom-radio:disabled+label::before {
    background-color: #e9ecef;
  }
</style>

<input class="custom-radio" name="color" type="radio" id="color-green" value="green">
<label for="color-green">Green</label>
Открыть пример
Ещё примеры по кастомизации checkbox и label
В этом разделе представлены следующие примеры:
- оформление чекбокса, когда input расположен в label
- оформление переключателя, когда input расположен в label
1. Стилизация checkbox, когда input расположен в label.
HTML разметка:
<label class="custom-checkbox">
  <input type="checkbox" value="value-1">
  <span>Indigo</span>
</label>
CSS код:
/* для элемента input c type="checkbox" */
.custom-checkbox>input {
  position: absolute;
  z-index: -1;
  opacity: 0;
}

/* для элемента label, связанного с .custom-checkbox */
.custom-checkbox>span {
  display: inline-flex;
  align-items: center;
  user-select: none;
}

/* создание в label псевдоэлемента before со следующими стилями */
.custom-checkbox>span::before {
  content: '';
  display: inline-block;
  width: 1em;
  height: 1em;
  flex-shrink: 0;
  flex-grow: 0;
  border: 1px solid #adb5bd;
  border-radius: 0.25em;
  margin-right: 0.5em;
  background-repeat: no-repeat;
  background-position: center center;
  background-size: 50% 50%;
}

/* стили при наведении курсора на checkbox */
.custom-checkbox>input:not(:disabled):not(:checked)+span:hover::before {
  border-color: #b3d7ff;
}

/* стили для активного чекбокса (при нажатии на него) */
.custom-checkbox>input:not(:disabled):active+span::before {
  background-color: #b3d7ff;
  border-color: #b3d7ff;
}

/* стили для чекбокса, находящегося в фокусе */
.custom-checkbox>input:focus+span::before {
  box-shadow: 0 0 0 0.2rem rgba(0, 123, 255, 0.25);
}

/* стили для чекбокса, находящегося в фокусе и не находящегося в состоянии checked */
.custom-checkbox>input:focus:not(:checked)+span::before {
  border-color: #80bdff;
}

/* стили для чекбокса, находящегося в состоянии checked */
.custom-checkbox>input:checked+span::before {
  border-color: #0b76ef;
  background-color: #0b76ef;
  background-image: url("data:image/svg+xml,%3csvg xmlns='http://www.w3.org/2000/svg' viewBox='0 0 8 8'%3e%3cpath fill='%23fff' d='M6.564.75l-3.59 3.612-1.538-1.55L0 4.26 2.974 7.25 8 2.193z'/%3e%3c/svg%3e");
}

/* стили для чекбокса, находящегося в состоянии disabled */
.custom-checkbox>input:disabled+span::before {
  background-color: #e9ecef;
}
Открыть пример
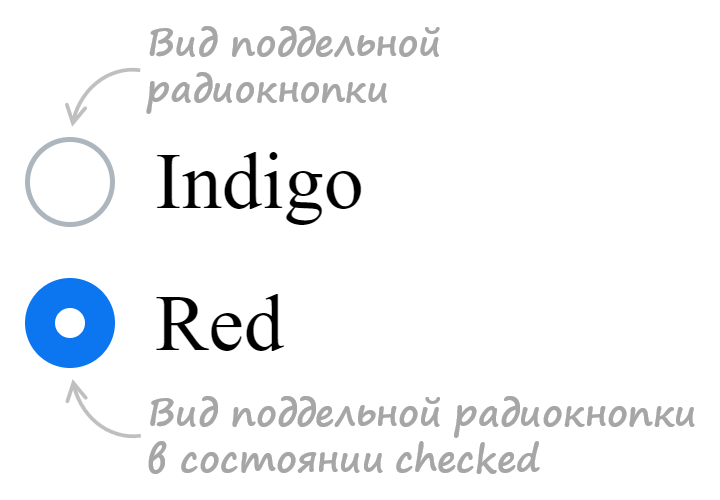
2. Стилизация radio, когда input расположен в label.
HTML разметка:
<label class="custom-radio">
  <input type="radio" name="color" value="indigo">
  <span>Indigo</span>
</label>
CSS код:
/* для элемента input c type="radio" */
.custom-radio>input {
  position: absolute;
  z-index: -1;
  opacity: 0;
}

/* для элемента label связанного с .custom-radio */
.custom-radio>span {
  display: inline-flex;
  align-items: center;
  user-select: none;
}

/* создание в label псевдоэлемента  before со следующими стилями */
.custom-radio>span::before {
  content: '';
  display: inline-block;
  width: 1em;
  height: 1em;
  flex-shrink: 0;
  flex-grow: 0;
  border: 1px solid #adb5bd;
  border-radius: 50%;
  margin-right: 0.5em;
  background-repeat: no-repeat;
  background-position: center center;
  background-size: 50% 50%;
}

/* стили при наведении курсора на радио */
.custom-radio>input:not(:disabled):not(:checked)+span:hover::before {
  border-color: #b3d7ff;
}

/* стили для активной радиокнопки (при нажатии на неё) */
.custom-radio>input:not(:disabled):active+span::before {
  background-color: #b3d7ff;
  border-color: #b3d7ff;
}

/* стили для радиокнопки, находящейся в фокусе */
.custom-radio>input:focus+span::before {
  box-shadow: 0 0 0 0.2rem rgba(0, 123, 255, 0.25);
}

/* стили для радиокнопки, находящейся в фокусе и не находящейся в состоянии checked */
.custom-radio>input:focus:not(:checked)+span::before {
  border-color: #80bdff;
}

/* стили для радиокнопки, находящейся в состоянии checked */
.custom-radio>input:checked+span::before {
  border-color: #0b76ef;
  background-color: #0b76ef;
  background-image: url("data:image/svg+xml,%3csvg xmlns='http://www.w3.org/2000/svg' viewBox='-4 -4 8 8'%3e%3ccircle r='3' fill='%23fff'/%3e%3c/svg%3e");
}

/* стили для радиокнопки, находящейся в состоянии disabled */
.custom-radio>input:disabled+span::before {
  background-color: #e9ecef;
}
Открыть пример
Радио-кнопки подразумевают, что вы выбираете один элемент из некоторого количества, поэтому элемент <input type="radio"> получил название переключателя в отличие от флажков, которые подразумевают множественный выбор. Браузеры довольно неплохо отображают радиокнопки по умолчанию.
Выбор 1
Выбор 2
Выбор 2
Однако, вам может понадобится как-то стилизовать эти элементы для своего сайта.
Как правило, стилизация радио-кнопок основана на использовании такого элемента, как label, клик на котором приводит к выбору определенного переключателя, с которым <label> связан с помощью атрибута for, в котором указывается id переключателя. Второй вариант — это когда в разметке радио-переключатель находится внутри элемента label.
Простой пример
See the Pen CSS Radio Buttons by Tristan White (@triss90) on CodePen.18892
Радио-кнопки, похожие на флажки
Если вы хотите стилизовать переключатели в виде флажков — пример от Andrew Vereshchak — как раз то, что нужно.
See the Pen Toggle radio intput with the label by Andrew Vereshchak (@multum) on CodePen.18892
Переключатели с изменением цвета и иконки
Здесь автор Andrew использовал абсолютное позиционирование для отдельного блока с классом .switch, в который входят 2 <label> и <span>. Также здесь не обошлось без псевдоэлемента ::after и псевдокласса :checked.
See the Pen Awesome Toggle Button by Andrew (@theawesomecoder61) on CodePen.18892
Разноцветные радио-кнопки
В этом примере от Dronca Raul каждый переключатель имеет свой цвет и галочку внутри при щелчке на элементе.
See the Pen Custom Radio Buttons by Dronca Raul (@rauldronca) on CodePen.18892
Используем переключатели для выбора цвета
В этом примере тема цветов для переключателей продолжается. Здесь мы не только прячем элемент <input type="radio"> с помощью CSS, но и изменяем фоновый цвет элемента с id="output" на тот, который указан в качестве value для <input> и фона для span-элемента, вло женного в <label>.
See the Pen Radio Color Picker by Elen (@ambassador) on CodePen.18892
Переключатели Да-Нет-Возможно
Еще одно цветовое решение от Matthew Blode.
See the Pen Flat Radio — Yes/No by Matthew Blode (@mblode) on CodePen.18892
Переключатель макета
Этот пример от Naoya очень удобен для демонстрации макетов с разной шириной. Интересно, что радио-кнопки, а точнее заменяющие их элементы label выглядят как … ссылки с подчеркиванием выбранного (псевдокласс :checked) в данный момент элемента.
See the Pen CSS Switch Layout by Naoya (@nxworld) on CodePen.18892
Вкладки-переключатели с анимацией
See the Pen Sliding tabs | CSS transitions only by Håvard Brynjulfsen (@havardob) on CodePen.0
Переключатель для света
Автор Ryan Mulligan
See the Pen Isometric Light Switch by Elen (@ambassador)
on CodePen.0
Выбор блюд
В этом примере от Kris Hedstrom радио-кнопки в какой-то степени похожи на чекбоксы (флажки) — они отмечают ваш выбор в виде галочки.
See the Pen Snacks? Flat radio button inputs… by Kris Hedstrom (@kristofferh) on CodePen.18892
Варианты переключателей с иконками для выбора инструментов, цены и др.
Автор Ivan Grozdic
See the Pen Checkboxes and radios (dark/light) — pure css — #06 by Ivan Grozdic (@ig_design)on CodePen.0
Использование радио-кнопок для выставления рейтинга в виде звездочек
Автор Stas Melnikov
See the Pen Pure CSS Rating via CSS Custom Properties as API by Stas Melnikov (@melnik909) on CodePen.18892
Анимация при переключении выбора
Несколько примеров, в которых использована анимация при переключении между радио-кнопками.
Автор: Tommaso Poletti
See the Pen Jelly Radio Button by Tommaso Poletti (@tomma5o) on CodePen.18892
Простые переключения с эффектом вдавливания от Pamela Dayne
See the Pen Just very simple radio buttons by Pamela Dayne (@pamdayne) on CodePen.18892
Переключение с перепрыгиванием от Jon Kantner
See the Pen Radio Hopping by Jon Kantner (@jkantner)
on CodePen.0
Автор Liam использовал для анимации JS-код.
See the Pen Bulgy radios by Liam (@liamj) on CodePen.18892
Интересное решение с радио-кнопками на темном фоне от Andrej Sharapov
See the Pen Animated SVG radio buttons by Andrej Sharapov (@andrejsharapov) on CodePen.18892
Анимация и стили как для радио-кнопок, так и для флажков от WILDER TAYPE.
See the Pen Ripple animation on input type radio and Checkbox by WILDER TAYPE (@wilder_taype) on CodePen.18892
Использование маски
See the Pen Underground radios by Mikael Ainalem (@ainalem) on CodePen.18892
«Текущая» кнопка
See the Pen Liquid Radio Button by Tamino Martinius (@Zaku) on CodePen.18892
Замечательное решение для переключения кнопок меню
See the Pen Material Radio Button by CODEARMADA (@montechristos) on CodePen.18892
Последовательное и быстрое заполнение кнопки
See the Pen Input Radio by Andreas Storm (@avstorm) on CodePen.18892
Выбираем кредитную карту вместе с Dean
See the Pen Recreation: Card theme switcher by Dean (@visualcookie) on CodePen.18892
Перепрыгивающий шарик от Jon Kantner
Вариант 1
See the Pen Radio Buttons With Marble and Wood by Jon Kantner (@jkantner) on CodePen.18892
Вариант 2
See the Pen Rolling Radio Buttons by Jon Kantner (@jkantner) on CodePen.18892
Вариант 3 от web-tiki
See the Pen CSS only input radio select concept by web-tiki (@web-tiki) on CodePen.18892
Переключатели в виде блоков с иконками
Автор Gabriel Ferreira предлагает использовать переключатели в виде блоков с анимированными иконками. Это можно сделать не только для Front-End/Back-End, но и для любых других текстов.
See the Pen Radio Button Big Square [Just CSS] by Gabriel Ferreira (@gabrielferreira) on CodePen.18892
Переключатель мужчина-женщина
See the Pen Radio button styling by Morten Olsen (@morten-olsen) on CodePen.18892
Соединительные линии, ведущие к радио-кнопкам
See the Pen Radio Button Circuit by LukasOe (@lukasoe) on CodePen.18892
Переключатели с отметкой в верхнем углу блока
При клике на блоке выбор отмечается сменой цвета и галочкой в круге от Rosa.
See the Pen Checkout Form by Rosa (@RRoberts) on CodePen.18892
Радио-кнопки как переключатели для радио от Jon Kantner
Вариант 1
See the Pen Literal Radio Buttons by Jon Kantner (@jkantner) on CodePen.18892
Вариант 2
See the Pen Literal Radio Buttons (Neumorphic Version) by Jon Kantner (@jkantner) on CodePen.18892
Радио-кнопки для вкладок (табов)
Ronny Siikaluoma предлагает вам использовать радио-кнопки для формирования отзывчивых (адаптивных) вкладок. Заметьте, без всякого JavaScript.
See the Pen Responsive Tabs with Pure CSS by Ronny Siikaluoma (@siiron) on CodePen.18892
Еще один вариант вкладок от Tristan White
See the Pen Tabs (checkbox-hack) by Tristan White (@triss90) on CodePen.18892
Выбор билетов с ценой и временем от Dannie Vinther
See the Pen Choose Ticket [a11y] by Dannie Vinther (@dannievinther) on CodePen.18892
Социальные кнопки
В этом примере от Aron использованы не только радио-кнопки, но и флажки (чекбоксы). При клике на элемент вы увидите pop-up окно с названием выбранной компании или соцсети.
See the Pen Pure CSS Option ( radio & checkbox ) No JS by Aron (@Aoyue) on CodePen.18892
Переключение иконок Google maps
See the Pen Google maps radio buttons CSS only by Elias Meire (@eliasmeire) on CodePen.18892
Переключение цветовых блоков
В этом примере от Ivan Grozdic элементы label выглядят и работают как ссылки, но без JavaScript, сортируя цветовые блоки.
See the Pen Content filter v2 — pure css — #09 by Ivan Grozdic (@ig_design) on CodePen.18892
Использование радио-кнопок для фильтации по категориям
Автор примера от ресурса Envato Tuts+ предлагают css-код, который без JavaScript служит для фильтрации категорий портфолио.
See the Pen
Build a Filtering Component in Pure CSS by Envato Tuts+ (@tutsplus)
on CodePen.0
Просмотров: 6 749