Последнее обновление: 11.09.2022
Виджет Label представляет текстовую метку. Этот элемент позволяет выводить статический текст без возможности редактирования.
Для создания элемента Label применяется конструктор, который принимает два параметра:
Label(master, options)
Параметр master представляет ссылку на родительский контейнер, а параметр options представляет следующие именованные параметры
-
anchor: устанавливает позиционирование текста
-
background: фоновый цвет
-
borderwidth: толщина границы метки
-
cursor: курсор указателя мыши при наведении на метку
-
font: шрифт текста
-
foreground: цвет текста
-
height: высота виджета
-
image: ссылка на изображение, которое отображается на метке
-
justify: устанавливает выравнивание текста. Значение LEFT выравнивает текст по левому краю, CENTER — по центру,
RIGHT — по правому краю -
pading: отступы от границ вилжета до его текста
-
relief: определяет тип границы, по умолчанию значение FLAT
-
text: устанавливает текст метки
-
textvariable: устанавливает привязку к элементу StringVar
-
underline: указывает на номер символа в тексте кнопки, который подчеркивается. По умолчанию значение -1, то есть никакой символ не подчеркивается
-
width: ширина виджета
-
wraplength: при положительном значении строки текста будут переносится для вмещения в пространство виджета
Выведем в окне приложения простейший текст:
from tkinter import *
from tkinter import ttk

root = Tk()
root.title("METANIT.COM")
root.geometry("250x200")

label = ttk.Label(text="Hello METANIT.COM")
label.pack()

root.mainloop()
Установка шрифта
Параметр font принимает определение шрифта в виде:
font = ("имя шрифта", размер_шрифта)
Первое значение передает имя шрифта в кавычках, а второе — числовой размер шрифта. Например, установим шрифт Arial высотой в 14 единиц:
from tkinter import *
from tkinter import ttk

root = Tk()
root.title("METANIT.COM")
root.geometry("250x200")

label = ttk.Label(text="Hello METANIT.COM", font=("Arial", 14))
label.pack()

root.mainloop()
Установка изображения
За установку изображения на метке отвечает параметр image. Самый простой способ определения изображения представляет
создание объекта PhotoImage, в конструктор которого передается путь к изображению:
from tkinter import *
from tkinter import ttk

root = Tk()
root.title("METANIT.COM")
root.geometry("250x200")

python_logo = PhotoImage(file="./python_logo.png")

label = ttk.Label(image=python_logo)
label.pack()

root.mainloop()
В моем случае изображение представляет файл python_logo.png, которое находится в одной папке с файлом приложения и которое изображает логотип python:
Если необходимо также отображать и текст, то для этого можно установить параметр compound, который определяет положение текста по отношению к изображению
с помощью одного из следующих значений:
-
top: изображение поверх текста
-
bottom: изображение под текстом
-
left: изображение слева от текста
-
right: изображение справа от текста
-
none: при наличии изображения отображается только изображение
-
text: отображается только текст
-
image: отображается только изображение
Например, отобразим картинку поверх текста:
from tkinter import *
from tkinter import ttk

root = Tk()
root.title("METANIT.COM")
root.geometry("250x200")

python_logo = PhotoImage(file="./python_logo.png")

label = ttk.Label(image=python_logo, text="Python", compound="top")
label.pack()

root.mainloop()
Стилизация
По умолчанию метка не имеет границы. Для установки толщины границы используется параметр borderwidth, при этом нам также надо
установить тип границы с помощью параметра releaf, который может принимать значения: «flat», «raised», «sunken», «ridge», «solid» и «groove»:
from tkinter import *
from tkinter import ttk

root = Tk()
root.title("METANIT.COM")
root.geometry("250x200")


label = ttk.Label(text="Hello Tkinter", borderwidth=2, relief="ridge", padding=8)
label.pack(expand=True)

root.mainloop()
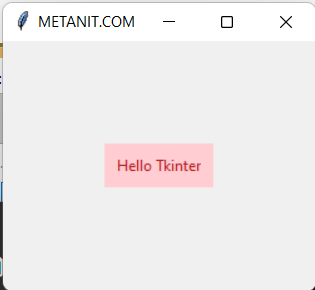
Установка цвета фона и текста:
from tkinter import *
from tkinter import ttk

root = Tk()
root.title("METANIT.COM")
root.geometry("250x200")


label = ttk.Label(text="Hello Tkinter", background="#FFCDD2", foreground="#B71C1C", padding=8)
label.pack(expand=True)

root.mainloop()
- Python Tkinter
LabelВиджет - Измените шрифт Pythonской этикетки
- Изменить цвет(ы) Python Tkinter
LabelЦвет(а) - Изображение на дисплее в Python Tkinter Label
Виджет Tkinter Label отображает текстовую строку или изображение, содержимое которого обычно не должно быть динамическим. Конечно, вы можете изменить его содержимое, если хотите.
Python Tkinter Label Виджет
from sys import version_info
if version_info.major == 2:
    import Tkinter as tk
elif version_info.major == 3:
    import tkinter as tk

app = tk.Tk()
labelExample = tk.Label(app, text="This is a Label")
labelExample.pack()
app.mainloop()
Генерирует окно с текстовой меткой внутри главного окна.

labelExample = tk.Label(app, text = "This is a label")
labelExample — это экземпляр Label, отображающий Это ярлык с родительским app.
Метод pack() управляет компоновкой конкретного виджета в родительском. Он имеет следующие опции
pack() Метод |
Описание |
|---|---|
after=widget |
упаковать его после того, как вы упаковали виджет |
anchor=NSEW (or subset) |
позиционный виджет в соответствии с |
before=widget |
упакуйте его перед тем, как упаковать виджет |
expand=bool |
расширять виджет при росте родительского размера |
fill=none or x or y or both |
заполнять виджет при росте виджета |
in=master |
использовать master, чтобы содержать этот виджет. |
in_=master |
см. описание опции in окне |
ipadx=amount |
добавить внутреннюю прокладку в направлении х |
ipady=amount |
добавить внутреннюю прокладку в направлении y |
padx=amount |
добавлять набивку в направлении х |
pady=amount |
добавить набивку в направлении y |
side=top or bottom or left or right |
куда добавить этот виджет. |
Вы можете изменить параметры, чтобы получить различное расположение виджетов меток.
Размеры метки задаются шириной и высотой, которые принадлежат определенным параметрам виджета метки.
Информация
Ширина и высота имеют единицу измерения текста, если он содержит текст, а его размер — пиксели, если он отображает изображение.
См. эта статья для проверки, что такое текстовый блок и как задать размер метки в единице пикселей.
Свойства метки можно получить командой dict(label),
from sys import version_info
if version_info.major == 2:
    import Tkinter as tk
elif version_info.major == 3:
    import tkinter as tk

from pprint import pprint

app = tk.Tk()
labelExample = tk.Label(app, text="This is a Label", height=15, width=100)
pprint(dict(labelExample))
Объекты недвижимости перечислены ниже
{'activebackground': 'SystemButtonFace',
 'activeforeground': 'SystemButtonText',
 'anchor': 'center',
 'background': 'SystemButtonFace',
 'bd': <pixel object at 00000000048D1000>,
 'bg': 'SystemButtonFace',
 'bitmap': '',
 'borderwidth': <pixel object at 00000000048D1000>,
 'compound': 'none',
 'cursor': '',
 'disabledforeground': 'SystemDisabledText',
 'fg': 'SystemButtonText',
 'font': 'TkDefaultFont',
 'foreground': 'SystemButtonText',
 'height': 15,
 'highlightbackground': 'SystemButtonFace',
 'highlightcolor': 'SystemWindowFrame',
 'highlightthickness': <pixel object at 00000000048FF100>,
 'image': '',
 'justify': 'center',
 'padx': <pixel object at 00000000048FED40>,
 'pady': <pixel object at 00000000048FF0D0>,
 'relief': 'flat',
 'state': 'normal',
 'takefocus': '0',
 'text': 'This is a Label',
 'textvariable': '',
 'underline': -1,
 'width': 100,
 'wraplength': <pixel object at 00000000048FED70>}
Теперь вы знаете свойства этикеток, и, изменив их, вы можете получить различный внешний вид этикеток.
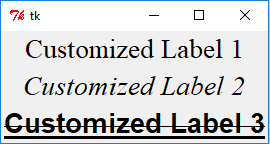
Измените шрифт Pythonской этикетки
Ниже мы покажем вам различные методы настройки шрифта этикетки.
from sys import version_info
if version_info.major == 2:
    import Tkinter as tk
elif version_info.major == 3:
    import tkinter as tk

import tkFont
app = tk.Tk()
labelExample1 = tk.Label(app, text="Customized Label 1", font=("Times", 20))
labelExample2 = tk.Label(app, text="Customized Label 2",
                         font=("Times", 20, "italic"))

labelFont3 = tkFont.Font(family="Helvetica", size=20, weight=tkFont.BOLD,
                         underline=1, overstrike=1)
labelExample3 = tk.Label(app, text="Customized Label 3",
                         font=labelFont3)
labelExample1.pack()
labelExample2.pack()
labelExample3.pack()
app.mainloop()
Установить Python Tkinter этикетка Шрифт с кортежом
labelExample1 = tk.Label(app, text="Customized Label 1", font=("Times", 20))
labelExample2 = tk.Label(app, text="Customized Label 2",
                         font=("Times", 20, "italic"))
Кортеж, первым элементом которого является тип шрифта, затем следует размер, стиль, например, вес, курсив, подчеркивание и/или зачеркивание.
Установите Python Tkinter Label Font с tkFont Объект шрифта
labelFont3 = tkFont.Font(family="Helvetica", size=20, weight=tkFont.BOLD,
                         underline=1, overstrike=1)
labelExample3 = tk.Label(app, text="Customized Label 3",
                         font=labelFont3)
Вы также можете использовать объект шрифта в модуле tkFont для указания свойств шрифта текста этикетки.
Тип шрифта в labelExample3 — это семейство шрифтов Helvetica, размер 20, полужирный, подчеркнутый и перечеркнутый.
from sys import version_info
if version_info.major == 2:
    import Tkinter as tk
elif version_info.major == 3:
    import tkinter as tk

import tkFont
from pprint import pprint

app = tk.Tk()
pprint(tkFont.families())
Изменить цвет(ы) Python Tkinter LabelЦвет(а)
Вы можете изменить цвет переднего плана и фона этикетки, используя свойства fg/bg.
labelExample1 = tk.Label(app, text="Customized Color",bg="gray", fg="red")

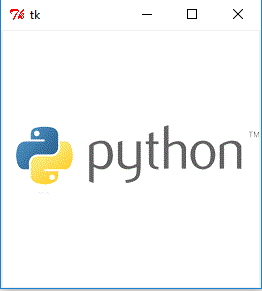
Изображение на дисплее в Python Tkinter Label
Свойство image в label используется для отображения изображения на этикетке.
from sys import version_info
if version_info.major == 2:
    import Tkinter as tk
elif version_info.major == 3:
    import tkinter as tk


app = tk.Tk()
logo = tk.PhotoImage(file='python.gif')
labelExample = tk.Label(app, image=logo)
labelExample.pack()
app.mainloop()
Предупреждение
tk.PhotoImage мог отображать только цветные изображения в формате GIF, PPM/PGM. Он генерирует _tkinter.TclError: не смог распознать данные в файле изображения, если вы используете другие форматы изображения.
I’m having trouble figuring out how to change the color of text in my Tkinter GUI. I’m trying to get Label1 to be red, Label2 to be blue, Label3 to be brown and Label4 to be yellow but I can’t seem to figure it out. Thanks in advance 
import random
from Tkinter import *          #don't import like this except for Tkinter
root = Tk() #create main window
root.title('Atarashi Sozo')
# Make and place a canvas widget for events and drawing
canvas = Canvas(root, height=600, width=600, relief=RAISED, bg='white')
canvas.grid() #Puts the canvas in the main Tk window

#Create lists
creature = ['is an Animal', 'is a Human', 'is an Artificial Intelligence',
        'is an Alien', 'is a Mage','is a Reptillian','is a Shapeshifter',
        'is Undead', 'is a Scorpion Hedgehog', 'is an Angel', 'is a Demon']
element = ['controls lightning', 'controls fire', 'controls nature','controls water', 'controls mater', 'controls time', 'controls gravity', 'controls life', 'controls     death', 'controls wind',
       'can bend any metal','controls the sun', 'controls the moon', 'controls love']
features = ['has wings', 'has markings', 'has large fangs', 'has claws', 'has a tail', 'has a weapon',
        'has cybernetic parts', 'has wolf ears', 'has broken teeth', 'has a horn', 'has big ears',
        'has eyes with two colors', 'has a mp3']
wildcard = ['is cursed', 'is bewitched', 'has no soul', 'killed someone', 'just learned magic',
        'has no wifi', 'has unlimited memory', 'is poor', 'won the lottery', 'set the world on fire', 'visited another dimension']
colors = ['is primarily blue', 'is primarily grey', 'is primarily red', 'is primarily green', 'is primarily orange',
      'is secondarily blue', 'is secondarily grey', 'is secondarily red', 'is secondarily green', 'is seconarily orange',
      'is primarily black', 'is primarily purple', 'is secondarily purple', 'has all the colors of the rainbow']
handicap = ['is blind', 'is deaf', 'lost limbs', 'fears everything', 'has broken bones','has a small head','has an illness',
        'has amnesia', 'is allergic to almost everything', 'is deformed']
habitat = ['lives in cyberspace', 'lives in a desert', 'lives in the mountains', 'lives in a volcano', 'lives in grasslands',
        'lives on the moon', 'lives in space', 'lives on a deserted island', 'lives in a virtual world', 'lives in the underworld']
personality = ['is clingy', 'is depressed', 'is energetic', 'is angry', 'is kind', 'is a jerk', 'is goofy', 'is immature', 'is happy',
           'is insane']
profession = ['is a teacher', 'is an assassin', 'is a graphic designer', 'is a programmer', 'is a photographer', 'is a blacksmith',
          'is a bounty hunter', 'is an inventor', 'is a mage', 'is a monster hunter']
hobby = ['likes to cook', 'likes to draw and paint', 'likes to build things', 'likes to play games', 'likes to shop',
     'studies alchemy', 'likes to write', 'likes to make music', 'likes to design', 'likes sports']
#Sets categories to choose from
categoryList = [hobby,profession,personality,habitat,handicap,colors,wildcard,features,element]
#Removes category from list if it has been choosen to remove the possibility of duplicates
catOne = random.choice(categoryList)
if catOne in categoryList: categoryList.remove(catOne)
catTwo = random.choice(categoryList)
if catTwo in categoryList: categoryList.remove(catTwo)
catThree = random.choice(categoryList)
if catThree in categoryList: categoryList.remove(catThree)
#Chooses item from category choosen
itemOne = random.choice(catOne)
itemTwo = random.choice(catTwo)
itemThree = random.choice(catThree)

#Creates the main visual almost the same as Atarashi Sozo in App Inventor
Title_box = canvas.create_rectangle(500, 90, 100, 18, outline = 'purple',width = 10, fill = 'violet')
Title_text = canvas.create_text(300, 50, text='Your Character', font=('Impact', -50))
Display_box1 = canvas.create_rectangle(600, 200, 8, 125, outline = 'blue', width = 10, fill = 'sky blue')
Label1 = canvas.create_text(300, 160, text=random.choice(creature), font=('Impact', -30,))
Display_box2 = canvas.create_rectangle(600, 300, 8, 225, outline = 'red', width = 10, fill = 'pink')
Label2 = canvas.create_text(300, 260, text=itemOne, font=('Impact', -30))
Display_box3 = canvas.create_rectangle(600, 400, 8, 325, outline = 'goldenrod', width = 10, fill = 'gold')
Label3 = canvas.create_text(300, 360, text=itemTwo, font=('Impact', -30))
Display_box4 = canvas.create_rectangle(600, 500, 8, 425, outline = 'saddle brown', width = 10, fill = 'chocolate')
Label4 = canvas.create_text(300, 460, text=itemThree, font=('Impact', -30))

#Create dummy button
class Outcomes(Frame):

def __init__(self,master):
    Frame.__init__(self,master)
    self.grid()
    self.create_widgets()
def create_widgets(self):
    self.button = Button(self, text = 'Generate Character')
    self.button['command'] = self.print_text
    self.button.grid()
def print_text():
    print
app = Outcomes(root)

# Enter event loop. This displays the GUI and starts listening for events.
# The program ends when you close the window.
root.mainloop()
I’m having trouble figuring out how to change the color of text in my Tkinter GUI. I’m trying to get Label1 to be red, Label2 to be blue, Label3 to be brown and Label4 to be yellow but I can’t seem to figure it out. Thanks in advance
import random
from Tkinter import *          #don't import like this except for Tkinter
root = Tk() #create main window
root.title('Atarashi Sozo')
# Make and place a canvas widget for events and drawing
canvas = Canvas(root, height=600, width=600, relief=RAISED, bg='white')
canvas.grid() #Puts the canvas in the main Tk window

#Create lists
creature = ['is an Animal', 'is a Human', 'is an Artificial Intelligence',
        'is an Alien', 'is a Mage','is a Reptillian','is a Shapeshifter',
        'is Undead', 'is a Scorpion Hedgehog', 'is an Angel', 'is a Demon']
element = ['controls lightning', 'controls fire', 'controls nature','controls water', 'controls mater', 'controls time', 'controls gravity', 'controls life', 'controls     death', 'controls wind',
       'can bend any metal','controls the sun', 'controls the moon', 'controls love']
features = ['has wings', 'has markings', 'has large fangs', 'has claws', 'has a tail', 'has a weapon',
        'has cybernetic parts', 'has wolf ears', 'has broken teeth', 'has a horn', 'has big ears',
        'has eyes with two colors', 'has a mp3']
wildcard = ['is cursed', 'is bewitched', 'has no soul', 'killed someone', 'just learned magic',
        'has no wifi', 'has unlimited memory', 'is poor', 'won the lottery', 'set the world on fire', 'visited another dimension']
colors = ['is primarily blue', 'is primarily grey', 'is primarily red', 'is primarily green', 'is primarily orange',
      'is secondarily blue', 'is secondarily grey', 'is secondarily red', 'is secondarily green', 'is seconarily orange',
      'is primarily black', 'is primarily purple', 'is secondarily purple', 'has all the colors of the rainbow']
handicap = ['is blind', 'is deaf', 'lost limbs', 'fears everything', 'has broken bones','has a small head','has an illness',
        'has amnesia', 'is allergic to almost everything', 'is deformed']
habitat = ['lives in cyberspace', 'lives in a desert', 'lives in the mountains', 'lives in a volcano', 'lives in grasslands',
        'lives on the moon', 'lives in space', 'lives on a deserted island', 'lives in a virtual world', 'lives in the underworld']
personality = ['is clingy', 'is depressed', 'is energetic', 'is angry', 'is kind', 'is a jerk', 'is goofy', 'is immature', 'is happy',
           'is insane']
profession = ['is a teacher', 'is an assassin', 'is a graphic designer', 'is a programmer', 'is a photographer', 'is a blacksmith',
          'is a bounty hunter', 'is an inventor', 'is a mage', 'is a monster hunter']
hobby = ['likes to cook', 'likes to draw and paint', 'likes to build things', 'likes to play games', 'likes to shop',
     'studies alchemy', 'likes to write', 'likes to make music', 'likes to design', 'likes sports']
#Sets categories to choose from
categoryList = [hobby,profession,personality,habitat,handicap,colors,wildcard,features,element]
#Removes category from list if it has been choosen to remove the possibility of duplicates
catOne = random.choice(categoryList)
if catOne in categoryList: categoryList.remove(catOne)
catTwo = random.choice(categoryList)
if catTwo in categoryList: categoryList.remove(catTwo)
catThree = random.choice(categoryList)
if catThree in categoryList: categoryList.remove(catThree)
#Chooses item from category choosen
itemOne = random.choice(catOne)
itemTwo = random.choice(catTwo)
itemThree = random.choice(catThree)

#Creates the main visual almost the same as Atarashi Sozo in App Inventor
Title_box = canvas.create_rectangle(500, 90, 100, 18, outline = 'purple',width = 10, fill = 'violet')
Title_text = canvas.create_text(300, 50, text='Your Character', font=('Impact', -50))
Display_box1 = canvas.create_rectangle(600, 200, 8, 125, outline = 'blue', width = 10, fill = 'sky blue')
Label1 = canvas.create_text(300, 160, text=random.choice(creature), font=('Impact', -30,))
Display_box2 = canvas.create_rectangle(600, 300, 8, 225, outline = 'red', width = 10, fill = 'pink')
Label2 = canvas.create_text(300, 260, text=itemOne, font=('Impact', -30))
Display_box3 = canvas.create_rectangle(600, 400, 8, 325, outline = 'goldenrod', width = 10, fill = 'gold')
Label3 = canvas.create_text(300, 360, text=itemTwo, font=('Impact', -30))
Display_box4 = canvas.create_rectangle(600, 500, 8, 425, outline = 'saddle brown', width = 10, fill = 'chocolate')
Label4 = canvas.create_text(300, 460, text=itemThree, font=('Impact', -30))

#Create dummy button
class Outcomes(Frame):

def __init__(self,master):
    Frame.__init__(self,master)
    self.grid()
    self.create_widgets()
def create_widgets(self):
    self.button = Button(self, text = 'Generate Character')
    self.button['command'] = self.print_text
    self.button.grid()
def print_text():
    print
app = Outcomes(root)

# Enter event loop. This displays the GUI and starts listening for events.
# The program ends when you close the window.
root.mainloop()
Are you trying to learn Python GUI programming? Let us check out in detail the Python Tkinter label. How to use Label in Python Tkinter. We will cover all the topics as :
- About Tkinter label
- Tkinter label font size
- Tkinter label position
- Tkinter label border
- Tkinter label transparent background
- Tkinter label attributes
- Tkinter label image
- Tkinter label attributes
- Tkinter label image
- Tkinter label text-align left
Let us see what is a Python Tkinter label?
- The label simply means the text on the screen.
- It could be an instruction or information.
- Labels are the widely used widget & is a command in all the GUI supporting tools & languages.
- Labels are also used to display images & icons.
- Few popular label options are:
- text: to display text
- textvariable: specifies name who will replace text. Mostly used when text is changing.
- underline: underlines just one character of the text string
- width: adds addition width to label, takes a number as an argument.
- image: to add an image or to style the label. It uses style.map()
- compound: display images with text, also provide control to position them.
Also, you may like, Python Tkinter Title.
Tkinter label font size
Let us see how to set font size in Python Tkinter label.
- Font-size creates emphasis on user.
- It makes things more clear & readable.
- In label font size can be controlled using keyword font
Syntax:
In this syntax ws is the master that we are using, font-name could be any font supported by ms word like Arial, Times new roman, Calibri, etc. weight can be Bold, italic, underline.
Label(ws, text="any text here", font=('font-name & weight', 'font-size')Code:
from tkinter import *

ws = Tk()

Label(ws, text="Hello there!", font=("arial italic", 18) ).pack()

ws.mainloop()
Output:
So in this output, you can see that the text “Hello there!” have size 18 and is italic. Similarly, you can put bold and underline.

You may like, BMI Calculator Using Python Tkinter.
Tkinter label position
- The right placement of widgets can create a difference.
- Label position can be controlled using pack, grid & place
- refer to our geometry positioning section to know more about them
Syntax:
Label(ws, text="any text", font=(14, "roboto")).pack()Label(ws, text="any text", font=(14, "roboto")).grid(row=value, columns=value)Label(ws, text="any text", font=(14, "roboto")).place(x=coordinate_value, y=coordinate_value)Tkinter label border
- The Python Tkinter Label border defines the type of border & its thickness.
- There 6 types of borders each having their on property:
- Flat
- Raised
- Sunken
- ridge
- solid
- groove
- By default flat is active.
- borderwidth keyword is used to define the thickness of the border.
- relief keyword is used to define the type of border.
Syntax: borderwidth should be provided any integer value, relief should provide anyone out of these ( flat, raised, sunken, ridge, solid, groove).
Label(ws, text="any text", borderwidth=value, relief="typeofborder").pack()Code:
from tkinter import *

ws = Tk()
ws.title("Border")
ws.geometry("300x400")

Label(ws, text="Flat border", borderwidth=3, relief="flat", padx=5, pady=10).pack(padx=5, pady=10)
Label(ws, text="raised border", borderwidth=3, relief="raised", padx=5, pady=10).pack(padx=5, pady=10)
Label(ws, text="sunken border", borderwidth=3, relief="sunken", padx=5, pady=10).pack(padx=5, pady=10)
Label(ws, text="ridge border", borderwidth=3, relief="ridge", padx=5, pady=10).pack(padx=5, pady=10)
Label(ws, text="solid border", borderwidth=3, relief="solid", padx=5, pady=10).pack(padx=5, pady=10)
Label(ws, text="groove border", borderwidth=3, relief="groove",padx=5, pady=10).pack(padx=5, pady=10)

ws.mainloop()
Output:
In this output, all types of border are displayed, each have width of 3 pixels. padx & pady determines the extra space around the box.

Tkinter label transparent background
- Transparent background means you can see through the frame.
- only an image will appear the rest frame will be invisible.
- make sure to take an image that does not have the background
- to provide bg color to the image and assign the same color to wm_attributes command.
- we tried in all colors but grey works best.
Syntax:
This colourname should be same as the image bg color. We tried with many colors but grey works best for this.
ws.wm_attributes("-transparentcolor", 'colorname')
Code:
from tkinter import *

ws = Tk()

giant=PhotoImage(file='bg.png')
Label(ws,image=giant,bg='grey').pack()
ws.wm_attributes("-transparentcolor", 'grey')

ws.mainloop()
Output:
In this output, picture of giant has been displayed with no background. You can see through the image frame.

Tkinter label attributes
- Attributes refer to features of the label
- They are also called options that facilitate more functions
- though we have discussed most of them in this blog.
- but we are summarising all of them here.
- Attributes are as following:
- colours:
- colours plays an important role in software development.
- Every colours has some meaning like red for error, green of correct, etc.
- bg is used to fill background colour of the label
- fg is used to change the text colour.
- you can either provide a colour name or hex code
Example:
Label(ws, text="colors", bg="blue", fg="#000").pack()2. font :
- fonts make text readable.
- to know more about fonts
- Please refer to our Tkinter label font size section
Example:
Label(ws, text="font demo", font=('arial bold', 18)).pack()3. relief:
- relief is used to provide decoration to the border.
- It has various options that can be used to emphasise text.
- To know more about options check Tkinter label border section.
Example:
Label(ws, text="relief demo", borderwidth=3, relief='solid border').pack()4. cursor :
- It used to change the cursor image when hovered over the label.
- here is the list of all cursors that one can use
- arrow, circle, clock, dotbox, exchange, fleur, heart man, mouse, pirate, pls, shuttle, sizing, spider, spraycan, star, target, tcross, trek, watch
Example:
Label(ws, text="cursor demo", cursor="watch").pack()5. Height & Width:
- Height determines the vertical dimension of the label.
- width determines the horizontal dimension of the label
Example:
Label(ws, text="Height & width", height=5, width=10).pack()6. padx & pady
- padx adds empty space vertically
- pady adds empty space horizontally
- if they are used with in the label then they add extra space inside the box
- if they are used in the positioning section (pack/grid/place) then add space outside the box.
Example: Inside the box
Label(ws, text="padding demo", padx=10, pady=5).pack()7. Justify:
- Justify is used for alignment.
- It works similar to anchor but has only three options
- LEFT, CENTER, RIGHT
- programmers prefer to use the anchor as it gives more control
Example:
Label(ws, text="padding demo", justify=CENTER).pack()8. anchor:
- Anchor also provides controls for alignment.
- to know more about it refer to our section Tkinter label text-alignment
Example:
Label(ws, text="padding demo").pack(anchor='w')So these were popular attributes for Label. Most of them work in other widgets as well as entry, button, etc. Now before we end this section, here is the program with attributes used in it. The controls are placed in a sequence for your convince. Do notice each and every attribute used. cursor one is my favorite
Code:
from tkinter import *

ws = Tk()
ws.title("pythonguides")
ws.geometry('200x150')

Label(ws, text='danger', bg='red', fg='red', font=('Arial bold', 14), relief='raised', cursor='pirate', height=4, width=10, padx=10, pady=10, justify=CENTER).pack(padx=10, pady=10, anchor='w')

ws.mainloop()
Output:
This is a simple program created using all the attributes mentioned above. Few highlights, the cursor has transforming ability to the pirate icon, though it is pack() still it is in the corner because of anchor set to west, blue is bg & red text is fg. Text is justified to center, etc.

Tkinter label image
- Images make things interesting.
- In this section we will learn how to put image in label
- We will also learn to place text on image.
Syntax:
var-name = PhotoImage(file="path/of/image.extension")
Label(ws, image=var-name).pack()
Code:
from tkinter import *

ws = Tk()
ws.title("giant image")

giant = PhotoImage(file="bg.png")
Label(ws, text="hi",image=giant).pack(side="top")
intro = '''Hi! I am Giant from COC, I have been programmed to
break walls & bones.'''
Label(ws, text=intro, anchor=S, font=('Arial bold', 14), underline=9).pack(side="bottom")

ws.mainloop()
Output:
In this output, giant image has been placed, below the image there is a brief information about him. In the intro section G is underlined and for that we have used underline option in label.

Tkinter label text-alignment
- Alignment refers to the quick position of text direction wise.
- direction-wise means:
- N : North
- S : South
- E : East
- W : West
- NE : North East
- NW : North West
- SE : South East
- SW : South West
- CENTER
- anchor keyword is used to position the label widget.
Syntax: In place of direction provide any one out of these (SN, SE, W, NE, SE, SW, CENTER)
Label(ws, text="sometext", anchor= direction).pack()Code:
from tkinter import *

ws = Tk()
ws.title("Border")
ws.geometry("50x100")

Label(ws, text="Left", anchor=W).pack(fill='both')
Label(ws, text="Right", anchor=E).pack(fill='both')

ws.mainloop()
Output:
In this output, you can see that text has been aligned to left and right using anchor.

You may like the following Python tutorials:
- Increment and Decrement operators in Python
- Python Anonymous Function (Lambda Function)
- Python access modifiers + Examples
- Python Read CSV File and Write CSV File
- Python Array with Examples
- Hash table in python
- Block Indentation in Python
- Python get filename from the path
- Python TypeError: ‘list’ object is not callable
- Python Tkinter Entry – How to use
- Python Tkinter Button – How to use
- Python Tkinter Menu bar – How to Use
- Python Tkinter Checkbutton – How to use
- Python Tkinter radiobutton – How to use
- Python Tkinter Calculator
- Python Tkinter Canvas Tutorial
In this tutorial we have learned Python tkinter label.
- What is the Tkinter label in Python
- Tkinter label font size
- Tkinter label position
- Tkinter label border
- Tkinter label transparent background
- Tkinter label attributes
- Tkinter label image
- Tkinter label attributes
- Tkinter label image
- Tkinter label text-align left

Python is one of the most popular languages in the United States of America. I have been working with Python for a long time and I have expertise in working with various libraries on Tkinter, Pandas, NumPy, Turtle, Django, Matplotlib, Tensorflow, Scipy, Scikit-Learn, etc… I have experience in working with various clients in countries like United States, Canada, United Kingdom, Australia, New Zealand, etc. Check out my profile.
В этом уроке мы узнаем, как разрабатывать графические пользовательские интерфейсы, с помощью разбора некоторых примеров графического интерфейса Python с использованием библиотеки Tkinter.
Библиотека Tkinter установлена в Python в качестве стандартного модуля, поэтому нам не нужно устанавливать что-либо для его использования. Tkinter — очень мощная библиотека. Если вы уже установили Python, можете использовать IDLE, который является интегрированной IDE, поставляемой в Python, эта IDE написана с использованием Tkinter. Звучит круто!
Мы будем использовать Python 3.7 поэтому, если вы все еще используете Python 2.x, настоятельно рекомендуем перейти на Python 3.x, если вы не в курсе нюансов изменения языка, с целью, чтобы вы могли настроить код для запуска без ошибок.
Давайте предположим, что у вас уже есть базовые знания по Python, которые помогут понять что мы будем делать.
Мы начнем с создания окна, в котором мы узнаем, как добавлять виджеты, такие, как кнопки, комбинированные поля и т. д. После этого поэкспериментируем со своими свойствами, поэтому предлагаю начать.
Создание своего первого графического интерфейса
Для начала, следует импортировать Tkinter и создать окно, в котором мы зададим его название:
from tkinter import *
window = Tk()
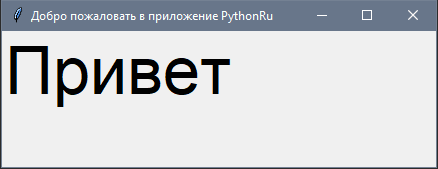
window.title("Добро пожаловать в приложение PythonRu")
window.mainloop()
Результат будет выглядеть следующим образом:
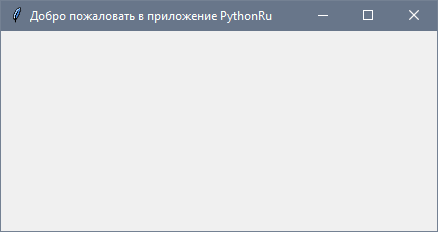 Прекрасно! Наше приложение работает.
Последняя строка вызывает функцию mainloop. Эта функция вызывает бесконечный цикл окна, поэтому окно будет ждать любого взаимодействия с пользователем, пока не будет закрыто.
В случае, если вы забудете вызвать функцию mainloop , для пользователя ничего не отобразится.
Создание виджета Label
Чтобы добавить текст в наш предыдущий пример, мы создадим lbl , с помощью класса Label, например:
lbl = Label(window, text="Привет")
Затем мы установим позицию в окне с помощью функции grid и укажем ее следующим образом:
lbl.grid(column=0, row=0)
Полный код, будет выглядеть следующим образом:
from tkinter import *


window = Tk()
window.title("Добро пожаловать в приложение PythonRu")
lbl = Label(window, text="Привет")
lbl.grid(column=0, row=0)
window.mainloop()
И вот как будет выглядеть результат:
 Если функция
 grid не будет вызвана, текст не будет отображаться.
Настройка размера и шрифта текста
Вы можете задать шрифт текста и размер. Также можно изменить стиль шрифта. Для этого передайте параметр font таким образом:
lbl = Label(window, text="Привет", font=("Arial Bold", 50))
 Обратите внимание, что параметр
 font может быть передан любому виджету, для того, чтобы поменять его шрифт, он применяется не только к Label.
Отлично, но стандартное окно слишком мало. Как насчет настройки размера окна?
Настройка размеров окна приложения
Мы можем установить размер окна по умолчанию, используя функцию geometry следующим образом:
window.geometry('400x250')
В приведенной выше строке устанавливается окно шириной до 400 пикселей и высотой до 250 пикселей.
Попробуем добавить больше виджетов GUI, например, кнопки и посмотреть, как обрабатывается нажатие кнопок.
Добавление виджета Button
Начнем с добавления кнопки в окно. Кнопка создается и добавляется в окно так же, как и метка:
btn = Button(window, text="Не нажимать!")
btn.grid(column=1, row=0)
Наш код будет выглядеть вот так:
from tkinter import *


window = Tk()
window.title("Добро пожаловать в приложение PythonRu")
window.geometry('400x250')
lbl = Label(window, text="Привет", font=("Arial Bold", 50))
lbl.grid(column=0, row=0)
btn = Button(window, text="Не нажимать!")
btn.grid(column=1, row=0)
window.mainloop()
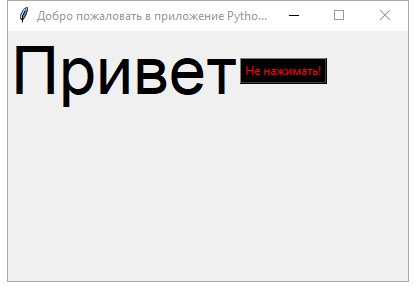
Результат будет следующим:
 Обратите внимание, что мы помещаем кнопку во второй столбец окна, что равно 1. Если вы забудете и поместите кнопку в том же столбце, который равен 0, он покажет только кнопку.
Изменение цвета текста и фона у Button
Вы можете поменять цвет текста кнопки или любого другого виджета, используя свойство fg.
Кроме того, вы можете поменять цвет фона любого виджета, используя свойство bg.
btn = Button(window, text="Не нажимать!", bg="black", fg="red")
 Теперь, если вы попытаетесь щелкнуть по кнопке, ничего не произойдет, потому что событие нажатия кнопки еще не написано.
Кнопка Click
Для начала, мы запишем функцию, которую нужно выполнить при нажатии кнопки:
def clicked():
    lbl.configure(text="Я же просил...")
Затем мы подключим ее с помощью кнопки, указав следующую функцию:
btn = Button(window, text="Не нажимать!", command=clicked)
Обратите внимание: мы пишем clicked, а не clicked()с круглыми скобками. Теперь полный код будет выглядеть так:
from tkinter import *


def clicked():
    lbl.configure(text="Я же просил...")


window = Tk()
window.title("Добро пожаловать в приложение PythonRu")
window.geometry('400x250')
lbl = Label(window, text="Привет", font=("Arial Bold", 50))
lbl.grid(column=0, row=0)
btn = Button(window, text="Не нажимать!", command=clicked)
btn.grid(column=1, row=0)
window.mainloop()
При нажатии на кнопку, результат, как и ожидалось, будет выглядеть следующим образом:
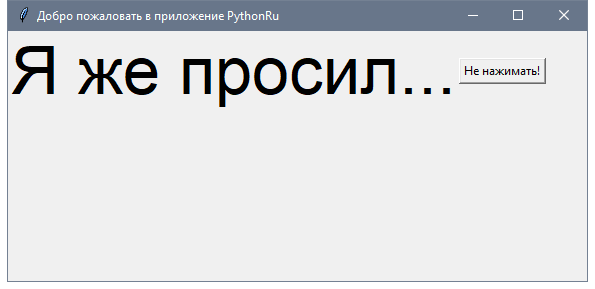 Круто!
Получение ввода с использованием класса Entry (текстовое поле Tkinter)
В предыдущих примерах GUI Python мы ознакомились со способами добавления простых виджетов, а теперь попробуем получить пользовательский ввод, используя класс Tkinter Entry (текстовое поле Tkinter).
Вы можете создать текстовое поле с помощью класса Tkinter Entry следующим образом:
txt = Entry(window, width=10)
Затем вы можете добавить его в окно, используя функцию grid.
Наше окно будет выглядеть так:
from tkinter import *
def clicked():
lbl.configure(text="Я же просил...")
window = Tk()
window.title("Добро пожаловать в приложение PythonRu")
window.geometry('400x250')
lbl = Label(window, text="Привет")
lbl.grid(column=0, row=0)
txt = Entry(window,width=10)
txt.grid(column=1, row=0)
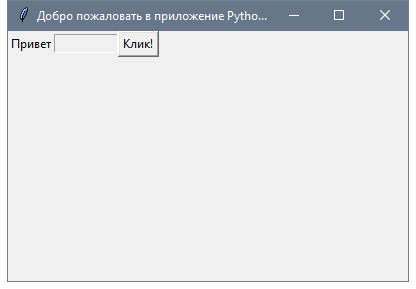
btn = Button(window, text="Не нажимать!", command=clicked)
btn.grid(column=2, row=0)
window.mainloop()
Полученный результат будет выглядеть так:
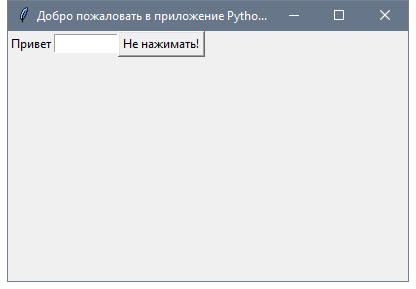 Теперь, если вы нажмете кнопку, она покажет то же самое старое сообщение, но что же будет с отображением введенного текста в виджет
 Entry?
Во-первых, вы можете получить текст ввода, используя функцию get. Мы можем записать код для выбранной функции таким образом:
def clicked():
    res = "Привет {}".format(txt.get())
    lbl.configure(text=res)
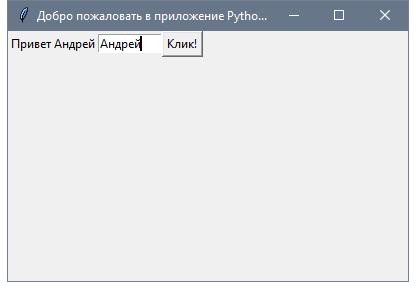
Если вы нажмете на кнопку — появится текст «Привет » вместе с введенным текстом в виджете записи. Вот полный код:
from tkinter import *


def clicked():
    res = "Привет {}".format(txt.get())
    lbl.configure(text=res)


window = Tk()
window.title("Добро пожаловать в приложение PythonRu")
window.geometry('400x250')
lbl = Label(window, text="Привет")
lbl.grid(column=0, row=0)
txt = Entry(window,width=10)
txt.grid(column=1, row=0)
btn = Button(window, text="Клик!", command=clicked)
btn.grid(column=2, row=0)
window.mainloop()
Запустите вышеуказанный код и проверьте результат:
 Прекрасно!
Каждый раз, когда мы запускаем код, нам нужно нажать на виджет ввода, чтобы настроить фокус на ввод текста, но как насчет автоматической настройки фокуса?
Установка фокуса виджета ввода
Здесь все очень просто, ведь все, что нам нужно сделать, — это вызвать функцию focus:
txt.focus()
Когда вы запустите свой код, вы заметите, что виджет ввода в фокусе, который дает возможность сразу написать текст.
Отключить виджет ввода
Чтобы отключить виджет ввода, отключите свойство состояния:
txt = Entry(window,width=10, state='disabled')
 Теперь вы не сможете ввести какой-либо текст.
Добавление виджета Combobox
Чтобы добавить виджет поля с выпадающем списком, используйте класс Combobox из ttk следующим образом:
from tkinter.ttk import Combobox


combo = Combobox(window)
Затем добавьте свои значения в поле со списком.
from tkinter import *
from tkinter.ttk import Combobox


window = Tk()
window.title("Добро пожаловать в приложение PythonRu")
window.geometry('400x250')
combo = Combobox(window)
combo['values'] = (1, 2, 3, 4, 5, "Текст")
combo.current(1)  # установите вариант по умолчанию
combo.grid(column=0, row=0)
window.mainloop()
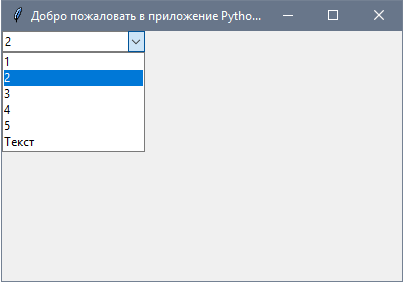 Как видите с примера, мы добавляем элементы
 combobox, используя значения tuple.
Чтобы установить выбранный элемент, вы можете передать индекс нужного элемента текущей функции.
Чтобы получить элемент select, вы можете использовать функцию get вот таким образом:
combo.get()
Добавление виджета Checkbutton (чекбокса)
С целью создания виджета checkbutton, используйте класс Checkbutton:
from tkinter.ttk import Checkbutton


chk = Checkbutton(window, text='Выбрать')
Кроме того, вы можете задать значение по умолчанию, передав его в параметр var в Checkbutton:
from tkinter import *
from tkinter.ttk import Checkbutton
window = Tk()
window.title("Добро пожаловать в приложение PythonRu")
window.geometry('400x250')
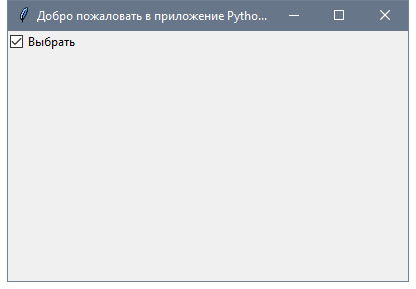
chk_state = BooleanVar()
chk_state.set(True) # задайте проверку состояния чекбокса
chk = Checkbutton(window, text='Выбрать', var=chk_state)
chk.grid(column=0, row=0)
window.mainloop()
Посмотрите на результат:
Установка состояния Checkbutton
Здесь мы создаем переменную типа BooleanVar, которая не является стандартной переменной Python, это переменная Tkinter, затем передаем ее классу Checkbutton, чтобы установить состояние чекбокса как True в приведенном выше примере.
Вы можете установить для BooleanVar значение false, что бы чекбокс не был отмечен.
Так же, используйте IntVar вместо BooleanVar и установите значения 0 и 1.
chk_state = IntVar()
chk_state.set(0) # False
chk_state.set(1) # True
Эти примеры дают тот же результат, что и BooleanVar.
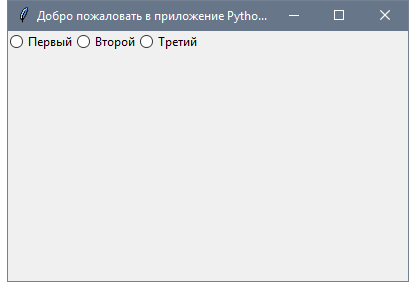
Добавление виджетов Radio Button
Чтобы добавить radio кнопки, используйте класс RadioButton:
rad1 = Radiobutton(window,text='Первый', value=1)
Обратите внимание, что вы должны установить value для каждой radio кнопки с уникальным значением, иначе они не будут работать.
from tkinter import *
from tkinter.ttk import Radiobutton


window = Tk()
window.title("Добро пожаловать в приложение PythonRu")
window.geometry('400x250')
rad1 = Radiobutton(window, text='Первый', value=1)
rad2 = Radiobutton(window, text='Второй', value=2)
rad3 = Radiobutton(window, text='Третий', value=3)
rad1.grid(column=0, row=0)
rad2.grid(column=1, row=0)
rad3.grid(column=2, row=0)
window.mainloop()
Результатом вышеприведенного кода будет следующий:
 Кроме того, вы можете задать
 command любой из этих кнопок для определенной функции. Если пользователь нажимает на такую кнопку, она запустит код функции.
Вот пример:
rad1 = Radiobutton(window,text='Первая', value=1, command=clicked)

def clicked():
    # Делайте, что нужно
Достаточно легко!
Получение значения Radio Button (Избранная Radio Button)
Чтобы получить текущую выбранную radio кнопку или ее значение, вы можете передать параметр переменной и получить его значение.
from tkinter import *
from tkinter.ttk import Radiobutton


def clicked():
    lbl.configure(text=selected.get())


window = Tk()
window.title("Добро пожаловать в приложение PythonRu")
window.geometry('400x250')
selected = IntVar()
rad1 = Radiobutton(window,text='Первый', value=1, variable=selected)
rad2 = Radiobutton(window,text='Второй', value=2, variable=selected)
rad3 = Radiobutton(window,text='Третий', value=3, variable=selected)
btn = Button(window, text="Клик", command=clicked)
lbl = Label(window)
rad1.grid(column=0, row=0)
rad2.grid(column=1, row=0)
rad3.grid(column=2, row=0)
btn.grid(column=3, row=0)
lbl.grid(column=0, row=1)
window.mainloop()
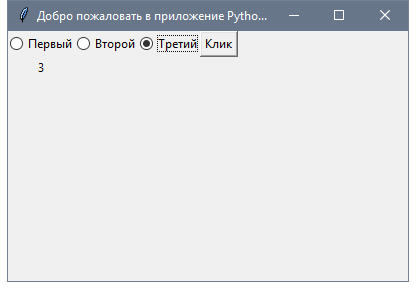 Каждый раз, когда вы выбираете radio button, значение переменной будет изменено на значение кнопки.
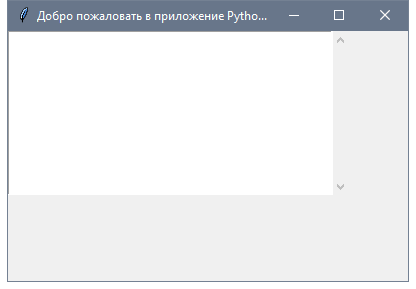
Добавление виджета ScrolledText (текстовая область Tkinter)
Чтобы добавить виджет ScrolledText, используйте класс ScrolledText:
from tkinter import scrolledtext


txt = scrolledtext.ScrolledText(window,width=40,height=10)
Здесь нужно указать ширину и высоту ScrolledText, иначе он заполнит все окно.
from tkinter import *
from tkinter import scrolledtext


window = Tk()
window.title("Добро пожаловать в приложение PythonRu")
window.geometry('400x250')
txt = scrolledtext.ScrolledText(window, width=40, height=10)
txt.grid(column=0, row=0)
window.mainloop()
Результат:
Настройка содержимого Scrolledtext
Используйте метод insert, чтобы настроить содержимое Scrolledtext:
txt.insert(INSERT, 'Текстовое поле')
Удаление/Очистка содержимого Scrolledtext
Чтобы очистить содержимое данного виджета, используйте метод delete:
txt.delete(1.0, END) # мы передали координаты очистки
Отлично!
Создание всплывающего окна с сообщением
Чтобы показать всплывающее окно с помощью Tkinter, используйте messagebox следующим образом:
from tkinter import messagebox


messagebox.showinfo('Заголовок', 'Текст')
Довольно легко! Давайте покажем окно сообщений при нажатии на кнопку пользователем.
from tkinter import *
from tkinter import messagebox


def clicked():
    messagebox.showinfo('Заголовок', 'Текст')


window = Tk()
window.title("Добро пожаловать в приложение PythonRu")
window.geometry('400x250')
btn = Button(window, text='Клик', command=clicked)
btn.grid(column=0, row=0)
window.mainloop()
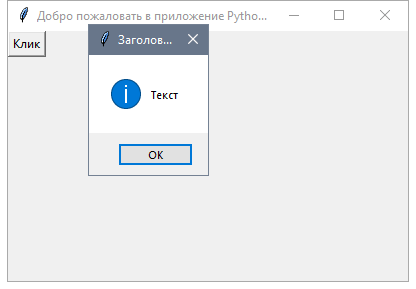 Когда вы нажмете на кнопку, появится информационное окно.
Показ сообщений о предупреждениях и ошибках
Вы можете показать предупреждающее сообщение или сообщение об ошибке таким же образом. Единственное, что нужно изменить—это функция сообщения.
messagebox.showwarning('Заголовок', 'Текст')  # показывает предупреждающее сообщение
messagebox.showerror('Заголовок', 'Текст')  # показывает сообщение об ошибке
Показ диалоговых окон с выбором варианта
Чтобы показать пользователю сообщение “да/нет”, вы можете использовать одну из следующих функций messagebox:
from tkinter import messagebox


res = messagebox.askquestion('Заголовок', 'Текст')
res = messagebox.askyesno('Заголовок', 'Текст')
res = messagebox.askyesnocancel('Заголовок', 'Текст')
res = messagebox.askokcancel('Заголовок', 'Текст')
res = messagebox.askretrycancel('Заголовок', 'Текст')
Вы можете выбрать соответствующий стиль сообщения согласно вашим потребностям. Просто замените строку функции showinfo на одну из предыдущих и запустите скрипт. Кроме того, можно проверить, какая кнопка нажата, используя переменную результата.
Если вы кликнете OK, yes или retry, значение станет True, а если выберете no или cancel, значение будет False.
Единственной функцией, которая возвращает одно из трех значений, является функция askyesnocancel; она возвращает True/False/None.
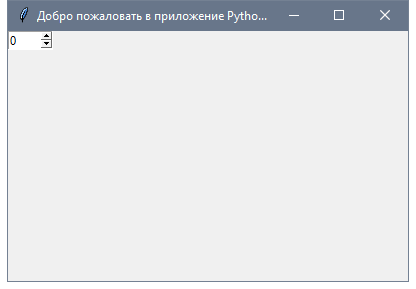
Добавление SpinBox (Виджет спинбокс)
Для создания виджета спинбокса, используйте класс Spinbox:
spin = Spinbox(window, from_=0, to=100)
Таким образом, мы создаем виджет Spinbox, и передаем параметры from и to, чтобы указать диапазон номеров.
Кроме того, вы можете указать ширину виджета с помощью параметра width:
spin = Spinbox(window, from_=0, to=100, width=5)
Проверим пример полностью:
from tkinter import *


window = Tk()
window.title("Добро пожаловать в приложение PythonRu")
window.geometry('400x250')
spin = Spinbox(window, from_=0, to=100, width=5)
spin.grid(column=0, row=0)
window.mainloop()
 Вы можете указать числа для
 Spinbox, вместо использования всего диапазона следующим образом:
spin = Spinbox(window, values=(3, 8, 11), width=5)
Виджет покажет только эти 3 числа: 3, 8 и 11.
Задать значение по умолчанию для Spinbox
В случае, если вам нужно задать значение по умолчанию для Spinbox, вы можете передать значение параметру textvariable следующим образом:
var = IntVar()
var.set(36)
spin = Spinbox(window, from_=0, to=100, width=5, textvariable=var)
Теперь, если вы запустите программу, она покажет 36 как значение по умолчанию для Spinbox.
Добавление виджета Progressbar
Чтобы создать данный виджет, используйте класс progressbar :
from tkinter.ttk import Progressbar


bar = Progressbar(window, length=200)
Установите значение progressbar таким образом:
bar['value'] = 70
Вы можете установить это значение на основе любого процесса или при выполнении задачи.
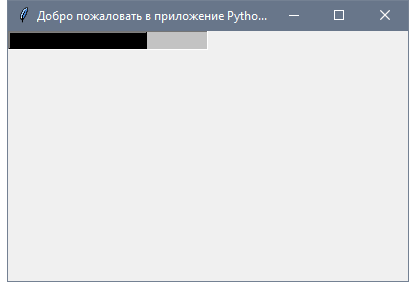
Изменение цвета Progressbar
Изменение цвета Progressbar немного сложно. Сначала нужно создать стиль и задать цвет фона, а затем настроить созданный стиль на Progressbar. Посмотрите следующий пример:
from tkinter import *
from tkinter.ttk import Progressbar
from tkinter import ttk


window = Tk()
window.title("Добро пожаловать в приложение PythonRu")
window.geometry('400x250')
style = ttk.Style()
style.theme_use('default')
style.configure("black.Horizontal.TProgressbar", background='black')
bar = Progressbar(window, length=200, style='black.Horizontal.TProgressbar')
bar['value'] = 70
bar.grid(column=0, row=0)
window.mainloop()
И в результате вы получите следующее:
Добавление поля загрузки файла
Для добавления поля с файлом, используйте класс filedialog:
from tkinter import filedialog


file = filedialog.askopenfilename()
После того, как вы выберете файл, нажмите “Открыть”; переменная файла будет содержать этот путь к файлу. Кроме того, вы можете запросить несколько файлов:
files = filedialog.askopenfilenames()
Указание типа файлов (расширение фильтра файлов)
Возможность указания типа файлов доступна при использовании параметра filetypes, однако при этом важно указать расширение в tuples.
file = filedialog.askopenfilename(filetypes = (("Text files","*.txt"),("all files","*.*")))
Вы можете запросить каталог, используя метод askdirectory :
dir = filedialog.askdirectory()
Вы можете указать начальную директорию для диалогового окна файла, указав initialdir следующим образом:
from os import path
file = filedialog.askopenfilename(initialdir= path.dirname(__file__))
Легко!
Добавление панели меню
Для добавления панели меню, используйте класс menu:
from tkinter import Menu


menu = Menu(window)
menu.add_command(label='Файл')
window.config(menu=menu)
Сначала мы создаем меню, затем добавляем наш первый пункт подменю. Вы можете добавлять пункты меню в любое меню с помощью функции add_cascade() таким образом:
menu.add_cascade(label='Автор', menu=new_item)
Наш код будет выглядеть так:
from tkinter import *
from tkinter import Menu


window = Tk()
window.title("Добро пожаловать в приложение PythonRu")
window.geometry('400x250')
menu = Menu(window)
new_item = Menu(menu)
new_item.add_command(label='Новый')
menu.add_cascade(label='Файл', menu=new_item)
window.config(menu=menu)
window.mainloop()
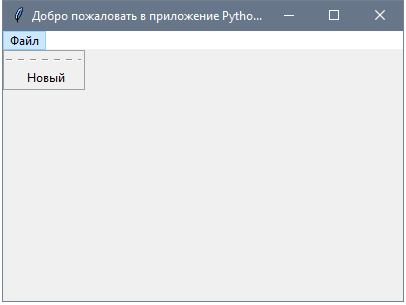 Таким образом, вы можете добавить столько пунктов меню, сколько захотите.
from tkinter import *


window = Tk()
window.title("Добро пожаловать в приложение PythonRu")
window.geometry('400x250')
menu = Menu(window)
new_item = Menu(menu)
new_item.add_command(label='Новый')
new_item.add_separator()
new_item.add_command(label='Изменить')
menu.add_cascade(label='Файл', menu=new_item)
window.config(menu=menu)
window.mainloop()
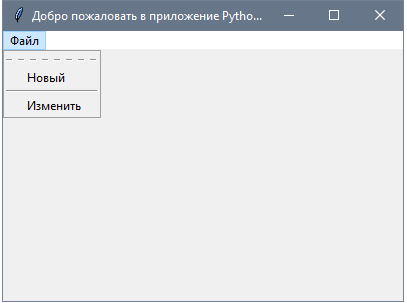 Теперь мы добавляем еще один пункт меню “Изменить” с разделителем меню. Вы можете заметить пунктирную линию в начале, если вы нажмете на эту строку, она отобразит пункты меню в небольшом отдельном окне.
Можно отключить эту функцию, с помощью tearoff подобным образом:
new_item = Menu(menu, tearoff=0)
Просто отредактируйте new_item, как в приведенном выше примере и он больше не будет отображать пунктирную линию.
Вы так же можете ввести любой код, который работает, при нажатии пользователем на любой элемент меню, задавая свойство команды.
new_item.add_command(label='Новый', command=clicked)
Добавление виджета Notebook (Управление вкладкой)
Для удобного управления вкладками реализуйте следующее:
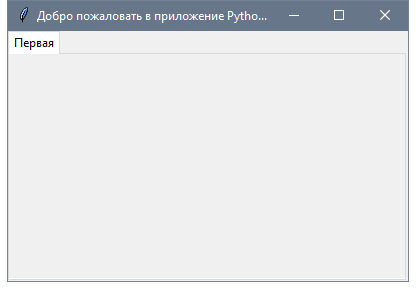
- Для начала, создается элемент управления вкладкой, с помощью класса
Notebook. - Создайте вкладку, используя класс
Frame. - Добавьте эту вкладку в элемент управления вкладками.
- Запакуйте элемент управления вкладкой, чтобы он стал видимым в окне.
from tkinter import *
from tkinter import ttk


window = Tk()
window.title("Добро пожаловать в приложение PythonRu")
window.geometry('400x250')
tab_control = ttk.Notebook(window)
tab1 = ttk.Frame(tab_control)
tab_control.add(tab1, text='Первая')
tab_control.pack(expand=1, fill='both')
window.mainloop()
 Таким образом, вы можете добавлять столько вкладок, сколько нужно.
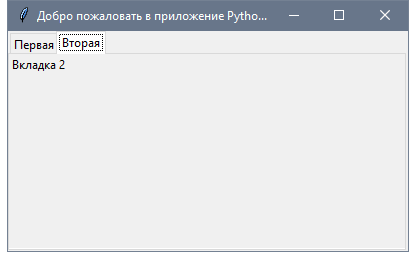
Добавление виджетов на вкладку
После создания вкладок вы можете поместить виджеты внутри этих вкладок, назначив родительское свойство нужной вкладке.
from tkinter import *
from tkinter import ttk


window = Tk()
window.title("Добро пожаловать в приложение PythonRu")
window.geometry('400x250')
tab_control = ttk.Notebook(window)
tab1 = ttk.Frame(tab_control)
tab2 = ttk.Frame(tab_control)
tab_control.add(tab1, text='Первая')
tab_control.add(tab2, text='Вторая')
lbl1 = Label(tab1, text='Вкладка 1')
lbl1.grid(column=0, row=0)
lbl2 = Label(tab2, text='Вкладка 2')
lbl2.grid(column=0, row=0)
tab_control.pack(expand=1, fill='both')
window.mainloop()
Добавление интервала для виджетов (Заполнение)
Вы можете добавить отступы для элементов управления, чтобы они выглядели хорошо организованными с использованием свойств padx иpady.
Передайте padx и pady любому виджету и задайте значение.
lbl1 = Label(tab1, text= 'label1', padx=5, pady=5)
Это очень просто!
В этом уроке мы увидели много примеров GUI Python с использованием библиотеки Tkinter. Так же рассмотрели основные аспекты разработки графического интерфейса Python. Не стоит на этом останавливаться. Нет учебника или книги, которая может охватывать все детали. Надеюсь, эти примеры были полезными для вас.
Summary: in this tutorial, you’ll learn about Tkinter Label widget and how to use it to display a text or image on the screen.
Introduction to Tkinter Label widget
Tkinter Label widget is used to display a text or image on the screen. To use a Label widget, you use the following general syntax:
Code language: Python (python)
label = ttk.Label(container, **options)
The Label widget has many options that allow you to customize its appearance:
| Options | Meaning |
|---|---|
| anchor | When the text and/or image are smaller than the width, the anchor option determines where to position them tk.W, tk.CENTER or tk.E for left, center, and right alignment respectively. |
| background | Set the background color for the label |
| borderwidth | Add a border around the label. |
| class_ | Specify a custom widget class name for changing the label’s appearance. |
| compound | Specify how to display both text and image on the Label. |
| cursor | Specify the mouse cursor’s appearance when the mouse is over the widget. |
| font | Specify the font style for displaying text |
| foreground | Specify the color of the text |
| image | Specify an image or images to show in addition to text or instead of text. |
| justify | If the text contains newline characters, the justify option specifies how each line is positioned horizontally. The valid values are tk.LEFT (left-justify), tk.CENTER (center), and tk.RIGHT (right-justify). |
| padding | Add more space around the label. |
| relief | Use this option to create an effect for the Label .e.g, flat, raised, sunken, groove, and ridge. |
| style | Specify the custom widget style. |
| takefocus | is a boolean value that specifies whether the label is visited during focus traversal. It defaults to False which doesn’t get focus. |
| text | Specify a string of text to show in the widget |
| textvariable | A StringVar instance that holds the text value of the widget. It overrides the text option if both textvariable and text are available. |
| underline | Specify the position of the letter that should be underlined e.g, underline = 0 would underline the letter E in the text='Exit' |
| width | Specify the number of characters to show |
| wraplength | Chop the text into the lines which less than the length specified by the wraplength option. |
The following shows a skeleton program that we’ll use to illustrate various options of the Label widget:
import tkinter as tk from tkinter import ttk root = tk.Tk() root.geometry('300x200') root.resizable(False, False) root.title('Label Widget Demo') # show the label here root.mainloop()Code language: Python (python)
Displaying a regular label
The following program shows how to display a regular label on the root window:
Code language: Python (python)
import tkinter as tk from tkinter.ttk import Label root = tk.Tk() root.geometry('300x200') root.resizable(False, False) root.title('Label Widget Demo') # show a label label = Label(root, text='This is a label') label.pack(ipadx=10, ipady=10) root.mainloop()
Output:
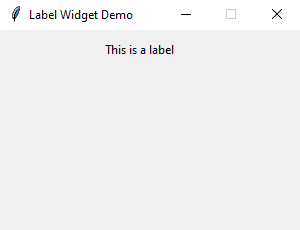
How it works.
- First, import
Labelclass from thetkinter.ttkmodule. - Second, create the root window and set its properties including size, resizeable, and title.
- Third, create a new instance of the Label widget, set its container to the root window, and assign a literal string to its
textproperty.
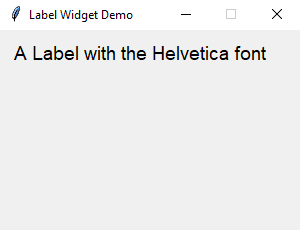
Setting a specific font for the Label
To set a particular font for a label, you pass the font keyword argument to the Label constructor like this:
Code language: Python (python)
font = ('font name', font_size)
The font keyword argument is a tuple that contains font name and size. For example:
Code language: Python (python)
font=("Helvetica", 14)
The following example shows a label with the Helvetica font:
Code language: Python (python)
import tkinter as tk from tkinter import ttk root = tk.Tk() root.geometry('300x200') root.resizable(False, False) root.title('Label Widget Demo') # label with a specific font label = ttk.Label( root, text='A Label with the Helvetica font', font=("Helvetica", 14)) label.pack(ipadx=10, ipady=10) root.mainloop()
Output:
Displaying an image
To use a Label widget to display an image, you follow these steps:
First, create a PhotoImage widget by passing the path to the photo to the PhotoImage constructor:
Code language: Python (python)
photo = tk.PhotoImage(file='./assets/python.png')
Second, assign the PhotoImage object to the image option of the Label widget:
Code language: Python (python)
Label(..., image=photo)
The following example shows how to use a Label widget to display an image:
Code language: Python (python)
import tkinter as tk from tkinter import ttk # create the root window root = tk.Tk() root.geometry('300x200') root.resizable(False, False) root.title('Label Widget Image') # display an image label photo = tk.PhotoImage(file='./assets/python.png') image_label = ttk.Label( root, image=photo, padding=5 ) image_label.pack() root.mainloop()
Output:
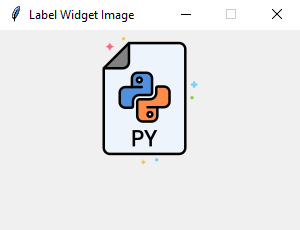
Note that the image file is located at the /assets/ folder.
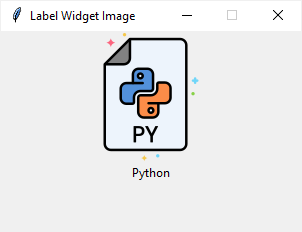
To display both text and image, you’ll use the text attribute and compound option.
The compound option specifies the position of the image relative to the text. Its valid values are:
| Compound | Effect |
|---|---|
'top' |
Display the image above the text. |
'bottom' |
Display the image below the text. |
'left' |
Display the image to the left of the text. |
'right' |
Display the image to the right of the text. |
'none' |
Display the image if there’s one, otherwise display the text. The compound option defaults to 'none'. |
'text' |
Display the text, not the image |
'image' |
Display the image, not the text. |
The following program shows how to display both text and image on a label:
Code language: PHP (php)
import tkinter as tk from tkinter import ttk # create the root window root = tk.Tk() root.geometry('300x200') root.resizable(False, False) root.title('Label Widget Image') # display an image label photo = tk.PhotoImage(file='./assets/python.png') image_label = ttk.Label( root, image=photo, text='Python', compound='top' ) image_label.pack() root.mainloop()
Output:
Summary
- Use the Label widget to display a text or an image or both.
Did you find this tutorial helpful ?