Swiper Full HTML Layout
<!-- Slider main container -->
<div class="swiper">
  <!-- Additional required wrapper -->
  <div class="swiper-wrapper">
    <!-- Slides -->
    <div class="swiper-slide">Slide 1</div>
    <div class="swiper-slide">Slide 2</div>
    <div class="swiper-slide">Slide 3</div>
    ...
  </div>
  <!-- If we need pagination -->
  <div class="swiper-pagination"></div>

  <!-- If we need navigation buttons -->
  <div class="swiper-button-prev"></div>
  <div class="swiper-button-next"></div>

  <!-- If we need scrollbar -->
  <div class="swiper-scrollbar"></div>
</div>
Styles
Swiper package contains different sets of CSS, Less and SCSS styles:
CSS Styles
CSS styles for bundle version:
swiper-bundle.css— all Swiper styles including all modules styles (like Navigation, Pagination, etc.)swiper-bundle.min.css— same as previous but minified
CSS styles for bundle version (package imports):
swiper/css— all Swiper styles including all modules styles (like Navigation, Pagination, etc.)swiper/css/bundle— same as previous but minified
CSS styles for core version and modules (package imports):
swiper/css— only core Swiper stylesswiper/css/a11y— styles required for A11y moduleswiper/css/autoplay— styles required for Autoplay moduleswiper/css/controller— styles required for Controller moduleswiper/css/effect-cards— styles required for Cards Effect moduleswiper/css/effect-coverflow— styles required for Coverflow Effect moduleswiper/css/effect-creative— styles required for Creative Effect moduleswiper/css/effect-cube— styles required for Cube Effect moduleswiper/css/effect-fade— styles required for Fade Effect moduleswiper/css/effect-flip— styles required for Flip Effect moduleswiper/css/free-mode— styles required for Free Mode moduleswiper/css/grid— styles required for Grid moduleswiper/css/hash-navigation— styles required for Hash Navigation moduleswiper/css/history— styles required for History moduleswiper/css/keyboard— styles required for Keyboard moduleswiper/css/manipulation— styles required for Manipulation moduleswiper/css/mousewheel— styles required for Mousewheel moduleswiper/css/navigation— styles required for Navigation moduleswiper/css/pagination— styles required for Pagination moduleswiper/css/parallax— styles required for Parallax moduleswiper/css/scrollbar— styles required for Scrollbar moduleswiper/css/thumbs— styles required for Thumbs moduleswiper/css/virtual— styles required for Virtual moduleswiper/css/zoom— styles required for Zoom module
Less Styles
Less styles are separate styles for core version and modules (package imports):
swiper/less— only core Swiper stylesswiper/less/bundle— all Swiper styles including all modules styles (like Navigation, Pagination, etc.)swiper/less/a11y— styles required for A11y moduleswiper/less/autoplay— styles required for Autoplay moduleswiper/less/controller— styles required for Controller moduleswiper/less/effect-cards— styles required for Cards Effect moduleswiper/less/effect-coverflow— styles required for Coverflow Effect moduleswiper/less/effect-creative— styles required for Creative Effect moduleswiper/less/effect-cube— styles required for Cube Effect moduleswiper/less/effect-fade— styles required for Fade Effect moduleswiper/less/effect-flip— styles required for Flip Effect moduleswiper/less/free-mode— styles required for Free Mode moduleswiper/less/grid— styles required for Grid moduleswiper/less/hash-navigation— styles required for Hash Navigation moduleswiper/less/history— styles required for History moduleswiper/less/keyboard— styles required for Keyboard moduleswiper/less/manipulation— styles required for Manipulation moduleswiper/less/mousewheel— styles required for Mousewheel moduleswiper/less/navigation— styles required for Navigation moduleswiper/less/pagination— styles required for Pagination moduleswiper/less/parallax— styles required for Parallax moduleswiper/less/scrollbar— styles required for Scrollbar moduleswiper/less/thumbs— styles required for Thumbs moduleswiper/less/virtual— styles required for Virtual moduleswiper/less/zoom— styles required for Zoom module
SCSS Styles
SCSS styles are also separate styles for core version and modules (package imports):
swiper/scss— only core Swiper stylesswiper/scss/bundle— all Swiper styles including all modules styles (like Navigation, Pagination, etc.)swiper/scss/a11y— styles required for A11y moduleswiper/scss/autoplay— styles required for Autoplay moduleswiper/scss/controller— styles required for Controller moduleswiper/scss/effect-cards— styles required for Cards Effect moduleswiper/scss/effect-coverflow— styles required for Coverflow Effect moduleswiper/scss/effect-creative— styles required for Creative Effect moduleswiper/scss/effect-cube— styles required for Cube Effect moduleswiper/scss/effect-fade— styles required for Fade Effect moduleswiper/scss/effect-flip— styles required for Flip Effect moduleswiper/scss/free-mode— styles required for Free Mode moduleswiper/scss/grid— styles required for Grid moduleswiper/scss/hash-navigation— styles required for Hash Navigation moduleswiper/scss/history— styles required for History moduleswiper/scss/keyboard— styles required for Keyboard moduleswiper/scss/manipulation— styles required for Manipulation moduleswiper/scss/mousewheel— styles required for Mousewheel moduleswiper/scss/navigation— styles required for Navigation moduleswiper/scss/pagination— styles required for Pagination moduleswiper/scss/parallax— styles required for Parallax moduleswiper/scss/scrollbar— styles required for Scrollbar moduleswiper/scss/thumbs— styles required for Thumbs moduleswiper/scss/virtual— styles required for Virtual moduleswiper/scss/zoom— styles required for Zoom module
Initialize Swiper
Now, when we have Swiper’s HTML, we need to initialize it using the following function:
new Swiper(swiperContainer, parameters)- initialize swiper with options
- swiperContainer — HTMLElement or string (with CSS Selector) of swiper container HTML element. Required.
- parameters — object — object with Swiper parameters. Optional.
- Method returns initialized Swiper instance
For example:
const swiper = new Swiper('.swiper', {
  speed: 400,
  spaceBetween: 100,
});
After you initialize Swiper it is possible to access to Swiper’s instance on its HTMLElement. It is swiper property of Swiper’s HTML container element:
const swiper = document.querySelector('.swiper').swiper;

// Now you can use all slider methods like
swiper.slideNext();
Parameters
Let’s look on list of all available parameters:
| Name | Type | Default | Description |
|---|---|---|---|
| allowSlideNext | boolean | true |
Set to |
| allowSlidePrev | boolean | true |
Set to |
| allowTouchMove | boolean | true |
If |
| autoHeight | boolean | false |
Set to |
| breakpoints | object |
Allows to set different parameter for different responsive breakpoints (screen sizes). Not all parameters can be changed in breakpoints, only those which do not require different layout and logic, like |
|
| breakpointsBase | string | ‘window’ |
Base for breakpoints (beta). Can be
|
| centerInsufficientSlides | boolean | false |
When enabled it center slides if the amount of slides less than |
| centeredSlides | boolean | false |
If |
| centeredSlidesBounds | boolean | false |
If |
| containerModifierClass | string | ‘swiper-‘ |
The beginning of the modifier CSS class that can be added to swiper container depending on different parameters |
| createElements | boolean | false |
When enabled Swiper will automatically wrap slides with swiper-wrapper element, and will create required elements for navigation, pagination and scrollbar they are enabled (with their respective params object or with boolean |
| cssMode | boolean | false |
When enabled it will use modern CSS Scroll Snap API. It doesn’t support all of Swiper’s features, but potentially should bring a much better performance in simple configurations. This is what is not supported when it is enabled:
In case if you use it with other effects, especially 3D effects, it is required to wrap slide’s content with
|
| direction | ‘horizontal’ | ‘vertical’ | ‘horizontal’ |
Can be |
| edgeSwipeDetection | string | boolean | false |
Enable to release Swiper events for swipe-back work in app. If set to |
| edgeSwipeThreshold | number | 20 |
Area (in px) from left edge of the screen to release touch events for swipe-back in app |
| effect | ‘slide’ | ‘fade’ | ‘cube’ | ‘coverflow’ | ‘flip’ | ‘creative’ | ‘cards’ | ‘slide’ |
Transition effect. Can be |
| enabled | boolean | true |
Whether Swiper initially enabled. When Swiper is disabled, it will hide all navigation elements and won’t respond to any events and interactions |
| focusableElements | string | ‘input, select, option, textarea, button, video, label’ |
CSS selector for focusable elements. Swiping will be disabled on such elements if they are «focused» |
| followFinger | boolean | true |
If disabled, then slider will be animated only when you release it, it will not move while you hold your finger on it |
| grabCursor | boolean | false |
This option may a little improve desktop usability. If |
| height | null | number | null |
Swiper height (in px). Parameter allows to force Swiper height. Useful only if you initialize Swiper when it is hidden and in SSR and Test environments for correct Swiper initialization
|
| init | boolean | true |
Whether Swiper should be initialised automatically when you create an instance. If disabled, then you need to init it manually by calling |
| initialSlide | number | 0 |
Index number of initial slide. |
| injectStyles | string[] |
Inject text styles to the shadow DOM. Only for usage with Swiper Element |
|
| injectStylesUrls | string[] |
Inject styles |
|
| lazyPreloaderClass | string | ‘swiper-lazy-preloader’ |
CSS class name of lazy preloader |
| longSwipes | boolean | true |
Set to |
| longSwipesMs | number | 300 |
Minimal duration (in ms) to trigger swipe to next/previous slide during long swipes |
| longSwipesRatio | number | 0.5 |
Ratio to trigger swipe to next/previous slide during long swipes |
| loop | boolean | false |
Set to Because of nature of how the loop mode works, it will add rearrange slides |
| loopPreventsSliding | boolean | true |
If enabled then slideNext/Prev will do nothing while slider is animating in loop mode |
| loopedSlides | null | number | null |
Defines how many slides before end/beginning it should rearrange (loop) slides. If not specified, defaults to |
| maxBackfaceHiddenSlides | number | 10 |
If total number of slides less than specified here value, then Swiper will enable
|
| modules | SwiperModule[] |
Array with Swiper modules |
|
| nested | boolean | false |
Set to |
| noSwiping | boolean | true |
Enable/disable swiping on elements matched to class specified in |
| noSwipingClass | string | ‘swiper-no-swiping’ |
Specify |
| noSwipingSelector | string |
Can be used instead of |
|
| normalizeSlideIndex | boolean | true |
Normalize slide index. |
| observeParents | boolean | false |
Set to |
| observeSlideChildren | boolean | false |
Set to |
| observer | boolean | false |
Set to |
| on | object |
Register event handlers |
|
| oneWayMovement | boolean | false |
When enabled, will swipe slides only forward (one-way) regardless of swipe direction |
| passiveListeners | boolean | true |
Passive event listeners will be used by default where possible to improve scrolling performance on mobile devices. But if you need to use |
| preventClicks | boolean | true |
Set to |
| preventClicksPropagation | boolean | true |
Set to |
| preventInteractionOnTransition | boolean | false |
When enabled it won’t allow to change slides by swiping or navigation/pagination buttons during transition |
| resistance | boolean | true |
Set to |
| resistanceRatio | number | 0.85 |
This option allows you to control resistance ratio |
| resizeObserver | boolean | true |
When enabled it will use ResizeObserver (if supported by browser) on swiper container to detect container resize (instead of watching for window resize) |
| rewind | boolean | false |
Set to
|
| roundLengths | boolean | false |
Set to |
| runCallbacksOnInit | boolean | true |
Fire Transition/SlideChange/Start/End events on swiper initialization. Such events will be fired on initialization in case of your initialSlide is not 0, or you use loop mode |
| setWrapperSize | boolean | false |
Enabled this option and plugin will set width/height on swiper wrapper equal to total size of all slides. Mostly should be used as compatibility fallback option for browser that don’t support flexbox layout well |
| shortSwipes | boolean | true |
Set to |
| simulateTouch | boolean | true |
If |
| slideActiveClass | string | ‘swiper-slide-active’ |
CSS class name of currently active slide
|
| slideClass | string | ‘swiper-slide’ |
CSS class name of slide
|
| slideNextClass | string | ‘swiper-slide-next’ |
CSS class name of slide which is right after currently active slide
|
| slidePrevClass | string | ‘swiper-slide-prev’ |
CSS class name of slide which is right before currently active slide
|
| slideToClickedSlide | boolean | false |
Set to |
| slideVisibleClass | string | ‘swiper-slide-visible’ |
CSS class name of currently visible slide
|
| slidesOffsetAfter | number | 0 |
Add (in px) additional slide offset in the end of the container (after all slides) |
| slidesOffsetBefore | number | 0 |
Add (in px) additional slide offset in the beginning of the container (before all slides) |
| slidesPerGroup | number | 1 |
Set numbers of slides to define and enable group sliding. Useful to use with slidesPerView > 1 |
| slidesPerGroupAuto | boolean | false |
This param intended to be used only with |
| slidesPerGroupSkip | number | 0 |
The parameter works in the following way: If If |
| slidesPerView | number | ‘auto’ | 1 |
Number of slides per view (slides visible at the same time on slider’s container).
|
| spaceBetween | string | number | 0 |
Distance between slides in px.
|
| speed | number | 300 |
Duration of transition between slides (in ms) |
| swipeHandler | null | HTMLElement | CSSSelector | null |
String with CSS selector or HTML element of the container with pagination that will work as only available handler for swiping |
| threshold | number | 5 |
Threshold value in px. If «touch distance» will be lower than this value then swiper will not move |
| touchAngle | number | 45 |
Allowable angle (in degrees) to trigger touch move |
| touchEventsTarget | ‘container’ | ‘wrapper’ | ‘wrapper’ |
Target element to listen touch events on. Can be |
| touchMoveStopPropagation | boolean | false |
If enabled, then propagation of «touchmove» will be stopped |
| touchRatio | number | 1 |
Touch ratio |
| touchReleaseOnEdges | boolean | false |
Enable to release touch events on slider edge position (beginning, end) to allow for further page scrolling |
| touchStartForcePreventDefault | boolean | false |
Force to always prevent default for |
| touchStartPreventDefault | boolean | true |
If disabled, |
| uniqueNavElements | boolean | true |
If enabled (by default) and navigation elements’ parameters passed as a string (like |
| updateOnWindowResize | boolean | true |
Swiper will recalculate slides position on window resize (orientationchange) |
| url | null | string | null |
Required for active slide detection when rendered on server-side and enabled history |
| userAgent | null | string | null |
userAgent string. Required for browser/device detection when rendered on server-side |
| virtualTranslate | boolean | false |
Enabled this option and swiper will be operated as usual except it will not move, real translate values on wrapper will not be set. Useful when you may need to create custom slide transition |
| watchOverflow | boolean | true |
When enabled Swiper will be disabled and hide navigation buttons on case there are not enough slides for sliding. |
| watchSlidesProgress | boolean | false |
Enable this feature to calculate each slides progress and visibility (slides in viewport will have additional visible class) |
| width | null | number | null |
Swiper width (in px). Parameter allows to force Swiper width. Useful only if you initialize Swiper when it is hidden and in SSR and Test environments for correct Swiper initialization
|
| wrapperClass | string | ‘swiper-wrapper’ |
CSS class name of slides’ wrapper
|
| onAny | function |
Add event listener that will be fired on all events |
Methods & Properties
After we initialize Slider we have its initialized instance in variable (like swiper variable in example above) with helpful methods and properties:
| Properties | ||
|---|---|---|
| swiper.activeIndex | number |
Index number of currently active slide
|
| swiper.allowSlideNext | boolean |
Disable / enable ability to slide to the next slides by assigning |
| swiper.allowSlidePrev | boolean |
Disable / enable ability to slide to the previous slides by assigning |
| swiper.allowTouchMove | boolean |
Disable / enable ability move slider by grabbing it with mouse or by touching it with finger (on touch screens) by assigning |
| swiper.animating | boolean |
|
| swiper.clickedIndex | number |
Index number of last clicked slide |
| swiper.clickedSlide | HTMLElement |
Link to last clicked slide (HTMLElement) |
| swiper.el | HTMLElement |
Slider container HTML element |
| swiper.height | number |
Height of container |
| swiper.isBeginning | boolean |
|
| swiper.isEnd | boolean |
|
| swiper.isLocked | boolean |
|
| swiper.originalParams | SwiperOptions |
Object with original initialization parameters |
| swiper.params | SwiperOptions |
Object with passed initialization parameters |
| swiper.previousIndex | number |
Index number of previously active slide |
| swiper.progress | number |
Current progress of wrapper translate (from 0 to 1) |
| swiper.realIndex | number |
Index number of currently active slide considering rearranged slides in loop mode |
| swiper.slides | HTMLElement[] |
Array of slides HTML elements. To get specific slide HTMLElement use |
| swiper.snapGrid | number[] |
Slides snap grid |
| swiper.snapIndex | number |
Index number of current snap in |
| swiper.swipeDirection | ‘prev’ | ‘next’ |
Direction of sliding |
| swiper.touches | object |
Object with the following touch event properties:
|
| swiper.translate | number |
Current value of wrapper translate |
| swiper.width | number |
Width of container |
| swiper.wrapperEl | HTMLElement |
Wrapper HTML element |
| swiper.defaults | SwiperOptions |
Swiper default options |
| swiper.extendedDefaults | SwiperOptions |
Object with global Swiper extended options |
| Methods | ||
| swiper.attachEvents() |
Attach all events listeners again |
|
| swiper.changeDirection(direction, needUpdate) |
Changes slider direction from horizontal to vertical and back.
|
|
| swiper.changeLanguageDirection(direction) |
Changes slider language
|
|
| swiper.destroy(deleteInstance, cleanStyles) |
Destroy slider instance and detach all events listeners
|
|
| swiper.detachEvents() |
Detach all events listeners |
|
| swiper.disable() |
Disable Swiper (if it was enabled). When Swiper is disabled, it will hide all navigation elements and won’t respond to any events and interactions |
|
| swiper.emit(event, args) |
Fire event on instance |
|
| swiper.enable() |
Enable Swiper (if it was disabled) |
|
| swiper.getTranslate() |
Get current value of swiper wrapper css3 transform translate |
|
| swiper.init(el) |
Initialize slider |
|
| swiper.loopCreate() |
!INTERNAL |
|
| swiper.loopDestroy() |
!INTERNAL |
|
| swiper.off(event, handler) |
Remove event handler |
|
| swiper.offAny(handler) |
Remove event listener that will be fired on all events |
|
| swiper.on(event, handler) |
Add event handler |
|
| swiper.onAny(handler) |
Add event listener that will be fired on all events |
|
| swiper.once(event, handler) |
Add event handler that will be removed after it was fired |
|
| swiper.setGrabCursor() |
Set grab cursor |
|
| swiper.setProgress(progress, speed) |
Set Swiper translate progress (from 0 to 1). Where 0 — its initial position (offset) on first slide, and 1 — its maximum position (offset) on last slide
|
|
| swiper.setTranslate(translate) |
Set custom css3 transform’s translate value for swiper wrapper |
|
| swiper.slideNext(speed, runCallbacks) |
Run transition to next slide.
|
|
| swiper.slidePrev(speed, runCallbacks) |
Run transition to previous slide.
|
|
| swiper.slideReset(speed, runCallbacks) |
Reset swiper position to currently active slide for the duration equal to ‘speed’ parameter.
|
|
| swiper.slideTo(index, speed, runCallbacks) |
Run transition to the slide with index number equal to ‘index’ parameter for the duration equal to ‘speed’ parameter.
|
|
| swiper.slideToClosest(speed, runCallbacks) |
Reset swiper position to closest slide/snap point for the duration equal to ‘speed’ parameter.
|
|
| swiper.slideToLoop(index, speed, runCallbacks) |
Does the same as .slideTo but for the case when used with enabled loop. So this method will slide to slides with realIndex matching to passed index
|
|
| swiper.translateTo(translate, speed, runCallbacks, translateBounds) |
Animate custom css3 transform’s translate value for swiper wrapper
|
|
| swiper.unsetGrabCursor() |
Unset grab cursor |
|
| swiper.update() |
You should call it after you add/remove slides manually, or after you hide/show it, or do any custom DOM modifications with Swiper This method also includes subcall of the following methods which you can use separately: |
|
| swiper.updateAutoHeight(speed) |
Force swiper to update its height (when autoHeight enabled) for the duration equal to ‘speed’ parameter
|
|
| swiper.updateProgress() |
recalculate swiper progress |
|
| swiper.updateSize() |
recalculate size of swiper container |
|
| swiper.updateSlides() |
recalculate number of slides and their offsets. Useful after you add/remove slides with JavaScript |
|
| swiper.updateSlidesClasses() |
update active/prev/next classes on slides and bullets |
|
| swiper.extendDefaults(options) |
Extend global Swiper defaults |
|
| swiper.use(modules) |
Installs modules on Swiper in runtime. |
Events
Swiper comes with a bunch of useful events you can listen. Events can be assigned in two ways:
-
Using
onparameter on swiper initialization:const swiper = new Swiper('.swiper', { // ... on: { init: function () { console.log('swiper initialized'); }, }, }); -
Using
onmethod after swiper initialization.const swiper = new Swiper('.swiper', { // ... }); swiper.on('slideChange', function () { console.log('slide changed'); });
Please note, that this keyword within event handler always points to Swiper instance
| Name | Arguments | Description |
|---|---|---|
| activeIndexChange | (swiper) |
Event will fired on active index change |
| afterInit | (swiper) |
Event will fired right after initialization |
| beforeDestroy | (swiper) |
Event will be fired right before Swiper destroyed |
| beforeInit | (swiper) |
Event will fired right before initialization |
| beforeLoopFix | (swiper) |
Event will be fired right before «loop fix» |
| beforeResize | (swiper) |
Event will fired before resize handler |
| beforeSlideChangeStart | (swiper) |
Event will fired before slide change transition start |
| beforeTransitionStart | (swiper, speed, internal) |
Event will fired before transition start |
| breakpoint | (swiper, breakpointParams) |
Event will be fired on breakpoint change |
| changeDirection | (swiper) |
Event will fired on direction change |
| click | (swiper, event) |
Event will be fired when user click/tap on Swiper. Receives |
| destroy | (swiper) |
Event will be fired on swiper destroy |
| doubleClick | (swiper, event) |
Event will be fired when user double click/tap on Swiper |
| doubleTap | (swiper, event) |
Event will be fired when user double tap on Swiper’s container. Receives |
| fromEdge | (swiper) |
Event will be fired when Swiper goes from beginning or end position |
| init | (swiper) |
Fired right after Swiper initialization. |
| lock | (swiper) |
Event will be fired when swiper is locked (when |
| loopFix | (swiper) |
Event will be fired after «loop fix» |
| momentumBounce | (swiper) |
Event will be fired on momentum bounce |
| observerUpdate | (swiper) |
Event will be fired if observer is enabled and it detects DOM mutations |
| orientationchange | (swiper) |
Event will be fired on orientation change (e.g. landscape -> portrait) |
| progress | (swiper, progress) |
Event will be fired when Swiper progress is changed, as an arguments it receives progress that is always from 0 to 1 |
| reachBeginning | (swiper) |
Event will be fired when Swiper reach its beginning (initial position) |
| reachEnd | (swiper) |
Event will be fired when Swiper reach last slide |
| realIndexChange | (swiper) |
Event will fired on real index change |
| resize | (swiper) |
Event will be fired on window resize right before swiper’s onresize manipulation |
| setTransition | (swiper, transition) |
Event will be fired everytime when swiper starts animation. Receives current transition duration (in ms) as an arguments |
| setTranslate | (swiper, translate) |
Event will be fired when swiper’s wrapper change its position. Receives current translate value as an arguments |
| slideChange | (swiper) |
Event will be fired when currently active slide is changed |
| slideChangeTransitionEnd | (swiper) |
Event will be fired after animation to other slide (next or previous). |
| slideChangeTransitionStart | (swiper) |
Event will be fired in the beginning of animation to other slide (next or previous). |
| slideNextTransitionEnd | (swiper) |
Same as «slideChangeTransitionEnd» but for «forward» direction only |
| slideNextTransitionStart | (swiper) |
Same as «slideChangeTransitionStart» but for «forward» direction only |
| slidePrevTransitionEnd | (swiper) |
Same as «slideChangeTransitionEnd» but for «backward» direction only |
| slidePrevTransitionStart | (swiper) |
Same as «slideChangeTransitionStart» but for «backward» direction only |
| slideResetTransitionEnd | (swiper) |
Event will be fired in the end of animation of resetting slide to current one |
| slideResetTransitionStart | (swiper) |
Event will be fired in the beginning of animation of resetting slide to current one |
| sliderFirstMove | (swiper, event) |
Event will be fired with first touch/drag move |
| sliderMove | (swiper, event) |
Event will be fired when user touch and move finger over Swiper and move it. Receives |
| slidesGridLengthChange | (swiper) |
Event will be fired when slides grid has changed |
| slidesLengthChange | (swiper) |
Event will be fired when number of slides has changed |
| snapGridLengthChange | (swiper) |
Event will be fired when snap grid has changed |
| snapIndexChange | (swiper) |
Event will fired on snap index change |
| tap | (swiper, event) |
Event will be fired when user click/tap on Swiper. Receives |
| toEdge | (swiper) |
Event will be fired when Swiper goes to beginning or end position |
| touchEnd | (swiper, event) |
Event will be fired when user release Swiper. Receives |
| touchMove | (swiper, event) |
Event will be fired when user touch and move finger over Swiper. Receives |
| touchMoveOpposite | (swiper, event) |
Event will be fired when user touch and move finger over Swiper in direction opposite to direction parameter. Receives |
| touchStart | (swiper, event) |
Event will be fired when user touch Swiper. Receives |
| transitionEnd | (swiper) |
Event will be fired after transition. |
| transitionStart | (swiper) |
Event will be fired in the beginning of transition. |
| unlock | (swiper) |
Event will be fired when swiper is unlocked (when |
| update | (swiper) |
Event will be fired after swiper.update() call |
Modules
Navigation
Navigation Parameters
| Name | Type | Default | Description |
|---|---|---|---|
| navigation | boolean | NavigationOptions |
Object with navigation parameters or boolean |
|
| { | |||
| disabledClass | string | ‘swiper-button-disabled’ |
CSS class name added to navigation button when it becomes disabled |
| enabled | boolean |
Boolean property to use with breakpoints to enable/disable navigation on certain breakpoints |
|
| hiddenClass | string | ‘swiper-button-hidden’ |
CSS class name added to navigation button when it becomes hidden |
| hideOnClick | boolean | false |
Toggle navigation buttons visibility after click on Slider’s container |
| lockClass | string | ‘swiper-button-lock’ |
CSS class name added to navigation button when it is disabled |
| navigationDisabledClass | string | ‘swiper-navigation-disabled’ |
CSS class name added on swiper container when navigation is disabled by breakpoint |
| nextEl | null | HTMLElement | CSSSelector | null |
String with CSS selector or HTML element of the element that will work like «next» button after click on it |
| prevEl | null | HTMLElement | CSSSelector | null |
String with CSS selector or HTML element of the element that will work like «prev» button after click on it |
| } |
Navigation Methods
| Properties | ||
|---|---|---|
| swiper.navigation.nextEl | HTMLElement |
HTMLElement of «next» navigation button |
| swiper.navigation.prevEl | HTMLElement |
HTMLElement of «previous» navigation button |
| Methods | ||
| swiper.navigation.destroy() |
Destroy navigation |
|
| swiper.navigation.init() |
Initialize navigation |
|
| swiper.navigation.update() |
Update navigation buttons state (enabled/disabled) |
Navigation Events
| Name | Arguments | Description |
|---|---|---|
| navigationHide | (swiper) |
Event will be fired on navigation hide |
| navigationNext | (swiper) |
Event will be fired on navigation next button click |
| navigationPrev | (swiper) |
Event will be fired on navigation prev button click |
| navigationShow | (swiper) |
Event will be fired on navigation show |
Navigation CSS Custom Properties
--swiper-navigation-size: 44px;
--swiper-navigation-top-offset: 50%;
--swiper-navigation-sides-offset: 10px;
--swiper-navigation-color: var(--swiper-theme-color);
| Name | Type | Default | Description |
|---|---|---|---|
| pagination | boolean | PaginationOptions |
Object with pagination parameters or boolean |
|
| { | |||
| bulletActiveClass | string | ‘swiper-pagination-bullet-active’ |
CSS class name of currently active pagination bullet |
| bulletClass | string | ‘swiper-pagination-bullet’ |
CSS class name of single pagination bullet |
| bulletElement | string | ‘span’ |
Defines which HTML tag will be used to represent single pagination bullet. Only for |
| clickable | boolean | false |
If |
| clickableClass | string | ‘swiper-pagination-clickable’ |
CSS class name set to pagination when it is clickable |
| currentClass | string | ‘swiper-pagination-current’ |
CSS class name of the element with currently active index in «fraction» pagination |
| dynamicBullets | boolean | false |
Good to enable if you use bullets pagination with a lot of slides. So it will keep only few bullets visible at the same time. |
| dynamicMainBullets | number | 1 |
The number of main bullets visible when |
| el | null | HTMLElement | CSSSelector | null |
String with CSS selector or HTML element of the container with pagination |
| enabled | boolean |
Boolean property to use with breakpoints to enable/disable pagination on certain breakpoints |
|
| formatFractionCurrent | function(number) |
format fraction pagination current number. Function receives current number, and you need to return formatted value |
|
| formatFractionTotal | function(number) |
format fraction pagination total number. Function receives total number, and you need to return formatted value |
|
| hiddenClass | string | ‘swiper-pagination-hidden’ |
CSS class name of pagination when it becomes inactive |
| hideOnClick | boolean | true |
Toggle (hide/show) pagination container visibility after click on Slider’s container |
| horizontalClass | string | ‘swiper-pagination-horizontal’ |
CSS class name set to pagination in horizontal Swiper |
| lockClass | string | ‘swiper-pagination-lock’ |
CSS class name set to pagination when it is disabled |
| modifierClass | string | ‘swiper-pagination-‘ |
The beginning of the modifier CSS class name that will be added to pagination depending on parameters |
| paginationDisabledClass | string | ‘swiper-pagination-disabled’ |
CSS class name added on swiper container and pagination element when pagination is disabled by breakpoint |
| progressbarFillClass | string | ‘swiper-pagination-progressbar-fill’ |
CSS class name of pagination progressbar fill element |
| progressbarOpposite | boolean | false |
Makes pagination progressbar opposite to Swiper’s |
| progressbarOppositeClass | string | ‘swiper-pagination-progressbar-opposite’ |
CSS class name of pagination progressbar opposite |
| renderBullet | function(index, className) |
This parameter allows totally customize pagination bullets, you need to pass here a function that accepts |
|
| renderCustom | function(swiper, current, total) |
This parameter is required for |
|
| renderFraction | function(currentClass, totalClass) |
This parameter allows to customize «fraction» pagination html. Only for |
|
| renderProgressbar | function(progressbarFillClass) |
This parameter allows to customize «progress» pagination. Only for |
|
| totalClass | string | ‘swiper-pagination-total’ |
CSS class name of the element with total number of «snaps» in «fraction» pagination |
| type | ‘bullets’ | ‘fraction’ | ‘progressbar’ | ‘custom’ | ‘bullets’ |
String with type of pagination. Can be |
| verticalClass | string | ‘swiper-pagination-vertical’ |
CSS class name set to pagination in vertical Swiper |
| } |
| Properties | ||
|---|---|---|
| swiper.pagination.bullets | HTMLElement[] |
Array of pagination bullets HTML elements. To get specific slide HTMLElement use |
| swiper.pagination.el | HTMLElement |
HTMLElement of pagination container element |
| Methods | ||
| swiper.pagination.destroy() |
Destroy pagination |
|
| swiper.pagination.init() |
Initialize pagination |
|
| swiper.pagination.render() |
Render pagination layout |
|
| swiper.pagination.update() |
Update pagination state (enabled/disabled/active) |
| Name | Arguments | Description |
|---|---|---|
| paginationHide | (swiper) |
Event will be fired on pagination hide |
| paginationRender | (swiper, paginationEl) |
Event will be fired after pagination rendered |
| paginationShow | (swiper) |
Event will be fired on pagination show |
| paginationUpdate | (swiper, paginationEl) |
Event will be fired when pagination updated |
--swiper-pagination-color: var(--swiper-theme-color);
--swiper-pagination-left: auto;
--swiper-pagination-right: 8px;
--swiper-pagination-bottom: 8px;
--swiper-pagination-top: auto;
--swiper-pagination-fraction-color: inherit;
--swiper-pagination-progressbar-bg-color: rgba(0, 0, 0, 0.25);
--swiper-pagination-progressbar-size: 4px;
--swiper-pagination-bullet-size: 8px;
--swiper-pagination-bullet-width: 8px;
--swiper-pagination-bullet-height: 8px;
--swiper-pagination-bullet-inactive-color: #000;
--swiper-pagination-bullet-inactive-opacity: 0.2;
--swiper-pagination-bullet-opacity: 1;
--swiper-pagination-bullet-horizontal-gap: 4px;
--swiper-pagination-bullet-vertical-gap: 6px;
Scrollbar
Scrollbar Parameters
| Name | Type | Default | Description |
|---|---|---|---|
| scrollbar | boolean | ScrollbarOptions |
Object with scrollbar parameters or boolean |
|
| { | |||
| dragClass | string | ‘swiper-scrollbar-drag’ |
Scrollbar draggable element CSS class |
| dragSize | number | ‘auto’ | ‘auto’ |
Size of scrollbar draggable element in px |
| draggable | boolean | false |
Set to |
| el | null | HTMLElement | CSSSelector | null |
String with CSS selector or HTML element of the container with scrollbar. |
| enabled | boolean |
Boolean property to use with breakpoints to enable/disable scrollbar on certain breakpoints |
|
| hide | boolean | true |
Hide scrollbar automatically after user interaction |
| horizontalClass | string | ‘swiper-scrollbar-horizontal’ |
CSS class name set to scrollbar in horizontal Swiper |
| lockClass | string | ‘swiper-scrollbar-lock’ |
Scrollbar element additional CSS class when it is disabled |
| scrollbarDisabledClass | string | ‘swiper-scrollbar-disabled’ |
CSS class name added on swiper container and scrollbar element when scrollbar is disabled by breakpoint |
| snapOnRelease | boolean | false |
Set to |
| verticalClass | string | ‘swiper-scrollbar-vertical’ |
CSS class name set to scrollbar in vertical Swiper |
| } |
Scrollbar Methods
| Properties | ||
|---|---|---|
| swiper.scrollbar.dragEl | HTMLElement |
HTMLElement of Scrollbar draggable handler element |
| swiper.scrollbar.el | HTMLElement |
HTMLElement of Scrollbar container element |
| Methods | ||
| swiper.scrollbar.destroy() |
Destroy scrollbar |
|
| swiper.scrollbar.init() |
Initialize scrollbar |
|
| swiper.scrollbar.setTranslate() |
Updates scrollbar translate |
|
| swiper.scrollbar.updateSize() |
Updates scrollbar track and handler sizes |
Scrollbar Events
| Name | Arguments | Description |
|---|---|---|
| scrollbarDragEnd | (swiper, event) |
Event will be fired on draggable scrollbar drag end |
| scrollbarDragMove | (swiper, event) |
Event will be fired on draggable scrollbar drag move |
| scrollbarDragStart | (swiper, event) |
Event will be fired on draggable scrollbar drag start |
Scrollbar CSS Custom Properties
--swiper-scrollbar-border-radius: 10px;
--swiper-scrollbar-top: auto;
--swiper-scrollbar-bottom: 4px;
--swiper-scrollbar-left: auto;
--swiper-scrollbar-right: 4px;
--swiper-scrollbar-sides-offset: 1%;
--swiper-scrollbar-bg-color: rgba(0, 0, 0, 0.1);
--swiper-scrollbar-drag-bg-color: rgba(0, 0, 0, 0.5);
--swiper-scrollbar-size: 4px;
Autoplay
Autoplay Parameters
| Name | Type | Default | Description |
|---|---|---|---|
| autoplay | boolean | AutoplayOptions |
Object with autoplay parameters or boolean |
|
| { | |||
| delay | number | 3000 |
Delay between transitions (in ms). If this parameter is not specified, auto play will be disabled If you need to specify different delay for specific slides you can do it by using |
| disableOnInteraction | boolean | true |
Set to |
| pauseOnMouseEnter | boolean | false |
When enabled autoplay will be paused on pointer (mouse) enter over Swiper container. |
| reverseDirection | boolean | false |
Enables autoplay in reverse direction |
| stopOnLastSlide | boolean | false |
Enable this parameter and autoplay will be stopped when it reaches last slide (has no effect in loop mode) |
| waitForTransition | boolean | true |
When enabled autoplay will wait for wrapper transition to continue. Can be disabled in case of using Virtual Translate when your slider may not have transition |
| } |
Autoplay Methods
| Properties | ||
|---|---|---|
| swiper.autoplay.paused | boolean |
Whether autoplay is paused |
| swiper.autoplay.running | boolean |
Whether autoplay enabled and running |
| swiper.autoplay.timeLeft | number |
If autoplay is paused, it contains time left (in ms) before transition to next slide |
| Methods | ||
| swiper.autoplay.pause() |
Pause autoplay |
|
| swiper.autoplay.resume() |
Resume autoplay |
|
| swiper.autoplay.start() |
Start autoplay |
|
| swiper.autoplay.stop() |
Stop autoplay |
Autoplay Events
| Name | Arguments | Description |
|---|---|---|
| autoplay | (swiper) |
Event will be fired when slide changed with autoplay |
| autoplayPause | (swiper) |
Event will be fired on autoplay pause |
| autoplayResume | (swiper) |
Event will be fired on autoplay resume |
| autoplayStart | (swiper) |
Event will be fired in when autoplay started |
| autoplayStop | (swiper) |
Event will be fired when autoplay stopped |
| autoplayTimeLeft | (swiper, timeLeft, percentage) |
Event triggers continuously while autoplay is enabled. It contains time left (in ms) before transition to next slide and percentage of that time related to autoplay delay |
Free Mode
Free Mode Parameters
| Name | Type | Default | Description |
|---|---|---|---|
| freeMode | boolean | FreeModeOptions |
Enables free mode functionality. Object with free mode parameters or boolean |
|
| { | |||
| enabled | boolean | false |
Whether the free mode is enabled |
| minimumVelocity | number | 0.02 |
Minimum touchmove-velocity required to trigger free mode momentum |
| momentum | boolean | true |
If enabled, then slide will keep moving for a while after you release it |
| momentumBounce | boolean | true |
Set to |
| momentumBounceRatio | number | 1 |
Higher value produces larger momentum bounce effect |
| momentumRatio | number | 1 |
Higher value produces larger momentum distance after you release slider |
| momentumVelocityRatio | number | 1 |
Higher value produces larger momentum velocity after you release slider |
| sticky | boolean | false |
Set to enabled to enable snap to slides positions in free mode |
| } |
Grid
Grid Parameters
| Name | Type | Default | Description |
|---|---|---|---|
| grid | GridOptions |
Object with grid parameters to enable «multirow» slider. |
|
| { | |||
| fill | ‘row’ | ‘column’ | ‘column’ |
Can be |
| rows | number | 1 |
Number of slides rows, for multirow layout
|
| } |
Manipulation
Manipulation module adds useful Swiper methods to manipulate slides. It makes sense to use it only with Swiper Core version, not intended to be uses with Swiper React or Vue.
Manipulation Methods
| Methods | |
|---|---|
| swiper.addSlide(index, slides) |
Add new slides to the required index. slides could be HTMLElement or HTML string with new slide or array with such slides, for example: |
| swiper.appendSlide(slides) |
Add new slides to the end. slides could be HTMLElement or HTML string with new slide or array with such slides, for example: |
| swiper.prependSlide(slides) |
Add new slides to the beginning. slides could be HTMLElement or HTML string with new slide or array with such slides, for example: |
| swiper.removeAllSlides() |
Remove all slides |
| swiper.removeSlide(slideIndex) |
Remove selected slides. slideIndex could be a number with slide index to remove or array with indexes. |
Parallax
Swiper supports parallax transition effects for swiper/slides nested elements. There are two types of parallax elements supported:
- Direct child elements of
swiper. Parallax effect for such elements will depend on total slider progress. Useful for parallax backgrounds - Slides child elements. Parallax effect for such elements will depend on slide progress
To enable parallax effects you need to init Swiper with passed parallax:true parameter and add one of the following (or mix) attributes to required elements:
data-swiper-parallax— enable transform-translate parallax transition. This attribute may accept:number— value in px (as for title, subtitle in example above) to move element depending on progress. In this case such element will be moved on ± this value in px depending on slide position (next or previous)percentage— (as for «parallax-bg») to move element depending on progress and on its size. In this case such element will be moved on ± this percentage of its size (width in horizontal direction, and height in vertical direction) depending on slide position (next or previous). So if element has 400px width and you specified data-swiper-parallax=»50%» then it will be moved on ± 200px
data-swiper-parallax-x— same but for x-axis directiondata-swiper-parallax-y— same but for y-axis directiondata-swiper-parallax-scale— scale ratio of the parallax element when it is in «inactive» (not on active slide) statedata-swiper-parallax-opacity— opacity of the parallax element when it is in «inactive» (not on active slide) statedata-swiper-parallax-duration— custom transition duration for parallax elements
<div class="swiper">
  <!-- Parallax background element -->
  <div
    class="parallax-bg"
    style="background-image:url(path/to/image.jpg)"
    data-swiper-parallax="-23%"
  ></div>
  <div class="swiper-wrapper">
    <div class="swiper-slide">
      <!-- Each slide has parallax title -->
      <div class="title" data-swiper-parallax="-100">Slide 1</div>
      <!-- Parallax subtitle -->
      <div class="subtitle" data-swiper-parallax="-200">Subtitle</div>
      <!-- And parallax text with custom transition duration -->
      <div
        class="text"
        data-swiper-parallax="-300"
        data-swiper-parallax-duration="600"
      >
        <p>Lorem ipsum dolor sit amet, ...</p>
      </div>
      <!-- Opacity parallax -->
      <div data-swiper-parallax-opacity="0.5">I will change opacity</div>
      <!-- Scale parallax -->
      <div data-swiper-parallax-scale="0.15">I will change scale</div>
    </div>
    ...
  </div>
</div>
Parallax Parameters
| Name | Type | Default | Description |
|---|---|---|---|
| parallax | boolean | ParallaxOptions |
Object with parallax parameters or boolean |
|
| { | |||
| enabled | boolean | false |
Enable, if you want to use «parallaxed» elements inside of slider |
| } |
Lazy Loading
Since version 9 Swiper doesn’t have specifid lazy loading API, as it relies on native browser lazy loading feature. To use lazy loading, we just need to set loading="lazy" on images and add preloader element:
<div class="swiper">
  <div class="swiper-wrapper">
    <!-- Lazy image -->
    <div class="swiper-slide">
      <img src="path/to/picture-1.jpg" loading="lazy" />
      <div class="swiper-lazy-preloader"></div>
    </div>

    <!-- Lazy image with srcset -->
    <div class="swiper-slide">
      <img
        src="path/to/logo-small.png"
        srcset="path/to/logo-large.png 2x"
        loading="lazy"
      />
      <div class="swiper-lazy-preloader"></div>
    </div>
  </div>
</div>
As you see:
- Lazy image must have
loading="lazy"attribute - Add animated preloader spinner to slide which will be removed automatically after image loaded:
<div class="swiper-lazy-preloader"></div>
Or white one for dark layout:
<div class="swiper-lazy-preloader swiper-lazy-preloader-white"></div>
Fade Effect
Be sure to have the effect param set to 'fade' in order for this to work.
Note that crossFade should be set to true in order to avoid seeing content behind or underneath.
Fade Effect Parameters
| Name | Type | Default | Description |
|---|---|---|---|
| fadeEffect | FadeEffectOptions |
Object with Fade-effect parameters |
|
| { | |||
| crossFade | boolean | false |
Enables slides cross fade |
| } |
Coverflow Effect
Be sure to have the effect param set to 'coverflow' in order for this to work.
Coverflow Effect Parameters
| Name | Type | Default | Description |
|---|---|---|---|
| coverflowEffect | CoverflowEffectOptions |
Object with Coverflow-effect parameters. |
|
| { | |||
| depth | number | 100 |
Depth offset in px (slides translate in Z axis) |
| modifier | number | 1 |
Effect multiplier |
| rotate | number | 50 |
Slide rotate in degrees |
| scale | number | 1 |
Slide scale effect |
| slideShadows | boolean | true |
Enables slides shadows |
| stretch | number | 0 |
Stretch space between slides (in px) |
| } |
Flip Effect
Be sure to have the effect param set to 'flip' in order for this to work.
Flip Effect Parameters
| Name | Type | Default | Description |
|---|---|---|---|
| flipEffect | FlipEffectOptions |
Object with Flip-effect parameters |
|
| { | |||
| limitRotation | boolean | true |
Limit edge slides rotation |
| slideShadows | boolean | true |
Enables slides shadows |
| } |
Cube Effect
Be sure to have the effect param set to 'cube' in order for this to work.
Cube Effect Parameters
| Name | Type | Default | Description |
|---|---|---|---|
| cubeEffect | CubeEffectOptions |
Object with Cube-effect parameters |
|
| { | |||
| shadow | boolean | true |
Enables main slider shadow |
| shadowOffset | number | 20 |
Main shadow offset in px |
| shadowScale | number | 0.94 |
Main shadow scale ratio |
| slideShadows | boolean | true |
Enables slides shadows |
| } |
Cards Effect
Be sure to have the effect param set to 'cards' in order for this to work.
Cards Effect Parameters
| Name | Type | Default | Description |
|---|---|---|---|
| cardsEffect | CardsEffectOptions |
Object with Cards-effect parameters |
|
| { | |||
| perSlideOffset | number | 8 |
Offset distance per slide (in px) |
| perSlideRotate | number | 2 |
Rotate angle per slide (in degrees) |
| rotate | boolean | true |
Enables cards rotation |
| slideShadows | boolean | true |
Enables slides shadows |
| } |
Creative Effect
Be sure to have the effect param set to 'creative' in order for this to work.
Creative Effect Parameters
| Name | Type | Default | Description |
|---|---|---|---|
| creativeEffect | CreativeEffectOptions |
Object with Creative-effect parameters |
|
| { | |||
| limitProgress | number | 1 |
Limit progress/offset to amount of side slides. If |
| next | CreativeEffectTransform |
Next slide transformations. |
|
| perspective | boolean | true |
Enable this parameter if your custom transforms require 3D transformations ( |
| prev | CreativeEffectTransform |
Previous slide transformations. Accepts object of the following type: |
|
| progressMultiplier | number | 1 |
Allows to multiply slides transformations and opacity. |
| shadowPerProgress | boolean | false |
Splits shadow «opacity» per slide based on |
| } |
Thumbs
In addition to Controller component Swiper comes with Thumbs component that is designed to work with additional thumbs swiper in a more correct way than Controller which is used for syncing two swipers.
Thumbs Parameters
| Name | Type | Default | Description |
|---|---|---|---|
| thumbs | ThumbsOptions |
Object with thumbs component parameters |
|
| { | |||
| autoScrollOffset | number | 0 |
Allows to set on which thumbs active slide from edge it should automatically move scroll thumbs. For example, if set to 1 and last visible thumb will be activated (1 from edge) it will auto scroll thumbs |
| multipleActiveThumbs | boolean | true |
When enabled multiple thumbnail slides may get activated |
| slideThumbActiveClass | string | ‘swiper-slide-thumb-active’ |
Additional class that will be added to activated thumbs swiper slide |
| swiper | null | Swiper | null |
Swiper instance of swiper used as thumbs or object with Swiper parameters to initialize thumbs swiper |
| thumbsContainerClass | string | ‘swiper-thumbs’ |
Additional class that will be added to thumbs swiper |
| } |
Thumbs Methods
| Properties | ||
|---|---|---|
| swiper.thumbs.swiper | Swiper |
Swiper instance of thumbs swiper |
| Methods | ||
| swiper.thumbs.init() |
Initialize thumbs |
|
| swiper.thumbs.update(initial) |
Update thumbs |
Zoom
Swiper supports zoom images functionality (similar to what you see on iOS when browsing single photo) where you can zoom-in image by pinch gesture and or by zoom-in/out by double tap on it. In this case, additional layout is required:
<div class="swiper">
  <div class="swiper-wrapper">
    <div class="swiper-slide">
      <div class="swiper-zoom-container">
        <img src="path/to/image1.jpg" />
      </div>
    </div>
    <div class="swiper-slide">
      <div class="swiper-zoom-container">
        <img src="path/to/image2.jpg" />
      </div>
    </div>
    <div class="swiper-slide">Plain slide with text</div>
    <div class="swiper-slide">
      <!-- Override maxRatio parameter -->
      <div class="swiper-zoom-container" data-swiper-zoom="5">
        <img src="path/to/image1.jpg" />
      </div>
    </div>
  </div>
</div>
-
All «zoomable» images should be wrapped with the div with
swiper-zoom-containerclass. -
By default it expects to zoom one of the
img,pictureorcanvaselement. If you want to make zoom on some other custom element, then just addswiper-zoom-targetclass to this element. For example:<div class="swiper"> <div class="swiper-wrapper"> <div class="swiper-slide"> <div class="swiper-zoom-container"> <!-- custom zoomable element --> <div class="swiper-zoom-target" style="background-image: url(...)" ></div> </div> </div> </div> </div> -
You can override
maxRatioparameter for specific slides by usingdata-swiper-zoomattribute on zoom container.
Zoom Parameters
| Name | Type | Default | Description |
|---|---|---|---|
| zoom | boolean | ZoomOptions |
Enables zooming functionality. Object with zoom parameters or boolean |
|
| { | |||
| containerClass | string | ‘swiper-zoom-container’ |
CSS class name of zoom container |
| maxRatio | number | 3 |
Maximum image zoom multiplier |
| minRatio | number | 1 |
Minimal image zoom multiplier |
| toggle | boolean | true |
Enable/disable zoom-in by slide’s double tap |
| zoomedSlideClass | string | ‘swiper-slide-zoomed’ |
CSS class name of zoomed in container |
| } |
Zoom Methods
| Properties | ||
|---|---|---|
| swiper.zoom.enabled | boolean |
Whether the zoom module is enabled |
| swiper.zoom.scale | number |
Current image scale ratio |
| Methods | ||
| swiper.zoom.disable() |
Disable zoom module |
|
| swiper.zoom.enable() |
Enable zoom module |
|
| swiper.zoom.in(ratio) |
Zoom in image of the currently active slide. Optionally accepts custom zoom ratio |
|
| swiper.zoom.out() |
Zoom out image of the currently active slide |
|
| swiper.zoom.toggle() |
Toggle image zoom of the currently active slide |
Zoom Events
| Name | Arguments | Description |
|---|---|---|
| zoomChange | (swiper, scale, imageEl, slideEl) |
Event will be fired on zoom change |
Keyboard Control
Keyboard Control Parameters
| Name | Type | Default | Description |
|---|---|---|---|
| keyboard | boolean | KeyboardOptions |
Enables navigation through slides using keyboard. Object with keyboard parameters or boolean |
|
| { | |||
| enabled | boolean | false |
Set to |
| onlyInViewport | boolean | true |
When enabled it will control sliders that are currently in viewport |
| pageUpDown | boolean | true |
When enabled it will enable keyboard navigation by Page Up and Page Down keys |
| } |
Keyboard Control Methods
| Properties | ||
|---|---|---|
| swiper.keyboard.enabled | boolean |
Whether the keyboard control is enabled |
| Methods | ||
| swiper.keyboard.disable() |
Disable keyboard control |
|
| swiper.keyboard.enable() |
Enable keyboard control |
Keyboard Events
| Name | Arguments | Description |
|---|---|---|
| keyPress | (swiper, keyCode) |
Event will be fired on key press |
Mousewheel Control
Mousewheel Control Parameters
| Name | Type | Default | Description |
|---|---|---|---|
| mousewheel | boolean | MousewheelOptions |
Enables navigation through slides using mouse wheel. Object with mousewheel parameters or boolean |
|
| { | |||
| eventsTarget | HTMLElement | ‘container’ | ‘wrapper’ | CSSSelector | ‘container’ |
String with CSS selector or HTML element of the container accepting mousewheel events. By default it is swiper |
| forceToAxis | boolean | false |
Set to |
| invert | boolean | false |
Set to |
| releaseOnEdges | boolean | false |
Set to |
| sensitivity | number | 1 |
Multiplier of mousewheel data, allows to tweak mouse wheel sensitivity |
| thresholdDelta | null | number | null |
Minimum mousewheel scroll delta to trigger swiper slide change |
| thresholdTime | null | number | null |
Minimum mousewheel scroll time delta (in ms) to trigger swiper slide change |
| } |
Mousewheel Control Methods
| Properties | ||
|---|---|---|
| swiper.mousewheel.enabled | boolean |
Whether the mousewheel control is enabled |
| Methods | ||
| swiper.mousewheel.disable() |
Disable mousewheel control |
|
| swiper.mousewheel.enable() |
Enable mousewheel control |
Mousewheel Events
| Name | Arguments | Description |
|---|---|---|
| scroll | (swiper, event) |
Event will be fired on mousewheel scroll |
Virtual Slides
Virtual Slides module allows to keep just required amount of slides in DOM. It is very useful in terms in performance and memory issues if you have a lot of slides, especially slides with heavyweight DOM tree or images.
Note that according to Virtual Slides realization it doesn’t work with Grid module and slidesPerView: 'auto'
Virtual Slides Parameters
| Name | Type | Default | Description |
|---|---|---|---|
| virtual | boolean | VirtualOptions |
Enables virtual slides functionality. Object with virtual slides parameters or boolean |
|
| { | |||
| addSlidesAfter | number | 0 |
Increases amount of pre-rendered slides after active slide |
| addSlidesBefore | number | 0 |
Increases amount of pre-rendered slides before active slide |
| cache | boolean | true |
Enables DOM cache of rendering slides html elements. Once they are rendered they will be saved to cache and reused from it. |
| enabled | boolean | false |
Whether the virtual slides are enabled |
| renderExternal | function(data) |
Function for external rendering (e.g. using some other library to handle DOM manipulations and state like React.js or Vue.js). As an argument it accepts
|
|
| renderExternalUpdate | boolean | true |
When enabled (by default) it will update Swiper layout right after renderExternal called. Useful to disable and update swiper manually when used with render libraries that renders asynchronously |
| renderSlide | function(slide, index) |
Function to render slide. As an argument it accepts current slide item for |
|
| slides | any[] | [] |
Array with slides |
| } |
Virtual Slides Methods
| Properties | ||
|---|---|---|
| swiper.virtual.cache | object |
Object with cached slides HTML elements |
| swiper.virtual.from | number |
Index of first rendered slide |
| swiper.virtual.slides | any[] |
Array with slide items passed by |
| swiper.virtual.to | number |
Index of last rendered slide |
| Methods | ||
| swiper.virtual.appendSlide(slide) |
Append slide.
|
|
| swiper.virtual.prependSlide(slide) |
Prepend slide.
|
|
| swiper.virtual.removeAllSlides() |
Remove all slides
|
|
| swiper.virtual.removeSlide(slideIndexes) |
Remove specific slide or slides.
|
|
| swiper.virtual.update(force) |
Update virtual slides state |
Virtual Slides Dom
Since version 9, Swiper virtual slides can work with slides originally rendered in DOM. On initialize it will remove them from DOM, cache and then re-use the ones which are required:
<div class="swiper">
  <div class="swiper-wrapper">
    <div class="swiper-slide">Slide 1</div>
    <div class="swiper-slide">Slide 2</div>
    ...
    <div class="swiper-slide">Slide 100</div>
  </div>
</div>
<script>
  const swiper = new Swiper('.swiper', {
    virtual: {
      enabled: true,
    },
  });
</script>
Hash Navigation
Hash navigation is intended to have a link to specific slide that allows to load page with specific slide opened.
To make it work, you need to enable it by passing hashNavigation:true parameter and adding slides hashes in data-hash attribute:
<div class="swiper">
  <div class="swiper-wrapper">
    <div class="swiper-slide" data-hash="slide1">Slide 1</div>
    <div class="swiper-slide" data-hash="slide2">Slide 2</div>
    <div class="swiper-slide" data-hash="slide3">Slide 3</div>
    <div class="swiper-slide" data-hash="slide4">Slide 4</div>
    <div class="swiper-slide" data-hash="slide5">Slide 5</div>
    ...
  </div>
</div>
const swiper = new Swiper('.swiper', {
  //enable hash navigation
  hashNavigation: true,
});
Hash Navigation Parameters
| Name | Type | Default | Description |
|---|---|---|---|
| hashNavigation | boolean | HashNavigationOptions |
Enables hash url navigation to for slides. Object with hash navigation parameters or boolean |
|
| { | |||
| replaceState | boolean | false |
Works in addition to hashnav to replace current url state with the new one instead of adding it to history |
| watchState | boolean | false |
Set to |
| } |
Hash Navigation Events
| Name | Arguments | Description |
|---|---|---|
| hashChange | (swiper) |
Event will be fired on window hash change |
| hashSet | (swiper) |
Event will be fired when swiper updates the hash |
History Navigation
History Navigation Parameters
| Name | Type | Default | Description |
|---|---|---|---|
| history | boolean | HistoryOptions |
Enables history push state where every slide will have its own url. In this parameter you have to specify main slides url like Object with history navigation parameters or boolean |
|
| { | |||
| enabled | boolean | false |
Enables History Plugin. |
| keepQuery | boolean | false |
Keep query parameters when changing browser url. |
| key | string | ‘slides’ |
Url key for slides |
| replaceState | boolean | false |
Works in addition to hashnav or history to replace current url state with the new one instead of adding it to history |
| root | string | » |
Swiper page root, useful to specify when you use Swiper history mode not on root website page. For example can be |
| } |
Controller
Controller Parameters
| Name | Type | Default | Description |
|---|---|---|---|
| controller | ControllerOptions |
Object with controller parameters or boolean |
|
| { | |||
| by | ‘slide’ | ‘container’ | ‘slide’ |
Defines a way how to control another slider: slide by slide (with respect to other slider’s grid) or depending on all slides/container (depending on total slider percentage). |
| control | string | Swiper | Swiper[] | HTMLElement |
Pass here another Swiper instance or array with Swiper instances that should be controlled by this Swiper. Also accepts string with CSS selector of Swiper element, or HTMLElement of Swiper element |
|
| inverse | boolean | false |
Set to |
| } |
Controller Methods
| Properties | ||
|---|---|---|
| swiper.controller.control | Swiper | Swiper[] |
Pass here another Swiper instance or array with Swiper instances that should be controlled by this Swiper |
Accessibility (a11y)
Accessibility Parameters
| Name | Type | Default | Description |
|---|---|---|---|
| a11y | A11yOptions |
Object with a11y parameters or boolean |
|
| { | |||
| containerMessage | null | string | null |
Message for screen readers for outer swiper container |
| containerRoleDescriptionMessage | null | string | null |
Message for screen readers describing the role of outer swiper container |
| enabled | boolean | true |
Enables A11y |
| firstSlideMessage | string | ‘This is the first slide’ |
Message for screen readers for previous button when swiper is on first slide |
| id | null | string | number | null |
Value of |
| itemRoleDescriptionMessage | null | string | null |
Message for screen readers describing the role of slide element |
| lastSlideMessage | string | ‘This is the last slide’ |
Message for screen readers for next button when swiper is on last slide |
| nextSlideMessage | string | ‘Next slide’ |
Message for screen readers for next button |
| notificationClass | string | ‘swiper-notification’ |
CSS class name of A11y notification |
| paginationBulletMessage | string | ‘Go to slide {{index}}’ |
Message for screen readers for single pagination bullet |
| prevSlideMessage | string | ‘Previous slide’ |
Message for screen readers for previous button |
| slideLabelMessage | string | ‘{{index}} / {{slidesLength}}’ |
Message for screen readers describing the label of slide element |
| slideRole | string | ‘group’ |
Value of swiper slide |
| } |
Custom Build
You have two options of making custom version of Swiper.
Using JS Modules
If you use bundler with JS modules support in your project you can import only the modules you need:
// Import Swiper and modules
import Swiper, { Navigation, Pagination, Scrollbar } from 'swiper';

// Now you can use Swiper
const swiper = new Swiper('.swiper', {
  // Install modules
  modules: [Navigation, Pagination, Scrollbar],
  speed: 500,
  navigation: {
    nextEl: '.swiper-button-next',
    prevEl: '.swiper-button-prev',
  },
  // ...
});
The following modules are exported:
Virtual— Virtual Slides moduleKeyboard— Keyboard Control moduleMousewheel— Mousewheel Control moduleNavigation— Navigation modulePagination— Pagination moduleScrollbar— Scrollbar moduleParallax— Parallax moduleFreeMode— Free Mode moduleGrid— Grid moduleManipulation— Slides manipulation module (only for Core version)Zoom— Zoom moduleController— Controller moduleA11y— Accessibility moduleHistory— History Navigation moduleHashNavigation— Hash Navigation moduleAutoplay— Autoplay moduleEffectFade— Fade Effect moduleEffectCube— Cube Effect moduleEffectFlip— Flip Effect moduleEffectCoverflow— Coverflow Effect moduleEffectCards— Cards Effect moduleEffectCreative— Creative Effect moduleThumbs— Thumbs module
Using Build Script
Swiper comes with gulp builder that allows to build custom library version where you may include only required modules. We need the following:
-
Download and unzip Swiper GitHub repository to local folder
-
Install Node.js (if not installed)
-
Now, we need to install required dependencies. Go to the folder with downloaded and unzipped Swiper repository and execute in terminal:
$ npm install -
Open
scripts/build-config.jsfile:module.exports = { // remove modules you don't need modules: [ 'virtual', 'keyboard', 'mousewheel', 'navigation', 'pagination', 'scrollbar', 'parallax', 'zoom', 'controller', 'a11y', 'history', 'hash-navigation', 'autoplay', 'thumbs', 'free-mode', 'grid', 'manipulation', 'effect-fade', 'effect-cube', 'effect-flip', 'effect-coverflow', 'effect-creative', 'effect-cards', ], }; -
Now, we are ready to build custom version of Swiper:
$ npm run build:prod -
That is all. Generated CSS and JS files and their minified versions will be available in
dist/folder.
TypeScript Definitions
Swiper is fully typed, it exports Swiper and SwiperOptions types:
// main.ts
import { Swiper, SwiperOptions } from 'swiper';

const swiperParams: SwiperOptions = {
  slidesPerView: 3,
  spaceBetween: 50,
};

const swiper = new Swiper('.swiper', swiperParams);
You can also check auto generated TypeScript definitions explorer for all the types, options, properties and methods.
First, check my video tutorial if you want to learn how to use Swiper with Oxygen : How To Use Swiper With Oxygen
SwiperJS is the most popular Slider library for a reason.
Whilst it offers ton of options for customization, it can be a little bit tricky to use.
Here are some valuable tips, that can be useful even if you don’t use Oxygen (actually most of them are used in the new Breakdance Builder)
- Arrows outside the slider
- Better selectors
- Custom CSS variables
- Size and aspect ratio
- Custom navigation arrows
- Adding your own transition animations
- The Parallax Trick
- Continuous Looping Effect
- Swiper with GSAP
- Some fun examples
Moving the arrows outside the slider
When using the default structure, the arrows will always be on top of the slider.
The common mistake is to move the arrows by changing their current right and left CSS properties. By doing so, they can be outside the container, but you will have to deal with the media-queries to change their positions for each breakpoints.
The best and safest way to do, it’s to change the structure of the full slider.
Here is the original structure (notice the pagination and buttons are at the same level of swiper-wrapper)

And here is the new structure.
We have added a new container (that we have called swiper-container), and we have moved the pagination and buttons so now they are at the same level as swiper (and not swiper-wrapper, as it was previously).

We then add some CSS for our new container.
And finally we just need to adjust the padding size for your arrows:
/* the new container */
.swiper-container {
    position: relative;
    width: 100%;
    padding: 0 40px;
}

/* fix the buttons positions */
.swiper-button-prev {
    left: 0;
}

.swiper-button-next {
    right: 0;
}
Now our arrows are outside and it’s fully responsive:
Better selectors
To keep the default style, you should always use the default selectors:
const swiper = new Swiper('.swiper', {
    // If we need pagination
    pagination: {
        el: '.swiper-pagination',
    },
    // Navigation arrows
    navigation: {
        nextEl: '.swiper-button-next',
        prevEl: '.swiper-button-prev',
    },
});
But if you plan to have more than one slider in a page, don’t forget to add a unique class or ID:
const swiper = new Swiper('.swiper-container-1 .swiper', {
    // If we need pagination
    pagination: {
        el: '.swiper-container-1 .swiper-pagination',
    },
    // Navigation arrows
    navigation: {
        nextEl: '.swiper-container-1 .swiper-button-next',
        prevEl: '.swiper-container-1 .swiper-button-prev',
    },
});
Custom CSS variables
Swiper has some ready-made CSS variable so you can easily style some of his components.
Apply them to the :root if you want all your sliders to have the same style, or to their main containers.
Here are the CSS variables with their default values:
.swiper-container-1 {
    --swiper-theme-color: #007aff;

    --swiper-navigation-size: 44px;
    --swiper-navigation-color: var(--swiper-theme-color);

    --swiper-pagination-color: var(--swiper-theme-color);
    --swiper-pagination-bullet-horizontal-gap: 4px;
    --swiper-pagination-bullet-vertical-gap: 6px;
    --swiper-pagination-bullet-size: 8px;
    --swiper-pagination-bullet-width: 8px;
    --swiper-pagination-bullet-height: 8px;
    --swiper-pagination-bullet-opacity: 1;
    --swiper-pagination-bullet-inactive-color: black;
    --swiper-pagination-bullet-inactive-opacity: .2;
    --swiper-pagination-bullet-horizontal-gap: 4px;

    --swiper-preloader-color: var(--swiper-theme-color);
    --swiper-virtual-size: 80px;
}
Size and Aspect ratio
There are different way to set the size of a slider.
If you want it to be 400px high all the time, whatever the resolution, and use some media-queries if you want to be smaller/bigger is smaller resolutions.
.swiper {
    width: 100%;
    height: 400px;
}
If you prefer to have a specific aspect ratio, you have to set the height to auto:
.swiper {
    width: 100%;
    height: auto;
    aspect-ratio: 16/9
}
if you want your content to have a specific aspect ratio, like all square, then you set :
.swiper {
    width: 100%;
    height: auto;
}

.swiper-slide {
    aspect-ratio: 1
}
note that the aspect-ratio CSS property is not supported by some old browsers. You can use the padding trick instead.
Custom navigation arrows
The navigation arrows are very minimalist and kind of trouble to customize.
So instead of using the inbuild arrows, we can use our own SVG files, or better, the Oxygen Icon element :
![]()
In that case, we must use our own classes, instead of the default ones:
// Navigation arrows
navigation: {
    nextEl: '.my-cool-arrow-next',
    prevEl: '.my-cool-arrow-prev',
}
But you have to deal with the positioning by yourself, as swiper won’t apply any styling.
.my-cool-arrow-prev {
    position: absolute;
    top: 50%;
    left: 0;
    transform: translatey(-50%);
    z-index: 10;
    cursor: pointer;
}

.my-cool-arrow-next {
    position: absolute;
    top: 50%;
    right: 0;
    transform: translatey(-50%);
    z-index: 10;
    cursor: pointer;
}
I have centered them vertically, as the same position of the swiper default one, but actually you can put them anywhere you want. There is no limitation in term of styling and positioning.
You can see plenty of examples in my DEZIGN4FUN slider set
Adding your own transition animations
With only few classes, we can control and customize the transition animations
/* the default style of each slide */
.swiper-slide {}

/* the active slide */
.swiper-slide-active {}

/* the slide just next to the active slide */
.swiper-slide-next {}

/* the slide before the active slide */
.swiper-slide-prev {}

/* same classes but for the duplicate slides, when in loop mode */

.swiper-slide-duplicate-active {}
.swiper-slide-duplicate-next {}
.swiper-slide-duplicate-prev {}
Important
1 — You must use the -duplicate- classes (see example below) when you are in loop mode, or your animation won’t work properly
2 — Do not modify these classes directly! It might not always work as expected. Instead, style and animate their content.
DON’T DO THAT: .swiper-slide { opacity: 0.1 }
DO THAT: .swiper-slide img { opacity: 0.1 }
Example :
The following code will set all the slides with an opacity of 0.1
The active slide will have an opacity of 1
The next and previous slides will have an opacity of 1 and will be grey.
.swiper-slide img {
    opacity: 0.1;
    transition: .3s ease all
}

.swiper-slide-active img,
.swiper-slide-duplicate-active img {
    opacity: 1
}

.swiper-slide-next img,
.swiper-slide-duplicate-next img {
    filter: grayscale(100%);
    opacity: 1;
}

.swiper-slide-prev img,
.swiper-slide-duplicate-prev img {
    filter: grayscale(100%);
    opacity: 1;
}
Notice the difference between the 2 following sliders:
— The first one has the default settings, which means that the active slide is the first one on the left.
— The second one has the option centeredSlides:true, which means that the active slide is centered.
The Parallax Trick
We can make some parallax effects with Swiper ( https://swiperjs.com/swiper-api#parallax ) but this little trick is not about that.
Check the 2 following sliders. The first one has the parallax option set to false. The second one has the parallax option set to true.
Even if they don’t have any parallax effect, there is still a difference between them.
Click and drag (to the right and left) on each sliders. Do you see a difference?
In the second one (parallax:true) the CSS effects we have added will still be animated while dragging the slide. (which is not the case by default).
Continuous Looping Effect
Swiper doesn’t have an option to make a continuous looping scrolling effect, so the only way is to set the autoplay delay to 0, and change the easing to a linear transition.
autoplay: {
    delay: 0,
},
.swiper-wrapper {
transition-timing-function: linear
}It’s not very smooth and there is a kind of little lag sometimes. Some other slider libs have better option for that kind of effect.
Swiper with GSAP
Check this tutorial
Some fun examples
I have made plenty of examples in my DEZIGN4FUN website, using these same exact techniques:
Testimonial Sliders — Content Tickers Sliders — Dynamic Sliders
Some cool and
useless effect
Sliders are functional user interface units that organize pieces of information in a condensed and cyclical manner within a limited space. Sliders consist of the following components:
- Containers, or the boxes that house the slider components
- Slides, or the content area that includes text, images, videos, and buttons
- Navigation icons that guide users through the slides
- Pagination visualizers that serve as additional navigation, usually bullets or numbers placed on the bottom of the container
In addition, sliders are built with transition effects to avoid abrupt changes from one block of content to another. Building these sliders from scratch, and covering their components and transition, can be intimidating. That is why in this article we will use Swiper to create modern, fast, responsive, and native (mobile-first) touch sliders with amazing transitions.
Contents
- What is Swiper?
- Getting started with Swiper
- Defining the markup
- Implementing movement and navigation
- Implementing transition effects
- Implementing sliders for image galleries
- Custom controls
What is Swiper?
Swiper is a JavaScript library that creates modern touch sliders with hardware-accelerated transitions (utilizing GPU to offload graphic-intensive transitions and create smoother visuals) and excellent native behavior. Swiper is available for vanilla JavaScript, Angular, React, Vue.js, and Svelte.
Some of the best websites that use Swiper JS can be found here.
Swiper is a completely free and open-source library with over 30.1k stars and 9.6k forks on GitHub. Some key features of Swiper include:
- Responsive design
- Rich API
- Image lazy loading
- Library agnostic
- Mobile-friendly
- Multi-row slide layout
- Flexbox layout
- Virtual slides for better performance
- Nested sliders
- Full navigation control
- Transition effects (fade, 3D Cube, 3D overflow, parallax, cards, and creative)
- Works on iOS, Android, and the latest desktop browsers
- RTL (right-to-left) layout
- Keyboard and mouse interaction and control
- Mutation observer
- Autoplay
- Loop mode
Getting started with Swiper
At the time of writing, Swiper is currently on v.8; however, check for the respective migration guide to upgrade from Swiper 6 to Swiper 7 or from Swiper 7 to Swiper 8.
There are three options for importing Swiper into your project:
- Download and use Swiper assets locally here
- Use Swiper as a content delivery network (CDN) by adding the following to your HTML file head and body, respectively:
    <link rel="stylesheet" href="https://unpkg.com/[email protected]/swiper-bundle.min.css"/>

    <script src="https://unpkg.com/[email protected]/swiper-bundle.min.js"></script>
- Install from npm using the installation command
$ npm install swiper
For this article, we will be using option two.
Defining the markup
The HTML markup to structure our project web page, layout, and its contents are shown in the image above. The HTML markup is as follows:
<!DOCTYPE html>
<html lang="en">
<head>
   <meta charset="UTF-8">
   <meta http-equiv="X-UA-Compatible" content="IE=edge">
   <meta name="viewport" content="width=device-width, initial-scale=1.0">
   <title>Swiper Article</title>
   <link rel="stylesheet" href="style.css">
   <link rel="stylesheet" href="https://unpkg.com/[email protected]/swiper-bundle.min.css"/>


</head>
<body>
   <div class="container">
       <!-- Project content container -->
       <div class="project_content">
           <h1>Swiper JS</h1>
           <h2>Building modern sliders with HTML, CSS and Swiper JS</h2>
           <h2>Author: Aboze Brain</h2>
           <p>Bio: Aboze Brain John is a data scientist. He has experience in data science and analytics, software engineering, product research and technical writing</p>
           <p>The code can be found on GitHub <a href="#">here</a> and the article can be found on Logrocket blog <a href="#">here</a></p>
           <p></p>
           <img src="/logrocket.png" alt="logrocket logo">
       </div>
       <!-- Slider main container -->
       <div class="swiper mySwiper">
           <div class="swiper-wrapper">
             <div class="swiper-slide slide_1">Slide 1</div>
             <div class="swiper-slide slide_2">Slide 2</div>
             <div class="swiper-slide slide_3">Slide 3</div>
             <div class="swiper-slide slide_4">Slide 4</div>
             <div class="swiper-slide slide_5">Slide 5</div>
           </div>
         </div>
   </div>


   <script src="https://unpkg.com/[email protected]/swiper-bundle.min.js"></script>
   <script src="/script.js"></script>
</body>
</html>
In the HTML markup, you can see that our project consists of five slides. Next, let’s style the default HTML markup using CSS as shown below:
/* Import google font (Balsamiq Sans) */
@import url('https://fonts.googleapis.com/css2?family=Balsamiq+Sans:ital,[email protected],400;0,700;1,400;1,700&display=swap');


/* Box sizing rules */
*,
*::before,
*::after {
   box-sizing: border-box;
}


/* Remove default padding and margin */
* {
   padding: 0;
   margin: 0;
}


/* Default anchor tag styling */
a {
   text-decoration: none;
   color: black;
}


a:hover {
   cursor: pointer;
}


/* Default image styling */
img {
   padding: 1rem;
   max-width: 75%;
   height: auto;
}


/* Body styling */
html,
body {
 position: relative;
 height: 100%;
}


body {
   font-family: 'Balsamiq Sans', cursive, "Roboto Mono";
   font-size: 1.2rem;
   text-align:justify;
}


.container {
   display: grid;
   grid-template-columns: 1fr 1fr;
   grid-gap: 1rem;
}


.container > div {
   top: 25vh;
   height: 50vh;
}


div.project_content {
   padding-top: 25vh;
   justify-items: center;
   align-items: center;
}
.project_content h1,h2, p {
   padding: 0.2rem 1rem;
}


.project_container img {
   height: 75%;
}


/* Swiper container stylng */
.swiper {
   right: 1rem;
   width: 100%;
   height: 100%;
}


.swiper-slide {
   text-align: center;
    /* Center slide text vertically */
   display: -webkit-box;
   display: -ms-flexbox;
   display: -webkit-flex;
   display: flex;
   -webkit-box-pack: center;
   -ms-flex-pack: center;
   -webkit-justify-content: center;
   justify-content: center;
   -webkit-box-align: center;
   -ms-flex-align: center;
   -webkit-align-items: center;
   align-items: center;
}
 .swiper-slide img {
   display: block;
   width: 100%;
   height: 100%;
   object-fit: cover;
 }


.slide_1 {
   background-color:#643ca3 ;
}


.slide_2 {
   background-color:#e38364 ;
}


.slide_3 {
   background-color:#faf47a ;
}


.slide_4 {
   background-color:#64e3c1 ;
}


.slide_5 {
   background-color:#9e6ffd ;
}
Next, we initialize Swiper in this project with JavaScript. The JavaScript is as follows:
//  Initialize Swiper
let swiper = new Swiper(".mySwiper", {});
Note that the class in the Swiper container ".mySwiper" is used to create a Swiper object in the JavaScript file.
Implementing movement and navigation
For the default web page, we can see that the five slides are overlapping each other, and there’s no way to view the slides one at a time except by using the mouse to swipe over.
This is not the most intuitive or clear way to communicate information. Swipers are supposed to be tools for displaying lots of information in a small space, so let’s see how we can improve this system with Swiper.
Pagination
As we learned earlier, pagination is just a set of traditional bullets or numbers placed on the bottom of the container (in this case, the box that covers the slides). The pagination shows how many sliders are overlapping in the container.
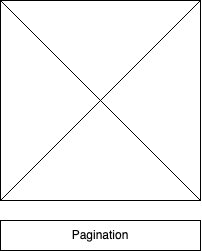
It can easily be implemented on the default files we have, by making some changes. On the HTML file, we need to add the pagination container under the sliders container as follows:
<div class="swiper mySwiper">
           <div class="swiper-wrapper">
             <div class="swiper-slide slide_1">Slide 1</div>
             <div class="swiper-slide slide_2">Slide 2</div>
             <div class="swiper-slide slide_3">Slide 3</div>
             <div class="swiper-slide slide_4">Slide 4</div>
             <div class="swiper-slide slide_5">Slide 5</div>
           </div>
           <div class="swiper-pagination"></div>
</div>
The CSS remains the same, but we need to make changes to our JavaScript file to initiate the pagination effect:
//  Initialize Swiper
let swiper = new Swiper(".mySwiper", {
   pagination: {
     el: ".swiper-pagination",
   },
 });
Now, our slider indicates how many slides we have in total, and which slide we are viewing at the moment.
Navigation
Navigation, just like pagination, serves as a tool to guide through the slides with a click rather than swiping with the mouse. It consists of a left and right arrow located on the sides of the slides container.
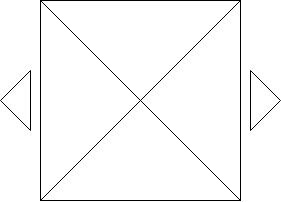
Let’s make the respective changes to our default files. On our HTML file, just like the pagination, we need to add the navigation containers under the sliders container as follows:
<div class="swiper mySwiper">
           <div class="swiper-wrapper">
             <div class="swiper-slide slide_1">Slide 1</div>
             <div class="swiper-slide slide_2">Slide 2</div>
             <div class="swiper-slide slide_3">Slide 3</div>
             <div class="swiper-slide slide_4">Slide 4</div>
             <div class="swiper-slide slide_5">Slide 5</div>
           </div>
           <div class="swiper-button-next"></div>
           <div class="swiper-button-prev"></div>
       </div>
Next, we need to add some styling to our CSS for arrow positioning (at the center of the slides container) and removing the arrow component outline as follows:
.swiper-button-next,
.swiper-button-prev {
   outline: none;
}


div.swiper-button-next, div.swiper-button-prev {
  top: 70%
}
Next, we initiate the navigation effect on our JavaScript file as follows:
//  Initialize Swiper
let swiper = new Swiper(".mySwiper", {
   navigation: {
     nextEl: ".swiper-button-next",
     prevEl: ".swiper-button-prev",
   },
 });
Scroll
Scroll aids simple horizontal scrollable sliders moving to start from left to right. It can easily be implemented by making the following changes on the default settings.
First, on the HTML markup, we will be making changes to the Swiper container as follows:
<div class="swiper mySwiper">
           <div class="swiper-wrapper">
             <div class="swiper-slide slide_1">Slide 1</div>
             <div class="swiper-slide slide_2">Slide 2</div>
             <div class="swiper-slide slide_3">Slide 3</div>
             <div class="swiper-slide slide_4">Slide 4</div>
             <div class="swiper-slide slide_5">Slide 5</div>
           </div>
           <div class="swiper-scrollbar"></div>
       </div>
Next, using the default CSS, let’s initiate the scroll effect on the JavaScript file as follows:
//  Initialize Swiper
letswiper = new Swiper(".mySwiper", {
 scrollbar: {
   el: ".swiper-scrollbar",
   hide: true,
 },
});
Now, you can see a scroll bar at the bottom of our slides.
Vertical
Vertical means vertical pagination; vertical pagination is just like the regular pagination we covered previously, but the bullet points are in a vertical orientation.
The HTML markup is the same as the horizontal pagination, we just need to specify the orientation in our JavaScript file as follows:
//  Initialize Swiper
let swiper = new Swiper(".mySwiper", {
 direction: "vertical",
 pagination: {
   el: ".swiper-pagination",
   clickable: true,
   hide: true,
 },
});
Now, we can see the slides moving up and down instead of side to side.
Nested
Nested sliders are a bit trickier. They are a combination of both the horizontal and vertical display of sliders with pagination to give you more information about the number of slides on each axis.
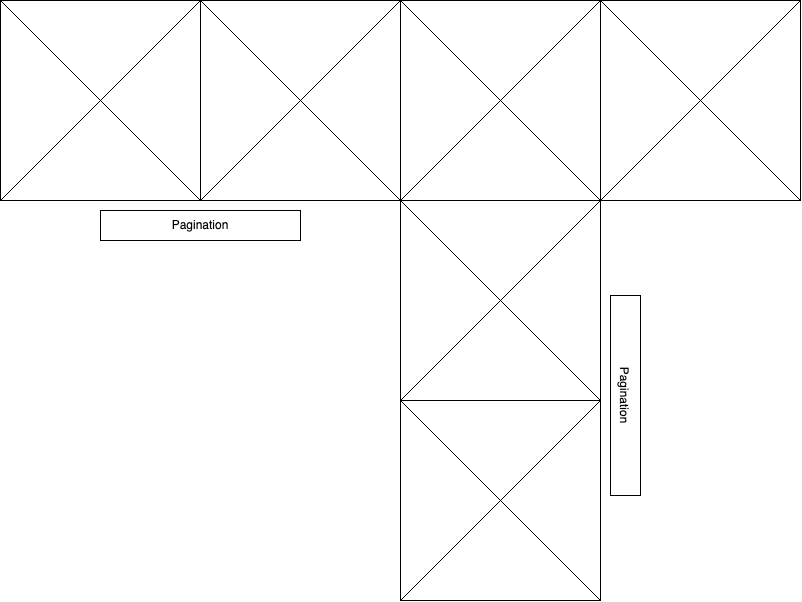
Let’s implement this using the default settings, on our HTML markup. The following changes should be made on the swiper container as follows:
<div class="swiper mySwiper swiper-h">
           <div class="swiper-wrapper">
             <div class="swiper-slide slide_1">Horizontal Slide 1</div>
             <div class="swiper-slide slide_2">Horizontal Slide 2</div>
             <div class="swiper-slide">
               <div class="swiper mySwiper2 swiper-v">
                 <div class="swiper-wrapper">
                   <div class="swiper-slide slide_3">Horizontal Slide 3 & Vertical Slide 1</div>
                   <div class="swiper-slide v_slide_2">Vertical Slide 2</div>
                   <div class="swiper-slide v_slide_3">Vertical Slide 3</div>
                 </div>
                 <div class="swiper-pagination"></div>
               </div>
             </div>
             <div class="swiper-slide slide_4">Horizontal Slide 4</div>
           </div>
           <div class="swiper-pagination"></div>
         </div>
Next, we need to specify some changes in our default CSS file to accommodate the vertical slide color as follows:
.v_slide_2 {
   background-color: #c164e3;
}


.v_slide_3 {
   background-color: #e3c164;
}
Then, we have to initiate both the vertical and horizontal sliders with pagination on our JavaScript script:
let swiper = new Swiper(".mySwiper", {
 spaceBetween: 50,
 pagination: {
   el: ".swiper-pagination",
   clickable: true,
 },
});


let swiper2 = new Swiper(".mySwiper2", {
 direction: "vertical",
 spaceBetween: 50,
 pagination: {
   el: ".swiper-pagination",
   clickable: true,
 },
});
Implementing transition effects
Sliders in web designs are incorporated with a range of transition effects to avoid overwhelming and abrupt shifts between blocks of information. For the context of this article, we will be focusing on the cube effect and the cards effect.
Cube effect
The cube effect transition makes the slides look like they are sides on a rotating cube. Changing from one slide to the next spins the cube to bring the desired slide to the front.
To implement the cube effect, on our default files we will make the following changes.
On our HTML markup we will update the swiper container as follows:
<div class="swiper mySwiper">
           <div class="swiper-wrapper">
             <div class="swiper-slide slide_1">Slide 1</div>
             <div class="swiper-slide slide_2">Slide 2</div>
             <div class="swiper-slide slide_3">Slide 3</div>
             <div class="swiper-slide slide_4">Slide 4</div>
             <div class="swiper-slide slide_5">Slide 5</div>
           </div>
       </div>
In the CSS, we have to make some changes to the swiper container selector by reducing the slide size to accommodate the effect transition like so:
.swiper {
   width: 280px;
   height: 320px;
}
Next, we have to initiate a cube effect on our JavaScript file:
//  Initialize Swiper
let swiper = new Swiper(".mySwiper", {
 effect: "cube",
 grabCursor: true,
 cubeEffect: {
   shadow: true,
   slideShadows: true,
   shadowOffset: 20,
   shadowScale: 0.94,
 },
 pagination: {
   el: ".swiper-pagination",
 },
});
![]()
Cards effect
This is a transition effect for shifting between slides just like the cube above. With the cards effect, each slide looks like a card in a deck that is being shuffled to bring the desired slide to the front.
The HTML and CSS is the same as the cube effect, just change the effect to the cards as follows:
//  Initialize Swiper
let swiper = new Swiper(".mySwiper", {
 effect: "cards",
 grabCursor: true,
});

Implementing sliders for image galleries
In this section, we will look at some sliders that are ideal for images or galleries. In my opinion, two great options for gallery sliders are thumb galleries and lazy loading, which we will learn how to implement in the following sections.
Thumb galleries
This slider consists of a compressed preview image of the original that is used as a placeholder. The thumbnail image should be smaller than the original, but the exact size is up to you. This slider creates a simple thumbnail gallery module to hold content and also functions as a means of navigation.
Using the default settings, we can implement this by making changes to our default HTML markup as follows:
<div class="swiper-container">
           <div class="swiper mySwiper2">
               <div class="swiper-wrapper">
                   <div class="swiper-slide slide_1">Slide 1</div>
                   <div class="swiper-slide slide_2">Slide 2</div>
                   <div class="swiper-slide slide_3">Slide 3</div>
                   <div class="swiper-slide slide_4">Slide 4</div>
                   <div class="swiper-slide slide_5">Slide 5</div>
               </div>
               <div class="swiper-button-next"></div>
               <div class="swiper-button-prev"></div>
           </div>


           <div thumbsSlider="" class="swiper mySwiper">
               <div class="swiper-wrapper">
                   <div class="swiper-slide slide_1">Slide 1</div>
                   <div class="swiper-slide slide_2">Slide 2</div>
                   <div class="swiper-slide slide_3">Slide 3</div>
                   <div class="swiper-slide slide_4">Slide 4</div>
                   <div class="swiper-slide slide_5">Slide 5</div>
               </div>
           </div>
 </div>
Next, we need to make changes on our CSS to the slider and thumbnails inside our swiper container as follows:
div.swiper-container {
   padding-top: 25vh;
}


.swiper-slide {
   display: flex;
   align-items: center;
   justify-content: center;
}


.swiper {
   width: 480px;
}


.mySwiper2 {
   width: 480px;
   height: 320px;
}


.mySwiper {
   height: 30%;
   box-sizing: border-box;
   margin: 10px;
}


.mySwiper .swiper-slide {
   opacity: 0.4;
}


.swiper-slide {
   background-position: center;
}


.mySwiper .swiper-slide-thumb-active {
   opacity: 1;
}
Then, we initiate the thumb gallery sliders on our default JavaScript file:
//  Initialize Swiper
let swiper = new Swiper(".mySwiper", {
 spaceBetween: 10,
 slidesPerView: 4,
 freeMode: true,
 watchSlidesProgress: true,
});


let swiper2 = new Swiper(".mySwiper2", {
 spaceBetween: 10,
 navigation: {
   nextEl: ".swiper-button-next",
   prevEl: ".swiper-button-prev",
 },
 thumbs: {
   swiper: swiper,
 },
});
Lazy loading
Lazy loading is a strategy that delays loading or initialization of resources until they are actually needed in order to reduce page load time and save system resources. Just imagine a user downloading the entire gallery in the previous use case, but the user leaves after viewing only the first slide; it results in memory and bandwidth wastage.
Lazy loading occurs on some users’ interactions such as navigation and scrolling. In order to see the lazy loading effect, we will be using images from Pexels.
To begin, on the default HTML file make the following changes on the slider container as follows:
div class="swiper mySwiper">
           <div class="swiper-wrapper">
              <div class="swiper-slide">
               <img data-src="https://images.pexels.com/photos/1824273/pexels-photo-1824273.jpeg?cs=srgb&dl=pexels-victor-miyata-1824273.jpg&fm=jpg"
               class="swiper-lazy"/>
              </div>
              <div class="swiper-slide">
               <img data-src="https://images.pexels.com/photos/3219549/pexels-photo-3219549.jpeg?cs=srgb&dl=pexels-engin-akyurt-3219549.jpg&fm=jpg"
               class="swiper-lazy"/>
              </div>
              <div class="swiper-slide">
               <img data-src="https://images.pexels.com/photos/1579240/pexels-photo-1579240.jpeg?cs=srgb&dl=pexels-stas-knop-1579240.jpg&fm=jpg"
               class="swiper-lazy"/>
              </div>
              <div class="swiper-slide">
               <img data-src="https://images.pexels.com/photos/51415/pexels-photo-51415.jpeg?cs=srgb&dl=pexels-max-deroin-51415.jpg&fm=jpg"
               class="swiper-lazy"/>
              </div>
           </div>


           <div class="swiper-button-next"></div>
           <div class="swiper-button-prev"></div>
           <div class="swiper-pagination"></div>
       </div>
On the default CSS file, remove all stylings related to swiper class and add the following styling:
.swiper {
   width: 70%;
   --swiper-navigation-color: #000000;
   --swiper-pagination-color: #000000;
}


.swiper-slide img {
   width: auto;
   height: auto;
   max-width: 85%;
   max-height: 100%;
   -ms-transform: translate(-50%, -50%);
   -webkit-transform: translate(-50%, -50%);
   -moz-transform: translate(-50%, -50%);
   transform: translate(-50%, -50%);
   position: absolute;
   left: 50%;
   top: 50%;
 }
Next we need to initiate the lazy loading effect on our JavaScript file like so:
let swiper = new Swiper(".mySwiper", {
 lazy: true,
 pagination: {
   el: ".swiper-pagination",
   clickable: true,
 },
 navigation: {
   nextEl: ".swiper-button-next",
   prevEl: ".swiper-button-prev",
 },
});
Custom controls
These controls are just a few ways to navigate through the slides. They are relatively simple to implement, we just need to specify them in the JavaScript file to take effect. Let’s look at three of the most popular.
First is keyboard control. This control utilizes the navigation keys on the keyboard (arrows keys or WASD) to control the shifting of slides. It can be initiated by adding the following to the swiper object as follows:
    keyboard: {
       enabled: true,
     },
Second is mousewheel control: This control aids navigation of slides via the scrolling of the mouse. This is ideal for vertical sliders, as the mousewheel can quickly scroll through the content. It can be initiated by adding the following to the swiper object in the JavaScript:
mousewheel: true,
Third and finally is grab cursor. This is an intuitive control that allows the mouse cursor to grab content and move it in different directions to navigate through the slides. It can be initialized on the JavaScript as follows:
grabCursor: true,
Conclusion
Sliders are important web design units that deserve special attention. Despite their pros on managing contents in a space, they have some cons such as inhibiting SEO strategies and creating UX blunders. Sliders are a matter of personal preference, and when implemented efficiently, can produce a favorable impression. Swiper makes it easy for you to make them, should you decide to include them in your next project.
Is your frontend hogging your users’ CPU?
As web frontends get increasingly complex, resource-greedy features demand more and more from the browser. If you’re interested in monitoring and tracking client-side CPU usage, memory usage, and more for all of your users in production, try LogRocket. https://logrocket.com/signup/
LogRocket is like a DVR for web and mobile apps, recording everything that happens in your web app or site. Instead of guessing why problems happen, you can aggregate and report on key frontend performance metrics, replay user sessions along with application state, log network requests, and automatically surface all errors.
Modernize how you debug web and mobile apps — Start monitoring for free.
Skip to content
Introduction: This is a requirement from UI designer. We are using Swiper (idangero.us/swiper/) to do the slider on our web pages.
By default, we are applying a simple slider for the contents.
HTML:
< div class="swiper-pagination swiper-pagination-custom">
< div>1 of 3</div>
< span class="swiper-pagination-bullet swiper-pagination-bullet-active"></span>
< span class="swiper-pagination-bullet"></span>
< span class="swiper-pagination-bullet"></span>
< /div>
CSS:
/*active pagination*/
.swiper-pagination .swiper-pagination-bullet-active {
  border-radius: 0;
  color: #FF7800; /*orange color*/
  background-color: #FF7800; /*orange color*/
  opacity: 1;
}

/*other pagination*/
.swiper-pagination .swiper-pagination-bullet {
  border-radius: 0;
  color: #ffffff;
  background-color: #ffffff;
  opacity: 1;
}
The slider pagination will look like this:

As required, we want to customize the pagination to look like this:
(a 1px border outside the square box)
![]()
Solution:
We need to add paginationBulletRender to Swiper function.
JS:
paginationBulletRender: function (swiper, index, className) {
  return '< div class=" '+ className +' ">< div class="inner-dot">< /div>< /div>';
}
The output for HTML:
< div class="swiper-pagination swiper-pagination-custom">
 < div>1 of 3</div>
 < div class="swiper-pagination-bullet swiper-pagination-bullet-active">
   < div class="inner-dot"></div>
 </div>
 < div class="swiper-pagination-bullet">
   < div class="inner-dot"></div>
 </div>
 < div class="swiper-pagination-bullet">
   < div class="inner-dot"></div>
 </div>
< /div>
CSS:
/*create the outer border line for active bullet*/
.swiper-pagination .swiper-pagination-bullet.swiper-pagination-bullet-active {
  background-color: transparent;
  border: 1px solid #ff7800;
  padding: 2px 6px 6px 2px;
}

/*the active square bullet*/
.swiper-pagination .swiper-pagination-bullet.swiper-pagination-bullet-active .inner-dot {
  background-color: #ff7800; /*orange color when active*/
  height: 4px:
  width: 4px;
}

/*the square dot*/
.swiper-pagination  .swiper-pagination-bullet .inner-dot {
  background-color: #ffffff; /*white color when passive*/
  height: 4px;
  width: 4px;
}
Cool, now we have our own design for the Swiper pagination =)