DigitalOcean provides cloud products for every stage of your journey. Get started with $200 in free credit!
SVG is a great format for icons. Vector formats look crisp and razor sharp, no matter the size or device — and we get tons of design control when using them inline.
SVG also gives us another powerful feature: the ability to manipulate their properties with CSS. As a result, we can make quick and simple interactions where it used to take crafty CSS tricks or swapping out entire image files.
Those interactions include changing color on hover states. It sounds like such a straightforward thing here in 2019, but there are actually a few totally valid ways to go about it — which only demonstrates the awesome powers of SVG more.
First off, let’s begin with a little abbreviated SVG markup:
<svg class="icon">
  <path .../>
</svg>
Target the .icon class in CSS and set the SVG fill property on the hover state to swap colors.
.icon:hover {
  fill: #DA4567;
}
This is by far the easiest way to apply a colored hover state to an SVG. Three lines of code!
SVGs can also be referenced using an <img> tag or as a background image. This allows the images to be cached and we can avoid bloating your HTML with chunks of SVG code. But the downside is a big one: we no longer have the ability to manipulate those properties using CSS. Whenever I come across non-inline icons, my first port of call is to inline them, but sometimes that’s not an option.
I was recently working on a project where the social icons were a component in a pattern library that everyone was happy with. In this case, the icons were being referenced from an <img> element. I was tasked with applying colored :focus and :hover styles, without adjusting the markup.
So, how do you go about adding a colored hover effect to an icon if it’s not an inline SVG?
CSS Filters
CSS filters allow us to apply a whole bunch of cool, Photoshop-esque effects right in the browser. Filters are applied to the element after the browser renders layout and initial paint, which means they fall back gracefully. They apply to the whole element, including children. Think of a filter as a lens laid over the top of the element it’s applied to.
These are the CSS filters available to us:
brightness(<number-percentage>);contrast(<number-percentage>);grayscale(<number-percentage>);invert(<number-percentage>);opacity(<number-percentage>);saturate(<number-percentage>);sepia(<number-percentage>);hue-rotate(<angle>);blur(<length>);drop-shadow(<length><color>);
All filters take a value which can be changed to adjust the effect. In most cases, this value can be expressed in either a decimal or percent units (e.g. brightness(0.5) or brightness(50%)).
Straight out of the box, there’s no CSS filter that allows us to add our own specific color.
We have hue-rotate(), but that only adjusts an existing color; it doesn’t add a color, which is no good since we’re starting with a monochromatic icon.
The game-changing bit about CSS filters is that we don’t have to use them in isolation. Multiple filters can be applied to an element by space-separating the filter functions like this:
.icon:hover {
  filter: grayscale(100%) sepia(100%);
}
If one of the filter functions doesn’t exist, or has an incorrect value, the whole list is ignored and no filter will be applied to the element.
When applying multiple filter functions to an element, their order is important and will affect the final output. Each filter function will be applied to the result of the previous operation.

So, in order to colorize our icons, we have to find the right combination.
To make use of hue-rotate(), we need to start off with a colored icon. The sepia() filter is the only filter function that allows us to add a color, giving the filtered element a yellow-brown-y tinge, like an old photo.
The output color is dependent on the starting tonal value:

In order to add enough color with sepia(), we first need to use invert() to convert our icon to a medium grey:
.icon:hover {
  filter: invert(0.5)
}![]()
We can then add the yellow/brown tone with sepia():
.icon:hover {
  filter: invert(0.5) sepia(1);
}![]()
…then change the hue with hue-rotate():
.icon:hover {
  filter: invert(0.5) sepia(1) hue-rotate(200deg);
}![]()
Once we have the rough color we want, we can tweak it with saturation() and brightness():
.icon:hover {
  filter:
    invert(0.5)
    sepia(1)
    hue-rotate(200deg)
    saturate(4)
    brightness(1);
}![]()
I’ve made a little tool for this to make your life a little easier, as this is a pretty confusing process to guesstimate.
See the Pen CSS filter example by Cassie Evans (@cassie-codes)
on CodePen.
Even with the tool, it’s still a little fiddly, not supported by Internet Explorer, and most importantly, you’re unable to specify a precise color.
Desktop
| Chrome | Firefox | IE | Edge | Safari |
|---|---|---|---|---|
| 18* | 35 | No | 79 | 6* |
Mobile / Tablet
| Android Chrome | Android Firefox | Android | iOS Safari |
|---|---|---|---|
| 109 | 109 | 4.4* | 6.0-6.1* |
So, what do we do if we need a specific hex code?
SVG Filters
If we need more precise control (and better browser support) than CSS filters can offer, then it’s time to turn to SVG.
Filters originally came from SVG. In fact, under the hood, CSS filters are just shortcuts to SVG filters with a particular set of values baked in.
Unlike CSS, the filter isn’t predefined for us, so we have to create it. How do we do this?
This is the syntax to define a filter:
<svg xmlns="<http://www.w3.org/2000/svg>" version="1.1">
  <defs>
    <filter id="id-of-your-filter">
      ...

      ...
    </filter>
    ...
  </defs>
</svg>
Filters are defined by a <filter> element, which goes inside the <defs> section of an SVG.
SVG filters can be applied to SVG content within the same SVG document. Or, the filter can be referenced and applied to HTML content elsewhere.
To apply an SVG filter to HTML content, we reference it the same way as a CSS filter: by using the url() filter function. The URL points to the ID of the SVG filter.
.icon:hover {
  filter: url('#id-of-your-filter');
}
The SVG filter can be placed inline in the document or the filter function can reference an external SVG. I prefer the latter route as it allows me to keep my SVG filters tidied away in an assets folder.
.icon:hover {
  filter: url('assets/your-SVG.svg#id-of-your-filter');
}
Back to the <filter> element itself.
<filter id="id-of-your-filter">
  ...

  ...
</filter>
Right now, this filter is empty and won’t do anything as we haven’t defined a filter primitive. Filter primitives are what create the filter effects. There are a number of filter primitives available to us, including:
[<feBlend>][<feColorMatrix>][<feComponentTransfer>][<feComposite>][<feConvolveMatrix>][<feDiffuseLighting>][<feDisplacementMap>][<feDropShadow>][<feFlood>][<feGaussianBlur>][<feImage>][<feMerge>][<feMorphology>][<feOffset>][<feSpecularLighting>][<feTile>][<feTurbulence>]
Just like with CSS filters, we can use them on their own or include multiple filter primitives in the <filter> tag for more interesting effects. If more than one filter primitive is used, then each operation will build on top of the previous one.
For our purposes we’re just going to use feColorMatrix, but if you want to know more about SVG filters, you can check out the specs on MDN or this (in progress, at the time of this writing) article series that Sara Soueidan has kicked off.
feColourMatrix allows us to change color values on a per-channel basis, much like channel mixing in Photoshop.
This is what the syntax looks like:
<svg xmlns="<http://www.w3.org/2000/svg>" version="1.1">
  <defs>
    <filter id="id-of-your-filter">
      <feColorMatrix
        color-interpolation-filters="sRGB"
        type="matrix"
        values="1 0 0 0 0
                0 1 0 0 0
                0 0 1 0 0
                0 0 0 1 0 "/>
    </filter>
    ...
  </defs>
</svg>
The color-interpolation-filters attribute specifies our color space. The default color space for filter effects is linearRGB, whereas in CSS, RGB colors are specified in the sRGB color space. It’s important that we set the value to sRGB in order for our colors to match up.
Let’s have a closer look at the color matrix values.

The first four columns represent the red, green and blue channels of color and the alpha (opacity) value. The rows contain the red, green, blue and alpha values in those channels.
The M column is a multiplier — we don’t need to change any of these values for our purposes here. The values for each color channel are represented as floating point numbers in the range 0 to 1.
We could write these values as a CSS RGBA color declaration like this:

The values for each color channel (red, green and blue) are stored as integers in the range 0 to 255. In computers, this is the range that one 8-bit byte can offer.
By dividing these color channel values by 255, the values can be represented as a floating point number which we can use in the feColorMatrix.
And, by doing this, we can create a color filter for any color with an RGB value!
Like teal, for example:

See the Pen
SVG filter – teal hover by Cassie Evans (@cassie-codes)
on CodePen.
This SVG filter will only impart color to icons with a white fill, so If we have an icon with a black fill, we can use invert() to convert it to white before applying the SVG filter.
.icon:hover {
  filter: invert(100%) url('assets/your-SVG.svg#id-of-your-filter');
}
If we just have a hex code, the math is a little trickier, although there are plenty of hex-to-RGBA converters out there. To help out, I’ve made a HEX to feColorMatrix converter.
See the Pen
HEX to feColorMatrix converterr by Cassie Evans (@cassie-codes)
on CodePen.
Have a play around, and happy filtering!
DigitalOcean provides cloud products for every stage of your journey. Get started with $200 in free credit!
SVG is a great format for icons. Vector formats look crisp and razor sharp, no matter the size or device — and we get tons of design control when using them inline.
SVG also gives us another powerful feature: the ability to manipulate their properties with CSS. As a result, we can make quick and simple interactions where it used to take crafty CSS tricks or swapping out entire image files.
Those interactions include changing color on hover states. It sounds like such a straightforward thing here in 2019, but there are actually a few totally valid ways to go about it — which only demonstrates the awesome powers of SVG more.
First off, let’s begin with a little abbreviated SVG markup:
<svg class="icon">
  <path .../>
</svg>
Target the .icon class in CSS and set the SVG fill property on the hover state to swap colors.
.icon:hover {
  fill: #DA4567;
}
This is by far the easiest way to apply a colored hover state to an SVG. Three lines of code!
SVGs can also be referenced using an <img> tag or as a background image. This allows the images to be cached and we can avoid bloating your HTML with chunks of SVG code. But the downside is a big one: we no longer have the ability to manipulate those properties using CSS. Whenever I come across non-inline icons, my first port of call is to inline them, but sometimes that’s not an option.
I was recently working on a project where the social icons were a component in a pattern library that everyone was happy with. In this case, the icons were being referenced from an <img> element. I was tasked with applying colored :focus and :hover styles, without adjusting the markup.
So, how do you go about adding a colored hover effect to an icon if it’s not an inline SVG?
CSS Filters
CSS filters allow us to apply a whole bunch of cool, Photoshop-esque effects right in the browser. Filters are applied to the element after the browser renders layout and initial paint, which means they fall back gracefully. They apply to the whole element, including children. Think of a filter as a lens laid over the top of the element it’s applied to.
These are the CSS filters available to us:
brightness(<number-percentage>);contrast(<number-percentage>);grayscale(<number-percentage>);invert(<number-percentage>);opacity(<number-percentage>);saturate(<number-percentage>);sepia(<number-percentage>);hue-rotate(<angle>);blur(<length>);drop-shadow(<length><color>);
All filters take a value which can be changed to adjust the effect. In most cases, this value can be expressed in either a decimal or percent units (e.g. brightness(0.5) or brightness(50%)).
Straight out of the box, there’s no CSS filter that allows us to add our own specific color.
We have hue-rotate(), but that only adjusts an existing color; it doesn’t add a color, which is no good since we’re starting with a monochromatic icon.
The game-changing bit about CSS filters is that we don’t have to use them in isolation. Multiple filters can be applied to an element by space-separating the filter functions like this:
.icon:hover {
  filter: grayscale(100%) sepia(100%);
}
If one of the filter functions doesn’t exist, or has an incorrect value, the whole list is ignored and no filter will be applied to the element.
When applying multiple filter functions to an element, their order is important and will affect the final output. Each filter function will be applied to the result of the previous operation.
So, in order to colorize our icons, we have to find the right combination.
To make use of hue-rotate(), we need to start off with a colored icon. The sepia() filter is the only filter function that allows us to add a color, giving the filtered element a yellow-brown-y tinge, like an old photo.
The output color is dependent on the starting tonal value:
In order to add enough color with sepia(), we first need to use invert() to convert our icon to a medium grey:
.icon:hover {
  filter: invert(0.5)
}![]()
We can then add the yellow/brown tone with sepia():
.icon:hover {
  filter: invert(0.5) sepia(1);
}![]()
…then change the hue with hue-rotate():
.icon:hover {
  filter: invert(0.5) sepia(1) hue-rotate(200deg);
}![]()
Once we have the rough color we want, we can tweak it with saturation() and brightness():
.icon:hover {
  filter:
    invert(0.5)
    sepia(1)
    hue-rotate(200deg)
    saturate(4)
    brightness(1);
}![]()
I’ve made a little tool for this to make your life a little easier, as this is a pretty confusing process to guesstimate.
See the Pen CSS filter example by Cassie Evans (@cassie-codes)
on CodePen.
Even with the tool, it’s still a little fiddly, not supported by Internet Explorer, and most importantly, you’re unable to specify a precise color.
Desktop
| Chrome | Firefox | IE | Edge | Safari |
|---|---|---|---|---|
| 18* | 35 | No | 79 | 6* |
Mobile / Tablet
| Android Chrome | Android Firefox | Android | iOS Safari |
|---|---|---|---|
| 109 | 109 | 4.4* | 6.0-6.1* |
So, what do we do if we need a specific hex code?
SVG Filters
If we need more precise control (and better browser support) than CSS filters can offer, then it’s time to turn to SVG.
Filters originally came from SVG. In fact, under the hood, CSS filters are just shortcuts to SVG filters with a particular set of values baked in.
Unlike CSS, the filter isn’t predefined for us, so we have to create it. How do we do this?
This is the syntax to define a filter:
<svg xmlns="<http://www.w3.org/2000/svg>" version="1.1">
  <defs>
    <filter id="id-of-your-filter">
      ...

      ...
    </filter>
    ...
  </defs>
</svg>
Filters are defined by a <filter> element, which goes inside the <defs> section of an SVG.
SVG filters can be applied to SVG content within the same SVG document. Or, the filter can be referenced and applied to HTML content elsewhere.
To apply an SVG filter to HTML content, we reference it the same way as a CSS filter: by using the url() filter function. The URL points to the ID of the SVG filter.
.icon:hover {
  filter: url('#id-of-your-filter');
}
The SVG filter can be placed inline in the document or the filter function can reference an external SVG. I prefer the latter route as it allows me to keep my SVG filters tidied away in an assets folder.
.icon:hover {
  filter: url('assets/your-SVG.svg#id-of-your-filter');
}
Back to the <filter> element itself.
<filter id="id-of-your-filter">
  ...

  ...
</filter>
Right now, this filter is empty and won’t do anything as we haven’t defined a filter primitive. Filter primitives are what create the filter effects. There are a number of filter primitives available to us, including:
[<feBlend>][<feColorMatrix>][<feComponentTransfer>][<feComposite>][<feConvolveMatrix>][<feDiffuseLighting>][<feDisplacementMap>][<feDropShadow>][<feFlood>][<feGaussianBlur>][<feImage>][<feMerge>][<feMorphology>][<feOffset>][<feSpecularLighting>][<feTile>][<feTurbulence>]
Just like with CSS filters, we can use them on their own or include multiple filter primitives in the <filter> tag for more interesting effects. If more than one filter primitive is used, then each operation will build on top of the previous one.
For our purposes we’re just going to use feColorMatrix, but if you want to know more about SVG filters, you can check out the specs on MDN or this (in progress, at the time of this writing) article series that Sara Soueidan has kicked off.
feColourMatrix allows us to change color values on a per-channel basis, much like channel mixing in Photoshop.
This is what the syntax looks like:
<svg xmlns="<http://www.w3.org/2000/svg>" version="1.1">
  <defs>
    <filter id="id-of-your-filter">
      <feColorMatrix
        color-interpolation-filters="sRGB"
        type="matrix"
        values="1 0 0 0 0
                0 1 0 0 0
                0 0 1 0 0
                0 0 0 1 0 "/>
    </filter>
    ...
  </defs>
</svg>
The color-interpolation-filters attribute specifies our color space. The default color space for filter effects is linearRGB, whereas in CSS, RGB colors are specified in the sRGB color space. It’s important that we set the value to sRGB in order for our colors to match up.
Let’s have a closer look at the color matrix values.
The first four columns represent the red, green and blue channels of color and the alpha (opacity) value. The rows contain the red, green, blue and alpha values in those channels.
The M column is a multiplier — we don’t need to change any of these values for our purposes here. The values for each color channel are represented as floating point numbers in the range 0 to 1.
We could write these values as a CSS RGBA color declaration like this:
The values for each color channel (red, green and blue) are stored as integers in the range 0 to 255. In computers, this is the range that one 8-bit byte can offer.
By dividing these color channel values by 255, the values can be represented as a floating point number which we can use in the feColorMatrix.
And, by doing this, we can create a color filter for any color with an RGB value!
Like teal, for example:
See the Pen
SVG filter – teal hover by Cassie Evans (@cassie-codes)
on CodePen.
This SVG filter will only impart color to icons with a white fill, so If we have an icon with a black fill, we can use invert() to convert it to white before applying the SVG filter.
.icon:hover {
  filter: invert(100%) url('assets/your-SVG.svg#id-of-your-filter');
}
If we just have a hex code, the math is a little trickier, although there are plenty of hex-to-RGBA converters out there. To help out, I’ve made a HEX to feColorMatrix converter.
See the Pen
HEX to feColorMatrix converterr by Cassie Evans (@cassie-codes)
on CodePen.
Have a play around, and happy filtering!
DigitalOcean provides cloud products for every stage of your journey. Get started with $200 in free credit!
There are a lot of different ways to use SVG. Depending on which way, the tactic for recoloring that SVG in different states or conditions — :hover, :active, :focus, class name change, etc. — is different.
Let’s look at the ways.
Inline SVG
Inline SVG is my favorite way to use SVG anyway, in part because of how easy it is to access and style the SVG.
See the Pen
bJXNyy by Chris Coyier (@chriscoyier)
on CodePen.
If you’re used to working with icon fonts, one thing you might enjoy about them is how easy it is to change the color. You’re largely limited to a single color with icon fonts in a way that SVG isn’t, but still, it is appealingly easy to change that single color with color. Using inline SVG allows you to set the fill, which cascades to all the elements within the SVG, or you can fill each element separately if needed.
SVG Symbol / Use
There is such thing as an SVG sprite, which is a group of SVGs turned into <symbol> elements such that any given icon can be referenced easily with a <use> element.
See the Pen
Use SVG Hovers by Chris Coyier (@chriscoyier)
on CodePen.
You can still set the fill color from outside CSS rather easily this way, but there are caveats.
- The internal SVG elements (like the
<path>) can have no fill themselves. This allows the fill set from the parent SVG to cascade into the Shadow DOM created by<use>. As soon as you have something like<path fill="blue" ... />in the<symbol>, you’ve lost outside CSS control. - Likewise, the
fillof individual elements cannot be controlled within the SVG like you could with inline SVG. This means you’re pretty firmly in single-color territory. That covers most use cases anyway, but still, a limitation nonetheless.
SVG background images
SVG can be set as a background image just like PNG, JPG, or whatever other graphics format. At this point, you’ve sort of given up on being able to change the fill. One possibility, which I’d argue isn’t a particularly good one, is to have two versions of every icon, in the respective colors, and swap between them:
See the Pen
Background SVG Hovers by Chris Coyier (@chriscoyier)
on CodePen.
I don’t blame you if you’d rather not swap sources, so another possibility is to get gnarly with filters.
See the Pen
Background SVG Hovers with Filters by Chris Coyier (@chriscoyier)
on CodePen.
Trying to finagle the right filters to get the color right is tricky stuff. Fortunately, Barrett Sonntag made a tool to calculate the filters for you! Turning black to red ends up a whacky combination like this: invert(27%) sepia(51%) saturate(2878%) hue-rotate(346deg) brightness(104%) contrast(97%);.
SVG also has object, which is kinda neat in that it had a built-in fallback back in the day — although browser support is so good these days, I honestly have never used it. But if you’re using it, you would probably have to use this filter technique to swap color on hover.
See the Pen
Background SVG Object Hovers by Chris Coyier (@chriscoyier)
on CodePen.
Use a mask instead of a background image
This way, the SVG is still in charge of essentially drawing the shape, but the color comes from the background-color (or image! or gradient!) behind it rather than the SVG itself.
See the Pen
Background SVG Hovers with Mask by Chris Coyier (@chriscoyier)
on CodePen.
SVG background images as data URLs
This doesn’t change that much from above, but it does open up one interesting possibility: Using a variable for the internal fills. Here that is with Sass keeping the URLs as variables:
See the Pen
Background SVG Hovers with Data URL variables by Chris Coyier (@chriscoyier)
on CodePen.
You can also do this with native CSS custom properties!
На чтение 3 мин Просмотров 26.7к. Опубликовано 17.04.2021
Содержание
- В предыдущих сериях…
- Подключение через тег <img> в html
- Подключение фона в .css
- Описываем svg-графику inline
- Заключение
В предыдущих сериях…
В прошлой статье мы выяснили, в чем отличие растровых форматов изображения от векторных. Теперь будем работать с векторной графикой. Для начала, научимся подключать эти изображения разными способами.
Возьмем стандартную папку с проектом, в которой есть отдельная папка для изображений, отдельная — для файлов .css, а также файл .html
Подключение через тег <img> в html
Работаем как с обычной картинкой. Тег <img>, атрибут src, прописываем путь к файлу. Можно использовать любые атрибуты <img>, включая атрибут width.
HTML
<h2>Иконки</h2>
<img src="./img/calendar.svg" alt="Calendar" width="102">
Получаем результат.
Подключение фона в .css
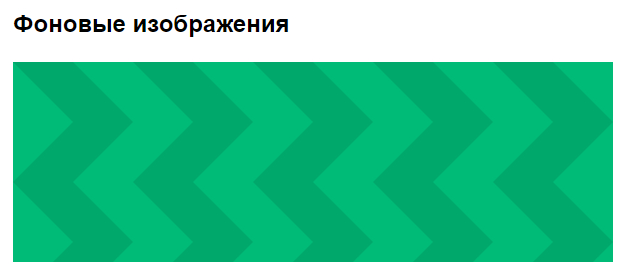
Можно подключить svg-графику в качестве фона элемента. Часто используются фоновые паттерны. Это небольшой фрагмент, впоследствии повторяющийся и создающий орнамент.
Так выглядит наш паттерн:

Укажите в html нужный класс и пропишите свойства фона background-image в файле css. Используйте функцию url(), чтобы задать путь к файлу с изображением.
HTML
<h2>Фоновые изображения</h2>
<div class="block-bg"></div>
CSS
/* SVG фоновое изображение */
.block-bg {
    width: 600px;
    height: 200px;
    background-image: url('./../img/bg-zigzag.svg');
}
Вот, что у нас получилось:
Описываем svg-графику inline
Существуют специальные теги и атрибуты для описания графики прямо в коде. При этом, изображение становится интерактивным — мы можем, например, менять цвет, или размер по наведению на иконку.
Тег <svg> используется как контейнер для хранения SVG графики. При помощи тега <path> и его атрибутов создается фигура. Посмотрите, как выглядит иконка YouTube в inline формате.
HTML
<svg class="youtube-icon" xmlns="http://www.w3.org/2000/svg" viewBox="0 0 576 512">
   <path d="M549.655 124.083c-6.281-23.65-24.787-42.276-48.284-48.597C458.781 64 288 64 288 64S117.22 64 74.629 75.486c-23.497 6.322-42.003 24.947-48.284 48.597-11.412 42.867-11.412 132.305-11.412 132.305s0 89.438 11.412 132.305c6.281 23.65 24.787 41.5 48.284 47.821C117.22 448 288 448 288 448s170.78 0 213.371-11.486c23.497-6.321 42.003-24.171 48.284-47.821 11.412-42.867 11.412-132.305 11.412-132.305s0-89.438-11.412-132.305zm-317.51 213.508V175.185l142.739 81.205-142.739 81.201z"></path>
</svg>
Стилизуем в файле .css по классу youtube-icon.
Будем менять цвет иконки по наведению при помощи свойства fill.
CSS
/* SVG inline код. Смена цвета по ховеру */
.youtube-icon {
    width: 64px;
    height: 64px;
    fill: black;
}

.youtube-icon:hover {
    fill: red;
}
Взгляните на результат:

Заключение
- Мы разобрали 3 стандартных способа подключения SVG-графики на сайт: тег
<img>, свойства CSS, тег<svg>. - Узнали про то, как можно менять цвет SVG-иконки через CSS и свойство
fill. - В следующей статье продолжим работу с тегам
<svg>,<path>, разберем как можно ещё кастомизировать векторную графику.
#База знаний
- 5 мар 2021
-

14
Узнаём про векторную графику, добавляем svg-картинки к HTML и творим всякое-разное с их цветом.

Автор статей по программированию. Преподаватель, ментор, выпускник Skillbox. Фрилансер, веб-разработчик
Помимо привычных растровых форматов (JPG, PNG, GIF), в веб-разработке широко применяют векторный — SVG.
SVG (сокращение от Scalable Vector Graphics — «масштабируемая векторная графика») — это вид графики, которую создают с помощью математического описания геометрических примитивов (линий, кругов, эллипсов, прямоугольников, кривых и так далее), которые и образуют все детали будущего изображения.
То есть в этом формате хранится не сама картинка, а инструкции для её построения по точкам и кривым. Они написаны на языке разметки SVG, расширяющем XML.
Прелесть SVG раскрывает масштабирование. Если увеличить растровое изображение сверх 100%-ного размера — проявляется пикселизация: отдельные точки превращаются в одноцветные блоки пикселей, границы областей становятся ступенчатыми, и в целом картинка выглядит негладко, некрасиво.
Если же увеличить векторное изображение — все его детали останутся чёткими, то есть их видимое разрешение не уменьшится. Поэтому svg-картинки отображаются на самых больших разрешениях без потери качества — и просто идеальны для адаптивных сайтов.
У svg-графики есть ещё одно достоинство. Её можно открывать как HTML или CSS и менять в любом редакторе кода, и даже на лету. Подробнее об этом ниже.
И наконец, при прочих равных SVG весит намного меньше растровых изображений.
Их мало. Во-первых, SVG не поддерживается очень старыми браузерами, а во-вторых, не используется для фотографий.
Есть три варианта добавления векторной графики. У каждого свои показания к применению.
Здесь всё так же, как и с растровой графикой:
<img src="img/icon.svg" alt="Иконка лупы">
Минус этого способа в том, что взаимодействовать с внутренними элементами SVG не получится. Файл будет как за стеклом: смотреть можно, а вот трогать нельзя.
Такой вариант подключения используется для контентных svg-изображений, которые менять внешне не требуется (вроде графиков, схем и логотипов).
Как и в случае с растровой графикой, SVG можно подключать через css-свойство background:
.icon {
      background-image: url("../img/icon.svg");
    }
Минус тут тот же самый, что и у предыдущего способа. Этот случай подходит для декоративных изображений (фоны, иконки и прочая мелочь), которые тоже внешне менять не нужно.
Вставлять svg-код прямо в html-файл — это третий способ. И для нас самый интересный. Он позволяет не просто отображать готовую графику, но и менять её (толщину элементов, заливку, обводку и так далее).
<svg>
    <rect x="10" y="10" width="100" height="100" />
</svg>
Такая вставка выручает, когда при взаимодействии с картинкой нужно её визуально модифицировать — например, перекрасить svg-иконку при наведении на неё курсора.
Напрямую на html-страницу (в теге <svg>) вставляют как контентные, так и декоративные изображения, а минус тут в том, что такие картинки не кешируются отдельно от страницы.
Верстальщику часто приходится обыгрывать реакцию иконки при наведении на неё мышки. В случае с svg-картинками можно просто менять их цвет.
Научимся это делать на примере иконки «ВКонтакте»:
Логотип сложный, поэтому svg-код, который его математически описывает, довольно длинный. Посмотрим, как это выглядит в HTML:
<a href="https://vk.com/" class=”vk”>
    <svg id="Bold" enable-background="new 0 0 24 24" height="512" viewBox="0 0 24 24" width="512"
      xmlns="http://www.w3.org/2000/svg">
      <path d="m19.915 13.028c-.388-.49-.277-.708 0-1.146.005-.005 3.208-4.431 3.538-5.932l.002-.001c.164-.547 0-.949-.793-.949h-2.624c-.668 0-.976.345-1.141.731 0 0-1.336 3.198-3.226 5.271-.61.599-.892.791-1.225.791-.164 0-.419-.192-.419-.739v-5.105c0-.656-.187-.949-.74-.949h-4.126c-.419
      0-.668.306-.668.591 0 .622.945.765 1.043 2.515v3.797c0 .832-.151.985-.486.985-.892
      0-3.057-3.211-4.34-6.886-.259-.713-.512-1.001-1.185-1.001h-2.625c-.749 0-.9.345-.9.731
      0 .682.892 4.073 4.148 8.553 2.17 3.058 5.226 4.715 8.006 4.715 1.671 0 1.875-.368 1.875-1.001
      0-2.922-.151-3.198.686-3.198.388 0 1.056.192 2.616 1.667 1.783 1.749 2.076 2.532 3.074
      2.532h2.624c.748 0 1.127-.368.909-1.094-.499-1.527-3.871-4.668-4.023-4.878z" />
    </svg>
  </a>
Да, это не ошибка, так в HTML вставляют небольшие svg-картинки. Для больших целесообразнее подключать отдельный файл, который будет кэшироваться браузером. Здесь мы не будем в это углубляться.
Обратите внимание на тег <path> (в переводе с английского «путь»). Он позволяет задать любую фигуру компактной строкой — описанием пути от начальной точки до конечной через промежуточные координаты.
Строка с данными задаётся атрибутом d тега <path>. Она содержит команды, которые закодированы набором букв и чисел. Буква представляет тип команды, а числа — её параметры (чаще всего координаты).
Теперь мы запросто добавим к ссылочному тегу <a> псевдокласс :hover и зададим через него новый цвет svg-изображения. Это делается в CSS с помощью свойства fill («заливка»).
.vk:hover svg {
      fill: red;
    }
Проверьте, как это работает: наведите курсор на иконку — например, в песочнице Codepen.
И ещё один нюанс. Заливка может быть задана атрибутом у <svg> (fill=»#000″). Тогда работать с ней через CSS не получится, так как css-стили не могут перебить правила, заданные атрибутами. В этом случае стоит просто вручную удалить этот атрибут у <svg>.
Итак, мы научились менять цвет svg-иконки через свойство fill, вставляя её напрямую в HTML. Заметьте, что такое нельзя сделать ни с помощью тега <img>, ни через свойство background.
Рассмотрим более сложную ситуацию — когда иконка состоит из нескольких простых svg-изображений. Например, примитивная лупа из прямоугольника и круга:
Код для кнопки с иконкой лупы будет таким:
<button class="btn-reset search">
            <svg width="26" height="26" viewBox="0 0 26 26" fill="none" xmlns="http://www.w3.org/2000/svg">
              <rect x="19.5138" y="18.5495" width="8" height="2" transform="rotate(45 19.5138 18.5495)"
              />
              <circle cx="11.5" cy="11.5" r="10.5" stroke-width="2" />
            </svg>
</button>
Проблема здесь в том, что внутри svg-иконки два разных тега:
- <rect> (прямоугольник — ручка лупы)
- и <circle> (круг — ободок лупы).
Сделать как в примере с «ВКонтакте» не получится, потому что прямоугольник в нашем случае имеет заливку (fill), а круг — обводку (stroke).
Чтобы при наведении менять цвет обоих, используем два селектора. Один будет менять заливку у палочки, второй — обводку у круга:
.search svg rect {
  fill: #000;
}

.search svg circle {
  stroke: #000;
}

.search:hover svg rect {
  fill: yellow;
}

.search:hover svg circle {
  stroke: yellow;
}
Как видите, при наведении на кнопку мы сперва нашли rect, потом circle, то есть разделили логику.
Делить код таким образом приходится нечасто, но помнить об этой возможности полезно.
Например, поучитесь работать с фоновыми картинками через CSS.

Учись бесплатно:
вебинары по программированию, маркетингу и дизайну.
Участвовать
Школа дронов для всех
Учим программировать беспилотники и управлять ими.
Узнать больше
Neyury, вот кодировка со style внутри.
я правда еще не пробовал всё менять.
но как пример надеюсь поможет
<?xml version="1.0" encoding="utf-8"?>
<!-- Generator: Adobe Illustrator 21.0.2, SVG Export Plug-In . SVG Version: 6.00 Build 0)  -->
<svg version="1.1" id="Слой_1" xmlns="http://www.w3.org/2000/svg" xmlns:xlink="http://www.w3.org/1999/xlink" x="0px" y="0px"
	 viewBox="0 0 148.5 91" style="enable-background:new 0 0 148.5 91;" xml:space="preserve">
<style type="text/css">
	.st0{fill:#E6E7E8;}
	.st1{fill:#D8D8D8;}
	.st2{fill:#58595B;}
	.st3{fill:#4A8EBC;}
	.st4{fill:#726658;}
	.st5{fill:#63C458;}
	.st6{fill:#FCF05B;}
	.st7{fill:#D7F6FF;}
	.st8{fill:#D1D3D4;}
	.st9{fill:#939598;}
	.st10{fill:#919191;}
	.st11{fill:#FFBA1F;}
	.st12{fill:#F7941D;}
	.st13{fill:#231F20;}
	.st14{fill:#C6C6C6;}
	.st15{fill:none;stroke:#231F20;stroke-width:1.7053;stroke-linecap:round;stroke-linejoin:round;stroke-miterlimit:10;}
	.st16{fill:#9FE4FF;}
	.st17{fill:none;stroke:#231F20;stroke-width:1.5177;stroke-linecap:round;stroke-linejoin:round;stroke-miterlimit:10;}
	.st18{fill:none;stroke:#231F20;stroke-width:1.1776;stroke-linecap:round;stroke-linejoin:round;stroke-miterlimit:10;}
	.st19{fill:none;stroke:#00AEEF;stroke-width:1.7053;stroke-linecap:round;stroke-linejoin:round;stroke-miterlimit:10;}
	.st20{fill:none;stroke:#231F20;stroke-width:1.6435;stroke-linecap:round;stroke-linejoin:round;stroke-miterlimit:10;}
	.st21{fill:none;stroke:#E5235F;stroke-width:1.7053;stroke-linecap:round;stroke-linejoin:round;stroke-miterlimit:10;}
	.st22{fill:none;stroke:#FFBF0D;stroke-width:1.7053;stroke-linecap:round;stroke-linejoin:round;stroke-miterlimit:10;}
	.st23{fill:none;stroke:#8DC63F;stroke-width:1.7053;stroke-linecap:round;stroke-linejoin:round;stroke-miterlimit:10;}
	.st24{fill:#414042;}
</style>
<g>
	<path class="st24" d="M21.8,80.5c0,1.3-0.6,2.4-1.8,3.2c-1.1,0.8-2.6,1.2-4.3,1.2c-1.3,0-2.5-0.3-3.7-0.8c-0.6-0.3-1.1-0.8-1.6-1.3
		c-0.3-0.3-0.4-0.5-0.6-0.8C9.7,81.9,9.3,81,9.4,81l2.6-0.9c0.2,0.8,0.8,1.6,1.6,2c0.6,0.3,1.3,0.5,2.1,0.5c1.2,0,3-0.4,3-1.9
		c0-0.5-0.2-0.9-0.6-1.3c-0.2-0.2-0.3-0.3-0.5-0.4c-0.4-0.3-0.9-0.6-1.3-0.7c-0.3-0.2-0.7-0.3-1-0.4c-0.8-0.3-1.6-0.7-2.3-1.2
		c-0.3-0.2-0.5-0.3-0.8-0.5L12,76c-0.3-0.3-0.6-0.5-0.8-0.8c-0.4-0.6-0.7-1.3-0.7-2.1c0-1.7,1-2.7,1.8-3.3c1-0.7,2.3-1.1,3.7-1.1
		c1.1,0,2.1,0.2,3,0.7c0.5,0.2,0.9,0.5,1.3,0.9c0.3,0.3,0.5,0.5,0.7,0.8l0.3,0.5c0,0,0.3,0.5,0.3,0.5l-2.6,1
		c-0.2-0.7-0.8-1.3-1.3-1.6c-1.3-0.7-4.2-0.5-4.2,1.5c0,0.5,0.2,0.9,0.6,1.3c0.1,0.1,0.3,0.3,0.4,0.3c0.8,0.6,1.8,1,2.7,1.3l0.7,0.3
		c0.2,0.1,0.4,0.2,0.6,0.3c0.6,0.3,1.3,0.6,1.8,1.1c0,0,0,0,0,0C21.3,78.4,21.8,79.4,21.8,80.5z"/>
	<path class="st24" d="M29.5,69c0.6-0.2,1.2-0.2,1.8-0.2c1.5,0,2.9,0.4,4.2,1.2c1.3,0.8,2.3,2,3,3.4c0.3,0.5,0.4,1.1,0.6,1.7
		l0.1,0.7l-13.1,3c0.5,1.4,1.4,2.4,2.8,3.1c1.1,0.5,2.4,0.7,3.6,0.4c1.4-0.3,2.7-1.3,3.4-2.5l2.3,1c-0.5,0.9-1.1,1.7-1.9,2.3
		c-1,0.8-2.1,1.3-3.3,1.6c-2.1,0.5-4.2,0.1-6-1c-1.8-1.2-3.1-2.9-3.6-5c-0.5-2.1-0.2-4.3,1-6.1C25.7,70.7,27.4,69.5,29.5,69z
		 M30.1,71.4c-1.1,0.3-2,0.8-2.8,1.6c-0.4,0.5-0.8,1.1-1,1.7c-0.3,0.7-0.4,1.3-0.5,2l10.5-2.4c-0.8-1.2-1.7-2.1-3-2.7
		C32.2,71.3,31.1,71.2,30.1,71.4z"/>
	<path class="st24" d="M68.8,78.6v5.9h-2.9v-7.3c0-1.5-0.1-3.1-1-4.3c-0.1-0.2-0.3-0.3-0.4-0.4c-1.9-1.7-5.2-1.5-6.9,0.4
		c-1,1.2-1,2.9-1,4.2v7.3h-2.8v-7.3c0-1.5-0.1-3.1-1-4.3c-0.1-0.2-0.3-0.3-0.4-0.4c-1.9-1.7-5.2-1.5-6.9,0.4
		c-1.1,1.2-1.1,2.9-1.1,4.2v7.3h-2.8V69.2h2.8v2.4c0,0,1-1.9,3.6-2.5c2.4-0.5,5.4,0,6.9,2c0.3,0.3,0.4,0.6,0.6,0.9
		c0.7-0.9,2.2-2.4,4.6-2.9c2.4-0.5,5.5,0,7.1,2C68.8,73.3,68.8,76.1,68.8,78.6z"/>
	<path class="st24" d="M77.1,69c0.6-0.2,1.2-0.2,1.8-0.2c1.5,0,2.9,0.4,4.2,1.2c1.3,0.8,2.3,2,3,3.4c0.3,0.5,0.4,1.1,0.6,1.7
		l0.1,0.7l-13.1,3c0.5,1.4,1.4,2.4,2.8,3.1c1.1,0.5,2.4,0.7,3.6,0.4c1.4-0.3,2.7-1.3,3.4-2.5l2.3,1c-0.5,0.9-1.1,1.7-1.9,2.3
		c-1,0.8-2.1,1.3-3.3,1.6c-2.1,0.5-4.2,0.1-6-1c-1.8-1.2-3.1-2.9-3.6-5c-0.5-2.1-0.2-4.3,1-6.1C73.2,70.7,75,69.5,77.1,69z
		 M77.7,71.4c-1.1,0.3-2,0.8-2.8,1.6c-0.4,0.5-0.8,1.1-1,1.7c-0.3,0.7-0.4,1.3-0.5,2l10.5-2.4c-0.8-1.2-1.7-2.1-3-2.7
		C79.8,71.3,78.7,71.2,77.7,71.4z"/>
	<path class="st24" d="M100.1,72.5c-1.9-1.7-5.2-1.5-6.9,0.4c-1.1,1.2-1.1,2.9-1.1,4.2v7.3h-2.8V69.2h2.8v2.4c0,0,1-1.9,3.6-2.5
		c2.4-0.5,5.5,0,7.1,2c1.7,2.1,1.6,4.9,1.6,7.5v5.9h-3v-7.3c0-1.5-0.1-3.1-1-4.3C100.4,72.8,100.2,72.7,100.1,72.5z"/>
	<path class="st24" d="M122,79.9c-0.4,1-1,1.8-1.7,2.6c-1.5,1.5-3.5,2.3-5.6,2.3c-2.1,0-4.1-0.8-5.6-2.3c-1.5-1.6-2.3-3.6-2.3-5.7
		c0-1,0.2-2.1,0.6-3c1.2-3,4.3-5,7.5-5c2.1,0,4.1,0.9,5.5,2.4c1.5,1.5,2.3,3.5,2.3,5.6C122.6,77.9,122.4,78.9,122,79.9z M120.1,76.8
		c0-1.5-0.6-2.8-1.6-3.9c-1-1.1-2.4-1.6-3.9-1.6c-3,0-5.4,2.5-5.4,5.5c0,1.5,0.6,2.9,1.6,3.9c1,1,2.4,1.6,3.9,1.6
		c1.5,0,2.8-0.6,3.9-1.6C119.5,79.7,120.1,78.3,120.1,76.8z"/>
	<path class="st24" d="M130.7,85.3l-7.8-16.1h2.8l4.9,10.4l4.9-10.4h2.8L130.7,85.3z"/>
</g>
<g>
	<path class="st24" d="M11.6,58.3V17.5c0-9.2,5.8-15.3,14.5-15.3c8.8,0,14.6,6.1,14.6,15.3v40.8c0,1-0.6,1.5-1.5,1.5h-7.3
		c-0.9,0-1.5-0.5-1.5-1.5v-16h-8.8v16c0,1-0.5,1.5-1.4,1.5H13C12,59.8,11.6,59.3,11.6,58.3z M30.4,33V16.8c0-3.2-1.6-5.1-4.4-5.1
		s-4.4,1.9-4.4,5.1V33H30.4z"/>
	<path class="st24" d="M73.1,50.8c1,0,1.5,0.5,1.5,1.4v6.6c0,0.9-0.5,1.4-1.5,1.4h-9.2c-8.8,0-13.9-6.2-13.9-14.7v-41
		c0-0.9,0.5-1.4,1.5-1.4h7.4c1,0,1.5,0.5,1.5,1.4V45c0,3.8,2,5.8,4.5,5.8H73.1z"/>
	<path class="st24" d="M78.2,44.9v-27c0-9,5.8-15.2,14.6-15.2h8.5c0.9,0,1.5,0.5,1.5,1.4v6.5c0,1-0.6,1.5-1.5,1.5H94
		c-3.5,0-5.6,2.4-5.6,6.2v8.4h10.9c1,0,1.5,0.6,1.5,1.5v6.2c0,1-0.5,1.5-1.5,1.5H88.4v8.9c0,3.7,2.1,6.2,5.6,6.2h7.3
		c0.9,0,1.5,0.5,1.5,1.4v6.6c0,0.9-0.6,1.4-1.5,1.4h-8.5C84,60.1,78.2,54,78.2,44.9z"/>
	<path class="st24" d="M134.1,31.1c3,2.6,4.6,6.2,4.6,10.5v16.8c0,1-0.6,1.5-1.5,1.5H130c-0.9,0-1.5-0.5-1.5-1.5V40.8
		c0-3-1.6-5-4.2-5c-2.5,0-4.2,2-4.2,5v17.5c0,1-0.5,1.5-1.4,1.5h-7.3c-1,0-1.5-0.5-1.5-1.5V41.6c0-4.3,1.6-7.9,4.6-10.5
		c-3-2.6-4.6-6.2-4.6-10.5V4.4c0-0.9,0.5-1.4,1.5-1.4h7.3c0.9,0,1.4,0.5,1.4,1.4v16.9c0,3,1.7,5,4.2,5c2.6,0,4.2-2,4.2-5V4.4
		c0-0.9,0.6-1.4,1.5-1.4h7.3c0.9,0,1.5,0.5,1.5,1.4v16.1C138.7,24.9,137.1,28.5,134.1,31.1z"/>
</g>
</svg>In one of the previous articles, I have mentioned Best 5+ Free HTML Rich Text Editor to use but now in this article, I have provided few possible ways to change the color of SVG images using CSS or Javascript.
If you are using SVG image icons or SVG image logo and want to change the color of the image, then you can have an issue while changing its color, because if you will use CSS property like background-color or color for SVG files it will not work, so I have provided solutions to resolve this issue.
Change SVG color using CSS
Every SVG has XML file like structure so, it could be as below
<svg xmlns="http://www.w3.org/2000/svg" id="Outline" viewBox="0 0 24 24">
<path d="M19,1H5A5.006,5.006,0,0,0,0,6V18a5.006,5.006,0,0,0,5,5H19a5.006,5.006,0,0,0,5-5V6A5.006,5.006,0,0,0,19,1ZM5,3H19a3,3,0,0,1,2.78,1.887l-7.658,7.659a3.007,3.007,0,0,1-4.244,0L2.22,4.887A3,3,0,0,1,5,3ZM19,21H5a3,3,0,0,1-3-3V7.5L8.464,13.96a5.007,5.007,0,0,0,7.072,0L22,7.5V18A3,3,0,0,1,19,21Z"/>
</svg>
So, if you want to change SVG color, then you can directly target «path» element or «polygon» element of SVG structure and use CSS property «fill«
So, you can have CSS has below
svg path{
  fill:red
}
Output
Here is the complete Fiddle sample
But the above solution will only work when you have SVG with path information.
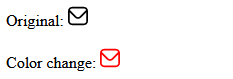
You can also open SVG in any Text Editor and then get to it’s XML as shown above and then in <path> tag use property «fill» to add change color, as shown below
<svg xmlns="http://www.w3.org/2000/svg" id="Outline" viewBox="0 0 24 24">
   <path fill="#AB7C94" d="M19,1H5A5.006,5.006,0,0,0,0,6V18a5.006,5.006,0,0,0,5,5H19a5.006,5.006,0,0,0,5-5V6A5.006,5.006,0,0,0,19,1ZM5,3H19a3,3,0,0,1,2.78,1.887l-7.658,7.659a3.007,3.007,0,0,1-4.244,0L2.22,4.887A3,3,0,0,1,5,3ZM19,21H5a3,3,0,0,1-3-3V7.5L8.464,13.96a5.007,5.007,0,0,0,7.072,0L22,7.5V18A3,3,0,0,1,19,21Z"/>
</svg>
Another way (Using SVG as background image)
You can also use SVG as a background image for an icon and then use CSS ‘mask’ property to fill it as Background.
Once you have set it as the background image, you can simply use ‘background-color’ CSS property to change image’s color
Example CSS
.icon {
  width: 48px;
  height: 48px;
  display: inline-block;

  -webkit-mask: url(https://s3-us-west-2.amazonaws.com/s.cdpn.io/18515/heart.svg) no-repeat 50% 50%;
  mask: url(https://s3-us-west-2.amazonaws.com/s.cdpn.io/18515/heart.svg) no-repeat 50% 50%;
  -webkit-mask-size: cover;
  mask-size: cover;
}

.icon-red { background-color: red; }
.icon-orange { background-color: orange; }
.icon-yellow { background-color: yellow; }
With Sample HTML
<i class="icon icon-red"></i>
<i class="icon icon-orange"></i>
<i class="icon icon-yellow"></i>
Gives output as below

Fiddle
Using Filter and SVG inside IMG tag
If you are using SVG with IMG tag, you can use CSS property ‘filter’ with saturation, which will change the color of the SVG image
Sample HTML
<img src="https://s3-us-west-2.amazonaws.com/s.cdpn.io/18515/heart.svg" class="colorize-orange ">CSS
.colorize-orange {
   -webkit-filter: hue-rotate(40deg) saturate(0.5) brightness(390%) saturate(4);
  filter: hue-rotate(40deg) saturate(0.5) brightness(390%) saturate(4);
}
Here is the fiddle
Using CSS Mask
We can also use CSS mask property to change SVG color
<i class="icon"></i>CSS
body{ overflow:hidden; }

.icon {
  --size: 70px;
  display: inline-block;
  width: var(--size);
  height: var(--size);
  transition: .12s;

  -webkit-mask-size: cover;
  mask-size: cover;
}

.icon-heart{
  background: black;
  animation: 4s frames infinite linear;

  -webkit-mask-image: url(https://s3-us-west-2.amazonaws.com/s.cdpn.io/18515/heart.svg);
  mask-image: url(https://s3-us-west-2.amazonaws.com/s.cdpn.io/18515/heart.svg);
}

@keyframes frames {
  0% { transform:translatex(100vw) }
  25% { background: red; }
  75% { background: lime; }
  100% { transform:translatex(-100%) }
}
Fiddle: https://jsfiddle.net/5hd0xfLj/
This approach can be useful if SVG is external, and included via URL.
That’s it, these are some 4 useful ways to change color of SVG using CSS.
You may also like to read:
Vertical Carousel (Bootstrap 4 and Bootstrap 3 With jQuery)
Useful CSS animation examples with code & animation basics
Top HTML and CSS interview questions
Creating Underline text in HTML (With or Without CSS)
Best HTML Editors for developers (Free)
Creating nested tables in HTML ( Example with code)
Внешний вид SVG-элементам можно задавать как с помощью CSS, так и с помощью SVG-фильтров, градиентов и паттернов — их можно прописывать элементам прямо в коде либо задавать также через CSS.
Стили и скрипты можно задавать внутри SVG-файла, но если мы хотим, чтобы одно и то же изображение в разных условиях выглядело по-разному — стили внутри файла не годятся — нужно, чтобы векторное содержимое было доступно для внешних стилей.
Из всех способов вставки SVG для этого подходят всего два: иконочный шрифт или инлайновый SVG в HTML (удобнее всего делать это через use).
Какие стили оформления можно использовать для иконочных шрифтов?
Можно задать цвет, добавить тени и анимацию:
Не так уж и много, по сравнению с возможностями обычного SVG.
Для SVG-изображений можно использовать SVG-градиенты и фильтры, например, размытие или тени. Также можно использовать в качестве обводки и заливки паттерны и изображения, а ещё можно красить отдельные части картинок и таким образом получать разноцветные иконки.
При вставке SVG через use иконки становятся доступны для стилей страницы, и всеми этими прекрасными возможностями можно управлять через внешний CSS.
Вот пример иконок с паттернами в качестве фона:
Пример немного диковат, но он хорошо показывает, что фоном может быть любая картинка. Паттерны заданы в коде страницы и подключены с помощью CSS.
Вот код деревянного паттерна:
<!-- Нужно задать размеры и Id, по которому будет вызываться паттерн -->
<pattern id="wood" width="400" height="400"
  patternUnits="userSpaceOnUse">
  <!-- Внутрь вставляется картинка для фона -->
  <image xlink:href="//img-fotki.yandex.ru/get/6447/5091629.86/0_74298_17a84446_L.jpg"
  width="400" height="400">
</pattern>
В паттерн можно класть всё что угодно: комбинации фигур, объекты с градиентами, текст… Правда, есть подозрение, что сложные фоны могут плохо влиять на производительность страницы, но тестов не делала.
Подключаем паттерн:
.icons--wood {
  fill: url(#wood);
}
Чтобы при наведении менять местами обводку и заливку, нужно добавить ещё пару строчек:
.icons--wood {
  fill: url(#wood);
}
.icons--wood .icon:hover {
  fill: none;
  stroke: url(#wood);
}
Также можно делать интересные эффекты на основе обводки:
Обводки могут быть пунктирными, для них можно использовать градиент или паттерн.
/* Обычная обводка, по наведению меняет цвет */
.icons--stroke .icon {
  stroke: rgba(0, 0, 0, .5);
  stroke-width: 2;

  &:hover {
    stroke: skyblue;
  }
}

/* Пунктирная обводка, по наведению линия становится непрерывной */
.icons--dasharray .icon {
  stroke: rgba(0, 0, 0, .5);
  stroke-width: 2;
  stroke-dasharray: 10 5;
  fill: rgba(0, 0, 0, .1);

  &:hover {
    stroke-dasharray: 10 0;
  }
}

/* Обводка с градиентом */
.icons--gradient .icon {
  stroke-width: 3;
  stroke: url(#stripes);
}
Иконкам в последней строке в качестве обводки задан градиент, уходящий в прозрачность, почему-то не работает в последней опере.
С анимацией пуктирной обводки можно делать интересные штуки:
Нажмите Rerun если демо застыло.
Не уверена, что эта анимация подходит для иконок (будет не очень хорошо, если иконки будут шевелиться или исчезать), но она может быть использована для эффектно появляющихся иллюстраций.
Примерный код:
path {
  fill: none;
  /* В качестве обводки задан градиент */
  stroke: url(#stripes);
  stroke-width: 2;
  /* Исходное состояние обводки — длинные черточки с нулевыми пробелами */
  stroke-dasharray: 550 0;
  animation: dasharray 5s infinite alternate;
}

@keyframes dasharray {
  100% {
  	/* Черточки нулевой длины с длинными пробелами, линиия исчезнет */
    stroke-dasharray: 0 500;
  }
}
Следующий пример демонстрирует иконки с SVG-фильтрами:
Размытие, тень, повторяющийся контур и внутренняя тень (её не очень хорошо видно).
Конечно, размытие врядли подойдет для иконок, но с ним можно придумать разные другие интересные штуки.
У фильтров есть недостаток: результатом наложения фильтров является растровое изображение, из-за чего картинки утрачивают способность тянуться без потерь в качестве и хуже выглядят на экранах с ретиной.
UPD от 19 мая 2014: фильтры хорошо выглядят на ретине, при условии, что они задаются SVG-элементам, а не HTML. Прошу прощения за неточность.
В примере ниже SVG-изображение разделено на несколько путей, что дает возможность обращаться к ним поотдельности. Здесь это используется чтобы задать элементам разные цвета и задержки анимации. При этом в дальнейшем фигура (в данном случае это группа путей) может быть использована целиком — таким образом можно получить не только монохромные иконки, но и разноцветные. Правда, при вставке такого объекта через use в нем перестанет работать анимация, но раскраска сохранится.
В качестве заливки (или обводки) SVG-элементов удобно использовать сurrentColor. Это ключевое слово, обозначающее текущий цвет текста, и если задать его в качестве заливки (обводки) — элемент будет краситься вместе с окружающим текстом.
Задаем заливку:
.icon {
  fill: currentColor;
}
Если потом для родительского элемента задать цвет текста
фигура зальется этим же цветом. Очень удобно для ссылок по наведению и для страниц с несколькими темами оформления.
Пример:
Интересно, что в SVG можно использовать далеко не все CSS-свойства, относительно полный список можно найти вот тут.
Можно использовать animation, но transition работает странно и не во всех браузерах. CSS-градиенты использовать, к сожалению, нельзя. Трансформации работают.
Также перед использованием различных фильтров и эффектов нужно всегда проверять как они поддерживаются разными браузерами.
Из всего вышеизложенного можно сделать следующие выводы:
- самые широкие возможности для оформления дает инлайновый SVG;
- меньше возможностей, но более удобное подключение на страницу предоставляет иконочный шрифт. Существенный минус состоит в проблемах с поддержкой встраиваемых шрифтов в разных браузерах;
- если SVG-графика нужна только в одном стиле и нет необходимости управления через внешний CSS — лучше всего воспользоваться спрайтом.