Here is the code needed to create your own message box:
using System;
using System.Collections.Generic;
using System.ComponentModel;
using System.Data;
using System.Drawing;
using System.Linq;
using System.Text;
using System.Windows.Forms;

namespace MyStuff
{
    public class MyLabel : Label
    {
        public static Label Set(string Text = "", Font Font = null, Color ForeColor = new Color(), Color BackColor = new Color())
        {
            Label l = new Label();
            l.Text = Text;
            l.Font = (Font == null) ? new Font("Calibri", 12) : Font;
            l.ForeColor = (ForeColor == new Color()) ? Color.Black : ForeColor;
            l.BackColor = (BackColor == new Color()) ? SystemColors.Control : BackColor;
            l.AutoSize = true;
            return l;
        }
    }
    public class MyButton : Button
    {
        public static Button Set(string Text = "", int Width = 102, int Height = 30, Font Font = null, Color ForeColor = new Color(), Color BackColor = new Color())
        {
            Button b = new Button();
            b.Text = Text;
            b.Width = Width;
            b.Height = Height;
            b.Font = (Font == null) ? new Font("Calibri", 12) : Font;
            b.ForeColor = (ForeColor == new Color()) ? Color.Black : ForeColor;
            b.BackColor = (BackColor == new Color()) ? SystemColors.Control : BackColor;
            b.UseVisualStyleBackColor = (b.BackColor == SystemColors.Control);
            return b;
        }
    }
    public class MyImage : PictureBox
    {
        public static PictureBox Set(string ImagePath = null, int Width = 60, int Height = 60)
        {
            PictureBox i = new PictureBox();
            if (ImagePath != null)
            {
                i.BackgroundImageLayout = ImageLayout.Zoom;
                i.Location = new Point(9, 9);
                i.Margin = new Padding(3, 3, 2, 3);
                i.Size = new Size(Width, Height);
                i.TabStop = false;
                i.Visible = true;
                i.BackgroundImage = Image.FromFile(ImagePath);
            }
            else
            {
                i.Visible = true;
                i.Size = new Size(0, 0);
            }
            return i;
        }
    }
    public partial class MyMessageBox : Form
    {
        private MyMessageBox()
        {
            this.panText = new FlowLayoutPanel();
            this.panButtons = new FlowLayoutPanel();
            this.SuspendLayout();
            //
            // panText
            //
            this.panText.Parent = this;
            this.panText.AutoScroll = true;
            this.panText.AutoSize = true;
            this.panText.AutoSizeMode = AutoSizeMode.GrowAndShrink;
            //this.panText.Location = new Point(90, 90);
            this.panText.Margin = new Padding(0);
            this.panText.MaximumSize = new Size(500, 300);
            this.panText.MinimumSize = new Size(108, 50);
            this.panText.Size = new Size(108, 50);
            //
            // panButtons
            //
            this.panButtons.AutoSize = true;
            this.panButtons.AutoSizeMode = AutoSizeMode.GrowAndShrink;
            this.panButtons.FlowDirection = FlowDirection.RightToLeft;
            this.panButtons.Location = new Point(89, 89);
            this.panButtons.Margin = new Padding(0);
            this.panButtons.MaximumSize = new Size(580, 150);
            this.panButtons.MinimumSize = new Size(108, 0);
            this.panButtons.Size = new Size(108, 35);
            //
            // MyMessageBox
            //
            this.AutoScaleDimensions = new SizeF(8F, 19F);
            this.AutoScaleMode = AutoScaleMode.Font;
            this.ClientSize = new Size(206, 133);
            this.Controls.Add(this.panButtons);
            this.Controls.Add(this.panText);
            this.Font = new Font("Calibri", 12F, FontStyle.Regular, GraphicsUnit.Point, ((byte)(0)));
            this.FormBorderStyle = FormBorderStyle.FixedSingle;
            this.Margin = new Padding(4);
            this.MaximizeBox = false;
            this.MinimizeBox = false;
            this.MinimumSize = new Size(168, 132);
            this.Name = "MyMessageBox";
            this.ShowIcon = false;
            this.ShowInTaskbar = false;
            this.StartPosition = FormStartPosition.CenterScreen;
            this.ResumeLayout(false);
            this.PerformLayout();
        }
        public static string Show(Label Label, string Title = "", List<Button> Buttons = null, PictureBox Image = null)
        {
            List<Label> Labels = new List<Label>();
            Labels.Add(Label);
            return Show(Labels, Title, Buttons, Image);
        }
        public static string Show(string Label, string Title = "", List<Button> Buttons = null, PictureBox Image = null)
        {
            List<Label> Labels = new List<Label>();
            Labels.Add(MyLabel.Set(Label));
            return Show(Labels, Title, Buttons, Image);
        }
        public static string Show(List<Label> Labels = null, string Title = "", List<Button> Buttons = null, PictureBox Image = null)
        {
            if (Labels == null) Labels = new List<Label>();
            if (Labels.Count == 0) Labels.Add(MyLabel.Set(""));
            if (Buttons == null) Buttons = new List<Button>();
            if (Buttons.Count == 0) Buttons.Add(MyButton.Set("OK"));
            List<Button> buttons = new List<Button>(Buttons);
            buttons.Reverse();

            int ImageWidth = 0;
            int ImageHeight = 0;
            int LabelWidth = 0;
            int LabelHeight = 0;
            int ButtonWidth = 0;
            int ButtonHeight = 0;
            int TotalWidth = 0;
            int TotalHeight = 0;

            MyMessageBox mb = new MyMessageBox();

            mb.Text = Title;

            //Image
            if (Image != null)
            {
                mb.Controls.Add(Image);
                Image.MaximumSize = new Size(150, 300);
                ImageWidth = Image.Width + Image.Margin.Horizontal;
                ImageHeight = Image.Height + Image.Margin.Vertical;
            }

            //Labels
            List<int> il = new List<int>();
            mb.panText.Location = new Point(9 + ImageWidth, 9);
            foreach (Label l in Labels)
            {
                mb.panText.Controls.Add(l);
                l.Location = new Point(200, 50);
                l.MaximumSize = new Size(480, 2000);
                il.Add(l.Width);
            }
            int mw = Labels.Max(x => x.Width);
            il.ToString();
            Labels.ForEach(l => l.MinimumSize = new Size(Labels.Max(x => x.Width), 1));
            mb.panText.Height = Labels.Sum(l => l.Height);
            mb.panText.MinimumSize = new Size(Labels.Max(x => x.Width) + mb.ScrollBarWidth(Labels), ImageHeight);
            mb.panText.MaximumSize = new Size(Labels.Max(x => x.Width) + mb.ScrollBarWidth(Labels), 300);
            LabelWidth = mb.panText.Width;
            LabelHeight = mb.panText.Height;

            //Buttons
            foreach (Button b in buttons)
            {
                mb.panButtons.Controls.Add(b);
                b.Location = new Point(3, 3);
                b.TabIndex = Buttons.FindIndex(i => i.Text == b.Text);
                b.Click += new EventHandler(mb.Button_Click);
            }
            ButtonWidth = mb.panButtons.Width;
            ButtonHeight = mb.panButtons.Height;

            //Set Widths
            if (ButtonWidth > ImageWidth + LabelWidth)
            {
                Labels.ForEach(l => l.MinimumSize = new Size(ButtonWidth - ImageWidth - mb.ScrollBarWidth(Labels), 1));
                mb.panText.Height = Labels.Sum(l => l.Height);
                mb.panText.MinimumSize = new Size(Labels.Max(x => x.Width) + mb.ScrollBarWidth(Labels), ImageHeight);
                mb.panText.MaximumSize = new Size(Labels.Max(x => x.Width) + mb.ScrollBarWidth(Labels), 300);
                LabelWidth = mb.panText.Width;
                LabelHeight = mb.panText.Height;
            }
            TotalWidth = ImageWidth + LabelWidth;

            //Set Height
            TotalHeight = LabelHeight + ButtonHeight;

            mb.panButtons.Location = new Point(TotalWidth - ButtonWidth + 9, mb.panText.Location.Y + mb.panText.Height);

            mb.Size = new Size(TotalWidth + 25, TotalHeight + 47);
            mb.ShowDialog();
            return mb.Result;
        }

        private FlowLayoutPanel panText;
        private FlowLayoutPanel panButtons;
        private int ScrollBarWidth(List<Label> Labels)
        {
            return (Labels.Sum(l => l.Height) > 300) ? 23 : 6;
        }

        private void Button_Click(object sender, EventArgs e)
        {
            Result = ((Button)sender).Text;
            Close();
        }

        private string Result = "";
    }
}
- Remove From My Forums
-
Question
-
Is there an easy way to change the background color of a MessageBox, short of changing the Color Scheme under the Appearance tab of the Display Properties. I guess I could create my own mini-form, but was hoping not to have to go there. I’d like
to do it programatically (in C#). I want to display the results of a process in the MessageBox, and wanted the background color to match my app background color. Thanks.MattM
Answers
-
Create a new form, which would be your message box. But the buttons and maybe an image (notification icon) on, and change the background color (or put some image as a background image).
Mitja
-
Proposed as answer by
Monday, November 21, 2011 6:01 PM
-
Marked as answer by
Helen Zhou
Tuesday, November 29, 2011 5:38 AM
-
Proposed as answer by
-
-
Marked as answer by
Helen Zhou
Tuesday, November 29, 2011 5:38 AM
-
Marked as answer by
-
> Is there an easy way to change the background color of a MessageBox …
Nope.
> … short of changing the Color Scheme under the Appearance tab of the Display Properties.
Don’t even think about it.
Seriously.
You’d be astonished how defensive people get about their PC and the way that they choose to set it up.> I guess I could create my own mini-form, but was hoping not to have to go there.
Sorry but that is the way to go.
> I want to display the results of a process in the MessageBox …
Any particular reason? Dialogs are nasty, intrusive things that break the user’s workflow — that’s what they’re designed to do; stop the user in their tracks until they’ve dealt with this popped-up thing.
> … and wanted the background color to match my app background color.
So your application isn’t following the colour scheme chosen by the user for
their PC? Unless you have a very Good Reason for doing this, I would reconsider that decision. Part of the success of Windows is that every application [more or less] looks the same and [more or less] behaves the same way. If you
deliberately flaunt this convention, your users are likely to get confused and start filing bug reports because things aren’t the way that they
expect them to be.
Regards, Phill W.
-
Marked as answer by
Helen Zhou
Tuesday, November 29, 2011 5:38 AM
-
Marked as answer by
This post shows you How to Custom a Message Box in C# .NET Windows Forms Application.
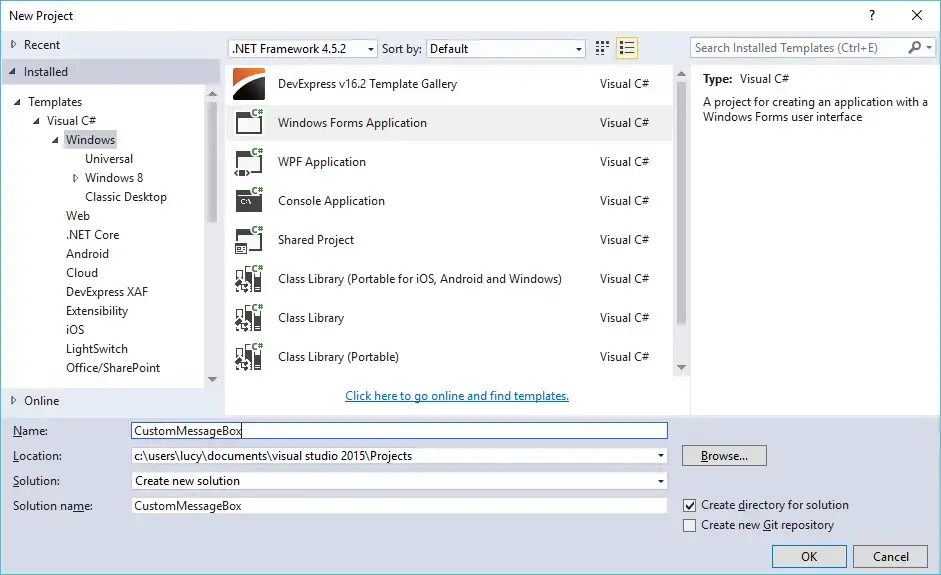
First, Open your Visual Studio, then click New Project. Next, Select Visual C# on the left, then Windows and then select Windows Forms Application. Name your project «CustomMessageBox» and then click OK button.
Custom message box c#
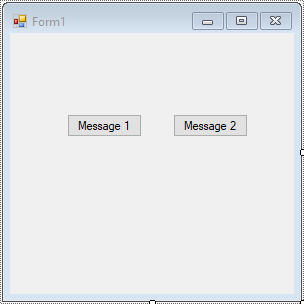
Dragging two Button controls from the Visual Toolbox, then design your form as shown below.
Form1
Next, We will create custom message boxes.
For example: MessageBox with OK button and MessageBox with YesNo button. You can do the same for other custom message boxes.
Creating a custom message box allows you to easily increase the size of message box in c#.
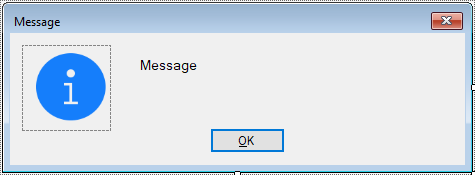
C# Message box ok
frmMessageOK
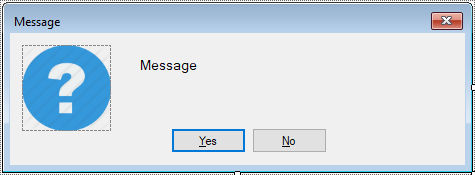
C# Message box yes no
frmMessageYesNo
C# Custom message box
Creating a MyMessageBox class that allows you to show your custom mesagebox.
public static class MyMessageBox
{
    public static System.Windows.Forms.DialogResult ShowMessage(string message, string caption, System.Windows.Forms.MessageBoxButtons button, System.Windows.Forms.MessageBoxIcon icon)
    {
        System.Windows.Forms.DialogResult dlgResult = System.Windows.Forms.DialogResult.None;
        switch (button)
        {
            case System.Windows.Forms.MessageBoxButtons.OK:
                using (frmMessageOK msgOK = new frmMessageOK())
                {
                    //Change text, caption, icon
                    msgOK.Text = caption;
                    msgOK.Message = message;
                    switch (icon)
                    {
                        case System.Windows.Forms.MessageBoxIcon.Information:
                            msgOK.MessageIcon = CustomMessageBox.Properties.Resources.Information;
                            break;
                        case System.Windows.Forms.MessageBoxIcon.Question:
                            msgOK.MessageIcon = CustomMessageBox.Properties.Resources.Question;
                            break;
                    }
                    dlgResult = msgOK.ShowDialog();
                }
                break;
            case System.Windows.Forms.MessageBoxButtons.YesNo:
                using (frmMessageYesNo msgYesNo = new frmMessageYesNo())
                {
                    msgYesNo.Text = caption;
                    msgYesNo.Message = message;
                    switch (icon)
                    {
                        case System.Windows.Forms.MessageBoxIcon.Information:
                            msgYesNo.MessageIcon = CustomMessageBox.Properties.Resources.Information;
                            break;
                        case System.Windows.Forms.MessageBoxIcon.Question:
                            msgYesNo.MessageIcon = CustomMessageBox.Properties.Resources.Question;
                            break;
                    }
                    dlgResult = msgYesNo.ShowDialog();
                }
                break;
        }
        return dlgResult;
    }
}
Open your Form1 code behind, then add click event handler to your button controls as shown below
Form1
using System;
using System.Collections.Generic;
using System.ComponentModel;
using System.Data;
using System.Drawing;
using System.Linq;
using System.Text;
using System.Threading.Tasks;
using System.Windows.Forms;

namespace CustomMessageBox
{
    public partial class Form1 : Form
    {
        public Form1()
        {
            InitializeComponent();
        }

        private void button1_Click(object sender, EventArgs e)
        {
            MyMessageBox.ShowMessage("Hello world !", "Message", MessageBoxButtons.OK, MessageBoxIcon.Information);
        }

        private void button2_Click(object sender, EventArgs e)
        {
            //Display your message box
            if(MyMessageBox.ShowMessage("Are you sure want to delete this record ?", "Message", MessageBoxButtons.YesNo, MessageBoxIcon.Question) == DialogResult.Yes)
            {
                MyMessageBox.ShowMessage("Yes !", "Message", MessageBoxButtons.OK, MessageBoxIcon.Information);
            }
            else
                MyMessageBox.ShowMessage("No !", "Message", MessageBoxButtons.OK, MessageBoxIcon.Information);
        }
    }
}
Open your frmMessageOK form, then add MessageIcon and Message properties to your form allows you to set icon and message to your custom message box.
C# Custom dialog box example
frmMessageOK
//c# custom messagebox
public partial class frmMessageOK : Form
{
    public frmMessageOK()
    {
        InitializeComponent();
    }

    public Image MessageIcon
    {
        get { return pictureBox.Image; }
        set { pictureBox.Image = value; }
    }

    public string Message
    {
        get { return lblMessage.Text; }
        set { lblMessage.Text = value; }
    }
}
Do the same for frmMessageOK form
frmMessageYesNo
//c# custom message box
public partial class frmMessageYesNo : Form
{
    public frmMessageYesNo()
    {
        InitializeComponent();
    }

    public Image MessageIcon
    {
        get { return pictureBox.Image; }
        set { pictureBox.Image = value; }
    }

    public string Message
    {
        get { return lblMessage.Text; }
        set { lblMessage.Text = value; }
    }
}
You can easily increase the size of message box in c# or change messagebox font color in c# by creating a custom message box. This is the best way to make your own message box instead of using the default message box.
VIDEO TUTORIAL
Hi, in this article I am going to explain how to create a custom message box in c#.net. As we know that by using
MessageBox class to display message box but that is not looking beautiful. When we make project then sometimes we need to create a custom message box because the ordinary message box did not fill our requirements such as MessageBox which has checkbox control like Do Not Show Next time or have a gradient background color etc. In this demo, I will be told you, how to create a custom message box that has gradient background color. For completing this demo I used visual studio 2010 as IDE and c# as programing language.
In this demo, I had created two class
frmShowMessage which display a message box and frmMain class which is used to test application. Then I had created two enumerations one is enumMessageIcon which contains Icon for Image and the other one is enumMessageButton which contains a type of buttons to be displayed.
frmShowMessage class have a static overloaded method named Show() which is used to display message. The first type accept one
string parameter which is message needs to be displayed, the second type accept two string parameter, first is message to be displayed and the second one is message title and the last one is accepted four-parameter, first one is messageText, second one is message title, the third one is message icon and the last one is messageButton. You can create more overloaded methods according to your needs. Let’s start beginning this demo.
First, create a form named frmShowMessage and write down the following line of codes. I had used ImageList control which contains all images to be displayed on frmShowMessage and created two enumerations in the same namespace.
using System;
using System.Drawing;
using System.Windows.Forms;
using System.Drawing.Drawing2D;

namespace MessageBoxDemo
{
    public partial class frmShowMessage : Form
    {
        public frmShowMessage()
        {
            InitializeComponent();
        }

        /// <summary>
        /// Here I am overriding Paint method of form object
        /// and set it's background color as gradient. Here I am
        /// using LinearGradientBrush class object to make gradient
        /// color which comes in System.Drawing.Drawing2D namespace.
        /// </summary>
        /// <param name="e"></param>
        protected override void OnPaint(PaintEventArgs e)
        {
            Rectangle rect = this.ClientRectangle;
            LinearGradientBrush brush = new LinearGradientBrush(rect, Color.SkyBlue, Color.AliceBlue, 60);
            e.Graphics.FillRectangle(brush, rect);
            base.OnPaint(e);
        }

        /// <summary>
        /// setMessage method is used to display message
        /// on form and it's height adjust automatically.
        /// I am displaying message in a Label control.
        /// </summary>
        /// <param name="messageText">Message which needs to be displayed to user.</param>
        private void setMessage(string messageText)
        {
            int number = Math.Abs(messageText.Length / 30);
            if (number != 0)
                this.lblMessageText.Height = number * 25;
            this.lblMessageText.Text = messageText;
        }

        /// <summary>
        /// This method is used to add button on message box.
        /// </summary>
        /// <param name="MessageButton">MessageButton is type of enumMessageButton
        /// through which I get type of button which needs to be displayed.</param>
        private void addButton(enumMessageButton MessageButton)
        {
            switch (MessageButton)
            {
                case enumMessageButton.OK:
                    {
                        //If type of enumButton is OK then we add OK button only.
                        Button btnOk = new Button();  //Create object of Button.

                        btnOk.Text = "OK";  //Here we set text of Button.
                        btnOk.DialogResult = DialogResult.OK;  //Set DialogResult property of button.
                        btnOk.FlatStyle = FlatStyle.Popup;  //Set flat appearence of button.
                        btnOk.FlatAppearance.BorderSize = 0;
                        btnOk.SetBounds(pnlShowMessage.ClientSize.Width - 80, 5, 75, 25);  // Set bounds of button.
                        pnlShowMessage.Controls.Add(btnOk);  //Finally Add button control on panel.
                    }
                    break;
                case enumMessageButton.OKCancel:
                    {
                        Button btnOk = new Button();
                        btnOk.Text= "OK";
                        btnOk.DialogResult = DialogResult.OK;
                        btnOk.FlatStyle= FlatStyle.Popup;
                        btnOk.FlatAppearance.BorderSize= 0;
                        btnOk.SetBounds((pnlShowMessage.ClientSize.Width - 70), 5, 65, 25);
                        pnlShowMessage.Controls.Add(btnOk);

                        Button btnCancel = new Button();
                        btnCancel.Text = "Cancel";
                        btnCancel.DialogResult = DialogResult.Cancel;
                        btnCancel.FlatStyle = FlatStyle.Popup;
                        btnCancel.FlatAppearance.BorderSize = 0;
                        btnCancel.SetBounds((pnlShowMessage.ClientSize.Width - (btnOk.ClientSize.Width + 5 + 80)), 5, 75, 25);
                        pnlShowMessage.Controls.Add(btnCancel);

                    }
                    break;
                case enumMessageButton.YesNo:
                    {
                        Button btnNo = new Button();

  btnNo.Text = "No";
                        btnNo.DialogResult = DialogResult.No;
                        btnNo.FlatStyle= FlatStyle.Popup;
                        btnNo.FlatAppearance.BorderSize= 0;
                        btnNo.SetBounds((pnlShowMessage.ClientSize.Width - 70), 5, 65, 25);
                        pnlShowMessage.Controls.Add(btnNo);

                        Button btnYes = new Button();
                        btnYes.Text= "Yes";
                        btnYes.DialogResult= DialogResult.Yes;
                        btnYes.FlatStyle= FlatStyle.Popup;
                        btnYes.FlatAppearance.BorderSize= 0;
                        btnYes.SetBounds((pnlShowMessage.ClientSize.Width- (btnNo.ClientSize.Width + 5 + 80)), 5, 75, 25);

                     pnlShowMessage.Controls.Add(btnYes);
                    }
                    break;
                case enumMessageButton.YesNoCancel:
                    {
                        Button btnCancel = new Button();
                        btnCancel.Text= "Cancel";
                        btnCancel.DialogResult= DialogResult.Cancel;
                        btnCancel.FlatStyle= FlatStyle.Popup;
                        btnCancel.FlatAppearance.BorderSize= 0;

                 btnCancel.SetBounds((pnlShowMessage.ClientSize.Width- 70), 5, 65, 25);
                        pnlShowMessage.Controls.Add(btnCancel);

                        Button btnNo = new Button();
                        btnNo.Text= "No";

                  btnNo.DialogResult= DialogResult.No;
                        btnNo.FlatStyle= FlatStyle.Popup;
                        btnNo.FlatAppearance.BorderSize= 0;
                        btnNo.SetBounds((pnlShowMessage.ClientSize.Width- (btnCancel.ClientSize.Width + 5 + 80)), 5, 75, 25);
                        pnlShowMessage.Controls.Add(btnNo);

                        Button btnYes = new Button();
                        btnYes.Text= "Yes";
                        btnYes.DialogResult= DialogResult.No;
                        btnYes.FlatStyle= FlatStyle.Popup;
                        btnYes.FlatAppearance.BorderSize= 0;
                        btnYes.SetBounds((pnlShowMessage.ClientSize.Width- (btnCancel.ClientSize.Width + btnNo.ClientSize.Width + 10 + 80)), 5, 75, 25);
                        pnlShowMessage.Controls.Add(btnYes);
                    }
                    break;
            }
        }

        /// <summary>
        /// We can use this method to add image on message box.
        /// I had taken all images in ImageList control so that
        /// I can eaily add images. Image is displayed in
        /// PictureBox control.
        /// </summary>
        /// <param name="MessageIcon">Type of image to be displayed.</param>
        private void addIconImage(enumMessageIcon MessageIcon)
        {
            switch (MessageIcon)
            {
                case enumMessageIcon.Error:
                    pictureBox1.Image= imageList1.Images["Error"];  //Error is key name in imagelist control which uniqly identified images in ImageList control.
                    break;
                case enumMessageIcon.Information:
                    pictureBox1.Image= imageList1.Images["Information"];
                    break;

         case enumMessageIcon.Question:
                    pictureBox1.Image= imageList1.Images["Question"];
                    break;
                case enumMessageIcon.Warning:
                    pictureBox1.Image= imageList1.Images["Warning"];

                  break;
            }
        }

        #region Overloaded Show message to display message box.

        /// <summary>
        /// Show method is overloaded which is used to display message
        /// and this is static method so that we don't need to create
        /// object of this class to call this method.
        /// </summary>
        /// <param name="messageText"></param>
        internal static void Show(string messageText)
        {

    frmShowMessage frmMessage = new frmShowMessage();
            frmMessage.setMessage(messageText);
            frmMessage.addIconImage(enumMessageIcon.Information);
            frmMessage.addButton(enumMessageButton.OK);
            frmMessage.ShowDialog();
        }

        internal static void Show(string messageText, string messageTitle)
        {
            frmShowMessage frmMessage = new frmShowMessage();
            frmMessage.Text = messageTitle;
            frmMessage.setMessage(messageText);
            frmMessage.addIconImage(enumMessageIcon.Information);
            frmMessage.addButton(enumMessageButton.OK);
            frmMessage.ShowDialog();
        }

        internal static void Show(string messageText, string messageTitle, enumMessageIcon messageIcon, enumMessageButton messageButton)
        {
            frmShowMessage frmMessage = new frmShowMessage();
            frmMessage.setMessage(messageText);
            frmMessage.Text= messageTitle;
            frmMessage.addIconImage(messageIcon);
            frmMessage.addButton(messageButton);
            frmMessage.ShowDialog();
        }

        #endregion
    }

    #region constant defiend in form of enumration which is used in showMessage class.

    internal enum enumMessageIcon
    {
        Error,
        Warning,
        Information,
        Question,
    }

    internal enum enumMessageButton
    {
        OK,
        YesNo,
        YesNoCancel,
        OKCancel
    }

    #endregion
}
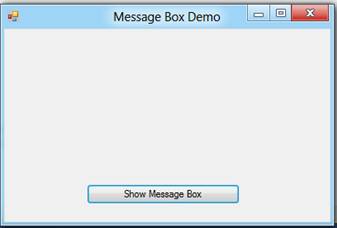
Now create frmMain form which is your main form or we can say startup form and write down the following code to test it.
using System;
using System.Windows.Forms;
namespace MessageBoxDemo
{
public partial class Form1 : Form
{
public Form1()
{
InitializeComponent();
}
/// <summary>
/// On Click event of button I am showing user defind message box.
/// Here I am showing message box with three type of parameters.
/// </summary>
/// <param name="sender"></param>
/// <param name="e"></param>
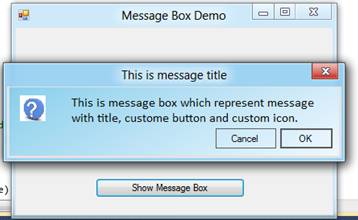
private void button1_Click(object sender, EventArgs e)
{
frmShowMessage.Show("This is message box which represent message with title, custome button and custom icon.", "This is message title", enumMessageIcon.Question, enumMessageButton.OKCancel);
}
}
}
After creating these two classes and writing code build your program and see output which is as follows.

Please write your valuable comments.
Thanks.
Последнее обновление: 31.10.2015
Как правило, для вывода сообщений применяется элемент MessageBox. Однако кроме сообственно вывода строки сообщения данный элемент может устанавливать
ряд настроек, которые определяют его поведение.
Для вывода сообщения в классе MessageBox предусмотрен метод Show, который имеет различные версии и может принимать ряд параметров.
Рассмотрим одну из наиболее используемых версий:
public static DialogResult Show(
	string text,
	string caption,
	MessageBoxButtons buttons,
	MessageBoxIcon icon,
	MessageBoxDefaultButton defaultButton,
	MessageBoxOptions options
)
Здесь применяются следующие параметры:
text: текст сообщения
caption: текст заголовка окна сообщения
buttons: кнопки, используемые в окне сообщения.
Принимает одно из значений перечисления MessageBoxButtons:
-
AbortRetryIgnore: три кнопки Abort (Отмена), Retry (Повтор), Ignore (Пропустить) -
OK: одна кнопка OK -
OKCancel: две кнопки OK и Cancel (Отмена) -
RetryCancel: две кнопки Retry (Повтор) и Cancel (Отмена) -
YesNo: две кнопки Yes и No -
YesNoCancel: три кнопки Yes, No и Cancel (Отмена)
Таким образом, в зависимости от выбора окно сообщения может иметь от одной до трех кнопок.
icon: значок окна сообщения. Может принимать одно из следующих значений перечисления MessageBoxIcon:
-
Asterisk, Information: значок, состоящий из буквы i в нижнем регистре, помещенной в кружок -
Error, Hand, Stop: значок, состоящий из белого знака «X» на круге красного цвета. -
Exclamation, Warning: значок, состоящий из восклицательного знака в желтом треугольнике -
Question: значок, состоящий из вопросительного знака на периметре круга -
None: значок у сообщения отсутствует
defaultButton: кнопка, на которую по умолчанию устанавливается фокус. Принимает одно из значений перечисления MessageBoxDefaultButton:
-
Button1: первая кнопка из тех, которые задаются перечислением MessageBoxButtons -
Button2: вторая кнопка -
Button3: третья кнопка
options: параметры окна сообщения. Принимает одно из значений перечисления MessageBoxOptions:
-
DefaultDesktopOnly: окно сообщения отображается на активном рабочем столе. -
RightAlign: текст окна сообщения выравнивается по правому краю -
RtlReading: все элементы окна располагаются в обратном порядке справа налево -
ServiceNotification: окно сообщения отображается на активном рабочем столе, даже если в системе не зарегистрирован ни один пользователь
Нередко используется один параметр — текст сообщения. Но посмотрим, как использовать остальные параметры. Пусть у нас есть кнопка, в обработчике
нажатия которой открывается следующее окно сообщения:
private void button1_Click(object sender, EventArgs e)
{
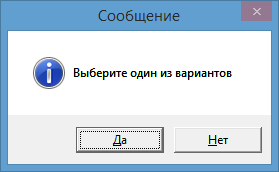
MessageBox.Show(
"Выберите один из вариантов",
"Сообщение",
MessageBoxButtons.YesNo,
MessageBoxIcon.Information,
MessageBoxDefaultButton.Button1,
MessageBoxOptions.DefaultDesktopOnly);
}
Однако нам не просто дается возможность установки кнопок в окне сообщения. Метод MessageBox.Show возвращает объект
DialogResult, с помощью которого мы можем узнать, какую кнопку в окне сообщения нажал пользователь. DialogResult представляет
перечисление, в котором определены следующие значения:
-
Abort: нажата кнопка Abort -
Retry: нажата кнопка Retry -
Ignore: нажата кнопка Ignore -
OK: нажата кнопка OK -
Cancel: нажата кнопка Cancel -
None: отсутствие результата -
Yes: нажата кнопка Yes и No -
No: нажата кнопка No
Используем обработку выбора пользователя, изменив обработчик нажатия кнопки следующим образом:
private void button1_Click(object sender, EventArgs e)
{
    DialogResult result = MessageBox.Show(
        "Окрасить кнопку в красный цвет?",
        "Сообщение",
        MessageBoxButtons.YesNo,
        MessageBoxIcon.Information,
        MessageBoxDefaultButton.Button1,
        MessageBoxOptions.DefaultDesktopOnly);

	if (result == DialogResult.Yes)
        button1.BackColor=Color.Red;

	this.TopMost = true;
}
И теперь, если в окне сообщения мы выберем выриант Yes, то кнопка окрасится в красный цвет.
- Remove From My Forums
-
Question
-
Is there an easy way to change the background color of a MessageBox, short of changing the Color Scheme under the Appearance tab of the Display Properties. I guess I could create my own mini-form, but was hoping not to have to go there. I’d like
to do it programatically (in C#). I want to display the results of a process in the MessageBox, and wanted the background color to match my app background color. Thanks.MattM
Answers
-
Create a new form, which would be your message box. But the buttons and maybe an image (notification icon) on, and change the background color (or put some image as a background image).
Mitja
-
Proposed as answer by
Monday, November 21, 2011 6:01 PM
-
Marked as answer by
Helen Zhou
Tuesday, November 29, 2011 5:38 AM
-
Proposed as answer by
-
-
Marked as answer by
Helen Zhou
Tuesday, November 29, 2011 5:38 AM
-
Marked as answer by
-
> Is there an easy way to change the background color of a MessageBox …
Nope.
> … short of changing the Color Scheme under the Appearance tab of the Display Properties.
Don’t even think about it.
Seriously.
You’d be astonished how defensive people get about their PC and the way that they choose to set it up.> I guess I could create my own mini-form, but was hoping not to have to go there.
Sorry but that is the way to go.
> I want to display the results of a process in the MessageBox …
Any particular reason? Dialogs are nasty, intrusive things that break the user’s workflow — that’s what they’re designed to do; stop the user in their tracks until they’ve dealt with this popped-up thing.
> … and wanted the background color to match my app background color.
So your application isn’t following the colour scheme chosen by the user for
their PC? Unless you have a very Good Reason for doing this, I would reconsider that decision. Part of the success of Windows is that every application [more or less] looks the same and [more or less] behaves the same way. If you
deliberately flaunt this convention, your users are likely to get confused and start filing bug reports because things aren’t the way that they
expect them to be.
Regards, Phill W.
-
Marked as answer by
Helen Zhou
Tuesday, November 29, 2011 5:38 AM
-
Marked as answer by
- Download demo and source code — 228.33 KB
Introduction
In this article, I am going to explain how to create a custom message box in C#.NET. As we know, we can use a MessageBox class to display a message box, but that does not look beautiful. When we make a project, sometimes we need to create a custom message box because ordinary message box does not fill our requirements such as MessageBox which has check box control like Do Not Show Next time or has a gradient background color, etc. In this demo, I will tell you how to create a custom message box which has a gradient background color. For completing this demo, I used Visual Studio 2010 as IDE and C# as programming language.
In this demo, I created two classes, frmShowMessage which displays message box and frmMain class which is used to test application. Then I created two enumerations, one is enumMessageIcon which contains Icon for Image and the other one is enumMessageButton which contains type of buttons to be displayed.
frmShowMessage class has a static overloaded method named Show() which is used to display message. First type accepts one string parameter which is message needs to be displayed, second type accepts two string parameters, first is message to be displayed and second one is message title and the last one is accept four parameters, first one is messageText, second one is messageTitle, third one is messageIcon and last one is messageButton. You can create more overloaded methods according to your need. Let’s start with this demo.
First, create a form named frmShowMessage and write down the following lines of code. I had used ImageList control which contains all images to be displayed on frmShowMessage and creates two enumerations in the same namespace.
using System;
using System.Drawing;
using System.Windows.Forms;
using System.Drawing.Drawing2D;

namespace MessageBoxDemo
{
    public partial class frmShowMessage : Form
    {
        public frmShowMessage()
        {
            InitializeComponent();
        }

                                                                protected override void OnPaint(PaintEventArgs e)
        {
            Rectangle rect = this.ClientRectangle;
            LinearGradientBrush brush = new LinearGradientBrush
            (rect, Color.SkyBlue, Color.AliceBlue, 60);
            e.Graphics.FillRectangle(brush, rect);
            base.OnPaint(e);
        }

                                                        private void setMessage(string messageText)
        {
            int number = Math.Abs(messageText.Length / 30);
            if (number != 0)
                this.lblMessageText.Height = number * 25;
            this.lblMessageText.Text = messageText;
        }

                                                private void addButton(enumMessageButton MessageButton)
        {
            switch (MessageButton)
            {
                case enumMessageButton.OK:
                    {

                        Button btnOk = new Button();
                        btnOk.Text = "OK";
                        btnOk.DialogResult = DialogResult.OK;

                        btnOk.FlatStyle = FlatStyle.Popup;

                        btnOk.FlatAppearance.BorderSize = 0;
                        btnOk.SetBounds(pnlShowMessage.ClientSize.Width - 80,
                    5, 75, 25);
                        pnlShowMessage.Controls.Add(btnOk);

                    }
                    break;
                case enumMessageButton.OKCancel:
                    {
                        Button btnOk = new Button();
                        btnOk.Text = "OK";
                        btnOk.DialogResult = DialogResult.OK;
                        btnOk.FlatStyle = FlatStyle.Popup;
                        btnOk.FlatAppearance.BorderSize = 0;
                        btnOk.SetBounds((pnlShowMessage.ClientSize.Width - 70),
                    5, 65, 25);
                        pnlShowMessage.Controls.Add(btnOk);

                        Button btnCancel = new Button();
                        btnCancel.Text = "Cancel";
                        btnCancel.DialogResult = DialogResult.Cancel;
                        btnCancel.FlatStyle = FlatStyle.Popup;
                        btnCancel.FlatAppearance.BorderSize = 0;
                        btnCancel.SetBounds((pnlShowMessage.ClientSize.Width -
                (btnOk.ClientSize.Width + 5 + 80)), 5, 75, 25);
                        pnlShowMessage.Controls.Add(btnCancel);

                    }
                    break;
                case enumMessageButton.YesNo:
                    {
                        Button btnNo = new Button();
                        btnNo.Text = "No";
                        btnNo.DialogResult = DialogResult.No;
                        btnNo.FlatStyle = FlatStyle.Popup;
                        btnNo.FlatAppearance.BorderSize = 0;
                        btnNo.SetBounds((pnlShowMessage.ClientSize.Width - 70),
                    5, 65, 25);
                        pnlShowMessage.Controls.Add(btnNo);

                        Button btnYes = new Button();
                        btnYes.Text = "Yes";
                        btnYes.DialogResult = DialogResult.Yes;
                        btnYes.FlatStyle = FlatStyle.Popup;
                        btnYes.FlatAppearance.BorderSize = 0;
                        btnYes.SetBounds((pnlShowMessage.ClientSize.Width -
                (btnNo.ClientSize.Width + 5 + 80)), 5, 75, 25);
                        pnlShowMessage.Controls.Add(btnYes);
                    }
                    break;
                case enumMessageButton.YesNoCancel:
                    {
                        Button btnCancel = new Button();
                        btnCancel.Text = "Cancel";
                        btnCancel.DialogResult = DialogResult.Cancel;
                        btnCancel.FlatStyle = FlatStyle.Popup;
                        btnCancel.FlatAppearance.BorderSize = 0;
                        btnCancel.SetBounds
            ((pnlShowMessage.ClientSize.Width - 70), 5, 65, 25);
                        pnlShowMessage.Controls.Add(btnCancel);

                        Button btnNo = new Button();
                        btnNo.Text = "No";
                        btnNo.DialogResult = DialogResult.No;
                        btnNo.FlatStyle = FlatStyle.Popup;
                        btnNo.FlatAppearance.BorderSize = 0;
                        btnNo.SetBounds((pnlShowMessage.ClientSize.Width -
            (btnCancel.ClientSize.Width + 5 + 80)), 5, 75, 25);
                        pnlShowMessage.Controls.Add(btnNo);

                        Button btnYes = new Button();
                        btnYes.Text = "Yes";
                        btnYes.DialogResult = DialogResult.No;
                        btnYes.FlatStyle = FlatStyle.Popup;
                        btnYes.FlatAppearance.BorderSize = 0;
                        btnYes.SetBounds((pnlShowMessage.ClientSize.Width -
            (btnCancel.ClientSize.Width + btnNo.ClientSize.Width +
                10 + 80)), 5, 75, 25);
                        pnlShowMessage.Controls.Add(btnYes);
                    }
                    break;
            }
        }

                                                                private void addIconImage(enumMessageIcon MessageIcon)
        {
            switch (MessageIcon)
            {
                case enumMessageIcon.Error:
                    pictureBox1.Image = imageList1.Images["Error"];


                    break;
                case enumMessageIcon.Information:
                    pictureBox1.Image = imageList1.Images["Information"];
                    break;
                case enumMessageIcon.Question:
                    pictureBox1.Image = imageList1.Images["Question"];
                    break;
                case enumMessageIcon.Warning:
                    pictureBox1.Image = imageList1.Images["Warning"];
                    break;
            }
        }

        #region Overloaded Show message to display message box.

                                                        internal static void Show(string messageText)
        {
            frmShowMessage frmMessage = new frmShowMessage();
            frmMessage.setMessage(messageText);
            frmMessage.addIconImage(enumMessageIcon.Information);
            frmMessage.addButton(enumMessageButton.OK);
            frmMessage.ShowDialog();
        }

        internal static void Show(string messageText, string messageTitle)
        {
            frmShowMessage frmMessage = new frmShowMessage();
            frmMessage.Text = messageTitle;
            frmMessage.setMessage(messageText);
            frmMessage.addIconImage(enumMessageIcon.Information);
            frmMessage.addButton(enumMessageButton.OK);
            frmMessage.ShowDialog();
        }

        internal static void Show(string messageText, string messageTitle,
        enumMessageIcon messageIcon, enumMessageButton messageButton)
        {
            frmShowMessage frmMessage = new frmShowMessage();
            frmMessage.setMessage(messageText);
            frmMessage.Text = messageTitle;
            frmMessage.addIconImage(messageIcon);
            frmMessage.addButton(messageButton);
            frmMessage.ShowDialog();
        }

        #endregion
    }

    #region constant defined in form of enumeration which is used in showMessage class.

    internal enum enumMessageIcon
    {
        Error,
        Warning,
        Information,
        Question,
    }

    internal enum enumMessageButton
    {
        OK,
        YesNo,
        YesNoCancel,
        OKCancel
    }

    #endregion
}
Now create a frmMain form which is your main form or we can say start up form and write down the following code to test it:
using System;
using System.Windows.Forms;

namespace MessageBoxDemo
{
    public partial class Form1 : Form
    {
        public Form1()
        {
            InitializeComponent();
        }


                                                        private void button1_Click(object sender, EventArgs e)
        {
            frmShowMessage.Show("This is message box which represent message with title,
        custom button and custom icon.", "This is message title",
        enumMessageIcon.Question, enumMessageButton.OKCancel);
        }
    }
}
After creating these two classes and writing code, build your program and see the output which is as follows:
Please write your valuable comments. Thanks.
History
- 7th January, 2012: Initial version
This member has not yet provided a Biography. Assume it’s interesting and varied, and probably something to do with programming.