В этом уроке мы рассмотрим создание модификации для Hotline Miami.
Необходимые программы
Чтобы изменить спрайт игры и сделать так, что-бы он использовался в игре вам потребуются следующие программы:
Game Maker
Купить
Для редактирования самих файлов игры и создания мода нам потребуется Game Maker. Необходимая версия — 7.0, 8.0 или 8.1.
Желательно иметь Pro Версию, чтобы иметь максимум возможностей во время создания модификации.
GM Декомпилятор
Скачать
Данная программа нужна нам, для извлечения файлов игры и их последующего редактирования.
Графический редактор
Также понадобится любой графический редактор, поддерживающий прозрачность. К примеру: Adobe Photoshop, PaintDotNet.
Процесс
Добавление своего оружия
В этом уроке мы рассмотрим создание модификации для Hotline Miami 2.
Необходимые программы
Чтобы изменить спрайт игры и сделать так, что-бы он использовался в игре вам потребуются следующие программы:
Hotline Miami Wad Explorer
Скачать
Данная программа понадобится для того, что-бы открывать файлы игры с расширением .wad.
Графический редактор
Также понадобится любой графический редактор, поддерживающий прозрачность. К примеру: Adobe Photoshop, Paint.net (Не ссылка, а название программы).
Процесс
- Для начала стоит выбрать тип файла, который мы будем изменять (Музыка или спрайт), найти его в папке игры (Спрайты — hlm2_data_desktop.wad, музыка — hlm2_music_desktop.wad), найти файл в экстракторе и экспортировать его на компьютер.
- Нужно открыть графический редактор и изменить спрайт по нашему усмотрению.
- Теперь нужно преобразовать наш файлы со спрайтами или музыкой в СВОЁНАЗВАНИЕ.patchwad
- После того, как вы получили файл .patchwad переместите его по пути «ИМЯПОЛЬЗОВАТЕЛЯDocumentsMy GamesHotlineMiami2modsLevelssingle». После этого, Ваши изменённые файлы должны появится в самой игре
Важно
- Если вы собираетесь редактировать изображения, то Ваше изображение должно быть одного размера с исходным.
- Изменять название и размер изображения файла нельзя.
- Чтобы создать файл с расширением .patchwad, нужно: Сделать замену какого-либо файла из wad базы игры, заменить исходный файл, после этого вы должны сохранить. Вам откроется отдельное окно, где нужно будет задать местоположение нашего .patchwad файла и выбрать ему название. По-умолчанию там стоит папка mods всей игры.
- Если Вы хотите, чтобы Ваш спрайт работал только в пользовательских уровнях, то создайте в папку mods по пути «ИМЯПОЛЬЗОВАТЕЛЯDocumentsMy GamesHotlineMiami2modsLevelssingle» и также переместите или создайте там СВОЁНАЗВАНИЕ.patchwad
- Если Вы хотите что-бы изменённый спрайт работал только в одном уровне и загружался вместе с уровнем в мастерскую, то создайте папку mods в папке с вашим уровнем и переместите туда СВОЁНАЗВАНИЕ.patchwad
- Можно использовать любую музыку формата ogg.
Hotline Miami 2: Wrong Number Guide
Overview
Всё о модификациях для Hotline Miami 2.
Изменение спрайтов
Что-бы изменить спрайт или звук игры и сделать так, что-бы он использовался в игре вам потребуются следующие программы:
Hotline Miami Wad Explorer
Скачать[github.com]
Данная программа понадобится для того, что-бы открывать файлы игры с расширением .wad.
Графический редактор
Так-же понадобится любой графический редактор, поддерживающий альфа канал. К примеру: Adobe Photoshop, Paint.net.
Важно
1. Если вы собираетесь редактировать изобажения, то Ваше изображение должно быть одного размера с исходным, чтобы не было каких-либо проблем.
2. Если Вы хотите что-бы изменённый спрайт работал только в одном уровне и загружался вместе с уровнем в мастерскую, то создайте папку mods в папке с вашим уровнем и переместите туда СВОЁНАЗВАНИЕ.patchwad
Шаг Первый
Нужно включить HLM Wad Explorer, после чего Вам предложат выбрать Wad-Базу. Выбираем hlm2_data_desktop.wad.
Шаг Второй
Нужно открыть графический редактор и изменить спрайт по нашему усмотрению или иметь заранее заготовленный звук. Требуемое расширение для спрайтов: .png; для звуков: .wav
Шаг Третий
Теперь нужно преобразовать наш Wad-файл с изменёнными спрайтами или звуками в СВОЁНАЗВАНИЕ.patchwad. Чтобы это сделать, нужно: заменить исходный файл своим, после чего вы должны сохранить файл. Вам откроется отдельное окно, где нужно будет задать местоположение нашего .patchwad файла и выбрать ему название. По-умолчанию там стоит папка mods Hotline miami 2.
Шаг Четвёртый
После того, как вы получили файл .patchwad переместите его в папку mods уровня или компании. Путь к ним: “Диск:ПользователиИмя пользователяДокументыMy GamesHotlineMiami2LevelssingleID Уровня” (Если папки mods нет, то создайте их; Нужный уровень можно узнать по изображению в папке с ним)
Изменение музыки
Что-бы изменить музыку игры и сделать так, что-бы он использовался в игре вам потребуются следующие программы:
Hotline Miami Wad Explorer
Скачать[github.com]
Данная программа понадобится для того, что-бы открывать файлы игры с расширением .wad.
Музыка
Сама музыка в формате .ogg.
Шаг первый
Открыть HML Wad Explorer и выбрать “hlm2_music_desktop.wad” в качестве wad-базы. Если вы уже выбрали какую-либо другую wad-базу, то откройте программу, включите меню “File” и выберите “Switch base wad…”.
Шаг второй
Собственно, заменить нужную музыку. После этого нужно экспортировать музыку, которую мы не заменяли, а после ею-же заменить себя в HLM Wad Explorer.
Шаг третий
Сохранить файл, после чего переименовать его в hlm2_music_desktop.wad.
Шаг четвёртый
Заменить нашим новым файлом “hlm2_music_desktop.wad” одноимённый файл в коренной папке игры.
Note: This method does not work for Hotline Miami 2: Wrong Number.
Tools needed[]
Decompiler loaded with Hotline Miami’s executable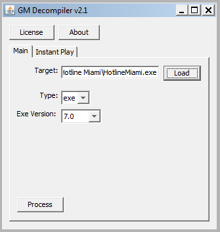
To decompile the game files you need GM Decompiler: Here is the download link
Click on LOAD in the right.
Select the Original Game .EXE (HotlineMiami_Original.exe)
Wait a few minutes and a file called HotlineMiami.GMK will appear on your Hotline Miami folder.
Now Import this file to Game Maker 7 or 8.0/8.1
You can find this two versions of Game Maker from various sources.
Game Maker: Studio‘s standard version is free, but there will be a watermark at the start of the game, and because some of the functions that Hotline Miami uses were removed in GM:Studio, editing the code will be required to make the game work.
Hotline Miami’s gmk file.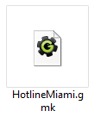
A port of the game to GM: Studio can be downloaded here.
The Pro and Master versions of GM:Studio costs from 90-560$.
When saving your edited version, press Ctrl+S and name it anything and place it in the original game folder.
Adding new weapons[]
To add new weapons to the game you need to create 4 sprites of the weapon:
• Walking [when the player is moving with the weapon]
• Attack/Shoot [when shooting/hitting with the weapon, gun or melee]
• Execution [killing a downed enemy with the weapon]
• Dropped [when the weapon is a pickup on the ground]
you need the sprites for the weapon. This is the following: sprPAttack____ sprPWalk____ sprEAttack____ sprEWalk____ sprESearch____ and lastly, the actual weapon image itself (this will go into the sprWeapons image, just look at all the other weapons in there for a reference for what kind of thing you want to draw). The index your new image holds in sprWeapons is extremely important. See that little number that says «image whatever» underneath the picture? Make sure you remember that number. This is the way’s game of keeping track of what weapon is which, and that ‘whatever’ is how you’ll be primarily working with weapons from now on. Every time you create a new image for a weapon, it’ll automatically be added to the end, but make sure to move it to immediately after the last weapon added. For your first weapon, you want to put it after the silenced Uzi, which is image 25. Everything after that is considered by the game to be a ‘throwing weapon’, which is treated differently. For example, if I want to add an AK-47, I’d draw the sprite for it, and move it till it is image 26, and if I want a 9mm, for example, I’d move its image sprite to right after the AK, so that it’s image 27. I’ll talk about how to adjust for these later.
On a side note, if you want your weapon to be player-exclusive (ie, something like the drill or the silenced Uzi, you can skip all the enemy sprites. This saves significant time and effort, and allows you to work with ‘special’ weapons. However, it also restricts the weapons to your player character, so make sure that’s what you absolutely intend in terms of gameplay and canon. It wouldn’t make much sense if your character was the only one in the entire world who could properly wield a wooden 2×4, for example.
Anyhow, after you have all the sprites drawn, you want to actually ‘initiate’ the weapons. You want to find two particular objects:
objWeapon
objSpecificWeapon
(if you’re creating a throwing object, I haven’t actually done this so the finer points may alter, but generally it’s the same and you’d want to also go to objWeaponThrow)
Open up the Create event for both of these, and you’ll see an ammunition section. If your weapon is a gun, this is the place to input ammo, and the first place where you’re going to have to use that image index. Continuing the example of the AK, I would add the line
if image_index=26 ammo=60
right below the ammo indicator for image_index=25, which would mean that if the game is calling the weapon associated with image 26 (the AK), the global ammo counter for that gun would be 60. Note that this is also for the objWeapon only, which are weapon spawns. The weapons which generate with enemies can have different ammo values, which I’ll mention later.
The next thing you want to do is modify the scripts. The scripts to be modified are
- scrGetWeapon *scrCurrentWeapon *scrCurrentWeaponExt *scrScoreDraw (if gun) *scrStoryDrawAmmo (if gun) *scrScoreDrawStory (if gun) *scrPlayerShoot *scrIsWalking *scrIsSwinging (if melee) *scrIsSearching *scrGetAttack (if melee) *scrGetAmmo (if gun)
scrGetWeapon
Scroll to the bottom till you get to
if image_index=25 objPlayer.sprite_index=sprPWalkSilencedUzi.
Immediately after this line, enter a new line and type in the code for the new weapon. Adding the AK, I would input
if image_index=26 objPlayer.sprite_index=sprPWalkAK
Now, you want to modify the line that contains the throwing variables. Currently, in my game, I’ve added both the AK and a handgun, so my script looks like
if image_index=25 objPlayer.sprite_index=sprPWalkSilencedUzi
if image_index=26 objPlayer.sprite_index=sprPWalkAK
if image_index=27 objPlayer.sprite_index=sprPWalkHandgun
if image_index>28 {objPlayer.sprite_index=sprPWalkThrow objPlayer.throwindex=image_index-28}
Every time you add a new weapon, you have to increase that
image_index>28 by 1. This allows the game to differentiate between throwing weapons and standard weapons.
scrCurrentWeapon
Scroll all the way down till you find something that reads
if objPlayer.sprite_index=sprPAttackThrow.
As with before, that number ()+throwindex must be increased by one any time you add a new weapon. As for initializing your own weapons, you can pretty much insert the code anywhere you want, it won’t matter. It should follow the format
if objPlayer.sprite_index=sprPAttack(weapon) return (weapon index)
So, the AK would look like
if objPlayer.sprite_index=sprPAttackAK return 26
scrCurrentWeaponExt
This handles enemy attacks as well. Functionally, you can post any code anywhere and as long as it’s correct the game will read it, but for organizational purposes, the code is divided into such:
player attacks waiter walking player walking enemy attacks enemy walking enemy searching special attacks (throwing, punching, and for some reason the trophy)
To each section, add the respective code. This is the example using the AK
if argument0=sprPAttackAK return 26
if argument0=sprPWalkAK return 26
if argument0=sprEAttackAK return 26
if argument0=sprEWalkAK return 26
if argument0=sprESearchAK return 26
scrScoreDraw/scrScoreDrawStory/scrStoryDrawAmmo
These all handle ammo counts and are pretty much interchangeable. Scroll down until you see something like
if objPlayer.sprite_index=sprPWalk() or objPlayer.sprite_index=sprPAttack() {
showammo=1
maxammo=whatever
}
Replace the ()s with your weapon name, and give it whatever kind of ammo count you want. Then just copy that entire thing and copy-paste it to each of the three folders, right beneath the other ammo counters. For the AK, for example:
if objPlayer.sprite_index=sprPWalkAK or objPlayer.sprite_index=sprPAttackAK {
showammo=1
maxammo=30
}
scrPlayerShoot
This controls attacking, and is organized by weapons. I’ll break it down between melee weapons and guns.
MELEE:
I’ll use the knife as an example. The standard code for one weapon looks something like
if sprite_index=sprPWalkKnife {
sound_play(choose(sndSwing1,sndSwing2))
sprite_index=sprPAttackKnife
image_speed=1
image_index=0
reload=6
global.usedmelee[3]=1
}
The first line controls what weapon you want, so in this case, the knife. Whatever you want your weapon to be, change that first line to sprPWalk().
The second line chooses the sound which plays when you hit the attack button. It’s relatively unimportant for melee weapons so I’m going to ignore it.
The third line initiates the attack sequence. Change it to sprPAttack().
The fourth and fifth lines respectively control how fast the image moves (with 1 being at 100%, or normal speed) and where the image starts playing from (the first index, 0). Don’t change those.
The sixth line controls how long the animation lasts, and is the determinant of swing speed. Lower it to make the swing speed faster; raise to add some bulk to the swings. I recommend looking at the other swing speeds of weapons to get a grasp on what numbers approximate what swing speeds.
The seventh line determines if the game reads the new melee weapon in the script for achievements, and unless you have interest in your game registering for official Steam achievements, skip this.
GUNS:
Scroll down till you find a line that begins
if ammo>0 {
From here starts the guns section, and this first line tells the game that when there’s an ammo counter displayed on screen, the weapon being held is a gun.
To add a gun, scroll down till you find the section handling one of the more unique guns (the MP5, Uzi, silenced Uzi, magnum, or Skorpion), and create a new space directly beneath it. You can realistically put it anywhere, but putting it in these places ensures you don’t accidentally insert it in the brackets of another gun, which could seriously mess up the code.
For this example, I’m going to use the code from the handgun, since I’m actually having trouble finding where the brackets for the AK code are (karmic justice for piss poor formatting, to be fair):
if sprite_index=sprPWalkHandgun {
sound_play(sndHandgun)
scrHearPlayer()
ammo-=1
reload=6
global.shake=5
if place_meeting(x+lengthdir_x(12,dir),y+lengthdir_y(12,dir),objSolid) or > place_meeting(x+lengthdir_x(12,dir),y+lengthdir_y(12,dir),objDoorV) {
my_id=instance_create(x,y,objSmokeHit)
my_id.image_angle=image_angle
global.dir=dir
with my_id {
move_contact_solid(global.dir,16)
}
} else {
my_id=instance_create(x+lengthdir_x(20,dir-7),y+lengthdir_y(20,dir-7),objBullet)
if instance_exists(my_id) {
my_id.direction=dir-5+random(10)
my_id.speed=16
my_id.image_angle=my_id.direction
}
}
my_id=instance_create(x+lengthdir_x(16,dir-7-4left),y+lengthdir_y(16,dir-7-4left),objShell)
my_id.sprite_index=sprUziShell
my_id.image_angle=dir
my_id.direction=dir-90*left-20+random(30)
my_id.speed=1+random(3)
sprite_index=sprPAttackHandgun
image_speed=1
image_index=0
light=12
global.usedgun[4]=1
}
This seems like and probably is an utter clusterfuck of code, but basically breaks down into three parts: the main weapon stats, how the weapon reacts with doors, and shell casings.
Change the first line to sprPwalk(yourweaponhere). Then change the sound_play to whatever sound you want your gun to make when you shoot it. Ignore the next line (presumably it controls suppressed weapons, but I haven’t worked with these yet and if you want to give it a try open up scrHearPlayer and mess around with it a bit).
ammo-=1 means that for each time you pull the trigger, that many rounds is subtracted from the overall ammo count. There’s no reason to change this unless you for some reason want a single trigger pull to release multiple rounds (dual wield, perhaps?).
reload, as usual, controls how quickly rounds are dispensed. Increase this in order to make it semiautomatic, decrease this in order to make it automatic.
global.shake controls the weapon ‘recoil’, or in terms of Hotline Miami, how much the screen shakes when you fire the shot. Adjust this to your heart’s ever-vibrating content.
Everything within the section containing objBullet controls how the bullets fly.
my_id.direction is the spread. my_id.speed is how fast the bullets fly. my_id.image_angle is pretty much the same as my_id.direction
Skip to the line which contains the objShell code. Change
my_id.sprite_index=spr()Shell to accommodate the kind of weapon you’re firing.
If it’s a handgun or submachine gun, it’s sprUziShell. If it’s a rifle of some sorts, it’s sprM16Shell. If it’s a shotgun, it’s sprShotgunShell. Anything else, you’ll have to draw a new sprite for, but it’s more or less the same. So if you want a grenade casing, draw something like sprThumperShell and use that.
Then change sprPAttack() to whatever weapon you want.
light controls how bright muzzle flash is, or in terms of Hotline Miami, the radius of the flash which the gun adjusts. You can mess around with it but in my personal experience, it doesn’t seem to affect much unless you change it to exorbitant amounts, which is pretty much epilepsy: the simulator as if the game itself weren’t already seizure-inducing enough.
scrIsWalking
This controls walking behaviours. Simply insert a line of code anywhere in the format
if argument0=sprPWalk(insertweapon)return true
and you’re good.
scrIsSwinging
This controls swinging of melee weapons. As with before, input anywhere within this code before return false something along the lines of
if argument0=sprPAttack(whatever) return true
and that’s done.
scrIsSearching
If you’ve drawn searching sprites for your enemies, this is the place to put them in effect. As with the previous two, just insert something like
if argument0=sprESearch(weapon) return true
and you’re done.
scrGetAttack
This controls enemy attacks, and is fairly straightforward to read. Copy-paste any line of code and change the weapon names to meet your new needs, for example:
if argument0=sprEWalkHockeyStick or sprite_index=sprEWalkHockeyStick return sprEAttackHockeyStick
scrGetAmmo
This controls the base value of bullets for each gun. This is how much each gun contains outside of the ammo you input into objWeapon and objSpecificWeapon, and will manifest in the form of how many bullets you want to give your enemies. These are all the ‘roaming’ guns which exist in the level, or otherwise, how much starting ammo each enemy gets. To add your gun, add something like
if argument0=sprPWalkAK ammo=30
and you’re good.
Обновлено: 09.02.2023
Что-бы изменить спрайт или звук игры и сделать так, что-бы он использовался в игре вам потребуются следующие программы:
1. Если вы собираетесь редактировать изобажения, то Ваше изображение должно быть одного размера с исходным, чтобы не было каких-либо проблем.
2. Если Вы хотите что-бы изменённый спрайт работал только в одном уровне и загружался вместе с уровнем в мастерскую, то создайте папку mods в папке с вашим уровнем и переместите туда СВОЁНАЗВАНИЕ.patchwad
Нужно включить HLM Wad Explorer, после чего Вам предложат выбрать Wad-Базу. Выбираем hlm2_data_desktop.wad.
Нужно открыть графический редактор и изменить спрайт по нашему усмотрению или иметь заранее заготовленный звук. Требуемое расширение для спрайтов: .jpg; для звуков: .wav
Теперь нужно преобразовать наш Wad-файл с изменёнными спрайтами или звуками в СВОЁНАЗВАНИЕ.patchwad. Чтобы это сделать, нужно: заменить исходный файл своим, после чего вы должны сохранить файл. Вам откроется отдельное окно, где нужно будет задать местоположение нашего .patchwad файла и выбрать ему название. По-умолчанию там стоит папка mods Hotline miami 2.
После того, как вы получили файл .patchwad переместите его в папку mods уровня или компании. Путь к ним: «Диск:ПользователиИмя пользователяДокументыMy GamesHotlineMiami2LevelssingleID Уровня» (Если папки mods нет, то создайте их; Нужный уровень можно узнать по изображению в папке с ним)
Что-бы изменить музыку игры и сделать так, что-бы он использовался в игре вам потребуются следующие программы:
Сама музыка в формате .ogg.
Открыть HML Wad Explorer и выбрать «hlm2_music_desktop.wad» в качестве wad-базы. Если вы уже выбрали какую-либо другую wad-базу, то откройте программу, включите меню «File» и выберите «Switch base wad. «.
Собственно, заменить нужную музыку. После этого нужно экспортировать музыку, которую мы не заменяли, а после ею-же заменить себя в HLM Wad Explorer.
(Создатель уровней) Смена персонажей во время уровня!

(Редактор Уровней) Добавление эффектов наркоты, пола,скрытых объектов

Want to create a level like Death Wish? This guide will show you how to swap player characters while the level is still going.
This guide will show you how to unlock the secret achievement ‘TOXIC WASTE’ quickly, and also includes a video.
Have you really wondered who the «Miami Mulitilator» really is? This Guide will reveal the dark secret behind of who it actually is.
A small guide on adding more floors than the limit.
(Level Editor) Fighting Restricted Enemies as Any Character
Want to fight the Mafia as the Pig Butcher or the Soviet Soldiers as Jake? This guide will show you a few simple tricks that allow you to cheat the editor restrictions and fight any type of enemy.
В этом руководсве я покажу вам как изменять спрайты голов для анимации.
(UPDATED 5/21/21) Hotline Miami 2 has tons of well-known and obscure programming quirks. From time-saving exploits to amusing glitches and self-inflicted bugs, this guide will explain all of the little ways you can break the game.
Так, в этом руководстве я научу вас делать обложку (VHS cover) для вашего уровня или же кампании.
English: In This guide i collect all A+ scores of All levels for A+ achievement! Русский: В этом гайде содержатся информация, сколько очков нужно для получения А+ на всех уровнях! Scores/Очки: 1st Scene — Down Under (The Fan.


This guide will show you a list of points requirements to get A+ on Normal mode.

Вот, как и обещал. Такси на замену Пардовской машины. За основу брал такси из First Trial.

Спрайты можно как то быстро заменить (я не про цвет) или их надо рисовать самому долго и пичально?
Владислав, можно вытащить спрайт из игры и отредактировать так, как пожелаешь.
Валерий, я знаю это, как сделать это быстро? то есть заменить например анимацию персонажа?
Вытаскиваешь спрайты персонажа, редактируешь каждый кадр и суешь в игру.

Виталий, при помощи HLM WAD Explorer открываешь hlm2_data_desktop.wad, выбираешь любой файл в формате png и во вкладке Resource нажимаешь на кнопку Extract.

Валерий, прекрасно, ты только недавно писал «Моддинг 2016 года», когда чувак выкладывал экран загрузки, так поясни пожалуйста, как блин может в голову стукнуть идея замены тачки персонажа, это даже никак не влияет на игровой процесс и ощущения от игры, зачем ты это сделал?
Артур, я это сделал для уровней в редакторе, потому что эту тему можно развивать и дальше. Но в чем смысл замены одного экрана и только на русском языке?

Задавайте вопросы касающиеся моддинга обеих частей Hotline Miami, а мы постараемся вам ответить в кратчайшие сроки.

Как notepad юзать?
(я повторял за Rob Salmon и фигня получилась)
Николай, зависит от того, что нужно сделать. Да и само использование Notepad++ нельзя назвать полноценным моддингом, так что вопросы по нему стоит задавать в соседнем обсуждении.

Как сохранять тайлы в сюрфейс? (HLM1) Делаю порт своего проекта на Studio и там не работает почему-то scrSaveTiles().

есть ли моды на персонажа хаммер (киньте сайт с модами если можете

Не подскажете как установить свой скин? То есть рескин на персонажа

Я что-то понять не могу. Раньше я легко устанавливал моды на музыку , а сейчас то ли забыл , то ли не знаю. Ребят , можете напомнить инструкцию , как установить кастомную музыку через patchwad файл?

Максим, музяку вроде нельзя внести через patchwad, только внедрять в базовый wad, который находится в корневой папке с игрой и там уже, если надо, заменять файл с музыкой. Рекомендую, когда будешь патчить главный файл, сделать резерв, если захочется вернуть обратно музыку, которая была изначально

У меня не видно кастомного оружия на полу, хотя на скриншотах других я видел что оно есть, так и должно быть?
Читайте также:
- Atom rpg моды как установить
- Dragon age 2 моды как установить
- Как обновить мод в arma 3
- Как называется мод на майнкрафт на людей
- Майнкрафт мод жесткий как гвозди

Hotline Miami 2: Wrong Number
10.03.2015
Экшен,
Аркада,
Вид сверху,
Ретро
8.2
640
оценок
1
2
3
4
5
6
7
8
9
10
-
Hotline Miami 2: Wrong Number
-
Новости52
-
Мнения18
-
Юмор15
-
Файлы16
-
Читы11
-
Гайды1
-
Форумы17
-
Cкриншоты9
-
Галерея215
-
Игроки
Форум Hotline Miami 2: Wrong Number
Как устанавливать моды не из мастерской стима?

Lightning gamer
30 мая 2018
Например моды на ретекстур врагов или персонажей.
0
Комментарии: 1
сначала
лучшие
- новые
- старые
- лучшие
Ваш комментарий

flane
2 июля 2018
она сейчас на распродаже копейки стоит
неужели так тяжело наскребсти на классную игрушку сотню шекелей?
- пожаловаться
- скопировать ссылку
0

сегодня в 08:47
|
Индустрия
Command & Conquer: Generals исполнилось 20 лет
Command & Conquer: Generals
42
77

сегодня в 09:21
|
Индустрия
«Она стоит того, чтобы ее ждать»: тестировщик Hollow Knight: Silksong решил поддержать отчаявшихся фанатов
Hollow Knight: Silksong
8
21

сегодня в 18:15
|
Кино и сериалы,
Трейлеры
Новые постеры и тизер фильма «Подземелья и драконы: Честь среди воров»
3
11

5 февраля
|
ПК,
Трейлеры
Предварительная версия мода HD-текстур для Dino Crisis 2 доступна для скачивания
Dino Crisis 2
31
93

вчера в 22:45
|
ПК,
Обновления
Valve объявила о большом обновлении для Team Fortress 2
Team Fortress 2
13
40

сегодня в 11:25
|
Обзоры
от редакции
Обзор Hogwarts Legacy — идеальный волшебный мир любимой вселенной
Hogwarts Legacy
32
39

сегодня в 20:59
|
ПК,
Релизы
Hogwarts Legacy официально стала доступна на ПК — вместе с патчем первого дня
Hogwarts Legacy
39
27

сегодня в 19:09
|
Трейлеры
Буржуи будут в шоке! Создатели Atomic Heart посвятили новый мультик очередному навыку
Atomic Heart
12
30

вчера в 08:16
|
Кино и сериалы
Disney объявил о продолжении мультфильмов «Зверополис», «Истории игрушек» и «Холодного сердца»
47
66

вчера в 15:09
|
Консоли
Видео показывает, как выглядел бы ремейк Resident Evil 3 для PS1
Resident Evil 3
16
42

сегодня в 04:12
|
Скриншоты
Разработчики Star Wars Jedi: Survivor показали различных дроидов, с которыми придётся столкнуться
Star Wars Jedi: Survivor
4
33

6 февраля
Энтузиаст почти закончил создание ремейка The Simpsons: Hit & Run
The Simpsons: Hit & Run
22
98

сегодня в 13:15
Опубликованы системные требования к Wo Long: Fallen Dynasty
Wo Long: Fallen Dynasty
24
22

7 февраля
|
Новости сайта
А что случилось с форумами?
94
85

7 февраля
|
Кино и сериалы,
Трейлеры
Представлен дебютный тизер CGI-фильма Resident Evil: Death Island с Джилл Валентайн
64
171

8 февраля
|
Кино и сериалы
Официально: Сиквел «Константина» с Киану Ривзом все еще в производстве
14
88

7 февраля
|
ПК
На ПК стал доступен ранний доступ к Hogwarts Legacy
Hogwarts Legacy
86
69

8 февраля
|
Мероприятия
Нам покажут новый геймплей из Robocop: Rogue City: компания Nacon анонсировала новую игровую презентацию
RoboCop: Rogue City
22
63

7 февраля
|
Индустрия
Take-Two Interactive признала, что Red Dead Redemption 2 продолжает продаваться лучше, чем издатель предполагал
Red Dead Redemption 2
77
77

вчера в 19:08
|
Трейлеры
Свежий трейлер кровавого экшена Wanted: Dead посвятили миру игры
Wanted: Dead
5
30

6 февраля
Уморительный ролик ремейка Dead Space показывает, почему нужно быть осторожным при использовании лазерного пистолета
Dead Space
25
102
Самые новые и популярные игры можно получать бесплатно
Пополнение Steam-кошелька не проблема, если у вас есть бонусы

Дорогие и дефицитные геймерские девайсы теперь не нужно покупать

игра все равно не хотела запускаться на Русском языке, точнее на русском языке было только название игры (Горячая Линия Майами) в меню и только, но что интересно при смене языка на English было тоже самое)) но это не главное
Что бы я не делал и как бы я не страрался игру на русском языке мне так и не удавалось запустить
Вот что я сделал.
Вся проблема заключалась в том что Моя учетная запись пользователя в Windows была написана Кирилицей, т.е русскими буквами
Переименовать папку Вам не удастся так как она Административная, создание другой папки тоже ни к чему не приведет потому что все настройки и сохранения игр хранятся в административной папке.
Остается только одно:
1.Копируем все содержимое Административной папки на любой носитель или в другую созданную Вами папку, что бы не потерять запись сохранений игр, аккаунтов или других каких либо программ.
2. Создаем новую учентую запись пользователя с правами администратора Английскими буквами
Нажимаем Пуск — Панель управления — Учетные записи пользователей и семейная безопасность — Учетные записи пользователей — Управление учетными записями — Создание учетной записи
3. Теперь нужно снять права Администратора со старой учетной записи пользователя, делаем смену пользователя на новую учетную запись и перезагружам компьютер, иначе снять права администратора не получится так как вход в систему был произведен с действующей учетной записи.
4. И так после перзагрузки мы оказываемся на новой учетной записи
5. Переносим в эту папку все что сохраняли прежде с носителя или еще от куда либо еще.
6. А вот старую учетную запись которая была на Кирилице нужно удалить, так же идем по пути Пуск — Панель управления — Учетные записи пользователей и семейная безопасность — Учетные записи пользователей — Управление учетными записями — Управление другой учетной записью
[previewicon=2323873;sizeOriginal,inline;Безымянный888.jpg][/previewicon][/previewicon] 7. Осталось удалить старую административную папку [previewicon=2324025;sizeOriginal,inline;Безымянный233.jpg][/previewicon] Вот и все, осталась только одна учетная запись пользователя [previewicon=2323879;sizeOriginal,inline;Безымянный855.jpg][/previewicon]
7. Осталось удалить старую административную папку
Руководство создано для получение Результата А+ и выше(S).Открытие достижения — Get A Life. +Музыка из игры.
Список Очков Для Уровней.
Данный список покажет минимум для получения нужного нам результата.
Советы по упрощенному получению очков смотрите ниже ↓↓↓.
Маски для высокого результата. И почему они?
В этом списке маски с которыми я выполнял это достижение.
Сначала ознакомьтесь со списком а потом прочитайте объяснение.
P.s Желательно пройти игру полностью и собрать все маски. Если есть проблемы с нахождение масок Пишите комментарии и появится отдельный гайд.
(увеличивает время для комбо). (открывается на lvl: Assault)
Легко начать серию не имея холодного оружия и так же просто продолжить за счет огнестрела который он может подобрать(в hm2 не может).Проще комбинировать из-за ненадобности искать холодное оружие. (открывается на lvl: No Talk)
4.Carl(кузнечик) — Вы начинаете игру с дрелью,когда вы добиваете противников дрелью кол-во
очков становится значительно больше (Советую использовать эту маску в последнюю очередь.
Да вы получите больше очков за добивание но есть минусы:1 Дрель не убивает собак и толстяков . 2 Если вы перешили на 2-ой этаж без дрели все gg ее нету.) Сложная маска, можете поискать замену. (открывается на lvl: Push It . Лежит в комнате с диско -шаром)
Если не выходит с 1-ой маской пробуй с другой. Не забывай об этом
- The Metro: M|O|ON — Paris
- No Talk: M|O|O|N — Crystals
- Overdose: Jasper Byrne — Hotline
- Decadence: M|O|O|N — Hydrogen
- Tension: M|O|ON — Paris
- Full House: M|O|O|N — Crystals
- Clean Hit: Jasper Byrne — Hotline
- Neighbors: M|O|O|N — Hydrogen
- Push It: Perturbator — Miami Disco
- Crackdown:M|O|O|N — Crystals
- Hot & Heavy: Jasper Byrne — Hotline
- Deadline: M|O|O|N — Hydrogen
- Trauma: Scattle — Flatline
- Assault: Scattle — Knock Knock
- Vengeance: Scattle — Inner Animal
- Showdown: El Huervo — Turf
- Safehouse: Scattle — To The Top
- Fun & Games: Eliott Berlin — Musikk Per Automatikk
- Prank Call: Scattle — Knock Knock
- Resolution: Scattle — Inner Animal
- HIGHBALL: Perturbator — Miami Disco
- EXPOSED: Scattle — To The Top
- ТИТРЫ/captions(Джакет): Perturbator — Electric Dreams
- ТИТРЫ/captions(Байкер): Erik Suhrke — A New Morning
Музыка из Катсцен и прочего (Music of cutscenes)
- Главное меню/: Sun Araw — Horse Steppin
- Конец уровня/level end El Huervo — ic
- Подсчет очков за уровень/Scoring per level Jasper Byrne — Miami
- Квартира Джакета/Jacket’s apps: Sun Araw — Deep Cover
- Магазин/Бар/Пиццерия/Pizzeria/bar: El Huervo — Daisuke
- Кошмары Джакета/Jacket’s nightmares: Coconuts — Silver Lights
- Убийство Бума/Драка с боссом/Налет SWATa: M|O|ON — Release
- Рихтер стреляет в Джакета/Джакет приходит домой сбежав из больницы: El Huervo — Turf
- Байкер допрашивает «Шрама»/Дом Байкера: Scattle — It’s Safe now
Источник
Hotline Miami → Оптимизация для слабых ПК
Hotline Miami — жестокий и кровавый экшен с видом сверху. Вам предстоит влезть в шкуру серийного убийцы, который сотнями убивает разных. Подробнее
- Об игре
- Скриншоты
- Купить 191 руб
- Отзывы
- Гайды
- Требования
- Достижения
- Форум
- Файлы
- Новости
- Похожие
- Даты
- Статьи
Оптимизация для слабых ПК Hotline Miami
Существует много способов улучшить работу игр на не самом слабом компьютере. Далее мы рассмотрим их в порядке от простых к сложным и расскажем, что делать, если Hotline Miami тормозит.

Простое решение тормозов в Hotline Miami
- Скачайте и запустите всемирно известный CCleaner (скачать по прямой ссылке) — это программа, которая очистит ваш компьютер от ненужного мусора, в результате чего система станет работать быстрее после первой же перезагрузки;
- Обновите все драйверы в системе с помощью программы Driver Updater (скачать по прямой ссылке) — она просканирует ваш компьютер и обновит все драйверы до актуальной версии за 5 минут;
- Установите программу WinOptimizer (скачать по прямой ссылке) и включите в ней игровой режим, который завершит бесполезные фоновые процессы во время запуска игр и повысит производительность в игре.
Освободить место на диске
Прежде чем переходить к активным действиям нужно убедиться, что на компьютере есть хотя бы 10-15 Гб свободного места на жестком диске, на который установлена операционная система.
Обычно это диск «C». Этот минимальный запас необходим для того, чтобы система могла без каких-либо проблем создавать временные хранилища файлов Hotline Miami, кэши и так далее.
Посмотрите системные требования Hotline Miami и убедитесь, что на вашем жестком диске достаточно места для нормальной работы игры.
Отключить ненужные программы
Каждая программа, которая запущена в ОС, занимает определенный процент оперативной памяти и загружает процессор. Убедиться в этом легко, достаточно просто открыть диспетчер задач с помощью сочетания клавиш Ctrl+Alt+Del:

Если в компьютере установлен не самый мощный процессор, а оперативной памяти меньше 8-16 Гб, то перед запуском Hotline Miami нужно отключить ненужные программы. Например, Skype, Discord, Telegram, Google Chrome и так далее.
Отключить оверлеи
Речь идет о тех программах, которые способны отображать свой интерфейс поверх игры. Часто на компьютере есть такие — Fraps, Steam, Origin и так далее. Даже когда оверлей скрыт, он обрабатывается компьютером, снижая FPS в Hotline Miami.
Поэтому все оверлеи нужно отключить. Почти всегда это можно сделать в настройках программы без необходимости ее удаления. Например, оверлей Steam, легко отключается через меню:

Обновить драйвера видеокарты, скачать драйвера для Hotline Miami
Вне зависимости от того, какая видеокарта стоит в системном блоке, ее драйвера нужно поддерживать в актуальном состоянии. Поэтому перед запуском Hotline Miami следует зайти на сайт производителя и проверить, не вышли ли новые драйвера:
После установки драйвера следует перезагрузить компьютер, чтобы исключить возможность сбоев. Также стоит учитывать, что для многих старых видеокарт новые драйверы уже не выходят.
Для некоторых игр производители видеокарт выпускают специально оптимизированные драйвера. Поищите таковые в разделе новостей о Hotline Miami — обычно мы про них пишем. Также можно посмотреть на сайте производителей видеокарт.

Изменить параметры электропитания
По умолчанию в компьютере установлен сбалансированный режим электропитания, который, а в некоторых ноутбуках, в целях увеличения времени работы, и вовсе установлена экономия энергии.

Это не дает компьютеру раскрыть свой потенциал в Hotline Miami полностью, поэтому первым делом нужно открыть панель управления, которую можно найти с помощью поиска. После нужно сделать следующее:
- Выбрать режим просмотра «Мелкие значки»;
- Кликнуть на «Электропитание»;
- На экране найти опцию «Настройка схемы электропитания», кликнуть на нее;
- Кликнуть на «Изменить дополнительные параметры питания»;
- В открывшемся окне найти выпадающий список;
- В списке выбрать «Высокая производительность»;
- Нажать кнопку «Применить», затем кликнуть «ОК».
Включить режим производительности Nvidia
После установки драйвера для видеокарты от компании Nvidia можно ускорить работу Hotline Miami с помощью режима производительности. Это немного упростит графику в игре, но повысит FPS. Обратите внимание, что этот метод доступен только в случае, если у вас видеокарта с чипом от Nvidia. Вот как это сделать:
- В нижнем правом углу экрана, в трее, нажать правой кнопкой мыши на иконку «Настройки NVIDIA»;
- В открывшемся окне справа выбрать вкладку «Параметры 3D»;
- Нажать на опцию «Регулировка настроек изображения с просмотром»;
- Справа поставить флажок напротив «Пользовательские настройки с упором на:»;
- Передвинуть «ползунок», который находится ниже, в крайнюю левую позицию «Производительность»;
- Снизу нажать на кнопку «Применить».

Далее необходимо запустить Hotline Miami и убедиться, что все отображается корректно. Если возникают проблемы, то нужно вместо «Пользовательские настройки с упором на:» выбрать «Настройки согласно 3D-приложению».
Отключить эффекты Windows
Если Hotline Miami работает не в полноэкранном режиме, а в окне, в том числе и без рамки, то повысить FPS можно, если отключить эффекты Windows. Для этого нужно проделать следующие действия:
- Открыть «Проводник»;
- Правой кнопкой нажать на «Этот компьютер» (или «Мой компьютер»);
- В контекстном меню кликнуть на «Свойства»;
- В открывшемся окне слева нажать на «Дополнительные параметры системы»;
- В открывшемся окне перейти на вкладку «Дополнительно»;
- В разделе «Быстродействие» нажать на кнопку «Параметры. »;
- В открывшемся окне перейти на вкладку «Визуальные эффекты»;
- Поставить флажок напротив опции «Обеспечить наилучшее быстродействие».

При необходимости на последнем шаге можно выбрать опцию «Особые эффекты». В таком случае можно самостоятельно выбрать, какие эффекты оставить, а какие — отключить.
Увеличить файл подкачки, если не хватает оперативной памяти для Hotline Miami
Чтобы компенсировать недостаток оперативной памяти, можно увеличить файл подкачки. Это позволит системе хранить часть необходимых Hotline Miami данных прямо на жестком диске. Вот что нужно сделать:
- Открыть «Проводник»;
- Правой кнопкой нажать на «Этот компьютер» (или «Мой компьютер»);
- В контекстном меню кликнуть на «Свойства»;
- В открывшемся окне слева нажать на «Дополнительные параметры системы»;
- В открывшемся окне перейти на вкладку «Дополнительно»;
- В разделе «Быстродействие» нажать на кнопку «Параметры. »;
- В открывшемся окне перейти на вкладку «Дополнительно»;
- Снять флажок с параметра «Автоматически выбирать объем файла подкачки» (если есть);
- Поставить флажок напротив опции «Указать размер»;
- В текстовых полях «Исходный размер (МБ):» и «Максимальный размер (МБ):» указать в мегабайтах значение, равное половине объема оперативной памяти.
Например, если в системном блоке установлена «плашка» на 4 Гб, то есть 4192 Мб, в поля выше нужно вписать число 2048. Можно сделать файл подкачки больше, но никакого прироста это не даст.

Следует понимать, что файл подкачки эффективен только тогда, когда системе не хватает оперативной памяти. Если компьютер имеет 8-16 Гб, то файл подкачки практически не используется. А при использовании SSD-диска в качестве системного наличие файла подкачки и вовсе может замедлить производительность Hotline Miami, поэтому не следует бездумно задавать большое значение файла подкачки.
Еще больше ухудшить графику в Hotline Miami (режим «картошки») — выключить сглаживание и т.п.
Если Hotline Miami запускается, но сильно тормозит, то перед началом всех процедур следует снизить графику до минимума через настройки игры. Если это не помогло, то придется прибегнуть к помощи сторонних программ для настройки видеокарты:
Загрузив программу, запускаем ее. В случае с NVIDIA Inspector нужно запускать файл nvidiaProfileInspector.exe, а не nvidiaInspector.exe. Сверху, в строке «Profiles:» можно выбрать любую игру, которая поддерживается драйверами Nvidia.

Ниже представлены все доступные настройки. Их много, но для того, чтобы ухудшить графику в игре до «картофельной», вполне достаточно всего нескольких, которые находятся в разделе «Antialiasing».
Наибольший прирост производительности дает изменение этих двух параметров:
- Texture filtering — LOD bias;
- Antialiasing — Transparency Supersampling.
Каждая из этих настроек имеет разные значения. Некоторые из них могут делать картинку в Hotline Miami неудобоваримой, поэтому следует попробовать разные комбинации значений, которые дают более-менее сносное играбельную картинку.

В случае с RadeonMod все аналогично: нужно найти настройки, отвечающие за отображение текстур и снижать их до тех пор, пока FPS в игре не станет достаточно высоким.
Как разогнать видеокарту для Hotline Miami
Все, что связано с «разгоном», направлено на увеличение производительности, но это довольно обширные темы, о которых в двух словах рассказать сложно. К тому же это всегда довольно рисковое дело. Если что, мы вас предупредили.
Чтобы добиться большего значения FPS в Hotline Miami, сначала можно попробовать разогнать видеокарту. Самый простой способ сделать это — воспользоваться встроенными функциями ПО от производителя видеокарты.

Например, в комплекте с некоторыми видеокартами от GIGABYTE поставляется программа Graphics Engine, в которой есть несколько уже готовых профилей разгона. Это позволяет выжать из видеокарты 5-10 дополнительных кадров в секунду.
Если программы от производителя нет, то всегда можно воспользоваться универсальным решением — MSI Afterburner. Это одна из лучших программ для разгона, в ней множество разных настроек.

Но тут придется все настраивать вручную. Повышать следует в первую очередь частоту самого видеочипа («Core Clock») и частоту памяти видеокарты («Memory Clock»). Слева находятся базовые значения этих параметров. Справа отображаются температура и увеличение вольтажа — эти характеристики позволяют следить за «здоровьем» видеокарты.
При повышении частоты возрастает нагрев видеокарты. Если температура переходит отметку в 85 градусов, то следует увеличить скорость оборотов вентиляторов («Fan Speed»). Если температура повысилась до 100 градусов, то следует немедленно прекратить разгон, иначе чип может расплавиться. Мощный «разгон» требует водяного охлаждения, поэтому не следует повышать частоты более чем на 10%.
Разогнать процессор
В то время как «разгон» видеокарты вполне осуществим прямо в Windows, для того, чтобы улучшить работу процессора и тем самым увеличить быстродействие Hotline Miami, придется лезть в «Биос».
Геймерский «разгон» процессора обычно предполагает увеличение процессорного множителя (Core Ratio). Сделать это можно далеко не на каждом процессоре, а только на том, где этот множитель разблокирован. Обычно такие процессоры помечаются особым образом. Например, компания Intel использует маркировки «K» и «X‘. То есть, например, i7-4790 нельзя разогнать с помощью множителя, а вот i7-4790K — вполне.

Но как узнать точное название модели процессора? Проще всего воспользоваться программой CPU-Z. Запустив ее, нужно открыть вкладку «CPU» и посмотреть на самую первую строчку — «Name». Это и есть название процессора. Кстати, там же можно увидеть из сам множитель. Он в разделе «Clocks», в строке «Multiplier». Если процессор поддерживает «разгон», то этот множитель можно изменить.
Чтобы изменить коэффициент Core Ratio, нужно сначала попасть в оболочку BIOS. Для этого нужно нажать особое сочетание клавиш во время загрузки компьютера (до того, как появится экран Windows).

Сочетание может различаться в зависимости от материнской платы. Часто BIOS можно вызвать с помощью клавиши «F8» или «Del». На экране «Биоса» нужно найти раздел, посвященный процессору. Тут тоже все сложно, так как оболочек у BIOS много. Практически каждый производитель материнский плат использует свою собственную, поэтому без знания английского языка найти нужное место не так-то просто.
Изменять множитель нужно постепенно, повышая его на 2. После каждого изменения следует перезапускать компьютер и тщательно проверять работоспособность и температуру процессора. Если она становится выше 80 градусов во время игры, то нужно немедленно выключить Hotline Miami, перезагрузить компьютер, зайти в BIOS и снизить значение Core Ratio. Иначе процессор может сгореть.
Источник
INTRODUCTION
Hey, kid….. Lookin’ to compile some….texture pages?
Modding Hotline Miami Original offers more freedom than using the Hotline Miami 2 editor coupled with tools like HLMWadExplorer and Notepad++ — but is also way more difficult at first since you have to get used to working with Hotline Miami’s source code, which was written somewhat sloppily in GML (Game Maker Language), the coding language that is necessary to learn if you want to add new features, masks, weapons & etc.
It also allows you to package your mod as a completely standalone experience without the requirement to actually own a copy of Hotline Miami to play.
Examples of HLM1 modding you most likely have seen before are MIDNIGHT ANIMAL by Spencer Yan and THE MIAMI HORROR by Danny Judas & Yossarian.
Other examples can be found on the Modifications (Hotline Miami 1) wiki page[hotlinemiami.fandom.com] which I try to keep as up-to-date as possible. Please do contribute if you see any cool new projects pop up that aren’t part of the list!
‼️ >>> Hotline Miami is not an open source project. <<< ‼️
Hotline Miami’s code is owned by the creators, Dennaton Games. They have informally given the Hotline Miami community their permission to modify & use their code, as long as all usage and distribution is non-profit. You may not charge for or sell any modifications or other projects made with the Hotline Miami source code.
I would like to thank Dennaton Games for their incredible work on the Hotline Miami series, because playing them and making mods for the series is what brings me & many of my friends a lot of joy to this day and I wish them all the best of luck on their new project!!!
GAMEMAKER: STUDIO
First of all, you’re going to need a copy of GameMaker: Studio 1.4.9999. GameMaker: Studio 1.4 used to be available on Steam, but has since been discontinued by YoYo Games. I do not recommend picking up GameMaker: Studio 2 (also known as just GameMaker) for modding Hotline Miami, as it can be quite tough for beginners to figure out how to make Hotline Miami run in it.
You can get GameMaker: Studio by either purchasing a key for the Professional version 1.4 from a key reseller, or you can grab a free download of it here:
https://me ga. nz/folder/AKoxUYSD#hMEoRpid3vyS3053lZ36dA/file/dWIR3K6T (Remove spaces!)
Extract the zip file somewhere, and then run the Unlock Modules executable. Doing this will allow you to actually compile the game.
To launch GameMaker: Studio, open Startilla_V3.exe and click off any errors that may appear.
HOTLINE MIAMI SOURCE CODE
Fellow game developer & modder Pi0h1[pi0h1.com] has recently opened up a GitHub repo for Hotline Miami, which is always being improved with new features to make it easier for aspiring modders to get into. It’s designed to be pulled at any time so you can work on your own mods at any stage of the repo’s development.
>>> https://github.com/Pi0h1/HotlineMiami.gmx <<<
Either pull the repo with a source control program (such as GitHub Desktop) or download a zip of the project, then open HotlineMiami.project.gmx with GameMaker: Studio 1.4.
SPENCER YAN’S MODDING HOTLINE MIAMI TUTORIAL SERIES
These are quite old, yet they can still be helpful for newcomers on a few topics you may be interested in.
Keep in mind, since this is an old series, not everything may be up-to-date with Pi0h1’s updated Hotline Miami project file.
GAMEMAKER MANUAL
The modders’ best friend. Self-explanatory.
https://manual.yoyogames.com/
MISC. EXTENSIONS & USEFUL RESOURCES
Users on Windows 10 may experience slow-down when trying to run their mods — this is due to a Windows update and it is fixable.
.DLL > https://github.com/omicronrex/gms_scheduler_fix/releases/tag/v1.1
Simply extract the .zip and place the .dll file in both your GameMaker folder and the datafiles folder of your project.
For more experienced users, there is an extension that fixes this but requires a bit more work in the programming side.
EXTENSION > https://github.com/skyfloogle/gmsched
END
Last updated: 15/APRIL/2022
Thank you for reading! (◕ᴗ◕✿)
Source: https://steamcommunity.com/sharedfiles/filedetails/?id=2794679769