
-
#2
Как сделать так как на гифке?
![]()
-
#3
Проверю работоспособность плагина, размещу, я уже забыл про него 

-
#5
Подскажите пожалуйста, а как прописать в css, чтобы можно было кликнуть по всей области шапки, и это было как лого (линк) ?
В примере тса, клик возможен только по центру, там где лого, как сделать лого типа бэкграудом?


-
#8
не могу понять как в шапке удалить фон в мобильной версии , подскажите пожалуйста
-
#9
не могу понять как в шапке удалить фон в мобильной версии , подскажите пожалуйста
Так то если правильно сделано, то в мобильной версии шапки вообще не видно
-
#10
Так то если правильно сделано, то в мобильной версии шапки вообще не видно
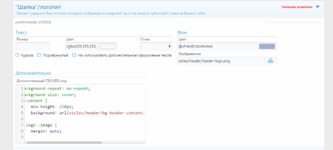
CSS:
&-content {
    min-height: 250px;
    background: url(styles/header/bg-header-content.png) no-repeat center / cover;
}
не на всю ширину
-
#11
ну так надо картинку нормальную делать изучать возможности css, мануал дает общее понятие, а уж там сами смотрите
-
#12
ну так надо картинку нормальную делать
изучать возможности css, мануал дает общее понятие, а уж там сами смотрите
ну наверное картинка нормальная раз если не использовать код, но как ее удалить в мобильных версиях? так ответ и не дал лень потратить вам 5 минут золотого времени
-
#13
Politarov, как я дам ответ. если я не знаю как она используется у тебя
Да и если не используешь мануал, то вопрос в тему стиля, а стиль твой у меня не установлен, могу посмотреть по месту
Последнее редактирование модератором: 4 Дек 2021

-
#14
ширину еще бы как изменить размеры
Последнее редактирование: 4 Дек 2021
-
#15
ширину еще бы как изменить размеры
Если читать мануал, то будет понятно, что не шапку надо подгонять под размеры найденной картинки, а делать нужные по размеру
-
#16
Все сделал по инструкции, логотип почему то маленький.
-
#17
Все сделал по инструкции, логотип почему то маленький.
Ширину логотипа указывал? В основных настройках
-
#18
Все сделал как описано, а стандартная шапка не изменилась, может где то она отключается прежде чем ее изменить. Где прошляпил не пойму
-

1658577607486.png
25.6 KB
· Просмотры: 16
-

1658577631435.png
47.6 KB
· Просмотры: 16
-

1658577661301.png
50.7 KB
· Просмотры: 16
-
#19
в мануале все подробно написано
-
#20
А логотип ставится в настройках логотипа ты про это может забыл?

[data-widget-section="staffMembers"] h3.block-minorHeader:before { /* Staff online */
    display: inline-block;
    padding-right: 5px;
    .m-faBase();
    .m-faContent(@fa-var-user-tie);
}
[data-widget-section="onlineNow"] h3.block-minorHeader:before { /* Members online */
    display: inline-block;
    padding-right: 5px;
    .m-faBase();
    .m-faContent(@fa-var-users);
}
[data-widget-key="forum_overview_new_posts"] h3.block-minorHeader:before { /* Latest posts */
    display: inline-block;
    padding-right: 5px;
    .m-faBase();
    .m-faContent(@fa-var-comments);
}
[data-widget-key="xfrm_forum_overview_new_resources"] h3.block-minorHeader:before { /* Latest resources */
    display: inline-block;
    .m-faBase();
    .m-faContent(@fa-var-download);
}
[data-widget-key="forum_overview_forum_statistics"] h3.block-minorHeader:before { /* Forum statistics */
    display: inline-block;
    padding-right: 5px;
    .m-faBase();
    .m-faContent(@fa-var-chart-bar);
}
[data-widget-key="xfmg_media_slider"] h3.block-minorHeader:before { /* Random media */
    display: inline-block;
    padding-right: 5px;
    .m-faBase();
    .m-faContent(@fa-var-image);
}
[data-widget-key="forum_overview_share_page"] h3.block-minorHeader:before { /* Share this page */
    display: inline-block;
    padding-right: 5px;
    .m-faBase();
    .m-faContent(@fa-var-share-alt);
}
Иногда нужно выделить какой то текст на форуме, рассмотрим один из возможных вариантов:
@import url("https://fonts.googleapis.com/css?family=Sacramento&display=swap");

.p-title-value {
  line-height: calc(20px + 20vh);
  text-shadow: 0 0 5px #ffa500, 0 0 15px #ffa500, 0 0 20px #ffa500, 0 0 40px #ffa500, 0 0 60px #ff0000, 0 0 10px #ff8d00, 0 0 98px #ff0000;
    color: #fff6a9;
  font-family: "Sacramento", cursive;
  text-align: center;
  animation: blink 12s infinite;
  -webkit-animation: blink 12s infinite;
}

@-webkit-keyframes blink {
  20%,
  24%,
  55% {
    color: #111;
    text-shadow: none;
  }

  0%,
  19%,
  21%,
  23%,
  25%,
  54%,
  56%,
  100% {
  text-shadow: 0 0 5px #ffa500, 0 0 15px #ffa500, 0 0 20px #ffa500, 0 0 40px #ffa500, 0 0 60px #ff0000, 0 0 10px #ff8d00, 0 0 98px #ff0000;
    color: #fff6a9;
  }
}

@keyframes blink {
  20%,
  24%,
  55% {
    color: #111;
    text-shadow: none;
  }

  0%,
  19%,
  21%,
  23%,
  25%,
  54%,
  56%,
  100% {
  text-shadow: 0 0 5px #ffa500, 0 0 15px #ffa500, 0 0 20px #ffa500, 0 0 40px #ffa500, 0 0 60px #ff0000, 0 0 10px #ff8d00, 0 0 98px #ff0000;
    color: #fff6a9;
  }
}
Если у вас стоит плагин Node тогда данный код позволит приближать разделы при наведении на них.
.th_node--overwriteTextStyling .node .node-body {
-webkit-transition: all 0.4s ease-in;
-moz-transition: all 0.4s ease-in;
-ms-transition: all 0.4s ease-in;
-o-transition: all 0.4s ease-in;
transition: all 0.4s ease-in;
}
.th_node--overwriteTextStyling .node .node-body:hover {
-webkit-transform: scale(1.05);
-moz-transform: scale(1.05);
-o-transform: scale(1.05);
-ms-transform: scale(1.05);
transform: scale(1.02);
z-index: 100;
}
Добавляем кнопку в объявления, для каких целей каждый сам решит для себя, просто оформление через CSS. Объявление будет такого формата:
Продается котенок очень пушистый <a class="fire" href="#">ЗА 125 рублей</a> в добрые руки.Добавляем код в шаблон EXTRA.LESS:
a.fire {
  position: relative;
  display: inline-flex;
  justify-content: center;
  align-items: center;
  width: 200px;
  height: 50px;
  background: #fff;
  border-radius: 999px;
}
a.fire:hover {
  -webkit-animation: burn 1000ms ease-out forwards;
          animation: burn 1000ms ease-out forwards;
}
a.fire:hover::before {
  content: '';
  position: absolute;
  left: 40px;
  width: 100px;
  height: 40px;
  background: #ffe66e;
  border-radius: 100%;
  -webkit-animation: flare 1000ms ease-out forwards;
          animation: flare 1000ms ease-out forwards;
}
a.fire:hover::after {
  content: '';
  position: absolute;
  right: 40px;
  width: 100px;
  height: 40px;
  background: #ffe66e;
  border-radius: 100%;
  -webkit-animation: flare 1000ms ease-out forwards;
          animation: flare 1000ms ease-out forwards;
}

@-webkit-keyframes flare {
  100% {
    -webkit-transform: translateY(-20px) scale(1.5);
            transform: translateY(-20px) scale(1.5);
    -webkit-filter: blur(10px);
            filter: blur(10px);
    opacity: 0;
  }
}

@keyframes flare {
  100% {
    -webkit-transform: translateY(-20px) scale(1.5);
            transform: translateY(-20px) scale(1.5);
    -webkit-filter: blur(10px);
            filter: blur(10px);
    opacity: 0;
  }
}
@-webkit-keyframes burn {
  0% {
    color: #ff826e;
    background: #ffe66e;
    box-shadow: 0 0 5px 0 #c8000a, 0 0 5px 0 rgba(230, 30, 10, 0.8), 0 0 5px 0 rgba(230, 230, 10, 0.6);
  }
  100% {
    color: black;
    background: white;
    box-shadow: 0 -35px 40px 30px rgba(255, 130, 10, 0), 0 -30px 30px 10px rgba(230, 30, 10, 0), 0 -20px 10px 0 rgba(255, 255, 10, 0);
  }
}
@keyframes burn {
  0% {
    color: #ff826e;
    background: #ffe66e;
    box-shadow: 0 0 5px 0 #c8000a, 0 0 5px 0 rgba(230, 30, 10, 0.8), 0 0 5px 0 rgba(230, 230, 10, 0.6);
  }
  100% {
    color: black;
    background: white;
    box-shadow: 0 -35px 40px 30px rgba(255, 130, 10, 0), 0 -30px 30px 10px rgba(230, 30, 10, 0), 0 -20px 10px 0 rgba(255, 255, 10, 0);
  }
}
Результат:

Делаем отображение 75 лет ВОВ:
.p-header-content {
   background: url(https://s8.hostingkartinok.com/uploads/images/2020/05/cd64344b9e85ed4fc9083c9034703231.png) no-repeat;
   background-size: contain;
}
.p-header-logo.p-header-logo--image img {
   margin-left: 40px;
}
Добавляет эффект при наведении на кнопку создать:
.button--cta.button.button--icon.button--icon--write:hover {
animation: rainbow 3s infinite linear;
}
@keyframes rainbow {
    to {
        filter: hue-rotate(360deg);
    }
}

.button--cta.button.button--icon.button--icon--write:focus {
    outline: none;
}
Украшаем категории на главной странице (изображение во вложении):
.block.block--category:nth-child(1n) .block-header {
    background: linear-gradient(to left, #8a9c73, #769c73);
color: #fff;
}
.block.block--category:nth-child(2n) .block-header {
    background: linear-gradient(to left, #739c85, #739c9a);
color: #fff;
}
.block.block--category:nth-child(3n) .block-header {
    background: linear-gradient(to left, #738a9c, #73769c);
color: #fff;
}
.block.block--category:nth-child(4n) .block-header {
    background: linear-gradient(to left, #85739c, #9a739c);
color: #fff;
}
.block.block--category:nth-child(5n) .block-header {
    background: linear-gradient(to left, #9c738a, #9c7376);
color: #fff;
}
.block.block--category:nth-child(6n) .block-header {
    background: linear-gradient(to left, #9c8573, #9c9a73);
color: #fff;
}
.block.block--category .block-header {
    text-shadow: 0 0 1px rgba(0,0,0,0.7);
    position: relative;
    transition: ease-in .15s border-bottom-left-radius,ease-in .15s border-bottom-right-radius;
}
.block.block--category .block-header:after {
    content: '';
    background: url(js/swirl.png);
    background-size: cover;
    background-position: center;
    position: absolute;
    height: 100%;
    width: 100%;
    z-index: 1;
    top: 0;
    bottom: 0;
    left: 0;
    right: 0;
    display: block;
    mix-blend-mode: overlay;
    pointer-events: none;
}
Синтаксис шаблонов
Синтаксис шаблонов XenForo 2 — мощный инструмент как для разработчиков, так и для администраторов форумов, дающий вам полный контроль над макетом Ваших страниц XenForo.
Лучшие практики
- Теги XenForo, по соглашению, пишутся строчными буквами
lowercase. - Все теги XenForo имеют префикс пространства имен
xf:.
Полезная информация
Комментирование ваших шаблонов
Если вы хотите закомментировать код шаблона (или вдохновляющее сообщение), который вы не хотите отображать в исходном коде финальной страницы, вы можете использовать тег xf:comment.
<xf:comment>
Если вы перестанете смотреть на мир с точки зрения того,
что вам нравится и что вам не нравится, и будете видеть вещи такими,
какие они есть на самом деле, вы найдете в своей жизни гораздо больше покоя.
</xf:comment>
Включение другого шаблона в шаблон
Тег xf:include позволяет вам включить другой шаблон в ваш текущий шаблон.
<xf:include template="my_template" />
Просто установите атрибут template для имени шаблона, который вы хотите включить.
Макросы шаблона
Макросы шаблона — очень мощный аспект синтаксиса шаблона XenForo.
Как правило, вы должны использовать макрос в любом месте, где вы будете использовать функцию или подпрограмму на языке программирования.
Для не программистов я бы резюмировал это следующим образом: либо используйте макрос в любом месте, где вы хотите создать одно и то же несколько раз в нескольких разных файлах, либо для создания чего-то другого при разных обстоятельствах (это будет вероятно, будет иметь больше смысла, если вы посмотрите руководство по определению макроса).
Warning
По причинам удобочитаемости не следует использовать тег макроса в качестве переменной. Вместо этого вы должны использовать тег Set и обращаться с переменной, как с любой переменной шаблона.
Определение макроса
<xf:macro
    name="my_macro_name">

    <!-- Содержимое вашего макроса -->

</xf:macro>
В самом простом случае макрос может быть определен с помощью атрибута name и содержимого, которое вы хотите повторить внутри тега макроса.
Note
Когда вы используете макрос в нескольких файлах, лучше всего поместить макрос в собственный шаблон.
Аргументы макроса
<xf:macro
    name="my_macro_name"
    arg-message="My amazing macro message!">

    <h1>Сообщение</h1>
    <p>{$message}</p>

</xf:macro>
В этом примере макрос определен со значением по умолчанию для arg-message (My amazing macro message!).
Это значение было бы переопределено, если бы макрос был вызван с аргументом сообщения.
Иногда необходимо пометить аргумент как обязательный. Это можно сделать, установив значение аргумента на ! в определении макроса..
Включение и использование макросов
<xf:macro template="my_macro_template" name="my_macro_name" />
В самом простом случае вы подключаете макрос, устанавливая атрибут name и оставляя тег пустым.
Note
При использовании тега макроса следует использовать самозакрывающуюся форму тега, чтобы позволить кому-то более легко различать разницу между определением и использованием макроса.
Аргументы макроса
вы также можете предоставить макросу аргументы:
<xf:macro template="my_macro_template" name="my_macro_name" arg-argName="argValue" />
Где argName — имя аргумента макроса.
Note
вы должны использовать lowerCamelCase для имен Ваших аргументов макроса.
Управляющие структуры шаблонов
Синтаксис шаблонов XenForo 2 поддерживает определенные управляющие структуры, чтобы облегчить выполнение определенных задач.
Тег if
Тег шаблона if может использоваться для условного отображения некоторого HTML или части шаблона.
<!-- Показывает контент, только если пользователь вошел в систему... -->
<xf:if is="$xf.visitor.user_id">
    <!-- Сделайте что-нибудь... -->
</xf:if>
Тег if принимает следующие атрибуты:
is— Условие, при выполнении которого должно отображаться содержимое тегов.
Условия
Атрибут is поддерживает несколько логических операторов:
OR— Используется для связывания альтернативных условий. (Альтернативы:||)AND— Используется для связывания дополнительных условий. (Альтернативы:&&)!— Поставьте перед условием для его инвертирования. (Известен как: ‘not’)XOR— Возвращает истину, если истинно только одно из двух условий. (Известно как: Исключающее ИЛИ)
Теги Else/Else-If
Теги else и else-if используются вместе с тегом if для условного отображения HTML в соответствии с названием.
Пример использования else:
<xf:if is="$xf.visitor.is_admin">
    <!-- Содержимое здесь будет показано только Администраторам... -->
<xf:else />
    <!-- Содержимое здесь будет показано всем, кто не является Администратором! -->
</xf:if>
Пример использования else-if:
<xf:if is="$xf.visitor.is_admin">

    <!-- Содержимое здесь будет показано только Администраторам... -->

<xf:elseif is="$xf.visitor.is_moderator" />
    <!--
        Содержимое здесь будет показано только модераторам
        (за исключением пользователей, которые также являются администраторами).
    -->
<xf:else />
    <!--
        Содержимое здесь будет показано всем,
        кто не является администратором или модератором.
    -->
</xf:if>
Как видите, после выполнения условия остальная часть оператора if игнорируется. (В этом случае, если пользователь является администратором, запускается верхний раздел xf:if, но затем остальная часть оператора if игнорируется.)
Тег for-each
Тег for-each позволяет вам перебирать массив элементов, печатая блок HTML для каждого элемента.
<xf:set var="$names" value="{{ ['Patrick', 'Theresa', 'Kimball', 'Wayne', 'Grace'] }}" />

<xf:foreach loop="$names" key="$key" value="$name" i="$i">
    <p>Привет, {$name}. Это имя под номером {$i}. Ключ массива этого элемента: {$key}</p>
</xf:foreach>
Для каждого тега используются следующие атрибуты:
loop— Массив для обхода.key— Имя переменной для использования в цикле для получения ключа текущего элемента массива. Может быть целым числом (обычный массив) или строкой (ассоциативный массив).value— Имя переменной для использования в цикле, содержащее текущий элемент массива.i— Имя переменной для использования в цикле, содержащее текущий индекс.istart— Позволяет установить начальное значение для i (0 по умолчанию).if— Условие отображения блока HTML. Аналогично тому, если бы внутри тега foreach был расположен if.
Пример вывода
Привет, Patrick. Это имя под номером 1. Ключ массива этого элемента: 0
Привет, Theresa. Это имя под номером 2. Ключ массива этого элемента: 1
Привет, Kimball. Это имя под номером 3. Ключ массива этого элемента: 2
Привет, Wayne. Это имя под номером 4. Ключ массива этого элемента: 3
Привет, Grace. Это имя под номером 5. Ключ массива этого элемента: 4
Теги шаблонов
Тег avatar
Вставляет аватар пользователя на страницу.
<xf:avatar user="{$xf.visitor}" size="o" canonical="true" />
Тег аватара принимает следующие атрибуты:
user— Объект пользователя XenForo, для которого создается аватар.size— Размер создаваемого изображения. (Смотрите размеры изображения).canonical— Использовать ли полный URL-адрес, оптимизированный для SEO. Это значение соблюдается только для аватаровcustom.notooltip— Должна ли быть отключена всплывающая подсказка, отображаемая при наведении курсора на аватар.forcetype— Может использоваться для принудительного получения аватаровgravatarилиcustom, задав значение любого из них.defaultname— Имя пользователя, которое будет использоваться, если атрибутuserсодержит недопустимого пользователя.
Размеры изображения
Если указан аватар недопустимого размера, код вернется к размеру ‘s‘.
o—384pxh—384pxl—192pxm—96pxs—48px
Тег breadcrumb
Изменяет хлебные крошки страницы.
<xf:breadcrumb href="{{ link('my_page') }}">{{ phrase('my_page_name') }}</xf:breadcrumb>
Тег хлебной крошки принимает следующие атрибуты:
href— Ссылка, которую нужно установить для последнего элемента в хлебных крошках.
Значение тега можно использовать для установки имени последнего элемента в строке навигации.
Альтернативные варианты использования
<xf:breadcrumb source="$category.getBreadcrumbs(false)" />
вы также можете программно определить свою собственную навигационную цепочку, вызвав свою функцию в атрибуте source тега хлебной крошки.
Параметр source по существу принимает массив объектов с атрибутами href и value (многомерный массив), где каждый объект является элементом навигации.
Note
Если вы хотите изменить корневую цепочку навигации, вы можете изменить параметр «Корневая цепочка навигации» в разделе параметров «Основная информация».
Тег button
Добавляет элемент кнопки с соответствующими классами и, при необходимости, иконку.
<xf:button icon="save"></xf:button>
Тег кнопки принимает следующие атрибуты:
icon— Класс иконки, применяемый к кнопке. (Смотрите иконки кнопок)
Иконки кнопки
По умолчанию кнопки XenForo поддерживают следующие иконки (созданные с помощью CSS):
addconfirmwriteimportexportdownloaddisableeditsavereplyquotepurchasepaymentconvertsearchsortuploadattachloginrateconfigrefreshtranslatevoteresulthistorycancelpreviewconversationboltlistprevnextmarkReadnotificationsOnnotificationsOffmergemovecopyapproveunapprovedeleteundeletestickunsticklockunlock
Тег callback
Выполняет метод обратного вызова PHP.
<xf:callback class="VendorAddonClass" method="getX" params="['abc']"></xf:callback>
Тег обратного вызова принимает следующие атрибуты:
class— Класс (из корневого пространства имен), содержащий запускаемый метод.method— Метод для запуска. (Смотрите методы обратного вызова)params— Массив параметров, передаваемых методу.
Методы обратного вызова
Чтобы метод считался методом обратного вызова, он должен быть назван соответствующим образом, иначе будет выдана ошибка ‘callback_method_x_does_not_appear_to_indicate_read_only‘. Чтобы он считался доступным только для чтения, имя метода должно начинаться с одного из следующих префиксов:
arecancountdatadisplaydoesexistsfetchfilterfindgethasispluckprintrenderreturnshowtotalvalidateverifyview
Тег CSS
Подключает файл шаблона CSS или LESS.
<xf:css src="mycss_file.css" />
Тег CSS принимает следующие атрибуты:
src— Файл шаблона CSS или LESS для включения.
Альтернативные варианты использования
<xf:css>
html, body {
 font-family: "Roboto", sans-serif;
}
</xf:css>
Если тег CSS не пустой, все в теге будет преобразовано во встроенный CSS.
Дальнейшие примечания
Забудьте о подключении [CSS] через файлы. Скопируйте и вставьте его в новые шаблоны.
Крис Д., разработчик XenForo Источник: https://xenforo.com/community/threads/including-external-library-js-and-css.136153/post-1185631
Тег JS
Подключает файл JavaScript.
<xf:js src="myaddon/vendor/scripts/myjs_file.js" />
Тег JS принимает следующие атрибуты:
src— Файл JS для включения в шаблон.prod— Файл JS для включения в шаблон, только для режима продакшена.dev— Файл JS для включения в шаблон, только для режима разработки.min— Включать или не включать уменьшенную версию файла. (Заменяет.jsна.min.js) — Соблюдается только в продакшен-режиме.addon— Следует ли использовать URL-адрес JS для разработки. — Соблюдается только в режиме разработки.
Warning
Атрибут src нельзя использовать вместе с тегами prod или dev.
Альтернативные варианты использования
<xf:js>
alert("Я знаю, правда ранит. На самом деле это биологически основано.");
</xf:js>
Если тег JS не пуст, все в теге будет преобразовано во встроенный JS.
Дальнейшие примечания
Файлы JavaScript обслуживаются относительно каталога /js. Хотя это не рекомендуется, вы также можете включать в этот тег внешние ресурсы.
Хороший пример этого тега — шаблон editor.
Тег set
Тег set позволяет вам создать ссылку на другую переменную или создать новую. вы должны использовать тег set везде, где вы используете переменную в языке программирования.
<xf:set var="$visitor" value="{$xf.visitor}" />
Warning
Не используйте тег Set для группы элементов, которые вы хотите использовать в нескольких шаблонах, вместо этого следует использовать тег макроса.
Warning
Имя переменной (атрибут var) должно начинаться с символа $.
Тег set принимает следующие атрибуты:
var— Имя переменной, которую вы хотите определить (по сути, псевдоним).value— Переменная, на которую нужно ссылаться, или значение переменной.
Альтернативные варианты использования
<xf:set var="$myVariableName">
Мое значение переменной!
Это может быть обратный вызов или просто группа фраз.
</xf:set>
Если атрибут value не указан и тег не пуст, значение переменной будет установлено равным содержимому тега.
Warning
Когда вы используете тег Set в этой форме, значение будет экранировано, и результирующее значение будет строкой.
Атрибут value, хотя он не поддерживает HTML или HTML-подобные теги, не имеет этого ограничения.
Тег Likes
Отображает количество лайков посту и нескольких пользователей, которым понравился пост.
<xf:likes content="{$post}" url="" />
Тег лайков принимает следующие атрибуты:
content— СущностьXFEntityPostилиXFEntityProfilePost, для которой отображается текст «Нравится».url— URL-адрес, отображаемый при нажатии на текст «Нравится».
Формат
Вы, лиссабон, эхо и еще 2 человека
Формат [👍 abc и x других] (где 👍 «палец вверх» обозначает иконку «нравится», а abc обозначает имена трех последних пользователей, которым понравился пост).
Смотрите Секционные теги.
Тег SideNav
Смотрите Секционные теги.
Тег Title
Устанавливает заголовок страницы как на странице в теге h1, так и во вкладке браузера.
<xf:title>{{ phrase('my_page_title') }}</xf:title>
Дальнейшие примечания
Хотя заголовок, конечно, можно жестко запрограммировать, настоятельно рекомендуется использовать фразу как для интернационализации, так и для дополнительной настройки со стороны администратора сайта.
Тег widget
Подключает виджет на страницу или добавляет виджет в позицию виджета.
<xf:widget key="widget_name" />
Тег виджета принимает следующие атрибуты:
key— Ключ виджета, как определено в настройках виджета.position— Если установлено, изменяет позицию, в которой будет отображаться виджет.class— Не путать с классом HTML, это класс PHP, содержащий определение виджета.title— Когда используется атрибутclass, вы можете использовать атрибутtitleдля установки заголовка виджета.- вы также можете предоставить параметры, специфичные для виджета, в качестве атрибутов, когда используется атрибут
class.
Warning
Тег class не может использоваться вместе с тегом key.
Тег UserActivity
Отображает статус пользователя с точки зрения его последнего действия и времени его совершения.
<xf:useractivity user="{$xf.visitor}" />
Тег UserActivity принимает следующие атрибуты:
user— пользователь, статус которого будет отображен.
Формат
Просмотр страницы Последние файлы дела · 4 минуты назад
Формат: [Название действия] · [Время]
Отображает баннеры пользователя в горизонтальном списке.
<xf:userbanners user="{$xf.visitor}" />
Тег UserBanners принимает следующие атрибуты:
user— Пользователь, баннеры которого будут отображены.
Пример

Пример результата тега UserBanners.
Тег UserBlurb
Отображает однострочную сводку профиля пользователя.
<xf:userblurb user="${xf.visitor}" />
Тег UserBlurb принимает следующие атрибуты:
user— Пользовательский объект XenForo для отображения аннотации.
Формат
Консультант ФБР · 43 · Из Соединенных Штатов Америки
Формат: [[Роль / Пользовательский заголовок] · Возраст · Местоположение]
Тег Username
Отображает имя пользователя, необязательно со всплывающей подсказкой.
<xf:username user="{$xf.visitor.username}" notooltip="true" />
Тег имени пользователя принимает следующие атрибуты:
user— Объект пользователя XenForo, имя которого будет отображено.notooltip— Нужно ли отключать всплывающую подсказку.href— Ссылка, по которой следует переходить при клике по имени пользователя.
Warning
Всплывающая подсказка не будет отображаться, если установлен href, так как он не будет работать и может вводить пользователей в заблуждение.
Тег UserTitle
Отображает звание пользователя.
<xf:usertitle user="{$xf.visitor}" />
Тег UserTitle принимает следующие атрибуты:
user— Объект пользователя XenForo, звание которого будет отображено.
Секционные теги
Все секционированные теги вызывают функцию modifySectionedHtml.
Элемент HTML, который они изменяют, — это просто имя тега. Таким образом, тег sidebar изменит HTML-код боковой панели и т. д.
Пример
<xf:sidebar>
 <h1>Моя магическая боковая панель!</h1>
</xf:sidebar>
Общие атрибуты
mode— Режим модификации. (Смотрите режимы модификации).
Режимы модификации
По умолчанию режим модификации — replace. (т.е. если атрибут не указан.)
prepend— Помещает содержимое тега в начало HTML элемента.append— Помещает содержимое тега в конец HTML-кода элемента.replace— Заменяет HTML-код элемента содержимым тега.
Давайте построим плагин
Для некоторых людей, застрять в разработке проекта это лучший способ получить знания, наша цель — научить вас разрабатывать плагины с нуля. Будьте готовы — это не пример, по типу ‘Hello World’. Это полноценный демо-плагин, который охватывает множество концепций XF2.
Плагин, который мы будем разрабатывать, позволит пользователям с соответствующим правом продвигать темы, такие темы мы отобразим на отдельной странице. Мы даже настроим процесс, который будет автоматически продвигать темы из выбранных форумов. Мы будем использовать роутинг, названный portal и в конечном итоге установим его в качестве роутинга главной страницы и сделаем вкладку «Home» активной при просмотре этой страницы.
Создание плагина
Идентификатор нашего плагина — Demo/Portal. Первое, что мы сделаем — создадим плагин. Для этого, нам нужно открыть командную строку/терминал, перейти в директорию с вашей установкой XF (где находится cmd.php), выполнить следующую команду и ответить на вопросы так же, как внизу:
$ php cmd.php xf-addon:create

Enter an ID for this add-on: Demo/Portal

Enter a title: Demo/Portal

Enter a version ID: 1000010

 Version string set to: 1.0.0 Alpha

Should this add-on be enabled? (y/n) y

Add-on created successfully. Should the addon.json file be written out to ../src/addons/Demo/Portal/addon.json? (y/n) y

The addon.json file was successfully written out to ../src/addons/Demo/Portal/addon.json

Does your add-on need a Setup file? (y/n) y

Does your Setup need to support running multiple steps? (y/n) y

The Setup.php file was successfully written out to ../src/addons/Demo/Portal/Setup.php
Плагин создан, вы можете найти его директорию в каталоге src/addons, также он отображается в списке установленных плагинов в АСР.
Один из созданных файлов — addon.json, сейчас он выглядит так:
{
    "title": "Demo - Portal",
    "version_string": "1.0.0 Alpha",
    "version_id": 1000010
}
Давайте расширим его немного:
{
    "title": "Demo - Portal",
    "description": "Add-on which will display featured threads on the forum home page.",
    "version_string": "1.0.0 Alpha",
    "version_id": 1000010,
    "dev": "You!",
    "icon": "fa-code"
}
Это всё ещё довольно базовый вариант, но мы добавили описание, имя разработчика и иконку. Иконку можно указать в виде путя к файлу (относительно корня плагина) или имя FontAwesome-иконки, как в примере выше.
Создание класса установки
Собственно, класс уже создан и записан в файл Setup.php, но сейчас он ничего не делает. Мы получили базовый скелет, который выглядит следующим образом:
<?php

namespace DemoPortal;

use XFDbSchemaAlter;
use XFDbSchemaCreate;

class Setup extends XFAddOnAbstractSetup
{
    use XFAddOnStepRunnerInstallTrait;
    use XFAddOnStepRunnerUpgradeTrait;
    use XFAddOnStepRunnerUninstallTrait;
}
Мы уже говорили немного о классе установки. Мы собираемся поделить процесс установки, обновления и удаления на отдельные шаги.
Трейты StepRunner предназначены для обработки процесса прохождения всех доступных шагов, всё что нам остается — создать эти самые шаги. Начнём с добавления кода, который создаст новый столбец в таблице xf_forum:
<?php

namespace DemoPortal;

use XFDbSchemaAlter;
use XFDbSchemaCreate;

class Setup extends XFAddOnAbstractSetup
{
    use XFAddOnStepRunnerInstallTrait;
    use XFAddOnStepRunnerUpgradeTrait;
    use XFAddOnStepRunnerUninstallTrait;

    public function installStep1()
    {
        $this->schemaManager()->alterTable('xf_forum', function(Alter $table)
        {
            $table->addColumn('demo_portal_auto_feature', 'tinyint')->setDefault(0);
        });
    }
}
Этот столбец будет добавлен в таблицу xf_forum для того, чтобы мы могли настроить автоматическое добавление тем в портал из определенных разделов. Название имеет большое значение; столбцы добавленные в стандартные таблицы XF должны иметь префикс. Это нужно для двух вещей. Во-первых, уменьшается риск конфликтов из-за повторяющихся имён столбцов. Во-вторых, это помогает определить к камому плагину относится столбец, в случае вощникновения проблем.
Пока мы здесь, можем добавить ещё немного кода в наш установщик. Для краткости, мы покажем вам новый код, вместо кода целого класса. Он должен находится под кодом метода installStep1():
public function installStep2()
{
    $this->schemaManager()->alterTable('xf_thread', function(Alter $table)
    {
        $table->addColumn('demo_portal_featured', 'tinyint')->setDefault(0);
    });
}
Этот шаг, как и шаг выше, добавит новый столбец, на этот раз в таблицу xf_thread.Мы будем использовать этот столбец в качестве кэшируемого значения, чтобы быстро определять добавлена тема в портал или нет, без необходимости выполнять дополнительные запросы или поиск по таблицу xf_demo_portal_featured_thread.
Кстати говоря, сейчас мы добавим эту таблицу. На этот раз прямо под installStep2():
public function installStep3()
{
    $this->schemaManager()->createTable('xf_demo_portal_featured_thread', function(Create $table)
    {
        $table->addColumn('thread_id', 'int');
        $table->addColumn('featured_date', 'int');
        $table->addPrimaryKey('thread_id');
    });
}
Этот шаг создаст новую таблицу. Эта таблица будет использоваться для ведения журнала всех тем, которые были добавлены в портал и когда они были добавлены.
Для таблиц мы применяем те же принципы именования. Единственное отличие в том, что все таблицы должны иметь префикс xf_. Это нужно для того, чтобы при выполнении чистой установки, XF удалил все таблицы с префиксом xf_, в том числе созданные плагинами.
Одна из вещей, про которую следует забыть при добавлении кода, изменяющего схему — ручное редактирование схемы. Вы можете выполнять шаги установкиобновления с помощью CLI команд. В этом случае выполните следующие команды:
$ php cmd.php xf-addon:install-step Demo/Portal 1
$ php cmd.php xf-addon:install-step Demo/Portal 2
$ php cmd.php xf-addon:install-step Demo/Portal 3
Расширение сущности XF:Forum
So far we’ve added a column to the xf_forum table, it’s now time to extend the Forum entity structure. We need to do this so that the entity knows about our new column, and so that data can be read from and written to it via the entity.
!!! note
The following steps will require Development mode to be enabled. Remember to set Demo/Portal as the defaultAddOn value in config.php.
The first step in this process is to create a «Code event listener». This can be done in the Admin CP under Development, click the «Code event listeners» link and click the «Add code event listener» button.
We need to listen to the entity_structure event. We will use this to modify the default forum entity structure to add our newly created demo_portal_auto_feature column.
In the «Event hint» field, we will enter the name of the class we’re extending, e.g. XFEntityForum. This will ensure our listener only executes on the forum entity.
For the «Execute callback» class enter DemoPortalListener and for the method enter forumEntityStructure.
It’s worth adding a description to explain what this listener is for, as this will help more easily identify the listener in the code event listener list. «Extends the XFEntityForum structure» should be sufficient. Finally, make sure the «Demo — Portal» add-on is selected.
Before we click «Save» we need to actually create the Listener class. So create a new file named Listener.php in src/addons/Demo/Portal. The contents of this file should be as follows, initially. We know the arguments this function requires from the documentation below the code event selector.
<?php

namespace DemoPortal;

use XFMvcEntityEntity;

class Listener
{
    public static function forumEntityStructure(XFMvcEntityManager $em, XFMvcEntityStructure &$structure)
    {

    }
}
Notice the use declaration between the namespace and class name. We will be referencing the class declared here more than once, so declaring it here does allow us to reference it by its much shorter alias, in this case, Entity.
This code won’t actually do anything yet, but now is a good time to save the code event listener, so go ahead and click the «Save» button.
Before we add some functional code to our new function, now might be a good time to see how the development output system works. Check out the new directories and files added to your add-on directory. Specifically there is a new JSON file in the _output/code_event_listeners directory, which should look like this:
{
    "event_id": "entity_structure",
    "execute_order": 10,
    "callback_class": "Demo\Portal\Listener",
    "callback_method": "forumEntityStructure",
    "active": true,
    "hint": "XF\Entity\Forum",
    "description": "Extends the XF\Entity\Forum structure"
}
Whenever changes are made to the listener this file will update automatically.
Right, let’s add some more code. Back inside the Listener class, add the following to the forumEntityStructure function:
$structure->columns['demo_portal_auto_feature'] = ['type' => Entity::BOOL, 'default' => false];
The forum entity is now aware of our new column, but there are a few more steps we should take care of first before we can begin to implement a way to actually start setting values on that column.
Расширение сущности XF:Thread
Again, as we have added a new column to the xf_thread table, we should make the Thread entity aware of that. This is very similar to what we did above.
Head back to «Add code event listener» and listen to entity_structure again. The «Event hint» this time will be XFEntityThread. We can use the same callback class as before (DemoPortalListener) but this time the method will be named threadEntityStructure. Add a description similar to before. Before saving, we should add the code, directly below the forumEntityStructure function:
public static function threadEntityStructure(XFMvcEntityManager $em, XFMvcEntityStructure &$structure)
{
    $structure->columns['demo_portal_featured'] = ['type' => Entity::BOOL, 'default' => false];
}
This code is almost identical to what we added to the forum entity structure; really the only difference is the column name. But, we do need to add something else. We should create an entity relation so that, later on, should we need to access the featured thread entity (which we create in the next section) we can do so easily with a finder query. Below the $structure->columns line add:
$structure->relations['FeaturedThread'] = [
    'entity' => 'DemoPortal:FeaturedThread',
    'type' => Entity::TO_ONE,
    'conditions' => 'thread_id',
    'primary' => true
];
See Relations for more information about relations. Hit «Save» to save the listener.
Создание новой сущности
Above in installStep3() we created a new table. We are going to need to create an entity to interact with and create new records in this table. Because this is a brand new entity we don’t need to do anything other than create the class inside src/addons/Demo/Portal/Entity/FeaturedThread.php, the skeleton for which will look like this:
<?php

namespace DemoPortalEntity;

use XFMvcEntityStructure;

class FeaturedThread extends XFMvcEntityEntity
{

}
We need to use this to define the entity structure which represents our new xf_demo_portal_featured_thread table which we created earlier. The structure for this entity should look like this:
public static function getStructure(Structure $structure)
{
    $structure->table = 'xf_demo_portal_featured_thread';
    $structure->shortName = 'DemoPortal:FeaturedThread';
    $structure->primaryKey = 'thread_id';
    $structure->columns = [
        'thread_id' => ['type' => self::UINT, 'required' => true],
        'featured_date' => ['type' => self::UINT, 'default' => time()]
    ];
    $structure->getters = [];
    $structure->relations = [
        'Thread' => [
            'entity' => 'XF:Thread',
            'type' => self::TO_ONE,
            'conditions' => 'thread_id',
            'primary' => true
        ],
    ];

    return $structure;
}
The list of columns is probably self explanatory based on the MySQL we wrote earlier to create the table. The relations includes a Thread relation, which will allow us to get the related thread entity record (and even the thread entity relations) from this entity.
Изменение формы редактирования форума
We now need a way to modify the forum_edit template to add a new checkbox there which can ultimately write back to the new column we have now created. We’ll do this by creating a template modification. This is done from the Admin CP under Appearance and then click Template modifications. Click the «Admin» tab followed by the «Add template modification» button.
In the «Template» field, type «forum_edit». This is the template we need to modify.
In the «Modification key» field, type «demo_portal_forum_edit». This is a unique key which identifies your template modification. The preferred convention for this is, at minimum, to mention the add-on followed by the template name being modified.
The «Description» field should contain some text to help you identify the purpose of this modification when looking down the template modifications list. Something like «Adds auto feature checkbox to the forum_edit template» should suffice.
When you entered the template name in the «Template» field, you may notice that a preview of the template contents was displayed. We need to use this to identify the preferred place for our checkbox. While viewing the forum edit page, you may notice there’s a series of checkboxes and this looks like a reasonable location.
The simplest way to place a checkbox in this section is to do a simple replacement on the top checkbox, so in the «Find» field add:
<xf:option name="allow_posting"
And in the replace field:
<xf:option name="demo_portal_auto_feature" selected="$forum.demo_portal_auto_feature"
    label="Automatically feature threads in this forum"
    hint="If selected, any new threads posted in this forum will be automatically featured." />
$0
We don’t need to worry about creating phrases, yet, we can pick those up later. Notice that the name attribute matches the name of the column we created earlier, and more significantly, the checked state of the checkbox row also reads the newly added column from the forum entity.
When we save the template modification later, if the contents of the find field matches any part of the template then it will be replaced with the contents of the replace field. We are not actually removing what we have matched because the $0 in the replace field is re-inserting the matched text.
We can use the «Test» button to check the replacement is working as expected. When the test button is clicked, an overlay with the modified template will appear. If all goes well, a green area should be highlighted with the new code we want to add.
!!! note
This is a fairly simple replacement. For more advanced matching, you can also use the «Regular expression» type. A detailed explanation of working with regular expressions is beyond the scope for this guide, but there are lots of resources online which may help.
Finally, click save to save your template modification. If all has gone well, when you return to the template modifications list, you will see the log summary is displaying 1 / 0 / 0 therefore indicating that the modification successfully applied one time. An even better indicator that it has worked as planned is to go to the «Nodes» page listed under «Forums» in the Admin CP, and edit an existing forum. Our newly added template modification should now appear.
Расширение процесса сохранения XF:Forum
We have our column, we have a UI to pass an input to that column, now we have to handle saving data to that column. We will do this by extending the Forum controller and extending a special method which is called when a node and its data are saved. First, let’s create a «Class extension» which can be found under the «Development» entry in the Admin CP. Click «Add class extension».
Here we need to specify a «Base class name» which is the name of the class we are extending, which in this case will be XFAdminControllerForum. And we need to specify a «Extension class name» which is the class which will extend the base class. Enter this as DemoPortalXFAdminControllerForum. We should create that class before clicking Save.
Create a new file in src/addons/Demo/Portal/XF/Admin/Controller named Forum.php. This might seem like quite a long path, but we recommend a path like this for extended classes. It enables you to more easily identify the files that represent extended classes by virtue of the fact that they are in a directory of the same name as the extended «add-on» ID (in this case XF). It also makes it clear exactly which class has been extended as the directory structure follows the same path as the default class. The contents of the file should, for now, look like this:
<?php

namespace DemoPortalXFAdminController;

class Forum extends XFCP_Forum
{

}
See Extending classes and Type hinting for more information.
Click save to save the Class extension. Now we can add some code. The particular method we need to extend is a protected function called saveTypeData. When extending any existing method in any class, it is important to inspect the original method for a couple of reasons. The first being we want to make sure the arguments we use in the extended method, match that of the method we’re extending. The second being that we need to know what this method actually does. For example, should the method be returning something of a particular type, or a certain object? This is certainly the case in most controller actions as we mentioned in the Modifying a controller action reply (properly) section. However, although this method is within a controller, it isn’t actually a controller action itself. In fact, this particular method is a «void» method; it isn’t expected to return anything. However, we should always ensure we call the parent method in our extended method so let’s just add the new method itself, without the new code we need to add:
protected function saveTypeData(FormAction $form, XFEntityNode $node, XFEntityAbstractNode $data)
{
    parent::saveTypeData($form, $node, $data);
}
!!! Warning
This particular method’s argument list assumes that we have a use declaration which aliases the full XFMvcFormAction class to simply FormAction. You will therefore need to add that use declaration yourself. Add use XFMvcFormAction; between the namespace and class lines.
So, right now, we’ve extended that method, and our extension should be called, but right now it isn’t doing anything other than calling its parent method. We now need to get the value of the input from the forum edit page and apply that to the $data entity (which in this case is the Forum entity).
protected function saveTypeData(FormAction $form, XFEntityNode $node, XFEntityAbstractNode $data)
{
    parent::saveTypeData($form, $node, $data);

    $form->setup(function() use ($data)
    {
        $data->demo_portal_auto_feature = $this->filter('demo_portal_auto_feature', 'bool');
    });
}
Using the FormAction object allows us to have various extension points into the process that runs during the course of a typical form submission. It isn’t available for all controller actions. It is much more prevalent in the Admin CP, for example, which often follow a simple CRUD model (Create, Read, Update, Delete). A lot of other processes within XF happen inside a service object, which usually has specific extension points related to the service that is running. This particular usage of the FormAction object is somewhat different to what you would usually encounter. Saving a node is a somewhat different process, because as well as working with the node entity, you’ll also be working with an associated type of node, e.g. a forum entity. We do have access to the form action object in this method, though, so we should use it. We’ve used it here to add a specific behaviour to the «setup» phase of the process. Namely, when the FormAction object’s run() method is called, it will run through the various phases in a specific order. It doesn’t matter which order those behaviors were added to the object in, they will still run in the order setup, validate, apply, complete.
The code we added above lets us set our demo_portal_auto_feature column in the forum entity to whatever value is stored for the demo_portal_auto_feature input which we added to the forum edit page. It should now be possible to test that all of this works. Simply edit a forum of your choice and check the checkbox. You should be able to observe two things. First, when you go back into edit that forum, the checkbox should now be checked. Second, if you look in the xf_forum table for the forum you just edited, the demo_portal_auto_feature field should now be set to 1. Keep this value enabled for this forum, as we will eventually be automatically featuring threads from that forum.
Настройка потока, которая будет отображаться автоматически
We’ve added a new column to the forum entity which will allow us to automatically feature a thread when it is newly created in this forum, so now it’s time to add the code which will do this.
In XF2, we make heavy use of Service objects. These typically take a «setup and go» type approach; you setup your configuration and then call a method to complete the action. We use a service object to setup and perform the thread creation, so this is a perfect place to add the code we need. It all starts with another class extension, so go to the «Add class extension» page.
This time, the base class will be XFServiceThreadCreator and the extension class will be DemoPortalXFServiceThreadCreator and, as usual, this new class will look something like the code below. Create that code in the path src/addons/Demo/Portal/XF/Service/Thread/Creator.php then click «Save» to create the extension.
<?php

namespace DemoPortalXFServiceThread;

class Creator extends XFCP_Creator
{

}
While we’re here we will also create another extension. The base will be XFPubControllerForum and the extension class will be DemoPortalXFPubControllerForum. Creating the following code in the path src/addons/Demo/Portal/XF/Pub/Controller/Forum.php and click «Save»:
<?php

namespace DemoPortalXFPubController;

class Forum extends XFCP_Forum
{

}
We’re ultimately going to extend the _save() method in our extended thread creator object so we can feature our thread after it has been created. To fit in with the «setup and go» approach, we will create a method which can be used to indicate whether the thread should be created as featured, or not. For this, we need two things; a class property to store the value (it defaults to null) and a public method to allow that property to be set.
protected $featureThread;

public function setFeatureThread($featureThread)
{
    $this->featureThread = $featureThread;
}
Going back to our newly extended forum controller, we will now extend the method that sets up the creator service, and opt in to featuring if the forum entity has the necessary value set. Remember, before extending a method, we need to know what it is expected to return (if anything), and ensure we call the parent method. If the parent method does return something, then it is this which we should return after our code has finished. The setupThreadCreate() method in this case returns the set up creator service, so we will start this off as follows:
protected function setupThreadCreate(XFEntityForum $forum)
{
    /** @var DemoPortalXFServiceThreadCreator $creator */
    $creator = parent::setupThreadCreate($forum);

    return $creator;
}
As expected, this doesn’t actually do anything; the extended code is called, but all it does is return whatever was returned by the parent call. We should now modify the $creator to set up featuring if it applies to the forum we’re currently working with.
In between the $creator line and the return line, add:
if ($forum->demo_portal_auto_feature)
{
    $creator->setFeatureThread(true);
}
We can now add the _save() method to the extended creator class:
protected function _save()
{
    $thread = parent::_save();

    return $thread;
}
To make sure this thread gets featured, in between the $thread line and the return line we just need to add:
if ($this->featureThread && $thread->discussion_state == 'visible')
{
    /** @var DemoPortalEntityFeaturedThread $featuredThread */
    $featuredThread = $thread->getRelationOrDefault('FeaturedThread');
    $featuredThread->save();

    $thread->fastUpdate('demo_portal_featured', true);
}
Because we earlier created the FeaturedThread relation on the thread entity, we can actually use that relation for creation too! There is a method named getRelationOrDefault() which we use here. This will see if that relation actually returns an existing record, and if it doesn’t, it will create the entity and set it up with any default values even the thread ID! This means we actually need to do little more than to get the default relation and save it to insert it into the database.
Additionally, we should set the demo_portal_featured field to true. Because the thread entity has already been saved (when the original class saved the entity) we can use the fastUpdate() method to quickly update that field.
We now need to try this all out and make sure it works. Go to the forum which you enabled the demo_portal_auto_feature option on earlier, and create a new thread. The only way to tell if it is working right now is to check the xf_demo_portal_featured_thread table and in doing that we should see a new record in there!
Создание страницы портала
There’s still a considerable amount of work to do before we’re finished, but now we have the ability to feature threads, it certainly would be nice if we could display them somewhere, so let’s start creating our portal page.
To do this we need a new public route. Go to the Admin CP and under «Development» click «Routes» then click «Add route: Public». We’re going to keep this quite simple, for now. The route prefix is going to be «portal», the section context is going to be «home» and the controller is going to be «DemoPortal:Portal».
We should now create that controller at the path src/addons/Demo/Portal/Pub/Controller/Portal.php with the following basic contents:
<?php

namespace DemoPortalPubController;

class Portal extends XFPubControllerAbstractController
{

}
We want our portal to be displayed to people when they visit the index.php?portal page. This URL doesn’t have an «action» part — just the route prefix we just created. With that in mind, the code we need to add to display the portal page, should be in the actionIndex() method. The basic code we will need in that is:
public function actionIndex()
{
    $viewParams = [];
    return $this->view('DemoPortal:View', 'demo_portal_view', $viewParams);
}
Now, this won’t exactly work, yet, because we haven’t created the template, yet, but this is enough, for now, to at least demonstrate our route and controller are talking to each other. So visiting index.php?portal should at the very least display a ‘Template error’.
As was mentioned in the View reply section, the first argument is a view class, but we don’t need to actually create this class. This class could be extended by other add-ons, if necessary, even if it doesn’t exist. The second argument is the template, which we need to create now in the path src/addons/Demo/Portal/_output/templates/public/demo_portal_view.html. That template, for now, should simply contain the following:
<xf:title>Portal</xf:title>
If we now visit the portal page, the template error will be gone, and although we will still have a fairly blank looking page, it will at least now have the title «Portal».
Now, it’s time to start adding the code which will display a list of featured threads. The first step to this is to create a repository for some of our common base finder queries. So, create a new file in the path src/addons/Demo/Portal/Repository/FeaturedThread.php and add the following code:
<?php

namespace DemoPortalRepository;

use XFMvcEntityFinder;
use XFMvcEntityRepository;

class FeaturedThread extends Repository
{
    /**
     * @return Finder
     */
    public function findFeaturedThreadsForPortalView()
    {
        $visitor = XF::visitor();

        $finder = $this->finder('DemoPortal:FeaturedThread');
        $finder
            ->setDefaultOrder('featured_date', 'DESC')
            ->with('Thread', true)
            ->with('Thread.User')
            ->with('Thread.Forum', true)
            ->with('Thread.Forum.Node.Permissions|' . $visitor->permission_combination_id)
            ->with('Thread.FirstPost', true)
            ->with('Thread.FirstPost.User')
            ->where('Thread.discussion_type', '<>', 'redirect')
            ->where('Thread.discussion_state', 'visible');

        return $finder;
    }
}
What we’re doing here is using the finder to query for all featured threads, in reverse featured_date order, and joining to the xf_thread table and from that table joining to the xf_user table for the thread creator, xf_forum table, the xf_post table and from there joining to the xf_user table again for the post creator. We’ve asserted that the thread, forum and first post must exist by specifying true for that argument so these will be performed as INNER JOIN whereas the user queries will be performed with a LEFT JOIN. It’s possible that the author of some threads and posts may not exist (for example if they were posted automatically by the RSS feeder system, or posted by guests).
We also have a special join here that fetches the current visitor’s permissions along with the query. This will reduce the number of queries needed to render the portal page, as we will be doing a number of things (later) to only display featured threads to users who have permission to view them.
This doesn’t return the results of this query. This returns the finder object itself. This enables a clear extension point in case another add-on needs to extend our code, and also allows us to make further changes before fetching that data (such as for setting a limit/offset for pagination, or setting a different order).
Let’s now use that in our actionIndex() method inside our portal controller. Change the existing $viewParams = []; line to the following:
/** @var DemoPortalRepositoryFeaturedThread $repo */
$repo = $this->repository('DemoPortal:FeaturedThread');

$finder = $repo->findFeaturedThreadsForPortalView();

$viewParams = [
    'featuredThreads' => $finder->fetch()
];
At this stage, we’re not going to worry about modifying the base finder we’ve retrieved from the repo. Instead, let’s start to actually see some results, and update the demo_portal_view template as follows (after the <xf:title> tags):
<xf:if is="$featuredThreads is not empty"> <xf:foreach loop="$featuredThreads" value="$featuredThread"> <xf:macro name="thread_block" arg-thread="{$featuredThread.Thread}" arg-post="{$featuredThread.Thread.FirstPost}" arg-featuredThread="{$featuredThread}" /> </xf:foreach> <xf:else /> <div class="blockMessage">No threads have been featured yet.</div> </xf:if> <xf:macro name="thread_block" arg-thread="!" arg-post="!" arg-featuredThread="!"> <xf:css src="message.less" /> <div class="block"> <div class="block-container" data-xf-init="lightbox"> <h4 class="block-header"><a href="{{ link('threads', $thread) }}">{$thread.title}</a></h4> <div class="block-body"> <xf:macro name="message" arg-post="{$post}" arg-thread="{$thread}" arg-featuredThread="{$featuredThread}" /> </div> <div class="block-footer"> <a href="{{ link('threads', $thread) }}">Continue reading...</a> </div> </div> </div> </xf:macro> <xf:macro name="message" arg-post="!" arg-thread="!" arg-featuredThread="!"> <div class="message message--post message--simple"> <div class="message-inner"> <div class="message-cell message-cell--main"> <div class="message-content js-messageContent"> <div class="message-attribution"> <div class="contentRow contentRow--alignMiddle"> <div class="contentRow-figure"> <xf:avatar user="{$post.User}" size="xxs" defaultname="{$post.username}" href="" /> </div> <div class="contentRow-main contentRow-main--close"> <ul class="listInline listInline--bullet u-muted"> <li><xf:username user="{$thread.User}" /></li> <li><xf:date time="{$featuredThread.featured_date}" /></li> <li><a href="{{ link('forums', $thread.Forum) }}">{$thread.Forum.title}</a></li> <li>{{ phrase('replies:') }} {$thread.reply_count|number}</li> </ul> </div> </div> </div> <div class="message-userContent lbContainer js-lbContainer" data-lb-id="post-{$post.post_id}" data-lb-caption-desc="{{ $post.User ? $post.User.username : $post.username }} · {{ date_time($post.post_date) }}" > <blockquote class="message-body"> {{ bb_code($post.message, 'post', $post.User, { 'attachments': $post.attach_count ? $post.Attachments : [], 'viewAttachments': $thread.canViewAttachments() }) }} </blockquote> </div> </div> </div> </div> </div> </xf:macro>
Now, admittedly, there’s a lot going on here. Although it may look daunting, it’s mostly just markup to display our featured threads in a reasonable style. There’s a few things worth paying attention to, though.
We start off the template with a condition that reads <xf:if is="$featuredThreads is not empty">. This is to chceck that the object returned by the finder actually contains featured thread records. If it doesn’t, then we display an appropriate message.
If we do have some records, we need to loop through each to display it. For each record, we call a macro. Macros are reusable portions of template code which are self documenting (in that you see which arguments are supported) and maintain their own scope which cannot be polluted with the arguments in the template calling the macro; meaning that macros are only aware of the arguments that are explicitly passed in and the global $xf param.
The thread block macro displays the basic block for the featured thread, and then that calls another macro to display each message.
Создание пункта навигации
You may have spotted when setting up the route that we specified the section context as «home», and when you visited the portal page, the home tab was selected, or alternatively you may not have seen a home tab at all if a homePageUrl is not set in options. We want to use the default home tab rather than creating one ourselves and potentially having a duplicate tab.
To do this, we should use a code event listener to change the URL to our portal URL. In the Admin CP under Development click «Code event listeners» and click «Add code event listener». Listen to the event home_page_url, callback class will be DemoPortalListener again, and this time the method will be named homePageUrl.
The code for this new method should be fairly simple:
public static function homePageUrl(&$homePageUrl, XFMvcRouter $router)
{
    $homePageUrl = $router->buildLink('canonical:portal');
}
Finally, we should consider changing the index page route to our portal page. Go to Admin CP and under Setup click Options followed by «Basic board information». Change the «Index page route» option to portal/.
While you’re in the Admin CP, let’s see what happens now when you click on the Board title in the header. This should take you to your index page. All being well, that index page should now be your portal! In addition to that, the Home tab should be visible, and selected.
As an optional step, you may choose to add some additional navigation entries under the home tab. But, for now, let’s move on.
Manually featuring (or unfeaturing) threads
So, we can automatically feature new threads. What about manually featuring existing threads? Or manually featuring threads during creation where auto featuring is not supported? This will be a good way to get our current portal page looking a bit more busy.
To achieve this, we will add a template modification to a specific macro, and this macro is actually used during thread reply, thread edit and when creating a thread. This will involve extending the editor service and making changes to the existing code which handled the auto featuring.
First step then is a new template modification. So go to «Add template modification» (make sure the «Public» tab is selected on the «Template modifications» list). This time the template we are modifying is helper_thread_options, we’ll use demo_portal_helper_thread_options as the key and you can write a reasonable description. We can actually do a «Simple replacement» here so leave that radio selected and in the «Find» field add:
<xf:if is="$thread.canLockUnlock()">
In the «Replace» field add:
<xf:if is="($thread.isInsert() AND !$thread.Forum.demo_portal_auto_feature AND $thread.canFeatureUnfeature())
    OR ($thread.isUpdate() && $thread.canFeatureUnfeature())"
>
    <xf:option label="{{ phrase('demo_portal_featured') }}" name="featured" value="1" selected="{$thread.demo_portal_featured}">
        <xf:hint>{{ phrase('demo_portal_featured_hint') }}</xf:hint>
        <xf:afterhtml>
            <xf:hiddenval name="_xfSet[featured]" value="1" />
        </xf:afterhtml>
    </xf:option>
</xf:if>
$0
That condition is a little on the lengthy side, but it allows us to show the featured checkbox under two specific conditions: a) If the thread has not yet been created and the auto feature option is disabled for the forum and there is permission to feature or b) it’s an existing thread and there is permission to feature/unfeature.
A quick «Test» should show this additional code will be inserted just above the existing «Open» checkbox within the existing <xf:checkboxrow>. If that all looks good, click «Save».
We have had to use template code directly within the modification here, because including a template (like we did before) won’t work within an existing input or row tag in this way. We’ll also need to create the phrases now for the label and hint, because it won’t be possible to detect those later.
Under «Appearance» go to «Phrases» and click «Add phrase». Make sure your add-on is selected. The «Title» of the first phrase will be «demo_portal_featured» and the text will be simply «Featured». Click «Save and Exit». Click «Add phrase» again. The «Title» for the second phrase will be «demo_portal_featured_hint» and the text will be «Featured threads will appear on the Portal page.»
Back to the template code we just added to the modification; you may have noticed something. We have called a method on the thread entity, canFeatureUnfeature(), and this method does not exist, yet. We are going to use this eventually to do a permission check that will control whether a user can manually feature a thread or not.
To add this method, we need a new class extension for the XFEntityThread entity. So, do that now similar to how we’ve done it before. The extended class will be DemoPortalXFEntityThread so create that in the path src/addons/Demo/Portal/XF/Entity/Thread.php with the contents:
<?php

namespace DemoPortalXFEntity;

class Thread extends XFCP_Thread
{
    public function canFeatureUnfeature()
    {
        return true;
    }
}
Ok, so, we haven’t exactly done much here of value, yet. All the canFeatureUnfeature() method does is return true right now. Later on, we will implement some proper permissions and add them here.
To test this works so far, open one of the threads you previously featured, and select «Edit thread» from the tools menu. We should see the «Set thread status» checkbox row has the «Featured» checkbox we added, and it should be checked, indicating that this thread is indeed featured.
We can now move on to changing the thread editor service to look for this value and feature or unfeature accordingly. We are going to need two new class extensions for this. Go back to the «Add class extensions» page. The first one will have a base class of XFPubControllerThread and extension class of DemoPortalXFPubControllerThread. The second one will have a base class of XFServiceThreadEditor and an extension class of DemoPortalXFServiceThreadEditor.
The editor service is actually going to be very similar to the extended creator service we created earlier, so create that in the relevant location. Here is all of the code for the extended class:
<?php

namespace DemoPortalXFServiceThread;

class Editor extends XFCP_Editor
{
    protected $featureThread;

    public function setFeatureThread($featureThread)
    {
        $this->featureThread = $featureThread;
    }

    protected function _save()
    {
        $thread = parent::_save();

        if ($this->featureThread !== null && $thread->discussion_state == 'visible')
        {
            /** @var DemoPortalEntityFeaturedThread $featuredThread */
            $featuredThread = $thread->getRelationOrDefault('FeaturedThread', false);

            if ($this->featureThread)
            {
                if (!$featuredThread->exists())
                {
                    $featuredThread->save();
                    $thread->fastUpdate('demo_portal_featured', true);
                }
            }
            else
            {
                if ($featuredThread->exists())
                {
                    $featuredThread->delete();
                    $thread->fastUpdate('demo_portal_featured', false);
                }
            }
        }

        return $thread;
    }
}
This is a little bit more involved than the code in the creator service. For example, there may be situations where a thread is edited, and the user has no permission to edit the thread, and therefore we don’t show the checkboxes. In these cases, we do not want to automatically assume the thread should be unfeatured. As the class $featureThread property defaults to null we can use this so that essentially the property has three states. In this case null will mean «no change», true will mean we feature the thread and false will mean we unfeature it.
In the case of unfeaturing, we actually just delete the featured thread entity by calling the delete() method. In both cases we use the fastUpdate() method again to update the cached value in the thread entity to represent the curent featured state.
Before we finish the process of editing, we need to add code to our extended thread controller, and specifically extend the setupThreadEdit() method. The entire extended thread controller code will look like this:
<?php

namespace DemoPortalXFPubController;

class Thread extends XFCP_Thread
{
    public function setupThreadEdit(XFEntityThread $thread)
    {
        /** @var DemoPortalXFServiceThreadEditor $editor */
        $editor = parent::setupThreadEdit($thread);

        $canFeatureUnfeature = $thread->canFeatureUnfeature();
        if ($canFeatureUnfeature)
        {
            $editor->setFeatureThread($this->filter('featured', 'bool'));
        }

        return $editor;
    }
}
This should be enough to be able to edit a thread, and set the status to featured (or unfeatured). If you try this out now, you should be able to see threads appearing and disappearing from your portal page accordingly.
We need to extend another method in the thread controller to handle a situation whereby the thread status controls are shown on some thread reply forms, too.
We just need to add the following code below the setupThreadEdit() method we added above:
public function finalizeThreadReply(XFServiceThreadReplier $replier)
{
    parent::finalizeThreadReply($replier);

    $setOptions = $this->filter('_xfSet', 'array-bool');
    if ($setOptions)
    {
        $thread = $replier->getThread();

        if ($thread->canFeatureUnfeature() && isset($setOptions['featured']))
        {
            $replier->setFeatureThread($this->filter('featured', 'bool'));
        }
    }
}
Note that we haven’t actually returned anything in this method because it isn’t expected to return anything.
For the final step in manually featuring/unfeaturing a thread, we need to go back to the forum controller and slightly change our existing code so that if featuring isn’t automatic, we can handle it manually, instead. This should be fairly straight forward. Head into your extended forum controller, and replace this:
if ($forum->demo_portal_auto_feature)
{
    $creator->setFeatureThread(true);
}
With this:
if ($forum->demo_portal_auto_feature)
{
    $creator->setFeatureThread(true);
}
else
{
    $setOptions = $this->filter('_xfSet', 'array-bool');
    if ($setOptions)
    {
        $thread = $creator->getThread();

        if ($thread->canFeatureUnfeature() && isset($setOptions['featured']))
        {
            $creator->setFeatureThread($this->filter('featured', 'bool'));
        }
    }
}
This is mostly the same as we already had, for example, if the forum has auto featuring enabled then we just set the thread as featured, otherwise, we check to see if the checkbox is available and as we’ve done for the other cases, set that to whatever the checkbox state was.
We should now test creating 3 threads to ensure this is working as expected. The first in a forum with auto featuring enabled, to make sure that is still working, then in a forum without auto featuring enabled with the «Featured» checkbox checked, and again with it unchecked. Assuming that all works, let’s move on.
Улучшение страницы портала
So, the portal page looks reasonable, but we can do a bit better.
First we should adjust our code so we only display X featured threads, and we should also add some page navigation. At this point, if you haven’t already, it may be worth featuring some more threads so we can actually test the pagination!
To start, we need to go back to our portal controller, and add some code to the top of the actionIndex() method:
$page = $this->filterPage();
$perPage = 5;
The first line here is a special helper method to get the current page number. The second is how many items we are going to load per page. This would usually come from an option, but we will hard code this to 5 for now.
The next thing to do is to change this line:
$finder = $repo->findFeaturedThreadsForPortalView();
To this:
$finder = $repo->findFeaturedThreadsForPortalView()
    ->limitByPage($page, $perPage);
This changes our query so that it will limit by the page / per page values we defined above. This will automatically calculate the correct limit ($perPage) and offset (($page - 1) * $perPage) for the current page. Next, we need to pass a few more params into our view params so change:
$viewParams = [
    'featuredThreads' => $finder->fetch()
];
To:
$viewParams = [
    'featuredThreads' => $finder->fetch(),
    'total' => $finder->total(),
    'page' => $page,
    'perPage' => $perPage
];
To use display our page navigation, we need to know the total number of entries, which we can get from the finder using the total() method, the current page number and how many we are displaying per page.
If you head back on over to the portal, you will now see only 5 featured threads displayed. However, we need to now add the page navigation. So open up the demo_portal_view template and directly after the closing </xf:foreach> tag add the following:
<xf:pagenav page="{$page}" perpage="{$perPage}" total="{$total}" link="portal" wrapperclass="block" />
Reloading the portal page at this point, as long as you have more than 5 featured threads, you will now see page navigation at the bottom of the list of featured threads.
Something else that may be useful to help improve how this page looks is to add a sidebar or, more accurately, a widget position that displays in the sidebar.
Widget positions are added in the Admin CP under «Development». Go to the «Widget positions» page then click «Add widget position». Type a «Position ID» of demo_portal_view_sidebar, a «Title» of Demo portal view: Sidebar and an appropriate description. After making sure the position is enabled, and the correct add-on ID is selected, click «Save».
To add this position to the template, simply add the following below the <xf:title> tag:
<xf:widgetpos id="demo_portal_view_sidebar" position="sidebar" />
Of course we still won’t see a sidebar until we add some widgets to it. Widgets themselves are not assigned to add-ons, so the widgets you create for this position, if you wish to ship some configured widgets by default, will need to be added to the Setup class.
For the sake of simplicity, we’ll just duplicate the widgets that are currently assigned to the forum_list_sidebar position (by default). So, we’ll add those to a new installStep4() method into the Setup class:
public function installStep4()
{
    $this->createWidget('demo_portal_view_members_online', 'members_online', [
        'positions' => ['demo_portal_view_sidebar' => 10]
    ]);

    $this->createWidget('demo_portal_view_new_posts', 'new_posts', [
        'positions' => ['demo_portal_view_sidebar' => 20]
    ]);

    $this->createWidget('demo_portal_view_new_profile_posts', 'new_profile_posts', [
        'positions' => ['demo_portal_view_sidebar' => 30]
    ]);

    $this->createWidget('demo_portal_view_forum_statistics', 'forum_statistics', [
        'positions' => ['demo_portal_view_sidebar' => 40]
    ]);

    $this->createWidget('demo_portal_view_share_page', 'share_page', [
        'positions' => ['demo_portal_view_sidebar' => 50]
    ]);
}
And, of course, don’t forget to run this setup step for yourself:
!!! terminal
$ php cmd.php xf-addon:install-step Demo/Portal 4
Создание разрешений и оптимизация
Right now, we are displaying all featured threads in the portal, regardless of whether the visitor has permission to view them or not. This isn’t ideal; there may be use cases where you want to feature threads from certain restricted forums, and only have those visible by the users who can normally view that forum.
To do this, we need to change our code so that we «over-fetch» the number of records that we need to display, filter out any unviewable results, and then slice the resulting collection to the actual amount we want to display per page. This is somewhat easier than it sounds.
To start, go to the Portal controller, and change this line:
->limitByPage($page, $perPage);
To:
->limitByPage($page, $perPage * 3);
And below that, add:
$featuredThreads = $finder->fetch()
    ->filter(function(DemoPortalEntityFeaturedThread $featuredThread)
    {
        return ($featuredThread->Thread->canView());
    })
    ->slice(0, $perPage, true);
Finally change:
'featuredThreads' => $finder->fetch(),
To:
'featuredThreads' => $featuredThreads,
You may have spotted earlier in the demo_portal_view template that each post we render also specifies its attachments:
'attachments': $post.attach_count ? $post.Attachments : [],
Right now, this is going to generate an additional query for each post. So, we should instead try to do a single query for all of the posts we are displaying and add them to the posts in advance. It probably sounds more complicated than it is. Just add the below code beneath the ->slice(0, $perPage, true); line.
$threads = $featuredThreads->pluckNamed('Thread');
$posts = $threads->pluckNamed('FirstPost', 'first_post_id');

/** @var XFRepositoryAttachment $attachRepo */
$attachRepo = $this->repository('XF:Attachment');
$attachRepo->addAttachmentsToContent($posts, 'post');
We use the pluckNamed() method first to get a collection of threads, then again to get a collection of the posts (keyed by the post ID) from the threads. Once we have the posts, we can just pass them into a special method in the attachment repo, which performs a single query and «hydrates» the Attachments relation for each post.
The final permission related thing to finish up is to create a new permission to control who can feature / unfeature threads manually. To do this, in the Admin CP under «Development» click «Permission definitions» and click «Add permission». The «Permission group» will be «forum», «Permission ID» will be demoPortalFeature, «Title» should be Can feature / unfeature threads, set «Interface group» to Forum moderator permissions and after choosing an appropriate display order and ensuring your add-on is selected, click «Save».
To actually use this permission, we need to go back to our extended thread entity to modify the canFeatureUnfeature() method. Replace return true; with:
return XF::visitor()->hasNodePermission($this->node_id, 'demoPortalFeature');
At this point, because permissions do not have any default values, if you go to edit any thread, you should find the «Featured» checkbox is missing. But, if you go and give yourself that permission, the checkbox will come back. So, that should demonstrate the permission is working as expected!
Создание некоторых параметров
We currently display only 5 featured threads per page, but it would be nice to have the option to display more. Creating options is easy. Although not essential, we’ll first create a new option group and then add a new option to that group.
In the Admin CP under Setup then Options click the «Add option group» button. We’ll just call the «Group ID» demoPortal and give it a title of «Demo — Portal options». Give it an appropriate ̀»Description» and «Display order» and click «Save».
Now click «Add option». Set the «Option ID» to demoPortalFeaturedPerPage, «Title» to Featured threads per page, edit format to Spin box, «Data type» to Positive integer and «Default value» to 10. Click «Save».
To implement that, go back to the portal controller and change:
To:
$perPage = $this->options()->demoPortalFeaturedPerPage;
It’s probably not going to hurt to add another option. Perhaps another useful option would be to be able to change the default sort order from xf_demo_portal_featured_thread.feartured_date to xf_thread.post_date. Go back to the «Demo — Portal options» group, and click «Add option».
Set «Option ID» to demoPortalDefaultSort, «Title» to Default sort order and «Edit format» to Radio buttons. For the «Format parameters» set those as follows:
featured_date={{ phrase('demo_portal_featured_date') }}
post_date={{ phrase('demo_portal_post_date') }}
Finally set «Default value» to featured_date and click «Save».
We’ll need to create the phrases used for the radio button labels, similar to how we created the phrases earlier for the template modification.
Set the option value to «Post date».
Strictly speaking, we could just update our repository method to use the new option directly, however, it might be worth looking at how custom finder methods work. Create a new file in the path src/addons/Demo/Portal/Finder/FeaturedThread.php with the contents:
<?php

namespace DemoPortalFinder;

use XFMvcEntityFinder;

class FeaturedThread extends Finder
{
    public function applyFeaturedOrder($direction = 'ASC')
    {
        $options = XF::options();

        if ($options->demoPortalDefaultSort == 'featured_date')
        {
            $this->setDefaultOrder('featured_date', $direction);
        }
        else
        {
            $this->setDefaultOrder('Thread.post_date', $direction);
        }

        return $this;
    }
}
As you can see, all we’ve done here is create a fairly basic class which extends the XF Finder object and a simple method which looks at the value of our option, and applies the appropriate default order. We can now update our repository method to use this instead.
Inside our featured thread repository, find:
->setDefaultOrder('featured_date', 'DESC')
And change to:
->applyFeaturedOrder('DESC')
Finally, it probably makes sense to update our portal view to display the appropriate time stamp — either the featured date or the post date, depending on our option value.
In the demo_portal_view template change:
<li><xf:date time="{$featuredThread.featured_date}" /></li>
To:
<li>
    <xf:if is="$xf.options.demoPortalDefaultSort == 'featured_date'">
        <xf:date time="{$featuredThread.featured_date}" />
    <xf:else />
        <xf:date time="{$thread.post_date}" />
    </xf:if>
</li>
Не возможно изменить видимость
To approach this, we are going to need to modify the Thread entity again but this time we’ll be doing that with the entity_post_save event. As we mentioned in The Entity life cycle, the _postSave() method is where actions can be performed as a result of an entity being inserted or updated. Initially we will be unfeaturing a thread when that thread is no longer visible.
So, head back into the «Add code event listeners» page, and this time listen to the entity_post_save event. The event hint this time will be XFEntityThread. For the execute callback, we will use the same class as we did before (DemoPortalListener) but we will add a new method here named threadEntityPostSave. Let’s add that method now so it’s there when we save the listener:
public static function threadEntityPostSave(XFMvcEntityEntity $entity)
{

}
Click «Save» to save the listener.
The contents of this function are fairly simple, let’s look at that:
if ($entity->isUpdate())
{
    $visibilityChange = $entity->isStateChanged('discussion_state', 'visible');
    if ($visibilityChange == 'leave')
    {
        $featuredThread = $entity->FeaturedThread;
        if ($featuredThread)
        {
            $featuredThread->delete();
            $entity->fastUpdate('demo_portal_featured', false);
        }
    }
}
We’ve unfeatured threads before, but this time we want to make that conditional on the state of the thread. We can detect state changes using the isStateChanged method. This will return either enter or leave for the column name and value passed in. For example, if the discussion_state changes from visible to deleted then the method will return leave in the example above.
Once we have detected that we are «leaving» the visible state, we can then just make sure we have a featured thread relation, and delete it, and update the cached value.
This would only cover the situation whereby the thread is soft deleted or sent to the approval queue. We also need to cover the situation where the thread is permanently deleted.
For this, we need another listener, this time for the entity_post_delete event. So, add that using the same callback class, and this time a method name of threadEntityPostDelete. Add the following code to the listener class:
public static function threadEntityPostDelete(XFMvcEntityEntity $entity)
{
    $featuredThread = $entity->FeaturedThread;
    if ($featuredThread)
    {
        $featuredThread->delete();
    }
}
After clicking «Save» to save the listener, it will be worth giving this a test. To test this, you might actually be better off keeping an eye on the xf_demo_portal_featured_thread table, as so far the code will already not display non-visible threads, but it’s always important not to leave orphaned data. All being well, we’re very nearly finished…
Последние штрихи
Speaking of orphaned data, we should tidy up the database whenever the add-on is uninstalled. We can do this in the Setup class we created earlier.
We’re going to create 3 new methods which correspond to our first 3 install steps:
public function uninstallStep1()
{
    $this->schemaManager()->alterTable('xf_forum', function(Alter $table)
    {
        $table->dropColumns('demo_portal_auto_feature');
    });
}

public function uninstallStep2()
{
    $this->schemaManager()->alterTable('xf_thread', function(Alter $table)
    {
        $table->dropColumns('demo_portal_featured');
    });
}

public function uninstallStep3()
{
    $this->schemaManager()->dropTable('xf_demo_portal_featured_thread');
}
We don’t have to create an uninstall step to remove the widgets as they will be removed automatically when the widget positions are removed. The same is true for any other data we created and associated to the add-on — it will be removed automatically on uninstall.
Сборка плагина
The final step for any add-on, is releasing it! This involves extracting the XML files from the database (which are shipped in the package and used for installation), calculating the hash of each file and adding it to our hashes.json and packaging only the relevant files up into a ZIP file.
Thankfully, this can be done with a single CLI command! Just execute the command below:
!!! terminal
$ php cmd.php xf-addon:build-release Demo/Portal
**Performing add-on export.**

**Exporting data for Demo - Portal to ../src/addons/Demo/Portal/_data.**

10/10 [============================] 100%

**Written successfully.**

**Building release ZIP.**

**Writing release ZIP to ../src/addons/Demo/Portal/_releases.**

**Release written successfully.**