Don’t know how to set a Static IP address and hostname in FreeBSD 12? We can help you.
Today, we are going to see how our Support Engineers set hostname and static IP address on FreeBSD 12.
Set Static IP and Hostname in FreeBSD 12

Initially, we need to make sure that the IP address assigns to an interface and the IP configuration includes in /etc/rc.conf, to have a persistent IP address.
Please keep in mind that a FreeBSD network interface identifier uses the drive name followed by a number as shown below:
# ifconfig em0: flags=8843 metric 0 mtu 1500 options=81009b ether 08:00:27:12:6b:98 inet 10.0.0.11 netmask 0xffffff00 broadcast 10.0.0.255 media: Ethernet autoselect (1000baseT ) status: active nd6 options=29 lo0: flags=8049 metric 0 mtu 16384 options=680003 inet6 ::1 prefixlen 128 inet6 fe80::1%lo0 prefixlen 64 scopeid 0x2 inet 127.0.0.1 netmask 0xff000000 groups: lo nd6 options=21For example:
- Set Server static hostname – freebsd.example.com
- Set interface IP Address – 192.168.13.4/24
- Change gateway of interface to 192.168.13.1
Given below are the steps to follow:
- Configure network settings in FreeBSD
- Set hostname in FreeBSD 12
- Set Static IP address in FreeBSD 12
- Establish a DHCP Address
Let us now look into it in detail.
Configure network settings in FreeBSD
Network configurations for FreeBSD are stored in the system configuration file.
The path to this file is /etc/rc.conf, this is where the server’s host name as well as network interface configurations are set.
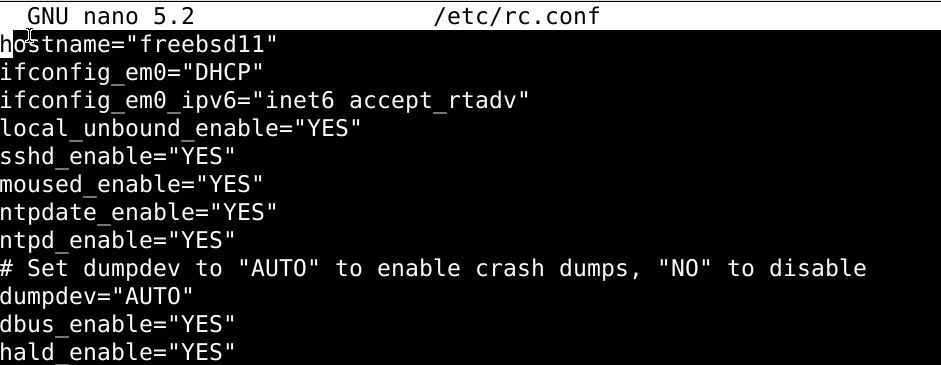
Given below is an example for the rc.conf file used by FreeBSD:
hostname=”freebsd12″
ifconfig_em0=”DHCP”
ifconfig_em0_ipv6=”inet6 accept_rtadv”
sshd_enable=”YES”
# Set dumpdev to “AUTO” to enable crash dumps, “NO” to disable
dumpdev=”AUTO”- The hostname value sets the host name of the FreeBSD server
- ifconfig_em0 value sets the network configurations for the em0 network interface
- ifconfig_em0_ipv6 value is the IPv6 equvelant of the ifconfig_em0 value
- sshd_enable sees whether the SSH daemon is enabled or not.
Set Hostname on FreeBSD 12
$ su –
# hostname freebsd.example.com
# echo “”hostname=freebsd.example.com”” >> /etc/rc.conf
If the dhclient is used to set the hostname via DHCP, the hostname variable should be set to an empty string.
Set Static IP Address on FreeBSD 12
Once we set the hostname, proceed to configure a Static IP address on FreeBSD 12:
# vi /etc/rc.confAdd:
ifconfig_em0=”inet 192.168.13.4 netmask 255.255.255.0″
defaultrouter=”192.168.13.1″
Later, restart FreeBSD network service and routing table:
# /etc/rc.d/netif restart && /etc/rc.d/routing restartSimultaneously, to configure an interface for DHCP, reset the settings to:
ifconfig_em0=”DHCP”Setting a DHCP Address
DHCP address for a network interface on a FreeBSD host is set by editing the system configuration file /etc/rc.conf.
For instance, to set the network interface em0 to DHCP:
ifconfig_em0=”DHCP”- Open the system configuration file into a text editor
vi /etc/rc.conf- Update the network interface to use DHCP. In our example, the interface will be em0
ifconfig_em0=”DHCP”- Save the changes and exit the text editor.
Meanwhile, apply new network configurations:
./etc/netstartSimilarly, the system configuration file must resemble with the ifconfig_ interface where we have updated the “DHCP” value.
For instance:
hostname=”freebsd12″
ifconfig_em0=”DHCP”
ifconfig_em0_ipv6=”inet6 accept_rtadv”
sshd_enable=”YES”
# Set dumpdev to “AUTO” to enable crash dumps, “NO” to disable
dumpdev=”AUTO”
Furthermore, to verify if the changes are done successfully use the command:
ifconfig em0[Need further assistance? We are here for you!]
Conclusion
To conclude, today, we saw how our Support Engineers configure network settings in FreeBSD by setting static IP addresses and DHCP addresses.
PREVENT YOUR SERVER FROM CRASHING!
Never again lose customers to poor server speed! Let us help you.
Our server experts will monitor & maintain your server 24/7 so that it remains lightning fast and secure.
GET STARTED
var google_conversion_label = «owonCMyG5nEQ0aD71QM»;
В этом кратком уроке вы увидите, как параметр командной строки используется для изменения имен хостов во FreeBSD. Чтобы перейти к делу, вам необходимо использовать вариант команды hostname, которая, если она запущена без добавления каких-либо параметров, выводит список текущих имен хостов.
Список имен хостов во FreeBSD с помощью команды hostname
Запустите терминал и введите команду ниже, чтобы вывести список имен хостов в вашей системе FreeBSD:
$ имя хоста

Или вы можете использовать утилиту grep и указать местоположение в команде:
$ grepимя хоста/так далее/rc.conf
Изменение имени хоста в FreeBSD
Как указывалось ранее, вам нужно добавить переключатель, чтобы команда hostname изменяла имена хостов. Чтобы эти изменения были согласованы после перезапуска, вам нужно будет отредактировать файл конфигурации, расположенный в /etc/rc.conf.
Чтобы настроить файл /etc/rc.conf, используйте редактор nano и введите следующую команду:
$ судонано/так далее/rc.conf

Замените имя новым и запустите переменную имени хоста.
Затем внесите изменения в файл / etc / hosts, снова используя текстовый редактор nano:
$ судонано/так далее/хозяева
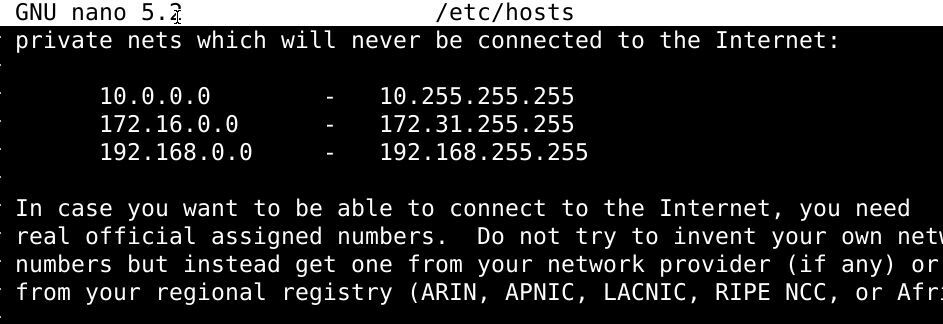
Отредактируйте файл, чтобы удалить имя из всего файла и заменить его новым.
Наконец, чтобы временно применить изменения без перезагрузки, введите:
$ судоимя хоста новое-имя-здесь
В любом случае вам следует перезагрузиться, чтобы увидеть, были ли сохранены изменения.
$ судо перезагружать
Изменение имен хостов в FreeBSD без перезагрузки
Выполните следующую команду:
$ судоимя хоста freebsd11
Затем внесите изменения в /etc/rc.conf, используя следующую команду:
$ судонано/так далее/rc.conf
Для лучшей иллюстрации рассмотрим следующее:
# имя хоста=«имя-нового-сервера-здесь»
Обязательно сохраните файл перед выходом из него.
Наконец, вам нужно изменить файл / etc / hosts, заменив старое имя хоста новым: s
$ судонано/так далее/хозяева

Измените имя хоста с 127.0.0.1 old-host-name на 127.0.0.1 new-server-name-here:
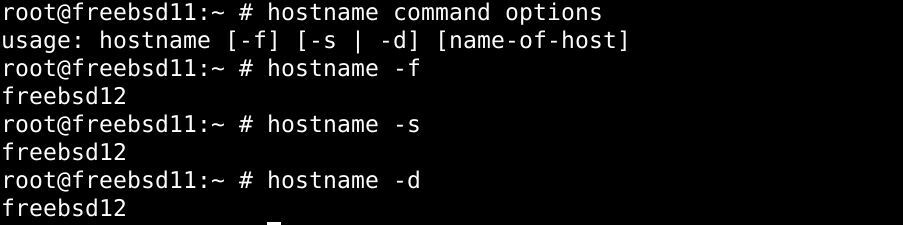
$ имя хостакоманда опции
Добавьте информацию о домене с именем. используйте команду hostname с параметром –f:
$ имя хоста-f
Используйте параметр –s, чтобы удалить информацию о домене:
$ имя хоста-s
Чтобы получить подробную информацию об имени хоста, добавьте параметр –d в команду hostname:
$ имя хоста-d
Чтобы узнать больше по теме, посетите следующие страницы:
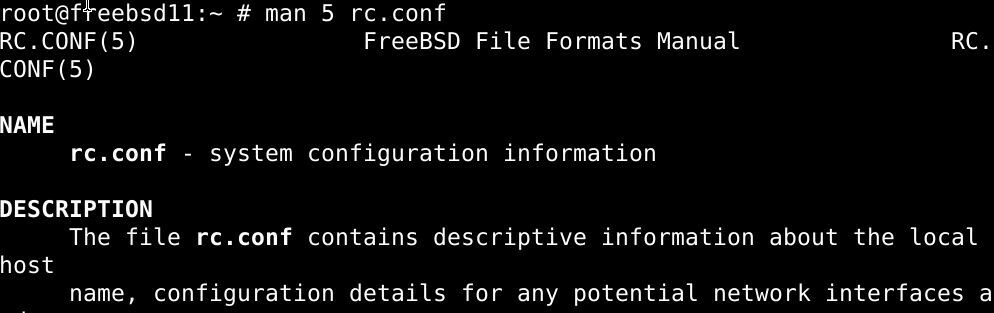
$ человек5 rc.conf
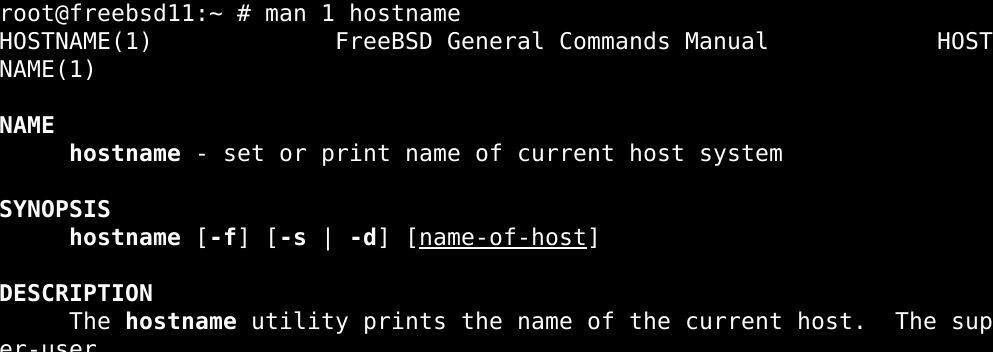
$ человек1имя хоста
Подведение итогов
Это конец урока. Надеюсь, приведенные здесь инструкции сработали для вас, и вы успешно изменили имя хоста в своей системе FreeBSD.
The hostname is the name given to a computer so that it could be identified uniquely when connected to a network. The installer asks and setup the hostname while installing FreeBSD in a system.
Sometimes you may want to change the hostname after installing FreeBSD operating system to somewhat relevant to the service running on it or something else.
This article shows exactly how you can change the hostname of a FreeBSD machine.
How to check the hostname in FreeBSD
There are various ways to find the hostname of a FreeBSD machine. You can check it in your terminal, see the image below –

The highlighted part of this image that is the string “srvr02” is the hostname.
The other way is to use hostname command in your terminal to find the hostname on FreeBSD. If you run hostname command without any argument, it will display the hostname –

As you can see in the above image srvr02 is the hostname.
How to change the hostname for the current session only
If you want to change the hostname for the current session only then execute the following command in your terminal –
hostname [new_hostname]
For example –
hostname ftp-server
Once this command is executed this will immediately change the current hostname srvr02 to ftp-server. When you log out or reboot the system, the hostname will change to the previous one i.e. srvr02.
Now you can check the hostname by running –
hostname
How to change the hostname permanently
To make changes permanent across reboots, you need to edit the file /etc/rc.conf and also you need to replace any occurrence of hostname from /etc/hosts.
[alert color=”yellow”]You need to have root access for editing configuration files[/alert]
First open /etc/rc.conf using a text editor –
vi /etc/rc.conf
And modify the given hostname to –
hostname="new_hostname"
For example –
hostname ="ftp-server"
Now open /etc/hosts file by using –
vi /etc/hosts
Here find and change any occurrence of the old hostname to the new one, finally save the changes and exit from the editor.
Hostname command options in FreeBSD
You can use the following command-line options with hostname command in FreeBSD –
-f – Includes domain name information in printed name, this is the default behavior
-s – Trim off any domain information from the printed name
-d – Using this will print domain information only
To know more about hostname see its manual page by running –
man hostname
Also, see the system configuration information by using-
man rc.conf