Know what you’re sharing and protect your personal information
Updated on February 8, 2021
What to Know
- Select the Windows Start icon, then select the Settings gear and choose Privacy.
- Choose General in the left menu. Toggle the on/off buttons in each category to configure your general privacy settings.
- Repeat the process for Speech, Inking & Typing Personalization, Diagnostics & Feedback, and Active History, located in the left menu.
This article explains how to change your Windows 10 privacy settings. The instructions focus on adjusting the five main privacy settings categories: General, Speech, Inking & Typing Personalization, Diagnostics & Feedback, and Active History.
How to Adjust Windows 10 Privacy Settings
Maybe you just want to limit the amount of personal data your Windows 10 PC sends out, or maybe you just don’t want much data gathered about your computing activities to begin with. Regardless of why, if you want to adjust how Windows 10 gathers your data and sends it out, you need to how to change your Windows 10 privacy settings.
Here’s how to access and adjust each of the five main Windows 10 privacy settings: General, Speech, Inking & Typing Personalization, Diagnostics & Feedback, and Active History.
Turn General Settings On and Off
The General privacy settings category is a series of four toggle options. Each toggle option can be turned off or on by selecting the toggle once.
- The first option (at the top) asks if you’d like your apps to use advertising ID to deliver more interesting ads «based on your app activity.»
- The second option asks if you want to let websites access your language list in order to provide «locally relevant content.»
- The third option asks if you want to allow Windows 10 to track you when you launch an app so that Windows can improve your Start and search results.
- The fourth option asks if you want to see suggested content in the Settings app.
Here’s how to adjust the General Privacy settings:
-
Select the Windows Start menu icon in the bottom left corner of your screen. The Start menu should appear once you do so.
-
In the bottom left corner of the Start menu, select the Settings gear icon. This will open the main Settings menu for your Windows 10 device.
-
In the main Settings menu, select the option labeled Privacy.
-
The Privacy menu should automatically open itself to the main General privacy settings section. If it doesn’t, select the option labeled General in the left side menu of the main Privacy settings screen.
-
Once in the General settings menu, adjust each of the four options by tapping on the on/off toggle buttons until you reach your desired privacy setting.
Use Speech Recognition and Cortana
The Speech category also has an on/off toggle, but this section only has one setting to adjust. This section asks if you would like to turn on a feature known as Online speech recognition. This feature lets you speak to Cortana (Microsoft’s virtual assistant), take dictation with your voice, and access other services that use Windows cloud-based services.
If you turn this feature on, you can do all of the above. If you turn it off, you lose access to Cortana and the dictation feature but you can still use the Windows Speech Recognition app and other services that aren’t reliant on Windows cloud-based services.
According to Microsoft, leaving this setting turned on allows Microsoft to gather and use your voice data to «help improve our speech services.»
Here’s how to access the Speech Privacy settings:
-
Follow steps 1 — 3 of the General settings category instructions to access the main Privacy settings menu in Windows 10.
-
Once you’re in the main Privacy settings menu, select the Speech option from the menu on the left side of the Privacy settings menu screen.
-
Tap the toggle button to the the On or Off position to choose your setting for the Online speech recognition option. Choose On if you plan on using Cortana or the dictation feature. Choose Off if you’d rather not let Microsoft gather and use your voice data.
Access the Inking & Typing Personalization Settings
Like the Speech settings category, the Inking & Typing Personalization category only has one option to adjust, and it can be adjusted by tapping the on/off toggle provided. This option asks if you would like to let Windows gather your typing history and handwriting pattern data to develop a «local user dictionary» for you.
If you decide to turn this option off, the personal dictionary Windows made for you is deleted, but Windows still provides other services such as handwriting recognition and typing suggestions based on the system dictionary.
Here’s how to access the Inking & Typing Personalization Privacy settings:
-
Follow steps 1 — 3 of the General settings category instructions to access the main Privacy settings menu in Windows 10.
-
Within the Privacy settings menu, select the Inking & typing personalization option from the menu located on the left side of the main Privacy settings menu.
-
Select the On/Off toggle button underneath the Getting to know you option until you reach your desired privacy setting.
Perform Diagnostics and Get Feedback
The Diagnostics & Feedback settings category has six different settings options you can adjust.
- The first option allows you to choose how much diagnostic data about your computer you’d like to send to Microsoft. You can choose between either the Basic or Full options. The Basic option only sends information about your device, while the Full option sends information about your device and some of your personal data as it relates to how you use your device (like web browsing history).
- The second option is only adjustable if you chose the Full option from the first section. This option allows Windows 10 to send your inking and typing data to Microsoft. If you chose Full earlier, you can still turn the inking and typing data option off.
- The third option is called Tailored Experiences and this allows you to choose whether or not Microsoft provides tailored tips or ads based on your diagnostic data settings.
- The fourth option asks if you want to view your diagnostic data in the Diagnostic Data Viewer. If you toggle this option on, Windows will use up to 1GB of hard drive space on your device to devote to this data.
- The fifth option allows you to delete whatever diagnostic data Microsoft has already gathered about your device.
- Lastly, the sixth option is called Feedback Frequency, and this option allows you to choose how often Windows asks for your feedback.
Here’s how to access the Diagnostics & Feedback Privacy settings:
-
Follow steps 1 — 3 of the General settings category instructions to access the main Privacy settings menu in Windows 10.
-
Within the main Privacy settings menu, choose the Diagnostics & feedback option from the menu on the left side of the Privacy settings menu.
-
In the Diagnostics & feedback section, there are six options you can potentially adjust. The first option is listed as Diagnostic data. Underneath the heading Diagnostic data, choose between either the Required or Optional options by selecting one of the circles next to either option.
-
If you chose the Optional option in the previous step, you can adjust the option underneath the heading called Improve inking and typing. To turn this option on or off, tap on its corresponding toggle button. If you chose Required in the previous step, you won’t have access to this option.
-
You can turn on or off the Tailored experiences option by tapping on the toggle button found under the Tailored experiences heading.
-
The View diagnostic data option can be turned on or off by tapping on the toggle button underneath the View diagnostic data heading. If you turn this option on, you’ll be able to click on the Open Diagnostic Data Viewer button to view your diagnostic data.
-
You can also delete your diagnostic data by clicking on the Delete button located underneath the Delete diagnostic data heading.
-
You can also choose how often Windows asks you for your feedback by selecting a frequency option from the drop-down menu that is located underneath Feedback frequency heading.
Protect Your Activity History
The Activity History privacy settings category has four options you can adjust as they relate to the gathering and sending of your activity history with your Windows 10 device. In this context, your activity history is personal data gathered about how you use apps and services and information about the websites you visit.
- The first option in this category lets you choose whether or not you want to store this history on your device.
- The second option asks if you want to send your history to Microsoft. The stated benefit of allowing your device to keep your history and allowing Windows to send your history to Microsoft is that it presumably allows you to quickly resume your activities even if you do something like switch devices (this feature is known as Timeline).
- If you linked your various Microsoft accounts with your Windows 10 device, you’ll be able to adjust the third option, which lets you hide the activity history of these accounts from your Timeline feature.
- The fourth and final option allows you to clear your activity history.
Here’s how to access the Activity History Privacy settings:
-
Follow steps 1 — 3 of the General settings category instructions to access the main Privacy settings menu in Windows 10.
-
Once you’re in the main Privacy settings menu, choose the Activity history option from the menu located on the left side of the main Privacy settings menu.
-
There are four options you can potentially adjust within the Activity history section. The first option asks if you want to store your activity history on your Windows 10 device. If you do, select the box next to the phrase Store my activity history on this device.
-
The second option asks if you want send your activity history to Microsoft. If you do want to send your activity history to Microsoft select the box next to the phrase Send my activity history to Microsoft.
-
The third option is only available to those who have linked their Microsoft accounts to their Windows 10 device. If you have accounts linked to this device and you want to show or hide your activity history from these accounts on your Timeline, tap on the toggle buttons next to each account listed until you reach your desired setting.
-
The fourth and final option allows you to clear your activity history by clicking on the Manage my Microsoft account activity data underneath the Clear activity history heading.
Thanks for letting us know!
Get the Latest Tech News Delivered Every Day
Subscribe
Microsoft уважает конфиденциальность своих пользователей и, таким образом, предоставляет им полный контроль над настройками конфиденциальности вашей учетной записи Microsoft . Если вы хотите избежать онлайн-угроз и опасностей, очень важно обеспечить безопасность и безопасность ваших учетных записей в Интернете. Никогда не забывайте настраивать параметры конфиденциальности, как только вы создадите онлайн-аккаунт.
Учетная запись Microsoft используется для входа в ваш Outlook.com, Hotmail.com и другие идентификаторы электронной почты. Его также можно использовать для входа в другие службы и устройства Microsoft, такие как компьютеры Windows, Xbox Live, Windows Phone и т. Д. Мы уже видели некоторые меры безопасности, которые можно предпринять для защиты учетной записи Microsoft. Сегодня в этом посте мы поговорим о настройках конфиденциальности, которые может предложить учетная запись Microsoft.
Настройки конфиденциальности учетной записи Microsoft
Маркетинговые предпочтения . Для начала вам необходимо настроить свои маркетинговые предпочтения. Войдите в свою учетную запись Microsoft и перейдите в Настройки. Нажмите Уведомления и настройте свои маркетинговые предпочтения.

Поскольку ваша учетная запись Microsoft подключена к каждой службе, очень важно управлять информацией, которой вы делитесь с этими онлайн-службами. Не многие пользователи могут это знать, но когда вы подключаете свою учетную запись Microsoft к другим сайтам, таким как Facebook, Linked и другим; вы на самом деле делитесь с ними своими личными данными.
Чтобы изменить настройки конфиденциальности, войдите в свою учетную запись Microsoft и перейдите на страницу профиля . Нажмите на Управление псевдонимами и измените свои маркетинговые предпочтения. Вы также можете изменить псевдонимы электронной почты на вкладке «Псевдонимы».
Если здесь добавлено несколько писем, отключите настройки входа для адресов электронной почты, которые вы не используете.
Управление связанными учетными записями . В правом верхнем углу страницы своего профиля вы можете видеть учетные записи социальных сетей, связанные с вашей учетной записью Microsoft, в разделе Управление учетными записями . Нажмите на любой из них и настройте, какую информацию вы хотите поделиться.

Используйте флажки, чтобы настроить параметры конфиденциальности здесь. Нажмите “ Удалить это соединение полностью “, чтобы удалить учетную запись из Microsoft.

Настройки пароля . На странице своей учетной записи перейдите на страницу Безопасность и конфиденциальность и нажмите Изменить пароль . Введите свой текущий пароль, а затем создайте новый. Убедитесь, что выбрали надежный пароль для своей учетной записи. Microsoft рекомендует установить флажок « Заставить меня изменить свой пароль через 72 дня » и нажать «Сохранить».
Надеюсь, эта статья о настройках конфиденциальности в учетной записи Microsoft была вам полезна. Теперь посмотрим, как можно улучшить параметры конфиденциальности Outlook.com.
Наверное каждый, при использовании Windows 10 больше всего обеспокоен телеметрией, автоматическим сбором данных и проблемами конфиденциальности.

Многие пользователи встревожены тем, что Windows 10 автоматически собирает личную информацию и отправляет ее на сервера Microsoft. Хорошо, что есть возможность отключать сбор данных, следственно мы можем в некоторой степени контролировать этот процесс. Существует множество настроек конфиденциальности, давайте рассмотрим то что мы можем отключить по пунктам.
Настройки конфиденциальности
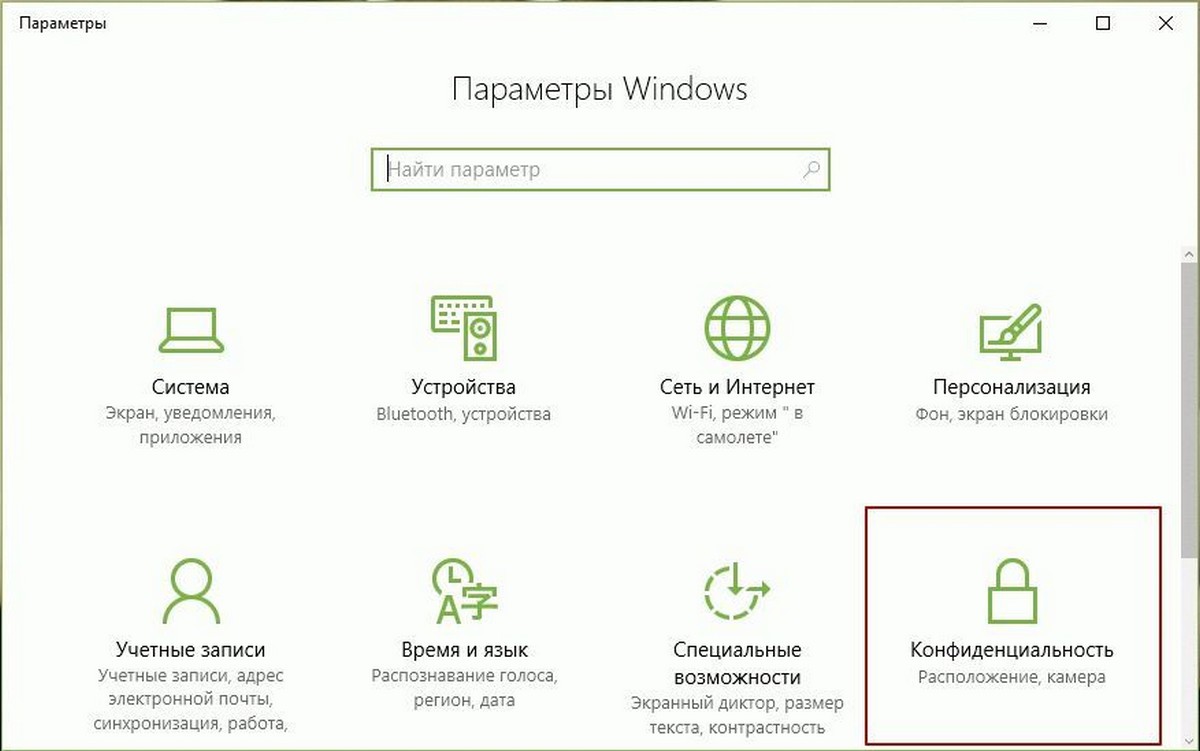
Откройте приложение Параметры используя сочетание клавиш Windows + I и перейдите в раздел «Конфиденциальность«.

Изменение общих параметров конфиденциальности

Разрешить приложениям использовать идентификатор рекламы, чтобы делать рекламу более интересной для вас на основе вашего использования приложений (отключение этого параметра сбросит ваш идентификатор).
Это функция отображает рекламные объявления, настроенные для отдельных пользователей. Если вы предпочитаете отключать рекламный идентификатор, установите его в положение «Откл«.
Разрешить Windows отслеживать запуски приложений для улучшения меню «Пуск» и результатов поиска.
Если отключить отслеживание запуска приложений, параметр «Показать наиболее часто используемые приложения» в меню «Пуск» станет недоступен. Тут по желанию «Вкл» или «Откл«.
Показывать рекомендуемое содержимое в приложении «Параметры».
Майкрософт предлагает вам рекомендации через параметры и помогает находить в них новые функции, а также содержимое и приложения, которые могут оказаться вам интересными: «Отключаем«.
Диагностика и отзывы
Здесь можно задать объем диагностических данных который будет отправляться на сервера Microsoft.

Диагностические данные
Основные: отправляется только информация об устройстве, его параметрах и возможностях, а так же о том, работает ли оно надлежащим образом.
Полные: помимо диагностических данных с базового уровня, отправляются сведения о посещаемых веб-сайтах и способах использования приложений и функций, а также дополнительная информация о работоспособности и применении устройства и расширенные отчеты об ошибках.
Рекомендуем выбрать «Основной режим«.
Частота формирования отзывов
Предлагает вам получить запрос на обратную связь и предложит вам оставить комментарий о Windows 10.
Если вам не нужна эта функция, выберите «Никогда«.
Журнал действий
Если вы не используете функционал временной шкалы, то отключите журнал действий сняв все галочки. Опуститесь ниже, к своей учетной записи и переведите тумблер, в выключенное положение.

Откройте ссылку «
Управление данными о действиях в рамках учетной записи Майкрософт
» и очистите там все данные.

Расположение
Служба определения местоположения устанавливает, разрешать ли доступ к информации о местоположении для приложений, которым требуется текущее местоположение пользователя, например карта или приложение прогноза погоды.
В качестве значения по умолчанию в Windows 10 определение местоположения включено, но вы можете полностью его отключить.
В некоторых приложениях функция Bluetooth или Wi-Fi проверяет местоположение пользователя, даже если местоположение остановлено. Вы можете включить или отключить соответствующую функцию в «Радио» (левом меню). Bluetooth и Wi-Fi будут по-прежнему работать, но без определения местоположения.
Если вы хотите отключить определение местоположения, нажмите кнопку «Изменить» и поставьте переключатель в положение «Откл«.

Расположение по умолчанию
Если нажать кнопку «Задать по умолчанию» откроется доступ сервису Карты. Для правильного обслуживания местоположения необходимо нажать кнопку «Указать расположение по умолчанию» и выбрать его на карте.

Для некоторых приложений требуется точная информация о местоположении и вы можете разрешить или запретить использовать им эти данные.

Камера
В Windows 10 есть много приложений и удобных сервисов, которые используют камеру. Например, для людей, которые часто используют видеозвонки по Skype или социальные сети, камера незаменима, но если она вам не нужна, давайте отключим ее.
Но, даже если отключить веб-камеру в настройках, вы не сможете полностью блокировать к ней доступ. Мы рекомендуем вам прикреплять непрозрачную пленку к объективу веб-камеры, если вы не используете ее, на случай если вдруг систему поразит вредоносное ПО.
Разрешить доступ к камере на этом устройстве: если вам камера не нужна, просто выключите ее.

Выберете приложения, которые могут получать доступ к камере: вы можете индивидуально настроить каждое приложение переведя кнопки в состояние «Вкл» или «Выкл«. В разделе «Микрофон» можно произвести аналогичные действия.

Сведения учетной записи
Разрешать доступ к сведениям об учетной записи на этом устройстве. Лучше всего отключить.
Разрешить приложениям доступ к данным учетной записи, так же стоит отключить.

Контакты, Календарь, Журнал вызовов, Электронная почта, Обмен сообщениями, Радио, Документы, Изображения и Видео
Эти разделы почти одинаковы, вы можете полностью или выборочно отключить ненужные приложения.


Другие устройства
Разрешает приложениям автоматически предоставлять общий доступ к сведениям и синхронизировать их на беспроводных устройствах, тоже отключаем.

Фоновые приложения
Это приложения, которое работают в фоновом режиме, даже если не запускаются пользователем. Иметь быстрый к ним доступ очень удобно, но если вы их не используете, просто отключите. Или выборочно определите какие приложения будут работать а какие нет.

Диагностика приложений
Отключаем разрешение доступа к диагностическим данным приложений на этом устройстве.

Файловая система
Доступ к файловой системе отключается полностью или для определенных приложений, выбор за вами.


На этом настройка основных параметров конфиденциальности в Windows 10 завершена.
Если необходим серьезный подход к отключению слежки Windows 10 используйте проверенное временем средство O&O ShutUp10.
Некоторые функции в настройках Office, например параметры конфиденциальности, включены по умолчанию. Microsoft заявляет, что это делается для того, чтобы идентифицировать пользователей или связаться с ними, но если вы чувствуете, что это представляет угрозу для вашей конфиденциальности, вы можете управлять ими из центра управления безопасностью.
Центр управления безопасностью в Microsoft Office — это место, где вы можете найти параметры безопасности и конфиденциальности для программ Office. Доступные здесь параметры позволяют вам обмениваться документами с людьми, которых вы хотите, или находить и удалять скрытую информацию, которую вы, возможно, не захотите раскрывать.
- Откройте приложение Office и выберите вкладку Файл.
- Выберите Параметры на левой панели.
- Выберите Центр управления безопасностью.
- Нажмите кнопку «Настройки центра управления безопасностью».
- Прокрутите вниз до параметров конфиденциальности.
- Нажмите кнопку «Настройки конфиденциальности».
- Включите или отключите различные параметры, установив или сняв флажок напротив них.
При изменении параметров конфиденциальности вы должны настроить параметры, которые позволят вам контролировать уровень конфиденциальности Office, который вы хотите.
Откройте Word и щелкните значок Файл вкладка в меню ленты.
Затем на левой боковой панели выберите Опции меню.
Это откроет Параметры слова окно. В окне найдите Центр доверия вкладка и, когда найдете, выберите Настройки центра управления безопасностью возможность открыть новое окно.
В окне «Центр управления безопасностью» прокрутите вниз до Параметры конфиденциальности.
Ударь Настройки конфиденциальности кнопка. Здесь снимите флажки с нежелательных параметров, которые включены по умолчанию. Точно так же вы можете включить нужные параметры для приложений Office, установив флажки напротив них.
Когда вы закончите, нажмите хорошо кнопку и выйти. Это должно помочь вам решить ваши проблемы с конфиденциальностью в Microsoft Office.
Вы также можете получить доступ к настройке конфиденциальности Office следующим образом: Откройте любое приложение Office, например. Word> Файл> Параметры> Учетная запись> Щелкните Управление настройками.
Если вам нужна дополнительная информация, вы можете прочитать Заявление о конфиденциальности для Microsoft Office.
В этом посте будет показано, как отказаться от отслеживания данных и целевой рекламы в Интернете.
.
Эта статья раскажет, как настроить конфиденциальность Windows 10 с помощью встроенного приложения параметры Windows 10.
Пользователи Windows 10 всегда беспокоились о том, как Microsoft с помощью обратной связи собирает статистику, информацию о использовании Windows 10 ПК. Не будет ошибкой сказать, что Microsoft не была достаточно прозрачной в этом. Правда в том, что Microsoft нуждается в обратной связи с пользователями, чтобы улучшить операционную систему — но есть много людей, которые не хотят делиться даже простой информацией.
Таким образом, в данном руководстве мы рассмотрим несколько встроенных вариантов конфиденциальности, которые доступны в Параметрах Windows 10, с их помощью можно настроить способ, Windows 10, обменивается информацией с Microsoft.
Настройка параметров конфиденциальности Windows 10
Windows 10 особенно хороша в отношении соблюдения конфиденциальности, давая вам возможность выбрать, какие приложения могут получить доступ к вашей Информации об аккаунте, Контактах, истории звонков, сообщений электронной почты, и т.д.
Вы можете получить доступ к настройкам Конфидициальности, с помощью приложения Параметры Windows.
Нажмите клавиши Win + I на вашей клавиатуре, открыв настройки системы. Кликните на значок Конфиденциальность, чтобы открыть настройки конфиденциальности для вашего ПК. Все параметры конфиденциальности появятся на текущем окне.
Сегодня рассмотрим шесть параметров конфиденциальности, которые отображаются на вкладке Общие, и которые нам необходимо настроить.
В разделе Общие вы можете увидеть параметры, с правой стороны с переключателями под ними.

Доступные параметры конфиденциальности позволяют контролировать то, как неприкосновенность частной жизни играет важную роль на самом высоком уровне.
Позволить приложениям использовать мой идентификатор получателя рекламы
При установке Windows 10, используя Учетную запись Майкрософт, идентификатор рекламы назначается автоматически к вашему компьютеру, и используется для отслеживания ваших коммерческих предпочтений и другой соответствующей информации. Приложения могут запрашивать доступ к этому идентификатору, и он в дальнейшем может использоваться Разработчиками приложений и Рекламными сетями чтобы показывать вам более релевантную рекламу. Это работает так же, как YouTube предлагает видео на основе вашей истории просмотров или подписки.
Возможно отключение этого параметра не будет много значить. Ваш идентификатор рекламы будет выключен, и вам будет показаны общие рекламные объявления.
Включить фильтр SmartScreen для проверки веб-содержимого (URL), которые могут использовать приложения из Магазина Windows
Этот конкретный вариант защищает вас от недоброжелательного и вредоносного контента в Интернете. Защита от мошеннических сайтов — антифишинговая защита. Фильтр также предупреждает вас, при попытке установить ненадежное приложение, загруженное из Интернета, которое потенциально может нанести вред ПК. Рекомендуем сохранить переключатель в положении ВКЛ для улучшения безопасности системы.
Отправлять Майкрософт мои сведения о написании, чтобы помочь в усовершествовании функции печатного и рукописного ввода
Windows 10 находится в режиме непрерывного развития, чтобы использовать более революционную технологию сенсорного экрана. Microsoft, нуждается в информации о том, как вы взаимодействуете с клавиатурой или сенсорным экраном набирая текст на вашем компьютере для улучшения словарей и распознавания рукописного текста для всех, кто использует Windows.. Мы все знаем о Windows Ink Workspace появившемся в Юбилейном обновлении. Это хороший опыт взаимодействия с сенсорным экраном ПК с помощью стилуса или пера.
Хотя существует не так много понимания того, как используется эта информация Microsoft, лично я не нахожу ничего вредного чтобы оставить этот переключатель в положении Вкл.
Позволить веб-сайтам предоставлять местную информацию за счет доступа к моему списку языков.
Корпорация Майкрософт использует этот параметр, чтобы получить доступ к вашему списку языков это позволит сайтам получать доступ к установленным в системе языкам, и по ним определять на каком языке показывать вам контент.
Вы можете выключить этот параметр для того, чтобы предотвратить Microsoft от использования вашей информации.
Разрешить приложениям на других устройствах, открывать приложения и продолжать работу с ними на этом устройстве
Эта опция была добавлена в Windows 10 с обновлением Anniversary Update . Это в первую очередь , улучшает синхронизацию между установленными приложениями на разных устройствах. Например, если вы открыли на Windows 10 ПК работали в нем, то позже можно открыть его на вашем Windows Phone, и продолжить работу. Суммируя все, Майкрософт может использовать эти данные для улучшения производительности путем синхронизации между устройствами, поэтому решайте сами выключить или оставить этот параметр.
Разрешить приложениям на других устройствах запускать приложения и продолжить работу на этом устройстве по Bluetooth
Это вторая новинка, добавленная в Windows 10 с обновлением Anniversary. П риложения на других устройствах, могут использовать Bluetooth для соединения с Windows 10 ПК и синхронизироватся между различными устройствами, где это приложение установлено. Если вы не собираетесь пользоваться данной опцией передвиньте ползунок в положение Откл.

Вы также можете изучить дополнительную информацию по ссылке внизу окна — Изменение параметров конфидициальности, чтобы сделать необходимый вам выбор в отношении рекламы.
Дайте нам знать что вы думаете об этом.