![]()
Download Article
![]()
Download Article
This wikiHow teaches you how to change the email address associated with your iCloud account. You can do this by changing your Apple ID, or updating a secondary email address. If you have an Apple email address (ending in @icloud.com, @me.com, or @mac.com), you can only change it to another Apple email.
-

1
Open Settings
on your iPhone or iPad. Look for the settings cog icon on your home screen.
-
2
Tap your name. It’s the section at the top of the screen.
Advertisement
-
3
Tap Name, Phone Numbers, Email. It’s the first option under your name.
-
4
Tap Edit. It’s to the right of «Reachable At».
-
5
Tap the red remove button
next to your current Apple ID. This is the email address that says «Apple ID» underneath.
-
6
Tap Delete. This will delete your current Apple ID.
-
7
Tap Continue. You will be prompted to enter your passcode if you have one.
-
8
Enter the new email address and tap Next. This address will be used for your Apple ID.
- If your Apple ID is an Apple email address (ending in @icloud.com, @me.com, or @mac.com), it can only be replaced by another Apple email address. Check if another Apple email address is listed under Reachable At.
- If one is not listed, add one. Click Add More…, and enter another Apple email address ending in @icloud.com, @me.com, or @mac.com.
-
9
Check the inbox belonging to your new email. Look for a verification email from Apple. Follow the instructions to verify your email.
- If you are changing the email to one that you already listed as a secondary contact email (seen under «Reachable At»), you will not need to verify it, as you already verified the email when adding it.
-
10
Tap Next. Your new Apple ID will show under your name.


Advertisement
-
1
Sign out of your Apple ID on all devices. Do the following on all your iOS devices:
- Tap the Settings app on your home screen.
- Tap Apple ID.
- Tap Sign Out at the bottom.
-
2
Go to https://icloud.com in your web browser. You can use any browser, such as Safari or Chrome, to access this site.
-
3
Enter your Apple ID and password to log in. Once you click the arrow or hit ↵ Enter, you’ll be signed in to the website.
- Your Apple ID is the email address that you used to set up your Apple account.
-
4
Click Account Settings. It’s a blue link beneath the greeting at the top.
-
5
Click Manage. It’s a blue link at the top under Apple ID.
- You may be asked to sign in again, and a verification code may be sent to your phone if you have Two-Factor Authentication set up.
-
6
Click Edit on the right of the Account section at the top. This will bring you to a page to edit your details.
-
7
Click Change Apple ID…. It’s a blue link at the top, below your Apple ID.
-
8
Enter the new email address to use as your Apple ID. Click into the text bar and type the new email.
- If your Apple ID is an Apple email address (ending in @icloud.com, @me.com, or @mac.com), it can only be replaced by another Apple email address. Check if another Apple email address is listed under Reachable At.
- If one is not listed, add one. Click Add More…, and enter another Apple email address ending in @icloud.com, @me.com, or @mac.com.
- If there is one, hover over the question mark (?) icon. It should say «This is an alias of your Apple ID». If it does, you can use this email address.
-
9
Click Continue. Your new email will be added, but you may need to verify it before the changes are finalized.
-
10
Check the inbox belonging to your new email. Look for a verification email from Apple. Follow the instructions to verify your email.
- If you are changing the email to one that you already listed as a secondary contact email (seen under «Reachable At»), you will not need to verify it, as you already verified the email when adding it.
-
11
Click Done in the top right. You should see your new ID at the top of the page under your name.


Advertisement
-
1
Go to https://icloud.com in your web browser. You can use any web browser, such as Safari or Chrome, to log in to iCloud on the web.
- This method adds a new email to your account to help contacts find you on Apple service, including Facetime and iMessage. Your Apple ID will remain as your primary email address.
-
2
Enter your Apple ID and password. Once you click the arrow or hit ↵ Enter, you’ll be logged in to your account.
- Your Apple ID is the email address that you used to set up your Apple account.
-
3
Click Account Settings. It’s a blue link beneath the greeting at the top.
-
4
Click Manage. It’s a blue link at the top under Apple ID.
- You may be asked to sign in again, and a verification code may be sent to your phone if you have Two-Factor Authentication set up.
-
5
Click Add More… to add a secondary email address. It’s a blue link in the «Reachable At» section near the middle of the page.
-
6
Enter the new email address to use as your Apple ID. Click into the text bar and type the new email.
-
7
Click Continue. You will need to verify the email before it is added to your account.
-
8
Check the inbox belonging to your new email. Look for a verification email from Apple. Follow the instructions to verify your email.
-
9
Click Done in the top right. Your new email address will be added under Reachable At.
- Click the gray X to the right of a secondary email address if you wish to remove it.


Advertisement
Ask a Question
200 characters left
Include your email address to get a message when this question is answered.
Submit
Advertisement
About This Article
Article SummaryX
1. Open the Settings app on your iPhone or iPad.
2. Tap your name, then Name, Phone Numbers, Email.
3. Tap Edit next to «Reachable At». Delete your current Apple ID and replace with a new email address.
4. Tap Continue. Enter the new email address to use for your Apple ID.
5. Verify the new email address.
Did this summary help you?
Thanks to all authors for creating a page that has been read 59,755 times.
Is this article up to date?
![]()
Download Article
![]()
Download Article
This wikiHow teaches you how to change the email address associated with your iCloud account. You can do this by changing your Apple ID, or updating a secondary email address. If you have an Apple email address (ending in @icloud.com, @me.com, or @mac.com), you can only change it to another Apple email.
-
1
Open Settings
on your iPhone or iPad. Look for the settings cog icon on your home screen.
-
2
Tap your name. It’s the section at the top of the screen.
Advertisement
-
3
Tap Name, Phone Numbers, Email. It’s the first option under your name.
-
4
Tap Edit. It’s to the right of «Reachable At».
-
5
Tap the red remove button
next to your current Apple ID. This is the email address that says «Apple ID» underneath.
-
6
Tap Delete. This will delete your current Apple ID.
-
7
Tap Continue. You will be prompted to enter your passcode if you have one.
-
8
Enter the new email address and tap Next. This address will be used for your Apple ID.
- If your Apple ID is an Apple email address (ending in @icloud.com, @me.com, or @mac.com), it can only be replaced by another Apple email address. Check if another Apple email address is listed under Reachable At.
- If one is not listed, add one. Click Add More…, and enter another Apple email address ending in @icloud.com, @me.com, or @mac.com.
-
9
Check the inbox belonging to your new email. Look for a verification email from Apple. Follow the instructions to verify your email.
- If you are changing the email to one that you already listed as a secondary contact email (seen under «Reachable At»), you will not need to verify it, as you already verified the email when adding it.
-
10
Tap Next. Your new Apple ID will show under your name.
Advertisement
-
1
Sign out of your Apple ID on all devices. Do the following on all your iOS devices:
- Tap the Settings app on your home screen.
- Tap Apple ID.
- Tap Sign Out at the bottom.
-
2
Go to https://icloud.com in your web browser. You can use any browser, such as Safari or Chrome, to access this site.
-
3
Enter your Apple ID and password to log in. Once you click the arrow or hit ↵ Enter, you’ll be signed in to the website.
- Your Apple ID is the email address that you used to set up your Apple account.
-
4
Click Account Settings. It’s a blue link beneath the greeting at the top.
-
5
Click Manage. It’s a blue link at the top under Apple ID.
- You may be asked to sign in again, and a verification code may be sent to your phone if you have Two-Factor Authentication set up.
-
6
Click Edit on the right of the Account section at the top. This will bring you to a page to edit your details.
-
7
Click Change Apple ID…. It’s a blue link at the top, below your Apple ID.
-
8
Enter the new email address to use as your Apple ID. Click into the text bar and type the new email.
- If your Apple ID is an Apple email address (ending in @icloud.com, @me.com, or @mac.com), it can only be replaced by another Apple email address. Check if another Apple email address is listed under Reachable At.
- If one is not listed, add one. Click Add More…, and enter another Apple email address ending in @icloud.com, @me.com, or @mac.com.
- If there is one, hover over the question mark (?) icon. It should say «This is an alias of your Apple ID». If it does, you can use this email address.
-
9
Click Continue. Your new email will be added, but you may need to verify it before the changes are finalized.
-
10
Check the inbox belonging to your new email. Look for a verification email from Apple. Follow the instructions to verify your email.
- If you are changing the email to one that you already listed as a secondary contact email (seen under «Reachable At»), you will not need to verify it, as you already verified the email when adding it.
-
11
Click Done in the top right. You should see your new ID at the top of the page under your name.
Advertisement
-
1
Go to https://icloud.com in your web browser. You can use any web browser, such as Safari or Chrome, to log in to iCloud on the web.
- This method adds a new email to your account to help contacts find you on Apple service, including Facetime and iMessage. Your Apple ID will remain as your primary email address.
-
2
Enter your Apple ID and password. Once you click the arrow or hit ↵ Enter, you’ll be logged in to your account.
- Your Apple ID is the email address that you used to set up your Apple account.
-
3
Click Account Settings. It’s a blue link beneath the greeting at the top.
-
4
Click Manage. It’s a blue link at the top under Apple ID.
- You may be asked to sign in again, and a verification code may be sent to your phone if you have Two-Factor Authentication set up.
-
5
Click Add More… to add a secondary email address. It’s a blue link in the «Reachable At» section near the middle of the page.
-
6
Enter the new email address to use as your Apple ID. Click into the text bar and type the new email.
-
7
Click Continue. You will need to verify the email before it is added to your account.
-
8
Check the inbox belonging to your new email. Look for a verification email from Apple. Follow the instructions to verify your email.
-
9
Click Done in the top right. Your new email address will be added under Reachable At.
- Click the gray X to the right of a secondary email address if you wish to remove it.
Advertisement
Ask a Question
200 characters left
Include your email address to get a message when this question is answered.
Submit
Advertisement
About This Article
Article SummaryX
1. Open the Settings app on your iPhone or iPad.
2. Tap your name, then Name, Phone Numbers, Email.
3. Tap Edit next to «Reachable At». Delete your current Apple ID and replace with a new email address.
4. Tap Continue. Enter the new email address to use for your Apple ID.
5. Verify the new email address.
Did this summary help you?
Thanks to all authors for creating a page that has been read 59,755 times.
Is this article up to date?
![]()
Привет! Как мы все с вами знаем, при регистрации нового Apple ID обязательно указывать почтовый ящик, который впоследствии и будет вашим логином в системе. На него будут завязаны все сервисы компании Apple — «Найти iPhone», iCloud, iTunes, App Store и т.д. Правда, поначалу этому не уделяется большого внимания. Ведь главное — это начать как можно быстрей пользоваться устройством. А уж на какой там электронный почтовый ящик зарегистрирована учетка… да без разницы!
Но потом приходит осознание того, что слишком много всего связано именно с этим Apple ID (покупки, загрузки, резервные копии), а вот почту, на которую изначально регистрировался идентификатор, уже никто и не помнит. А значит нужно срочно поменять ее на другую. Каким образом это сделать? Вот этом мы сегодня и поговорим.
Приготовились? Раз, два, три, поехали же!
Когда необходимо менять электронную почту Apple ID и что для этого нужно?
Для начала о том, что может сподвигнуть Вас на эту процедуру:
- Как я уже писал чуть выше, в некоторых случаях почта указывается абы какая — ведь главное зарегистрироваться и начать побыстрей пользоваться устройством, и потом доступ к ней теряется.
- Если в почтой долгое время не пользоваться — она просто становиться не активна, и в будущем ее может зарегистрировать другой человек. А ваш то Apple ID все еще на ней!
- В магазинах часто предлагают услугу активации и настройки iPhone. Вместе с этим регистрируют и Apple ID на свой электронный адрес, а пароль к нему, естественно, никто не дает.
- Да и вообще, я лично советую завести отдельный почтовый ящик под учетную запись Apple ID и нигде его не «светить».
Для смены электронного почтового адреса Apple ID необходимо:
- Знать пароль от Apple ID (что делать если забыли его?).
- Знать ответы на контрольные вопросы (в идеале, если не знаете, то придется звонить в техническую поддержку 8-800-555-67-34).
- Доступ к старой почте — не нужен.
Вот и все, пора приступать!
Как сменить e-mail привязанный к Apple ID?
С компьютера переходим на эту страницу — управлять Apple ID. Указываем свой Apple ID и пароль.

Открывается главное меню управления учетной записью. В правом углу видим кнопку — изменить.

В открывшемся окне выбираем — изменить адрес электронной почты.

В всплывающей форме, указываем ту почту, которую Вам хотел бы использовать в качестве новой для вашего Apple ID.

Отвечаем на контрольные вопросы.

Все! Теперь Ваш Apple ID привязан к новой электронной почте. Обратите внимание, что после этой процедуры, на всех устройствах произойдет автоматический выход из вашей учетной записи — придется заходить заново.
Почему может не получаться смена электронного ящика Apple ID?
В некоторых случаях, при изменении почты могут возникать проблемы, вот основные причины почему это происходит:
- На всех устройствах, где активирована учетная запись, нужно из нее выйти.
- Нельзя менять почтовый ящик на тот, который уже используется в качестве идентификатора Apple ID.
- Если ваш идентификатор имеет вид — @icloud.com, @me.com, @mac.com то его сменить нельзя!
- Проблемы с серверами у Apple также нельзя исключать. В некоторое время различные службы Apple могут не работать — как узнать их состояние?
Напоследок хотелось бы напомнить, что во избежание различных проблем, очень важно постоянно иметь доступ к почте, на которую привязан ваш Apple ID.
Причем, крайне желательно, чтобы вы и только вы знали ее. Иначе, при неблагоприятном развитии ситуации, посторонний человек может с легкостью:
- Прочитать переписку.
- Ознакомиться с телефонной книгой.
- Посмотреть фото, да и вообще абсолютно все ваши данные.
- Ну или «просто-напросто» заблокировать устройство.
Поэтому будьте внимательны и аккуратны. Как я уже советовал, самым лучшим вариантом будет завести отдельный электронный ящик для Apple ID и нигде его больше не использовать. Ведь безопасность превыше всего!
P.S. Пишите в комментарии ваши вопросы — я обязательно постараюсь дать ответ и подсказать решение проблемы. Мощный и решительный «лайк» автору (для мотивации)!:)
![]()
Дорогие друзья! Минутка полезной информации:
1. Вступайте в группу ВК — возможно, именно там вы сможете получить всю необходимую вам помощь!
2. Иногда я занимаюсь ерундой (запускаю стрим) — играю в игрушки в прямом эфире. Приходите, буду рад общению!
3. Вы всегда можете кинуть деньги в монитор (поддержать автора). Респект таким людям!
P.S. Моя самая искренняя благодарность (карта *9644, *4550, *0524, *9328, *1619, *6732, *6299, *4889, *1072, *9808, *7501, *6056, *7251, *4949, *6339, *6715, *4037, *2227, *8877, *7872, *5193, *0061, *7354, *6622, *9273, *5012, *1962, *1687 + перевод *8953, *2735, *2760 + без реквизитов (24.10.2021 в 18.34; 10.12.2021 в 00.31)) — очень приятно!
Многие пользователи техники Apple в России уже подготовились к возможному отключению яблочных сервисов и перенесли часть данных в отечественные аналоги. Однако, лишь единицы позаботились о своей почтовой записи, которая является идентификатором Apple ID.
Если пропадет доступ к почте Google, Yahoo или Microsoft, безопасность учетки Apple будет под угрозой. Сейчас расскажем, как изменить свой Apple ID на любой почтовый адрес.
Как указать другой почтовый ящик для Apple ID
Вы можете использовать адрес любого почтового сервиса, в том числе и отечественных.
Внимание! При смене идентификатора Apple ID, убедитесь, что к новой почте не имеют доступ другие пользователи (желательно измените на ней пароль). Кроме этого рекомендуется включить двухфакторную аутентификацию для выбранного почтового сервиса.
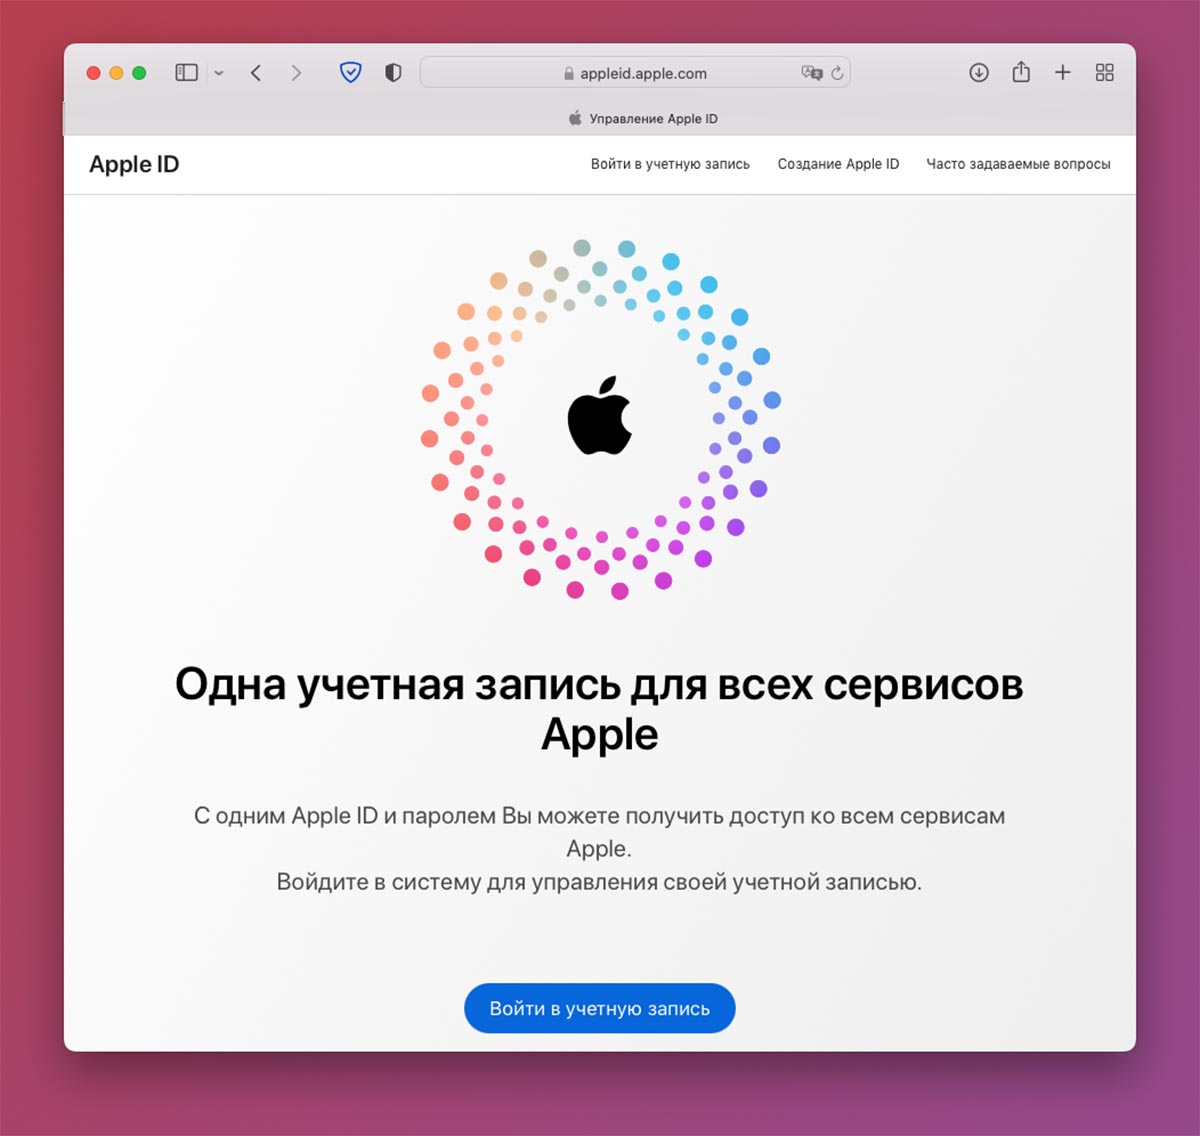
1. Перейдите на сайт управления учетной записью Apple ID.
2. Авторизуйтесь при помощи логина и пароля, подтвердите вход с другого устройства при включенной двухфакторной аутентификации.
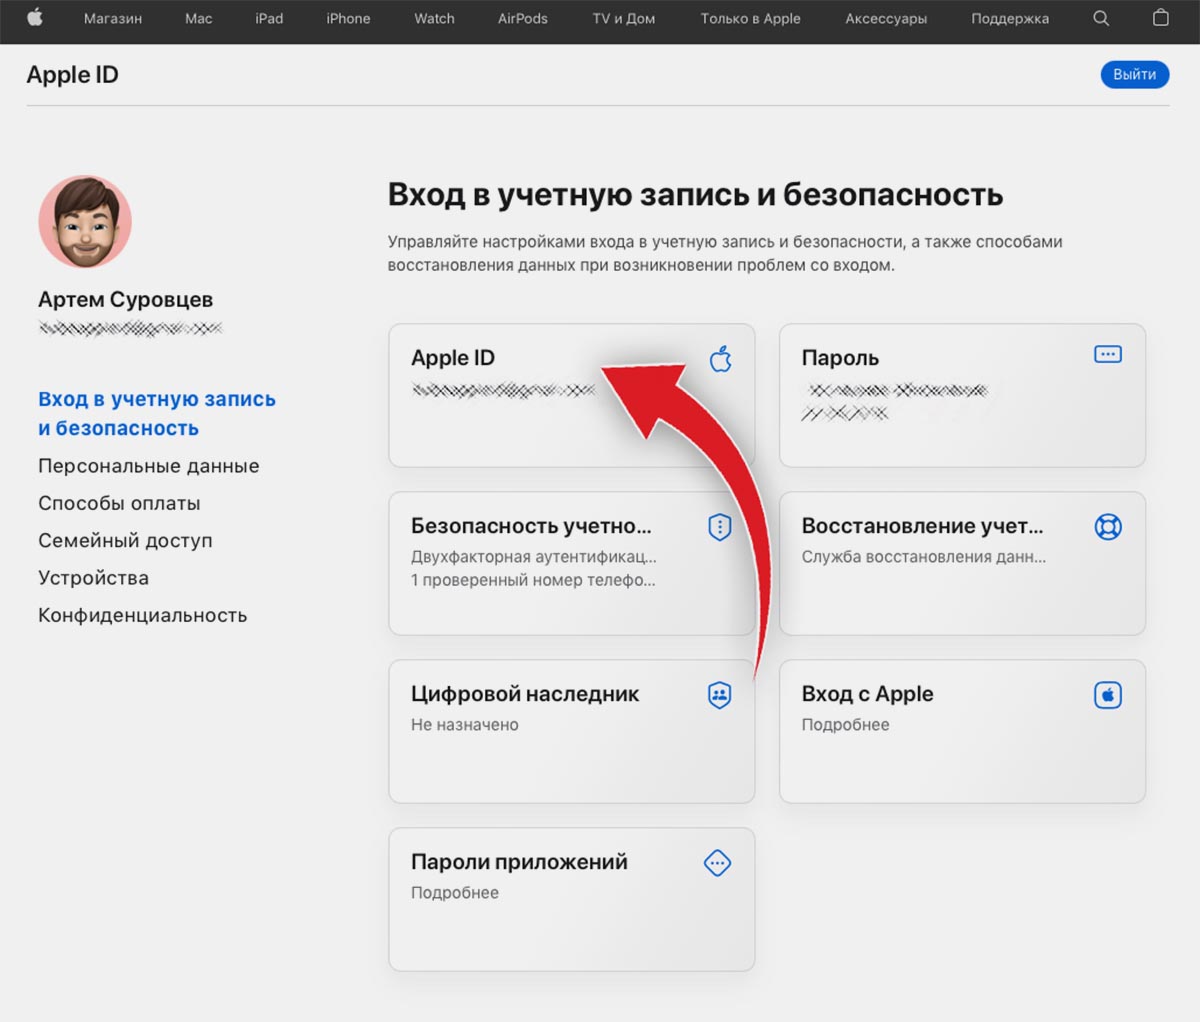
3. В разделе Вход в учетную запись и безопасность выберите пункт Apple ID.
4. В поле Изменить Apple ID укажите действующий адрес электронной почты, который хотите использовать в качестве идентификатора.
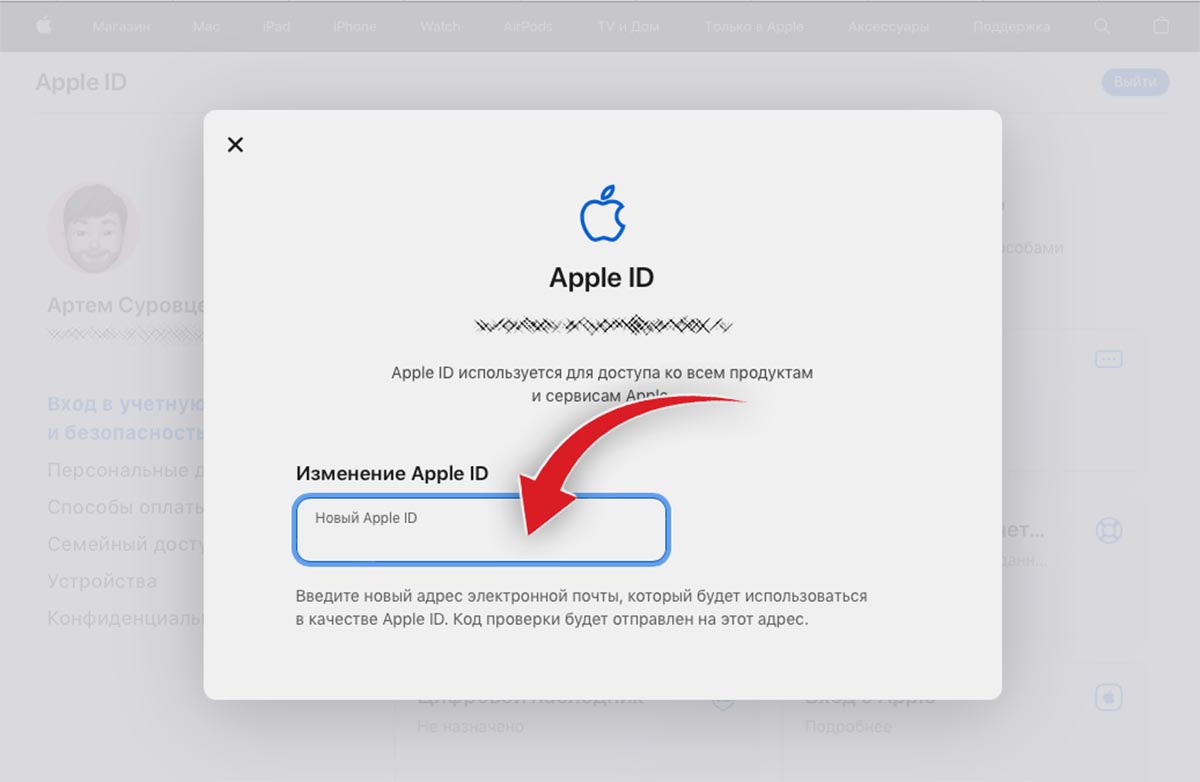
5. Подтвердите действие вводом проверочного кода, который придет на почту.
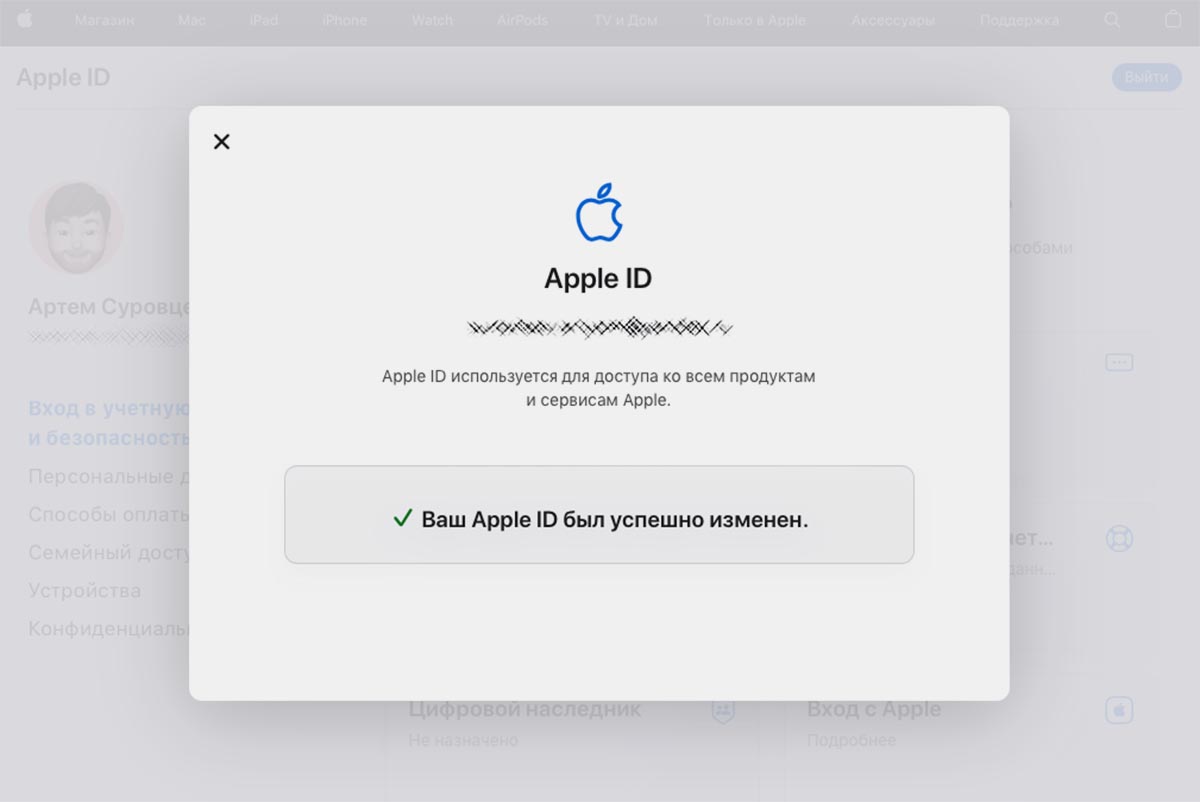
После этого указанный адрес будет использоваться в качестве идентификатора вашей учетной записи Apple ID. Управлять всеми подключенными к учётке почтовыми адресами можно на том же сайте в разделе Персональные данные – Контактные данные.
Не забудьте изменить адрес электронной почты в настройках iMessage и FaceTime на любом используемом гаджете.
В этом же разделе вы сможете удалять ненужные адреса почты из Apple ID и добавлять новые.

Обратите внимание, что вы не сможете удалить из учетной записи свой основной почтовый адрес iCloud.com или использовать псевдонимы яблочной почты в качестве нового идентификатора.
<- назад в статью про подготовку к блокировке iCloud в России

 (9 голосов, общий рейтинг: 4.56 из 5)
🤓 Хочешь больше? Подпишись на наш Telegram.
![]()
iPhones.ru
Можно использовать почту Mail.ru и Yandex.
- Безопасность,
- инструкции,
- Сервисы,
- это полезно
![]()
Артём Суровцев
@artyomsurovtsev
Люблю технологии и все, что с ними связано. Верю, что величайшие открытия человечества еще впереди!