I am wondering how to change the default URL for phpMyAdmin. I am using the latest version (4.0.4.1) on my CentOS 6 VPS. I am wanting to change it from /phpmyadmin to something more secure. I am unsure how to do this or where to even find my apache.conf file if there is one?
Thanks!
asked Jul 1, 2013 at 11:39
![]()
For ubuntu (i used ubuntu 12.04), the default phpmyadmin apache configuration can be found at /etc/phpmyadmin/apache.conf
You can open it by type sudo nano /etc/phpmyadmin/apache.conf and change the third
Alias /yournewalias /usr/share/phpmyadmin
Do not forget to restart apache service,
sudo service apache2 restart
answered Sep 24, 2014 at 17:18
![]()
0
phpMyAdmin default Apache configuration
Alias /phpmyadmin /usr/share/phpmyadmin
Change that to
phpMyAdmin default Apache configuration
Alias /anyname /usr/share/phpmyadmin
Then make sure to restart Apache
sudo /etc/init.d/apache2 restart
answered Aug 5, 2013 at 0:14
![]()
M_R_KM_R_K
5,7731 gold badge38 silver badges40 bronze badges
0
Edit this file
/etc/apache2/conf-available/phpmyadmin.conf
line 3: change the line to be
Alias /whateveryouwant /usr/share/phpmyadmin
answered Jun 14, 2015 at 18:34
![]()
DevyDevy
23810 silver badges19 bronze badges
Installation
phpMyAdmin does not apply any special security methods to the MySQL
database server. It is still the system administrator’s job to grant
permissions on the MySQL databases properly. phpMyAdmin’s :guilabel:`Users`
page can be used for this.
Linux distributions
phpMyAdmin is included in most Linux distributions. It is recommended to use
distribution packages when possible — they usually provide integration to your
distribution and you will automatically get security updates from your distribution.
Debian and Ubuntu
Most Debian and Ubuntu versions include a phpMyAdmin package, but be aware that
the configuration file is maintained in /etc/phpmyadmin and may differ in
some ways from the official phpMyAdmin documentation. Specifically, it does:
- Configuration of a web server (works for Apache and lighttpd).
- Creating of :ref:`linked-tables` using dbconfig-common.
- Securing setup script, see :ref:`debian-setup`.
More specific details about installing Debian or Ubuntu packages are available
in our wiki.
.. seealso::

    More information can be found in `README.Debian <https://salsa.debian.org/phpmyadmin-team/phpmyadmin/blob/debian/latest/debian/README.Debian>`_
    (it is installed as :file:`/usr/share/doc/phpmyadmin/README.Debian` with the package).
OpenSUSE
OpenSUSE already comes with phpMyAdmin package, just install packages from
the openSUSE Build Service.
Gentoo
Gentoo ships the phpMyAdmin package, both in a near-stock configuration as well
as in a webapp-config configuration. Use emerge dev-db/phpmyadmin to
install.
Mandriva
Mandriva ships the phpMyAdmin package in their contrib branch and can be
installed via the usual Control Center.
Fedora
Fedora ships the phpMyAdmin package, but be aware that the configuration file
is maintained in /etc/phpMyAdmin/ and may differ in some ways from the
official phpMyAdmin documentation.
Red Hat Enterprise Linux
Red Hat Enterprise Linux itself and thus derivatives like CentOS don’t
ship phpMyAdmin, but the Fedora-driven repository
Extra Packages for Enterprise Linux (EPEL)
is doing so, if it’s
enabled.
But be aware that the configuration file is maintained in
/etc/phpMyAdmin/ and may differ in some ways from the
official phpMyAdmin documentation.
Installing on Windows
The easiest way to get phpMyAdmin on Windows is using third party products
which include phpMyAdmin together with a database and web server such as
XAMPP.
You can find more of such options at Wikipedia.
Installing from Git
In order to install from Git, you’ll need a few supporting applications:
- Git to download the source, or you can download the most recent source directly from Github
- Composer
- Node.js (version 10 or higher)
- Yarn
You can clone current phpMyAdmin source from
https://github.com/phpmyadmin/phpmyadmin.git:
git clone https://github.com/phpmyadmin/phpmyadmin.git
Additionally you need to install dependencies using Composer:
If you do not intend to develop, you can skip the installation of developer tools
by invoking:
Finally, you’ll need to use Yarn to install some JavaScript dependencies:
yarn install --production
Installing using Composer
You can install phpMyAdmin using the Composer tool, since 4.7.0 the releases
are automatically mirrored to the default Packagist repository.
Note
The content of the Composer repository is automatically generated
separately from the releases, so the content doesn’t have to be
100% same as when you download the tarball. There should be no
functional differences though.
To install phpMyAdmin simply run:
composer create-project phpmyadmin/phpmyadmin
Alternatively you can use our own composer repository, which contains
the release tarballs and is available at
<https://www.phpmyadmin.net/packages.json>:
composer create-project phpmyadmin/phpmyadmin --repository-url=https://www.phpmyadmin.net/packages.json --no-dev
Installing using Docker
phpMyAdmin comes with a Docker official image, which you can easily deploy. You can
download it using:
The phpMyAdmin server will listen on port 80. It supports several ways of
configuring the link to the database server, either by Docker’s link feature
by linking your database container to db for phpMyAdmin (by specifying
--link your_db_host:db) or by environment variables (in this case it’s up
to you to set up networking in Docker to allow the phpMyAdmin container to access
the database container over the network).
Docker environment variables
You can configure several phpMyAdmin features using environment variables:
.. envvar:: PMA_ARBITRARY

    Allows you to enter a database server hostname on login form.

    .. seealso:: :config:option:`$cfg['AllowArbitraryServer']`
.. envvar:: PMA_HOST

    Hostname or IP address of the database server to use.

    .. seealso:: :config:option:`$cfg['Servers'][$i]['host']`
.. envvar:: PMA_HOSTS

    Comma-separated hostnames or IP addresses of the database servers to use.

    .. note:: Used only if :envvar:`PMA_HOST` is empty.
.. envvar:: PMA_VERBOSE

    Verbose name of the database server.

    .. seealso:: :config:option:`$cfg['Servers'][$i]['verbose']`
.. envvar:: PMA_VERBOSES

    Comma-separated verbose name of the database servers.

    .. note:: Used only if :envvar:`PMA_VERBOSE` is empty.
.. envvar:: PMA_USER

    User name to use for :ref:`auth_config`.
.. envvar:: PMA_PASSWORD

    Password to use for :ref:`auth_config`.
.. envvar:: PMA_PORT

    Port of the database server to use.
.. envvar:: PMA_PORTS

    Comma-separated ports of the database server to use.

    .. note:: Used only if :envvar:`PMA_PORT` is empty.
.. envvar:: PMA_ABSOLUTE_URI

    The fully-qualified path (``https://pma.example.net/``) where the reverse
    proxy makes phpMyAdmin available.

    .. seealso:: :config:option:`$cfg['PmaAbsoluteUri']`
.. envvar:: PMA_QUERYHISTORYDB

    When set to `true`, enables storing SQL history to :config:option:`$cfg['Servers'][$i]['pmadb']`.
    When `false`, history is stored in the browser and is cleared when logging out.

    .. seealso:: :config:option:`$cfg['Servers'][$i]['history']`
    .. seealso:: :config:option:`$cfg['QueryHistoryDB']`
.. envvar:: PMA_QUERYHISTORYMAX

    When set to an integer, controls the number of history items.

    .. seealso:: :config:option:`$cfg['QueryHistoryMax']`
.. envvar:: PMA_CONTROLHOST

    When set, this points to an alternate database host used for storing the ":ref:`linked-tables`" database.

    .. seealso:: :config:option:`$cfg['Servers'][$i]['controlhost']`
.. envvar:: PMA_CONTROLUSER

    Defines the username for phpMyAdmin to use for the ":ref:`linked-tables`" database.

    .. seealso:: :config:option:`$cfg['Servers'][$i]['controluser']`
.. envvar:: PMA_CONTROLPASS

    Defines the password for phpMyAdmin to use for the ":ref:`linked-tables`" database.

    .. seealso:: :config:option:`$cfg['Servers'][$i]['controlpass']`
.. envvar:: PMA_CONTROLPORT

    When set, will override the default port (`3306`) for connecting to the control host.

    .. seealso:: :config:option:`$cfg['Servers'][$i]['controlport']`
.. envvar:: PMA_PMADB

    When set, define the name of the database to be used for the ":ref:`linked-tables`" database.
    When not set, the advanced features are not enabled by default: they can still potentially be enabled by the user when logging in with the :ref:`zeroconf` feature.

    .. note:: Suggested values: `phpmyadmin` or `pmadb`

    .. seealso:: :config:option:`$cfg['Servers'][$i]['pmadb']`
.. envvar:: HIDE_PHP_VERSION

    If defined, this option will hide the PHP version (`expose_php = Off`).
    Set to any value (such as `HIDE_PHP_VERSION=true`).
.. envvar:: UPLOAD_LIMIT

    If set, this option will override the default value for apache and php-fpm (this will change ``upload_max_filesize`` and ``post_max_size`` values).

    .. note:: Format as `[0-9+](K,M,G)` default value is `2048K`
.. envvar:: MEMORY_LIMIT

    If set, this option will override the phpMyAdmin memory limit :config:option:`$cfg['MemoryLimit']` and PHP's `memory_limit`.

    .. note:: Format as `[0-9+](K,M,G)` where `K` is for Kilobytes, `M` for Megabytes, `G` for Gigabytes and `1K` = 1024 bytes. Default value is `512M`.
.. envvar:: MAX_EXECUTION_TIME

    If set, this option will override the maximum execution time in seconds for phpMyAdmin :config:option:`$cfg['ExecTimeLimit']` and PHP's `max_execution_time`.

    .. note:: Format as `[0-9+]`. Default value is `600`.
.. envvar:: PMA_CONFIG_BASE64

    If set, this option will override the default `config.inc.php` with the base64 decoded contents of the variable.
.. envvar:: PMA_USER_CONFIG_BASE64

    If set, this option will override the default `config.user.inc.php` with the base64 decoded contents of the variable.
.. envvar:: PMA_UPLOADDIR

    If set, this option will set the path where files can be saved to be available to import (:config:option:`$cfg['UploadDir']`)
.. envvar:: PMA_SAVEDIR

    If set, this option will set the path where exported files can be saved (:config:option:`$cfg['SaveDir']`)
.. envvar:: APACHE_PORT

    If set, this option will change the default Apache port from `80` in case you want it to run on a different port like an unprivileged port. Set to any port value (such as `APACHE_PORT=8090`).
By default, :ref:`cookie` is used, but if :envvar:`PMA_USER` and
:envvar:`PMA_PASSWORD` are set, it is switched to :ref:`auth_config`.
Note
The credentials you need to log in are stored in the MySQL server, in case
of Docker image, there are various ways to set it (for example
:samp:`MYSQL_ROOT_PASSWORD` when starting the MySQL container). Please check
documentation for MariaDB container
or MySQL container.
Customizing configuration
Additionally configuration can be tweaked by :file:`/etc/phpmyadmin/config.user.inc.php`. If
this file exists, it will be loaded after configuration is generated from above
environment variables, so you can override any configuration variable. This
configuration can be added as a volume when invoking docker using
-v /some/local/directory/config.user.inc.php:/etc/phpmyadmin/config.user.inc.php parameters.
Note that the supplied configuration file is applied after :ref:`docker-vars`,
but you can override any of the values.
For example to change the default behavior of CSV export you can use the following
configuration file:
<?php
$cfg['Export']['csv_columns'] = true;
You can also use it to define server configuration instead of using the
environment variables listed in :ref:`docker-vars`:
<?php
/* Override Servers array */
$cfg['Servers'] = [
    1 => [
        'auth_type' => 'cookie',
        'host' => 'mydb1',
        'port' => 3306,
        'verbose' => 'Verbose name 1',
    ],
    2 => [
        'auth_type' => 'cookie',
        'host' => 'mydb2',
        'port' => 3306,
        'verbose' => 'Verbose name 2',
    ],
];
.. seealso::

    See :ref:`config` for detailed description of configuration options.
Docker Volumes
You can use the following volumes to customize image behavior:
:file:`/etc/phpmyadmin/config.user.inc.php`
Can be used for additional settings, see the previous chapter for more details.
:file:`/sessions/`
Directory where PHP sessions are stored. You might want to share this
for example when using :ref:`auth_signon`.
:file:`/www/themes/`
Directory where phpMyAdmin looks for themes. By default only those shipped
with phpMyAdmin are included, but you can include additional phpMyAdmin
themes (see :ref:`themes`) by using Docker volumes.
Docker Examples
To connect phpMyAdmin to a given server use:
docker run --name phpmyadmin -d -e PMA_HOST=dbhost -p 8080:80 phpmyadmin:latest
To connect phpMyAdmin to more servers use:
docker run --name phpmyadmin -d -e PMA_HOSTS=dbhost1,dbhost2,dbhost3 -p 8080:80 phpmyadmin:latest
To use arbitrary server option:
docker run --name phpmyadmin -d --link mysql_db_server:db -p 8080:80 -e PMA_ARBITRARY=1 phpmyadmin:latest
You can also link the database container using Docker:
docker run --name phpmyadmin -d --link mysql_db_server:db -p 8080:80 phpmyadmin:latest
Running with additional configuration:
docker run --name phpmyadmin -d --link mysql_db_server:db -p 8080:80 -v /some/local/directory/config.user.inc.php:/etc/phpmyadmin/config.user.inc.php phpmyadmin:latest
Running with additional themes:
docker run --name phpmyadmin -d --link mysql_db_server:db -p 8080:80 -v /some/local/directory/custom/phpmyadmin/themeName/:/var/www/html/themes/themeName/ phpmyadmin:latest
Using docker-compose
Alternatively, you can also use docker-compose with the docker-compose.yml from
<https://github.com/phpmyadmin/docker>. This will run phpMyAdmin with an
arbitrary server — allowing you to specify MySQL/MariaDB server on the login page.
Customizing configuration file using docker-compose
You can use an external file to customize phpMyAdmin configuration and pass it
using the volumes directive:
phpmyadmin:
    image: phpmyadmin:latest
    container_name: phpmyadmin
    environment:
     - PMA_ARBITRARY=1
    restart: always
    ports:
     - 8080:80
    volumes:
     - /sessions
     - ~/docker/phpmyadmin/config.user.inc.php:/etc/phpmyadmin/config.user.inc.php
     - /custom/phpmyadmin/theme/:/www/themes/theme/
.. seealso:: :ref:`docker-custom`
Running behind haproxy in a subdirectory
When you want to expose phpMyAdmin running in a Docker container in a
subdirectory, you need to rewrite the request path in the server proxying the
requests.
For example, using haproxy it can be done as:
frontend http
    bind *:80
    option forwardfor
    option http-server-close

    ### NETWORK restriction
    acl LOCALNET  src 10.0.0.0/8 192.168.0.0/16 172.16.0.0/12

    # /phpmyadmin
    acl phpmyadmin  path_dir /phpmyadmin
    use_backend phpmyadmin if phpmyadmin LOCALNET

backend phpmyadmin
    mode http

    reqirep  ^(GET|POST|HEAD) /phpmyadmin/(.*)     1 /2

    # phpMyAdmin container IP
    server localhost     172.30.21.21:80
When using traefik, something like following should work:
defaultEntryPoints = ["http"]
[entryPoints]
  [entryPoints.http]
  address = ":80"
    [entryPoints.http.redirect]
      regex = "(http:\/\/[^\/]+\/([^\?\.]+)[^\/])$"
      replacement = "$1/"

[backends]
  [backends.myadmin]
    [backends.myadmin.servers.myadmin]
    url="http://internal.address.to.pma"

[frontends]
   [frontends.myadmin]
   backend = "myadmin"
   passHostHeader = true
     [frontends.myadmin.routes.default]
     rule="PathPrefixStrip:/phpmyadmin/;AddPrefix:/"
You then should specify :envvar:`PMA_ABSOLUTE_URI` in the docker-compose
configuration:
version: '2'

services:
  phpmyadmin:
    restart: always
    image: phpmyadmin:latest
    container_name: phpmyadmin
    hostname: phpmyadmin
    domainname: example.com
    ports:
      - 8000:80
    environment:
      - PMA_HOSTS=172.26.36.7,172.26.36.8,172.26.36.9,172.26.36.10
      - PMA_VERBOSES=production-db1,production-db2,dev-db1,dev-db2
      - PMA_USER=root
      - PMA_PASSWORD=
      - PMA_ABSOLUTE_URI=http://example.com/phpmyadmin/
IBM Cloud
One of our users has created a helpful guide for installing phpMyAdmin on the
IBM Cloud platform.
Quick Install
- Choose an appropriate distribution kit from the phpmyadmin.net
Downloads page. Some kits contain only the English messages, others
contain all languages. We’ll assume you chose a kit whose name
looks likephpMyAdmin-x.x.x -all-languages.tar.gz. - Ensure you have downloaded a genuine archive, see :ref:`verify`.
- Untar or unzip the distribution (be sure to unzip the subdirectories):
tar -xzvf phpMyAdmin_x.x.x-all-languages.tar.gzin your
webserver’s document root. If you don’t have direct access to your
document root, put the files in a directory on your local machine,
and, after step 4, transfer the directory on your web server using,
for example, FTP. - Ensure that all the scripts have the appropriate owner (if PHP is
running in safe mode, having some scripts with an owner different from
the owner of other scripts will be a problem). See :ref:`faq4_2` and
:ref:`faq1_26` for suggestions. - Now you must configure your installation. There are two methods that
can be used. Traditionally, users have hand-edited a copy of
:file:`config.inc.php`, but now a wizard-style setup script is provided
for those who prefer a graphical installation. Creating a
:file:`config.inc.php` is still a quick way to get started and needed for
some advanced features.
Manually creating the file
To manually create the file, simply use your text editor to create the
file :file:`config.inc.php` (you can copy :file:`config.sample.inc.php` to get
a minimal configuration file) in the main (top-level) phpMyAdmin
directory (the one that contains :file:`index.php`). phpMyAdmin first
loads the default configuration values and then overrides those values
with anything found in :file:`config.inc.php`. If the default value is
okay for a particular setting, there is no need to include it in
:file:`config.inc.php`. You’ll probably need only a few directives to get going; a
simple configuration may look like this:
<?php
// The string is a hexadecimal representation of a 32-bytes long string of random bytes.
$cfg['blowfish_secret'] = sodium_hex2bin('f16ce59f45714194371b48fe362072dc3b019da7861558cd4ad29e4d6fb13851');

$i=0;
$i++;
$cfg['Servers'][$i]['auth_type']     = 'cookie';
// if you insist on "root" having no password:
// $cfg['Servers'][$i]['AllowNoPassword'] = true;
Or, if you prefer to not be prompted every time you log in:
<?php

$i=0;
$i++;
$cfg['Servers'][$i]['user']          = 'root';
$cfg['Servers'][$i]['password']      = 'changeme'; // use here your password
$cfg['Servers'][$i]['auth_type']     = 'config';
Warning
Storing passwords in the configuration is insecure as anybody can then
manipulate your database.
For a full explanation of possible configuration values, see the
:ref:`config` of this document.
.. index:: Setup script
Using the Setup script
Instead of manually editing :file:`config.inc.php`, you can use phpMyAdmin’s
setup feature. The file can be generated using the setup and you can download it
for upload to the server.
Next, open your browser and visit the location where you installed phpMyAdmin,
with the /setup suffix. The changes are not saved to the server, you need to
use the :guilabel:`Download` button to save them to your computer and then upload
to the server.
Now the file is ready to be used. You can choose to review or edit the
file with your favorite editor, if you prefer to set some advanced
options that the setup script does not provide.
- If you are using the
auth_type«config», it is suggested that you
protect the phpMyAdmin installation directory because using config
does not require a user to enter a password to access the phpMyAdmin
installation. Use of an alternate authentication method is
recommended, for example with HTTP–AUTH in a :term:`.htaccess` file or switch to using
auth_typecookie or http. See the :ref:`faqmultiuser`
for additional information, especially :ref:`faq4_4`. - Open the main phpMyAdmin directory in your browser.
phpMyAdmin should now display a welcome screen and your databases, or
a login dialog if using :term:`HTTP` or
cookie authentication mode.
Setup script on Debian, Ubuntu and derivatives
Debian and Ubuntu have changed the way in which the setup script is enabled and disabled, in a way
that single command has to be executed for either of these.
To allow editing configuration invoke:
To block editing configuration invoke:
Setup script on openSUSE
Some openSUSE releases do not include setup script in the package. In case you
want to generate configuration on these you can either download original
package from <https://www.phpmyadmin.net/> or use setup script on our demo
server: <https://demo.phpmyadmin.net/master/setup/>.
Verifying phpMyAdmin releases
Since July 2015 all phpMyAdmin releases are cryptographically signed by the
releasing developer, who through January 2016 was Marc Delisle. His key id is
0xFEFC65D181AF644A, his PGP fingerprint is:
436F F188 4B1A 0C3F DCBF 0D79 FEFC 65D1 81AF 644A
and you can get more identification information from <https://keybase.io/lem9>.
Beginning in January 2016, the release manager is Isaac Bennetch. His key id is
0xCE752F178259BD92, and his PGP fingerprint is:
3D06 A59E CE73 0EB7 1B51 1C17 CE75 2F17 8259 BD92
and you can get more identification information from <https://keybase.io/ibennetch>.
Some additional downloads (for example themes) might be signed by Michal Čihař. His key id is
0x9C27B31342B7511D, and his PGP fingerprint is:
63CB 1DF1 EF12 CF2A C0EE 5A32 9C27 B313 42B7 511D
and you can get more identification information from <https://keybase.io/nijel>.
You should verify that the signature matches the archive you have downloaded.
This way you can be sure that you are using the same code that was released.
You should also verify the date of the signature to make sure that you
downloaded the latest version.
Each archive is accompanied by .asc files which contain the PGP signature
for it. Once you have both of them in the same folder, you can verify the signature:
$ gpg --verify phpMyAdmin-4.5.4.1-all-languages.zip.asc
gpg: Signature made Fri 29 Jan 2016 08:59:37 AM EST using RSA key ID 8259BD92
gpg: Can't check signature: public key not found
As you can see gpg complains that it does not know the public key. At this
point, you should do one of the following steps:
- Download the keyring from our download server, then import it with:
$ gpg --import phpmyadmin.keyring
- Download and import the key from one of the key servers:
$ gpg --keyserver hkp://pgp.mit.edu --recv-keys 3D06A59ECE730EB71B511C17CE752F178259BD92
gpg: requesting key 8259BD92 from hkp server pgp.mit.edu
gpg: key 8259BD92: public key "Isaac Bennetch <bennetch@gmail.com>" imported
gpg: no ultimately trusted keys found
gpg: Total number processed: 1
gpg:               imported: 1  (RSA: 1)
This will improve the situation a bit — at this point, you can verify that the
signature from the given key is correct but you still can not trust the name used
in the key:
$ gpg --verify phpMyAdmin-4.5.4.1-all-languages.zip.asc
gpg: Signature made Fri 29 Jan 2016 08:59:37 AM EST using RSA key ID 8259BD92
gpg: Good signature from "Isaac Bennetch <bennetch@gmail.com>"
gpg:                 aka "Isaac Bennetch <isaac@bennetch.org>"
gpg: WARNING: This key is not certified with a trusted signature!
gpg:          There is no indication that the signature belongs to the owner.
Primary key fingerprint: 3D06 A59E CE73 0EB7 1B51  1C17 CE75 2F17 8259 BD92
The problem here is that anybody could issue the key with this name. You need to
ensure that the key is actually owned by the mentioned person. The GNU Privacy
Handbook covers this topic in the chapter Validating other keys on your public
keyring. The most reliable method is to meet the developer in person and
exchange key fingerprints, however, you can also rely on the web of trust. This way
you can trust the key transitively though signatures of others, who have met
the developer in person.
Once the key is trusted, the warning will not occur:
$ gpg --verify phpMyAdmin-4.5.4.1-all-languages.zip.asc
gpg: Signature made Fri 29 Jan 2016 08:59:37 AM EST using RSA key ID 8259BD92
gpg: Good signature from "Isaac Bennetch <bennetch@gmail.com>" [full]
Should the signature be invalid (the archive has been changed), you would get a
clear error regardless of the fact that the key is trusted or not:
$ gpg --verify phpMyAdmin-4.5.4.1-all-languages.zip.asc
gpg: Signature made Fri 29 Jan 2016 08:59:37 AM EST using RSA key ID 8259BD92
gpg: BAD signature from "Isaac Bennetch <bennetch@gmail.com>" [unknown]
.. index::
    single: Configuration storage
    single: phpMyAdmin configuration storage
    single: pmadb
phpMyAdmin configuration storage
.. versionchanged:: 3.4.0

   Prior to phpMyAdmin 3.4.0 this was called Linked Tables Infrastructure, but
   the name was changed due to the extended scope of the storage.
For a whole set of additional features (:ref:`bookmarks`, comments, :term:`SQL`-history,
tracking mechanism, :term:`PDF`-generation, :ref:`transformations`, :ref:`relations`
etc.) you need to create a set of special tables. Those tables can be located
in your own database, or in a central database for a multi-user installation
(this database would then be accessed by the controluser, so no other user
should have rights to it).
Zero configuration
In many cases, this database structure can be automatically created and
configured. This is called “Zero Configuration” mode and can be particularly
useful in shared hosting situations. “Zeroconf” mode is on by default, to
disable set :config:option:`$cfg[‘ZeroConf’]` to false.
The following three scenarios are covered by the Zero Configuration mode:
- When entering a database where the configuration storage tables are not
present, phpMyAdmin offers to create them from the Operations tab. - When entering a database where the tables do already exist, the software
automatically detects this and begins using them. This is the most common
situation; after the tables are initially created automatically they are
continually used without disturbing the user; this is also most useful on
shared hosting where the user is not able to edit :file:`config.inc.php` and
usually the user only has access to one database. - When having access to multiple databases, if the user first enters the
database containing the configuration storage tables then switches to
another database,
phpMyAdmin continues to use the tables from the first database; the user is
not prompted to create more tables in the new database.
Manual configuration
Please look at your ./sql/ directory, where you should find a
file called create_tables.sql. (If you are using a Windows server,
pay special attention to :ref:`faq1_23`).
If you already had this infrastructure and:
- upgraded to MySQL 4.1.2 or newer, please use
:file:`sql/upgrade_tables_mysql_4_1_2+.sql`. - upgraded to phpMyAdmin 4.3.0 or newer from 2.5.0 or newer (<= 4.2.x),
please use :file:`sql/upgrade_column_info_4_3_0+.sql`. - upgraded to phpMyAdmin 4.7.0 or newer from 4.3.0 or newer,
please use :file:`sql/upgrade_tables_4_7_0+.sql`.
and then create new tables by importing :file:`sql/create_tables.sql`.
You can use your phpMyAdmin to create the tables for you. Please be
aware that you may need special (administrator) privileges to create
the database and tables, and that the script may need some tuning,
depending on the database name.
After having imported the :file:`sql/create_tables.sql` file, you
should specify the table names in your :file:`config.inc.php` file. The
directives used for that can be found in the :ref:`config`.
You will also need to have a controluser
(:config:option:`$cfg[‘Servers’][$i][‘controluser’]` and
:config:option:`$cfg[‘Servers’][$i][‘controlpass’]` settings)
with the proper rights to those tables. For example you can create it
using following statement:
And for any MariaDB version:
CREATE USER 'pma'@'localhost' IDENTIFIED VIA mysql_native_password USING 'pmapass';
GRANT SELECT, INSERT, UPDATE, DELETE ON `<pma_db>`.* TO 'pma'@'localhost';
For MySQL 8.0 and newer:
CREATE USER 'pma'@'localhost' IDENTIFIED WITH caching_sha2_password BY 'pmapass';
GRANT SELECT, INSERT, UPDATE, DELETE ON <pma_db>.* TO 'pma'@'localhost';
For MySQL older than 8.0:
CREATE USER 'pma'@'localhost' IDENTIFIED WITH mysql_native_password AS 'pmapass';
GRANT SELECT, INSERT, UPDATE, DELETE ON <pma_db>.* TO 'pma'@'localhost';
Note that MySQL installations with PHP older than 7.4 and MySQL newer than 8.0 may require
using the mysql_native_password authentication as a workaround, see
:ref:`faq1_45` for details.
Upgrading from an older version
Warning
Never extract the new version over an existing installation of
phpMyAdmin, always first remove the old files keeping just the
configuration.
This way, you will not leave any old or outdated files in the directory,
which can have severe security implications or can cause various breakages.
Simply copy :file:`config.inc.php` from your previous installation into
the newly unpacked one. Configuration files from old versions may
require some tweaking as some options have been changed or removed.
For compatibility with PHP 5.3 and later, remove a
set_magic_quotes_runtime(0); statement that you might find near
the end of your configuration file.
The complete upgrade can be performed in a few simple steps:
- Download the latest phpMyAdmin version from <https://www.phpmyadmin.net/downloads/>.
- Rename existing phpMyAdmin folder (for example to
phpmyadmin-old). - Unpack freshly downloaded phpMyAdmin to the desired location (for example
phpmyadmin). - Copy :file:`config.inc.php« from old location (
phpmyadmin-old) to the new one (phpmyadmin). - Test that everything works properly.
- Remove backup of a previous version (
phpmyadmin-old).
If you have upgraded your MySQL server from a version previous to 4.1.2 to
version 5.x or newer and if you use the phpMyAdmin configuration storage, you
should run the :term:`SQL` script found in
:file:`sql/upgrade_tables_mysql_4_1_2+.sql`.
If you have upgraded your phpMyAdmin to 4.3.0 or newer from 2.5.0 or
newer (<= 4.2.x) and if you use the phpMyAdmin configuration storage, you
should run the :term:`SQL` script found in
:file:`sql/upgrade_column_info_4_3_0+.sql`.
Do not forget to clear the browser cache and to empty the old session by
logging out and logging in again.
.. index:: Authentication mode
Using authentication modes
:term:`HTTP` and cookie authentication modes are recommended in a multi-user
environment where you want to give users access to their own database and
don’t want them to play around with others. Nevertheless, be aware that MS
Internet Explorer seems to be really buggy about cookies, at least till version
6. Even in a single-user environment, you might prefer to use :term:`HTTP`
or cookie mode so that your user/password pair are not in clear in the
configuration file.
:term:`HTTP` and cookie authentication
modes are more secure: the MySQL login information does not need to be
set in the phpMyAdmin configuration file (except possibly for the
:config:option:`$cfg[‘Servers’][$i][‘controluser’]`).
However, keep in mind that the password travels in plain text unless
you are using the HTTPS protocol. In cookie mode, the password is
stored, encrypted with the AES algorithm, in a temporary cookie.
Then each of the true users should be granted a set of privileges
on a set of particular databases. Normally you shouldn’t give global
privileges to an ordinary user unless you understand the impact of those
privileges (for example, you are creating a superuser).
For example, to grant the user real_user with all privileges on
the database user_base:
GRANT ALL PRIVILEGES ON user_base.* TO 'real_user'@localhost IDENTIFIED BY 'real_password';
What the user may now do is controlled entirely by the MySQL user management
system. With HTTP or cookie authentication mode, you don’t need to fill the
user/password fields inside the :config:option:`$cfg[‘Servers’]`.
.. seealso::

    :ref:`faq1_32`,
    :ref:`faq1_35`,
    :ref:`faq4_1`,
    :ref:`faq4_2`,
    :ref:`faq4_3`
.. index:: pair: HTTP; Authentication mode
HTTP authentication mode
-
Uses :term:`HTTP` Basic authentication
method and allows you to log in as any valid MySQL user. -
Is supported with most PHP configurations. For :term:`IIS` (:term:`ISAPI`)
support using :term:`CGI` PHP see :ref:`faq1_32`, for using with Apache
:term:`CGI` see :ref:`faq1_35`. -
When PHP is running under Apache’s :term:`mod_proxy_fcgi` (e.g. with PHP-FPM),
Authorizationheaders are not passed to the underlying FCGI application,
such that your credentials will not reach the application. In this case, you can
add the following configuration directive:SetEnvIf Authorization "(.*)" HTTP_AUTHORIZATION=$1
-
See also :ref:`faq4_4` about not using the :term:`.htaccess` mechanism along with
‘:term:`HTTP`‘ authentication mode.
Note
There is no way to do proper logout in HTTP authentication, most browsers
will remember credentials until there is no different successful
authentication. Because of this, this method has a limitation that you can not
login with the same user after logout.
.. index:: pair: Cookie; Authentication mode
Cookie authentication mode
- Username and password are stored in cookies during the session and password
is deleted when it ends. - With this mode, the user can truly log out of phpMyAdmin and log
back in with the same username (this is not possible with :ref:`auth_http`). - If you want to allow users to enter any hostname to connect (rather than only
servers that are configured in :file:`config.inc.php`),
see the :config:option:`$cfg[‘AllowArbitraryServer’]` directive. - As mentioned in the :ref:`require` section, having the
opensslextension
will speed up access considerably, but is not required.
.. index:: pair: Signon; Authentication mode
Signon authentication mode
- This mode is a convenient way of using credentials from another
application to authenticate to phpMyAdmin to implement a single signon
solution. - The other application has to store login information into session
data (see :config:option:`$cfg[‘Servers’][$i][‘SignonSession’]` and
:config:option:`$cfg[‘Servers’][$i][‘SignonCookieParams’]`) or you
need to implement script to return the credentials (see
:config:option:`$cfg[‘Servers’][$i][‘SignonScript’]`). - When no credentials are available, the user is being redirected to
:config:option:`$cfg[‘Servers’][$i][‘SignonURL’]`, where you should handle
the login process.
The very basic example of saving credentials in a session is available as
:file:`examples/signon.php`:
.. literalinclude:: ../examples/signon.php
    :language: php
Alternatively, you can also use this way to integrate with OpenID as shown
in :file:`examples/openid.php`:
.. literalinclude:: ../examples/openid.php
    :language: php
If you intend to pass the credentials using some other means than, you have to
implement wrapper in PHP to get that data and set it to
:config:option:`$cfg[‘Servers’][$i][‘SignonScript’]`. There is a very minimal example
in :file:`examples/signon-script.php`:
.. literalinclude:: ../examples/signon-script.php
    :language: php
.. seealso::
    :config:option:`$cfg['Servers'][$i]['auth_type']`,
    :config:option:`$cfg['Servers'][$i]['SignonSession']`,
    :config:option:`$cfg['Servers'][$i]['SignonCookieParams']`,
    :config:option:`$cfg['Servers'][$i]['SignonScript']`,
    :config:option:`$cfg['Servers'][$i]['SignonURL']`,
    :ref:`example-signon`
.. index:: pair: Config; Authentication mode
Config authentication mode
- This mode is sometimes the less secure one because it requires you to fill the
:config:option:`$cfg[‘Servers’][$i][‘user’]` and
:config:option:`$cfg[‘Servers’][$i][‘password’]`
fields (and as a result, anyone who can read your :file:`config.inc.php`
can discover your username and password). - In the :ref:`faqmultiuser` section, there is an entry explaining how
to protect your configuration file. - For additional security in this mode, you may wish to consider the
Host authentication :config:option:`$cfg[‘Servers’][$i][‘AllowDeny’][‘order’]`
and :config:option:`$cfg[‘Servers’][$i][‘AllowDeny’][‘rules’]` configuration directives. - Unlike cookie and http, does not require a user to log in when first
loading the phpMyAdmin site. This is by design but could allow any
user to access your installation. Use of some restriction method is
suggested, perhaps a :term:`.htaccess` file with the HTTP-AUTH directive or disallowing
incoming HTTP requests at one’s router or firewall will suffice (both
of which are beyond the scope of this manual but easily searchable
with Google).
Securing your phpMyAdmin installation
The phpMyAdmin team tries hard to make the application secure, however there
are always ways to make your installation more secure:
-
Follow our Security announcements and upgrade
phpMyAdmin whenever new vulnerability is published. -
Serve phpMyAdmin on HTTPS only. Preferably, you should use HSTS as well, so that
you’re protected from protocol downgrade attacks. -
Ensure your PHP setup follows recommendations for production sites, for example
display_errors
should be disabled. -
Remove the
testdirectory from phpMyAdmin, unless you are developing and need a test suite. -
Remove the
setupdirectory from phpMyAdmin, you will probably not
use it after the initial setup. -
Properly choose an authentication method — :ref:`cookie`
is probably the best choice for shared hosting. -
Deny access to auxiliary files in :file:`./libraries/` or
:file:`./templates/` subfolders in your webserver configuration.
Such configuration prevents from possible path exposure and cross side
scripting vulnerabilities that might happen to be found in that code. For the
Apache webserver, this is often accomplished with a :term:`.htaccess` file in
those directories. -
Deny access to temporary files, see :config:option:`$cfg[‘TempDir’]` (if that
is placed inside your web root, see also :ref:`web-dirs`. -
It is generally a good idea to protect a public phpMyAdmin installation
against access by robots as they usually can not do anything good there. You
can do this usingrobots.txtfile in the root of your webserver or limit
access by web server configuration, see :ref:`faq1_42`. -
In case you don’t want all MySQL users to be able to access
phpMyAdmin, you can use :config:option:`$cfg[‘Servers’][$i][‘AllowDeny’][‘rules’]` to limit them
or :config:option:`$cfg[‘Servers’][$i][‘AllowRoot’]` to deny root user access. -
Enable :ref:`2fa` for your account.
-
Consider hiding phpMyAdmin behind an authentication proxy, so that
users need to authenticate prior to providing MySQL credentials
to phpMyAdmin. You can achieve this by configuring your web server to request
HTTP authentication. For example in Apache this can be done with:AuthType Basic AuthName "Restricted Access" AuthUserFile /usr/share/phpmyadmin/passwd Require valid-user
Once you have changed the configuration, you need to create a list of users which
can authenticate. This can be done using the :program:`htpasswd` utility:htpasswd -c /usr/share/phpmyadmin/passwd username
-
If you are afraid of automated attacks, enabling Captcha by
:config:option:`$cfg[‘CaptchaLoginPublicKey’]` and
:config:option:`$cfg[‘CaptchaLoginPrivateKey’]` might be an option. -
Failed login attempts are logged to syslog (if available, see
:config:option:`$cfg[‘AuthLog’]`). This can allow using a tool such as
fail2ban to block brute-force attempts. Note that the log file used by syslog
is not the same as the Apache error or access log files. -
In case you’re running phpMyAdmin together with other PHP applications, it is
generally advised to use separate session storage for phpMyAdmin to avoid
possible session-based attacks against it. You can use
:config:option:`$cfg[‘SessionSavePath’]` to achieve this.
Using SSL for connection to database server
It is recommended to use SSL when connecting to remote database server. There
are several configuration options involved in the SSL setup:
- :config:option:`$cfg[‘Servers’][$i][‘ssl’]`
- Defines whether to use SSL at all. If you enable only this, the connection
will be encrypted, but there is not authentication of the connection — you
can not verify that you are talking to the right server. - :config:option:`$cfg[‘Servers’][$i][‘ssl_key’]` and :config:option:`$cfg[‘Servers’][$i][‘ssl_cert’]`
- This is used for authentication of client to the server.
- :config:option:`$cfg[‘Servers’][$i][‘ssl_ca’]` and :config:option:`$cfg[‘Servers’][$i][‘ssl_ca_path’]`
- The certificate authorities you trust for server certificates.
This is used to ensure that you are talking to a trusted server. - :config:option:`$cfg[‘Servers’][$i][‘ssl_verify’]`
- This configuration disables server certificate verification. Use with
caution.
When the database server is using a local connection or private network and SSL can not be configured
you can use :config:option:`$cfg[‘MysqlSslWarningSafeHosts’]` to explicitly list the hostnames that are considered secure.
.. seealso::

    :ref:`example-google-ssl`,
    :ref:`example-aws-ssl`,
    :config:option:`$cfg['Servers'][$i]['ssl']`,
    :config:option:`$cfg['Servers'][$i]['ssl_key']`,
    :config:option:`$cfg['Servers'][$i]['ssl_cert']`,
    :config:option:`$cfg['Servers'][$i]['ssl_ca']`,
    :config:option:`$cfg['Servers'][$i]['ssl_ca_path']`,
    :config:option:`$cfg['Servers'][$i]['ssl_ciphers']`,
    :config:option:`$cfg['Servers'][$i]['ssl_verify']`
Known issues
Users with column-specific privileges are unable to «Browse»
If a user has only column-specific privileges on some (but not all) columns in a table, «Browse»
will fail with an error message.
As a workaround, a bookmarked query with the same name as the table can be created, this will
run when using the «Browse» link instead. Issue 11922.
Trouble logging back in after logging out using ‘http’ authentication
When using the ‘http’ auth_type, it can be impossible to log back in (when the logout comes
manually or after a period of inactivity). Issue 11898.
Managing a database is a complex but necessary part of running a website. Luckily, software like phpMyAdmin exist to make the process much easier. This popular administration tool may seem challenging to learn, but accessing and modifying your database will be a breeze once you have the hang of it.
The most difficult part is knowing how to install phpMyAdmin and setting it up on your web server. If you’re having trouble, you’re certainly not the only one.
In this article, we’ll show you step by step how to install phpMyAdmin on all major operating systems, plus how to configure it from there.
Let’s get going!
Prefer to watch the video version?
What Is phpMyAdmin?
Behind every website is a database. This database allows you to store data ranging from user account information to the posts you make on your site. While there are many database services, MySQL is the most popular one. And most likely, it’s the one your website is using. MariaDB is a common alternative.
Interacting directly with MySQL can be complicated and confusing, especially if you’re new to website administration. But interacting with your databases is often a necessary part of site maintenance.
phpMyAdmin was created to bring a browser-based visual interface to MySQL and make it easier to work with your database. Due to its popularity, many web hosting services include access to phpMyAdmin, including Kinsta.
Managing a database can be complicated 😅 phpMyAdmin exists to make the process much easier ✅ Learn how to install and configure it right here.Click to Tweet
Why Do You Need phpMyAdmin?
Without a tool like phpMyAdmin, your only option for accessing the database is with the command line. It means you have no visual interface — just a text prompt where you put in commands. Doing it this way can be confusing and may even lead to accidentally breaking your site.
phpMyAdmin is free and open source. A wide range of web hosts supports it, and you can even install it yourself without paying a single cent. And once you’ve installed it, executing database commands from the visual interface is much more intuitive.
Still on the fence? You can try phpMyAdmin yourself to see if it’s a database manager you’d like to use. Once you’ve given it a test drive and decided you’d like it, you can install the tool on your server.
phpMyAdmin Requirements
The requirements to install phpMyAdmin are, luckily, relatively simple. If you have a web server of any kind, you should almost certainly be able to get it running. Here are the detailed requirements:
- A webserver of any kind
- MySQL or MariaDB 5.5 or newer
- A web browser that supports Javascript, cookies, and Bootstrap 4.5 (to access phpMyAdmin)
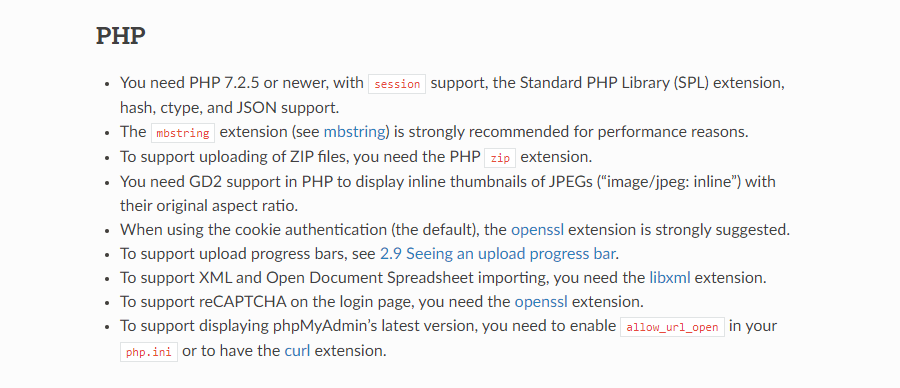
- PHP 7.2.5 or newer
- Additional PHP requirements: The session and SPL extensions, hash, ctype, and JSON support. Other extensions such as mbstring can improve performance or add additional minor functionality (see the requirements page for the complete list).
Before you try to install phpMyAdmin, remember that many web hosts already come with it installed. Kinsta is among them; if you want to access the database manager, log into your Kinsta account, then go to the Info tab and look for Database Access.
Before installing phpMyAdmin, check your web host’s documentation to ensure they’ve not installed it already.
Step By Step: Installing phpMyAdmin
Once you’ve checked to make sure your server supports phpMyAdmin, it’s time to get to work installing it. Web servers come in a wide range of operating systems, so we’ve included all the most popular ones, including Windows, Mac, and multiple distributions of Linux.
With that, here are the step-by-step instructions for installing phpMyAdmin.
How to Install phpMyAdmin on Windows 10
As the requirements state, you’re going to need a web server with PHP and a database to use phpMyAdmin. While you can undoubtedly download Apache, PHP, and MySQL manually, there’s a much simpler option to get a server up and running on a Windows computer.
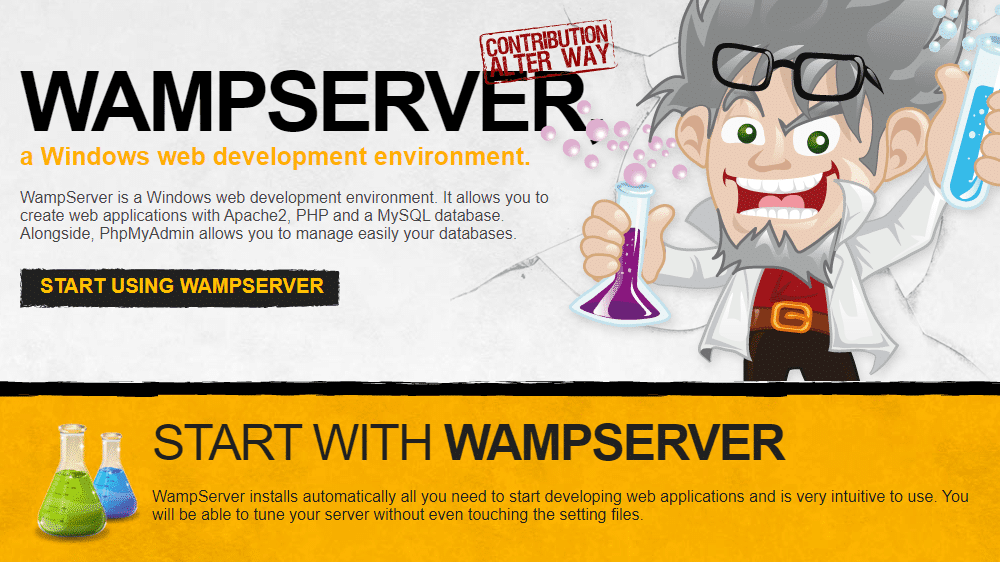
WAMP (Windows, Apache, MySQL, and PHP) is free software that easily allows you to create a server with all prerequisites. You can also try XAMPP for Windows (Apache, MariaDB, PHP, and Perl) if it suits your needs better.
Once you have one of these downloaded, it’s just a matter of installing it and walking through the setup process.
Suppose you’re using WAMP or XAMPP. Both of these come with phpMyAdmin already! In your browser, navigate to http://localhost/phpMyAdmin, and you should see the login screen, confirming that you’ve installed everything correctly.
How to Install phpMyAdmin on Mac
Getting phpMyAdmin on a Mac is a little different. All the prerequisites are the same. But as macOS ships with both Apache and PHP, you don’t need to download them.
With Mac, you have two options: You can use XAMPP just like with other operating systems or install everything manually.
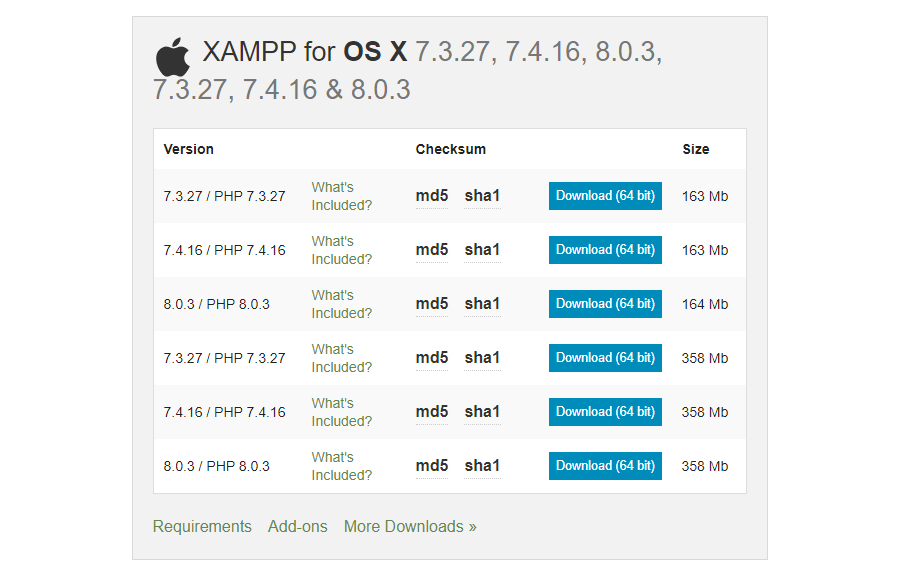
Download XAMPP for OS X, open it, and drop it into your Applications folder.
Open XAMPP Control from /Applications/XAMPP/manager-osx.app to start your Apache and MySQL servers. If you then visit http://localhost, you should find everything working correctly and your phpMyAdmin login under the “Tools” section.
If you’d instead install phpMyAdmin manually, the process is simple. Since you already have Apache and PHP, you only need to download MySQL. Make sure you select macOS from the dropdown. Download and install the file, follow the instructions, and record any usernames and passwords given to you.
You can then open System Preferences and launch MySQL to start a server. You can also start Apache by running this command in the Terminal:
sudo apachectl start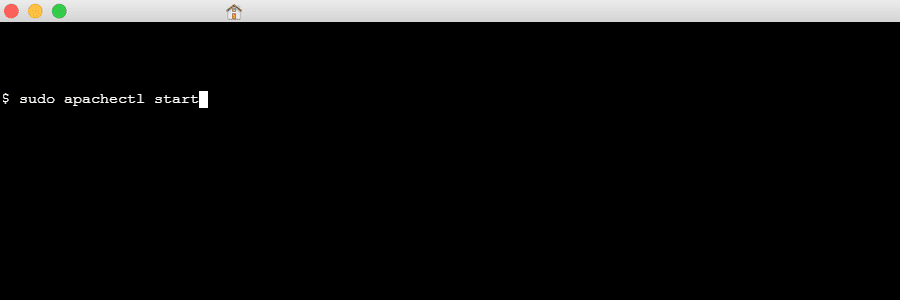
With that, all that’s left is installing phpMyAdmin. Rename the folder to “phpMyAdmin” and move it to /Library/WebServer/Documents/. Check to make sure it’s installed correctly by visiting http://localhost/phpMyAdmin in the browser.
If you have Homebrew installed, another option is to put in the command: brew install phpMyAdmin.
How to Install phpMyAdmin on Ubuntu
As one of the most popular and most accessible to use Linux distributions, Ubuntu is a good choice for your server.
While manual installation of Apache and MySQL is always possible, Linux has its own “stack” of standard server software known as LAMP (Linux, Apache, MySQL, and PHP). Unlike WAMP and XAMPP, this does not come with phpMyAdmin, so you’ll need to install it manually. Luckily, Ubuntu allows you to do all of your installations through the command line.
First, check that tasksel is enabled. Server editions of Ubuntu should come with it installed, but if you have a desktop edition, you can enable it with this command:
sudo apt-get install taskselAfter that, you can use tasksel to install a LAMP server with this command:
sudo tasksel install lamp-server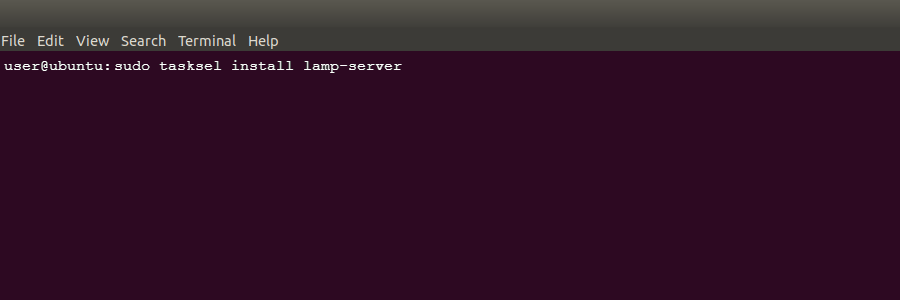
Now, you can install phpMyAdmin:
sudo apt install phpMyAdminWith that, you have all the necessary files to run a server on your computer.
How to Install phpMyAdmin on CentOS 7
Installing phpMyAdmin on CentOS 7 is very similar to other distributions, but the commands are slightly different as this OS uses Yum rather than the typical apt command.
There’s also no simple LAMP stack that installs all the server components you need at once, so you’ll need to download Apache, MySQL, and PHP manually. Thankfully these can be easily obtained through the command line.
First, let’s get a LAMP stack downloaded using the command line, beginning with Apache:
sudo yum install httpd.serviceTo start the Apache server and ensure it runs on boot, use these commands:
sudo systemctl start httpd.service
sudo systemctl enable httpd.service
Now it’s time to install a database. CentOS 7 defaults to installing MariaDB. It is also fully compatible with phpMyAdmin, so it’s safe to use. While it’s possible to download MySQL instead, it’s a much more complicated process. Let’s use MariaDB:
sudo yum install mariadb-server mariadb
Now we can run it and cause it to start at boot:
sudo systemctl start mariadb
sudo systemctl enable mariadb.service
To finish installing MariaDB and ensure it’s secure, run the secure installation setup with the following command.
sudo mysql_secure_installationLast, we can install PHP with the additional MySQL package.
sudo yum install php php-mysqlYou’ll also need to restart the Apache server, so it works properly with PHP.
sudo systemctl restart httpd.serviceWith that, you have the LAMP stack you need and can finally get to downloading phpMyAdmin. As it isn’t in the Yum repository, you’ll need to install the EPEL repository instead with this command:
sudo yum install epel-releaseAnd install phpMyAdmin.
sudo yum install phpMyAdminIt takes a few more steps on CentOS 7, but you should now have a server ready for configuration.
How to Install phpMyAdmin on Debian
Much like CentOS 7, you’ll need to install a LAMP stack using the command line manually. First, let’s get Apache with this command:
sudo apt install apache2Next, we’ll install MariaDB. Like CentOS 7, this Linux distribution works better with MariaDB, and we recommended you use that one instead.
sudo apt install mariadb-serverAnd like with CentOS 7, you should run the secure installation to add a database password and ensure that everything is secure.
sudo mysql_secure_installationFinally, we can install PHP and a few extra packages your server will need to work.
sudo apt install php php-mysql libapache2-mod-phpAnd we can finish off by installing phpMyAdmin.
sudo apt install phpMyAdminHow to Access phpMyAdmin
Once you have phpMyAdmin appropriately installed, accessing it and logging in is the same on any operating system.
You’ll need your web server’s address, then append /phpMyAdmin/ to the end of it. If you just set up a server on your computer, the address is very likely simply “localhost,” so visit this link:
http://localhost/phpMyAdminIt may also be an IP, or even a named address if this is a server you already have running on the web. If you’re not sure, you can likely find the address in your Apache or MySQL config files.
Once you’re on the login screen, you’ll need a username and password. If this is a fresh installation, the username is likely “root,” and you can leave the password blank. If that doesn’t work, the password may be “password.”

If you can’t log in, check the phpMyAdmin or MySQL config files to find your login info. You may have also changed the login info during the installation process.
Linux users should try the following Linux command if they’re having trouble accessing the page or logging in:
sudo dpkg-reconfigure phpMyAdminLastly, you should note that if you’re using a web host such as Kinsta with phpMyAdmin preinstalled, you can usually find login info and links in your hosting dashboard. In this case, you don’t need to install phpMyAdmin on the server manually.
Configuring phpMyAdmin
With the database manager installed and ready to go on your system, you should know how to configure phpMyAdmin. Like with any server software, you’re certainly going to want to do plenty of tinkering with the settings.
An unconfigured phpMyAdmin can also pose a potential security risk. There are a few extra steps you need to take to lock down your system.
If you ever need to restore a backup of your database, you can always use phpMyAdmin to import a new SQL file. Always make frequent backups before doing any significant modifications to the database or its settings, especially if you’re not just working on a test server.
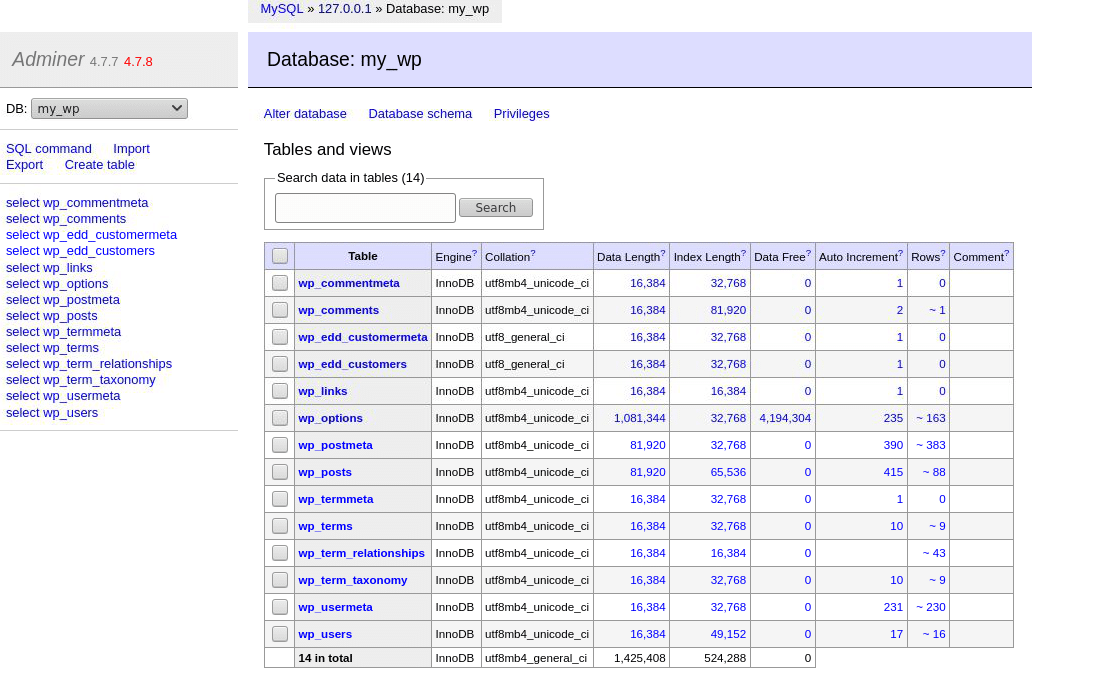
How to Run SQL Queries
Now that you have phpMyAdmin working, you should know how to do what it’s made for: running SQL queries.
You can run queries either on the homepage (this will apply to the entire site), or in a specific database or table. Click the SQL tab at the top of the screen, type in your command, and press Go.

Here’s a list of common SQL queries:
- Select: The most important tag, used at the beginning of almost every query.
- Create Table: Create a new table.
- Alter Table: Add new columns.
- Insert: Add new rows.
- Delete: Remove columns.
- Update: Edit values in a table.
- Sum(): Adds up all the values.
- Avg(): Average the values.
- Count(): Counts the number of filled columns.
- Round(): Rounds the value to the integer you set.
- Max(): Return the largest value.
- Min(): Return the smallest value.
- Between: Select columns within a specific range.
- Group By: Group tables by data.
- Order By: Order results in a certain way.
There are certainly more commands to learn, but those are a few to start with.
How to Change the Default phpMyAdmin URL
Leaving the phpMyAdmin access link on its default setting (http://website.com/phpMyAdmin) can pose a security risk.
If you make this page easy to find, hackers will be able to visit it and attempt to brute force down your username and password. It can be even worse if you’ve left the credentials on the default “root” and “password.”
But by changing the URL to something only you know, you can make it much more difficult for unknown users to access this page and try to guess the password.
Open phpMyAdmin.conf in a text editor, which you can find under C:wampalias on Windows/WAMP, xamppapacheconfextra on XAMPP, /etc/httpd/conf.d on Linux, or /usr/conf/extra on Mac.
You should see this line in there:
Alias /phpMyAdmin /usr/share/phpMyAdminChange the /phpMyAdmin path to the new address of your choice. For instance:
Alias /exampleURL /usr/share/phpMyAdminNow you can access this unique URL for phpMyAdmin by visiting the custom address you set (http://website.com/exampleURL).
How to Set Up an NGINX Authentication Gateway
Another option is to set up a second layer of security with an authentication gateway. After moving the phpMyAdmin login page to a secret location, you can password protect this page to make it even less likely for attackers to get through.
Users of Linux on an NGINX server can run the following commands in the command line to create an authentication gateway (this is also possible on Apache servers).
Start by creating an encrypted password (change “example” to whatever you like) and noting down the result:
openssl passwd exampleCreate a configuration file in NGINX’s folder and give it a name:
sudo nano /etc/nginx/examplenameEnter the username and password into this file like this, being careful to leave in the colon:
exampleusername:examplepasswordNow open the NGINX configuration file.
sudo nano /etc/nginx/sites-available/defaultWithin the “server” block, we’ll add our gateway by pasting the following code (make sure to change the values).
location /example {
  auth_basic "Login";
  auth_basic_user_file /etc/nginx/examplename;
The first /example should be whatever you set your phpMyAdmin URL to, and you can adjust the auth_basic variable name to anything you want, and the final /examplename should be the name of the password file you created earlier.
Now upon login, you should be required to enter the credentials you set before even seeing the phpMyAdmin login.
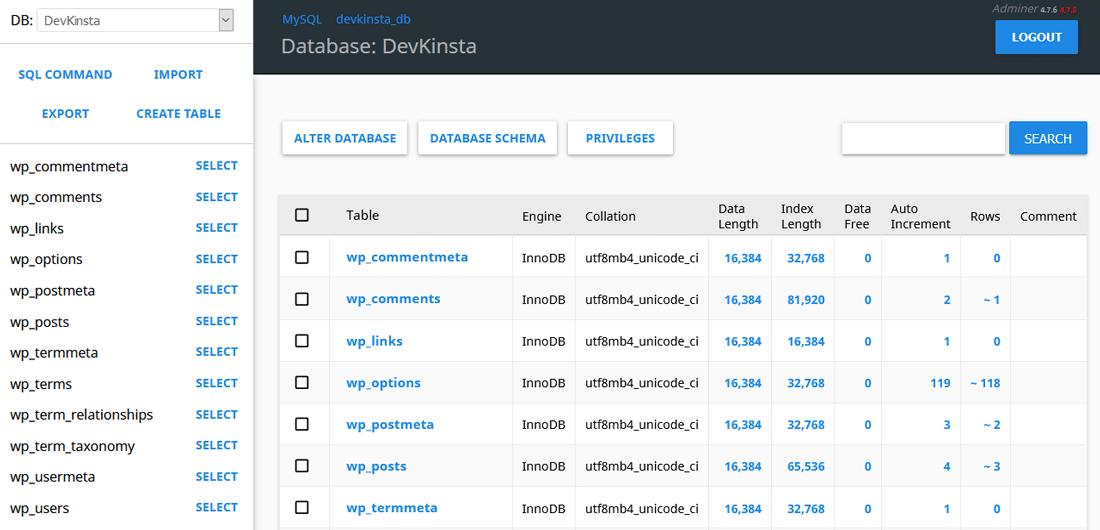
Adminer: A Simpler Alternative to phpMyAdmin
Adminer is a free, open source database management tool similar to phpMyAdmin. Formerly called phpMinAdmin, Adminer was explicitly designed as a simpler, better alternative to phpMyAdmin.
It’s effortless to deploy on any web server. All it takes is uploading a single, lightweight PHP file.
Even DevKinsta, Kinsta’s free suite of local development tools, uses Adminer to run its database manager. It supports many powerful database management features such as easy database switching, viewing and editing tables, manipulating database values, importing and exporting databases, running SQL queries, and much more.
You can learn more about Adminer, its features, and how to use it in our dedicated Adminer article.
Need a little help installing & configuring this popular administration tool? ⬇️ This guide has you covered ✅Click to Tweet
Summary
Your first time using phpMyAdmin can be intimidating. But once you know how to install and configure it, accessing your database will be as easy as logging into WordPress.
Windows, Mac, and Linux users alike can all make use of this invaluable database manager. As long as you have a web server with PHP installed, getting it running should be simple if you follow our instructions. Remember to configure it properly and make sure it’s secure, and you’ll never have trouble modifying your database again.
Get all your applications, databases and WordPress sites online and under one roof. Our feature-packed, high-performance cloud platform includes:
- Easy setup and management in the MyKinsta dashboard
- 24/7 expert support
- The best Google Cloud Platform hardware and network, powered by Kubernetes for maximum scalability
- An enterprise-level Cloudflare integration for speed and security
- Global audience reach with up to 35 data centers and 275 PoPs worldwide
Test it yourself with $20 off your first month of Application Hosting or Database Hosting. Explore our plans or talk to sales to find your best fit.
Managing a database is a complex but necessary part of running a website. Luckily, software like phpMyAdmin exist to make the process much easier. This popular administration tool may seem challenging to learn, but accessing and modifying your database will be a breeze once you have the hang of it.
The most difficult part is knowing how to install phpMyAdmin and setting it up on your web server. If you’re having trouble, you’re certainly not the only one.
In this article, we’ll show you step by step how to install phpMyAdmin on all major operating systems, plus how to configure it from there.
Let’s get going!
Prefer to watch the video version?
What Is phpMyAdmin?
Behind every website is a database. This database allows you to store data ranging from user account information to the posts you make on your site. While there are many database services, MySQL is the most popular one. And most likely, it’s the one your website is using. MariaDB is a common alternative.
Interacting directly with MySQL can be complicated and confusing, especially if you’re new to website administration. But interacting with your databases is often a necessary part of site maintenance.
phpMyAdmin was created to bring a browser-based visual interface to MySQL and make it easier to work with your database. Due to its popularity, many web hosting services include access to phpMyAdmin, including Kinsta.
Managing a database can be complicated 😅 phpMyAdmin exists to make the process much easier ✅ Learn how to install and configure it right here.Click to Tweet
Why Do You Need phpMyAdmin?
Without a tool like phpMyAdmin, your only option for accessing the database is with the command line. It means you have no visual interface — just a text prompt where you put in commands. Doing it this way can be confusing and may even lead to accidentally breaking your site.
phpMyAdmin is free and open source. A wide range of web hosts supports it, and you can even install it yourself without paying a single cent. And once you’ve installed it, executing database commands from the visual interface is much more intuitive.
Still on the fence? You can try phpMyAdmin yourself to see if it’s a database manager you’d like to use. Once you’ve given it a test drive and decided you’d like it, you can install the tool on your server.
phpMyAdmin Requirements
The requirements to install phpMyAdmin are, luckily, relatively simple. If you have a web server of any kind, you should almost certainly be able to get it running. Here are the detailed requirements:
- A webserver of any kind
- MySQL or MariaDB 5.5 or newer
- A web browser that supports Javascript, cookies, and Bootstrap 4.5 (to access phpMyAdmin)
- PHP 7.2.5 or newer
- Additional PHP requirements: The session and SPL extensions, hash, ctype, and JSON support. Other extensions such as mbstring can improve performance or add additional minor functionality (see the requirements page for the complete list).
Before you try to install phpMyAdmin, remember that many web hosts already come with it installed. Kinsta is among them; if you want to access the database manager, log into your Kinsta account, then go to the Info tab and look for Database Access.
Before installing phpMyAdmin, check your web host’s documentation to ensure they’ve not installed it already.
Step By Step: Installing phpMyAdmin
Once you’ve checked to make sure your server supports phpMyAdmin, it’s time to get to work installing it. Web servers come in a wide range of operating systems, so we’ve included all the most popular ones, including Windows, Mac, and multiple distributions of Linux.
With that, here are the step-by-step instructions for installing phpMyAdmin.
How to Install phpMyAdmin on Windows 10
As the requirements state, you’re going to need a web server with PHP and a database to use phpMyAdmin. While you can undoubtedly download Apache, PHP, and MySQL manually, there’s a much simpler option to get a server up and running on a Windows computer.
WAMP (Windows, Apache, MySQL, and PHP) is free software that easily allows you to create a server with all prerequisites. You can also try XAMPP for Windows (Apache, MariaDB, PHP, and Perl) if it suits your needs better.
Once you have one of these downloaded, it’s just a matter of installing it and walking through the setup process.
Suppose you’re using WAMP or XAMPP. Both of these come with phpMyAdmin already! In your browser, navigate to http://localhost/phpMyAdmin, and you should see the login screen, confirming that you’ve installed everything correctly.
How to Install phpMyAdmin on Mac
Getting phpMyAdmin on a Mac is a little different. All the prerequisites are the same. But as macOS ships with both Apache and PHP, you don’t need to download them.
With Mac, you have two options: You can use XAMPP just like with other operating systems or install everything manually.
Download XAMPP for OS X, open it, and drop it into your Applications folder.
Open XAMPP Control from /Applications/XAMPP/manager-osx.app to start your Apache and MySQL servers. If you then visit http://localhost, you should find everything working correctly and your phpMyAdmin login under the “Tools” section.
If you’d instead install phpMyAdmin manually, the process is simple. Since you already have Apache and PHP, you only need to download MySQL. Make sure you select macOS from the dropdown. Download and install the file, follow the instructions, and record any usernames and passwords given to you.
You can then open System Preferences and launch MySQL to start a server. You can also start Apache by running this command in the Terminal:
sudo apachectl start
With that, all that’s left is installing phpMyAdmin. Rename the folder to “phpMyAdmin” and move it to /Library/WebServer/Documents/. Check to make sure it’s installed correctly by visiting http://localhost/phpMyAdmin in the browser.
If you have Homebrew installed, another option is to put in the command: brew install phpMyAdmin.
How to Install phpMyAdmin on Ubuntu
As one of the most popular and most accessible to use Linux distributions, Ubuntu is a good choice for your server.
While manual installation of Apache and MySQL is always possible, Linux has its own “stack” of standard server software known as LAMP (Linux, Apache, MySQL, and PHP). Unlike WAMP and XAMPP, this does not come with phpMyAdmin, so you’ll need to install it manually. Luckily, Ubuntu allows you to do all of your installations through the command line.
First, check that tasksel is enabled. Server editions of Ubuntu should come with it installed, but if you have a desktop edition, you can enable it with this command:
sudo apt-get install taskselAfter that, you can use tasksel to install a LAMP server with this command:
sudo tasksel install lamp-server
Now, you can install phpMyAdmin:
sudo apt install phpMyAdminWith that, you have all the necessary files to run a server on your computer.
How to Install phpMyAdmin on CentOS 7
Installing phpMyAdmin on CentOS 7 is very similar to other distributions, but the commands are slightly different as this OS uses Yum rather than the typical apt command.
There’s also no simple LAMP stack that installs all the server components you need at once, so you’ll need to download Apache, MySQL, and PHP manually. Thankfully these can be easily obtained through the command line.
First, let’s get a LAMP stack downloaded using the command line, beginning with Apache:
sudo yum install httpd.serviceTo start the Apache server and ensure it runs on boot, use these commands:
sudo systemctl start httpd.service
sudo systemctl enable httpd.service
Now it’s time to install a database. CentOS 7 defaults to installing MariaDB. It is also fully compatible with phpMyAdmin, so it’s safe to use. While it’s possible to download MySQL instead, it’s a much more complicated process. Let’s use MariaDB:
sudo yum install mariadb-server mariadb
Now we can run it and cause it to start at boot:
sudo systemctl start mariadb
sudo systemctl enable mariadb.service
To finish installing MariaDB and ensure it’s secure, run the secure installation setup with the following command.
sudo mysql_secure_installationLast, we can install PHP with the additional MySQL package.
sudo yum install php php-mysqlYou’ll also need to restart the Apache server, so it works properly with PHP.
sudo systemctl restart httpd.serviceWith that, you have the LAMP stack you need and can finally get to downloading phpMyAdmin. As it isn’t in the Yum repository, you’ll need to install the EPEL repository instead with this command:
sudo yum install epel-releaseAnd install phpMyAdmin.
sudo yum install phpMyAdminIt takes a few more steps on CentOS 7, but you should now have a server ready for configuration.
How to Install phpMyAdmin on Debian
Much like CentOS 7, you’ll need to install a LAMP stack using the command line manually. First, let’s get Apache with this command:
sudo apt install apache2Next, we’ll install MariaDB. Like CentOS 7, this Linux distribution works better with MariaDB, and we recommended you use that one instead.
sudo apt install mariadb-serverAnd like with CentOS 7, you should run the secure installation to add a database password and ensure that everything is secure.
sudo mysql_secure_installationFinally, we can install PHP and a few extra packages your server will need to work.
sudo apt install php php-mysql libapache2-mod-phpAnd we can finish off by installing phpMyAdmin.
sudo apt install phpMyAdminHow to Access phpMyAdmin
Once you have phpMyAdmin appropriately installed, accessing it and logging in is the same on any operating system.
You’ll need your web server’s address, then append /phpMyAdmin/ to the end of it. If you just set up a server on your computer, the address is very likely simply “localhost,” so visit this link:
http://localhost/phpMyAdminIt may also be an IP, or even a named address if this is a server you already have running on the web. If you’re not sure, you can likely find the address in your Apache or MySQL config files.
Once you’re on the login screen, you’ll need a username and password. If this is a fresh installation, the username is likely “root,” and you can leave the password blank. If that doesn’t work, the password may be “password.”
If you can’t log in, check the phpMyAdmin or MySQL config files to find your login info. You may have also changed the login info during the installation process.
Linux users should try the following Linux command if they’re having trouble accessing the page or logging in:
sudo dpkg-reconfigure phpMyAdminLastly, you should note that if you’re using a web host such as Kinsta with phpMyAdmin preinstalled, you can usually find login info and links in your hosting dashboard. In this case, you don’t need to install phpMyAdmin on the server manually.
Configuring phpMyAdmin
With the database manager installed and ready to go on your system, you should know how to configure phpMyAdmin. Like with any server software, you’re certainly going to want to do plenty of tinkering with the settings.
An unconfigured phpMyAdmin can also pose a potential security risk. There are a few extra steps you need to take to lock down your system.
If you ever need to restore a backup of your database, you can always use phpMyAdmin to import a new SQL file. Always make frequent backups before doing any significant modifications to the database or its settings, especially if you’re not just working on a test server.
How to Run SQL Queries
Now that you have phpMyAdmin working, you should know how to do what it’s made for: running SQL queries.
You can run queries either on the homepage (this will apply to the entire site), or in a specific database or table. Click the SQL tab at the top of the screen, type in your command, and press Go.
Here’s a list of common SQL queries:
- Select: The most important tag, used at the beginning of almost every query.
- Create Table: Create a new table.
- Alter Table: Add new columns.
- Insert: Add new rows.
- Delete: Remove columns.
- Update: Edit values in a table.
- Sum(): Adds up all the values.
- Avg(): Average the values.
- Count(): Counts the number of filled columns.
- Round(): Rounds the value to the integer you set.
- Max(): Return the largest value.
- Min(): Return the smallest value.
- Between: Select columns within a specific range.
- Group By: Group tables by data.
- Order By: Order results in a certain way.
There are certainly more commands to learn, but those are a few to start with.
How to Change the Default phpMyAdmin URL
Leaving the phpMyAdmin access link on its default setting (http://website.com/phpMyAdmin) can pose a security risk.
If you make this page easy to find, hackers will be able to visit it and attempt to brute force down your username and password. It can be even worse if you’ve left the credentials on the default “root” and “password.”
But by changing the URL to something only you know, you can make it much more difficult for unknown users to access this page and try to guess the password.
Open phpMyAdmin.conf in a text editor, which you can find under C:wampalias on Windows/WAMP, xamppapacheconfextra on XAMPP, /etc/httpd/conf.d on Linux, or /usr/conf/extra on Mac.
You should see this line in there:
Alias /phpMyAdmin /usr/share/phpMyAdminChange the /phpMyAdmin path to the new address of your choice. For instance:
Alias /exampleURL /usr/share/phpMyAdminNow you can access this unique URL for phpMyAdmin by visiting the custom address you set (http://website.com/exampleURL).
How to Set Up an NGINX Authentication Gateway
Another option is to set up a second layer of security with an authentication gateway. After moving the phpMyAdmin login page to a secret location, you can password protect this page to make it even less likely for attackers to get through.
Users of Linux on an NGINX server can run the following commands in the command line to create an authentication gateway (this is also possible on Apache servers).
Start by creating an encrypted password (change “example” to whatever you like) and noting down the result:
openssl passwd exampleCreate a configuration file in NGINX’s folder and give it a name:
sudo nano /etc/nginx/examplenameEnter the username and password into this file like this, being careful to leave in the colon:
exampleusername:examplepasswordNow open the NGINX configuration file.
sudo nano /etc/nginx/sites-available/defaultWithin the “server” block, we’ll add our gateway by pasting the following code (make sure to change the values).
location /example {
  auth_basic "Login";
  auth_basic_user_file /etc/nginx/examplename;
The first /example should be whatever you set your phpMyAdmin URL to, and you can adjust the auth_basic variable name to anything you want, and the final /examplename should be the name of the password file you created earlier.
Now upon login, you should be required to enter the credentials you set before even seeing the phpMyAdmin login.
Adminer: A Simpler Alternative to phpMyAdmin
Adminer is a free, open source database management tool similar to phpMyAdmin. Formerly called phpMinAdmin, Adminer was explicitly designed as a simpler, better alternative to phpMyAdmin.
It’s effortless to deploy on any web server. All it takes is uploading a single, lightweight PHP file.
Even DevKinsta, Kinsta’s free suite of local development tools, uses Adminer to run its database manager. It supports many powerful database management features such as easy database switching, viewing and editing tables, manipulating database values, importing and exporting databases, running SQL queries, and much more.
You can learn more about Adminer, its features, and how to use it in our dedicated Adminer article.
Need a little help installing & configuring this popular administration tool? ⬇️ This guide has you covered ✅Click to Tweet
Summary
Your first time using phpMyAdmin can be intimidating. But once you know how to install and configure it, accessing your database will be as easy as logging into WordPress.
Windows, Mac, and Linux users alike can all make use of this invaluable database manager. As long as you have a web server with PHP installed, getting it running should be simple if you follow our instructions. Remember to configure it properly and make sure it’s secure, and you’ll never have trouble modifying your database again.
Get all your applications, databases and WordPress sites online and under one roof. Our feature-packed, high-performance cloud platform includes:
- Easy setup and management in the MyKinsta dashboard
- 24/7 expert support
- The best Google Cloud Platform hardware and network, powered by Kubernetes for maximum scalability
- An enterprise-level Cloudflare integration for speed and security
- Global audience reach with up to 35 data centers and 275 PoPs worldwide
Test it yourself with $20 off your first month of Application Hosting or Database Hosting. Explore our plans or talk to sales to find your best fit.
1 2009-06-11 12:47:43
- Fatum
- Редкий гость
- Неактивен
- Зарегистрирован: 2009-06-11
- Сообщений: 8
Тема: Прописать путь к папке phpMyAdmin в httpd.conf
В инструкции по установке phpmyadmin написано
Далее откройте многострадальный httpd.conf и добавьте в блок начинающийся строкой:
<IfModule alias_module>
Следующую строку:
Alias /pma «C:/apache/localhost/www/phpmyadmin»
«
Но я блок IfModule alias_module не нашел Где можно прописать путь к папке ?
2 Ответ от Hanut 2009-06-11 14:34:17

- Hanut
- Модератор
- Неактивен

- Откуда: Рига, Латвия
- Зарегистрирован: 2006-07-02
- Сообщений: 9,723
Re: Прописать путь к папке phpMyAdmin в httpd.conf
Fatum
Если блок не нашли — значит где-то при установке была допущена ошибка, или вы устанавливали Apache не по статье вовсе.
По сути, прописать данную строку можно вне всяких условных блоков (если известно, что модуль alias_module загружен), практически в любом месте httpd.conf, можете самой последней строкой.
3 Ответ от Fatum 2009-06-11 16:54:36 (изменено: Fatum, 2009-06-11 16:57:43)
- Fatum
- Редкий гость
- Неактивен
- Зарегистрирован: 2009-06-11
- Сообщений: 8
Re: Прописать путь к папке phpMyAdmin в httpd.conf
Прописал я внизу Но не открывает Сам апач запущен Я устанавливал с сайта Че то спойлер не сворачиваеться
http://www.php.ru/install/
#
# Based upon the NCSA server configuration files originally by Rob McCool.
#
# This is the main Apache server configuration file.  It contains the
# configuration directives that give the server its instructions.
# See <URL:http://httpd.apache.org/docs-2.0/> for detailed information about
# the directives.
#
# Do NOT simply read the instructions in here without understanding
# what they do.  They're here only as hints or reminders.  If you are unsure
# consult the online docs. You have been warned.
#
# The configuration directives are grouped into three basic sections:
#  1. Directives that control the operation of the Apache server process as a
#     whole (the 'global environment').
#  2. Directives that define the parameters of the 'main' or 'default' server,
#     which responds to requests that aren't handled by a virtual host.
#     These directives also provide default values for the settings
#     of all virtual hosts.
#  3. Settings for virtual hosts, which allow Web requests to be sent to
#     different IP addresses or hostnames and have them handled by the
#     same Apache server process.
#
# Configuration and logfile names: If the filenames you specify for many
# of the server's control files begin with "/" (or "drive:/" for Win32), the
# server will use that explicit path.  If the filenames do *not* begin
# with "/", the value of ServerRoot is prepended -- so "logs/foo.log"
# with ServerRoot set to "D:/Program Files/Apache Group/Apache2" will be interpreted by the
# server as "D:/Program Files/Apache Group/Apache2/logs/foo.log".
#
# NOTE: Where filenames are specified, you must use forward slashes
# instead of backslashes (e.g., "c:/apache" instead of "c:apache").
# If a drive letter is omitted, the drive on which Apache.exe is located
# will be used by default.  It is recommended that you always supply
# an explicit drive letter in absolute paths, however, to avoid
# confusion.
#

### Section 1: Global Environment
#
# The directives in this section affect the overall operation of Apache,
# such as the number of concurrent requests it can handle or where it
# can find its configuration files.
#

#
# ServerRoot: The top of the directory tree under which the server's
# configuration, error, and log files are kept.
#
# NOTE!  If you intend to place this on an NFS (or otherwise network)
# mounted filesystem then please read the LockFile documentation (available
# at <URL:http://httpd.apache.org/docs-2.0/mod/mpm_common.html#lockfile>);
# you will save yourself a lot of trouble.
#
# Do NOT add a slash at the end of the directory path.
#
ServerRoot "D:/Program Files/Apache Group/Apache2"

#
# ScoreBoardFile: File used to store internal server process information.
# If unspecified (the default), the scoreboard will be stored in an
# anonymous shared memory segment, and will be unavailable to third-party
# applications.
# If specified, ensure that no two invocations of Apache share the same
# scoreboard file. The scoreboard file MUST BE STORED ON A LOCAL DISK.
#
#ScoreBoardFile logs/apache_runtime_status

#
# PidFile: The file in which the server should record its process
# identification number when it starts.
#
PidFile logs/httpd.pid

#
# Timeout: The number of seconds before receives and sends time out.
#
Timeout 300

#
# KeepAlive: Whether or not to allow persistent connections (more than
# one request per connection). Set to "Off" to deactivate.
#
KeepAlive On

#
# MaxKeepAliveRequests: The maximum number of requests to allow
# during a persistent connection. Set to 0 to allow an unlimited amount.
# We recommend you leave this number high, for maximum performance.
#
MaxKeepAliveRequests 100

#
# KeepAliveTimeout: Number of seconds to wait for the next request from the
# same client on the same connection.
#
KeepAliveTimeout 15

##
## Server-Pool Size Regulation (MPM specific)
##

# WinNT MPM
# ThreadsPerChild: constant number of worker threads in the server process
# MaxRequestsPerChild: maximum  number of requests a server process serves
<IfModule mpm_winnt.c>
ThreadsPerChild 250
MaxRequestsPerChild  0
</IfModule>

#
# Listen: Allows you to bind Apache to specific IP addresses and/or
# ports, instead of the default. See also the <VirtualHost>
# directive.
#
# Change this to Listen on specific IP addresses as shown below to
# prevent Apache from glomming onto all bound IP addresses (0.0.0.0)
#
#Listen 12.34.56.78:80
Listen 80

#
# Dynamic Shared Object (DSO) Support
#
# To be able to use the functionality of a module which was built as a DSO you
# have to place corresponding `LoadModule' lines at this location so the
# directives contained in it are actually available _before_ they are used.
# Statically compiled modules (those listed by `httpd -l') do not need
# to be loaded here.
#
# Example:
# LoadModule foo_module modules/mod_foo.so
#
LoadModule php5_module C:/php5/php5apache2.dll
AddType application/x-httpd-php .php
PHPIniDir "C:/php5/"
LoadModule access_module modules/mod_access.so
LoadModule actions_module modules/mod_actions.so
LoadModule alias_module modules/mod_alias.so
LoadModule asis_module modules/mod_asis.so
LoadModule auth_module modules/mod_auth.so
#LoadModule auth_anon_module modules/mod_auth_anon.so
#LoadModule auth_dbm_module modules/mod_auth_dbm.so
#LoadModule auth_digest_module modules/mod_auth_digest.so
LoadModule autoindex_module modules/mod_autoindex.so
#LoadModule cern_meta_module modules/mod_cern_meta.so
LoadModule cgi_module modules/mod_cgi.so
#LoadModule dav_module modules/mod_dav.so
#LoadModule dav_fs_module modules/mod_dav_fs.so
LoadModule dir_module modules/mod_dir.so
LoadModule env_module modules/mod_env.so
#LoadModule expires_module modules/mod_expires.so
#LoadModule file_cache_module modules/mod_file_cache.so
#LoadModule headers_module modules/mod_headers.so
LoadModule imap_module modules/mod_imap.so
LoadModule include_module modules/mod_include.so
#LoadModule info_module modules/mod_info.so
LoadModule isapi_module modules/mod_isapi.so
LoadModule log_config_module modules/mod_log_config.so
LoadModule mime_module modules/mod_mime.so
#LoadModule mime_magic_module modules/mod_mime_magic.so
#LoadModule proxy_module modules/mod_proxy.so
#LoadModule proxy_connect_module modules/mod_proxy_connect.so
#LoadModule proxy_http_module modules/mod_proxy_http.so
#LoadModule proxy_ftp_module modules/mod_proxy_ftp.so
LoadModule negotiation_module modules/mod_negotiation.so
#LoadModule rewrite_module modules/mod_rewrite.so
LoadModule setenvif_module modules/mod_setenvif.so
#LoadModule speling_module modules/mod_speling.so
#LoadModule status_module modules/mod_status.so
#LoadModule unique_id_module modules/mod_unique_id.so
LoadModule userdir_module modules/mod_userdir.so
#LoadModule usertrack_module modules/mod_usertrack.so
#LoadModule vhost_alias_module modules/mod_vhost_alias.so
#LoadModule ssl_module modules/mod_ssl.so

#
# ExtendedStatus controls whether Apache will generate "full" status
# information (ExtendedStatus On) or just basic information (ExtendedStatus
# Off) when the "server-status" handler is called. The default is Off.
#
#ExtendedStatus On

### Section 2: 'Main' server configuration
#
# The directives in this section set up the values used by the 'main'
# server, which responds to any requests that aren't handled by a
# <VirtualHost> definition.  These values also provide defaults for
# any <VirtualHost> containers you may define later in the file.
#
# All of these directives may appear inside <VirtualHost> containers,
# in which case these default settings will be overridden for the
# virtual host being defined.
#

#
# ServerAdmin: Your address, where problems with the server should be
# e-mailed.  This address appears on some server-generated pages, such
# as error documents.  e.g. admin@your-domain.com
#
ServerAdmin named@local.com

#
# ServerName gives the name and port that the server uses to identify itself.
# This can often be determined automatically, but we recommend you specify
# it explicitly to prevent problems during startup.
#
# If this is not set to valid DNS name for your host, server-generated
# redirections will not work.  See also the UseCanonicalName directive.
#
# If your host doesn't have a registered DNS name, enter its IP address here.
# You will have to access it by its address anyway, and this will make
# redirections work in a sensible way.
#
ServerName named@local.com:80

#
# UseCanonicalName: Determines how Apache constructs self-referencing
# URLs and the SERVER_NAME and SERVER_PORT variables.
# When set "Off", Apache will use the Hostname and Port supplied
# by the client.  When set "On", Apache will use the value of the
# ServerName directive.
#
UseCanonicalName Off

#
# DocumentRoot: The directory out of which you will serve your
# documents. By default, all requests are taken from this directory, but
# symbolic links and aliases may be used to point to other locations.
#
DocumentRoot "D:/Program Files/Apache Group/Apache2/htdocs"

#
# Each directory to which Apache has access can be configured with respect
# to which services and features are allowed and/or disabled in that
# directory (and its subdirectories).
#
# First, we configure the "default" to be a very restrictive set of
# features.
#
<Directory />
    Options FollowSymLinks
    AllowOverride None
</Directory>

#
# Note that from this point forward you must specifically allow
# particular features to be enabled - so if something's not working as
# you might expect, make sure that you have specifically enabled it
# below.
#

#
# This should be changed to whatever you set DocumentRoot to.
#
<Directory "D:/Program Files/Apache Group/Apache2/htdocs">

#
# Possible values for the Options directive are "None", "All",
# or any combination of:
#   Indexes Includes FollowSymLinks SymLinksifOwnerMatch ExecCGI MultiViews
#
# Note that "MultiViews" must be named *explicitly* --- "Options All"
# doesn't give it to you.
#
# The Options directive is both complicated and important.  Please see
# http://httpd.apache.org/docs-2.0/mod/core.html#options
# for more information.
#
    Options Indexes FollowSymLinks

#
# AllowOverride controls what directives may be placed in .htaccess files.
# It can be "All", "None", or any combination of the keywords:
#   Options FileInfo AuthConfig Limit
#
    AllowOverride None

#
# Controls who can get stuff from this server.
#
    Order allow,deny
    Allow from all

</Directory>

#
# UserDir: The name of the directory that is appended onto a user's home
# directory if a ~user request is received.  Be especially careful to use
# proper, forward slashes here.  On Windows NT, "Personal/My Website"
# is a more appropriate choice.
#
UserDir "My Documents/My Website"

#
# Control access to UserDir directories.  The following is an example
# for a site where these directories are restricted to read-only.
#
# You must correct the path for the root to match your system's configured
# user directory location, e.g. "C:/WinNT/profiles/*/My Documents/My Website"
# or whichever, as appropriate.
#
#<Directory "C:/Documents and Settings/*/My Documents/My Website">
#    AllowOverride FileInfo AuthConfig Limit
#    Options MultiViews Indexes SymLinksIfOwnerMatch IncludesNoExec
#    <Limit GET POST OPTIONS PROPFIND>
#        Order allow,deny
#        Allow from all
#    </Limit>
#    <LimitExcept GET POST OPTIONS PROPFIND>
#        Order deny,allow
#        Deny from all
#    </LimitExcept>
#</Directory>

#
# DirectoryIndex: sets the file that Apache will serve if a directory
# is requested.
#
# The index.html.var file (a type-map) is used to deliver content-
# negotiated documents.  The MultiViews Option can be used for the
# same purpose, but it is much slower.
#
DirectoryIndex index.html index.html.var

#
# AccessFileName: The name of the file to look for in each directory
# for additional configuration directives.  See also the AllowOverride
# directive.
#
AccessFileName .htaccess

#
# The following lines prevent .htaccess and .htpasswd files from being
# viewed by Web clients.
#
<FilesMatch "^.ht">
    Order allow,deny
    Deny from all
</FilesMatch>

#
# TypesConfig describes where the mime.types file (or equivalent) is
# to be found.
#
TypesConfig conf/mime.types

#
# DefaultType is the default MIME type the server will use for a document
# if it cannot otherwise determine one, such as from filename extensions.
# If your server contains mostly text or HTML documents, "text/plain" is
# a good value.  If most of your content is binary, such as applications
# or images, you may want to use "application/octet-stream" instead to
# keep browsers from trying to display binary files as though they are
# text.
#
DefaultType text/plain

#
# The mod_mime_magic module allows the server to use various hints from the
# contents of the file itself to determine its type.  The MIMEMagicFile
# directive tells the module where the hint definitions are located.
#
<IfModule mod_mime_magic.c>
    MIMEMagicFile conf/magic
</IfModule>

#
# HostnameLookups: Log the names of clients or just their IP addresses
# e.g., www.apache.org (on) or 204.62.129.132 (off).
# The default is off because it'd be overall better for the net if people
# had to knowingly turn this feature on, since enabling it means that
# each client request will result in AT LEAST one lookup request to the
# nameserver.
#
HostnameLookups Off

#
# EnableMMAP: Control whether memory-mapping is used to deliver
# files (assuming that the underlying OS supports it).
# The default is on; turn this off if you serve from NFS-mounted
# filesystems.  On some systems, turning it off (regardless of
# filesystem) can improve performance; for details, please see
# http://httpd.apache.org/docs-2.0/mod/core.html#enablemmap
#
#EnableMMAP off

#
# EnableSendfile: Control whether the sendfile kernel support is
# used  to deliver files (assuming that the OS supports it).
# The default is on; turn this off if you serve from NFS-mounted
# filesystems.  Please see
# http://httpd.apache.org/docs-2.0/mod/core.html#enablesendfile
#
#EnableSendfile off

#
# ErrorLog: The location of the error log file.
# If you do not specify an ErrorLog directive within a <VirtualHost>
# container, error messages relating to that virtual host will be
# logged here.  If you *do* define an error logfile for a <VirtualHost>
# container, that host's errors will be logged there and not here.
#
ErrorLog logs/error.log

#
# LogLevel: Control the number of messages logged to the error.log.
# Possible values include: debug, info, notice, warn, error, crit,
# alert, emerg.
#
LogLevel warn

#
# The following directives define some format nicknames for use with
# a CustomLog directive (see below).
#
LogFormat "%h %l %u %t "%r" %>s %b "%{Referer}i" "%{User-Agent}i"" combined
LogFormat "%h %l %u %t "%r" %>s %b" common
LogFormat "%{Referer}i -> %U" referer
LogFormat "%{User-agent}i" agent

# You need to enable mod_logio.c to use %I and %O
#LogFormat "%h %l %u %t "%r" %>s %b "%{Referer}i" "%{User-Agent}i" %I %O" combinedio

#
# The location and format of the access logfile (Common Logfile Format).
# If you do not define any access logfiles within a <VirtualHost>
# container, they will be logged here.  Contrariwise, if you *do*
# define per-<VirtualHost> access logfiles, transactions will be
# logged therein and *not* in this file.
#
CustomLog logs/access.log common

#
# If you would like to have agent and referer logfiles, uncomment the
# following directives.
#
#CustomLog logs/referer.log referer
#CustomLog logs/agent.log agent

#
# If you prefer a single logfile with access, agent, and referer information
# (Combined Logfile Format) you can use the following directive.
#
#CustomLog logs/access.log combined

#
# ServerTokens
# This directive configures what you return as the Server HTTP response
# Header. The default is 'Full' which sends information about the OS-Type
# and compiled in modules.
# Set to one of:  Full | OS | Minor | Minimal | Major | Prod
# where Full conveys the most information, and Prod the least.
#
ServerTokens Full

#
# Optionally add a line containing the server version and virtual host
# name to server-generated pages (internal error documents, FTP directory
# listings, mod_status and mod_info output etc., but not CGI generated
# documents or custom error documents).
# Set to "EMail" to also include a mailto: link to the ServerAdmin.
# Set to one of:  On | Off | EMail
#
ServerSignature On

#
# Aliases: Add here as many aliases as you need (with no limit). The format is
# Alias fakename realname
#
# Note that if you include a trailing / on fakename then the server will
# require it to be present in the URL.  So "/icons" isn't aliased in this
# example, only "/icons/".  If the fakename is slash-terminated, then the
# realname must also be slash terminated, and if the fakename omits the
# trailing slash, the realname must also omit it.
#
# We include the /icons/ alias for FancyIndexed directory listings.  If you
# do not use FancyIndexing, you may comment this out.
#
Alias /icons/ "D:/Program Files/Apache Group/Apache2/icons/"

<Directory "D:/Program Files/Apache Group/Apache2/icons">
    Options Indexes MultiViews
    AllowOverride None
    Order allow,deny
    Allow from all
</Directory>

#
# This should be changed to the ServerRoot/manual/.  The alias provides
# the manual, even if you choose to move your DocumentRoot.  You may comment
# this out if you do not care for the documentation.
#
AliasMatch ^/manual(?:/(?:de|en|es|fr|ja|ko|ru))?(/.*)?$ "D:/Program Files/Apache Group/Apache2/manual$1"

<Directory "D:/Program Files/Apache Group/Apache2/manual">
    Options Indexes
    AllowOverride None
    Order allow,deny
    Allow from all

    <Files *.html>
        SetHandler type-map
    </Files>

    SetEnvIf Request_URI ^/manual/(de|en|es|fr|ja|ko|ru)/ prefer-language=$1
    RedirectMatch 301 ^/manual(?:/(de|en|es|fr|ja|ko|ru)){2,}(/.*)?$ /manual/$1$2
</Directory>

#
# ScriptAlias: This controls which directories contain server scripts.
# ScriptAliases are essentially the same as Aliases, except that
# documents in the realname directory are treated as applications and
# run by the server when requested rather than as documents sent to the client.
# The same rules about trailing "/" apply to ScriptAlias directives as to
# Alias.
#
ScriptAlias /cgi-bin/ "D:/Program Files/Apache Group/Apache2/cgi-bin/"

#
# "D:/Program Files/Apache Group/Apache2/cgi-bin" should be changed to whatever your ScriptAliased
# CGI directory exists, if you have that configured.
#
<Directory "D:/Program Files/Apache Group/Apache2/cgi-bin">
    AllowOverride None
    Options None
    Order allow,deny
    Allow from all
</Directory>

#
# Redirect allows you to tell clients about documents which used to exist in
# your server's namespace, but do not anymore. This allows you to tell the
# clients where to look for the relocated document.
# Example:
# Redirect permanent /foo http://www.example.com/bar

#
# Directives controlling the display of server-generated directory listings.
#

#
# IndexOptions: Controls the appearance of server-generated directory
# listings.
#
IndexOptions FancyIndexing VersionSort

#
# AddIcon* directives tell the server which icon to show for different
# files or filename extensions.  These are only displayed for
# FancyIndexed directories.
#
AddIconByEncoding (CMP,/icons/compressed.gif) x-compress x-gzip

AddIconByType (TXT,/icons/text.gif) text/*
AddIconByType (IMG,/icons/image2.gif) image/*
AddIconByType (SND,/icons/sound2.gif) audio/*
AddIconByType (VID,/icons/movie.gif) video/*

AddIcon /icons/binary.gif .bin .exe
AddIcon /icons/binhex.gif .hqx
AddIcon /icons/tar.gif .tar
AddIcon /icons/world2.gif .wrl .wrl.gz .vrml .vrm .iv
AddIcon /icons/compressed.gif .Z .z .tgz .gz .zip
AddIcon /icons/a.gif .ps .ai .eps
AddIcon /icons/layout.gif .html .shtml .htm .pdf
AddIcon /icons/text.gif .txt
AddIcon /icons/c.gif .c
AddIcon /icons/p.gif .pl .py
AddIcon /icons/f.gif .for
AddIcon /icons/dvi.gif .dvi
AddIcon /icons/uuencoded.gif .uu
AddIcon /icons/script.gif .conf .sh .shar .csh .ksh .tcl
AddIcon /icons/tex.gif .tex
AddIcon /icons/bomb.gif core

AddIcon /icons/back.gif ..
AddIcon /icons/hand.right.gif README
AddIcon /icons/folder.gif ^^DIRECTORY^^
AddIcon /icons/blank.gif ^^BLANKICON^^

#
# DefaultIcon is which icon to show for files which do not have an icon
# explicitly set.
#
DefaultIcon /icons/unknown.gif

#
# AddDescription allows you to place a short description after a file in
# server-generated indexes.  These are only displayed for FancyIndexed
# directories.
# Format: AddDescription "description" filename
#
#AddDescription "GZIP compressed document" .gz
#AddDescription "tar archive" .tar
#AddDescription "GZIP compressed tar archive" .tgz

#
# ReadmeName is the name of the README file the server will look for by
# default, and append to directory listings.
#
# HeaderName is the name of a file which should be prepended to
# directory indexes.
ReadmeName README.html
HeaderName HEADER.html

#
# IndexIgnore is a set of filenames which directory indexing should ignore
# and not include in the listing.  Shell-style wildcarding is permitted.
#
IndexIgnore .??* *~ *# HEADER* README* RCS CVS *,v *,t

#
# DefaultLanguage and AddLanguage allows you to specify the language of
# a document. You can then use content negotiation to give a browser a
# file in a language the user can understand.
#
# Specify a default language. This means that all data
# going out without a specific language tag (see below) will
# be marked with this one. You probably do NOT want to set
# this unless you are sure it is correct for all cases.
#
# * It is generally better to not mark a page as
# * being a certain language than marking it with the wrong
# * language!
#
# DefaultLanguage nl
#
# Note 1: The suffix does not have to be the same as the language
# keyword --- those with documents in Polish (whose net-standard
# language code is pl) may wish to use "AddLanguage pl .po" to
# avoid the ambiguity with the common suffix for perl scripts.
#
# Note 2: The example entries below illustrate that in some cases
# the two character 'Language' abbreviation is not identical to
# the two character 'Country' code for its country,
# E.g. 'Danmark/dk' versus 'Danish/da'.
#
# Note 3: In the case of 'ltz' we violate the RFC by using a three char
# specifier. There is 'work in progress' to fix this and get
# the reference data for rfc1766 cleaned up.
#
# Catalan (ca) - Croatian (hr) - Czech (cs) - Danish (da) - Dutch (nl)
# English (en) - Esperanto (eo) - Estonian (et) - French (fr) - German (de)
# Greek-Modern (el) - Hebrew (he) - Italian (it) - Japanese (ja)
# Korean (ko) - Luxembourgeois* (ltz) - Norwegian Nynorsk (nn)
# Norwegian (no) - Polish (pl) - Portugese (pt)
# Brazilian Portuguese (pt-BR) - Russian (ru) - Swedish (sv)
# Simplified Chinese (zh-CN) - Spanish (es) - Traditional Chinese (zh-TW)
#
AddLanguage ca .ca
AddLanguage cs .cz .cs
AddLanguage da .dk
AddLanguage de .de
AddLanguage el .el
AddLanguage en .en
AddLanguage eo .eo
AddLanguage es .es
AddLanguage et .et
AddLanguage fr .fr
AddLanguage he .he
AddLanguage hr .hr
AddLanguage it .it
AddLanguage ja .ja
AddLanguage ko .ko
AddLanguage ltz .ltz
AddLanguage nl .nl
AddLanguage nn .nn
AddLanguage no .no
AddLanguage pl .po
AddLanguage pt .pt
AddLanguage pt-BR .pt-br
AddLanguage ru .ru
AddLanguage sv .sv
AddLanguage zh-CN .zh-cn
AddLanguage zh-TW .zh-tw

#
# LanguagePriority allows you to give precedence to some languages
# in case of a tie during content negotiation.
#
# Just list the languages in decreasing order of preference. We have
# more or less alphabetized them here. You probably want to change this.
#
LanguagePriority en ca cs da de el eo es et fr he hr it ja ko ltz nl nn no pl pt pt-BR ru sv zh-CN zh-TW

#
# ForceLanguagePriority allows you to serve a result page rather than
# MULTIPLE CHOICES (Prefer) [in case of a tie] or NOT ACCEPTABLE (Fallback)
# [in case no accepted languages matched the available variants]
#
ForceLanguagePriority Prefer Fallback

#
# Commonly used filename extensions to character sets. You probably
# want to avoid clashes with the language extensions, unless you
# are good at carefully testing your setup after each change.
# See http://www.iana.org/assignments/character-sets for the
# official list of charset names and their respective RFCs.
#
AddCharset ISO-8859-1  .iso8859-1 .latin1
AddCharset ISO-8859-2  .iso8859-2 .latin2 .cen
AddCharset ISO-8859-3  .iso8859-3 .latin3
AddCharset ISO-8859-4  .iso8859-4 .latin4
AddCharset ISO-8859-5  .iso8859-5 .latin5 .cyr .iso-ru
AddCharset ISO-8859-6  .iso8859-6 .latin6 .arb
AddCharset ISO-8859-7  .iso8859-7 .latin7 .grk
AddCharset ISO-8859-8  .iso8859-8 .latin8 .heb
AddCharset ISO-8859-9  .iso8859-9 .latin9 .trk
AddCharset ISO-2022-JP .iso2022-jp .jis
AddCharset ISO-2022-KR .iso2022-kr .kis
AddCharset ISO-2022-CN .iso2022-cn .cis
AddCharset Big5        .Big5       .big5
# For russian, more than one charset is used (depends on client, mostly):
AddCharset WINDOWS-1251 .cp-1251   .win-1251
AddCharset CP866       .cp866
AddCharset KOI8-r      .koi8-r .koi8-ru
AddCharset KOI8-ru     .koi8-uk .ua
AddCharset ISO-10646-UCS-2 .ucs2
AddCharset ISO-10646-UCS-4 .ucs4
AddCharset UTF-8       .utf8

# The set below does not map to a specific (iso) standard
# but works on a fairly wide range of browsers. Note that
# capitalization actually matters (it should not, but it
# does for some browsers).
#
# See http://www.iana.org/assignments/character-sets
# for a list of sorts. But browsers support few.
#
AddCharset GB2312      .gb2312 .gb
AddCharset utf-7       .utf7
AddCharset utf-8       .utf8
AddCharset big5        .big5 .b5
AddCharset EUC-TW      .euc-tw
AddCharset EUC-JP      .euc-jp
AddCharset EUC-KR      .euc-kr
AddCharset shift_jis   .sjis

#
# AddType allows you to add to or override the MIME configuration
# file mime.types for specific file types.
#
#AddType application/x-tar .tgz
#
# AddEncoding allows you to have certain browsers (Mosaic/X 2.1+) uncompress
# information on the fly. Note: Not all browsers support this.
# Despite the name similarity, the following Add* directives have nothing
# to do with the FancyIndexing customization directives above.
#
#AddEncoding x-compress .Z
#AddEncoding x-gzip .gz .tgz
#
# If the AddEncoding directives above are commented-out, then you
# probably should define those extensions to indicate media types:
#
AddType application/x-compress .Z
AddType application/x-gzip .gz .tgz

#
# AddHandler allows you to map certain file extensions to "handlers":
# actions unrelated to filetype. These can be either built into the server
# or added with the Action directive (see below)
#
# To use CGI scripts outside of ScriptAliased directories:
# (You will also need to add "ExecCGI" to the "Options" directive.)
#
#AddHandler cgi-script .cgi

#
# For files that include their own HTTP headers:
#
#AddHandler send-as-is asis

#
# For server-parsed imagemap files:
#
#AddHandler imap-file map

#
# For type maps (negotiated resources):
# (This is enabled by default to allow the Apache "It Worked" page
#  to be distributed in multiple languages.)
#
AddHandler type-map var

#
# Filters allow you to process content before it is sent to the client.
#
# To parse .shtml files for server-side includes (SSI):
# (You will also need to add "Includes" to the "Options" directive.)
#
#AddType text/html .shtml
#AddOutputFilter INCLUDES .shtml

#
# Action lets you define media types that will execute a script whenever
# a matching file is called. This eliminates the need for repeated URL
# pathnames for oft-used CGI file processors.
# Format: Action media/type /cgi-script/location
# Format: Action handler-name /cgi-script/location
#

#
# Customizable error responses come in three flavors:
# 1) plain text 2) local redirects 3) external redirects
#
# Some examples:
#ErrorDocument 500 "The server made a boo boo."
#ErrorDocument 404 /missing.html
#ErrorDocument 404 "/cgi-bin/missing_handler.pl"
#ErrorDocument 402 http://www.example.com/subscription_info.html
#

#
# Putting this all together, we can internationalize error responses.
#
# We use Alias to redirect any /error/HTTP_<error>.html.var response to
# our collection of by-error message multi-language collections.  We use
# includes to substitute the appropriate text.
#
# You can modify the messages' appearance without changing any of the
# default HTTP_<error>.html.var files by adding the line:
#
#   Alias /error/include/ "/your/include/path/"
#
# which allows you to create your own set of files by starting with the
# @exp_errordir@/include/ files and copying them to /your/include/path/,
# even on a per-VirtualHost basis.  The default include files will display
# your Apache version number and your ServerAdmin email address regardless
# of the setting of ServerSignature.
#
# The internationalized error documents require mod_alias, mod_include
# and mod_negotiation.  To activate them, uncomment the following 30 lines.

#    Alias /error/ "@exp_errordir@/"
#
#    <Directory "@exp_errordir@">
#        AllowOverride None
#        Options IncludesNoExec
#        AddOutputFilter Includes html
#        AddHandler type-map var
#        Order allow,deny
#        Allow from all
#        LanguagePriority en cs de es fr it ja ko nl pl pt-br ro sv tr
#        ForceLanguagePriority Prefer Fallback
#    </Directory>
#
#    ErrorDocument 400 /error/HTTP_BAD_REQUEST.html.var
#    ErrorDocument 401 /error/HTTP_UNAUTHORIZED.html.var
#    ErrorDocument 403 /error/HTTP_FORBIDDEN.html.var
#    ErrorDocument 404 /error/HTTP_NOT_FOUND.html.var
#    ErrorDocument 405 /error/HTTP_METHOD_NOT_ALLOWED.html.var
#    ErrorDocument 408 /error/HTTP_REQUEST_TIME_OUT.html.var
#    ErrorDocument 410 /error/HTTP_GONE.html.var
#    ErrorDocument 411 /error/HTTP_LENGTH_REQUIRED.html.var
#    ErrorDocument 412 /error/HTTP_PRECONDITION_FAILED.html.var
#    ErrorDocument 413 /error/HTTP_REQUEST_ENTITY_TOO_LARGE.html.var
#    ErrorDocument 414 /error/HTTP_REQUEST_URI_TOO_LARGE.html.var
#    ErrorDocument 415 /error/HTTP_UNSUPPORTED_MEDIA_TYPE.html.var
#    ErrorDocument 500 /error/HTTP_INTERNAL_SERVER_ERROR.html.var
#    ErrorDocument 501 /error/HTTP_NOT_IMPLEMENTED.html.var
#    ErrorDocument 502 /error/HTTP_BAD_GATEWAY.html.var
#    ErrorDocument 503 /error/HTTP_SERVICE_UNAVAILABLE.html.var
#    ErrorDocument 506 /error/HTTP_VARIANT_ALSO_VARIES.html.var


#
# The following directives modify normal HTTP response behavior to
# handle known problems with browser implementations.
#
BrowserMatch "Mozilla/2" nokeepalive
BrowserMatch "MSIE 4.0b2;" nokeepalive downgrade-1.0 force-response-1.0
BrowserMatch "RealPlayer 4.0" force-response-1.0
BrowserMatch "Java/1.0" force-response-1.0
BrowserMatch "JDK/1.0" force-response-1.0

#
# The following directive disables redirects on non-GET requests for
# a directory that does not include the trailing slash.  This fixes a
# problem with Microsoft WebFolders which does not appropriately handle
# redirects for folders with DAV methods.
# Same deal with Apple's DAV filesystem and Gnome VFS support for DAV.
#
BrowserMatch "Microsoft Data Access Internet Publishing Provider" redirect-carefully
BrowserMatch "MS FrontPage" redirect-carefully
BrowserMatch "^WebDrive" redirect-carefully
BrowserMatch "^WebDAVFS/1.[0123]" redirect-carefully
BrowserMatch "^gnome-vfs" redirect-carefully
BrowserMatch "^XML Spy" redirect-carefully
BrowserMatch "^Dreamweaver-WebDAV-SCM1" redirect-carefully

#
# Allow server status reports generated by mod_status,
# with the URL of http://servername/server-status
# Change the ".named" to match your domain to enable.
#
#<Location /server-status>
#    SetHandler server-status
#    Order deny,allow
#    Deny from all
#    Allow from .named
#</Location>

#
# Allow remote server configuration reports, with the URL of
#  http://servername/server-info (requires that mod_info.c be loaded).
# Change the ".named" to match your domain to enable.
#
#<Location /server-info>
#    SetHandler server-info
#    Order deny,allow
#    Deny from all
#    Allow from .named
#</Location>


#
# Bring in additional module-specific configurations
#
<IfModule mod_ssl.c>
    Include conf/ssl.conf
</IfModule>


### Section 3: Virtual Hosts
#
# VirtualHost: If you want to maintain multiple domains/hostnames on your
# machine you can setup VirtualHost containers for them. Most configurations
# use only name-based virtual hosts so the server doesn't need to worry about
# IP addresses. This is indicated by the asterisks in the directives below.
#
# Please see the documentation at
# <URL:http://httpd.apache.org/docs-2.0/vhosts/>
# for further details before you try to setup virtual hosts.
#
# You may use the command line option '-S' to verify your virtual host
# configuration.

#
# Use name-based virtual hosting.
#
#NameVirtualHost *:80

#
# VirtualHost example:
# Almost any Apache directive may go into a VirtualHost container.
# The first VirtualHost section is used for requests without a known
# server name.
#
#<VirtualHost *:80>
#    ServerAdmin webmaster@dummy-host.example.com
#    DocumentRoot /www/docs/dummy-host.example.com
#    ServerName dummy-host.example.com
#    ErrorLog logs/dummy-host.example.com-error_log
#    CustomLog logs/dummy-host.example.com-access_log common
#</VirtualHost>

Alias /pma "C:/apache/localhost/www/phpmyadmin"
4 Ответ от Hanut 2009-06-11 21:47:47
- Hanut
- Модератор
- Неактивен
- Откуда: Рига, Латвия
- Зарегистрирован: 2006-07-02
- Сообщений: 9,723
Re: Прописать путь к папке phpMyAdmin в httpd.conf
Fatum
Все правильно, но phpMyAdmin надо развернуть где-то внутри DocumentRoot.
Например:
Alias /pma «D:/Program Files/Apache Group/Apache2/htdocs/localhost/phpmyadmin»
5 Ответ от Fatum 2009-06-13 10:59:05
- Fatum
- Редкий гость
- Неактивен
- Зарегистрирован: 2009-06-11
- Сообщений: 8
Re: Прописать путь к папке phpMyAdmin в httpd.conf
D:Program FilesApache GroupApache2htdocstestphpMyAdmin Скопировал по этому пути и прописал путь в htdocs Но теперь при заходе на http://localhost/test/phpmyadmin/ Он просто выдает весь список файлов из папки phpmyadmin
Index of /test/phpmyadmin
Name Last modified Size Description——————————————————————————— Parent Directory —
CREDITS 15-May-2009 12:29 169
ChangeLog 12-Jun-2009 06:43 23K
Documentation.html 12-Jun-2009 06:43 224K
6 Ответ от Hanut 2009-06-13 14:56:15
- Hanut
- Модератор
- Неактивен
- Откуда: Рига, Латвия
- Зарегистрирован: 2006-07-02
- Сообщений: 9,723
Re: Прописать путь к папке phpMyAdmin в httpd.conf
Fatum
Отредактируйте данную директиву в httpd.conf:
DirectoryIndex index.html index.htm index.shtml index.phpI just finished installing mysql-server, and then installed phpmyadmin which came with Apache and PHP. It set it up alright and made a phpMyAdmin database, but I can’t seem to find the URL to get to it — I tried going to http://my.server.ip/phpmyadmin but it doesn’t seem to be there.
I can’t find the location in any of the manuals, does anyone know where this is located? Thanks.
asked Jul 26, 2012 at 1:52
![]()
1
You just need to make a symbolic link to the installation in your server root. Mine is in /var/www/ (though check your DocumentRoot as default is often /var/www/html) so:
sudo ln -s /usr/share/phpmyadmin/ /var/www/phpmyadmin
After that, you’ll be able to access trough localhost:
http://localhost/phpmyadmin
As for why is not installed by default in its right location, or the installer creates a symbolic link itself, I have no idea…
![]()
answered Nov 23, 2013 at 22:34
![]()
animaletdesequiaanimaletdesequia
8,2384 gold badges26 silver badges43 bronze badges
3
This answer is little bit more generic. To know the list of files installed by any package you have to do this
- Get the name of the package with
dpkg --list | grep phpmyadmin - For list of file installed use this
dpkg --listfiles <package_name step 1>
answered Jul 26, 2012 at 6:12
![]()
1
I imagine that you probably are facing the same issue that I had the first time I installed phpmyadmin. Considering it’s been over a year since you asked this, I’m assuming you’ve figured it out by now, but for future reference for others, if you can’t see it when going to http://yourdomain.com/phpmyadmin, you probably need to reconfigure the package, and make sure that you place a checkbox in the apache2 box (assuming that’s what you’re using for your server) by pressing the spacebar before you continue. I was going quickly and just pressed enter, not realizing that I hadn’t selected apache2. To reconfigure the package, use the following:
sudo dpkg-reconfigure phpmyadmin
answered Jun 6, 2013 at 19:59
![]()
1
Oh, usually the phpmyadmin goes to /usr/lib/phpmyadmin if I’m not wrong.
I always need to move the folder to my www path.
![]()
answered Nov 23, 2013 at 22:30
![]()
RagazziDRagazziD
411 silver badge5 bronze badges
4
For me it worked out differently.
I’ve had to copy the apache.conf file from /etc/phpmyadmin to /etc/apache2/sites-available and to /etc/apache2/sites-enabled using file manager as root.
Then I ran sudo service apache2 restart and everything was just fine.
Hope it’s usefull.
![]()
answered Dec 11, 2018 at 14:11
![]()
1
Presumably you have Apache installed and that’s what you use as your main web server (ie, it listens on port 80). If you have not done (much) customisation to your Apache install, it should be accessible at:
http://localhost/phpmyadmin/
(If you’re accessing the server from a different machine, then obviously substitute localhost).
The installer for phpMyAdmin installs a config file into /etc/apache2/conf.d/ called phpmyadmin, which sets up an alias. Look at this file to see how it works and where it should appear on your website.
If you have modified your Apache configuration, it’s possible though unlikely that you have done something which overrides the directives in that phpmyadmin config file. In which case you should be able to fix phpmyadmin’s configuration yourself to get it working how you like it.
answered Jul 26, 2012 at 5:21
![]()
thomasrutterthomasrutter
35.4k10 gold badges85 silver badges103 bronze badges
http://127.0.0.1/phpmyadmin
or also http://::1/phpmyadmin or http://localhost/phpmyadmin
read: https://en.wikipedia.org/wiki/Localhost
also, type «ip addr» to see your public address (or semi-public with NAT)
answered Jul 26, 2012 at 5:25
![]()
user72421user72421
3,4111 gold badge12 silver badges8 bronze badges
Try using:
<server_ip or localhost>/phpmyadmin/index.php
That might just do the trick. In the past this one solved it for me.
answered Jul 26, 2012 at 6:04
![]()
saji89saji89
11.8k5 gold badges44 silver badges64 bronze badges
In my case I had it under
/usr/local/phpMyAdmin-*
I guess you can always try to find it through (some) httpd configuration file.
answered Nov 5, 2018 at 10:08
![]()
PJuniorPJunior
3351 gold badge3 silver badges13 bronze badges
In my case this command worked:
sudo ln -s /usr/share/phpmyadmin/ /var/www/html/phpmyadmin
Because my server root is default, that is: /var/www/html
answered Aug 2, 2019 at 8:22
![]()
I re-configured and its working fine for me on Ubuntu 18.04 with the below command:
sudo dpkg-reconfigure phpmyadmin
![]()
answered Sep 3, 2019 at 6:59
![]()