В Python есть много библиотек по работе с изображениями. Одна из самых известных библиотек — Pillow (ранее PIL). В этой статье будут рассмотрены примеры по изменению размеров картинки с помощью увеличения и уменьшения картинки, а так же обрезания.
Pillow не является стандартной библиотекой и устанавливается отдельно:
pip install pillowПолучение размеров
Для получения размера картинки мы должны открыть ее (создать объект класса Image) и получить атрибут ‘size’. Это можно сделать так:
from PIL import Image

image_path = 'F:/hello.png'

img = Image.open(image_path)
# получаем ширину и высоту
width, height = img.size
print(width, height)
# открываем картинку в окне
img.show()
Изменение размера изображения с resize()
Для изменения ширины и высоты есть метод ‘resize’. Этот метод не изменяет текущую картинку, а возвращает новую. Новый размер мы должны указать в виде кортежа ‘(ширина, высота)’. Сохранить картинку можно через метод ‘save’:
from PIL import Image

image_path = 'F:/hello.png'

img = Image.open(image_path)
# изменяем размер
new_image = img.resize((200, 385))
new_image.show()
# сохранение картинки
new_image.save('F:/hello2.png')
На примере выше видно, что картинка меняется не пропорционально. Это можно изменить двумя способами:
Учет соотношения сторон
Что бы создать пропорциональную картинку вам нужно определиться с размером одно из сторон. В примере ниже указана фиксированная ширина, но вы можете немного изменить скрипт и указать высоту. Мы должны вычислить процентное соотношение старой ширины к новой, а затем умножить ее на высоту:
from PIL import Image

image_path = 'F:/hello.png'

# указываем фиксированный размер стороны
fixed_width = 200
img = Image.open(image_path)
# получаем процентное соотношение
# старой и новой ширины
width_percent = (fixed_width / float(img.size[0]))
# на основе предыдущего значения
# вычисляем новую высоту
height_size = int((float(img.size[0]) * float(width_percent)))
# меняем размер на полученные значения
new_image = img.resize((fixed_width, height_size))
new_image.show()
new_image.save('F:/hello2.png')
Создание эскиза thumbnail
Есть еще один способ выполнить предыдущие шаги автоматически — он называется ‘thumbnail’. Его отличие от resize() в том, что он не может увеличить размер изображения. Если с помощью resize() вы можете изменить размер 200х200 на 400х400, то метод thumbnail() оставит исходный.
В методе ‘thumbnail()’ создается кортеж с 2-мя числами: максимальная ширина и высота. Понятие «максимальный» нужно оценивать как значение, которое можно менять в меньшую сторону. Если вы возьмете картинку размером 100х100 и захотите ее уменьшить до 100х50, то Pillow высчитает оптимальны размер как 50х50.
Пример работы:
from PIL import Image

image_path = 'F:/hello.png'

img = Image.open(image_path)
# пропорциональное изменение картинки
img.thumbnail(size=(350,400))
img.show()
img.save('F:/hello3.png')
Обрезание (cropping) картинки
Для обрезания ненужных частей картинки используется метод ‘crop()’. Внутри этого метода помещается кортеж со значениями (отступами) соответствующие сторонам, которые нужно обрезать. Стороны можно определить следующими переменными:
(x1,y1,x2,y2)Оси x1 и y1 находятся в левой верхней части изображения, а оси x2 и y2 в правой нижней. Левая верхняя часть имеет координаты 0 и 0, а правая нижняя соответствует ширине и высоте изображения. Картинка, которую я использовал в предыдущих примерах, имеет размер 401х385. Если распределить все координаты, соответствующие этой картинке, получится следующий результат:
(0,0,401,385)Или:
 в Python Pillow")
Представим, что нам нужно обрезать название на картинке — это примерно 60px. Мы должны вычесть (вырезать) это значение из нижнего правого угла (высоты):
from PIL import Image

image_path = 'F:/hello.png'

img = Image.open(image_path)
size = img.size
width, height = img.size
# обрезаем картинку
new_image = img.crop((0,0,width,height-60))
new_image.show()
new_image.save('F:/hello3.png')
 в Python Pyllow")
Если бы мы хотели оставить только название, то нужно было бы изменить значение y1 (2-ой индекс):
(0,height-60,width,height) в Python Pyllow")
Создание границ картинки и ее увеличение за счет новой области
Увеличить размер изображения, не растягивая ее (как делает resize()), можно тремя методами.
Первый, который так же обсуждался в предыдущей части статьи, увеличит изображение без возможности изменения фона (в зависимости от изображения он может быть черным/прозрачным). В примере ниже мы добавим по 50px к каждому углу:
(-50,-50,width+50,height+50)
Второй способ — за счет создания нового изображения и вставки в него старого.
Для создания нового изображения нужно использовать метод ‘Image.new()’. В этом методе мы должны указать тип картинки, ее ширину и высоту, а так же цвет. Что бы вставить изображение — используется метод ‘paste()’. В нем указывается отступ формата ‘(верх, лево)’ либо вы можете использовать координаты аналогичные методу ‘crop()’.
В следующем примере мы создадим изображение, которое будет на 50px больше и вставим в него старую картинку. Картинка будет располагаться в 25px от верхнего и левого края:
from PIL import Image

image_path = 'F:/hello.png'

old_img = Image.open(image_path)
# создание нового изображения
new_image = Image.new(old_img.mode,
      (old_img.size[0]+50, old_img.size[1]+50),
      'white')
# вставляем старой изображение в новое
new_image.paste(old_img, (25, 25))
new_image.show()
new_image.save('F:/hello3.png')

Создание границ изображения с ImageOps.expand
Создать границы картинки (расширить) так же можно через метод ImageOps.expand(). Вообще через модуль ‘ImageOps’ можно проделать все шаги описанные выше, но он может не работать с какими-то типами изображений.
В метод ‘expand()’ мы должны передать объект ‘Image’, размер границы и цвет. Пример с результатом аналогичным предыдущему:
from PIL import Image
from PIL import ImageOps

image_path = 'F:/hello.png'

old_img = Image.open(image_path)
# создание нового изображения с белым фоном
new_image = ImageOps.expand(old_img, border=25, fill=(255,255,255))
new_image.show()
new_image.save('F:/hello3.png')

…
Теги:
#python
Бывает такой заходишь на почту и видишь очередную подборку статей, которые никогда не прочитаешь, но тут так сошлись звезды, что и открыл статью, и прочел, и придумал, где на практике пригодится. А теперь хочу поделиться статьей с Хабром, чтобы если кому-то нужен будет простой и понятный гайд по работе с изображениями на Python — пожалуйста.
Pillow — это свободно распространяемая библиотека для работы с изображениями (далее Imaging Library) на Python с открытым исходным кодом, которая добавляет вашему коду поддержку открытия, изменения и сохранения изображений в различных расширениях.
Давайте начнем
Самый важный класс в Imaging Library Python — это класс Image, определенный в одноименном модуле. Мы используем open(), чтобы открыть изображение в нашей локальной директории, как показано ниже:
from PIL import Image
sample = Image.open('pena.jpg')
Это просто! Теперь вы умеете считывать изображения с помощью Pillow, а значит можно приступать к обработке изображения с его помощью. Вы также можете проверить тип изображения, которое мы только что загрузили.
type(sample)
PIL.JpegImagePlugin.JpegImageFile
Вы можете посмотреть свойства изображения, например:
- формат
- размер
- цветовой режим
sample.format
'JPEG'
sample.size
(640, 640)
sample.mode
'RGB'
Кроме того, вы можете вывести на экран изображение, используя метод show
sample.show() #Открывает в новом окне, расширение изображения меняется на PNG
Конвертирование расширения изображения
Когда вы закончите работать с изображением при помощи библиотеки Pillow в изначальном расширении, вы можете пересохранить его в других форматах, например, их jpg сделать png или многие другие.
Для примера, давайте попробуем написать простую программу на Python для преобразования всех изображений в каталоге вашего проекта, которые находятся в формате jpg, в формат png.
import os
import sys
from PIL import Image
jpg_images = [image for image in os.listdir() if image.endswith('.jpg')]
for jpg_image in jpg_images:
    try:
        new_name = jpg_image.split('.')[0] + '.png'
        Image.open(jpg_image).save(new_name)
    except IOError as error:
        print('Couldn't read {} '.format(jpg_image))
После того, как вы запустите приведенный выше код, в каталоге проекта, состоящем из изображений в формате jpg, откроются все изображения и преобразуются в .png, как показано на скриншоте. Вы можете повторить тот же процесс для преобразования изображений в другие преобразований.
Обрезка изображения
Pillow также может использоваться для обрезки изображения, при этом вы можете получить производный прямоугольник выбранного изображения, указав координаты, по которым преобразовать изображение.
from PIL import Image
picture = Image.open('pena.png')
cord = (10, 10, 640, 340) # лево, верх, право, низ
new_picture = picture.crop(cord)
new_picture.show()
Как мы видим, изображение было успешно обрезано. Координаты обрезанной поверхности представлены диагональными координатами.
При этом первые две точки находятся (x, y) от верхней левой диагональной точки, а следующие две точки (x2, y2) также являются диагональной точкой снизу справа.
Геометрическое преобразование
С помощью Pillow мы можем выполнять некоторые геометрические преобразования над изображением, включая изменение размера и поворот изображения.
Эти знания играют большую роль при генерации данных для глубокого обучения путем преобразования одного изображения в тонны других изображений с разных ракурсов.
Изменение размера изображения
from PIL import Image
image = Image.open('pena.png')
resized_image = image.resize((320, 320))
resized_image.save('resized.png')
Когда вы запустите приведенный выше код, вы должны увидеть новое изображение с измененным размером в вашем каталоге с размером 320 на 320.
Поворот изображения
from PIL import Image
image = Image.open('pena.png')
rotated_img = image.rotate(80)
rotated_img.save('./rotation/rotated_img.png')
Используйте функцию вращения для создания 360 изображений одного из того же изображения под разными углами — это поможет сгенерировать данные, которые вы потенциально можете использовать для обучения своей модели глубокого обучения.
Генератор изображений
from PIL import Image
images = ['pena.jpg']
for img in images:
    try:
        org_img = Image.open(img)
        for angle in range(1, 361):
            image_name = str(angle)+'.jpg'
            new_img = org_img.rotate(angle)
            new_img.save('./rotation/'+image_name)
    except IOError:
        print('Couldn't read {}'.format(img))
После запуска скрипта, вы должны увидеть 360 изображений одного и того же исходного изображения с разным поворотом, как показано ниже.

Фильтрация изображений
Фильтрация — это метод изменения или улучшения изображения. Например, вы можете отфильтровать изображение, чтобы выделить определенные особенности или удалить другие.
Фильтрация изображений используется для получения различных результатов, как, например,- сглаживание, повышение резкости, удаление шума и обнаружение краев.
В библиотеке Pillow доступно множество фильтров, включая BLUR, BoxBlur, CONTOUR, FIND_EDGES, Filter, GaussianBlur, Kernel, MaxFilter, MedianFilter, SHARPEN, SMOOTH и т.д.
Пример использования
Давайте попробуем найти края на изображении ниже, используя фильтр FIND_EDGES.
from PIL import Image
from PIL import Image, ImageFilter
image = Image.open('pena.jpg')
edges = image.filter(ImageFilter.FIND_EDGES)
edges.show()
Таким же образом вы можете экспериментировать с другими фильтрами в Python библиотеке Pillow в зависимости от того, что вы пытаетесь сделать.
Чтение изображения из открытого файла
Кроме того, вы можете использовать Pillow для чтения изображения из файлового объекта Python, как показано ниже
from PIL import Image
image = Image.open(open('pena.jpg', 'rb'))
Чтение изображения из URL
В этом случае вам придется использовать Pillow в сочетании с запросами. Запросы должны будут отправлять GET-request на сервер, чтобы получить необработанные байты изображения, а уже Pillow считает эти байты.
import requests
from PIL import Image
url = 'http://pena.marketing/images/Logo1.png'
raw = requests.get(url, stream=True).raw
Image.open(raw).show()
Создание новых изображений
С помощью Pillow вы также можете создать новое пустое изображение, которое может понадобиться для различных целей. Используйте Image.new() для создания совершенно нового изображения.
Синтаксис:
new = Image.new(mode, shape, color)Пример использования:
from PIL import Image
new_img = Image.new('RGB', (500, 500), 'blue')
new_img.show()
Рисование прямоугольников на изображениях
Pillow также может использоваться для рисования прямоугольника на изображениях. Обычно это делают при обнаружении объекта. При этом вы можете нарисовать не просто прямоугольник, а рамку над обнаруженным объектом.
Пример исползования
Давайте попробуем нарисовать прямоугольную рамку внутри пустого изображения.
from PIL import Image, ImageDraw
new_img = Image.new('RGB', (400, 400), 'black')
pencil = ImageDraw.Draw(new_img)
pencil.rectangle((200, 50, 300, 300), fill ='green')
new_img.show()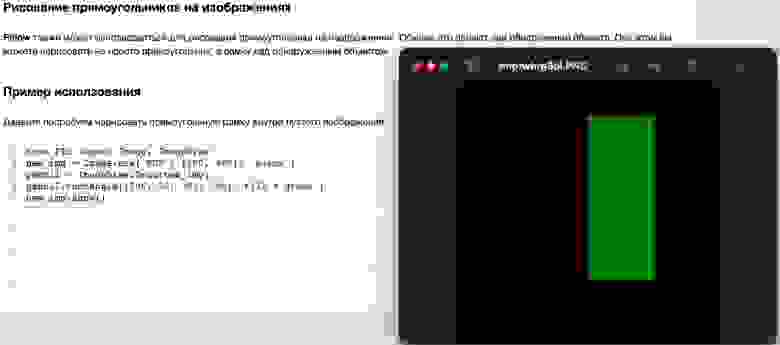
Первые две координаты представляют (x, y) левой верхней части, а следующие две (x2, y2) представляют координатную точку правой нижней части.
Рисование текста на изображениях
Мы также можем использовать библиотеку Pillow для рисования текста на изображениях.
from PIL import Image , ImageDraw, ImageFont
new_img = Image.new('RGB', (200, 200), 'black')
font = ImageFont.load_default()
pencil = ImageDraw.Draw(new_img)
pencil.text((100,100),'Hello World',  font=font, fill='blue', size = 36)
new_img.show()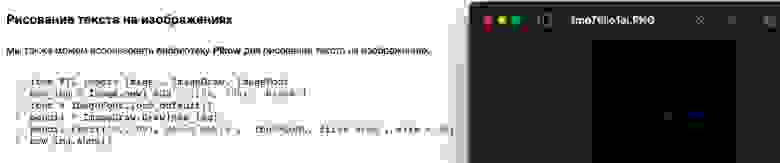
Ссылки:
- Оригинал статьи
- Библиотека Pillow
- Jupyter Notebook с переведённой статьей и примерами кода
Только зарегистрированные пользователи могут участвовать в опросе. Войдите, пожалуйста.
Будешь пользоваться библиотекой?
9.43%
Нет, использую другую (поделюсь в комментариях)
5
Проголосовали 53 пользователя.
Воздержались 3 пользователя.
Resizing images is an integral part of the web, whether to display images on your website or app, store lower-resolution images, or generate a training set for neural networks.
Python offers a rich set of options to perform some of the routine image resizing tasks. This article will walk you through those options and look at ImageKit — a cloud-based, ready-to-use solution that offers real-time image manipulation.
We will look at
- Resizing Images using Pillow
- Resizing Images using OpenCV
- Simplify all of it by using ImageKit, a complete image optimization product
Before we get started
Make sure you have a recent version of Python installed on your system, preferably Python 3.6+, then spin up a virtual environment.
# create virtual env
Python3 -m venv image-resize

# activate
source image-resize/bin/activate
When we get to ImageKit later in this article, you will need to sign up for a free account on ImageKit’s website. The free plan has access to all the features we need for image resizing and other transformations.
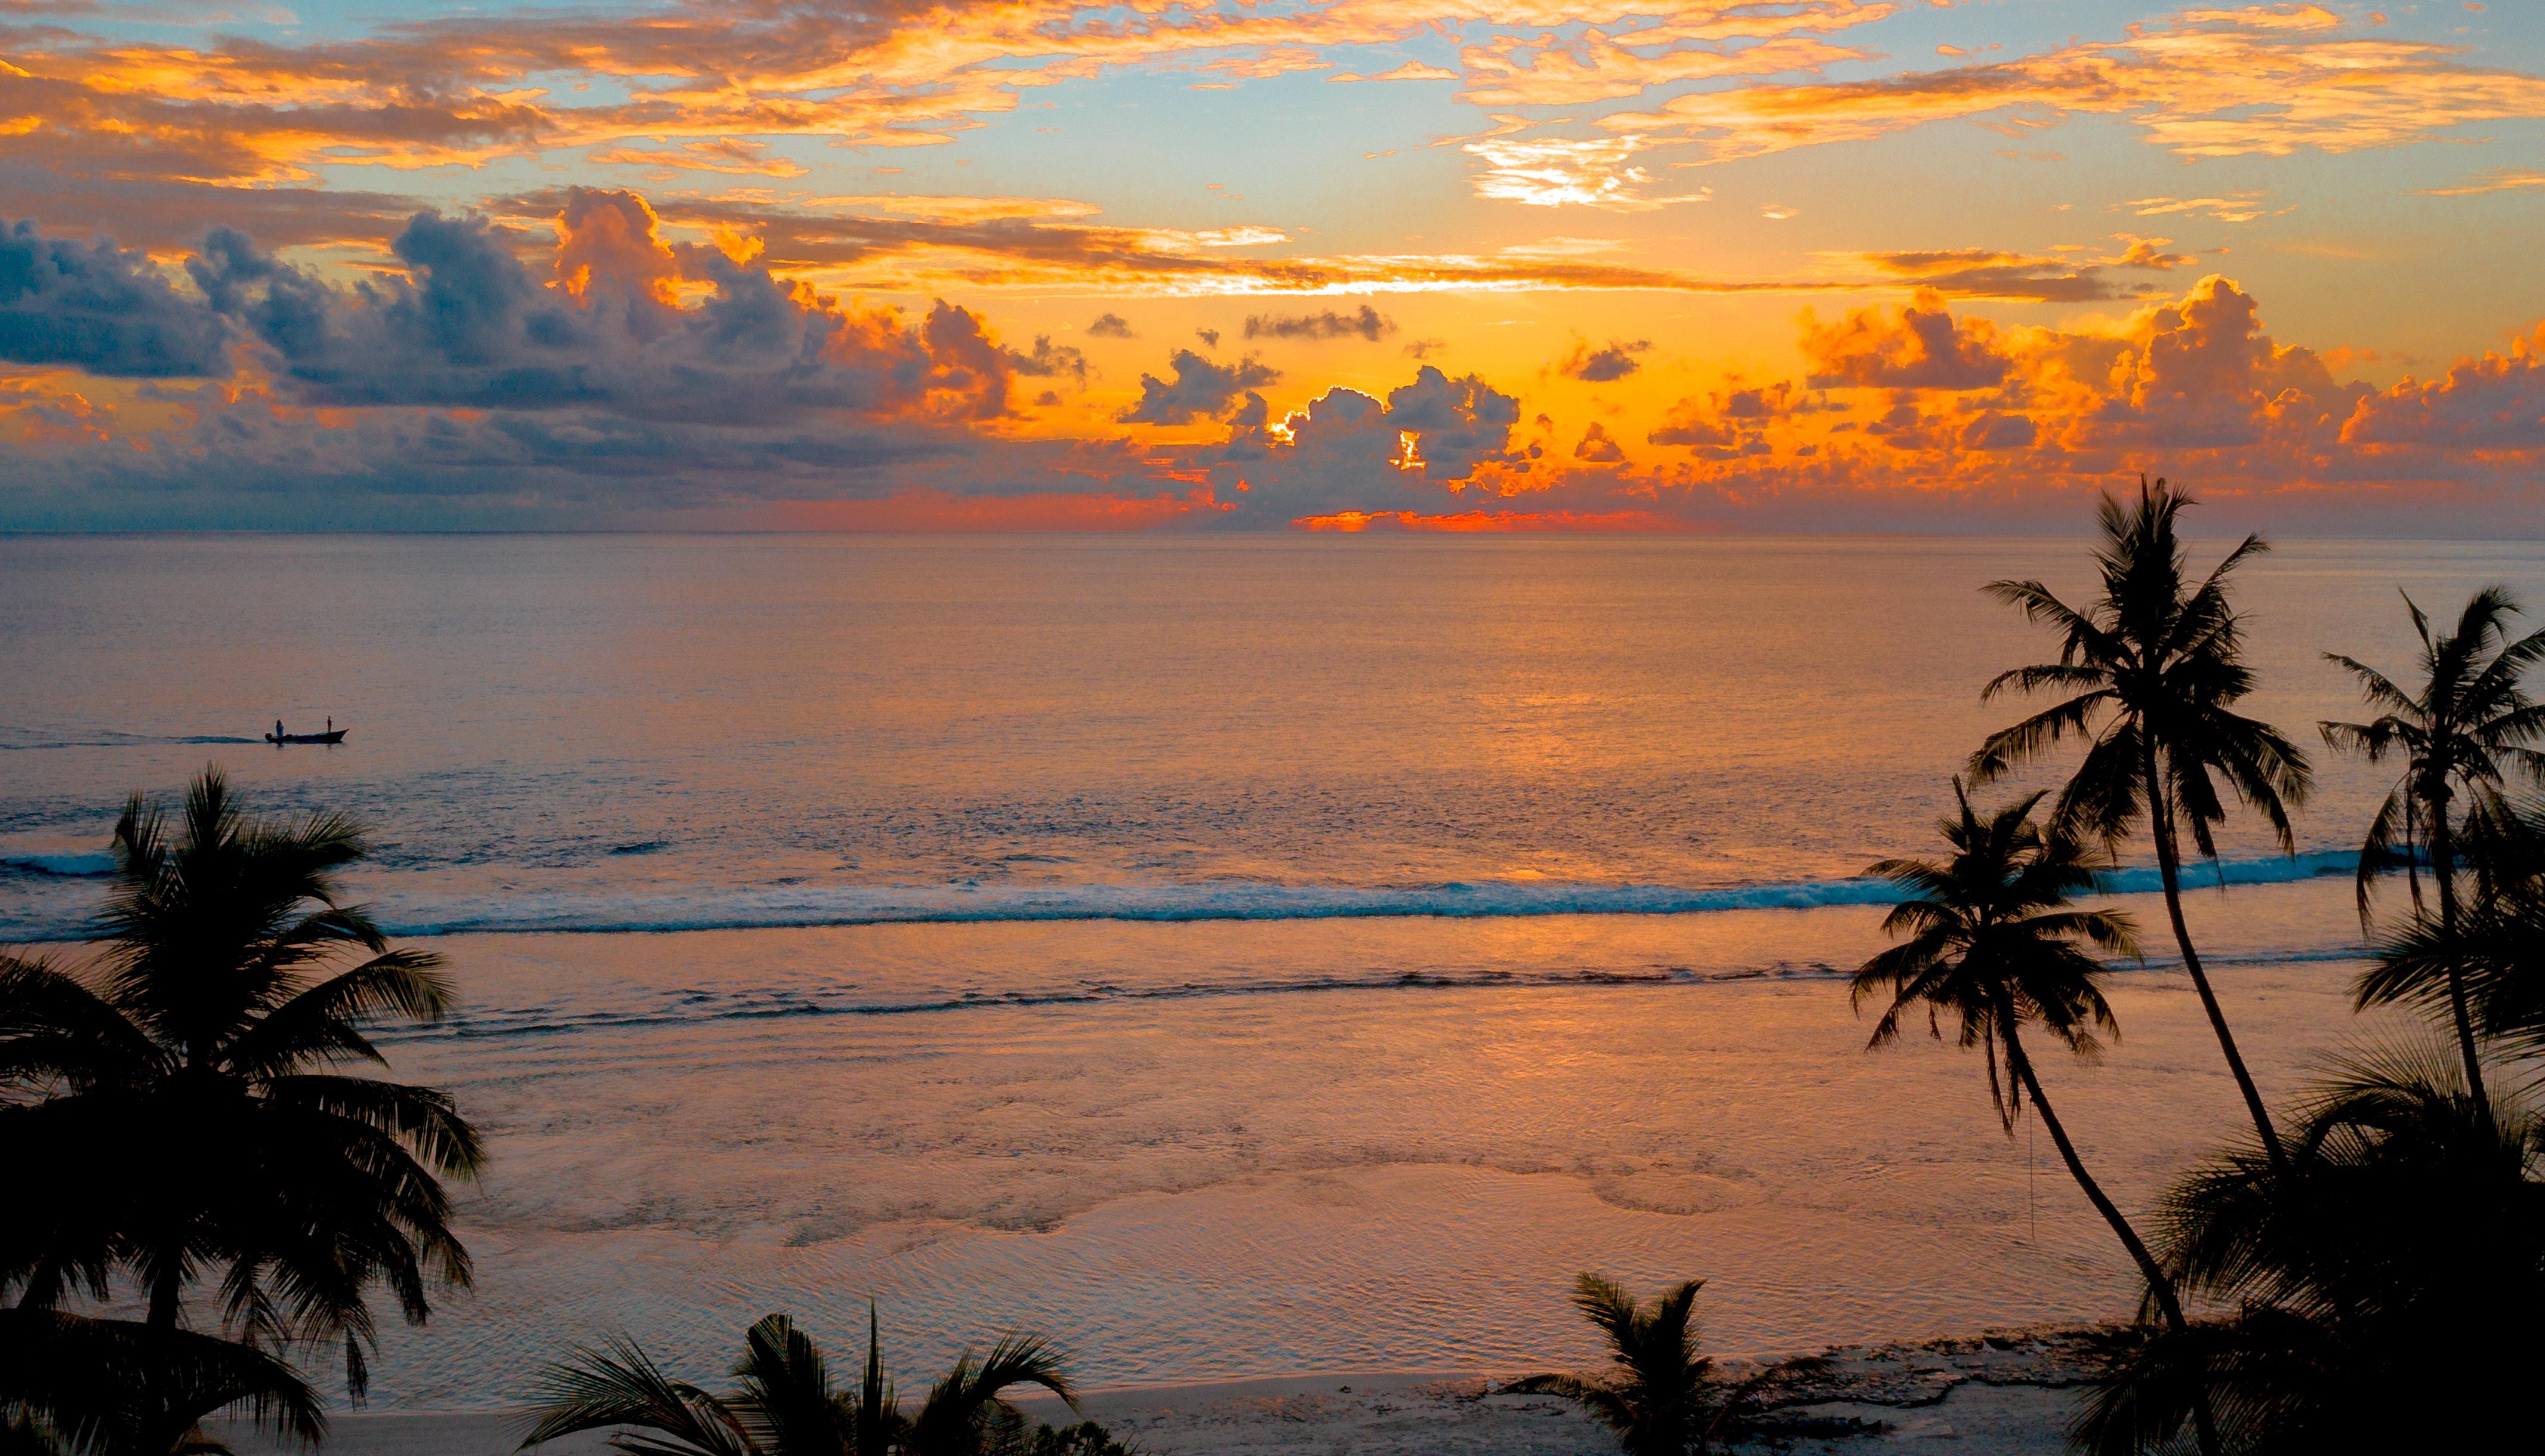
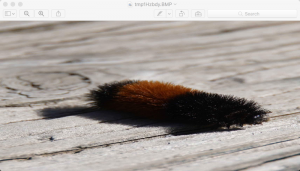
We will be using an image by Asad from Pexels for all examples in this article. This image is also hosted on ImageKit.
https://ik.imagekit.io/ikmedia/python-resizing/sunset_SLoRHsWVo.jpgResizing Images using Pillow (PIL)
Pillow is one of the most popular options for performing basic image manipulation tasks such as cropping, resizing, or adding watermarks.
Install the latest version of Pillow with pip.
Python3 -m pip install PillowPillow provides the resize() method, which takes a (width, height) tuple as an argument.
from PIL import Image

image = Image.open('sunset.jpg')
print(f"Original size : {image.size}") # 5464x3640

sunset_resized = image.resize((400, 400))
sunset_resized.save('sunset_400.jpeg')
We read our image using the open() method from the Image module. Then we use resize with a tuple, representing the width and height of the output image, respectively, as an argument containing the new size.
Here is how our resized image looks like

Maintain Aspect Ratio while Resizing
The resize method is pretty handy and quick to work with, but it doesn’t always give the best results. Images resized using this method may be stretched or forced to fit in a box and therefore skewed.
ImageKit makes it ridiculously easy to resize images while maintaining the aspect ratio. See how ImageKit works for resizing.
Although the thumbnail() method can address the problem of skewing, it creates a thumbnail version of the image whose size does not exceed the dimensions specified in the arguments.
image.thumbnail((400, 400))image.save("sunset-aspect.jpeg")The thumbnail method resizes the image in place without returning an image object. Therefore, make sure to save the file with a different name.

Cropping an image with Pillow
The crop() method used to crop an image accepts a 4-tuple of the x and y coordinates of the top-left and the bottom-right corner of the crop area.
So, if we want to crop an image from the (300,300) point to (700,900) point, the code would be
# Crop the image
box = (300, 300, 700, 900)
cropped_image = image.crop(box)
cropped_image.save('cropped-image.jpg')

# 400x600 size of the image
print(cropped_image.size) 
There is an easier method of using ImageOps. The ImageOps.crop() method accepts two arguments:
img— The image to cropborder— The width of the area to be removed. The same width is removed from all four sides of the image.
from PIL import Image, ImageOps

image = Image.open('sunset.jpg')
cropped = ImageOps.crop(image, 600)
cropped.save("crop-imageops-600.jpg")
Here is our sample image cropped by 600px from all sides.
You should check out the pillow handbook for more complex image operations.
Bonus: Adding a watermark to an image
To add watermarks, we need to use the ImageDraw and ImageFont methods. The ImageDraw module provides simple-to-use APIs for working with 2D graphics, from creating polygons to writing text. ImageFont sets the font of the watermark text.
from PIL import Image, ImageDraw, ImageFont

im = Image.open('sunset-aspect.jpg')
width, height = im.size # 400x266

draw = ImageDraw.Draw(im)
text = "Sunset"

font = ImageFont.truetype('/usr/share/fonts/truetype/ubuntu/UbuntuMono-RI.ttf', 20)
textwidth, textheight = draw.textsize(text, font)

# calculate new x,y coordinates of the text
x = (width - textwidth)/2
y = (height - textheight)/2

# draw watermark in the center
draw.text((x, y), text, font=font)

im.save('pillow-watermark.jpg')
Make sure to choose a font that is available on your system. You can set the position, fill, anchor, or language. You can also download a font of your choice and provide the path to it.
Here is the sample output —

Resizing images using OpenCV
OpenCV is the de-facto library used to perform complex image processing tasks such as face detection, pixel transformations, and 3D modeling. But, it can perform more generic tasks like image resizing as well.
First, let’s install the latest opencv for Python using pip.
Python3 -m pip install opencv-PythonNote that we are using OpenCV 4.5 for this tutorial. cv2 is the name of the Python wrapper.
Resizing with OpenCV
Although OpenCV is a viable choice for image resizing, it is best suited for heavy-duty tasks like object detection. Stick to Pillow for basic image manipulation or scroll below to see how ImageKit does that.
Resizing images can be done by cv2.resize() method.
import cv2

img = cv2.imread('sunset.jpg')

# Get original height and width
print(f"Original Dimensions : {img.shape}")

# resize image by specifying custom width and height
resized = cv2.resize(img, (2000, 1500))

print(f"Resized Dimensions : {resized.shape}")
cv2.imwrite('resized_imaged.jpg', resized)
Cropping an image with OpenCV
OpenCV uses a NumPy array under the hood for representing images. We can leverage array slicing to extract the part of the pixels we need, i.e., crop the image.
Since this is a 2D array, we need to specify the start and end coordinates, just like we did while cropping images with Pillow. Though, the syntax here is slightly different.
If we want to crop an image starting at (0,0) point to (2732, 3640) point, then we can do this with OpenCV as shown below
# image[startY:endY, startX:endX]
cropped_image = img[0:3640, 0:2732]
cv2.imwrite('cropped-image-opencv.jpg', cropped_image)
print(f"Cropped Image Dimensions : {cropped_image.shape}") # 2732x3640
You can read more about image processing tutorials from OpenCV.
Using ImageKit to resize and crop images
Both Pillow and OpenCV are good options to resize and crop images. But these solutions require extensive setup and maintenance in line with the changing business needs.
This might not be the best utilization of your or your team’s time when tools like ImageKit.io can do the same job for you with minimal effort.
ImageKit.io is a real-time image and video optimization, manipulation, and storage product that can help you do basic resizing and cropping on your images and more.
You have the flexibility to either upload your images to the integrated media library or attach your existing cloud storage or servers to ImageKit and start delivering optimized files. Several image and video optimizations are done automatically, considering multiple factors, whereas resizing, cropping, and other transformations can be done by simply modifying the URL in real-time.
Setup with ImageKit
In our example, we have already uploaded the sample image to ImageKit.
https://ik.imagekit.io/ikmedia/python-resizing/sunset_SLoRHsWVo.jpgYou should sign up for a free account on ImageKit that comes with an ample amount of storage and delivery bandwidth. You can download the original image from Pexels from here and upload it to your media library.
We will be using ImageKit’s Python SDK to create the resized and cropped image URLs. You can install this SDK using the following command —
Python3 -m pip install imagekitio Python-dotenvBasic resizing by changing height and width
Resizing images in ImageKit is simple. Just add the required dimension transformation to the URL, and you will get the resized image in real-time.
For example, to get the sample image with a width of 200px, the URL will be —
https://ik.imagekit.io/ikmedia/python-resizing/sunset_SLoRHsWVo.jpg?tr=w-200While this is a simple string append operation, the Python SDK makes the code simpler and readable.
image_url = imagekit.url({
    "path": "/python-resizing/sunset_SLoRHsWVo.jpg",
    "transformation_position": "query",
    "transformation": [
      {"width": "200"}
    ]
})Similarly, if we want to get a 400 x 300px resized image from ImageKit, the URL will contain height and width transformation parameters.
https://ik.imagekit.io/ikmedia/python-resizing/sunset_SLoRHsWVo.jpg?tr=w-400,h-300The corresponding code with the Python SDK will be
image_url = imagekit.url({
    "path": "/python-resizing/sunset_SLoRHsWVo.jpg",
    "transformation_position": "query",
    "transformation": [
      {"width": "400", height : "300"}
    ]
})
There are several other image transformation options with ImageKit. You can read about them from the product documentation or from the Python SDK documentation.
Cropping images with a specific aspect ratio
Another transformation available in ImageKit is the aspect ratio transformation. You can use it with either the width or the height transformation to fix the output image’s aspect ratio and transformations.
For example, to get an image at 800px width with an aspect ratio 4:3, the URL will be
https://ik.imagekit.io/ikmedia/python-resizing/sunset_SLoRHsWVo.jpg?tr=w-800,ar-4-3Cropping options available with ImageKit
In the above examples, if the output aspect ratio doesn’t match the input aspect ratio, the image gets cropped around the center of the original by default.
However, ImageKit gives us multiple cropping options that can prevent cropping on the image and help us get the required output. Let’s look at some of the standard cropping options below.
1. No cropping — Forcing Requested Dimensions
You can do this by adding the c-force transformation parameter to the URL. This will force-fit the image to the size requested. Though, because this is a force fit, it may cause the image to get skewed.
https://ik.imagekit.io/ikmedia/python-resizing/sunset_SLoRHsWVo.jpg?tr=w-400,h-200,c-force
In the Python SDK, this can be specified using the crop transformation
image_url = imagekit.url({
    "path": "/python-resizing/sunset_SLoRHsWVo.jpg",
    "transformation_position": "query",
    "transformation": [
      {
        "height": "200",
        "width": "400",
        "crop": "force",
      },
    ]
})
2. Fit inside a container
The at_max crop strategy fits the image inside a container with a defined height and width while preserving the aspect ratio. Either the height or width of the image may differ from the requested dimensions, and the resulting image will always be smaller than the dimensions specified.
https://ik.imagekit.io/ikmedia/python-resizing/sunset_SLoRHsWVo.jpg?tr=w-400,h-200,c-at_max
3. Fit outside a container
Opposite to the at_max crop, the at_least crop results in an image that is at least the size that is specified using the height and width dimensions. Either the height or width of the image may differ from the requested dimensions, and the resulting image will always be larger than the dimensions specified.
https://ik.imagekit.io/ikmedia/python-resizing/sunset_SLoRHsWVo.jpg?tr=w-400,h-200,c-at_least
4. Pad an image
If you still want the resulting image to match the output dimension requested but not get cropped, you can use the pad_resize crop mode. Note that this is different from the crop transformations used above and is specified using the crop_mode transformation. You can also specify the padding color that is added around the image using the background transformation.
image_url = imagekit.url({
    "path": "/python-resizing/sunset_SLoRHsWVo.jpg",
    "transformation_position": "query",
    "transformation": [
      {
        "height": "200",
        "width": "400",
        "crop_mode": "pad_resize",
        "background" : "DADADA"
      },
    ]
})
The resulting URL is
https://ik.imagekit.io/ikmedia/python-resizing/sunset_SLoRHsWVo.jpg?tr=w-400,h-200,cm-pad_resize,bg-DADADA
You can see grey-colored padding around the image, which perfectly fits the 400 x 200px output dimensions without cropping the image.
Bonus: Adding watermarks to an image using ImageKit
ImageKit offers more than 40+ different real-time transformation parameters for images.
We can use them to add both image and text overlays to our images and control how and where they are displayed on our images. You can refer to the complete overlays documentation here.
Let’s look at an example to add text on the image in the top-left corner of our base image. Here we specify the text, its font size, and font color in the URL itself.
image_url = imagekit.url({
    "path": "/python-resizing/sunset_SLoRHsWVo.jpg",
    "transformation_position": "query",
    "transformation": [
      {
        "height": "400",
        "overlay_text": "Sunset",
        "overlay_text_font_size": "30",
        "overlay_text_color": "FFFFFF"
       }
    ]
})
The resulting image URL is
https://ik.imagekit.io/ikmedia/python-resizing/sunset_SLoRHsWVo.jpg?tr=h-400,ot-Sunset,ots-30,otc-FFFFFF
Similarly, we can add image watermarks or combine multiple watermarks in different positions and sizes on an image in real-time. You will find such examples in the documentation for overlays and chained transformations.
Conclusion
Here’s a quick summary of what we learned today. We looked at three different ways of resizing images in Python.
- Pillow provides easy-to-setup and usable methods for performing basic image manipulation tasks. The Pillow Handbook contains examples of different operations you can perform on the image.
- OpenCV can also resize images using the cv2.resize() utility, but it is generally slower than other available methods.
- ImageKit is a third-party cloud-based image transformation service that you can use to manipulate images at scale using URL-based transformation parameters.
Sign up now for ImageKit’s forever free plan and start resizing images in real-time with minimal effort.
Нередко нам нужно изменить размер картинки, кропнуть ее, наложить текст и так далее. Все это можно автоматизировать с помощью Python и библиотеки Pillow.
Установка Pillow
Установка производится через pip3. Вводим в консоль:
pip3 install pillow
Комьюнити теперь в Телеграм
Подпишитесь и будьте в курсе последних IT-новостей
Подписаться
Начало работы с библиотекой
Для начала нам нужно инициализировать библиотеку в нашем скрипте:
from PIL import Image
В папку со скриптом поместим произвольное изображение. Файл назовем test.jpg.
Теперь откроем изображение через метод в библиотеке:
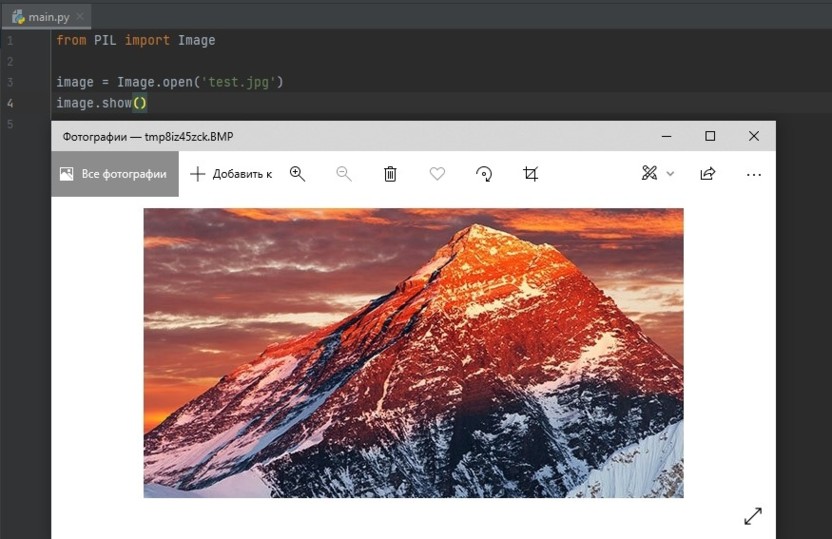
from PIL import Image
img = Image.open('test.jpg')
img.show()
На экране у нас отобразилось изображение, которое мы добавили в папку:
Для просмотра основной информации об изображении с помощью Pillow используем следующие методы:
from PIL import Image
img = Image.open('test.jpg')
print(img.format) # Просмотр формата изображения. Выведет 'JPEG'
print(img.mode) # Просмотр типа цветового пространства. Выведет 'RGB'
print(img.size) # Просмотр размера изображения. Выведет (568, 305)
print(img.filename) # Просмотр имени файла. Выведет 'test.jpg'
r, g, b = img.split()
histogram = img.histogram()
print(histogram) # Просмотр значений RGB изображения. Выведет 1750, 255, 267, 237, 276, 299…
Обрезка изображений
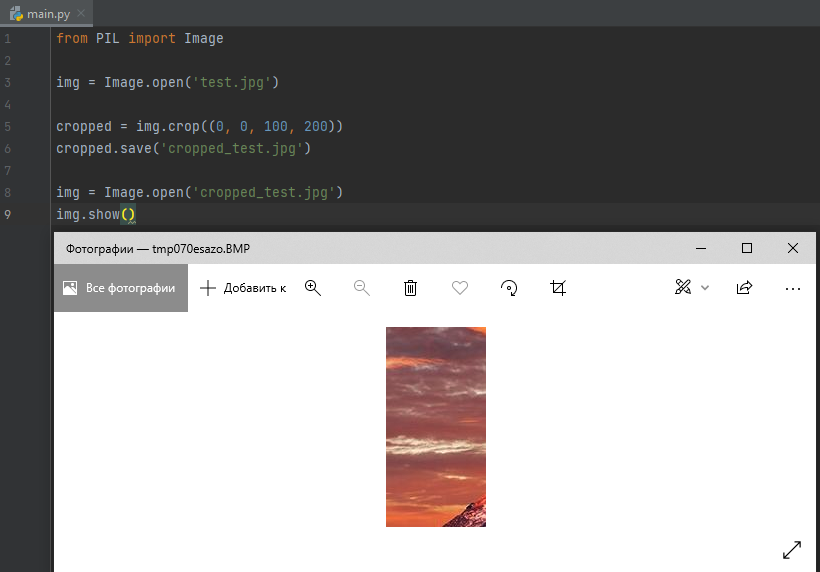
В Pillow есть методы для кропа (обрезки) изображений. Обрежем наше изображение с помощью метода crop(), передав в параметры координаты обрезки:
from PIL import Image
img = Image.open('test.jpg')
cropped = img.crop((0, 0, 100, 200))
cropped.save('cropped_test.jpg')
img = Image.open('cropped_test.jpg')
img.show()
После выполнения данного кода, получим следующее изображение:
Поворот изображений
С помощью метода Image.rotate() мы можем поворачивать изображение как нам угодно. В скобках указываем количество градусов, на которое нужно повернуть изображение. Рассмотрим на примере:
from PIL import Image
img = Image.open('test.jpg')
rotated = img.rotate(180)
rotated.save('rotated_test.jpg')
img = Image.open('rotated_test.jpg')
img.show()
Получим:

Конвертируем из JPG в PNG с помощью Pillow
Для конвертации нам понадобится открыть изображение и просто сохранить его в другом формате. Рассмотрим на примере:
from PIL import Image
img = Image.open('test.jpg')
img.save('test_png.png', 'png')
Получаем такое же изображение, но в формате PNG.
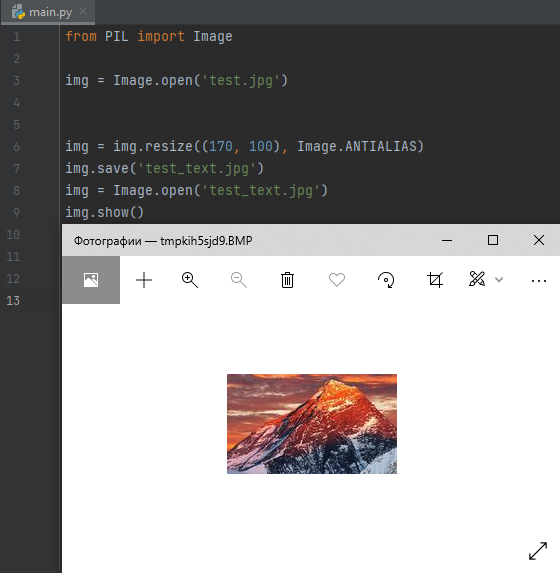
Изменение размера изображений
Чтобы изменить размер изображения используем метод resize(). Рассмотрим это на примере:
from PIL import Image
img = Image.open('test.jpg')
img = img.resize((170, 100), Image.ANTIALIAS)
img.save('test_text.jpg')
img = Image.open('test_text.jpg')
img.show()
Получим:
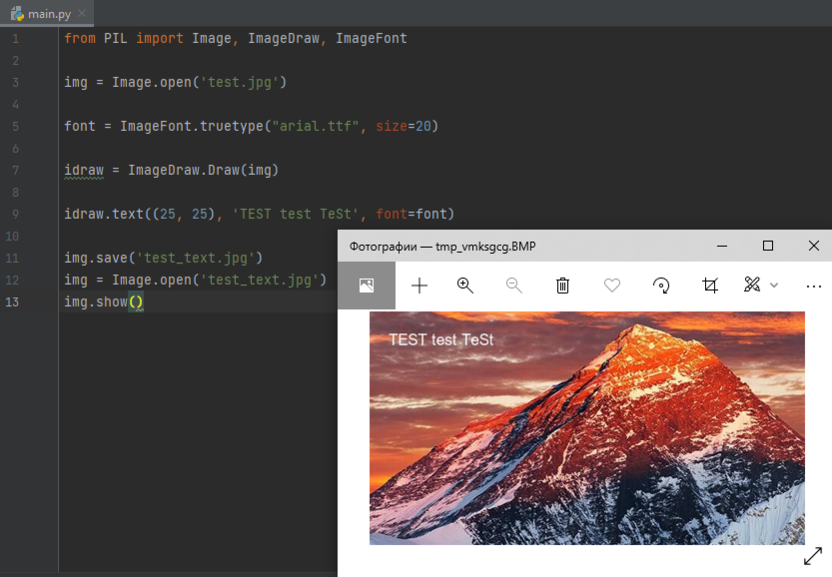
Пишем текст на изображениях
Для наложения текста на изображение в Pillow существует метод text(), но для начала нужно добавить шрифт. Рассмотрим на примере:
from PIL import Image, ImageDraw, ImageFont
img = Image.open('test.jpg')
font = ImageFont.truetype("arial.ttf", size=20)
idraw = ImageDraw.Draw(img)
idraw.text((25, 25), 'TEST test TeSt', font=font)
img.save('test_text.jpg')
img = Image.open('test_text.jpg')
img.show()
Получим изображение с текстом:
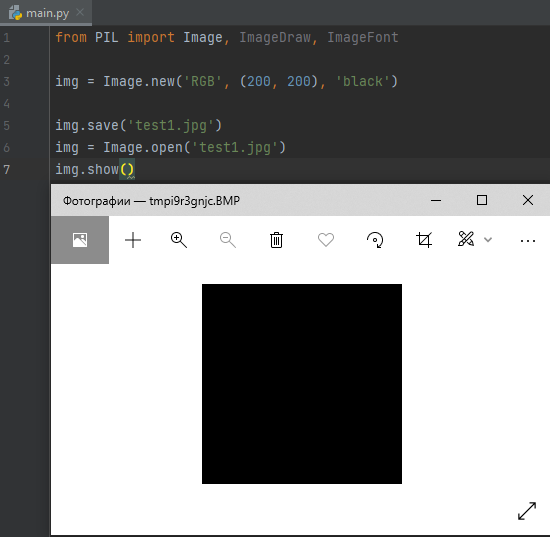
Генерация пустого изображения
Для создания пустого холста (изображения) используем метод Image.new(). Рассмотрим на примере:
from PIL import Image, ImageDraw, ImageFont
img = Image.new('RGB', (200, 200), 'black')
img.save('test1.jpg')
img = Image.open('test1.jpg')
img.show()
Получаем черный квадрат:
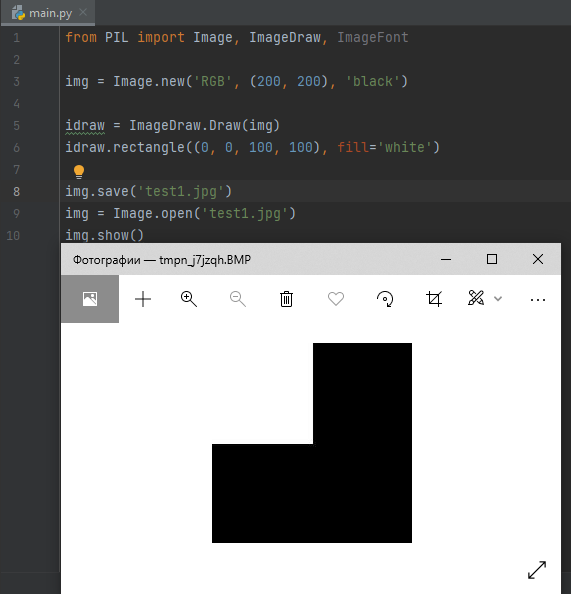
Теперь давайте нарисуем на этом квадрате белый прямоугольник:
from PIL import Image, ImageDraw, ImageFont
img = Image.new('RGB', (200, 200), 'black')
idraw = ImageDraw.Draw(img)
idraw.rectangle((0, 0, 100, 100), fill='white')
img.save('test1.jpg')
img = Image.open('test1.jpg')
img.show()
Получим:
Вывод
Мы разобрали основные методы библиотеки Pillow в Python: научились писать текст на изображениях, изменять размер, поворачивать их и даже обрезать.
Надеюсь, статья была полезна для вас. Удачи!

Возможно, вам нужно изменить размер фотографии, используя для этого Python. Лично мне это необходимо для размещения изображений для рассылки по почте или для поста на сайте, но изображения слишком большие. Как правило, для этих целей используют редакторы. Я также пользуюсь ими, но ради интереса я покажу, как это делается при помощи языка программирования Python. Самый быстрый способ сделать это – использовать пакет Pillow, который можно установить при помощи pip.
После этого, открываем свой любимый редактор кода и пробуем следующий код:
|
1 2 3 4 5 6 7 8 9 10 11 12 13 14 15 16 17 18 19 20 21 |
from PIL import Image def resize_image(input_image_path, output_image_path, size): original_image = Image.open(input_image_path) width, height = original_image.size print(‘The original image size is {wide} wide x {height} ‘ ‘high’.format(wide=width, height=height)) resized_image = original_image.resize(size) width, height = resized_image.size print(‘The resized image size is {wide} wide x {height} ‘ ‘high’.format(wide=width, height=height)) resized_image.show() resized_image.save(output_image_path) if __name__ == ‘__main__’: resize_image(input_image_path=‘caterpillar.jpg’, output_image_path=‘caterpillar_small.jpg’, size=(800, 400)) |
Здесь мы импортируем класс Image из пакета Pillow. Далее, мы видим функцию, которая принимает три аргумента:
- Локация файла, который мы хотим открыть;
- Локацию, куда мы хотим сохранить измененное изображение;
- Кортеж, который демонстрирует новый размер изображения, где кортеж – это ширина и высота.
Далее, мы открываем изображение и вводим его размер. После этого, мы вызываем метод resize() объекта изображения с размером переданного кортежа. Наконец, мы берем новый размер, выводим его и открываем изображение перед тем, как сохранить изменения. Теперь оно выглядит вот так:
Как мы видим, метод resize() ничего не делает с масштабированием. Давайте разберемся с этой задачей!
Масштабирование изображения
Скорее всего, изменять размер изображения таким образом, как мы видели выше, вам не хочется, для лучшего результата нужно написать метод масштабирования. Проблема с предыдущим методом в том, что он не учитывает соотношения сторон картинки. Так что вместо изменения размера, вы можете просто использовать метод thumbnail(). Давайте попробуем:
|
1 2 3 4 5 6 7 8 9 10 11 12 13 14 15 16 17 18 19 20 21 22 23 24 25 26 27 28 29 30 31 32 33 34 35 |
from PIL import Image def scale_image(input_image_path, output_image_path, width=None, height=None ): original_image = Image.open(input_image_path) w, h = original_image.size print(‘The original image size is {wide} wide x {height} ‘ ‘high’.format(wide=w, height=h)) if width and height: max_size = (width, height) elif width: max_size = (width, h) elif height: max_size = (w, height) else: # No width or height specified raise RuntimeError(‘Width or height required!’) original_image.thumbnail(max_size, Image.ANTIALIAS) original_image.save(output_image_path) scaled_image = Image.open(output_image_path) width, height = scaled_image.size print(‘The scaled image size is {wide} wide x {height} ‘ ‘high’.format(wide=width, height=height)) if __name__ == ‘__main__’: scale_image(input_image_path=‘caterpillar.jpg’, output_image_path=‘caterpillar_scaled.jpg’, width=800) |
Здесь мы даем Python передавать пути ввода и вывода, наряду с максимальной шириной и высотой. Далее, мы используем условное выражение для определения того, каким должен быть максимальный размер, после чего вызываем метод thumbnail() в нашем открытом объекте изображения. Мы также передаем флаг Image.ANTIALIAS, который применит фильтр для получения высокого качества изображения. Наконец, мы открываем обновленное, масштабированное изображение и выводим его новый размер, чтобы сравнить со старым. Если вы откроете масштабированное изображение, то увидите, что соотношение сторон фотографии сохранено.
Есть вопросы по Python?
На нашем форуме вы можете задать любой вопрос и получить ответ от всего нашего сообщества!
Telegram Чат & Канал
Вступите в наш дружный чат по Python и начните общение с единомышленниками! Станьте частью большого сообщества!
Паблик VK
Одно из самых больших сообществ по Python в социальной сети ВК. Видео уроки и книги для вас!
Подведем итоги
Работа с пакетом Pillow – это просто и интересно. В данной статье мы научились менять размер изображений, масштабировать фотографии с учетом соотношения сторон. Вы также можете использовать новые знания для создания функции, которая будет выполнять вычисления над той или иной папкой и создавать эскизы хранящихся в ней фотографиях. Кроме этого, вы можете создать простое приложение для просмотра изображений и при этом удобное в использовании.
Для владельцев магазинов на WordPress есть отличная тема ThemeForest WoodMart для более выгодной конверсии покупателей. Отличный шаблон под планшеты и смартфоны.

Являюсь администратором нескольких порталов по обучению языков программирования Python, Golang и Kotlin. В составе небольшой команды единомышленников, мы занимаемся популяризацией языков программирования на русскоязычную аудиторию. Большая часть статей была адаптирована нами на русский язык и распространяется бесплатно.
E-mail: vasile.buldumac@ati.utm.md
Образование
Universitatea Tehnică a Moldovei (utm.md)
- 2014 — 2018 Технический Университет Молдовы, ИТ-Инженер. Тема дипломной работы «Автоматизация покупки и продажи криптовалюты используя технический анализ»
- 2018 — 2020 Технический Университет Молдовы, Магистр, Магистерская диссертация «Идентификация человека в киберпространстве по фотографии лица»
Чтобы получить размер изображения с помощью Pillow в Python, используйте свойство size объекта Image. Свойство size возвращает ширину и высоту изображения.
В этом уроке мы узнаем, как получить размер изображения, другими словами, ширину и высоту изображения, используя библиотеку Pillow.
Синтаксис
Синтаксис для использования свойства size объекта PIL Image приведен ниже.
im = Image.open("sample-image.png")
im.size
Пример 1
В следующей программе мы будем читать и изображать, а затем распечатывать его размер, используя свойство size объекта Image.
from PIL import Image

#read the image
im = Image.open("sample-image.png")

#image size
print(im.size)
Выход
(640, 400)
Пример 2: доступ к ширине и высоте
Вы можете получить доступ к высоте и ширине из свойства size, используя index. В следующем примере мы получим ширину и высоту изображения.
from PIL import Image

#read the image
im = Image.open("sample-image.png")

#image size
width = im.size[0]
height = im.size[1]

print('Width  of the image is:', width)
print('Height of the image is:', height)
Вывод:
Width  of the image is: 640
Height of the image is: 400
В этом руководстве на примерах Python мы узнали, как получить размер изображения с помощью библиотеки Python Pillow с помощью хорошо подробных примеров программ.
Изменение размера изображения
Чтобы изменить размер изображения с помощью Pillow, вы можете использовать метод resize() класса PIL.Image.Image. Вы можете передать такие параметры, как размер результирующего изображения, фильтр передискретизации пикселей и область блока источника, которую необходимо учитывать.
Синтаксис
Синтаксис метода resize() показан в следующем фрагменте кода.
Image.resize(size, resample=0, box=None)
Где:
- size передается, как кортеж (ширина, высота). Это размер, запрошенный для результирующего выходного изображения после изменения размера.
- resample – это фильтр, который должен использоваться для повторной выборки, это необязательно. Вы можете пройти:
- PIL.Image.NEAREST;
- PIL.Image.BOX;
- PIL.Image.BILINEAR;
- PIL.Image.HAMMING;
- PIL.Image.BICUBIC;
- PIL.Image.LANCZOS.
- box – это необязательный набор из 4 чисел с плавающей запятой, задающий область исходного изображения, которую следует рассматривать, как входные данные для изменения размера. Значения должны быть в пределах прямоугольника (0, 0, ширина, высота). Если опущено или None, используется весь источник.
Если для параметра размера заданы правильные значения, вы можете уменьшить или увеличить входное изображение.
Пример 1: со значениями по умолчанию
В следующем примере мы прочитаем изображение и изменим его размер до (200, 200).
from PIL import Image

#read the image
im = Image.open("sample-image.png")

#image size
size=(200,200)
#resize image
out = im.resize(size)
#save resized image
out.save('resize-output.png')
Входное изображение:

Выходное изображение:

Для изменения размера рассматривается все исходное изображение, поскольку мы не предоставили никакого значения для параметра box. В следующем примере мы предоставим параметр box и найдем выходное изображение.
Пример 2: с помощью поля входного изображения
В следующем примере мы предоставим параметр box. При этом мы рассматриваем только область поля входного изображения, а затем изменяем его размер до нужного размера.
from PIL import Image

#read the image
im = Image.open("sample-image.png")

#image size
size = (200,200)
box = (100,100,500,400)
#resize image
out = im.resize(size, box=box)
#save resized image
out.save('resize-output.png')
Выходное изображение:

Если вы заметили, для действия изменения размера учитывается только прямоугольная часть входного изображения.
В этом руководстве на примерах Python мы узнали, как изменить размер изображения с помощью библиотеки PIL.
This div height required for enabling the sticky sidebar
In this tutorial, you’ll learn how to resize an image in Python using the Pillow library. You’ll learn how to resize individual images and multiple images in bulk. You’ll also learn how to specify a percentage to scale by, a maximum width, and a maximum height.
By the end of this tutorial, you’ll have learned:
- How to use the PIL library to open and resize an image
- How to use Python to resize images in bulk
- How to maintain an aspect ratio while resizing images in Python
How to open an Image with Pillow
In order to resize an image using Python, we first need to open the image that we’re working with. For this, we can use the Pillow library. The library isn’t part of the standard Python library. Because of this, we first need to install it. This can be done using either pip or conda, as shown below:
# Installing the Pillow library
pip install pillow
# conda install pillow
Now that we have the library installed, we can load an image using Pillow. This can be done using the Image module in Pillow:
# Opening an Image using Pillow
from PIL import Image
with Image.open ('/Users/datagy/Desktop/Original.png') as im:
    im.show()
Running this code using a context manager safely manages memory. Once the indented code is done running, the image is closed and the memory is safely purged.
Running the code shows the following image:

We can check the current dimensions of the image by using the .size attribute. The attribute returns a tuple containing the width and height of the image:
# Getting Dimensions of an Image in Pillow
from PIL import Image
with Image.open ('/Users/datagy/Desktop/Original.png') as im:
    print(im.size)

# Returns: (930, 620)
Now that we have safely opened the image, we can start on resizing the image using Pillow.
How to Resize an Image with Pillow resize
The Python Pillow library provides two ways in which to resize an image: resize() and thumbnail(). In this section, we’ll use the Pillow resize method to resize an image. This method allows you to:
- Upscale and downscale an image, by providing specific dimensions
- Resize an image even the aspect ratio doesn’t match the original image
Let’s take a look at the Pillow .resize() method:
# The Python Pillow .resize() Method
Image.resize(
    size,               # Tuple representing size
    resample=None,      # Optional resampling filter
    box=None,           # Optional bounding box to resize
    reducing_gap=None   # Optional optimization
    )
To keep things simple, we’ll focus on the size= parameter. This allows us to pass in the new dimensions in a tuple of length two.
Let’s see how we can pass in a tuple containing the new width and height of the image:
# Resizing an Image using Pillow .resize()
from PIL import Image
with Image.open ('/Users/datagy/Desktop/Original.png') as im:
    resized = im.resize((600,400))
    resized.show()
Running this code changes the dimensions of the image to (600,400). This returns the following image:
Using the .show() method allows us to open the image. If we wanted to save the image, we could instead write:
# Saving a Resized Image in Python Pillow
from PIL import Image
with Image.open ('/Users/datagy/Desktop/Original.png') as im:
    resized = im.resize((600,400))
    resized.save('/Users/datagy/Desktop/Resized.png')
Resizing an Image with Pillow to a Certain Percentage
There may be times when you simply want to resize an image to be a percentage of the original size. This can be done by using a custom function to calculate the tuple size that you want to use.
Let’s see how we can use a custom function to define the percentage that you want to resize an image by:
# Resizing an Image by Percentage
from PIL import Image

def resize_by_percentage(image, outfile, percentage):
    with Image.open (image) as im:
        width, height = im.size
        resized_dimensions = (int(width * percentage), int(height * percentage))
        resized = im.resize(resized_dimensions)
        resized.save(outfile)

resize_by_percentage('/Users/datagy/Desktop/Original.png', '/Users/datagy/Desktop/Resized.png', 0.5)
Let’s break down what we did here:
- We defined a new function that takes three parameters: the original file path, the new file path, and the percentage by which to resize
- The image is opened and the dimensions are defined
- The dimensions are resized by the percentage that’s defined
- The
.resize()method is used to resize the image - Finally, the image is saved using the
.save()method
Running the above function generates the following image:
How to Resize an Image with Pillow thumbnail
The Pillow thumbnail method returns an image that is scaled to its original aspect ratio. The method allows you to pass in a tuple of values that represent the maximum width and height of the image that is meant to be generated.
This allows you to ensure that images have either a consistent width or height when working with multiple images. Let’s see how we can use the .thumbail() method to resize our image.
The tuple that you pass in represents the maximum size of an image, on either dimension. So passing in (300, 200) would generate an image that is no bigger than 300px wide or 200px wide.
Let’s apply this method to resize our image and find the resulting dimensions:
# Using .thumbnail() to Maintain Aspect Rations
from PIL import Image

with Image.open('/Users/datagy/Desktop/Original.png') as im:
    print(im.size)
    im.thumbnail((300, 150))
    print(im.size)

# Returns:
# (930, 620)
# (225, 150)
Let’s see what the image now looks like:
Let’s see how we can now save the image using the .save() method:
# Saving a Resized Image Using Pillow
from PIL import Image

with Image.open('/Users/datagy/Desktop/Original 2.png') as im:
    im.thumbnail((300, 150))
    im.save('/Users/datagy/Desktop/thumbnail.png')
How to Resize Multiple Images with Python
We can also use Python to resize images in bulk. This allows us to, for example, loop over all files in a directory and resize all the images in that directory.
Let’s combine what we’ve learned about the Pillow .thumbnail() method and loop over files in a directory to return their resized versions:
# Resize all Images in a Directory
from PIL import Image
import os

directory = '/Users/datagy/Desktop/images'
for file in os.listdir(directory):
    if file.endswith(('jpeg', 'png', 'jpg')):
        filepath = os.path.join(directory, file)
        outfile = os.path.join(directory, 'resized_'+file)
        with Image.open(directory+'/'+file) as im:
            im.thumbnail((300, 200))
            im.save(outfile)
Let’s break down what we did here:
- We loaded the directory into a string. Change this to whatever folder is holding the images you want to resize.
- We then loop over each file in the
listdir()method of the directory - If the file ends with a jpeg, png, or jpg, then we resize the image
- We do this by first getting the full path to the file and generating an outfile name for that file. The outfile simply prepends
'resized_'to the front of the name of the file. - We then load the file using Pillow and use the thumbnail method to resize the image.
- Finally, we save the image using the
.save()method.
Conclusion
In this tutorial, you learned how to resize images you Python’s Pillow library. You first learned how to open an image safely as a Pillow Image object. Then, you learned how to resize images using the .resize() and .thumbnail() methods. Finally, you learned how to batch resize images using the os library to loop over files in a directory.
Additional Resources
To learn more about related topics, check out the tutorials below:
- Use Python to List Files in a Directory (Folder) with os and glob
- Python: Copy a File (4 Different Ways)
- Python: Check if a File or Directory Exists