Note
Click here
to download the full example code
Controlling properties of text and its layout with Matplotlib.
matplotlib.text.Text instances have a variety of properties which can be
configured via keyword arguments to set_title, set_xlabel,
text, etc.
|
Property |
Value Type |
|---|---|
|
alpha |
|
|
backgroundcolor |
any matplotlib color |
|
bbox |
|
|
clip_box |
a matplotlib.transform.Bbox instance |
|
clip_on |
bool |
|
clip_path |
a |
|
color |
any matplotlib color |
|
family |
[ |
|
fontproperties |
|
|
horizontalalignment or ha |
[ |
|
label |
any string |
|
linespacing |
|
|
multialignment |
[ |
|
name or fontname |
string e.g., [ |
|
picker |
[None|float|bool|callable] |
|
position |
(x, y) |
|
rotation |
[ angle in degrees | |
|
size or fontsize |
[ size in points | relative size, e.g., |
|
style or fontstyle |
[ |
|
text |
string or anything printable with ‘%s’ conversion |
|
transform |
|
|
variant |
[ |
|
verticalalignment or va |
[ |
|
visible |
bool |
|
weight or fontweight |
[ |
|
x |
|
|
y |
|
|
zorder |
any number |
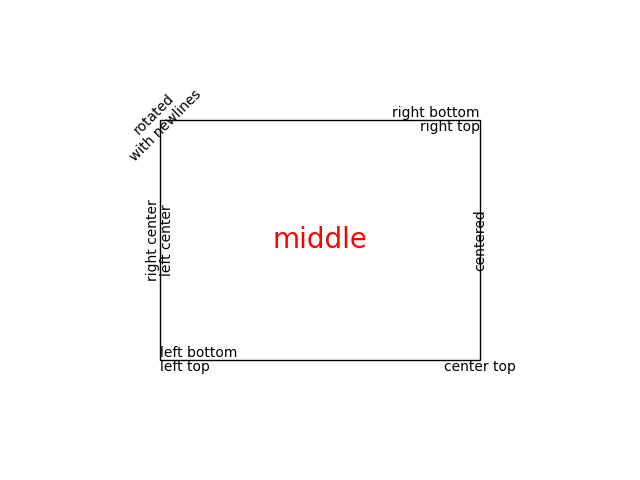
You can lay out text with the alignment arguments
horizontalalignment, verticalalignment, and
multialignment. horizontalalignment controls whether the x
positional argument for the text indicates the left, center or right
side of the text bounding box. verticalalignment controls whether
the y positional argument for the text indicates the bottom, center or
top side of the text bounding box. multialignment, for newline
separated strings only, controls whether the different lines are left,
center or right justified. Here is an example which uses the
text() command to show the various alignment
possibilities. The use of transform=ax.transAxes throughout the
code indicates that the coordinates are given relative to the axes
bounding box, with (0, 0) being the lower left of the axes and (1, 1) the
upper right.
import matplotlib.pyplot as plt
import matplotlib.patches as patches

# build a rectangle in axes coords
left, width = .25, .5
bottom, height = .25, .5
right = left + width
top = bottom + height

fig = plt.figure()
ax = fig.add_axes([0, 0, 1, 1])

# axes coordinates: (0, 0) is bottom left and (1, 1) is upper right
p = patches.Rectangle(
    (left, bottom), width, height,
    fill=False, transform=ax.transAxes, clip_on=False
    )

ax.add_patch(p)

ax.text(left, bottom, 'left top',
        horizontalalignment='left',
        verticalalignment='top',
        transform=ax.transAxes)

ax.text(left, bottom, 'left bottom',
        horizontalalignment='left',
        verticalalignment='bottom',
        transform=ax.transAxes)

ax.text(right, top, 'right bottom',
        horizontalalignment='right',
        verticalalignment='bottom',
        transform=ax.transAxes)

ax.text(right, top, 'right top',
        horizontalalignment='right',
        verticalalignment='top',
        transform=ax.transAxes)

ax.text(right, bottom, 'center top',
        horizontalalignment='center',
        verticalalignment='top',
        transform=ax.transAxes)

ax.text(left, 0.5*(bottom+top), 'right center',
        horizontalalignment='right',
        verticalalignment='center',
        rotation='vertical',
        transform=ax.transAxes)

ax.text(left, 0.5*(bottom+top), 'left center',
        horizontalalignment='left',
        verticalalignment='center',
        rotation='vertical',
        transform=ax.transAxes)

ax.text(0.5*(left+right), 0.5*(bottom+top), 'middle',
        horizontalalignment='center',
        verticalalignment='center',
        fontsize=20, color='red',
        transform=ax.transAxes)

ax.text(right, 0.5*(bottom+top), 'centered',
        horizontalalignment='center',
        verticalalignment='center',
        rotation='vertical',
        transform=ax.transAxes)

ax.text(left, top, 'rotatednwith newlines',
        horizontalalignment='center',
        verticalalignment='center',
        rotation=45,
        transform=ax.transAxes)

ax.set_axis_off()
plt.show()
Default Font#
The base default font is controlled by a set of rcParams. To set the font
for mathematical expressions, use the rcParams beginning with mathtext
(see mathtext).
|
rcParam |
usage |
|---|---|
|
|
List of font families (installed on user’s machine) |
|
|
The default style, ex |
|
|
Default variant, ex |
|
|
Default stretch, ex |
|
|
Default weight. Either string or integer |
|
|
Default font size in points. Relative font sizes |
Matplotlib can use font families installed on the user’s computer, i.e.
Helvetica, Times, etc. Font families can also be specified with
generic-family aliases like ({'cursive', 'fantasy', 'monospace',).
'sans', 'sans serif', 'sans-serif', 'serif'}
Note
To access the full list of available fonts:
matplotlib.font_manager.get_font_names()
The mapping between the generic family aliases and actual font families
(mentioned at default rcParams)
is controlled by the following rcParams:
|
CSS-based generic-family alias |
rcParam with mappings |
|---|---|
|
|
|
|
|
|
|
|
|
|
|
|
|
|
|
If any of generic family names appear in 'font.family', we replace that entry
by all the entries in the corresponding rcParam mapping.
For example:
matplotlib.rcParams['font.family'] = ['Family1', 'serif', 'Family2']
matplotlib.rcParams['font.serif'] = ['SerifFamily1', 'SerifFamily2']

# This is effectively translated to:
matplotlib.rcParams['font.family'] = ['Family1', 'SerifFamily1', 'SerifFamily2', 'Family2']
Text with non-latin glyphs#
As of v2.0 the default font, DejaVu, contains
glyphs for many western alphabets, but not other scripts, such as Chinese,
Korean, or Japanese.
To set the default font to be one that supports the code points you
need, prepend the font name to 'font.family' (recommended), or to the
desired alias lists.
# first method
matplotlib.rcParams['font.family'] = ['Source Han Sans TW', 'sans-serif']

# second method
matplotlib.rcParams['font.family'] = ['sans-serif']
matplotlib.rcParams['sans-serif'] = ['Source Han Sans TW', ...]
The generic family alias lists contain fonts that are either shipped
alongside Matplotlib (so they have 100% chance of being found), or fonts
which have a very high probability of being present in most systems.
A good practice when setting custom font families is to append
a generic-family to the font-family list as a last resort.
You can also set it in your .matplotlibrc file:
font.family: Source Han Sans TW, Arial, sans-serif
To control the font used on per-artist basis use the name, fontname or
fontproperties keyword arguments documented above.
On linux, fc-list can be a
useful tool to discover the font name; for example
$ fc-list :lang=zh family
Noto to Sans Mono CJK TC,Noto Sans Mono CJK TC Bold
Noto Sans CJK TC,Noto Sans CJK TC Medium
Noto Sans CJK TC,Noto Sans CJK TC DemiLight
Noto Sans CJK KR,Noto Sans CJK KR Black
Noto Sans CJK TC,Noto Sans CJK TC Black
Noto Sans Mono CJK TC,Noto Sans Mono CJK TC Regular
Noto Sans CJK SC,Noto Sans CJK SC Light
lists all of the fonts that support Chinese.
Gallery generated by Sphinx-Gallery

Matplotlib — одна из наиболее широко используемых библиотек визуализации данных в Python. Большая часть популярности Matplotlib связана с его параметрами настройки — вы можете настроить практически любой элемент из его иерархии объектов.
В этом уроке мы рассмотрим, как изменить размер шрифта в Matplotlib.
Изменить размер шрифта в Matplotlib
Есть несколько способов изменить размер шрифтов в Matplotlib. Вы можете установить аргумент fontsize, изменить способ обработки шрифтов в Matplotlib в целом или даже изменить размер рисунка.
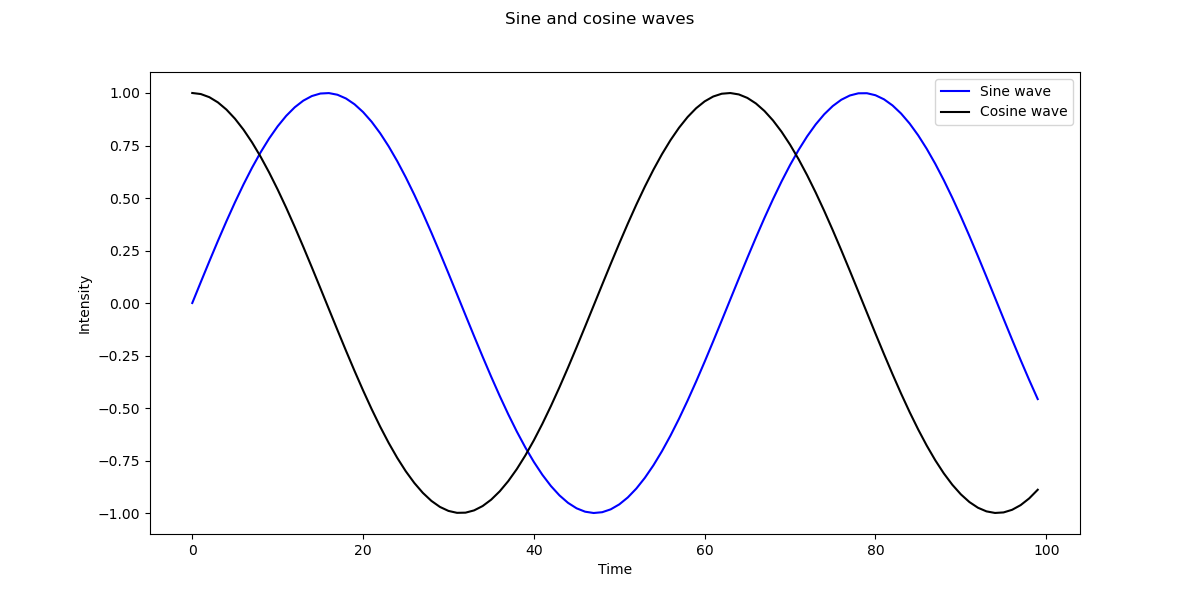
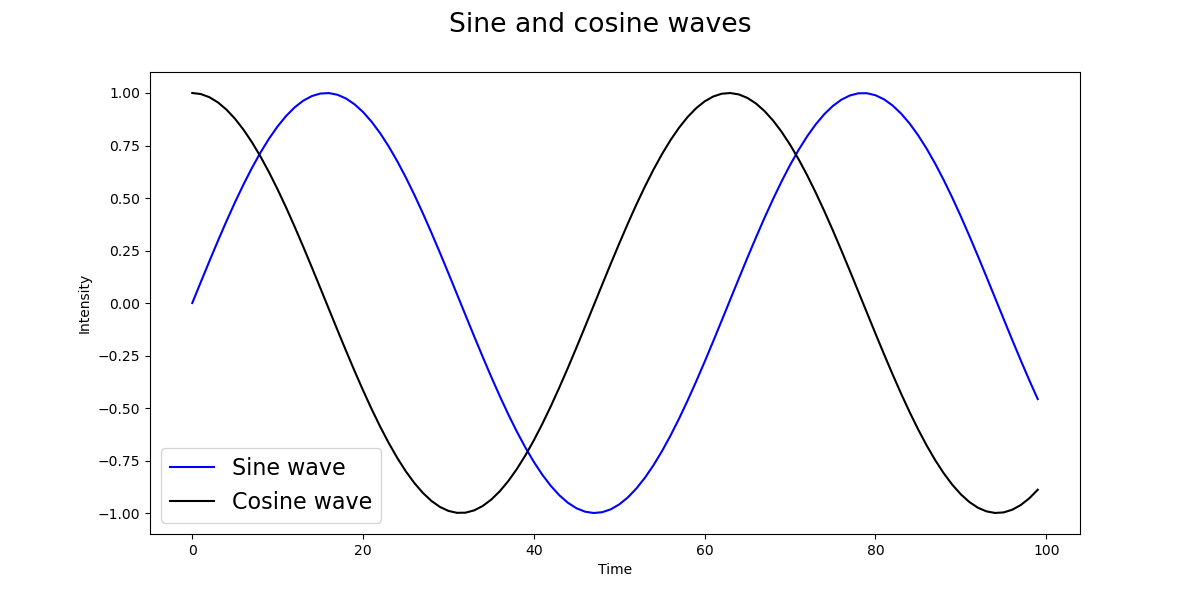
Давайте сначала создадим простой сюжет, на котором мы захотим изменить размер шрифтов:
import matplotlib.pyplot as plt
import numpy as np

fig, ax = plt.subplots(figsize=(12, 6))

x = np.arange(0, 10, 0.1)
y = np.sin(x)
z = np.cos(x)

ax.plot(y, color='blue', label='Sine wave')
ax.plot(z, color='black', label='Cosine wave')
fig.suptitle('Sine and cosine waves')
plt.xlabel('Time')
plt.ylabel('Intensity')
leg = ax.legend()

plt.show()
Изменить размер шрифта с помощью fontsize
Попробуем самый простой вариант. Каждая функция, которая имеет дело с текстом, например suptitle(), xlabel() и все другие текстовые функции, принимают аргумент — fontsize.
Вернемся к предыдущему коду и укажем fontsize для этих элементов:
import matplotlib.pyplot as plt
import numpy as np
fig, ax = plt.subplots(figsize=(12, 6))
x = np.arange(0, 10, 0.1)
y = np.sin(x)
z = np.cos(x)
ax.plot(y, color='blue', label='Sine wave')
ax.plot(z, color='black', label='Cosine wave')
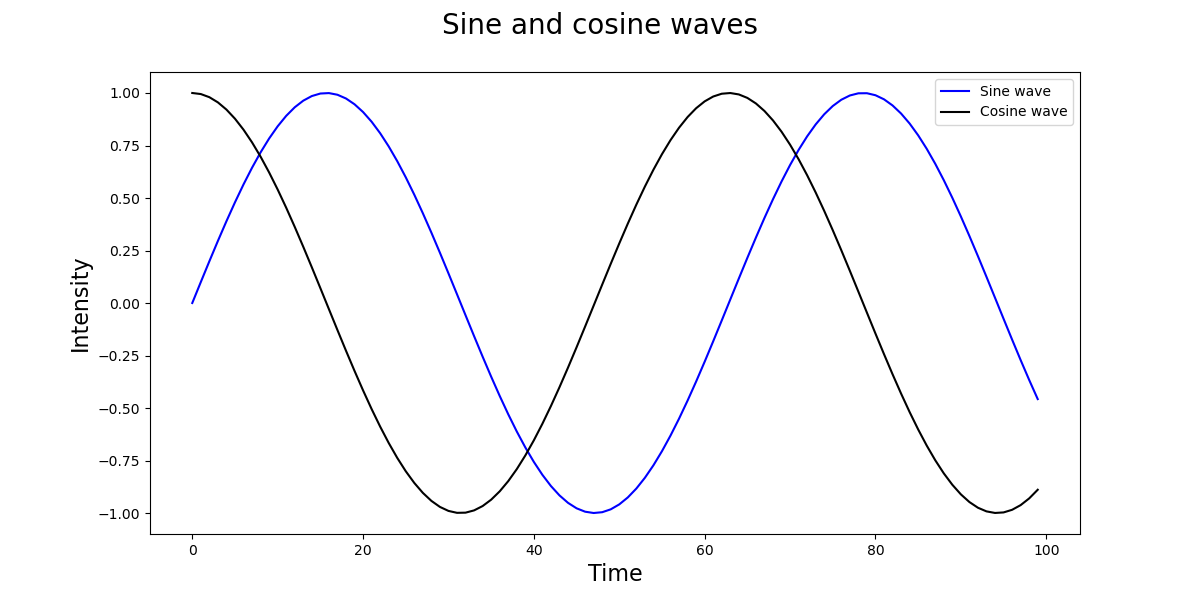
fig.suptitle('Sine and cosine waves', fontsize=20)
plt.xlabel('Time', fontsize=16)
plt.ylabel('Intensity', fontsize=16)
leg = ax.legend()
plt.show()
Здесь мы установили fontsize для suptitle, а также меток времени и интенсивности. Запуск этого кода дает:
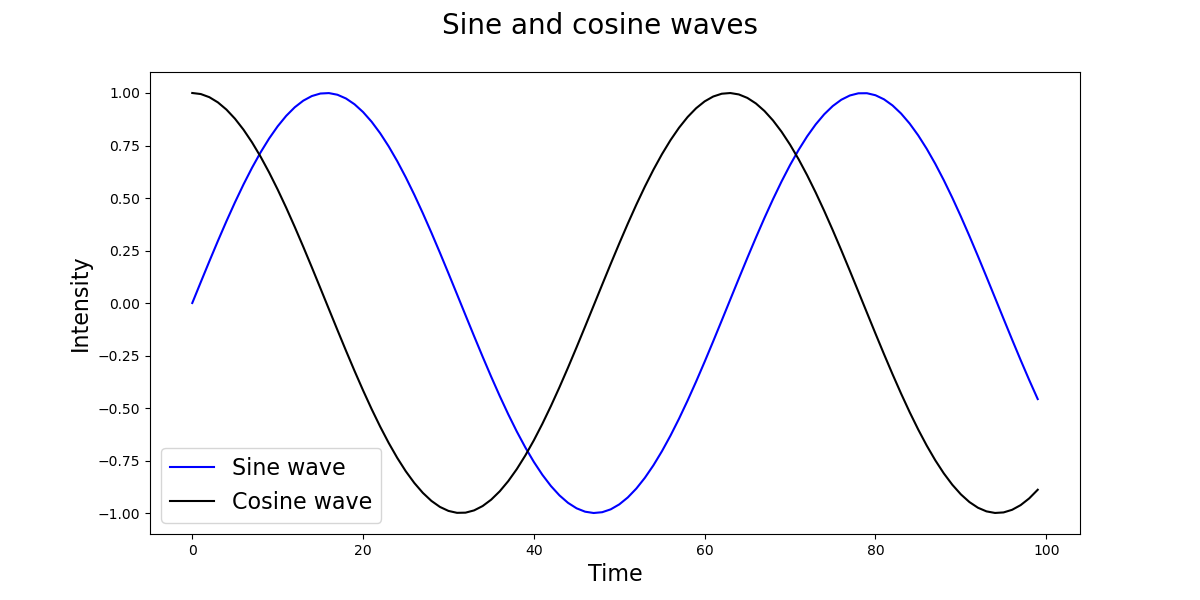
Мы также можем изменить размер шрифта в легенде, добавив аргумент prop и установив там размер шрифта:
leg = ax.legend(prop={"size":16})
Это изменит размер шрифта, который в этом случае также сдвинет легенду в нижний левый угол, чтобы она не перекрывалась с элементами в верхнем правом углу:
Однако, хотя мы можем установить каждый размер шрифта таким образом, если у нас много текстовых элементов, и мы просто хотим единообразного общего размера, этот подход повторяется.
В таких случаях мы можем перейти к установке размера шрифта глобально.
Изменить размер шрифта глобально
Есть два способа установить глобальный размер шрифта. Мы хотим установить для параметра font_size новый размер. Мы можем перейти к этому параметру через rcParams['font.size'].
Один из способов — изменить их напрямую:
import matplotlib.pyplot as plt
import numpy as np

fig, ax = plt.subplots(figsize=(12, 6))

x = np.arange(0, 10, 0.1)
y = np.sin(x)
z = np.cos(x)

plt.rcParams['font.size'] = '16'

ax.plot(y, color='blue', label='Sine wave')
ax.plot(z, color='black', label='Cosine wave')
plt.xlabel('Time')
plt.ylabel('Intensity')
fig.suptitle('Sine and cosine waves')
leg = ax.legend()

plt.show()
Вы должны установить их перед вызовом функции plot(), так как если вы пытаетесь применить их в дальнейшем, никаких изменений не будет. Этот подход изменит все, что указано в качестве шрифта объектом kwargs font.
Однако, когда мы запускаем этот код, становится очевидным, что метки x и y, не изменились в размере:
В зависимости от версии Matplotlib, которую вы используете, вы не сможете изменить их с помощью параметров rc. Вы бы использовали axes.labelsize и xtick.labelsize / ytick.labelsize для них соответственно.
Если их установка не меняет размер меток, вы можете использовать функцию set(), передаваемую через fontsize, или использовать функцию set_fontsize():
import matplotlib.pyplot as plt
import numpy as np

fig, ax = plt.subplots(figsize=(12, 6))

x = np.arange(0, 10, 0.1)
y = np.sin(x)
z = np.cos(x)

# Set general font size
plt.rcParams['font.size'] = '16'

# Set tick font size
for label in (ax.get_xticklabels() + ax.get_yticklabels()):
	label.set_fontsize(16)

ax.plot(y, color='blue', label='Sine wave')
ax.plot(z, color='black', label='Cosine wave')
plt.xlabel('Time', fontsize=16)
plt.ylabel('Intensity', fontsize=16)

fig.suptitle('Sine and cosine waves')
leg = ax.legend()

plt.show()
Это приводит к:
Update: See the bottom of the answer for a slightly better way of doing it.
Update #2: I’ve figured out changing legend title fonts too.
Update #3: There is a bug in Matplotlib 2.0.0 that’s causing tick labels for logarithmic axes to revert to the default font. Should be fixed in 2.0.1 but I’ve included the workaround in the 2nd part of the answer.
This answer is for anyone trying to change all the fonts, including for the legend, and for anyone trying to use different fonts and sizes for each thing. It does not use rc (which doesn’t seem to work for me). It is rather cumbersome but I could not get to grips with any other method personally. It basically combines ryggyr’s answer here with other answers on SO.
import numpy as np
import matplotlib.pyplot as plt
import matplotlib.font_manager as font_manager

# Set the font dictionaries (for plot title and axis titles)
title_font = {'fontname':'Arial', 'size':'16', 'color':'black', 'weight':'normal',
              'verticalalignment':'bottom'} # Bottom vertical alignment for more space
axis_font = {'fontname':'Arial', 'size':'14'}

# Set the font properties (for use in legend)
font_path = 'C:WindowsFontsArial.ttf'
font_prop = font_manager.FontProperties(fname=font_path, size=14)

ax = plt.subplot() # Defines ax variable by creating an empty plot

# Set the tick labels font
for label in (ax.get_xticklabels() + ax.get_yticklabels()):
    label.set_fontname('Arial')
    label.set_fontsize(13)

x = np.linspace(0, 10)
y = x + np.random.normal(x) # Just simulates some data

plt.plot(x, y, 'b+', label='Data points')
plt.xlabel("x axis", **axis_font)
plt.ylabel("y axis", **axis_font)
plt.title("Misc graph", **title_font)
plt.legend(loc='lower right', prop=font_prop, numpoints=1)
plt.text(0, 0, "Misc text", **title_font)
plt.show()
The benefit of this method is that, by having several font dictionaries, you can choose different fonts/sizes/weights/colours for the various titles, choose the font for the tick labels, and choose the font for the legend, all independently.
UPDATE:
I have worked out a slightly different, less cluttered approach that does away with font dictionaries, and allows any font on your system, even .otf fonts. To have separate fonts for each thing, just write more font_path and font_prop like variables.
import numpy as np
import matplotlib.pyplot as plt
import matplotlib.font_manager as font_manager
import matplotlib.ticker
# Workaround for Matplotlib 2.0.0 log axes bug https://github.com/matplotlib/matplotlib/issues/8017 :
matplotlib.ticker._mathdefault = lambda x: '\mathdefault{%s}'%x

# Set the font properties (can use more variables for more fonts)
font_path = 'C:WindowsFontsAGaramondPro-Regular.otf'
font_prop = font_manager.FontProperties(fname=font_path, size=14)

ax = plt.subplot() # Defines ax variable by creating an empty plot

# Define the data to be plotted
x = np.linspace(0, 10)
y = x + np.random.normal(x)
plt.plot(x, y, 'b+', label='Data points')

for label in (ax.get_xticklabels() + ax.get_yticklabels()):
    label.set_fontproperties(font_prop)
    label.set_fontsize(13) # Size here overrides font_prop

plt.title("Exponentially decaying oscillations", fontproperties=font_prop,
          size=16, verticalalignment='bottom') # Size here overrides font_prop
plt.xlabel("Time", fontproperties=font_prop)
plt.ylabel("Amplitude", fontproperties=font_prop)
plt.text(0, 0, "Misc text", fontproperties=font_prop)

lgd = plt.legend(loc='lower right', prop=font_prop) # NB different 'prop' argument for legend
lgd.set_title("Legend", prop=font_prop)

plt.show()
Hopefully this is a comprehensive answer
17 авг. 2022 г.
читать 2 мин
Вы можете использовать один из следующих методов, чтобы изменить семейство шрифтов в Matplotlib:
Способ 1: изменить шрифт для всего текста
import matplotlib

matplotlib.rcParams['font.family'] = 'monospace '
Способ 2: изменить шрифт для меток заголовков и осей
import matplotlib.pyplot as plt

mono_font = {' fontname ':' monospace '}
serif_font = {' fontname ':' serif '}

plt.title('Title of Plot', ** mono_font)
plt.xlabel('X Label', ** serif_font)
В следующих примерах показано, как использовать каждый метод на практике.
Способ 1: изменить шрифт для всего текста
В следующем коде показано, как изменить семейство шрифтов для всего текста на графике Matplotlib:
import matplotlib
import matplotlib.pyplot as plt

#define font family to use for all text
matplotlib.rcParams['font.family'] = 'monospace '

#define x and y
x = [1, 4, 10]
y = [5, 9, 27]

#create line plot
plt.plot (x, y)

#add title and axis labels
plt.title('Title of Plot')
plt.xlabel('X Label')
plt.ylabel('Y Label')

#display plot
plt.show()

Обратите внимание, что заголовок и метки обеих осей имеют «моноширинный» шрифт, поскольку это семейство шрифтов, которое мы указали в аргументе rcParams .
Способ 2: изменить шрифт для меток заголовков и осей
В следующем коде показано, как указать уникальное семейство шрифтов как для заголовка, так и для меток осей:
import matplotlib.pyplot as plt

#define font families to use
mono_font = {' fontname':'monospace '}
serif_font = {' fontname':'serif '}

#define x and y
x = [1, 4, 10]
y = [5, 9, 27]

#create plot of x and y
plt.plot (x, y)

#specify title and axis labels with custom font families
plt.title('Title of Plot', ** mono_font)
plt.xlabel('X Label', ** serif_font)
plt.ylabel('Y Label', ** serif_font)

#display plot
plt.show()

Обратите внимание, что в заголовке используется семейство моноширинных шрифтов, а для меток по осям X и Y используется семейство шрифтов с засечками.
Примечание.Полный список доступных семейств шрифтов, которые можно использовать в Matplotlib, можно найти здесь .
Дополнительные ресурсы
В следующих руководствах объясняется, как выполнять другие распространенные операции в Matplotlib:
Как изменить размер шрифта на графике Matplotlib
Как изменить размер шрифта легенды в Matplotlib
Как установить размер шрифта Tick Labels в Matplotlib
In this tutorial we’ll look at how to change the font size of text elements in a matplotlib plot.
You can change the global font size in matplotlib using rcparams. You can also change the font size of individual components such as tick labels, axes labels, axes titles, etc. The following is the syntax:
import matplotlib.pyplot as plt
plt.rcParams.update({'font.size':20})
The above syntax changes the overall font size in matplotlib plots to 20. Note that, the default font size is 10. You can also change the font size of specific components (see the examples below)
Examples
Let’s look at some of the use cases of changing font size in matplotlib. First, we’ll create a simple matplotlib line plot and see the default font size.
import matplotlib.pyplot as plt
plt.rcdefaults()

# number of employees of A
emp_count = [3, 20, 50, 200, 350, 400]
year = [2014, 2015, 2016, 2017, 2018, 2019]

# plot a line chart
plt.plot(year, emp_count, 'o-g')
# set axis titles
plt.xlabel("Year")
plt.ylabel("Employees")
# set chart title
plt.title("Employee Growth at A")
plt.show()
Output:

The above code creates a line plot with text using the default font size.
1. Change the global font size
Let’s change the overall font size of the above plot. Since by default it is 10, we will increase that to 15 to see how the plot appears with a higher font size.
# update the overall font size
plt.rcParams.update({'font.size':15})

# plot a line chart
plt.plot(year, emp_count, 'o-g')
# set axis titles
plt.xlabel("Year")
plt.ylabel("Employees")
# set chart title
plt.title("Employee Growth at A")
plt.show()
Output:

You can see that the overall font size of the line chart is now considerably bigger. The tick labels, axis titles, plot title all are comparatively bigger than in the default plot.
2. Change font size of the tick labels
You can also set the sizes of individual elements in a matplotlib plot instead of changing the font size of the entire plot. To change the font size of only the tick labels for both the axes:
# reset the plot configurations to default
plt.rcdefaults()

# change the fontsize of the xtick and ytick labels
plt.rc('xtick', labelsize=15)
plt.rc('ytick', labelsize=15)

# plot a line chart
plt.plot(year, emp_count, 'o-g')
# set axis titles
plt.xlabel("Year")
plt.ylabel("Employees")
# set chart title
plt.title("Employee Growth at A")
plt.show()
Output:

Note that first, we’re using the rcdefaults() function to reset the matplotlib configurations to their defaults, and then we’re customizing our plot. You can see that the labels on the x-axis (2014, 2015, …) and the y-axis (0, 100, …) have a comparatively larger font size.
3. Change font size of the axes labels
Similarly, you can also change the size of the axes labels specifically without changing other font sizes.
# reset the plot configurations to default
plt.rcdefaults()

# change the fontsize of axes lables
plt.rc('axes', labelsize=15)

# plot a line chart
plt.plot(year, emp_count, 'o-g')
# set axis titles
plt.xlabel("Year")
plt.ylabel("Employees")
# set chart title
plt.title("Employee Growth at A")
plt.show()
Output:

You can see that the axis labels “Employees” and “Year” have a larger font size compared to other text components of the plot.
4. Change font size of the axes title
You can also change the size of the axes title specifically without changing other font sizes.
# reset the plot configurations to default
plt.rcdefaults()

# change the fontsize of axes title
plt.rc('axes', titlesize=20)

# plot a line chart
plt.plot(year, emp_count, 'o-g')
# set axis titles
plt.xlabel("Year")
plt.ylabel("Employees")
# set chart title
plt.title("Employee Growth at A")
plt.show()
Output:

You can see that the axes title is quite large compared to the axes labels and the tick labels.
With this, we come to the end of this tutorial. The code examples and results presented in this tutorial have been implemented in a Jupyter Notebook with a python (version 3.8.3) kernel having matplotlib version 3.2.2
Subscribe to our newsletter for more informative guides and tutorials.
We do not spam and you can opt out any time.
Tutorials on matplotlib –
- Change Background Color of Plot in Matplotlib
- Change Font Size of elements in a Matplotlib plot
- Matplotlib – Save Plot as a File
- Change Size of Figures in Matplotlib
- Plot a Bar Chart using Matplotlib
- Plot a Pie Chart with Matplotlib
- Plot Histogram in Python using Matplotlib
- Create a Scatter Plot in Python with Matplotlib
- Plot a Line Chart in Python with Matplotlib
- Save Matplotlib Plot with Transparent Background
- Change Font Type in Matplotlib plots
-

Piyush is a data professional passionate about using data to understand things better and make informed decisions. He has experience working as a Data Scientist in the consulting domain and holds an engineering degree from IIT Roorkee. His hobbies include watching cricket, reading, and working on side projects.
View all posts

Improve Article
Save Article
Improve Article
Save Article
Prerequisite: Matplotlib
In this article, we will learn how to change (increase/decrease) the font size of tick label of a plot in matplotlib. For this understanding of following concepts is mandatory:
- Matplotlib : Matplotlib is an amazing visualization library in Python for 2D plots of arrays. Matplotlib is a multi-platform data visualization library built on NumPy arrays and designed to work with the broader SciPy stack. It was introduced by John Hunter in the year 2002.
- Tick Label : Ticks are the markers denoting data points on axes. Matplotlib’s default tick locators and formatters are designed to be generally sufficient in many common situations. Position and labels of ticks are often explicitly mentioned to suit specific requirements.
- Font Size : The font size or text size is how large the characters displayed on a screen or printed on a page are.
Approach: To change the font size of tick labels, one should follow some basic steps that are given below:
- Import Libraries.
- Create or import data.
- Plot a graph on data using matplotlib.
- Change the font size of tick labels. (this can be done by different methods)
To change the font size of tick labels, any of three different methods in contrast with the above mentioned steps can be employed. These three methods are:
- fontsize in plt.xticks/plt.yticks()
- fontsize in ax.set_yticklabels/ax.set_xticklabels()
- labelsize in ax.tick_params()
Lets discuss implementation of these methods one by one with the help of examples:
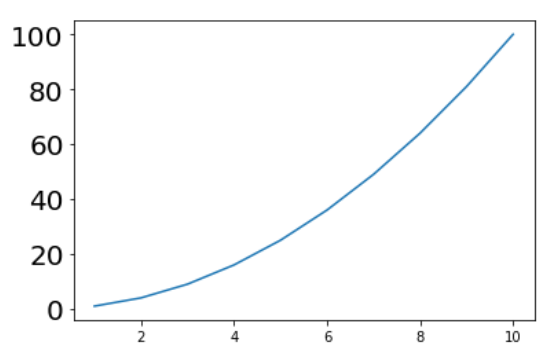
Example 1: (Using plt.xticks/plt.yticks)
Python3
import matplotlib.pyplot as plt
x = list(range(1, 11, 1))
y = [s*s for s in x]
plt.plot(x, y)
plt.yticks(fontsize=20)
plt.show()
Output :
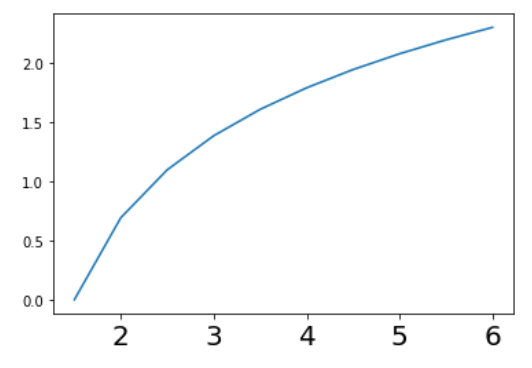
Example 2: (Using ax.set_yticklabels/ax.set_xticklabels)
Python3
import matplotlib.pyplot as plt
import numpy as np
x = list(range(1, 11, 1))
y = np.log(x)
fig, ax = plt.subplots()
ax.plot(x, y)
ax.set_xticklabels(x, fontsize=20)
plt.show()
Output :
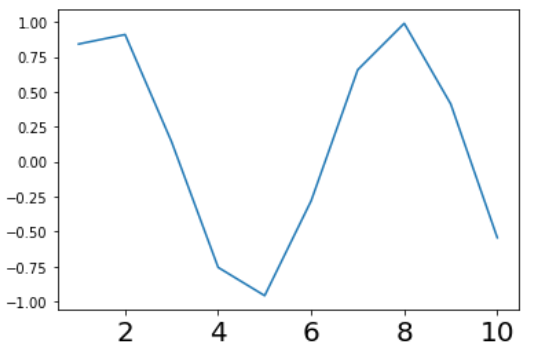
Example 3: (Using ax.tick_params)
Python3
import matplotlib.pyplot as plt
import numpy as np
x = list(range(1, 11, 1))
y = np.sin(x)
fig, ax = plt.subplots(1, 1)
ax.plot(x, y)
ax.tick_params(axis='x', labelsize=20)
plt.show()
Output:
Introduction
Matplotlib is one of the most widely used data visualization libraries in Python. Much of Matplotlib’s popularity comes from its customization options — you can tweak just about any element from its hierarchy of objects.
In this tutorial, we’ll take a look at how to change the font size in Matplotlib.
Change Font Size in Matplotlib
There are a few ways you can go about changing the size of fonts in Matplotlib. You can set the fontsize argument, change how Matplotlib treats fonts in general, or even changing the figure size.
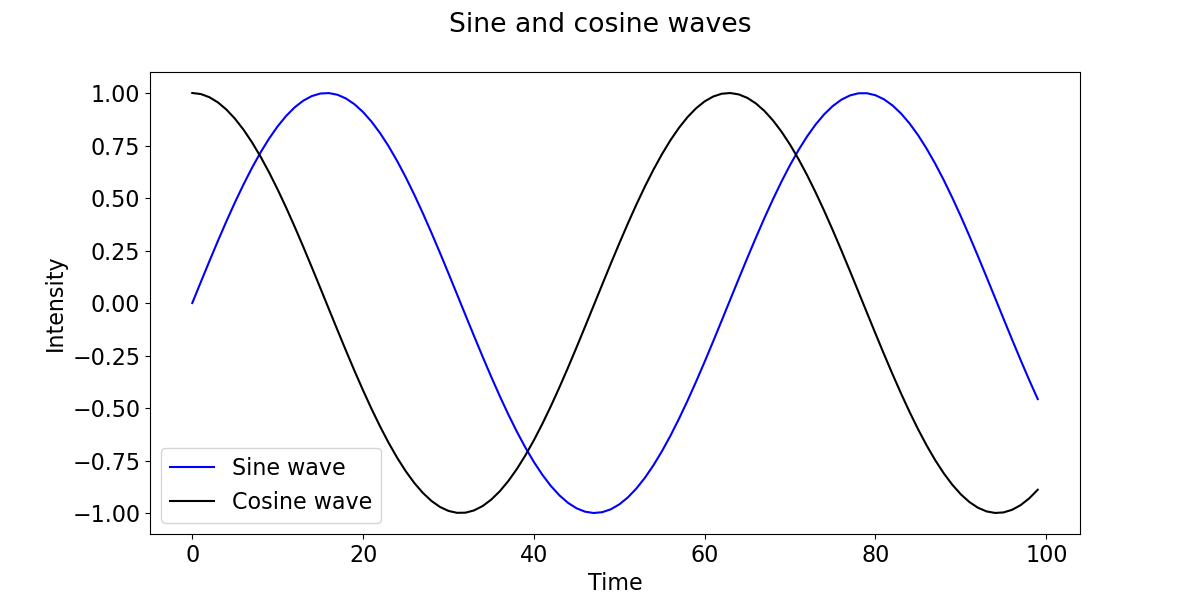
Let’s first create a simple plot that we’ll want to change the size of fonts on:
import matplotlib.pyplot as plt
import numpy as np

fig, ax = plt.subplots(figsize=(12, 6))

x = np.arange(0, 10, 0.1)
y = np.sin(x)
z = np.cos(x)

ax.plot(y, color='blue', label='Sine wave')
ax.plot(z, color='black', label='Cosine wave')
ax.set_title('Sine and cosine waves')
ax.set_xlabel('Time')
ax.set_ylabel('Intensity')
leg = ax.legend()

plt.show()
Change Font Size using fontsize
Let’s try out the simplest option. Every function that deals with text, such as Title, labels and all other textual functions accept an argument — fontsize.
Let’s revisit the code from before and specify a fontsize for these elements:
import matplotlib.pyplot as plt
import numpy as np

fig, ax = plt.subplots(figsize=(12, 6))

x = np.arange(0, 10, 0.1)
y = np.sin(x)
z = np.cos(x)

ax.plot(y, color='blue', label='Sine wave')
ax.plot(z, color='black', label='Cosine wave')
ax.set_title('Sine and cosine waves', fontsize=20)
ax.set_xlabel('Time', fontsize=16)
ax.set_ylabel('Intensity', fontsize=16)
leg = ax.legend()

plt.show()
Here, we’ve set the fontsize for the title as well as the labels for time and intensity. Running this code yields:
We can also change the size of the font in the legend by adding the prop argument and setting the font size there:
leg = ax.legend(prop={"size":16})
This will change the font size, which in this case also moves the legend to the bottom left so it doesn’t overlap with the elements on the top right:
However, while we can set each font size like this, if we have many textual elements, and just want a uniform, general size — this approach is repetitive.
In such cases, we can turn to setting the font size globally.
Change Font Size Globally
There are two ways we can set the font size globally. We’ll want to set the font_size parameter to a new size. We can get to this parameter via rcParams['font.size'].
One way is to modify them directly:
import matplotlib.pyplot as plt
import numpy as np

fig, ax = plt.subplots(figsize=(12, 6))

x = np.arange(0, 10, 0.1)
y = np.sin(x)
z = np.cos(x)

plt.rcParams['font.size'] = '16'

ax.plot(y, color='blue', label='Sine wave')
ax.plot(z, color='black', label='Cosine wave')
plt.xlabel('Time')
plt.ylabel('Intensity')
fig.suptitle('Sine and cosine waves')
leg = ax.legend()

plt.show()
You have to set these before the plot() function call since if you try to apply them afterwards, no change will be made. This approach will change everything that’s specified as a font by the font kwargs object.
However, when we run this code, it’s obvious that the x and y ticks, nor the x and y labels didn’t change in size:
Check out our hands-on, practical guide to learning Git, with best-practices, industry-accepted standards, and included cheat sheet. Stop Googling Git commands and actually learn it!
Depending on the Matplotlib version you’re running, you won’t be able to change these with rc parameters. You’d use axes.labelsize and xtick.labelsize/ytick.labelsize for them respectively.
If setting these doesn’t change the size of labels, you can use the set() function passing in a fontsize or use the set_fontsize() function:
import matplotlib.pyplot as plt
import numpy as np

fig, ax = plt.subplots(figsize=(12, 6))

x = np.arange(0, 10, 0.1)
y = np.sin(x)
z = np.cos(x)

# Set general font size
plt.rcParams['font.size'] = '16'

# Set tick font size
for label in (ax.get_xticklabels() + ax.get_yticklabels()):
	label.set_fontsize(16)

ax.plot(y, color='blue', label='Sine wave')
ax.plot(z, color='black', label='Cosine wave')
plt.xlabel('Time', fontsize=16)
plt.ylabel('Intensity', fontsize=16)

fig.suptitle('Sine and cosine waves')
leg = ax.legend()

plt.show()
This results in:
Conclusion
In this tutorial, we’ve gone over several ways to change the size of fonts in Matplotlib.
If you’re interested in Data Visualization and don’t know where to start, make sure to check out our bundle of books on Data Visualization in Python:
Data Visualization in Python with Matplotlib and Pandas is a book designed to take absolute beginners to Pandas and Matplotlib, with basic Python knowledge, and allow them to build a strong foundation for advanced work with theses libraries — from simple plots to animated 3D plots with interactive buttons.
It serves as an in-depth, guide that’ll teach you everything you need to know about Pandas and Matplotlib, including how to construct plot types that aren’t built into the library itself.
Data Visualization in Python, a book for beginner to intermediate Python developers, guides you through simple data manipulation with Pandas, cover core plotting libraries like Matplotlib and Seaborn, and show you how to take advantage of declarative and experimental libraries like Altair. More specifically, over the span of 11 chapters this book covers 9 Python libraries: Pandas, Matplotlib, Seaborn, Bokeh, Altair, Plotly, GGPlot, GeoPandas, and VisPy.
It serves as a unique, practical guide to Data Visualization, in a plethora of tools you might use in your career.