![]() Данный материал является переводом оригинальной статьи «MSSQLTips : How to change server level collation for a SQL Server Instance».
Данный материал является переводом оригинальной статьи «MSSQLTips : How to change server level collation for a SQL Server Instance».
Случилось так, что уже после того, как выполнена установка экземпляра SQL Server, вам с опозданием сообщили, что вы должны использовать другой параметр сортировки (Collation) для этого экземпляра. В этой статье пошагово опишем то, как можно изменить настройку параметров сортировки на уровне сервера для существующего экземпляра SQL Server.
Прежде чем идти дальше, давайте обсудим, что используется для настройки параметров сортировки в соответствии с Books Online.
«В параметрах сортировки задаются правила сортировки и сравнения строк символьных данных на основе норм конкретных языков и локалей. Например, в предложении ORDER BY англоговорящий ожидает, что строка символов «Chiapas» появится до «Colima» в порядке возрастания. Однако испаноговорящий в Мексике может ожидать, что слова, начинающиеся с «Ch», появятся в конце списка слов, начинающихся с «C». Параметры сортировки диктуют эти правила сортировки и сравнения. Параметр сортировки Latin_1 будет сортировать «Chiapas» до «Colima» в предложении ORDER BY ASC, тогда как параметр сортировки Traditional_Spanish будет сортировать «Chiapas» после «Colima».
Параметры сортировки сервера действуют, как параметры сортировки по умолчанию для всех системных баз данных, которые установлены с экземпляром SQL Server, а также с любыми новыми созданными пользовательскими базами данных. В процессе установки SQL Server указываются параметры сортировки сервера. Не обязательно, чтобы мы меняли параметры сортировки уровня сервера по умолчанию, потому что вы можете указать другой уровень параметров сортировки при создании пользовательских баз данных, но вам нужно помнить, что нужно указывать его при создании пользовательских баз данных.
Чтобы изменить параметры сортировки SQL Server по умолчанию, вы можете просто перестроить системные базы данных. Когда вы перестраиваете системную базу данных master, системные базы model, msdb и tempdb фактически удаляются и воссоздаются в исходном местоположении. Если в инструкции rebuild указаны новые параметры сортировки, системные базы данных перестраиваются с использованием этой настройки параметров сортировки. Любые пользовательские изменения в этих базах данных будут потеряны, поэтому важно создать резервную копию любой из той информации, которую вы хотите сохранить. Например, у вас могут быть определенные пользователем объекты в базе данных master, запланированные задания в msdb или изменения параметров базы данных по умолчанию в базе данных model. База данных tempdb воссоздается каждый раз при перезапуске SQL Server, поэтому в этой базе данных нет ничего, что нужно сохранять. Изменение параметров сортировки на уровне сервера не изменяет параметров сортировки существующих пользовательских баз данных, но все вновь созданные пользовательские базы данных будут использовать новые параметры сортировки по умолчанию.
ПРИМЕЧАНИЕ: НЕ ДЕЛАЙТЕ ЛЮБЫЕ ИЗМЕНЕНИЯ В РАБОЧЕЙ СРЕДЕ БЕЗ ДОЛЖНЫХ ИСПЫТАНИЙ В СРЕДЕ ТЕСТИРОВАНИЯ
Далее рассмотрим шаги, необходимые для изменения параметров сортировки на уровне сервера на заданном экземпляре SQL Server.
Шаг 1. Проверка текущих параметров сортировки
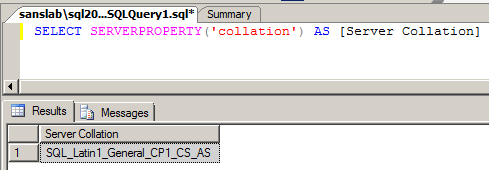
Сначала проверьте существующие параметры сортировки SQL Server вашего экземпляра. Выполните приведенную ниже команду, чтобы получить значение параметров сортировки экземпляра SQL Server.
SELECT SERVERPROPERTY(N'Collation')
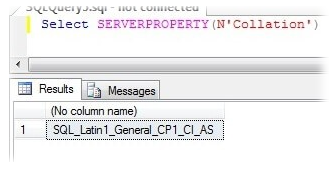
Как видите, в данном случае установлен порядок сортировки «SQL_Latin1_General_CP1_CI_AS».
Шаг 2. Сохранение системной конфигурации
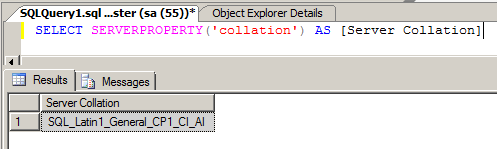
В нашем примере необходимо изменить текущий порядок сортировки на «SQL_Latin1_General_CP1_CI_AI». Как я уже упоминал, мы должны перестроить наши системные базы данных, чтобы изменить параметры сортировки на уровне сервера и поместить это новое значение параметра сортировки в команду rebuild. Обязательно запишите все настройки уровня сервера до пересоздания системных баз данных, чтобы смочь обеспечить восстановление системных баз данных до их текущих настроек. Запишите все значения конфигурации сервера, выполнив приведенные ниже команды и сохраните вывод. Если это была новая настройка, и вы не внесли никаких изменений в системные базы данных, вам не нужно беспокоиться о сборе этих данных.
SELECT * FROM sys.configurations;
-- OR
EXEC SP_CONFIGURE
Шаг 3. Сохранение сценариев создания объектов
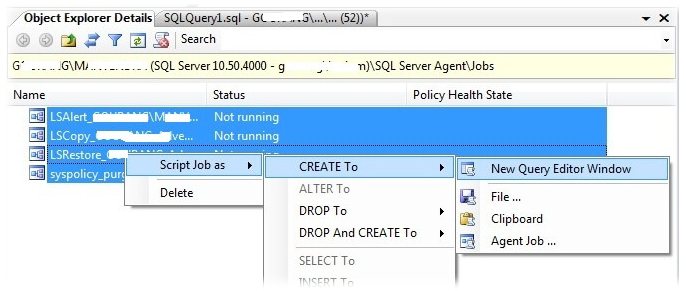
Создайте и подготовьте все сценарии, связанные с заданиями, планами обслуживания, логинами и уровнями доступа. Вы можете создавать сценарии, выбирая все задания в проводнике объектов в SSMS и щелкая правой кнопкой мыши по вашему выбору, затем выберите вариант «script as» для создания сценария для всех заданий. Вы можете сделать аналогичные шаги для генерации сценариев для предупреждений и операторов. Ниже снимок экрана для создания сценариев для всех ваших заданий.
Далее следует обеспечить безопасность ваших логинов, паролей и их уровней доступа. Вы можете использовать хранимую процедуру sp_help_revlogin для создания сценария для всех логинов, чтобы их можно было легко воссоздать.
Шаг 4. Отсоединение пользовательских БД
Отсоедините все пользовательские базы данных до пересоздания системных баз данных. Если вы оставите прикрепленные базы данных, они будут отсоединены и будут находиться в папке базы данных.
Шаг 5. Перестроение системных БД
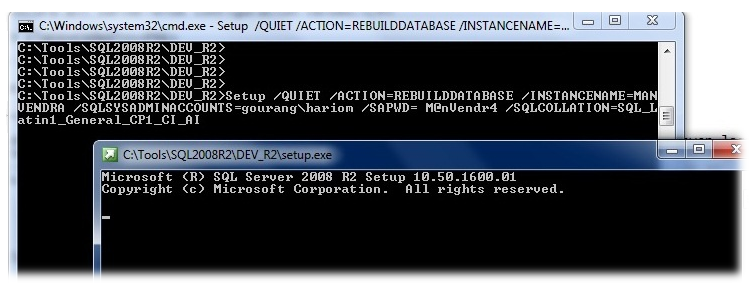
Теперь пришло время перестроить ваши системные базы данных. Эта операция воссоздает вашу базу данных master и все существующие настройки будут сброшены. Выполните команду ниже из командной строки Windows. Обязательно запустите эту команду из каталога, в который вы разместили установочные файлы SQL Server. Как только вы нажмете Enter, появится отдельное окно, чтобы показать вам индикатор выполнения. Как только перестройка будет завершена, это окно исчезнет.
Setup /QUIET /ACTION=REBUILDDATABASE /INSTANCENAME=MANVENDRA /SQLSYSADMINACCOUNTS=gouranghariom /SAPWD=M@nVendr4 /SQLCOLLATION=SQL_Latin1_General_CP1_CI_AI
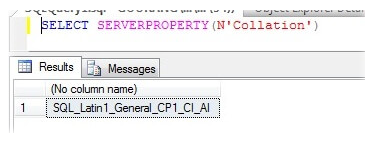
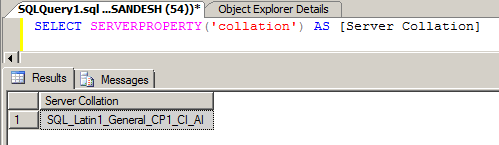
По завершении операции перестроения, проверьте параметры сортировки сервера, чтобы проверить, выполнено ли это изменение или нет. Как мы видим на скриншоте ниже, параметры сортировки сервера изменились на «SQL_Latin1_General_CP1_CI_AI». На этом этапе мы не можем восстановить какую-либо из системных баз данных, так как это вернет нас обратно к предыдущей настройке параметров сортировки. Поэтому, нам нужно будет использовать сценарии, созданные для воссоздания логинов, заданий и т.д…
Шаг 6. Присоединение пользовательских БД
Прикрепите все пользовательские базы данных, которые были отсоединены на шаге 4. Если у вас есть какие-либо проблемы, взгляните на этот совет: How to fix database attach error in SQL Server 2008R2.
Шаг 7. Обновление пользовательских БД (опционально)
Теперь измените настройки параметров сортировки для всех пользовательских баз данных. Нет необходимости изменять настройки параметров сортировки для пользовательских баз данных, это полностью зависит от ваших требований. Выполните приведенные ниже команды, чтобы изменить настройки параметров сортировки ваших пользовательских баз данных.
ALTER DATABASE DBName collate SQL_Latin1_General_CP1_CI_AI
Иногда команда не выполняется, и вы получаете ошибку:
Msg 5075, Level 16, State 1, Line 1 The object 'CK_xxxx' is dependent on database collation. The database collation cannot be changed if a schema-bound object depends on it. Remove the dependencies on the database collation and then retry the operation.
В этом случае вам может потребоваться экспортировать все данные и воссоздать базу данных с новыми настройками параметров сортировки.
Шаг 8. Восстановление системной конфигурации и сценариев
Теперь запустите все сценарии, созданные на шаге 3, чтобы восстановить задания, предупреждения (alerts), логины, операторы и т.д. Также не забудьте изменить настройки конфигурации на уровне сервера, которые были зафиксированы на Шаге 2. Теперь ваш экземпляр готов использовать новые параметры сортировки уровня сервера.
Exporting all of the data (including logins, linked servers, SQL Agent jobs, DB Mail settings, etc), and rebuilding the instance-level data, plus reloading all of the user data, is a lot of work. And, even after all of that, there’s still no guarantee that you can update a database’s default collation via ALTER DATABASE because there are several conditions that will prevent the operation from completing (please see the «Changing the Database Collation» section of the ALTER DATABASE documentation for details).
There is, however, an undocumented method that is much easier. The main drawback being that it’s unsupported. This is not to say that anything will go wrong, just that if something does, Microsoft won’t help fix it (because they never guaranteed that it would work).
The method I speak of is running sqlservr.exe with the -q {new_collation_name} switch. There’s a little more to it than that, but that is the basic idea. This method simply updates the system meta-data, which has benefits and consequences, the main ones being:
BENEFITS
- pretty fast
- bypass most restrictions that prevent
ALTER DATABASEfrom working - likely far more accurate than any script that people have come up with over the years to drop and recreate objects
DRAWBACKS
- unsupported if something goes wrong
VARCHARdata can change, IF the code page is different between the old and new collations, and characters with values of 128 — 255 (0x80 — 0xFF) exists, and those characters do not exist as the same character with the same value on the new code page. So the potential is there for data loss, and your data needs to be research first to ensure that this condition does not exist. But, this also means that there are plenty of cases with only characters having values of 0 — 127 which are not in any danger, even if the code page changes.- User-Defined Table Types (UDTTs) are skipped and need to be updated manually.
For a detailed description of what the sqlservr.exe -q method does and does not do (including details on how collations work at the various levels, and potential issues to watch out for), please see my post:
Changing the Collation of the Instance, the Databases, and All Columns in All User Databases: What Could Possibly Go Wrong?
To change only the instance (including the system databases: master, model, msdb, and tempdb) and one or more databases (but not all databases), simply detach the database(s) that you want to exclude from this operation, and then re-attach them once the collation update completes.
Changing SQL Server Collation In Simple Steps
Here is the simpler steps to change the SQL Server Instance Collation, Please note once the collation is changed we may need to modify the query according to the need as the collation it was referring will change.
Steps:
- Open the CMD in elevated privilege
- Check the services
sc queryex type= service state=
all| find /i
"SQL Server" - Stop SQL Server NET STOP «SQL Server (SQLEXPRESS2008R2)»
- Move to Binn Directory from CMD
EXAMPLE: D:Program FilesMicrosoft SQL ServerMSSQL10_50.SQLEXPRESS2008R2MSSQLBinn - type DIR and Check SQL Server.exe is listed
- Apply a New SQL Server Collation
sqlservr -m -T4022
-T3659
-s"SQLEXPRESS2008R2"
-q"SQL_Latin1_General_CP1_CI_AS"[-m] single user admin mode
[-T] trace flag turned on at startup
[-s] sql server instance name
[-q] new collation to be applied4022
Used to bypass automatically started (startup) procedures, this is a subset of startup option –f.
TIP: Each SP consumes one worker thread while executing so you may prefer to make one startup procedure that calls others.3659
After a lot of research, I found a reference to this flag in a script called AddSelfToSqlSysadmin, written by Ward Beattie, a developer in the SQL Server product group at Microsoft.
The script contains a line which suggests that this flag enables logging all errors to error log during server startup. - SQL Server may start in single user mode, if command prompt doesn’t end press ctrlX, this will prompt Y/N to shutdown SQL Server, Choose Y
2018-08-01
17:12:30.25
spid7s The
defaultcollation was successfully changed.2018-08-01
17:12:30.26
spid7s Recovery is complete. This is an informational message only. No user action is required.2018-08-01
17:12:42.01
Logon Error:18461, Severity:
14, State:
1.2018-08-01
17:12:42.01
Logon Login failed for user 'NT AUTHORITYNETWORK SERVICE'. Reason: Server is in single user mode. Only one administrator can connect at this time. [CLIENT: <local
machine>]2018-08-01
17:13:41.91
Logon Error:18461, Severity:
14, State:
1.2018-08-01
17:13:41.91
Logon Login failed for user 'NT AUTHORITYNETWORK SERVICE'. Reason: Server is in single user mode. Only one administrator can connect at this time. [CLIENT: <local
machine>]Do you wish to shutdown SQL Server (Y/N)? Y - Start SQL and verify the collation
NET START
"SQL Server (SQLEXPRESS2008R2)"D:Program FilesMicrosoft SQL ServerMSSQL10_50.SQLEXPRESS2008R2MSSQLBinn>NET START
"SQL Server (SQLEXPRESS2008R2)"The SQL Server (SQLEXPRESS2008R2)
service is starting.The SQL Server (SQLEXPRESS2008R2)
service was started successfully.
I have one question, I was trying to find more information on the internet but, I’m still not sure about it.
If I have a SQL Server instance with the following default Collation example «Modern_Spanish_CI_AS» and I also have a restored databse with different collation example «Latin1_General_CI_AS».
What collation SQL Server will use? by default the Modern_Spanish… or it will use from database Latin1_General?
In the follwing link explains something about it
Setting and Changing the Server Collation
Thanks!
asked Mar 22, 2012 at 7:56
![]()
It will use the Latin1_General_CI_AS collation, as that’s what’s set in the database itself.
For clarification, whatever’s set in the database will override the «default» collation for the server. The default collation is basically only used when you create a brand new database.
Changing the default collation at the server level has no effect on existing databases, you would have to change each collation individually, though that in itself will probably cause you cascading issues with any other database level objects you’ve created, such as stored procedures, constraints and even any dynamic SQL you’re executing against the database from 3rd party applications.
answered Mar 22, 2012 at 7:59
![]()
SpikehSpikeh
3,4433 gold badges24 silver badges49 bronze badges
1
SQL Server collations can be set at various levels: server, database, column, expession. If you do not set a collation at a lower level it is inherited from the level above. E.g. when creating a database the database collation will be the server’s collation unless you explicitly set a collation for the DB.
And many collations will work together fine. Occasionally there can be difficulties, often of the nature of sort order being unexpected. I do not know for sure but I would expect the 2 you specify to be compatible.
So yes, your DB will (almost certainly) restore with the Latin1_General_CI_AS collation and almost certainly be fine. There is a list of compatible collations which Google should be able to help you find.
![]()
Bridge
29.4k9 gold badges59 silver badges82 bronze badges
answered Mar 22, 2012 at 8:23
![]()
KarlKarl
3,28220 silver badges27 bronze badges
1
How to change server collation
The Server Collation acts as the default collation for all the system databases on that instance of SQL Server and also for the newly created user databases.
The Collation for an instance is specified during the setup of SQL Server, whereas this can be changed at any point of time by rebuilding the master database and specifying the new collation.
This operation will overwrite the system databases and hence it is strongly recommended to have a complete system backup before proceeding with this activity.
Before you proceed,
- Make sure you have backup of all user database, jobs, logins, maintenance plans, etc..
- Drop / Detach all user databases
- Rebuild Master database by specifying new collation
For SQL Server 2005,
Check the current Collation of the server by running the below script
SELECT SERVERPROPERTY('collation') AS [Server Collation]
Navigate to the setup path using command prompt and run the below query by changing the parameters
start /wait setup.exe /qb INSTANCENAME=SQL2005 REINSTALL=SQL_Engine REBUILDDATABASE=1 SAPWD=yourSApassword SQLCOLLATION=SQL_Latin1_General_CP1_CI_AI

This will start the GUI for setup

Once the Installation of Prerequisites is completed, you will be presented with the below screen

Click «Yes»

Once this configuration is completed, it will automatically close the GUI.
Now you can verify the change of collation by executing the below commands
SELECT SERVERPROPERTY('collation') AS [Server Collation]
For SQL Server 2008, SQL Server 2008 R2, SQL 2012,
Check the current Collation of the server by running the below script
SELECT SERVERPROPERTY('collation') AS [Server Collation]

Navigate to the setup path using command prompt and run the below query by changing the parameters
Setup /QUIET /ACTION=REBUILDDATABASE /INSTANCENAME=InstanceName
/SQLSYSADMINACCOUNTS=adminaccount /[ SAPWD= StrongPassword ]
/SQLCOLLATION=CollationName

Wait for the configuration to complete

Verify the change of collation by executing the below commands
SELECT SERVERPROPERTY('collation') AS [Server Collation]
Once the activity of changing the collation is completed,
- Recreate / Attach the users databases
- Make sure to verify / recreate the jobs, logins, maintenance plans, etc..
Demystifying What “sqlservr -q” Actually Does
(last updated: 2019-11-06 @ 10:00 EST / 2019-11-06 @ 15:00 UTC )
CONTENTS
- General Concepts
- Methods
- Documented Approach
- Rebuild System Databases
- Change User Databases
- Change Column Collations
- Undocumented Approach
- How To Do It
- What It Does
- Errors You Might Encounter
- Finding and Fixing Ignored Objects
- Documented Approach
- Misc.
- SQL Server Express LocalDB
- Compatiblity Collations
- In-Memory OLTP and UTF-8 Collations
- External Posts
- Testing
- General
- SQL Server Express LocalDB
- Compatiblity Collations
- In-Memory OLTP and UTF-8 Collations
For various reasons, people sometimes find themselves in the unfortunate (and unenviable) situation of having a SQL Server Instance and/or Database configured with the wrong Collation. This can often lead to unexpected errors and/or sorting and comparison behavior.
People sometimes try to “fix” this problem by adding the COLLATE DATABASE_DEFAULT to string columns of temporary tables, and/or COLLATE {collation_name} to WHERE / JOIN predicates. While this might work in some situations, it is not a true fix since it does not address areas controlled by the Instance-level Collation: resolving names of variables, cursors, and GOTO labels. It also does not affect the behavior of any Microsoft-provided feature that is contained within msdb and might use the system Collation (possibly including SQL Server Agent, Database Mail, Central Management Server (CMS), Maintenance Plans, Policy Management, etc).
For situations where adding the COLLATE {collation_name} keyword is inadequate or undesirable, there is the option of changing the Instance-level Collation. There are two ways to accomplish this: one “official” and the other “unofficial”. But first, before seeing how to change an Instance’s Collation, it is important to understand exactly what the total impact of that change could be.
General Concepts
The following should be a mostly-complete list of affected areas. It assumes that the Collation will be changing across all levels (Instance, Database, and column) since one of the two methods for changing the Instance-level Collation will change all levels.
- Simplistically, changing any Collation, even to the same Collation of a newer version (e.g.
Latin1_General_CI_AStoLatin1_General_100_CI_AS) can easily change sort orders as well as what equates to what:- Since the Database default Collations are changing,
IF/WHILE/ etc conditions for variable and input parameters can change behavior. For example, consider the following code:IF (@Variable = N'some string')Passing in
yesfor@Variablewould evaluate to “True” in a case-insensitive Database. But if the Database’s Collation changes to be binary or case-sensitive, then that same value would evaluate to “False”. - Since the Instance default Collation is changing, this impacts resolution of names of variables / parameters, cursors, and
GOTOlabels. For example, consider the following code:DECLARE @Var INT; SET @var = 1;This will work just fine on an Instance having a case-insensitive Collation. But, if that Instance changes to either a binary or case-sensitive Collation, then that code will break due to the difference between
@Varand@var. - JOINs and WHERE predicates can change behavior based on columns having a new Collation:
- More rows might match when moving from a binary or case-sensitive Collation to a case-insensitive Collation. This could result in a Cartesian product.
- Conversely, fewer rows than before might match when moving from a case-insensitive Collation to either a binary or case-sensitive Collation. This could result in missing rows.
- GROUP BY and DISTINCT behavior could change in the same manner.
- FOREIGN KEYS: Rows that equated to the Primary Key reference due to using a Collation with one or more insensitivities (case, accent, etc.) might no longer equate to the PK when moving to a binary or case-sensitive Collation.
- ORDER BY behavior could change.
- CHECK CONSTRAINT behavior.
- Since the Database default Collations are changing,
- Data-loss potential for 8-bit string columns: these rely upon the Code Page used by the Collation of the column to determine which characters can be stored in the column. Data loss can occur only if all 3 of the following conditions are true:
- Data is stored in a column using an 8-bit type:
CHAR/VARCHAR/TEXT(FYI: theTEXTtype has been deprecated starting with the release of SQL Server 2005, so don’t use it, but it might exist in some places) - Characters with underlying values of 128 (0x80) – 255 (0xFF) are being used.
- The old and new Collations use different Code Pages. It does not matter if the old and new Collations use different LCIDs (i.e. Locales / Cultures); only a change in the column’s Code Page matters. For example, the following cultures (and several others) all use Code Page 1252, and hence switching between them will not be a Code Page conversion: French, Finnish_Swedish, German, Latin1_General, Spanish, Norwegian, etc.
Even if all three conditions are met, that does not guarantee that there will be data loss. Many Code Pages have many of the same characters in the 0x80 – 0xFF range. Whether or not there will be data loss depends on the specific characters being used, what the new Code Page supports, and which method of updating the Collations is being used:
- The documented method does an actual conversion: if switching to a Collation that uses a different Code Page than the current one, it is possible that some characters might not be available in the new Code Page and would be converted to either a “best fit” mapping, if one can be found, or else to a «?». But if the characters are available, then the underlying byte value will be changed if necessary.
- The undocumented method simply changes the Collation: the bytes of the source data will remain the same, but what characters they represent might change if the new Code Page has a different character with that same underlying byte value.
- Data is stored in a column using an 8-bit type:
- Similar to #2, if a Database’s new Collation uses a different Code Page than the previous Collation, then
VARCHARstring literals in that Database (i.e. those not prefixed with an upper-case «N») can have one or more characters changed to either a best-fit mapping or into a «?» if not available in the Code Page of the new Database default Collation. This can bePRINTstatements,RAISERRORmessages, literals used forINSERTorUPDATEstatements. PLEASE NOTE: this conversion will take place during parsing and hence will not be visible to you. Please see the following two part series for a full explanation: “Which Collation is Used to Convert NVARCHAR to VARCHAR in a WHERE Condition?” (Part A of 2: “Duck”) and (Part B of 2: “Rabbit”).
- All Indexes containing string-type columns in key fields (
INCLUDEcolumns shouldn’t matter unless one or more of them areCHAR/VARCHARand the old and new Collations use different Code Pages) need to be fully rebuilt (or more likely dropped and recreated):- If using a filter expression (and this applies equally to filtered statistics) that filters on a string column, then the rows that have been included / excluded from the index (or statistic) might change!
- For
CHAR/VARCHARcolumns, if the old and new Collations use different Code Pages, then it’s possible that characters might change (especially if their underlying value is between 0x80 (128) and 0xFF (255)). See item #2 above regarding data-loss. - Their ordering might have changed (even if there are no changes to either the rows that are present in the Index or the characters in the key columns).
- Potential breaking of code: similar to #1, but here the code will actually break (not just silently behave differently) in any of the following situations if a column in a User Table (i.e. Collation will be changing) is used in combination with a column from a System Table that is NOT based on the Instance default Collation or the Database default Collation (some Collations are hard-coded and are the same between all systems) such that the Collations between the columns is no longer the same:
- JOIN or WHERE predicate
- String concatenation (e.g.
column1 + column2) - UNION / UNION ALL
- COALESCE (but ISNULL is fine)
- CASE statements returning the columns in question
- CONCAT function
- possibly some other situations
- Some columns might not be desirable to change. Some (perhaps many) applications use the same Collation for all string columns. But, for any columns that are set to a different Collation for a specific reason, it might not be desirable to change that to the same Collation as all other columns. On the other hand, it might be less work to change a few columns back to non-standard Collations than it would be to change most of them manually. At the very least you need to do an audit to make sure that you know where all of your «special» columns with differing Collations are, and what Collation they are using so that they can be set back to that after the mass-update.
- System objects might be in conflict and/or code might break if object names can no longer be resolved, or resolve to duplicates. If using inconsistent casing between object definition and object reference in code (e.g. Table name = «Customers», Table reference in stored procedures / functions / views = «customers») and moving to a case-sensitive or binary Collation, that code will fail. If currently using a binary or case-sensitive Collation and having objects named both «Customers» and «customers», moving to a case-insensitive Collation will fail on a unique constraint violation for what is the internal table holding what we see in
sys.objects.
- What about Full Text Search? Not sure if that is impacted or not, and if so, how…
Methods
IMPORTANT: Before making any changes to your system, be sure to have a complete (and working) set of backups, just in case something goes wrong. «Working» here means that you have tested them by restoring them (somewhere).
Documented Approach
Below is a general overview of this approach that only mentions the parts that actually change the Collation of some part of the system. This is not a full, step-by-step guide. Please see the “Set or Change the Server Collation” link below for additional details.
Rebuild System Databases
Do this to change the Instance-level default Collation, as well as the Collation of the system Databases: master, model, msdb, and tempdb (which is just a copy of model).
- Rebuild System Databases
- Set or Change the Server Collation
Note: the ^ character is for line-continuation. Otherwise, hitting Enter executes the command.
SETUP.EXE /QUIET /ACTION=REBUILDDATABASE ^
/INSTANCENAME=InstanceName ^
/SQLCOLLATION=CollationName ^
/SQLSYSADMINACCOUNTS=accounts  [ ^
/OptionalSwitches ]
PLEASE BE AWARE of the following warning in the documentation:
RebuildDatabase scenario deletes system databases and installs them again in clean state. Because the setting of tempdb file count does not persist, the value of number of tempdb files is not known during setup.
This step does not do anything more than change the Collation of the four system Databases, Instance-level meta-data, and the Instance itself. User Databases, as well as the string columns of the User Tables within them, are ignored.
You can find SETUP.EXE in the C:Program FilesMicrosoft SQL Server{INT_version_number}Setup Bootstrap{product_common_name} folder. Some examples are:
C:Program FilesMicrosoft SQL Server110Setup BootstrapSQLServer2012C:Program FilesMicrosoft SQL Server120Setup BootstrapSQLServer2014C:Program FilesMicrosoft SQL Server130Setup BootstrapSQLServer2016C:Program FilesMicrosoft SQL Server140Setup BootstrapSQL2017C:Program FilesMicrosoft SQL Server150Setup BootstrapSQL2019RC1
Change Database-level Collation of User Databases
Do this to change the Database’s default Collation, as well as the Collation of Database-level meta-data:
ALTER DATABASE { database_name | CURRENT } COLLATE {new_collation_name} ;
For example:
ALTER DATABASE [TestDB] COLLATE Latin1_General_100_CI_AS_SC;
or:
ALTER DATABASE CURRENT COLLATE Latin1_General_100_CI_AS_SC;
PLEASE NOTE: You cannot change the Collation for any of the system Databases. Attempting to do so will result in the following error:
Msg 3708, Level 16, State 5, Line 271
Cannot alter the database ‘model’ because it is a system database.
Also, there are certain conditions which can prevent this command from completing. For example, if there are any objects that were created with the SCHEMABINDING option and that use the Database’s default Collation. For more details, please see the documentation for “ALTER DATABASE: Changing the Database Collation”.
This step does not do anything more than change the Collation of Database-level meta-data, and the Database itself. String columns of the User Tables within the Database are ignored.
Change Collation of Columns
Do this to change a column’s Collation:
ALTER TABLE { schema_name }.{ table_name }
   ALTER COLUMN { column_name } { datatype }
   COLLATE { new_collation_name }
   { [ NOT ] NULL } ;
If you do not specify the current NULL / NOT NULL setting, it might change! The default is usually NULL.
Certain conditions may prevent you from being able to alter the column. For example, if you have a Check Constraint defined that references that column, you will get the following error:
Msg 5074, Level 16, State 1, Line XXXXX
The object ‘CK_test’ is dependent on column ‘col1’.
Msg 4922, Level 16, State 9, Line XXXXX
ALTER TABLE ALTER COLUMN col1 failed because one or more objects access this column.
You should also get an error if either a Primary Key or Foreign Key exists that references the column. However, having a Default Constraint on the column does not cause an error.
Undocumented Approach
How To Do It
The following approach has some advantages over the documented approach described above, especially being one step instead of three, but it is undocumented and hence unsupported, so if you run into any problems, Microsoft is not likely to help, nor will they fix any buggy or unexpected behavior. The -q switch of SQLSERVR.EXE is not found in the Microsoft documentation, nor is it listed when passing in the -? switch to get the help info. However, it can be used as follows:
sqlservr -c -m -T4022 -T3659 -s"{instance_name}" -q"{new_collation_name}"
For example:
sqlservr -c -m -T4022 -T3659 -s"CHANGECOLLATION" -q"Estonian_100_CS_AS_SC"
You must execute this command in an «Administrator» Command Prompt, not a regular Command Prompt. Attempting to do this in a regular Command Prompt will result in the following error messages:
2018-06-10 16:08:19.06 Server Error: 17058, Severity: 16, State: 1.
2018-06-10 16:08:19.06 Server initerrlog: Could not open error log file ”. Operating system error = 3(The system cannot find the path specified.).
… {same error repeated 9 more times}
2018-06-10 16:08:22.08 Server SQL Server shutdown has been initiated
You will also need to make sure that the Instance is not currently running before executing that command-line. You can run the following in the Command Prompt:
NET STOP MSSQL${InstanceName}
- Trace Flag 4022 instructs SQL Server to not execute any Stored Procedures marked as «execute at startup».
- Trace Flag 3659 instructs SQL Server to log all errors to the error log during server startup.
Once it completes, you should see the following in the Command Prompt window:
2018-06-10 16:10:45.97 spid6s   The default collation was successfully
                                changed.
2018-06-10 16:10:46.12 spid6s   Recovery is complete. This is an
                                informational message only. No user action
                                is required.
However, the process is still running and does not self-terminate.
Hit Control-C.
You will then see:
Do you wish to shutdown SQL Server (Y/N)?
Hit y.
You should then see the following:
2018-06-10 16:10:56.13 spid6s   SQL Server shutdown due to Ctrl-C or
                                Ctrl-Break signal. This is an informational
                                message only. No user action is required.
2018-06-10 16:10:56.13 spid6s   SQL Server shutdown has been initiated
2018-06-10 16:10:56.13 spid6s   SQL Trace was stopped due to server
                                shutdown. Trace ID = '1'. This is an
                                informational message only; no user action
                                is required.
Now you can start the Instance again. You can run the following in the Command Prompt:
NET START MSSQL${InstanceName}
You can find sqlservr.exe in the Binn folder within the main directory for the Instance (not the SQL Server main directory for that version of SQL Server). If you need help finding it, just run the following from a Command Prompt (does not need to be an Administrator Command Prompt):
REG QUERY "HKLMSOFTWAREMicrosoftMicrosoft SQL Server" ^
 /f "Setup" /s /v "SQLBinRoot" /k /e | FINDSTR SQLBinRoot
You will get back entries such as:
... C:Program FilesMicrosoft SQL Server110LocalDBBinn

... C:Program FilesMicrosoft SQL Server120LocalDBBinn

... C:Program FilesMicrosoft SQL Server130LocalDBBinn

... c:Program FilesMicrosoft SQL ServerMSSQL14.MSSQLSERVERMSSQLBinn

... c:Program FilesMicrosoft SQL ServerMSSQL14.SQL2017EXPRESSMSSQLBinn

... C:Program FilesMicrosoft SQL Server140LocalDBBinn

... C:Program FilesMicrosoft SQL ServerMSSQL15.SQL2019MSSQLBinn
What It Does
- Converts one Database at a time (appears to be in
database_idorder):mastertempdbmodelmsdb- User DBs
- Will roll back a DB if it does not complete fully, but DBs that have completed will remain converted if an error occurs. This behavior holds true for the system Database’s also. This could lead to the process leaving the Instance with inconsistent Collations for the system DBs if they do not all complete successfully. Meaning, if less than all 4 system DBs complete successfully, there will be a mismatch between the system DBs. And if they do complete successfully but a User DB fails, then the system DBs won’t match the Instance-level Collation. This is not terribly bad, though, since you can fix the problem and restart the operation.
- Conversion bypasses restrictions imposed on documented method (ALTER DATABASE, and ALTER TABLE…ALTER COLUMN). The following do not cause an error with this method:
- Schema-bound objects
- Check constraints that use the Database’s Collation
- Computed columns that use the Database’s Collation
- Table-Valued Functions (TVFs) that pass back string columns that did not specify the COLLATE keyword.
- Indexes on string columns
- Indexes containing string columns are dropped and recreated. If the Clustered Index contains at least one string column, then all Indexes on the Table are dropped and recreated (even if they do not contain any string columns).
- Conversion bypasses checks meant to prevent leaving the data in an invalid state:
NTEXTcolumns do not error when being set to a Collation that supports Supplementary Characters. This leaves the column as effectively read-only: you can select from it, but attempting to modify it will get the following error:
Msg 4189, Level 16, State 0, Line XXXXX
Cannot convert to text/ntext or collate to ‘{collation_name}’ because these legacy LOB types do not support the Unicode supplementary characters whose codepoints are U+10000 or greater. Use types varchar(max), nvarchar(max), or a collation which does not have the _SC flag.
However, it’s easy enough to manually change the Collation of these columns to one that is not Supplementary Character Aware.- Foreign Key rows that referenced a PK value due to relying upon an insensitivity (e.g. «Y = y» due to case-insensitivity) might no longer reference any PK value. There is no constraint verification, so the FK will be left as «enabled» and «trusted» (assuming it was both «enabled» and «trusted» prior to the operation), yet these same values can no longer be added due to now getting the expected FK violation error.
- Data loss can occur in
VARCHAR/CHAR/TEXTcolumns if the new Collation uses a different Code Page than was being used previously, and the new Code Page does not have the same character having the same numeric value. This is a different type of data loss than what happens with the other method. The documented method does an actual Code Page conversion, which will both (a) adjust the byte value to a different one for characters that exist in both Code Pages but with different underlying values, and (b) attempt to find a similar looking character, known as a “best fit” match, if a “best fit” mapping exists. This undocumented method does neither of those character conversions; no attempt is made to maintain consistency of the character / glyph itself. The underyling byte values remain the same, but the character that they map to might change between Code Pages. For example, in Code Page 1252 (Latin1_General), byte value0xC6equates to «Æ» (Latin Capital Letter AE), but using this method to change to Code Page 1257 (Baltic Rim), the data would show «Ę» (Latin Capital Letter E with Ogonek) because that is what0xC6maps to in that Code Page, even though Code Page 1257 contains «Æ», but having an underlying value of0xAFinstead of0xC6. A true Code Page conversion would have changed the underlying byte value from0xC6to0xAFso that the data would have shown the same character, «Æ», after the operation.
This alone indicates that the operation is not doing any actual string conversions, but instead is merely updating the meta-data for string columns directly to the system catalog tables.
(please also see related item #15 below regarding In-Memory OLTP)
- The following items are completely ignored! It is unclear whether this behavior is intentional (i.e. by design) or an oversight (i.e. nobody has looked as this code since it was first introduced, prior to the existence of these items), but at the very least it’s inconsistent with the «change-everything» approach of this process.
- User-Defined Table Types (UDTTs): Collations for string columns of UDTTs, whether explicitly set using the
COLLATEkeyword in theCREATE TYPEstatement or not (hence using the Database’s default Collation), are not changed by this process. If you need the Collations of the string columns in UDTTs to be the same as the Collation you are updating everything else to, then you will need to manually drop and recreate the UDTTs (there is noALTER TYPE). - Partitioned Tables / Indexes: Collations for string parameters of Partition Functions, whether explicitly set using the
COLLATEkeyword in theCREATE PARTITION FUNCTIONstatement or not (hence using the Database’s default Collation), are not changed by this process. You will need to manually drop and recreate the Partition Functions (ALTER PARTITION FUNCTIONdoes not allow for changing the input parameter). You will not get any errors if you don’t fix the input parameter Collations, and data will insert and update correctly, but the physical partitioning will likely not behave as expected:- Assuming the data is either
VARCHARbut no change of Code Page, orNVARCHAR, then the data will still be partitioned as it was before, even if it shouldn’t be due to changes in sensitivity and/or locale / culture. For example, let’s say that you have aRANGE LEFTpartition function using “FOR VALUES ( 'D', 'H', 'O', 'V' )”. In this case, partition #2 contains values “> D” and “<= H”.- When using the case-insensitive collation of
SQL_Latin1_General_CP1_CI_AI, partition #2 would contain “E,e,F,f,G,g,H,h”. Simple enough, right? - However, when using the case-sensitive collation of
SQL_Latin1_General_CP1_CS_AI, partition #2 would contain “d,E,e,F,f,G,g,H”. This partition now contains lower-case “d”, and does not contain lower-case “h”. This is due to most of the SQL Server collations sorting upper-case before lower-case (Windows collations sort lower-case first).
- When using the case-insensitive collation of
- If data is
VARCHARand the code page is different, then things might get interesting. Any characters with values between 128 and 255 can potentially either: have a different value and/or sort position, be mapped to a similar character because it isn’t available on the code page associated with the collation used for the partition function’s input parameter but has a “best fit” mapping, or it might be missing on the old code page hence it becomes a «?» and sorts as that. Depending on what characters are being used, how they map (if they even do) to the other code page, and how the partition ranges are set up, you can experience anything ranging from “no effect at all” to “really strange and difficult to trace/debug behavior”.
- Assuming the data is either
For help in finding and fixing both of these issues, please see the Finding and Fixing Ignored Objects section below.Please support (i.e. vote for) my suggestion to have Microsoft update this operation to handle these objects: Update Collation of Partition Functions and User-Defined Table Types via SQLSERVR -Q.
- User-Defined Table Types (UDTTs): Collations for string columns of UDTTs, whether explicitly set using the
-
The result set meta-data for User-Defined Table-Valued Functions (TVFs) is updated to the new Collation, even if the column’s Collation is being explicitly set with the
COLLATEkeyword. This happens for both Multi-Statement TVFs and Inline TVFs, though the effect of this change is different between them:- Multi-Statement TVFs use the Collation as recorded in the meta-data. Even if a column is using the
COLLATEkeyword in theRETURNS @{table_name} TABLE ()definition in theCREATE FUNCTIONstatement to explicitly set the Collation, the Collation shown insys.columnsis what will be used. In this case, the behavior of the function will be inconsistent with its definition, and the output might be incorrect (especially forCHAR/VARCHARfields). - Inline TVFs use the Collation as recorded in the definition of the function or source table. Regardless of the Collation shown in
sys.columns, a Collation that is either explicitly set using theCOLLATEkeyword in theSELECTstatement in the function, or specified for a column when selecting from a table, is what will be used. In this case, the behavior of the function will be inconsistent with its meta-data, but the output should be correct.
In both cases, executing
sys.sp_refreshsqlmodulefor the TVF will correct the meta-data shown insys.columns. There will be no behavioral change for Inline TVFs. But, for Multi-Statement TVFs, because the output was based on the meta-data, the behavior will change to be consistent with the function definition.
- Multi-Statement TVFs use the Collation as recorded in the meta-data. Even if a column is using the
- Computed Columns that set the output Collation by using the
COLLATEkeyword, whetherPERSISTEDor not, will have their meta-data updated insys.columns, but the actual Collation used will be whatever was specified in the definition. This is very similar to how Inline TVFs behave, except:- Selecting from the Table will display the following warning in the «Messages» tab:
Metadata stored on disk for computed column '{column_name}' in table '{schema_name}.{column_name}' did not match the column definition. In order to avoid possible index corruption, please drop and recreate this computed column.
This warning will appear when the query referencing the table is not in the plan cache. Once the query is cached, the warning will not be displayed again, for that query, until the plan is evicted from the cache, orDBCC FREEPROCCACHEis executed, etc. - There is no «refresh» system stored procedure that will fix the meta-data. Executing
sys.sp_recompileon the table does not help. Correcting the meta-data requires dropping and recreating the Computed Column.
- Selecting from the Table will display the following warning in the «Messages» tab:
- Contained Databases (i.e. “Partially Contained Database”,
CONTAINMENT = PARTIAL) are handled correctly:- Instance-level meta-data is changed as expected
- Database-level meta-data (
namecolumn in system catalog views) is stillLatin1_General_100_CI_AS_KS_WS_SC(i.e.CATALOG_DEFAULT) - System lookup values (
_desccolumns in system catalog views) are stillLatin1_General_CI_AS_KS_WS(coming from the hiddenmssqlsystemresourceDB) - User data is changed (this includes:
filter_definitioninsys.indexes;collation_nameinsys.columns;collation_nameanddefinitioninsys.computed_columns;definitioninsys.sql_modules;clr_nameinsys.assemblies; etc)
- Instance-level default Collation will not change until all DBs have successfully converted.
- This operation will make no changes at all if the current Instance-level Collation is the same as the new Collation being requested by this operation. This means that if the process converts some Databases but then fails while converting another Database (hence not completing, and not changing the Instance-level Collation), then you cannot «revert» the operation by going back to the original Collation. If the Collation you request using the «
-q» switch is the same as the Instance-level Collation, then running this command-line will simply start the Instance in Single-User mode instead of making any Collation changes. However, you will still be able to make changes to the Database that the error occurred in and repeat the operation for the new Collation.
- To be clear, the Database-level Collation does not affect whether or not the operation will process a Database. Even if a Database’s Collation is the same as the new Collation being requested by this operation, the Database will still be processed.
- While both documented and undocumented methods use the Transaction Log for the dropping and recreating of Indexes, this method sometimes uses less Tran Log space due to not doing Code Page conversions of
VARCHAR/CHAR/TEXTcolumns. Of course, if the old and new Collations use the same Code Page, then the documented method won’t be doing Code Page conversions anyway.
- Unlike the documented «
SETUP.EXE /ACTION=REBUILDDATABASE» method, this method does not drop and recreate the system Databases (requiring a bit of extra work to get the instance back to its original state minus the change in Collation). This could save a good bit of work in terms of restoring Databases, recreating Instance-level objects, SQL Server Agent configuration and jobs, re-applying patches, etc.
-
For memory-optimized tables containing string columns, there are a few issues that might come up:
- The existence of any auto-created statistics (i.e. names starting with «
_WA_Sys_*«) on string columns will most likely cause an error that will stop the Collation update process. Please see next section on “Errors you Might Encounter” (below) for details. - For any characters with values of 128 or above, it is quite likely that those same bytes will refer to different, or possibly even invalid, characters. This is pretty much the same data loss issue as noted above in item #6. For example, if the original Collation is
Korean_100_CI_AS, then the byte sequence of «0xB15A» will produce «켣». If you then use this method to switch to any «_UTF8» Collation, you will end up seeing «�Z» because «0xB1» is an invalid byte sequence in UTF-8, and «0x5A» is valid and is the «Z» character. - What is different with memory-optimized tables (regarding data loss) is that even when there is no data loss, indexes on string columns can easily produce non-obvious, «delayed-reaction» errors (meaning: they do not cause the Collation-update process to fail, and you might not notice them immediately). For memory-optimized tables that persist their data and have data to persist, the Collation update process does not drop and recreate their indexes, which leads to two issues:
- The indexes could, quite likely, be out of order. For example (using a
VARCHARcolumn):
Column Collation ORDER BY Data Notes SQL_EBCDIC297_ CP1_CS_AS column ab ➞ aA ➞ ba ➞ Aa ➞ Ab Initial order French_CI_AS column ab ➞ aA ➞ ba ➞ Aa ➞ Ab Same order French_CI_AS column COLLATE French_CI_AS ab ➞ aA ➞ ba ➞ Aa ➞ Ab Same order French_CI_AS column COLLATE French_100_CI_AS aA ➞ Aa ➞ ab ➞ Ab ➞ ba Correct order As you can see, after the Collation update, ordering by the column (no
COLLATEclause) uses the original sort order because the index hasn’t been rebuilt for the new Collation. And even if you specify theCOLLATEclause with the new Collation in an attempt to force the intended new sort order, it will still return in the original order because specifying the Collation that is defined for the column has no effect at all. But, specifying a Collation that is neither the original Collation nor the new Collation, will return in the order for that Collation because SQL Server knows that it doesn’t have the rows sorted by the new ordering rules, so it applies the specified Collation.Also, you aren’t allowed to manually
REBUILDorREORGANIZEthese either.
ALTER INDEX [IX_ShoppingCart_Name2i] ON dbo.ShoppingCart REBUILD; -- REORGANIZE

/*

Msg 10794, Level 16, State 12, Line XXXXX

The operation 'ALTER INDEX' is not supported with memory optimized tables.

*/
ALTER TABLE dbo.ShoppingCart REBUILD;
/*
Msg 10794, Level 16, State 134, Line XXXXX
The operation 'ALTER TABLE REBUILD' is not supported with memory optimized tables.
*/
DROP INDEX [IX_ShoppingCart_Name2i] ON dbo.ShoppingCart;
/*
Msg 10794, Level 16, State 114, Line XXXXX
The operation 'DROP INDEX' is not supported with memory optimized tables.
*/
In these cases you will need to, at the very least, delete and re-insert the data, or drop and recreate the table(s) and then re-insert the data. - Queries appear to execute correctly, until you add more data. Then, when you use
WHEREorORDER BY, you will likely get one of the following errors:
Msg 9100, Level 21, State 2, Line XXXX

Possible index corruption detected. Run DBCC CHECKDB.

(disconnected!)
Msg 701, Level 17, State 153, Line XXXXX

There is insufficient system memory in resource pool 'default' to run this query.
These errors will disappear once the Instance is resarted (there might be a more elegant way of getting the system to rebuild memory-optimized indexes, but I am not aware of any at the moment). The errors might come back if more rows are added to these tables.
- The indexes could, quite likely, be out of order. For example (using a
- The existence of any auto-created statistics (i.e. names starting with «
PLEASE NOTE
- To avoid unnecessary time, disk I/O, tran log space, etc spent (i.e. wasted) on DBs that are already set to the desired Collation (in terms of both Database-level and all columns that are desired to be using the new Collation), or to skip updating one or more Databases for any reason: detach the Database(s) before shutting the Instance down. Then, after the update, re-attach the Database(s). Unfortunately, you cannot skip a Database by setting it to
OFFLINEsince it will be treated as being «read-only», which causes an error before any Database is converted (though the error message never says which Database(s) are causing the problem).
- To change the collation of a single database (and everything in it), consider the following:
- Install a temporary Instance of the same SQL Server version that you are currently using (if needed, SQL Server Express is free any easy). During the installation, set the instance to use the same default Collation that the current Instance is using (this is not entirely necessary, but should reduce the potential for problems / confusion).
- Detach the Database from the current Instance.
- Attach the Database to the temporary Instance.
- Shut down the temporary Instance.
- Update the Collation of the temporary Instance using «
sqlservr -q«. - Start the temporary Instance.
- Detach the Database from the temporary Instance.
- Attach the Database to its original Instance.
- Uninstall the temporary Instance.
Errors You Might Encounter
- Due to read-only DB (documented in link #4 at the bottom, and can be caused by a Database being
OFFLINE):
Error: 5804, Severity: 16, State: 1
Character set, sort order, or collation cannot be changed at the server level because at least one database is not writable.
Make the database writable, and retry the operation.
- Due to files being read-only (documented in link #4 at the bottom, and can be caused by a Database being
OFFLINE):
Error: 3416, Severity: 20, State: 1
The server contains read-only files that must be made writable before the server can be recollated.
- Due to In-Memory DB (documented in link #4 at the bottom):
Error: 41317, Severity: 16, State: 4
A user transaction that accesses memory optimized tables or natively compiled procedures cannot access more than one user database or databases model and msdb, and it cannot write to master.
(please see “Fix…” immediately below this list)
- Due to In-Memory DB (documented in link #4 at the bottom) and Unique Constraint Violation:
Error: 3434, Severity: 20, State: 1
Cannot change sort order or locale. An unexpected failure occurred while trying to reindex the server to a new collation. SQL
Server is shutting down. Restart SQL Server to continue with the sort order unchanged. Diagnose and correct previous errors and then retry the operation.
(please see “Fix…” immediately below this list)
- Due to Unique Constraint Violation:
Error: 1505, Severity: 16, State: 1.
The CREATE UNIQUE INDEX statement terminated because a duplicate key was found for the object name ‘dbo.UniqueIndexViolation’ and the index name ‘CUIX_UniqueIndexViolation’. The duplicate key value is (a ).
- Due to specifying an invalid Collation for the «
-q» option (including Collations not available in the version of SQL Server being updated; e.g. trying to use a version «100» Collation with SQL Server 2005):- SQL Server 2005, 2008, and 2008 R2 error (specifying
-q"Latin1_General_200_CI_AS"):
2018-08-02 14:24:00.78 Server Error: 17112, Severity: 16, State: 1.
2018-08-02 14:24:00.78 Server An invalid startup option q was supplied, either from the registry or the command prompt. Correct or remove the option. - SQL Server 2017 and 2019 error (specifying
-q"Latin1_General_200_CI_AS"):
An invalid startup option ‘qLatin1_General_200_CI_AS’ was supplied, either from the registry or the command prompt. Correct or remove the option.
2018-08-02 14:07:30.11 Server SQL Server shutdown has been initiated
- SQL Server 2005, 2008, and 2008 R2 error (specifying
Fix for In-Memory OLTP Errors
Errors related to memory-optimized tables are due to non-indexed columns (specifically, columns that are not the leading column in any index) that have auto-created statistics on them. All you need to do is remove these auto-created statistics by using the following query:
DECLARE @DropStats NVARCHAR(MAX) = N'';
SELECT
       @DropStats = @DropStats +
       N'DROP STATISTICS ' + QUOTENAME(OBJECT_SCHEMA_NAME(st.[object_id]))
       + N'.' + QUOTENAME(OBJECT_NAME(st.[object_id]))
       + N'.' + QUOTENAME(st.[name]) + N';' + NCHAR(0x000D) + NCHAR(0x000A)
FROM   sys.stats st
INNER JOIN sys.objects so
        ON so.[object_id] = st.[object_id]
WHERE  st.[auto_created] = 1
AND    so.[is_ms_shipped] = 0
PRINT @DropStats; -- DEBUG
EXEC (@DropStats);
NOTE: This query only fixes the problem that prevents the Collation update process from completing. It does not fix any instances of data loss or potentially corrupted indexes. To fix those problems you still might need to drop/recreate any affected tables or maybe just the data (in any affected tables).
Finding and Fixing Ignored Objects
The effects of this process not updating the following two objects are noted above in item #7, under “What It Does” in the “Undocumented Approach” section.
Please support (i.e. vote for) my suggestion to have Microsoft update this operation to handle these objects: Update Collation of Partition Functions and User-Defined Table Types via SQLSERVR -Q.
User-Defined Table Types (UDTTs)
Unfortunately, there’s no ALTER TYPE statement, so UDTTs containing string columns will need to be dropped and recreated. However, when User-Defined Table Types are used as input parameters to Functions or Stored Procedures, that usage is recorded in system tables. If you attempt to DROP a UDTT that is being used as an input parameter datatype, you will get the following error:
Msg 3732, Level 16, State 1, Line XXXXX
Cannot drop type ‘dbo.TestTable’ because it is being referenced by object ‘TestTable_Param’. There may be other objects that reference this type.
You can find UDTTs that have at least one string column via the following query (which also indicates associated object and parameter names, when applicable):
SELECT QUOTENAME(sch_t.[name]) + N'.' + QUOTENAME(typ_t.[name])
                AS [TableType],
       QUOTENAME(sch_o.[name]) + N'.' + QUOTENAME(obj.[name])
                AS [DependentObject],
       par.[name] AS [ParameterName],
       '--' AS [---],
       typ_t.[user_type_id] AS [TypeID],
       sch_t.[schema_id] AS [TypeSchemaID],
       par.[object_id] AS [DependentObjectID],
       sch_o.[schema_id] AS [DependentObjectSchemaID]
FROM   sys.table_types typ_t -- UDTTs
INNER JOIN sys.schemas sch_t -- table type schemas
        ON sch_t.[schema_id] = typ_t.[schema_id]
LEFT JOIN (
           sys.parameters par -- input parameters
           INNER JOIN sys.objects obj -- objects using the UDTTs
                   ON obj.[object_id] = par.[object_id]
           INNER JOIN sys.schemas sch_o -- object schemas
                   ON sch_o.[schema_id] = obj.[schema_id]
          )
       ON par.[user_type_id] = typ_t.[user_type_id]
WHERE  EXISTS(
              SELECT *
              FROM   sys.columns col -- UDTT columns
              WHERE  col.[object_id] = typ_t.[type_table_object_id]
              AND    col.[collation_name] IS NOT NULL
             )
ORDER BY [TableType], [DependentObject], [ParameterName];
If any rows are returned by that query, do the following:
- Drop dependent object(s), if there are any.
- Drop the User-Defined Data Type (UDTT).
- Recreate the UDTT with the appropriate collation(s).
- Recreate any dependent objects that were dropped in step #1.
Partition Functions
Unfortunately, the ALTER PARTITION FUNCTION statement does not allow for changing any aspect of the input parameter, so Partition Functions with a string input parameter will need to be dropped and recreated. However, Partition Functions are referenced in Partition Schemes, and those are referenced in place of the File Group when creating Tables and Indexes.
If you attempt to DROP a Partition Function that is being used in a Partition Scheme, you will get the following error:
Msg 7706, Level 16, State 1, Line XXXXX
Partition function ‘PartitionFunc’ is being used by one or more partition schemes.
And, if you attempt to DROP a Partition Scheme that is being used in a Table or Index, you will get the following error:
Msg 7717, Level 16, State 1, Line XXXXX
The partition scheme “PartSchm” is currently being used to partition one or more tables.
You can find Partition Functions with string input parameters via the following query (which also indicates associated Partition Schemes, when applicable, and associated Tables / Indexes, when applicable):
SELECT QUOTENAME(fnc.[name]) AS [PartitionFunction],
       prm.[collation_name] AS [CollationName],
       QUOTENAME(psm.[name]) AS [PartitionScheme],
       '--' AS [---],
       QUOTENAME(sch.[name]) + N'.' + QUOTENAME(obj.[name]) AS [TableName],
       CASE
         WHEN ind.[index_id] = 0 THEN N'<heap>'
         WHEN ind.[index_id] > 0 THEN QUOTENAME(ind.[name])
       END AS [IndexName],
       CASE
         WHEN ind.[index_id] = 0 THEN 'Heap'
         WHEN ind.[index_id] = 1 THEN 'Clustered'
         WHEN ind.[index_id] > 1 THEN 'Nonclustered'
       END AS [IndexType],
       CASE
         WHEN ind.[is_primary_key] = 1 THEN 'Primary Key'
         WHEN ind.[is_unique_constraint] = 1 THEN 'Unique'
         WHEN ind.[index_id] IS NOT NULL THEN '<n/a>'
       END AS [ConstraintType],
       CASE
         WHEN ind.[index_id] > 1 AND ind.[is_primary_key] = 0
              AND ind.[is_unique_constraint] = 0 THEN 'DROP'
         WHEN ind.[index_id] = 1 OR ind.[is_primary_key] = 1
              OR ind.[is_unique_constraint] = 1 THEN 'MOVE'
         WHEN ind.[index_id] = 0 THEN 'UNPARTITION'
       END AS [ACTION],
       '--' AS [---],
       ind.[fill_factor],
       ind.[filter_definition],
       fnc.[function_id] AS [PartitionFunctionID],
       psm.[data_space_id] AS [DataSpaceID],
       ind.[object_id] AS [TableObjectID],
       ind.[index_id]
FROM   sys.partition_functions fnc
INNER JOIN sys.partition_parameters prm
        ON prm.[function_id] = fnc.[function_id]
LEFT JOIN sys.partition_schemes psm
       ON psm.[function_id] = fnc.[function_id]
      AND psm.[is_system] = 0
LEFT JOIN (
           sys.indexes ind
           INNER JOIN sys.objects obj
                   ON obj.[object_id] = ind.[object_id]
           INNER JOIN sys.schemas sch
                   ON sch.[schema_id] = obj.[schema_id]
          )
        ON ind.[data_space_id] = psm.[data_space_id]
WHERE  fnc.[is_system] = 0
AND    prm.[collation_name] IS NOT NULL
ORDER BY [PartitionFunction], [PartitionScheme], [TableName], [IndexName];
If any rows are returned by that query, do the following:
- Drop any partitioned Non-Clustered index(es). This must not include Non-Clustered Indexes that were created automatically as part of Non-Clustered Primary Keys or Non-Clustered Unique Constraints!
- Move any partitioned Clustered Indexes (Unique or non-Unique), Primary Keys (Clustered and Non-Clustered), and Unique Contraints (Clustered and Non-Clustered) to a non-partitioned File Group using
DROP_EXISTING = ON. For example:-- Clustered Primary Key (which is always Unique), Clustered -- Unique Constraint, or Clustered Unique Index: CREATE UNIQUE CLUSTERED INDEX [PK_PartitionedInt] ON dbo.[PartitionedInt]([PartitionedIntID]) WITH (DROP_EXISTING = ON, FILLFACTOR = 100, ONLINE = ON) ON [PRIMARY];or:
    -- Non-Clustered Primary Key (which is always Unique), and
    --   Non-Clustered Unique Constraint:
    CREATE UNIQUE NONCLUSTERED INDEX [PK_PartitionCollation]
      ON dbo.[PartitionCollation]([PartitionCol] ASC)
      WITH (DROP_EXISTING = ON, FILLFACTOR = 100, ONLINE = ON)
      ON [PRIMARY];
or:
-- Non-Unique Clustered Index: CREATE CLUSTERED INDEX [IX_PartitionCollation] ON dbo.[PartitionCollation]([PartitionCollationID]) WITH (DROP_EXISTING = ON, FILLFACTOR = 100, ONLINE = ON) ON [PRIMARY]; - Unpartition any partitioned Heaps by creating a Clustered Index on them that is on a non-partitioned File Group:
CREATE CLUSTERED INDEX [CIX_PartitionedHeap_temp] ON dbo.[PartitionedHeap]([PartitionedHeapID]) WITH (FILLFACTOR = 100, ONLINE = ON) ON [PRIMARY]; - Drop the Partition Scheme(s).
- Drop the Partition Function(s).
- Recreate the Partition Function(s).
- Recreate the Partition Scheme(s).
- Partition any Heaps that were originally partitioned. Do this by dropping the temporary Clustered Index using
MOVE TO:DROP INDEX [CIX_PartitionedHeapVarChar_temp] ON [dbo].[PartitionedHeapVarChar] WITH (ONLINE = ON, MOVE TO PartSchm([PartitionCol])); - Move Clustered Indexes, Primary Keys, and Unique Constraints back to their original Partition Schemes. See step #2 above.
- Recreate the remaining Non-Clustered on their original Partition Schemes.
Misc.
SQL Server Express LocalDB
Changing the Instance-level Collation for LocalDB is not possible. It will always be SQL_Latin1_General_CP1_CI_AS (quite unfortunately!):
- SETUP.EXE for LocalDB will not be able to find the LocalDB instance. Using something like
(LocalDB)v12.0for the Instance name will result in the following error:
Instance Name (LOCALDB)V12.0 for product Microsoft SQL Server doesn’t exist. Specify a valid instance name.
Error result: -2068578302
Result facility code: 1204
Result error code: 2
Nor does using “LocalDB” or “v12.0” by themselves work. And yes, I do have av12.0Instance of LocalDB.
- Attempting to use the «
sqlservr -q» option results in one of the following errors, depending on how you specify the Instance name:- Using just the instance name:
Your SQL Server installation is either corrupt or has been tampered with (Error getting instance ID from name.). Please uninstall then re-run setup to correct this problem - Using
(LocalDB)InstanceName:
Your SQL Server installation is either corrupt or has been tampered with (Error: Instance name exceeds maximum length.). Please uninstall then re-run setup to correct this problem
- Using just the instance name:
There is a UserVoice suggestion, however, to allow it to be user-settable: Allow collation to be set for LocalDB at Instance level when creating an instance.
Compatibility Collations
You probably have never heard of «compatibility» Collations, and that is fine (full post on them coming in early 2020). They should only show up when migrating from pre-SQL Server 2000. Most likely nobody outside of myself would ever try this, and I’m only doing it for research / documentation. The «sqlserver -q» method allows you to use a compatibility collation at the Instance-level. Attempting to do this using the documented method results in the following error:
The collation Compatibility_52_409_30002 was not found.
Error result: -2061893630
Result facility code: 1306
Result error code: 2
In-Memory OLTP and UTF-8 Collations (new in SQL Server 2019)
Even though In-Memory OLTP was mentioned in item #15 in the «Undocumented Approach» section above, this is a special case.
The new UTF-8 Collations, introduced in SQL Server 2019, are not supported for using in memory-optimized tables. Attempting to CREATE or ALTER tables to use UTF-8 Collations will result in one of the following errors:
Msg 12356, Level 16, State 157, Line XXXXX
Comparison, sorting, and manipulation of character strings that use a UTF8 collation is not supported with memory optimized tables.
or:
Msg 12357, Level 16, State 158, Line XXXXX
Indexes on character columns that use a UTF8 collation are not supported with indexes on memory optimized tables.
Using the «sqlservr -q» approach will by-pass those restrictions and update memory-optimized tables to use UTF-8 Collations (assuming you specified a UTF-8 Collation). For memory-optimized tables that either have no data or are only persisting the schema (i.e. DURABILITY = SCHEMA_ONLY), this might work. I have not done extensive testing. But, even if testing does seem to indicate that it works as expected, this is still an unsupported configuration (so don’t expect any help from Microsoft if there is odd / incorrect behavior with a UTF-8 Collation in a memory-optimized table).
External Posts Dealing With the Undocumented «sqlservr -q» Option
These are posts I found (on other blogs) that mention this option:
- Changing Server Collation ( 2011-05-26 )
- Changing SQL Server Collation After Installation ( 2015-02-19 )
- SQL Server – Changing Sql Instance Collation – via sqlservr/-q ( 2016-11-04 ; based on post linked directly above)
- SQL Server – Changing Sql Instance Collation – via sqlservr/-q – Little Traps ( 2017-01-08 ; follow-up to post linked directly above)
- Change SQL Server Collation – Back to Basics ( 2018-04-12 )
Testing
I tested on SQL Server 2017 CU6 and SQL Server 2019 CTP 2.1+, but the behavior should be consistent across versions.
General
{ When I have time I will post the test cases }
LocalDB
SETUP
sqllocaldb c TestChange

CD C:Program FilesMicrosoft SQL Server140LocalDBBinn
TEST 1
.sqlservr -c -m -T4022 -T3659 -s"TestChange" -q"Hebrew_100_CI_AS"

REM Your SQL Server installation is either corrupt or has been tampered
REM with (Error getting instance ID from name.).  Please uninstall then
REM re-run setup to correct this problem
TEST 2
.sqlservr -c -m -T4022 -T3659 -s"(LocalDB)TestChange" -q"Hebrew_100_CI_AS"

REM Your SQL Server installation is either corrupt or has been tampered
REM with (Error: Instance name exceeds maximum length.).  Please
REM uninstall then re-run setup to correct this problem
TEST 3
CD C:Program FilesMicrosoft SQL Server120Setup BootstrapSQLServer2014

.SETUP.EXE /ACTION=REBUILDDATABASE /INSTANCENAME="(LocalDB)v12.0" ^
/QUIET /SQLCOLLATION=Latin1_General_100_CI_AS

REM Instance Name (LOCALDB)V12.0 for product Microsoft SQL Server
REM doesn't exist. Specify a valid instance name.
REM
REM Error result: -2068578302
REM Result facility code: 1204
REM Result error code: 2
Compatiblity Collations
TEST 1
SETUP.EXE /QUIET /ACTION=REBUILDDATABASE /INSTANCENAME=SQL2019 ^
/SQLCOLLATION=Compatibility_52_409_30002

REM The collation Compatibility_52_409_30002 was not found.
REM
REM Error result: -2061893630
REM Result facility code: 1306
REM Result error code: 2
TEST 2
.sqlservr -c -m -T4022 -T3659 -s"{InstanceName}" ^
-q"Compatibility_55_409_30002"

REM Success!!
In-Memory OLTP and UTF-8 Collations
SETUP
CREATE DATABASE [Hekaton] COLLATE Japanese_XJIS_140_CI_AS_VSS;
ALTER DATABASE [Hekaton] SET RECOVERY SIMPLE;

ALTER DATABASE [Hekaton]
   ADD FILEGROUP [InMemoryStuff]
   CONTAINS MEMORY_OPTIMIZED_DATA;

ALTER DATABASE [Hekaton]
   ADD FILE (name = N'InMemoryStuff', filename =
   'C:Program FilesMicrosoft SQL ServerMSSQL15.SQL2019MSSQLDATAInMemoryStuff.idf')
   TO FILEGROUP [InMemoryStuff];

USE [Hekaton];
TEST 1
Specify a UTF-8 Collation when creating the table (no index specified for the column attempting the UTF-8 Collation):
CREATE TABLE dbo.UTF8
(
    [ID] INT IDENTITY(1, 1)
        NOT NULL
        PRIMARY KEY NONCLUSTERED HASH WITH (BUCKET_COUNT = 400),
    [Name] VARCHAR(50) COLLATE Latin1_General_100_CI_AS_SC_UTF8
        NOT NULL
)
WITH (MEMORY_OPTIMIZED = ON);
/*
Msg 12356, Level 16, State 157, Line XXXXX
Comparison, sorting, and manipulation of character strings that use
   a UTF8 collation is not supported with memory optimized tables.
*/
TEST 2
Create the table with a non-UTF-8 Collation, then attempt to change the Collation via ALTER TABLE:
CREATE TABLE dbo.UTF8
(
    [ID] INT IDENTITY(1, 1)
        NOT NULL
        PRIMARY KEY NONCLUSTERED HASH WITH (BUCKET_COUNT = 400),
    [Name] VARCHAR(50) COLLATE Latin1_General_100_CI_AS_SC -- NOT UTF8
        NOT NULL
)
WITH (MEMORY_OPTIMIZED = ON);
-- Success

ALTER TABLE dbo.[UTF8]
    ALTER COLUMN [Name]
    VARCHAR(50) COLLATE Latin1_General_100_CI_AS_SC_UTF8 NOT NULL;
/*
Msg 12356, Level 16, State 157, Line XXXXX
Comparison, sorting, and manipulation of character strings that use
   a UTF8 collation is not supported with memory optimized tables.
*/
However, changing the Collation to a non-UTF-8 Collation does work.
TEST 3
Specify a UTF-8 Collation when creating the table (include an index for the column attempting the UTF-8 Collation):
CREATE TABLE dbo.UTF8i
(
    [ID] INT IDENTITY(1, 1)
        NOT NULL
        PRIMARY KEY NONCLUSTERED HASH WITH (BUCKET_COUNT = 400),
    [Name] VARCHAR(50) COLLATE Latin1_General_100_CI_AS_SC_UTF8
        NOT NULL INDEX [IX_UTF8i_Name] NONCLUSTERED
)
WITH (MEMORY_OPTIMIZED = ON);
/*
Msg 12357, Level 16, State 158, Line XXXXX
Indexes on character columns that use a UTF8 collation are not
   supported with indexes on memory optimized tables.
*/
More…
For more info on Collations / encodings / Unicode / Extended ASCII (especially as they relate to Microsoft SQL Server), please visit:
Collations.Info