Среда разработки для плат семейства Ардуино – Arduino IDE – имеет весьма скромный и неброский вид. Многим хотелось бы настроить её под себя, но, к сожалению, пока что эта возможность отсутствует. По крайней мере, средствами самой среды разработки. Однако такая возможность всё же есть. Давайте посмотрим, как настроить внешний вид среды Arduino IDE.
Инструкция по настройке внешнего вида среды Arduino IDE
1 Внешний вид Arduino IDE по умолчанию
Давайте посмотрим, как выглядит стандартная цветовая схема IDE. Так выглядит среда разработки при первом запуске после скачивания с официального сайта Ардуино. Голубые панели, белое поле для редактирования текста, жёлтая подсветка, серые комментарии, ключевые слова и методы голубые и оранжевые, процедуры цвета хаки и т.д.

2 Соответствие частей интерфейса Arduino IDEразделам файла theme.txt
Все настройки внешнего вида IDE хранятся в файле %папка_Arduino_IDE%libthemetheme.txt. В нём описаны все настройки шрифтов и цветов. Их много, давайте откроем данный файл и рассмотрим его содержимое подробнее. Все параметры разделены на группы. Вот какие:
| Название группы | Соответствие интерфейсу IDE |
|---|---|
| # GUI — STATUS | цвета и шрифты поля статуса |
| # GUI — TABS | вкладки |
| # GUI — CONSOLE | поле консоли |
| # GUI — BUTTONS | кнопки |
| # GUI — LINESTATUS и # LINE STATUS | строка статуса |
| # EDITOR — DETAILS | параметры поля текстового редактора |
| # TEXT — KEYWORDS | цвета ключевых слов (функций, методов и структур) |
| # TEXT — LITERALS | константы, литералы |
| # TEXT — COMMENTS | комментарии |
На иллюстрации показано соответствие деталей интерфейса программы разделам файла theme.txt.

3 Изменение вешнего видаArduino IDE
Чтобы поменять внешний вид Arduino IDE, нужно закрыть среду разработки, если она открыта, открыть любым текстовым редактором файл theme.txt, поменять нужные значения на желаемые, сохранить файл. Теперь снова запускаем IDE – вуаля, новые настройки стиля применены автоматически. Давайте изменим некоторые параметры, чтобы увидеть всё наглядно.
Все параметры имеют смысловые названия, так что понятно, что за что отвечает. Например, параметры editor.bgcolor, editor.fgcolor и editor.comment1.style отвечают за цвет фона текстового редактора, цвет шрифта и цвет комментариев, соответственно. Давайте изменим несколько параметров, сохраним файл theme.txt и перезапустим Arduino IDE.Вот как теперь выглядит среда разработки для Ардуино.

Теперь вы знаете, как настроить среду разработки для Ардуино полностью на свой вкус.
Полезный совет
Сделайте резервную копию файла theme.txt, прежде чем экспериментировать с настройками стилей.
В той же директории %папка_Arduino_IDE%libtheme находятся иконки кнопок в виде графических файлов; при желании их можно изменить в графическом редакторе.
If you use Arduino frequently, the default interface can feel monotonous and boring. Against a white background, the text may be hard to read. Ever thought of adding more color and variety to your IoT development? For this, you should be able to customize your Arduino IDE with different background themes, colors, and font schemes.
As the following steps illustrate, it’s actually quite easy to personalize your Arduino IDE experience. Whether you prefer a Count Dracula dark theme or an ocean-green font style, we have you covered. There’s no need for any advanced programming editors, such as command shell, Atom, or Notepad++.
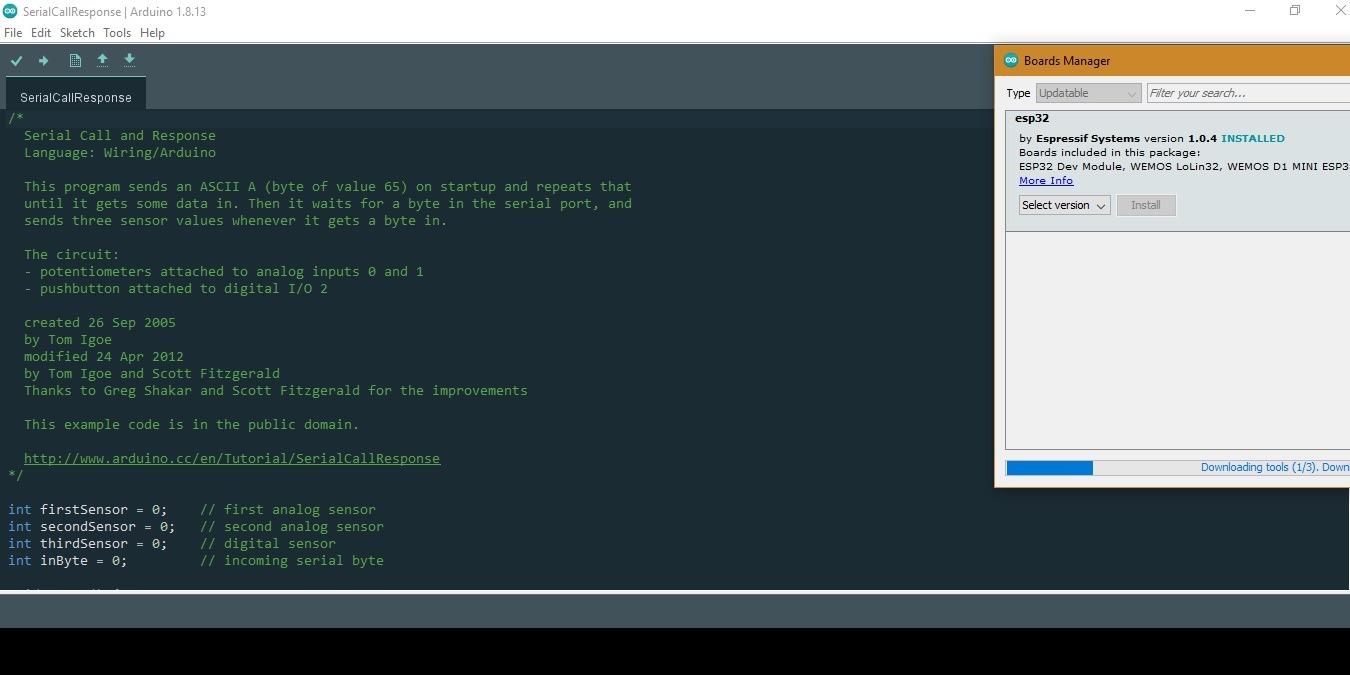
Arduino has recently launched its 2.0 version, which is currently in Beta. We’ve covered the steps on how to download and install it for Windows. The new version supports more advanced capabilities of text editing and a neat, uncluttered interface. It also comes with built-in themes, which don’t exist in the present Arduino 1.8.13.
To access these new themes in Arduino 2.0, go to “File -> Preferences.” There are four different themes to choose from: light (theia) – which is default, light (arduino), dark (theia), and high contrast (theia).
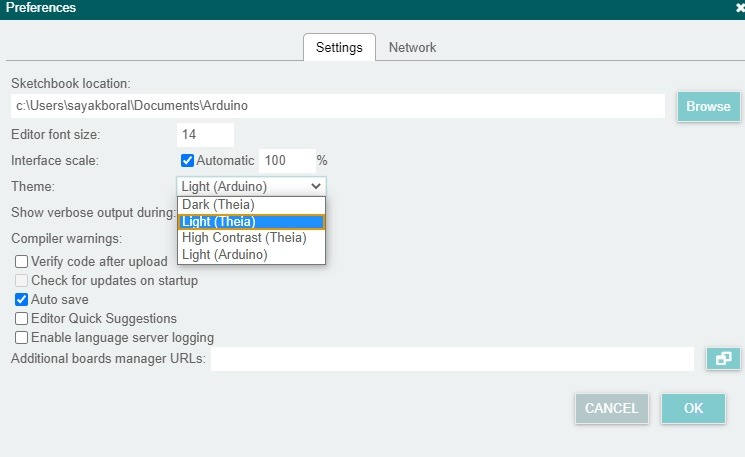
You can also change font size here – but not the font style which we have covered separately below. The following screen is for Arduino 2.0’s dark (theia) theme. As shown, the pitch-dark background offers a stunning contrast to the light-green font.
If you want even more contrast, use the High Contrast theme, which uses white text against a slate-black background. This is indeed very clear compared to the default light background due to more evenness in spacing.
All this feels good, but let us remember version 2.0 is still in beta. Apart from the limitations of just four themes, Arduino version 2.0 can still feel buggy, unresponsive and slow. That’s why it’s important to be able to customize the latest, fully-tested Arduino IDE.
How to Change Background Theme in Arduino IDE
The following screen illustrates the challenge in changing the theme with the present Arduino version, 1.8.13. Once you access Preferences, you will find out that no extra themes have been provided here.
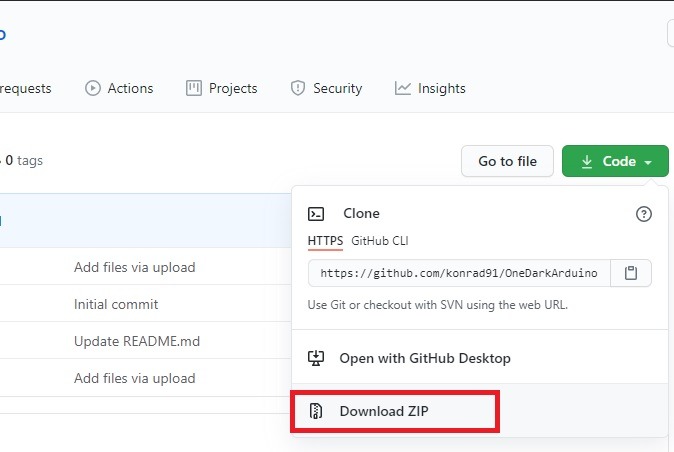
The only way to change the theme to say, a dark one, requires using another theme from an outside source. The Arduino store recommends a theme repository called “One dark Arduino.” It can be downloaded here.
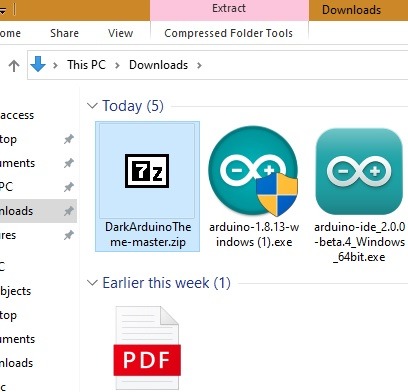
Just download the ZIP file in the link and open it with your favorite ZIP extractor. Keep it aside for a moment.
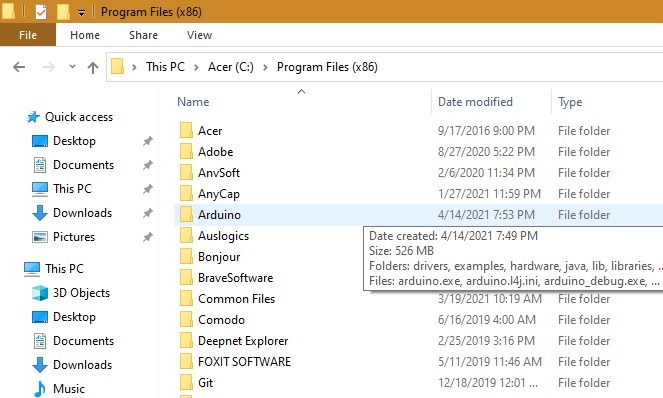
Next, locate your Arduino .exe file. It can be found in the folder where you installed the Arduino software.
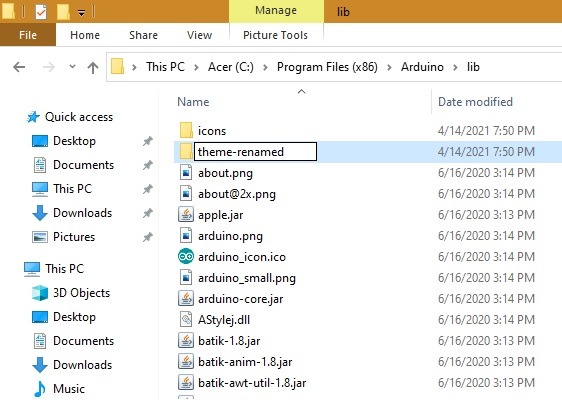
Go deep inside this folder down “lib,” and you’ll find a subfolder named “theme.” It can be easily renamed to anything else, as shown here.
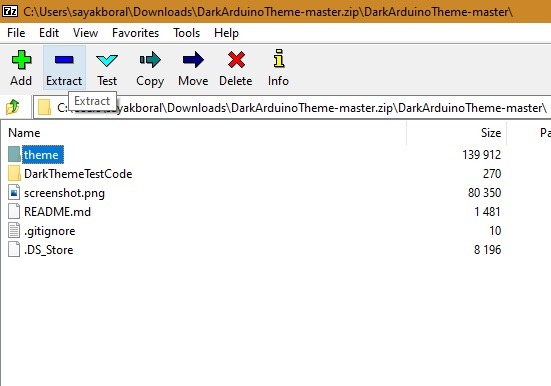
After renaming the theme folder, go back to where you downloaded the zipped file for the new dark theme. Open it using your favorite Zip extractor software.
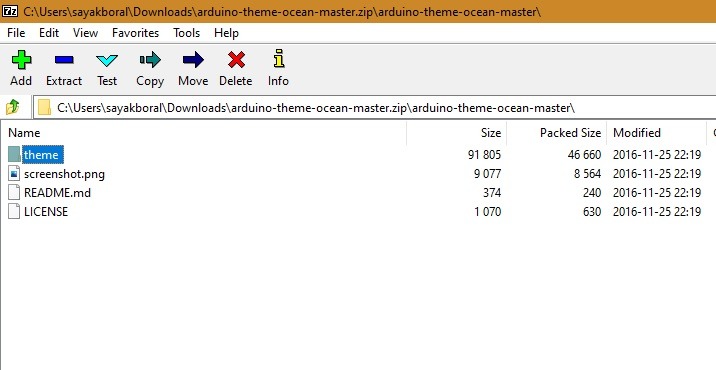
Once inside, you can find an identically-named subfolder, “theme,” buried inside the “DarkArduinoTheme-Master” subfolder. Extract this and save it on another PC location different from your ZIP file.
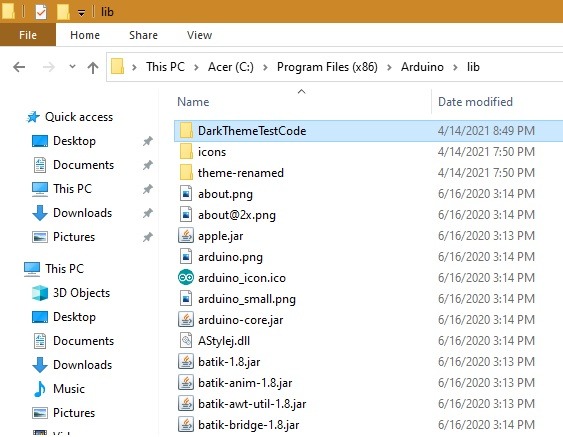
Copy-paste the entire “theme” folder containing the new dark theme to your destination folder in Arduino lib. As shown here, the original theme folder was already renamed to something else.
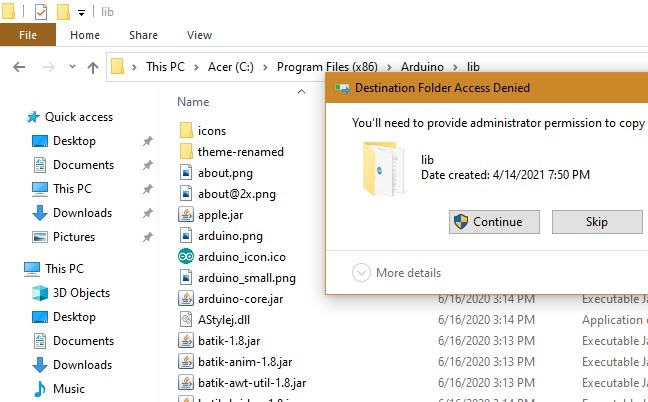
You may need to provide separate administrator permission to copy the new folder in the Arduino default categories. Click Continue to proceed. The new dark theme subfolder has successfully replaced the older default subfolder.
Typical Error Screens in New Arduino Themes
It’s highly recommended to save the extracted theme subfolder in a different location from where you downloaded the online ZIP file. For example, if you saved the original ZIP file to your “Downloads” folder, save the extracted theme in “Desktop.”
If you save it to the same location, you may later encounter an error called “cannot read color theme settings” while running Arduino. Just un-rename the default theme subfolder, and the IDE should open once again.
How to Change Font Style and Colors in Arduino IDE
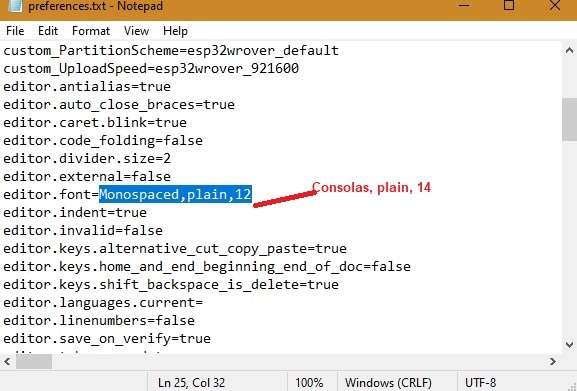
Before seeing the effect of the new theme in Arduino IDE, let’s calibrate the font style and colors a bit. Again, go back to Preferences from the File menu and click a link related to the preferences text folder.
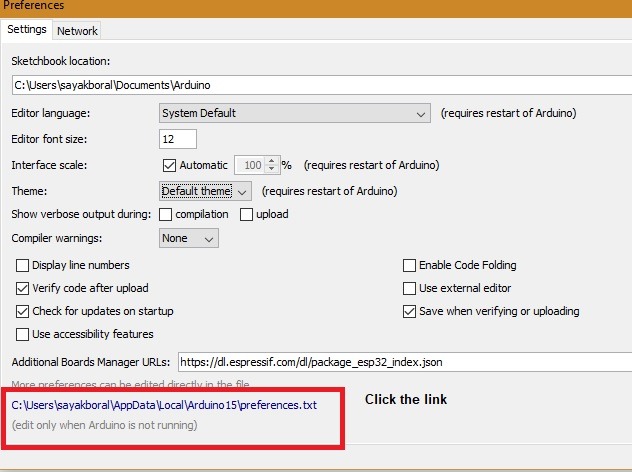
The subfolder containing the Preferences text file will open in its new location. Open the text file in Notepad.
Use Ctrl + F with search term “font” and replace the editor.font property from “Monospaced, plain, 12” to “Consolas, plain, 14.” Of course, you can experiment a bit more with the font style. Whether you like “Times New Roman” or “Arial,” this is where you can change it.
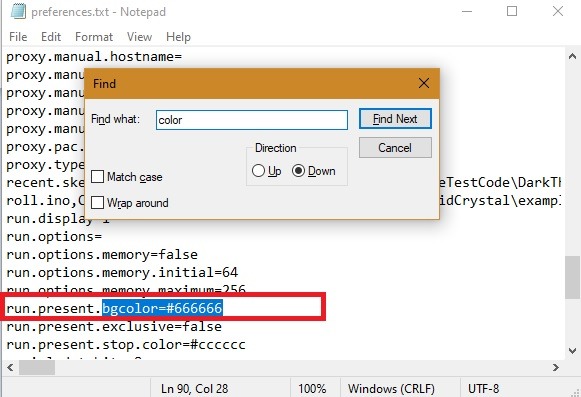
To change the color scheme a bit, use Ctrl + F with search term “color” and identify the run.present.bgcolor property from its default color. As shown here, it’s set at “#666666,” which is a very dark color.
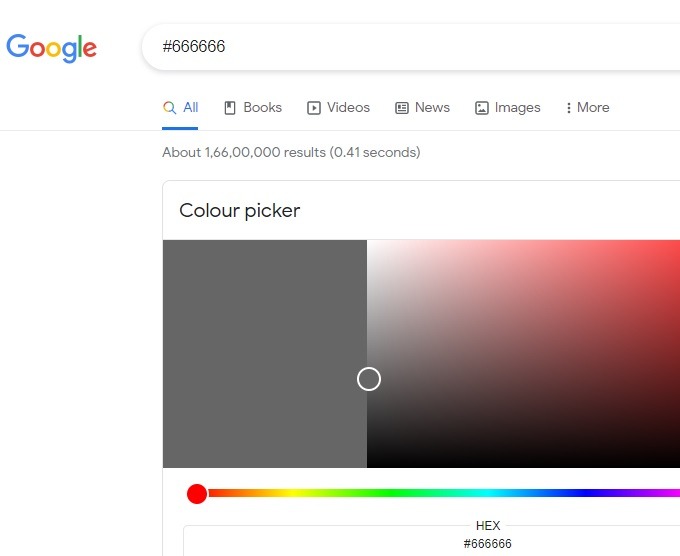
To tweak the background color settings, run a simple Google search for the color term you found in the code snippet. Here, I have used Google’s color picker to change the run.present.bgcolor property from “#666666” to “#6e6e6e.”
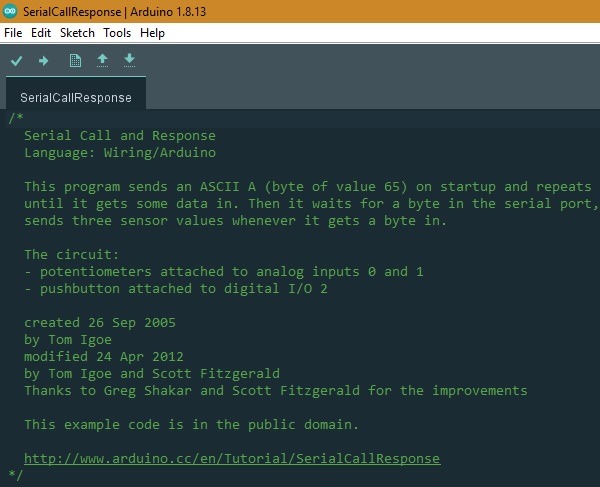
Applying New Themes in Arduino 1.8.13
After changing the background theme subfolder and color/font properties as shown in the above sections, you’ll get a whole new dark theme in Arduino 1.8.13.
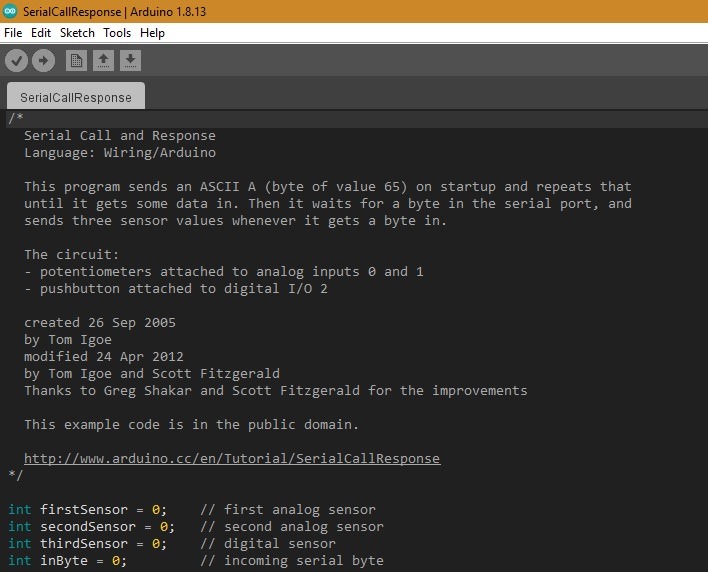
Let’s repeat the entire procedure above for an Arduino-theme Ocean. The download link can be found here.
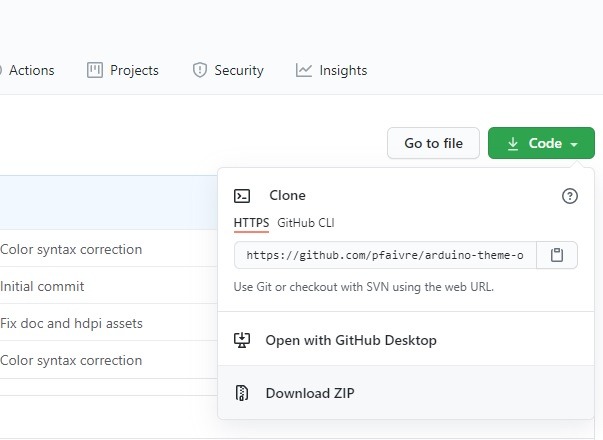
Again, after unzipping, you have to extract a subfolder named “theme” (shown here), which is then copy-pasted in the Arduino lib subfolder (provided the original theme subfolder was renamed). The same procedure can be repeated wherever you find a zipped folder related to Arduino themes.
For the above link, enjoy the new beautiful ocean-like interface for Arduino 1.8.3.
List of Interesting Arduino IDE Themes
We discussed above the detailed procedure of how to change the default theme, colors, and font scheme for Arduino IDE. There are many useful themes you can find on websites,such as GitHub. Here is a small yet interesting list.
- Count Dracula theme
- Solarized and Dark Ice theme
- Trident theme
- Dark theme by Tauno
- Pirates of the Caribbean theme (with song)
- Pan Galactic Tech personalized dark theme
- Arduino Gray theme – enough of dark, why not try another console, such as gray
- Tetris theme – Tetris lovers will enjoy it quite a bit
Are you new to Arduino? Check out our exhaustive list of tutorials on it and other boards, including Raspberry Pi.
Subscribe to our newsletter!
Get the best of IoT Tech Trends delivered right to your inbox!

Sayak Boral
IoT-addicted since early 2016. Love to explore the challenges, opportunities and trend insights into what is becoming the third wave of Internet.
This is article is kind of help to make the default Arduino IDE somewhat sober-looking like Microsoft Visual Studio Code’s colour schemes for Arduino. Yes, autocompletion on Arduino IDE is not impossible. Here is how to change the theme, font, syntax highlighting of Arduino IDE and some ready to use themes matching with your iTerm scheme! The Arduino IDE is simply just basic, otherwise, it is not exactly bad to push a code faster.

We are dividing the thing in to two matters :
- Installing custom build of Arduino IDE
- Customizing Theme, Font, Syntax Highlighting of Arduino IDE
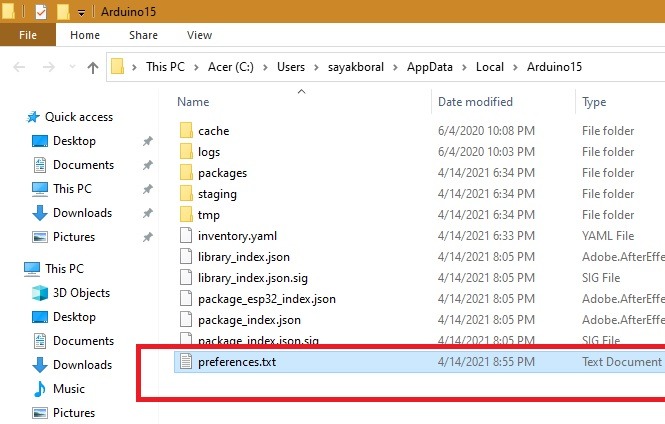
The second way is for already installed Arduino IDE. The method is very easy. In case of Mac, inside ~/Applications/Arduino.app/Contents/Java/lib there is theme directory and files like preferences.txt. We need to replace the files in those directories with custom ones of course after making a copy of the original. This contains lots of changes, including all the button files, fonts etc. That path for Microsoft Windows is C:/Program Files (x86)/Arduino/lib. In Linux it will be in /usr/share/arduino/lib/. Otherwise, the thing is the same. There is an existing font directory inside like ../java/lib/fonts. If you want to change the fonts too, you need to place the desired font’s OTF or TTF files, change the preferences file to match the new font.
Restarting the IDE works fine. We have a good collection of Arduino themes on Github :
|
https://github.com/AbhishekGhosh/Arduino—Themes |
Installing a custom build of Arduino IDE is difficult to work and for matters like getting autocompletion feature. From Arduino Forum :
|
http://forum.arduino.cc/index.php?topic=134198.0 |
We came to know that this custom build repo of Arduino IDE has autocompletion :
|
https://github.com/ricardojlrufino/Arduino/tree/master https://github.com/arduino/Arduino/pull/3484 |
That developer has a different set of codes, so there will be some custom functions. In case you want to install it, for Mac you have to run :
|
brew install git brew tap caskroom/cask brew cask install java brew install ant # set java home properly from profile file like ~/.zshrc cd ~ git clone https://github.com/ricardojlrufino/Arduino.git cd Arduino cd build ant dist ant run |
That beautiful “screenshot” in this article is “imagination of Artist” (read sketch) :
|
https://dribbble.com/shots/1583301—Arduino—IDE—Redesign |
P.S.: Strangely, 40,000 peoples read this post in 3 years! I have not written this guide so seriously.
Tagged With change font color in arduino programmer windows 10 , arduino ide themes , arduino themes , arduino ide syntax highlighting , themes arduino ide , темная тема ардуино иде visual code , arduino ide highlight , arduino ide themes setting , arduino ide windows 10 changing the font , arduino theme
Подскажите как в программе Arduino IDE увеличить размер шрифта в текстовом редакторе, все перепробовал, не могу найти (
Цвета отредактировал так как и хотел, но вот скобки и цифры остались черными, подскажите как исправить?
#FUNCTIONS COLOR #D35400 — ORANGE KEYWORD1
#FUNCTIONS COLOR #D35400 — ORANGE KEYWORD2
#STRUCTURE COLORS #728E00 — GREEN KEYWORD3
#CONSTANTS COLOR #00979C — BLUE LITERAL1
#VARIABLES COLOR #00979C — BLUE LITERAL2
#ERROR COLOR #A61717 — RED
#COMMENTS // COLOR #95A5A6 — LIGHT GREY
#COMMENTS /**/ COLOR #434F54 — GREY
# GUI — STATUS
status.notice.fgcolor = #002325
status.notice.bgcolor = #17A1A5
status.error.fgcolor = #FFFFFF
status.error.bgcolor = #E34C00
status.edit.fgcolor = #000000
status.edit.bgcolor = #F1B500
status.font = SansSerif,bold,15
# GUI — TABS
# (tab images are stored in the lib/theme folder)
header.bgcolor = #2B2B2B
header.text.selected.color = #FF0000
header.text.unselected.color = #000000
header.text.font = SansSerif,bold,15
# GUI — CONSOLE
console.font = Monospaced,plain,15
console.font.macosx = Monaco,plain,14
console.color = #000000
console.output.color = #eeeeee
console.error.color = #E34C00
# GUI — BUTTONS
buttons.bgcolor = #006468
buttons.status.font = SansSerif,plain,15
buttons.status.color = #ffffff
#
GUI — PLOTTING
plotting.bgcolor = #ffffff
plotting.color = #ffffff
plotting.gridcolor = #f0f0f0
plotting.boundscolor = #0000ff
plotting.graphcolor.size = 15
plotting.graphcolor.00 = #0000FF
plotting.graphcolor.01 = #FF0000
plotting.graphcolor.02 = #009900
plotting.graphcolor.03 = #FF9900
plotting.graphcolor.04 = #CC00CC
plotting.graphcolor.05 = #666666
plotting.graphcolor.06 = #00CCFF
plotting.graphcolor.07 = #FF00FF
# GUI — LINESTATUS
linestatus.color = #ffffff
linestatus.bgcolor = #006468
#
EDITOR — DETAILS
#
foreground and background
colors
editor.fgcolor = #00FF00
editor.bgcolor = #2B2B2B
#
highlight for the current line
editor.linehighlight.color=#FFFFFF
#
highlight for the current line
editor.linehighlight=false
#
caret blinking and caret color
editor.caret.color = #00FFFF
#
color to be used for background when ‘external editor’ enabled
editor.external.bgcolor = #FFFFFF
#
selection color
editor.selection.color = #4169E1
#
area that’s not in use by the text (replaced with tildes)
editor.invalid.style = #7e7e7e,bold
#
little pooties at the end of lines that show where they finish
editor.eolmarkers = false
editor.eolmarkers.color = #999999
#
bracket/brace highlighting
editor.brackethighlight = true
editor.brackethighlight.color = #006699
# TEXT — KEYWORDS
#
FUNCTIONS
editor.keyword1.style = #00FF00,bold
editor.data_type.style = #00FF00,bold
#
METHODS
editor.keyword2.style = #00FF00,plain
editor.function.style = #00FF00,plain
#
STRUCTURES
editor.keyword3.style = #00FFFF,plain
editor.reserved_word.style = #00FFFF,plain
#
TEXT — LITERALS
editor.literal1.style = #00FFFF,plain
editor.literal2.style = #00FFFF,plain
editor.variable.style = #E34C00,plain
editor.reserved_word_2.style = #00FFFF,plain
editor.literal_boolean.style = #00FFFF,plain
editor.literal_char.style = #00FFFF,plain
editor.literal_string_double_quote.style = #00FFFF,plain
editor.preprocessor.style = #00FFFF,plain
# http://www.arduino.cc/
editor.url.style = #0000FF,underlined
# e.g. + — = /
editor.operator.style = #00FF00,plain
# ?? maybe this is for words followed by a colon
# like in case statements or goto
editor.label.style = #FF1493,bold
# TEXT — COMMENTS
editor.comment1.style = #FFFF00,plain
editor.comment2.style = #FFFFFF,plain
# LINE STATUS — editor line number status bar at the bottom of the screen
linestatus.font = SansSerif,plain,14
linestatus.height = 18