Классы Font и SysFont находятся в модуле pygame.font и предназначены для работы со шрифтами и текстом. Чтобы создавать от этих классов объекты, модуль pygame.font необходимо предварительно инициализировать командой pygame.font.init(), или выполнить инициализацию всех вложенных модулей библиотеки Pygame командой pygame.init().
От классов pygame.font.Font и pygame.font.SysFont создаются объекты-шрифты. Второй класс берет системные шрифты, поэтому конструктору достаточно передать имя шрифта. Конструктору Font надо передавать имя файла шрифта. Например:
pygame.font.SysFont('arial', 36)
pygame.font.Font('/адрес/Arial.ttf', 36)
Пример полного адреса в системе Linux – «/usr/share/fonts/truetype/msttcorefonts/Arial.ttf».
Второй аргумент – это размер шрифта в пикселях.
Узнать, какие шрифты есть в системе, можно с помощью функции get_fonts():
>>> pygame.font.get_fonts()
['cmmi10', 'umeminchos3', 'kacstbook' ...
Узнать адрес конкретного шрифта:
>>> pygame.font.match_font('verdana')
'/usr/share/fonts/.../Verdana.ttf'
Вы можете скопировать шрифт в каталог программы и обращаться к нему без адреса:
pygame.font.Font('Verdana.ttf', 24)
В pygame есть шрифт по-умолчанию. Чтобы использовать его, вместо имени файла в конструктор надо передать объект None:
pygame.font.Font(None, 24)
От обоих классов (Font и SysFont) создаются объекты типа Font.
Метод render() экземпляра Font создает поверхность (экземпляр Surface), на которой «написан» переданный в качестве аргумента текст, шрифтом, к которому применяется метод. Вторым аргументом указывается сглаживание, третьим – цвет текста. При необходимости четвертым аргументом можно указать цвет фона.
import pygame
import sys
pygame.font.init()

sc = pygame.display.set_mode((300, 200))
sc.fill((255, 255, 255))

f1 = pygame.font.Font(None, 36)
text1 = f1.render('Hello Привет', True,
                  (180, 0, 0))

f2 = pygame.font.SysFont('serif', 48)
text2 = f2.render("World Мир", False,
                  (0, 180, 0))

sc.blit(text1, (10, 50))
sc.blit(text2, (10, 100))
pygame.display.update()

while 1:
    for i in pygame.event.get():
        if i.type == pygame.QUIT:
            sys.exit()
Рассмотрим такой пример:
import pygame as pg
import sys
pg.init()

sc = pg.display.set_mode((400, 300))
sc.fill((200, 255, 200))

font = pg.font.Font(None, 72)
text = font.render(
    "Hello Wold", True, (0, 100, 0))
place = text.get_rect(
    center=(200, 150))
sc.blit(text, place)

pg.display.update()

while 1:
    for i in pg.event.get():
        if i.type == pg.QUIT:
            sys.exit()

    pressed = pg.key.get_pressed()
    if pressed[pg.K_LEFT]:
        place.x -= 1
    elif pressed[pg.K_RIGHT]:
        place.x += 1

    sc.fill((200, 255, 200))
    sc.blit(text, place)

    pg.display.update()

    pg.time.delay(20)
Вспомним, что метод get_rect() экземпляра Surface возвращает объект типа Rect, чьи размеры соответствуют размерам поверхности.
Поскольку у самой поверхности нет собственных свойств-координат на родительском окне, а у Rect они есть, то по умолчанию, если get_rect() применяется без аргументов, для его верхнего левого угла устанавливаются координаты (0, 0).
В нашем примере мы передаем в get_rect() значение для свойства center порождаемой прямоугольной области. Это свойство определяет координаты центра экземпляра Rect (то, что это еще и центр главного окна, неважно). При этом остальные координаты, в том числе координаты верхнего левого угла, вычисляются автоматически, исходя из установленного центра и размеров поверхности.
Поэтому, когда вызывается метод blit(), в который в качестве второго аргумента передается созданный экземпляр Rect, то из последнего берутся координаты верхнего левого угла. Но они уже не (0, 0), а имеют значения, которые равны свойству centerx минус половина ширины и centery минус половина высоты прямоугольной области или соответствующей ей поверхности.
При зажиме стрелок на клавиатуре координата x прямоугольника меняется. В результате метод blit() рисует поверхность в новых координатах.
Практическая работа
У объектов Rect есть метод contains(), который проверяет, заключает ли в себе одна область (к которой применяется метод) другую (которая передается в качестве аргумента).
Напишите программу, в которой, если одна поверхность попадает в пределы другой, то на главной поверхности появляется какая-либо надпись. «Подвижный» экземпляр Surface должен переноситься с помощью мыши.
Курс с примерами решений практических работ:
pdf-версия, android-приложение
Improve Article
Save Article
Improve Article
Save Article
In this article, we will see how to play with texts using the Pygame module. We will be dealing here with initializing the font, rendering the text, editing the text using the keyboard, and adding a blinking cursor note.
Installation
To install this module type the below command in the terminal.
pip install pygame
Font Initialization
Now we can proceed further with the font initialization part. The pygame.font.init() method is used to initialize the font and the pygame.font.get_init() method is used to check whether the font has been initialized or not. Both of the methods do not require any argument. If the font has been initialized successfully then pygame.font.get_init() method returns true.

Printing Text on Window
Here we will see how to get customized font and text on the screen. We will set the position of the texts’ to be displayed on the screen using x and y coordinates. First, we will create the font files and then render the texts. The screen. blit() function is used for copying the text surface objects to the display surface objects at the center coordinates.
Python3
import pygame
pygame.font.init()
pygame.font.get_init()
display_surface = pygame.display.set_mode((500, 500))
pygame.display.set_caption('Our Text')
font1 = pygame.font.SysFont('freesanbold.ttf', 50)
font2 = pygame.font.SysFont('chalkduster.ttf', 40)
text1 = font1.render('GeeksForGeeks', True, (0, 255, 0))
text2 = font2.render('GeeksForGeeks', True, (0, 255, 0))
textRect1 = text1.get_rect()
textRect2 = text2.get_rect()
textRect1.center = (250, 250)
textRect2.center = (250, 300)
while True:
display_surface.fill((255, 0, 0))
display_surface.blit(text1, textRect1)
display_surface.blit(text2, textRect2)
for event in pygame.event.get():
if event.type == pygame.QUIT:
pygame.quit()
quit()
pygame.display.update()
Output:

Cursor Input on Window
We are going to add Blinking Cursor Note here. Our cursor will continue blinking after every 0.5 sec. We can also edit our text.
Python3
import pygame
import time
pygame.init()
display_screen = pygame.display.set_mode((500, 500))
text = 'Hello Guys!!'
font = pygame.font.SysFont(None, 40)
img = font.render(text, True, (255, 0, 0))
rect = img.get_rect()
rect.topleft = (20, 20)
cursor = pygame.Rect(rect.topright, (3, rect.height))
running = True
while running:
for event in pygame.event.get():
if event.type == pygame.QUIT:
running = False
if event.type == pygame.KEYDOWN:
if event.key == pygame.K_BACKSPACE:
if len(text) > 0:
text = text[:-1]
else:
text += event.unicode
img = font.render(text, True, (255, 0, 0))
rect.size = img.get_size()
cursor.topleft = rect.topright
display_screen.fill((200, 255, 200))
display_screen.blit(img, rect)
if time.time() % 1 > 0.5:
pygame.draw.rect(display_screen, (255, 0, 0), cursor)
pygame.display.update()
pygame.quit()
Output:

Input Box on Window
Here we will see how to read the text using the keyboard in pygame. We are going to show our text inside a rectangle. When the mouse is taken over the rectangle the color of the rectangle gets changed. Comments have been added to the code for clear understanding.
Python3
import pygame
import sys
pygame.init()
clock = pygame.time.Clock()
display_screen = pygame.display.set_mode((500, 500))
base_font = pygame.font.Font(None, 40)
user_text = ''
input_rect = pygame.Rect(200, 200, 140, 32)
color_active = pygame.Color("lightskyblue")
color_passive = pygame.Color("gray15")
color = color_passive
active = False
while True:
for event in pygame.event.get():
if event.type == pygame.QUIT:
pygame.quit()
sys.exit()
if event.type == pygame.MOUSEBUTTONDOWN:
if input_rect.collidepoint(event.pos):
active = True
if event.type == pygame.KEYDOWN:
if event.key == pygame.K_BACKSPACE:
user_text = user_text[0:-1]
else:
user_text += event.unicode
display_screen.fill((0, 0, 0))
if active:
color = color_active
else:
color = color_passive
pygame.draw.rect(display_screen, color, input_rect)
text_surface = base_font.render(user_text, True, (255, 255, 255))
display_screen.blit(text_surface, (input_rect.x + 5, input_rect.y + 5))
input_rect.w = max(100, text_surface.get_width() + 10)
pygame.display.flip()
clock.tick(60)
Output:

Vote for difficulty
Current difficulty :
Medium
Improve Article
Save Article
Improve Article
Save Article
In this article, we will see how to play with texts using the Pygame module. We will be dealing here with initializing the font, rendering the text, editing the text using the keyboard, and adding a blinking cursor note.
Installation
To install this module type the below command in the terminal.
pip install pygame
Font Initialization
Now we can proceed further with the font initialization part. The pygame.font.init() method is used to initialize the font and the pygame.font.get_init() method is used to check whether the font has been initialized or not. Both of the methods do not require any argument. If the font has been initialized successfully then pygame.font.get_init() method returns true.
Printing Text on Window
Here we will see how to get customized font and text on the screen. We will set the position of the texts’ to be displayed on the screen using x and y coordinates. First, we will create the font files and then render the texts. The screen. blit() function is used for copying the text surface objects to the display surface objects at the center coordinates.
Python3
import pygame
pygame.font.init()
pygame.font.get_init()
display_surface = pygame.display.set_mode((500, 500))
pygame.display.set_caption('Our Text')
font1 = pygame.font.SysFont('freesanbold.ttf', 50)
font2 = pygame.font.SysFont('chalkduster.ttf', 40)
text1 = font1.render('GeeksForGeeks', True, (0, 255, 0))
text2 = font2.render('GeeksForGeeks', True, (0, 255, 0))
textRect1 = text1.get_rect()
textRect2 = text2.get_rect()
textRect1.center = (250, 250)
textRect2.center = (250, 300)
while True:
display_surface.fill((255, 0, 0))
display_surface.blit(text1, textRect1)
display_surface.blit(text2, textRect2)
for event in pygame.event.get():
if event.type == pygame.QUIT:
pygame.quit()
quit()
pygame.display.update()
Output:
Cursor Input on Window
We are going to add Blinking Cursor Note here. Our cursor will continue blinking after every 0.5 sec. We can also edit our text.
Python3
import pygame
import time
pygame.init()
display_screen = pygame.display.set_mode((500, 500))
text = 'Hello Guys!!'
font = pygame.font.SysFont(None, 40)
img = font.render(text, True, (255, 0, 0))
rect = img.get_rect()
rect.topleft = (20, 20)
cursor = pygame.Rect(rect.topright, (3, rect.height))
running = True
while running:
for event in pygame.event.get():
if event.type == pygame.QUIT:
running = False
if event.type == pygame.KEYDOWN:
if event.key == pygame.K_BACKSPACE:
if len(text) > 0:
text = text[:-1]
else:
text += event.unicode
img = font.render(text, True, (255, 0, 0))
rect.size = img.get_size()
cursor.topleft = rect.topright
display_screen.fill((200, 255, 200))
display_screen.blit(img, rect)
if time.time() % 1 > 0.5:
pygame.draw.rect(display_screen, (255, 0, 0), cursor)
pygame.display.update()
pygame.quit()
Output:
Input Box on Window
Here we will see how to read the text using the keyboard in pygame. We are going to show our text inside a rectangle. When the mouse is taken over the rectangle the color of the rectangle gets changed. Comments have been added to the code for clear understanding.
Python3
import pygame
import sys
pygame.init()
clock = pygame.time.Clock()
display_screen = pygame.display.set_mode((500, 500))
base_font = pygame.font.Font(None, 40)
user_text = ''
input_rect = pygame.Rect(200, 200, 140, 32)
color_active = pygame.Color("lightskyblue")
color_passive = pygame.Color("gray15")
color = color_passive
active = False
while True:
for event in pygame.event.get():
if event.type == pygame.QUIT:
pygame.quit()
sys.exit()
if event.type == pygame.MOUSEBUTTONDOWN:
if input_rect.collidepoint(event.pos):
active = True
if event.type == pygame.KEYDOWN:
if event.key == pygame.K_BACKSPACE:
user_text = user_text[0:-1]
else:
user_text += event.unicode
display_screen.fill((0, 0, 0))
if active:
color = color_active
else:
color = color_passive
pygame.draw.rect(display_screen, color, input_rect)
text_surface = base_font.render(user_text, True, (255, 255, 255))
display_screen.blit(text_surface, (input_rect.x + 5, input_rect.y + 5))
input_rect.w = max(100, text_surface.get_width() + 10)
pygame.display.flip()
clock.tick(60)
Output:
Vote for difficulty
Current difficulty :
Medium
I wrote a TextBox class. It can use many custom fonts relatively easily and specify colors.
I wanted to have text in several places on the screen, some of which would update such as lives, scores (of all players) high score, time passed and so on.
Firstly, I created a fonts folder in the project and loaded in the fonts I wanted to use. As an example, I had ‘arcade.ttf’ in my fots folder. When making an instance of the TextBox, I could specify that font using the fontlocation (optional) arg.
e.g.
self.game_over_text = TextBox("GAME OVER", 100, 80, 420, RED, 'fonts/arcade.ttf')
I found making the text and updating it each time «clunky» so my solution was an update_text method.
For example, updating the Player score:
self.score1_text.update_text(f'{self.p1.score}')
It could be refactored to accept a list of str, but it suited my needs for coding a version of «S
# -*- coding: utf-8 -*-
'''
 @author:   srattigan
 @date:     22-Mar-2022
 @project:  TextBox class example
 @description:  A generic text box class
            to simplify text objects in PyGame
            Fonts can be downloaded from
            https://www.dafont.com/
            and other such sites.
'''

# imports
import pygame

# initialise and globals
WHITE = (255, 255, 255)
pygame.font.init() # you have to call this at the start


class TextBox:
    '''
    A text box class to simplify creating text in pygame
    '''
    def __init__(self, text, size, x=50, y=50, color=WHITE, fontlocation=None):
        '''
        Constuctor
        text: str, the text to be displayed
        size: int, the font size
        x: int, x-position on the screen
        y: int, y-position on the screen
        color: tuple of int representing color, default is (255,255,255)
        fontlocation: str, location of font file.  If None, default system font is used.
        '''
        pygame.font.init()
        self.text = text
        self.size = size
        self.color = color
        self.x = x
        self.y = y
        if fontlocation == None:
            self.font = pygame.font.SysFont('Arial', self.size)
        else:
            self.font = pygame.font.Font(fontlocation, self.size)

    def draw(self, screen):
        '''
        Draws the text box to the screen passed.
        screen: a pygame Surface object
        '''
        text_surface = self.font.render(f'{self.text}', False, self.color)
        screen.blit(text_surface, [self.x, self.y])

    def update_text(self, new_text):
        '''
        Modifier- Updates the text variable in the textbox instance
        new_text: str, the updated str for the instance.
        '''
        if not isinstance(new_text, str):
            raise TypeError("Invalid type for text object")
        self.text = new_text

    def set_position(self, x, y):
        '''
        Modifier- change or set the position of the txt box
        x: int, x-position on the screen
        y: int, y-position on the screen
        '''
        self.x = x
        self.y = y

    def __repr__(self):
        rep = f'TextBox instance, nttext: {self.text} ntFontFamly:{self.font} ntColor: {self.color} ntSize: {self.size} ntPos: {self.x, self.y}'
        return rep

if __name__ == "__main__":
    test = TextBox("Hello World", 30, 30, 30)
    print(test)
To use this in my Game class
from textbox import TextBox
and in the initialisation part of the game, something like this:
self.time_text = TextBox("Time Left: 100", 20, 20, 40)
self.cred_text = TextBox("created by Sean R.", 15, 600, 870)
self.score1_text = TextBox("0", 100, 40, 650)
self.score2_text = TextBox("0", 100, 660, 650)
self.lives1_text = TextBox("[P1] Lives: 3", 20, 40, 750)
self.lives2_text = TextBox("[P2] Lives: 3", 20, 660, 750)
self.game_over_text = TextBox("GAME OVER", 100, 80, 420, RED)

self.textbox_list = []
self.textbox_list.append(self.time_text)
self.textbox_list.append(self.cred_text)
self.textbox_list.append(self.score1_text)
self.textbox_list.append(self.score2_text)
self.textbox_list.append(self.lives1_text)
self.textbox_list.append(self.lives2_text)
so that when I want to draw all on the screen:
for txt in self.textbox_list:
    txt.draw(screen)
In the update section of the game, I only update directly the boxes that have updated text using the update_text method- if there is nothing to be updated, the text stays the same.
This tutorial demonstrates how to use Font and Text in Pygame.
No game is complete without the addition of font or text. Whether it’s a simple “Game Over” message or dialogue between several characters, Font and Text plays an important role in any Pygame application.
Fonts use the file .ttf, which stands for True Type File.
There are generally two different ways to use fonts in pygame. pygame.font.Font() and pygame.font.SysFont(). The difference between the two of them is that pygame.font.Font() requires the file path for a font to be passed into it’s parameters whereas pygame.font.SysFont() just requires the name of the font. You’ll understand where to use which in the examples shown below.
Pygame.font.Font()
pygame.font.Font() is used mainly when you’ve included an actual .ttf Font file with your code. For example, if you have a .ttf file for the font arial in the same directory as your python file, you can use it with the following code.
pygame.font.Font("arial.ttf", 20)
The first parameter is the file path, and the second is the font size.
The obvious benefit of this is that there is no chance of the font you’ve selected not being available.
Another thing you can do is simply to make the your program use the system default font from the beginning. This method is 100% error free and not prone to any “missing font” problems.
font = pygame.font.Font(None, size)
Just remember, the system default font will vary from system to system.
There might be cases where the font-type you specify was not found, or some error occurred. In cases like these, pygame will fallback to the default system font instead.
Pygame.font.SysFont()
If you’re not looking to be including any ttf files in your code, we then turn to using pygame.font.SysFont(). This is the method I personally recommend and use in my own pygame programs.
A good strategy is to first find the fonts supported by the system the code is executing on. The pygame.font.get_fonts() function will return a list of all the names of the fonts it can find on your system. We ran the code on our windows desktop and the following output was received. (We only included about 10 lines for readability, there were 52 in total)
['arial', 'arialblack', 'bahnschrift', 'calibri', 'cambriacambriamath', 'cambria', 'candara', 'comicsansms', 'consolas', 'constantia', 'corbel', 'couriernew', 'ebrima', 'franklingothicmedium', 'gabriola', 'gadugi', 'georgia', 'impact', 'inkfree', 'javanesetext', 'leelawadeeui', 'leelawadeeuisemilight', 'lucidaconsole', 'lucidasans', 'malgungothic', 'malgungothicsemilight', 'microsofthimalaya', 'microsoftjhengheimicrosoftjhengheiui', 'microsoftjhengheimicrosoftjhengheiuibold', 'microsoftjhengheimicrosoftjhengheiuilight', 'microsoftnewtailue', ....It looks like a lot, but certain system have less than a dozen system fonts available to them. Now that we have these font names in front of us, we can simply pick one and pass it into the SysFont() function.
Using SysFonts
dialogue_font = pygame.font.SysFont('arial', 15)
name_font = pygame.font.SysFont('Helvetica', 20)
game_over_font = pygame.font.SysFont('Verdana', 60)
The SysFont() function only requires the name of the font, not the file path. For this reason the ttf extension is not included. The second parameter remains the same however, representing font size.
As you can see, there we’ve created several types of fonts. The reason being that in an average game, there are many different types of fonts you’ll be using for different parts of the text. It would be highly unusual to have the same type of the font family and size throughout your game.
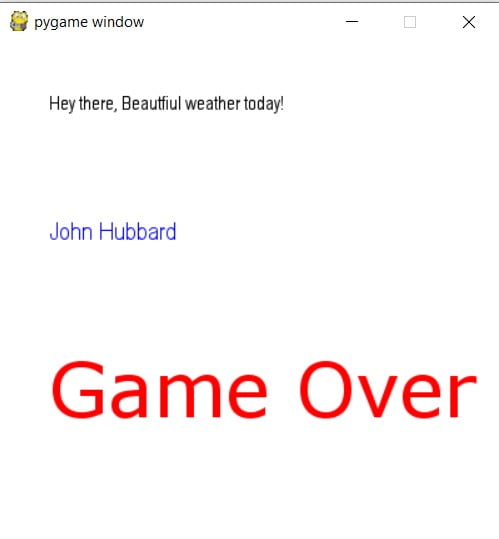
For instance, we’ve created a font type for dialogue using a rather small font size. For the “Game Over” text that many games have, we’ve used a much larger font size. We’ve even created a different font for names, with it’s font size being a little larger than text (to make it stand out a bit).
dialogue = dialogue_font.render("Hey there, Beautiful weather today!",
                                True, (0,0,0))
name = name_font.render("John Hubbard", True, (0,0,255))
game_over = game_over_font.render("Game Over", True, (255,0,0))
Defining the font is only the first step. Next up you actually have to render your chosen font and create a surface object. You also get to decide the color while rendering. The True parameter stands for anti-aliasing, used to make the edges smoother. Pass True if you want to use it, otherwise pass False.
screen.blit(dialogue, (40,40))
screen.blit(name, (40,140))
screen.blit(game_over, (40,240))
The final step is to actually display the object onscreen. For this purpose, we use the surface.blit() function. It takes two parameters, first a surface object and second a pair of co-ordinates to draw the surface object to.
Pygame Fonts Example
Now we’ll actually put together all the code shown above into one comprehensive program and show you the output.
The code for our program.
import pygame

pygame.init()
screen = pygame.display.set_mode((400, 400))
clock = pygame.time.Clock()

dialogue_font = pygame.font.SysFont('arial', 15)
name_font = pygame.font.SysFont('Helvetica', 20)
game_over_font = pygame.font.SysFont('Verdana', 60)

dialogue = dialogue_font.render("Hey there, Beautfiul weather today!",
                                True, (0,0,0))
name = name_font.render("John Hubbard", True, (0,0,255))
game_over = game_over_font.render("Game Over", True, (255,0,0))

while True:
    for event in pygame.event.get():
        if event.type == pygame.QUIT:
            pygame.quit()
            sys.exit()

    screen.fill((255, 255, 255))

    screen.blit(dialogue, (40,40))
    screen.blit(name, (40,140))
    screen.blit(game_over, (40,240))

    pygame.display.flip()
    clock.tick(60)
Below is the output of the below code.
Bonus Tip:
You can be a little more organized and efficient by creating tuples with RGB values beforehand, stored in variables.
color_light = (170,170,170)
color_dark = (100,100,100)
color_white = (255,255,255)
Now all you have to do is write the name of the color (variable) you want in the appropriate place, and you’re done.
Be sure to check out our Game creation with Pygame Tutorial as well!
This marks the end of the Pygame Font and Text article. Any suggestions or contributions for CodersLegacy are more than welcome. Questions regarding the article material, can be asked in the comments section below.
The writing is on the screen!
Introduction
In this section we will look at how you include and manipulate text in Pygame. Text is valuable for many aspects of a good game. Text can be a little bit fiddly to set up in PyGame but once you have it set up it’s fairly easy to work with.
Getting Set Up
Before we begin, let’s create a new file (call it text.py) and copy in the template code from the previous section
Once you’ve saved your file with the template code in it, run the file to make sure you’ve copied it in ok. (You should get a blank white window.)
Including Text — The Simple Method
Including text in PyGame may be done as a three step process :
- Load the font for the text
- Render the text you want to a Text surface object
- Blit the text to the display surface (window)
Let’s start by adding a variable with a colour for our text (place it just below the existing BACKGROUND variable) :
- # Colours
- BACKGROUND = (255, 255, 255)
- TEXTCOLOUR = (200, 100, 0)
- # Game Setup
Next up we will add a few commands to render a basic text message in the center of the window :
- pygame.display.set_caption(‘My Game!’)
- # set up Fonts
- fontObj = pygame.font.Font(None, 32)
- textSufaceObj = fontObj.render(‘blah blah’, True, TEXTCOLOUR, None)
- # The main function that controls the game
What this does is :
- Create a font Object (fontObj) with the required font. (In this example we are just loading the PyGame default font by specifying it as ‘None’). We also specify the size of the font here as well (32)
- Create a surface object (textSurfaceObj) to hold the text we want to display. When we render we pass in four arguments :
- The text to render (‘blah blah’)
- If we are antialaising the text or not (True)
- The colour of the text (TEXTCOLOUR)
- The background colour of the surface (None — which means transparent)
Finally we will blit the surface to the window :
- WINDOW.fill(BACKGROUND)
- WINDOW.blit(textSufaceObj, (100, 100))
- pygame.display.update()
 If you save and run the program now you should get a window with some text near the center.
See if you can change the size, location and colour of the text.
Which fonts are available
The default font is a little bit boring. Thankfully it is very easy to change this. Your system will have a heap of built in fonts (any of which may be used). If you want to see what fonts are already available on your system, create a simple script as follows :
Installed-fonts.py
- import pygame, sys, random
- from pygame.locals import *
- pygame.init()
- fontsList = pygame.font.get_fonts()
- print (fontsList)
Any of the fonts in this list may then be utilised by replacing None (in the initial program) with the name of the font (within quotes) and changing Font to SysFont when loading the font. eg :
- pygame.display.set_caption(‘My Game!’)
- # set up Fonts
- # fontObj = pygame.font.Font(None, 32)
- fontObj = pygame.font.SysFont(‘courier’, 32)
- textSufaceObj = fontObj.render(‘blah blah’, True, TEXTCOLOUR, None)
- # The main function that controls the game
Loading your own fonts
The system fonts provide some variability in the look of the fonts but for a game we often want something a bit more exciting / suited to the style of our game interface. Fortunately it is very simple to find and use other fonts.
Any font in the .ttf (True Type Font) can be used. Let’s say we have a folder called fonts which is in the same location as our program. Including it is as simple as using the path to the font file :
- pygame.display.set_caption(‘My Game!’)
- # set up Fonts
- fontObj = pygame.font.Font(None, 32)
- fontObj = pygame.font.Font(‘fonts/Bullpen3D.ttf’, 32)
- textSufaceObj = fontObj.render(‘blah blah’, True, TEXTCOLOUR, None)
- # The main function that controls the game
 If you find and download a font then update the program with the name of the font and run the program now you should get a window with some text near the center in your chosen font.
There are many locations where you can obtain fonts to use in your games. Try doing a Google search for free fonts and you will find many websites to start from.
Including Text — Advanced Method
The simple method for including text works well enough but sometimes we need a bit more ability to manage placement of the text. We may achieve this by using a rect object to hold the text. Then we may use the features of the rect object to help with placement.
Text_Advanced.py
- import pygame, sys, random
- from pygame.locals import *
- pygame.init()
- # Colours
- BACKGROUND = (255, 255, 255)
- TEXTCOLOUR = (200, 100, 0)
- # Game Setup
- FPS = 60
- fpsClock = pygame.time.Clock()
- WINDOW_WIDTH = 400
- WINDOW_HEIGHT = 300
- WINDOW = pygame.display.set_mode((WINDOW_WIDTH, WINDOW_HEIGHT))
- pygame.display.set_caption(‘My Game!’)
- # Set up fonts
- fontObj = pygame.font.Font(None, 32)
- textSufaceObj = fontObj.render(‘blah blah’, True, TEXTCOLOUR, None)
- textRectObj = textSufaceObj.get_rect()
- # The main function that controls the game
- def main () :
- looping = True
- # The main game loop
- while looping :
- # Get inputs
- for event in pygame.event.get() :
- if event.type == QUIT :
- pygame.quit()
- sys.exit()
- # Processing
- # This section will be built out later
- # Render elements of the game
- WINDOW.fill(BACKGROUND)
- WINDOW.blit(textSufaceObj, textRectObj)
- pygame.display.update()
- fpsClock.tick(FPS)
- main()
Line 21 — we create a rect object which will have the same dimensions as the text surface.
Line 41 — we blit the textSurfaceObj but use the textRectObj to get the coordinates for where to place it.
If you run the script you will notice that the text is placed in the top left corner of the window. That is because we haven’t moved the rect object from its default location yet.
The rect object isn’t the actual text but a rectangle which has the same dimensions as the text. We may now use the rectangle’s virtual attributes for location in order to more accurately place the text, or discover the width and height of the text. Here are the virtual attributes we can take advantage of :
- x, y
- top, left, bottom, right
- topleft, bottomleft, topright, bottomright
- midtop, midleft, midbottom, midright
- center, centerx, centery
- size, width, height
- w, h
Let’s say that part of the interface of our game is a line along the bottom of the screen, and we would like to place our text in the middle of that line, 15 pixels above it. This now becomes very easy.
- pygame.display.set_caption(‘My Game!’)
- BOTTOMLINEHEIGHT = 20
- # set up Fonts
- fontObj = pygame.font.Font(None, 32)
- textSufaceObj = fontObj.render(‘blah blah’, True, TEXTCOLOUR, None)
- textRectObj = textSufaceObj.get_rect()
- textRectObj.midbottom = (WINDOW_WIDTH // 2, WINDOW_HEIGHT — BOTTOMLINEHEIGHT — 15)
- # The main function that controls the game
- WINDOW.fill(BACKGROUND)
- WINDOW.blit(textSufaceObj, textRectObj)
- pygame.draw.line(WINDOW, TEXTCOLOUR, (0, WINDOW_HEIGHT — BOTTOMLINEHEIGHT), (WINDOW_WIDTH, WINDOW_HEIGHT — BOTTOMLINEHEIGHT), 3)
- pygame.display.update()
 You could have achieved the same outcome using the simple method for rendering text and trial and error with the coordinates. This method will save you time and effort however, especially if you have several items you want to accurately place.
A Simple Text Game
In this simple game we will print either Left or Right. The player has to press the opposite arrow key on the keyboard as fast as they can.
Simple_Text_Game.py
- import pygame, sys, random
- from pygame.locals import *
- pygame.init()
- # Colours
- BACKGROUND = (255, 255, 255)
- TEXTCOLOUR = (200, 100, 0)
- # Game Setup
- FPS = 60
- fpsClock = pygame.time.Clock()
- WINDOW_WIDTH = 400
- WINDOW_HEIGHT = 300
- WINDOW = pygame.display.set_mode((WINDOW_WIDTH, WINDOW_HEIGHT))
- pygame.display.set_caption(‘My Game!’)
- # Set up fonts
- rightText = fontObj.render(‘Right’, True, TEXTCOLOUR, None)
- leftText = fontObj.render(‘Left’, True, TEXTCOLOUR, None)
- rightTextRectObj = rightText.get_rect()
- leftTextRectObj = leftText.get_rect()
- # Center the text on the window
- rightTextRectObj.center = (WINDOW_WIDTH // 2, WINDOW_HEIGHT //2)
- leftTextRectObj.center = (WINDOW_WIDTH // 2, WINDOW_HEIGHT //2)
- # Selects ramdomly either Left or Right
- def select_side () :
- side = »
- chosen = random.randint(0,1)
- if chosen == 1 :
- side = ‘Right’
- else :
- side = ‘Left’
- return side
- # The main function that controls the game
- def main () :
- looping = True
- target = select_side() # Prime the target before the main loop
- goes = 0 # How many goes the user has had
- score = 0
- rounds = 10 # How many rounds in the game
- active = True # Used so that the next target won’t be set until the user releases the key on the keyboard
- # The main game loop
- while looping :
- sideChosen = »
- # Get inputs
- for event in pygame.event.get() :
- if event.type == QUIT :
- pygame.quit()
- sys.exit()
- pressed = pygame.key.get_pressed()
- if pressed[K_RIGHT] :
- sideChosen = ‘Right’
- elif pressed[K_LEFT] :
- sideChosen = ‘Left’
- # Processing
- if sideChosen != » and sideChosen != target and active == True :
- print (‘Correct’)
- goes = goes + 1
- score = score + 1
- active = False
- elif sideChosen == target and active == True :
- print (‘Incorrect’)
- goes = goes + 1
- active = False
- elif active == False and sideChosen == » : # Enable the next round
- active = True
- target = select_side()
- if goes == rounds :
- looping = False
- # Render elements of the game
- WINDOW.fill(BACKGROUND)
- if target == ‘Right’ and active == True :
- WINDOW.blit(rightText, rightTextRectObj)
- elif target == ‘Left’ and active == True :
- WINDOW.blit(leftText, leftTextRectObj)
- pygame.display.update()
- fpsClock.tick(FPS)
- print (‘Game Over’)
- print (f’Your score was : {score}’)
- main()
There is a lot that could be improved with this game. It is intended simply to illustrate including text within your games. Check out the activities below for ideas on how you could improve it.
Activities
Even though our program doesn’t do too much just yet we can still tinker with a few elements to make sure we understand them.
Have a go at the following :
1. Can you improve your game so that it has up and down as well as left and right?
2. Can you make it to that the score is printed to the window as well? (instead of to the terminal)
3. Can you use shapes and other elements to create a more interesting interface for your game?
4. (extra challenging) The game in its current form doesn’t actually incorporate how fast the user was to select their answer. Can you improve the game so that the score is also based upon how quickly the user enters the answer?

![]() reply.it
reply.it
«A long descriptive name is better than a short enigmatic name. A long descriptive name is better than a long descriptive comment.»
Robert C. Martin, Clean Code: A Handbook of Agile Software Craftsmanship
Text and font
Bugs
Related Stack Overflow questions:
- Blitting text with pygame2.1 not working correctly
Font
Related Stack Overflow questions:
- pygame — How to display text with font & color?
- How to display text in pygame?
- How to scale the font size in pygame based on display resolution?
- I need to add text to my rectangles, how would I do this?
- How to display some text in pygame?
- Pygame smooth fonts
- TypeError: Invalid foreground RGBA argument
Minimal pygame.font module example
repl.it/@Rabbid76/PyGame-Text
Minimal pygame.freetype module example
repl.it/@Rabbid76/PyGame-FreeTypeText
There are 2 possibilities. In either case PyGame has to be initialized by pygame.init.
import pygame
pygame.init()
Use either the pygame.font module and create a pygame.font.SysFont or pygame.font.Font object. render() a pygame.Surface with the text and blit the Surface to the screen:
my_font = pygame.font.SysFont(None, 50)
text_surface = myfont.render("Hello world!", True, (255, 0, 0))
screen.blit(text_surface, (10, 10))
Or use the pygame.freetype module. Create a pygame.freetype.SysFont() or pygame.freetype.Font object. render() a pygame.Surface with the text or directly render_to() the text to the screen:
my_ft_font = pygame.freetype.SysFont('Times New Roman', 50)
my_ft_font.render_to(screen, (10, 10), "Hello world!", (255, 0, 0))
Find font
Related Stack Overflow questions:
- I can’t use the available fonts in pygame
Use pygame.font.SysFont instead of pygame.font.Font:
font = pygame.font.SysFont('comicsansms', size)
Or use pygame.font.match_font() to find the path to a specific font file:
comicsansms_file = pygame.font.match_font('comicsansms')
font = pygame.font.Font(comicsansms_file, size)
Bold
Related Stack Overflow questions:
-
Make a Single Word Within a String Bold
-
Make a Single Word Within a String Bold
📜 Minimal example — Bold text
📜 Minimal example — Bold text freetype
To draw a»bold» text the «bold» version of the font must be used. «bold» isn’t a flag or attribute, it’s just a different font.
Use pygame.font.match_font() to find the path to a specific font file.
With the pygame.freetype modle the text can be rendered with different styles like STYLE_DEFAULT and STYLE_STRONG. However, the text can only be rendered with one style at a time.
Unicode
Related Stack Overflow questions:
-
Displaying unicode symbols using pygame
-
how to make PNG canvas see-through in pygame when blitting image
📜 Minimal example — Unicode
-
How to load colorful emojis in pygame?
📜 Minimal example — Unicode
I want to use Pygame’s freetype module to load a colorful emoji via its unicode. Unfortunately I only get a monochrome image with the outline of the emoji:
import pygame
import pygame.freetype

pygame.init()
window = pygame.display.set_mode((200, 200))

seguisy80 = pygame.freetype.SysFont("segoeuisymbol", 100)
emoji, rect = seguisy80.render('😃', "black")
rect.center = window.get_rect().center

run = True
while run:
    for event in pygame.event.get():
        if event.type == pygame.QUIT:
            run = False

    window.fill("lightgray")
    window.blit(emoji, rect)
    pygame.display.flip()

pygame.quit()
How can I modify this code to get a full RGBA color image of an emoji?
Unfortunately, colored font loading is not natively supported in Pygame. However, there is a workaround.
First you need a colored emoji font. For example, you can download one here: Apple Color Emoji for Linux.
Load this font using https://freetype.org/. Install freetype-py:
For Windows users, it should be mentioned that the installed package does not support the font and results in an «unimplemented feature» exception.
Download the package from Unofficial Windows Binaries for Python Extension Packages and install it. e.g.:
pip3 install freetype_py-2.2.0-cp310-cp310-win_amd64.whl
Now you’re prepared and can load an emoji from the font.Emojis and their Unicode can be found here: Emoticons (Unicode block).
Copy the emoji or use the unicode and load the glyph:
import freetype

face = freetype.Face("AppleColorEmoji.ttf")
face.set_char_size(int(face.available_sizes[-1].size))

face.load_char('😀', freetype.FT_LOAD_COLOR) # or face.load_char('U0001F603', freetype.FT_LOAD_COLOR)
The loaded glyph now needs to be turned into a pygame.Surface. To do this, use NumPy.
How this works in detail is explained in the answer to the question: How do I convert an OpenCV (cv2) image (BGR and BGRA) to a pygame.Surface object.
import numpy as np

ft_bitmap = face.glyph.bitmap
bitmap = np.array(ft_bitmap.buffer, dtype=np.uint8).reshape((ft_bitmap.rows, ft_bitmap.width, 4))
bitmap[:, :, [0, 2]] = bitmap[:, :, [2, 0]]
emoji = pygame.image.frombuffer(bitmap.flatten(), (ft_bitmap.width, ft_bitmap.rows), 'RGBA')
import pygame
import freetype
import numpy as np

class Emojis:
    def __init__(self):
        self. face = freetype.Face("AppleColorEmoji.ttf")
        self.face.set_char_size(int(self.face.available_sizes[-1].size))
    def create_surface(self, unicode):
        self.face.load_char(unicode, freetype.FT_LOAD_COLOR)
        ft_bitmap = self.face.glyph.bitmap
        bitmap = np.array(ft_bitmap.buffer, dtype=np.uint8).reshape((ft_bitmap.rows, ft_bitmap.width, 4))
        bitmap[:, :, [0, 2]] = bitmap[:, :, [2, 0]]
        return pygame.image.frombuffer(bitmap.flatten(), (ft_bitmap.width, ft_bitmap.rows), 'RGBA')

pygame.init()
window = pygame.display.set_mode((200, 200))
emojis = Emojis()

emoji = emojis.create_surface('😃')
#emoji = emojis.create_surface('U0001F603')
rect = emoji.get_rect(center = window.get_rect().center)

run = True
while run:
    for event in pygame.event.get():
        if event.type == pygame.QUIT:
            run = False

    window.fill("lightgray")
    window.blit(emoji, rect)
    pygame.display.flip()

pygame.quit()
Align text and text size
Related Stack Overflow questions:
-
How to Center Text in Pygame
-
How to center text inside a shape?
-
How to get text width in pygame?
-
Pygame: Centering text system font text
📜 Minimal example — Freetype centered
-
Python Pygame Font x coordinate
-
Pygame Python Font Size
Pygame Python font
pygame.Surface.get_rect.get_rect() returns a rectangle with the size of the Surface object, that always starts at (0, 0) since a Surface object has no position. The position of the rectangle can be specified by a keyword argument. For example, the center of the rectangle can be specified with the keyword argument center. These keyword argument are applied to the attributes of the pygame.Rect before it is returned (see pygame.Rect for a full list of the keyword arguments).
Get the text rectangle and place the center of the text rectangle on the center of the window rectangle:
text_rect = text.get_rect(center = (SCREEN_WIDTH // 2, SCREEN_HEIGHT // 2))
You can even get the center of the window from the display Surface :
text_rect = text.get_rect(center = screen.get_rect().center)
Or with the use of pygame.display.get_surface():
text_rect = text.get_rect(center = pygame.display.get_surface().get_rect().center)
A Surface can be drawn on another Surface using the blit method. The second argument is either a tuple (x, y) representing the upper left corner or a rectangle. With a rectangle, only the upper left corner of the rectangle is taken into account. Therefore you can pass the text rectangle directly to blit:
screen.blit(text, text_rect)
📜 minimal example — Render centered text
Table
Related Stack Overflow questions:v
- display sqlite database as a table in paygames
Blinking text
Related Stack Overflow questions:
- How to make a text blink in PyGame?
Text
Related Stack Overflow questions:
-
Padding for text using pygame SysFont
-
How to add a text speech in Pygame
-
Have an outline of text in Pygame
📜 minimal example — Outline
-
How to save an image with the outline text using pygame?
-
Text with a Drop-shadow
📜 minimal example — Drop shadow
-
How to add a blinking cursor in pygame?
-
How to create a text input box with pygame?
How to make a string’s content appears on screen as we type on keyboard?
How to allow the user to type only under certain conditions in pygame?
repl.it/@Rabbid76/PyGame-TextInput -
Paragraph input in pygame
📜 minimal example — Drop shadow
-
Rendering text with multiple lines in pygame
Python/Pygame make text in Pygame wrap when in leaves the window
-
How can I make Pygame wait a few milliseconds before every loop in a for loop without stopping other stuff?
Use the KEYDOWN event to get the input from the keyboard (see pygame.event). The key that was pressed can be obtained from the key attribute of the pygame.event.Event object. unicode contains a single character string that is the fully translated character. Add the character to the text when a key is pressed.
Two special keys need to be dealt with. If RETURN is pressed, the input is finished. If BACKSPACE is pressed, the last character of the input text must be removed:
if event.type == pygame.KEYDOWN and input_active:
    if event.key == pygame.K_RETURN:
        input_active = False
    elif event.key == pygame.K_BACKSPACE:
        text =  text[:-1]
    else:
        text += event.unicode
📜 minimal example — Text input
Use the algorithm in a pygame.sprite.Sprite class. Handle the event in the update method.Determine whether the mouse clicks in the text entry field with collidepoint (see How to detect when a rectangular object, image or sprite is clicked) and activate the text input box:
class TextInputBox(pygame.sprite.Sprite):
    # [...]

    def update(self, event_list):
        for event in event_list:
            if event.type == pygame.MOUSEBUTTONDOWN and not self.active:
                self.active = self.rect.collidepoint(event.pos)
            if event.type == pygame.KEYDOWN and self.active:
                if event.key == pygame.K_RETURN:
                    self.active = False
                elif event.key == pygame.K_BACKSPACE:
                    self.text = self.text[:-1]
                else:
                    self.text += event.unicode
                self.render_text()
Pass the list of events to the update method of the Group that contains the Sprite:
event_list = pygame.event.get()
for event in event_list:
    if event.type == pygame.QUIT:
        run = False
group.update(event_list)
📜 minimal example — Text input box
There is no automatic solution. You have to implement the text wrap by yourself and draw the text line by line respectively word by word.
Fortunately PyGame wiki provides a function that for this task. See PyGame wiki Simple Text Wrapping for pygame.
I’ve extended the function and added an additional argument, which provides left or right aligned text, centerd text or even block mode:
📜 Minimal example — Word wrap
📜 Minimal example — Word wrap
repl.it/@Rabbid76/PyGame-TextWrap
textAlignLeft = 0
textAlignRight = 1
textAlignCenter = 2
textAlignBlock = 3

def drawText(surface, text, color, rect, font, align=textAlignLeft, aa=False, bkg=None):
    lineSpacing = -2
    spaceWidth, fontHeight = font.size(" ")[0], font.size("Tg")[1]

    listOfWords = text.split(" ")
    if bkg:
        imageList = [font.render(word, 1, color, bkg) for word in listOfWords]
        for image in imageList: image.set_colorkey(bkg)
    else:
        imageList = [font.render(word, aa, color) for word in listOfWords]

    maxLen = rect[2]
    lineLenList = [0]
    lineList = [[]]
    for image in imageList:
        width = image.get_width()
        lineLen = lineLenList[-1] + len(lineList[-1]) * spaceWidth + width
        if len(lineList[-1]) == 0 or lineLen <= maxLen:
            lineLenList[-1] += width
            lineList[-1].append(image)
        else:
            lineLenList.append(width)
            lineList.append([image])

    lineBottom = rect[1]
    lastLine = 0
    for lineLen, lineImages in zip(lineLenList, lineList):
        lineLeft = rect[0]
        if align == textAlignRight:
            lineLeft += + rect[2] - lineLen - spaceWidth * (len(lineImages)-1)
        elif align == textAlignCenter:
            lineLeft += (rect[2] - lineLen - spaceWidth * (len(lineImages)-1)) // 2
        elif align == textAlignBlock and len(lineImages) > 1:
            spaceWidth = (rect[2] - lineLen) // (len(lineImages)-1)
        if lineBottom + fontHeight > rect[1] + rect[3]:
            break
        lastLine += 1
        for i, image in enumerate(lineImages):
            x, y = lineLeft + i*spaceWidth, lineBottom
            surface.blit(image, (round(x), y))
            lineLeft += image.get_width()
        lineBottom += fontHeight + lineSpacing

    if lastLine < len(lineList):
        drawWords = sum([len(lineList[i]) for i in range(lastLine)])
        remainingText = ""
        for text in listOfWords[drawWords:]: remainingText += text + " "
        return remainingText
    return ""
Performance issues an lag
Related Stack Overflow questions:
- Rendering text in pygame causes lag
- How to render/blit text in pygame for good performance
Creating a font object is very time consuming because the font file has to be read and interpreted.
Transparent text
Related Stack Overflow questions:
- How to render transparent text with alpha channel in PyGame?
- How to separately change the opacity of a text on a button pygame?
When using the pygame.font module, the alpha channel of the text color is not taken into account when rendering a text, but see pygame.font.Font.render:
Antialiased images are rendered to 24-bit RGB images. If the background is transparent a pixel alpha will be included.
and pygame.Surface.set_alpha
Changed in pygame 2.0: per-surface alpha can be combined with per-pixel alpha.
Hence it is completely sufficient to set the transparency after rendering the text with set_alpha. This even works for anti-aliased text:
font = pygame.font.SysFont(None, 150)

text_surf = font.render('test text', True, (255, 0, 0))
text_surf.set_alpha(127)

window.blit(text_surf, (x, y))
📜 minimal example — Render transparent text with font module
repl.it/@Rabbid76/PyGame-TransparentText
By using the pygame.freetype module, you can use a transparent color directly when creating a text surface:
ft_font = pygame.freetype.SysFont('Times New Roman', 150)

text_surf2, text_rect2 = ft_font.render('test text', (255, 0, 0, 128))

window.blit(text_surf2, (x, y))
Or if you are rendering the text directly onto a surface:
ft_font = pygame.freetype.SysFont('Times New Roman', 150)

ft_font.render_to(window, (x, y), 'test text', (255, 0, 0, 128))
📜 minimal example — Render transparent text with freetype module
repl.it/@Rabbid76/PyGame-TransparentFreeTypeText
📜 minimal example — Render transparent text with transparent background
repl.it/@Rabbid76/PyGame-TextTransparentBackground
Anti-Aliasing
Related Stack Overflow questions:
Devanagari/Arabic/Persian text
Related Stack Overflow questions:
- How to fix Arabic/Persian text and font in pygame?
- Devanagari text rendering improperly in PyGame
Ascii image
Related Stack Overflow questions:
-
How to display image and text at the same time in python (like SanctuaryRPG)?
📜 minimal example — Render ASCII text image
repl.it/@Rabbid76/PyGame-AsciiTextImage
Typewriter
Related Stack Overflow questions:
-
Typewriter Effect Pygame
-
Pygame Rendering Text 1 by 1 Causes Lag In Game How Do I Fix This?
📜 minimal example — Typewriter
repl.it/@Rabbid76/PyGame-Typewriter
Scroll Text
Related Stack Overflow questions:
-
Pygame when adding new text it appears on bottom and rest of text goes up
📜 Minimal example — Text scroll
-
Make a rect object scrollable
- Python
- Основы Python
- Python ООП
- wxPython
- Модули
- Flask
- Django
- JavaScript
- Основы JavaScript
- JavaScript DOM
- JavaScript ООП
- Java
- Основы Java
- Java ООП
- Обработка данных
- Нейронные сети
- ЦОС
- Фракталы
- Генетические алгоритмы
- Tensorflow
- ML
- Еще
- Структуры данных
|
Как рисовать текст различными шрифтамиНа этом занятии pygame.font в котором
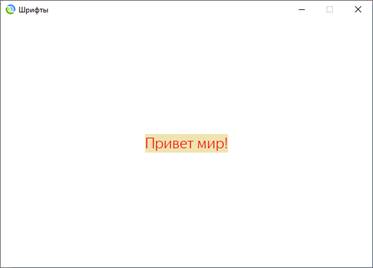
Например, вот import pygame pygame.init() print( pygame.font.get_fonts() ) И выберем первый f_sys = pygame.font.SysFont('arial', 12) На выходе Аналогично f = pygame.font.Font('fonts/YandexSDLight.ttf', 24) только здесь мы import pygame pygame.init() W, H = 600, 400 sc = pygame.display.set_mode((600, 400)) pygame.display.set_caption("Шрифты") pygame.display.set_icon(pygame.image.load("app.bmp")) clock = pygame.time.Clock() FPS = 60 WHITE = (255, 255, 255) RED = (255, 0, 0) YELLOW = (239, 228, 176) f = pygame.font.Font('fonts/YandexSDLight.ttf', 24) sc_text = f.render('Привет мир!', 1, RED, YELLOW) pos = sc_text.get_rect(center=(W//2, H//2)) sc.fill(WHITE) sc.blit(sc_text, pos) pygame.display.update() while True: for event in pygame.event.get(): if event.type == pygame.QUIT: exit() clock.tick(FPS) Смотрите, сначала
Вот такие f = pygame.font.Font(None, 24) В заключение import pygame pygame.init() W, H = 600, 400 sc = pygame.display.set_mode((600, 400)) pygame.display.set_caption("Шрифты") pygame.display.set_icon(pygame.image.load("app.bmp")) clock = pygame.time.Clock() FPS = 60 WHITE = (255, 255, 255) RED = (255, 0, 0) YELLOW = (239, 228, 176) print( pygame.font.get_fonts() ) f = pygame.font.Font('fonts/YandexSDLight.ttf', 24) sc_text = f.render('Привет мир!', 1, RED, YELLOW) pos = sc_text.get_rect(center=(W//2, H//2)) def draw_text(): sc.fill(WHITE) sc.blit(sc_text, pos) pygame.display.update() draw_text() while True: for event in pygame.event.get(): if event.type == pygame.QUIT: exit() elif event.type == pygame.MOUSEBUTTONDOWN and event.button == 1: pygame.mouse.get_rel() # обнуляем первое смещение (при повторном вызове ниже) if pygame.mouse.get_focused() and pos.collidepoint(pygame.mouse.get_pos()): btns = pygame.mouse.get_pressed() if btns[0]: # нажата левая кнопка мыши rel = pygame.mouse.get_rel() # получаем смещение pos.move_ip(rel) draw_text() clock.tick(FPS) Смотрите, в Вот так довольно Видео по теме
|
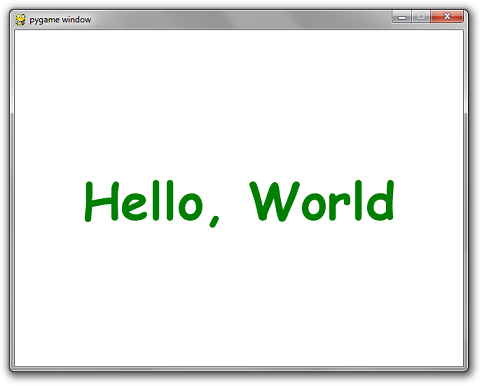
If you’re looking for the quick answer on how to render text, here it is:
import pygame
pygame.init()
screen = pygame.display.set_mode((640, 480))
clock = pygame.time.Clock()
done = False
font = pygame.font.SysFont(«comicsansms», 72)
text = font.render(«Hello, World», True, (0, 128, 0))
while not done:
for event in pygame.event.get():
if event.type == pygame.QUIT:
done = True
if event.type == pygame.KEYDOWN and event.key == pygame.K_ESCAPE:
done = True
screen.fill((255, 255, 255))
screen.blit(text,
(320 — text.get_width() // 2, 240 — text.get_height() // 2))
pygame.display.flip()
clock.tick(60)
But of course, there’s a few things not ideal about this.
Rule #1: You should never assume a certain font is installed on the user’s computer. Even in CSS there is a way to define a hierarchy of fonts to use. If the best choice for font isn’t available, an alternate is used. You should follow the same pattern. Luckily, PyGame has a way to enumerate all the fonts available on the machine:
all_fonts = pygame.font.get_fonts()
Additionally, there’s a way to instantiate the default system font:
font = pygame.font.Font(None, size)
And alternatively, you can pass in the name of a font file you include along with your code instead of None to guarantee the existence of the perfect font:
font = pygame.font.Font(«myresources/fonts/Papyrus.ttf», 26)
Using any combination of the above, you can write a better font creation function. For example, here’s a function that takes a list of font names, a font size and will create a font instance for the first available font in the list. If none are available, it’ll use the default system font.
def make_font(fonts, size):
available = pygame.font.get_fonts()
# get_fonts() returns a list of lowercase spaceless font names
choices = map(lambda x:x.lower().replace(‘ ‘, »), fonts)
for choice in choices:
if choice in available:
return pygame.font.SysFont(choice, size)
return pygame.font.Font(None, size)
You can even further improve it by caching the font instance by font name and size.
_cached_fonts = {}
def get_font(font_preferences, size):
global _cached_fonts
key = str(font_preferences) + ‘|’ + str(size)
font = _cached_fonts.get(key, None)
if font == None:
font = make_font(font_preferences, size)
_cached_fonts[key] = font
return font
You can take it a step further and actually cache the rendered text itself. Storing an image is cheaper than rendering a new one, especially if you plan on having the same text show up for more than one consecutive frame. Yes. That is your plan if you want it to be readable.
_cached_text = {}
def create_text(text, fonts, size, color):
global _cached_text
key = ‘|’.join(map(str, (fonts, size, color, text)))
image = _cached_text.get(key, None)
if image == None:
font = get_font(fonts, size)
image = font.render(text, True, color)
_cached_text[key] = image
return image
Putting it all together.
Now here’s that original «Hello, World» example but with the improved code:
import pygame
def make_font(fonts, size):
available = pygame.font.get_fonts()
# get_fonts() returns a list of lowercase spaceless font names
choices = map(lambda x:x.lower().replace(‘ ‘, »), fonts)
for choice in choices:
if choice in available:
return pygame.font.SysFont(choice, size)
return pygame.font.Font(None, size)
_cached_fonts = {}
def get_font(font_preferences, size):
global _cached_fonts
key = str(font_preferences) + ‘|’ + str(size)
font = _cached_fonts.get(key, None)
if font == None:
font = make_font(font_preferences, size)
_cached_fonts[key] = font
return font
_cached_text = {}
def create_text(text, fonts, size, color):
global _cached_text
key = ‘|’.join(map(str, (fonts, size, color, text)))
image = _cached_text.get(key, None)
if image == None:
font = get_font(fonts, size)
image = font.render(text, True, color)
_cached_text[key] = image
return image
pygame.init()
screen = pygame.display.set_mode((640, 480))
clock = pygame.time.Clock()
done = False
font_preferences = [
«Bizarre-Ass Font Sans Serif»,
«They definitely dont have this installed Gothic»,
«Papyrus»,
«Comic Sans MS»]
text = create_text(«Hello, World», font_preferences, 72, (0, 128, 0))
while not done:
for event in pygame.event.get():
if event.type == pygame.QUIT:
done = True
if event.type == pygame.KEYDOWN and event.key == pygame.K_ESCAPE:
done = True
screen.fill((255, 255, 255))
screen.blit(text,
(320 — text.get_width() // 2, 240 — text.get_height() // 2))
pygame.display.flip()
clock.tick(60)
Next up: More on Input
Hey, there, Python folks. Hope you enjoyed the post. I just wanted to give a quick shout-out for a weekly Python code golf that I recently started up over on StringLabs.io. If you like Python puzzles please come check it out!