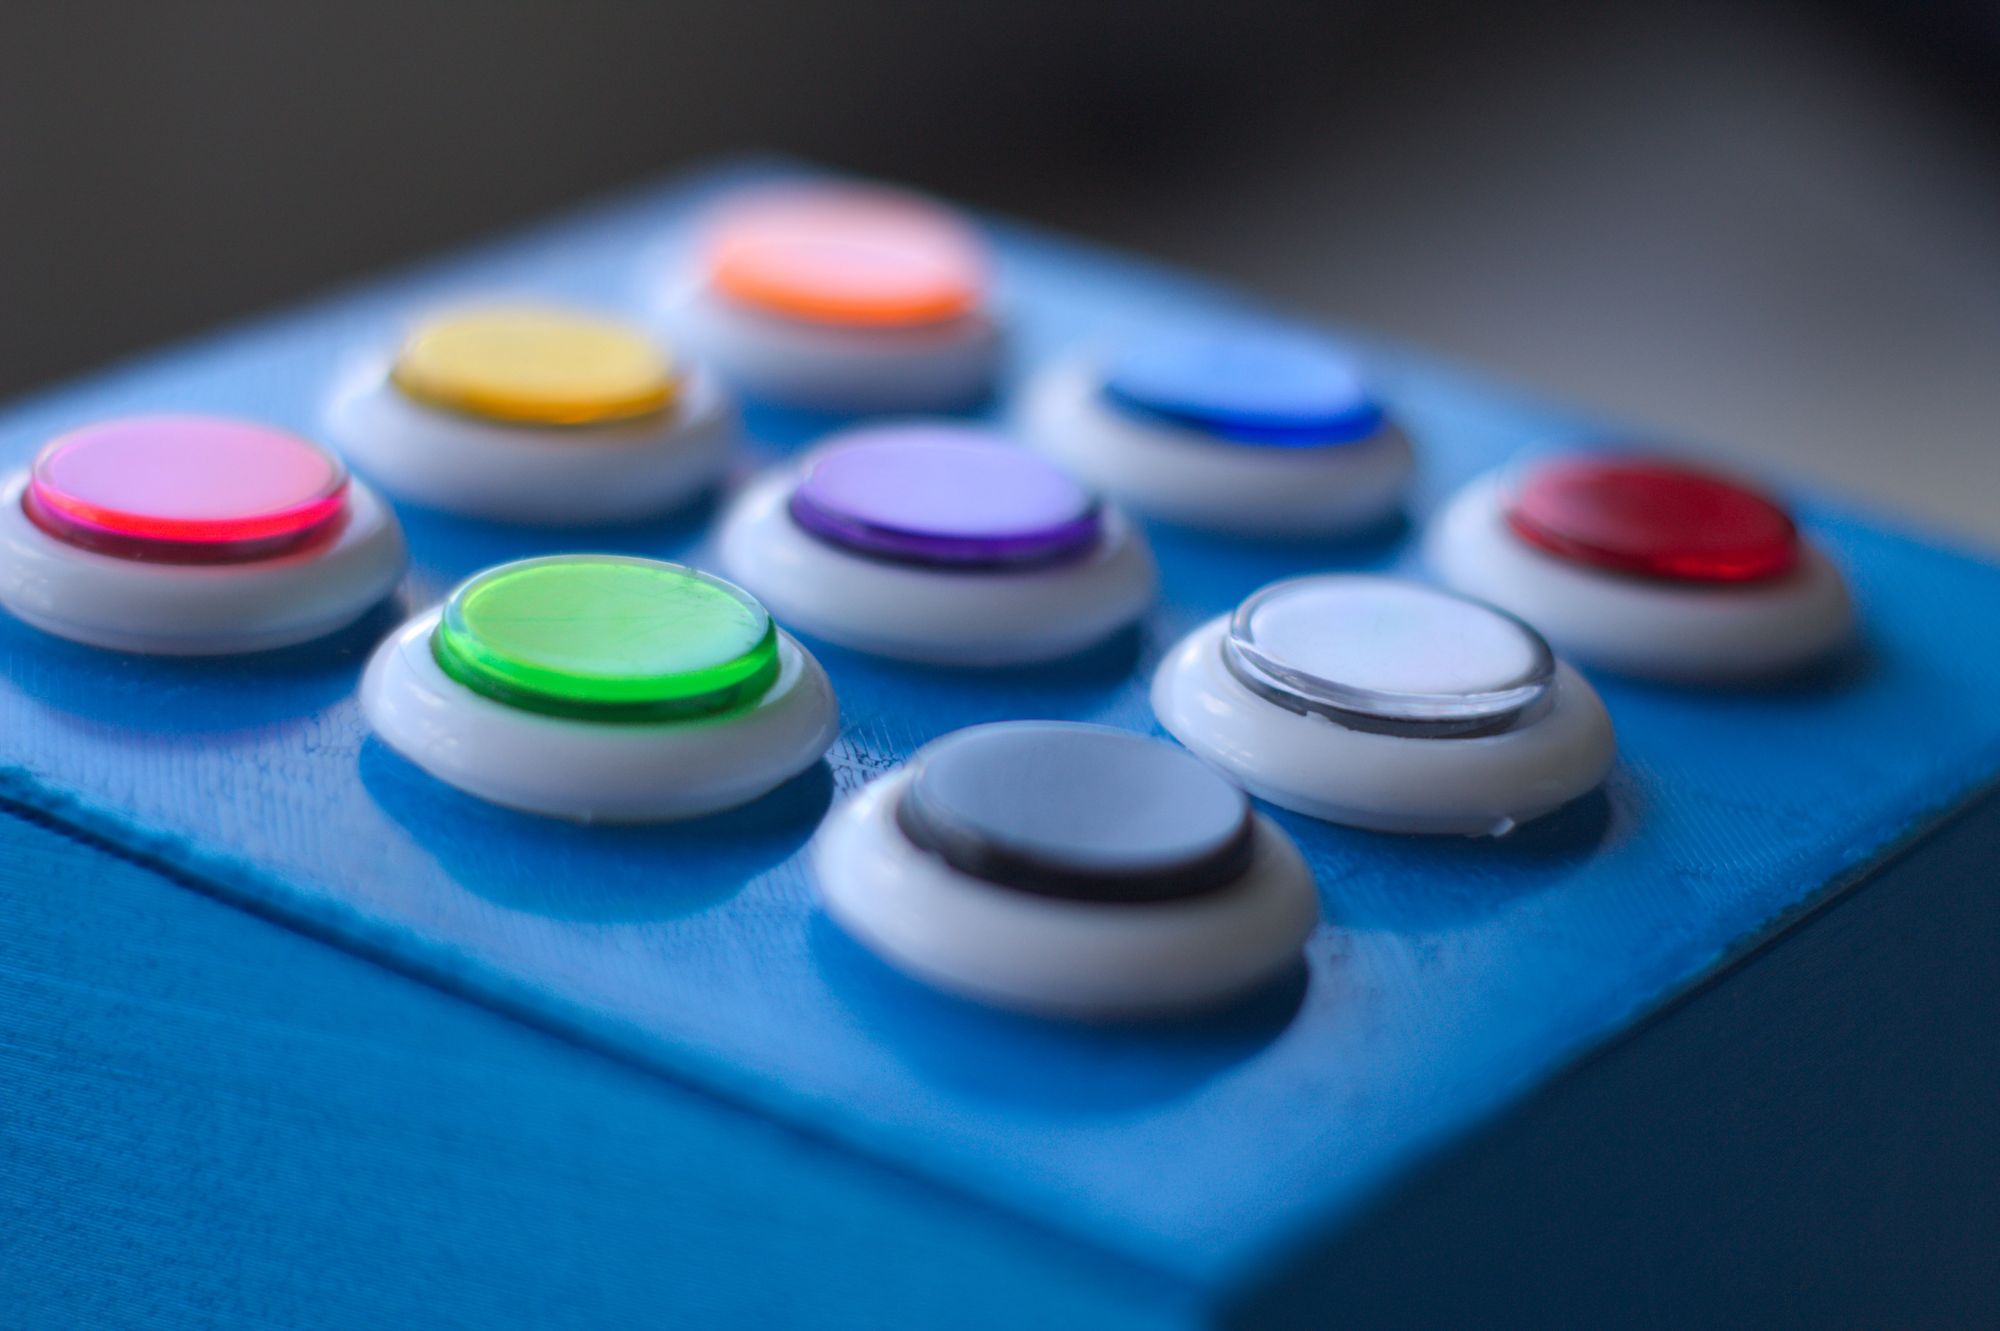
In this article you’ll see how to style a button using CSS.
My goal here is mostly to showcase how different CSS rules and styles are applied and used. We won’t see much design inspiration nor will we discuss ideas for styling.
Instead, this will be more of an overview of how the styles themselves work, what properties are commonly used, and how they can be combined.
You’ll first see how to create a button in HTML. Then you’ll learn how to override the default styles of buttons. Lastly, you’ll get a glimpse of how to style buttons for their three different states.
Here’s an Interactive Scrim of CSS Button Style
Table of Contents
- Create a button in HTML
- Change default styling of buttons
- Change the background color
- Change text color
- Change the border style
- Change the size
- Style button states
- Style hover state
- Style focus state
- Style active state
- Conclusion
Let’s get started!
How to Create a Button in HTML
To create a button, use the <button> element.
This is a more accessible and semantic option compared to using a generic container which is created with the <div> element.
In the index.html file below, I’ve created the basic structure for a webpage and added a single button:
<!DOCTYPE html>
<html lang="en">
<head>
    <meta charset="UTF-8">
    <meta http-equiv="X-UA-Compatible" content="IE=edge">
    <meta name="viewport" content="width=device-width, initial-scale=1.0">
    <link rel="stylesheet" href="style.css">
    <title>CSS Button Style</title>
</head>
<body>
    <button type="button" class="button">Click me!</button>
</body>
</html>
Let’s break down the line <button type="button" class="button">Click me!</button>:
- You first add the button element, which consists of an opening
<button>and closing</button>tag. - The
type="button"attribute in the opening<button>tag explicitly creates a clickable button. Since this particular button is not used for submitting a form, it is useful for semantic reasons to add it in order to make the code clearer and not trigger any unwanted actions. - The
class="button"attribute will be used to style the button in a separate CSS file. The valuebuttoncould be any other name you choose. For example you could have usedclass="btn". - The text
Click me!is the visible text inside the button.
Any styles that will be applied to the button will go inside a spearate style.css file.
You can apply the styles to the HTML content by linking the two files together. You do this with the <link rel="stylesheet" href="style.css"> tag which was used in index.html.
In the style.css file, I’ve added some styling which only centers the button in the middle of the browser window.
Notice that the class="button" is used with the .button selector. This is a way to apply styles directly to the button.
* {
    box-sizing: border-box;
}

body {
    display:flex;
    justify-content: center;
    align-items: center;
    margin:50px auto;
}

.button {
    position: absolute;
    top:50%
}
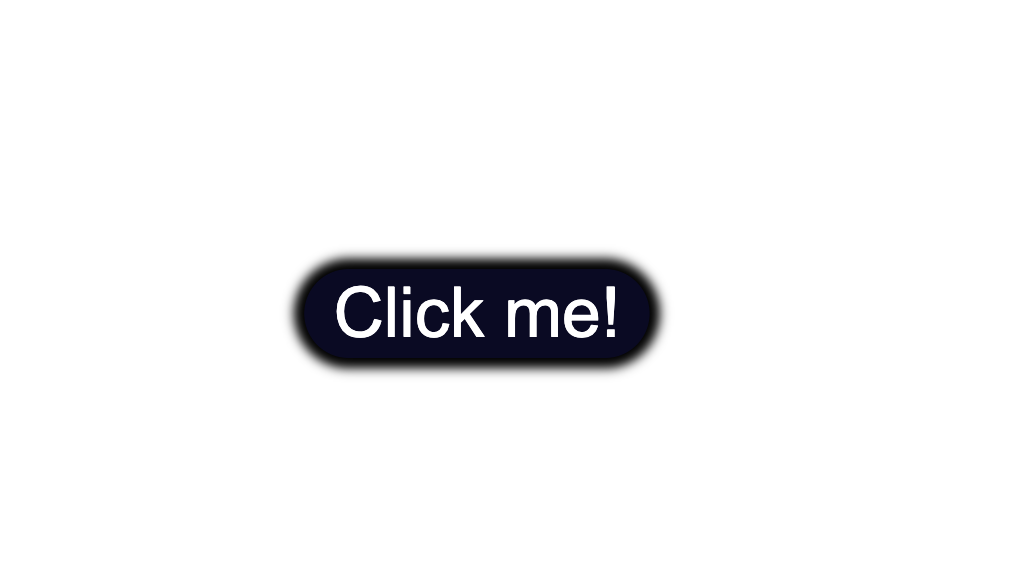
The code from above will result in the following:
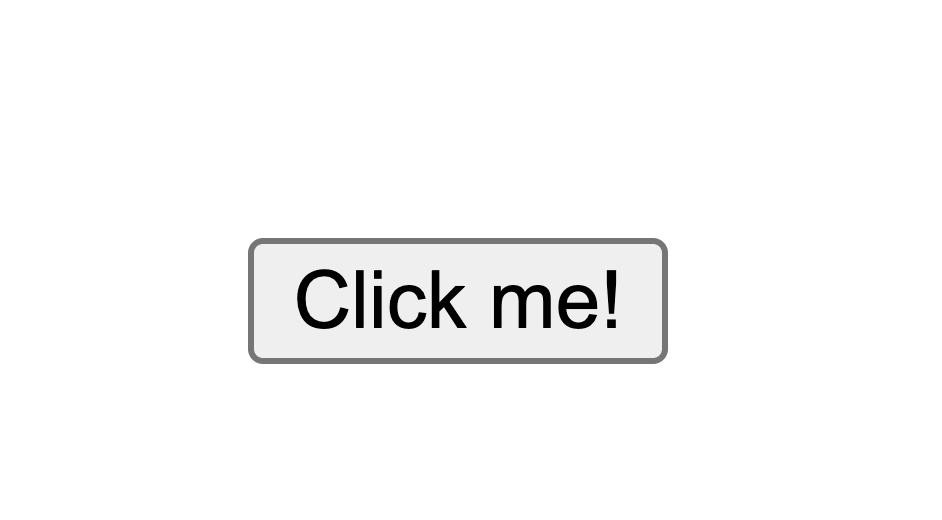
The default styling of buttons will vary depending on the browser you’re using.
This is an example of how the native styles for buttons look on the Google Chrome browser.
How to Change the Default Styling of Buttons
How to Change the Background Color of Buttons
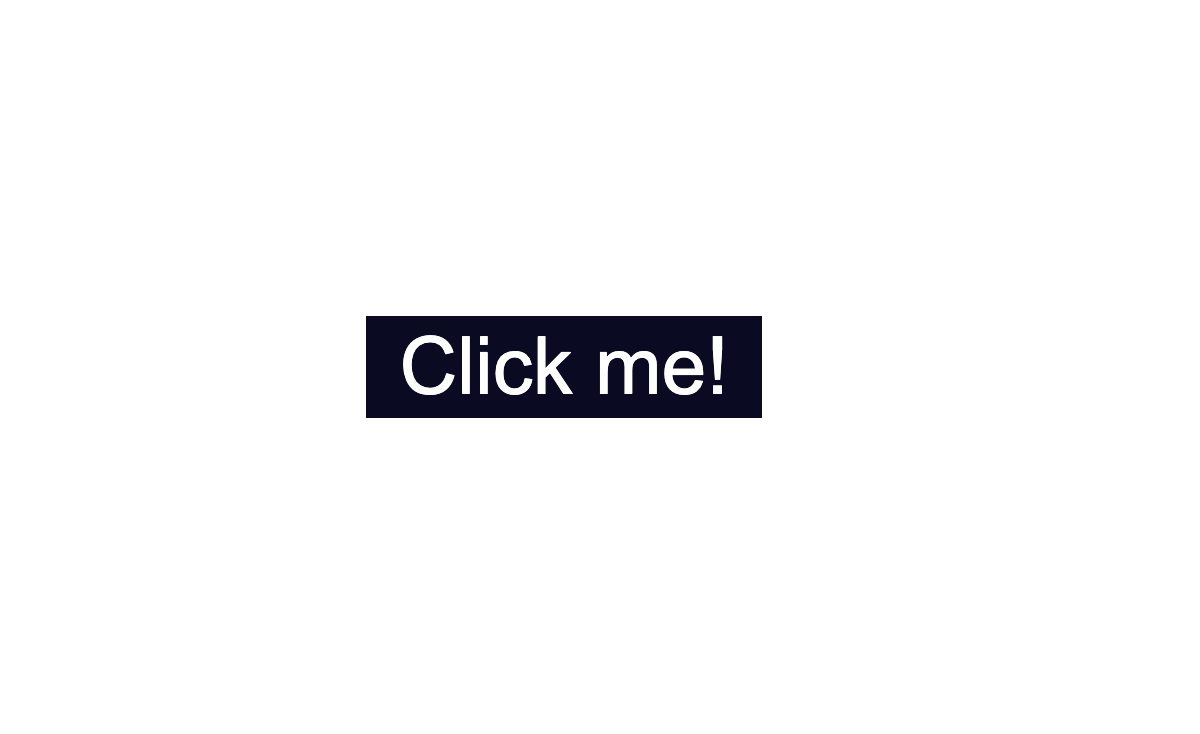
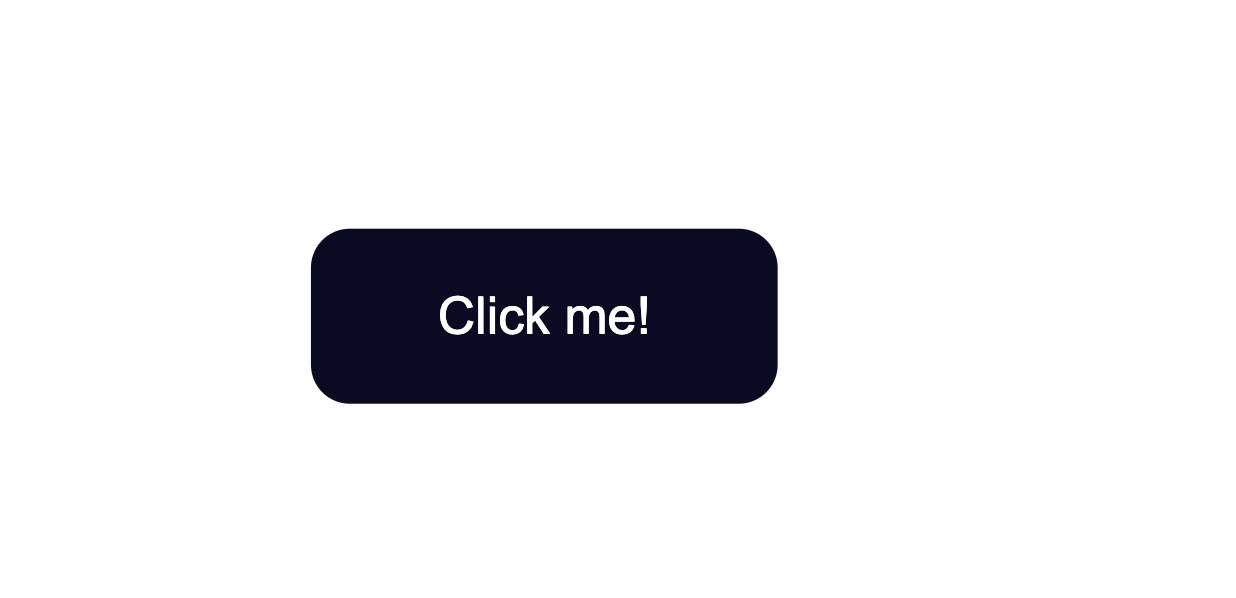
To change the background color of the button, use the CSS background-color property and give it a value of a color of your taste.
In the .button selector, you use background-color:#0a0a23; to change the background color of the button.
.button {
    position: absolute;
    top:50%;
    background-color:#0a0a23;
}

How to Change the Text Color of Buttons
The default color of text is black, so when you add a dark background color you will notice that the text has disappeared.
Another thing to make sure of is that there is enough contrast between the button’s background color and text color. This helps make the text more readable and easy on the eyes.
Next, use the color property to change the color of text:
.button {
    position: absolute;
    top:50%;
    background-color:#0a0a23;
    color: #fff;
}

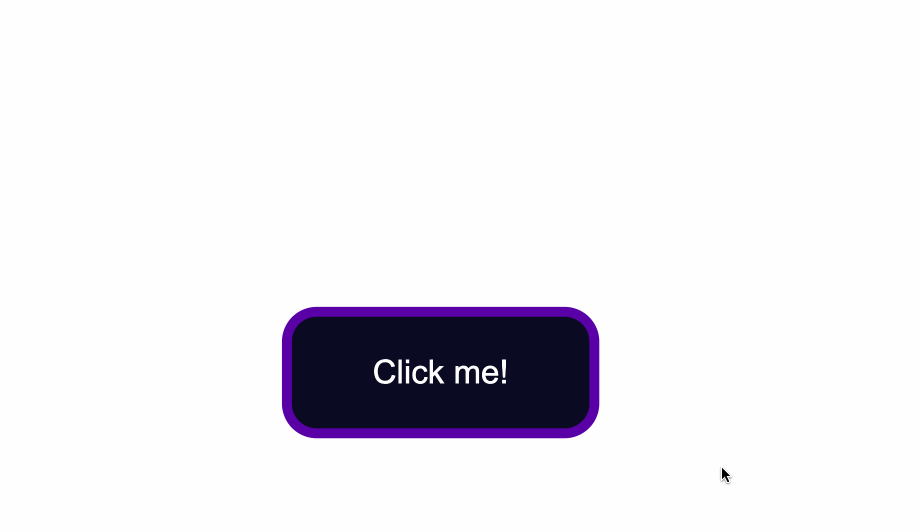
How to Change the Border Style of Buttons
Notice the grey around the edges of the button? That is the default color of the button’s borders.
One way to fix this is to use the border-color property. You set the value to be the same as the value of background-color. This makes sure the borders have the same color as the background of the button.
Another way would be to remove the border around the button entirely by using border:none;.
.button {
  position: absolute;
  top:50%;
  background-color:#0a0a23;
  color: #fff;
  border:none;
}
Next, you can also round-up the edges of the button by using the border-radius property, like so:
.button {
    position: absolute;
    top:50%;
    background-color:#0a0a23;
    color: #fff;
    border:none;
    border-radius:10px;
  }
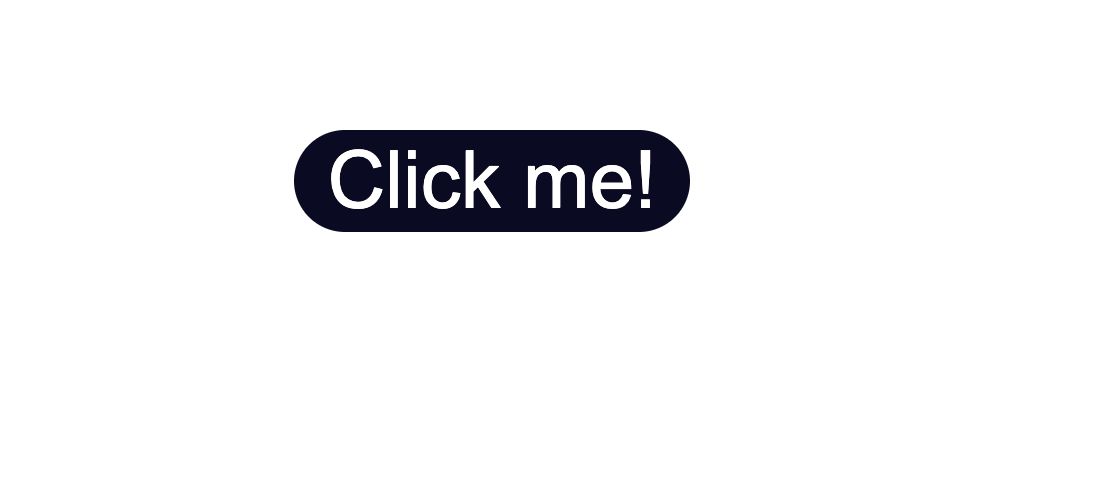
You could also add a slight dark shadow effect around the button by using the box-shadow property:
 position: absolute;
    top:50%;
    background-color:#0a0a23;
    color: #fff;
    border:none;
    border-radius:10px;
    box-shadow: 0px 0px 2px 2px rgb(0,0,0);
How to Change the Size of Buttons
The way to create more space inside the button’s borders is to increase the padding of the button.
Below I added a value of 15px for the top, bottom, right, and left padding of the button.
I also set a minimum height and width, with the min-height and min-width properties respectively. Buttons need to be large enough for all different kind of devices.
.button {
    position: absolute;
    top:50%;
    background-color:#0a0a23;
    color: #fff;
    border:none;
    border-radius:10px;
    padding:15px;
    min-height:30px;
    min-width: 120px;
  }
How to Style Button States
Buttons have three different states:
:hover:focus:active
It’s best that the three states are styled differently and don’t share the same styles.
In the following sections I’ll give a brief explanation on what each one of the states mean and what triggers them. You’ll also see some ways you can style the button for each separate state.
Here’s an interactive scrim about styling button states:
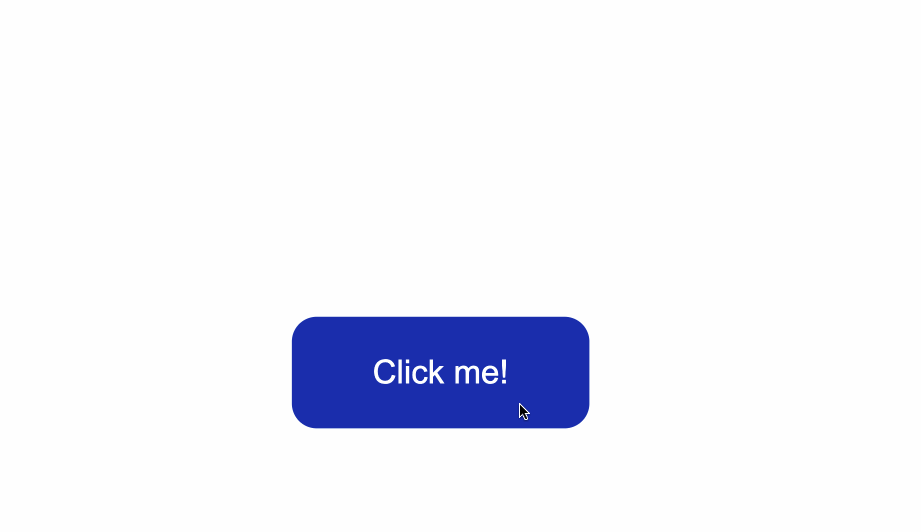
How to Style :hover States
The :hover state becomes present when a user hovers over a button, by bringing their mouse or trackpad over it, without selecting it or clicking on it.
To change the button’s styles when you hover over it, use the :hover CSS
pseudoclass selector.
A common change to make with :hover is switching the background-color of the button.
To make the change less sudden, pair :hover with the transition property.
The transition property will help make the transition from no state to a :hover state much smoother.
The change of background color will happen a bit slower than it would without the transition property. This will also help make the end result less jarring for the user.
.button:hover {
      background-color:#002ead;
      transition: 0.7s;
  }
In the example above, I used a Hex color code value to make the background color a lighter shade for when I hover over the button.
With the help of the transition property I also caused a delay of 0.7s when the transition from no state to a :hover state happens. This caused a slower transition from the original #0a0a23 background color to the #002ead background color.

Keep in mind that the :hover pseudoclass does not work for mobile device screens and mobile apps. Choose to use hover effects only for desktop web applications and not touch screens.
How to Style :focus States
The :focus state takes effect for keyboard users — specifically it will activate when you focus on a button by hitting the Tab key (⇥).
If you’re following along, when you focus on the button after pressing the Tab key, you’ll see the following:
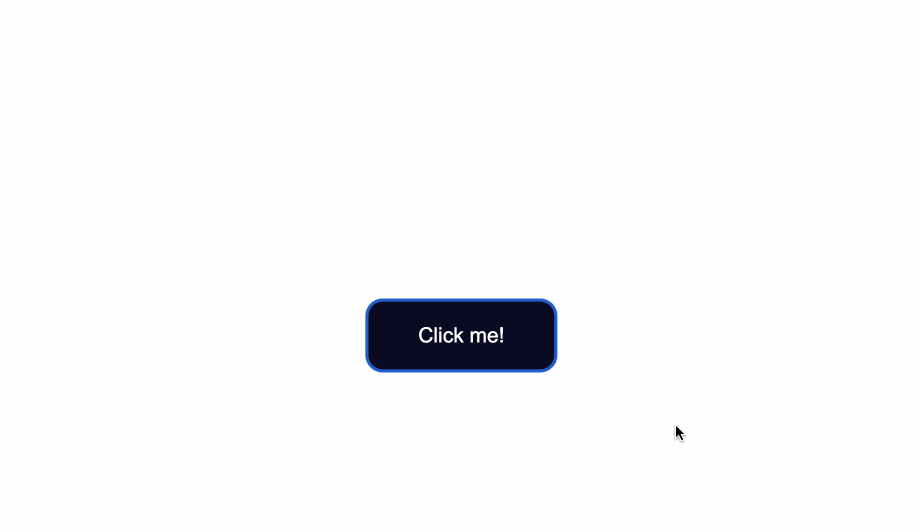
Notice the slight light blue outline around the button when it’s gained focus?
Browsers have default styling for the :focus pseudoclass, for accessibility keyboard navigation purposes. It’s not a good idea to remove that outline altogether.
You can however create custom styles for it and make it easily detectable.
A way to do so is by setting the outline color to first be transparent.
Following that, you can maintain the outline-style to solid. Lastly, using the box-shadow property, you can add a color of your liking for when the element is focused on:
 .button:focus {
    outline-color: transparent;
    outline-style:solid;
    box-shadow: 0 0 0 4px #5a01a7;
}
You can also again pair these styles with the transition property, depending on the effect you want to achieve:
  .button:focus {
    outline-color: transparent;
    outline-style:solid;
    box-shadow: 0 0 0 4px #5a01a7;
    transition: 0.7s;
}
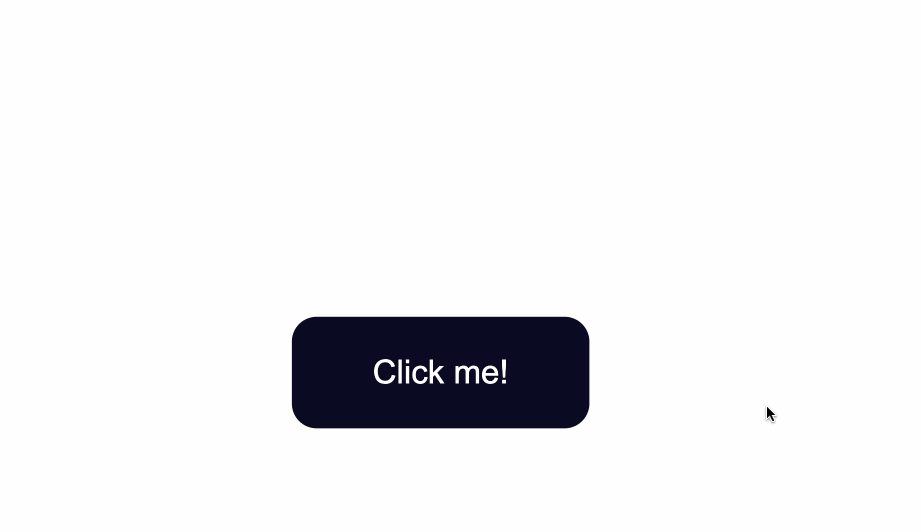
How to Style for the :active State
The :active state gets activated when you click on the button by either clicking the computer’s mouse or pressing down on the laptop’s trackpad.
That being said, look at what happens when I click the button after I’ve applied and kept the styles for the :hover and :focus states:
The :hover state styles are applied before clicking when I hover over the button.
The :focus state styles are applied also, because when a button is clicked it also gains a :focus state alongside an :active one.
However, keep in mind that they are not the same thing.
:focus state is when an element is being focused on and :active is when a user clicks on an element by holding and pressing down on it.
To change the style for when a user clicks a button, apply styles to the :active CSS pseudoselector.
In this case, I’ve changed the background color of the button when a user clicks on it
.button:active {
    background-color: #ffbf00;
}

Conclusion
And there you have it! You now know the basics of how to style a button with CSS.
We went over how to change the background color and text color of buttons as well as how to style buttons for their different states.
To learn more about web design, check out freeCodeCamp’s Responsive Web Design Certification. In the interactive lessons, you’ll learn HTML and CSS by building 15 practice projects and 5 certification projects.
Note that the above cert is still in beta — if you want the latest stable version, check here.
Thanks for reading and happy coding!
Learn to code for free. freeCodeCamp’s open source curriculum has helped more than 40,000 people get jobs as developers. Get started
In this article you’ll see how to style a button using CSS.
My goal here is mostly to showcase how different CSS rules and styles are applied and used. We won’t see much design inspiration nor will we discuss ideas for styling.
Instead, this will be more of an overview of how the styles themselves work, what properties are commonly used, and how they can be combined.
You’ll first see how to create a button in HTML. Then you’ll learn how to override the default styles of buttons. Lastly, you’ll get a glimpse of how to style buttons for their three different states.
Here’s an Interactive Scrim of CSS Button Style
Table of Contents
- Create a button in HTML
- Change default styling of buttons
- Change the background color
- Change text color
- Change the border style
- Change the size
- Style button states
- Style hover state
- Style focus state
- Style active state
- Conclusion
Let’s get started!
How to Create a Button in HTML
To create a button, use the <button> element.
This is a more accessible and semantic option compared to using a generic container which is created with the <div> element.
In the index.html file below, I’ve created the basic structure for a webpage and added a single button:
<!DOCTYPE html>
<html lang="en">
<head>
    <meta charset="UTF-8">
    <meta http-equiv="X-UA-Compatible" content="IE=edge">
    <meta name="viewport" content="width=device-width, initial-scale=1.0">
    <link rel="stylesheet" href="style.css">
    <title>CSS Button Style</title>
</head>
<body>
    <button type="button" class="button">Click me!</button>
</body>
</html>
Let’s break down the line <button type="button" class="button">Click me!</button>:
- You first add the button element, which consists of an opening
<button>and closing</button>tag. - The
type="button"attribute in the opening<button>tag explicitly creates a clickable button. Since this particular button is not used for submitting a form, it is useful for semantic reasons to add it in order to make the code clearer and not trigger any unwanted actions. - The
class="button"attribute will be used to style the button in a separate CSS file. The valuebuttoncould be any other name you choose. For example you could have usedclass="btn". - The text
Click me!is the visible text inside the button.
Any styles that will be applied to the button will go inside a spearate style.css file.
You can apply the styles to the HTML content by linking the two files together. You do this with the <link rel="stylesheet" href="style.css"> tag which was used in index.html.
In the style.css file, I’ve added some styling which only centers the button in the middle of the browser window.
Notice that the class="button" is used with the .button selector. This is a way to apply styles directly to the button.
* {
    box-sizing: border-box;
}

body {
    display:flex;
    justify-content: center;
    align-items: center;
    margin:50px auto;
}

.button {
    position: absolute;
    top:50%
}
The code from above will result in the following:
The default styling of buttons will vary depending on the browser you’re using.
This is an example of how the native styles for buttons look on the Google Chrome browser.
How to Change the Default Styling of Buttons
How to Change the Background Color of Buttons
To change the background color of the button, use the CSS background-color property and give it a value of a color of your taste.
In the .button selector, you use background-color:#0a0a23; to change the background color of the button.
.button {
    position: absolute;
    top:50%;
    background-color:#0a0a23;
}
How to Change the Text Color of Buttons
The default color of text is black, so when you add a dark background color you will notice that the text has disappeared.
Another thing to make sure of is that there is enough contrast between the button’s background color and text color. This helps make the text more readable and easy on the eyes.
Next, use the color property to change the color of text:
.button {
    position: absolute;
    top:50%;
    background-color:#0a0a23;
    color: #fff;
}
How to Change the Border Style of Buttons
Notice the grey around the edges of the button? That is the default color of the button’s borders.
One way to fix this is to use the border-color property. You set the value to be the same as the value of background-color. This makes sure the borders have the same color as the background of the button.
Another way would be to remove the border around the button entirely by using border:none;.
.button {
  position: absolute;
  top:50%;
  background-color:#0a0a23;
  color: #fff;
  border:none;
}
Next, you can also round-up the edges of the button by using the border-radius property, like so:
.button {
    position: absolute;
    top:50%;
    background-color:#0a0a23;
    color: #fff;
    border:none;
    border-radius:10px;
  }
You could also add a slight dark shadow effect around the button by using the box-shadow property:
 position: absolute;
    top:50%;
    background-color:#0a0a23;
    color: #fff;
    border:none;
    border-radius:10px;
    box-shadow: 0px 0px 2px 2px rgb(0,0,0);
How to Change the Size of Buttons
The way to create more space inside the button’s borders is to increase the padding of the button.
Below I added a value of 15px for the top, bottom, right, and left padding of the button.
I also set a minimum height and width, with the min-height and min-width properties respectively. Buttons need to be large enough for all different kind of devices.
.button {
    position: absolute;
    top:50%;
    background-color:#0a0a23;
    color: #fff;
    border:none;
    border-radius:10px;
    padding:15px;
    min-height:30px;
    min-width: 120px;
  }
How to Style Button States
Buttons have three different states:
:hover:focus:active
It’s best that the three states are styled differently and don’t share the same styles.
In the following sections I’ll give a brief explanation on what each one of the states mean and what triggers them. You’ll also see some ways you can style the button for each separate state.
Here’s an interactive scrim about styling button states:
How to Style :hover States
The :hover state becomes present when a user hovers over a button, by bringing their mouse or trackpad over it, without selecting it or clicking on it.
To change the button’s styles when you hover over it, use the :hover CSS
pseudoclass selector.
A common change to make with :hover is switching the background-color of the button.
To make the change less sudden, pair :hover with the transition property.
The transition property will help make the transition from no state to a :hover state much smoother.
The change of background color will happen a bit slower than it would without the transition property. This will also help make the end result less jarring for the user.
.button:hover {
      background-color:#002ead;
      transition: 0.7s;
  }
In the example above, I used a Hex color code value to make the background color a lighter shade for when I hover over the button.
With the help of the transition property I also caused a delay of 0.7s when the transition from no state to a :hover state happens. This caused a slower transition from the original #0a0a23 background color to the #002ead background color.
Keep in mind that the :hover pseudoclass does not work for mobile device screens and mobile apps. Choose to use hover effects only for desktop web applications and not touch screens.
How to Style :focus States
The :focus state takes effect for keyboard users — specifically it will activate when you focus on a button by hitting the Tab key (⇥).
If you’re following along, when you focus on the button after pressing the Tab key, you’ll see the following:
Notice the slight light blue outline around the button when it’s gained focus?
Browsers have default styling for the :focus pseudoclass, for accessibility keyboard navigation purposes. It’s not a good idea to remove that outline altogether.
You can however create custom styles for it and make it easily detectable.
A way to do so is by setting the outline color to first be transparent.
Following that, you can maintain the outline-style to solid. Lastly, using the box-shadow property, you can add a color of your liking for when the element is focused on:
 .button:focus {
    outline-color: transparent;
    outline-style:solid;
    box-shadow: 0 0 0 4px #5a01a7;
}
You can also again pair these styles with the transition property, depending on the effect you want to achieve:
  .button:focus {
    outline-color: transparent;
    outline-style:solid;
    box-shadow: 0 0 0 4px #5a01a7;
    transition: 0.7s;
}
How to Style for the :active State
The :active state gets activated when you click on the button by either clicking the computer’s mouse or pressing down on the laptop’s trackpad.
That being said, look at what happens when I click the button after I’ve applied and kept the styles for the :hover and :focus states:
The :hover state styles are applied before clicking when I hover over the button.
The :focus state styles are applied also, because when a button is clicked it also gains a :focus state alongside an :active one.
However, keep in mind that they are not the same thing.
:focus state is when an element is being focused on and :active is when a user clicks on an element by holding and pressing down on it.
To change the style for when a user clicks a button, apply styles to the :active CSS pseudoselector.
In this case, I’ve changed the background color of the button when a user clicks on it
.button:active {
    background-color: #ffbf00;
}
Conclusion
And there you have it! You now know the basics of how to style a button with CSS.
We went over how to change the background color and text color of buttons as well as how to style buttons for their different states.
To learn more about web design, check out freeCodeCamp’s Responsive Web Design Certification. In the interactive lessons, you’ll learn HTML and CSS by building 15 practice projects and 5 certification projects.
Note that the above cert is still in beta — if you want the latest stable version, check here.
Thanks for reading and happy coding!
Learn to code for free. freeCodeCamp’s open source curriculum has helped more than 40,000 people get jobs as developers. Get started
Тег <button> используется для создания интерактивных кнопок на веб-странице. В отличие от одинарного тега <input> (с атрибутом type=”button”), при помощи которого также можно создавать кнопки, содержимым тега <button> может быть как текст, так и изображение.
Если вы хотите создать кнопку в HTML форме, используйте элемент <input>, так как браузеры по-разному отображают содержимое тега <button>.
Содержимое тега пишется между открывающим <button> и закрывающим </button> тегами.
Пример
<!DOCTYPE html>
<html>
   <head>
       <title>Заголовок документа</title>
   </head>
   <body>
	<h1>Вот наша кнопка..</h1>
	<button type="button">Нажать</button>
   </body>
</html>
Результат

К тегу <button> можно применять CSS стили для изменения внешнего вида кнопки, ее размера, цвета, шрифта текста и т.д.
Пример
<!DOCTYPE html>
<html>
  <head>
    <title>Заголовок документа</title>
  </head>
  <body>
    Обычная кнопка
    <button type="button">Добавить в корзину</button>
    <hr />
    Кнопка с красным текстом
    <button type="button" style="color: red;"><b>Книга HTML</b></button>
    <hr />
    Кнопка с увеличенным размером шрифта
    <button type="button" style="font: bold 14px Arial;">Загрузить книгу </button><br />
  </body>
</html>
Результат

У тега <button> нет обязательных атрибутов, однако мы рекомендуем всегда использовать атрибут type=”button”, если тег используется в качестве обычной кнопки.
Тег <button> поддерживает глобальные атрибуты и атрибуты событий.
Узнайте, как стиль кнопок с помощью CSS.
Основные стили кнопок
Пример
.button {
background-color: #4CAF50; /* Green */
border: none;
color: white;
padding: 15px 32px;
text-align: center;
text-decoration: none;
display: inline-block;
font-size: 16px;
}
Цвета кнопок
Используйте свойство background-color для изменения цвета фона кнопки:
Пример
.button1 {background-color: #4CAF50;} /* Green */
.button2
{background-color: #008CBA;} /* Blue */
.button3 {background-color:
#f44336;} /* Red */
.button4 {background-color: #e7e7e7; color: black;} /* Gray */
.button5
{background-color: #555555;} /* Black */
Размеры кнопок
Используйте свойство font-size для изменения размера шрифта кнопки:
Пример
.button1 {font-size: 10px;}
.button2 {font-size: 12px;}
.button3
{font-size: 16px;}
.button4 {font-size: 20px;}
.button5 {font-size: 24px;}
Используйте свойство padding для изменения заполнения кнопки:
Пример
.button1 {padding: 10px
24px;}
.button2 {padding: 12px 28px;}
.button3 {padding: 14px 40px;}
.button4 {padding: 32px 16px;}
.button5 {padding: 16px;}
Закругленные кнопки
Используйте свойство border-radius для добавления скругленных углов к кнопке:
Пример
.button1 {border-radius: 2px;}
.button2 {border-radius: 4px;}
.button3
{border-radius: 8px;}
.button4 {border-radius: 12px;}
.button5 {border-radius: 50%;}
Цветные границы кнопок
Используйте свойство border, чтобы добавить цветную рамку к кнопке:
Пример
.button1 {
background-color: white;
color: black;
border: 2px solid #4CAF50; /* Green */
}
…
Наведите кнопки
Используйте селектор :hover для изменения стиля кнопки при наведении на нее указателя мыши.
Совет: Используйте свойство transition-duration для определения скорости эффекта «Hover»:
Пример
.button {
-webkit-transition-duration: 0.4s; /* Safari */
transition-duration: 0.4s;
}
.button:hover {
background-color: #4CAF50; /* Green */
color: white;
}
…
Кнопки теней
Use the box-shadow property to add shadows to a button:
Пример
.button1 {
box-shadow: 0 8px 16px 0 rgba(0,0,0,0.2), 0 6px 20px 0
rgba(0,0,0,0.19);
}
.button2:hover {
box-shadow: 0 12px
16px 0 rgba(0,0,0,0.24), 0 17px 50px 0 rgba(0,0,0,0.19);
}
Отключенные кнопки
Используйте свойство opacity для добавления прозрачности к кнопке (создает «отключенный» вид).
Совет: Вы также можете добавить свойство cursor со значением «not-allowed», которое будет отображать «нет парковки знак» при наведении указателя мыши на кнопку:
Пример
.disabled {
opacity: 0.6;
cursor: not-allowed;
}
Ширина кнопки
По умолчанию размер кнопки определяется по ее текстовому содержимому (так же широко, как и ее содержимое). Используйте свойство width для изменения ширины кнопки:
Пример
.button1 {width: 250px;}
.button2 {width: 50%;}
.button3 {width:
100%;}
Группы кнопок
Удалите поля и добавьте float:left к каждой кнопке, чтобы создать группу кнопок:
Пример
.button {
float: left;
}
Группа кнопок на границе
Используйте свойство border для создания группы кнопок с рамками:
Пример
.button {
float: left;
border: 1px
solid green;
}
Вертикальная группа кнопок
Используйте display:block вместо float:left для группирования кнопок ниже друг друга, вместо того, чтобы бок о бок:
Пример
.button {
display: block;
}
Кнопка на картинке

Анимированные кнопки
Пример
Добавить стрелку на наведении:
Пример
Добавить «нажатия» эффект на кнопку:
Пример
Исчезать при наведении:
Пример
Добавить эффект «рябь» при щелчке:
Стилизация ссылок и кнопок на примере разных сайтов с поддержкой разными состояний – наведение курсора, нажатие, попадание в фокус и заблокированное состояние элемента.
1
Скругленная кнопка
<a class="btn" href="##">Link</a>
<input class="btn" type="button" value="Input">
<button class="btn">Button</button>
<button class="btn" disabled>Disabled</button>
HTML
.btn {
	display: inline-block;
	box-sizing: border-box;
	padding: 0 25px;
	margin: 0 15px 15px 0;
	outline: none;
	border: 1px solid #fff;
	border-radius: 50px;
	height: 46px;
	line-height: 46px;
	font-size: 14px;
	font-weight: 600;
	text-decoration: none;
	color: #444;
	background-color: #fff;
	box-shadow: 0 4px 6px rgb(65 132 144 / 10%), 0 1px 3px rgb(0 0 0 / 8%);
	cursor: pointer;
	user-select: none;
	appearance: none;
	touch-action: manipulation;
	vertical-align: top;
	transition: box-shadow 0.2s;
}
.btn:focus-visible {
	border: 1px solid #4c51f9;
	outline: none;
}
.btn:hover {
	transition: all 0.2s;
	box-shadow: 0 7px 14px rgb(65 132 144 / 10%), 0 3px 6px rgb(0 0 0 / 8%);
}
.btn:active {
	background-color: #808080;
}
.btn:disabled {
	background-color: #eee;
	border-color: #eee;
	color: #444;
	cursor: not-allowed;
}
CSS
Результат:
2
Двойная рамка
<a class="btn" href="##"><span>Link</span></a>
<button class="btn"><span>Button</span></button>
<button class="btn" disabled><span>Disabled</span></button>
HTML
.btn {
	display: inline-block;
	box-sizing: border-box;
	padding: 1px;
	margin: 0 15px 15px 0;
	outline: none;
	border: 1px solid #F18230;
	border-radius: 25px;
	height: 46px;
	line-height: 0;
	font-size: 14px;
	font-weight: 500;
	text-decoration: none;
	color: #fff;
	background-color: #fff;
	position: relative;
	overflow: hidden;
	vertical-align: top;
	cursor: pointer;
	user-select: none;
	appearance: none;
	touch-action: manipulation;
}
.btn span {
	display: block;
	box-sizing: border-box;
	padding: 0 25px;
	height: 42px;
	line-height: 38px;
	border: 1px solid #F18230;
	border-radius: 25px;
	font-size: 14px;
	color: #FFFFFF;
	background: linear-gradient(180deg, rgba(255, 255, 255, 0.25) 0%, rgba(255, 255, 255, 0) 100%), #F18230;
	text-align: center;
	font-weight: 600;
}
.btn:focus-visible {
	box-shadow: 0 0 0 3px lightskyblue;
}
.btn:hover span {
	background-color: #fba768
}
.btn:active span {
	background-color: #c17237 !important;
}
.btn:disabled {
	opacity: 0.65;
	pointer-events: none;
}
CSS
Результат:
3
Yahoo
<a class="btn" href="##">Link</a>
<input class="btn" type="button" value="Input">
<button class="btn">Button</button>
<button class="btn" disabled>Disabled</button>
HTML
.btn {
	display: inline-block;
	box-sizing: border-box;
	padding: 0 20px;
	margin: 0 15px 15px 0;
	outline: none;
	border: none;
	border-radius: 4px;
	height: 32px;
	line-height: 32px;
	font-size: 14px;
	font-weight: 500;
	text-decoration: none;
	color: #fff;
	background-color: #3775dd;
	box-shadow: 0 2px #21487f;
	cursor: pointer;
	user-select: none;
	appearance: none;
	touch-action: manipulation;
	vertical-align: top;
}
.btn:hover {
	background-color: #002fed;
}
.btn:active {
	background-color: #2f599e !important;
}
.btn:focus-visible {
	box-shadow: 0 0 0 3px lightskyblue;
}
.btn:disabled {
	background-color: #6c87b5;
	pointer-events: none;
}
CSS
Результат:
4
<a class="btn" href="##">Link</a>
<button class="btn">Button</button>
<button class="btn" disabled>Disabled</button>
HTML
const buttons = document.querySelectorAll(".btn");
buttons.forEach((button) => {
	button.onclick = function(e){
		let x = e.clientX - e.target.offsetLeft;
		let y = e.clientY - e.target.offsetTop;
		let ripple = document.createElement("span");
		ripple.style.left = `${x}px`;
		ripple.style.top = `${y}px`;
		this.appendChild(ripple);
		setTimeout(function(){
			ripple.remove();
		}, 600);
	}
});
JS
.btn {
	display: inline-block;
	box-sizing: border-box;
	padding: 0 15px;
	margin: 0 15px 15px 0;
	outline: none;
	border: none;
	border-radius: 4px;
	height: 36px;
	line-height: 36px;
	font-size: 14px;
	font-weight: 500;
	text-decoration: none;
	color: #fff;
	background-color: #1a73e8;
	position: relative;
	overflow:hidden;
	vertical-align: top;
	cursor: pointer;
	user-select: none;
	appearance: none;
	touch-action: manipulation;
	z-index: 1;
}
.btn span{
	position: absolute;
	background: #fff;
	transform: translate(-50%, -50%);
	border-radius: 50%;
	pointer-events: none;
	animation: btn_ripples 0.6s linear infinite;
}
@keyframes btn_ripples {
	0% {
		width: 0px;
		height: 0px;
		opacity: 0.5;
	}
	100% {
		width: 1000px;
		height: 1000px;
		opacity: 0;
	}
}
.btn:hover {
	box-shadow: 0 1px 2px 0 rgb(26 115 232 / 45%), 0 1px 3px 1px rgb(26 115 232 / 30%);
	background-color: #297be6;
}
.btn:active {
	box-shadow: 0 1px 2px 0 rgb(26 115 232 / 45%), 0 2px 6px 2px rgb(26 115 232 / 30%);
	background-color: #1a73e8 !important;
}
.btn:focus-visible {
	box-shadow: 0 0 0 3px lightskyblue;
}
.btn:disabled {
	pointer-events: none;
	opacity: 0.65;
}
CSS
Результат:
5
<a class="btn" href="##">Link</a>
<input class="btn" type="button" value="Input">
<button class="btn">Button</button>
<button class="btn" disabled>Disabled</button>

<a class="btn-2" href="##">Link</a>
<input class="btn-2" type="button" value="Input">
<button class="btn-2">Button</button>
<button class="btn-2" disabled>Disabled</button>
HTML
.btn {
	display: inline-block;
	box-sizing: border-box;
	padding: 0 24px;
	margin: 0 15px 15px 0;
	outline: none;
	border: none;
	border-radius: 3px;
	height: 37px;
	line-height: 37px;
	font-size: 14px;
	text-transform: uppercase;
	font-weight: normal;
	text-decoration: none;
	color: #07bc4c;
	background-color: #fff;
	cursor: pointer;
	user-select: none;
	appearance: none;
	touch-action: manipulation;
	transition: box-shadow .18s ease-out,background .18s ease-out,color .18s ease-out;
}
.btn:focus-visible {
	box-shadow: 0 0 0 3px lightskyblue;
}
.btn:hover {
	box-shadow: 0 1px 1px 0  #cfcfcf, 0 2px 5px 0  #cfcfcf;
}
.btn:active {
	background-color: #efefef !important;
}
.btn:disabled {
	background-color: #eee;
	color: #444;
	pointer-events: none;
}

.btn-2 {
	display: inline-block;
	box-sizing: border-box;
	padding: 0 24px;
	margin: 0 15px 15px 0;
	outline: none;
	border: none;
	border-radius: 3px;
	height: 37px;
	line-height: 37px;
	font-size: 14px;
	text-transform: uppercase;
	font-weight: normal;
	text-decoration: none;
	color: #fff;
	background-color: #05cd51;
	cursor: pointer;
	user-select: none;
	appearance: none;
	touch-action: manipulation;
	transition: box-shadow .18s ease-out,background .18s ease-out,color .18s ease-out;
}
.btn-2:focus-visible {
	box-shadow: 0 0 0 3px lightskyblue;
}
.btn-2:hover {
	box-shadow: 0 1px 1px 0  #cfcfcf, 0 2px 5px 0  #cfcfcf;
}
.btn-2:active {
	background-color: #058c38 !important;
}
.btn-2:disabled {
	background-color: #aed2bc;
	color: #444;
	pointer-events: none;
}
CSS
Результат:
6
<a class="btn" href="##">Link</a>
<input class="btn" type="button" value="Input">
<button class="btn">Button</button>
<button class="btn" disabled>Disabled</button>
HTML
.btn {
	display: inline-block;
	box-sizing: border-box;
	padding: 0 20px;
	margin: 0 15px 15px 0;
	outline: none;
	border: none;
	border-radius: 6px;
	height: 40px;
	line-height: 40px;
	font-size: 17px;
	font-weight: 600;
	text-decoration: none;
	color: #385898;
	background-color: #e7f3ff;
	cursor: pointer;
	user-select: none;
	appearance: none;
	touch-action: manipulation;
}
.btn:focus-visible {
	box-shadow: 0 0 0 2px #666;
}
.btn:hover {
	background-color: #DBE7F2;
}
.btn:active {
	transform: scale(0.96);
}
.btn:disabled {
	pointer-events: none;
	opacity: 0.65;
}
CSS
Результат:
7
Вконтакте
<a class="btn" href="##">Link</a>
<input class="btn" type="button" value="Input">
<button class="btn">Button</button>
<button class="btn" disabled>Disabled</button>

<a class="btn-2" href="##">Link</a>
<input class="btn-2" type="button" value="Input">
<button class="btn-2">Button</button>
<button class="btn-2" disabled>Disabled</button>
HTML
.btn {
	display: inline-block;
	box-sizing: border-box;
	padding: 0 16px;
	margin: 0 15px 15px 0;
	outline: none;
	border: none;
	border-radius: 4px;
	height: 30px;
	line-height: 30px;
	font-size: 12.5px;
	font-weight: normal;
	text-decoration: none;
	vertical-align: top;
	color: #55677d;
	background-color: #dfe6ed;
	cursor: pointer;
	user-select: none;
	appearance: none;
	touch-action: manipulation;
	overflow: hidden;
}
.btn:focus-visible {
	box-shadow: 0 0 0 3px lightskyblue;
}
.btn:hover {
	opacity: 0.88;
}
.btn:active {
	line-height: 32px;
}
.btn:disabled {
	pointer-events: none;
	opacity: 0.65;
}

.btn-2 {
	display: inline-block;
	box-sizing: border-box;
	padding: 0 16px;
	margin: 0 15px 15px 0;
	outline: none;
	border: none;
	border-radius: 4px;
	height: 30px;
	line-height: 30px;
	font-size: 12.5px;
	font-weight: normal;
	text-decoration: none;
	vertical-align: top;
	color: #fff;
	background-color: #5181b8;
	cursor: pointer;
	user-select: none;
	appearance: none;
	touch-action: manipulation;
	overflow: hidden;
}
.btn-2:focus-visible {
	box-shadow: 0 0 0 3px lightskyblue;
}
.btn-2:hover {
	opacity: 0.88;
}
.btn-2:active {
	line-height: 32px;
}
.btn-2:disabled {
	pointer-events: none;
	opacity: 0.65;
}
CSS
Результат:
8
Habr
<a class="btn" href="##">Link</a>
<input class="btn" type="button" value="Input">
<button class="btn">Button</button>
<button class="btn" disabled>Disabled</button>

<a class="btn-2" href="##">Link</a>
<input class="btn-2" type="button" value="Input">
<button class="btn-2">Button</button>
<button class="btn-2" disabled>Disabled</button>
HTML
.btn {
	display: inline-block;
	box-sizing: border-box;
	padding: 0 13px;
	margin: 0 15px 15px 0;
	outline: none;
	border: 1px solid #a4afba;
	border-radius: 3px;
	height: 32px;
	line-height: 32px;
	font-size: 14px;
	font-weight: 500;
	text-decoration: none;
	color: #838a92;
	background-color: #fff;
	cursor: pointer;
	user-select: none;
	appearance: none;
	touch-action: manipulation;
}
.btn:focus-visible {
	box-shadow: 0 0 0 3px lightskyblue;
}
.btn:hover {
	border-color: #65a3be;
	color: #4e879c;
}
.btn:active {
	border-color: #78a2b7 !important;
	color: #3a728b !important;
}
.btn:disabled {
	background-color: #eee;
	color: #444;
	pointer-events: none;
}

.btn-2 {
	display: inline-block;
	box-sizing: border-box;
	padding: 0 13px;
	margin: 0 15px 15px 0;
	outline: none;
	border: 1px solid transparent;
	border-radius: 3px;
	height: 32px;
	line-height: 32px;
	font-size: 14px;
	font-weight: 500;
	text-decoration: none;
	color: #fff;
	background-color: #65a3be;
	cursor: pointer;
	user-select: none;
	appearance: none;
	touch-action: manipulation;
}
.btn-2:focus-visible {
	box-shadow: 0 0 0 3px lightskyblue;
}
.btn-2:hover {
	border-color: transparent;
	background-color: #4986a1;
	color: #fff;
}
.btn-2:active {
	border-color: #6f9cbc !important;
	background-color: #367089 !important;
}
.btn-2:disabled {
	background-color: #558cb7;
	color: #fff;
	pointer-events: none;
}
CSS
Результат:
9
Bootstrap
<a class="btn" href="##">Link</a>
<input class="btn" type="button" value="Input">
<button class="btn">Button</button>
<button class="btn" disabled>Disabled</button>

<a class="btn-2" href="##">Link</a>
<input class="btn-2" type="button" value="Input">
<button class="btn-2">Button</button>
<button class="btn-2" disabled>Disabled</button>
HTML
.btn {
	display: inline-block;
	box-sizing: border-box;
	padding: 0 15px;
	margin: 0 15px 15px 0;
	outline: none;
	border: 1px solid #6c757d;
	border-radius: 5px;
	height: 38px;
	line-height: 38px;
	font-size: 14px;
	font-weight: 600;
	text-decoration: none;
	color: #6c757d;
	background-color: #fff;
	cursor: pointer;
	user-select: none;
	appearance: none;
	touch-action: manipulation;
}
.btn:focus {
	box-shadow: 0 0 0 3px rgb(108 117 125 / 50%);
}
.btn:hover {
	color: #fff;
	background-color: #6c757d;
	border-color: #6c757d;
}
.btn:active {
	color: #fff;
	background-color: #6c757d;
	border-color: #6c757d;
}
.btn:disabled {
	pointer-events: none;
	opacity: 0.65;
}

.btn-2 {
	display: inline-block;
	box-sizing: border-box;
	padding: 0 15px;
	margin: 0 15px 15px 0;
	outline: none;
	border: 1px solid #7952b3;
	border-radius: 5px;
	height: 38px;
	line-height: 38px;
	font-size: 14px;
	font-weight: 600;
	text-decoration: none;
	color: #fff;
	background-color: #7952b3;
	cursor: pointer;
	user-select: none;
	appearance: none;
	touch-action: manipulation;
}
.btn-2:focus {
	box-shadow: 0 0 0 3px rgb(121 82 179 / 25%);
}
.btn-2:hover {
	background-color: #61428f;
	border-color: #61428f;
}
.btn-2:active {
	background-color: #61428f !important;
	border-color: #61428f !important;
}
.btn-2:disabled {
	pointer-events: none;
	opacity: 0.65;
}
CSS
Результат:
10
<a class="btn" href="##">Link</a>
<button class="btn">Button</button>
<button class="btn" disabled>Disabled</button>
HTML
body {
	padding: 15px 0;
}
.btn {
	text-decoration: none;
	color: #6b5770;
	background-image: linear-gradient(90deg, #fd7f34, #bd155b);
	display: inline-block;
	padding: 14px 30px;
	border: 1px solid;
	position: relative;
	z-index: 0;
	border-radius: 5px;
	box-sizing: border-box;
	margin: 0 15px 15px 0;
	outline: none;
	cursor: pointer;
	user-select: none;
	appearance: none;
	touch-action: manipulation;
}
.btn:before {
	content: '';
	position: absolute;
	left: -2px;
	top: -2px;
	width: calc(100% + 4px);
	height: calc(100% + 4px);
	background: linear-gradient(90deg, #fd7f34, #bd155b);
	z-index: -2;
	transition: .4s;
	border-radius: 5px;
}
.btn:after {
	content: '';
	position: absolute;
	left: 0;
	top: 0;
	width: 100%;
	height: 100%;
	background: linear-gradient(90deg, #fff, #fff);
	z-index: -1;
	transition: .4s;
	border-radius: 4px;
}
.btn:hover {
	color: #fff;
	transition: .3s;
}
.btn:hover:after {
	background: linear-gradient(90deg, #fd7f34, #bd155b);
}
.btn:active:after {
	background: linear-gradient(90deg, #d96d2d, #760f3a);
}
.btn:focus-visible {
	box-shadow: 0 0 0 3px #fd7f34;
}
.btn:disabled {
	pointer-events: none;
}
.btn:disabled:before {
	filter: grayscale(100%);
}
CSS
Результат:
В этой статье мы расскажем о том как сделать кнопку в CSS?. Но понимание разницы между Flat UI и Material Design не имеет смысла, если вы не знаете, какие компоненты нужно применять. Давайте быстро пробежимся по основам создания кнопок с помощью CSS.
- Основы CSS кнопок
- Цвет
- Тени
- Время плавного перехода
- Сброс стилей кнопки
- Три стиля кнопок
- Простой черный и белый
- Кнопки Flat UI
- Material Design
- В заключение
Существует несколько «нетехнических» стандартов кнопок:
- Доступность – имеет первостепенное значение. Пользователи с ограниченными возможностями и старыми браузерами должны иметь простой доступ к кнопкам;
- Простой текст – пишите на кнопках простой и короткий текст. Пользователи должны сразу понять назначение кнопки и то, куда она их приведет.
Почти все кнопки в интернете используют эффекты с изменением цвета рамок и теней. Это можно сделать реализовать с помощью псевдоклассов. Мы остановимся на двух из них: :hover и :active. Псевдокласс :hover отвечает за поведение CSS при наведении курсора мыши. Код :active, когда пользователь нажал кнопку мыши, но еще ее не отпустил.
С помощью псевдоклассов можно полностью изменить внешний вид кнопки, но это неудобный подход. Новичкам лучше редактировать основные стили кнопки, почти полностью сохраняя ее внешний вид. В реализации данного элемента управления можно выделить три основных аспекта – цвет, тени и время перехода.
Изменить цвет CSS buttons можно с помощью различных свойств: color, background-color и border. Сначала разберемся, как выбрать цвет кнопки:
- Комбинации цветов – используйте цвета, которые дополняют друг друга. Colorhexa – отличный инструмент для поиска сочетающихся цветов;
- Соблюдение палитры — если вы ищете палитру цветов, зайдите на lolcolors.
С помощью box-shadow можно добавить тень вокруг объекта. Эта идея реализована в Flat UI и Material Design. Более подробно о свойстве box-shadow можно почитать на MDN.
Свойство transition-duration добавляет временные рамки CSS изменениям. Стили кнопки без плавного перехода моментально меняются на стили псевдокласса :hover, что может отпугнуть пользователя. В следующем примере стиль кнопки плавно меняется (за 0.5 с): на :hover:
.color-change {
  border-radius: 5px;
  font-size: 20px;
  padding: 14px 80px;
  cursor: pointer;
  color: #fff;
  background-color: #00A6FF;
  font-size: 1.5rem;
  font-family: 'Roboto';
  font-weight: 100;
  border: 1px solid #fff;
  box-shadow: 2px 2px 5px #AFE9FF;
  transition-duration: 0.5s;
  -webkit-transition-duration: 0.5s;
  -moz-transition-duration: 0.5s;
}

.color-change:hover {
  color: #006398;
  border: 1px solid #006398;
  box-shadow: 2px 2px 20px #AFE9FF;
}
А смотрится это так:
Код для плавных переходов сложный и старые браузеры по-разному выполняют анимацию. Поэтому нужно добавить префиксы для старых браузеров:
transition-duration: 0.5s /* Обычная запись, работает во всех современных браузерах*/
-webkit-transition-duration: 0.5s; /* Помогает некоторым версиям safari, chrome и android  */
-moz-transition-duration: 0.5s; /* для firefox */
Чтобы браузер установил значение по умолчанию для CSS button style, можно установить пользовательские стили:
button.your-button-class {
  -webkit-appearance: none;
  -moz-appearance: none;
}
Лучше применять это к классам элементов кнопки, а не к каждой кнопке по отдельности.
Такие кнопки хорошо сочетаются с множеством различных стилей. Этот эффект основан на контрасте черного и белого.
Рассмотрим код черной кнопки с белым фоном. Чтобы перекрасить кнопку в другой цвет, поменяйте в button стилях CSS все значения white и black местами:
.suit_and_tie {
  color: white;
  font-size: 20px;
  font-family: helvetica;
  text-decoration: none;
  border: 2px solid white;
  border-radius: 20px;
  transition-duration: .2s;
  -webkit-transition-duration: .2s;
  -moz-transition-duration: .2s;
  background-color: black;
  padding: 4px 30px;
}

.suit_and_tie:hover {
  color: black;
  background-color: white;
  transition-duration: .2s;
  -webkit-transition-duration: .2s;
  -moz-transition-duration: .2s;
}
В приведенных выше стилях видно, что свойства font и background-color меняют свои значения со свойством transition-duration.2s. Можно взять цвета своих любимых брендов и создать свою кнопку. Цвета брендов можно найти на BrandColors.
Flat UI делает упор на минимализм в HTML button CSS – больше действий, меньше движений. Обычно я перехожу от черно-белых кнопок на Flat UI, когда мой проект начинает обретать форму. Кнопки Flat UI имеют минималистичный вид и подходят под большинство дизайнов.
Улучшим нашу кнопку, добавив ей движения для имитации 3D эффекта.
Мы рассмотрим первую кнопку:
.turquoise {
  margin-right: 10px;
  width: 100px;
  background: #1abc9c;
  border-bottom: #16a085 3px solid;
  border-left: #16a085 1px solid;
  border-right: #16a085 1px solid;
  border-radius: 6px;
  text-align: center;
  color: white;
  padding: 10px;
  float: left;
  font-size: 12px;
  font-weight: 800;
}
.turquoise:hover {
  opacity: 0.8;
}
.turquoise:active {
  width: 100px;
  background: #18B495;
  border-bottom: #16a085 1px solid;
  border-left: #16a085 1px solid;
  border-right: #16a085 1px solid;
  border-radius: 6px;
  text-align: center;
  color: white;
  padding: 10px;
  margin-top: 3px;
]]

  float: left;
}
У button CSS три состояния: обычное, :hover и :active.
:hover содержит всего одну строку кода с уменьшением прозрачности, чтобы сделать кнопку немного светлее, поэтому нам не нужно подбирать более светлый цвет.
Вместо того чтобы указать сплошную рамку border, тут используются свойства border-bottom, border-left и border-right, которые создают 3D-эффект глубины.
Псевдокласс :active часто используется в Flat UI кнопках. Когда наша кнопка становится :active происходит две вещи:
- :border-bottom меняется с 3px на 1px. Тень под кнопкой уменьшается, а кнопка опускается на пару пикселей. Это изменение позволяет пользователю почувствовать, что он нажал кнопку;
- Цвет фона темнеет, имитируя смещение кнопки от пользователя к экрану. Что также напоминает пользователю о том, что он нажал кнопку.
Во Flat UI ценятся минималистичные движения кнопок, «рассказывающие большую историю». Многие имитируют сдвиг кнопки с помощью :border-bottom. Стоит отметить, что во Flat UI есть кнопки, которые вообще не двигаются, а только меняют цвет.
Material Design – подход к дизайну, который продвигает идею передачи информации в виде карточек с различной анимацией для привлечения внимания. Google перечислил на странице Material Design Homepage три основных принципа:
- Слово «Материальный» — это метафора;
- Монотонность, графика, агрессивность;
- Движение передает значение.
Чтобы лучше понять три этих принципа, взглянем на Material Design в действии:
Эти CSS buttons реализуют две основные идеи – свойство box-shadow и Polymer.
Polymer – фреймворк для создания сайтов. С его помощью эффект распространяющейся волны на кнопках добавляется всего одной строкой кода:
<div class="button">
  <div class="center" fit>SUBMIT</div>
  <paper-ripple fit></paper-ripple> /* эта строка добавляет эффект */
</div>
<paper-ripple fit></paper-ripple> — компонент Polymer. Подключив фреймворк в самом начале HTML, мы получаем доступ к его компонентам. Более подробно ознакомиться с возможностями фреймворка можно на сайте Polymer project.
Теперь поговорим о CSS коде, который реализует принципы Material Design:
body {
  background-color: #f9f9f9;
  font-family: RobotoDraft, 'Helvetica Neue';
}

/* Button */
.button {
  display: inline-block;
  position: relative;
  width: 120px;
  height: 32px;
  line-height: 32px;
  border-radius: 2px;
  font-size: 0.9em;
  background-color: #fff;
  color: #646464;
  margin: 20px 10px;
  transition: 0.2s;
  transition-delay: 0.2s;
  box-shadow: 0 2px 5px 0 rgba(0, 0, 0, 0.26);
}

.button:active {
  box-shadow: 0 8px 17px 0 rgba(0, 0, 0, 0.2);
  transition-delay: 0s;
}

/* Misc */
.button.grey {
  background-color: #eee;
}
.button.blue {
  background-color: #4285f4;
  color: #fff;
}
.button.green {
  background-color: #0f9d58;
  color: #fff;
}
.center {
  text-align: center;
}
Во всех button CSS используется свойство box-shadow. Удалим весь неменяющийся CSS код и посмотрим, как box-shadow работает:
.button {
  transition: 0.2s;
  transition-delay: 0.2s;
  box-shadow: 0 2px 5px 0 rgba(0, 0, 0, 0.26);
}
.button:active {
  transition-delay: 0s;
  box-shadow: 0 8px 17px 0 rgba(0, 0, 0, 0.2);
}
Свойство box-shadow используется в button стилях CSS для добавления тонкой темной тени слева и снизу у каждой кнопки. При нажатии тень немного увеличивается и становится светлее. Это движение имитирует эффект 3D тени, которая как бы подпрыгивает от страницы к пользователю. Эффект прописан в стилях Material Design и его принципах.
Кнопки в стиле Material Design можно создать путем совмещения Polymer и box-shadow эффектов.
- Слово «материальный» – метафора – с помощью свойства box-shadow мы имитируем эффект 3D тени, создаем аналог настоящей тени;
- Монотонность, графика, агрессивность – больше относится к ярко-голубым и зеленым кнопкам;
- Значение передается при помощи движений – с помощью Polymer и анимации свойства box-shadow можно создавать множество различных движений, когда пользователь нажимает на кнопку.
Черно-белые кнопки довольно просты и понятны. Flat UI кнопки тоже простые и используют мелкие движения и цвета, чтобы «рассказать большую историю». Material Design использует крупномасштабные сложные движения, имитирующие реальную тень, чтобы привлечь внимание пользователя.