I am trying to change the CSS of one element on click of another element. I’ve searched a lot but nothing works perfectly. Currently I am using the below code, but it doesn’t work. Can anyone tell me what I missed?
<div id="foo">hello world!</div>
<img src="zoom.png" onclick="myFunction()" />
function myFunction() {
    document.getElementById('foo').style.cssText = 'background-color: red; color: white; font-size: 44px';
}
![]()
neophyte
6,5202 gold badges28 silver badges43 bronze badges
asked Jan 14, 2013 at 13:26
![]()
5
Firstly, using on* attributes to add event handlers is a very outdated way of achieving what you want. As you’ve tagged your question with jQuery, here’s a jQuery implementation:
<div id="foo">hello world!</div>
<img src="zoom.png" id="image" />
$('#image').click(function() {
    $('#foo').css({
        'background-color': 'red',
        'color': 'white',
        'font-size': '44px'
    });
});
A more efficient method is to put those styles into a class, and then add that class onclick, like this:
$('#image').click(function() {
  $('#foo').addClass('myClass');
});
.myClass {
background-color: red;
color: white;
font-size: 44px;
}<script src="https://ajax.googleapis.com/ajax/libs/jquery/3.2.1/jquery.min.js"></script>
<div id="foo">hello world!</div>
<img src="https://i.imgur.com/9zbkKVz.png?1" id="image" />Here’s a plain Javascript implementation of the above for those who require it:
document.querySelector('#image').addEventListener('click', () => {
  document.querySelector('#foo').classList.add('myClass');
});
.myClass {
background-color: red;
color: white;
font-size: 44px;
}<div id="foo">hello world!</div>
<img src="https://i.imgur.com/9zbkKVz.png?1" id="image" />answered Jan 14, 2013 at 13:28
![]()
Rory McCrossanRory McCrossan
329k38 gold badges302 silver badges333 bronze badges
5
Try this:
CSS
.style1{
    background-color:red;
    color:white;
    font-size:44px;
}
HTML
<div id="foo">hello world!</div>
<img src="zoom.png" onclick="myFunction()" />
Javascript
function myFunction()
{
    document.getElementById('foo').setAttribute("class", "style1");
}
answered Jan 14, 2013 at 13:31
![]()
ATOzTOAATOzTOA
34.1k22 gold badges95 silver badges116 bronze badges
    <script>
        function change_css(){
            document.getElementById('result').style.cssText = 'padding:20px; background-color:#b2b2ff; color:#0c0800; border:1px solid #0c0800; font-size:22px;';
        }
    </script>

</head>

<body>
    <center>
        <div id="error"></div>
        <center>
            <div id="result"><h2> Javascript Example On click Change Css style</h2></div>
            <button onclick="change_css();">Check</button><br />
        </center>
    </center>
</body>
answered Oct 5, 2015 at 9:27
![]()
1
In your code you aren’t using jquery, so, if you want to use it, yo need something like…
$('#foo').css({'background-color' : 'red', 'color' : 'white', 'font-size' : '44px'});
http://api.jquery.com/css/
Other way, if you are not using jquery, you need to do …
document.getElementById('foo').style = 'background-color: red; color: white; font-size: 44px';
answered Jan 14, 2013 at 13:33
![]()
ElwiElwi
6875 silver badges15 bronze badges
With jquery you can do it like:
$('img').click(function(){
    $('#foo').css('background-color', 'red').css('color', 'white');
});
this applies for all img tags you should set an id attribute for it like image and then:
$('#image').click(function(){
    $('#foo').css('background-color', 'red').css('color', 'white');
});
answered Jan 14, 2013 at 13:29
![]()
Mustafa ShujaieMustafa Shujaie
8062 gold badges10 silver badges18 bronze badges
<div id="foo">hello world!</div>
<img src="zoom.png" id="click_me" />
JS
$('#click_me').click(function(){
  $('#foo').css({
    'background-color':'red',
    'color':'white',
    'font-size':'44px'
  });
});
answered Jan 14, 2013 at 13:29
![]()
Mihai MateiMihai Matei
24k5 gold badges33 silver badges50 bronze badges
Try this:
$('#foo').css({backgroundColor:'red', color:'white',fontSize:'44px'});
answered Jan 14, 2013 at 13:29
![]()
Barry KayeBarry Kaye
7,5726 gold badges42 silver badges64 bronze badges
This code seems to work fine (see this jsfiddle). Is your javascript defined before your body?
When the browser reads onclick="myFunction()" it has to know what myFunction is.
answered Jan 14, 2013 at 13:35
![]()
rmhartogrmhartog
2,28312 silver badges19 bronze badges
Working on styling is one of the major tasks while creating websites. Time and again we have to manipulate the CSS styling to provide a better appearance to the application we are building. So, In this article, we will see how we can change the CSS styling using React. Specifically, we will see how an event(onClick) can change the CSS styling. Here, we will be using React hooks to implement the problem statement. React hooks helps in managing the state of functional components.
Approach: The introduction of React hooks is significant while working with functional components. It makes the management of the state much easier in React Lifecycle. Additionally, it’s much easier and uses less code while building components. So, we will leverage the functionality of React hooks in order to implement our problem statement. Here, we will be creating a small app to understand the concept. So, basically, we will change the background color of a container by making use of the onClick() event. We will initially define the CSS for our app. Once a user clicks the button then the background color gets changed by changing the state. The principle of React hooks will make things easier for us.
Now, let’s get started with the file structure and coding part.
Creating React App:
Step 1: Create a React application using the following command:
npx create-react-app appname
Make sure that the app name is starting with lower-case letters.
Step 2: After creating your project folder. Now, jump into the respective folder by making use of the following command:
cd appname
Project Structure: Now, the file structure will look like the following:

Our app file Structure
Step 3: In the above file structure, we will only use App.js and App.css files. Let’s first provide the CSS styling for our app. All the CSS code must be written inside the App.css file. Copy the code mentioned below in the App.css file.
App.css
.App {
font-family: sans-serif;
text-align: center;
background-color: aqua;
}
.cont {
width: 250px;
height: 250px;
margin-top: 50px;
margin-left: 150px;
background-color: violet;
}
.button {
border-radius: 8px;
font-size: 20px;
background-color: red;
color: white;
margin-left: 70px;
margin-top: 100px;
}
.cont2 {
width: 250px;
height: 250px;
margin-top: 50px;
margin-left: 150px;
background-color: yellow;
}
Step 4: Now, Let’s start implementing the React hooks approach in the App.js file. In the above code, we set initial state(style) value as the string. This value is the className that we will be using inside the Button. Initially, the value is defined as cont for which the CSS styling is defined in our App.css file. We provide this state value to the className of the button.
Now, the next step is to define the onClick handler for the button. So, changeStyle is the button handler. In order to change the state value, we define our setState value which is setStyle in our case. This is triggered inside the changeStyle. So, once we click the button then changeStyle gets executed which further executes the setStyle to change the state i.e cont2.
App.js
import React, { useState } from "react";
import "./App.css";
const App = () => {
const [style, setStyle] = useState("cont");
const changeStyle = () => {
console.log("you just clicked");
setStyle("cont2");
};
return (
<>
<div className="App">CHANGE CSS STYLING WITH ONCLICK EVENT</div>
<div className={style}>
<button className="button" onClick={changeStyle}>
Click me!
</button>
</div>
</>
);
};
export default App;
Step 5: Run the code by making use of the following command:
npm start
Output: Now open your browser and go to http://localhost:3000/, you will see the following output. After, Click the background color changes to yellow.
The Background color changed on clicking the Button.
I have the following buttons that change when hovering over them.
How do I set a background color when selecting one of the buttons without losing selection when I click elsewhere on the screen?
In the current way, clicking the button makes it the color you choose, but clicking another field of the screen returns to the original color.
button {
  padding: 15px;
  margin: 0px 3px 0px 0px;
  font-size: 20px;
  font-weight: 400;
  font-family: Arial, Helvetica, sans-serif;
  border: none;
}

button:hover {
  cursor: pointer;
  background: black;
}

.btn-scale-0,
.btn-scale-1,
.btn-scale-2,
.btn-scale-3 {
  background-color: #FE0200;
  color: white;
  text-shadow: 1px 1px 3px #8e8e8e;
}
<button id="scale-0" class="btn-scale-0"> 0 </button>
<button id="scale-1" class="btn-scale-1"> 1 </button>
<button id="scale-2" class="btn-scale-2"> 2 </button>
<button id="scale-3" class="btn-scale-3"> 3 </button>![]()
Pete
56.1k27 gold badges115 silver badges161 bronze badges
asked Nov 11, 2019 at 14:42
![]()
2
There is no possibility of achieving this without the use of JavaScript without experiencing unexpected side-effects.
If the visited state doesn’t matter or is even desired, please have a look at @Blazemonger’s answer.
CSS pseudo-classes focus and active are defined by losing its state when clicking elsewhere on the page.
JavaScript(+JQuery) solution:
$("#scale-0").click(function() {
  $("#scale-0").addClass('button-clicked');
});
$("#scale-1").click(function() {
  $("#scale-1").addClass('button-clicked');
});
$("#scale-2").click(function() {
  $("#scale-2").addClass('button-clicked');
});
$("#scale-3").click(function() {
  $("#scale-3").addClass('button-clicked');
});
button {
padding: 15px;
margin: 0px 3px 0px 0px;
font-size: 20px;
font-weight: 400;
font-family:Arial, Helvetica, sans-serif;
border:none;
}
button:hover{
cursor: pointer;
background: black;
}
.btn-scale-0, .btn-scale-1, .btn-scale-2, .btn-scale-3{
background-color: #FE0200;
color: white;
text-shadow: 1px 1px 3px #8e8e8e;
}
.button-clicked {
background-color: black;
}<script src="https://cdnjs.cloudflare.com/ajax/libs/jquery/3.3.1/jquery.min.js"></script>
<button id="scale-0" class="btn-scale-0 btn"> 0 </button>
<button id="scale-1" class="btn-scale-1 btn"> 1 </button>
<button id="scale-2" class="btn-scale-2 btn"> 2 </button>
<button id="scale-3" class="btn-scale-3 btn"> 3 </button>answered Nov 11, 2019 at 14:55
![]()
dmuenstererdmuensterer
1,86410 silver badges24 bronze badges
If you don’t want to use javascript and your button click doesn’t post back, then I would change this so that it used radio buttons and labels instead (assuming only one can be selected at a time — if multiple can, then change the radio for a checkbox):
.scale {
  /* hide radio button */
  position: fixed;
  left: 100%;
  top: 100%;
}

.button {
  display:inline-block;
  padding: 15px;
  margin: 0px 3px 0px 0px;
  font-size: 20px;
  font-weight: 400;
  font-family: Arial, Helvetica, sans-serif;
  border: none;
  cursor: pointer;
}

.button:hover {
  background: black;
  color: white;
}

.scale:checked + label {
  /* selected styled */
  background-color: #FE0200;
  color: white;
  text-shadow: 1px 1px 3px #8e8e8e;
}
<input id="scale0" class="scale" name="scale" type="radio" value="0" checked>
<label for="scale0" class="button"> 0 </label>
<input id="scale1" class="scale" name="scale" type="radio" value="1">
<label for="scale1" class="button"> 1 </label>
<input id="scale2" class="scale" name="scale" type="radio" value="2">
<label for="scale2" class="button"> 2 </label>
<input id="scale3" class="scale" name="scale" type="radio" value="3">
<label for="scale3" class="button"> 3 </label>answered Nov 11, 2019 at 15:07
![]()
PetePete
56.1k27 gold badges115 silver badges161 bronze badges
I don’t think you can do this with buttons without using JavaScript to add a class or change the style.
However, you can do this with <a href> by adding a :visited style:
.button {
  padding: 15px 30px;
  margin: 0px 3px 0px 0px;
  font-size: 20px;
  font-weight: 400;
  font-family:Arial, Helvetica, sans-serif;
  border:none;
  text-decoration:none;

}

.button:hover,.button:active,.button:visited{
  cursor: pointer;
  background: black;
}

.btn-scale-0, .btn-scale-1, .btn-scale-2, .btn-scale-3{
    background-color: #FE0200;
    color: white;
    text-shadow: 1px 1px 3px #8e8e8e;
}
<a href="#scale-0" id="scale-0" class="button btn-scale-0">0</a>
<a href="#scale-1" id="scale-1" class="button btn-scale-1">1</a>
<a href="#scale-2" id="scale-2" class="button btn-scale-2">2</a>
<a href="#scale-3" id="scale-3" class="button btn-scale-3">3</a>The downside is that they will remain black even if you leave the page and return (unless the user clears their browser history).
Here’s a second approach that uses invisible checkboxes instead of buttons. However, this also has a downside where the user can click the button again to undo the color change:
input[type=checkbox][id^=scale-] {
  display: none;
}
.button {
  padding: 15px 30px;
  margin: 0px 3px 0px 0px;
  font-size: 20px;
  font-weight: 400;
  font-family: Arial, Helvetica, sans-serif;
  border: none;

}
input[type=checkbox][id^=scale-]:checked + .button,
.button:hover,
.button:active,
.button:visited {
  cursor: pointer;
  background: black;
}

.btn-scale-0,
.btn-scale-1,
.btn-scale-2,
.btn-scale-3 {
  background-color: #FE0200;
  color: white;
  text-shadow: 1px 1px 3px #8e8e8e;
}
<input type="checkbox" id="scale-0"><label for="scale-0" class="button btn-scale-0">0</label>
<input type="checkbox" id="scale-1"><label for="scale-1" class="button btn-scale-1">1</label>
<input type="checkbox" id="scale-2"><label for="scale-2" class="button btn-scale-2">2</label>
<input type="checkbox" id="scale-3"><label for="scale-3" class="button btn-scale-3">3</label>answered Nov 11, 2019 at 14:55
![]()
BlazemongerBlazemonger
89.3k26 gold badges138 silver badges179 bronze badges
В течении нескольких последних лет наблюдается удивительная экспансия языков клиентской части веб приложений, особенно HTML5 и CSS3.
Теперь можно выполнять множество операций, которые раньше были немыслимы без применения JavaScript и изображений, например, скругленные углы, адаптивные шаблоны, модульные сетки, прозрачные цвета и многое другое.
Но всегда не хватало возможности обрабатывать событие click средствами CSS. Некоторые специалисты полагают, что такой опции не должно быть, так как интерактивное взаимодействие с пользователем является полем действия для JavaScript. Их доводы разумны, но использование JavaScript даже для простых нажатий утомительно.
В настоящее время нет официальных средств CSS для обработки события click. Но тем не менее, существуют способы, которые можно использовать для «обнаружения» нажатия с помощью только CSS без JavaScript.


Примечание
Описанные способы не предназначены для «реальной жизни». Материалы урока следует рассматривать как основу для экспериментов. Тем более что некоторые методы плохо поддерживаются в браузерах. Назначение урока — прикоснуться к границам возможностей CSS.
Используем чекбокс
Наверняка вы уже встречались с данным методом. Это самый популярный метод для обработки события click средствами CSS.
Метод основан на использовании чекбокса. Данный элемент имеет бинарную сущность и может быть только в одном из двух состояний. Поэтому данный метод является вполне надежным способом для обработки событий click в CSS.
HTML
<input type="checkbox">
<p class="to-be-changed">Здесь будет красный цвет. Или уже есть...</p>
CSS
.to-be-changed {
    color: black;
}

input[type=checkbox]:checked ~ .to-be-changed {
    color: red;
}
Метод основан на использовании псевдо-класса :checked и селектора ~. Обратите внимание, что он будет работать и с селектором +. Сущность метод заключается в том, что “если чекбокс отмечен, то следующие элементы с классом .to-be-changed будет красным”.
Чекбокс выглядит не очень привлекательно. Но вы можете сделать внешний вид более интересным скрыв чекбокс и привязав к нему метку. Как-то вот так:
<input type="checkbox" id="toggle">
<label for="toggle">Нажми меня!</label>
<p class="to-be-changed">Здесь будет красный цвет. Или уже есть...</p>
Итак, мы прячем чекбокс и используем метку для реагирования на событие click:
input[type=checkbox] {
    position: absolute;
    top: -9999px;
    left: -9999px;
}

label {
    display: block;
    background: #08C;
    padding: 5px;
    border: 1px solid rgba(0,0,0,.1);
    border-radius: 2px;
    color: white;
    font-weight: bold;
}

input[type=checkbox]:checked ~ .to-be-changed {
    color: red;
}
У нас получилась кнопка, нажатие на которую меняет цвет текста в параграфе. Повторное нажатие на кнопку меняет цвет обратно.
(Обратите внимание, что существуют различные методы для скрытия чекбокса. Очевидный — применение display:none.)
Плюсы
- Бинарный, есть только два состояния — отмечен или не отмечен
- Повторное нажатие приводит к восстановлению состояния (данный пункт может оказаться минусом)
- Позволяет организовать обработку связанных событий click (если первый чекбокс отмечен и второй чекбокс отмечен, то выполняем следующее действие)
Минусы
- Элементы должны иметь общего предка
- Требуется дополнительная разметка HTML (input, label и так далее)
- Требуется дополнительные действия для работы на мобильных браузерах
Способ с :target
Есть другой способ с использованием псевдо-класса :target. Данный псевдо-класс похож на псевдо-класс :hover тем, что соответствует только определенным условиям.
Специальное событие для псевдо-класса :target зависит от “идентификатора фрагмента”. Если говорить просто, то данный псевдо-класс ссылается на хэштег, который располагается в конце URL, и становится активным, когда хэштег и ID совпадают.
HTML
<a href="#id">Нажми меня!</a>
<p id="id" class="to-be-changed">Здесь будет красный цвет. Или уже есть...</p>
CSS
.to-be-changed {
    color: black;
}

.to-be-changed:target {
    color: red;
}
При нажатии на ссылку (href="#id") изменяется URL и осуществляется переход по метке #id на странице. В данный момент элемент с идентификатором id может быть выделен с помощью псевдо-класса :target.
Плюсы
- Простой код CSS
- Отлично подходит для выделения разделов
Минусы
- Мусор в истории браузера
- Происходит прокручивание страницы
- Требуется тег ссылки или операции с URL для включения хэштега
- Можно воздействовать только на один элемент (так как ID является уникальным)
- Нет способов возврата к исходному состоянию без использования другого хэштега, ссылки или операций с URL
Способ с :focus
Продолжим наш обзор способом с использованием другого псевдо-класса — :focus. Идея почти такая же, как и в предыдущем случае, за исключением того, что не предполагается изменения URL. Здесь мы полагаемся на фокус ввода на определенном элементе.
Когда вы находитесь на странице, то с помощью клавиши табуляции можно перемещаться от одного элемента к другому. Такой метод очень удобен при работе с формами для перехода между элементами без использования мыши. Также метод применяется для навигации слабовидящими людьми по странице.
Важно, что некоторые элементы могут получать фокус ввода, например, ссылки, параграфы, поля ввода и многие другие. Вам только нужно установить для них атрибут tabindex с числовым значение для них.
HTML
<span tabindex="0">Нажми меня!</span>
<p class="to-be-changed">Здесь будет красный цвет. Или уже есть...</p>
CSS
span:focus ~ .to-be-changed {
    color: red;
}
Когда происходит нажатие на элементе спан, или переключение на него с помощью клавиши табуляции, он получает фокус ввода и соответствует псевдо-классу :focus. Селектор соседей делает остальную работу. Если по каким-то причинам использовать атрибут tabindex не требуется, то можно просто установить ссылку с адресом #.
Плюсы
- Очень простой код CSS и HTML
- Отличная навигация
Минусы
- Требуется либо элемент с фокусом, либо атрибут tabindex
- Соответствие возникает только при наличии фокуса ввода (нажатие где-нибудь в другом месте страницы смешивает алгоритм работы)
Способ с переходами
Вероятно, данный метод является самым «грязным» способом обработки события click в CSS.
Идея заключается в «хранении» стиля CSS в переходе CSS. Используем псевдо-бесконечную задержку, чтобы предотвратить возврат в исходное состояние. Звучит сложно, но в действительности очень просто в реализации.
HTML
<span>Нажми меня!</span>
<p class="to-be-changed">Здесь будет красный цвет. Или уже есть...</p>
CSS
.to-be-changed {
    transition: all 0s 9999999s;
}

span:active ~ .to-be-changed {
    transition: all 0s;
    color: red;
}
Задержка составляет примерно 116 дней. Не бесконечность, но некое ее подобие для наших условий. Поэтому изменения сохраняются и нет возврата к исходному состоянию.
Плюсы
- Просто и изящно
- Сохраняется состояние, даже если переход не закончился
Минусы
- Плохая поддержка в браузерах (нет в IE9 и Opera Mini)
- Работает только со значениями, которые можно использовать с переходами
- Нет способов возврата к исходному состоянию
- Нет реальной бесконечности ожидания (если ваш проект предполагает ожидание более 116 дней)
Как изменить цвет фона по клику мыши | CSS | JS
Изменение цвета фона по клику мыши
Как изменить цвет фона по клику мыши | CSS | JS
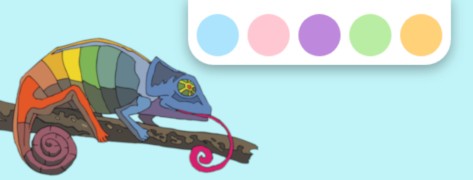
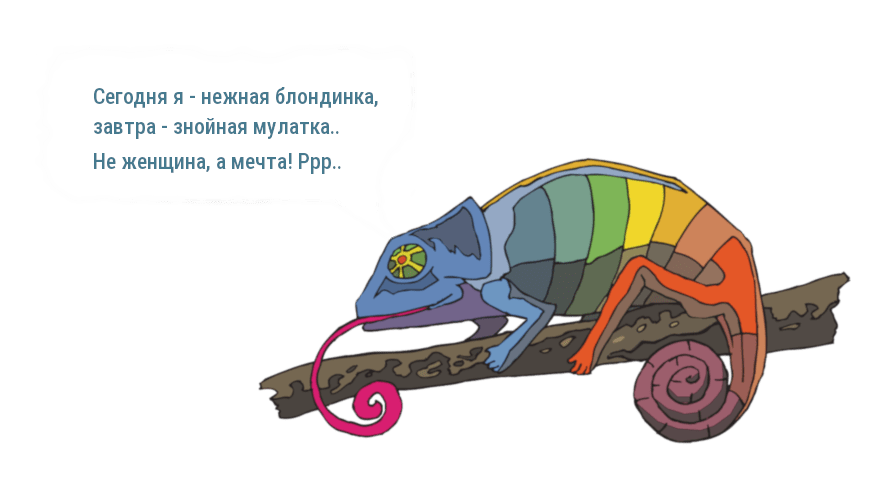
Сегодня мы испечем вкусняшку для визуала: мини-палитру с цветовыми блоками, с помощью которых пользователь сможет изменить цвет фона самого body по клику мыши. И помогут нам в этом CSS и JS!
При создании мини-палитры будем руководствоваться мини-ТЗ:
Техническое задание:
- Создать палитру с 5 разными цветами: #b3e5fc, #ffcdd2, #b39ddb, #c5e1a5, #ffcc80. Палитра должна располагаться в верхнем правом углу страницы.
- При клике левой кнопкой мыши на ячейку палитры с каким-либо цветом, фон страницы (body) должен менять цвет на выбранный.
Ингредиенты: HTML, CSS, JavaScript
Рецепт приготовления:
1. Откроем html-файл, который планируется дополнить цветовой палитрой. У меня это стандартная html-разметка пустой страницы:
<!doctype html>
<html>
<head>
    <meta charset="utf-8">
    <title>Изменение цвета фона по клику мыши</title>
    <link rel="stylesheet" href="styles.css">
</head>
<body>

</body>
</html>
2. Создадим блок с классом class=«color-panel», в котором расположим 5 блоков для ячеек палитры. Для каждой ячейки добавим «говорящий» идентификатор и атрибут data-color, значением которого будет HTML — код цвета ячейки:
<div class="color-panel">
    <div id="blue" data-color="#b3e5fc"> </div>
    <div id="red" data-color="#ffcdd2"> </div>
    <div id="purple" data-color="#b39ddb"> </div>
    <div id="green" data-color="#c5e1a5"> </div>
    <div id="orange" data-color="#ffcc80"> </div>
</div>
Подробнее о свойстве data-color вы можете узнать из статьи: http://htmlbook.ru/blog/atribut-data
3. Самое время заглянуть в CSS-файл и задать странице стили:
/* Задаем цвет фона по умолчанию */
body{
	background-color: #b2ebf2;
}

/* Позиционируем палитру так, чтобы она располагалась в правом верхнем углу страницы */
.color-panel {
    position: absolute; /* задаем абсолютное позиционирование */
    top: 0px; /* прижимаем палитру к верхней части страницы  */
    right: 30px; /* создаем внешний отступ справа */
    background-color: #fff;
    height: 60px;
    padding: 15px 5px 5px 5px; /* задаем внутренние отступы */
    -webkit-box-shadow: 0px 5px 15px 0px rgba(0,0,0,0.35); /* добавим тень*/
    -moz-box-shadow: 0px 5px 15px 0px rgba(0,0,0,0.35);
    box-shadow: 0px 5px 15px 0px rgba(0,0,0,0.35);
    border-radius: 0px 0px 30px 30px; /* закруглим края панели */
}

/* Зададим размеры ячейкам таблицы, закруглим их и прижмем к левому краю панели */
.color-panel div {
	height: 50px;
	width: 50px;
	border-radius: 30px;
	float:left;
	margin: 5px;
}

/* Для каждого блока с «цветным» идентификатором зададим соответствующий названию цвет фона */
#blue{
	background-color: #b3e5fc;
}
#red{
	background-color: #ffcdd2;
}
#purple{
	background-color: #b39ddb;
}
#green{
	background-color: #c5e1a5;
}
#orange{
	background-color: #ffcc80;
}
В результате применения CSS стилей получим цветовую панель симпатичного вида, но абсолютно не способную изменять цвет фона по клику мыши. 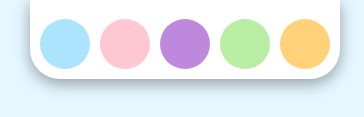
4. Добавим панели кликабельности с помощью JavaScript! Пусть каждая ее ячейка реагирует на клик левой кнопки мыши! Для этого в <div> каждой ячейки добавим вызов функции, меняющей цвет фона. Параметром этой функции будет название идентификатора блока, а саму функцию назовем ChangeColor:
<div class="color-panel">
    <div id="blue" data-color="#b3e5fc" onclick="changeColor('blue')">
    </div>
    <div id="red" data-color="#ffcdd2" onclick="changeColor('red')">
    </div>
    <div id="purple" data-color="#b39ddb" onclick="changeColor('purple')">
    </div>
    <div id="green" data-color="#c5e1a5" onclick="changeColor('green')">
    </div>
    <div id="orange" data-color="#ffcc80" onclick="changeColor('orange')">
    </div>
</div>
5. Приступим к
написанию функции changeColor():
С помощью выражения document.body.style.background мы подберемся к свойству background-color для body. Остается лишь присвоить этому свойству нужное значение. А нужное значение мы получим прочитав значение атрибута data-color у выбранного блока. Напомню, что идентификатор выбранного блока передается в качестве параметра функции changeColor. Поэтому сначала мы подберемся к выбранному блоку: document.getElementById(colorValue), а затем прочитаем значение его атрибута data-color: document.getElementById(colorValue).dataset.color.
Запишем результат наших измышлений в одну емкую строку:
<script>
function changeColor(colorValue) {
    document.body.style.background =     document.getElementById(colorValue).dataset.color;
}
</script>
6. А теперь самое время проверить результат работы и радостно хлопнуть в ладоши, ведь у вас, наверняка, все получилось 😉
Cкачать файлы с кодом можно по ссылке: Change_background_files.zip
2020-03-03