 Страница Оформления заказа — одна из самых главных страниц в процессе покупки товара.
На этой странице клиенты вводят личные данные и делают оплату.
Учитывая конкуренцию в любой нише и количество брошенных корзин, нужно настроить эту страницу так, чтобы уменьшить отказы и увеличить продажи насколько это возможно.
Хотя стандартная страница Оформления заказа в WooCommerce уже достаточно проработанная, вы можете сделать некоторые изменения, чтобы увеличить конверсию.
В этой статье вы узнаете, как изменить страницу Оформления заказа, чтобы улучшить поведение посетителей и увеличить продажи.
Зачем изменять страницу Оформления заказа
Исследование Baymard, проведенное в 2020 году, показывает, что почти 70% покупателей бросают корзину во время оформления заказа. Одна из главных причин заключается в том, что оформление заказа слишком длинное или сложное.

Так как привлечь посетителей на сайт довольно сложно, нужно приложить максимум усилий, чтобы как можно меньше посетителей бросали корзину и покидали сайт на странице Чекаут.
Устраните отвлекающие и раздражающие факторы, которые замедляют процесс оплаты, добавьте факторы доверия и предоставьте несколько возможностей оплаты.
Содержание:
- Сократите процесс оформления заказа
- Отредактируйте поля
- Автозавершение заказов
- Факторы доверия
- Цены в местной валюте
- Поп-ап при намерении выйти
- Напоминание о брошенной корзине
- Разные варианты оплаты
- Добавьте создание аккаунта
- Условные поля
Сократите процесс оформления заказа
Чтобы уменьшить количество отказов и брошенных корзин, сделайте процесс оформления заказа как можно более коротким, или частично автоматизируйте.
Например, можно сократить время работы с магазином и оформлением заказа, используя прямые ссылки для оформления заказа.
- Как изменить поведение кнопки Добавить в Корзину WooCommerce
- Прямая ссылка на вариативный товар WooCommerce
Вы можете добавить кнопку быстрой покупки (Quick Buy) в магазин или товары, чтобы покупатели могли пропустить добавление товаров в корзину и сразу перейти к оформлению заказа.
- 3 Способа отключить Корзину в WooCommerce
Или можно добавить Корзину на страницу Оформления заказа, чтобы посетители не терялись между шагами.
Отредактируйте поля
Первая вещь, которую вы можете сделать — убрать ненужные поля. Например, если у вас цифровые товары, то вам не нужны поля с адресом доставки. Если у вас мембершип-сайт, то вам нужны только поля с личной информацией посетителей, и так далее.
Кроме этого, вы можете изменить порядок полей, чтобы упростить их заполнение, или добавить собственные поля. Например, чтобы что-то спросить у посетителей, или добавить раздел ЧаВо / FAQ.
Обычно посетителям не нравятся длинные формы, поэтому оптимизируйте поля до необходимого минимума:
- Отображайте только необходимые поля. Вы можете удалить необязательные поля, например, название компании.
- Если вы продаете цифровые товары, уберите все поля доставки: индекс, город, улица, и так далее.
- Отключите проверку почтового индекса, чтобы уменьшить количество действий при оформлении заказа.
- Если вы продаете физические товары, сделайте платежные поля по умолчанию полями доставки, чтобы скрыть ненужные поля.
- По возможности используйте автозаполнение, чтобы сократить время посетителей на заполнение форм.
- Вместо отображения 2 полей (имя и фамилия) вы можете использовать одно поле для полного имени.
Это можно сделать вручную, или с помощью плагина:
Обычно я использую этот бесплатный плагин, с его помощью вы можете убрать лишние поля на странице Чекаут, переименовать их или изменить их порядок.
Лучший платный плагин, который мне удалось найти, — WooCommerce Checkout Manager.

Этот плагин может убирать, добавлять, переименовывать и изменить последовательность полей, добавляет возможность загружать файлы, добавляет информацию из кастомных полей в е-мейлы WooCommerce и работает с условными полями и условной логикой.
- Как удалить ненужные поля вручную или с помощью плагина
- Как редактировать поля на странице Оформления заказа WooCommerce
Автозавершение заказов
Если вы продаете цифровые товары, то вам нужно настроить оплату заказов так, чтобы пользователи получали доступ к своему продукту сразу после оплаты.
В зависимости от вашего плагина приема оплаты или агрегатора платежей, подтверждение об оплате может прийти через несколько минут или часов, или вообще не прийти.
Если ваш плагин или агрегатор платежей не сразу передает или вообще не передает подтверждение об оплате, вы можете настроить автоматическое изменение статуса заказа, чтобы вам не пришлось обновлять статус заказа вручную при каждом новом заказе.
- Как автоматически менять статус заказа в WooCommerce
Или используйте этот плагин:
Факторы доверия
Количество интернет покупок постоянно растет, поэтому безопасность сайта имеет большое значение. Согласно данным исследования, 17% покупателей бросают корзину во время оформления заказа, потому что они не доверяют сайту.
Чтобы зашифровать личные данные пользователей и данные банковских карт во время оформления заказа установите SSL сертификат.
Защита сайта является одним из факторов ранжирования сайтов в поисковой выдаче, поэтому настройте и другие способы защиты.
- 10 Главных факторов ранжирования поисковых систем
- Безопасность Вордпресс. Подробное описание
Еще одна вещь, которая вызывает доверие посетителей — логотипы сервисов платежных шлюзов, чтобы ваши посетители знали, что ваш сайт поддерживает все эти способы оплаты. Обычно это VISA, MasterCard, МИР, PayPal, Stripe и так далее.
Эти значки создают доверие у покупателей, чтобы они не беспокоились о том, что их личная информация или банковские реквизиты будут украдены.
Чтобы добавить картинки способов оплат перед кнопкой Подтвердить заказ, используйте этот снипет:
Замените путь к картинке на ваш в строке 3.

Также вы можете добавить другие элементы или картинки на других местах страницы Оформления заказа (хуки Woocommerce), например, картинки с Гарантией.
- Хуки WooCommerce на странице Оформления заказа
Еще одна вещь, которую вы можете здесь сделать — изменить текст на кнопке Подтвердить заказ.
Вы можете изменить текст для всех товаров на всем сайте, для определенных товаров по ID, в зависимости от категорий товаров или в зависимости от выбранного способа оплаты:
- Как изменить текст на кнопке Оформления заказа в WooCommerce
Цены в местной валюте
Если ваши посетители покупают ваши товары или услуги из разных стран, добавьте им возможность видеть цены в своих валютах.
Тогда вашим посетителям не придется открывать новую вкладку браузера с конвертером цен и переводить одну валюту в другую, и они будут точно знать, сколько именно им нужно заплатить.
Это особенно важно, когда посетители завершают оформление заказа, и им не нужно отвлекаться на посторонние вещи.
Вы можете добавить переключение валют с помощью плагинов:
Если вы хотите использовать платный плагин, попробуйте плагин Currency Converter Widget с официального сайта WooCommerce:

Поп-ап при намерении выйти
Когда посетитель хочет уйти с сайта и ведет мышку к кнопке Х, ему показывается поп-ап с призывом к действию, например, предложение подписаться на рассылку, скидкой, и так далее.
Хотя многие считают, что такие поп-апы раздражают, исследования показывают, что они эффективны и могут увеличить конверсию на 10%.
Существует множество платных и бесплатных плагинов для добавления всплывающих окон, которые открываются при намерении выйти с сайта. Вы можете попробовать Optin Monster, Popup Maker, Elementor или плагин вашей CRM.
Поп-апы с появлением по условию есть во многих премиум-темах, например, Blocksy и Kadence.
Напоминание о брошенной корзине
Согласно статистике, большинство посетителей бросают корзины при посещении сайта. Вы можете отправлять им сообщения на е-мейл с напоминанием о завершении покупки.
Многие магазины их используют, потому что они очень эффективны. Эти электронные письма могут отличаться в зависимости от магазина или сферы деятельности.
Это может быть одно письмо с товарами, которые посетитель оставил в корзине, или серия электронных писем, в которых вы предлагаете скидку. Суть этих сообщений в том, чтобы напомнить покупателю о товарах, которые он оставил в корзине, и убедить его их купить.
Вот несколько популярных плагинов, с помощью которых вы можете напоминать о незавершенных покупках:
С помощью этих плагинов вы можете создать купон со скидкой на следующую покупку:
Разные варианты оплаты
Еще один способ сократить количество отказов от покупок — предоставить покупателям несколько разных способов оплаты.
Добавьте все популярные способы приема оплат, включая банковские карты, электронные кошельки, например, ЮМани и PayPal и сервисы типа Apple Pay, Google Pay и Samsung Pay.
- Плагин приема платежей через Юмани с лайф-тайм лицензией на неограниченное число сайтов
WooCommerce поддерживает все эти платежные шлюзы, и настроить их довольно просто. Чтобы вашим посетителям было удобно оплачивать покупки, добавьте как можно больше вариантов оплат.
Добавьте создание аккаунта
Если вы добавите возможность создавать аккаунт при оформлении заказа, то пользователи смогут сохранять свои настройки, историю покупок, фильтры магазина и так далее.
В следующий раз, когда посетитель будет покупать какой-то товар, ему не придется вводить свои данные еще раз, вся эта информация будет заполняться по умолчанию.
Имея е-мейлы пользователей, вы можете предлагать им другие товары, делать эксклюзивные предложения, например, специальные купоны на скидку, которые они могут получать в своих аккаунтах или по электронной почте.
Условные поля
Условные поля — хороший способ оптимизации страницы Чекаут. Условные поля позволяют отображать или скрывать одно поле в зависимости от значения другого поля.
Например, ваши клиенты могут забрать купленные товары самовывозом, или выбрать доставку на дом. Вместо нескольких дополнительных полей с адресами вы можете создать условное поле, чтобы поля адреса отображались когда посетитель выбирает вариант доставки.
Самый простой способ добавить условные поля — с помощью платного плагина WooCommerce Checkout Manager.
Страница оформления заказа — одна из самых важных в интернет-магазине. Её содержание оказывает большое влияние на конверсию и количество брошенных корзин, поэтому оставьте только то, что нужно, и уберите все, что не нужно.
Читайте также:
- Как отключить уведомления WooCommerce
- Как отключить кнопку В корзину в WooCommerce
- Как вывести цену товара WooCommerce в любом месте сайта
- Как кастомизировать кнопку Оформления заказа WooCommerce
- Как редактировать поля на странице Оформления заказа WooCommerce
Оставляйте комментарии.
WooCommerce is a flexible and powerful plugin that you can use to turn your WordPress site into a dynamic ecommerce store. However, if you’re looking to reduce shopping cart abandonment, drive conversions, and boost revenue, it’s important to pay careful attention to your WooCommerce checkout page.
There are so many different ways to style and edit the checkout page in WooCommerce. Whether you’re starting your first online shop and seeking to understand how this page works, or you want to enhance the checkout experience on your existing WooCommerce site, we’ve got you covered.
In this post, we’ll explain what the WooCommerce checkout page is and how it functions. Then we’ll walk you through the many options you have to style, change, and leverage it to optimize conversions using plugins, code, themes, and more.
And remember, your ultimate goal is to increase your store’s revenue. So be sure to download our free ebook, 10 Ways to Boost Your WooCommerce Product Page Conversions.
Let’s jump right in!
An Overview of the WooCommerce Checkout Page
When you first set up your WooCommerce store, the plugin automatically creates and assigns a checkout page. If you preview it on the front end of your site, you’ll notice that it is rather simple:

By default, WooCommerce asks customers for some basic information. This includes:
- Billing details
- First and last name
- Company name
- Address (Town/City, Country, District, and Postcode/ZIP)
- Phone number
- Email address
- Order notes
- Privacy policy statement
This is important information to include on a WooCommerce checkout page. It provides the details necessary for a customer to complete their purchase, and for the website to process their payment information.
However, there’s nothing here that is necessarily helping to increase conversions or reduce checkout abandonment. What’s more, the default page may not offer the most relevant or useful information for your specific business. Therefore, like many WooCommerce site owners, you might be looking to change both the design and content of your checkout page.
Before we get into the different ways you can customize the checkout page in WooCommerce, there are a few things to understand first.
Let’s talk about where to find this page, as well as the various default settings and features available within the WooCommerce plugin.
Where to Find the Default WooCommerce Checkout Page and Settings
WooCommerce automatically creates a checkout page for your store once you activate the plugin. You can locate it by navigating to Pages > Checkout in your admin dashboard:

You can edit this page just as you would any WordPress content. For example, you can change the page’s title and permalink, add a featured image, modify the page attributes, etc. It also uses the [woocommerce_checkout] shortcode:
There are a handful of standard options for configuring this page, some of which you can find under WooCommerce > Settings > Advanced:

On this screen, under the Page Setup section, you can select a different page to use as the checkout screen for your store. You also have the option to force a secure HTTPS connection.
On the General settings page, you can enable coupons to be used at checkout, and configure how taxes will be calculated:

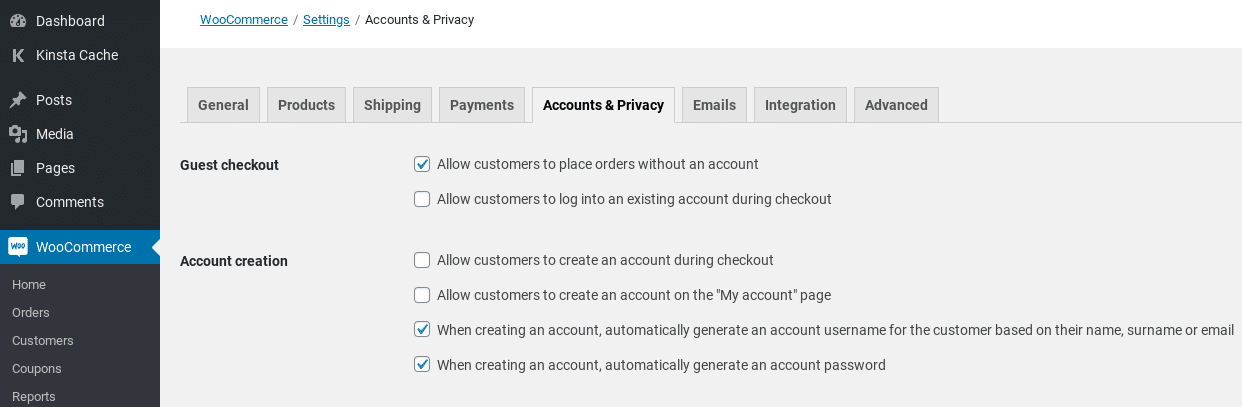
Under the Accounts & Privacy tab, you can also find a few options for account creation and guest checkouts:
Below that, there is a Privacy policy section where you can modify the privacy policy text that displays on the checkout page:

Beyond these built-in settings, you have limited options for customizing your checkout page using the WooCommerce plugin alone. Fortunately, there are other methods you can use to enhance its appearance and extend its functionality.
Why You Might Want to Change Your WooCommerce Checkout Page
The checkout page is the last thing customers see before completing their purchases. It can make the difference between whether they end up converting or abandoning your site altogether.
As such, it’s essential to make sure that your WooCommerce checkout page is designed well and functions in a way that encourages conversions. There are many ways you can provide a better experience, such as by:
- Changing the design and page template
- Creating a one-page checkout
- Adding, removing, or rearranging fields
- Changing input field labels and button text
- Requiring certain fields to be filled out
- Automatically triggering free shipping
- Directly linking products to the checkout page
Whether you want to overhaul the default page completely or make minor modifications, the important thing is that you’re able to do so with ease. Fortunately, you have multiple options.
Want to… ✅ reduce shopping cart abandonment, ✅ drive conversions, and ✅ boost revenue? Then this article is for you.👇 Learn how to build a customized WooCommerce checkout page in minutes ⏱Click to Tweet
Methods You Can Use to Change Your WooCommerce Checkout Page
There are many ways to change your WooCommerce checkout page. The best one to use depends on a handful of factors, such as the specific edit you’re trying to make and your comfort level with coding.
Some of the methods you can use to enhance your WooCommerce checkout page include:
- WooCommerce features, blocks, and shortcodes. WooCommerce does come with a few built-in features and settings that you can use to improve your store. For example, you can automatically trigger free shipping, as well as directly link products to the checkout page. There are also blocks and shortcodes for modifying the page.
- Plugins and extensions. If you’re not tech-savvy or simply want a quick and hassle-free way to enhance your WooCommerce checkout page, there are plenty of plugins you can use. Most are easy to get started with and require little support. Some add-ons are provided by WooCommerce and available from the extension library, while others are developed and offered by third-party platforms.
- Page templates and themes. If you want to change the style of your checkout page, you can use a pre-built template or theme. As with plugins, this is a solid option if you have limited coding experience and want to make changes to the overall appearance of the page, in order to better match your branding. The downside is that it does not offer as much flexibility as custom coding would.
- Custom code. Another method you can leverage to change the WooCommerce checkout page is custom coding. This is a powerful route if you’re comfortable editing your site’s files and want to add a lot of personalization.
In the following sections, we’ll take a look at some of the most effective changes you can make to your WooCommerce page. For each, we’ll explain why you might want to make the edit, and walk you through the different methods you can use to go about it.
How to Customize the WooCommerce Checkout Fields
One of the most common changes you might make to a WooCommerce page is to modify its form fields. These typically take up the most space on the page, so they need to be relevant. Whether you want to remove fields, rearrange their order, or add new custom fields, you have a couple of options for going about it. You can either use a plugin or edit the code directly.
Using a Plugin to Change the WooCommerce Checkout Fields
If you want a quick and simple way to customize the checkout fields in WooCommerce, we recommend using a plugin. There are a handful of options to choose from.
One of the most popular is the Checkout Field Editor plugin:

This is a freemium tool that lets you add or edit the form fields on your WooCommerce checkout page. You can enable or disable certain fields, as well as rearrange their order.
Although the free version lets you handle these basic tasks, WooCommerce Checkout Field Editor Pro comes with additional functionality. This includes 17 field types and custom hooks.
To use this plugin, you can install it on your WooCommerce site by navigating to Plugins > Add New and then searching for it. Once you find it, click on the Install Now button, followed by Activate.
When it’s activated, you can configure the settings by going to WooCommerce > Checkout Form:

There are three different types of fields you can edit:
- Billing
- Shipping
- Additional
You can select whichever field you want to change and then click on the Remove, Enable, or Disable button. To add a new field, select Add field.
If you want to change an existing form field, select the box to the left, and click on the Edit button. A panel will open where you can change the field type (in the premium version only), edit the field’s label, choose whether it will be required, and more:

When you’re done, click on the Save button. Once you’re finished making all the changes you wish to the checkout page’s fields, be sure to hit Save Changes at the bottom of the screen.
For more detailed guidance, you can refer to WooCommerce’s documentation on using the Checkout Field Editor plugin.
Of course, this is just one of many plugins you can use to change your WooCommerce checkout fields. Additional options worth considering include Flexible Checkout Fields and WooCommerce Checkout Manager, which we’ll discuss more later in this post.
Editing the Checkout Fields Using Code
Another option for editing the fields on your WooCommerce checkout page is to use custom coding. Of course, this requires a certain level of technical knowledge and comfort working with your site’s files. The advantage is that you have more flexibility in terms of customization than you would with a third-party plugin.
You can edit your checkout fields using your site’s functions.php file and filters such as:
- woocommerce_checkout_fields
- woocommerce_billing_fields
- Woocommerce_shipping_fields
WooCommerce actions and filters let you manipulate the checkout fields almost any way you wish. For example, you can remove them entirely, add new ones, or change the displayed text. Using the woocommerce_checkout_fields filter will enable you to override any field.
Let’s say you want to change the placeholder text for the order_comments field. By default, it is set as the following:
_x('Notes about your order, e.g. special notes for delivery.', 'placeholder', 'woocommerce')To change it, you can add this snippet of code to your functions.php file:
// Hook in

add_filter( 'woocommerce_checkout_fields' , 'custom_override_checkout_fields' );

// Our hooked in function - $fields is passed via the filter!

function custom_override_checkout_fields( $fields ) {

$fields['order']['order_comments']['placeholder'] = 'My new placeholder';

return $fields;

}
To remove a field, you can use the following:
// Hook in
add_filter( 'woocommerce_checkout_fields' , 'custom_override_checkout_fields' );

// Our hooked in function - $fields is passed via the filter!
function custom_override_checkout_fields( $fields ) {

unset($fields['order']['order_comments']);

return $fields;
There are many changes you can make to the fields on your checkout page, so we won’t explore all of them here. You can find a helpful list of override checkout field codes on GitHub.
How to Change the WooCommerce Checkout Page Template
By default, your WooCommerce checkout page template will be based on your site’s theme. But maybe you want to change the design to better fit your branding or perhaps you just want to make slight changes to the content of the template page.
The two main methods you can use to change this are by using a pre-built template or adding code. Let’s start with the former.
Starting With a Pre-Built Template to Customize Your Checkout Page
The easiest way to change the design of your WooCommerce checkout page is by installing a pre-built theme, such as the ones in the WooCommerce Themes Store. There are a variety of free options available, as well as premium themes.
You can search for one-page checkout themes, for example, or any other kind of specific templates you’re interested in using. You can also find plenty of WooCommerce themes on Envato Market.
Using Code to Customize the WooCommerce Checkout Page Template
If you’re comfortable editing code, you can also manually change the checkout page template. Depending on your hosting provider, you may be able to do this via File Manager in cPanel or a Secure File Transfer Protocol (SFTP) client.
You can use action hooks to add, edit, or remove elements from your checkout page. There are nine main action hooks that WooCommerce uses for the checkout page:
- woocommerce_before_checkout_form
- woocommerce_checkout_before_customer_details
- woocommerce_checkout_billing
- woocommerce_checkout_shipping
- woocommerce_checkout_after_customer_details
- woocommerce_checkout_before_order_review
- woocommerce_checkout_order_review
- woocommerce_checkout_after_order_review
- Woocommerce_after_checkout_form
These action hooks add markup to the page, which you can use to customize both its style and functionality. If you want to use these action hooks to modify your checkout page template, you can do so by editing the checkout form PHP file.
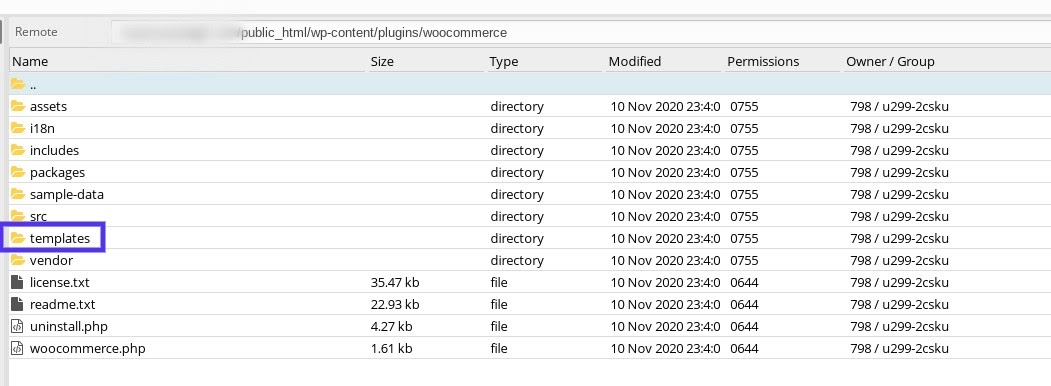
You can locate the WooCommerce template files under /woocommerce/templates. From your site’s root directory, you’ll need to navigate to wp-content/plugins/woocommerce:
Within these files, there are hooks you can use to add and rearrange content on the template page, without actually editing the template files. To create a custom theme template for your checkout page, you’ll first need to create a “woocommerce/checkout” folder within your theme’s folder.
Next, copy the WooCommerce checkout page template, which you can find at woocommerce/templates/checkout/form-checkout.php:

Then, add it to the new folder you just created. After that, you can edit the file to make your desired changes. When you save the file, the WooCommerce plugin will load this template and override the default page template.
How to Create a One Page WooCommerce Checkout
One of the ways to enhance the checkout experience for your customers, and in the process reduce abandonment rates, is to make it as quick and simple as possible. If you want to shorten the checkout process, you can do so by creating a one-page checkout in WooCommerce.
There are multiple ways to do this. As we mentioned earlier, you can look for a one-page theme or template that will provide a single checkout page. However, if you like your current theme, you may not want to change it.
If that’s the case, don’t worry. There are other options, such as the premium WooCommerce One Page Checkout extension:

Since this solution was developed by WooCommerce, you know that it’s safe, reliable, and offers plenty of support. In addition to letting you transform any page into a checkout page, it comes with a plethora of features for optimizing the one-page checkout process.
You can:
- Display both product selection and checkout forms on one page.
- Enable customers to add or remove items from their carts.
- Let customers complete payments without leaving the page.
- Add custom fields to pages.
After you purchase the extension through your WooCommerce account, you can download the plugin, and then install and activate it on your WooCommerce site.
To use it, navigate to Pages > Add New and select the One Page Checkout icon in the editor toolbar:
![]()
In the panel that opens, you can click within the Products field, and begin typing the name of the product(s) that you want to add.
Next, choose the template you want to use (Product List, Product Table, Pricing Table, or Single Product) and click on Create Shortcode.
You can also manually insert the one-page shortcode into any post or page. To learn more about this plugin and how to use it, you can refer to the WooCommerce One Page Checkout documentation.
How to Trigger Free Shipping During the WooCommerce Checkout Process
As an ecommerce business owner, there are many different strategies you can leverage to encourage your customers to spend more. One of those is to offer free shipping.
Of course, you may not want to offer free shipping on every order. However, adding it as an incentive on order totals that reach a certain amount can help you encourage shoppers to spend more than they otherwise would.
Therefore, you may want to configure your WooCommerce checkout page to automatically trigger free shipping on orders above a certain number, such as $100.
The first thing you’ll need to do is to offer the free shipping method to the relevant Shipping Zone(s).
To do so, navigate to WooCommerce > Settings > Shipping:

Hover over the Shipping Zone you want to modify, and then click on the Edit link. If you haven’t added any zones yet, select the Add shipping zone button first and follow the prompts before proceeding.
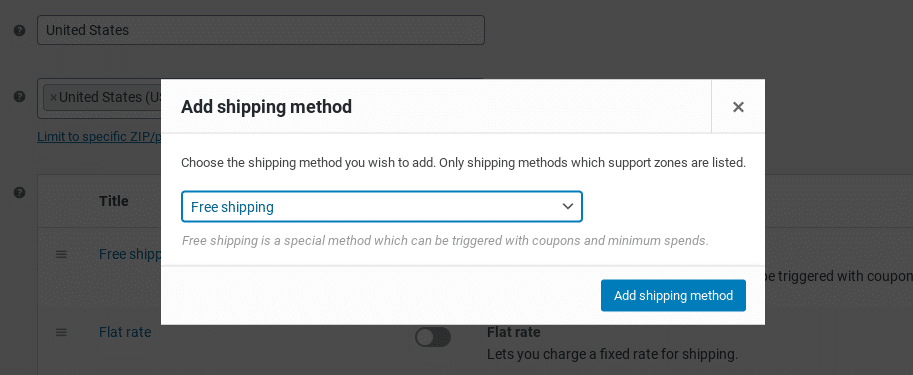
Next, click on Add Shipping Method. In the modal that opens, select Free Shipping from the dropdown menu, followed by Add shipping method again:
Next, from the Shipping methods list on the settings page, hover over Free Shipping and click on the Edit link.
A Free shipping settings panel will open. From the Free shipping requires…. dropdown menu, select A minimum order amount:

You can then define the minimum order amount. When you’re done, click on the Save Changes button.
How to Directly Link Products to the WooCommerce Checkout Page
Another way you can enhance the checkout experience for your customers is to create direct checkout links. This is helpful for sending customers straight to checkout from product and sales pages.
Creating a Direct Checkout Link Manually
To create and add a direct checkout link in WooCommerce, you can use the following URL: exampledomain.com//checkout/?add-to-cart=ID.
Note: you’ll want to replace “exampledomain” and “ID” with your domain name and the specific product ID that you’re linking to the checkout page.
To find a product ID, navigate to Products > All Products in your admin dashboard. Browse to the product you want to create the direct link for, and then hover over the name of it to reveal the product ID number:

Once you paste the product ID into the aforementioned URL, you can then place the link anywhere on your WooCommerce site. You can repeat this process for each of your products, even variable and grouped items.
Creating a Direct Checkout Link Using a Plugin
We realize that the above strategy may not be the most efficient method for all users. Depending on how many products you have in your WooCommerce store, it can be very time-consuming.
Fortunately, if you’re looking for a faster method you can also use the Direct Checkout for WooCommerce plugin:
This freemium tool lets you simplify the checkout process in a variety of ways, including by adding a direct link from a product page to the checkout screen. Once you install and activate the plugin on your WooCommerce site, navigate to WooCommerce > Direct Checkout:

Under the General tab, select Yes for the Added to cart redirect option and then choose Checkout from the Added to cart redirect to dropdown menu. Click on Save changes when you’re done.
Next, navigate to the Products tab:

Enable the Redirect to the cart page after successful addition option. Again, click on the Save changes button. That’s it!
How to Test Your WooCommerce Checkout Page
At this point, you’ve hopefully implemented a variety of ways to enhance your WooCommerce checkout page. Now, it’s essential to make sure that your checkout process is working properly, in order to reduce abandonment and confirm that no errors will interrupt the customer journey.
Fortunately, there is an easy way that you can send a test order and payment through your WooCommerce shop, to make sure that everything is working as it should. To do this, you’ll first need to install the WooCommerce Payments plugin on your site (if you haven’t already):
Once you install and activate the plugin, you can enable ‘test mode’. To do this, navigate to WooCommerce > Payments > Settings:

Remember to save your changes.
Once Test Mode is enabled, you can browse your WooCommerce store and select any product. Add it to your shopping cart and then move to the checkout page.
Fill out the checkout page form fields as necessary. For the payment information, you can use any of the dummy credit card numbers provided by WooCommerce. You can also use any three digits for the CVC code, and select any future date.
When you’re done, click on Place Order. Next, navigate to the Payments > Transactions screen:
Here, you should see the charge show up. If it’s there, you know that your checkout page is working as it should. Remember to turn Test Mode off when you’re done!
Learn how to style, change, and leverage your WooCommerce checkout page⚡️ to optimize conversions and 💰 boost your revenue here ⬇️Click to Tweet
The Best WooCommerce Checkout Plugins and Extensions
Throughout this post, we’ve covered a wide variety of ways to change your WooCommerce checkout page, including blocks, shortcodes, and custom code. We’ve also mentioned some key plugins that can help you add features and functionalities that wouldn’t otherwise be available.
However, there are some additional add-ons, plugins, and extensions we haven’t mentioned yet, but that provide you with more customization options for your WooCommerce checkout page. Some of the best ones worth considering include:
- WooCommerce Cart Notices Add-On. This WooCommerce add-on lets you display actionable messages and notifications to your customers during the checkout process. For example, you can use it to notify them of relevant sales and promotions.
- WooCommerce Checkout Manager. Made by the same team that developed Direct Checkout for WooCommerce, this plugin is a powerful extension that you can use to optimize your checkout page. You can use it to edit, remove, and add custom fields, as well as to create condition fields.
- WooCommerce Checkout Add-Ons. This premium plugin lets you add free and paid add-ons at the checkout stage. It’s a helpful tool for increasing conversions and driving revenue.
Depending on the type of ecommerce site you have, you may be looking for even more options. If so, we recommend checking out the WooCommerce Extensions Library, which offers a ton of add-ons for extending the WooCommerce plugin’s features and functionality, including both free and paid solutions.
Summary
There are different ways you can implement to improve and optimize your WooCommerce checkout page.
Depending on the change you want to make and your experience level, you can leverage WooCommerce plugins and extensions, page templates and themes, and even custom code.
Do you have any questions about using or editing the WooCommerce checkout page? Let us know in the comments section below!
Get all your applications, databases and WordPress sites online and under one roof. Our feature-packed, high-performance cloud platform includes:
- Easy setup and management in the MyKinsta dashboard
- 24/7 expert support
- The best Google Cloud Platform hardware and network, powered by Kubernetes for maximum scalability
- An enterprise-level Cloudflare integration for speed and security
- Global audience reach with up to 35 data centers and 275 PoPs worldwide
Test it yourself with $20 off your first month of Application Hosting or Database Hosting. Explore our plans or talk to sales to find your best fit.
WooCommerce is a flexible and powerful plugin that you can use to turn your WordPress site into a dynamic ecommerce store. However, if you’re looking to reduce shopping cart abandonment, drive conversions, and boost revenue, it’s important to pay careful attention to your WooCommerce checkout page.
There are so many different ways to style and edit the checkout page in WooCommerce. Whether you’re starting your first online shop and seeking to understand how this page works, or you want to enhance the checkout experience on your existing WooCommerce site, we’ve got you covered.
In this post, we’ll explain what the WooCommerce checkout page is and how it functions. Then we’ll walk you through the many options you have to style, change, and leverage it to optimize conversions using plugins, code, themes, and more.
And remember, your ultimate goal is to increase your store’s revenue. So be sure to download our free ebook, 10 Ways to Boost Your WooCommerce Product Page Conversions.
Let’s jump right in!
An Overview of the WooCommerce Checkout Page
When you first set up your WooCommerce store, the plugin automatically creates and assigns a checkout page. If you preview it on the front end of your site, you’ll notice that it is rather simple:
By default, WooCommerce asks customers for some basic information. This includes:
- Billing details
- First and last name
- Company name
- Address (Town/City, Country, District, and Postcode/ZIP)
- Phone number
- Email address
- Order notes
- Privacy policy statement
This is important information to include on a WooCommerce checkout page. It provides the details necessary for a customer to complete their purchase, and for the website to process their payment information.
However, there’s nothing here that is necessarily helping to increase conversions or reduce checkout abandonment. What’s more, the default page may not offer the most relevant or useful information for your specific business. Therefore, like many WooCommerce site owners, you might be looking to change both the design and content of your checkout page.
Before we get into the different ways you can customize the checkout page in WooCommerce, there are a few things to understand first.
Let’s talk about where to find this page, as well as the various default settings and features available within the WooCommerce plugin.
Where to Find the Default WooCommerce Checkout Page and Settings
WooCommerce automatically creates a checkout page for your store once you activate the plugin. You can locate it by navigating to Pages > Checkout in your admin dashboard:
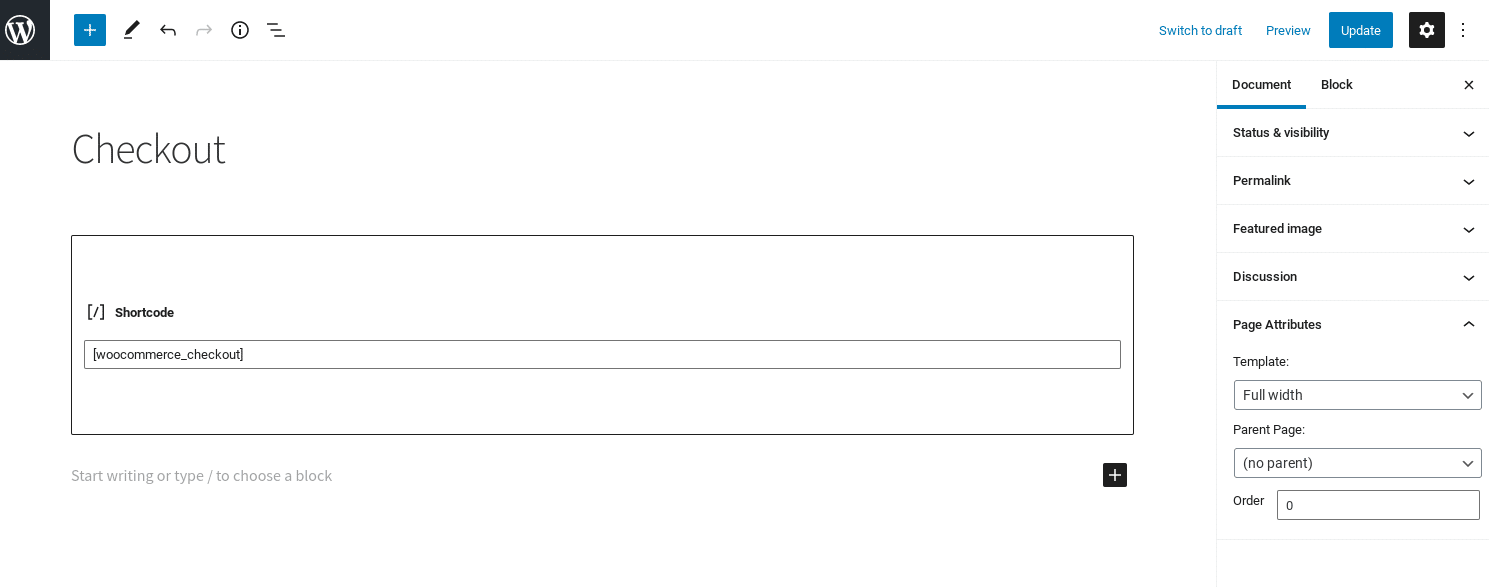
You can edit this page just as you would any WordPress content. For example, you can change the page’s title and permalink, add a featured image, modify the page attributes, etc. It also uses the [woocommerce_checkout] shortcode:
There are a handful of standard options for configuring this page, some of which you can find under WooCommerce > Settings > Advanced:
On this screen, under the Page Setup section, you can select a different page to use as the checkout screen for your store. You also have the option to force a secure HTTPS connection.
On the General settings page, you can enable coupons to be used at checkout, and configure how taxes will be calculated:
Under the Accounts & Privacy tab, you can also find a few options for account creation and guest checkouts:
Below that, there is a Privacy policy section where you can modify the privacy policy text that displays on the checkout page:
Beyond these built-in settings, you have limited options for customizing your checkout page using the WooCommerce plugin alone. Fortunately, there are other methods you can use to enhance its appearance and extend its functionality.
Why You Might Want to Change Your WooCommerce Checkout Page
The checkout page is the last thing customers see before completing their purchases. It can make the difference between whether they end up converting or abandoning your site altogether.
As such, it’s essential to make sure that your WooCommerce checkout page is designed well and functions in a way that encourages conversions. There are many ways you can provide a better experience, such as by:
- Changing the design and page template
- Creating a one-page checkout
- Adding, removing, or rearranging fields
- Changing input field labels and button text
- Requiring certain fields to be filled out
- Automatically triggering free shipping
- Directly linking products to the checkout page
Whether you want to overhaul the default page completely or make minor modifications, the important thing is that you’re able to do so with ease. Fortunately, you have multiple options.
Want to… ✅ reduce shopping cart abandonment, ✅ drive conversions, and ✅ boost revenue? Then this article is for you.👇 Learn how to build a customized WooCommerce checkout page in minutes ⏱Click to Tweet
Methods You Can Use to Change Your WooCommerce Checkout Page
There are many ways to change your WooCommerce checkout page. The best one to use depends on a handful of factors, such as the specific edit you’re trying to make and your comfort level with coding.
Some of the methods you can use to enhance your WooCommerce checkout page include:
- WooCommerce features, blocks, and shortcodes. WooCommerce does come with a few built-in features and settings that you can use to improve your store. For example, you can automatically trigger free shipping, as well as directly link products to the checkout page. There are also blocks and shortcodes for modifying the page.
- Plugins and extensions. If you’re not tech-savvy or simply want a quick and hassle-free way to enhance your WooCommerce checkout page, there are plenty of plugins you can use. Most are easy to get started with and require little support. Some add-ons are provided by WooCommerce and available from the extension library, while others are developed and offered by third-party platforms.
- Page templates and themes. If you want to change the style of your checkout page, you can use a pre-built template or theme. As with plugins, this is a solid option if you have limited coding experience and want to make changes to the overall appearance of the page, in order to better match your branding. The downside is that it does not offer as much flexibility as custom coding would.
- Custom code. Another method you can leverage to change the WooCommerce checkout page is custom coding. This is a powerful route if you’re comfortable editing your site’s files and want to add a lot of personalization.
In the following sections, we’ll take a look at some of the most effective changes you can make to your WooCommerce page. For each, we’ll explain why you might want to make the edit, and walk you through the different methods you can use to go about it.
How to Customize the WooCommerce Checkout Fields
One of the most common changes you might make to a WooCommerce page is to modify its form fields. These typically take up the most space on the page, so they need to be relevant. Whether you want to remove fields, rearrange their order, or add new custom fields, you have a couple of options for going about it. You can either use a plugin or edit the code directly.
Using a Plugin to Change the WooCommerce Checkout Fields
If you want a quick and simple way to customize the checkout fields in WooCommerce, we recommend using a plugin. There are a handful of options to choose from.
One of the most popular is the Checkout Field Editor plugin:
This is a freemium tool that lets you add or edit the form fields on your WooCommerce checkout page. You can enable or disable certain fields, as well as rearrange their order.
Although the free version lets you handle these basic tasks, WooCommerce Checkout Field Editor Pro comes with additional functionality. This includes 17 field types and custom hooks.
To use this plugin, you can install it on your WooCommerce site by navigating to Plugins > Add New and then searching for it. Once you find it, click on the Install Now button, followed by Activate.
When it’s activated, you can configure the settings by going to WooCommerce > Checkout Form:
There are three different types of fields you can edit:
- Billing
- Shipping
- Additional
You can select whichever field you want to change and then click on the Remove, Enable, or Disable button. To add a new field, select Add field.
If you want to change an existing form field, select the box to the left, and click on the Edit button. A panel will open where you can change the field type (in the premium version only), edit the field’s label, choose whether it will be required, and more:
When you’re done, click on the Save button. Once you’re finished making all the changes you wish to the checkout page’s fields, be sure to hit Save Changes at the bottom of the screen.
For more detailed guidance, you can refer to WooCommerce’s documentation on using the Checkout Field Editor plugin.
Of course, this is just one of many plugins you can use to change your WooCommerce checkout fields. Additional options worth considering include Flexible Checkout Fields and WooCommerce Checkout Manager, which we’ll discuss more later in this post.
Editing the Checkout Fields Using Code
Another option for editing the fields on your WooCommerce checkout page is to use custom coding. Of course, this requires a certain level of technical knowledge and comfort working with your site’s files. The advantage is that you have more flexibility in terms of customization than you would with a third-party plugin.
You can edit your checkout fields using your site’s functions.php file and filters such as:
- woocommerce_checkout_fields
- woocommerce_billing_fields
- Woocommerce_shipping_fields
WooCommerce actions and filters let you manipulate the checkout fields almost any way you wish. For example, you can remove them entirely, add new ones, or change the displayed text. Using the woocommerce_checkout_fields filter will enable you to override any field.
Let’s say you want to change the placeholder text for the order_comments field. By default, it is set as the following:
_x('Notes about your order, e.g. special notes for delivery.', 'placeholder', 'woocommerce')To change it, you can add this snippet of code to your functions.php file:
// Hook in

add_filter( 'woocommerce_checkout_fields' , 'custom_override_checkout_fields' );

// Our hooked in function - $fields is passed via the filter!

function custom_override_checkout_fields( $fields ) {

$fields['order']['order_comments']['placeholder'] = 'My new placeholder';

return $fields;

}
To remove a field, you can use the following:
// Hook in
add_filter( 'woocommerce_checkout_fields' , 'custom_override_checkout_fields' );

// Our hooked in function - $fields is passed via the filter!
function custom_override_checkout_fields( $fields ) {

unset($fields['order']['order_comments']);

return $fields;
There are many changes you can make to the fields on your checkout page, so we won’t explore all of them here. You can find a helpful list of override checkout field codes on GitHub.
How to Change the WooCommerce Checkout Page Template
By default, your WooCommerce checkout page template will be based on your site’s theme. But maybe you want to change the design to better fit your branding or perhaps you just want to make slight changes to the content of the template page.
The two main methods you can use to change this are by using a pre-built template or adding code. Let’s start with the former.
Starting With a Pre-Built Template to Customize Your Checkout Page
The easiest way to change the design of your WooCommerce checkout page is by installing a pre-built theme, such as the ones in the WooCommerce Themes Store. There are a variety of free options available, as well as premium themes.
You can search for one-page checkout themes, for example, or any other kind of specific templates you’re interested in using. You can also find plenty of WooCommerce themes on Envato Market.
Using Code to Customize the WooCommerce Checkout Page Template
If you’re comfortable editing code, you can also manually change the checkout page template. Depending on your hosting provider, you may be able to do this via File Manager in cPanel or a Secure File Transfer Protocol (SFTP) client.
You can use action hooks to add, edit, or remove elements from your checkout page. There are nine main action hooks that WooCommerce uses for the checkout page:
- woocommerce_before_checkout_form
- woocommerce_checkout_before_customer_details
- woocommerce_checkout_billing
- woocommerce_checkout_shipping
- woocommerce_checkout_after_customer_details
- woocommerce_checkout_before_order_review
- woocommerce_checkout_order_review
- woocommerce_checkout_after_order_review
- Woocommerce_after_checkout_form
These action hooks add markup to the page, which you can use to customize both its style and functionality. If you want to use these action hooks to modify your checkout page template, you can do so by editing the checkout form PHP file.
You can locate the WooCommerce template files under /woocommerce/templates. From your site’s root directory, you’ll need to navigate to wp-content/plugins/woocommerce:
Within these files, there are hooks you can use to add and rearrange content on the template page, without actually editing the template files. To create a custom theme template for your checkout page, you’ll first need to create a “woocommerce/checkout” folder within your theme’s folder.
Next, copy the WooCommerce checkout page template, which you can find at woocommerce/templates/checkout/form-checkout.php:
Then, add it to the new folder you just created. After that, you can edit the file to make your desired changes. When you save the file, the WooCommerce plugin will load this template and override the default page template.
How to Create a One Page WooCommerce Checkout
One of the ways to enhance the checkout experience for your customers, and in the process reduce abandonment rates, is to make it as quick and simple as possible. If you want to shorten the checkout process, you can do so by creating a one-page checkout in WooCommerce.
There are multiple ways to do this. As we mentioned earlier, you can look for a one-page theme or template that will provide a single checkout page. However, if you like your current theme, you may not want to change it.
If that’s the case, don’t worry. There are other options, such as the premium WooCommerce One Page Checkout extension:
Since this solution was developed by WooCommerce, you know that it’s safe, reliable, and offers plenty of support. In addition to letting you transform any page into a checkout page, it comes with a plethora of features for optimizing the one-page checkout process.
You can:
- Display both product selection and checkout forms on one page.
- Enable customers to add or remove items from their carts.
- Let customers complete payments without leaving the page.
- Add custom fields to pages.
After you purchase the extension through your WooCommerce account, you can download the plugin, and then install and activate it on your WooCommerce site.
To use it, navigate to Pages > Add New and select the One Page Checkout icon in the editor toolbar:
![]()
In the panel that opens, you can click within the Products field, and begin typing the name of the product(s) that you want to add.
Next, choose the template you want to use (Product List, Product Table, Pricing Table, or Single Product) and click on Create Shortcode.
You can also manually insert the one-page shortcode into any post or page. To learn more about this plugin and how to use it, you can refer to the WooCommerce One Page Checkout documentation.
How to Trigger Free Shipping During the WooCommerce Checkout Process
As an ecommerce business owner, there are many different strategies you can leverage to encourage your customers to spend more. One of those is to offer free shipping.
Of course, you may not want to offer free shipping on every order. However, adding it as an incentive on order totals that reach a certain amount can help you encourage shoppers to spend more than they otherwise would.
Therefore, you may want to configure your WooCommerce checkout page to automatically trigger free shipping on orders above a certain number, such as $100.
The first thing you’ll need to do is to offer the free shipping method to the relevant Shipping Zone(s).
To do so, navigate to WooCommerce > Settings > Shipping:
Hover over the Shipping Zone you want to modify, and then click on the Edit link. If you haven’t added any zones yet, select the Add shipping zone button first and follow the prompts before proceeding.
Next, click on Add Shipping Method. In the modal that opens, select Free Shipping from the dropdown menu, followed by Add shipping method again:
Next, from the Shipping methods list on the settings page, hover over Free Shipping and click on the Edit link.
A Free shipping settings panel will open. From the Free shipping requires…. dropdown menu, select A minimum order amount:
You can then define the minimum order amount. When you’re done, click on the Save Changes button.
How to Directly Link Products to the WooCommerce Checkout Page
Another way you can enhance the checkout experience for your customers is to create direct checkout links. This is helpful for sending customers straight to checkout from product and sales pages.
Creating a Direct Checkout Link Manually
To create and add a direct checkout link in WooCommerce, you can use the following URL: exampledomain.com//checkout/?add-to-cart=ID.
Note: you’ll want to replace “exampledomain” and “ID” with your domain name and the specific product ID that you’re linking to the checkout page.
To find a product ID, navigate to Products > All Products in your admin dashboard. Browse to the product you want to create the direct link for, and then hover over the name of it to reveal the product ID number:
Once you paste the product ID into the aforementioned URL, you can then place the link anywhere on your WooCommerce site. You can repeat this process for each of your products, even variable and grouped items.
Creating a Direct Checkout Link Using a Plugin
We realize that the above strategy may not be the most efficient method for all users. Depending on how many products you have in your WooCommerce store, it can be very time-consuming.
Fortunately, if you’re looking for a faster method you can also use the Direct Checkout for WooCommerce plugin:
This freemium tool lets you simplify the checkout process in a variety of ways, including by adding a direct link from a product page to the checkout screen. Once you install and activate the plugin on your WooCommerce site, navigate to WooCommerce > Direct Checkout:
Under the General tab, select Yes for the Added to cart redirect option and then choose Checkout from the Added to cart redirect to dropdown menu. Click on Save changes when you’re done.
Next, navigate to the Products tab:
Enable the Redirect to the cart page after successful addition option. Again, click on the Save changes button. That’s it!
How to Test Your WooCommerce Checkout Page
At this point, you’ve hopefully implemented a variety of ways to enhance your WooCommerce checkout page. Now, it’s essential to make sure that your checkout process is working properly, in order to reduce abandonment and confirm that no errors will interrupt the customer journey.
Fortunately, there is an easy way that you can send a test order and payment through your WooCommerce shop, to make sure that everything is working as it should. To do this, you’ll first need to install the WooCommerce Payments plugin on your site (if you haven’t already):
Once you install and activate the plugin, you can enable ‘test mode’. To do this, navigate to WooCommerce > Payments > Settings:
Remember to save your changes.
Once Test Mode is enabled, you can browse your WooCommerce store and select any product. Add it to your shopping cart and then move to the checkout page.
Fill out the checkout page form fields as necessary. For the payment information, you can use any of the dummy credit card numbers provided by WooCommerce. You can also use any three digits for the CVC code, and select any future date.
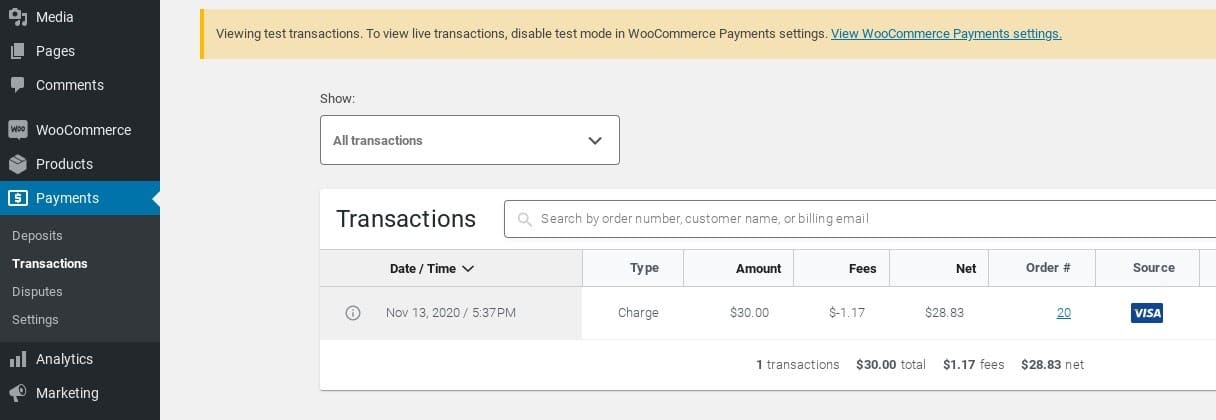
When you’re done, click on Place Order. Next, navigate to the Payments > Transactions screen:
Here, you should see the charge show up. If it’s there, you know that your checkout page is working as it should. Remember to turn Test Mode off when you’re done!
Learn how to style, change, and leverage your WooCommerce checkout page⚡️ to optimize conversions and 💰 boost your revenue here ⬇️Click to Tweet
The Best WooCommerce Checkout Plugins and Extensions
Throughout this post, we’ve covered a wide variety of ways to change your WooCommerce checkout page, including blocks, shortcodes, and custom code. We’ve also mentioned some key plugins that can help you add features and functionalities that wouldn’t otherwise be available.
However, there are some additional add-ons, plugins, and extensions we haven’t mentioned yet, but that provide you with more customization options for your WooCommerce checkout page. Some of the best ones worth considering include:
- WooCommerce Cart Notices Add-On. This WooCommerce add-on lets you display actionable messages and notifications to your customers during the checkout process. For example, you can use it to notify them of relevant sales and promotions.
- WooCommerce Checkout Manager. Made by the same team that developed Direct Checkout for WooCommerce, this plugin is a powerful extension that you can use to optimize your checkout page. You can use it to edit, remove, and add custom fields, as well as to create condition fields.
- WooCommerce Checkout Add-Ons. This premium plugin lets you add free and paid add-ons at the checkout stage. It’s a helpful tool for increasing conversions and driving revenue.
Depending on the type of ecommerce site you have, you may be looking for even more options. If so, we recommend checking out the WooCommerce Extensions Library, which offers a ton of add-ons for extending the WooCommerce plugin’s features and functionality, including both free and paid solutions.
Summary
There are different ways you can implement to improve and optimize your WooCommerce checkout page.
Depending on the change you want to make and your experience level, you can leverage WooCommerce plugins and extensions, page templates and themes, and even custom code.
Do you have any questions about using or editing the WooCommerce checkout page? Let us know in the comments section below!
Get all your applications, databases and WordPress sites online and under one roof. Our feature-packed, high-performance cloud platform includes:
- Easy setup and management in the MyKinsta dashboard
- 24/7 expert support
- The best Google Cloud Platform hardware and network, powered by Kubernetes for maximum scalability
- An enterprise-level Cloudflare integration for speed and security
- Global audience reach with up to 35 data centers and 275 PoPs worldwide
Test it yourself with $20 off your first month of Application Hosting or Database Hosting. Explore our plans or talk to sales to find your best fit.
102 комментария к “Как изменять WooCommerce. Эпизод #5. Страница оформления заказа”
-
Какие все таки шикарные видео! Желаю тебе удачи и спасибо за такие видосы.
Ответить
-
Спасибо! И тебе успехов!
Ответить
-
-
Отличный обзор, спасибо!
Ответить
-
Спасибо, что смотрите
Ответить
-
-
все по полочкам! лойс и спасиб)
Ответить
-
Всегда пожалуйста
Ответить
-
-
Спасибо за отличные уроки по woocommerce) Проблема с объединением корзины и checkout, на странице спасибо теперь тоже отображает корзину, как можно это решить) ?
Ответить
-
Хм, специально проверил, у меня на Storefront ничего не вылезает, все четко. Видимо у вас так тема сделана, попробуйте на другой теме проверить
Ответить
-
Да скорее всего тема так сделана
Ответить
-
-
ну а как быть с премиум темой FLATSOME, там очередность не меняеться етим способом
Ответить
-
Ну раз не работает, значит тема так сделана и в ней слишком многое переопределение. Пробуйте плагин использовать для управления полями.
Ответить
-
Проверил на этой теме, у меня все четко меняется без проблем
Ответить
-
Спасибо что посмотрели, переписал ещё раз код и тожет поменялось, наверно где то был ошибку сделал впервый раз, ещё раз спасибо
Ответить
-
-
-
Приветствую!
Отдельный респект за то что ткнул носом в yoast лайфхак – немного разнообразил тайтлы полями и аттрибутами.
Вопросик такой. Ставил плагин по доставкам – он делает аналогичное скрытие полей (город,отделение почты берет по апи для расчета доставки), но фигня в том, что когда ставишь галочку появление этих полей нифига не видно (выше на странице вылазят, ведь галочка доставки в самом низу после контактного инфо и корзины. Верстка такова что блок корзины на всю ширину экрана под конт. информацией). Покупатели тупо не видят.
можно ли их перевесить на другой хук?
В “своем” плагине я так понял, что просто массив чекаут_филдс меняется через фильтр … как выводить поля доставки внизу возле чекбокса, чтото пока ума не хватает)Ответить
-
Привет! Не очень понял, в чем проблема. Если в зависимости от доставки на чекауте поля выводить, то вот так можно https://wpruse.ru/woocommerce/hiding-fields-on-chosen-delivery/
Похоже у тебя с версткой проблемы… Перевесить можно, толко тут не полями надо оперировать, а файлами. Найди функцию которая выводит поля и переподключи ее
Ответить
-
Приветствую.
попробую объяснить иначе. На твоем примере, если верстка адаптивна, то на мобайле 2 колонки превращаются в одну (блок “ваш заказ” уплывает под “оплата и доставка”). при выборе доставки покупатели тупо не видят выше всплывающих полей.
Возможно ли вывести поля с адресом доставки.. ну где угодно.. перед выбором формы оплаты… или после купона?Ответить
-
Можно конечно. Переподключи блок Ваш заказ и выводи его на мобилках через is_wp_mobile где хочешь
Ответить
-
-
Еще вопрос, если можно… маюсь второй день.. вроде все очевидно но.. не работает нифига
add_filter(“woocommerce_checkout_fields”, “zzz_order_fields”);
function zzz_order_fields( $fields ) {
$fields[‘billing’][‘billing_phone’][‘priority’] = 31;
$fields[‘billing’][‘billing_email’][‘priority’] = 32;
return $fields;
}
но при выводе ничего не меняется.Хотя судя по коду в атрибутах data-priority присвоение явно происходит !
уже не знаю куда копать…Ответить
-
Артем, уже голову сломал, но ПОБЕДИЛ.
и знаешь в чем засада? тебе тож на заметку, может столкнешься или прольешь свет! чисто woo-шная заморочка.как только убрал
unset($fields[‘billing’][‘billing_country’]);все заработало!!! приоритеты начали строиться как надо через woocommerce_checkout_fields. правда, чтобы адрес_1 задвинуть в конец пришлось еще и woocommerce_default_address_fields задействовать.
+country тупо css убралкапут. вырванные годы.
Ответить
-
Ну я про это вообще в видео сказал, что это поле нельзя удалять, на него много проверок завязано
Ответить
-
Ага. Только тайна приоритетов далась с трудом 😉
Ответить
-
Зато получил бесценный опыт)
Ответить
-
Не говори. Надеюсь пригодится не только мне.)
а вушникам я бы уши пооткрутил))
костыль какойто дурацкий.Ответить
-
-
Вопрос, а можно после ФИО и номера телефона поставить выбор способа доставки а потом сразу оплаты, что бы пользователю было удобно, и форма менялась по логической цепочке? А то выходит покупатель дошёл до конца формы и когда меняет способ оплаты и доставки в конце формы меняется сама форма…
Ответить
-
Можно при желании, тут многое от самого сайта зависит и его оформления. А так, нет проблем перенести куда нужно
Ответить
-
-
Можно все поля .val() формы записывать в объект localstorage, а при последующих кликах на оплату восстанавливать их по ее id, вставляя из сохраненного объекта.
Ответить
-
Спасибо! Надо будет попробовать так сделать
Ответить
-
-
-
Добрый день.
Мне нужно сделать чтобы при выборе оплаты после доставки была предоплата и при оформление заказа вибрасывало на лигпей опачевалась эта предоплата и формировался заказ тоесть с оплатой после доставки – стоимость предоплаты.
На сайте уже работает лигпей и два вида оплаты. Нужно доделать предоплату для варианта когда оплата при получении.
Раньше с таким не сталкивался.
Спасибо за видео!
Буду благодарен за помощь.Ответить
-
Добрый! Обычно предоплата используется. Но если предоплата.. Никогда такого не делал, но как вариант – Получаем стоимость заказа на чекауте
Вычисляем процент предоплаты при выборе нужного способа оплаты.Как-то так
Ответить
-
+WPRUSe · Финты WordPress спасибо за ответ!
Ответить
-
-
если глобал объект сохранить в переменную а после обновления вернуть?
Ответить
-
Добрый день. Помогите пожалуйста. При нажатии кнопки “Оформление заказа” вдруг ни с того ни с сего Появляется страница ошибки, где написано “Попытка соединения не удалась
Firefox не может установить соединение с сервером mayson-lingerie.ru.
Возможно, сайт временно недоступен или перегружен запросами. Подождите некоторое время и попробуйте снова.
Если вы не можете загрузить ни одну страницу – проверьте настройки соединения с Интернетом.
Если ваш компьютер или сеть защищены межсетевым экраном или прокси-сервером – убедитесь, что Firefox разрешён выход в Интернет.”В код я не лез, ничего не настраивал. Страницу Оформление заказа пробовал удалять и ставить заново. Не помогает. Что с этим можно сделать?
Ответить
-
Добрый! Похоже хостинг не не справляется. Или поддержку пинать или попробовать сменить тему, может быть тема лишнее что-то генерирует
Ответить
-
-
Добрый день, занимаюсь как раз сейчас изменением страницы заказа, очень полезные курсы!
Вот только подскажите как например вставить дополнительный блок на эту страницу, в моем магазине есть самовывоз, и для самовывоза я хочу вставить карту с моим местонахождением. Ну или любой другой блок, было бы очень инетресно.Ответить
-
Добрый! Как дополнительное поле добавляйте. При желании можно что угодно добавить. Можно плагином, можно кодом, тут как удобнее
Ответить
-
-
Добрый день. Подскажите, пожалуйста, на некоторых шаблонах страниц, там где указано количество товаров в строке выводится × В русскоязычной версии это отображается как Ч, а должно быть х. Т.к оно выводится через sprintf, проблемно написать фильтр, как решаете проблему?)
Ответить
-
Добрый! Никогда не встречал такой проблемы. Обычно это означает что на компьютере не загружаются шрифты или браузер криво отрабатывает
И что-то не помню чтобы в количестве подобный знак отображался. Это же просто крестик. На какой страние вы его видите?
Ответить
-
-
Добрый день, проблема в том, что после оформления заказа с телефона высвечивается вместо нормальных данных (адреса доставки) всякие буквы а и е (это со стороны покупателя) как это исправить?
Ответить
-
Добрый! Это больше похоже на не верную кодировку
Ответить
-
-
Добрый день! Подскажите, пожалуйста, как убрать пометку поля “НЕОБЯЗАТЕЛЬНОЕ”
Ответить
-
Добрый! Только label править через хуки. Через фильтр woocommerce_default_address_fields можно изменить
Ответить
-
-
Нашел то что мне нужно корзина в форме + различные поля )))
Ответить
-
-
в файле class-wc-countries я в ручную расставил поля формы и приоритеты. Файл class-wc-order выводит значения Billing и shipping в админ панель. Не могу получить отображение значения поля в админ панели! Те поля которые я создал их значения не выводятся в админ панели! Пример: существующие поле address_2 я по такому же принципу добавил address_3, но значение поля address_3 не отображается а админке! Помогите решить проблему?
Ответить
-
Плохая идея – править файлы плагина…
Используйте плагин WooCommerce Checkout Fields. Должно помочьОтветить
-
@WPRUSe · Финты WordPress все через код получилось полностью без плагина
Ответить
-
-
-
Скажите, пожалуйста, у меня отображается “Ваши личные данные будут использоваться для обработки ваших заказов…” А фразы “я соглашаюсь” нет. В чем проблема.
И как можно реализовать страницу оформления заказа в одну колонку? Чтобы Ваш заказ отображался ниже раздела оплата и доставка, а не справа. У меня на этой странице размещена боковая панель и плохо смотрятся эти две колонки. …В кодах совсем не сильна. Спасибо за подробные видео!Ответить
-
Эти настройки есть в консоли WordPress woocommerce-настройки вкладка-Учётки и приватность.
а расположение блоков можете поискать в настройках страницы.Ответить
-
Скорее всего в кастомайзере “я соглашаюсь” надо включить
И как можно реализовать страницу оформления заказа в одну колонку – только править файлы темы или использовать уже готовую тему. Например в теме OceanWP уже есть функционал пошагового оформления заказаОтветить
-
-
Как можно изменить значение subtotal для товара, не общий, а именно товара(хочу написать свои скидки)
Ответить
-
Внести изменения в файл нужный. В видео про это так же говорится
Ответить
-
@WPRUSe · Финты WordPress нужно было желать это из function.php, спасибо я уже разобрался(:
Ответить
-
Всегда пожалуйста
Ответить
-
-
Добрый день! Подскажите как убрать ненужные поля с блока-Детали оплаты. например: Фамилия, Почтовый индекс, Область/регион ?
Ответить
-
Добрый! Можно, собственно в видео и рассказано как это сделать. Или можно воспользоваться плагином типа WooCommerce Checkout Fields
Ответить
-
-
как насчёт сделать видео о том, как можно сделать собственную систему скидок? такого в интернете не нашёл, а плагины не всегда удовлетворяют все потребности. Думаю многим была бы интересна эта тема.
Ответить
-
Это разработка, такое видео записать не так просто, а отдачи от него минимум… Как насчет просто купить готовый плагин или использовать купоны?
Ответить
-
@WPRUSe · Финты WordPress
не мой случай, слишком специфические условия скидок, ни один готовый плагин не подходит.Ответить
-
-
У меня все получилось при помощи кода! Есть только одна проблема! У меня подключен ключ google API к Billing полю address_2 для автоматического поиска адреса и номера дома клиента. Этот ключ перестает работать когда обновляется форма, проблема заключается в первом шаге кода! Когда Billing делает запрос на обновление формы при переключении. Вот примерно в этой строке проблема woocommerce_update_order_review_fragments. Может как то можно решить проблему ?
Ответить
-
Любую проблему можно решить при желании. Только при чем тут мой код? Логично что ключ перестает работать, не думаю что это проблема моего кода. Скорее всего надо ключ обновлять при переключении. Но это не точно
Ответить
-
@WPRUSe · Финты WordPress да, верно ключ нужно обновлять, но как это сделать пока голову ломаю за что его цеплять не пойму.
Ответить
-
-
-
Что нужно сделать?
Все просто: как изменить гребаную структуру вывода филдов?
Так как то что сделали разрабы – прото ппц
p -> label + span->input и все это с кучей своих класов
Ответить
-
-
@WPRUSe · Финты WordPress Спасибо!
Ответить
-
-
WPRUSe · Финты WordPress все сделал, все получилось!)
Чтоб все отвечали так как вы, спасибо ! =)))
Ответить
-
@Maks Fisher Рад, что все получилось!
Ответить
-
-
К слову видео отличное, просто не совсем то что я искал(
Ответить
-
Спасибо. Что искали?
Ответить
-
-
-
-
Все инфу не могу найти как изменить слово “Купон” на “Промокод”. Понимаю что вроде мелочь, а мозгов не хватает пока
Ответить
-
Проще перевод просто изменить. Например плагином Loco Translate
Ответить
-
-
Не подскажите, как добавить разные виды доставки в страницу оформления заказа (самовывоз, быстрая доставка и т.д.)?
Ответить
-
Через настройки можно добавить нужные способы доставки
Ответить
-
-
Добрый день, не очень поняла, в каком файле Вы пишете код на 16:30. Это файл в теме или в плагине? Только начала в этом разбираться, подскажите, пожалуйста. Использую тему Oceanwp
Ответить
-
Добрый! В файле functions.php дочерней темы. Я об этом говорю в начале видео. Так что, вам для начала надо сделать дочернюю тему для вашей Oceanwp или скачать готовую у них на сайте
Ответить
-
-
Убрал поле Страна через фильтр без CSS, заказ проходит, версия Woocommerce 3.6.4
Ответить
-
Хм, хорошая новость, спасибо. Проверю
Ответить
-
-
Добрый день, при выборе любой оплаты через сайт (кроме оплаты при получении) не приходит письмо о заказе на почту ни администратору, ни покупателю, то есть если выбрать оплату картой то оплата проходит, после оплаты покупателя перекидывает на страницу с заказом, заказ отображается в админке со статусом “в ожидании оплаты”, а письма не приходят. Подскажите пожалуйста какие есть варианты решения этой проблемы?
Ответить
-
Добрый! Может письма в спам попадают? Проверяли?
Ответить
-
@WPRUSe · Финты WordPress Спам проверили, писем там нет ни у клиента, ни у админа. Забыл также уточнить, что все онлайн платежи проходят через систему “Онлайн чеки” подключенную к кассе, если “Онлайн чеки” включены, то клиенту приходит письмо с чеком от ОФД, но админу письмо не приходит, по этому вопросу уже обратились в поддержку, но все равно как я понимаю, помимо ОФД письмо также должно приходить и с сайта. По настройкам тоже пробежались проверили, отправка писем и админу и клиенту включена на пунктах: “Новый заказ”, “Отмененный заказ” и “Неудавшийся заказ”, остальные пункты как я понимаю редактировать нельзя, они отправляются только клиенту. Подскажите, может есть возможность вручную создать новое уведомление на почту о всех действиях с заказами и с новыми поступившими заказами, или возможно есть другие варианты решения проблемы?
Ответить
-
@Александр Зорин Хм, тогда надо проверить вообще письма с сайта уходят или нет и настроить SMTP
Ответить
-
-
При создании страницы заказа таким образом у меня не отображаются апсейлы, пробовал на нескольких темах.
Если разносишь страницы корзины и заказа, то апсейлы отображаются на странице корзины.
Подскажите пожалуйста, в чем может быть дело?Ответить
-
В том, что апселы по дефолту выводятся на корзине, через хук. Если корзина и чекаут разносятся то апселы надо переключать
Ответить
-
-
А как быть с тем, что в дополнительных настройках Woo в Корзине нельзя назначить “Оформление заказа”, потому что нет ее в раскрывающемся меню?
Ответить
-
Не понял вопроса. На оформлении заказа по дефолту вообще нет корзины. В чем задача состоит?
Ответить
-
-
-
Привет) я пилю свой первый интернет магазин и ничего не понимаю. Где вообще находятся все эти коды?
Ответить
-
Привет! В файлах плагина Вукомерс
Ответить
-
-
После совмещения страниц корзины и оформления, кросселы не будут выводиться?
Ответить
-
Будут, если они есть и тема не правлена
Ответить
-
-
Подскажите, как сделать, чтобы при нажатии на Подтвердить заказ вело сразу на оплату, а не на страницу Подтверждения заказа? Используем woocommerce, storefront
Ответить
-
Для этого какой нибудь шлюз для оплаты надо подключить
Ответить
-
-
Добрый день. А можно поле второго адреса использовать под например НДС и разместить его под полем “название фирмы? Как это лучше сделать, какие нюансы?
Ответить
-
@Edward Januszkiewicz Поставьте плагин и не мучайтесь
Ответить
-
-
Добрый день, подскажите для чайков, как все-таки убрать повторяющее поле “оформить заказ” в мини корзине? в самом конце видео.
Ответить
-
Здравствуйте!
Возможно ли реализовать переключение не по методу доставки, а при переключении страны?
Как я понимаю нужно это править в Обновление формы.Если делали уже такое подскажите как или возможно ли такое реализовать?
Ответить
Добавить комментарий
The checkout page on your WooCommerce shop is where you get paid, so it’s important to get it just right.
The default configuration is pretty good, but you may need to customize it out of necessity, or to test for a higher conversion rate.
There are 2 ways to customize the page, with a plugin, or with custom code. We’ll go over both of those here.
Custom Checkout Template
Most customizations can be done using hooks and filters, but if you’d like to edit the markup on the checkout page, you can do that in a theme.
A word of warning: moving around the markup on the checkout page can cause problems with other plugins that use hooks and filters. I would not recommend removing any action hooks, or editing the markup aggressively.
According to the WooCommerce documentation, you can copy the checkout template to your theme by in a folder structured like this: woocommerce/checkout/form-checkout.php.
![]()
You can then customize form-checkout.php as desired, and it will load instead of the default template.
Customizing with CSS
CSS classes may change based on your theme or plugins, but the default classes are usually available.
You can customize these classes using custom CSS in a child theme, or the customizer. Here are the main high level tags, with classes and IDs you can use.
<body class="woocommerce-checkout">
<div class="woocommerce">
<form class="woocommerce-checkout"> <div id="customer_details" class="col2-set">
<div class="woocommerce-billing-fields">
<p class="form-row">
<div class="woocommerce-shipping-fields">
<p class="form-row">
<div class="woocommerce-additional-fields">
<div id="order_review" class="woocommerce-checkout-review-order"> <table class="woocommerce-checkout-review-order-table">
<div id="payment"> <ul class="wc_payment_methods payment_methods methods"> <div class="form-row place-order">
Example:
form.woocommerce-checkout input[type="text"] { border-radius: 3px; background-color: #ccc; color: #444; }To see all classes on the checkout page, use a browser inspector.
Checkout Action Hooks
Action hooks can be used to add or remove elements from the checkout page.
There are 9 action hooks on the checkout page:
- woocommerce_before_checkout_form
- woocommerce_checkout_before_customer_details
- woocommerce_checkout_billing
- woocommerce_checkout_shipping
- woocommerce_checkout_after_customer_details
- woocommerce_checkout_before_order_review
- woocommerce_checkout_order_review
- woocommerce_checkout_after_order_review
- woocommerce_after_checkout_form
There are also 7 additional hooks that may be available, depending on your layout:
- woocommerce_checkout_before_terms_and_conditions
- woocommerce_checkout_after_terms_and_conditions
- woocommerce_before_checkout_billing_form
- woocommerce_before_checkout_registration_form
- woocommerce_after_checkout_registration_form
- woocommerce_before_checkout_shipping_form
- woocommerce_after_checkout_shipping_form
Checkout Hooks Visualized
It helps to get a visual idea of where the hooks are located.
Here’s the standard WooCommerce checkout page, using the Storefront theme.
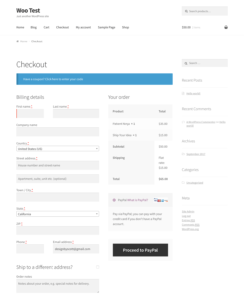
Here are many of the various hooks you can use, visually placed on the checkout page above.
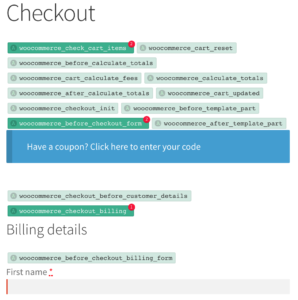
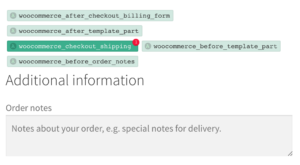
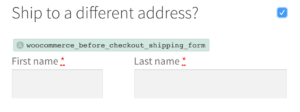
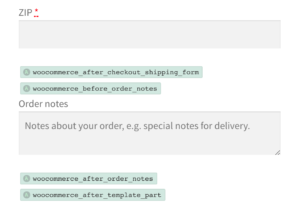
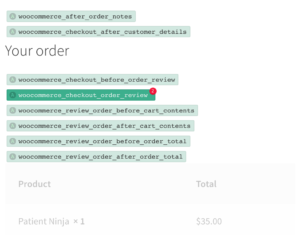
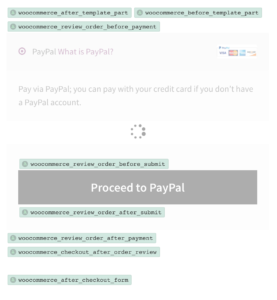
Action hooks are used to add markup to the page. For example, we can add a message to the customer about shipping details using the woocommerce_before_checkout_shipping_form hook.
add_action( 'woocommerce_before_checkout_shipping_form', function() { echo 'Don't forget to include your unit number in the address!'; });That looks like this:
You can find documentation on all of the hooks here.
Moving, Adding, or Removing Checkout Fields
The easiest way to customize checkout fields is to use the Checkout Field Editor plugin.
This plugin provides a simple UI to move, edit, add, or remove any checkout fields. You can edit anything about the fields, including type, label, position, and more.
After installing and activating this plugin, you can visit WooCommerce => Checkout Fields to begin editing.
To edit a field, simply change the desired value and save. To add a field, click Add Field, and to remove, check the field and click Disable/Remove.
Custom Code
Custom code is a bit trickier, but if you only want to make a small edit without purchasing a plugin, here’s how you do it.
WooCommerce has several filters available to edit checkout fields, including woocommerce_checkout_fields, woocommerce_billing_fields, and woocommerce_shipping_fields.
You can use the woocommerce_checkout_fields filter to manipulate all the checkout fields.
Remove the billing phone number field
// Hook in add_filter( 'woocommerce_checkout_fields' , 'my_override_checkout_fields' ); // Our hooked in function - $fields is passed via the filter! function my_override_checkout_fields( $fields ) { unset($fields['billing']['billing_phone']); return $fields; }Add Shipping Phone Number Field
// Hook in add_filter( 'woocommerce_checkout_fields' , 'custom_override_checkout_fields' ); // Our hooked in function - $fields is passed via the filter! function custom_override_checkout_fields( $fields ) { $fields['shipping']['shipping_phone'] = array( 'label' => __('Phone', 'woocommerce'), 'placeholder'=> _x('Phone', 'placeholder', 'woocommerce'), 'required' => false, 'class' => array('form-row-wide'), 'clear' => true ); return $fields; } /** * Display field value on the order edit page */ add_action( 'woocommerce_admin_order_data_after_shipping_address', 'my_custom_checkout_field_display_admin_order_meta', 10, 1 ); function my_custom_checkout_field_display_admin_order_meta($order){ global $post_id; $order = new WC_Order( $post_id ); echo '<p><strong>'.__('Field Value').':</strong> ' . get_post_meta($order->get_id(), '_shipping_field_value', true ) . '</p>'; }To edit a field, you can access the field attributes. For example, let’s change the placeholder for Zip to Postal Code.
Change Field Placeholder
add_filter( 'woocommerce_checkout_fields' , 'my_override_checkout_fields' ); // Our hooked in function - $fields is passed via the filter! function my_override_checkout_fields( $fields ) { $fields['billing']['billing_postcode']['placeholder'] = 'Postal Code'; return $fields; }For more examples, view the WooCommerce documentation here.
WooCommerce Checkout Extensions
There are a variety of extensions available to customize the checkout page, here are just a few.
One Page Checkout
This extension allows you to put a checkout form on the same page as your product, making it a one-step payment process.
The normal WooCommerce flow is: go to the single product, click add to cart, go to the cart page, then go to checkout. One page checkout allows you to change that to: go to the product page => checkout.
Checkout Add-Ons
This extension allows you to add paid services or products at checkout. Examples would be, gift wrapping, priority boarding, setup services, and more.
Social Login
This extension allows customers to use their social accounts to login at checkout, so they don’t have to create a new account manually.
It integrates with most major social networks, such as Facebook, Twitter, Google, and more.
FOMO Popups
This is not specific to checkout, but it can help purchase conversions. Show sale notification popups on your WooCommerce site with the Holler Box FOMO plugin.
Conclusion
Editing the WooCommerce checkout page is something you should do with care.
Sometimes your reason is a mandatory client request, other times you may have your own intuition as to what will work better. If you are making changes that aren’t critical to your business, just make sure to keep an eye on your conversions using a Google Analytics conversion funnel, or an A/B testing tool.
The last thing you want to do is make a change that will hurt your conversions instead of help them.
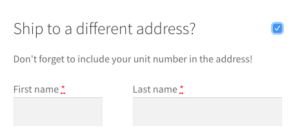
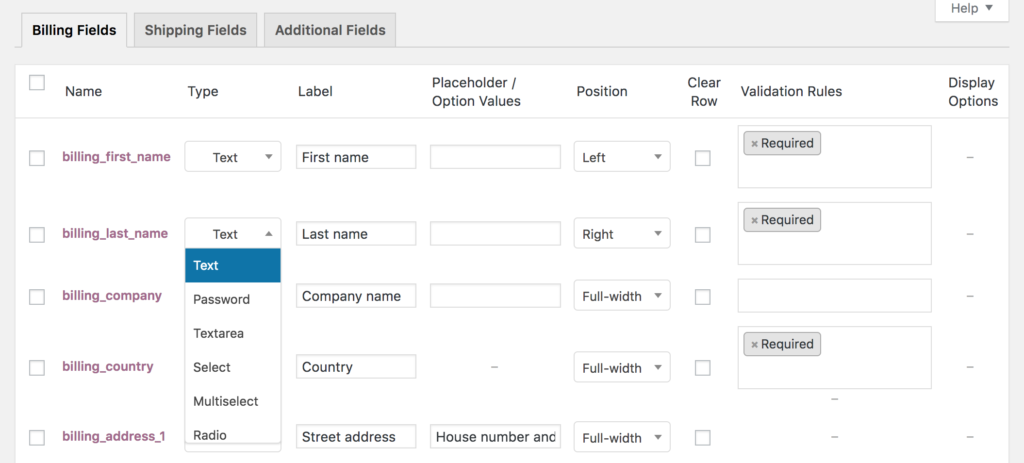
Разработка и продвижение сайта, особенно интернет-магазина, дело не простое и требует детальной проработки структуры, функционала и контента. Для интернет-магазина не последнюю роль играет удобство оформления заказа.
В этой статье мы расскажем Вам, как можно настроить под себя страницу оформления заказа в интернет-магазине, созданного на WordPress при помощи плагина Woocommerce.
Стандартный вид страницы оформления заказа в Woocommerce выглядит следующим образом:
Устанавливается он как любой другой плагин. После установки и активации в разделе Woocommerce появляется пункт Saphali WC Lite.
Как редактировать поля:
1. Перемещать и менять местами.
Для этого наводим курсор на любое поле, при этом курсор у нас приобретает вид плюсика со стрелочками.
Зажимаем левую кнопку мыши и перетаскиваем это поле туда, куда нам нужно.
2. Можно редактировать поля, изменять надпись. Для этого ставим курсор в поле, где указан заголовок и меняем его значение на своё.
5. Так же, обращаю ваше внимание на столбец«Clear», если вы устанавливаете здесь галочку, то это будет указывать на то, что следующее поле будет начинаться с новой строки. Обычно, галочки здесь следует ставить тогда, когда в одной строке идет по два поля, и ставится она возле поля с классомform-row-last.
6.Так же вы можете сделать, что бы у вас в поле было задано значение по умолчанию. Например, для адреса здесь уже введен текст «Улица и т.д.». При этом на странице формы в данном поле будет по умолчанию отображается текст, который исчезает, когда покупатель начинает вводить свои данные.
7.Так же, вы можете выбрать тип поля. Это может быть:
Select — раскрывающийся список
Checkbox – это когда у вас доступно несколько вариантов, я человек ставит галочкуTextarea — большое поле, в которое можно вводить какой-то более или мене большой текст
Text – стандартное поле для ввода
8.Также можно выбирать обязательно ли данное поле для заполнения или нет, и публиковать это поле или нет.
Добавление новых полей
Если вам не достаточно тех полей, которые есть изначально и вы хотите добавить какое-то свое поле, то для этого:
1.Спускаемся вниз страницы и нажимаем на кнопку«Добавить»:
2.После этого сразу под уже существующими полями появляется новое, для которого можно задать название, значение по умолчанию, задать ему класс, ти поля и т.д. 3.После того, как вы задали все настройки, прокручиваем вниз и нажимаем на кнопку «Сохранить».
Если вы удалили какие-то поля, а затем решили, что вам нужно, что бы форма была снова такая же, как по умолчанию, то вы можете здесь, в самом низу нажать на кнопку «Восстановить поля по умолчанию». А затем, уже по новой, править те поля, которые вас интересуют.
Редактирование полей реквизитов доставки и дополнительных полей
Так же, в Woocommerce, когда человек оформляет заказ, и у вас в магазине настроены различные способы доставки, то ему еще высвечивается блок, в котором ему необходимо ввести адрес доставки. Так вот, поля для заполнения адреса доставки так же можно редактировать при помощи данного плагина.
Здесь есть вот такой раздел «Реквизиты доставки»:
И здесь, аналогично предыдущему, точно так же можем удалять, добавлять свои поля, менять их местами, указывать, обязательны ли они для заполнения, менять им классы и т.д.
Так же у нас есть возможность добавить дополнительные поля. По умолчанию это у нас идет поле «Примечания к заказу».
Мы можем здесь либо это поле удалить совсем, либо добавить сюда какие-то еще свои дополнительные поля.
Есть еще один способ
Плагин Saphali Woocommerce Russian, который мы рассмотрели выше, не плохой инструмент, но он нагружает систему. Есть еще один хороший плагин для редактирования полей, им можно как и удалить так и создать нужные поля, WooCommerce Checkout Field Editor (Manager) Pro, но он также тяжеловат для такой простой манипуляции как просто убрать поля.
И так для такого чтобы просто удалить не нужные поля при оформлении заказа мы добавляем код в файл functions.php нашей темы:
add_filter( ‘woocommerce_checkout_fields’ , ‘custom_override_checkout_fields’ );
// Все $fields в этой функции будут пропущены через фильтр
function custom_override_checkout_fields( $fields ) {
unset($fields[‘billing’][‘billing_company’]);
unset($fields[‘billing’][‘billing_address_2’]);
unset($fields[‘billing’][‘billing_country’]);
unset($fields[‘billing’][‘billing_state’]);
unset($fields[‘billing’][‘billing_postcode’]);
return $fields;
}
Этим кодом мы удаляем поля Компанию, второй адрес, Страну, Город и Индекс.
Если вам нужно удалить еще какие-то поля, то просто продолжаем список подставляя нужные массивы.
Вот полный список полей массива, передаваемого в фильтр woocommerce_checkout_fields:
billing — это форма платежного адреса
billing_first_name
billing_last_name
billing_company
billing_address_1
billing_address_2
billing_city
billing_postcode
billing_country
billing_state
billing_email
billing_phone
shipping это форма адреса доставки (обычно опционально)
shipping_first_name
shipping_last_name
shipping_company
shipping_address_1
shipping_address_2
shipping_city
shipping_postcode
shipping_country
shipping_state
Надеемся, что статья будет для Вас полезной.
Благодарим за внимание.
Looking for ways to edit the checkout page in your store? The checkout is one of the most important steps in the purchase process, so it’s key that you optimize it to increase conversion rates. In this guide, we’ll show you different methods to customize the WooCommerce checkout page both with plugins and programmatically.
Why should you edit the checkout page in WooCommerce?
If you have a WooCommerce store, the checkout is one of the most crucial pages. It’s where the customer pays and you close the sale. Considering how many shoppers abandon their carts and how much competition there is nowadays, you should optimize the checkout to close as many sales as possible.
Even though WooCommerce includes a good default configuration, you may need to edit the checkout page to increase conversion rates on your store. Some of the changes you can apply to edit your WooCommerce checkout page are:
- Create a one-page checkout
- Change the checkout style and design with CSS
- Add, remove, or rearrange checkout fields
- Include content
- Make a field required or optional
- Add conditional fields and create conditional logic
- Add extra fees for shipping, packaging, and so on
- And many others
We have previously seen how to customize the shop page and how to remove fields from the checkout, and today we’ll show you 2 different ways to edit the checkout page in WooCommerce.
WooCommerce checkout page customization: 2 Methods
In this guide you will learn how to customize the checkout page in WooCommerce in 2 different ways:
- With a plugin
- Programmatically (coding)
Let’s have a closer look at each option.
1) Customize the checkout page with a plugin
If you don’t have coding skills, you can edit the WooCommerce checkout page with a plugin. There are many options out there but for this tutorial, we’ll use WooCommerce Checkout Manager.
This plugin has been on the market for a couple of years and has more than 90,000 active downloads. It has a free version with basic but powerful functionalities that you can download from here and 3 premium plans with more advanced features that start at 19 USD (one-time payment). Let’s have a look at what this tool can do.
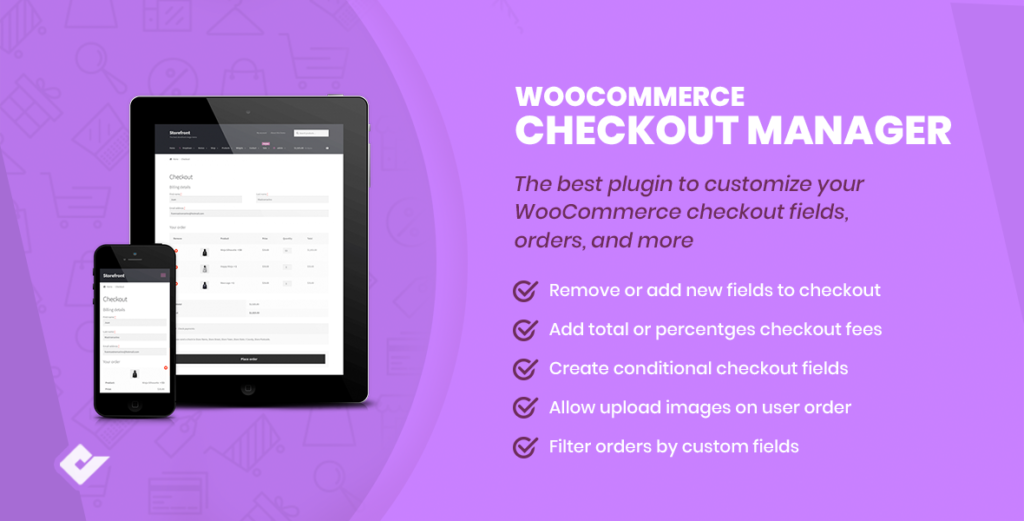
WooCommerce Checkout Manager
Checkout Manager is one of the best plugins to manage your checkout page. It allows you to add, edit, and delete fields on the checkout page to boost your sales. And the best part is that it’s very easy to use. For example, you can add shipping, billing, and additional fields to the checkout page by simply enabling the options from the menu.
The tool allows you to add or hide fields such as the first and last name, company name, country, city, zip code, address, phone number, email, and others. To do this, on your WordPress dashboard go to WooCommerce > Checkout and then the Billing, Shipping, or Additional tab. There, you will see a list of all the fields that you want to display or hide. 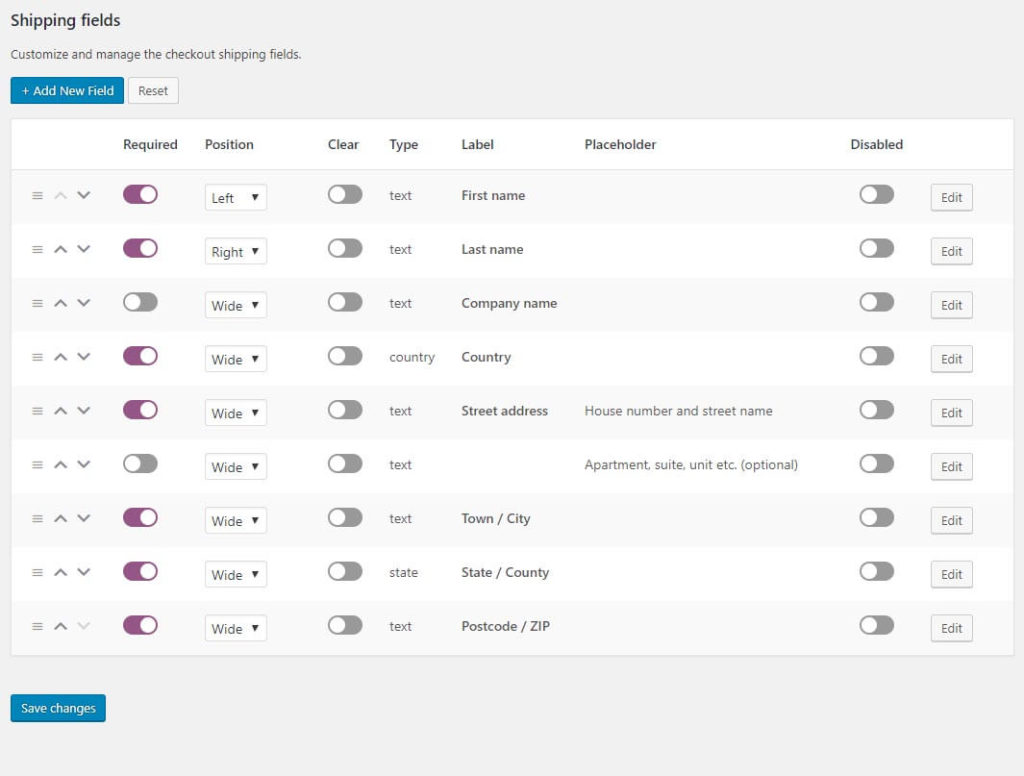
Create a custom upload file field
One of the most interesting features of the WooCommerce Checkout Manager plugin is the possibility to let shoppers upload any type of file during the purchase process. This is very useful when you book a hotel or rent a car online and have to upload your ID or driver’s license. You can also edit those files and let the users manage their files in case they need to provide additional documents. 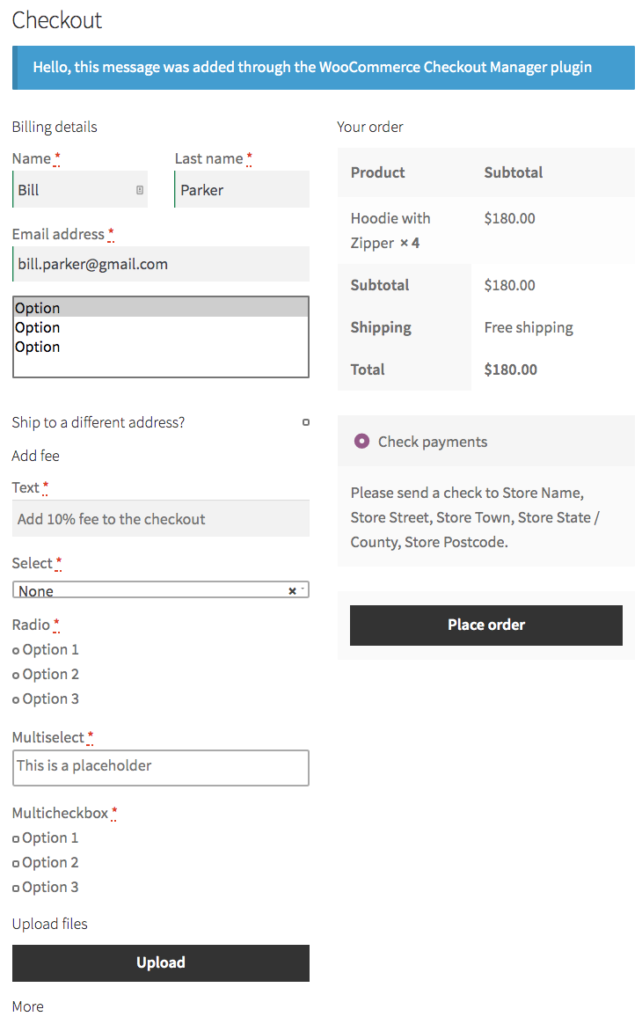 Additionally, you can add fixed or percentage fees to any core or conditional fields.
Add fees to the checkout
Another interesting option to edit the WooCommerce checkout page is to add fees. This can be very useful if you want to include an additional charge for situations like:
- Express delivery
- Special handling
- Extra charge for shipping to certain countries or locations
- Fees related to credit cards or payment gateways
Even though WooCommerce offers some options to add these extra charges, Checkout Manager provides you with more control and flexibility. To add fees with Checkout Manager, and go to WooCommerce > Checkout > Billing.
You’ll see different billing fields that you can enable. For this demonstration, we’ll add a fee for Express Delivery and we’ll need to create a new field, so we press the Add New Field button. We’ll select radio as the button type and give a name to the new field.
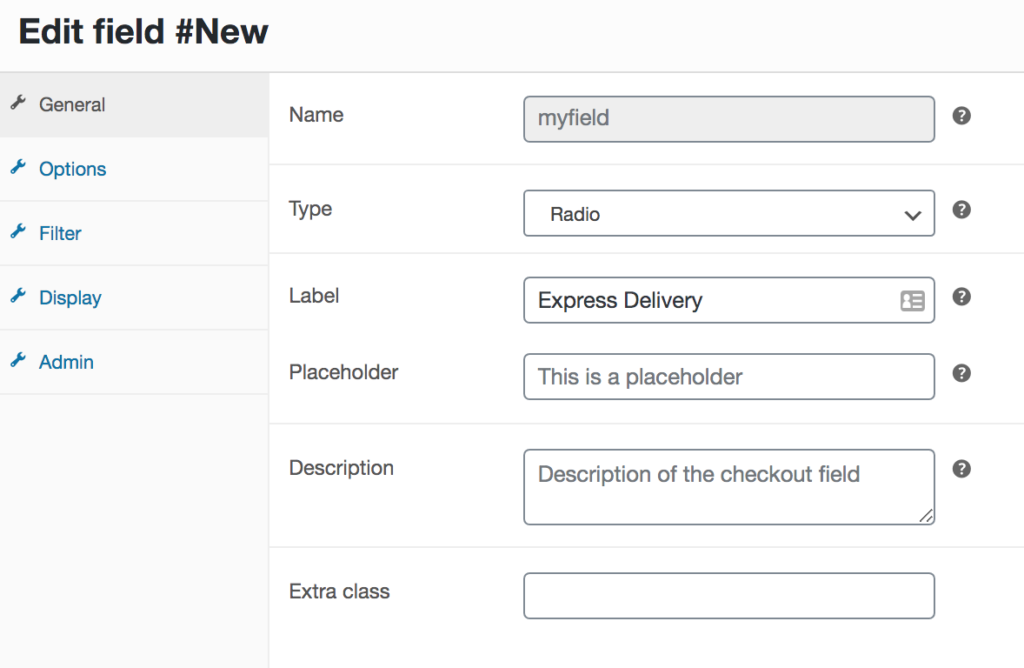
Then, go to the Options tab and we’ll add two labels: Yes and No. When the shopper selects Express Delivery, we’ll add an extra charge of $10.
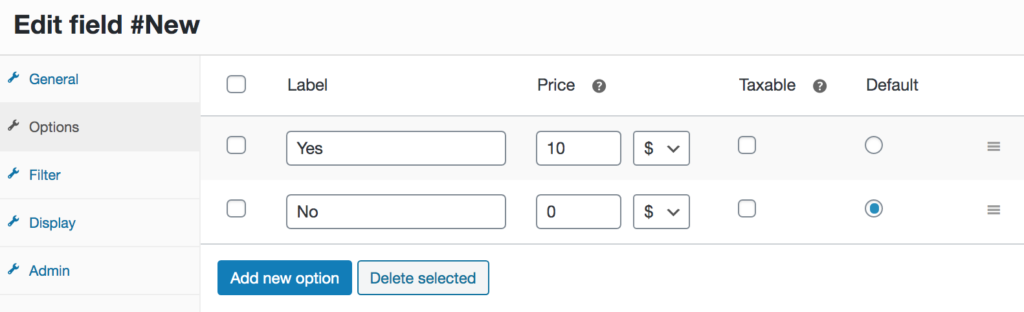 Save the changes and that’s it! Now when the user selects the Express Delivery option at checkout, an extra fee of $10 will be added to their cart.
Create conditional fields
Besides adding fields and fees, you can also customize the WooCommerce checkout page by creating conditional fields to improve the user experience. You simply need to select the conditional parent field and value. Let’s see the step-by-step process:
- In your WordPress dashboard, go to WooCommerce > Checkout > Billing and click Add New Field
- Select the type of field you want to create and fill in the label, placeholder/type, and description. This will depend on the type of conditional you’re creating
- After that, tick the conditional checkbox on the right. Select the parent field and the value the parent field has to take to display the conditional field
- Press Save and you’re done!
The good thing is that Checkout Manager allows you to create unlimited custom fields and apply as many conditions as you want to edit your checkout page and provide users with a unique experience.
For more information on how to create conditional fields in WooCommerce, have a look at this full guide that has several examples of what you can do to customize your checkout.
This is just a simple example but there’s much more you can do. For more information, check out our full guide on how to add fees to the WooCommerce checkout.
All in all, if you want to easily edit the checkout page, WooCommerce Checkout Manager is a great choice. The free version is a great start but if you want more advanced features, we recommend any of the premium plans.
2) Edit the checkout page programmatically (coding)
In this section, we’ll show you how to edit the WooCommerce checkout page via coding. So, by the end of it, you’ll know how to:
- Add custom fields to the WooCommerce checkout page
- Save custom fields to the database
- Make a required field optional
- Add content to the checkout page
- Use shortcodes in the WooCommerce checkout page
- Style the checkout page with custom CSS
To achieve all these customizations, you will use some WooCommerce checkout hooks. If you’re not familiar with hooks, we recommend you check out our starter guide on how to use WooCommerce hooks. As we’ll apply some changes to the functions.php file, we recommend you use a child theme. You can either use one of the many child theme plugins or create one following this guide.
2.1) Add custom fields to the WooCommerce checkout page
The first thing we’ll show you is how to add custom fields to the checkout page. To do this, paste the following script in the functions.php file of the child theme:
// checkbox field
add_action( 'woocommerce_after_order_notes', 'quadlayers_subscribe_checkout' );

function quadlayers_subscribe_checkout( $checkout ) {
woocommerce_form_field( 'subscriber', array(
'type' => 'checkbox',
//'required' => true,
'class' => array('custom-field form-row-wide'),
'label' => ' Subscribe to our newsletter.'
), $checkout->get_value( 'subscriber' ) );
}
This will add a custom checkbox field at the end of the checkout page to give users the option to subscribe to your newsletter. In the same way, you can add any field type. For example, let’s add a radio input field type with the following script:
// Radio input field
add_action('woocommerce_before_order_notes', 'quadlayers_radio_checkout');
function quadlayers_radio_checkout($checkout3){
woocommerce_form_field( 'feed', array(
'type' => 'radio',
//'required' => true,
'class' => array('custom-field form-row-wide'),
'label' => ' How did you find us?.',
'options' => array(
'Google' => 'Google',
'Friend' => 'Friend',
'Facebook' => 'Facebook',
'Youtube' => 'YoutTube',
'Other' => 'Other'
)
));
}
This will add a radio input type so you can ask your customers about where they heard about you. 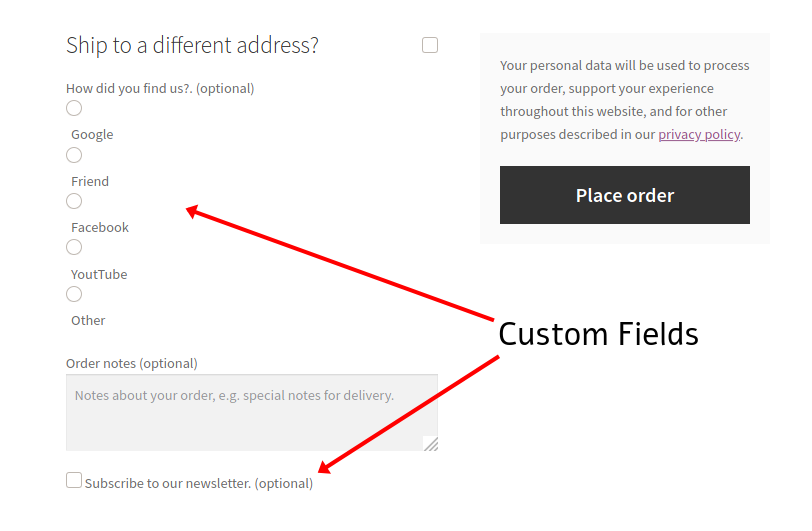 For more information about how to add custom fields to the WooCommerce checkout page, check out this complete guide with several examples.
2.2) Save custom fields values to the database
Now, let’s see how you can use these custom fields to edit the checkout and gather information about WooCommerce orders. To do this, you need to be able to retrieve the values of the custom fields whenever you need to. Additionally, you need to save the values of the custom fields in the database once the customers complete the form and hit the Place order button.
To achieve this, you have to use the 'woocommerce_checkout_update_order_meta'hook. To update the two custom fields you added in step 2.1, copy and paste the following code in the child theme funcitons.php file:
add_action( 'woocommerce_checkout_update_order_meta','quadlayers_save_function' );
function quadlayers_save_function( $order_id ){
if ( ! empty( $_POST['subscriber'] ) ) {
update_post_meta( $order_id, 'subscriber', sanitize_text_field( $_POST['subscriber'] ) );
}
if ( ! empty( $_POST['feed'] ) ) {
update_post_meta( $order_id, 'feed',sanitize_text_field( $_POST['feed'] ) );
}
}
This script checks if the custom field is empty or not with an if()conditional before saving it to the database. After adding this script, you can retrieve the saved data from the database using a global “$post” WP object. In the following script, we get the subscriber metadata of the current order. You can use this in the backend of the WooCommerce orders list.
global $post;
$order = wc_get_order( $post->ID );
$c_meta = $order->get_meta('subscriber');
It’s worth noting that this is a raw script, so you will have to adapt it to fit your specific needs.
2.3) Make a required field optional
Another simple yet effective way to edit the checkout page in WooCommerce is to make mandatory or required fields optional. This way, you let shoppers fill in only the fields that are necessary for the transaction and improve their buying experience.
For example, let’s say you sell downloadable or virtual products so you want to make the Address field in the Billing section optional. Simply add the following code to the functions.php file of your child theme.
add_filter( 'woocommerce_billing_fields', 'wc_address_field_optional');
function wc_address_field_optional( $fields ) {
$fields['billing']['billing_address_1']['required'] = false;
return $fields;
}
Using this snippet as a base, you can make more fields optional in no time.
Conditional fields
If you want to take your WooCommerce checkout page a step further, you can customize it by adding conditional fields. Conditional fields have conditional logic so that there are fields that appear or disappear based on the values of another field. For example, you can create conditional logic so that the credit card fields only appear if the user selects Credit Card as the payment option.
To know more about conditional fields and how to use them to edit your checkout page, have a look at this complete guide.
2.4) Add content to the checkout page
Another way to edit the WooCommerce checkout page is by adding some content. With a solid knowledge of WC checkout hooks, you can easily insert any kind of content such as images, titles, text, and so on wherever you want. For example, you can use this script to add a trust badge image before the Place order button on the checkout page:
add_action('woocommerce_review_order_before_submit','quadlayers_checkout_content');
function quadlayers_checkout_content(){
echo '<img src="https://www.heresylab.com/wp-content/uploads/2019/01/paypal-1.png" />;
}
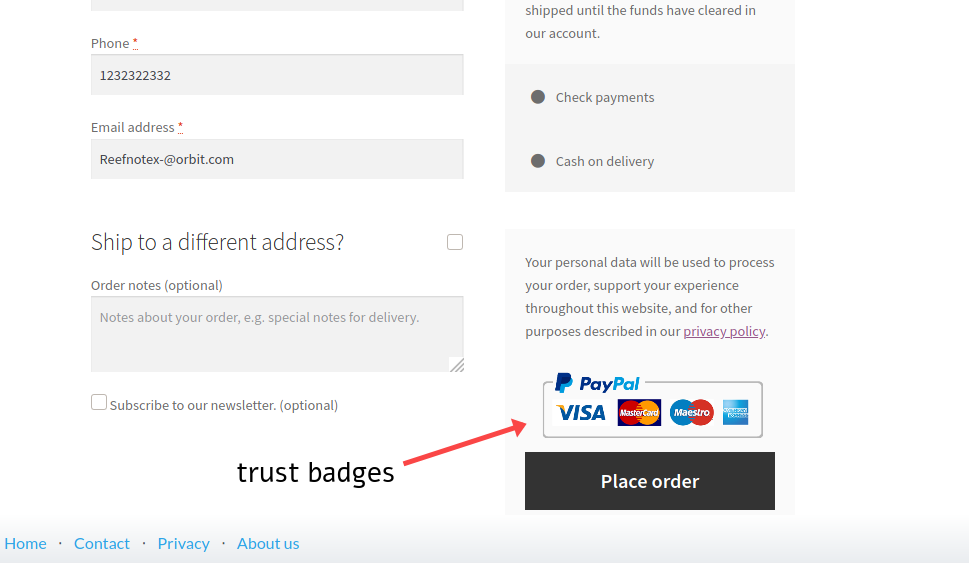 Apart from images, you can also add a simple header text at the top of the checkout:
add_action(woocommerce_checkout_before_customer_details
,'quadlayers_checkout_header');
function quadlayers_checkout_header(){
echo "<h2>This is a custom Header<h2>
";
}
Another interesting alternative is to add a message to your checkout page. Typically, stores mention things related to shipping, delivery, and so on. For example, let’s say you want to remind customers that they might need to wait 5 business days to receive their products. In the functions.php file of your file theme, add:
add_action( 'woocommerce_after_order_notes', 'wc_add_message' );
function wc_add_message () {
echo 'Please remember that delivery may take up to 5 business days.';
}
2.5) Add Fees to the checkout page
Let’s have a look at how to edit the WooCommerce checkout page and add extra fees. Most of the time, there are two types of additional fees:
- Fixed
- Percentage
In this section, we’ll show you how to add both to your checkout.
Add a fixed fee
A typical example of a fixed fee is express delivery. Let’s say you want to include a $10 fixed fee for express delivery.
Simply use the script below and edit the text for the field name. In this example, we’ll call the “Extra Charge” and it will add $10 to the order.
add_action('woocommerce_cart_calculate_fees', function() {
if (is_admin() && !defined('DOING_AJAX')) {
return;
}
WC()->cart->add_fee(__('Extra Charge', 'txtdomain'), 10);
});
Keep in mind that this code will automatically add a $10 fixed fee to the total of the customers’ order during checkout.
Add a percentage-based fee
Another alternative is to charge a percentage-based fee. This can be useful if there are extra taxes or you want to add an extra cost for certain payment gateways charges. Let’s say we want to add a 3% fee to the total price of the order (products + shipping).
add_action('woocommerce_cart_calculate_fees', function() {
if (is_admin() && !defined('DOING_AJAX')) {
return;
}
$percentage = 0.03;
$percentage_fee = (WC()->cart->get_cart_contents_total() + WC()->cart->get_shipping_total()) * $percentage;
 WC()->cart->add_fee(__('Tax', 'txtdomain'), $percentage_fee);
});
This script will add a 3% fee to the shopper’s total order during checkout.
For more information and examples to add fees to your store, check out our guide on how to add fees to the WooCommerce checkout.
2.6) Use shortcodes on the WooCommerce checkout page
WooCommerce shortcodes give you a lot of flexibility and allow you to add any type of content using checkout hooks. However, if you simply print the shortcode, it won’t work. Instead, you should include them as follows:
echo do_shortcode('[woocommerce_cart]');
So, using a hook the same way you did in previous examples, you can end up with something like this:
add_action('woocommerce_after_checkout_form','quadlayers_checkout_shortcode');
function quadlayers_checkout_shortcode(){
echo do_shortcode('[woocommerce_cart]'); }
This script will bring the
[woocommerce_cart]
shortcode into action, displaying the WooCommerce cart at the bottom of the checkout page. 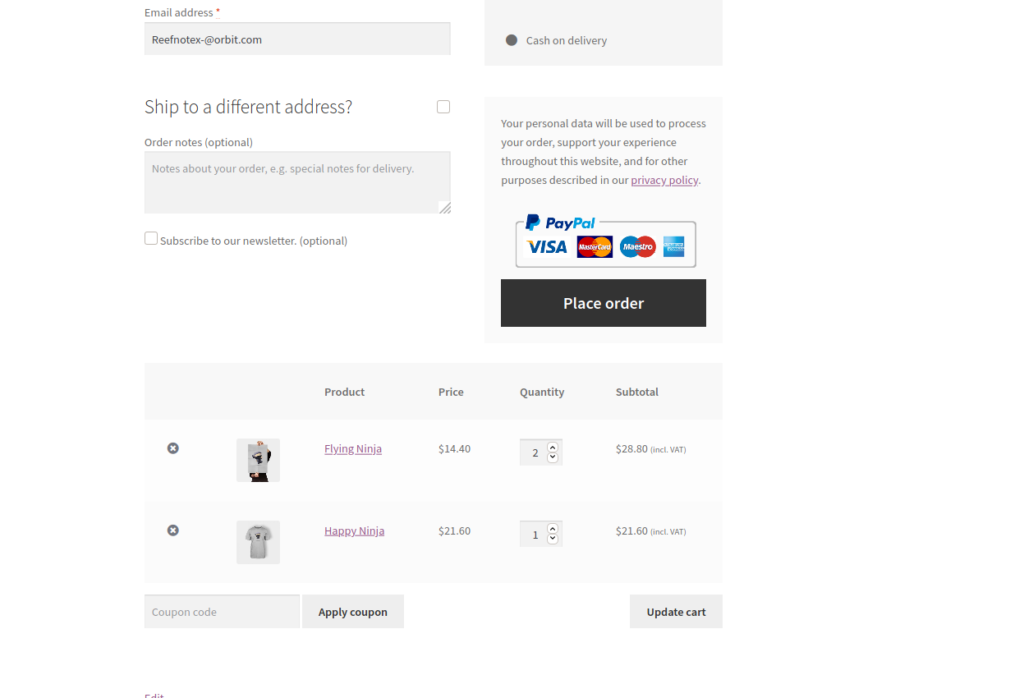 Please note that you can use any WordPress, WooCommerce, or custom shortcode. However, some shortcodes might not be compatible or supported by WooCommerce so check that before using them. To know more about shortcodes, you can check out our complete WooCommerce shortcodes guide.
2.7) Edit the WooCommerce checkout page with custom CSS
Finally, you can also customize the checkout page of your WooCommerce store by editing the CSS style. This doesn’t mean that you need to spend hours rebuilding the whole checkout page. Even a couple of simple changes can help you optimize the checkout. For example, by editing the colors, fonts, margins, or borders, you can see some great improvements in conversion rates.
There’s no magic formula that works for every business here and you’ll need to test different styles but adjusting a few things can help you boost your sales. For example, you can use this simple script to apply a custom CSS style and edit the background color on the checkout page:
add_action('wp_head','quadlayers_checkout_style');

function quadlayers_checkout_style(){
         if(is_checkout()==true){

                 echo '<style> body{background:#dfdfff!important;}<style>';
         }
}
On top of that, you can take this script as a base and add your own CSS rules inside the HTML tag to give it the perfect look and feel for your site. This is a quick hack to apply CSS to the checkout page. It’s very handy to add small pieces of CSS. But if you want more extensive style scripts, you should enqueue the CSS style the WordPress way, using the wp_enqueue_style() native WP hook as follows:
add_action( 'wp_enqueue_scripts', 'quadlayers_enqueue_css' );

function quadlayers_enqueue_css(){
    wp_enqueue_style(  'checkout_style',
        get_stylesheet_directory_uri() . '/checkout-style.css'
    );
}
This way, you can have all your custom CSS in a separate file (checkout-style.css in this example) which will be stored in your child theme folder at the same level as the main style.css file.
These are just a few examples of how you can customize the checkout page in WooCommerce with some simple scripts. We recommend taking them as a base and playing around to add or edit any other aspects of your checkout. Additionally, if you want to edit the shop page via coding, we recommend you have a look at our guide on how to customize the WooCommerce shop page programmatically.
Bonus: Checkout Hooks
There are many checkout hooks that you can use to edit the checkout page in WooCommerce. These are some of the main ones:
- woocommerce_before_checkout_form
- woocommerce_checkout_before_customer_details
- woocommerce_checkout_billing
- woocommerce_before_checkout_billing_form
- woocommerce_checkout_shipping
- woocommerce_before_order_notes
- woocommerce_checkout_after_order_review
- woocommerce_checkout_after_customer_details
- woocommerce_review_order_before_cart_contents
- woocommerce_review_order_before_shipping
- woocommerce_review_order_after_order_total
- woocommerce_checkout_order_review
- woocommerce_review_order_before_submit
- woocommerce_review_order_before_payment
- woocommerce_review_order_after_submit
- woocommerce_after_checkout_form
For more information about hooks and how they work, check out the following guides:
- How to use WooCommerce checkout hooks
- How to use WooCommerce hooks – The Full Guide
Finally, for the full list of hooks that you can use, have a look at this documentation page.
How to increase Checkout Page conversion
One of the main goals of checkout page optimization is increasing conversions. This means, improving the number of users who purchase from your WooCommerce store without having to increase the number of visitors. This is key to making your checkout and your overall business more efficient.
Let’s have a look at some ways to do it:
1) Offer more payment options
One of the mistakes that can cost you a lot of money is not offering enough payment options. This is especially important if you have customers from different countries.
Nowadays, people expect to have different options to pay, so you should let your shoppers decide the most convenient method for them. Accepting credit and debit cards and PayPal payments is a great way to increase your conversions.
2) Clear Pricing details
Have you ever been shopping online and then seen an extra charge that you weren’t aware on the last step? Experiences like this are quite common and deliver a terrible shopping experience. To reduce checkout cart abandonment and boost your conversions, make sure that your pricing and all the extra fees are clear from the start. This means clearly stating shipping costs, taxes, additional charges, and anything extra that the customer will have to pay.
Nobody likes discovering hidden costs and charges when they’re ready to pay, so avoid being that store at all costs.
3) Avoid unnecessary fields
A complicated checkout is one of the main reasons for checkout cart abandonment. That’s why you should make the checkout as simple as possible and remove or hide unnecessary fields that may distract shoppers. For example, if you sell a digital product, do you really need the shopper’s address? Probably not. Simply remove all distractions and only leave the fields that are strictly necessary.
For more ideas on how to optimize your WooCommerce checkout page, have a look at this guide.
Conclusion
All in all, editing the checkout page can make a great difference and help you take your WooCommerce store to the next level. Even with a few changes, you can increase conversion rates and boost your sales. In this guide, we’ve shown you two ways to edit the checkout:
- With a plugin
- Programmatically (via coding)
If you don’t have coding skills but want an easy yet solid solution, WooCommerce Checkout Manager is your best choice. This freemium plugin has powerful functionalities to edit the checkout page, and it’s easy to use.
Also, you can try to tailor your entire payment page to match your brand with help of Fondy. From design, imagery, and color scheme to typefaces and logos. Custom checkout pages help to build customer trust and reduce cart abandonment. You can also change your payment fields and messaging to match promotions and seasonal sales.
On the other hand, if you want to create your own solution via some coding and you don’t want to install any plugins, you can edit the checkout page programmatically. We’ve shown you five different examples to edit different aspects of the checkout but the options are endless. Play around with the scripts and unleash your creativity to optimize your checkout.
If you want to shorten the checkout process to improve conversion rates, we recommend you use a quick buy plugin for WooCommerce or direct checkout links.
Finally, if you want to learn different options to edit the shop page on your store, we recommend you have a look at this step-by-step guide.
Do you have any questions or want to share with us the checkout customizations that you have applied to your site? Let us know in the comments section below! We’ll be happy to hear from you!
- WordPress
- WooCommerce
- SEO
- Our Services
- Fitness Products
How to Customize WooCommerce Checkout Page Step by Step Guide
-
View Larger Image


How to Customize WooCommerce Checkout Page Step by Step Guide
Customize WooCommerce Checkout Page
Do you want to customize WooCommerce Checkout Page?
In this post, We will discuss how to customize WooCommerce checkout page programmatically and using the WooCommerce checkout plugin.
WooCommerce is a great eCommerce plugin, that you can use to turn your WordPress website into a dynamic online store. This plugin automatically creates a checkout page/ Cart page/ Account page / Order page.
But if you want to add extra features to these pages, you need to use any plugin or you can customize these pages using WooCommerce functions.
The checkout page on your online eCommerce shop is where you get paid, so it’s an important page for your online eCommerce business. WooCommerce the default configuration is so good, but you may need to customize it out of necessity. Like you may add extra user billing fields or your extra a few the important fields.
Obviously, the WooCommerce checkout page is the most important for any eCommerce store. It represents the final step that the customer must take to finally complete his purchase.
Today, In this guide, We will show you how to Customize WooCommerce Checkout Page Step by Step. There are two ways to customize the WooCommerce checkout page. First using the WordPress plugin and another using the Functions.
Most customizations would be done using hooks and filters. Look at the WooCommerce documentation and you can copy the checkout template to your website theme in a folder that looks like this: woocommerce/checkout/form-checkout.php.
Read WooCommerce Action and Filter Hook Reference
WooCommerce Checkout Page By Default

Default WooCommerce Checkout Page Fields
This is WooCommerce the default checkout page outlook:
This method adds the custom field to the checkout page using the code snippet. First, you need to perform an action you activate theme the functions.php file, then we will use this code snippet to start customizing the checkout page:
After adding this code, the checkout page looks like as : 
For the data validation of the custom field using the following code:
Now that we’ve added a replacement field to the checkout page. we would like to confirm whether the details entered into the custom field by the client, are being saved or not. This could be using the snippet below:
After saving the code, we have added custom fields to our WooCommerce Website.
Customizing Shipping Form In WooCommerce Checkout Page
To customize WooCommerce checkout fields, WooCommerce offers several filters and hooks that deal with major groups of fields on the page. Especially, these filters include woocommerce_checkout_fields (checkout fields), woocommerce_billing_fields ( billing fields), and woocommerce_shipping_fields (shipping fields).
Now for this tutorial, we will work with woocommerce_checkout_fields filter. The good news that, we will try to cover both the addition and removal fields.
Remove Fields From The WooCommerce Checkout Page

Just an example, we will try to demonstrate how to remove the First name and the Last name fields. Here is the code:
In the above PHP snippet, you will see the function custom_fields_woocommerce. And in this function takes the argument $fields that take the checkout fields that need to be removed or unset. So, we have unset the first name and the last name.
Here check Please: 
Add Fields To The WooCommerce Checkout Page
Add the following code snippet:
In the above PHP snippet, contains both labels and placeholders for the new fields. Now, there are requirements to set some fields essential. This is taken care of by the required argument that is set to TRUE.
Display Field Value At The WooCommerce Order Page
The following code will display the value of the field on the order page. So, add the following codes:
This code will display the field in the order page Looks like.

In this article, we have discussed, how to add custom fields to the WooCommerce checkout page. At this moment, we are going to customize the WooCommerce default checkout fields and the field modifications.
WooCommerce Default Checkout Field
WooCommerce has provided all the required fields for your website checkout page. such as:
- Billing details
- First name
- Last name
- Company name
- Country
- Address
- Town/City
- District
- Postcode/ZIP
- Phone
- Email address
- Order notes
Customize Checkout Fields Using Code Snippets
Code snippets are adjustable ways for web developers and to customize the WooCommerce checkout page. Here’s a list of principal HTML tags with CSS classes and ID, that very easily you can use to customize the WooCommerce checkout page.
Note: Add the custom CSS in your active theme or you can use a WordPress Custom CSS plugin.
CSS Looks like the following example:
Remove Checkout Field – Default WooCommerce checkout page fields
We are going to remove the default checkout fields using the WooCommerce filter hook woocommerce_checkout_fields. So, do this job very carefully. if possible first, pick up your website full backup. However, add the following code in your active theme fucntions.php file or child theme fucntions.php file.
Make Required Field Not Required
Add the following code in your active theme fucntions.php file or child theme fucntions.php file.
Look $fields[‘billing_phone’][‘required’] = false this code false, So, if you want your fields will be required, then change True.
Change Input Field Labels and Placeholders
Add the following codes in your active theme fucntions.php file or child theme fucntions.php file.
Wrap Up:
Any eCommerce store checkout is a very important page that asks for useful information and then helps the visitor go through the sale.
We hope the above checkout plugins and customize WooCommerce checkout page custom functions help you to optimize your WooCommerce checkout page for more conversions and sales.
Keep in mind, that most of the free plugins come with paid versions that offer you more extra features and if you want to customize WooCommerce checkout page programmatically, you must need enough knowledge of WordPress functions.
However, if you have any questions about customize Woocommerce checkout page? Please comment to us.
Do you want to create a fully functional WooCommerce website? kindly visit the details of our service.
You May Also Like This:
This site uses Akismet to reduce spam. Learn how your comment data is processed.
Ok
Optimizing & Experimenting with WooCommerce Checkout Checkout Page
There is no single checkout page design that gives the best result for all online stores. The effectiveness of any checkout page design will vary based on many factors like types of products and customers.
What works on one website may not be that much efficient on another website.
So, you need to experiment with different designs and identify what works best for your eCommerce business to improve the conversion rate.
Analyze
You can start by analyzing user behaviour using data from website analytics tools like Google Analytics and Hotjar.
It will help you to identify the major exit points in your funnel.
Experiment
Once you identify the issues, you can make small changes to address the problem that makes most users abandon the checkout process.
Then again check the user behaviour and see if there is an improvement in the funnel and conversion rate.
Gradually optimize the checkout page by repeating the experiments multiple times and implementing the changes that gave positive results on your websites.
Customize Elements on WooCommerce Checkout Page
Even a small change like changing the colour of a call to action button can have a significant impact on conversion rate. In this section, we discuss the different ways you can make small customization to the WooCommerce checkout page.
Changing the Visual Design with CSS
Most of the premium WooCommerce themes allow site owners to change the visual design to a small extent like changing the colour of important elements.
But if you want full control over the visual design, you need to know a little bit of CSS language. Unlike PHP code, there is nothing much to go terribly wrong when it comes to the CSS. Moreover, the option to backup WordPress and revert back to the backup gives you the safety net.
While changing the CSS rules for elements, you need to ensure that you only target the elements on the checkout page.
WooCommerce automatically assigns the element of checkout page a class called woocommerce-checkout.
<body class="woocommerce-checkout">
So, you can use this as a parent selector to target only the elements on the checkout page. For example, you can change the colour of paragraph texts to blue with the following code.
body.woocommerce-checkout p{
    font-color: #0000FF !important;
}
You can use the following container tags along with their class name to customize the visual design of any element on the checkout page.
<body class="woocommerce-checkout"><form class="woocommerce-checkout"><div id="customer_details" class="col2-set"><div class="woocommerce-billing-fields"><div class="woocommerce-shipping-fields"><p class="form-row"><div class="woocommerce-additional-fields"><div id="order_review" class="woocommerce-checkout-review-order"><table class="woocommerce-checkout-review-order-table"><div id="payment"><ul class="wc_payment_methods payment_methods methods"><div class=" place-order">
You can use the Inspector tool on the browser to find the class names of elements you want to target.
Here the code to change the background colour of the Place order button and make its corners slightly round.
body.woocommerce-checkout .place-order button{
        background-color: #00FF00 !important;
        border-radius: 40px !important;
}
Removing unwanted elements from checkout page
WooCommerce checkout page presents a whole bunch of fields to collect billing details, shipping address, and user information.
If you think that some of them are unnecessary, you can remove them.
Removing fields from the checkout page declutter the page. It makes customers feel less overwhelmed. So, they are highly likely to complete the checkout process which improves conversion rate.
WooCommerce doesn’t have an easy way to disable or remove unwanted input fields from the checkout page. You can do this through two methods.
Method 1: Disable or remove checkout page input fields using Plugin (Paid)
This method is easy but it requires a premium plugin from WooCommerce. Checkout Field Editor plugin by WooCommerce provides an interface to edit WooCommerce checkout page from WordPress admin dashboard. It lets you do two things with input fields in the checkout page
- Remove unwanted fields
- Make input required or optional
Method 2: Disable or remove checkout page input fields using functions.php
You don’t need to buy a plugin to remove unwanted input fields from the checkout page because you can do the same by adding a few lines of code to your functions.php file.
Step 1: Open functions.php file
Login to WordPress dashboard and choose Appearance > Theme editor to open WordPress Theme Editor screen.
Click on functions.php (with the label of Theme Functions) from the list of Theme Files on the right side to open in the Theme Editor.
Step 2: Copy the following code
/**
Remove fields from checkout page
**/
function wc_remove_checkout_fields( $fields ) {

        // list of fields to be removed from the checkout page.

        return $fields;
}
add_filter( 'woocommerce_checkout_fields', 'wc_remove_checkout_fields' );
Step 3: Add the code into functions.php file
In the Theme Editor, scroll down to the bottom of the functions.php and paste the above code at the end.
Step 4: Add the list of input fields to the function
The above code is not complete. You need to tell WordPress which input field on the WooCommerce checkout page you want to remove.
To remove each input field from the checkout page, you need to add a separate line of code.
You can copy the line of code you want from below based on what input field you want to hide and paste it in a new line immediately after the line // list of fields to be removed from the checkout page.
Lines of code to remove different fields from billing section
-
unset( $fields['billing']['billing_company'] ); -
unset( $fields['billing']['billing_email'] ); -
unset( $fields['billing']['billing_phone'] ); -
unset( $fields['billing']['billing_state'] ); -
unset( $fields['billing']['billing_first_name'] ); -
unset( $fields['billing']['billing_last_name'] ); -
unset( $fields['billing']['billing_address_1'] ); -
unset( $fields['billing']['billing_address_2'] ); -
unset( $fields['billing']['billing_city'] ); -
unset( $fields['billing']['billing_postcode'] );
Lines of code to remove different fields from shipping section
-
unset( $fields['shipping']['shipping_company'] ); -
unset( $fields['shipping']['shipping_phone'] ); -
unset( $fields['shipping']['shipping_state'] ); -
unset( $fields['shipping']['shipping_first_name'] ); -
unset( $fields['shipping']['shipping_last_name'] ); -
unset( $fields['shipping']['shipping_address_1'] ); -
unset( $fields['shipping']['shipping_address_2'] ); -
unset( $fields['shipping']['shipping_city'] ); -
unset( $fields['shipping']['shipping_postcode'] );
If you want to remove the Last Name field from the billing section and Shipping City from the shipping section, the code you add into the functions.php file will look like the following.
/**
Remove fields from checkout page
**/
function wc_remove_checkout_fields( $fields ) {

        // list of fields to be removed from the checkout page.

         unset( $fields['billing']['billing_last_name'] );
        unset( $fields['shipping']['shipping_city'] );

        return $fields;
}
add_filter( 'woocommerce_checkout_fields', 'wc_remove_checkout_fields' );
Note: Please note that the country code can’t be removed from the billing and shipping section. If you try to remove it, it will cause an error.
How to make a required field not required
You can also make required fields optional on your WooCommerce checkout page if you want. The following code will make the phone number field in the billing section optional.
add_filter( 'woocommerce_billing_fields', 'wc_unrequire_wc_phone_field');
function wc_unrequire_wc_phone_field( $fields ) {
        $fields['billing_phone']['required'] = false;
        return $fields;
}
You can replace the billing_phone with other field names in the billing section to make them optional. Please find the field names below.
- Company: billing_company
- Email: billing_email
- First name: billing_first_name
- Last name: billing_last_name
- City: billing_city
- Postcode: billing_postcode
- State: billing_state
- Address line 1: billing_company_1
- Address line 2: billing_company_2
If you want to make an optional field to a required field, all you need to is change the false to true.
Please remember that you don’t remove the apostrophe and quote symbols from the code.
How to rename input field labels
You can also rename the input field labels using functions.php file. The following code will change
- label for company name input field in the billing sections from Business Name to Name of your business.
- Label of email input field in the billing section from Email to Enter your email address.
add_filter('woocommerce_checkout_fields', 'custom_override_checkout_fields');
function custom_override_checkout_fields($fields)
{
$fields['billing']['billing_company']['label'] = Name of your business';
$fields['billing']['billing_email]['label'] = Enter your email address';
return $fields;
}
Please remember that it’s always better to keep the input label shorter to keep the design clean.
You can replace the billing_company with the following texts to change the labels of different fields in the billing section.
- Company: billing_company
- Email: billing_email
- First name: billing_first_name
- Last name: billing_last_name
- City: billing_city
- Postcode: billing_postcode
- State: billing_state
- Address line 1: billing_company_1
- Address line 2: billing_company_2
Similarly, you can also change the labels of input fields in the Shipping Details section by changing the billing to shipping and changing the name of the input field.
Adding the code below into the above code will change the label of input field for first name in the shipping section from Email to Enter your email address.
$fields['shipping']['shipping_email]['label'] = Enter your email address';
When you add this code, the final code will look like this.
add_filter('woocommerce_checkout_fields', 'custom_override_checkout_fields');
function custom_override_checkout_fields($fields)
{
        $fields['billing']['billing_company']['label'] = Name of your business';
       $fields['billing']['billing_email]['label'] = Enter your email address';
        $fields['shipping']['shipping_email]['label'] = Enter your email address';
return $fields;
}
You can replace the shipping_email with the following to change different fields in the shipping details section.
- Company: shipping_company
- Email: shipping_email
- First name: shipping_first_name
- Last name: shipping_last_name
- City: shipping_city
- Postcode: shipping_postcode
- State: shipping_state
- Address line 1: shipping_company_1
- Address line 2: shipping_company_2
Creating Custom Checkout Pages
WooCommerce doesn’t offer much control to website owners when it comes to customizing the page. It doesn’t have the flexibility to replace the default checkout process with a more optimized checkout process easily.
But with CartFlows, you can create custom checkout pages for WooCommerce websites easily.

CartFlows is an amazing tool that helps non-programmers to create and implement beautiful custom checkout flows on WooCommerce websites without writing code.
A Flow in CartFlows contains three elements:
- Landing page
- Checkout page
- Thank you page
Features and advantages of Cartflows
- Create custom checkout pages
- Order bumps
- Upsells down sells, and discount integrated to the checkout process
- Custom thank you pages
- Easy to use (No coding knowledge required)
- Free and premium templates are available
- Support all major WordPress page builders
- Ability to add new conversion-optimization elements can be added
The ability to create custom checkout pages gives you the flexibility to optimize your checkout page and improve the conversion rate.
You can include various elements to make the buyers reassure their decisions to buy the product from you. Some of the examples include:
- Guarantee badges
- Return policy statement
- Testimonials

How to Create a Custom Checkout Page with CartFlows
The biggest advantage of CartFlows is that it makes designing and implementing custom checkout pages on WooCommerce way a lot easier.
However, in this guide, we focus only on the custom checkout page.
It supports all major WordPress page building tools including Divi Builder, Elementor, and Beaver Builder. In this guide, we use the Elementor page builder to customize the prebuilt checkout page offered by CartFlows.
Step 1: Add CartFlows plugin to WordPress
In the WordPress admin dashboard, go to Plugins > Add new to open the WordPress plugin repository (collection).
In the search field, search for Cartflows

You will see CartFlows plugin among the results. Click on the Install button and then the Activate button to activate the plugin.
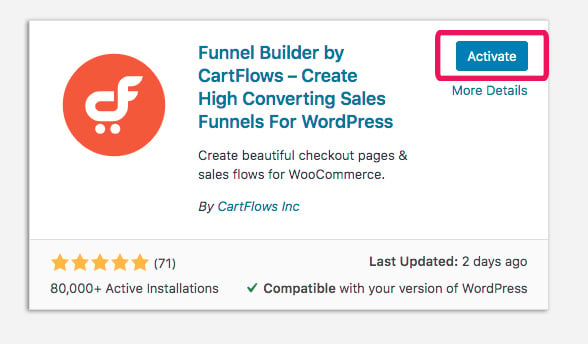
Step 2: Configure CartFlows
Once you install and activate the CartFlows plugin, you can see an alert box two buttons in the Plugins page.

Click on the Setup wizard button to open the wizard and go through the steps.
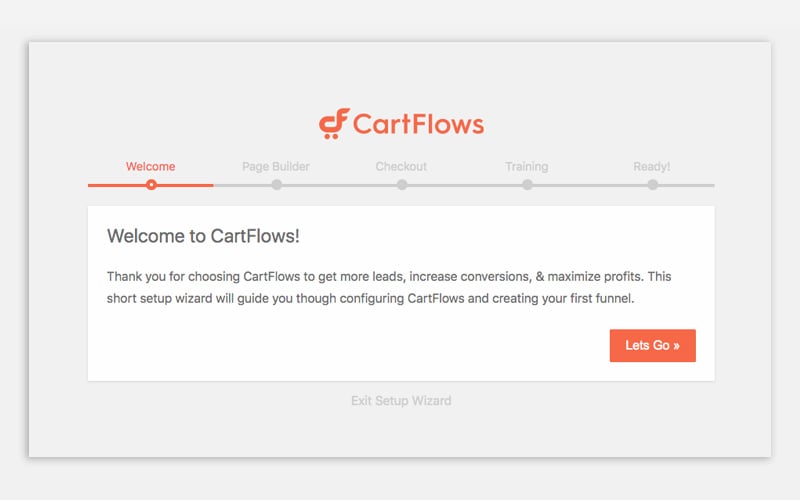
When you go through the steps, don’t forget to install your favourite page builder in the second step.
If you can’t see the link to the setup wizard, install a page builder plugin from the WordPress plugin repository. Go to Plugins > Add New to open plugin repository.
Search for Elementor in the search field. Click on the install button for the Elementor plugin from the result and then activate it.
Step 3: Add new Flow in CartFlows
Click on CartFlows menu in the left sidebar to open the plugin start creating a new Flow.
In the next screen, click on Add New to create a new Flow in CartFlows

Now the Flow Library screen will pop up which contains a list of Pro and Free templates for various page builders.
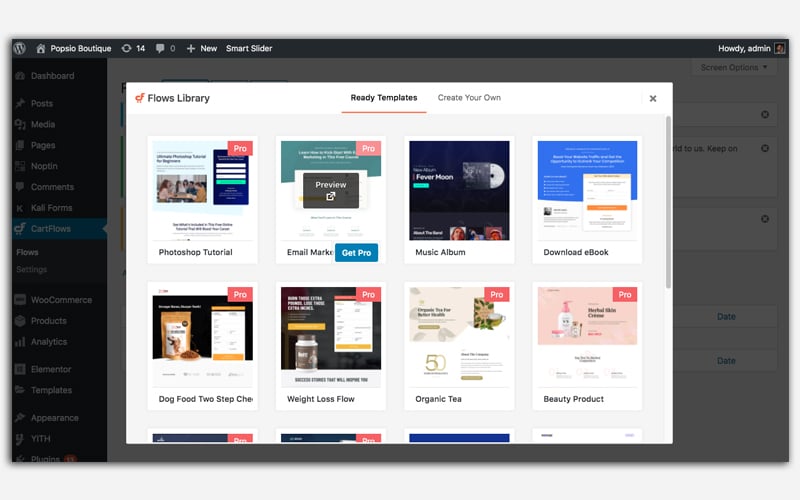
CartFlows allows you to create a flow in two ways
- Using the prebuilt templates
- Building a flow from scratch
If you are already familiar with the page builders, you can start creating from scratch.
But we recommend you to start with a template and customize it to get a hang of the various checkout page features provided by CartFlows.
Step 4: Choose a template
CartFlows offers lots of free and pro templates suitable for various types of products.
Let’s choose the free Evergreen Products 01 template from the list.

Hover your mouse over the thumbnail to view the Import and Preview buttons for the template.
If you want to see how the template will look on a website before you use it, you can click the Preview button to see the template’s demo on a new browser tab.
Click on the Import button to use the template for the new Flow. It will take a few seconds to import the template and create a new Flow in our CartFlows.
Step 5: Configure the Flow
After the import is complete, you will be taken back to the CartFlows dashboard page.
First, give a name to the Flow.
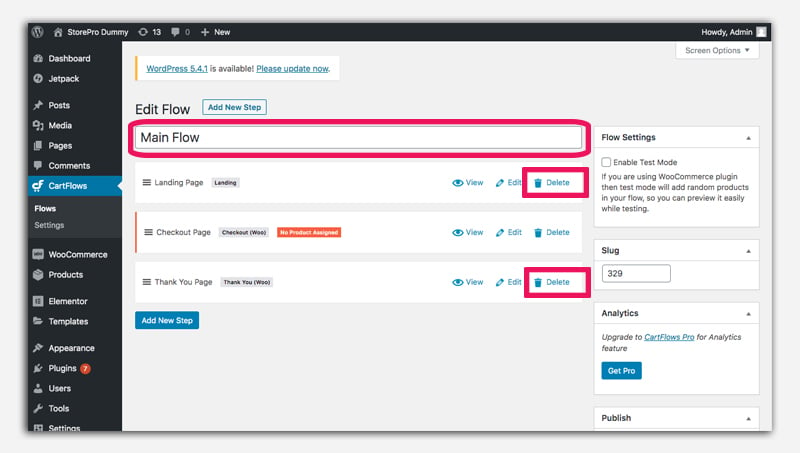
As we told earlier, a flow will contain
- Landing page
- Checkout page
- Thank you page
But we just need the checkout page
So, delete the landing page and thank you page.
Then click the Update button on the right side of the screen to save the changes.

Step 6: Edit custom checkout page
Click on the edit button on the right side of the checkout page to open the WordPress editor screen.
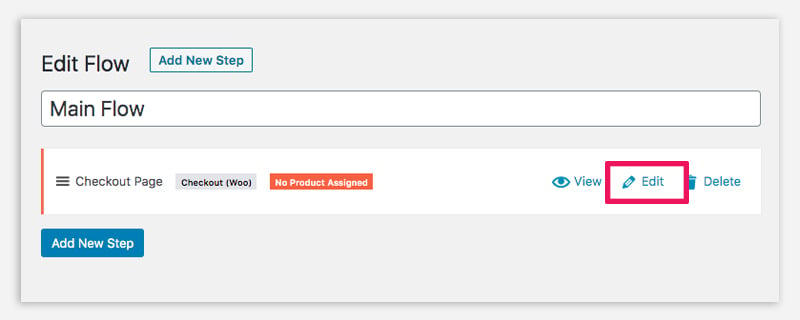
Under the checkout layout, click on the Checkout Design tab to get the options for changing the design of the checkout page.
Don’t forget to enable the Advanced Options.

Step 7: Customize the new custom checkout page (Optional)
Since we have already installed the Elementor plugin, you can customize the checkout page any way you want by using the Elementor page builder.
Click on the Edit Elementor button to open the page on Elementor.
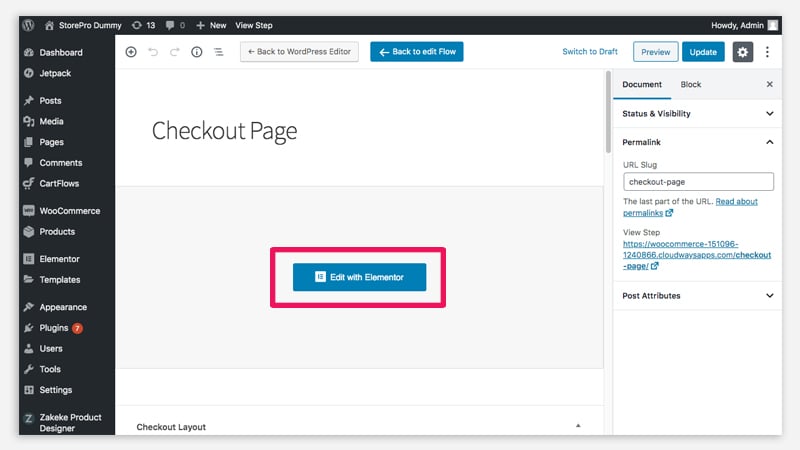
Elementor is a drag and drop page builder and it’s pretty easy to add new elements and features to the page. You can customize the page if you want.
After making all the changes, click on the Update button to save the changes.
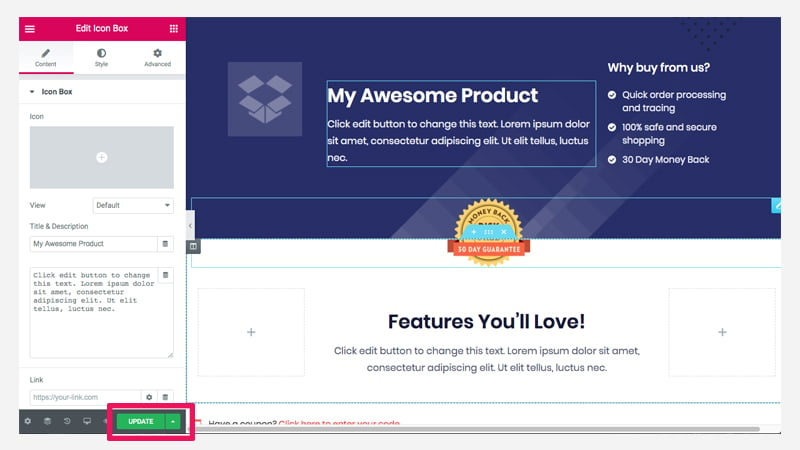
Step 8: Make the new custom checkout page WooCommerce global checkout page
Now we have successfully created a new checkout page and customized it to improve the conversion.
The next step is to make it our global checkout page.
In the WordPress dashboard, go to CartFlows > Settings to open the configuration page for CartFlows.

Under General Settings, you can see the field to choose Global Checkout for WooCommerce. Choose the checkout page you have just created from the dropdown list, and click on the Save Changes button to replace the default WooCommerce checkout page with the new optimized custom checkout page.
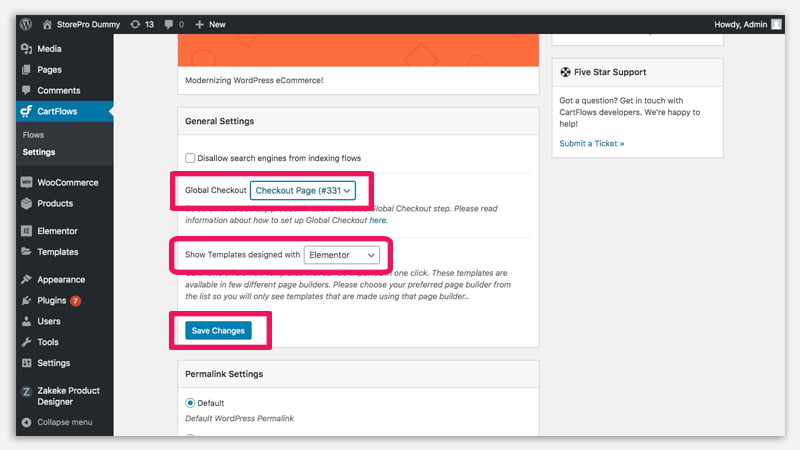
Summary
Although WooCommerce doesn’t offer the flexibility to customize the WooCommerce checkout page by default, there are many different methods you can use to optimize the checkout page.
If you want to reduce the cart abandonment and increase conversion rate, you can customize the checkout page in different ways based on various conversion optimization best practices.
It is only through constant experimentation and analysis that you will understand what checkout page design and tactics give best results for your eCommerce businesses.
So, try different optimization techniques on your eCommerce checkout page and check if they reduce checkout abandonment.