Страница товара разбита на несколько файлов. Каждый файл отвечает за вывод определенного контента.
-
-
Отключение всех функций с хука -
Замена надписи «Добавить в корзину» -
Управление вкладками на странице товара
-
Структура файлов страницы товара
Вся структура дана от основной папки /templates/
-
templates/ -
single-product.php
- content-single-product.php
- single-product/
- sale-flash.php — вывод фразы «Распродажа»
- product-image.php — вывод изображения и галереи товара
- title.php — вывод заголовка товара
- rating.php — вывод рейтинга товара
- price.php — вывод цены товара
- short-description.php — вывод краткого товара
- meta.php — вывод метаданных (категория, теги и тд) товара
- share.php — вывод кнопок поделиться (технически пустой файл, можно использовать для вывода любого контента)
- add-to-cart/
- external.php — кнопка «Добавить в корзину» для внешних товаров
- grouped.php — кнопка «Добавить в корзину» для сгруппированных товаров
- simple.php — кнопка «Добавить в корзину» для простых товаров
- variation-add-to-cart-button.php — кнопка «Добавить в корзину» для вариативных товаров
- variation.php — вывод значения выбранной вариации
- variable.php — вывод вариаций
- tabs/
- tabs.php — вывод вкладок
- description.php — вывод полного описания товара
- additional-information.php — вывод деталей товара (вес, габариты, атрибуты)
- single-product/
- content-single-product.php
к содержанию
Визуализация хуков страницы товара
-
woocommerce_before_single_product
Хуки по умолчанию:
add_action( 'woocommerce_before_single_product', 'wc_print_notices', 10 );Удаление хуков по умолчанию:
remove_action( 'woocommerce_before_single_product', 'wc_print_notices', 10 );
-
woocommerce_before_single_product_summary
Хуки по умолчанию:
							add_action( 'woocommerce_before_single_product_summary', 'woocommerce_show_product_sale_flash', 10 );
							add_action( 'woocommerce_before_single_product_summary', 'woocommerce_show_product_images', 20 );
Удаление хуков по умолчанию:
							remove_action( 'woocommerce_before_single_product_summary', 'woocommerce_show_product_sale_flash', 10 );
remove_action( 'woocommerce_before_single_product_summary', 'woocommerce_show_product_images', 20 );
Распродажа!

-
woocommerce_product_thumbnails
Хуки по умолчанию:
									/*
									* Вывод миниатюр галлереи товара
									*/
									add_action( 'woocommerce_product_thumbnails', 'woocommerce_show_product_thumbnails', 20 );
Удаление хуков по умолчанию:
remove_action( 'woocommerce_product_thumbnails', 'woocommerce_show_product_thumbnails', 20 );Пример использования хука:
		add_action( 'woocommerce_product_thumbnails' , 'woocust_after_product_gallery', 30 );

function woocust_after_product_gallery() {
   echo 'Тут выводим нужный текст с нужными тегами, при необходимости';
}
-
woocommerce_single_product_summary
Хуки по умолчанию:
									add_action( 'woocommerce_single_product_summary', 'woocommerce_template_single_title', 5 );
add_action( 'woocommerce_single_product_summary', 'woocommerce_template_single_rating', 10 );
add_action( 'woocommerce_single_product_summary', 'woocommerce_template_single_price', 10 );
add_action( 'woocommerce_single_product_summary', 'woocommerce_template_single_excerpt', 20 );
add_action( 'woocommerce_single_product_summary', 'woocommerce_template_single_add_to_cart', 30 );
add_action( 'woocommerce_single_product_summary', 'woocommerce_template_single_meta', 40 );
add_action( 'woocommerce_single_product_summary', 'woocommerce_template_single_sharing', 50 );
Удаление хуков по умолчанию:
remove_action( 'woocommerce_single_product_summary', 'woocommerce_template_single_title', 5 );
remove_action( 'woocommerce_single_product_summary', 'woocommerce_template_single_rating', 10 );
remove_action( 'woocommerce_single_product_summary', 'woocommerce_template_single_price', 10 );
remove_action( 'woocommerce_single_product_summary', 'woocommerce_template_single_excerpt', 20 );
remove_action( 'woocommerce_single_product_summary', 'woocommerce_template_single_add_to_cart', 30 );
remove_action( 'woocommerce_single_product_summary', 'woocommerce_template_single_meta', 40 );
remove_action( 'woocommerce_single_product_summary', 'woocommerce_template_single_sharing', 50 );
Заголовок товара
€554,00–€6.565,00
€44,00–€665,00
Краткое описание товара.
-
woocommerce_before_add_to_cart_form
Пример использования хука:
									add_action( 'woocommerce_before_add_to_cart_form', 'woocust_custom_action', 5 );

function woocust_custom_action() {
echo 'TEST';
}
-
woocommerce_before_variations_form
Пример использования хука:
									add_action( 'woocommerce_before_variations_form', 'woocust_custom_action', 5 );

function woocust_custom_action() {
echo 'TEST';
}
-
woocommerce_before_add_to_cart_button
Пример использования хука:
									add_action( 'woocommerce_before_add_to_cart_button', 'woocust_custom_action', 5 );

function woocust_custom_action() {
echo 'TEST';
}
-
woocommerce_before_single_variation
Пример использования хука:
									add_action( 'woocommerce_before_single_variation', 'woocust_custom_action', 5 );

function woocust_custom_action() {
echo 'TEST';
}
-
woocommerce_single_variation
Хуки по умолчанию:
									add_action( 'woocommerce_single_variation', 'woocommerce_single_variation', 10 );
									add_action( 'woocommerce_single_variation', 'woocommerce_single_variation_add_to_cart_button', 20 );
Удаление хуков по умолчанию:
		remove_action( 'woocommerce_single_variation', 'woocommerce_single_variation', 10 );
									remove_action( 'woocommerce_single_variation', 'woocommerce_single_variation_add_to_cart_button', 20 );
-
woocommerce_after_single_variation
Пример использования хука:
									add_action( 'woocommerce_after_single_variation', 'woocust_custom_action', 5 );

function woocust_custom_action() {
echo 'TEST';
}
-
woocommerce_after_add_to_cart_button
Пример использования хука:
									add_action( 'woocommerce_after_add_to_cart_button', 'woocust_custom_action', 5 );

function woocust_custom_action() {
echo 'TEST';
}
-
woocommerce_after_variations_form
Пример использования хука:
									add_action( 'woocommerce_after_variations_form', 'woocust_custom_action', 5 );

function woocust_custom_action() {
echo 'TEST';
}
-
woocommerce_after_add_to_cart_form
Пример использования хука:
									add_action( 'woocommerce_after_add_to_cart_form', 'woocust_custom_action', 5 );

function woocust_custom_action() {
echo 'TEST';
}
-
woocommerce_share
Пример использования хука:
									add_action( 'woocommerce_share', 'woocust_custom_action', 5 );

function woocust_custom_action() {
echo 'TEST';
}
-
woocommerce_after_single_product_summary
Хуки по умолчанию:
add_action( 'woocommerce_after_single_product_summary', 'woocommerce_output_product_data_tabs', 10 );
add_action( 'woocommerce_after_single_product_summary', 'woocommerce_upsell_display', 15 );
add_action( 'woocommerce_after_single_product_summary', 'woocommerce_output_related_products', 20 );
Удаление хуков по умолчанию:
remove_action( 'woocommerce_after_single_product_summary', 'woocommerce_output_product_data_tabs', 10 );
remove_action( 'woocommerce_after_single_product_summary', 'woocommerce_upsell_display', 15 );
remove_action( 'woocommerce_after_single_product_summary', 'woocommerce_output_related_products', 20 );
- Описание
- Детали
- Отзывы (0)
Описание
Тут длинное описание товара
Детали
| Вес | 546 кг |
|---|---|
| Размеры | 546 x 456 x 456 см |
| Аттрибуты | Аттрибут 1, Аттрибут 2 |
-
woocommerce_after_single_product
Пример использования хука:
									add_action( 'woocommerce_after_single_product', 'woocust_custom_action', 5 );

function woocust_custom_action() {
echo 'TEST';
}
к содержанию
Примеры использования хуков для страницы товара
Отключение всех функций с хука
/**
 * @snippet       Удаление всех функций с хука
 * @how-to-woo    https://wpruse.ru/courses/how-to-change-woocommerce/
 * @sourcecode    https://wpruse.ru/?p=3439
 * @author        Artem Abramovich
 * @testedwith    WooCommerce 3.6
 */
remove_all_actions( 'woocommerce_single_product_summary' );
Замена надписи «Добавить в корзину»
/**
 * @snippet       Замена надписи на кнопке Добавить в корзину
 * @how-to-woo    https://wpruse.ru/courses/how-to-change-woocommerce/
 * @sourcecode    https://wpruse.ru/?p=3439
 * @author        Artem Abramovich
 * @testedwith    WooCommerce 3.6
 */
add_filter( 'woocommerce_product_single_add_to_cart_text', 'woocust_change_label_button_add_to_cart_single' );
function woocust_change_label_button_add_to_cart_single( $label ) {

	$label = 'Просто купить';

	return $label;
}
Управление вкладками на странице товара
Удаление вкладок
/**
 * @snippet       Удаление вкладок
 * @how-to-woo    https://wpruse.ru/courses/how-to-change-woocommerce/
 * @sourcecode    https://wpruse.ru/?p=3439
 * @testedwith    WooCommerce 3.6
 */
add_filter( 'woocommerce_product_tabs', 'woocust_remove_product_tabs', 99 );
function wdm_remove_product_tabs( $tabs ) {

	unset( $tabs['description'] ); // Удаление вкладки Описание
	unset( $tabs['reviews'] ); // Удаление вкладки Отзывы
	unset( $tabs['additional_information'] ); // Удаление вкладки Детали

	return $tabs;

}
Переименование вкладок
/**
 * @snippet       Переименование вкладок
 * @how-to-woo    https://wpruse.ru/courses/how-to-change-woocommerce/
 * @sourcecode    https://wpruse.ru/?p=3439
 * @testedwith    WooCommerce 3.6
 */
add_filter( 'woocommerce_product_tabs', 'woocust_rename_tabs', 98 );
function woocust_rename_tabs( $tabs ) {

	$tabs['description']['title']            = 'Другое Описание'; // Переименование вкладки Описание
	$tabs['reviews']['title']                = 'Другие Отзывы'; // Переименование вкладки Отзывы
	$tabs['additional_information']['title'] = 'Другие детали'; // Переименование вкладки Детали

	return $tabs;

}
Упорядочивание вкладок
/**
 * @snippet       Упорядочивание вкладок
 * @how-to-woo    https://wpruse.ru/courses/how-to-change-woocommerce/
 * @sourcecode    https://wpruse.ru/?p=3439
 * @testedwith    WooCommerce 3.6
 */
add_filter( 'woocommerce_product_tabs', 'woocust_reorder_tabs', 98 );
function woocust_reorder_tabs( $tabs ) {

	$tabs['reviews']['priority']                = 5; // Отзывы первые
	$tabs['description']['priority']            = 10; // Описание вторые
	$tabs['additional_information']['priority'] = 15; // Детали третьи

	return $tabs;
}
Кастомизация вкладок
/**
 * @snippet       Кастомизация вкладок
 * @how-to-woo    https://wpruse.ru/courses/how-to-change-woocommerce/
 * @sourcecode    https://wpruse.ru/?p=3439
 * @testedwith    WooCommerce 3.6
 */
add_filter( 'woocommerce_product_tabs', 'woocust_custom_description_tab', 98 );
function woocust_custom_description_tab( $tabs ) {

	$tabs['description']['callback'] = 'woocust_custom_description_tab_content';

	return $tabs;
}

function woocust_custom_description_tab_content() {

	echo '<h2>Произвольное описание</h2>';
	echo '<p>Тут можно добавить произвольное описание</p>';
}
Добавление вкладок
/**
 * @snippet       Добавление произвольной вкладки
 * @how-to-woo    https://wpruse.ru/courses/how-to-change-woocommerce/
 * @sourcecode    https://wpruse.ru/?p=3439
 * @testedwith    WooCommerce 3.6
 */
add_filter( 'woocommerce_product_tabs', 'woocust_new_product_tab' );
function woocust_new_product_tab( $tabs ) {

	$tabs['custom_tab'] = array(
		'title'    => 'Новая вкладка',
		'priority' => 50,
		'callback' => 'woocust_new_product_tab_content',
	);

	return $tabs;

}

function woocust_new_product_tab_content() {

	echo '<h2>Новая вкладка</h2>';
	echo '<p>Тут контент новой вкладки</p>';

}
к содержанию
Заключение
В эпизоде разобрали структуру файлов страницы товара и возможности кастомизации страницы товара через хуки.
5
5
голоса
Рейтинг статьи

От автора: при планировании WooCommerce-магазина вам придется ответить на много вопросов, которые серьезно повлияют на будущий успех сайта. Настройка магазина — серьезный вызов. После завершения этого процесса уже сложно внести какие-то правки в настройки и дизайн. Для кастомизации страниц товаров в Woocommerce вам потребуется рассмотреть доступные варианты, о которых я и расскажу в этом посте.
И вот, магазин создан. Следующий вызов — беспорядок на страницах товаров. На странице WooCommerce Single Product есть множество элементов, которые не напрямую могут помочь с кастомизацией дизайна и настройкой магазина. Два главных виновника беспорядка — категории товаров и звезды рейтинга. Не каждому магазину нужны эти элементы на странице Single Product. Так же и другие элементы необходимо передвинуть, чтобы они вписывались в кастомный дизайн магазина.
Все эти сложности можно легко решить с помощью экшенов и хуков в WooCommerce. Для демонстрации возможностей кастомизации страницы товара я создал несколько экшенов и хуков.
Кастомизируйте страницы товаров в WooCommerce
Первое, что вы должны хотеть — это сменить шаблон отображения товаров. Для этого необходимо загрузить файл single-product.php, который контролирует файлы шаблонов, которые, в свою очередь, отображают информацию о товарах на frontend’е.
Самый распространенный совет при настройке шаблонных страниц родительских тем и плагинов — делайте копии шаблонов темы. Все изменения делайте с копией. Такой подход гарантирует вам сохранность ваших изменений в случае обновления тем и плагинов.

Бесплатный курс «Создание тем на WordPress. Быстрый старт»
Изучите курс и узнайте, как создавать уникальные темы на WordPress с нестандартной структурой страниц
Скачать курс
Некоторые плагины и темы предоставляют обширную коллекцию пользовательских экшенов и хуков, которые позволяют вносить изменения напрямую в файлы темы. Самое классное в таком подходе это то, что вам не нужно изменять разметку файлов шаблона. В результате вы получаете чистый код и отсутствие дублей файлов.
С помощью single-product.php я буду вызывать файлы шаблона, которые отвечают за информацию о товаре и формат ее отображения на странице. Файл content-single-product.php — шаблон товара. Именно этот файл необходимо редактировать, чтобы изменить информацию и стили страницы товаров.
А теперь откройте single_template и вставьте следующий код, чтобы изменить шаблон страницы Single Product:
|
1 2 3 4 5 6 7 8 9 10 11 12 13 14 15 16 17 18 19 20 21 22 23 24 |
function get_custom_post_type_template($single_template) { global $post; if ($post—>post_type == ‘product’) { $single_template = dirname( __FILE__ ) . ‘/single-template.php’; } return $single_template; } add_filter( ‘single_template’, ‘get_custom_post_type_template’ ); as well as following code include in template _include add_filter( ‘template_include’, ‘portfolio_page_template’, 99 ); function portfolio_page_template( $template ) { if ( is_page( ‘slug’ ) ) { $new_template = locate_template( array( ‘single-template.php’ ) ); if ( » != $new_template ) { return $new_template ; } } return $template; } |
Создайте кастомные товары/категории в WooCommerce
На этом этапе я предполагаю, что у вас уже есть работающий WooCommerce-магазин, и вы знакомы с процессом настройки страницы товаров и категорий. Существует бесконечное множество причин для создания пользовательских страниц товаров и категорий. Для этого необходимо настроить пользовательский шаблон этих шаблонов.
Настройте файлы шаблонов в WooCommerce
При работе с файлом content-single-product.php необходимо помнить следующее: любые добавленные товары и категории должны вставляться в конец файла. Еще одна хорошая практика — назовите файл так, чтобы он выделялся и был легко узнаваем. Например, если у вас есть категория «Books», назовите файл content-single-product-books.php. Такая небольшая правка гарантирует, что вы моментально определите файл для определенной категории. Этот файл отвечает за все изменения, которые необходимы, чтобы страницы товаров и категорий выглядели ровно так, как вы хотели (добавление или удаление сайдбара, изменение в цикле и т.д.).
Далее необходимо изменить файл single-product.php. В файле есть цикл, который отвечает за то, какие шаблоны необходимо загрузить для отображения товаров.
Я добавлю условие if, которое будет проверять принадлежность товара к определенной категории, после чего загружать связанный single-product.php в кастомный шаблон. Этот файл можно не переименовывать. Перед вставкой кода найдите в этом файле следующую строку:
Бесплатный курс «Создание тем на WordPress. Быстрый старт»
Изучите курс и узнайте, как создавать уникальные темы на WordPress с нестандартной структурой страниц
Скачать курс
|
woocommerce_get_template_part( ‘content’, ‘single-product’ ); |
Ее необходимо заменить на следующий код:
|
global $post; $terms = wp_get_post_terms( $post—>ID, ‘product_cat’ ); foreach ( $terms as $term ) $categories[] = $term—>slug; if ( in_array( ‘YOURCATEGORY’, $categories ) ) { woocommerce_get_template_part( ‘content’, ‘single-product-YOURCATEGORY’ ); } else { woocommerce_get_template_part( ‘content’, ‘single-product’ ); } |
В этом коде найдите YOURCATEGORY и замените на свое сокращение категории. Также вы можете переименовать файл content-single-product.php. На примере с категорией выше «Books» файл single-product.php был переименован в content-single-product-books.php. Сейчас код такой:
|
global $post; $terms = wp_get_post_terms( $post—>ID, ‘product_cat’ ); foreach ( $terms as $term ) $categories[] = $term—>slug; if ( in_array( ‘books’, $categories ) ) { woocommerce_get_template_part( ‘content’, ‘single-product-books’ ); } else { woocommerce_get_template_part( ‘content’, ‘single-product’ ); } |
К данному этапу все файлы успешно отредактированы и/или переименованы. Следующий шаг — загрузить их в WooCommerce-магазин. Чтобы все прошло гладко, создайте в директории темы папку /woocommerce/. Не забывайте, что оба файла (content-single-product.php и single-product.php) необходимо поместить в одну папку. Хорошая практика — изменять элементы кода в этой папке темы, чтобы предотвратить сложные для дебага ошибки при перезаписи оригинальных файлов WooCommerce.
Последний этап — проверить страницы товара и категорий на то, что изменения, внесенные в код, применились и идеально отображаются на экране.
Заключение
Кастомизация страниц товаров и категорий WooCommerce — это добавление и изменение хуков. Вот и вся наука. Важно понять, что все изменения напрямую влияют на рендеринг этих двух страниц на frontend’е магазина. Если вам необходимо помочь с кодом или с чем-либо еще, пишите в комментариях, и я отвечу вам.
Автор: Muhammad Owais Alam
Источник: //www.sitepoint.com/
Редакция: Команда webformyself.
Бесплатный курс «Создание тем на WordPress. Быстрый старт»
Изучите курс и узнайте, как создавать уникальные темы на WordPress с нестандартной структурой страниц
Скачать курс

WordPress. Создание интернет-магазина на WooCommerce
Узнайте, как создать полноценный интернет-магазин на WooCommerce
Подробнее
Привет! Продолжаем разбирать самые интересные и полезные плагины для интернет-магазина woocommerce. Сегодня вы узнаете как изменить внешний вид онлайн магазина woocommerce. Вы сможете изменить внешний вид страницы товара, страницы магазина, страниц оформления заказа и корзины. Вы сможете менять цвет и размер заголовков, цен, описаний, категорий, скрыть не нужные элементы, изменить цвет и размер кнопки в корзине и т.д.
Изменить внешний вид интернет-магазина Woocommerce
Изменить внешний вид интернет магазина woocommerce вы сможете с помощью плагина — Customize Woocommerce Shop. Установить данный плагин на свой сайт вы сможете прямо из админ-панели wordpress. Перейдите на страницу: Плагины — Добавить новый, введите название плагина в форму поиска, нажмите Enter, установите и активируйте плагин.

После установки и активации плагина, перейдите на страницу: Woocommerce — Customize Shop. Здесь вы сможете менять внешний вид своего интернет-магазина woocommerce.

Product Shop Page, страница товара.
— Selected Products, выберите здесь All, тогда изменения будут касаться всех товаров. Вы можете выбрать только один товар или несколько определённых товаров.
— Product Images, поставьте здесь галочку, чтобы скрыть изображение товара.
— Product Title, поставьте здесь галочку, чтобы скрыть заголовок товара.
— Logged In User Only, если поставите здесь галочку, то кнопку Добавить в корзину будут видеть только зарегистрированные пользователи.
— Products Prices, поставьте галочку, чтобы скрыть цены на товары.
— Add To Cart Button, поставьте здесь галочку, чтобы скрыть кнопку Добавить в корзину.
— Нажмите на кнопку — Save All Settings, чтобы сохранить настройки.
Shop Page Appearance, внешний вид страницы Магазин.
— Remove Unset Product Images, поставьте галочку, чтобы скрыть изображения которые не установлены.
— Set Default Product Image, здесь можно задать изображение, которое будет использоваться по умолчанию для товаров у которых нет изображения.
— Title Font Color, здесь вы можете выбрать цвет шрифта для заголовка товара.
— Title Font Size, выберите размер шрифта заголовка товара.
— Title Font Weight, здесь вы можете выбрать тип шрифта для заголовка товара.
— Price Font Color, выберите цвет цены товара.
— Price Font Size, выберите размер цены товара.
— Price Font Weight, выберите тип шрифта цены товара.
— Нажмите на кнопку — Save All Settings, чтобы сохранить настройки.
Product Details Page, одиночная страница товара.
— Selected Products, выберите для каких товаров будут происходить изменения. Для всех товаров выберите All.
— Product Images, поставьте галочку, чтобы скрыть изображения товара.
— Product Title, поставьте галочку, чтобы скрыть заголовок товара.
— Product Tabs, поставьте галочку, чтобы скрыть вкладку товара.
— Related Products, поставьте галочку, чтобы скрыть похожие товары.
— Logged In User Only, поставьте здесь галочку, чтобы кнопка Добавить в корзину, была видна только зарегистрированным пользователям.
— Products Prices, поставьте галочку, чтобы скрыть цену товара.
— Add To Cart Button, поставьте галочку, чтобы скрыть кнопку Добавить в корзину.
— Products Category, поставьте галочку, чтобы скрыть категории товара.
— Нажмите на кнопку — Save All Settings, чтобы сохранить сделанные изменения.
Detail Page Appearance, внешний вид страницы товара.
— Remove Unset Product Images, удалить неопределённые изображения.
— Set Default Product Image, задать изображение по умолчанию для товаров у которых нет изображений.
— Title Font Color, выбрать цвет заголовка товара.
— Title Font Size, выбрать размер заголовка товара.
— Title Font Weight, выбрать тип шрифта заголовка.
— Price Font Color, цвет цены товара.
— Price Font Size, размер цены товара.
— Price Font Weight, тип шрифта цены товара.
— Description Font Color, цвет описания товара.
— Description Font Size, размер текста описания товара.
— Description Font Weight, тип шрифта текста описания товара.
— Category Font Color, цвет категории товара.
— Category Font Size, размер текста категории товара.
— Category Font Weight, тип шрифта категории.
— Сохраните сделанные изменения.
Cart Page, корзина.
— Cart Empty Button, поставьте галочку, чтобы добавить кнопку Корзина пустая на страницу Корзина.
— Button Font Color, цвет кнопки пустой корзины.
— Button Font Size, размер кнопки.
— Button Font Weight, тип шрифта кнопки.
— Нажмите на кнопку — Save All Settings для сохранения настроек.
Checkout Page, страница Оформить заказ. Здесь вы сможете выбрать между двумя параметрами Disable — отключить, Optional — необязательно.
— Billing Country, биллинг страны.
— Billing First Name, биллинг имя.
— Billing Last Name, биллинг фамилия.
— Billing Company, биллинг компания.
— Billing Address1, биллинг адрес 1.
— Billing Address2, биллинг адрес 2.
— Billing City, фактура города.
— Billing State, биллинг государства.
— Billing Post Code, биллинг код поста.
— Billing Email, биллинг электронная почта.
— Billing Phone, биллинг телефон.
Shipping, доставка.
— Shipping Country, доставка страна.
— Shipping First Name, доставка имя.
— Shipping Last Name, доставка фамилия.
— Shipping Company, доставка компания.
— Shipping Address 1, 2, доставка адрес 1 и 2.
— Shipping City, город доставки.
— Shipping State, государственная доставка.
— Shipping Post Code, доставка код поста.
— Account Password, пароль учётной записи.
— Order Comment, комментарий заказа.
— Сохраните сделанные изменения.
Супер плагины Woocommerce, более 200, с руководством по настройке, смотри Здесь!
Остались вопросы? Напиши комментарий! Удачи!
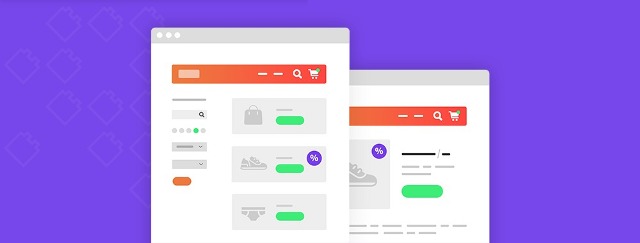
Хотите узнать, как легко настроить страницы продуктов WooCommerce? Если вы управляете интернет-магазином, то, вероятно, хотите, чтобы ваши страницы с каждым продуктом выглядели великолепно, были правильно организованы и соответствовали вашему бренду.


Это сложно сделать, если полагаться только на WooCommerce и свою тему, потому что приходится более или менее придерживаетесь макета по умолчанию.

Вместо этого можно использовать другие плагины, чтобы делать такие вещи, как:
- Добавить дополнительные элементы контента.
- Изменить шрифты и цвета.
- Внесите изменения в структуру страницы.
- Или даже полностью настроить страницы продуктов с нуля.
И все это делать без программирования!
Некоторые идеи полностью настраиваемых шаблонов продуктов:
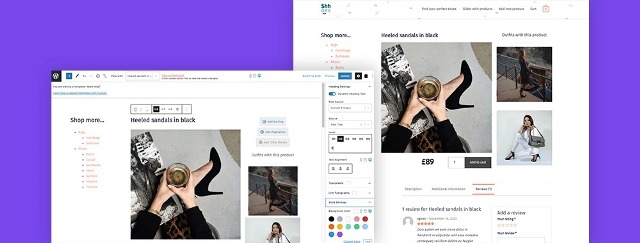
Найдите среди ниже представленных идеальный плагин для настройки страниц ваших продуктов в соответствии с тем, что вам нужно.
1. Измените стиль страниц продукта
Вот несколько плагинов, если вы ищете всего несколько косметических настроек, таких как изменения шрифтов, цвета или изменения отдельных элементов.
WooCommerce Colors

WooCommerce Colors позволяет настраивать цвета различных элементов WooCommerce, таких как кнопка «Добавить в корзину», цену продукта и другие. Вы можете внести эти изменения, используя собственный настройщик WordPress.
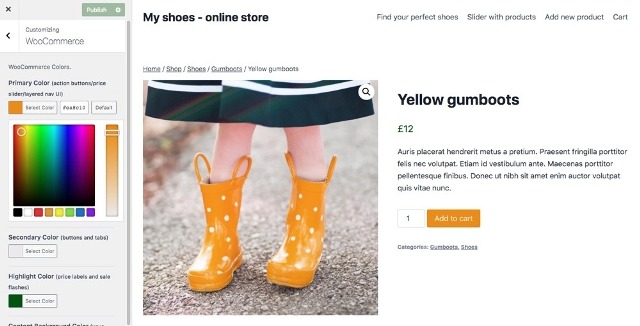
Это простой и понятный плагин, не требующий каких-либо знаний CSS. Однако он позволяет настраивать только цвета, и вы не сможете переопределить некоторые цвета в зависимости от вашей темы.
Цена: Бесплатно.
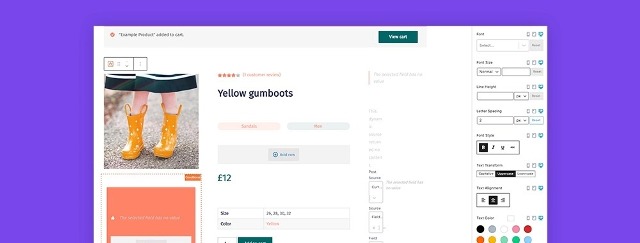
YellowPencil
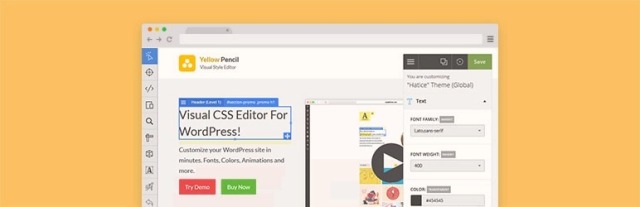
Благодаря плагину YellowPencil можно изменять шрифты, цвета, размеры шрифтов, расстояние между элементами и даже добавлять анимированные визуальные эффекты во внешний интерфейс вашего сайта. В бесплатной версии есть много вариантов стилей, но Yellow Pencil Pro добавляет расширенные параметры для градиентов, анимации, пользовательских шрифтов, цветовых палитр, фоновых изображений и многого другого.
YellowPencil будет работать на любой странице вашего сайта, а не только на страницах продуктов. Он автоматически генерирует код CSS для вашего сайта по мере его использования и сохраняет его в вашей базе данных, а не в файле темы. Это гарантирует, что изменения не потеряются при обновлении темы.
YellowPencil позволяет переупорядочивать элементы в шаблоне, но нельзя добавлять новые элементы. В результате вы ограничены элементами, которые уже существуют в шаблоне одного продукта по умолчанию.
Цена: бесплатно, с возможностью платного обновления.
CSS Hero

Что он делает: CSS Hero – это визуальный редактор, с помощью которого можно вносить изменения в стиль вашего сайта, автоматически настраивая CSS по мере внесения визуальных изменений.
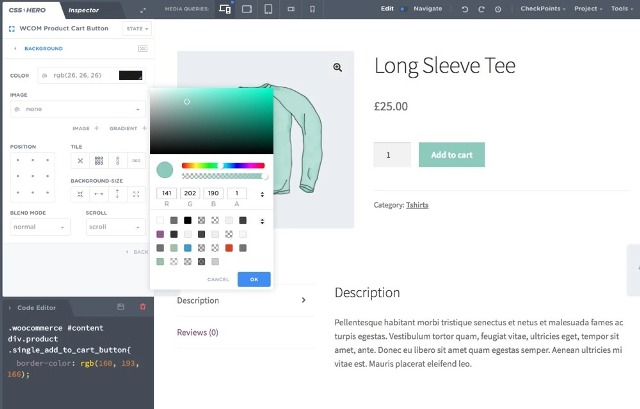
С этим плагином вы настроите элементы вашего шаблона, изменив цвета, шрифты, отзывчивые точки останова и многое другое. Вы также можете скрыть элементы или сохранить стиль определенных элементов, чтобы повторно использовать их в других местах вашего сайта.
Однако нельзя изменять порядок или добавлять новые элементы, поэтому вы ограничены макетом и элементами, которые уже существуют в шаблоне продукта.
Цена: платно, от 29 долларов в год.
Смотрите также:
Плагины Gutenberg блоков для магазинов WooCommerce.
2. Добавьте новые элементы в списки продуктов
Если вы хотите добавить на свои страницы дополнительные элементы, например места для дополнительного контента или видеоролики о продуктах, эти плагины предлагают способы добавления таких элементов на страницы отдельных продуктов.
WooCommerce Single Product Page Customizer
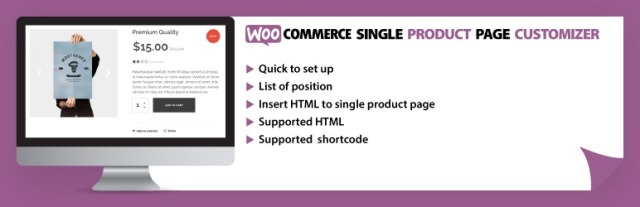
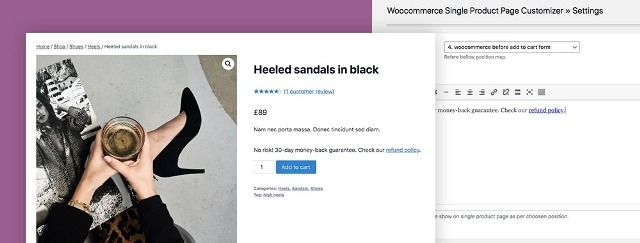
WooCommerce Single Product Page Customizer позволяет добавлять поля пользовательского текста или HTML в шаблон продукта и выбирать, где на странице их отображать.
Например, вы можете добавить информацию, такую как руководство по размеру одежды, информацию о доставке или ссылку на политику возврата в вашем магазине. Затем эта информация отобразится для всех ваших продуктов.
Это очень простой и легкий в использовании плагин, но он функционально ограничен. Например, вы не можете выбрать отображение информации только для некоторых продуктов. Вы также не можете добавлять в свой шаблон элементы других типов и не можете переставлять какие-либо из существующих элементов.
Цена: Бесплатно.
Custom Product Tabs for WooCommerce
Custom Product Tabs for WooCommerce позволяет добавлять дополнительные вкладки с текстом, изображениями, HTML или короткими кодами на страницах продуктов. Затем вы можете выбрать, для каких продуктов отображать информацию.
Можно использовать этот плагин для отображения дополнительной информации о производителях, публикации вашей политики возврата или добавления дополнительных фотографий, не загромождая страницу продукта.
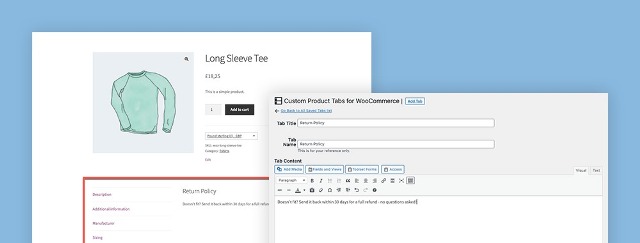
Опять же, у этого плагина есть конкретную цель. С его помощью невозможно настроить какие-либо другие части ваших шаблонов продуктов, кроме добавления вкладок с дополнительным контентом.
Если вы хотите отображать на вкладках контент, относящийся к конкретному продукту, например диаграммы размеров для каждого продукта, вы не сможете сделать это, динамически извлекая информацию о продукте. Вместо этого вам нужно создать отдельные вкладки для каждого продукта с определенным содержанием и добавить их к нужному продукту.
Цена: бесплатно, с платной версией Pro.
Product Video for WooCommerce

Product Video for WooCommerce позволяет добавлять видео на страницы продуктов или в галерею продуктов. Можно встраивать видеоролики YouTube, Vimeo, Dailymotion, Metacafe, Facebook или загружать свои собственные. Он также предлагает несколько вариантов отображения: во всплывающем окне, внутри вашей страницы и в полноэкранном режиме.
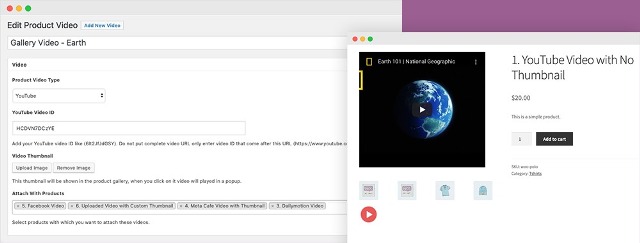
Плагин дает полный контроль над тем, как отображается ваше видео. Можно настроить размеры видео, включить автовоспроизведение, воспроизводить видео в цикле и загрузить определенное изображение эскиза.
Как и другие плагины в этой категории, возможности плагина ограничены видео. Вы не можете настроить никакую другую часть шаблона продукта с помощью этого плагина.
Цена: платно, сейчас 49 долларов.
3. Создавайте индивидуальные продукты
С этими плагинами можно создавать полностью настраиваемые страницы и целые сайты, так как они позволяют указывать стиль, макет страницы и многое другое.
Toolset
Toolset дает возможность создавать шаблоны продуктов полностью с нуля с желаемым макетом, стилем и элементами страницы, и все это без программирования.
Цена: платно, планы от 69 долларов.
Создайте собственный шаблон с динамическим контентом и полностью настраиваемым стилем
С помощью Toolset можно легко создать шаблон продукта, используя блоки WooCommerce и Toolset, и заполнить эти блоки динамическим контентом. Это означает, что нужно создать шаблон только один раз, и он автоматически подберет правильное название продукта, описание, цену, отзывы и многое другое в зависимости от продукта.
После создания шаблона продукта вы можете использовать множество вариантов стиля, чтобы он выглядел именно так, как хотите, без каких-либо ограничений по умолчанию.
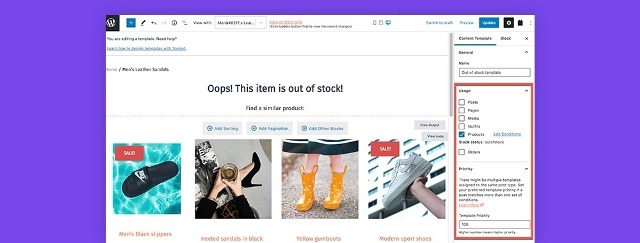
Выберите конкретные критерии отображения для ваших шаблонов
Вы также можете создавать разные шаблоны для разных критериев: например, создавать разные шаблоны для товаров, которых нет в наличии, для разных категорий продуктов или атрибутов, и даже назначать приоритеты в случае, если несколько шаблонов применяются к одному продукту.
Дальнейшая настройка вашего магазина WooCommerce с еще большей функциональностью
Популярные конструкторы страниц, такие как Elementor Pro, Divi и WPBakery, также предлагают варианты для создания и настройки страниц продуктов WooCommerce. Дополнительные функции, доступные с набором плагинов Toolset, можно использовать специально для магазинов WooCommerce или других типов сайтов.
Например, вы можете:
- Создавать интерфейсные формы, с помощью которых поставщики смогут добавлять свои продукты на ваш сайт.
- Создавать отношения записей, которые позволяют вам связывать свои продукты с другими типами записей (такими как «Одежда»).
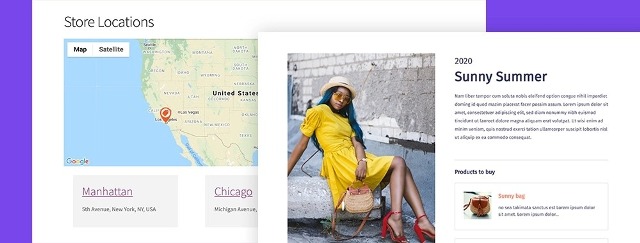
- Отображать расположение магазинов на карте.
- Добавлять мощные функции поиска и фильтрации.
- Создавать дополнительные настраиваемые поля для дальнейшего определения ваших продуктов.
Выбор подходящих инструментов WooCommerce для вас
Если вам не нравятся варианты, доступные через WooCommerce или вашу тему, воспользуйтесь подборкой бесплатных и платных плагинов, которые сделают ваш магазин именно таким, каким вы его хотите видеть.
Создание собственного магазина WooCommerce не должно быть сложным или требовать дорогостоящего индивидуального программирования. С помощью плагинов, описанных в этой статье, вы можете создавать продвинутые, красивые, функциональные магазины WooCommerce.
Источник: wpexplorer.com
Смотрите также:

Изучает сайтостроение с 2008 года. Практикующий вебмастер, специализирующий на создание сайтов на WordPress. Задать вопрос Алексею можно на https://profiles.wordpress.org/wpthemeus/
-
#4

Ничто не мешает Вам её просто не показывать.
В общем здесь, как раз и загвоздка. Я эту страницу удалил, но в пустой корзине есть кнопка — «вернуться в магазин». Пришлось восстановить обратно(из корзины) «магазин» — вместо него стала открываться пустая страница. Я обновил страницу в консоли, как будто вновь созданную, «магазин» появился, но теперь кнопка в корзине почему-то ведет в корзину, т.е. страница попросту обновляется, при нажатии на «вернуться в магазин». Замкнутый круг.
Вот я и думаю можно ли обойтись без этой страницы вообще? На что повлияет отсутствие страницы конкретно? Магазин станет неработоспособный или это просто удобная «свистелка», для для блога. Кнопку в корзине также хочу удалить. Непонятно зачем возвращаться в магазин, когда ты и так в магазине.
Пожалуйста, растолкуйте. Если мой план не противоречит здравому смыслу, то подскажите, как удалить кнопку «вернуться в магазин» в корзине, если противоречит, то как все вернуть на круги своя, чтобы по-фэншую?
Я два раза удалял и ставил обратно плагин «Woocommerce» — страницы создать не предлагает(видимо они и не удалялись), ссылка не поправилась.
Последнее редактирование: 20 Май 2016

-
#6
В общем здесь, как раз и загвоздка. Я эту страницу удалил, но в пустой корзине есть кнопка — «вернуться в магазин»
Создайте в WordPress новую страницу с произвольным названием. Затем в Woocommerce-Настройки-Товары-Отображение-Страница Магазина выберите эту страницу. После этого контент Магазина должен появиться на этой странице. Если предварительно вы сделали на этой странице некие записи в редакторе WordPress, то контент главной страницы магазина появится под ними.
Кнопка — «вернуться в магазин» будет переводить на эту страницу.
Последнее редактирование: 21 Май 2016
В прошлых статьях мы изменили внешний вид главной станицы интернет-магазина с помощью дочерней темы Storefront. Мы научились добавлять новые элементы и менять уже существующие с помощью action и filter hooks. Для этого установили плагины Simply Show Hooks и Query Monitor. Сегодня узнаем, какие изменения можно внести на страницу магазина и как это сделать (на примерах).
Настройка страницы магазина – вывод кода валюты рядом с символом
Это изменение касается не только страницы магазин, но и остальных страниц. Часто возникает необходимость отображать не только значок, но и символ валюты, которая используется в магазине.

Список подобных символов можно найти в википедии https://en.wikipedia.org/wiki/ISO_4217
Чтобы вывести кода валюты рядом с символом, добавим в functions.php следующий код
/* вывод названия валюты рядом с символом */

  function carolinaspa_usd($symbol, $currency){

    $symbol = $currency . " $";

    return  $symbol;

  }

  add_filter('woocommerce_currency_symbol', 'carolinaspa_usd', 10, 2);

Как поменять количество колонок на странице магазина
По умолчанию woocommerce выводит 10 продуктов на странице. Чтобы поменять количество товаров нужно прописать следующие строки в functions.php
  /* поменять количество продуктов на странице магазина */

 function products_per_page($products){

    $products = 3;

    return $products;

}

add_filter('loop_shop_per_page', 'products_per_page', 20);
Как видно на скриншоте теперь на странице видно только 3 товара и появилась пагинация.

Также можно поменять количество столбцов на странице
/* поменять количество колонок на странице магазина */

  function carolinaspa_colums_per_page($colums) {

    return 5; // выведет 5 товаров на странице

}

add_filter('loop_shop_columns', 'carolinaspa_colums_per_page', 20);
Настройка страницы магазина — Фильтры
Вот как выглядят фильтры на странице по умолчанию. Название «сортировка по более позднему» звучит не очень красиво. Давайте поменяем его

Выведем массив фильтров на экран
function carolinaspa_new_filter($orderby) {

    echo '<pre>';

    var_dump ($orderby);

    echo '</pre>';

    }

    add_filter('woocommerce_catalog_orderby', 'carolinaspa_new_filter', 40);
Поменяем название фильтра
Для начала нужно удалить строку «сортировка по более позднему» из списка.
Как удалить элемент фильтра
      function carolinaspa_new_filter($orderby) {

        unset($orderby ["date"]);

        return $orderby;

        }

        add_filter('woocommerce_catalog_orderby', 'carolinaspa_new_filter', 40);
А затем добавить новую
/* Поменять название фильтра */
function carolinaspa_new_filter1($orderby1) {

    $orderby1['date'] = _('По дате');

    return $orderby1;

}

add_filter('woocommerce_catalog_orderby', 'carolinaspa_new_filter1', 40);

В следующей статье поработаем со страницей вывода товара.

Do you want to edit your category pages? In this guide, we’ll show you different methods to customize the WooCommerce category page with and without plugins.
The category page is usually one of the most overlooked and least customized pages in an eCommerce store. This is because it normally acts as a bridge to the hierarchy between the product and shop page. However, there are several practical scenarios where users rely on the category page to browse for products, so it makes sense to edit it and make the most of it.
Before we have a look at the different methods to customize the category page in WooCommerce, let’s better understand the benefits of doing so.
Why Edit The WooCommerce Category Page?
The category page shows all the products of your WooCommerce store included in that category. Even though users normally look for products using other pages, sometimes customers find it easier to look for the items from the category page. For example, if you’re not sure of the name of the product but you know its category, you’ll probably search for the product using the category page.
On top of that, your customers might stay on your website longer if they are positively influenced by the category page. As these pages are usually overlooked, if you customize them, you’ll stand out and improve your customer’s experience.
The good news is that WooCommerce allows you to easily customize your category page. The bad news is that the default options provided by WooCommerce are quite limited. You can only edit the name, slug, parent category, description text, display type, and thumbnail for each category page.

You can also edit other elements with the theme customizer, but if you need to take your category page to a whole new level, you need something else.
That’s why in this guide, we will show you different methods to edit your category page in WooCommerce and help your customers navigate your site more easily.
How to Customize the WooCommerce Category Page
There are different methods to easily customize your WooCommerce category page in WordPress:
- With Divi
- Using a dedicated plugin
- Programmatically (coding)
In this section, we’ll go through each method step-by-step, so you can choose the one that best suits your needs.
NOTE: Before you start, make sure that you have set up WooCommerce correctly and created all the necessary pages.
1. Customize WooCommerce Category Page with Divi

Divi is one of the most popular WordPress themes and for good reason. It comes with plenty of features and it is fully compatible with WooCommerce which makes it ideal to customize your category pages.
This theme comes with a built-in drag and drop builder which allows you to create a custom category page template. This way, you can create a template for category pages and use it for all of them in your WooCommerce store.
What makes Divi so easy to use is that you can see all the changes you make with the builder in real-time with the live preview. Divi also provides various modules to easily add many elements to your pages, helping you save a lot of time when creating or editing your category pages.
1.1. Install and activate Divi
To start using Divi, you need to install and activate it first. You can download the Divi zip file from their official website.
Then, go to your WordPress dashboard and head to Appearance > Themes > Add New.
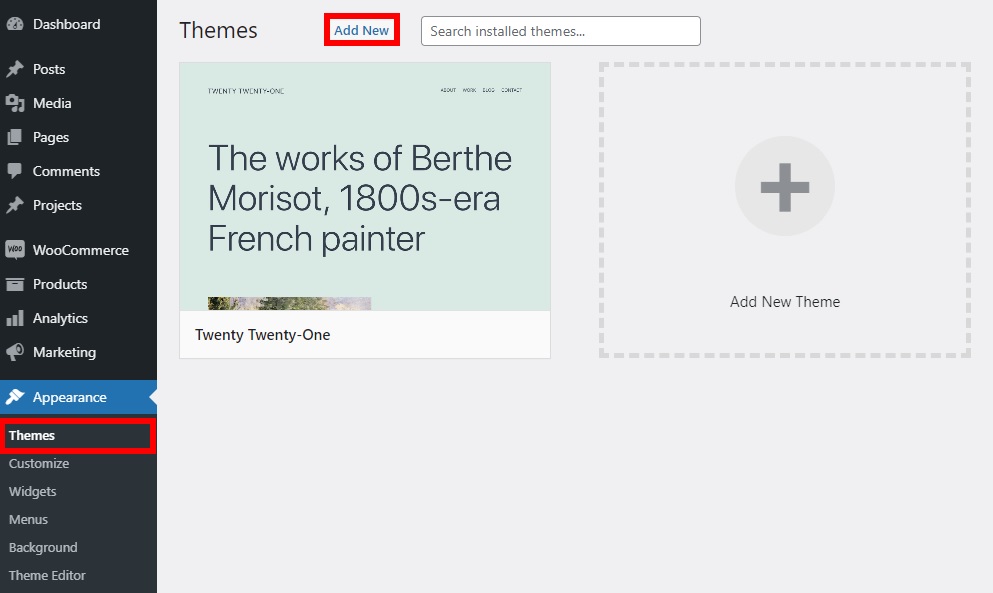
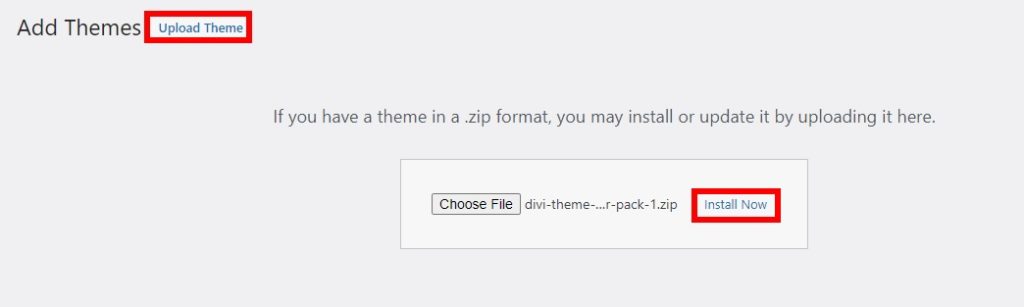
Press Upload Theme and choose the recently downloaded Divi .zip file to upload on your site. Once it is uploaded, click Install Now to install the theme and activate it once the installation is complete.
Activating the Divi theme will also automatically install the Divi builder which is the in-built page builder that we’ll use to customize the category pages.
1.2. Create a Custom Category Page Template
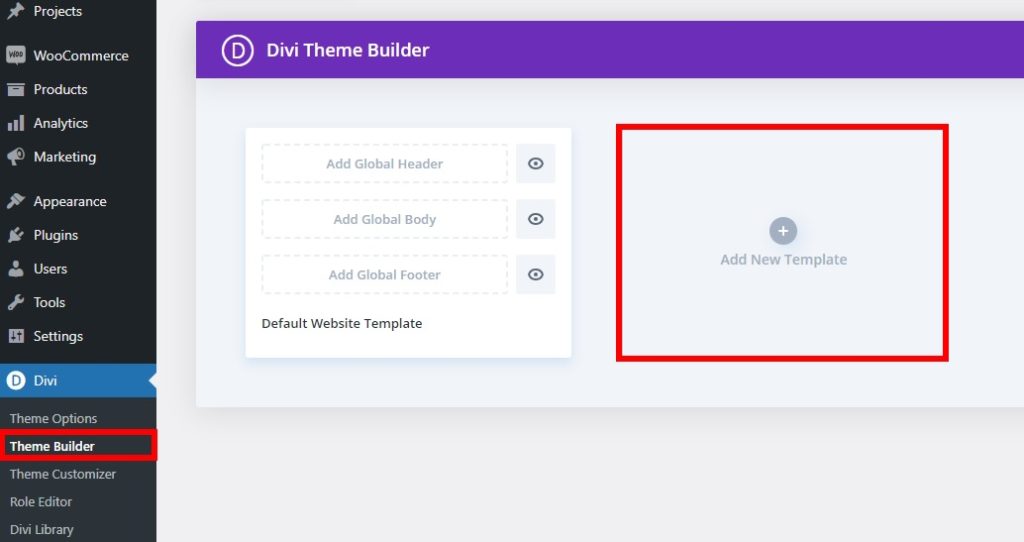
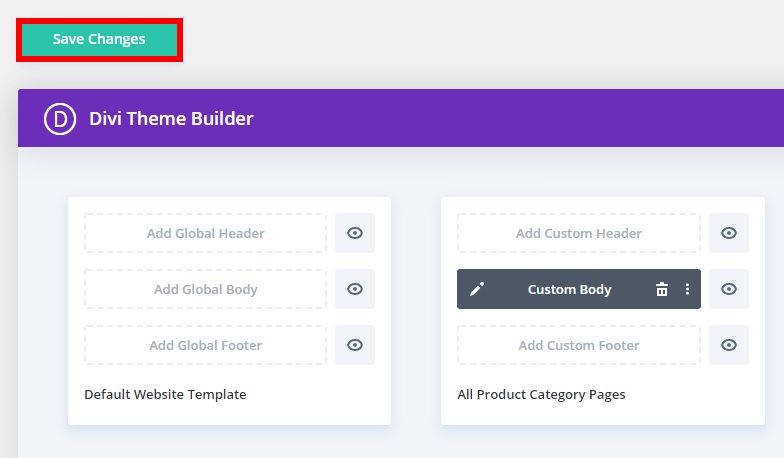
To start creating a custom category page template, you need to go to Divi > Theme Builder and press Add New Template.
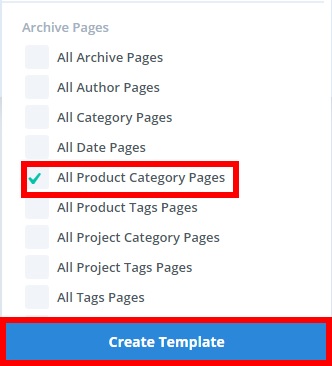
Then, tick the box for All Product Category Pages under Archive Pages and click Create Template.
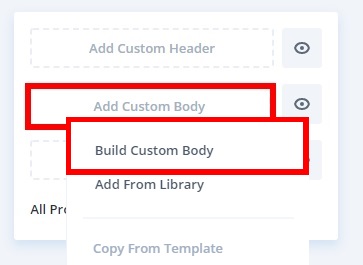
After that, select Add Custom Body on the new template you’ve just added. Since we are creating an entirely new template with Divi, select the Build Custom Body option as well.
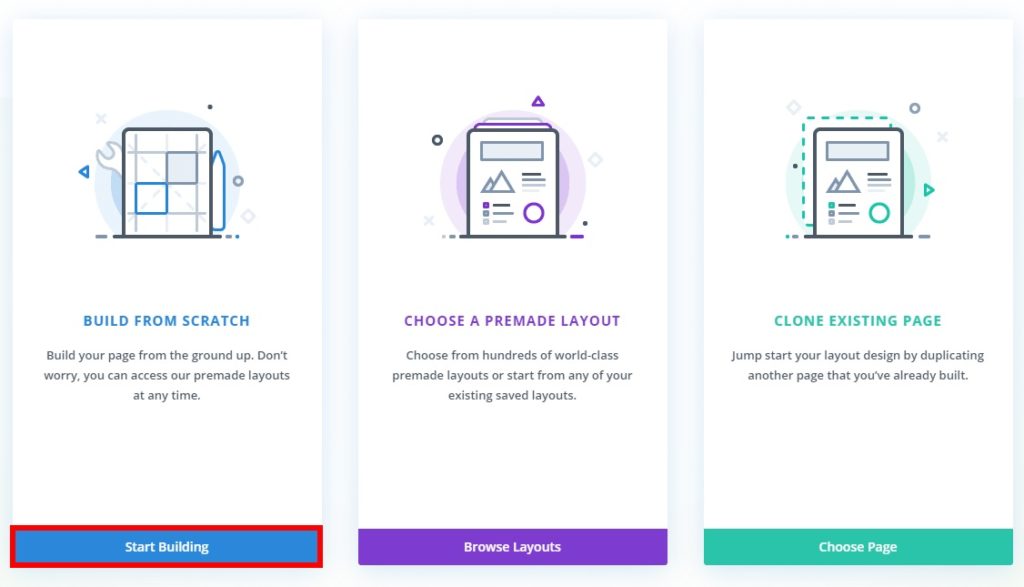
You will see 3 different options there:
- Build your template from scratch
- Use one of the templates from the Divi library and further use it to customize your WooCommerce category page
- Clone an existing page and use it as a template for all your product category pages
You can choose any of the options that best suits you. For this tutorial, we will select Build from Scratch, so we hit the Start building button.
You will be redirected to the Category page layout from where you will use the Divi Builder to create your template.
To start building your template, you need to select the structure. Under New Row, select the type of row you want for your category pages. You can add multiple rows and columns. You will need at least 2 rows for the category page header and body, but you can also have more columns if you want to add a sidebar on your category page body.
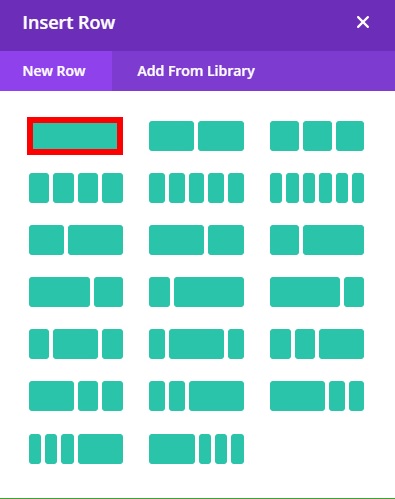
After selecting the number of rows and columns, you will have to add the Divi modules to further customize the category page layout.
1.3. Category Page Header
For the category page header, you need to add the page title and breadcrumb for your category pages.
To add the post title, click on the ‘+’ icon in the row, search for Post Title in the search bar, and select it.
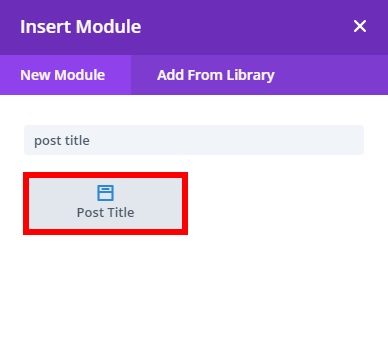
You will see the different post title options. You can add the meta and featured image, but we won’t use them for this tutorial, so we’ll disable the Show Meta and Show Featured Image options under the Elements section.

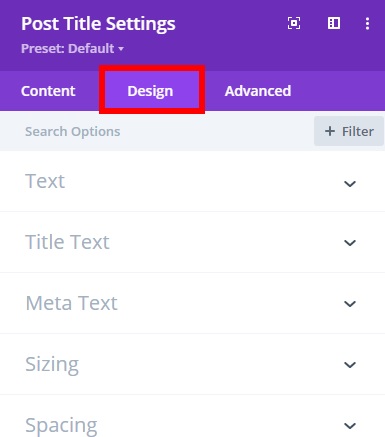
It’s worth noting that you don’t need to add any title here as it will automatically show the dynamic post title when you preview the website. Additionally, from the Design tab, you can edit the background color and fonts of the header.
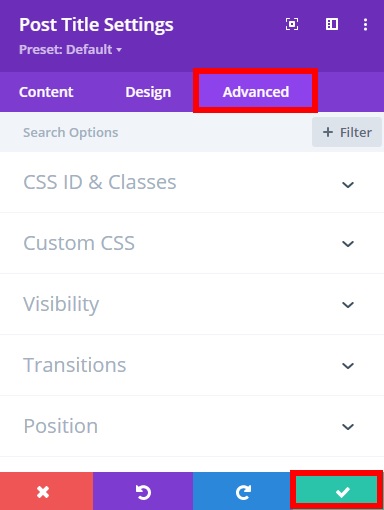
There are also some Advanced options to add CSS ID, classes, custom CSS, scroll effects, and more. After you have made all the necessary changes, click on the “tick” icon to save the changes.
1.3.1 – Add breadcrumb module
You will also need a breadcrumb module for additional navigation in the category pages, so click on the ‘+’ icon again to add a new module and search for “Woo Breadcrumb”.

Then, select the option This Product in the Product section under the Content tab. This will add the dynamic title for the product category your customers want to see.
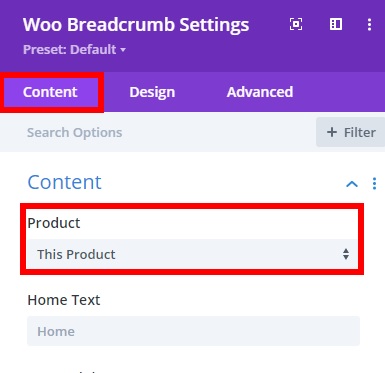
Once again, make the necessary changes using the Design and Advanced tabs, and finally, click on the “tick” icon to save the changes.
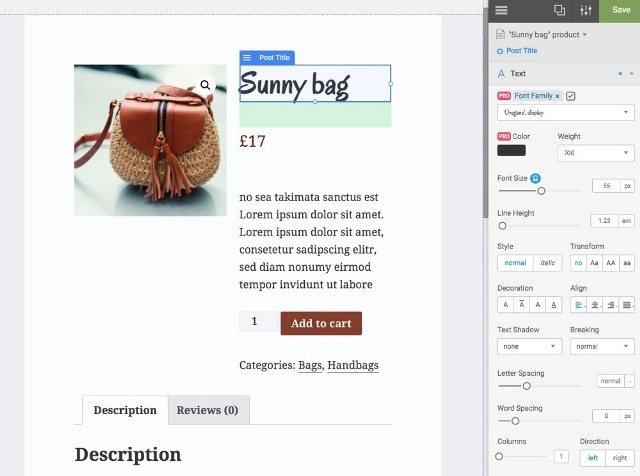
1.4. Category Page Body
After you have completed editing the header, you can move on to the category page body. If you haven’t included a row yet, click on the green “+” icon and select the type of row you want to add. After that, you will need to add the shop module here because it contains all the products for your shop.
Press the “+” icon in the row and search for the Shop module.
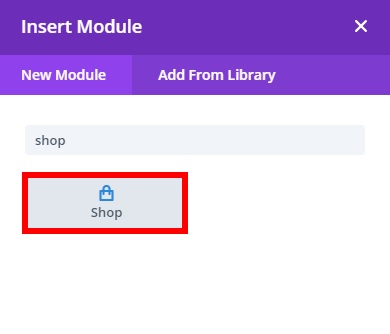
Once you click it, you will be able to configure the options for your products on the category page.
In the Content tab, you can edit all the elements for your category page. Make sure that you enable the Use Current Page to display the products of the specific product category that your customers select on your online store.
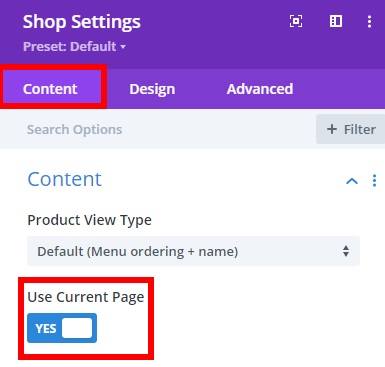
Now all you need to do is edit the other display elements of the page. For example, you can add the number of columns or products to show per page and pagination from here. Additionally, you can also edit the fonts of the product and price texts and much more from the Design and Advanced tabs. Once you have made all the necessary changes, press the “tick” icon to save the changes.
You can add more rows or customize the footer areas with the Divi Builder, just remember to save the page template body at the bottom right of your screen once you’ve done it all. 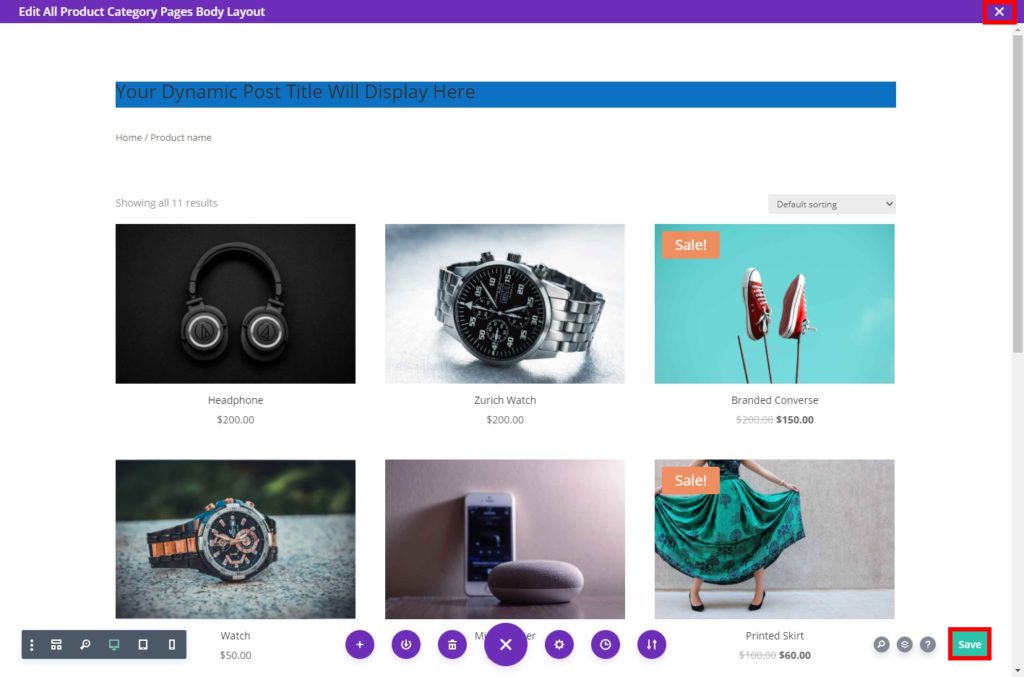
After saving your changes, close the Divi Builder and you will be redirected to the Theme Builder dashboard. Click Save Changes here as well to save the changes to your template.
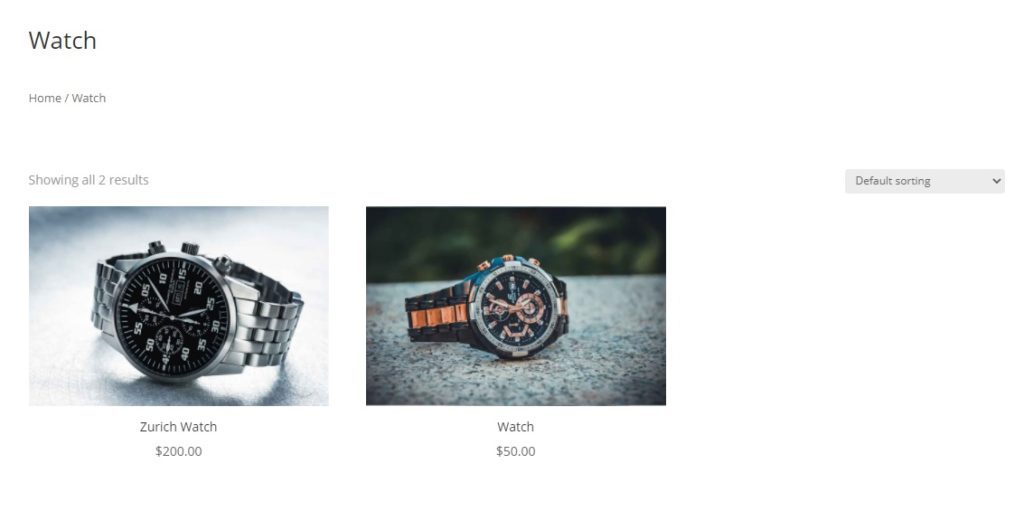
Now when you preview the category page of any product category, you will be able to see all your changes.
2. Customize WooCommerce Category Page using a Plugin
If you don’t use Divi and don’t want to replace your current theme, the best option to edit the WooCommerce category page would be to use a dedicated WordPress plugin.
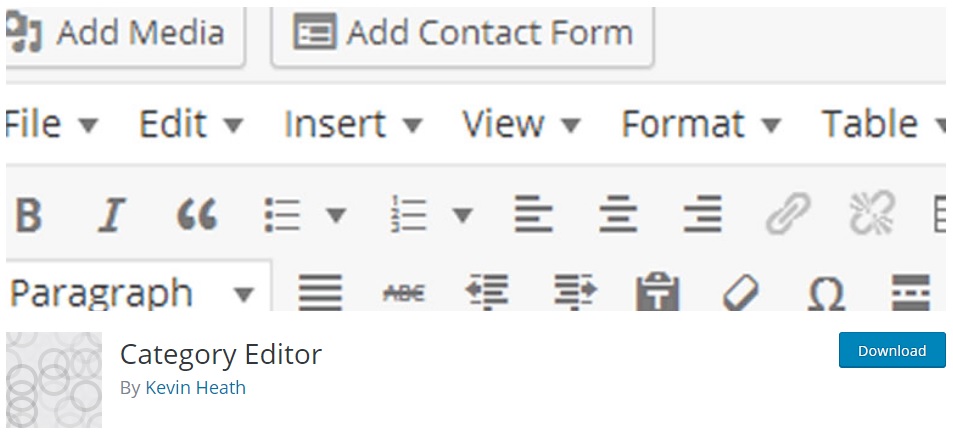
For this tutorial, we will use the Category Editor plugin as it is free, easy to use, and lets you customize category pages in a few clicks. This tool mainly focuses on the description area of the category pages and provides you with an editor for it. This way, you can edit the description of the product categories to display them on the category pages.
To start using this plugin, in your WordPress dashboard go to Plugins > Add New. Then, search for Category Editor, click Install Now, and then activate the plugin.

You can also install it manually by downloading the plugin straight from the WordPress repository. If you want to learn more about this process, you can have a look at our guide on how to install a plugin manually.
After activating Category Editor, go to Products > Categories and press Edit on the category you want to customize the description.
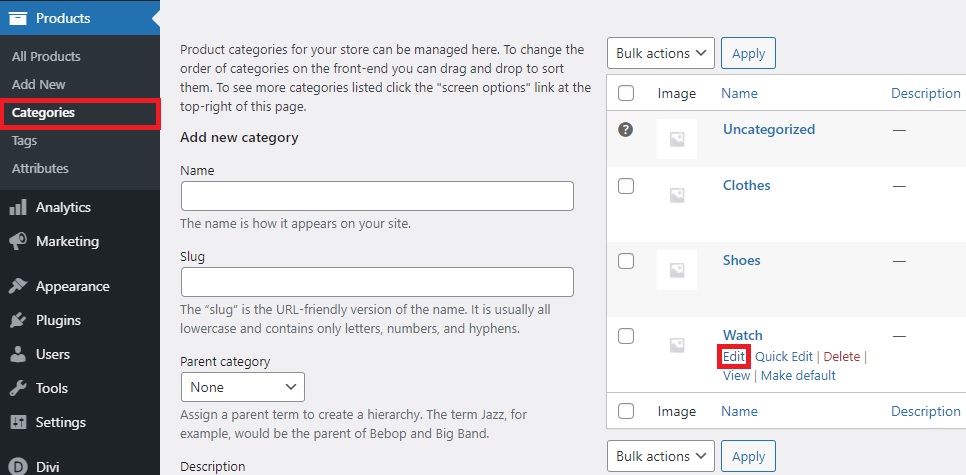
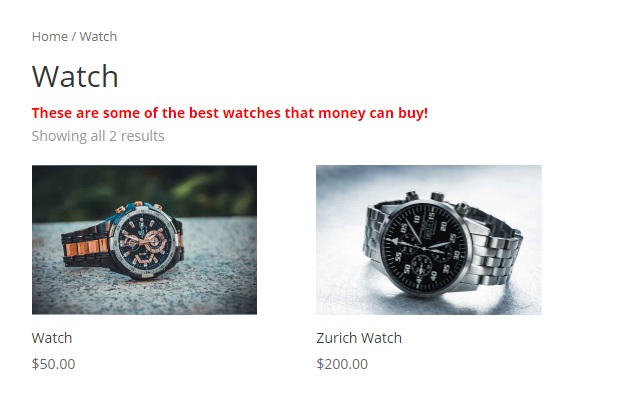
Here, you will see that a text editor has been added to the description area where you can change the text font, headings, lists, and alignment. Additionally, you can add category images and use the Text tab to customize the category description with a bit of code.
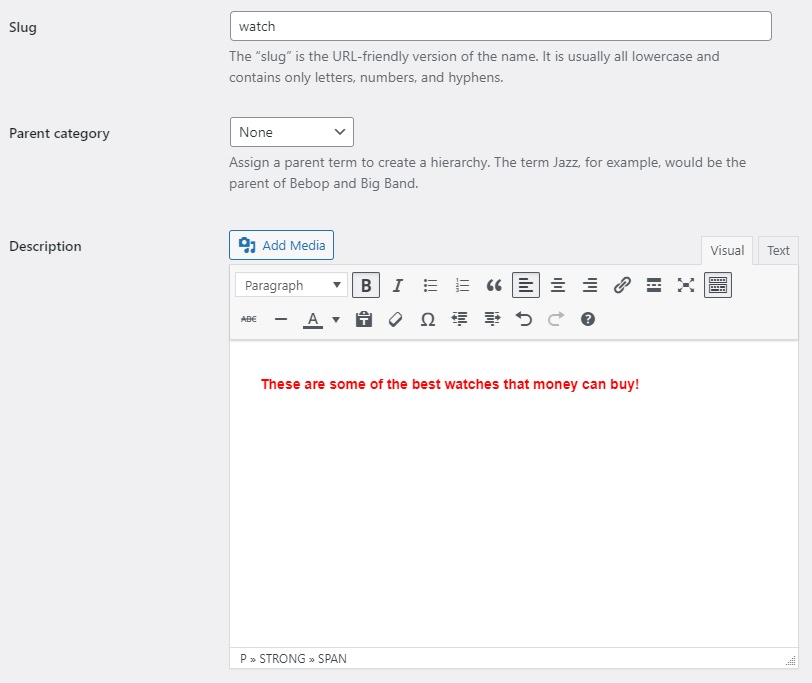
Once you have made all the necessary changes, press Update and preview the changes on your category pages.
That’s how you can customize your WooCommerce category pages with a plugin. However, if you want more customization options and have coding skills, you can code your own solution. Let’s have a look at how to do it.
3. Customize WooCommerce Category Page Programmatically
If you don’t use Divi and don’t want to install any third-party tools, coding your own solution is an excellent option. The main advantage of editing the category page programmatically is that it provides you with more flexibility.
Even if you’re not an experienced developer, WooCommerce provides you with several shortcodes and shortcode attributes to help you with the process. If you’re not familiar with shortcodes, check out this guide to better understand how to use them.
With these shortcodes, you can display product categories on any page:
- [
product_category] – displays a specific product category - [
product_categories] – displays all the product categories of your store
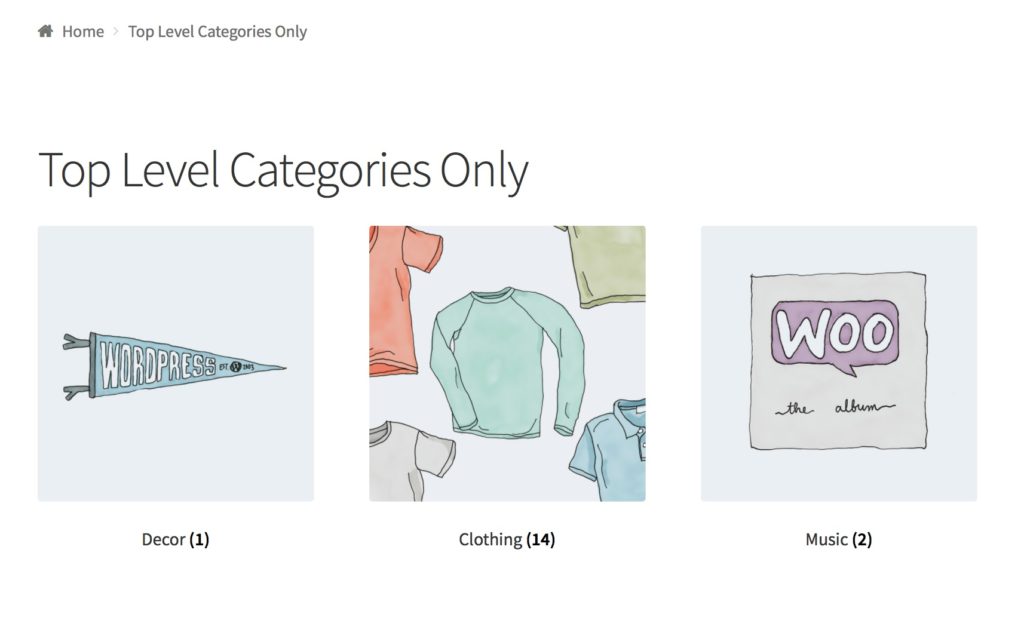
You can use them along with product category attributes to modify the way they display the product categories. For example, if you want to display the top-level product categories and hide the subcategories, you can use the following shortcode:
[product_categories number="0" parent="0"]
You will be able to see the top-level categories once you preview your page.
Additionally, you can also use various code snippets to edit your category page in WooCommerce. One of the most common examples is to create a custom category.
Before we show you how to do it, make sure that you back up your WordPress website and use a child theme. We will change some core theme files, so if something goes wrong you may break your site. That’s why it’s always recommended to have a backup version that you can restore to avoid any issues.
Create a Custom Category Page Title
To create a custom category page title using a code snippet, you need to go to Appearance > Theme Editor and add the following code snippet to the functions.php file of your child theme.
add_filter( 'woocommerce_page_title', 'QL_customize_woocommerce_page_title', 10, 1 );function QL_customize_woocommerce_page_title( $page_title) {// Custom title for the product category 't-shirts'if ( is_product_category('t-shirts') ) { $page_title = 'Something';}// Custom title for the product category 'hoodies'elseif ( is_product_category('hoodies') ) {$page_title = 'Something else'; }return $page_title;}
For more information about the snippet, check out this site.
This way you can display a custom title instead of the default category title on the category page.
Change Background of Product-Category Page
Similarly, you can also change the background of your product category page using code snippets. Just paste the following code snippet once again in the funtions.php file.
if(is_product_category()){
    add_action('wp_head',function(){
     ?>
        <style>
            .woocommerce.post-type-archive-product {
                background-image:none !important;
             }
           .woocommerce.single-product {
               background-image:none !important;
            }
     </style>
   <?php
   });
}
The code checks if the element is a product category and changes the color of the background. For more information, check out this site.
These are just a few examples but there’s a lot more you can do. Feel free to take this snippet as a base and add your own custom code to customize the category page in your store.
Bonus: Add Quick View to Category Pages
Another interesting option to customize your WooCommerce category page is to add a quick view feature as well. A quick view will allow your customers to view the product details on the respective category page without having to open the actual product page. This will provide shoppers with a better user experience while they are browsing your online store.
To add a quick view feature to the category page, we will use the WooCommerce Direct Checkout plugin. It is one of the best checkout plugins for WooCommerce that comes with plenty of features to help you boost your conversion rates and sales.
Even though this is a freemium plugin, to a add quick view to the category pages you need to install both the free version and one of the premium plans. So first, head to this page to install and activate WooCommerce Direct Checkout.
After you have installed and activated the plugin, head to WooCommerce > Direct Checkout > Archives in your WordPress dashboard. Activate the Add quick view button option by selecting Yes from the dropdown and then save the changes.
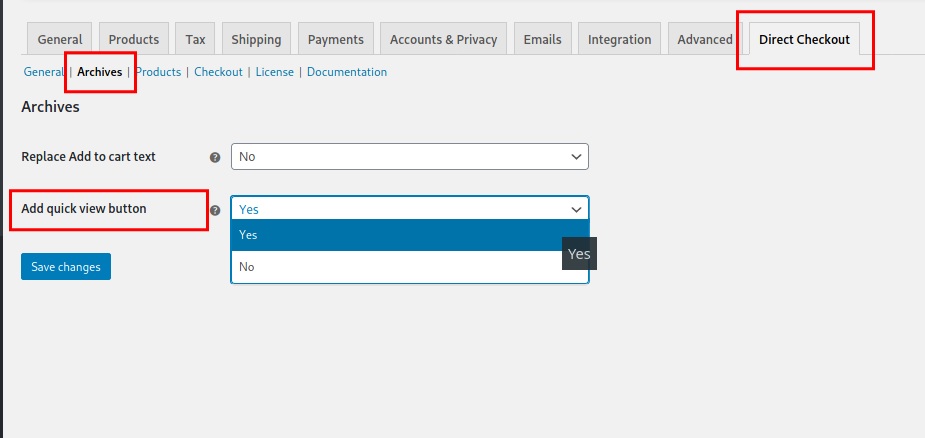
If you check your site from the front end, you will see that there’s a new button that appears right next to the “Purchase Now/Add to Cart” button. For example, for those who use the Storefront theme, the button looks like this.
![]()
When you click on the quick view button, a pop-up will open with all the most important information about the product such as title, price, description, and so on. This way, customers can directly add products to their cart without having to open the product page.

You can further customize the quick view button and pop-up. For more information on how to do that, check out our guide on how to add a quick view in WooCommerce.
Recommendations to Revamp your Category Page
As mentioned before, the overall design and interface of your category pages are very important to grow your online store. It is a very useful page where you can compare different products in the same category before buying them.
A well-designed category page can help you keep your customers longer in your online store. The better experience they have in your store, the more likely they are to buy and become loyal customers.
To make sure that you make the most of your category pages and stand out from your competitors, these are some recommendations to take them to the next level.
1. Add Large Product Images
When it comes to online shopping, an image is worth a thousand words. Shoppers want to see big and clear images of the products they’re interested in before having to go to the product page.
However, this doesn’t mean that you should use extremely large product images for the category page. Very large images tend to be heavier and make your site slow, so find a good balance between big images and site speed.
For example, you can use a 3-column category page with an image size of 300-400 pixels. This should be adequate to show the required product details on an average-sized monitor or mobile device.
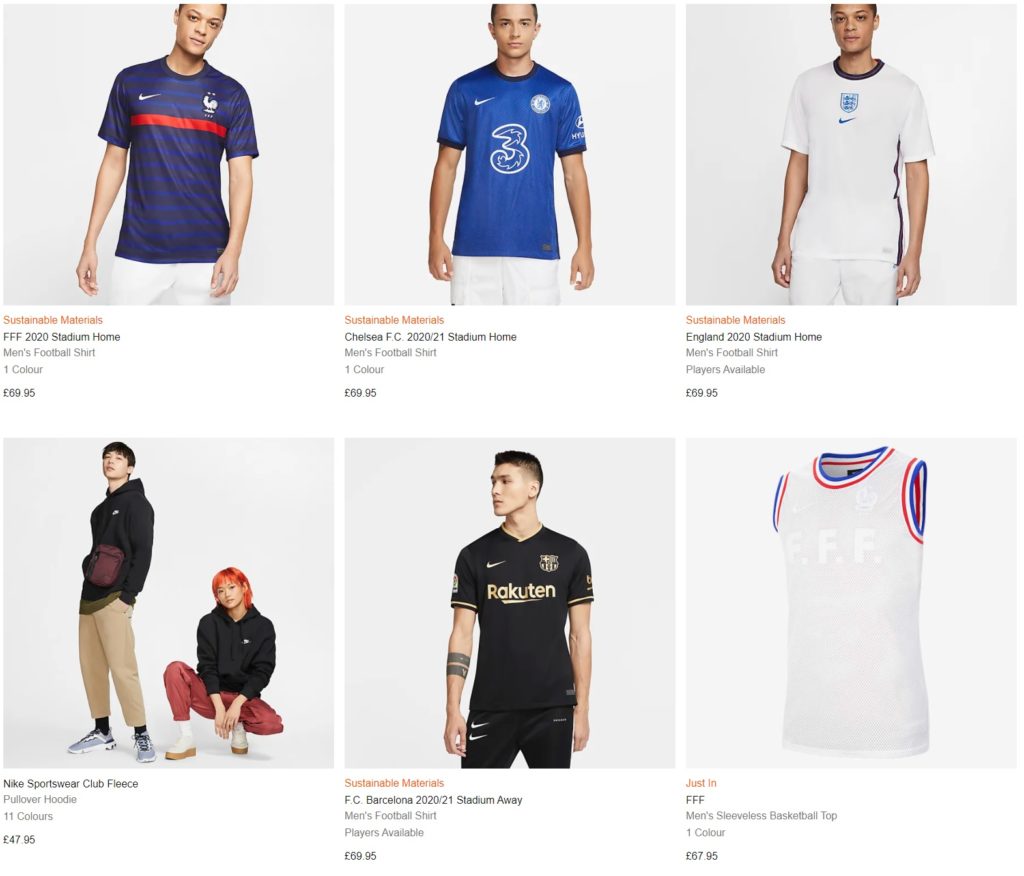
You can see a good example on Nike’s category pages, which is one of the most famous sports clothing brands. Nike uses clear and big pictures that are adequate for a product thumbnail image.
Also, keep in mind that online shopping is widely carried out on mobile devices nowadays. Make sure you test your category pages on both desktop and mobile, so the size and design are appropriate for every screen size.
2. Use Attractive Header Images
We all know that first impressions matter and even more so when it comes to online shopping. When a customer opens a category page, the first thing they notice is the header of the page. That’s why you should ensure that you use attractive headers for each category.
One of the best ways to create an attractive header is by adding a header image. Keep in mind the overall design of your site and match the header image with the overall color scheme of your online store.
For example, you can find header images in many fashion-oriented online stores such as MAC Cosmetics.
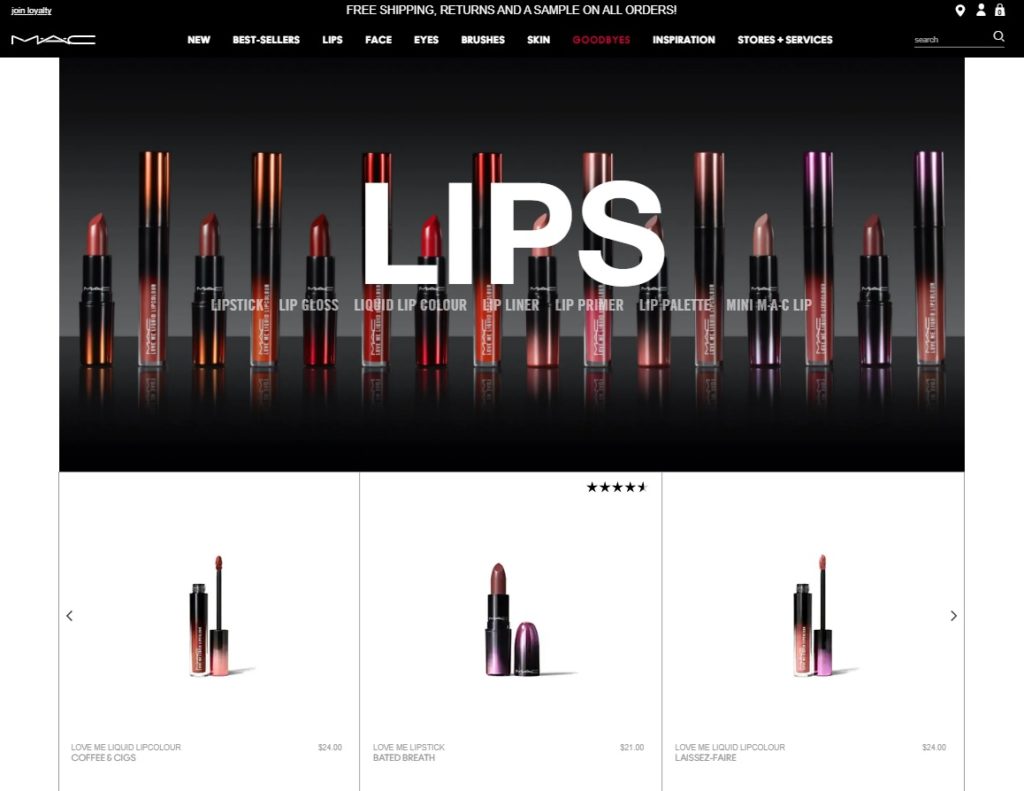
As you can see, MAC uses a very creative way to display the header image. The category header image consists of its image and also matches the dark color scheme with the header menus.
3. Always Keep the Breadcrumbs Visible
Breadcrumbs are one of the most useful elements to make sure that your website visitors are in the right place. Breadcrumbs also help users navigate your site which helps them find what they’re looking for faster and improves their shopping experience.
While browsing products, sometimes customers click on different things and may get lost in your store. By having the breadcrumbs always visible, users can immediately see where they are and go back to the desired category easily.
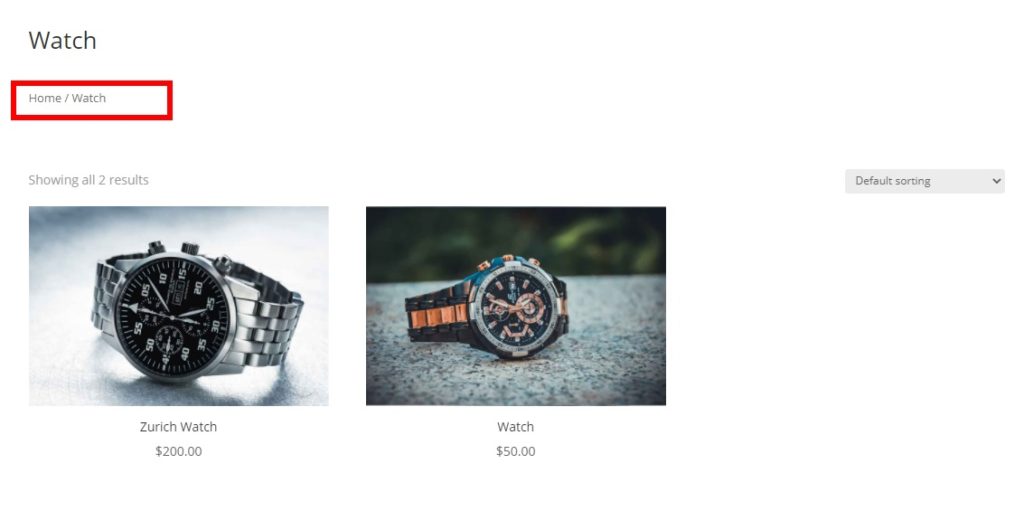
Some sites prefer to show the categories on the sidebar, but most online stores use the navigation path because it’s easier for customers to go back to where they were before.
Displaying breadcrumbs won’t be an issue if you’ve followed the above tutorial with Divi. If you use a different theme, check out this guide to learn how to add and display breadcrumbs on every page.
4. Check whether the Products are in the Correct Categories
Even though this seems obvious, mistakes can happen when adding products manually. So this point is more of a reminder than a recommendation.
Do routine checks to make sure that all the products are assigned to the correct categories and aren’t mixed up. You don’t need to check this every day but it’s important to do it once in a while. You can also check for spelling errors on products, categories, and descriptions.
Any errors on the products or their categories might affect the visitors’ impression of your website. What would you think if you were browsing an online shop and found some jeans in the laptop category? Doing checks once in a while doesn’t take much time and will help you keep everything organized.
If you want to improve your eCommerce shop, even more, have a look at our WooCommerce tips to optimize your online store.
Conclusion
All in all, your category page plays an important role in your store. To stand out from your competitors, you should customize your WooCommerce category page and make the most of it. Likewise, you can also edit your shop, product, my account, and checkout page to revamp your whole store while you’re at it.
To wrap up, we have discussed different methods to edit your category page:
- With Divi
- Using a dedicated plugin
- Programmatically
We hope that this guide was useful and you can easily edit your categories pages. Furthermore, we have also provided you with a bonus tip to add a product quick view on your category page.
Finally, we’ve also seen some recommendations to improve your category page and boost your conversion rates using better images and making breadcrumbs always visible.
If this tutorial was useful, we recommend you also have a look at the following tutorials:
- How to hide and remove Add to Cart button in WooCommerce
- Customize the WooCommerce Cart Page
- How to add fees to WooCommerce checkout