A textview gives you many options to display text in your Android app. This tutorial will give you all the information you need to create textviews in XML views or programmatically with Kotlin.
TextView Height and Width
Android provides several ways to specify the width and height of views. As a developer, you either specify the width/height in the XML resource files or you can set these values in your Kotlin files.
Basically, there are 4 options.
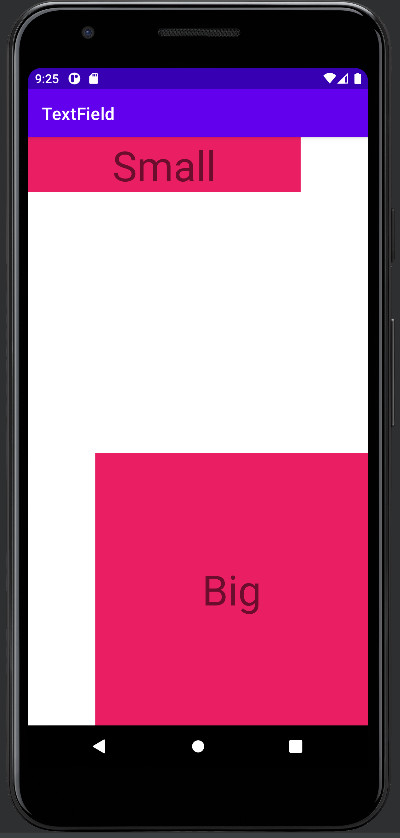
Explicit dimensions
You can set the exact dimensions of your width and height by indicating the number and unit. Android supports the following units:
px: Pixels – Corresponds to actual pixels on the screendp: Density-independent Pixels – An abstract unit that is based on the physical density of the screen.- sp: Scale-independent Pixels – This is like the dp unit, but it is also scaled by the user’s font size preference.
- pt: Points – 1/72 of an inch based on the physical size of the screen, assuming a 72dpi density screen.
- mm: Millimeters – Based on the physical size of the screen.
- in: Inches – Based on the physical size of the screen.
XML
<TextView
    android:id="@+id/small"
    android:layout_height="10mm"
    android:layout_width="50mm"
    android:text="Small"
    ...
/>

<TextView
    android:id="@+id/big"
    android:layout_height="50mm"
    android:layout_width="50mm"
    android:text="Big"
    ...
/>
Setting these values in XML is very easy. Note that in the image on the right, we have set some constraints to align the upper to top-left and the bottom view to the bottom-right of the parent. This is not shown in the XML layout above.
Code
Setting exact values for the width and the height of a view in Kotlin is not as easy as in XML. The reason is that you must control the layout params class. In there the width and height is given in pixels. So you must translate all units first to correct pixel values.
In our example, we have created an extension function, which calculates the conversion of millimeters to pixels.
class MainActivity : AppCompatActivity() {

    override fun onCreate(savedInstanceState: Bundle?) {
        super.onCreate(savedInstanceState)
        setContentView(R.layout.activity_main)

        val small = findViewById<TextView>(R.id.small)
        val big = findViewById<TextView>(R.id.big)

        val displayMetrics = resources.displayMetrics

        small.layoutParams.width = displayMetrics.mmToPixel(50)
        small.layoutParams.height = displayMetrics.mmToPixel(10)

        big.layoutParams.width = displayMetrics.mmToPixel(50)
        big.layoutParams.height = displayMetrics.mmToPixel(50)
    }
}

fun DisplayMetrics.mmToPixel(value : Int) : Int {
    return (this.xdpi * (1.0f/25.4f) * value).toInt()
}
Match Parent
The second option is to match the dimension of the parent of the view. This option is great if your view needs to be responsive to auto-scaling. It will automatically adapt to any changes of the parent.
You can set the width and height of the textview by indicating match_parent in the XML file or by indicating it programmatically in the constructor of the LayoutParam Class.
XML
<TextView
    android:id="@+id/match"
    android:layout_height="10mm"
    android:layout_width="match_parent"
    android:text="Match Parent Width"
    ...
/>

<TextView
    android:id="@+id/fixed"
    android:layout_height="50mm"
    android:layout_width="50mm"
    android:text="Fixed Size"
    ...
/>
Code
The MATCH_PARENT indicator is a constant integer (-1) that can be accessed by the static field in the ViewGroup.LayoutParams class.
val match = findViewById<TextView>(R.id.match)
val fixed = findViewById<TextView>(R.id.fixed)

match.layoutParams.width = ViewGroup.LayoutParams.MATCH_PARENT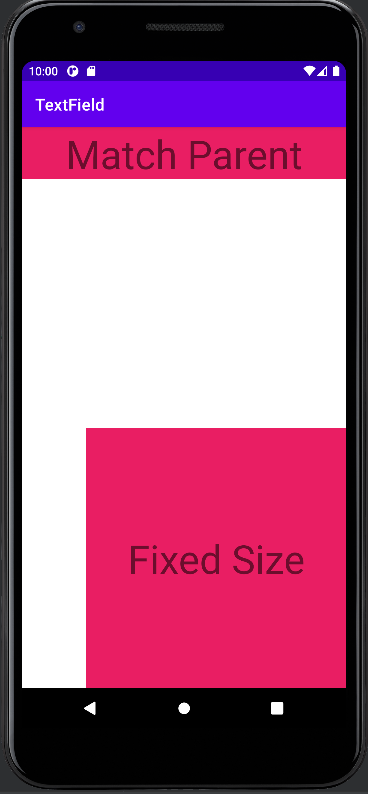
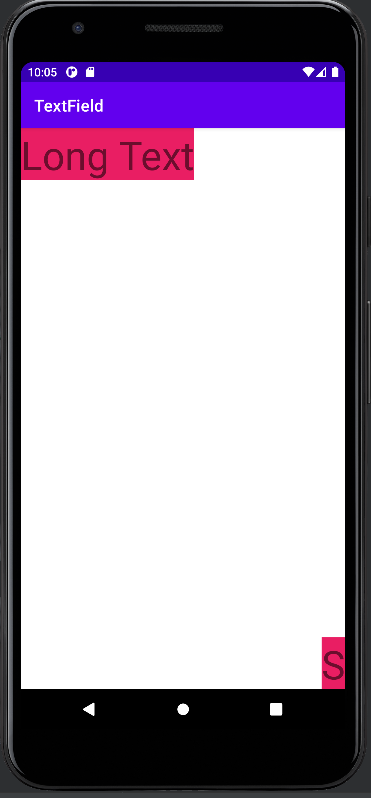
Wrap Content
Similar to match parent the dimensions can be set by wrapping all the content.
XML
<TextView
    android:id="@+id/longText"
    android:layout_height="10mm"
    android:layout_width="wrap_content"
    android:text="Long Text"
    ...
/>

<TextView
    android:id="@+id/shortText"
    android:layout_height="10mm"
    android:layout_width="wrap_content"
    android:text="S"
    ...
/>
By Constraints
Text Content
The main property of a text view is naturally the text content. You can bind the content within XML by setting the “android:text” field. You can either write directly your text or you can reference it within a lookup value from a different resource file. This would be the preferred way if the text must not be dynamically available. In Kotlin code you can directly set the text property as shown below.
XML
<TextView
    ...
    android:id="@+id/view"
    android:text="Hello World!"
/>
Code
val view = findViewById<TextView>(R.id.view)
view.text = "Changed Hello World"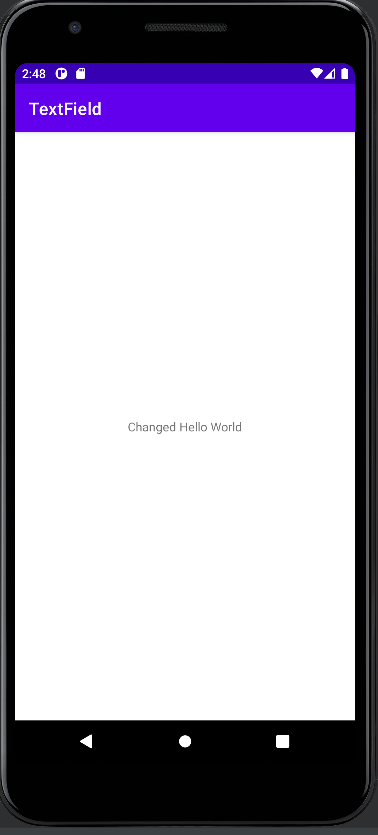
Text Size
The textsize determines how small or big the text will be displayed on your android phone. Ideally, this value should be defined in a resource file. You can set the textSize directly in the XML or programmatically.
XML
<TextView
	android:id="@+id/viewSmall"
	android:text="Small"
	android:textSize="14sp"
	...
/>

<TextView
	android:id="@+id/viewBig"
	android:text="Big"
	android:textSize="60sp"
	...
/>
Code
val viewSmall= findViewById<TextView>(R.id.viewSmall)
val viewBig= findViewById<TextView>(R.id.viewBig)

viewSmall.textSize = 14F
viewBig.textSize = 65F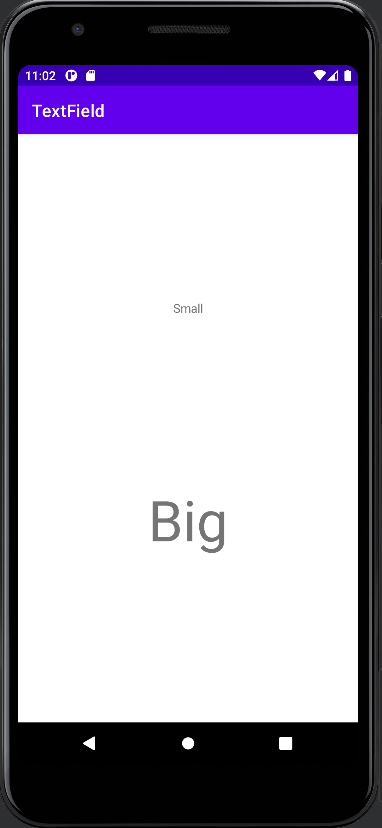
Font Family
XML
<TextView
	android:id="@+id/viewSans"
	android:fontFamily="sans-serif"
	...
/>

<TextView
	android:id="@+id/viewCasual"
	android:fontFamily="casual"
	...
/>
Code
Text Color
The Android framework provides several ways to set the text color, either statically in XML or programmatically in code.
SetTextColor from RGB / HEX colors
The first option is to use hardcoded RGB, RGBA or HEX colors. You can write them directly in your XML file. Or you can specify the text color programmatically in your Android app. When using the HEX, RGB colors in your Kotlin code, the build in Color class provides some nice feature to parse it.
XML
<TextView
	android:id="@+id/viewBlue"
	android:textColor="#2196F3"
	...
/>

<TextView
	android:id="@+id/viewRed"
	android:textColor="#E91E63"
	...
/>
Code: From HEX Color Code
val viewBlue = findViewById<TextView>(R.id.viewBlue)
val viewRed = findViewById<TextView>(R.id.viewRed)

viewBlue.setTextColor(Color.parseColor("#2196F3"));
viewRed.setTextColor(Color.parseColor("#E91E63"));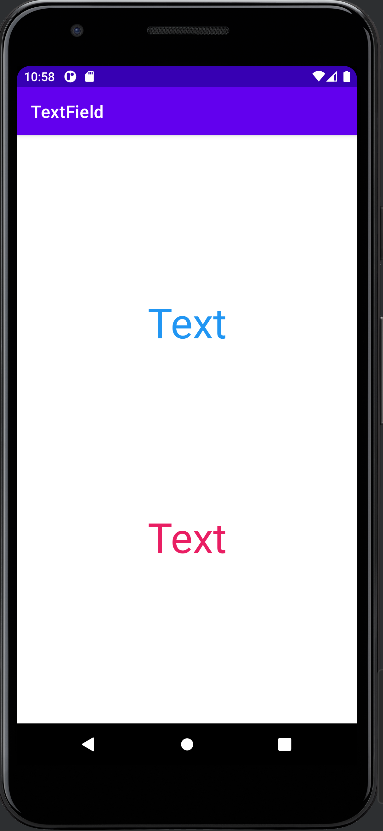
Code: From RGB / RGBA colors
viewBlue.setTextColor(Color.rgb(0, 0, 255));
viewRed.setTextColor(Color.rgb(255, 0, 0));
SetTextColor from predefined values
The second option is to use predefined (named) colors. You can either use internally defined colors (such as Color.Blue) or you can use your own colors, which you can specify in specific resource bundles.
Code: From internal predefined colors
The color class has some build in colors.
viewBlue.setTextColor(Color.BLUE);
viewRed.setTextColor(Color.RED);
Code / XML: From predefined colors
The colors in this example are defined in a resource bundle and can be accessed by the ContextCompat class.
viewBlue.setTextColor(ContextCompat.getColor(this, R.color.blue));
viewRed.setTextColor(ContextCompat.getColor(this, R.color.red));
<resources>
...
<color name="red">#E91E63</color>
<color name="blue">#2196F3</color>
</resources>Text Style
With the textstyle you can control if your text is bold, italic or underlined. In XML it is quite straightforward. Programmatically it is not so easy to find, as you need to use the typeface interface.
XML
<TextView
	android:id="@+id/viewBold"
	android:textStyle="bold"
	...
/>

<TextView
	android:id="@+id/viewItalic"
	android:textStyle="italic"
	...
/>
Code
val viewBold = findViewById<TextView>(R.id.viewBold)
val viewItalic = findViewById<TextView>(R.id.viewItalic)

viewBold.setTypeface(null, Typeface.BOLD);
viewItalic.setTypeface(null, Typeface.ITALIC);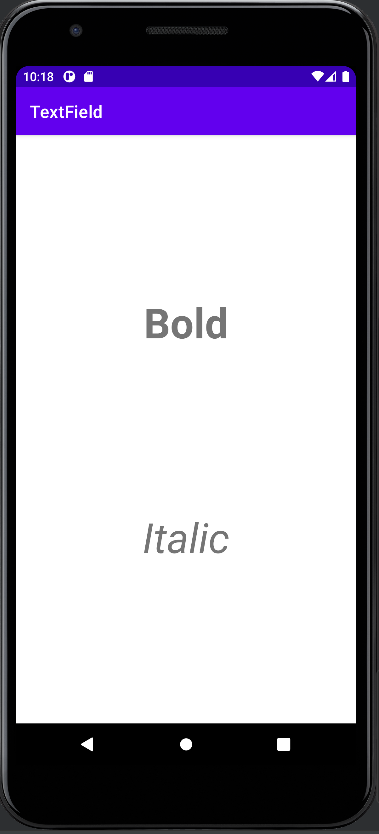
Text Alignment
Android provides several ways to align the text in you app. The text is aligned with respect to the textview width and height. This means you need to define width / height which is not “wrap_content”. The following option is the easiest way to do it. However, it is recommended to use the Gravity property as it gives you much more control about the text alignment.
XML
<TextView
	android:id="@+id/viewLeft"
	android:layout_width="0dp"
	android:textAlignment="textStart"
	app:layout_constraintEnd_toEndOf="parent"
	app:layout_constraintHorizontal_bias="0.5"
	app:layout_constraintStart_toStartOf="parent"
/>

<TextView
	android:id="@+id/viewRight"
	android:layout_width="0dp"
	android:textAlignment="textEnd"
	app:layout_constraintEnd_toEndOf="parent"
	app:layout_constraintHorizontal_bias="0.5"
	app:layout_constraintStart_toStartOf="parent"
/>
Code
val viewLeft= findViewById<TextView>(R.id.viewLeft)
val viewRight= findViewById<TextView>(R.id.viewRight)

viewLeft.textAlignment = TextView.TEXT_ALIGNMENT_TEXT_START;
viewRight.textAlignment = TextView.TEXT_ALIGNMENT_TEXT_END;
Background Color
XML
The background color can be easily given by using the “android:background” field. It accepts HEX color codes. You can also assign colors from other resources files.
<TextView
	android:id="@+id/viewRed"
	android:background="#E91E63"
	...
/>

<TextView
	android:id="@+id/viewBlue"
	android:background="#3F51B5"
	...
/>
Code
Similar to the text color there are several ways to set programmatically the background color of a textview in Kotlin. You can either use color codes such as RGB/RGBA or HEX. Or you can use predefined colors. With predefined colors you can either use Androids predefined colors or you can create your own color resources.

val viewRed = findViewById<TextView>(R.id.viewRed)
val viewBlue = findViewById<TextView>(R.id.viewBlue)

// RGB Colors
viewRed.setBackgroundColor(Color.rgb(255, 0, 0))
viewBlue.setBackgroundColor(Color.rgb(0, 0, 255))

// HEX Colors
viewRed.setBackgroundColor(Color.parseColor("#E91E63"))
viewBlue.setBackgroundColor(Color.parseColor("3F51B5"))

// Predefined internal Colors
viewRed.setBackgroundColor(Color.RED)
viewBlue.setBackgroundColor(Color.BLUE)

// Predefined XML Colors
viewRed.setTextColor(ContextCompat.getColor(this, R.color.red));
viewBlue.setTextColor(ContextCompat.getColor(this, R.color.blue));
Text alignment with Gravity
The most flexible way in aligning text within your app is to constrain the view and to give it; if necessary some width. Afterward, you can assign one or more gravity parameters to your view, which will affect the text position. You can set the gravity property in the Android XML file, or you can set the gravity parameter programmatically in your Kotlin code. Tip: Your view needs to have the correct width and height so that the gravity parameter works well (you should not use wrap_content).
Gravity Properties
The following options are available to align your text. They can be superimposed (as shown in the example) unless they are not contradictive to each other. For example, you can use Left and Right at the same time.
| Bottom | Top | clip_horizontal |
| Left | Right | clip_vertical |
| center | center_horizontal | center_vertical |
| fill | fill_horizontal | fill_vertical |
| start | end |
XML
<TextView
    android:id="@+id/viewTopLeft"
    android:layout_width="match_parent"
    android:layout_height="match_parent"
    android:gravity="top|left"
    android:text="TopLeft"
    android:textSize="48sp"
    app:layout_constraintBottom_toTopOf="parent"
    app:layout_constraintEnd_toEndOf="parent"
    app:layout_constraintStart_toStartOf="parent"
    app:layout_constraintTop_toTopOf="parent" />

<TextView
    android:id="@+id/viewBottomRight"
    android:layout_width="match_parent"
    android:layout_height="match_parent"
    android:gravity="bottom|right"
    android:text="BottomRight"
    android:textSize="48sp"
    app:layout_constraintBottom_toBottomOf="parent"
    app:layout_constraintEnd_toEndOf="parent"
    app:layout_constraintStart_toStartOf="parent"
    app:layout_constraintTop_toBottomOf="parent"
/>
Code
val topLeft = findViewById<TextView>(R.id.viewTopLeft)
val bottomRight = findViewById<TextView>(R.id.viewBottomRight)

topLeft.gravity = Gravity.TOP + Gravity.LEFT
bottomRight.gravity = Gravity.BOTTOM + Gravity.RIGHT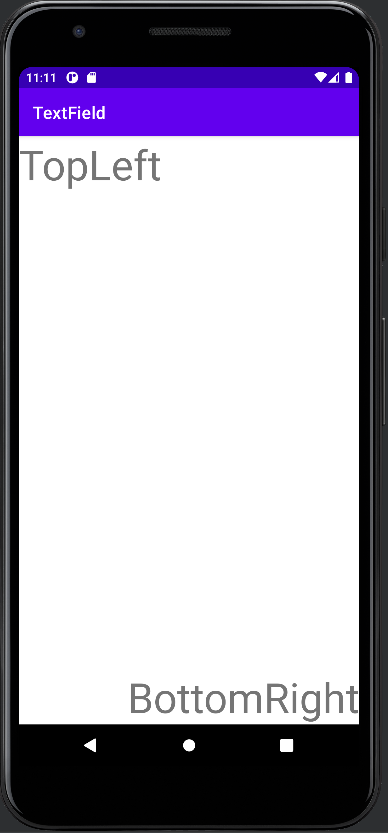
Within the XML you can specify several gravity properties by using the “|” symbol. In code, you can add (binary mask) the static field values of the public gravity class (LINK).
Text Visibility
XML
The visibility of elements can be specified in the XML resource file with the “visibility” tag and the corresponding values.
<TextView
    android:id="@+id/isVisible"
    android:text="isVisible"
    android:visibility="visible"
/>

<TextView
    android:id="@+id/notVisible"
    android:text="notVisible"
    android:visibility="invisible"
/>
Code
In your Android application, you can programmatically set the visibility of the Kotlin text view by specifying the Enum values, coming from “View”.
val isVisible = findViewById<TextView>(R.id.isVisible)
val notVisible = findViewById<TextView>(R.id.notVisible)

isVisible.visibility = View.VISIBLE;
notVisible.visibility = View.INVISIBLE;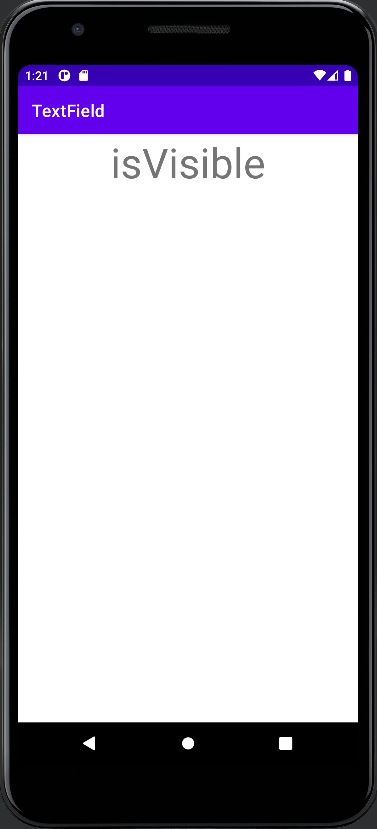
Text Visibility with Alpha Channel
Another option to control text visibility is to specify the alpha channel. With this option, you even have more control over the visual appearance than the previous option.
The alpha channel is a floating point number with a range of 0.0 – 1.0. If you indicate 0.0 the view will be completely invisible. If you indicate 1.0 the view will be 100 % visible. All numbers in between will make the view somewhat transparent. In our example, we have put the “Invisible” text view to 50 % transparency.
Once again you specify the alpha channel in the XML resource file of your Android app. This option is recommended for static views. The other way is to set the alpha value dynamically from your Kotlin project files.
XML
<TextView
    android:id="@+id/isVisible"
    android:text="isVisible"
    android:alpha="1.0"
/>

<TextView
    android:id="@+id/notVisible"
    android:alpha="0.5"
    android:text="notVisible"
/>
Code
val isVisible = findViewById<TextView>(R.id.isVisible)
val notVisible = findViewById<TextView>(R.id.notVisible)

isVisible.alpha = 1.0f;
notVisible.alpha = 0.5f;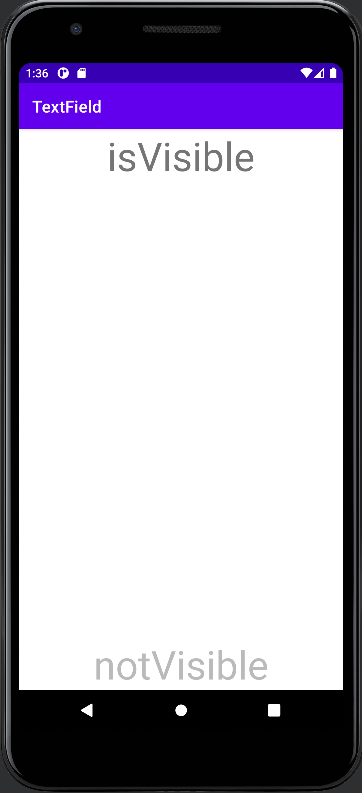
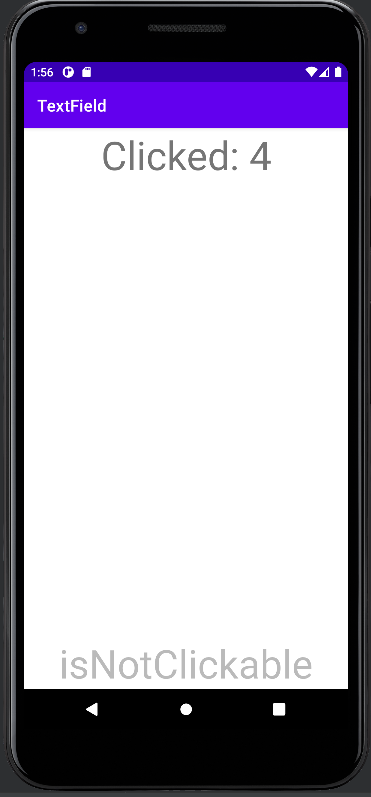
Clickable Textview
By default a textview is clickable. You can register any OnClickListeners or OnTouchListeners to handle click and touch events.
XML
<TextView
    android:id="@+id/isClickable"
    android:text="isClickable"
    android:clickable="true"
/>

<TextView
    android:id="@+id/isNotClickable"
    android:text="isNotClickable"
    android:clickable="false"
/>
Code
private var nClicks = 0

override fun onCreate(savedInstanceState: Bundle?) {
    super.onCreate(savedInstanceState)
    setContentView(R.layout.activity_main)

    val clickable = findViewById<TextView>(R.id.isVisible)
    val notClickable = findViewById<TextView>(R.id.notVisible)

    clickable.isClickable = true
    clickable.setOnClickListener {
        nClicks++;
        notClickable.text = "Clicked: $nClicks"
    }
}
Additional Information and References
Official reference guide from Google
- https://developer.android.com/reference/android/widget/TextView
Other useful material
- https://github.com/codepath/android_guides/wiki/Working-with-the-TextView
More Content
Android Button in Kotlin
Improve Article
Save Article
Improve Article
Save Article
Android TextView is simply a view that are used to display the text to the user and optionally allow us to modify or edit it. First of all, open Kotlin project in Android Studio.
Following steps are used to create TextView in Kotlin:
- Add a TextView in activity_main.xml file inside LinearLayout.
- Add attributes like text, textColor, textSize, textStyle in the activity_main.xml file.
- Open MainActivity.kt file and set OnClickListener for the textView to show the Toast message.
Different attributes of TextView widgets –
| Attributes | Description |
|---|---|
| android:text | Sets text of the Textview |
| android:id | Gives a unique ID to the Textview |
| android:cursorVisible | Use this attribute to make cursor visible or invisible. Default value is visible. |
| android:drawableBottom | Sets images or other graphic assets to below of the Textview. |
| android:drawableEnd | Sets images or other graphic assets to end of Textview. |
| android:drawableLeft | Sets images or other graphic assets to left of Textview. |
| android:drawablePadding | Sets padding to the drawable(images or other graphic assets) in the Textview. |
| android:autoLink | This attribute is used to automatically detect url or emails and show it as clickable link. |
| android:autoText | Automatically correct spelling errors in text of the Textview. |
| android:capitalize | It automatically capitalize whatever the user types in the Textview. |
| android:drawableRight | Sets drawables to right of text in the Textview. |
| android:drawableStart | Sets drawables to start of text in the Textview. |
| android:drawableTop | Sets drawables to top of text in the Textview. |
| android:ellipsize | Use this attribute when you want text to be ellipsized if it is longer than the Textview width. |
| android:ems | Sets width of the Textview in ems. |
| android:gravity | We can align text of the Textview vertically or horizontally or both. |
| android:height | Use to set height of the Textview. |
| android:hint | Use to show hint when there is no text. |
| android:inputType | Use to set input type of the Textview. It can be Number, Password, Phone etc. |
| android:lines | Use to set height of the Textview by number of lines. |
| android:maxHeight | Sets maximum height of the Textview. |
| android:minHeight | Sets minimum height of the Textview. |
| android:maxLength | Sets maximum character length of the Textview. |
| android:maxLines | Sets maximum lines Textview can have. |
| android:minLines | Sets minimum lines Textview can have. |
| android:maxWidth | Sets maximum width Textview can have. |
| android:minWidth | Sets minimum lines Textview can have. |
| android:textAllCaps | Show all texts of the Textview in capital letters. |
| android:textColor | Sets color of the text. |
| android:textSize | Sets font size of the text. |
| android:textStyle | Sets style of the text. For example, bold, italic, bolditalic. |
| android:typeface | Sets typeface or font of the text. For example, normal, sans, serif etc |
| android:width | Sets width of the TextView. |
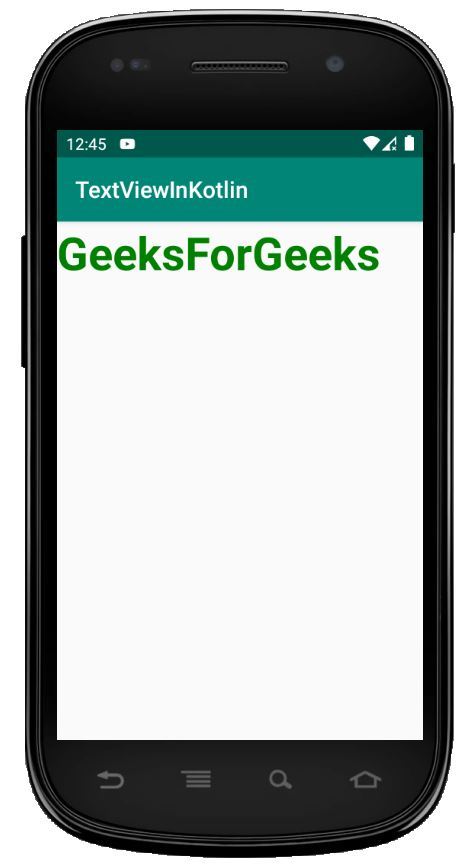
Modify the strings.xml file
We can add strings in the strings.xml file and use in the other files easily by calling them with their names.
<resources>
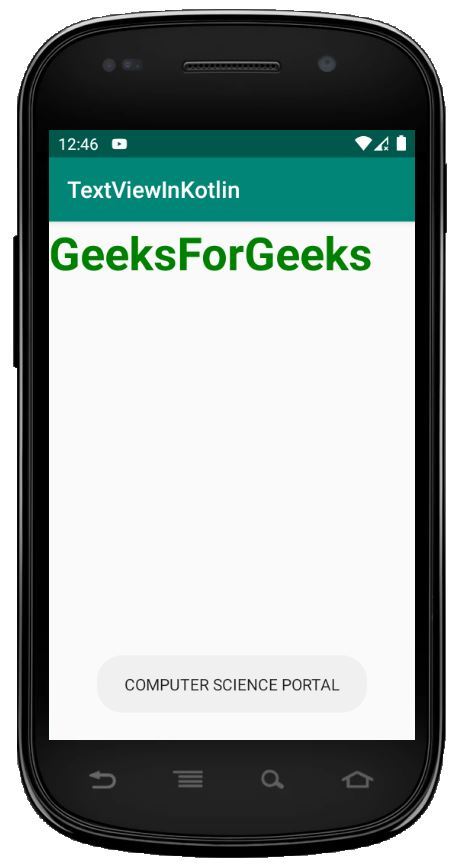
<string name="app_name">TextViewInKotlin</string>
<string name="text_view">GeeksForGeeks</string>
<string name="text_on_click">COMPUTER SCIENCE PORTAL</string>
</resources>
activity_main.xml file
Open activity_main.xml file and create a TextView using id textView.
<?xml version="1.0" encoding="utf-8"?>
<LinearLayout
android:orientation="vertical"
android:layout_width="match_parent"
android:layout_height="match_parent"
tools:context=".MainActivity">
<TextView
android:id="@+id/text_view_id"
android:layout_height="wrap_content"
android:layout_width="wrap_content"
android:text="@string/text_view"
android:textColor="#008000"
android:textSize="40dp"
android:textStyle="bold"/>
</LinearLayout>
Open MainActivity.kt file and get the reference of TextView defined in the layout file.
// finding the textView
 val textView = findViewById(R.id.text_view_id) as TextView
Setting the on click listener to the button
textView?.setOnClickListener{ Toast.makeText(this@MainActivity,
                "COMPUTER SCIENCE PORTAL", Toast.LENGTH_LONG).show() }
MainActivity.kt file
Open app/src/main/java/yourPackageName/MainActivity.kt to get the reference of TextView.
package com.geeksforgeeks.myfirstkotlinapp
import androidx.appcompat.app.AppCompatActivity
import android.os.Bundle
import android.widget.TextView
import android.widget.Toast
class MainActivity : AppCompatActivity() {
override fun onCreate(savedInstanceState: Bundle?) {
super.onCreate(savedInstanceState)
setContentView(R.layout.activity_main)
val textView = findViewById<TextView>(R.id.text_view_id) as TextView
textView?.setOnClickListener{ Toast.makeText(this@MainActivity,
R.string.text_on_click, Toast.LENGTH_LONG).show() }
}
}
AndroidManifest.xml file
We are also going to see the code inside main/AndroidManifest.xml file.
<?xml version="1.0" encoding="utf-8"?>
package="com.geeksforgeeks.myfirstkotlinapp">
<application
android:allowBackup="true"
android:icon="@mipmap/ic_launcher"
android:label="@string/app_name"
android:roundIcon="@mipmap/ic_launcher_round"
android:supportsRtl="true"
android:theme="@style/AppTheme">
<activity android:name=".MainActivity">
<intent-filter>
<action android:name="android.intent.action.MAIN" />
<category android:name="android.intent.category.LAUNCHER" />
</intent-filter>
</activity>
</application>
</manifest>
Run as emulator for output:
Improve Article
Save Article
Improve Article
Save Article
Android TextView is simply a view that are used to display the text to the user and optionally allow us to modify or edit it. First of all, open Kotlin project in Android Studio.
Following steps are used to create TextView in Kotlin:
- Add a TextView in activity_main.xml file inside LinearLayout.
- Add attributes like text, textColor, textSize, textStyle in the activity_main.xml file.
- Open MainActivity.kt file and set OnClickListener for the textView to show the Toast message.
Different attributes of TextView widgets –
| Attributes | Description |
|---|---|
| android:text | Sets text of the Textview |
| android:id | Gives a unique ID to the Textview |
| android:cursorVisible | Use this attribute to make cursor visible or invisible. Default value is visible. |
| android:drawableBottom | Sets images or other graphic assets to below of the Textview. |
| android:drawableEnd | Sets images or other graphic assets to end of Textview. |
| android:drawableLeft | Sets images or other graphic assets to left of Textview. |
| android:drawablePadding | Sets padding to the drawable(images or other graphic assets) in the Textview. |
| android:autoLink | This attribute is used to automatically detect url or emails and show it as clickable link. |
| android:autoText | Automatically correct spelling errors in text of the Textview. |
| android:capitalize | It automatically capitalize whatever the user types in the Textview. |
| android:drawableRight | Sets drawables to right of text in the Textview. |
| android:drawableStart | Sets drawables to start of text in the Textview. |
| android:drawableTop | Sets drawables to top of text in the Textview. |
| android:ellipsize | Use this attribute when you want text to be ellipsized if it is longer than the Textview width. |
| android:ems | Sets width of the Textview in ems. |
| android:gravity | We can align text of the Textview vertically or horizontally or both. |
| android:height | Use to set height of the Textview. |
| android:hint | Use to show hint when there is no text. |
| android:inputType | Use to set input type of the Textview. It can be Number, Password, Phone etc. |
| android:lines | Use to set height of the Textview by number of lines. |
| android:maxHeight | Sets maximum height of the Textview. |
| android:minHeight | Sets minimum height of the Textview. |
| android:maxLength | Sets maximum character length of the Textview. |
| android:maxLines | Sets maximum lines Textview can have. |
| android:minLines | Sets minimum lines Textview can have. |
| android:maxWidth | Sets maximum width Textview can have. |
| android:minWidth | Sets minimum lines Textview can have. |
| android:textAllCaps | Show all texts of the Textview in capital letters. |
| android:textColor | Sets color of the text. |
| android:textSize | Sets font size of the text. |
| android:textStyle | Sets style of the text. For example, bold, italic, bolditalic. |
| android:typeface | Sets typeface or font of the text. For example, normal, sans, serif etc |
| android:width | Sets width of the TextView. |
Modify the strings.xml file
We can add strings in the strings.xml file and use in the other files easily by calling them with their names.
<resources>
<string name="app_name">TextViewInKotlin</string>
<string name="text_view">GeeksForGeeks</string>
<string name="text_on_click">COMPUTER SCIENCE PORTAL</string>
</resources>
activity_main.xml file
Open activity_main.xml file and create a TextView using id textView.
<?xml version="1.0" encoding="utf-8"?>
<LinearLayout
android:orientation="vertical"
android:layout_width="match_parent"
android:layout_height="match_parent"
tools:context=".MainActivity">
<TextView
android:id="@+id/text_view_id"
android:layout_height="wrap_content"
android:layout_width="wrap_content"
android:text="@string/text_view"
android:textColor="#008000"
android:textSize="40dp"
android:textStyle="bold"/>
</LinearLayout>
Open MainActivity.kt file and get the reference of TextView defined in the layout file.
// finding the textView
 val textView = findViewById(R.id.text_view_id) as TextView
Setting the on click listener to the button
textView?.setOnClickListener{ Toast.makeText(this@MainActivity,
                "COMPUTER SCIENCE PORTAL", Toast.LENGTH_LONG).show() }
MainActivity.kt file
Open app/src/main/java/yourPackageName/MainActivity.kt to get the reference of TextView.
package com.geeksforgeeks.myfirstkotlinapp
import androidx.appcompat.app.AppCompatActivity
import android.os.Bundle
import android.widget.TextView
import android.widget.Toast
class MainActivity : AppCompatActivity() {
override fun onCreate(savedInstanceState: Bundle?) {
super.onCreate(savedInstanceState)
setContentView(R.layout.activity_main)
val textView = findViewById<TextView>(R.id.text_view_id) as TextView
textView?.setOnClickListener{ Toast.makeText(this@MainActivity,
R.string.text_on_click, Toast.LENGTH_LONG).show() }
}
}
AndroidManifest.xml file
We are also going to see the code inside main/AndroidManifest.xml file.
<?xml version="1.0" encoding="utf-8"?>
package="com.geeksforgeeks.myfirstkotlinapp">
<application
android:allowBackup="true"
android:icon="@mipmap/ic_launcher"
android:label="@string/app_name"
android:roundIcon="@mipmap/ic_launcher_round"
android:supportsRtl="true"
android:theme="@style/AppTheme">
<activity android:name=".MainActivity">
<intent-filter>
<action android:name="android.intent.action.MAIN" />
<category android:name="android.intent.category.LAUNCHER" />
</intent-filter>
</activity>
</application>
</manifest>
Run as emulator for output:
Android TextView и EditText — это пользовательские интерфейсы, которые отображают текст для пользователя в Kotlin.
Ниже показан простой XML-код TextView в макете.
 <TextView
        android:id="@+id/text_view_id"
        android:layout_height="wrap_content"
        android:layout_width="wrap_content"
        android:text="hello" />
Мы можем получить и изменить содержимое текстового представления, определенного в макете XML в файле класса Котлин, как:
val textView = findViewById(R.id.text_view_id)
textView.setText("string").toString()
val textViewValue = textView.text
EditText — это пользовательский интерфейс, который используется для ввода и изменения текста. При использовании текста редактирования в макете XML мы должны указать его атрибут inputType, который настраивает клавиатуру в соответствии с упоминанием типа ввода.
Простой XML-код EditText в макете показан ниже.
 <EditText
    android:id="@+id/editText_id"
    android:layout_width="wrap_content"
    android:layout_height="wrap_content"
    android:inputType="textPersonName"
    android:text="" />
Мы можем получить и изменить содержимое текста редактирования, определенного в макете XML в файле Kotlin, как:
val editText = findViewById(R.id.editText_id)
val editTextValue = editText.text
Пример Kotlin Android TextView и ExitText
В этом примере мы вводим текстовое значение в ExitText и отображаем его значение в TextView при нажатии кнопки.
Мы также наблюдаем за изменениями, сделанными над EditText, используя метод addTextChangedListener() и интерфейс TextWatcher.
Activity_main.xml
В файл activity_main.xml добавьте следующий код.
<?xml version="1.0" encoding="utf-8"?>
<RelativeLayout xmlns:android="http://schemas.android.com/apk/res/android"
    xmlns:app="http://schemas.android.com/apk/res-auto"
    xmlns:tools="http://schemas.android.com/tools"
    android:layout_width="match_parent"
    android:layout_height="match_parent"
    tools:context="example.javatpoint.com.kotlintextviewedittext.MainActivity">


    <TextView
        android:id="@+id/textView1"
        android:layout_width="wrap_content"
        android:layout_height="wrap_content"
        android:layout_alignParentTop="true"
        android:layout_centerHorizontal="true"
        android:layout_marginTop="12dp"
        android:text="TextView and EditText"
        android:gravity="center"
        android:textAppearance="@style/Base.TextAppearance.AppCompat.Large"/>

    <TextView
        android:id="@+id/textView2"
        android:layout_width="wrap_content"
        android:layout_height="wrap_content"
        android:layout_below="@+id/textView1"
        android:layout_marginTop="90dp"
        android:layout_marginLeft="20dp"
        android:layout_marginStart="20dp"
        android:textSize="16sp"
        android:text="Provide Input" />

    <TextView
        android:id="@+id/textView3"
        android:layout_width="wrap_content"
        android:layout_height="wrap_content"
        android:layout_below="@+id/textView2"
        android:layout_marginTop="50dp"
        android:layout_marginLeft="20dp"
        android:layout_marginStart="20dp"
        android:textSize="16sp"
        android:text="Display Output" />

    <EditText
        android:id="@+id/editText"
        android:layout_width="wrap_content"
        android:layout_height="wrap_content"
        android:layout_alignBaseline="@+id/textView2"
        android:layout_alignBottom="@+id/textView2"
        android:layout_alignParentEnd="true"
        android:layout_alignParentRight="true"
        android:layout_marginEnd="21dp"
        android:layout_marginRight="21dp"
        android:ems="10"
        android:inputType="textPersonName"
        android:text="" />

    <TextView
        android:id="@+id/textView4"
        android:layout_width="wrap_content"
        android:layout_height="wrap_content"
        android:layout_alignLeft="@+id/editText"
        android:layout_alignStart="@+id/editText"
        android:layout_alignTop="@+id/textView3"
        android:textSize="16sp"
        android:text="TextView" />

    <Button
        android:id="@+id/button"
        android:layout_width="wrap_content"
        android:layout_height="wrap_content"
        android:layout_below="@+id/textView4"
        android:layout_centerHorizontal="true"
        android:layout_marginTop="112dp"
        android:text="Click Button" />

    <TextView
        android:id="@+id/textView5"
        android:layout_width="wrap_content"
        android:layout_height="wrap_content"
        android:layout_alignEnd="@+id/editText"
        android:layout_alignRight="@+id/editText"
        android:layout_centerVertical="true"
        android:text="reset output text" />
</RelativeLayout>
MainActivity.kt
Добавьте следующий код в класс MainActivity.kt. В этом классе мы получаем значение редактируемого текста и отображаем его в текстовом виде, нажав кнопку. При этом мы также наблюдаем за изменениями, сделанными над EditText, с помощью метода addTextChangedListener() и интерфейса TextWatcher. Чтобы узнать больше о TextWatcher, обратитесь к https://www.javatpoint.com/android-edittext-with-textwatcher.
package example.javatpoint.com.kotlintextviewedittext

import android.support.v7.app.AppCompatActivity
import android.os.Bundle
import android.text.Editable
import android.text.TextWatcher
import android.view.View
import android.widget.TextView
import android.widget.Toast
import kotlinx.android.synthetic.main.activity_main.*

class MainActivity : AppCompatActivity() {

    override fun onCreate(savedInstanceState: Bundle?) {
        super.onCreate(savedInstanceState)
        setContentView(R.layout.activity_main)

        button.setOnClickListener(){
            val inputValue: String = editText.text.toString()
            if(inputValue == null || inputValue.trim()==""){
                Toast.makeText(this,"please input data, edit text cannot be blank",Toast.LENGTH_LONG).show()
            }else{
                textView4.setText(inputValue).toString()
            }
        }
        textView5.setOnClickListener(){
            if(textView4.text.toString() == null || textView4.text.toString().trim()==""){
                Toast.makeText(this,"clicked on reset textView,n output textView already reset",Toast.LENGTH_LONG).show()
            }else{
                textView4.setText("").toString()
            }
        }
        editText.addTextChangedListener(object: TextWatcher{
            override fun beforeTextChanged(p0: CharSequence?, p1: Int, p2: Int, p3: Int) {
              //  TODO("not implemented") //To change body of created functions use File | Settings | File Templates.
                Toast.makeText(applicationContext,"executed before making any change over EditText",Toast.LENGTH_SHORT).show()
            }

            override fun onTextChanged(p0: CharSequence?, p1: Int, p2: Int, p3: Int) {
              //  TODO("not implemented") //To change body of created functions use File | Settings | File Templates.
                Toast.makeText(applicationContext,"executed while making any change over EditText",Toast.LENGTH_SHORT).show()
            }
            override fun afterTextChanged(p0: Editable?) {
              //  TODO("not implemented") //To change body of created functions use File | Settings | File Templates.
                Toast.makeText(applicationContext,"executed after change made over EditText",Toast.LENGTH_SHORT).show()
            }
        })
    }
}
Выход:


Android TextView is a user interface element that shows the text (label) to users in the application. You can change TextView dynamically (programmatically). View class is the parent class of the android.widget.TextView. TextView can Create by declaring it inside a layout XML file or by instantiating it programmatically.

Android TextView Attributes
Here we are explaining the some attribute of TextView.
android:id
This is the ID which uniquely identifies the control.
android:id="@+id/textView"
android:textAllCaps

Set all the text in ALL CAPS.
<TextView
        android:id="@+id/textView6"
        android:layout_width="wrap_content"
        android:layout_height="wrap_content"
        android:layout_marginTop="16dp"
        android:text="Tutorial.eyehunt.in"
        android:textAllCaps="true"
        app:layout_constraintEnd_toEndOf="parent"
        app:layout_constraintStart_toStartOf="parent"
        app:layout_constraintTop_toBottomOf="@+id/button"/>
android:textColor

Set the Text color of TextView widget android.
TextView
        android:id="@+id/textView3"
        android:layout_width="wrap_content"
        android:layout_height="wrap_content"
        android:layout_marginTop="16dp"
        android:text="Color TextView"
        app:layout_constraintEnd_toEndOf="parent"
        app:layout_constraintStart_toStartOf="parent"
        app:layout_constraintTop_toBottomOf="@+id/textView"
        android:textColor="@color/colorAccent"/>
android:textSize

Set the Size of the text, use SP unit to set size.
<TextView
        android:id="@+id/textView"
        android:layout_width="wrap_content"
        android:layout_height="wrap_content"
        android:layout_marginTop="16dp"
        android:text="TextView 16dp"
        app:layout_constraintEnd_toEndOf="parent"
        app:layout_constraintStart_toStartOf="parent"
        app:layout_constraintTop_toBottomOf="@+id/textView2"
        android:textSize="16sp"/>
android:textStyle

Style (normal, bold, italic, bold|italic) for the TextView.
<TextView
        android:id="@+id/textView4"
        android:layout_width="wrap_content"
        android:layout_height="wrap_content"
        android:layout_marginTop="16dp"
        android:text="Style - Bold and Italic - TextView"
        android:textStyle="bold|italic"
        app:layout_constraintEnd_toEndOf="parent"
        app:layout_constraintStart_toStartOf="parent"
        app:layout_constraintTop_toBottomOf="@+id/textView3"/>
For more, you can check Android’s official documentation of a complete list of attributes and related methods, Uses to change these attributes are run time or make as per app requirements.
Let’s Build a Complete Example of Android TextView:
In this example will learn to change TextView dynamically, change color, setText, change Text Size, Change the style and Capitalize TextView.
Step 1. Create new project “Build Your First Android App in Kotlin“
Step 2. Add the following code in “activity_main.xml” resource file
<?xml version="1.0" encoding="utf-8"?>
<android.support.constraint.ConstraintLayout xmlns:android="http://schemas.android.com/apk/res/android"
    xmlns:app="http://schemas.android.com/apk/res-auto"
    xmlns:tools="http://schemas.android.com/tools"
    android:layout_width="match_parent"
    android:layout_height="match_parent"
    tools:context=".MainActivity">

    <TextView
        android:id="@+id/textView2"
        android:layout_width="wrap_content"
        android:layout_height="wrap_content"
        android:layout_marginTop="16dp"
        android:text="TextView , i will not change!"
        app:layout_constraintHorizontal_bias="0.502"
        app:layout_constraintLeft_toLeftOf="parent"
        app:layout_constraintRight_toRightOf="parent"
        app:layout_constraintTop_toTopOf="parent" />

    <TextView
        android:id="@+id/textView"
        android:layout_width="wrap_content"
        android:layout_height="wrap_content"
        android:layout_marginTop="16dp"
        android:text="TextView 16dp"
        android:textSize="16sp"
        app:layout_constraintEnd_toEndOf="parent"
        app:layout_constraintStart_toStartOf="parent"
        app:layout_constraintTop_toBottomOf="@+id/textView2" />

    <TextView
        android:id="@+id/textView3"
        android:layout_width="wrap_content"
        android:layout_height="wrap_content"
        android:layout_marginTop="16dp"
        android:text="Color TextView"
        android:textColor="@color/colorAccent"
        app:layout_constraintEnd_toEndOf="parent"
        app:layout_constraintStart_toStartOf="parent"
        app:layout_constraintTop_toBottomOf="@+id/textView" />

    <TextView
        android:id="@+id/textView4"
        android:layout_width="wrap_content"
        android:layout_height="wrap_content"
        android:layout_marginTop="16dp"
        android:text="Style - Bold and Italic - TextView"
        android:textStyle="bold|italic"
        app:layout_constraintEnd_toEndOf="parent"
        app:layout_constraintStart_toStartOf="parent"
        app:layout_constraintTop_toBottomOf="@+id/textView3" />

    <TextView
        android:id="@+id/textView5"
        android:layout_width="wrap_content"
        android:layout_height="wrap_content"
        android:layout_marginTop="16dp"
        android:text="Dynamic TextView"
        app:layout_constraintEnd_toEndOf="parent"
        app:layout_constraintStart_toStartOf="parent"
        app:layout_constraintTop_toBottomOf="@+id/textView4" />

    <Button
        android:id="@+id/button"
        android:layout_width="wrap_content"
        android:layout_height="wrap_content"
        android:layout_marginTop="16dp"
        android:onClick="changeText"
        android:text="Button"
        app:layout_constraintEnd_toEndOf="parent"
        app:layout_constraintStart_toStartOf="parent"
        app:layout_constraintTop_toBottomOf="@+id/textView5" />

    <TextView
        android:id="@+id/textView6"
        android:layout_width="wrap_content"
        android:layout_height="wrap_content"
        android:layout_marginTop="16dp"
        android:text="Tutorial.eyehunt.in"
        android:textAllCaps="true"
        app:layout_constraintEnd_toEndOf="parent"
        app:layout_constraintStart_toStartOf="parent"
        app:layout_constraintTop_toBottomOf="@+id/button" />

</android.support.constraint.ConstraintLayout>
Step 3. Open the “MainActivity.kt” and add following code
Here Button have even on click event , where TextView is changing text dynamically.
package `in`.eyehunt.androidtextview

import android.support.v7.app.AppCompatActivity
import android.os.Bundle
import android.view.View
import kotlinx.android.synthetic.main.activity_main.*

class MainActivity : AppCompatActivity() {

    override fun onCreate(savedInstanceState: Bundle?) {
        super.onCreate(savedInstanceState)
        setContentView(R.layout.activity_main)
    }
    // Dynamically text change - on click button
    fun changeText(view : View){
        textView5.setText("Hello I am dynamic text")
    }
}
Step 4. Now Run the application, in emulator or On you android device
Output screenshot Android TexView example :

Download source code Android TextView in kotlin
https://github.com/EyeHunts/AndroidTextView
Note: This example (Project) is developed in Android Studio 3.1.3. Tested on Android 9 ( Android-P), compile SDK version API 26: Android 8.0 (Oreo)
MinSdkVersion=”15″
TargetSdkVersion=”27″
Coding in Kotlin

Degree in Computer Science and Engineer: App Developer and has multiple Programming languages experience. Enthusiasm for technology & like learning technical.
Overview
Every Android device comes with a collection of standard fonts: Droid Sans, Droid Sans Mono and Droid Serif. They were designed to be optimal for mobile displays, so these are the three fonts you will be working with most of the time and they can be styled using a handful of XML attributes. You might, however, see the need to use custom fonts for special purposes.
This guide will take a look at the TextView and discuss common properties associated with this view as well as how to setup custom typefaces.
Text Attributes
Typeface
As stated in the overview, there are three different default typefaces which are known as the Droid family of fonts: sans, monospace and serif. You can specify any one of them as the value for the android:typeface attribute in the XML:
<TextView
    android:layout_width="match_parent"
    android:layout_height="wrap_content"
    android:text="This is a 'sans' demo!"
    android:typeface="sans"
/>
Here’s how they look:

In addition to the above, there is another attribute value named «normal» which defaults to the sans typeface.
Text Style
The android:textStyle attribute can be used to put emphasis on the text. The possible values are: normal, bold, italic. You can also specify bold|italic.
<TextView
    android:layout_width="match_parent"
    android:layout_height="wrap_content"
    android:text="This is bold!"
    android:textStyle="bold"
/>
A sampling of styles can be seen below:
Text Size
android:textSize specifies the font size. Its value must consist of two parts: a floating-point number followed by a unit. It is generally a good practice to use the sp unit so the size can scale depending on user settings.
<TextView
    android:layout_width="match_parent"
    android:layout_height="wrap_content"
    android:text="14sp is the 'normal' size."
    android:textSize="14sp"
/>
A sampling of styles can be seen below:
Too many type sizes and styles at once can wreck any layout. The basic set of styles are based on a typographic scale of 12, 14, 16, 20, and 34. Refer to this typography styles guide for more details.
Text Truncation
There are a few ways to truncate text within a TextView. First, to restrict the total number of lines of text we can use android:maxLines and android:minLines:
<TextView
    android:layout_width="match_parent"
    android:layout_height="wrap_content"
    android:minLines="1"
    android:maxLines="2"
/>
In addition, we can use android:ellipsize to begin truncating text
<TextView
    ...
    android:ellipsize="end"
    android:singleLine="true"
/>
Following values are available for ellipsize: start for ...bccc, end for aaab..., middle for aa...cc, and marquee for aaabbbccc sliding from left to right. Example:
There is a known issue with ellipsize and multi-line text, see this MultiplelineEllipsizeTextView library for an alternative.
Text Color
The android:textColor and android:textColorLink attribute values are hexadecimal RGB values with an optional alpha channel, similar to what’s found in CSS:
<TextView
    android:layout_width="match_parent"
    android:layout_height="wrap_content"
    android:text="A light blue color."
    android:textColor="#00ccff"
    android:textColorLink="#8DE67F"
/>
The android:textColorLink attribute controls the highlighting for hyperlinks embedded within the TextView. This results in:

We can edit the color at runtime with:
// based on hex value
textView.setTextColor(Color.parseColor("#000000"));
// based on a color resource file
textView.setTextColor(ContextCompat.getColor(context, R.color.your_color));
// based on preset colors
textView.setTextColor(Color.RED);
// based on hex value
textView.setTextColor(Color.parseColor("#000000"))
// based on a color resource file
textView.setTextColor(ContextCompat.getColor(this, R.color.your_color))
// based on preset colors
textView.setTextColor(Color.RED)
Text Shadow
You can use three different attributes to customize the appearance of your text shadow:
-
android:shadowColor— Shadow color in the same format as textColor. -
android:shadowRadius— Radius of the shadow specified as a floating point number. -
android:shadowDx— The shadow’s horizontal offset specified as a floating point number. -
android:shadowDy— The shadow’s vertical offset specified as a floating point number.
The floating point numbers don’t have a specific unit — they are merely arbitrary factors.
<TextView
    android:layout_width="match_parent"
    android:layout_height="wrap_content"
    android:text="A light blue shadow."
    android:shadowColor="#00ccff"
    android:shadowRadius="2"
    android:shadowDx="1"
    android:shadowDy="1"
/>
This results in:
Various Text Properties
There are many other text properties including android:lineSpacingMultiplier, android:letterSpacing, android:textAllCaps, android:includeFontPadding and many others:
<TextView
    android:layout_width="wrap_content"
    android:layout_height="wrap_content"
    android:lineSpacingMultiplier="1.1"
    android:textAllCaps="true"
/>
android:includeFontPadding removes the extra padding around large fonts. android:lineSpacingMultiplier governs the spacing between lines with a default of «1».
Inserting HTML Formatting
TextView natively supports HTML by translating HTML tags to spannable sections within the view. To apply basic HTML formatting to text, add text to the TextView with:
TextView view = findViewById(R.id.sampleText);

String formattedText = "This <i>is</i> a <b>test</b> of <a href='http://foo.com'>html</a>";
// or getString(R.string.htmlFormattedText);

view.setText(HtmlCompat.fromHtml(formattedText, HtmlCompat.FROM_HTML_MODE_LEGACY));
val view: TextView = findViewById(R.id.sampleText)

val formattedText = "This <i>is</i> a <b>test</b> of <a href='http://foo.com'>html</a>"
// or getString(R.string.htmlFormattedText)

view.text = HtmlCompat.fromHtml(formattedText, HtmlCompat.FROM_HTML_MODE_LEGACY)
You can read more about the html modes here.
This results in:
Note that all tags are not supported. See this article for a more detailed look at supported tags and usages.
Setting Font Colors
For setting font colors, we can use the <font> tag as shown:
HtmlCompat.fromHtml("Nice! <font color='#c5c5c5'>This text has a color</font>. This doesn't", HtmlCompat.FROM_HTML_MODE_LEGACY);
HtmlCompat.fromHtml("Nice! <font color='#c5c5c5'>This text has a color</font>. This doesn't", HtmlCompat.FROM_HTML_MODE_LEGACY)
And you should be all set.
Storing Long HTML Strings
If you want to store your HTML text within res/values/strings.xml, you have to use CDATA to escape such as:
<?xml version="1.0" encoding="utf-8"?>
<string name="htmlFormattedText">
    <![CDATA[
        Please <a href="http://highlight.com">let us know</a> if you have <b>feedback on this</b> or if
        you would like to log in with <i>another identity service</i>. Thanks!
    ]]>
</string>
and access the content with getString(R.string.htmlFormattedText) to load this within the TextView.
For more advanced cases, you can also check out the html-textview library which adds support for almost any HTML tag within this third-party TextView.
Autolinking URLs
TextView has native support for automatically locating URLs within the their text content and making them clickable links which can be opened in the browser. To do this, enable the android:autolink property:
<TextView
     android:id="@+id/custom_font"
     android:layout_width="match_parent"
     android:layout_height="wrap_content"
     android:autoLink="all"
     android:linksClickable="true"
/>
This results in:
Issues with ListView
One known issue when using android:autoLink or the Linkify class is that it may break the ability to respond to events on the ListView through setOnItemClickListener. Check out this solution which extends TextView in order to modify the onTouchEvent to correctly propagate the click. You basically need to create a LinkifiedTextView and use this special View in place of any of your TextView’s that need auto-link detection.
In addition, review these alternate solutions which may be effective as well:
- This stackoverflow post or this other post
- This android issue for additional context.
Displaying Images within a TextView
A TextView is actually surprisingly powerful and actually supports having images displayed as a part of it’s content area. Any images stored in the «drawable» folders can actually be embedded within a TextView at several key locations in relation to the text using the android:drawableRight and the android:drawablePadding property. For example:
<TextView xmlns:android="http://schemas.android.com/apk/res/android"
    android:layout_width="wrap_content"
    android:layout_height="wrap_content"
    android:gravity="center"
    android:text="@string/my_contacts"
    android:drawableRight="@drawable/ic_action_add_group"
    android:drawablePadding="8dp"
/>
Which results in:
In Android, many views inherit from TextView such as Buttons, EditTexts, RadioButtons which means that all of these views support the same functionality. For example, we can also do:
<EditText
    android:layout_width="match_parent"
    android:layout_height="wrap_content"
    android:hint="@string/user_name"
    android:drawableLeft="@drawable/ic_action_person"
    android:drawablePadding="8dp"
/>
Which results in:
The relevant attributes here are drawableLeft, drawableRight, drawableTop and drawableBottom along with drawablePadding. Check out this TextView article for a more detailed look at how to use this functionality.
Note that if you want to be able to better control the size or scale of the drawables, check out this handy TextView extension or this bitmap drawable approach. You can also make calls to setCompoundDrawablesWithIntrinsicBounds on the TextView.
Using Fonts
The easiest way to add font support is to upgrade to Android Studio 3.0, which provides the ability to use other fonts provided by Google. You can visit https://fonts.google.com/ to see the ones that are free to use. See the FAQ section for more information.
Android Studio v3.0 provides built-in support for these fonts and will automatically handles generating the XML and necessary metadata. Next to the Attributes section of a TextView, look for the fontFamily and click on More Fonts:
You will then see these choices:
Once you choose a font, you will notice that a font directory will be created and a similar XML file will be generated. Notice that Android Studio automatically takes care of adding the necessary font provider certificates required to request from Google:
<?xml version="1.0" encoding="utf-8"?> <font-family xmlns:app="http://schemas.android.com/apk/res-auto" app:fontProviderAuthority="com.google.android.gms.fonts" app:fontProviderPackage="com.google.android.gms" app:fontProviderQuery="name=Advent Pro&weight=100" app:fontProviderCerts="@array/com_google_android_gms_fonts_certs"> </font-family>
Adding custom fonts
We can actually use any custom font that we’d like within our applications. Check out fontsquirrel for an easy source of free fonts. For example, we can download Chantelli Antiqua as an example.
Fonts are stored in the «assets» folder. In Android Studio, File > New > folder > Assets Folder. Now download any font and place the TTF file in the assets/fonts directory:
We’re going to use a basic layout file with a TextView, marked with an id of «custom_font» so we can access it in our code.
<?xml version="1.0" encoding="utf-8"?>
<LinearLayout xmlns:android="http://schemas.android.com/apk/res/android"
              android:orientation="vertical"
              android:layout_width="match_parent"
              android:layout_height="match_parent">

    <TextView
            android:id="@+id/custom_font"
            android:layout_width="match_parent"
            android:layout_height="wrap_content"
            android:text="This is the Chantelli Antiqua font."
    />
</LinearLayout>
To set the custom font manually, open your activity file and insert this into the onCreate() method:
// Get access to our TextView
TextView txt = findViewById(R.id.custom_font);
// Create the TypeFace from the TTF asset
Typeface font = Typeface.createFromAsset(getAssets(), "fonts/Chantelli_Antiqua.ttf");
// Assign the typeface to the view
txt.setTypeface(font);
// Get access to our TextView
val txt: TextView = findViewById(R.id.custom_font)
// Create the TypeFace from the TTF asset
val font = Typeface.createFromAsset(assets, "fonts/Chantelli_Antiqua.ttf")
// Assign the typeface to the view
txt.typeface = font
Alternatively, you can use the third-party calligraphy library:
<TextView fontPath="fonts/Chantelli_Antiqua.ttf"/>
Either method will will result in:
You’ll also want to keep an eye on the total size of your custom fonts, as this can grow quite large if you’re using a lot of different typefaces.
Using Spans to Style Sections of Text
Spans come in really handy when we want to apply styles to portions of text within the same TextView. We can change the text color, change the typeface, add an underline, etc, and apply these to only certain portions of the text. The full list of spans shows all the available options.
As an example, let’s say we have a single TextView where we want the first word to show up in red and the second word to have a strikethrough:
We can accomplish this with spans using the code below:
String firstWord = "Hello";
String secondWord = "World!";

TextView tvHelloWorld = findViewById(R.id.tvHelloWorld);

// Create a span that will make the text red
ForegroundColorSpan redForegroundColorSpan = new ForegroundColorSpan(
        ContextCompat.getColor(this, android.R.color.holo_red_dark));

// Use a SpannableStringBuilder so that both the text and the spans are mutable
SpannableStringBuilder ssb = new SpannableStringBuilder(firstWord);

// Apply the color span
ssb.setSpan(
        redForegroundColorSpan,            // the span to add
        0,                                 // the start of the span (inclusive)
        ssb.length(),                      // the end of the span (exclusive)
        Spanned.SPAN_EXCLUSIVE_EXCLUSIVE); // behavior when text is later inserted into the SpannableStringBuilder
                                           // SPAN_EXCLUSIVE_EXCLUSIVE means to not extend the span when additional
                                           // text is added in later

// Add a blank space
ssb.append(" ");

// Create a span that will strikethrough the text
StrikethroughSpan strikethroughSpan = new StrikethroughSpan();

// Add the secondWord and apply the strikethrough span to only the second word
ssb.append(secondWord);
ssb.setSpan(
        strikethroughSpan,
        ssb.length() - secondWord.length(),
        ssb.length(),
        Spanned.SPAN_EXCLUSIVE_EXCLUSIVE);

// Set the TextView text and denote that it is Editable
// since it's a SpannableStringBuilder
tvHelloWorld.setText(ssb, TextView.BufferType.EDITABLE);
val firstWord  = "Hello"
val secondWord = "World!"

val tvHelloWorld: TextView = findViewById(R.id.tvHelloWorld)

// Create a span that will make the text red
val redForegroundColorSpan = ForegroundColorSpan(
    ContextCompat.getColor(this, android.R.color.holo_red_dark)
)

// Use a SpannableStringBuilder so that both the text and the spans are mutable
val ssb = SpannableStringBuilder(firstWord)

// Apply the color span
ssb.setSpan(
    redForegroundColorSpan,             // the span to add
    0,                                  // the start of the span (inclusive)
    ssb.length,                         // the end of the span (exclusive)
    Spanned.SPAN_EXCLUSIVE_EXCLUSIVE)   // behavior when text is later inserted into the SpannableStringBuilder
                                        // SPAN_EXCLUSIVE_EXCLUSIVE means to not extend the span when additional
                                        // text is added in later

// Add a blank space
ssb.append(" ")

// Create a span that will strikethrough the text
val strikethroughSpan = StrikethroughSpan()

// Add the secondWord and apply the strikethrough span to only the second word
ssb
    .append(secondWord)
    .setSpan(
        strikethroughSpan,
        ssb.length - secondWord.length,
        ssb.length,
        Spanned.SPAN_EXCLUSIVE_EXCLUSIVE)

// Set the TextView text and denote that it is Editable
// since it's a SpannableStringBuilder
tvHelloWorld.setText(ssb, TextView.BufferType.EDITABLE)
Note: There are 3 different classes that can be used to represent text that has markup attached. SpannableStringBuilder (used above) is the one to use when dealing with mutable spans and mutable text. SpannableString is for mutable spans, but immutable text. And SpannedString is for immutable spans and immutable text.
Creating Clickable Styled Spans
In certain cases, we might want different substrings in a TextView to different styles and then clickable to trigger an action. For example, rendering tweet items where @foo can be clicked in a message to view a user’s profile. For this, you should copy over the PatternEditableBuilder.java utility into your app. You can then use this utility to make clickable spans. For example:
// Set text within a `TextView`
TextView textView = findViewById(R.id.textView);
textView.setText("Hey @sarah, where did @jim go? #lost");
// Style clickable spans based on pattern
new PatternEditableBuilder().
    addPattern(Pattern.compile("\@(\w+)"), Color.BLUE,
       new PatternEditableBuilder.SpannableClickedListener() {
            @Override
            public void onSpanClicked(String text) {
                Toast.makeText(MainActivity.this, "Clicked username: " + text,
                    Toast.LENGTH_SHORT).show();
            }
       }).into(textView);
// Set text within a `TextView`
val textView: TextView = findViewById(R.id.textView)
textView.text = "Hey @sarah, where did @jim go? #lost"

// Style clickable spans based on pattern
PatternEditableBuilder()
    .addPattern(Pattern.compile("@(\w+)"), Color.BLUE) { text ->
        Toast.makeText(this@MainActivity, "Clicked username: $text",
            Toast.LENGTH_SHORT).show()
}.into(textView)
and this results in the following:

For more details, view the README for more usage examples.
References
- https://tutorialwing.com/android-textview-using-kotlin-example/
- https://tutorialwing.com/create-an-android-textview-programmatically-in-kotlin/
- https://code.tutsplus.com/tutorials/customize-android-fonts—mobile-1601
- https://www.androidhive.info/2012/02/android-using-external-fonts/
- https://stackoverflow.com/questions/3651086/android-using-custom-font
- https://www.tutorialspoint.com/android/android_custom_fonts.htm
- https://antonioleiva.com/textview_power_drawables/
- https://www.cronj.com/frontend-development/html.html
Improve Article
Save Article
Improve Article
Save Article
One of the most often used User Interface elements is TextView. The user experience is improved, and the application looks better, due to the clear and organized text. It doesn’t matter what kind of information is being shown, it should always be done well. In an android app, TextView allows us to do this, thus understanding its properties is crucial.
There are two methods of changing the color of a TextView and the code for that has been given in both Java and Kotlin Programming Language for Android, so it can be done by directly adding a color attribute in the XML code or we can change it through the MainActivity File. By default, the color of the text will be black until it is changed.
Method 1: Changing Text Color in XML File
This is the easiest and recommended method with the following syntax.
Syntax:
android:textColor="hex_code"
XML
<?xml version="1.0" encoding="utf-8"?>
android:layout_width="match_parent"
android:layout_height="match_parent"
tools:context=".MainActivity">
<TextView
android:id="@+id/exampleText"
android:layout_width="wrap_content"
android:layout_height="wrap_content"
android:text="GeeksForGeeks"
android:textColor="#0F9D58"
android:textSize="50sp"
app:layout_constraintBottom_toBottomOf="parent"
app:layout_constraintEnd_toEndOf="parent"
app:layout_constraintStart_toStartOf="parent"
app:layout_constraintTop_toTopOf="parent" />
</androidx.constraintlayout.widget.ConstraintLayout>
Method 2: Changing Text Color in MainActivity File
Syntax in Java:
TextView exampleTxt = findViewById(R.id.exampleText);
exampleTxt.setTextColor(Color.parseColor("hex_code"));
Syntax in Kotlin:
val exampleTxt = findViewById<TextView>(R.id.exampleText)
exampleTxt.setTextColor(Color.parseColor("hex_code"))
XML
<?xml version="1.0" encoding="utf-8"?>
android:layout_width="match_parent"
android:layout_height="match_parent"
tools:context=".MainActivity">
<TextView
android:id="@+id/exampleText"
android:layout_width="wrap_content"
android:layout_height="wrap_content"
android:text="GeeksForGeeks"
android:textColor="@color/black"
android:textSize="50sp"
app:layout_constraintBottom_toBottomOf="parent"
app:layout_constraintEnd_toEndOf="parent"
app:layout_constraintStart_toStartOf="parent"
app:layout_constraintTop_toTopOf="parent" />
</androidx.constraintlayout.widget.ConstraintLayout>
Java
import android.graphics.Color;
import android.os.Bundle;
import android.support.v7.app.AppCompatActivity;
import android.widget.TextView;
public class MainActivity extends AppCompatActivity {
@Override
protected void onCreate(Bundle savedInstanceState) {
super.onCreate(savedInstanceState);
setContentView(R.layout.activity_main);
TextView exampleTxt = findViewById(R.id.exampleText);
exampleTxt.setTextColor(Color.parseColor("#0F9D58"));
}
}
Kotlin
import android.graphics.Color
import androidx.appcompat.app.AppCompatActivity
import android.os.Bundle
import android.widget.TextView
class MainActivity : AppCompatActivity() {
override fun onCreate(savedInstanceState: Bundle?) {
super.onCreate(savedInstanceState)
setContentView(R.layout.activity_main)
val exampleTxt = findViewById<TextView>(R.id.exampleText)
exampleTxt.setTextColor(Color.parseColor("#0F9D58"))
}
}
Output:
The output for both the methods would be the same, just the method of implementation is different.

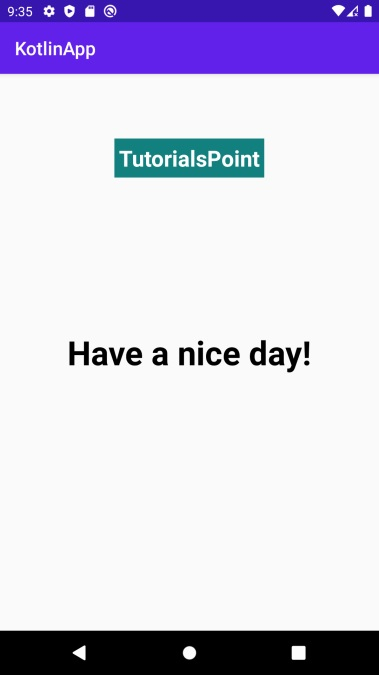
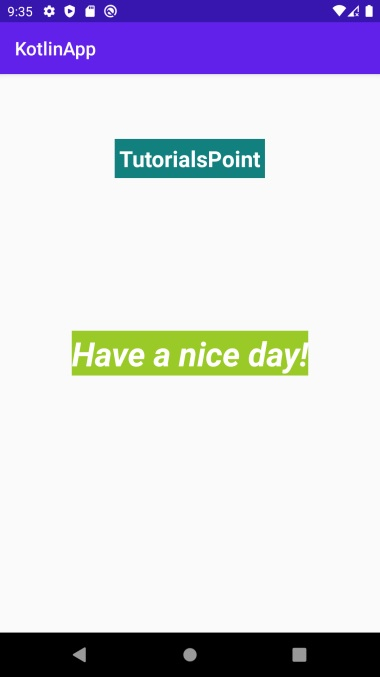
This example demonstrates how to change a TextView’s style at runtime in Android using Kotlin.
Step 1 − Create a new project in Android Studio, go to File ⇒ New Project and fill all required details to create a new project.
Step 2 − Add the following code to res/layout/activity_main.xml.
<?xml version="1.0" encoding="utf-8"?>
<RelativeLayout xmlns:android="http://schemas.android.com/apk/res/android"
   xmlns:tools="http://schemas.android.com/tools"
   android:layout_width="match_parent"
   android:layout_height="match_parent"
   tools:context=".MainActivity">
   <TextView
      android:layout_width="wrap_content"
      android:layout_height="wrap_content"
      android:layout_centerHorizontal="true"
      android:layout_marginTop="70dp"
      android:background="#008080"
      android:padding="5dp"
      android:text="TutorialsPoint"
      android:textColor="#fff"
      android:textSize="24sp"
      android:textStyle="bold" />
   <TextView
      android:id="@+id/textView"
      android:layout_width="wrap_content"
      android:layout_height="wrap_content"
      android:layout_centerInParent="true"
      android:text="Have a nice day!"
      android:textColor="@android:color/background_dark"
      android:textSize="36sp"
      android:textStyle="bold" />
</RelativeLayout>
Step 3 − Add the following code in res/values/styles.xml
<resources>
   <style name="boldText">
      <item name="android:textStyle">bold|italic</item>
      <item name="android:textColor">#FFFFFF</item>
   </style>
   <style name="normalText">
      <item name="android:textStyle">normal</item>
      <item name="android:textColor">#C0C0C0</item>
   </style>
</resources>
Step 4 − Add the following code in res/values/colors.xml
<resources>
   <color name="highlightedTextViewColor">@android:color/holo_green_light</color>
   <color name="normalTextViewColor">@android:color/holo_red_dark</color>
</resources>
Step 5 − Add the following code to src/MainActivity.kt
import android.os.Build
import android.os.Bundle
import android.widget.TextView
import androidx.appcompat.app.AppCompatActivity
class MainActivity : AppCompatActivity() {
   lateinit var textView: TextView
   override fun onCreate(savedInstanceState: Bundle?) {
      super.onCreate(savedInstanceState)
      setContentView(R.layout.activity_main)
      title = "KotlinApp"
      textView = findViewById(R.id.textView)
      textView.setOnClickListener {
         if (Build.VERSION.SDK_INT < 23) {
            textView.setTextAppearance(applicationContext, R.style.boldText)
         }
         else {
            textView.setTextAppearance(R.style.boldText)
         }
         textView.setBackgroundResource(R.color.highlightedTextViewColor)
      }
   }
}
Step 6 − Add the following code to androidManifest.xml
<?xml version="1.0" encoding="utf-8"?>
<manifest xmlns:android="http://schemas.android.com/apk/res/android"
   package="com.example.q11">
   <application
      android:allowBackup="true"
      android:icon="@mipmap/ic_launcher"
      android:label="@string/app_name"
      android:roundIcon="@mipmap/ic_launcher_round"
      android:supportsRtl="true"
      android:theme="@style/AppTheme">
      <activity android:name=".MainActivity">
         <intent-filter>
            <action android:name="android.intent.action.MAIN" />
            <category android:name="android.intent.category.LAUNCHER" />
         </intent-filter>
      </activity>
   </application>
</manifest>
Let’s try to run your application. I assume you have connected your actual Android Mobile device with your computer. To run the app from android studio, open one of your project’s activity files and click the Run icon ![]() from the toolbar. Select your mobile device as an option and then check your mobile device which will display your default screen.
from the toolbar. Select your mobile device as an option and then check your mobile device which will display your default screen.
Click here to download the project code.