In this article, we are going to learn How to redirect to another page in ReactJS using react-router-dom package. ReactJS is a free and open source front-end library used for building single page applications.
react-router-dom: react-router-dom is a reactJS package, It enables you to implement dynamic routing in a web page.
Approach:
- Create basic react app.
- Make different pages for routing.
- Install react-router-dom package.
- Implement routing using react-router-dom package.
Step 1: Create a basic react app using the following command in your terminal.
npx create-react-app <project_name>
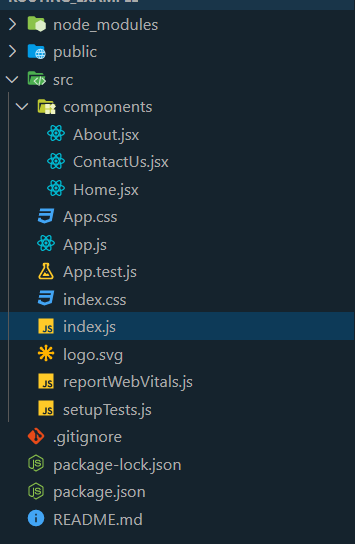
Project Structure: After creating the basic react app, the folder structure looks like this,

Folder structure of react-app
Step 2: Make different pages for routing. Here, We are going to create different components for our react-app. So that we route over them for demonstration.
Components: Home Page, About Page, ContactUs Page.
After creating components, the Folder structure looks like this,
Folder structure after making components
Home.jsx
import React from "react";
const Home = () => {
return (
<div>
<h1>Home Page</h1>
</div>
);
};
export default Home;
About.jsx
import React from "react";
const About = () => {
return (
<div>
<h1>About Page</h1>
</div>
);
};
export default About;
ContactUs.jsx
import React from "react";
const ContactUs = () => {
return (
<div>
<h1>Contact Us Page</h1>
</div>
);
};
export default ContactUs;
Step 3: Install react-router-dom package.
Here, We are going to install the react-router-dom package in our react-app, using the following command.
npm i react-router-dom

Installing react-router-dom
After installing react-router-dom package package.json file looks like this,

Package.json
Step 3: Implement routing using the react-router-dom package. Here, We are going to implement the react-router-dom package in our react-app. To implement this, We have to import some components from the react-router-dom package i.e. BrowserRouter, Switch, Route, and Redirect.
import { BrowserRouter as Router, Switch,
    Route, Redirect,} from "react-router-dom";
Note: We make an alias of BrowserRouter as Router, just make things simple.
Let’s see all the imported components one by one:
- BrowserRouter: It uses the HTML5 history API to keep the UI in sync with the URL.
- Route: Its responsibility is to render UI, when its path matches the current URL.
- Switch: It renders the first child Route or Redirect that matches the location.
- Redirect: It renders the new location irrespective of the current location in history stack.
Here, is the code of the App.js file where We are going to implement the react-router-dom package.
App.js
import "./App.css";
import {
BrowserRouter as Router,
Switch,
Route,
Redirect,
} from "react-router-dom";
import Home from "./components/Home";
import About from "./components/About";
import ContactUs from "./components/ContactUs";
function App() {
return (
<>
{}
<Router>
<Switch>
{
}
<Route exact path="/" component={Home} />
{
}
<Route path="/about" component={About} />
{
}
<Route path="/contactus" component={ContactUs} />
{
}
<Redirect to="/" />
</Switch>
</Router>
</>
);
}
export default App;
Step 4: After implementing routing in App.js file, We have to give the routing end points at user side. So, We are going to give the routing endpoints in Home.jsx file.
Here is the updated Home.jsx file.
Home.jsx
import React from "react";
import { Link } from "react-router-dom";
const Home = () => {
return (
<div>
<h1>Home Page</h1>
<br />
<ul>
<li>
{}
<Link to="/">Home</Link>
</li>
<li>
{}
<Link to="/about">About</Link>
</li>
<li>
{}
<Link to="/contactus">Contact Us</Link>
</li>
</ul>
</div>
);
};
export default Home;
Step to run the application: Open the terminal and run the following command.
npm start
Output:
React-app output
In this article, we are going to learn How to redirect to another page in ReactJS using react-router-dom package. ReactJS is a free and open source front-end library used for building single page applications.
react-router-dom: react-router-dom is a reactJS package, It enables you to implement dynamic routing in a web page.
Approach:
- Create basic react app.
- Make different pages for routing.
- Install react-router-dom package.
- Implement routing using react-router-dom package.
Step 1: Create a basic react app using the following command in your terminal.
npx create-react-app <project_name>
Project Structure: After creating the basic react app, the folder structure looks like this,
Folder structure of react-app
Step 2: Make different pages for routing. Here, We are going to create different components for our react-app. So that we route over them for demonstration.
Components: Home Page, About Page, ContactUs Page.
After creating components, the Folder structure looks like this,
Folder structure after making components
Home.jsx
import React from "react";
const Home = () => {
return (
<div>
<h1>Home Page</h1>
</div>
);
};
export default Home;
About.jsx
import React from "react";
const About = () => {
return (
<div>
<h1>About Page</h1>
</div>
);
};
export default About;
ContactUs.jsx
import React from "react";
const ContactUs = () => {
return (
<div>
<h1>Contact Us Page</h1>
</div>
);
};
export default ContactUs;
Step 3: Install react-router-dom package.
Here, We are going to install the react-router-dom package in our react-app, using the following command.
npm i react-router-dom
Installing react-router-dom
After installing react-router-dom package package.json file looks like this,
Package.json
Step 3: Implement routing using the react-router-dom package. Here, We are going to implement the react-router-dom package in our react-app. To implement this, We have to import some components from the react-router-dom package i.e. BrowserRouter, Switch, Route, and Redirect.
import { BrowserRouter as Router, Switch,
    Route, Redirect,} from "react-router-dom";
Note: We make an alias of BrowserRouter as Router, just make things simple.
Let’s see all the imported components one by one:
- BrowserRouter: It uses the HTML5 history API to keep the UI in sync with the URL.
- Route: Its responsibility is to render UI, when its path matches the current URL.
- Switch: It renders the first child Route or Redirect that matches the location.
- Redirect: It renders the new location irrespective of the current location in history stack.
Here, is the code of the App.js file where We are going to implement the react-router-dom package.
App.js
import "./App.css";
import {
BrowserRouter as Router,
Switch,
Route,
Redirect,
} from "react-router-dom";
import Home from "./components/Home";
import About from "./components/About";
import ContactUs from "./components/ContactUs";
function App() {
return (
<>
{}
<Router>
<Switch>
{
}
<Route exact path="/" component={Home} />
{
}
<Route path="/about" component={About} />
{
}
<Route path="/contactus" component={ContactUs} />
{
}
<Redirect to="/" />
</Switch>
</Router>
</>
);
}
export default App;
Step 4: After implementing routing in App.js file, We have to give the routing end points at user side. So, We are going to give the routing endpoints in Home.jsx file.
Here is the updated Home.jsx file.
Home.jsx
import React from "react";
import { Link } from "react-router-dom";
const Home = () => {
return (
<div>
<h1>Home Page</h1>
<br />
<ul>
<li>
{}
<Link to="/">Home</Link>
</li>
<li>
{}
<Link to="/about">About</Link>
</li>
<li>
{}
<Link to="/contactus">Contact Us</Link>
</li>
</ul>
</div>
);
};
export default Home;
Step to run the application: Open the terminal and run the following command.
npm start
Output:
React-app output
Introduction
If you’re a developer working on any modern web application, you’re probably aware of how important it is to properly set up routing. When you browse through many React Router tutorials, you may notice that they seldom mention redirects and instead focus on how to use the Link component. To manage routing in React, we can utilize the react-router-dom package.
In this post, we will look at the many methods and scenarios in which you can utilize redirects in React. We’ll also look at some previous strategies and how they functioned with the new replacements for them in React Router v6, which is the most recent version as of the time of this writing.
Prerequisite
In this article, we will use the react-router-dom package, which we must install in our project. This is accomplished by running one of the following commands in our terminal:
$ npm i react-router-dom
or
$ yarn add react-router-dom
Redirect and Navigate Component
The Redirect component was usually used in previous versions of the react-router-dom package to quickly do redirects by simply importing the component from react-router-dom and then making use of the component by providing the to prop, passing the page you desire to redirect to.
import { Redirect } from 'react-router-dom';

<Route path='/redirect-page' element={ <Redirect to="/error-page" /> }/>
With the release of React Router v6, the Redirect component was removed and replaced with the Navigate component, which operates just as the Redirect component does by taking in the to prop to enable you redirect to the page you specify.
import { Navigate } from 'react-router-dom';

<Route path="/redirect" element={ <Navigate to="/error-page" /> } />
Make sure that you have the route already. For instance, if you would be redirecting to the «/error-page» route, ensure you have already declared the route previously before setting up the redirect. Take note of the order or Route declarations in the code below:
import { BrowserRouter, Routes, Route, Navigate } from 'react-router-dom';
import ErrorPage from './ErrorPage';
import Home from './Home';

function App() {
    return (
        <BrowserRouter>
            <Routes>
                <Route
                    path="/"
                    element={ <Home /> }
                />
                {/* The next line is very important for the Navigate component to work */}
                <Route
                    path="/error-page"
                    element={ <ErrorPage /> }
                />
                <Route
                    path="/redirect"
                    element={ <Navigate to="/error-page" /> }
                />
            </Routes>
        </BrowserRouter>
    );
}
export default App;
Conditional Redirects
This is something you will likely need to make use of when building web applications. Conditional redirects is simply routing based on certain criteria. A common scenario might be when you’re building an e-commerce platform, and you don’t want users to have access to certain components/modals/forms, such as the checkout modal/component, until they’ve added some products to the cart. If they try to force their way into the page, they should be redirected to the products page so they can first select items.
This is known as conditional redirects. To do this, we would use the useState() hook to empty the cart array and then apply some criteria to our route.
const [cartItems, setCartItems] = useState([]);

<Route
    path="/checkout"
    element={ cartItems.length < 1 ? <Navigate to="/products" /> : <Checkout /> }
/>;
In this example, as long as this array is empty, we won’t be able to access the /checkout route until there is at least one item in the cartItems array.
Replacing the Current URL
In some cases, you might want to replace the current URL in the browser instead of adding (i.e. pushing) it to your browser’s history, to do this we simply have to add the replace prop to the Navigate component.
<Navigate replace to="/error-page" />
Without this prop, the browser will keep track of the history, including the redirect.
Programmatic Redirects with useNavigate()
You may be familiar with the useHistory() hook from previous versions of the react-router-dom package, which was used to programmatically redirect users. When visitors have finished filling out a form, or if you want to add a redirect function to a button, this is a great use-case.
Check out our hands-on, practical guide to learning Git, with best-practices, industry-accepted standards, and included cheat sheet. Stop Googling Git commands and actually learn it!
The useHistory() hook is first imported and then assigned to a variable, which is subsequently utilized in a button (for example) to redirect users once a specific action is taken. Using the onClick event, we can then call the .push() method to tell React Router where we want the button to redirect to.
import { useHistory } from 'react-router-dom';

const Home = () => {
    const history = useHistory();
    return (
        {/* ... */}
        <button onClick={() => history.push('/products')}>
        {/* ... */}
    );
};
With the release of React Router v6, we no longer utilize the useHistory() hook, but instead the useNavigate() hook, which is quite similar.
This is also accomplished by importing the hook and then assigning a variable to the useNavigate() hook, like we did with useHistory(). We can now utilize the variable that was returned to navigate the user to other pages.
import { useNavigate } from 'react-router-dom';

const Home = () => {
    const navigate = useNavigate();
    return (
        {/* ... */}
        <button onClick={() => navigate('/products')}>
        {/* ... */}
    );
};
Note: Unlike the useHistory() hook, this does not require calling the push method. All we need to do is pass the path as an argument to the navigate function.
Conclusion
In this post, we looked at a number of ways to redirect with React Router, how it functions, and how this was handled in both the older version and the latest v6 version.
This post will cover how to redirect in ReactJs when using react-router and or vanilla js, the possible methods you can use as well as the best practices for each situation.
There are currently many different components, hooks, and methods in which you can redirect using JavaScript and React so this post will add some clarity of how, and why to use them, and for which situations.
We will also be covering external vs internal urls and absolute vs relative and how to handle them all when it comes to redirecting.
I would recommend having a read through my post about how to redirect in JavaScript as well because this will help you understand how not only everything works behind the scenes in React but also it will help understand how you navigate within React as well.
How to redirect in ReactJs
Just before we get stuck into the details of how to redirect in ReactJs, here is a quick cheat sheet to redirecting in React Js / JavaScript (We will go into detail about each later on):
JS — redirect:
window.location.replace("https://google.com/");JS — user event navigation:
window.location.href = "https://google.com/";Learn more about the JS implementation here.
React.Js hooks — react-router-dom v6:
const navigate = useNavigation();
navigate("/redirect-example", { replace: true });
React.Js hooks — react-router-dom v5:
const history = useHistory();
history.push("/redirect-example");
React.Js JSX — react-router-dom v5:
import { Redirect } from 'react-router-dom'
…
<Redirect to='/redirect-example' />
In React there are many libraries that you can use to handle client side routing & navigation and redirection will be a part of those libraries, however the principle of the redirects will be very similar for each.
The principle of a client side redirect will be to push or replace a new route/url to the history of the window in order to change the page.
In vanilla JavaScript you would redirect using window.location.replace, or window.location.href depending on the scenario.
You would use the window.location.replace to perform a redirect which replaces the item in history to prevent loops, and you would use the window.location.href to add onto the history based on a user action.
When it comes to libraries used in ReactJs it will be a similar flow, you will just need to find the specific component/method to use for the given library, such as history.push.
We will shortly look at the differences between external vs internal urls as well as absolute and relative routes.
But first let’s dive into how to specifically redirect using some popular React libraries such as react-router.
How to redirect in ReactJs with react-router/react-router-dom v6
Firstly we will take a look into how we can redirect in react using the v6 version of react-router and react-router-dom.
It is fairly straightforward and makes use of a hook called useNavigate which we can just pass our url into with some optional parameters and then it will programmatically navigate/redirect to the new route/url.
Here is an example of the useNavigate hook in use:
import React from "react";
import { useNavigate } from "react-router-dom";

export default function HookRedirectExample() {
  const navigate = useNavigate();
  return (
    <button
      type="button"
      onClick={() => navigate("/redirect-example/", { replace: true })}
    >
      Redirect
    </button>
  );
}
As you can see in the above example it is fairly straightforward to use, all we need to do is initialize the hook in the component and then call navigate with our url.
I have included the parameter replace: true which will replace the history entry rather than add to it which is ideal for automatic redirection where you don’t want the user to be able to return to that page directly.
How to redirect in ReactJs with hooks & react-router/react-router-dom v5
Next we will look at the v5 version of the react-router library which is still widely used and we will start by using react hooks, more specifically the useHistory hook. Making use of the react hook implementation of the history context with useHistory makes it much cleaner and easier to use than in comparison to the JSX option.
All we need to do is import the useHistory hook from react-router-dom and then initialise it in a component like so:
import React from "react";
import { useHistory } from "react-router-dom";

export default function HookRedirectExample() {
  const history = useHistory();
  return null;
}
Once we have a basic setup complete for our component, we then just need to push a new url to the history using history.push("URL_HERE") whenever a user performs a certain action, in our example we will use a button click.
import React from "react";
import { useHistory } from "react-router-dom";

export default function HookRedirectExample() {
  const history = useHistory();
  return (
    <button type="button" onClick={() => history.push("/redirect-example/")}>
      Redirect
    </button>
  );
}
Now when the user clicks on the button we will push a new relative URL into the history which will cause the user to be redirected to the desired page.
How to redirect in ReactJs with JSX & react-router/react-router-dom v5
Next we will look at how to essentially do the above with a mixture of conditional rendering and the Redirect component from react-router-dom.
The principle of the redirect using theRedirect component is similar to the react hook version although we need to render the Redirect component instead of calling a function.
This makes it a little less intuitive in comparison to the hook version where you can just call a function as well as slightly different use cases, but it is still a valid way of doing it.
Let’s take our previous example but this time introduce some props to show the real benefit of using the Redirect component to redirect in ReactJS.
import React from "react";
import { Redirect } from "react-router-dom";

export default function HomePage({ authenticated, name }) {
  if (!authenticated) {
    return <Redirect to="/login" />;
  }
  return <h1>Welcome {name}</h1>;
}
As you can see in the above example, we are checking to see if the user is authenticated, if not we are rendering the redirect component, and if they are logged in, we are rendering the home page component which displays a welcome message.
If the user is not authenticated the Redirect component will be rendered which will then trigger the page to redirect to the login page.
In summary of the Redirect component it is a nice way to redirect based off of side effects rather than actions.
It is possible to create the same functionality with the hook method as well with the use of useEffect and the dependency array like so:
import React, { useEffect } from "react";
import { useHistory } from "react-router-dom";

export default function HomePage({ authenticated, name }) {
  const history = useHistory();

  useEffect(() => {
    if (!authenticated) {
      history.push("/login");
    }
  }, [authenticated]);
  return <h1>Welcome {name}</h1>;
}
How to redirect in ReactJs with JavaScript
The last redirection method in React is using vanilla JavaScript. React is a JavaScript based library, which means we can run plain JavaScript as well if we need to.
If you are already making use of a routing library, then it would not be recommended to use vanilla JavaScript to navigate or perform redirections because it could interfere with the routing library.
Instead the redirection from vanilla JavaScript is best used with React when you only need very basic navigation where an anchor element can’t do it.
The reason why you might opt for a vanilla JavaScript approach for redirection in React is simple because you might not need to add a whole new library to your application if you have a simple use case, and therefore might make some performance savings by reducing the overall application size.
Here is a quick example of how you can use JavaScript to navigate from a React application:
import React from "react";
import { sendAnalyticsEvent } from "./example-anaylytics.js";

const handleRedirect = () => {
  sendAnalyticsEvent("redirect");
  window.location.href = "http://google.com/";
};

export default function JsRedirectExample() {
  return (
    <button type="button" onClick={handleRedirect}>
      Redirect
    </button>
  );
}
Or for an automatic redirect:
import React from "react";
import { sendAnalyticsEvent } from "./example-anaylytics.js";

export default function JsRedirectExample() {
  sendAnalyticsEvent("redirect");
  window.location.replace("http://google.com/");
  return null;
}
Internal urls vs external urls for redirecting in react
The difference between internal and external urls/routes is simple enough where internal urls will navigate within the current website, and external urls/routes will navigate the user to a different website.
The reason why it is important to understand the difference is because handling the different types of url can be very different.
For simplicity let’s assume that we are always talking about urls/routes that will replace the current page (not open in a new tab).
If you are navigating to an external route from your page, you might not need to worry about running it through your library because in most cases the state of the application will be lost after you navigate away from the page in which case using either the React based library or a vanilla JS implementation won’t matter (This may vary between library, so make sure you read the docs!).
If you have an internal route/url though that is managed and handled by a react library you will always want to make use of the libraries implementation or redirection/navigating (even with JSX elements) so that the library can track, manage and render each page whilst maintaining the history.
Absolute urls vs relative urls for redirecting in react
Once again, absolute vs relative urls have a simple difference and it works in the same way as it does when referencing files in a directory.
A relative path is based on where you currently are, but an absolute path does not matter where you currently are and will always take you to the same place.
Generally speaking when it comes to client side applications, a relative path will be relative from the root of the URL/website.
For example, if you are on https://atomizedobjects.com/blog/react/how-to-redirect-in-reactjs/ and you navigate to a relative path of /blog/react it will take you to https://atomizedobjects.com/blog/react/.
However if you wanted to do the same thing but as an absolute path you would just need to add the root as well so you would enter https://atomizedobjects.com/blog/react/ instead of /blog/react.
Summary
There we have how to redirect in ReactJs, if you want more like this be sure to check out some of my other posts!

Redirect to an external URL
You can do that in plain JavaScript by calling window.location.replace() method. For example:
window.location.replace('https://codefrontend.com');Here’s how you could use that in React:
function RedirectExample() {
  useEffect(() => {
    const timeout = setTimeout(() => {
      // 👇️ redirects to an external URL
      window.location.replace('https://codefrontend.com');
    }, 3000);

    return () => clearTimeout(timeout);
  }, []);

  return <>Will redirect in 3 seconds...</>;
}window.location.replace in React.
📣
Note that after redirecting with the replace() method, the page will not be accessible via the browser’s back button.
Navigating to an external page in React
Often, by «redirect» people actually mean «navigate.
To navigate to another page, set the window.location.href property with the URL:
// 👇️ directly change the active URL to navigate
window.location.href = 'https://codefrontend.com';Navigating like this will add a new entry in the navigation history, instead of replacing the current one, so the user will be able to go back. That’s often the expected behavior.
If the navigation happens in response to the user clicking an element, it’s often sufficient and better to simply use an anchor tag:
// 👇️ A simple link to an external website
<a href="https://codefrontend.com" target="_blank" rel="noopener noreferrer">
  Go to codefrontend.com
</a>
The target="_blank" attribute can be used to open the link in the new browser tab, remove it to open in the same tab. The rel="noopener noreferrer" attribute should be added for security reasons. Read more about it here:
- noopener
- noreferer
📌
Use a simple link when possible for a good user experience. Browsers show a helpful tooltip at the bottom-left corner to inform the user where they will be redirected.
Redirect using react-router
It is common to use react-router together with React. It is only responsible for your client-side navigation, meaning that it doesn’t handle redirects to external URLs. If you need that, see the above methods.
However, if you need to redirect between the pages in your React app that uses react-router (version 6), you can use the useNavigate hook or Navigate component and set the replace property to true: navigate('/about', { replace: true });
Here’s a snippet of how it might look like in React:
import { useEffect } from 'react';
import { Route, Routes, useNavigate } from 'react-router-dom';

function RedirectReactRouterExample() {
  return (
    <Routes>
      <Route path="/" element={<Index />} />
      <Route path="about" element={<About />} />
    </Routes>
  );
}

function About() {
  return <div>About</div>;
}

function Index() {
  const navigate = useNavigate();

  useEffect(() => {
    setTimeout(() => {
      // 👇 Redirects to about page, note the `replace: true`
      navigate('/about', { replace: true });
    }, 3000);
  }, []);

  return <div>Redirecting...</div>;
}

export default RedirectReactRouterExample;
Conclusion
Normally, redirects should be done by the server, not the client. However, there are cases when it’s needed. In those cases, you can use a simple window.location.redirect() call.
However, more often than not, what people need is to simply navigate to another page when a button is clicked. In that case, you should set window.location.href with the target URL, or better yet — use an anchor tag.
As always, find the code examples in my GitHub repository.