Большинство проектов с которыми я работаю, требуют установленного PHP версии 7.x , но у меня также имеются другие параллельные задачи, которые требуют старых версий — 5.6 или даже 5.3. Во времена использования мною Windows + Open Server, переключение версий можно было сделать нажав пару кнопок в настройках, однако на данный момент при использовании Ubuntu я столкнулся с определенными трудностями о которых хочу поделиться далее…
Предполагается, что у вас уже установлен какой-нибудь PHP версии 7.x. Если нет, то давайте это исправим:
apt-get update && apt-get upgrade
apt-get install software-properties-common
add-apt-repository ppa:ondrej/php
apt-get update
apt-get install php7.2
apt-get install php-pear php7.2-curl php7.2-dev php7.2-gd php7.2-mbstring php7.2-zip php7.2-mysql php7.2-xml
Теперь, например устанавливаем версию 5.6:
sudo apt install php5.6
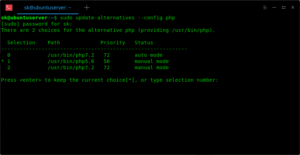
После всех этих команд на вашей машине установлены 7.2 и 5.6 версии. Выведем список всех установленных версий в меню, которое позволит выбрать нужную версию:
sudo update-alternatives --config php
После этого вы увидите примерно такое:
There are 2 choices for the alternative php (providing /usr/bin/php).

  Selection    Path             Priority   Status

------------------------------------------------------------

 * 0            /usr/bin/php7.2   72        auto mode

  1            /usr/bin/php5.6   56        manual mode

  2            /usr/bin/php7.2   72        manual mode


Press <enter> to keep the current choice[*], or type selection number:
В коде выше можно выбрать например пункт — 1 и тогда версия переключится на 5.6. Проверить это можно следующей командой:
php -v
Которая вернет примерно такое сообщение:
PHP 5.6.38+deb.sury.org+2 (cli)

Copyright (c) 1997-2016 The PHP Group

Zend Engine v2.6.0, Copyright (c) 1998-2016 Zend Technologies

with Zend OPcache v7.0.6-dev, Copyright (c) 1999-2016, by Zend Technologies
Таким образом, теперь вы можете легко менять свои версии даже легче чем в Open Server 🙂

В Ubuntu можно легко управлять несколькими версиями PHP. Мы рассмотрим процесс установки разных версий PHP и жонглирования ими.
Установка PHP
Выбор версии по умолчанию
Установка расширений
Установка PHP
В зависимости от необходимой версии PHP и версии Ubuntu, подход к установке может отличаться.
Установка базовой версии
Это самый простой способ. Каждая версия Ubuntu в своем репозитории содержит соответствующую версию PHP.
Установка выполняется одной командой:
apt install php
Установка определенной версии
Если нам необходима версия PHP, которой нет в репозитории, выполняем установку дополнительного — для этого вводим две команды:
apt install software-properties-common
add-apt-repository ppa:ondrej/php
Теперь можно установить нужную версию интерпретатора:
apt-get install php7.4
apt-get install php8.0
* в данном примере 7.4 и 8.
Выбор версии PHP по умолчанию
Посмотреть текущую версию php, которая работает по умолчанию можно командой:
php -v
Сменить версию по умолчанию:
update-alternatives —config php
There are 2 choices for the alternative php (providing /usr/bin/php).
Selection Path Priority Status
————————————————————
* 0 /usr/bin/php8.0 80 auto mode
1 /usr/bin/php7.4 74 manual mode
2 /usr/bin/php8.0 80 manual mode
* в данном примере используется версия php8 как версия по умолчанию.
Для смены, система предложит нам выбрать версию из списка:
Press <enter> to keep the current choice[*], or type selection number: 1
* так мы переключимся на php7.4.
Установка расширений
Расширения устанавливаются с синтаксисом:
apt install php<версия>-<расширение>
Для версии, которая идет по умолчанию в репозитории, установку можно выполнить так:
apt install php-mysqli
В остальных случаях обязательно указываем версию:
apt install php7.4-mysqli
Настройка PHP
В Ubuntu настройки PHP находятся в разных файлах — для каждой версии и для каждой системы, которая обрабатывает запросы.
Например, для php версии 8.0, которая будет запускаться из командной строки, файл будет:
vi /etc/php/8.0/cli/php.ini
для apache:
vi /etc/php/8.0/apache2/php.ini
для fpm:
vi /etc/php/8.0/fpm/php.ini
Была ли полезна вам эта инструкция?
Да Нет
После обновления до Ubuntu 16.04 из коробки установлен php7. Для моих проектов использую php5.6. Подскажите, как управлять версиями, и использовать php5.6 по умолчанию?
$ php -v
PHP 7.0.6-1+donate.sury.org~xenial+1 (cli) ( NTS )
Copyright (c) 1997-2016 The PHP Group
Zend Engine v3.0.0, Copyright (c) 1998-2016 Zend Technologies
with Zend OPcache v7.0.6-dev, Copyright (c) 1999-2016, by Zend Technologies

$ whereis php
php: /usr/bin/php /usr/bin/php7.0 /usr/bin/php5.6 /usr/lib/php /etc/php /usr/share/php7.0-opcache /usr/share/php7.0-gd /usr/share/php /usr/share/php5.6-opcache /usr/share/php7.0-mcrypt /usr/share/php7.0-json /usr/share/php7.0-common /usr/share/php7.0-readline /usr/share/php5.6-json /usr/share/php7.0-xml /usr/share/php7.0-mysql /usr/share/php5.6-common /usr/share/php5.6-readline /usr/share/man/man1/php.1.gz
задан 7 мая 2016 в 10:32
если эти пакеты установлены из официального репозитория, то используется механизм альтернатив (alternatives) и /usr/bin/php является символической ссылкой (symlink) на /etc/alternatives/php, которая, в свою очередь, тоже является символической ссылкой на реальный исполняемый файл. в вашем случае — /usr/bin/php7.0.
«перенаправить» на другую альтернативу можно, например, так:
$ sudo update-alternatives --config php
если есть альтернативы, то будет предложен пронумерованный список альтернатив (в частности, с указанием пути к реальным файлам) с предложением ввести номер (из списка) для изменения текущего выбора альтернативы.
ответ дан 7 мая 2016 в 10:59
aleksandr barakinaleksandr barakin
67.5k200 золотых знаков74 серебряных знака217 бронзовых знаков
Уже было. Странно, что не нашли. Сам пользуюсь:
устанавливаем с репозитория не официального (7.0 и 5.6):
sudo add-apt-repository ppa:ondrej/php
sudo apt-get update
sudo apt-get install php7.0 php5.6 php5.6-mysql php-gettext php5.6-mbstring php-mbstring php7.0-mbstring php-xdebug libapache2-mod-php5.6 libapache2-mod-php7.0
и переключаемся с помощью следующих команд (для Apache и для командной строки разные!!!):
php5.6 -> php7.0 :
Apache:
sudo a2dismod php5.6 ; sudo a2enmod php7.0 ; sudo service apache2 restart
CLI:
update-alternatives --set php /usr/bin/php7.0
php7.0 -> php5.6 :
Apache:
sudo a2dismod php7.0 ; sudo a2enmod php5.6 ; sudo service apache2 restart
CLI:
sudo update-alternatives --set php /usr/bin/php5.6
0xdb
51.3k194 золотых знака56 серебряных знаков227 бронзовых знаков
ответ дан 19 фев 2017 в 18:47
Vladimir ChVladimir Ch
5636 серебряных знаков12 бронзовых знаков
Еще вариант, phpenv как менеджер версий:
https://github.com/phpenv/phpenv
$(phpenv version-name)— текущая версия php;~/.phpenv/versions/$(phpenv version-name)/etc/php.ini— php.ini
текущей версии php;phpenv global 5.6.0— использовать версию php 5.6.0.
ответ дан 10 мая 2016 в 18:43
jekabyjekaby
2,78910 серебряных знаков21 бронзовый знак
Table of contents
-
Introduction
-
Установка версии PHP, которая идет по умолчанию
-
Установка другой версии PHP
-
Переключение между версиями PHP
Introduction
В данной статье мы установим несколько версий PHP на наш сервер Ubuntu 18.04.3 LTS и рассмотрим команды для переключения между версиями.
Начнем с обновления пакетов:
sudo apt-get update
sudo apt-get upgrade
Установка версии PHP, которая идет по умолчанию
sudo apt-get install phpПроверим версию PHP:
php -v PHP 7.2.19-0ubuntu0.18.04.2 (cli) (built: Aug 12 2019 19:34:28) ( NTS )
Copyright (c) 1997-2018 The PHP Group
Zend Engine v3.2.0, Copyright (c) 1998-2018 Zend Technologies
with Zend OPcache v7.2.19-0ubuntu0.18.04.2, Copyright (c) 1999-2018, by Zend TechnologiesВ процессе установки также были поставлены следующие пакеты:
| Пакет | Описание |
|---|---|
| php7.2 | server-side, HTML-embedded scripting language (metapackage) |
| php7.2-cli | command-line interpreter for the PHP scripting language |
| php7.2-common | documentation, examples and common module for PHP |
| php7.2-json | JSON module for PHP |
| php7.2-opcache | Zend OpCache module for PHP |
| php7.2-readline | readline module for PHP |
Установим наиболее распространенные модули для PHP:
sudo apt-get install php-pear php7.2-dev php7.2-fpm php7.2-curl php7.2-gd php7.2-mbstring php7.2-mysql php7.2-xml php7.2-zip libapache2-mod-php7.2| Пакет | Описание |
|---|---|
| libapache2-mod-php7.2 | server-side, HTML-embedded scripting language (Apache 2 module) |
| php-pear | PEAR Base System |
| php7.2-curl | CURL module for PHP |
| php7.2-dev | Files for PHP7.2 module development |
| php7.2-fpm | server-side, HTML-embedded scripting language (FPM-CGI binary) |
| php7.2-gd | GD module for PHP |
| php7.2-mbstring | MBSTRING module for PHP |
| php7.2-mysql | MySQL module for PHP |
| php7.2-xml | DOM, SimpleXML, WDDX, XML, and XSL module for PHP |
| php7.2-zip | Zip module for PHP |
Посмотреть все установленные PHP пакеты можно командой:
dpkg -l | grep phpУстановка другой версии PHP
Установим PHP 7.3, для этого добавим сторонний репозиторий Ondřej Surý, установив пакет:
sudo apt-get install software-properties-commonТеперь добавим репозиторий:
sudo add-apt-repository ppa:ondrej/phpОбновим список пакетов:
sudo apt-get updateПосле того, как, мы добавили репозиторий, перейдем к установке PHP 7.3:
sudo apt-get install php7.3Выполним команду:
dpkg -l | grep php7.3Были поставлены следующие пакеты:
| Пакет | Описание |
|---|---|
| libapache2-mod-php7.3 | server-side, HTML-embedded scripting language (Apache 2 module) |
| php7.3 | server-side, HTML-embedded scripting language (metapackage) |
| php7.3-cli | command-line interpreter for the PHP scripting language |
| php7.3-common | documentation, examples and common module for PHP |
| php7.3-json | JSON module for PHP |
| php7.3-opcache | Zend OpCache module for PHP |
| php7.3-readline | readline module for PHP |
Установим дополнительные модули для PHP:
sudo apt-get install php7.3-dev php7.3-fpm php7.3-curl php7.3-gd php7.3-mbstring php7.3-mysql php7.3-xml php7.3-zipПроверим версию PHP:
php -v PHP 7.3.10-1+ubuntu18.04.1+deb.sury.org+1 (cli) (built: Oct 8 2019 05:33:38) ( NTS )
Copyright (c) 1997-2018 The PHP Group
Zend Engine v3.3.10, Copyright (c) 1998-2018 Zend Technologies
with Zend OPcache v7.3.10-1+ubuntu18.04.1+deb.sury.org+1, Copyright (c) 1999-2018, by Zend TechnologiesТаким образом в системе активирована версия PHP 7.3.
Переключение между версиями PHP
Переключение происходит следующей командой:
sudo update-alternatives --set php /usr/bin/php7.2Или же просто созданием символьной ссылки:
sudo ln -f -s /usr/bin/php7.3 /etc/alternatives/phpДата публикации : 2019-10-12 16:12:43
Дата редактирования : 2020-11-12 00:30:28
Автор :
How can I change the PHP version used in console on Ubuntu 20.04? I have all versions in the /etc/php folder, but I don’t know where the configuration for the command line version is.
asked Nov 5, 2021 at 13:06
You can do this with update-alternatives. If you would like to do this interactively, you can do this:
sudo update-alternatives --config php
If you like to specifically choose the PHP version (via an alias or whatnot), you can do this:
sudo update-alternatives --set php /usr/bin/php7.4
Of course, be sure to change php7.4 to the actual version you want to switch between.
answered Nov 5, 2021 at 13:57
matigomatigo
17.8k6 gold badges35 silver badges61 bronze badges
1
Please use following command which will ask you to select a number against your required PHP version
sudo update-alternatives --config php
Then select your choice and press enter.
answered Nov 5, 2021 at 13:57
mshakeelmshakeel
6431 gold badge5 silver badges10 bronze badges
2
i just try in Ubuntu20.04 and it works.
// to show the list php installed:
sudo update-alternatives —config php
// choose number version that you wanna switch
screenshoot switch php version in ubtuntu
answered Feb 16, 2022 at 3:17
alias setphp="sudo update-alternatives --config php;sudo update-alternatives --config phar; update-alternatives --config phar.phar; a2dismod php*.*;systemctl restart apache2"
Put the above alias in ~/.bashrc:
sudo nano ~/.bashrc
Then just run this command:
a2enmod php<Your Desired Version> # like, a2enmod php7.4
Now you can run the command setphp from your terminal.
answered Mar 1, 2022 at 5:13
Did you install the cli? Do this first:
$ sudo apt install php7.4-cli
After that, you should see it listed under update-alternatives
$ update-alternatives --list php
/usr/bin/php7.4
/usr/bin/php8.1
answered Oct 27, 2022 at 22:37
1
Иногда самая последняя версия установленного пакета может работать не так, как вы ожидали.
Приложение может не соответствовать обновленному пакету и поддерживать только определенную старую версию пакета.
В таких случаях вы можете просто отказаться от проблемного пакета до его ранней рабочей версии в кратчайшие сроки
Однако вам не нужно понижать некоторые пакеты.
Мы можем использовать несколько версий одновременно.
Например, скажем, вы тестируете приложение PHP в стек LAMP, развернутое в Ubuntu 18.04 LTS.
Через некоторое время вы обнаружите, что приложение отлично работает в PHP5.6, но не в PHP 7.2 (Ubuntu 18.04 LTS устанавливает PHP 7.x по умолчанию).
Вы собираетесь снова установить PHP или весь пакет LAMP? Не обязательно.
Вам даже не нужно понижать PHP до более ранней версии.
В этом кратком уроке я покажу вам, как переключаться между несколькими версиями PHP в Ubuntu 18.04 LTS. Это не так сложно, как вы думаете.
Полное обучение PHP вы всегда можете пройти здесь : https://webshake.ru/php-training-course
Переключение между несколькими версиями PHP
Чтобы проверить установленную по умолчанию версию PHP, запустите:
$ php -v
PHP 7.2.7-0ubuntu0.18.04.2 (cli) (built: Jul 4 2018 16:55:24) ( NTS )
Copyright (c) 1997-2018 The PHP Group
Zend Engine v3.2.0, Copyright (c) 1998-2018 Zend Technologies
with Zend OPcache v7.2.7-0ubuntu0.18.04.2, Copyright (c) 1999-2018, by Zend Technologies
Как вы можете увидеть, установленная версия PHP – 7.2.7.
После тестирования вашего приложения пару дней вы узнаете, что ваше приложение не поддерживает PHP7.2.
В таких случаях неплохо иметь версию PHP5.x и версию PHP7.x, так что вы можете в любой момент легко переключаться между любой поддерживаемой версией.
Вам не нужно удалять PHP7.x или переустанавливать стек LAMP. Вы можете использовать как версии PHP5.x, так и 7.x вместе.
Я предполагаю, что вы еще не удалили php5.6 в своей системе.
На всякий случай, вы удалили его уже, вы можете установить его снова, используя PPA, как показано ниже.
Вы можете установить PHP5.6 из PPA:
$ sudo add-apt-repository -y ppa:ondrej/php
$ sudo apt update
$ sudo apt install php5.6
Переключитесь с PHP7.x на PHP5.x
Сначала отключите модуль PHP7.2, используя команду:
$ sudo a2dismod php7.2
Module php7.2 disabled.
To activate the new configuration, you need to run:
systemctl restart apache2
Затем включите модуль PHP5.6:
$ sudo a2enmod php5.6
Установите PHP5.6 в качестве версии по умолчанию:
$ sudo update-alternatives --set php /usr/bin/php5.6
Кроме того, вы можете запустить следующую команду, чтобы установить, какую версию PHP по всей системе вы хотите использовать по умолчанию.
$ sudo update-alternatives --config php
Введите номер, чтобы установить его как версию по умолчанию или просто нажмите ENTER, чтобы сохранить текущий выбор.
В случае, если вы установили другие расширения PHP, установите их как по умолчанию.
$ sudo update-alternatives --set phar /usr/bin/phar5.6
Наконец, перезапустите веб-сервер Apache:
$ sudo systemctl restart apache2
Теперь проверьте, является ли версия PHP5.6 версией по умолчанию или нет:
$ php -v
PHP 5.6.37-1+ubuntu18.04.1+deb.sury.org+1 (cli)
Copyright (c) 1997-2016 The PHP Group
Zend Engine v2.6.0, Copyright (c) 1998-2016 Zend Technologies
with Zend OPcache v7.0.6-dev, Copyright (c) 1999-2016, by Zend Technologies
Переключитесь с PHP5.x на PHP7.x
Аналогично, вы можете переключиться с PHP5.x на версию PHP7.x, как показано ниже:
$ sudo a2enmod php7.2
$ sudo a2dismod php5.6
$ sudo update-alternatives --set php /usr/bin/php7.2
$ sudo systemctl restart apache2
Introduction
This guide will show you how to migrate from PHP 7.x to PHP 8 on an Apache web server. Check the migration guide for new features and incompatible changes.
Prerequisites
- A fully-updated Ubuntu Linux 20.04 server, running Apache.
Before proceeding, it is recommended to make a backup of your server. Then, test the backup by deploying a new instance from the backup, then verify that the test instance boots and has the correct data. If you do not make a backup before proceeding, you risk losing your data.
1. List Installed PHP Modules
Before upgrading PHP, find all the PHP 7.x modules currently installed on the server. These will need to be upgraded along with PHP core to their respective 8 versions.
Take note of the version number of the current PHP installation; this will be needed later.
$ dpkg -l | grep php


Output:

php-common                                  install

php7.x-cli                                  install

php7.x-curl                                 install

[...]
2. Install PHP 8
Ubuntu may not yet have PHP version 8 in its official repositories, and you can install PHP 8 from the ondrej/php repository, a long-time and community-trusted repository for Ubuntu PHP packages.
Add the necessary repository.
$ sudo apt install software-properties-common

$ sudo add-apt-repository ppa:ondrej/php

$ sudo apt update
Install PHP 8.
$ sudo apt install php8.0
3. Install Modules
Install related PHP modules; below are some of the most frequently used. Please refer back to step 1 and manually install any modules necessary that are missing, replacing 7.x with 8.0.
$ sudo apt install php8.0-common php8.0-fpm php8.0-mysql php8.0-gmp php8.0-xml php8.0-xmlrpc php8.0-curl php8.0-mbstring php8.0-gd php8.0-dev php8.0-imap php8.0-opcache php8.0-readline php8.0-soap php8.0-zip php8.0-intl php8.0-cli libapache2-mod-php8.0
Once complete, restart PHP
$ sudo systemctl restart php8.0-fpm.service
Verify PHP has been installed correctly.
$ php -v
3. Enable PHP 8 in Apache
The a2enmod and a2dismod scripts can be used for enabling and disabling PHP versions in Apache.
-
Disable the previous PHP version installed. Replace
7.xwith the version number noted in step 1.$ sudo a2dismod php7.x -
Enable PHP 8.
$ sudo a2enmod php8.0 -
Restart the Apache web server.
$ sudo systemctl restart apache2.service
4. Verify Apache is Using PHP 8
-
Navigate to the document root of a website on the server. For this example the document root is
/var/www/html.$ cd /var/www/html -
Create a PHP file.
$ sudo nano phpinfo.php -
Add the following content to the file.
<?php phpinfo(); ?> -
Open a browser and access the file at
http://[ip-address]/phpinfo.phporhttp://[domain]/phpinfo.phpand verify it displays the correct PHP version.
Remember to remove
phpinfo.phpwhen finished to prevent exposing sensitive information about your server.
Conclusion
You have now successfully migrated from PHP 7.x to PHP 8 on your Apache web server.
PHP (recursive acronym for PHP: Hypertext Preprocessor) is an open-source, popular general-purpose scripting language that is widely used and best suited for developing websites and web-based applications. It is a server-side scripting language that can be embedded in HTML.
Currently, there are three supported versions of PHP, i.e PHP 5.6, 7.0, and 8.0. Meaning PHP 5.3, 5.4, and 5.5 have all reached the end of life; they are no longer supported with security updates.
In this article, we will explain how to install all the supported versions of PHP in Ubuntu and its derivatives with the most requested PHP extensions for both Apache and Nginx web servers using an Ondřej Surý PPA. We will also explain how to set the default version of PHP to be used on the Ubuntu system.
Note that PHP 7.x is the supported stable version in the Ubuntu software repositories, you can confirm this by running the apt command below.
$ sudo apt show php
OR
$ sudo apt show php -a
Show PHP Version Information
Package: php
Version: 1:7.0+35ubuntu6
Priority: optional
Section: php
Source: php-defaults (35ubuntu6)
Origin: Ubuntu
Maintainer: Ubuntu Developers <[email protected]>
Original-Maintainer: Debian PHP Maintainers <[email protected]>
Bugs: https://bugs.launchpad.net/ubuntu/+filebug
Installed-Size: 11.3 kB
Depends: php7.0
Supported: 5y
Download-Size: 2,832 B
APT-Sources: http://archive.ubuntu.com/ubuntu xenial/main amd64 Packages
Description: server-side, HTML-embedded scripting language (default)
 PHP (recursive acronym for PHP: Hypertext Preprocessor) is a widely-used
 open source general-purpose scripting language that is especially suited
 for web development and can be embedded into HTML.
 .
 This package is a dependency package, which depends on Debian's default
 PHP version (currently 7.0).
To install the default PHP version from the Ubuntu software repositories, use the command below.
$ sudo apt install php
Install PHP (5.6, 7.x, 8.0) on Ubuntu Using PPA
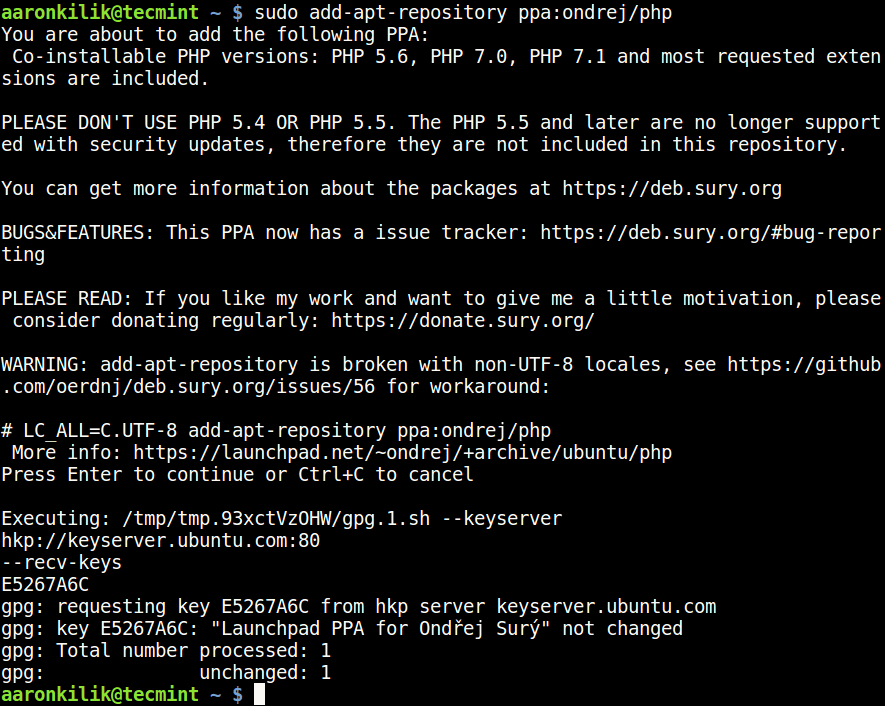
1. First start by adding Ondřej Surý PPA to install different versions of PHP – PHP 5.6, PHP 7.x, and PHP 8.0 on the Ubuntu system.
$ sudo apt install software-properties-common
$ sudo add-apt-repository ppa:ondrej/php
2. Next, update the system as follows.
$ sudo apt-get update
3. Now install different supported versions of PHP as follows.
For Apache Web Server
$ sudo apt install php5.6   [PHP 5.6]
$ sudo apt install php7.0   [PHP 7.0]
$ sudo apt install php7.1   [PHP 7.1]
$ sudo apt install php7.2   [PHP 7.2]
$ sudo apt install php7.3   [PHP 7.3]
$ sudo apt install php7.4   [PHP 7.4]
$ sudo apt install php8.0   [PHP 8.0]
For Nginx Web Server
$ sudo apt install php5.6-fpm   [PHP 5.6]
$ sudo apt install php7.0-fpm   [PHP 7.0]
$ sudo apt install php7.1-fpm   [PHP 7.1]
$ sudo apt install php7.2-fpm   [PHP 7.2]
$ sudo apt install php7.3-fpm   [PHP 7.3]
$ sudo apt install php7.4-fpm   [PHP 7.4]
$ sudo apt install php8.0-fpm   [PHP 8.0]
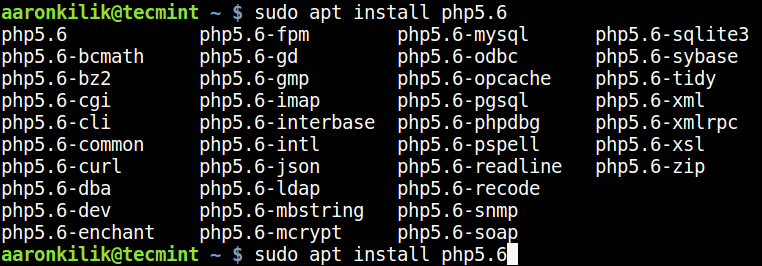
4. To install any PHP modules, simply specify the PHP version and use the auto-completion functionality to view all modules as follows.
------------ press Tab key for auto-completion ------------
$ sudo apt install php5.6
$ sudo apt install php7.0
$ sudo apt install php7.1
$ sudo apt install php7.2
$ sudo apt install php7.3
$ sudo apt install php7.4
$ sudo apt install php8.0
5. Now you can install the most required PHP modules from the list.
------------ Install PHP Modules ------------
$ sudo apt install php5.6-cli php5.6-xml php5.6-mysql
$ sudo apt install php7.0-cli php7.0-xml php7.0-mysql
$ sudo apt install php7.1-cli php7.1-xml php7.1-mysql
$ sudo apt install php7.2-cli php7.2-xml php7.2-mysql
$ sudo apt install php7.3-cli php7.3-xml php7.3-mysql
$ sudo apt install php7.3-cli php7.4-xml php7.4-mysql
$ sudo apt install php7.3-cli php8.0-xml php8.0-mysql
6. Finally, verify your default PHP version used on your system like this.
$ php -v
Set Default PHP Version in Ubuntu
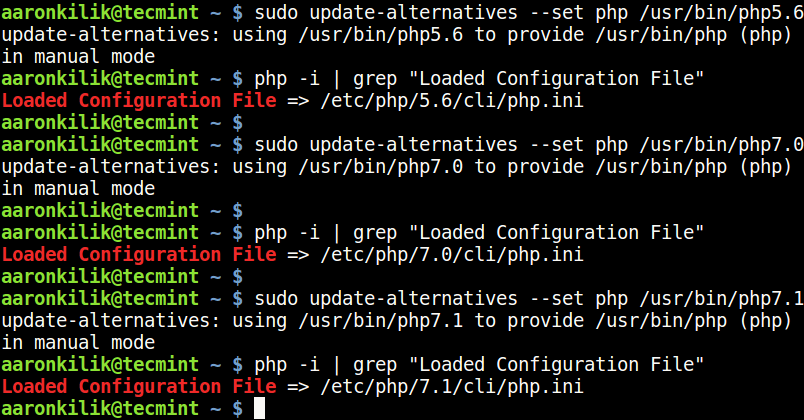
7. You can set the default PHP version to be used on the system with the update-alternatives command, after setting it, check the PHP version to confirm as follows.
------------ Set Default PHP Version 5.6 ------------
$ sudo update-alternatives --set php /usr/bin/php5.6
------------ Set Default PHP Version 7.0 ------------
$ sudo update-alternatives --set php /usr/bin/php7.0
------------ Set Default PHP Version 7.1 ------------
$ sudo update-alternatives --set php /usr/bin/php7.1
------------ Set Default PHP Version 8.0 ------------
$ sudo update-alternatives --set php /usr/bin/php8.0
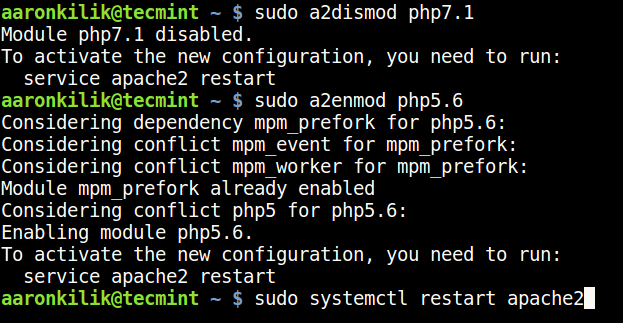
8. To set the PHP version that will work with the Apache web server, use the commands below. First, disable the current version with the a2dismod command and then enable the one you want with the a2enmod command.
----------- Disable PHP Version -----------
$ sudo a2dismod php5.6
$ sudo a2dismod php7.0
$ sudo a2dismod php7.1
$ sudo a2dismod php7.2
$ sudo a2dismod php7.3
$ sudo a2dismod php7.4
$ sudo a2dismod php8.0

----------- Enable PHP Version -----------
$ sudo a2enmod php5.6
$ sudo a2enmod php7.1
$ sudo a2enmod php7.2
$ sudo a2enmod php7.3
$ sudo a2enmod php7.4
$ sudo a2enmod php8.0

----------- Restart Apache Server -----------
$ sudo systemctl restart apache2
9. After switching from one version to another, you can find your PHP configuration file, by running the command below.
------------ For PHP 5.6 ------------
$ sudo update-alternatives --set php /usr/bin/php5.6
$ php -i | grep "Loaded Configuration File"

------------ For PHP 7.0 ------------
$ sudo update-alternatives --set php /usr/bin/php7.0
$ php -i | grep "Loaded Configuration File"

------------ For PHP 7.1 ------------
$ sudo update-alternatives --set php /usr/bin/php7.1
$ php -i | grep "Loaded Configuration File"

------------ For PHP 7.2 ------------
$ sudo update-alternatives --set php /usr/bin/php7.2
$ php -i | grep "Loaded Configuration File"

------------ For PHP 7.3 ------------
$ sudo update-alternatives --set php /usr/bin/php7.3
$ php -i | grep "Loaded Configuration File"

------------ For PHP 7.4 ------------
$ sudo update-alternatives --set php /usr/bin/php7.4
$ php -i | grep "Loaded Configuration File"

------------ For PHP 8.0 ------------
$ sudo update-alternatives --set php /usr/bin/php8.0
$ php -i | grep "Loaded Configuration File"
You may also like:
- How to Use and Execute PHP Codes in Linux Command Line
- 12 Useful PHP Commandline Usage Every Linux User Must Know
- How to Hide PHP Version in HTTP Header
In this article, we showed how to install all the supported versions of PHP in Ubuntu and its derivatives. If you have any queries or thoughts to share, do so via the feedback form below.
If You Appreciate What We Do Here On TecMint, You Should Consider:
TecMint is the fastest growing and most trusted community site for any kind of Linux Articles, Guides and Books on the web. Millions of people visit TecMint! to search or browse the thousands of published articles available FREELY to all.
If you like what you are reading, please consider buying us a coffee ( or 2 ) as a token of appreciation.
We are thankful for your never ending support.
The previous tutorial provided the steps required to install multiple PHP versions on Ubuntu 20.04 LTS. You can follow How To Install Multiple Versions Of PHP On Ubuntu 20.04 LTS.
Switch PHP versions — CLI
Verify the currently active PHP as shown below.
# Verify PHP
php --version# Output
PHP 8.0.13 (cli) (built: Nov 22 2021 09:50:43) ( NTS )
Copyright (c) The PHP Group
Zend Engine v4.0.13, Copyright (c) Zend Technologies
    with Zend OPcache v8.0.13, Copyright (c), by Zend Technologies
We can configure multiple versions of PHP installed on Ubuntu 20.04 LTS using the commands as shown below.
# PHP 7.0
sudo update-alternatives --set php /usr/bin/php7.0
sudo update-alternatives --set phar /usr/bin/phar7.0
sudo update-alternatives --set phar.phar /usr/bin/phar.phar7.0# PHP 8.0
sudo update-alternatives --set php /usr/bin/php8.0
sudo update-alternatives --set phar /usr/bin/phar8.0
sudo update-alternatives --set phar.phar /usr/bin/phar.phar8.0
Now we can switch among PHP 7.0 or PHP 8.0 using the commands as shown below.
# Switch PHP
sudo update-alternatives --config php# Output
There are 2 choices for the alternative php (providing /usr/bin/php).Selection Path Priority Status
------------------------------------------------------------
0 /usr/bin/php8.0 80 auto mode
1 /usr/bin/php7.0 70 manual mode
* 2 /usr/bin/php8.0 80 manual modePress <enter> to keep the current choice[*], or type selection number: 1
update-alternatives: using /usr/bin/php7.0 to provide /usr/bin/php (php) in manual mode# Switch
sudo update-alternatives --config phar# Output
There are 2 choices for the alternative phar (providing /usr/bin/phar).Selection Path Priority Status
------------------------------------------------------------
0 /usr/bin/phar8.0 80 auto mode
1 /usr/bin/phar7.0 70 manual mode
* 2 /usr/bin/phar8.0 80 manual modePress <enter> to keep the current choice[*], or type selection number: 1
update-alternatives: using /usr/bin/phar7.0 to provide /usr/bin/phar (phar) in manual mode# Switch
sudo update-alternatives --config phar.phar# Output
There are 2 choices for the alternative phar.phar (providing /usr/bin/phar.phar).Selection Path Priority Status
------------------------------------------------------------
0 /usr/bin/phar.phar8.0 80 auto mode
1 /usr/bin/phar.phar7.0 70 manual mode
* 2 /usr/bin/phar.phar8.0 80 manual modePress <enter> to keep the current choice[*], or type selection number: 1
update-alternatives: using /usr/bin/phar.phar7.0 to provide /usr/bin/phar.phar (phar.phar) in manual mode
Now, again verify the currently active PHP as shown below.
# Verify PHP
php --version# Output
PHP 7.0.33-57+ubuntu20.04.1+deb.sury.org+1 (cli) (built: Nov 19 2021 06:39:53) ( NTS )
Copyright (c) 1997-2017 The PHP Group
Zend Engine v3.0.0, Copyright (c) 1998-2017 Zend Technologies
    with Zend OPcache v7.0.33-57+ubuntu20.04.1+deb.sury.org+1, Copyright (c) 1999-2017, by Zend Technologies
This is helpful for the applications reliable on the PHP in CLI mode to run console based programs. We can switch among the multiple versions of PHP installed on Ubuntu systems.
Switch PHP versions — Apache Web Server
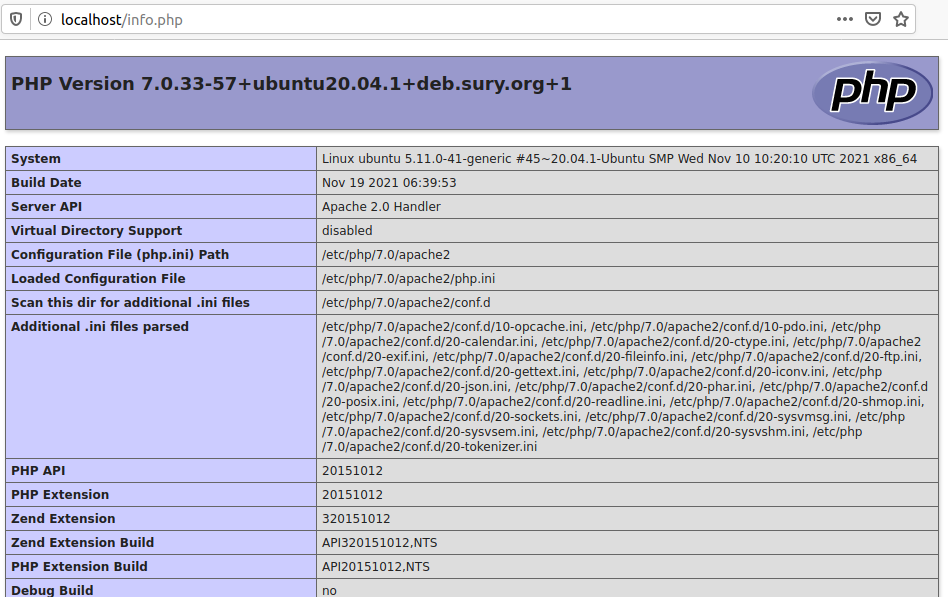
Similar to CLI mode, we can also switch among multiple versions of PHP for the Apache Web Server. In the previous tutorial — How To Install Multiple Versions Of PHP On Ubuntu 20.04 LTS, we saw that the PHP version remains same i.e. PHP 7.0 even after installing the recent version of PHP i.e. PHP 8.0 as shown in Fig 1.
Fig 1
We can switch among the PHP versions for the Apache Web server using the commands as shown below.
# Disable PHP 7.0
sudo a2dismod php7.0# Output
Module php7.0 disabled.
To activate the new configuration, you need to run:
  systemctl restart apache2# Enable PHP 8.0
sudo a2enmod php8.0# Output
Considering dependency mpm_prefork for php8.0:
Considering conflict mpm_event for mpm_prefork:
Considering conflict mpm_worker for mpm_prefork:
Module mpm_prefork already enabled
Considering conflict php5 for php8.0:
Enabling module php8.0.
To activate the new configuration, you need to run:
  systemctl restart apache2# Restart Apache Web Server
sudo service apache2 restart
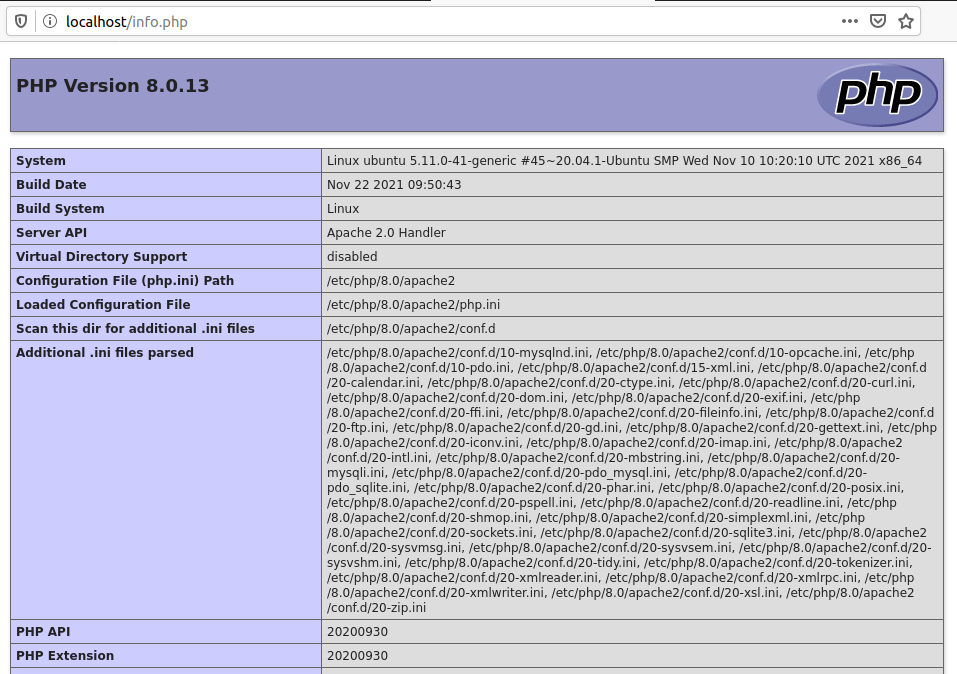
Now, again refresh the info.php using the Web Browser. It should be similar to Fig 2.
Fig 2
We can also switch back to PHP 7 using the same commands.
Switch PHP versions — Apache Web Server — PHP FPM
Instead of switch PHP version for Apache Web Server which impacts all the Virtual Hosts, we can also configure the selected Virtual Host to use the PHP version specified by us. We can do so using PHP FPM installed by us as shown in How To Install Multiple Versions Of PHP On Ubuntu 20.04 LTS.
# Check Status - PHP 7.0 FPM
systemctl status php7.0-fpm# Output
● php7.0-fpm.service - The PHP 7.0 FastCGI Process Manager Loaded: loaded (/lib/systemd/system/php7.0-fpm.service; enabled; vendor preset: enabled) Active: active (running) since Sat 2021-12-04 20:35:28 PST; 1h 14min ago Docs: man:php-fpm7.0(8) Main PID: 42546 (php-fpm7.0) Status: "Processes active: 0, idle: 2, Requests: 0, slow: 0, Traffic: 0req/sec" Tasks: 3 (limit: 9432) Memory: 18.1M CGroup: /system.slice/php7.0-fpm.service ├─42546 php-fpm: master process (/etc/php/7.0/fpm/php-fpm.conf) ├─42548 php-fpm: pool www └─42549 php-fpm: pool www Dec 04 20:35:28 ubuntu systemd[1]: Starting The PHP 7.0 FastCGI Process Manager... Dec 04 20:35:28 ubuntu systemd[1]: Started The PHP 7.0 FastCGI Process Manager.# Check Status - PHP 8.0 FPM
systemctl status php8.0-fpm# Output
● php8.0-fpm.service - The PHP 8.0 FastCGI Process Manager Loaded: loaded (/lib/systemd/system/php8.0-fpm.service; enabled; vendor preset: enabled) Active: active (running) since Sat 2021-12-04 21:15:28 PST; 35min ago Docs: man:php-fpm8.0(8) Process: 61492 ExecStartPost=/usr/lib/php/php-fpm-socket-helper install /run/php/php-fpm.sock /etc/php/8.0/fpm/pool.d/www.co> Main PID: 61489 (php-fpm8.0) Status: "Processes active: 0, idle: 2, Requests: 0, slow: 0, Traffic: 0req/sec" Tasks: 3 (limit: 9432) Memory: 10.7M CGroup: /system.slice/php8.0-fpm.service ├─61489 php-fpm: master process (/etc/php/8.0/fpm/php-fpm.conf) ├─61490 php-fpm: pool www └─61491 php-fpm: pool www Dec 04 21:15:28 ubuntu systemd[1]: Starting The PHP 8.0 FastCGI Process Manager... Dec 04 21:15:28 ubuntu systemd[1]: Started The PHP 8.0 FastCGI Process Manager.
We can see that both PHP 7.0 FPM and PHP 8.0 FPM are in running state. Now, enable Apache2 to use multiple versions of PHP using the command as shown below.
# Install FCGID
sudo apt install libapache2-mod-fcgid# Enable FCGID
sudo a2enmod actions fcgid alias proxy_fcgi# Restart Apache
sudo service apache2 restart
Also, update the Virtual Host as shown below.
<VirtualHost *:80>
----
----<FilesMatch .php$>
# For Apache version 2.4.10 and above
SetHandler "proxy:unix:/run/php/php7.0-fpm.sock|fcgi://localhost"
</FilesMatch>----
----
</VirtualHost>
Also, reload Apache as shown below.
# Reload Apache
sudo service apache2 reload
Now, check the output of info.php using the Browser. It should show the configurations specific to PHP 7. Similarly, we can change PHP 7 to PHP 8 for the selected virtual host, without impacting the other virtual hosts.
Switch PHP versions — NGINX
Switching PHP version for NGINX is straight-forward, since it uses PHP FPM to execute the PHP scripts. We can simply specify the PHP version while configuring the Server Block as shown below. You can also follow How To Install PHP For Nginx On Ubuntu 20.04 LTS for more details.
# Server Block with PHP FPM
sudo nano /etc/nginx/sites-available/example.comserver {
...
...# pass the PHP scripts to FastCGI
location ~ .php$ {
root /var/www/example.com/html;
fastcgi_intercept_errors on;
fastcgi_pass unix:/run/php/php7.0-fpm.sock;
fastcgi_index index.php;
fastcgi_param SCRIPT_FILENAME $document_root/$fastcgi_script_name;
include fastcgi_params;
}...
...
}
Summary
This tutorial provided the steps required to switch among the multiple PHP versions installed on Ubuntu 20.04 LTS for CLI, Apache Web Server, and NGINX.

