33 страницы подробных инструкций и пользовательских руководств по эксплуатации
 26:43
26:43
Panasonic NV-180 собран и работает
 21:39
21:39
Обзор видеокамеры Panasonic NV-RX11
 04:48
04:48
Panasonic NV-HD650 EE Hi-Fi stereo
 33:10
33:10
Ремонт видеомагнитофона Panasonic NV-SD3. Часть 1.
 00:55
00:55
Не большой ремонт Видеомагнитофона Panasonic NV-SD25.
 05:38
05:38
Видеомагнитофон Panasonic NV-FS88 S-VHS
 02:29
02:29
Panasonic NV-SD450EU
 03:01
03:01
Panasonic NV-SD 350. Panasonic NV-SD 450. Panasonic NV-HD 650. часть 1
Установка часов вкм, Подготовка, Операции
Например, Отображение информации на экране телевизора, Функция сброса временной установки, Установите время (ч:м), Символы дисплея, Примеча
- Изображение
- Текст
- Содержание
Установка часов ВКМ
Установка языка при отображении
информации на экране телевизора
Установка часов ВКМ
Встроенные часы используются, чтобы привести в
действие таймер для автоматической записи, и
должны быть установлены на точное время.
Во встроенных цифровых часах используется
24-часовая система.
Подготовка
• Убедитесь в том, что телевизор
включен, и выбран желаемый
канал просмотра изображения с
видеомагнитофона.
• Включите видеомагнитофон.
f
POWER TV/AV VOLUME
©Off
[TV]
tRACKINfi.’V-LOCK DISPLAY
GH© O
CHECK MENU X-—s.
o o/®io
:
ancel
o
o (yiaio
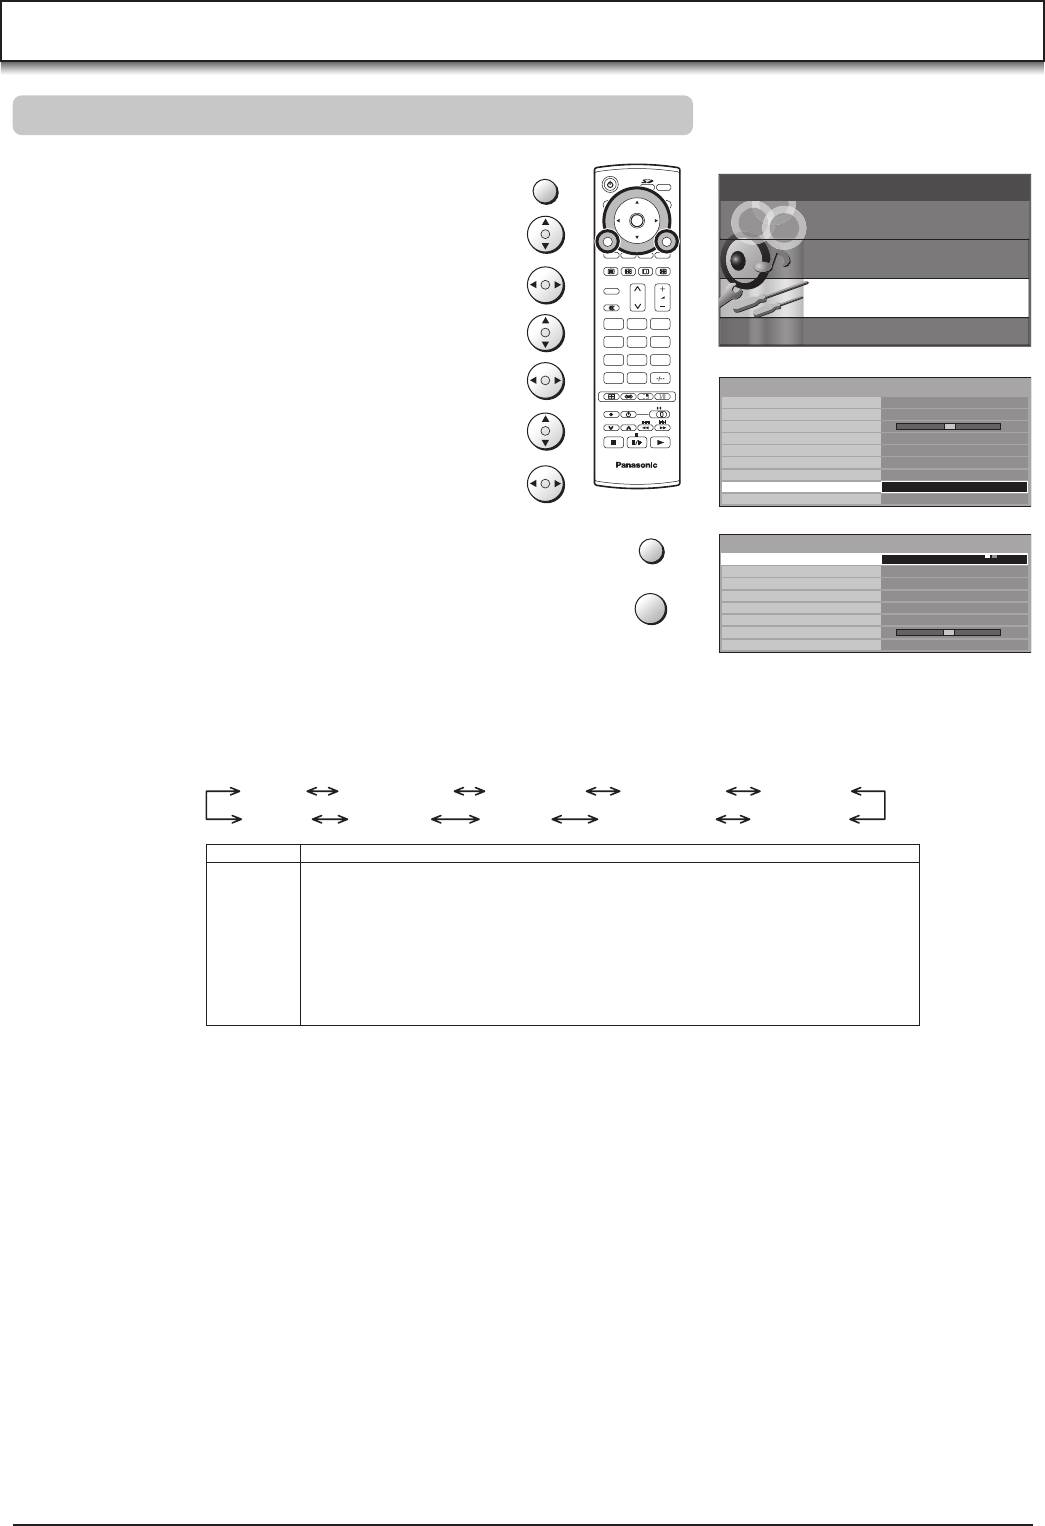
Операции
Например:
Установить часы на 16 октября 1999 года на время
20:15.
Отображение
информации на
экране телевизора
1
MtNU
о
ОЗОМЕНЮ
• ЯЗЫК
УСТАНОВКА ЧАСОВ
ПРЕДУСТАНОВКА ТЮНЕРА
:Ti
СИСТЕМА
ОПЦИЯ
ДЕМОНСТРАЦИЯ
ВЫБОР
:BS.ENTER
КОНЕЦ :MENU
Нажмите кнопку MENU.
2
®
ENIEH
О
ОЗОМЕНЮ
ЯЗЫК
• УСТАНОВКА ЧАСОВ
ПРЕДУСТАНОВКА ТЮНЕРА
СИСТЕМА
ОПЦИЯ
ДЕМОНСТРАЦИЯ
ВЫБОР :Ва .ENTER
КОНЕЦ :MENU
Выберите функцию
УСТАНОВКА ЧАСОВ.
Установите каждый параметр нажатием А или Т и ►.
Установите год (Г) “1999”.
…Л
-1999
УСТАНОВКА ЧАСОВ
. М Д Ч:1
ВЫБОР; BS
CTAPT:MENU
-/+;ВВ
Функция сброса
временной установки
Если часы спешат или отстают
менее чем на 2 минуты, точное
время может быть легко выставлено
повторно.
Например:
Выставить часы повторно на
12:00:00.
1 Выберите функцию УСТАНОВКА
ЧАСОВ при отображении
информации на экране
телевизора и нажмите кнопку
ENTER.
2 При показаниях текущего
времени на дисплее в ВКМ
между 11:58 и 12:01 нажмите
кнопку MENU, как только Вы
услышите сигнал времени
12:00:00. При этом произойдет
сброс времени на 12:00:00.
0
®
■ti
®
УСТАНОВКА ЧАСОВ
Г
м
Д
Ч:М
1999
0:00
ВЫБОР: ВО
-/+:ВИ
CTAPT:MENU
Установите месяц (М) “10”
УСТАНОВКА ЧАСОВ
Г
м
Д Ч:М
>99
10
-^161-
0:00
ВЫБОР:Ва
-/+:DD
CTAPT:MENU
Установите дату (Д) “16”.
УСТАНОВКА ЧАСОВ
Г
1999
М
Д
10
16
-20:15-
ВЫБОРгВВ
-/+:Ва
CTAPT-.MENU
Установите время (Ч:М)
“20:15”
• При удерживании этой кнопки
нажатой, индикации изменяются с
шагом в 30 минут.
• Нет необходимости нажимать ►.
Символы дисплея
MtlNIU
О
Нажмите кнопку MENU.
• Часы начнут работать.
Примечание:
В случае отключения питания часы будут работать по меньшей мере 60 минут за
счет резервной системы питания.
43

Хранение вещания тв в вашем вкм, Подготовка, Выберите функцию предустановка тюнера
Примечания, G)ff±) ф ф, О©co^ о owo, Процедура автоматической настройки, Введение, Нажмите кнопку menu
- Изображение
- Текст
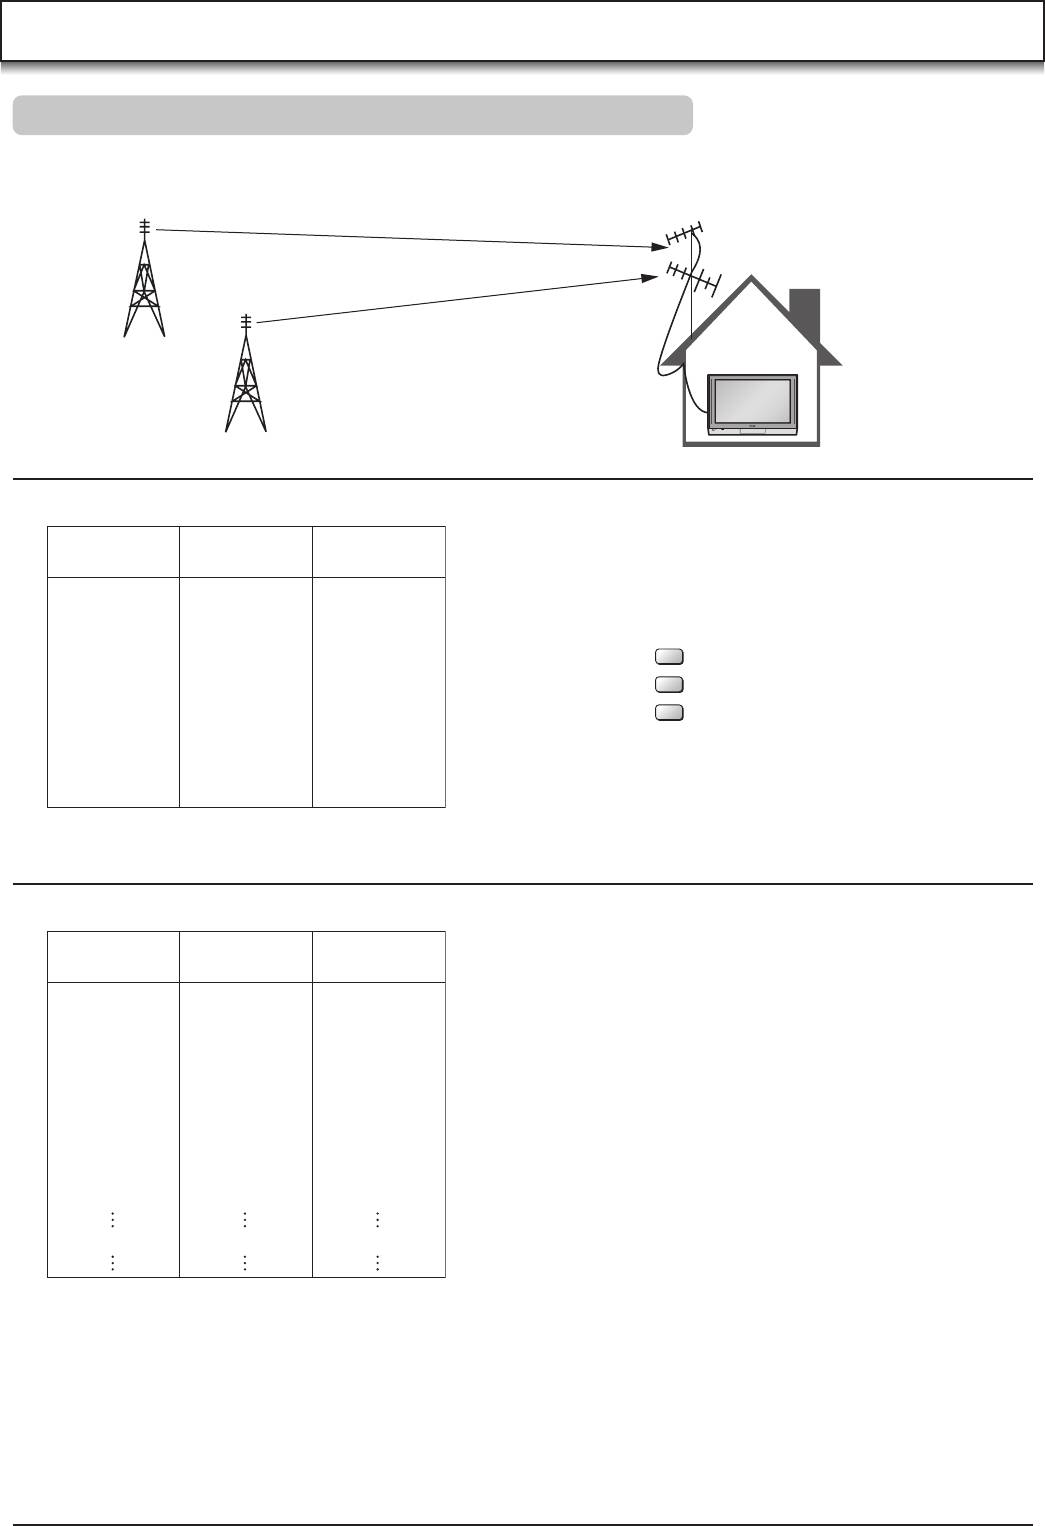
Хранение вещания ТВ в Вашем ВКМ
Введение
Видеомагнитофон снабжен своим собственным
тюнером (таким, какой имеется у обычного
телевизора) и может быть установлен для приема до
99 телевизионных вещательных станций.
f
POWER TV/ÂV VOLUME
©Off
|W|
TRACKINÜ.V-LOCK DISMAY RE^f
G)ff±) Ф Ф
CHECK MENU
^
SP-‘LP
О
©Co^
О oWo
POWER
® © О
© © © ©
PAUSE/
SLOW
HNDEX^
STILL
Подготовка
• Убедитесь в том, что телевизор включен, и выбран
желаемый канал просмотра изображения с
видеомагнитофона.
• Включите ВКМ и выберите позицию программы, за
исключением А1 илиА2.
Процедура автоматической настройки
Операции Отображение информации
на экране телевизора
1
MtINU
О
OSD МЕНЮ
•ЯЗЫК
УСТАНОВКА ЧАСОВ
ПРЕДУСТАНОВКА ТЮНЕРА
СИСТЕМА
ОПЦИЯ
ДЕМОНСТРАЦИЯ
ВЫБОР ;BQ-ENTER
КОНЕЦ ;MENU
Нажмите кнопку MENU.
20
0
tNlEH
О
OSD МЕНЮ
ЯЗЫК
УСТАНОВКА ЧАСОВ
• ПРЕДУСТАНОВКА ТЮНЕРА
СИСТЕМА
ОПЦИЯ
ДЕМОНСТРАЦИЯ
ВЫБОР —SB.
enter
КОНЕЦ :MENU
Выберите функцию
ПРЕДУСТАНОВКА
ТЮНЕРА.
3
0
0′
0 0
СН 1
CLEAR…. ON •OFF
-СИСТЕМА- •BOOK I
‘WIESECKM •АВТО ON
АВТОПОИСК
ПОИСК
1
FINE
ВЫБОР:ЕЗВ
-/+:DD
КОНЕЦ:МЕНи
Выберите функцию
СИСТЕМА, а затем
выберите желаемую
систему телеве£цания.
СН 1
CLEAR
ON *С
СИС.Т.ЕМА. •ВО DK
-MESECAM- »АВТО
‘АВТОГТОИбК
ПОИСК
1
FINE
еыБОРгЕЗО
-/+:
0
а
КОНЕЦ;МЕНи
Выберите функцию
MESECAM, а затем
выберите позицию АВТО.
0
СН 1
CLEAR
СИСТЕМА
MESECAM…
■АВТОПОИСК
ПОИСК'»”’
FINE
0
ВЫБОР:СВ
ON
»OFF
•BGDK
I
•АВТО ON
-/-К: DO
КОНЕЦ;МЕНи
0
0
«I Выберите функцию
АВТОПОИСК и нажмите
кнопку ◄ или ►.
• После завершения
автоматической настройки
отображение информации на
экране телевизора исчезает, и
выбирается позиция программы 1.
ПОИСК
KOHÈtj;MENU
Примечания:
• Функция автоматической настройки отыскивает ТВ станции в диапазоне от
минимальной ОВЧ (VHF) до максимальной УВЧ (UHF) и запоминает данные для
каждой позиции программы. Оставшиеся позиции программы пропускаются.
• Завершение поиска с помощью функции автоматической настройки занимает
семь или более минут.
• Установка функций СИСТЕМА и MESECAM производится для каждой позиции
программы, используя одинаковые установки, выбранные в пунктах 3 и 4.
• В случае, если невозможно правильно настроить ВКМ с помощью автопоиска,
следуйте процедуре на следующе странице.
44

Процедура установки системы вручную, Процедура установки системы mesecam вручную, Процедура настройки вручную
Процедура точной настройки, Исключение незанятых позиций программы, Схема каналов
- Изображение
- Текст
Процедура установки системы
вручную
1 Выберите желаемую позицию программы нажатием
кнопки V или
2 Нажмите кнопку MENU.
3 Выберите функцию ПРЕДУСТАНОВКА ТЮНЕРА
нажатием кнопки
А
или
Т
, а затем нажмите кнопку
ENTER.
4 Выберите позицию СИСТЕМА нажатием кнопки
А
или ▼, а затем выберите систему телевещания
нажатием кнопки ◄ или ►.
• BGDK: При приеме системы телевещания PAL
B.G.H.D или SECAM B.G.D.K.K1.
• I:
При приеме системы телевещания PAL I.
5 Нажмите кнопку MENU дважды.
Процедура установки системы
MESECAM вручную
1 Выберите желаемую позицию программы нажатием
кнопки V» или /Ч.
2 Нажмите кнопку MENU.
3 Выберите функцию ПРЕДУСТАНОВКА ТЮНЕРА
нажатием кнопки
А
или ▼, а затем нажмите кнопку
ENTER.
4 Выберите позицию MESECAM нажатием кнопки
А
или ▼, а затем выберите позицию ON нажатием
кнопки ◄ или ►.
5 Нажмите кнопку MENU дважды.
Процедура настройки вручную
1 Нажмите кнопку MENU.
2 Выберите функцию ПРЕДУСТАНОВКА ТЮНЕРА
нажатием кнопки
А
или ▼, а затем нажмите кнопку
ENTER.
3 Выберите позицию СН нажатием кнопки
А
или
Т
, а
затем выберите позицию программы нажатием
кнопки ◄ или ►.
4 Убедитесь в том, что для позиции CLEAR выбрано
положение OFF.
5 Выберите позицию СИСТЕМА нажатием кнопки
А
или ▼, а затем выберите систему телевещания
нажатием кнопки ◄ или ►.
• BGDK: При приеме системы телевещания PAL
B.G.H.D или SECAM B.G.D.K.K1.
• I:
При приеме системы телевещания PAL I.
6 Выберите позицию MESECAM нажатием кнопки
А
или ▼, а затем выберите позицию АВТО нажатием
кнопки ◄ или ►.
• ВКМ автоматически различает системы
телевещания PAL и SECAM.
• Если в изображении отсутствует цветность при
выборе режима АВТО, установите позицию ON.
7 Выберите позицию ПОИСК нажатием кнопки
А
или
Т, а затем нажмите кнопку ►.
Н 1
М
CH2 ПОИСК
K0HÈQ:MENU
./
СН2
ПОИСК 2
КОНЕЦ:МЕЫи
• Если настройка на желаемую ТВ станцию не
выполнена, нажмите кнопку ► снова.
• Нажмите кнопку MENU и повторите пункты 3-7
для каждой позиции программы, которую Вы
желаете настроить на станцию.
8 Нажмите кнопку MENU три раза.
Процедура точной настройки
1 Нажмите кнопку MENU.
2 Выберите функцию ПРЕДУСТАНОВКА ТЮНЕРА
нажатием кнопки А или ▼, а затем нажмите кнопку
ENTER.
3 Выберите позицию СН нажатием кнопки А или ▼, а
затем выберите позицию программы нажатием
кнопки ◄ или ►.
4 Выберите позицию FINE нажатием кнопки А или ▼.
5 Нажмите кнопку ◄ или ► с
целью наилучшей настройки.
•Для возвращения настройки в
предыдущее положение
нажмите кнопку ENTER.
6 Нажмите кнопку MENU.
СН2
FINE
AFC:ENTER
КОНЕЦ:МЕЫи
Исключение Незанятых Позиций
Программы
1 Нажмите кнопку MENU.
2 Выберите функцию ПРЕДУСТАНОВКА ТЮНЕРА
нажатием кнопки А или ▼, а затем нажмите кнопку
ENTER.
3 Выберите позицию СН нажатием кнопки А или Т, а
затем выберите позицию программы нажатием
кнопки ◄ или ►.
4 Выберите позицию CLEAR нажатием кнопки А или
▼ .
5 Выберите позицию ON нажатием кнопки ◄ или ►.
• Повторите пункты 3 и 5 для другой незанятой
позиции программы для пропуска в течение выбора
позиций программы.
•Для отмены исключения позиции программы
выберите позицию этой программы и затем
выберите позицию CLEAR OFF.
6 Нажмите кнопку MENU дважды.
Схема каналов
СИСТЕМА
0B4(VHF)
KTB
УВЧ(иНР)
В
G
D
К
Стандарт CCIR
STD(B.G.H)
E2-E12
S01-S05
M1-M10
U1-U10
21-69
CHINA (D)
1-12
ZI-ZI 7
13-57
EAST EU
(D.K.K1)
1-12
44-300 MHz 21-69
1
HONG KONG,
UK(I)
—
21-69
со
СО
о
3:
со
к
45

0 о ó о oi©lo, Oco^ о owo, Подготовка
Установка тв системы цветности
- Изображение
- Текст
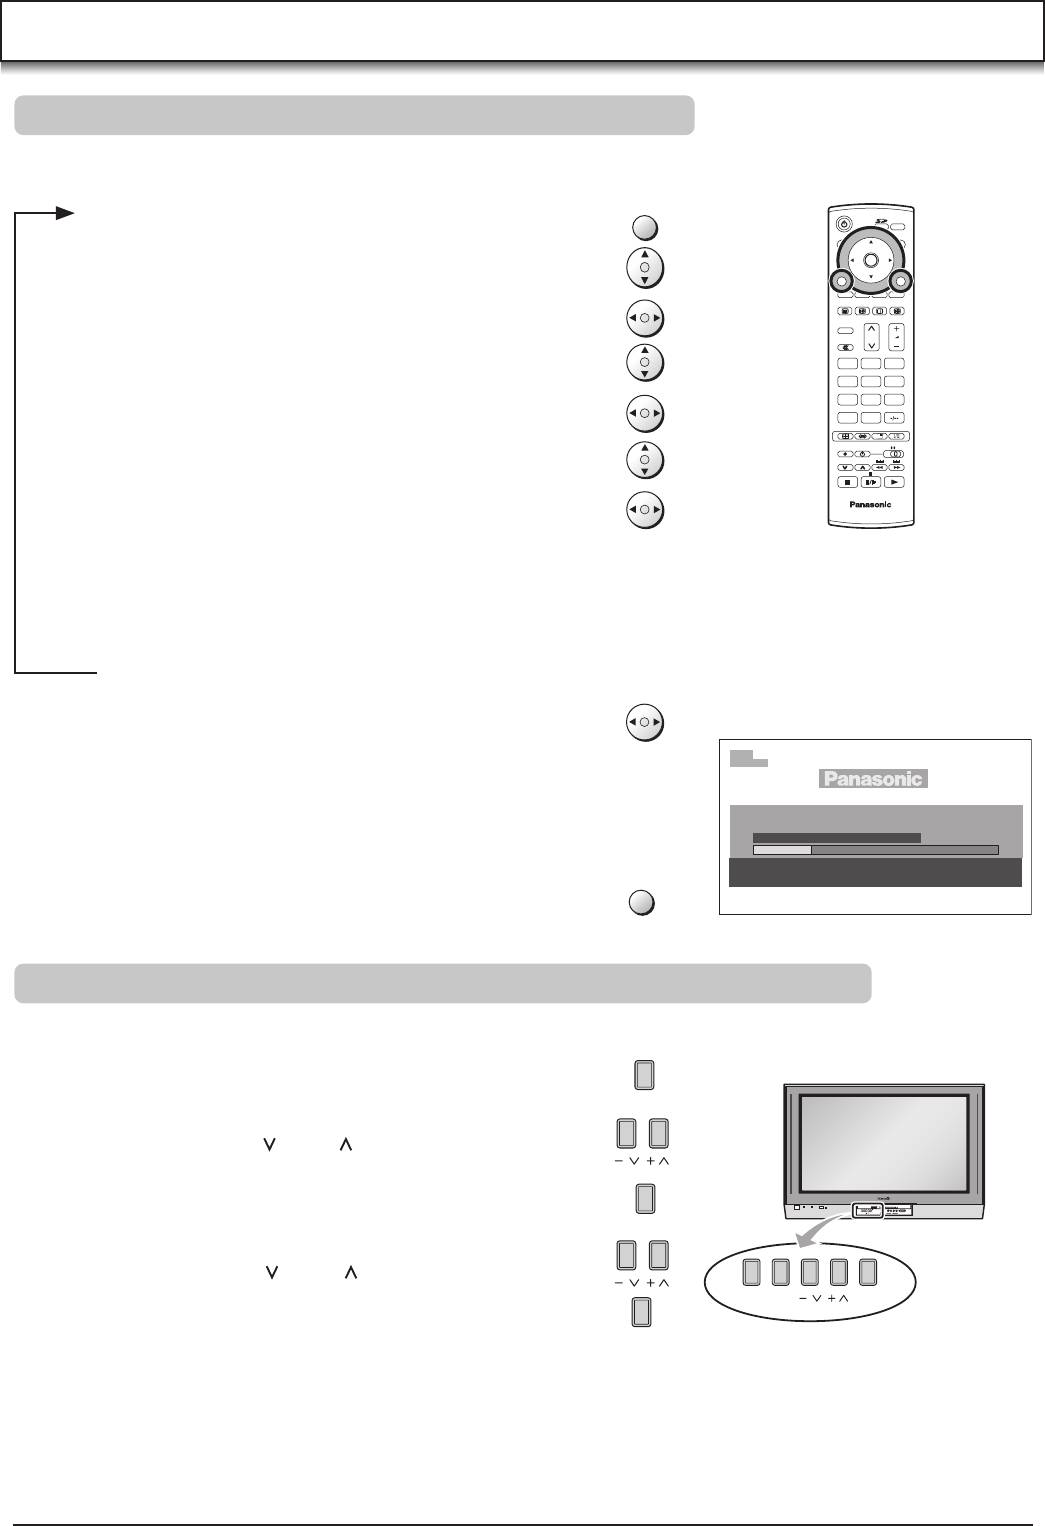
Установки с использованием функции отображения
информации на экране телевизора
Подготовка
• Убедитесь в том, что телевизор включен, и выбран
желаемый канал просмотра изображения с
видеомагнитофона.
• Включите ВКМ,
/»
power
TV/AV VOLUME
©Off
ИЯ
TRACKING;V-LOCK DISPLAY В||
е
Т
0-0 О Ó
О Oi©lO
:ANCEL
у
-^ FNTER ^——— X
oCo^
О owo
Выбор кассетной ленты
соответствующей длительности для
получения правильной индикации
оставшегося времени на ленте
1 Нажмите кнопку MENU.
MENU
О
2 Выберите функцию ОПЦИЯ.
0
ENTER
ЯЗЫК
УСТАНОВКА ЧАСОВ
ПРЕДУСТАНОВКА ТЮНЕРА
СИСТЕМА
О
•ОПЦИЯ
ДЕМОНСТРАЦИЯ
0
ВЫБОР ;QQ,ENTER
КОНЕЦ ;MENU
L J
3 Выберите позицию ВЫБОР ЛЕНТЫ.
0
0
9ПЦИЯ
/
выбор
ленты
‘“
#ЕЮТ”»ЕТдЗ’ Е240
Е260
СКОРОСТЬ ЛЕНТЫ *8Р
LP
ГОЛУБОЙ ЭКРАН ON »OFF
ВЫБОР:00
-/н-:Са
КОНЕЦ ;MENU
Установка ТВ системы цветности
1 Нажмите кнопку MENU.
MENU
О
Отображение
2 Выберите функцию СИСТЕМА, информации на
экране телевизора
3 Выберите позицию АВТО.
0
0
•АВТО
PAL
MESECAM
NTSC
ВЫБОР
;QS
КОНЕЦ ;MENU
• ВКМ автоматически различает сигналы систем
PAL, SECAM/MESECAM и NTSC. Если в
изображении отсутствует цветность во время
записи или воспроизведения с внешнего
аудиовизуального источника, установите PAL,
MESECAM или NTSC.
4 Нажмите кнопку MENU дважды.
MhNU
О
4 Выберите соответствующую длительность
кассетной ленты.
0 0
/
выбор
ленты
‘“
Е240
Е260
СКОРОСТЬ
ЛЕНТЫ
«SP
LP
ГОЛУБОЙ ЭКРАН ON #OFF
BblBOPiQQ
-/-Е:С0
КОНЕЦ :MENU
0
^
Г
OSD МЕНЮ
ЯЗЫК
УСТАНОВКА ЧАСОВ
«1
о
ПРЕДУСТАНОВКА ТЮНЕРА
•СИСТЕМА
Е180: Для лент ЕЗО, -60, -90, -120, -150, и -180.
0
«*
ДЕМОНСТРАЦИЯ
Е195: Для лент Е195.
ВЫБОР :0 В.
enter
КОНЕЦ :MENU
Е240: Для лент Е240.
1
Е260: Для лент Е260 и -300.
46

Выбор желаемой скорости ленты при записи вручную, После выбора всех установок, Для выполнения функции голубой экран
Страница 15
- Изображение
- Текст
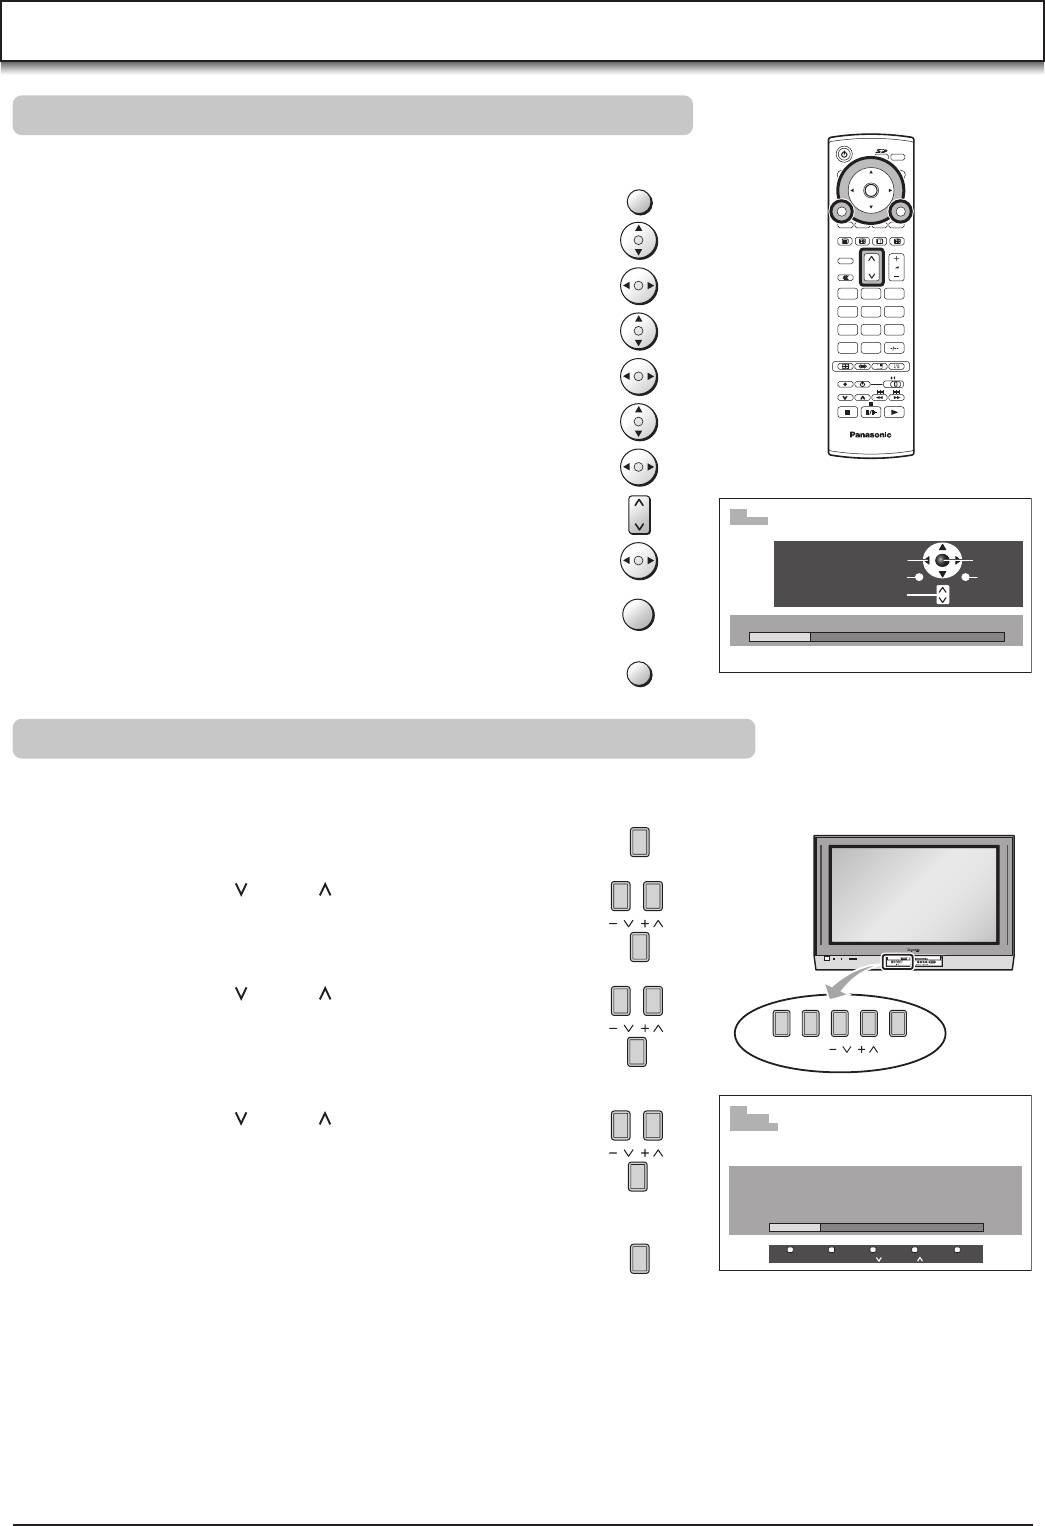
Установки с использованием функции отображения
информации на экране телевизора
Выбор желаемой скорости ленты при
записи вручную
1 Выберите позицию СКОРОСТЬ ЛЕНТЫ.
Отображение
информации на
экране телевизора
0
Г
ОПЦИЯ
ВЫБОР ЛЕНТЫ
.• Бгво.. ^ ^ B-19S…. .£240 Е260
-СКОРОСТЬ ЛЕНТЫ’»SP LP
ГОЛ УБОЙ* ЭКРАН’ »ON OFF
0
ВЫБОР:Са
-/+:DQ
КОНЕЦ:МЕМи
2 Выберите желаемую скорость ленты.
0
0
опция
ВЫБОР ЛЕНТЫ
Е260
-СКОРОСТЬ ЛЕНТЫ’ SP *LP
ГОЛУБОЙ* ЭКРАН’ *ON OFF
ВЫБОР:В&
КОНЕЦ:МЕЫи
После выбора всех установок
Нажмите кнопку MENU дважды для исчезновения
отображения информации на экране телевизора.
MtlNU
О
is:
CQ
О
X
CD
к-
Для выполнения функции ГОЛУБОЙ
ЭКРАН
Если для функции ГОЛУБОЙ ЭКРАН выбрана позиция
ОМ, экран будет иметь голубую окраску при отсутствии
сигнала или в случае, если принимаемый сигнал очень
слабый.
1 Выберите позицию ГОЛУБОЙ ЭКРАН.
0
0
опция
ВЫБОР ЛЕНТЫ
• Е180
Е195
Е240
Е260
,CKQRQCXbJ3EHJi}l »SP
LP
— ГОЛУБОЙ ЭКРАН’ »ON
OFF
BblBOP;DQ
-/+:QB
КОНЕЦ:МЕМи
2 Выберите позицию ON.
0
0
ОПЦИЯ
ВЫБОРЛЕНТЫ
• E18D Е195
Е240
Е260
,CKORQCXbJ3EHJiìl *SP
LP
— ГОЛУБОЙ ЭКРАН.’ »ON OFF
ВЫБОР:0В
-/+;Ва
КОНЕЦ:МЕМи
• Если для функции ГОЛУБОЙ ЭКРАН выбрана
позиция OFF, функция голубого экрана не
работает.
• Запись голубого изображения функции голубого
экрана невозможна.
47

Установка устройства дистанционного
управления для управления Вашим ТВ
Вы можете управлять телевизором следующих
фирм-производителей (смотрите следующую
таблицу), используя прилагаемое устройство
дистанционного управления лосле его
нижеследующей установки.
Подготовка
Установите батареи в устройство дистанционного
управления. См. стр. 39.
Операции
Включите телевизор.
Р Нажмите кнопку, соответствующую
^ Вашей фирме-производителю ТВ
(смотрите следующую таблицу), при
удерживании нажатой кнопки TV
SELECT.
• Если установка верна, телевизор
выключится автоматически.
Фирма-
производитель ТВ
Функциональная
кнопка
Panasonic/Mational
POWER
О
+
1—
TV SELECT [jy]
^ TV/AV
О
-E Г )
TV SELECT Hy]’^
Q VOLUME
TV SELECT [
tv
]®
TV SELECT
SONY
VOLUME
® +
^0
TV SELECT
Гту]^
TOSHIBA
0
+
^0
TV SELECT +
Liyj
JVC
ГЛ CHECK
W +
TV SELECT cj
HITACHI
0
+
0
TV SELECT ^
MITSUBISHI
SP/LP
^ + Г )
TV SELECT
CANCEL
^ + ГЛ
TV SELECT W
SHARP
TIMER REC
^ + О
TV SELECT TV
PHILIPS
+Л OSD-v
0
+
Q
TV SELECT ^
В случае, если фирмой-производителем является
Panasonic/National или MITSUBISHI:
Когда питание ТВ отключится после выполнения
пункта 2, включите его снова и подрегулируйте
уровень громкости ТВ, используя это устройство
дистанционного управления. Уровень громкости может
быть отрегулирован, если функциональная кнопка
соответствует фирме-производителю ТВ.
Если регулировка уровня громкости ТВ является
невозможной, следует добиться возможности
регулировки уровня громкости путем нажатия
функциональных кнопок, соответствующих фирме-
производителю ТВ.
Примечание:
Управление некоторыми моделями телевизоров с
помощью этого устройства дистанционного
управления является невозможным.
48

Установка, Переключателя системы, Видеосистема воспроизводимой ленты
Переключатель системы, Система, Ntsc select, Выходная цветность, Установка переключателя системы для записи, Предустановка, Тюнера
- Изображение
- Текст
Установка
переключателя системы
Установка устройства дистанционного
управления для управления Вашим ТВ
Установка переключателя системы
Установка переключателя системы для воспроизведения
На данном ВКМ возможно воспроизведение лент, записанных в видеосистеме PAL, MESECAM или NTSC. Установите
переключатель системы в соответствии с видеосистемой ленты, которую Вы желаете воспроизвести.
При воспроизведении ленты убедитесь в том, что переключатель системы установлен должным образом.
CÜ
ic
0Q
О
си
h-
Видеосистема
воспроизводимой ленты
Переключатель системы
СИСТЕМА*
NTSC SELECT
Выходная цветность
Видеосигнал Антенный выход
PAL
(заю
• АВТО
PAL
MESECAM
NTSC
PAL
PAL
B.G/I/D.K
5.5 6.0 6.5
MESECAM
• АВТО
PAL
MESECAM
NTSC
SECAM
SECAM
B.C/I/D.K
5.5 6.0 6.5
• АВТО
PAL
MESECAM
NTSC
NTSC SELECT
NTSC P в 4 43 3 58
□
PAL
PAL
B.C/I/D.K
5.5 6.0 6.5
NTSC
• АВТО
PAL
MESECAM
NTSC
NTSC SELECT
NTSC P B. 4 43 3,58
□
NTSC 4.43
NTSC 4.43
B.C/I/D.K
5.5 6.0 6.5
• АВТО
PAL
MESECAM
NTSC
NTSC SELECT
NTSC P В 4 43 3.58
Л
NTSC 3.58
NTSC 3.58
B.C/I/D.K
5.5 6.0 6.5
Установка переключателя системы для записи
Следует также выполнить установку переключателя системы, когда выполняется запись ТВ программы или запись с
внешнего аудио/видео источника.
При выполнении записи или записи по таймеру убедитесь, что переключатель системы установлен должным образом.
Система
Переключатель системы
ПРЕДУСТАНОВКА
ТЮНЕРА*^
(СИСТЕМА)
СИСТЕМА*
NTSC SELECT
ЗАПИСАННАЯ
ЛЕНТА
СИСТЕМЫ
ТЕЛЕВЕЩАНИЯ
PAL В/С
PALI
PALD
»BOOK I
или
BGDK»I
• АВТО
PAL
MESECAM
NTSC
PAL
СЗСЗЮ
SECAM D/K
SECAM B/C
• BGDK
• АВТО
PAL
MESECAM
NTSC
MESECAM
сзаю
PAL
• АВТО
PAL
MESECAM
NTSC
PAL
ВХОДНАЯ
ЛИНИЯ
NTSC 3.58
• АВТО
PAL
MESECAM
NTSC
NTSC SELECT
NTSC P в 4 43 3 58
NTSC
rtr
NTSC 4.43
• АВТО
PAL
MESECAM
NTSC
NTSC SELECT
NTSC P в 4,43 3 58
□
•’Установка OSD (отображение информации на экране телевизора) (См стр. 46.)
• Установка OSD (отображение информации на экране телевизора) (См стр. 44.)
■ Если в изображении отсутствует цветность, когда для функции MESECAM выбрано положение АВТО, установите в
положение ON. (См. стр. 44.)
49

Воспроизведение
Операции
4
3
7
6
5
Символы
дисплея
1
сзаю
©
©
PAUSE/
STILL
©
SLOW
Вставьте кассету с
записью.
Начните просмотр
изображения.
Произведите поиск в
поступательном
направлении нажатием
кнопки FF.
• Для возвращения в режим
нормального воспроизведения
нажмите кнопку PLAY.
Произведите поиск в
обратном направлении
нажатием кнопки REW.
•Для возвращения в режим
нормального воспроизведения
нажмите кнопку PLAY.
Войдите в режим стоп-
кадра.
• Для продолжения нормального
воспроизведения нажмите кнопку
PLAY или PAUSE/STILL.
Войдите в режим
замедленного
воспроизведения.
•Для продолжения нормального
воспроизведения нажмите кнопку
PLAY
Остановите просмотр
изображения.
50

Примечания, Другие функции, используемые при воспроизведении
Страница 19
- Изображение
- Текст
Воспроизведение
Другие функции, используемые при
воспроизведении
Изменение скорости
воспроизведения
1 Нажмите кнопку PAUSE/STILL на ВКМ.
2 Вращайте челночное кольцо.
PAUSE STILL
©
Точная установка желаемого
изображения
1 Нажмите кнопку PAUSE/STILL на ВКМ.
2 Поверните циферблат Jog.
PAUSE STILL
0
Назад
Получение изображения с высокой
частотой смены кадров при
перемотке в поступательном и
обратном направлении
Держите кнопку РР нажатой в режиме перемотки в
поступательном направлении.
Держите кнопку ВЕЛ/ нажатой в режиме перемотки в
обратном направлении.
Воспроизведение записанного
участка повторно
Держите кнопку PLAY нажатой в течение более
5 секунд.
Начало
Конец записанного
ленты
участка
Повторное
воспроизведение
PLAY
Прерывание
контрольного сигнала
(по крайней мере
5 секунд)
REW
• Для выхода из режима повторного воспроизведения
нажмите кнопку STOP.
Примечания:
•Убедитесь в том, что переключатель системы
установлен должным образом. См. стр. 49.
• Режимы воспроизведения с пропусками, обзорного
воспроизведения или замедленного
воспроизведения автоматически отключаются по
истечении 10 минут, а режим воспроизведения
стоп-кадра—по истечении 5 минут.
•Только в режиме замедленного воспроизведения
(ЕР):
1. В любых режимах, отличных от режима
нормального воспроизведения, на изображении
могут появиться шумовые полосы, цветность
может быть нестабильной, или возможно
появление черно-белого изображения.
2. При воспроизведении ленты, записанной на
другом ВКМ, может возникнуть необходимость
регулировки контроля трекинга. В некоторых
случаях качество изображения продолжает
оставаться низким. Это происходит из-за
ограничения формата.
3-
ГО
О-
0)
С
о
ш
2
СП
0
1
О
о
51

Запись в ручном режиме
1
2
3 4
Операции
Символы
дисплея
1
(заю
3 2
2
4 3
REC
Вставьте видеокассету.
• Если кассета уже была вставлена,
нажмите кнопку POWER для
включения видеомагнитофона.
Выберите ТВ станцию.
Начните запись.
Остановите запись.
52

Комментарии
Настройка: Panasonic TH-42PA30
Настройка
Меню настройки
Во время режима телевизора
MENU
Главное меню
Нажмите кнопку MENU.
OK
Меню изображения
Переместите, чтобы выбрать “Меню установок”.
Меню звука
Получите доступ к “Меню установок”.
N
Меню установок
123
Переместите, чтобы выбрать “Меню настройки”.
456
Язык
789
Получите доступ к “Меню настройки”.
C
0
Меню установок
Телетекст
FASTEXT
Переместите, чтобы выбрать опцию меню.
Таймер откл.
Выкл.
Чст.цв.канала
Блок.
Выкл.
Выбор текста
СНГ
Подрегулируйте выбранную опцию или
Боков. яркость
ВЫС
TV
Энергосохр.
Выкл.
получите доступ к выбранному меню.
Меню настройки
Достул
Owner ID
Нажмите кнопку EXIT в любое время, чтобы вернуться
EXIT
Меню настройки
к просмотру телевизора.
Выб.канала
Поз.
Выб.сист.
ЕВРОПА
Авт. настройка
При нажатии кнопки OK после регулировки некоторых
Ручная настройка
OK
Звук.система
5.5MHz
опций установка будет сохранена как установка по
Цвет.система
Авто
То чная настройка
умолчанию (заменяя заводскую установку).
Пропуск
Выкл.
Выб. канала
Выберите наиболее легкий метод выбора просматриваемого канала. См. стр. 17.
(Выбор канала)
Поз. / Прямой
Выб. сист.
Выберите систему.
(Выбор системы )
КИТАЙ
ГОНКОНГ/БР
АЗИЯ/БЛ. В. Н. ЗЕЛ/ИНД. АВСТРАЛ.
ЯПОН. КАБ. ТВ. АМЕР. СП. ВЕРСИЯ ЕВРОПА
СИСТЕМА РЕГИОН
КИТАЙ
Китай
ГОНКОНГ/БР
Гонконг, Британия
АЗИЯ/БЛ. В.
Малайзия, Сингапур, Таиланд, страны Азии, Кувейт, Саудовская Аравия, Объединенные Арабские
Эмираты, страны Ближнего Востока и т.д.
Н. ЗЕЛ/ИНД.
Новая Зеландия, Индонезия и т.д.
АВСТРАЛ.
Австралия
ЕВРОПА
СНГ, Польша и т.д.
СП. ВЕРСИЯ
Южная Африка
АМЕР.
США, Чили, Мексика, Панама, Перу, Филиппины, Тайвань, Венесуэла и т.д.
КАБ. ТВ.
Кабельное ТВ США
ЯПОН.
Япония
Авт. настройка
Позволяет Вам выполнять перенастройку телевизора автоматически. Это полезно,
если Вы переезжаете в другой дом и хотите перенастроить Ваш телевизор на местные
станции. См. стр. 18.
Ручная настройка
Позволяет настроить положение отдельных программ вручную. См. стр. 19.
Звук. cистема
Позволяет Вам изменить звуковую систему, используемую для канала программы.
Выберите требуемую звуковую систему:
4,5 МГц / 5,5 МГц / 6,0 МГц / 6,5 МГц
Цвет. cистема
Позволяет Вам выбрать правильный стандарт передачи для принимаемого сигнала
передачи. См. стр. 23.
Авто / PAL / SECAM / NTSC 4.43 / NTSC 3.58
Точная настройка
Используйте эту опцию для выполнения тонких регулировок настройки отдельной станции
(это полезно, например, если на качество приема программы влияют погодные условия).
Чтобы отменить функцию “Точной настройки”, выполните еще раз “Ручную настройку”.
Пропуск
Можно пропустить номер программы, появляющейся на экране, на который не настроены
телевизионные станции. Эта функция эффективна только при нажатии кнопки
изменения номера программы больше или меньше на телевизоре или пульте
дистанционного управления. В условия нормального просмотра выберите номер
программы, которую Вы хотите пропустить. Затем получите доступ к “Меню настройки”
и установите пункт “Пропуск” в положение “Вкл.”.
16
Настройка
Выбор канала
Выберите наиболее легкий метод выбора просматриваемого канала.
2ch
4ch
6ch
8ch
10ch
12ch
14ch
16ch
18ch
20ch
Пример
Выбор позиции
Номер
Индикация
Принимаемый
программы
канала
канал
Когда выбор каналов установлен в положение “Поз.” и
выполнена автоматическая настройка, аппарат помнит
1
2
2
каналы, настроенные по порядку с программы No 1.
2
4
4
3
6
6
4
8
8
Нажмите кнопку
1
, чтобы смотреть канал 2.
5
10
10
Нажмите кнопку
2
, чтобы смотреть канал 4.
6
12
12
Нажмите кнопку
3
, чтобы смотреть канал 6.
7
14
14
8
16
16
Во время режима позиции могут просматриваться
9
18
18
различные принимаемые каналы.
10
20
20
Пример
Прямой выбор
Номер
Индикация
Принимаемый
программы
канала
канал
Когда выбор каналов установлен в положение
“Прямой” и выполнена автоматическая настройка,
1
–
–
аппарат помнит номера программ, которые являются
2
2
2
такими же, как настроенные каналы.
3
–
–
4
4
4
Этот метод позволяет Вам выбрать нужный канал
5
–
–
нажатием номера индикации канала непосредственно
6
6
6
на пульте дистанционного управления, чтобы выбрать
7
–
–
станцию. Номера индикации каналов для станций
8
8
8
телевещания в каждом регионе перечислены на стр.
9
–
–
20.
10
10
10
20
20
20
17
Настройка
Автоматическая настройка
“Автоматическая настройка” автоматически перенастраивает Ваш телевизор. Эта функция полезна,
например, если Вы переезжаете в другой дом и хотите перенастроить Ваш телевизор на местные станции.
MENU
Нажмите кнопку MENU.
OK
Переместите, чтобы выбрать “Меню установок”.
Получите доступ к “Меню установок”.
N
Переместите, чтобы выбрать “Меню настройки”.
123
456
789
Получите доступ к “Меню настройки”.
C
0
Переместите, чтобы выбрать меню “Авт. настройка”.
Получите доступ к меню “Авт. настройка”.
TV
Примечания:
• Если Вы перейдете к выполнению действий следующего пункта, все данные настройки
будут стерты (все станции и их позиции программ, сохраненные в памяти Вашего телевизора,
будут стерты, чтобы можно было сохранить новые установки).
• Если Вы выйдете из процедуры после выполнения этого действия, до завершения процедуры
“Авт. настройки”, информация о станциях не будет сохранена. Начните сначала и завершите
процедуру “Авт. настройки”, в результате чего телевизор будет перенастроен.
Нажмите, чтобы начать “Авт. настройку”.
Телевизор будет выполнять поиск, сохранять, а затем
12
CH 12
сортировать по порядку Ваши местные станции.
Как только эта операция будет завершена, на экране
ИДЕТ ПОИСК КАНАЛОВ
телевизора отобразится программа, сохраненная в
ПОИСК : ЖДИТЕ
СОХРАНЕНО CH12
настоящее время на позиции программы 1.
MENU : Возврат
EXIT
EXIT : Выход
Нажмите кнопку EXIT в любое время, чтобы вернуться к
просмотру телевизора (прочитайте, пожалуйста,
Примечания относительно вышеописанной процедуры).
Автоматическая настройка (с использованием передней панели)
Также можно использовать кнопки панели управления на передней панели телевизора, чтобы настроить
индивидуальные позиции программ:
Нажимайте кнопку F до тех пор, пока не будет
достигнут режим настройки.
F
Нажмите кнопки –/ или +/ , чтобы получить доступ к
/ /
режиму настройки.
STR F TV/AV
/ /
SD CARD
PUSH-EJECT
S VIDEO
VIDEO
LR PC
PC CARD EJECT
Нажимайте кнопку F до тех пор, пока не будет
AV3
F
достигнуто меню “Авт. настройка”.
Нажмите кнопки –/ или +/ , чтобы начать поиск.
/ /
STR F TV/AV/ /
Нажмите кнопку TV/AV в любое время, чтобы выйти
из “Меню настройка”.
TV/AV
Примечания:
• Если ясное изображение с правильной цветопередачей не может быть получено, когда принимается
сигнал телевещания или аудио-видео сигнал, обращайтесь к опции “Цвет. система” на стр. 16.
• После окончания “Авт. настройки”, нажмите кнопку номер программы больше, чтобы подтвердить
условие настройки для каждого номера программы. Если некоторые номера программ не используются,
возможно пропустить такие номера программ. Обращайтесь, пожалуйста, к описанию функции “Пропуск”
на стр. 16.
18
Настройка
Ручная настройка
Возможно настроить индивидуальные позиции программ:
MENU
OK
Нажмите кнопку MENU.
Переместите, чтобы выбрать “Меню установок”.
N
Получите доступ к “Меню установок”.
123
456
789
Переместите, чтобы выбрать “Меню настройки”.
C
0
Получите доступ к “Меню настройки”.
Переместите, чтобы выбрать меню “Ручная настройка”.
TV
Получите доступ к меню “Ручная настройка”.
Выберите позицию программы для настройки.
1
CH 12
Нажимайте повторно до тех пор, пока не будет найдена
начать
Сохранить
поиск
—
/+
нужная станция.
Возврат
Выход
Программа
—
/+
Когда найдена нужная станция, нажмите кнопку OK, чтобы
OK
Ручная настройка
сохранить. Позиция программы будет мигать.
EXIT
Нажмите кнопку EXIT в любое время, чтобы вернуться к
просмотру телевизора.
Ручная настройка (с использованием передней панели)
Также можно использовать кнопки панели управления на передней панели телевизора, чтобы настроить
индивидуальные позиции программ:
Нажимайте кнопку F до тех пор, пока не будет достигнут
режим настройки.
F
Нажмите кнопки –/ или +/ , чтобы получить доступ к
режиму настройки.
/ /
Нажимайте кнопку F до тех пор, пока не будет достигнуто
STR F TV/AV
PUSH-EJECT
SD CARD
PC CARD EJECT
меню “Ручной настройки”.
/ /
S VIDEO
VIDEO
AV3
LR PC
F
Нажмите кнопки –/ или +/ , чтобы получить доступ к
меню “Ручной настройки”.
/ /
Нажмите кнопку TV/AV, чтобы перемещаться между
STR F TV/AV/ /
изменением программы, поиском и изменением звуковой
TV/AV
системы.
1
Нажмите кнопки –/ или +/ , чтобы изменить позицию
CH 12
5. 5MHz
программы или начать поиск.
/ /
Когда найдена нужная станция, нажмите кнопку STR, чтобы сохранить.
Ручная настройка
—
, + : начать поиск
Позиция программы будет мигать.
TV / AV : Переместить курсор
STR
STR : Сохранение
Повторите приведенную выше процедуру, чтобы настроить
F : Выход
дополнительные позиции программ.
STR F
—
/ + / TV / AV
Нажмите кнопку
F
в любое время, чтобы выйти из “Меню настройки”.
F
Примечания:
• Если ясное изображение с правильной цветопередачей не может быть получено, когда принимается сигнал
телевещания или аудио-видео сигнал, обращайтесь к опции “Цвет. система” на стр. 16.
•
После окончания “Ручной настройки”, нажмите кнопку номера программы больше, чтобы подтвердить условие
настройки на каждый номер программы. Если некоторые номера программ не используются, возможно
пропустить такие номера программ. Обращайтесь, пожалуйста, к описанию функции “Пропуск” на стр. 16.
• При использовании ВКМ без входных/выходных видео и аудио разъемов удобно подсоединить антенный
кабель, как показано в инструкции по эксплуатации ВКМ, и установить предназначенный канал в положение
программы № 0. В этом случае заранее выполните “Ручную настройку” после настройки “Цвет. системы” и
“Звук. системы”. Более того, для мульти системного ВКМ более удобно установить предназначенный канал
на несколько номеров программ.
19
Оглавление
Топ 10 инструкций
Другие инструкции

Функции
по
д
соединения
(Q-Link / VIERA
Link)
87
Уменьшение энергопотребления в режиме ожидания [Эконом. режим ожидания]
Для использования этой функции установите пункт Эконом. режим ожидания в положение [Вкл.] в меню
Установки [Эконом. режим ожидания] (стр. 45)
Энергопотребление подсоединенного оборудования в режиме ожидания контролируется в сторону повышения или
понижения синхронно с состоянием включения / выключения телевизора для уменьшения энергопотребления.
При переходе телевизора в режим ожидания подсоединенное оборудование также автоматически переходит в
режим ожидания, и энергопотребление подсоединенного оборудования автоматически минимизируется.
При включении телевизора подсоединенное оборудование все еще находится в режиме ожидания, но
энергопотребление повышается для обеспечения возможности быстрого включения.
●
Эта функция эффективна, если подсоединенное оборудование может изменять энергопотребление в режиме
ожидания и если оно установлено на более высокое потребление.
●
Эта функция работает, когда параметр [Совместное выкл.] установлен на [Вкл.].
Автоматический переход в режим ожидания для ненужного оборудования [Интеллект. режим ожид.]
Для использования этой функции установите пункт Интеллект. режим ожид. в положение [Вкл(с
напоминанием)] или [Вкл(без напоминания)] в меню Установки [Интеллект. режим ожид.] (стр. 45)
При включенном телевизоре подсоединенное оборудование, которое не используется, автоматически
переходит в режим ожидания для уменьшения энергопотребления. Например, при переключении входного
режима с HDMI или когда установка Выбор динамика изменена на [TV] (за исключением просмотра диска).
●
Если Вы выберете [Вкл(с напоминанием)], то перед переходом подсоединенного оборудования в режим
ожидания на экран будет выводиться соответствующее сообщение.
●
Эта функция может работать несоответствующим образом в зависимости от подсоединенного оборудования.
В случае необходимости установите на [Выкл.].
Прямая запись с телевизора
– Вы видите то, что записываете
[Direct TV Rec]
Немедленная запись текущей программы на записывающее устройство DIGA.
●
Если Вы собираетесь одновременно подсоединить несколько записывающих устройств, среди которых есть
записывающие устройства других производителей, пожалуйста, подсоедините записывающее устройство DIGA
к разъему HDMI на телевизоре, имеющему меньший номер. Например, если Вы используете разъемы HDMI1 и
HDMI2 для двух записывающих устройств, то подсоедините записывающее устройство DIGA к разъему HDMI1.
●
Если управление невозможно, проверьте установки и оборудование.
“Краткий обзор функций Q-Link и VIERA Link” (стр. 83, 84), “Подготовка” (стр. 86)
●
Чтобы записать программу, которую не поддерживает записывающее устройство DIGA, Вам потребуется
соединение SCART, а программа будет записана с помощью функции Q-Link (стр. 85).
●
В зависимости от программы для записи может понадобиться соединение SCART.
●
Вы можете переключать каналы или выключить телевизор, если записывающее устройство выполняет запись,
используя собственный тюнер.
●
Вы не можете переключать каналы, если записывающее устройство выполняет запись с помощью тюнера телевизора.
1
Отобразите [VIERA TOOLS] и выберите [VIERA Link]
VIERA Link
выбор
доступ
2
Выберите [Direct TV Rec] и начните запись
Меню VIERA Link
Pause Live TV
Direct TV Rec
Упр. VIERA Link
Выбор динамика
Пуск
Дом. кинотеатр
Рекордер
Пуск
выбор
доступ /
начало
●
Вы также можете непосредственно начать
запись, если с помощью пульта дистанционного
управления введен код “73” (стр. 30).
■
Для остановки записи
Выберите [Стоп] в [Direct TV Rec]
Меню VIERA Link
Pause Live TV
Direct TV Rec
Упр. VIERA Link
Выбор динамика
Стоп
Дом. кинотеатр
Рекордер
Пуск
выбор
доступ / остановка
●
Вы также можете непосредственно остановить запись.
Разблокируйте тюнер
Тюнер заблокирован
Нажмите EXIT, чтобы
разблокировать и остановить запись
-
Contents
-
Table of Contents
-
Bookmarks
Quick Links
Operating Instructions
LCD Television
Thank you for purchasing this Panasonic product.
Please read these instructions carefully before operating this product and retain
them for future reference.
The images shown in this manual are for illustrative purposes only.
English
UK and Ireland model
Model No.
TX-L32DT30B
TX-L37DT30B
TQB0E2109
Related Manuals for Panasonic Viera TX-L32DT30B
Summary of Contents for Panasonic Viera TX-L32DT30B
-
Page 1: Operating Instructions
TX-L32DT30B TX-L37DT30B Operating Instructions LCD Television Thank you for purchasing this Panasonic product. Please read these instructions carefully before operating this product and retain them for future reference. The images shown in this manual are for illustrative purposes only. English…
-
Page 2
PC connected to your home network by accessing from the TV. (p. 92) VIERA Connect — Enjoy great web entertainment (p. 16, 95) VIERA Connect allows you to access some specific websites supported by Panasonic, and enjoy internet contents such as photos, videos, games, etc. from VIERA Connect home screen. -
Page 3: Table Of Contents
The recording and playback of content on this or any other Be Sure to Read device may require permission from the owner of the copyright or other such rights in that content. Panasonic has no authority Safety Precautions····································································4 to and does not grant you that permission and explicitly…
-
Page 4: Safety Precautions
Safety Precautions Warning ■ Mains plug and lead To help avoid risk of electrical shock, fire, damage or injury, please follow the warnings below: • This TV is designed to operate on AC 220-240 V, 50 / 60 Hz. • Insert the mains plug fully into the socket outlet.
-
Page 5
Do not insert foreign objects into the TV through the air vents. • Do not use an unapproved pedestal / mounting equipment. Be sure to ask your local Panasonic dealer to perform the setup or installation of approved wall-hanging brackets. -
Page 6: Standard Accessories
Accessories may not be placed all together. Take care not to throw them away unintentionally. Optional accessories Please contact your nearest Panasonic dealer to purchase the recommended optional accessories. For additional details, please refer to the manual of the optional accessories.
-
Page 7
• Do not use any pedestal other than the one provided with this TV. • Do not use the pedestal if it becomes warped or physically damaged. If this occurs, contact your nearest Panasonic dealer immediately. • During setup, make sure that all screws are securely tightened. -
Page 8: Identifying Controls
Identifying Controls Remote Control Standby On / Off switch Direct TV Recording (p. 98, 100) • • Switches TV On or Off standby Records programme INPUT 3D button (p. 33) immediately in DVD Recorder / • Switches to the viewing mode VCR with Q-Link or VIERA Link MENU ASPECT DIRECT TV REC…
-
Page 9: Auto Power Standby Function
Changes the input mode Remote control signal receiver • Do not place any objects between the TV remote control signal receiver and remote control. C.A.T.S. (Contrast Automatic Tracking System) sensor • Senses brightness to adjust picture quality when [C.A.T.S.] in the Picture Menu is set to [On] (p. 38) Power and Timer LED •…
-
Page 10: Basic Connection
Basic Connection External equipment and cables shown are not supplied with this TV. Please ensure that the unit is disconnected from the mains socket before attaching or disconnecting any leads. There are some restrictions on placement for viewing 3D images. For details (p.
-
Page 11
Example 3 Connecting DVD Recorder / VCR and Cable TV box TV, DVD Recorder / VCR and Cable Rear of the TV Terrestrial aerial RF cable Fully wired HDMI compliant cable Aerial input AC 220-240 V terminal 50 / 60 Hz Fully wired Fully wired HDMI SCART cable compliant cable… -
Page 12: Auto Setup
Auto Setup Search and store TV channels automatically. • These steps are not necessary if the setup has been completed by your local dealer. • Please complete connections (p. 10, 11) and settings (if necessary) of the connected equipment before starting Auto Setup. For details of settings for the connected equipment, read the appropriate manual.
-
Page 13: Setup The Network Connection
Setup the network connection Setup the network connection to enable the network service functions such as VIERA Connect, etc. (p. 16, 95). • To setup the wireless connection, the Wireless LAN Adaptor (optional accessory) is required. Please note that this TV does not support wireless public access points. •…
-
Page 14: Input Owner Id
4. Select [Yes] Access Point Settings select Encryption key is set to:- XXXXXXXX • Select ‘Yes’ to confirm. To re-enter the encryption key, select [No]. Select ‘No’ to change. • If the connection has failed, check the encryption key, settings and positions of your access point.
-
Page 15
■ How to input Owner ID Enter the PIN number (4 digits) • Enter the PIN number twice at first setting. Owner ID Please enter new PIN pqrs wxyz * * * Select the item (NAME / HOUSE NO / POSTCODE) select Owner ID-Data Entry * * * *… -
Page 16: Using «Viera Connect
Using “VIERA Connect” VIERA Connect is a gateway to the internet services unique to Panasonic and has expanded VIERA CAST features greatly. VIERA Connect allows you to access some specific websites supported by Panasonic, and enjoy internet contents such as photos, videos, games, etc.
-
Page 17: Watching Tv
Watching TV Turn power on • Press for about 1 second • Mains power On / Off switch should be On. (p. 9) ■ VIERA Connect introduction banner appears You can access to VIERA Connect and enjoy the various contents. (p. 16) •…
-
Page 18: Other Useful Functions
Other useful functions Display Information banner Display Information banner • Also appears when changing a channel Example : DVB 20:35 HDTV Coronation Street All DVB Channels 20:00 — 20:55 Info Select favourites Mute Bad signal STTL TEXT Multi Audio Channel position and name Programme Start / Finish time (except Analogue) Channel number, etc.
-
Page 19: Off Timer
Hold Freeze / unfreeze picture HOLD Display the selectable settings for the current status Check or change the current status instantly • OPTION To change select / change select access store [Teletext Character Set] [Multi Audio] [Multi Audio / AD] (DVB, Other Sat.
-
Page 20: Display Subtitles
Aspect Change the aspect ratio (image size) ASPECT Enjoy viewing the image at its optimum size and aspect. Programmes usually contain an “Aspect Control Signal” (Widescreen signal, etc.), and the TV will choose the aspect ratio automatically according to the “Aspect Control Signal” (p. 107). ■…
-
Page 21: Using Tv Guide
Using TV Guide TV Guide−Electronic Programme Guide (EPG) provides an on screen listing of the programmes currently broadcast and the forthcoming broadcasts over the next seven days (depending on the broadcasters). • When this TV is turned on for the first time, or the TV is switched off for more than a week, it may take some time before TV Guide is completely shown. (freesat) Select freesat Display the Channel Genre selection list…
-
Page 22: View Tv Guide
■ To search programme types and view a channel list of the searched programmes (yellow) (Search list) select type Search view Search Titles… Movie News and Factual ■ To search programme titles and view a list of the searched programmes (yellow) •…
-
Page 23
■ ■ To the previous day (DVB mode) To view a channel list of the selected category (red) (blue) (Category list) ■ To the next day (DVB mode) Categor y All Channels (green) All Channels ■ View details of the programme (DVB mode) All DVB Channels All HD Channels Select the programme… -
Page 24: Guide Link Programming (Timer Programming From The Tv Guide Signal)
■ ■ To check / change / cancel a timer To return to TV Guide programming event BACK/ RETURN “Timer Programming” (p. 58, 59) ■ ■ If you select a current programme If a programme exists in both HD and SD broadcasts A confirmation screen asking whether you wish to watch or The [Timer Options] screen will be displayed to select HD or SD record the programme will appear.
-
Page 25
View advertisement (DVB or Analogue mode) Enter your postcode when using this function for the first time [Guide Plus+ Postcode] in [TV Guide Settings] (p. 41) If you have already entered your postcode in “Auto Setup” — when first using the TV (p. 12 — 15), you do not have to enter it again. If you enter an incorrect postcode for your area, or no postcode is entered, advertisements may not be displayed correctly. -
Page 26: Viewing Teletext
Viewing Teletext You can enjoy news, weather forecasts and subtitles, etc. (depending on the broadcaster) • The availability of teletext services for a programme is indicated by [TEXT] in the information banner. Information banner (p. 18) 20:35 Coronation Street All DVB Channels 20:00 — 20:55 BBC ONE WALES Select favourites…
-
Page 27: Analogue Teletext
Analogue teletext Analogue teletext services are the text information provided by the broadcasters. The features may vary depending on the broadcasters. What is FASTEXT (FLOF) mode? In FASTEXT mode, four differently coloured subjects are situated at the bottom of the screen. To access more information about one of these subjects, press the appropriately coloured button.
-
Page 28
INDEX Subtitles Return to the main index page View a favourite page stored • INDEX STTL Factory setting is “P888” (subtitle service) on the blue button (List mode). View in multi window Watch TV and Teletext in two windows at once TEXT •… -
Page 29: Watching External Inputs
Watching External Inputs Connect the external equipment (VCRs, DVD equipment, etc.) and you can watch through the AV input. • To connect the equipment (p.10, 11, 104 — 106) The Remote Control is capable of operating some functions of selected external equipment. “Operating the equipment with the TV remote control”…
-
Page 30: Operating The Equipment With The Tv Remote Control
The equipment connected to the TV can be directly operated with the below buttons of this TV remote control. Selection Switch for operating the connected equipment Select “DVD/VCR” to operate Panasonic DVD Recorder, DVD Player, Player theatre, Blu-ray Disc theatre or VCR DVD/VCR “How to change the code for the type of the equipment”…
-
Page 31: Viewing 3D Images
Stop using the 3D Eyewear immediately if you experience TX-L32DT30B: 1.2 m or more / TX-L37DT30B: 1.4 m or more any redness, pain, or skin irritation around the nose or When the top and bottom area of the screen is blackened, temples.
-
Page 32
• Please consult the suppliers of contents or programmes for availability of this service. ■ 3D photos and 3D videos taken by 3D-compatible Panasonic products • Available in Media Player (p. 74 — 76, 79, 80) and Network services (p. 93) ■… -
Page 33
Changing 2D — 3D mode You can easily change the viewing mode between 2D and 3D using 3D button. Select the mode • [2D 3D] mode is displayed when this select 3D Mode Selection function is available (see below [2D 3D]). -
Page 34
Table of images that can be seen for each [3D Mode Selection (Manual)] and the source image format If the picture appears to be abnormal, refer to the table below to choose the correct 3D mode. [Frame [3D Mode Selection] [Side by Side [Top and [Original]… -
Page 35
Item Adjustments / Configurations (alternatives) Selects a level of 3D-image depth for viewing converted 2D images [Min] / [Mid] / [Max] 2D 3D Depth Adjustment of the 3D effect (except in [2D 3D] mode) [Off] / [On] • Set to [On] to enable [Effect] setting. •… -
Page 36: How To Use Viera Tools
How to Use VIERA TOOLS You can access some special features easily by using the VIERA TOOLS function. • For [VIERA Link Control] and [Pause Live TV] functions to operate correctly, ensure the connections and settings are completed. “Summary of Q-Link and VIERA Link features” (p. 96, 97), “Preparations” (p. 99) After connection, turn the equipment on and then switch the TV on.
-
Page 37: How To Use Menu Functions
How to Use Menu Functions Various menus allow you to make settings for the picture, sound, and other functions. Display the menu • MENU Displays the functions that can be set (varies according to the input signal) Select the menu Main Menu select Picture…
-
Page 38: Menu List
Menu list Menu Item Adjustments / Configurations (alternatives) Basic picture mode [Dynamic] / [Normal] / [Cinema] / [True Cinema] / [Game] / [Photo] / [Professional1] / [Professional2] In each Viewing Mode, [Contrast], [Brightness], [Colour], [Sharpness], [Tint], [Colour Balance], [Vivid Colour], [C.A.T.S.], [P-NR] and [3D-COMB] can be adjusted and stored to suit your particular viewing requirement.
-
Page 39
Menu Item Adjustments / Configurations (alternatives) Automatically compensates the picture frame rate and removes juddering movements to make the images smooth [Off] / [Mid] / [Max] • Intelligent Frame Depending on the contents, images may be noisy. To prevent the noise, change the Creation setting. -
Page 40
Menu Item Adjustments / Configurations (alternatives) Balance Adjusts volume level of right and left speakers Headphone Volume Adjusts the volume of the headphones Surround sound settings [Off] / [V-Audio] / [V-Audio Surround] / [V-Audio ProSurround] [V-Audio] : Provides a dynamic enhancer of width to simulate improved spatial effects [V-Audio Surround] : Surround Provides a dynamic enhancer of width and depth to simulate improved spatial effects… -
Page 41
Menu Item Adjustments / Configurations (alternatives) Sets programme reminders and records forthcoming programmes (p. 58) Timer Programming • DVB mode only Sets the time until the TV automatically goes to Standby mode Off Timer [Off] / [15] / [30] / [45] / [60] / [75] / [90] (minutes) (p. 19) Sets the duration of time that the TV will remain On when no operation is received from the user [Off] / [2] / [4] (hours) •… -
Page 42
Menu Item Adjustments / Configurations (alternatives) Favourites Edit Creates a list of favourite freesat channels (p. 50) Channel List Skips the unwanted freesat channels (p. 51) Regional Channel Edit Replace your regional channels with available channels from another region (p. 51) Auto Setup Automatically searches for the freesat channels received in the area (p. -
Page 43
Menu Item Adjustments / Configurations (alternatives) Input Labels Labels or skips each input terminal (p. 61) Banner Display Sets how long the Information banner (p. 18) stays on screen Timeout [0 (No display)] / [1] / [2] / [3] / [4] / [5] / [6] / [7] / [8] / [9] / [10] (seconds) VIERA Connect Sets the VIERA Connect introduction banner display [Off] / [On] (p. -
Page 44
Overview (Picture, Sound, Timer, Setup) How to operate (p. 37) Available in NTSC Main Menu Viewing Mode Dynamic Contrast Not available when [Viewing Mode] is set Picture Brightness to [True Cinema] or [Professional1 / 2] Colour Sharpness Not available in PC or when [Viewing Sound Tint Mode] is set to [Professional1 / 2]… -
Page 45
TV Guide Settings Menu Main Menu TV Guide View Normal GUIDE Plus+ Postcode Access GUIDE Plus+ Information Access Picture (p. 41) Sound Enter Postcode Postcode Timer C D E L M N O P Q R U V W X .!:# Setup TV Guide Settings… -
Page 46
Overview (Setup) freesat Tuning Menu How to operate (p. 37) Favourites Edit Access Channel List Access Main Menu Regional Channel Edit Access Auto Setup Access Picture Signal Condition Access Available in freesat (p. 48, 50, 51) Sound Timer Setup TV Guide Settings Access DVB Tuning Menu Eco Navigation… -
Page 47
freesat Favourites Editor All freesat Channels Favourites1 freesat Channel List 1 BBC One Wales 101 BBC 1 Scotland freesat Auto Setup 7 BBC THREE 14 E4 102 BBC 2 Scotland CBBC Channel 103 stv 72 Cartoon Nwk Searching BBCi 104 stv Signal Quality BBC Radio Wales Signal Strength… -
Page 48: Retuning From Setup Menu
Retuning from Setup Menu Automatically retune the channels received in the area. • This function is available if channel tuning is already performed. • Only the selected mode is retuned. All the previous tuning settings are erased. • If Child Lock PIN number (p. 60) has been set, the PIN number is required. •…
-
Page 49
DVB or Analogue channels Select DVB or Analogue Display the menu MENU Select [Setup] select Main Menu access Picture Sound Timer Setup Select [DVB Tuning Menu] or [Analogue Tuning Menu] select access DVB Tuning Menu Access • Analogue Tuning Menu Access The displayed item depends on the selected mode. -
Page 50: Tuning And Editing Channels
Tuning and Editing Channels (freesat) You can retune channels or make your favourite channel lists, skip unwanted channels, etc. Select freesat Display the menu MENU Select [Setup] select Main Menu access Picture Sound Timer Setup Select [freesat Tuning Menu] select access freesat Tuning Menu Access…
-
Page 51
• To name the Favourites Set characters (maximum: ten characters) Store (red) BACK/ select User input RETURN Name C D E L M N O P Q R U V W X • To use numeric buttons v w x … -
Page 52: Set Dvb Channel Manually [Manual Tuning
(DVB) You can retune channels or make your favourite channel lists, skip unwanted channels, etc. Select DVB Display the menu MENU Select [Setup] select Main Menu access Picture Sound Timer Setup Select [DVB Tuning Menu] select DVB Tuning Menu Access access Select one of the following functions select…
-
Page 53: Check Dvb Signal [Signal Condition
List favourite DVB channels [Favourites Edit] Create your favourite channel lists from various broadcasters (up to 4: [Favourites]1 to 4). The DVB Favourites lists are available for switching in the Information banner (p. 18) and from [Category] in the TV Guide screen (p. 21). Select a channel to list ( : Encrypted channel) DVB Favourites Editor…
-
Page 54
Skip unwanted DVB channels, Edit DVB Channels [Channel List] You can hide unwanted DVB channels. The hidden channels cannot be displayed except in this function. Use this function to skip unwanted channels. Select a channel and [reveal] / [hide] • To reveal all channels select All DVB Channels… -
Page 55: Fine Tuning
Skip unwanted Analogue channels, Edit Analogue channels [Channel List] You can hide unwanted Analogue channels. The hidden channels cannot be displayed except in this function. Use this function to skip unwanted channels. Select a channel and [reveal] / [hide] • To reveal all channels select Analogue Channel List…
-
Page 56
(Other Sat.) / (Satellite) You can tune all receivable digital satellite channels and create your channel list, etc. • Some of Other Sat. / Satellite functions may work to differing specifications (depending on the broadcasters). Select freesat or Other Sat. Select Satellite Display the menu MENU… -
Page 57
Select the search mode and start Auto Setup • If you select [Astra2/Eurobird] or Other Satellite Auto Setup Search Mode Satellite Astra 2/Eurobird [Any Satellite], freesat channels Free Channels All Channels Progress 100% This may take up to 20 minutes. will also be searched. -
Page 58: Timer Programming
Timer Programming Timer Programming from Menu The Timer Programming menu allows you to choose programmes that you wish to remind watching or record to the external recorder or the USB HDD. At the correct time, the TV will tune to the correct channel automatically to record even if the TV is in Standby mode. TV Guide may also be used to set timer programming event (p.
-
Page 59: Set Timer Programming Event Details [Timer Programming
Set timer programming event details [Timer Programming] Start making the settings Select the function ([Ext Rec.], [USB HDD Rec.] or select [Reminder]) [Reminder] : to remind you to watch the programme [Ext Rec.] / [USB HDD Rec.] When you are watching TV, a reminder message appears to record the programme to the external recorder or the USB HDD 2 minutes before the start time.
-
Page 60: Child Lock
Child Lock You can lock specific channels / AV input terminals and control who watches them. When the locked channel / input is selected, a message appears; by entering the PIN number, you can watch it. Display the menu MENU Select [Setup] select Main Menu…
-
Page 61: Input Labels
Input Labels For easier identification and selection of the input mode, you can label each input mode or skip terminals that are not connected to any equipment. • To select the input mode (p. 29) Display the menu MENU Select [Setup] select Main Menu access…
-
Page 62: Shipping Condition
Shipping Condition Resets the TV to its original condition with no channels tuned in. All settings other than [Owner ID] and [USB HDD Setup] are reset (channels, picture, sound settings, etc.). • To retune TV channels only, e.g. after moving house “Retuning from Setup Menu”…
-
Page 63: Owner Id
Owner ID Entry of the PIN number and personal information (your name, address and postcode). In the unfortunate event of theft, the Owner ID will help the Police to determine the owner. Display the menu MENU Select [Setup] select Main Menu access Picture Sound…
-
Page 64: Using Common Interface
Using Common Interface The Common Interface Module menu provides access to software contained on Common Interface (CI) Modules. This TV works only for Pay TV modules complying with CI standard. • This function is not available for BskyB’s Sky channels. •…
-
Page 65: Updating The Tv Software
Updating the TV Software From time to time, a new version of software may become available for download to enhance the performance or operations of the TV. In DVB mode, a notification banner will appear when one of the BBC channels is turned to if a new available software is found. •…
-
Page 66: Displaying Pc Screen On Tv
Displaying PC Screen on TV The screen of the PC connected to the TV can be displayed on the TV. You can also listen to PC sound with the audio cable connected. • To connect PC (p. 105) Select the external input Select [PC] Input Selection select…
-
Page 67: Advanced Picture Settings
Advanced Picture Settings You can adjust and setup the detailed picture settings for each input and Viewing Mode. • To use this function completely, set [Advance(isfccc)] to [On] in the Setup Menu. (p. 43) • For PC input mode, some functions are available without setting [Advance(isfccc)]. Select the input mode to adjust and setup (p. 17, 29) Display the menu…
-
Page 68
Menu Item Adjustments / Configurations (alternatives) R-Hue Adjusts the picture hue of red area G-Hue Adjusts the picture hue of green area B-Hue Adjusts the picture hue of blue area R-Saturation Adjusts the saturation of red area G-Saturation Adjusts the saturation of green area B-Saturation Adjusts the saturation of blue area R-Luminance… -
Page 69: Usb Hdd Recording
USB HDD Recording You can record the digital TV programmes to the connected USB HDD and enjoy playing back in various ways. • Analogue TV programme cannot be recorded to the USB HDD. • The data broadcasting (MHEG, etc.), radio broadcasting and the periods without any signal will not be recorded. •…
-
Page 70
Setup the USB HDD [USB HDD Setup] All the USB devices recognised as a mass storage device will be listed. • You can only choose one USB HDD for recording at a time. Select the USB HDD for recording and start setup USB HDD Setup select Product… -
Page 71: One Touch Recording
Recording the TV programme to USB HDD You can record the current programme immediately by using [One Touch Recording]. You can also record the current programme constantly for the selected period by using [Rewind LIVE TV] so that you can go back or pause the current programme.
-
Page 72
■ To start One Touch Recording Set the position to “TV” Start DVD/VCR • No other channel can be selected while the recording is in progress. ■ To stop recording on the way DVD/VCR EXIT ■ To playback or delete the recorded contents “Recorded TV mode”… -
Page 73: Using Media Player
Using Media Player Media Player allows you to enjoy photo, video or music recorded on an SD Card and a USB Flash Memory, and recorded contents on the formatted USB HDD. VIERA IMAGE VIEWER is the function of the easy viewing for photos or videos recorded on an SD Card on the TV screen by simply inserting into the SD Card slot.
-
Page 74: Photo Mode
Starting Media Player Insert the SD Card or USB Flash Memory to the TV (p. 73) • To play back contents in USB HDD, check the connection and settings are completed. (p. 69, 70) Start Media Player Media Player Signal output from all AV terminals will be disabled during Media Player view.
-
Page 75
■ To sort by folder, recorded date or recorded month Display the view selection (green) Select the sort type [Folder view] : Folder view Displays the thumbnail grouped by folder Sort by Date • The files which are not into a folder will be collected to the folder named “/”. Sort by Month [Sort by Date] : select… -
Page 76: Multi Shot 3D
Multi Shot 3D This TV can create the 3D photo using a pair of photos in the SD Card and save it into the same SD Card. • This TV can also create the 3D photo from photos in the USB Flash Memory, but cannot save it. •…
-
Page 77: Photo Settings
Photo Settings Setup the settings for Photo mode. Display the option menu Select [Slideshow Settings] Select the items and set OPTION Option Menu Slideshow Settings Slideshow Settings Frame Colour Effect Transition Effect Fade Aspect Original Burst Playback access Interval 5 seconds Repeat Back Ground Music select…
-
Page 78: Change The Contents
Menu Item Adjustments / Configurations (alternatives) Selects the back ground music during Photo mode [Off] / [Type1] / [Type2] / [Type3] / [User] / [Auto] • [Type1], [Type2] and [Type3] are the fixed music each installed in this TV. [User] : Music data in the device registered by yourself will be played back. To register the music 1.
-
Page 79: Video Mode
Video and Recorded TV mode • Supported file format (p. 108) Video mode (For SD Card or USB Flash Memory) The thumbnail of video titles in the SD Card or USB Flash Memory will be displayed. Example : Thumbnail — [Title view] The preview will start when the title is Title view Media Player…
-
Page 80
■ How to operate in the playback Example : Playback • • To display / hide the operation guide and To change aspect 19/02/2010 11:21 00:15:39 00:02:05 information banner ASPECT • To the previous title / • To operate the playback scene Rewind EXIT… -
Page 81: Recorded Tv Mode
Recorded TV mode (For USB HDD) Contents list of the USB HDD will be displayed. Example : Contents list Remaining capacity of the HDD • Media Player Recorded TV Remaining Capacity 500GB (50%) This value may not be accurate depending on the condition. Not Viewed •…
-
Page 82
■ How to operate in the playback Example : Playback • To display / hide the operation guide and information banner Das Erste 00:15:39 00:02:05 • To operate the playback Rewind Manual skip [Manual skip] • Press to skip forward about 30 seconds RETURN •… -
Page 83: Audio Output Settings
Audio output Settings You can enjoy the multi-channel sound via an amplifier connected to DIGITAL AUDIO OUT or HDMI2 (ARC function) terminal. • To confirm or change the current sound status “Confirm or change the current status” (p. 80) Display the menu Select [Sound] Select [SPDIF Selection] and set MENU…
-
Page 84: Music Setup
■ Playback from File view Selected file will be played back. Select the folder Select the file Start playback Example : Thumbnail — File view (red) Folder view > My Music_1 Media Player Music select access My Song_1 My Song_2 My Song_3 My Song_4 My Song_5…
-
Page 85: Using Network Services (Dlna / Viera Connect / Freesat)
(p. 92 — 95) VIERA Connect VIERA Connect is a gateway to the internet services unique to Panasonic and has expanded VIERA CAST features greatly. VIERA Connect allows you to access some specific websites supported by Panasonic, and enjoy internet contents such as photos, videos, games, etc.
-
Page 86: Network Connections
Network connections To use only DLNA features, you can operate the features without broadband network environment. To use VIERA Connect features or freesat interactive services, you need a broadband network environment. • If you do not have any broadband network services, please consult your retailer for assistance. •…
-
Page 87: Network Setup
Enables to control the TV from the network equipment (Smartphone, etc.) [Off] / [On] • Depending on the area, this function may not be available. For details, consult your Network Remote Control local Panasonic dealer. • For more information of this function, visit the following website. http://panasonic.jp/support/global/cs/tv/…
-
Page 88: Wired Connection Settings
Wired connection settings This setting is for the network connection by using the LAN cable. Select [Network Type] and set to [Wired] select Network Setup Connection Test Network Type Wired access / store Access Point Settings IP/DNS Settings Network Link Settings If you make the network connection like “Example 2”…
-
Page 89: Wireless Connection Settings
Select [Connection Test] and access to test select Network Setup Connection Test Access Network Type Wired access Access Point Settings • IP/DNS Settings Performs automatic testing of the network connection for the TV. (It takes a Network Link Settings while to test.) Software Update MAC Address ab-cd-ef-gh-ij-kl…
-
Page 90
Select [Connection Test] and access to test select Network Setup Connection Test Access Network Type Wireless access Access Point Settings Connected IP/DNS Settings Performs automatic testing of the network connection for the TV. (It takes a while Network Link Settings to test.) Software Update MAC Address… -
Page 91: Update Tv’s Software
Select ‘Yes’ to confirm. Select ‘No’ to change. Please select the authentication type. WPA2-PSK WPA-PSK Shared key Open Update TV’s software Check for available software updates from the Panasonic website. Select [Software Update] select Network Setup Connection Test Network Type Wired access Access Point Settings •…
-
Page 92
Using DLNA® features • Ensure the preparation of media server, network connections and network settings are completed. “Media server” (p. 85), “Network connections” (p. 86), [Network Setup] (p. 87 — 91) Display icons of the feature Select [Media Server] select access Media Server Select one of the media servers you want to access Example : Media server list Media Server… -
Page 93
For photo file [Single view] — Photos are displayed one at a time. Example : • • To display / hide the operation guide To return to list Single view BACK/ RETURN • • Single view To operate Single view To rotate 90°… -
Page 94: Option Menu For Each Content
For DIGA Recorder Control the DIGA Recorder The screen of the DIGA Recorder will be displayed. You can control the functions of the DIGA Recorder with this TV remote control according to the operation guide. Example : • Before operating, register this TV on the DIGA Recorder. DIRECT NAVIGATOR (Grouped Titles) Time Remaining 36:17 (DR) •…
-
Page 95: Audio Output Settings (For Video Contents)
VIERA Connect home screen is subject to change without notice. • The services through VIERA Connect are operated by their respective service providers, and service may be discontinued either temporarily or permanently without notice. Therefore, Panasonic will make no warranty for the content or the continuity of the services. •…
-
Page 96: Link Functions (Q-Link / Viera Link)
Connect the equipment supporting VIERA Link to the TV’s HDMI1 or HDMI2 terminal via an HDMI cable. • For information about using HDMI cables for connecting Panasonic HD Video Camera or LUMIX Camera, read the manual of the equipment. VIERA Link (HDMI and SCART connections)
-
Page 97: Viera Link (Hdmi And Audio Out Connections)
VIERA Link (HDMI and Audio out connections) Connected equipment Player theatre with Blu-ray Disc theatre with Amplifier with VIERA Link VIERA Link function VIERA Link function function Features Analogue channel download – – – ∗ ∗ Easy playback – Power on link –…
-
Page 98: Power Off Link
Q-Link Preparations • Connect the DVD Recorder / VCR with the following logos: “Q-Link”, “NEXTVIEWLINK”, “DATA LOGIC (a trademark of Metz Corporation)”, “Easy Link (a trademark of Philips Corporation)”, “Megalogic (a trademark of Grundig Corporation)” or “SMARTLINK (a trademark of Sony Corporation)” •…
-
Page 99: Easy Playback
Control™” ∗ VIERA Link “ ∗ Enjoy additional HDMI Inter-Operability with Panasonic products which have “HDAVI Control” function. This TV supports “HDAVI Control 5” function. Connections to the equipment (DIGA Recorder, HD Video Camera, Player theatre, Amplifier, etc.) with HDMI and SCART cables allow you to interface them automatically (p. 96, 97).
-
Page 100
Reduce unnecessary power consumption in standby [Standby Power Save] Set Standby Power Save [On] in the Setup Menu to use this function [Standby Power Save] (p. 41) The power consumption in Standby mode of the connected equipment is controlled in synchronization with the TV On / Off state. -
Page 101
Pause Live TV programme [Pause Live TV] You can pause the live TV programme and resume the programme later. The live TV programme will be recorded on HDD of the connected DIGA Recorder. • This function is available with a DIGA Recorder which has HDD. •… -
Page 102: Operate The Menu Of The Equipment
Select the equipment you want to access The type of the connected equipment is displayed. Select the type of the equipment and access. select VIERA Link Menu Pause Live TV Start Direct TV Rec Start store VIERA Link Control Recorder Speaker Selection Home Cinema [Recorder] / [Player] / [Home Cinema] / [Video Camera] / [LUMIX] / [Digital Camera] / [Other]…
-
Page 103
Speaker control [Speaker Selection] You can control the home theatre speakers with this TV remote control (point the remote control at the TV’s signal receiver). • If you cannot operate, check the settings and the equipment “Summary of Q-Link and VIERA Link features” (p. 96, 97), “Preparations” (p. 99) Display [VIERA Link Menu] Select [Speaker Selection] select… -
Page 104: External Equipment
External Equipment These diagrams show our recommendations for connection of your TV to various pieces of equipment. For other connections, consult the instructions for each piece of equipment, the table (p. 106), and the specifications (p. 122, 123). To watch satellite broadcasts Satellite dish Satellite cable To watch cable broadcasts…
-
Page 105: Network (Wired)
Network (wired) Internet Modem LAN cable (Shielded) Hub or Router USB devices USB cable USB HDD Wireless LAN Adaptor (Listening) Computer (Viewing) Conversion adaptor (if necessary) To listen with speakers Optical digital audio cable Rear of the TV Amplifier with speaker system RCA cable To enjoy the sound from the external equipment in…
-
Page 106
Camcorder / Game equipment Rear of the TV (Viewing) Camcorder (Listening) Game equipment Side panel of the TV Headphones (M3 stereo mini plug) • To adjust volume [Headphone Volume] (p. 40) Types of connectable equipment to each terminal Terminal Recording / Playback (equipment) To record / playback videocassettes / DVDs (VCR / DVD Recorder) -
Page 107: Technical Information
Technical Information Auto Aspect The optimum size and aspect can be chosen automatically, and you can enjoy finer images. (p. 20) Aspect Control Signal [WIDE] will appear in the top left of the screen if a Widescreen signal (WSS) or a Control signal through SCART / HDMI terminal is found.
-
Page 108
Dolby Digital products. Linear PCM (RAW / • This TV supports Motion JPEG recorded TWOS / SOWT) by Panasonic LUMIX Camera ∗ MotionJPEG .mov • This TV is not available for playing back H.264 BP / MP / HP Motion JPEG with the media server. -
Page 109
■ Music Codec File extension Restrictions .mp3 – • .m4a Copy-protected files cannot be played back. • Copy-protected files cannot be played back. .wma • WMA Pro and WMA Lossless are not supported. Note • Some files may not be played back even if they fulfill these conditions. •… -
Page 110: Devices For Recording Or Playing Back
• Back up the recorded data at regular intervals in case of deteriorated or damaged data or erratic operation of the TV. (Panasonic is not liable for any deterioration or damage of recorded data.) SCART and HDMI terminal information AV1 SCART terminal (RGB, VIDEO, Q-Link)
-
Page 111: Hdmi Connection
Characters table for numeric buttons You can enter characters by using numeric buttons for free input items. Press the numeric button repeatedly until you reach the desired User input character. Name pqrs wxyz A B C D E F G H I J K L M N O P Q R S T U V W X Y Z…
-
Page 112: Usb Connection
You cannot use two or more same kind of USB devices simultaneously except USB Flash Memory or USB HDD. • Additional information for USB devices may be on the following website. http://panasonic.jp/support/global/cs/tv/ USB Keyboard • The USB Keyboard which requires the driver is not supported.
-
Page 113: Input Signal That Can Be Displayed
Input signal that can be displayed COMPONENT (Y, P ), HDMI Signal name COMPONENT HDMI 525 (480) / 60i, 60p 625 (576) / 50i, 50p 750 (720) / 60p, 50p 1,125 (1,080) / 60i, 50i 1,125 (1,080) / 60p, 50p, 24p Mark : Applicable input signal PC (from D-sub 15P) Signal name…
-
Page 114
How to use Windows 7 as a media server Follow the examples below to set up Windows 7 for use as a media server. Confirm the MAC Address of VIERA in [Network Setup] (p. 91). The following procedure and screens are examples. For more information, refer to the help functions of Windows 7. Open the Windows start menu and select [Control Panel]. -
Page 115
FAQs Before requesting service or assistance, please follow these simple guides to resolve the problem. If the problem still persists, please contact your local Panasonic dealer or Panasonic Customer Care Centre for assistance. For details (p. 124) Block noise, frozen or disappearing image occurs in digital mode / White spots or shadow image (ghosting) occurs in Analogue mode / Some channels cannot be tuned •… -
Page 116
Problem Actions • Set [P-NR] in the Picture Menu (to remove noise). (p. 38) • Chaotic image, noisy Check nearby electrical products (fluorescent lamp, DECT phones, mobile phones, microwave, etc.). • No image can be Is [Contrast], [Brightness] or [Colour] in the Picture Menu set to the minimum? (p. 38) •… -
Page 117: On Screen Messages
Check if foreign objects are inside the USB port. • An error message Follow the message’s instructions. • appears If the problem persists, contact your local Panasonic dealer or the authorized Service Centre. On screen messages Message Meaning / Action All contents will be lost. •…
-
Page 118
Please check aerial or local signal • Please also refer to p. 100. availability. • If channels are still not found, consult your local Panasonic dealer. Press OK to start Auto Setup. • No module inserted Check the CI module is inserted completely (p. 64). -
Page 119
Message Meaning / Action Reset to Factory Shipping • [Auto Setup] will automatically start when Mains power On / Off switch is next Condition Completed. turned On. (p. 12) Please switch off TV. • Sending Preset Data Q-Link or VIERA Link channel download is in progress. Software successfully updated. -
Page 120: Mains Plug
• HDAVI Control™ is a trademark of Panasonic Corporation. • “AVCHD” and the “AVCHD” logo are trademarks of Panasonic Corporation and Sony Corporation. • Manufactured under license from Dolby Laboratories. Dolby and the double-D symbol are trademarks of Dolby Laboratories.
-
Page 121
Index Accessories ············································· 6 HDMI ································ 110, 111, 122 Safely remove USB ····························19 Advanced Settings ··············39, 67, 68 HDMI Content Detection ················41 Sales and Support Information ··· 124 Analogue Tuning Menu ·····42, 49, 54 Hold ·················································19, 27 SCART·········································104, 110 Aspect ····················································20 Home Cinema ··································… -
Page 122: Specifications
Progressive images recorded at a rate signals on a single cable known as Euro SCART and Peritel) of 24 frames per second (film source) Local Area Network Specifications TX-L32DT30B TX-L37DT30B Power Source AC 220-240 V, 50 / 60 Hz Rated Power Consumption 118 W…
-
Page 123
DVB-S / S2 freesat services via Satellite dish input. freesat Receiver frequency range — 950 MHz to 2,150 MHz Other Sat. LNB Power and Polarisation — Vertical: +13 V Horizontal: +18 V Current: Max. 500 mA (overload protection) 22 kHz Tone — Frequency: 22 kHz ± 2 kHz Amplitude: 0.6 V ±… -
Page 124
• Or go on line through our Internet Accessory ordering application at www.pas-europe.com. • Most major credit and debit cards accepted. • All enquiries transactions and distribution facilities are provided directly by Panasonic UK Ltd. • It couldn’t be simpler! •…
-
Contents
-
Table of Contents
-
Bookmarks
Quick Links
Operating Instructions
LCD Television
Thank you for purchasing this Panasonic product.
Please read these instructions carefully before operating this product and retain
them for future reference.
The images shown in this manual are for illustrative purposes only.
English
UK and Ireland model
Model No.
TX-L32DT30B
TX-L37DT30B
TQB0E2109
Related Manuals for Panasonic Viera TX-L32DT30B
Summary of Contents for Panasonic Viera TX-L32DT30B
-
Page 1: Operating Instructions
TX-L32DT30B TX-L37DT30B Operating Instructions LCD Television Thank you for purchasing this Panasonic product. Please read these instructions carefully before operating this product and retain them for future reference. The images shown in this manual are for illustrative purposes only. English…
-
Page 2
PC connected to your home network by accessing from the TV. (p. 92) VIERA Connect — Enjoy great web entertainment (p. 16, 95) VIERA Connect allows you to access some specific websites supported by Panasonic, and enjoy internet contents such as photos, videos, games, etc. from VIERA Connect home screen. -
Page 3: Table Of Contents
The recording and playback of content on this or any other Be Sure to Read device may require permission from the owner of the copyright or other such rights in that content. Panasonic has no authority Safety Precautions····································································4 to and does not grant you that permission and explicitly…
-
Page 4: Safety Precautions
Safety Precautions Warning ■ Mains plug and lead To help avoid risk of electrical shock, fire, damage or injury, please follow the warnings below: • This TV is designed to operate on AC 220-240 V, 50 / 60 Hz. • Insert the mains plug fully into the socket outlet.
-
Page 5
Do not insert foreign objects into the TV through the air vents. • Do not use an unapproved pedestal / mounting equipment. Be sure to ask your local Panasonic dealer to perform the setup or installation of approved wall-hanging brackets. -
Page 6: Standard Accessories
Accessories may not be placed all together. Take care not to throw them away unintentionally. Optional accessories Please contact your nearest Panasonic dealer to purchase the recommended optional accessories. For additional details, please refer to the manual of the optional accessories.
-
Page 7
• Do not use any pedestal other than the one provided with this TV. • Do not use the pedestal if it becomes warped or physically damaged. If this occurs, contact your nearest Panasonic dealer immediately. • During setup, make sure that all screws are securely tightened. -
Page 8: Identifying Controls
Identifying Controls Remote Control Standby On / Off switch Direct TV Recording (p. 98, 100) • • Switches TV On or Off standby Records programme INPUT 3D button (p. 33) immediately in DVD Recorder / • Switches to the viewing mode VCR with Q-Link or VIERA Link MENU ASPECT DIRECT TV REC…
-
Page 9: Auto Power Standby Function
Changes the input mode Remote control signal receiver • Do not place any objects between the TV remote control signal receiver and remote control. C.A.T.S. (Contrast Automatic Tracking System) sensor • Senses brightness to adjust picture quality when [C.A.T.S.] in the Picture Menu is set to [On] (p. 38) Power and Timer LED •…
-
Page 10: Basic Connection
Basic Connection External equipment and cables shown are not supplied with this TV. Please ensure that the unit is disconnected from the mains socket before attaching or disconnecting any leads. There are some restrictions on placement for viewing 3D images. For details (p.
-
Page 11
Example 3 Connecting DVD Recorder / VCR and Cable TV box TV, DVD Recorder / VCR and Cable Rear of the TV Terrestrial aerial RF cable Fully wired HDMI compliant cable Aerial input AC 220-240 V terminal 50 / 60 Hz Fully wired Fully wired HDMI SCART cable compliant cable… -
Page 12: Auto Setup
Auto Setup Search and store TV channels automatically. • These steps are not necessary if the setup has been completed by your local dealer. • Please complete connections (p. 10, 11) and settings (if necessary) of the connected equipment before starting Auto Setup. For details of settings for the connected equipment, read the appropriate manual.
-
Page 13: Setup The Network Connection
Setup the network connection Setup the network connection to enable the network service functions such as VIERA Connect, etc. (p. 16, 95). • To setup the wireless connection, the Wireless LAN Adaptor (optional accessory) is required. Please note that this TV does not support wireless public access points. •…
-
Page 14: Input Owner Id
4. Select [Yes] Access Point Settings select Encryption key is set to:- XXXXXXXX • Select ‘Yes’ to confirm. To re-enter the encryption key, select [No]. Select ‘No’ to change. • If the connection has failed, check the encryption key, settings and positions of your access point.
-
Page 15
■ How to input Owner ID Enter the PIN number (4 digits) • Enter the PIN number twice at first setting. Owner ID Please enter new PIN pqrs wxyz * * * Select the item (NAME / HOUSE NO / POSTCODE) select Owner ID-Data Entry * * * *… -
Page 16: Using «Viera Connect
Using “VIERA Connect” VIERA Connect is a gateway to the internet services unique to Panasonic and has expanded VIERA CAST features greatly. VIERA Connect allows you to access some specific websites supported by Panasonic, and enjoy internet contents such as photos, videos, games, etc.
-
Page 17: Watching Tv
Watching TV Turn power on • Press for about 1 second • Mains power On / Off switch should be On. (p. 9) ■ VIERA Connect introduction banner appears You can access to VIERA Connect and enjoy the various contents. (p. 16) •…
-
Page 18: Other Useful Functions
Other useful functions Display Information banner Display Information banner • Also appears when changing a channel Example : DVB 20:35 HDTV Coronation Street All DVB Channels 20:00 — 20:55 Info Select favourites Mute Bad signal STTL TEXT Multi Audio Channel position and name Programme Start / Finish time (except Analogue) Channel number, etc.
-
Page 19: Off Timer
Hold Freeze / unfreeze picture HOLD Display the selectable settings for the current status Check or change the current status instantly • OPTION To change select / change select access store [Teletext Character Set] [Multi Audio] [Multi Audio / AD] (DVB, Other Sat.
-
Page 20: Display Subtitles
Aspect Change the aspect ratio (image size) ASPECT Enjoy viewing the image at its optimum size and aspect. Programmes usually contain an “Aspect Control Signal” (Widescreen signal, etc.), and the TV will choose the aspect ratio automatically according to the “Aspect Control Signal” (p. 107). ■…
-
Page 21: Using Tv Guide
Using TV Guide TV Guide−Electronic Programme Guide (EPG) provides an on screen listing of the programmes currently broadcast and the forthcoming broadcasts over the next seven days (depending on the broadcasters). • When this TV is turned on for the first time, or the TV is switched off for more than a week, it may take some time before TV Guide is completely shown. (freesat) Select freesat Display the Channel Genre selection list…
-
Page 22: View Tv Guide
■ To search programme types and view a channel list of the searched programmes (yellow) (Search list) select type Search view Search Titles… Movie News and Factual ■ To search programme titles and view a list of the searched programmes (yellow) •…
-
Page 23
■ ■ To the previous day (DVB mode) To view a channel list of the selected category (red) (blue) (Category list) ■ To the next day (DVB mode) Categor y All Channels (green) All Channels ■ View details of the programme (DVB mode) All DVB Channels All HD Channels Select the programme… -
Page 24: Guide Link Programming (Timer Programming From The Tv Guide Signal)
■ ■ To check / change / cancel a timer To return to TV Guide programming event BACK/ RETURN “Timer Programming” (p. 58, 59) ■ ■ If you select a current programme If a programme exists in both HD and SD broadcasts A confirmation screen asking whether you wish to watch or The [Timer Options] screen will be displayed to select HD or SD record the programme will appear.
-
Page 25
View advertisement (DVB or Analogue mode) Enter your postcode when using this function for the first time [Guide Plus+ Postcode] in [TV Guide Settings] (p. 41) If you have already entered your postcode in “Auto Setup” — when first using the TV (p. 12 — 15), you do not have to enter it again. If you enter an incorrect postcode for your area, or no postcode is entered, advertisements may not be displayed correctly. -
Page 26: Viewing Teletext
Viewing Teletext You can enjoy news, weather forecasts and subtitles, etc. (depending on the broadcaster) • The availability of teletext services for a programme is indicated by [TEXT] in the information banner. Information banner (p. 18) 20:35 Coronation Street All DVB Channels 20:00 — 20:55 BBC ONE WALES Select favourites…
-
Page 27: Analogue Teletext
Analogue teletext Analogue teletext services are the text information provided by the broadcasters. The features may vary depending on the broadcasters. What is FASTEXT (FLOF) mode? In FASTEXT mode, four differently coloured subjects are situated at the bottom of the screen. To access more information about one of these subjects, press the appropriately coloured button.
-
Page 28
INDEX Subtitles Return to the main index page View a favourite page stored • INDEX STTL Factory setting is “P888” (subtitle service) on the blue button (List mode). View in multi window Watch TV and Teletext in two windows at once TEXT •… -
Page 29: Watching External Inputs
Watching External Inputs Connect the external equipment (VCRs, DVD equipment, etc.) and you can watch through the AV input. • To connect the equipment (p.10, 11, 104 — 106) The Remote Control is capable of operating some functions of selected external equipment. “Operating the equipment with the TV remote control”…
-
Page 30: Operating The Equipment With The Tv Remote Control
The equipment connected to the TV can be directly operated with the below buttons of this TV remote control. Selection Switch for operating the connected equipment Select “DVD/VCR” to operate Panasonic DVD Recorder, DVD Player, Player theatre, Blu-ray Disc theatre or VCR DVD/VCR “How to change the code for the type of the equipment”…
-
Page 31: Viewing 3D Images
Stop using the 3D Eyewear immediately if you experience TX-L32DT30B: 1.2 m or more / TX-L37DT30B: 1.4 m or more any redness, pain, or skin irritation around the nose or When the top and bottom area of the screen is blackened, temples.
-
Page 32
• Please consult the suppliers of contents or programmes for availability of this service. ■ 3D photos and 3D videos taken by 3D-compatible Panasonic products • Available in Media Player (p. 74 — 76, 79, 80) and Network services (p. 93) ■… -
Page 33
Changing 2D — 3D mode You can easily change the viewing mode between 2D and 3D using 3D button. Select the mode • [2D 3D] mode is displayed when this select 3D Mode Selection function is available (see below [2D 3D]). -
Page 34
Table of images that can be seen for each [3D Mode Selection (Manual)] and the source image format If the picture appears to be abnormal, refer to the table below to choose the correct 3D mode. [Frame [3D Mode Selection] [Side by Side [Top and [Original]… -
Page 35
Item Adjustments / Configurations (alternatives) Selects a level of 3D-image depth for viewing converted 2D images [Min] / [Mid] / [Max] 2D 3D Depth Adjustment of the 3D effect (except in [2D 3D] mode) [Off] / [On] • Set to [On] to enable [Effect] setting. •… -
Page 36: How To Use Viera Tools
How to Use VIERA TOOLS You can access some special features easily by using the VIERA TOOLS function. • For [VIERA Link Control] and [Pause Live TV] functions to operate correctly, ensure the connections and settings are completed. “Summary of Q-Link and VIERA Link features” (p. 96, 97), “Preparations” (p. 99) After connection, turn the equipment on and then switch the TV on.
-
Page 37: How To Use Menu Functions
How to Use Menu Functions Various menus allow you to make settings for the picture, sound, and other functions. Display the menu • MENU Displays the functions that can be set (varies according to the input signal) Select the menu Main Menu select Picture…
-
Page 38: Menu List
Menu list Menu Item Adjustments / Configurations (alternatives) Basic picture mode [Dynamic] / [Normal] / [Cinema] / [True Cinema] / [Game] / [Photo] / [Professional1] / [Professional2] In each Viewing Mode, [Contrast], [Brightness], [Colour], [Sharpness], [Tint], [Colour Balance], [Vivid Colour], [C.A.T.S.], [P-NR] and [3D-COMB] can be adjusted and stored to suit your particular viewing requirement.
-
Page 39
Menu Item Adjustments / Configurations (alternatives) Automatically compensates the picture frame rate and removes juddering movements to make the images smooth [Off] / [Mid] / [Max] • Intelligent Frame Depending on the contents, images may be noisy. To prevent the noise, change the Creation setting. -
Page 40
Menu Item Adjustments / Configurations (alternatives) Balance Adjusts volume level of right and left speakers Headphone Volume Adjusts the volume of the headphones Surround sound settings [Off] / [V-Audio] / [V-Audio Surround] / [V-Audio ProSurround] [V-Audio] : Provides a dynamic enhancer of width to simulate improved spatial effects [V-Audio Surround] : Surround Provides a dynamic enhancer of width and depth to simulate improved spatial effects… -
Page 41
Menu Item Adjustments / Configurations (alternatives) Sets programme reminders and records forthcoming programmes (p. 58) Timer Programming • DVB mode only Sets the time until the TV automatically goes to Standby mode Off Timer [Off] / [15] / [30] / [45] / [60] / [75] / [90] (minutes) (p. 19) Sets the duration of time that the TV will remain On when no operation is received from the user [Off] / [2] / [4] (hours) •… -
Page 42
Menu Item Adjustments / Configurations (alternatives) Favourites Edit Creates a list of favourite freesat channels (p. 50) Channel List Skips the unwanted freesat channels (p. 51) Regional Channel Edit Replace your regional channels with available channels from another region (p. 51) Auto Setup Automatically searches for the freesat channels received in the area (p. -
Page 43
Menu Item Adjustments / Configurations (alternatives) Input Labels Labels or skips each input terminal (p. 61) Banner Display Sets how long the Information banner (p. 18) stays on screen Timeout [0 (No display)] / [1] / [2] / [3] / [4] / [5] / [6] / [7] / [8] / [9] / [10] (seconds) VIERA Connect Sets the VIERA Connect introduction banner display [Off] / [On] (p. -
Page 44
Overview (Picture, Sound, Timer, Setup) How to operate (p. 37) Available in NTSC Main Menu Viewing Mode Dynamic Contrast Not available when [Viewing Mode] is set Picture Brightness to [True Cinema] or [Professional1 / 2] Colour Sharpness Not available in PC or when [Viewing Sound Tint Mode] is set to [Professional1 / 2]… -
Page 45
TV Guide Settings Menu Main Menu TV Guide View Normal GUIDE Plus+ Postcode Access GUIDE Plus+ Information Access Picture (p. 41) Sound Enter Postcode Postcode Timer C D E L M N O P Q R U V W X .!:# Setup TV Guide Settings… -
Page 46
Overview (Setup) freesat Tuning Menu How to operate (p. 37) Favourites Edit Access Channel List Access Main Menu Regional Channel Edit Access Auto Setup Access Picture Signal Condition Access Available in freesat (p. 48, 50, 51) Sound Timer Setup TV Guide Settings Access DVB Tuning Menu Eco Navigation… -
Page 47
freesat Favourites Editor All freesat Channels Favourites1 freesat Channel List 1 BBC One Wales 101 BBC 1 Scotland freesat Auto Setup 7 BBC THREE 14 E4 102 BBC 2 Scotland CBBC Channel 103 stv 72 Cartoon Nwk Searching BBCi 104 stv Signal Quality BBC Radio Wales Signal Strength… -
Page 48: Retuning From Setup Menu
Retuning from Setup Menu Automatically retune the channels received in the area. • This function is available if channel tuning is already performed. • Only the selected mode is retuned. All the previous tuning settings are erased. • If Child Lock PIN number (p. 60) has been set, the PIN number is required. •…
-
Page 49
DVB or Analogue channels Select DVB or Analogue Display the menu MENU Select [Setup] select Main Menu access Picture Sound Timer Setup Select [DVB Tuning Menu] or [Analogue Tuning Menu] select access DVB Tuning Menu Access • Analogue Tuning Menu Access The displayed item depends on the selected mode. -
Page 50: Tuning And Editing Channels
Tuning and Editing Channels (freesat) You can retune channels or make your favourite channel lists, skip unwanted channels, etc. Select freesat Display the menu MENU Select [Setup] select Main Menu access Picture Sound Timer Setup Select [freesat Tuning Menu] select access freesat Tuning Menu Access…
-
Page 51
• To name the Favourites Set characters (maximum: ten characters) Store (red) BACK/ select User input RETURN Name C D E L M N O P Q R U V W X • To use numeric buttons v w x … -
Page 52: Set Dvb Channel Manually [Manual Tuning
(DVB) You can retune channels or make your favourite channel lists, skip unwanted channels, etc. Select DVB Display the menu MENU Select [Setup] select Main Menu access Picture Sound Timer Setup Select [DVB Tuning Menu] select DVB Tuning Menu Access access Select one of the following functions select…
-
Page 53: Check Dvb Signal [Signal Condition
List favourite DVB channels [Favourites Edit] Create your favourite channel lists from various broadcasters (up to 4: [Favourites]1 to 4). The DVB Favourites lists are available for switching in the Information banner (p. 18) and from [Category] in the TV Guide screen (p. 21). Select a channel to list ( : Encrypted channel) DVB Favourites Editor…
-
Page 54
Skip unwanted DVB channels, Edit DVB Channels [Channel List] You can hide unwanted DVB channels. The hidden channels cannot be displayed except in this function. Use this function to skip unwanted channels. Select a channel and [reveal] / [hide] • To reveal all channels select All DVB Channels… -
Page 55: Fine Tuning
Skip unwanted Analogue channels, Edit Analogue channels [Channel List] You can hide unwanted Analogue channels. The hidden channels cannot be displayed except in this function. Use this function to skip unwanted channels. Select a channel and [reveal] / [hide] • To reveal all channels select Analogue Channel List…
-
Page 56
(Other Sat.) / (Satellite) You can tune all receivable digital satellite channels and create your channel list, etc. • Some of Other Sat. / Satellite functions may work to differing specifications (depending on the broadcasters). Select freesat or Other Sat. Select Satellite Display the menu MENU… -
Page 57
Select the search mode and start Auto Setup • If you select [Astra2/Eurobird] or Other Satellite Auto Setup Search Mode Satellite Astra 2/Eurobird [Any Satellite], freesat channels Free Channels All Channels Progress 100% This may take up to 20 minutes. will also be searched. -
Page 58: Timer Programming
Timer Programming Timer Programming from Menu The Timer Programming menu allows you to choose programmes that you wish to remind watching or record to the external recorder or the USB HDD. At the correct time, the TV will tune to the correct channel automatically to record even if the TV is in Standby mode. TV Guide may also be used to set timer programming event (p.
-
Page 59: Set Timer Programming Event Details [Timer Programming
Set timer programming event details [Timer Programming] Start making the settings Select the function ([Ext Rec.], [USB HDD Rec.] or select [Reminder]) [Reminder] : to remind you to watch the programme [Ext Rec.] / [USB HDD Rec.] When you are watching TV, a reminder message appears to record the programme to the external recorder or the USB HDD 2 minutes before the start time.
-
Page 60: Child Lock
Child Lock You can lock specific channels / AV input terminals and control who watches them. When the locked channel / input is selected, a message appears; by entering the PIN number, you can watch it. Display the menu MENU Select [Setup] select Main Menu…
-
Page 61: Input Labels
Input Labels For easier identification and selection of the input mode, you can label each input mode or skip terminals that are not connected to any equipment. • To select the input mode (p. 29) Display the menu MENU Select [Setup] select Main Menu access…
-
Page 62: Shipping Condition
Shipping Condition Resets the TV to its original condition with no channels tuned in. All settings other than [Owner ID] and [USB HDD Setup] are reset (channels, picture, sound settings, etc.). • To retune TV channels only, e.g. after moving house “Retuning from Setup Menu”…
-
Page 63: Owner Id
Owner ID Entry of the PIN number and personal information (your name, address and postcode). In the unfortunate event of theft, the Owner ID will help the Police to determine the owner. Display the menu MENU Select [Setup] select Main Menu access Picture Sound…
-
Page 64: Using Common Interface
Using Common Interface The Common Interface Module menu provides access to software contained on Common Interface (CI) Modules. This TV works only for Pay TV modules complying with CI standard. • This function is not available for BskyB’s Sky channels. •…
-
Page 65: Updating The Tv Software
Updating the TV Software From time to time, a new version of software may become available for download to enhance the performance or operations of the TV. In DVB mode, a notification banner will appear when one of the BBC channels is turned to if a new available software is found. •…
-
Page 66: Displaying Pc Screen On Tv
Displaying PC Screen on TV The screen of the PC connected to the TV can be displayed on the TV. You can also listen to PC sound with the audio cable connected. • To connect PC (p. 105) Select the external input Select [PC] Input Selection select…
-
Page 67: Advanced Picture Settings
Advanced Picture Settings You can adjust and setup the detailed picture settings for each input and Viewing Mode. • To use this function completely, set [Advance(isfccc)] to [On] in the Setup Menu. (p. 43) • For PC input mode, some functions are available without setting [Advance(isfccc)]. Select the input mode to adjust and setup (p. 17, 29) Display the menu…
-
Page 68
Menu Item Adjustments / Configurations (alternatives) R-Hue Adjusts the picture hue of red area G-Hue Adjusts the picture hue of green area B-Hue Adjusts the picture hue of blue area R-Saturation Adjusts the saturation of red area G-Saturation Adjusts the saturation of green area B-Saturation Adjusts the saturation of blue area R-Luminance… -
Page 69: Usb Hdd Recording
USB HDD Recording You can record the digital TV programmes to the connected USB HDD and enjoy playing back in various ways. • Analogue TV programme cannot be recorded to the USB HDD. • The data broadcasting (MHEG, etc.), radio broadcasting and the periods without any signal will not be recorded. •…
-
Page 70
Setup the USB HDD [USB HDD Setup] All the USB devices recognised as a mass storage device will be listed. • You can only choose one USB HDD for recording at a time. Select the USB HDD for recording and start setup USB HDD Setup select Product… -
Page 71: One Touch Recording
Recording the TV programme to USB HDD You can record the current programme immediately by using [One Touch Recording]. You can also record the current programme constantly for the selected period by using [Rewind LIVE TV] so that you can go back or pause the current programme.
-
Page 72
■ To start One Touch Recording Set the position to “TV” Start DVD/VCR • No other channel can be selected while the recording is in progress. ■ To stop recording on the way DVD/VCR EXIT ■ To playback or delete the recorded contents “Recorded TV mode”… -
Page 73: Using Media Player
Using Media Player Media Player allows you to enjoy photo, video or music recorded on an SD Card and a USB Flash Memory, and recorded contents on the formatted USB HDD. VIERA IMAGE VIEWER is the function of the easy viewing for photos or videos recorded on an SD Card on the TV screen by simply inserting into the SD Card slot.
-
Page 74: Photo Mode
Starting Media Player Insert the SD Card or USB Flash Memory to the TV (p. 73) • To play back contents in USB HDD, check the connection and settings are completed. (p. 69, 70) Start Media Player Media Player Signal output from all AV terminals will be disabled during Media Player view.
-
Page 75
■ To sort by folder, recorded date or recorded month Display the view selection (green) Select the sort type [Folder view] : Folder view Displays the thumbnail grouped by folder Sort by Date • The files which are not into a folder will be collected to the folder named “/”. Sort by Month [Sort by Date] : select… -
Page 76: Multi Shot 3D
Multi Shot 3D This TV can create the 3D photo using a pair of photos in the SD Card and save it into the same SD Card. • This TV can also create the 3D photo from photos in the USB Flash Memory, but cannot save it. •…
-
Page 77: Photo Settings
Photo Settings Setup the settings for Photo mode. Display the option menu Select [Slideshow Settings] Select the items and set OPTION Option Menu Slideshow Settings Slideshow Settings Frame Colour Effect Transition Effect Fade Aspect Original Burst Playback access Interval 5 seconds Repeat Back Ground Music select…
-
Page 78: Change The Contents
Menu Item Adjustments / Configurations (alternatives) Selects the back ground music during Photo mode [Off] / [Type1] / [Type2] / [Type3] / [User] / [Auto] • [Type1], [Type2] and [Type3] are the fixed music each installed in this TV. [User] : Music data in the device registered by yourself will be played back. To register the music 1.
-
Page 79: Video Mode
Video and Recorded TV mode • Supported file format (p. 108) Video mode (For SD Card or USB Flash Memory) The thumbnail of video titles in the SD Card or USB Flash Memory will be displayed. Example : Thumbnail — [Title view] The preview will start when the title is Title view Media Player…
-
Page 80
■ How to operate in the playback Example : Playback • • To display / hide the operation guide and To change aspect 19/02/2010 11:21 00:15:39 00:02:05 information banner ASPECT • To the previous title / • To operate the playback scene Rewind EXIT… -
Page 81: Recorded Tv Mode
Recorded TV mode (For USB HDD) Contents list of the USB HDD will be displayed. Example : Contents list Remaining capacity of the HDD • Media Player Recorded TV Remaining Capacity 500GB (50%) This value may not be accurate depending on the condition. Not Viewed •…
-
Page 82
■ How to operate in the playback Example : Playback • To display / hide the operation guide and information banner Das Erste 00:15:39 00:02:05 • To operate the playback Rewind Manual skip [Manual skip] • Press to skip forward about 30 seconds RETURN •… -
Page 83: Audio Output Settings
Audio output Settings You can enjoy the multi-channel sound via an amplifier connected to DIGITAL AUDIO OUT or HDMI2 (ARC function) terminal. • To confirm or change the current sound status “Confirm or change the current status” (p. 80) Display the menu Select [Sound] Select [SPDIF Selection] and set MENU…
-
Page 84: Music Setup
■ Playback from File view Selected file will be played back. Select the folder Select the file Start playback Example : Thumbnail — File view (red) Folder view > My Music_1 Media Player Music select access My Song_1 My Song_2 My Song_3 My Song_4 My Song_5…
-
Page 85: Using Network Services (Dlna / Viera Connect / Freesat)
(p. 92 — 95) VIERA Connect VIERA Connect is a gateway to the internet services unique to Panasonic and has expanded VIERA CAST features greatly. VIERA Connect allows you to access some specific websites supported by Panasonic, and enjoy internet contents such as photos, videos, games, etc.
-
Page 86: Network Connections
Network connections To use only DLNA features, you can operate the features without broadband network environment. To use VIERA Connect features or freesat interactive services, you need a broadband network environment. • If you do not have any broadband network services, please consult your retailer for assistance. •…
-
Page 87: Network Setup
Enables to control the TV from the network equipment (Smartphone, etc.) [Off] / [On] • Depending on the area, this function may not be available. For details, consult your Network Remote Control local Panasonic dealer. • For more information of this function, visit the following website. http://panasonic.jp/support/global/cs/tv/…
-
Page 88: Wired Connection Settings
Wired connection settings This setting is for the network connection by using the LAN cable. Select [Network Type] and set to [Wired] select Network Setup Connection Test Network Type Wired access / store Access Point Settings IP/DNS Settings Network Link Settings If you make the network connection like “Example 2”…
-
Page 89: Wireless Connection Settings
Select [Connection Test] and access to test select Network Setup Connection Test Access Network Type Wired access Access Point Settings • IP/DNS Settings Performs automatic testing of the network connection for the TV. (It takes a Network Link Settings while to test.) Software Update MAC Address ab-cd-ef-gh-ij-kl…
-
Page 90
Select [Connection Test] and access to test select Network Setup Connection Test Access Network Type Wireless access Access Point Settings Connected IP/DNS Settings Performs automatic testing of the network connection for the TV. (It takes a while Network Link Settings to test.) Software Update MAC Address… -
Page 91: Update Tv’s Software
Select ‘Yes’ to confirm. Select ‘No’ to change. Please select the authentication type. WPA2-PSK WPA-PSK Shared key Open Update TV’s software Check for available software updates from the Panasonic website. Select [Software Update] select Network Setup Connection Test Network Type Wired access Access Point Settings •…
-
Page 92
Using DLNA® features • Ensure the preparation of media server, network connections and network settings are completed. “Media server” (p. 85), “Network connections” (p. 86), [Network Setup] (p. 87 — 91) Display icons of the feature Select [Media Server] select access Media Server Select one of the media servers you want to access Example : Media server list Media Server… -
Page 93
For photo file [Single view] — Photos are displayed one at a time. Example : • • To display / hide the operation guide To return to list Single view BACK/ RETURN • • Single view To operate Single view To rotate 90°… -
Page 94: Option Menu For Each Content
For DIGA Recorder Control the DIGA Recorder The screen of the DIGA Recorder will be displayed. You can control the functions of the DIGA Recorder with this TV remote control according to the operation guide. Example : • Before operating, register this TV on the DIGA Recorder. DIRECT NAVIGATOR (Grouped Titles) Time Remaining 36:17 (DR) •…
-
Page 95: Audio Output Settings (For Video Contents)
VIERA Connect home screen is subject to change without notice. • The services through VIERA Connect are operated by their respective service providers, and service may be discontinued either temporarily or permanently without notice. Therefore, Panasonic will make no warranty for the content or the continuity of the services. •…
-
Page 96: Link Functions (Q-Link / Viera Link)
Connect the equipment supporting VIERA Link to the TV’s HDMI1 or HDMI2 terminal via an HDMI cable. • For information about using HDMI cables for connecting Panasonic HD Video Camera or LUMIX Camera, read the manual of the equipment. VIERA Link (HDMI and SCART connections)
-
Page 97: Viera Link (Hdmi And Audio Out Connections)
VIERA Link (HDMI and Audio out connections) Connected equipment Player theatre with Blu-ray Disc theatre with Amplifier with VIERA Link VIERA Link function VIERA Link function function Features Analogue channel download – – – ∗ ∗ Easy playback – Power on link –…
-
Page 98: Power Off Link
Q-Link Preparations • Connect the DVD Recorder / VCR with the following logos: “Q-Link”, “NEXTVIEWLINK”, “DATA LOGIC (a trademark of Metz Corporation)”, “Easy Link (a trademark of Philips Corporation)”, “Megalogic (a trademark of Grundig Corporation)” or “SMARTLINK (a trademark of Sony Corporation)” •…
-
Page 99: Easy Playback
Control™” ∗ VIERA Link “ ∗ Enjoy additional HDMI Inter-Operability with Panasonic products which have “HDAVI Control” function. This TV supports “HDAVI Control 5” function. Connections to the equipment (DIGA Recorder, HD Video Camera, Player theatre, Amplifier, etc.) with HDMI and SCART cables allow you to interface them automatically (p. 96, 97).
-
Page 100
Reduce unnecessary power consumption in standby [Standby Power Save] Set Standby Power Save [On] in the Setup Menu to use this function [Standby Power Save] (p. 41) The power consumption in Standby mode of the connected equipment is controlled in synchronization with the TV On / Off state. -
Page 101
Pause Live TV programme [Pause Live TV] You can pause the live TV programme and resume the programme later. The live TV programme will be recorded on HDD of the connected DIGA Recorder. • This function is available with a DIGA Recorder which has HDD. •… -
Page 102: Operate The Menu Of The Equipment
Select the equipment you want to access The type of the connected equipment is displayed. Select the type of the equipment and access. select VIERA Link Menu Pause Live TV Start Direct TV Rec Start store VIERA Link Control Recorder Speaker Selection Home Cinema [Recorder] / [Player] / [Home Cinema] / [Video Camera] / [LUMIX] / [Digital Camera] / [Other]…
-
Page 103
Speaker control [Speaker Selection] You can control the home theatre speakers with this TV remote control (point the remote control at the TV’s signal receiver). • If you cannot operate, check the settings and the equipment “Summary of Q-Link and VIERA Link features” (p. 96, 97), “Preparations” (p. 99) Display [VIERA Link Menu] Select [Speaker Selection] select… -
Page 104: External Equipment
External Equipment These diagrams show our recommendations for connection of your TV to various pieces of equipment. For other connections, consult the instructions for each piece of equipment, the table (p. 106), and the specifications (p. 122, 123). To watch satellite broadcasts Satellite dish Satellite cable To watch cable broadcasts…
-
Page 105: Network (Wired)
Network (wired) Internet Modem LAN cable (Shielded) Hub or Router USB devices USB cable USB HDD Wireless LAN Adaptor (Listening) Computer (Viewing) Conversion adaptor (if necessary) To listen with speakers Optical digital audio cable Rear of the TV Amplifier with speaker system RCA cable To enjoy the sound from the external equipment in…
-
Page 106
Camcorder / Game equipment Rear of the TV (Viewing) Camcorder (Listening) Game equipment Side panel of the TV Headphones (M3 stereo mini plug) • To adjust volume [Headphone Volume] (p. 40) Types of connectable equipment to each terminal Terminal Recording / Playback (equipment) To record / playback videocassettes / DVDs (VCR / DVD Recorder) -
Page 107: Technical Information
Technical Information Auto Aspect The optimum size and aspect can be chosen automatically, and you can enjoy finer images. (p. 20) Aspect Control Signal [WIDE] will appear in the top left of the screen if a Widescreen signal (WSS) or a Control signal through SCART / HDMI terminal is found.
-
Page 108
Dolby Digital products. Linear PCM (RAW / • This TV supports Motion JPEG recorded TWOS / SOWT) by Panasonic LUMIX Camera ∗ MotionJPEG .mov • This TV is not available for playing back H.264 BP / MP / HP Motion JPEG with the media server. -
Page 109
■ Music Codec File extension Restrictions .mp3 – • .m4a Copy-protected files cannot be played back. • Copy-protected files cannot be played back. .wma • WMA Pro and WMA Lossless are not supported. Note • Some files may not be played back even if they fulfill these conditions. •… -
Page 110: Devices For Recording Or Playing Back
• Back up the recorded data at regular intervals in case of deteriorated or damaged data or erratic operation of the TV. (Panasonic is not liable for any deterioration or damage of recorded data.) SCART and HDMI terminal information AV1 SCART terminal (RGB, VIDEO, Q-Link)
-
Page 111: Hdmi Connection
Characters table for numeric buttons You can enter characters by using numeric buttons for free input items. Press the numeric button repeatedly until you reach the desired User input character. Name pqrs wxyz A B C D E F G H I J K L M N O P Q R S T U V W X Y Z…
-
Page 112: Usb Connection
You cannot use two or more same kind of USB devices simultaneously except USB Flash Memory or USB HDD. • Additional information for USB devices may be on the following website. http://panasonic.jp/support/global/cs/tv/ USB Keyboard • The USB Keyboard which requires the driver is not supported.
-
Page 113: Input Signal That Can Be Displayed
Input signal that can be displayed COMPONENT (Y, P ), HDMI Signal name COMPONENT HDMI 525 (480) / 60i, 60p 625 (576) / 50i, 50p 750 (720) / 60p, 50p 1,125 (1,080) / 60i, 50i 1,125 (1,080) / 60p, 50p, 24p Mark : Applicable input signal PC (from D-sub 15P) Signal name…
-
Page 114
How to use Windows 7 as a media server Follow the examples below to set up Windows 7 for use as a media server. Confirm the MAC Address of VIERA in [Network Setup] (p. 91). The following procedure and screens are examples. For more information, refer to the help functions of Windows 7. Open the Windows start menu and select [Control Panel]. -
Page 115
FAQs Before requesting service or assistance, please follow these simple guides to resolve the problem. If the problem still persists, please contact your local Panasonic dealer or Panasonic Customer Care Centre for assistance. For details (p. 124) Block noise, frozen or disappearing image occurs in digital mode / White spots or shadow image (ghosting) occurs in Analogue mode / Some channels cannot be tuned •… -
Page 116
Problem Actions • Set [P-NR] in the Picture Menu (to remove noise). (p. 38) • Chaotic image, noisy Check nearby electrical products (fluorescent lamp, DECT phones, mobile phones, microwave, etc.). • No image can be Is [Contrast], [Brightness] or [Colour] in the Picture Menu set to the minimum? (p. 38) •… -
Page 117: On Screen Messages
Check if foreign objects are inside the USB port. • An error message Follow the message’s instructions. • appears If the problem persists, contact your local Panasonic dealer or the authorized Service Centre. On screen messages Message Meaning / Action All contents will be lost. •…
-
Page 118
Please check aerial or local signal • Please also refer to p. 100. availability. • If channels are still not found, consult your local Panasonic dealer. Press OK to start Auto Setup. • No module inserted Check the CI module is inserted completely (p. 64). -
Page 119
Message Meaning / Action Reset to Factory Shipping • [Auto Setup] will automatically start when Mains power On / Off switch is next Condition Completed. turned On. (p. 12) Please switch off TV. • Sending Preset Data Q-Link or VIERA Link channel download is in progress. Software successfully updated. -
Page 120: Mains Plug
• HDAVI Control™ is a trademark of Panasonic Corporation. • “AVCHD” and the “AVCHD” logo are trademarks of Panasonic Corporation and Sony Corporation. • Manufactured under license from Dolby Laboratories. Dolby and the double-D symbol are trademarks of Dolby Laboratories.
-
Page 121
Index Accessories ············································· 6 HDMI ································ 110, 111, 122 Safely remove USB ····························19 Advanced Settings ··············39, 67, 68 HDMI Content Detection ················41 Sales and Support Information ··· 124 Analogue Tuning Menu ·····42, 49, 54 Hold ·················································19, 27 SCART·········································104, 110 Aspect ····················································20 Home Cinema ··································… -
Page 122: Specifications
Progressive images recorded at a rate signals on a single cable known as Euro SCART and Peritel) of 24 frames per second (film source) Local Area Network Specifications TX-L32DT30B TX-L37DT30B Power Source AC 220-240 V, 50 / 60 Hz Rated Power Consumption 118 W…
-
Page 123
DVB-S / S2 freesat services via Satellite dish input. freesat Receiver frequency range — 950 MHz to 2,150 MHz Other Sat. LNB Power and Polarisation — Vertical: +13 V Horizontal: +18 V Current: Max. 500 mA (overload protection) 22 kHz Tone — Frequency: 22 kHz ± 2 kHz Amplitude: 0.6 V ±… -
Page 124
• Or go on line through our Internet Accessory ordering application at www.pas-europe.com. • Most major credit and debit cards accepted. • All enquiries transactions and distribution facilities are provided directly by Panasonic UK Ltd. • It couldn’t be simpler! •…