Содержание
- Как поменять язык в хойке 4 на пиратке?
- Как изменить язык в Hoi 4?
- Как включить русский язык в Hoi 4?
- Как включить русский язык Squad?
- Как поменять язык на Пиратке?
- Как поменять язык в игре Kerbal Space Program?
- Как поменять язык в Generation Zero?
- Как переключить язык в игре?
- Как установить мод для Hearts of Iron 4?
- Hoi 4 как настроить язык
- Hoi 4 как настроить язык
- Русификатор для Hearts of Iron IV
Как поменять язык в хойке 4 на пиратке?
ни как скачивай версия с русским языком либо модбак со всеми Hearts of Iron IV: Field Marshal Edition [v 1.7.0 + DLC’s]
Hearts of Iron IV: War Stories
Hearts of Iron IV: German Tanks Pack
Hearts of Iron IV: French Tanks Pack
Hearts of Iron IV: Famous Battleships Unit Pack
Hearts of Iron IV: Heavy Cruisers Unit Pack
Hearts of Iron IV: Soviet Tanks Unit Pack
Hearts of Iron IV: US Tanks Unit Pack
Hearts of Iron IV: British Tanks Unit Pack
Hearts of Iron IV: German March Order Music Pack
Hearts of Iron IV: Allied Radio Music Pack
Hearts of Iron IV: Rocket Launcher Unit Pack
Hearts of Iron IV: Poland — United and Ready
Hearts of Iron IV: German Historical Portraits
Hearts of Iron IV: Sabaton Soundtrack
Hearts of Iron IV: Wallpaper
Hearts of Iron IV: Artbook
Hearts of Iron IV: Original Soundtrack
Hearts of Iron IV: Together for Victory
Hearts of Iron IV: Death or Dishonor
Hearts of Iron IV: Sabaton Soundtrack Vol. 2
Hearts of Iron IV: Anniversary Pack
Hearts of Iron IV: Waking the Tiger
Hearts of Iron IV: Man the Guns
Hearts of Iron IV: Man the Guns Wallpaper
Ничего не вырезано / Не перекодировано
Время установки 2 минуты
Смена языка и настроек игры в лаунчере игры (Ярлык выведен на рабочий стол)
Операционная система: Windows 7 + (64-bit)
Процессор: Intel Core 2 Quad Q9400 @ 2.66 GHz / AMD Athlon II X4 650 @ 3.20 GHz и лучше
Оперативная память: 4 GB ОЗУ
Видеокарта: ATI Radeon HD 5850 / NVIDIA GeForce GTX470 with 1 GB VRAM или лучше
Звуковая карта: Звуковое устройство, совместимое с DirectX®11
Свободное место на жестком диске: 4 GB
Источник
Как изменить язык в Hoi 4?
Как включить русский язык в Hoi 4?
На странице игры в библиотеке выберите «Управление» > «Свойства». Перейдите на вкладку «Язык». Выберите нужный вам язык из выпадающего меню.
Как включить русский язык Squad?
В этом случае нужно найти в папке с игрой папку Binaries, в ней – папку – Win64, и в ней уже отыскать файл steam_emu. ini. Его нужно открыть и отыскать строчку Language that will be used in the game. По умолчанию там будет английский, вам же нужно установить Language=russian.
Как поменять язык на Пиратке?
Для этого, после запуска игры, следует зайти в раздел «Настройки/Settings». Вы увидите различные вкладки. Затем, переходите в раздел «Игра», в котором можно выбрать желаемый язык, заменив каиайский на русский.
Как поменять язык в игре Kerbal Space Program?
В случае со Steam-клиентом зайдите в свою библиотеку, нажмите ПКМ по видеоигре в списке, выбирайте «Свойства». Там потребуется обнаружить вкладку Language и выбрать Russian. После этого само приложение от Valve может быть перезапущено.
Как поменять язык в Generation Zero?
Другим способом служит смена языка в меню:
- После запуска Generation Zero необходимо перейти в раздел «Настройки» или «Settings».
- В настройках появятся вкладки с разными параметрами.
- В разделе «Игра» можно изменить действующий язык интерфейса.
Как переключить язык в игре?
Если у вас Windows 10, то: для планшетов и компьютеров — поднесите курсор к верхнему краю экрана, откройте меню игры, зайдите в параметры игры -> Язык -> выберите язык среди предлагаемых и перезапустите игру; для смартфонов — изменить язык можно только через изменение языка девайса.
Как установить мод для Hearts of Iron 4?
Если вы покупали игру в цифровом магазине Steam, то для установки мода необходимо просто перейти на страницу модификации в мастерской и нажать кнопку «Подписаться». Спустя некоторое время, архив с модификацией загрузится в папку SteamLibrarysteamappsworkshopcontent394360. Делать с ней больше ничего не нужно.
Источник
Hoi 4 как настроить язык
Hello my friend I am not russian but I will try to help you!
You need to scroll down in the launcher and select Russian as SYSTEM language as well or the game will be in english! Also you can try setting the launcher on OPT OUT OF PERSONALIZED CONTENT — ON
and under this BETA CONTENT — OFF
under this
RECEIVE BETA VERSIONS OF THE LAUNCHER — OFF
if that also does not work try this:
Rightclick on HOI4 in your steam library
go to properties (click)
go to local files
Validate game files (click)
Now after this done and it still won’t start you can try the following:
C:UsersYOURUSERNAMEDocumentsParadox InteractiveHearts of Iron IVmod
delete everything in that folder
and delete everything in that folder as well.

GOOGLE TRANSLATED:
Здравствуйте, мой друг, я не русский, но я постараюсь вам помочь!
Вам нужно прокрутить вниз в лаунчере и выбрать русский язык в качестве языка SYSTEM, иначе игра будет на английском! Также вы можете попробовать установить модуль запуска на ВЫКЛ. ПЕРСОНАЛИЗИРОВАННОГО КОНТЕНТА — ВКЛ.
и под этим бета-контентом — OFF
под этим
ПОЛУЧИТЬ БЕТА-ВЕРСИИ ОТКРЫТИЯ — ВЫКЛ
если это также не работает, попробуйте это:
Щелкните правой кнопкой мыши на HOI4 в вашей библиотеке Steam
перейти к свойствам (нажмите)
перейти к локальным файлам
Проверьте файлы игры (нажмите)
Теперь, после того, как это сделано и все еще не запускается, вы можете попробовать следующее:
C: Users ВАШЕ ИМЯ Документы Paradox Interactive Hearts of Iron IV mod
удалить все в этой папке
затем перейдите к:
: Steam SteamApps мастерская Содержание 394360
и удалите все в этой папке.

Hello my friend I am not russian but I will try to help you!
You need to scroll down in the launcher and select Russian as SYSTEM language as well or the game will be in english! Also you can try setting the launcher on OPT OUT OF PERSONALIZED CONTENT — ON
and under this BETA CONTENT — OFF
under this
RECEIVE BETA VERSIONS OF THE LAUNCHER — OFF
if that also does not work try this:
Rightclick on HOI4 in your steam library
go to properties (click)
go to local files
Validate game files (click)
Now after this done and it still won’t start you can try the following:
C:UsersYOURUSERNAMEDocumentsParadox InteractiveHearts of Iron IVmod
delete everything in that folder
and delete everything in that folder as well.
Источник
Hoi 4 как настроить язык
Считаю что необходимо добавить в игру русский язык, и это прерогатива разработчика, а не сообщества. Для огромного колличества людей создаются трудности из за отсутствия русского языка.
Отсутствие русского языка в серии игр Hearts of Iron, Victoria II, Crusader Kings,Europa Universalis создает для многих людей купивших игру трудности которые зачастую являются поводом отказаться от покупки.
Знаю много людей не купивших игру из за отсутствия в ней русского языка и политике DLC при том что они не испытывают затруднений при игре в игру на другом языке.

Насколько я знаю один из аргументов разработчиков не добавлять в игру русский язык это то что в России много «пиратов» ,это безусловно не повод так как не меньше людей купивших игру, при том что с русификацией пиратской версии игры нет проблем.
Лучший способ искоренить пиратство сделать качественный продукт который будет выгодно купить.
Современными международными языками можно считать (в порядке убывания общего количества владеющих языком):
Ранг Язык Родной Второй Общее число носителей
1 Китайский язык[1] 1,2 миллиарда до 300 миллионов до 1,5 миллиарда
2 Английский язык[2] 500 миллионов до 1 миллиарда до 1,5 миллиарда
3 Испанский язык[3] 425 миллионов до 125 миллионов до 550 миллионов
4 Арабский язык[4] 300 миллионов до 120 миллионов до 420 миллионов
5 Русский язык 160 миллионов до 100 миллионов до 260 миллионов
6 Португальский язык[5] 230 миллионов до 30 миллионов до 260 миллионов
7 Французский язык[6] 75 миллионов до 195 миллионов до 250 миллионов
8 Немецкий язык 120 миллионов до 80 миллионов до 200 миллионов
Источник
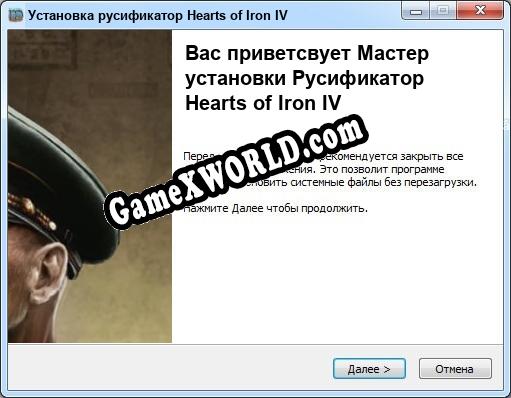
Русификатор для Hearts of Iron IV
Приветсвуем на GameXWorld.COM! На этой странице вы можете скачать русификатор для Hearts of Iron IV. Используя русификатор к этой игре, вы сможете перевести игру на русский язык. На этой странице представлен русификатор от автора как F4CG, в ближайшее время мы добавим больше файлов для этой игры от других авторов.
Русификатор текста для игры Hearts of Iron IV (полный перевод игры)
Размер: 15 мб
Авторы перевода: F4CG
Описание игры:
Победа в ваших руках Ваша способность вести свою страну является вашим высшим оружием, и стратегическая игра Hearts of Iron IV дает вам возможность возглавить любую нацию в ходе второй мировой войны, самого масштабного конфликта в мировой истории.
Установка русификатора для игры Hearts of Iron IV:
1. Скачать файл Русификатор(RUS) Hearts of Iron IV.
2. Закинуть файлы в папку ДИСК:locales Hearts of Iron IV.
3. Запускаем игру.
Полноценный русификатор для игры Hearts of Iron IV. Переводит текст в игре, субтитры, элементы интерфейса и активирует русский язык в игре.
Сам русификатор может активировать уже интегрированный перевод в игре, а также загрузить дополнительный перевод в Hearts of Iron IV. Также в русификаторе присутствуют доп. файлы ini в которых заменены строки перевода c language=eng на language=rus. Русификатор создан профессиональным сообществом переводчиков и качество перевода одно из лучших.
Источник
Hearts of iron 4 steam русский язык
На пиратке в хойке 4 есть возможность поменять язык, русифицировав эту версию. Это полезный гайд для пиратской версии в хойке 4, у кого нет денег.
Что нужно сделать:
Правой кнопкой мыши мы нажимаем на иконку Hearts of Iron IV и затем «Расположение файла». Вы попадаете на файл. Находим seyttings. layout. Это настройки его расположения. Далее переходим на вкладку «Открыть». Открываем с помощью блокнотика. Теперь прокручиваем в самый низ. И здесь мы видим languare, то есть, «язык». Спускаемся ниже в default. Здесь мы должны поменять вместо english на russian. Переходим в верхний левый угол и нажимаем «Сохранить».
После этого мы выходим отсюда и запускаем хойк 4. Теперь наша игра Хойка стала на русском языке.
Если пиратская версия игры то скорее всего вам придется менять язык на русский. Сделать это можно выполнив несложные действия. Для этого понадобится текстовой редактор. Сначала заходим в папку, в которой установлена игра. В этой папке ищем файл, который называется Setting. Его как раз и нужно открыть с помощью текстового редактора, например Блокнот. Ищем строчку Language english и в ней меняем слово english на слово russian. Должно получиться Language russian. Все, теперь остается только сохранить изменения и перезагрузить игру. В игре будет русский язык.
На рабочем столе вы видите иконку игры Hearts of Iron IV. Нужно навести на иконку курсор мыши, и кликнуть правой кнопкой. Откроется окно со списком файлов. Прокручиваем мышкой и находим файл под названием seyttings. layout. Открываем этот файл, при этом в графе Открыть с помощью, выбираем Блокнот. Прокручиваем длинный текст до низу, до раздела язык, по английски Languare. Переходим к default и меняем английский язык игры English на русский язык игры Russian.
Поменять язык в данной игре можно следующим образом:
Наводим курсор мыши на иконку игры, которая, как правило, находится нам рабочем столе. Кликаем правой кнопкой по иконке, в открывшемся меню ищем файл, который называется settings, то есть это настройки.
Нужно открыть данный фай, нажимаем на строку «Открыть с помощью», далее нужно выбрать «Блокнот». Откроется список с разделами, находим раздел language, то есть «язык». Далее переходим к default и потом меняем английский язык, то есть english на русский язык, то есть russian.
В данном вопросе речь идет о популярной компьютерной игре под названием «Hearts of Iron IV». Если честно, то у многих пользователей, у которых официальная версия, уже стоит русский язык и с этим проблем не возникает.
Если у вас пиратская версия, то эту проблему тоже можно решить. Для этого нажимаем правой кнопкой мыши на игру, выбираем «Свойства», далее «Расположение файла».
Находим файл с названием «seyttings. layout», открываем его с помощью блокнота.
Внизу файла надо найти «languare» и «default». Здесь нужно слово «english» заменить на слово «russian». Остается только сохранить файл, и ваша проблема будет решена.
Hearts Of Iron 4 — интересная компьютерная игра, которая дает возможность нам сыграть за любую страну во времена Второй Мировой войны. Если игра не пиратская, а купленная, например, в стиме, то проблемы с языком не должны возникнуть, так-как изначально в игре будет русский язык.
Если же это пиратка то кликаем по ярлыку игры, переходим в местоположение игры. Далее открываем файл setting с помощью блокнота и меняем строку «Language english» на «Language russian».
Готово. После этого заходим в игру и наслаждаемся игрой на русском языке. Как видим, сменить язык в игре не так уж и сложно, как кажется.
Для того, чтобы иметь возможность произвести смену языка в игре Hearts of Iron IV следует зайти в настройки игры.
Для этого правой кнопкой мыши кликаем на иконку игры. Иконку игры можно найти на рабочем столе, либо «Пуск» -> «Программы».
Далее находим слово settings и ищем слово language (язык). Здесь находим english и меняем его на russian (русский язык).
Остаётся только сохранить внесённые изменения.
Всё, что необходимо, обычно меняют в настройках. Чтобы там оказаться, курсором тыкаем в виджет, открывая правой клавишкой меню. В строке «Открыть с помощью» находим настройки языка. Если вы в английском не сильны, найти слово languare всё равно сможете, а там уже останется из предложенного перечня остановиться на одном — russian. Это как раз то, что вам нужно.
Найдите первым делом иконку игры и наведите на нее курсор вашей мышки, после этого кликнете на нее правой кнопкой мышки и перед вами откроется меню. В нем вам нужно отыскать файл, который именуется словом — settings, а находятся в нем в конечном итоге — настройки.
Затем что бы вам его открыть, жмите на графу, которая называется — «Открыть с помощью». После этого активируйте функцию — «Блокнот».
Затем из всех появившихся перед вами разделов, вам надо будет выбрать тот, который называется — language, а уже через него перейдите к разделу под названием — default и в этом разделе, вы и сможите поменять английский язык на русский и наоборот.
Откроется список с разделами, находим раздел language, то есть язык.
Www. bolshoyvopros. ru
15.03.2019 2:43:15
2019-03-15 02:43:15
Источники:
Http://www. bolshoyvopros. ru/questions/3577340-kak-pomenjat-jazyk-v-hearts-of-iron-iv. html
Russian language: Hearts of Iron IV Общие обсуждения » /> » /> .keyword { color: red; } Hearts of iron 4 steam русский язык
Hearts of iron 4 steam русский язык
Hearts of iron 4 steam русский язык
27 окт. 2015 в 3:14
Считаю что необходимо добавить в игру русский язык, и это прерогатива разработчика, а не сообщества. Для огромного колличества людей создаются трудности из за отсутствия русского языка.
Отсутствие русского языка в серии игр Hearts of Iron, Victoria II, Crusader Kings, Europa Universalis создает для многих людей купивших игру трудности которые зачастую являются поводом отказаться от покупки.
Знаю много людей не купивших игру из за отсутствия в ней русского языка и политике DLC при том что они не испытывают затруднений при игре в игру на другом языке.
30 окт. 2015 в 6:52
Насколько я знаю один из аргументов разработчиков не добавлять в игру русский язык это то что в России много «пиратов» ,это безусловно не повод так как не меньше людей купивших игру, при том что с русификацией пиратской версии игры нет проблем.
Лучший способ искоренить пиратство сделать качественный продукт который будет выгодно купить.
Современными международными языками можно считать (в порядке убывания общего количества владеющих языком):
Ранг Язык Родной Второй Общее число носителей
1 Китайский язык[1] 1,2 миллиарда до 300 миллионов до 1,5 миллиарда
2 Английский язык[2] 500 миллионов до 1 миллиарда до 1,5 миллиарда
3 Испанский язык[3] 425 миллионов до 125 миллионов до 550 миллионов
4 Арабский язык[4] 300 миллионов до 120 миллионов до 420 миллионов
5 Русский язык 160 миллионов до 100 миллионов до 260 миллионов
6 Португальский язык[5] 230 миллионов до 30 миллионов до 260 миллионов
7 Французский язык[6] 75 миллионов до 195 миллионов до 250 миллионов
8 Немецкий язык 120 миллионов до 80 миллионов до 200 миллионов
Hearts of iron 4 steam русский язык.
Steamcommunity. com
09.06.2017 23:11:55
2017-06-09 23:11:55
Источники:
Https://steamcommunity. com/app/394360/discussions/0/490123938444711070/
Expansion — Hearts of Iron IV: No Step Back в Steam » /> » /> .keyword { color: red; } Hearts of iron 4 steam русский язык
Дополнительный контент
Дополнительный контент
Для запуска требуется Steam-версия игры Hearts of Iron IV.
Купить Hearts of Iron IV: No Step Back
Подписка
Подписка для Hearts of Iron IV
За небольшую месячную плату вы получите доступ ко всем дополнениям и наборам стран Hearts of Iron, а также особым косметическим, музыкальным и звуковым наборам. Материалы по подписке будут обновляться по мере выхода новых дополнений.
![]()
Начальная цена: 199 pуб. / мес.
При покупке будет списано 199 pуб. После этого раз в 1 мес. будет сниматься 199 pуб.
При покупке будет списано 557 pуб. После этого раз в 3 мес. будет сниматься 557 pуб.
При покупке будет списано 1075 pуб. После этого раз в 6 мес. будет сниматься 1075 pуб.
Информация о дополнении
Самые жестокие бои Второй мировой войны велись на Восточном фронте.
No Step Back — это новое дополнение для глобальной стратегии Hearts of Iron IV, в которой Paradox Interactive раскрывает тему кризиса 1930-х и последующей Второй мировой войны. В дополнении вас ждет углубленная проработка игрового процесса за страны Восточной Европы, уникальные механики, отражающие положение дел в советской власти, а также много военных нововведений.
С Hearts of Iron IV: No Step Back в игре появятся:
- Новые национальные фокусы для СССР. В коммунистическом правительстве царит атмосфера недоверия и плетутся интриги, но лидеру страны можно противопоставить оппозицию, а при желании даже восстановить монархический строй.
Системные требования
- Минимальные:
- ОС: Windows® 7 64 Bit | Windows® 8.1 64 Bit | Windows® 10 Home 64 Bit
Процессор: Intel® Core™ i5 750 | AMD® FX 4300
Оперативная память: 4 GB ОЗУ
Видеокарта: Nvidia® GeForce™ GTX 470 (1.28GB) | AMD® HD 5850 (1GB) | Intel Iris Xe G7 (Tiger Lake) | AMD® Radeon™ RX Vega 11 | Steam Deck
DirectX: Версии 9.0
Место на диске: 2 GB
Звуковая карта: Direct X — compatible soundcard
Дополнительно: Mouse and keyboard are required. / Latest available WHQL drivers from both manufacturers/ Internet Connection or LAN for multiplayer, Up to 32 other players in multiplayer mode.
- Рекомендованные:
- ОС: Windows® 10 Home 64 bit
Процессор: Intel® Core™ i5 2500K | AMD® Ryzen 3 2200G
Оперативная память: 6 GB ОЗУ
Видеокарта: Nvidia® GeForce™ GTX 570 (1.28GB) | AMD® Radeon™ HD 7970 (3GB) | Intel Iris Xe G7 (Tiger Lake)
DirectX: Версии 9.0
Место на диске: 2 GB
Звуковая карта: Direct X — compatible soundcard
Дополнительно: Mouse and keyboard are required. / Latest available WHQL drivers from both manufacturers/ Internet Connection or LAN for multiplayer, Up to 32 other players in multiplayer mode.
- Минимальные:
- ОС: macOS 10.11 (El Capitan)
Процессор: Intel Core i5 @ 2.60 GHz
Оперативная память: 4 GB ОЗУ
Видеокарта: ATI Radeon HD 6970M
Место на диске: 2 GB
Дополнительно: Mouse and keyboard are required. / Latest available proprietary drivers / Internet Connection or LAN for multiplayer, Up to 32 other players in multiplayer mode.
- Рекомендованные:
- ОС: macOS 10.11 (El Capitan)
Процессор: Intel Core i5 @ 2.90 GHz
Оперативная память: 4 GB ОЗУ
Видеокарта: ATI Radeon R9 390M / NVIDIA GeForce 750M (1GB VRAM)
Место на диске: 2 GB
Дополнительно: Mouse and keyboard are required. / Latest available proprietary drivers / Internet Connection or LAN for multiplayer, Up to 32 other players in multiplayer mode.
- Минимальные:
- ОС: Ubuntu 18.04
Процессор: Intel Core 2 Quad Q9400 @ 2.66 GHz / AMD Athlon II X4 650 @ 3.20 GHz
Оперативная память: 4 GB ОЗУ
Видеокарта: ATI Radeon HD 5850 / NVIDIA GeForce GTX470 (1GB VRAM). Latest available proprietary drivers from both manufacturers
Место на диске: 2 GB
Дополнительно: Controller support: 3-button mouse, keyboard, and speakers are required. / Internet Connection or LAN for multiplayer, Up to 32 other players in multiplayer mode.
- Рекомендованные:
- ОС: Ubuntu 18.04
Процессор: Intel Core i5 750 @ 2.66 GHz / AMD Phenom II X4 955 @ 3.20 GHz
Оперативная память: 4 GB ОЗУ
Видеокарта: ATI Radeon HD 6950 / NVIDIA GeForce GTX570 (2GB VRAM). Latest available proprietary drivers from both manufacturers
Место на диске: 2 GB
Дополнительно: Controller support: 3-button mouse, keyboard, and speakers are required. / Internet Connection or LAN for multiplayer, Up to 32 other players in multiplayer mode.
©2016-2021 and published by Paradox Interactive AB, HEARTS OF IRON and PARADOX INTERACTIVE are trademarks and/or registered trademarks of Paradox Interactive AB in Europe, the U. S., and other countries. All other trademarks, logos, and copyrights are the property of their respective owners.
Начальная цена: 199 pуб. / мес.
Дополнительный контент
Для запуска требуется Steam-версия игры Hearts of Iron IV.
За небольшую месячную плату вы получите доступ ко всем дополнениям и наборам стран Hearts of Iron, а также особым косметическим, музыкальным и звуковым наборам. Материалы по подписке будут обновляться по мере выхода новых дополнений.
![]()
Начальная цена: 199 pуб. / мес.
При покупке будет списано 199 pуб. После этого раз в 1 мес. будет сниматься 199 pуб.
При покупке будет списано 557 pуб. После этого раз в 3 мес. будет сниматься 557 pуб.
При покупке будет списано 1075 pуб. После этого раз в 6 мес. будет сниматься 1075 pуб.
- Новые национальные фокусы для СССР. В коммунистическом правительстве царит атмосфера недоверия и плетутся интриги, но лидеру страны можно противопоставить оппозицию, а при желании даже восстановить монархический строй.
Системные требования.
Store. steampowered. com
18.03.2018 10:09:08
2018-03-18 10:09:08
Источники:
Https://store. steampowered. com/app/1348661/Expansion__Hearts_of_Iron_IV_No_Step_Back/?l=russian
This is a community maintained wiki. If you spot a mistake then you are welcome to fix it.
HOI4 uses the modified YAML localization system used by modern Paradox games.
The localisation is stored within the /Hearts of Iron IV/localisation/ folder, in which any sub-folder can be used. Each file is assigned a language with its filename by adding it in the end, with the following languages existing:
l_english: English, as in /Hearts of Iron IV/localisation/english/filename_l_english.ymll_french: French, as in /Hearts of Iron IV/localisation/french/mod_file_l_french.ymll_german: German, as in /Hearts of Iron IV/localisation/german/state_names_l_german.ymll_spanish: Spanish, as in /Hearts of Iron IV/localisation/spanish/mod_germany_l_spanish.ymll_braz_por: Brazilian Portuguese, as in /Hearts of Iron IV/localisation/braz_por/bahrain_l_braz_por.ymll_polish: Polish, as in /Hearts of Iron IV/localisation/polish/myfile_l_polish.ymll_russian: Russian, as in /Hearts of Iron IV/localisation/russian/siberia_l_russian.ymll_japanese: Japanese, as in /Hearts of Iron IV/localisation/japanese/kuril_l_japanese.yml
The filename has to end with the language’s internal name as the file will not be loaded otherwise.
The currently-turned on language is chosen within the user directory’s /Hearts of Iron IV/settings.txt file, however, more languages cannot be added directly other than these listed languages.
Quick checklist[edit | edit source]
In order for a file to work, it must have the following:
- The file has the .yml extension. By default, Windows hides file extensions, so this must be turned off to change the extension and to easily see it.
- The file’s name, minus the extension, has to end with the internal name of the language, e.g.
filename_l_english.yml. In this case,lis a lowercase L. - The file has to be encoded in UTF-8-BOM — the UTF-8 encoding with the EFBBBF byte order mark at the beginning of the file. The game throws an error in the log if this is not met.
- The first line of the file has to be the internal language followed by a colon, such as
l_english:. This assigns the keys within to the largerl_englishdatabase.
Basics[edit | edit source]
Localisation is created within any file in the localisation folder: the filename aside from the file extension is irrelevant aside from deciding which language is chosen.
Every localisation file must use the UTF-8-BOM encoding, i.e. the UTF-8 encoding with the byte order mark in the beginning of the file. Exact details depend on the text editor:
- Notepad++: Top bar’s «Encoding» menu provides a selection of encodings. UTF-8-BOM is used in this case.
- Sublime Text: Top bar’s «File» menu provides the «Save with Encoding» selection. UTF-8 with BOM is used in this case.
- Visual Studio Code: In the bottom bar, there’s the «Select Encoding» button titled with the current encoding (Usually «UTF-8» or «UTF-8 with BOM»). To convert, this must be pressed and then «Save with encoding» must be selected with «UTF-8 with BOM».
The first line in the file decides the language in addition to the filename, such as l_english:
Next lines are structured in the format of localisation_key:0 "Localisation value". In here:
- localisation_key is the localisation key that is being localised. This is usually the same as the name of the database entry (e.g. a focus with the name of TAG_focusname will have TAG_focusname as the needed localisation key). Other times, it’s possible or required to set in the database entry itself (e.g.
title = my_event.1.twithin an event). Commonly, appending _desc as TAG_focusname_desc provides the localisation key for the description, such as with characters, focuses, ideas, traits, and so on. The localisation key cannot have special characters in it, where a special character is defined as taking up more than 1 byte using the UTF-8 encoding. This includes every character other than those in the ASCII character system, so in essence localisation keys shouldn’t have anything other than English letters, underscores, dots, and numbers. Localisation keys additionally cannot include spaces in them. - 0 is the version number, used for Paradox’s internal translation tracking.[1] This is never read in-game, and it can be omitted entirely with no difference.
- Localisation value refers to the text that will show up in-game. This must be on one line total, multiple lines will break the file. Instead, newlines are marked using
n(Note that this is a backslash rather than a regular slash), such aslocalisation_key: "First line.nSecond line."A space after the n should be avoided, as it will appear in-game as offsetting the next lines.
Any issue with localisation, such as special characters or spaces in localisation keys or a missing quote, will break the localisation file starting with the point where the syntax first stopped being followed correctly.
An example of a localisation file’s contents is the following:
l_english:
 infantry_equipment: "Infantry Equipment"
 infantry_equipment_short: "Inf. Eq."
 infantry_equipment_desc: "This is infantry equipment"
Replacing[edit | edit source]
Typically, localisation key overlap must be avoided, overlap being the same localisation key being defined several times in the same language’s files. This is tracked within user directory’s /Hearts of Iron IV/logs/text.log file, which contains a list of overlapping localisation keys if any. The value that’ll get chosen does not seem to have a consistent pattern, but seems to prioritise base game files.
However, if the localisation file is contained within a folder with the name of «replace» (such as /Hearts of Iron IV/localisation/english/replace, still must be inside of localisation), it will get priority over the entries that are not. This can be helpful to overwrite only specific localisation keys without porting over the entire file, such as if the file gets frequently updated in base game.
For example, if desiring to change the name of the effect to add political power from the default POLITICS_ADD_POLITICAL_POWER:0 "Political Power: $VAL|=+0$.", it may be undesirable to port over the entire /Hearts of Iron IV/localisation/english/effects_l_english.yml file to the mod, as new effects frequently get added to the game which would mean the file has to be kept in check.
However, if you instead create a new localisation file within the /Hearts of Iron IV/localisation/english/replace/ folder and define the POLITICS_ADD_POLITICAL_POWER localisation key there, the value of the key will get changed without needing to copy the entire localisation file, meaning that the mod is now easier to port to future updates.
Special characters[edit | edit source]
Colouring characters[edit | edit source]
Various characters can be added to a string to alter its colour in-game. The text you want to be coloured in a different way has to be prefaced with a colouring character and has to end with §!, with the exclamation point.
The following formatting characters are implemented (The colour provided is the default generic colour and may be different depending on the font):
| Code | Effect | Exact colour |
|---|---|---|
| §! | Ends the current formatting rule. | None. |
| §C | Colours the text cyan. | ( 35, 206, 255 ) |
| §L | Colours the text a dirty orange-gray (labeled «lilac»). | ( 195, 176, 145 ) |
| §W | Colours the text white. | ( 255, 255, 255 ) |
| §B | Colours the text blue. | ( 0, 0, 255 ) |
| §G | Colours the text green. | ( 0, 159, 3 ) |
| §R | Colours the text red. | ( 255, 50, 50 ) |
| §b | Colours the text black. | ( 0, 0, 0 ) |
| §g | Colours the text light gray. | ( 176, 176, 176 ) |
| §Y | Colours the text yellow. | ( 255, 189, 0 ) |
| §H | Colours the text yellow (same as §Y, labeled «header»). | ( 255, 189, 0 ) |
| §T | Colours the text white (same as §W, labeled «Title»). | ( 255, 255, 255 ) |
| §O | Colours the text orange. | ( 255, 112, 25 ) |
| §0 | Colours the text purple (labeled «Gradient Step 0»). | ( 203, 0, 203 ) |
| §1 | Colours the text lilac (labeled «Gradient Step 1»). | ( 128, 120, 211 ) |
| §2 | Colours the text blue (labeled «Gradient Step 2»). | ( 81, 112, 243 ) |
| §3 | Colours the text gray-blue (labeled «Gradient Step 3»). | ( 81, 143, 220 ) |
| §4 | Colours the text light blue (labeled «Gradient Step 4»). | ( 90, 190, 231 ) |
| §5 | Colours the text dull cyan (labeled «Gradient Step 5»). | ( 63, 181, 194 ) |
| §6 | Colours the text turquoise (labeled «Gradient Step 6»). | ( 119, 204, 186 ) |
| §7 | Colours the text light green (labeled «Gradient Step 7»). | ( 153, 209, 153 ) |
| §8 | Colours the text an orange-yellow (labeled «Gradient Step 8»). | ( 204, 163, 51 ) |
| §9 | Colours the text white-orange (labeled «Gradient Step 9»). | ( 252, 169, 125 ) |
| §t | Colours the text vivid red (labeled «Gradient Step 10»). | ( 255, 76, 77 ) |
Here is an example of the colour formatting:
l_english:
 example_key: "This is my text, §Bthis text is blue§!, and §Rthis text is red§!"
New text colours can be added by expanding the textcolors = {} array in interface/core.gfx. Colour keys cannot have more than one letter (i.e. «BU = {0 255 0}»), and will attempt to overwrite another colour key with the same first letter. It is also possible to make a colouring character represent a different colour from default when a certain font is used within the bitmapfont definition of that font.
Errors[edit | edit source]
The errors related to the colouring characters can be fairly unintuitive to find, considering that they do not provide the location of the file.
There are two types of the error:
Could not find coloring for character 'M'– This exact example means that, somewhere, the game found§Mwithin localisation; however, since «M» isn’t a valid colour, this is an unexpected result. The exact character is provided, so finding the cause should be elementary.Could not find coloring for character id '17'– Note that it specifies the character ID. In this case, the printable Unicode character ID is provided. This is typically done where providing the actual character would be confusing (e.g. for the number «1», the game would specify the character id «17» if such a colour doesn’t exist. Since «1» is the 18th printed character, it has the id of 17, as the numeration typically starts from 0.)
- This has a notable exception: the character id ‘0’ refers to the NULL character rather than a space, where the game instead provides the character itself. In other words, the character id ‘0’ means there is absolutely nothing after the § symbol, therefore the string ends with §. As such, locating this error would be done by searching for
§"This is usually caused by omitting the exclamation mark from the character to end the colour formatting, which would properly be§!.
Searching can be done using a text editor with the «Find in Files» functionality. For example, this is how the functionality is accessed in the more common editors to use:
- Notepad++ – This is located in the «Search» topbar menu as «Find in Files…». By default, no folder is provided. «Follow current doc.» allows the text editor to automatically input the currently-opened document’s folder as the place for the search, or it can be entered manually. Alternatively, this menu can be opened from the right-click menu of a folder within the «Folder as Workspace» menu – accessed by a button in the topbar – which’ll automatically set the folder location to be that folder.
- Sublime Text – This is located in the «Find» topbar menu as «Find in Files…». In order to add a folder to search, the menu to the right of the «Where:» line can be opened, with either «Add Folder» (to select an individual folder) or «Add Open Folders» (To automatically select all folders opened via Sublime Text) buttons serving to do so.
- Visual Studio Code – Visual Studio Code only supports searching the currently opened folder. A folder is opened either through the «Open Folder…» button in the «File» topbar menu or the «Explorer» menu, accessed through the bar on the left. After this, the functionality can be accessed in the «Edit» menu as «Find in Files». In order to speed up the search, filename filters can be used. For example,
localisation/english/*.ymlwithin «files to include» will only search every *.yml file within the <currently opened folder>/localisation/english/ folder, where*stands for any amount (including 0) of any characters within the filename. Similar filters can be used in the previous two text editors, however without allowing folders to be filtered — only the filenames.
Formatting variables[edit | edit source]
- See also: Variables
Variables have a special way to more easily apply the colouring characters, as well as special formatting characters. These are applied after a pipe placed at the end of the variable’s name, such as [?my_variable|R] that will turn the colour of the variable my_variable red. The exact list of formatting characters that are restricted to variables only are the following:
| Code | Effect |
|---|---|
| % | Converts the variable to percentage, multiplying by 100 and appending a %. |
| %% | Appends a percentage to the end of the variable without multiplying by 100. |
| * | Converts the variable to SI units—appends «K» or «M» and divides the variable appropriately, such as 65 536 becoming 65.53K and 1 500 000 becoming 1.50M. Displays 2 decimals after the dot by default. |
| ^ | Same as *. |
| = | Prefixes the variable with + if the value is positive or — if it is negative. |
| 0..3 | Controls the number of decimals to display. Due to the nature of the game’s variables, there are no more than 3 decimals that can be used. Optionally possible to prepend a dot to the beginning. |
| + | Colours the variable green if positive, yellow if zero, red if negative. |
| — | Colours the variable red if positive, yellow if zero, green if negative. |
Here are some examples of formatting characters in usage:
loc_key: "Democratic party popularity: [?party_popularity@democracy|%G0]"
loc_key_2: "Modifier token's value: [?modifier@my_modifier|.1%%+]"
Within these examples, the first string depicts the current scope’s democratic popularity as a percentage multiplied by 100 (%), in green (G), rounded to a whole number with 0 decimals (0). The second string displayes the my_modifier modifier token’s value as a ‘good’ number (+ making it green if positive, red if negative), with a percentage sign appended in the end (%%) and rounded to a number with one decimal (.1).
Country’s flags[edit | edit source]
The following in localisation will display the default, /Hearts of Iron IV/gfx/flags/TAG.tga, flag of a country: @TAG
It’s recommended to use the GetFlag namespace when possible instead, however, this can be used on localisation that doesn’t support namespaces, such as custom modifier tooltips or the game rules.
Text icons[edit | edit source]
Icons can be displayed within strings using the £ notation.
l_english:
 example_key: "£army_experience"
Text icons are added as spriteType = { ... } definitions in /Hearts of Iron IV/interface/*.gfx files within an overarching spriteTypes = { ... }. An example definition of one looks like:
	spriteType = {
		name = "GFX_my_text_icon"
		texturefile = "gfx/texticons/filename.dds"
		legacy_lazy_load = no
	}
The text icon’s name is equal to the text icon with the GFX_ part in the beginning removed, being £my_text_icon in this case.
If the sprite of the text icon is made out of multiple frames, then the specified frame can be used in localisation as £icon_name|1, this example being the first frame. Note that legacy_lazy_load = no is necessary for multi-framed text icons to work properly.
Nesting strings[edit | edit source]
The dollar sign special symbol is used for nesting other strings within any given localisation key’s value. In particular, there are 3 primary usage cases for it:
- Nesting other localisation keys. For example,
some_modifier_tooltip:0 "$modifier_production_speed_infrastructure_factor$: §R-10%§!"will show up in-game asInfrastructure construction speed: -10%, assuming thatmodifier_production_speed_infrastructure_factor‘s definition is unchanged from the base game.
- This is useful with localisation key values that need to be re-used within others, but can be easily changed during the development of the mod, as to not need to adjust every single localisation value that uses it when changing it. This can also be used to expand compatibility with base game updates or other mods that may potentially change the localisation value but should still be compatible with the mod.
- When used within
pdx_tooltipof an interface element, this does not work properly, instead showing up with the dollar signs visible. This can be bypassed using scripted localisation, as a scripted localisation entry that points towards a key, the value of which contains nested localisation entry, will work as intended.
- Inputting a dollar sign itself. This is done by doubling the dollar sign in localisation, such as
cost_tooltip: "This option costs $$100". - Nesting a strictly internal variable. This is particularly common within base game’s localisation that corresponds to game mechanics rather than database entries, such as
confirm_cancel_national_focus_desc:0 "Are you sure you want to cancel the national focus §H$FOCUS_NAME$§!?". In these cases, the specified internal variable only exists within the scope of that localisation key and cannot be used anywhere else.
- One notable usage of strictly internal variables is in country names, as these offer a variety of internal variables fetching the non-ideology name of the country and the overlord’s name in either regular, ADJ, or DEF form, such as
COUNTRY_autonomy_collaboration_government:0 "$OVERLORDADJ$ $NONIDEOLOGY$".
Namespaces[edit | edit source]
Namespaces refer to obtaining certain information from some scope to display in localisation. For example, getting the name of a country, the surname of a character, the ID of a state, and etc.
A namespace is marked with the square brackets on either side as in my_localisation_key: "[GetDateText]". By default, there is no scope assumed. A scope can be added, separated from the namespace with a dot, in order to let the game know from whom to obtain information, such as my_localisation_key: "[QAT.GetRulingParty]", which’ll result in the ruling party of the country QAT appearing in localisation. Any dual scope that can be used as a target may be used in localisation. THIS can be used in order to refer to the scope of where it’s used, such as effect_tooltip: "[ROOT.GetNameDefCap] declares war on [THIS.GetNameDef]".
Variables and event targets can be used within namespaces as well. For example, this grants the name of the capital state of OMA using the ‘capital’ variable: my_localisation_key: "[OMA.capital.GetName]". A list of built-in variables that can be used can be seen in the respective wiki page. Another common ones to use include ‘owner’ and ‘controller’ for states, such as my_localisation_key: "Owner of South-West England: [123.owner.GetName]".
Characters only exist within the scope of the country where they’re recruited, in versions prior to 1.12.8. What this means is that before scoping into the character, one must first scope into the country that they are assigned to, such as current_name_of_fdr:0 "[USA.USA_franklin_delano_roosevelt.GetFullName]". If the character is marked with some other token (such as THIS or ROOT), this is unnecessary, but it is necessary for direct character IDs. Characters also support scoping to the GetLeader localisation function beforehand, such as leader_pronoun: "[ROOT.GetLeader.GetHeShe]" In this case, scoping into the country is still necessary.
Note that namespaces cannot be used everywhere. In the majority of the user interface, such as the names for wars or countries, they will not work properly, instead appearing exactly as in localisation, with the square brackets still visible. A list of locations where namespaces do work is:
| Location | Notes |
|---|---|
| Focuses | Requires dynamic = yes within the focus to work correctly for the title, otherwise it generates a value at the game’s start and it remains unchanging until the next reload (either of the savefile or the focus tree). Not required for the description, which always dynamically refreshes localisation.
|
| Ideas | Despite the fact that it works in ideas, it does not work within dynamic modifiers. |
| Decisions | |
| Events | At times it may be better to use completely different localisation keys within events instead of using scripted localisation. |
| Custom effect/trigger tooltips | Despite the fact that it works for effects and triggers, custom modifier tooltips do not support scripted localisation. |
| Boolean flags | The names of the boolean flags, appearing in the tooltip when checked for them with triggers such as has_country_flag = flag_name or has_character_flag = flag_name
|
| Operations | |
| Adjacency rule tooltips | Referring to the tooltip that appears when hovering over a strait that’s disabled for this country. |
| Scripted GUI tooltips | At times, this may not function properly with reloading in the debug mode. A restart can be required to make the scripted localisation work if pdx_tooltip was added to the interface element in the same session. |
The list may be incomplete, so something not being mentioned does not necessitate that localisation does not work there, but that does make it unlikely. Other localisation functions, not involving square brackets, do still work in this case, however.
Functions[edit | edit source]
Date variable in this case refers to a variable set to a date value. Using it with the current date can be done by using the global.date variable as [?global.date.GetDateString].
| Name | Scope | Example | Description |
|---|---|---|---|
| GetDateText | Any | [GetDateText]
|
Gets the date in the format of «HH:00, DD Month, YYYY», such as «12:00, 1 January, 1936». |
| GetDate | Any | [GetDate]
|
Gets the date in the format of YYYY.MM.DD.HH, such as 1936.1.1.12. |
| GetMonth | Any | [GetMonth]
|
Gets the current month. |
| GetYear | Any | [GetYear]
|
Gets the current year. |
| GetName | Country, state, character, operative, ace | [GER.GetName]
|
Gets the name of the country, the name of the state, or the name of the character. For aces, only gets the first name: see GetFullName. |
| GetTag | Country | [GER.GetTag]
|
Puts the tag of the country into localisation. Particularly useful for Meta effects. If there is a non-ideology name for the country, this can result in that showing up in localisation in some cases. |
| GetLeader | Country | [POL.GetLeader]
|
Gets the name of the leader of the country. |
| GetManpower | Country | [ENG.GetManpower]
|
Gets the total population of the country, including civilians. |
| GetFactionName | Country | [SOV.GetFactionName]
|
Gets the name of the faction that the country is located in. |
| GetAgency | Country | [FRA.GetAgency]
|
Gets the name of the country’s intelligence agency. |
| GetFlag | Country | [GER.GetFlag]
|
Gets the current flag of the country. |
| GetNameWithFlag | Country | [ITA.GetNameWithFlag]
|
Gets the current flag of the country and adds the name afterwards. |
| GetNameDef | Country | [SPR.GetNameDef]
|
Gets the DEF name of the country, primarily used to tell if «the» is needed to be put in the beginning. |
| GetNameDefCap | Country | [POR.GetNameDefCap]
|
Gets the DEF name of the country, primarily used to tell if «The» is needed to be put in the beginning, capitalising the first letter as well. |
| GetAdjective | Country | [YUG.GetAdjective]
|
Gets the adjective for the country, such as |
| GetAdjectiveCap | Country | [CAN.GetAdjectiveCap]
|
Gets the adjective for the country, capitalising the first letter. |
| GetOldName | Country | [RAJ.GetOldName]
|
Gets the name of the country without any cosmetic tags applied. |
| GetOldNameDef | Country | [MAL.GetOldNameDef]
|
Gets the DEF name of the country, primarily used to tell if «the» is needed to be put in the beginning, without any cosmetic tags applied. |
| GetOldNameDefCap | Country | [AST.GetOldNameDefCap]
|
Gets the DEF name of the country, primarily used to tell if «The» is needed to be put in the beginning, without any cosmetic tags applied, capitalising the first letter. |
| GetOldAdjective | Country | [NZL.GetOldAdjective]
|
Gets the adjective for the country without any cosmetic tags applied. |
| GetOldAdjectiveCap | Country | [HAW.GetOldAdjectiveCap]
|
Gets the adjective for the country without any cosmetic tags applied, capitalising the first letter. |
| GetNonIdeologyName | Country | [JAP.GetNonIdeologyName]
|
Gets the non-ideology name of the country, defined with TAG:0 "Country name"
|
| GetNonIdeologyNameDef | Country | [SAU.GetNonIdeologyNameDef]
|
Gets the non-ideology DEF name of the country, primarily used to tell if «the» is needed to be put in the beginning. |
| GetNonIdeologyNameDefCap | Country | [SWE.GetNonIdeologyNameDefCap]
|
Gets the non-ideology DEF name of the country, primarily used to tell if «The» is needed to be put in the beginning, capitalising the first letter. |
| GetNonIdeologyAdjective | Country | [DEN.GetNonIdeologyAdjective]
|
Gets the non-ideology adjective for the country. |
| GetNonIdeologyAdjectiveCap | Country | [NOR.GetNonIdeologyAdjectiveCap]
|
Gets the non-ideology adjective for the country, capitalising the first letter. |
| GetPartySupport | Country | [ICE.GetPartySupport]
|
Gets the percentage of the ruling party, on the scale from 0 to 100. Does not have the % symbol in the end. |
| GetLastElection | Country | [ROOT.GetLastElection]
|
Gets the date when the last country’s election occurred in the «HH:00, DD Month, YYYY» format, such as «01:00, 1 January, 1936». |
| GetRulingParty | Country | [HOL.GetRulingParty]
|
Gets the short name of the party ruling over the country. |
| GetRulingPartyLong | Country | [BEL.GetRulingPartyLong]
|
Gets the long name of the party ruling over the country. |
| GetRulingIdeology | Country | [LUX.GetRulingIdeology]
|
Gets the name of the country’s ideology group, in adjective form. |
| GetRulingIdeologyNoun | Country | [GER.GetRulingIdeologyNoun]
|
Gets the name of the country’s ideology group, in noun form. |
| GetCommunistParty | Country | [HUN.GetCommunistParty]
|
Gets the name of the |
| GetDemocraticParty | Country | [AUS.GetDemocraticParty]
|
Gets the name of the |
| GetFascistParty | Country | [CZE.GetFascistParty]
|
Gets the name of the |
| GetNeutralParty | Country | [ROM.GetNeutralParty]
|
Gets the name of the |
| GetCommunistLeader | Country | [BUL.GetCommunistLeader]
|
Gets the name of the leader of the country’s |
| GetDemocraticLeader | Country | [GRE.GetDemocraticLeader]
|
Gets the name of the leader of the country’s |
| GetFascistLeader | Country | [ALB.GetFascistLeader]
|
Gets the name of the leader of the country’s |
| GetNeutralLeader | Country | [TUR.GetNeutralLeader]
|
Gets the name of the leader of the country’s |
| GetID | State | [123.GetID]
|
Gets the ID of the state. Particularly useful for Meta effects. |
| GetCapitalVictoryPointName | State | [540.GetCapitalVictoryPointName]
|
Gets the name of the capital victory point (i.e. the province with the largest amount of victory points) of the state. |
| GetSheHe | Character | [PRU.GetLeader.GetSheHe]
|
Results in either «she» or «he» depending on the gender of the character, beginning with lowercase letters. |
| GetSheHeCap | Character | [MEX.MEX_character.GetSheHeCap]
|
Results in either «She» or «He» depending on the gender of the character, beginning with uppercase letters. |
| GetHerHim | Character | [BRA.BRA_character.GetHerHim]
|
Results in either «her» or «him» depending on the gender of the character, beginning with lowercase letters. |
| GetHerHimCap | Character | [ARG.ARG_character.GetHerHimCap]
|
Results in either «Her» or «Him» depending on the gender of the character, beginning with uppercase letters. |
| GetHerHis | Character | [CHI.CHI_character.GetHerHis]
|
Results in either «her» or «his» depending on the gender of the character, beginning with lowercase letters. |
| GetHerHisCap | Character | [CHL.CHL_character.GetHerHisCap]
|
Results in either «Her» or «His» depending on the gender of the character, beginning with uppercase letters. |
| GetHersHis | Character | [PRC.PRC_character.GetHersHis]
|
Results in either «hers» or «his» depending on the gender of the character, beginning with lowercase letters. |
| GetHersHisCap | Character | [YUN.YUN_character.GetHersHisCap]
|
Results in either «Hers» or «His» depending on the gender of the character, beginning with uppercase letters. |
| GetHerselfHimself | Character | [GXC.GXC_character.GetHerselfHimself]
|
Results in either «herself» or «himself» depending on the gender of the character, beginning with lowercase letters. |
| GetHerselfHimselfCap | Character | [XSM.XSM_character.GetHerselfHimselfCap]
|
Results in either «Herself» or «Himself» depending on the gender of the character, beginning with uppercase letters. |
| GetIdeology | Country leader | [SIK.GetLeader.GetIdeology]
|
Gets the ideology type assigned to the country leader, such as liberalism or centrism. |
| GetIdeologyGroup | Country leader | [MAN.MAN_character.GetIdeologyGroup]
|
Gets the ideology group assigned to the country leader, such as |
| GetRank | Unit leader | [MEN.MEN_character.GetRank]
|
Gets the rank of the unit leader, such as Corps Commander or Field Marshal. |
| GetCodeName | Operative | [THIS.GetCodeName]
|
Gets the codename of the operative. |
| GetCallsign | Operative | [THIS.GetCallsign]
|
Gets the callsign of the operative. |
| GetSurname | Ace | [LIB.GetLeader.GetSurname]
|
Gets the last name of the ace. |
| GetFullName | Ace | [ECU.ECU_character.GetFullName]
|
Gets the full name of the ace, with both first and last names. |
| GetWing | Ace | [THIS.GetWing]
|
Gets the wing that the ace is assigned to. |
| GetWingShort | Ace | [THIS.GetWingShort]
|
Gets the shortened name of the wing that the ace is assigned to. |
| GetAceType | Ace | [THIS.GetAceType]
|
Gets the type of the ace. |
| GetMissionRegion | Ace | [THIS.GetMissionRegion]
|
Gets the region that the ace is assigned to. |
| GetTokenKey | Any variable | [?global.variablename.GetTokenKey]
|
Gets the token of the variable, such as infantry_equipment, instead of the internal ID. Particularly useful for Meta effects. |
| GetTokenLocalizedKey | Any variable | [?GER.variablename.GetTokenLocalizedKey]
|
Gets the localised name of the variable, such as «Infantry Equipment».
Useful for advanced abstraction techniques, as it can be used to approximate arbitrary string interpolation in Meta effects by applying to token variables which reference dummy objects, such as empty ideas, for which arbitrary localisation strings have been defined. Being able to pass around token variables that resolve to localised dummy objects is the closest it is currently possible to get to passing around and manipulating strings directly. This can enable all sorts of useful tricks and techniques, and you can even concatenate two dummy token’s localisation values to form a new token string which is then pasted into a token variable in a Meta effect (as long as the resulting token string is in fact a valid existing token, otherwise the result is just an integer 0). In effect, this lets you derive a previously-unknown token variable from another already-known token variable, according to a template provided by another already-known token variable, provided the destination token is some prefixed or suffixed templated variation of the source token. |
| GetDateString | Date variable | [?global.date.GetDateString]
|
Gets the date in the format of «HH:00, DD Month, YYYY», such as «12:00, 1 January, 1936». |
| GetDateStringShortMonth | Date variable | [?global.date.GetDateStringShortMonth]
|
Gets the date in the format of «HH:00, DD Mon., YYYY», such as «12:00, 1 Jan., 1936». |
| GetDateStringNoHour | Date variable | [?global.date.GetDateStringNoHour]
|
Gets the date in the format of YYYY.MM.DD, such as 1936.1.1. |
| GetDateStringNoHourLong | Date variable | [?global.date.GetDateStringNoHourLong]
|
Gets the date in the format of «DD Month, YYYY», such as «1 January, 1936». |
Scripted localisation[edit | edit source]
Scripted localisation is similar to creating your own namespaces. It is defined in /Hearts of Iron IV/common/scripted_localisation/*.txt and used in localisation in a similar manner to namespaces. However, unlike namespaces, by default the current scope is assumed when using scripted localisation, making scoping optional.
An example of a scripted localisation definition is:
defined_text = {
    name = mod_scripted_loc
    text = {
        trigger = {
            tag = FRA
        }
        localization_key = FRA_localization_key
    }
    text = {
        localization_key = mod_localization_key
    }
}
This consists of these entries:
name = my_scripted_loc— The name of the scripted localisation used to refer to it within regular localisation.text = { ... }— A possible choice for localisation. The game picks the topmosttext = { ... }block to serve as the localisation’s output. In particular, these are used in the example:trigger = { ... }is the trigger block evaluated for the checked scope, using this scripted localisation if true. Temporary variables set in this trigger block will remain set when displaying the localisation key, allowing math to be done between different variables or using scripted localisation recursively (such as to display every element of an array).localization_key = my_loc_key(Note the American spelling with Z rather than the British spelling with S used elsewhere) assigns the localisation key to be used with this scripted localisation option. This does not support dynamic localisation directly within (e.g.localization_key = "my_loc_key_[?my_var]"), however the contents of localisation keys do support dynamic localisation.
The example above will show the FRA_localization_key localisation key for France and the mod_localization_key one otherwise as a backup. The first localization key that meets the triggers will be used. In localisation, that example can be used as
some_localisation: "[mod_scripted_loc]"
FRA_localization_key: "France-exclusive localisation"
mod_localization_key: "Generic localisation"
Scripted localisation also allows randomisation of the localisation key that would be chosen, using random_list. For example, the following code will give a 60% and a 40% chance respectively for mod_localization_key_1 or mod_localization_key_2 to be chosen when this scripted localisation entry is used:
defined_text = {
    name = mod_scripted_loc
    text = {
        random_list = {
            30 = { localization_key = mod_localization_key_1 }
            20 = { localization_key = mod_localization_key_2 }
        }
    }
}
References[edit | edit source]
- ↑ https://twitter.com/Martin_Anward/status/1039175213773144066