Office 2021 Office 2019 Office 2016 Office 2013 Microsoft 365 для дома Office для бизнеса Office 365 для малого бизнеса Администратор Microsoft 365 служба Office 365, предоставляемая 21Vianet служба Office 365 для малого бизнеса, предоставляемая 21Vianet — для администраторов служба Office 365, предоставляемая 21Vianet — для администраторов нажми и работай Office 365 Germany корпоративный Office 365 Germany корпоративный для администраторов Office.com Еще…Меньше
Если при попытке установить Microsoft 365 вы получаете сообщение об ошибке с кодом 30068, воспользуйтесь указанными ниже рекомендациями для устранения ошибки. Первыми указаны наиболее распространенные решения. Попробуйте их по порядку.
Совет: Если одно из этих решений вам помогло, сообщите нам об этом в разделе Оставьте комментарий.
1. Перезагрузка компьютера и повторная установка Office
-
Перезагрузите компьютер.
-
Переустановите Microsoft 365.
Выберите версию Office, которую вы хотите переустановить, и выполните указанные ниже действия.
Microsoft 365
Office 2021
Office 2019
Office 2016
Office 2013
2. Проверка активности службы
-
Нажмите Пуск
 +R, чтобы открыть окно Выполнить.
 -
В открывшемся окне введите services.msc и нажмите кнопку ОК.
-
В окне «Службы» прокрутите экран до элемента Служба Microsoft Office «Нажми и работай».
-
Проверьте столбец «Состояние». Если в нем указано состояние Отключена, щелкните службу правой кнопкой мыши и выберите Свойства.
Примечание: Если в столбце не указано состояние Отключено, перейдите к следующему разделу Удаление и повторная установка Office.
-
На вкладке «Общие» в раскрывающемся списке «Тип запуска» выберите Вручную или Автоматически. Нажмите кнопку Применить, а затем кнопку ОК.
-
Снова установите Office, следуя инструкциям в статье Скачивание, установка и повторная установка Office на компьютере с Windows.
 +R, чтобы открыть окно Выполнить.
3. Удаление и повторная установка Office
-
Выберите расположенную ниже кнопку для скачивания и установки средства поддержки удаления.
Скачать
-
Следуйте указанным ниже инструкциям, чтобы скачать средство поддержки удаления для соответствующего браузера.
Совет: Скачивание и установка средства может занять несколько минут. После завершения установки откроется окно удаления продуктов Office.
Edge или Chrome
-
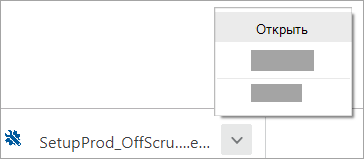
В левом нижнем углу щелкните правой кнопкой мыши SetupProd_OffScrub.exe и выберите пункт Открыть.
Microsoft Edge (старый) или Internet Explorer
-
В нижней части окна браузера нажмите кнопку Выполнить, чтобы запустить файл SetupProd_OffScrub.exe.
Firefox
-
Во всплывающем окне выберите Сохранить файл, а затем в правом верхнем окне браузера выберите стрелку загрузки> SetupProd_OffScrub.exe.
-
-
Выберите версию, которую нужно удалить, и нажмите кнопку «Далее».
-
Следуйте остальным указаниям и при появлении запроса перезагрузите компьютер.
После перезагрузки компьютера средство удаления автоматически откроется для завершения последнего этапа процесса удаления. Следуйте остальным указаниям.
-
Выберите действия для версии Office, которую нужно установить или переустановить. Закройте средство удаления.
Microsoft 365 | Office 2021 | Office 2019 | Office 2016 | Office 2013 | Office 2010 | Office 2007


Нужна дополнительная помощь?
Код ошибки 30068 возникает при установке Office . Основной причиной этого является проблема со службой Office Click-to-Run. Однако это также может произойти из-за проблем с установкой. В этом руководстве мы расскажем, как можно устранить код ошибки 30068 при установке Office. Коды ошибок могут выглядеть следующим образом – 30068-29 (2), 30068-4 (3), 30068-4 (1715), 30068-39 (3) и в ближайшее время.

Содержание
- Код ошибки 30068 при установке Office
- 1] Проверьте, не отключена ли услуга «нажми и работай»
- 2] Перезагрузите компьютер и переустановите Office
- 3] Удалите и переустановите Office
Код ошибки 30068 при установке Office
Большинство установок Office происходят непосредственно с серверов Microsoft. Работает через сервис Click-to-Run. Это альтернатива MSI или автономная установка. Click-to-Run – это технология потоковой передачи и виртуализации от Microsoft. Это помогает сократить время, необходимое для установки Office. Хотя это и предназначено для экономии времени, хорошее интернет-соединение является основным условием правильной работы.
1] Проверьте, не отключена ли услуга «нажми и работай»
Нажмите клавишу Windows + q и введите Services. Вы получите возможность запустить Services.msc от имени администратора. Когда откроется раздел «Службы», найдите в списке службу Microsoft Click to Run. На вкладке «Общие» в раскрывающемся списке «Тип запуска» выберите «Автоматически». Нажмите Применить, затем ОК. В случае возникновения проблем обязательно следуйте нашему руководству по ремонту, обновлению, удалению Microsoft Office «нажми и работай».
2] Перезагрузите компьютер и переустановите Office
Попробуйте просто перезагрузить компьютер и попробуйте переустановить Office. Если онлайн-установка не работает, вы всегда можете загрузить автономную установку Office и установить ее.
3] Удалите и переустановите Office
Если ничего не работает, вы всегда можете удалить и переустановить Office. Загрузите средство удаления Microsoft Office от Microsoft. Запустите его, и он удалит все неполные установки Office и ненужные файлы. Он полностью удалит все приложения и настройки Office с вашего компьютера. То же решение можно применить, если при установке Office вы получили код ошибки 30068-4 (3).
Если программа удаления выдает ошибку, в которой говорится, что установка Office отсутствует, проверьте, выполняется ли текущая установка Office. Вам придется либо завершить его, либо удалить вручную. Эта ошибка в основном связана с Microsoft Project и Viso. Поэтому удалите их и попробуйте удалить программу.
Сообщите нам, помогли ли эти советы устранить ошибку 30068 при установке Office на компьютер.
Если при попытке установить Office вы получаете сообщение об ошибке с кодом 30068, воспользуйтесь указанными ниже рекомендациями для устранения ошибки. Первыми указаны наиболее распространенные решения. Попробуйте применить их по порядку.
Совет: Если одно из этих решений вам помогло, сообщите нам об этом в разделе Оставьте комментарий.
1. Перезагрузка компьютера и повторная установка Office
Выберите версию Office, которую вы хотите переустановить, и выполните указанные ниже действия.
2. Проверка активности службы
Нажмите Пуск  +R, чтобы открыть окно Выполнить.
В открывшемся окне введите services. msc и нажмите кнопку ОК.
В окне «Службы» прокрутите экран до элемента Служба Microsoft Office «Нажми и работай».
Проверьте столбец «Состояние». Если в нем указано состояние Отключена, щелкните службу правой кнопкой мыши и выберите Свойства.
Примечание: Если в столбце не указано состояние Отключено, перейдите к следующему разделу Удаление и повторная установка Office.
На вкладке «Общие» в раскрывающемся списке «Тип запуска» выберите Вручную или Автоматически. Нажмите кнопку Применить, а затем кнопку ОК.
3. Удаление и повторная установка Office
Нажмите расположенную ниже кнопку для скачивания и установки средства поддержки удаления.
Следуйте указанным ниже инструкциям, чтобы скачать средство поддержки удаления для соответствующего браузера.
Совет: Скачивание и установка средства может занять несколько минут. После завершения установки откроется окно удаления продуктов Office.
Edge или Chrome
В левом нижнем углу щелкните правой кнопкой мыши SetupProd_OffScrub. exe и выберите пункт Открыть.
Microsoft Edge (старый) или Internet Explorer
В нижней части окна браузера нажмите кнопку Выполнить, чтобы запустить файл SetupProd_OffScrub. exe.
Во всплывающем окне выберите Сохранить файл, а затем в правом верхнем окне браузера выберите стрелку загрузки> SetupProd_OffScrub. exe.
Выберите версию, которую нужно удалить, и нажмите кнопку «Далее».
Следуйте остальным указаниям и при появлении запроса перезагрузите компьютер.
После перезагрузки компьютера средство удаления автоматически откроется для завершения последнего этапа процесса удаления. Следуйте остальным указаниям.
Выберите действия для версии Office, которую нужно установить или переустановить. Закройте средство удаления.
Оставьте комментарий
Мы ценим ваши отзывы. Оставьте комментарий внизу страницы, в котором сообщите нам, какие из этих решений вам помогли. Если ни одно из решений не помогло, сообщите нам об этом, чтобы мы продолжили изучение проблемы.
How to Fix the CE-30005-8 Error on PS4? [Complete Guide] [Partition Manager]

It is annoying that you cannot start the application with the stop code CE-30005-8, especially when you are eager to play the favorite game, right? How to fix this error? Now, read the post of MiniTool and you will get the most effective troubleshooting methods from it.
Quick Navigation :
Determine the Real Reason of the PS4 Cannot Start Application CE-30005-8 Error
In order to get rid of the PS4 cannot start application CE-30005-8 error code, you need to figure out its root causes. According to the survey, the real reason behind this type of error is fundamentally related to a hardware failure with your device.

What hardware failures will arouse the error CE-30005-8? There are 3 major forms of devices are responsible for the error, including your PS4 internal and external hard drive, or the Blu-Ray/DVD player. So, you need to diagnose these devices separately.
The PS4 CE-30005-8 error indicates the hardware failures, especially on your PS4 hard disk drive. As you know, it is very likely that your PS4 hard drives are undergoing some serious functionality issues. So, it is highly recommended that you back up the hard drive as soon as possible in case of any data loss.
Now, let’s diagnose your devices one by one.
Fix CE-30005-8 on Blu-ray/DVD Disc
If you encounter the CE-30005-8 error code while trying to start a game from the Blu-Ray/DVD player, you need to check if it is broken or damaged. Here’s how to do that.
Step 1. You need to eject the disc first of all. Here are 2 ways below:
1. Eject the disc manually by pressing the Eject button on your PS4.

2. Alternatively, you can press the Options button on the Dual Shock 4, which is located on the Home menu. This action will give you the option to Remove Disc.

Step 2. Clean the disc carefully. Now, you need to check the underside of the disc. There may be some scratches or smudges. Then you can use a soft cloth to wipe the disc from the inner circle to the outer edge with a straight line.
Step 3. Now, insert the cleaned disc back into your PS4 and check if the PS4 cannot start the application problem is resolved. Well, if the PS4 game discs or Blu-Ray is damaged actually, you should consider buying a new one.
More importantly, you need to check if there are any errors on your PS4 hard disk drive, which may lead to the error CE-30005-8. Please keep reading the following part to check your PS4 hard drive.

Have you come across the PS4 error CE-34788-0. The error may happen to you after the console downloaded a new update. This post will tell you how to fix it.
Fix CE-30005-8 on PS4 Hard Drive
If the PS4 cannot start application CE-30005-8 error pops up when trying to start your game from an external hard drive, you need to check if the PS4 system gets corrupted or any bad sectors on the hard drive.
You can use a free tool to check your external hard drive quickly. Here it is highly recommended that you use MiniTool Partition Wizard Free Edition. It is a powerful partition management tool trusted by millions of users around the world.
This tool provides you with so many practical features like perform a disk benchmark, resize partition, convert MBR to GPT disk and so on. Now, follow the steps below to perform a surface test for your hard drive.
Step 1. Connect the external hard drive to your computer and launch this tool to get its main interface.
Step 2. Select the external hard drive and click on the Surface Test feature.
Step 3. In the Surface Test window, click on the Start Now button.

Now, this tool will scan the bad sectors for the whole hard drive automatically. If you found a large chunk of blocks marked with red color like the shown image below, you may need to consider switching to a new hard drive.

Well, if there are just little bad factors on the hard drive, you can run the chkdsk /f /r to shield the bad tracks. Read this post ‘’How to check Hard Drive and Fix the Error?” to know more details.
Right now, you may have figured out the real reasons that cause the CE-30005-8 error. So, how to fix CE-30005-8 PS4? Please read the following part carefully in which all the effective methods will be discussed.
Here are 4 accessible CE-30005-8 fixes for you. You can try them one by one until you fix the problem.
Method 1. Delete and Restore the Game Data on the Hard Disk Drive
The most common way to get rid of the PS4 CE-30005-8 error is to delete the game data on the hard drive. If you are a PlayStation Plus member, you need to have a backup for the game data using a USB flash drive or online cloud service.
You can follow the detailed steps below to delete and restore the game data.
Step 1. On the Home page of PS4, press the Up on D-pad to open the Function menu. After that, navigate to the Settings icon and press the X button on the console to open it.

Step 2. In the Settings window, click on the Application Saved Data Management section and press the X button again.

Step 3. Then click on the Saved Data in System Storage option.

Step 4. Now select the problematic game and press the Options button on the console to bring up the Delete option.
Step 5. After deleting the problematic game data, you can restore the saved data from the same Application Saved Data Management option in the Settings menu.
Now, restart the application or game and check if the error CE-30005-8 still persists.
Method 2. Rebuild the PS4 Database
In addition, rebuilding the PS4 database is another effective method to troubleshoot some common error codes like CE-35694-7. Here you can have a try.
Step 1. Hold the Power button to turn off PS4 entirely.
Step 2. Hold the Power button for several seconds again until you heard the 2 short beeps, and then your PS4 will enter into Safe Mode.
Step 3. Connect the DS4 with a USB cable and press the PS button on the controller.
Step 4. Select the Rebuild Database option.
This process may take hours to complete, please wait patiently.

You might get stuck in the PS4 error CE-34878-0 while playing games with PS4. Don’t worry about this issue, because you can learn about 6 solutions in the post.
Method 3. Switch to A New PS4 Hard Drive
If you have confirmed that your PS4 hard drive has so many bad sectors using the MiniTool Partition Wizard, you can replace it with a new PS4 hard drive. It is a relatively complex process that will take you some time. Please keep reading carefully.
So, what do you need to prepare? Here are some recommendations that can help you upgrade PS4 hard drive smoothly.
Now, follow the CE-30005-8 fix below to upgrade the PS4 hard drive.
How to Upgrade Your PS4 Hard Drive
Step 1. Back up Your Game Data:
1. Connect the external hard drive to the PS4.
2. Open the Settings window of PS4, and then navigate to the System > Backup and Restore > Back up PS4 to save the game data to the external drive.
Step2. After that, your PS4 console will restart and the backup process will begin. Download the latest PS4 System Software Update:
1. Connect the USB drive into your computer, and create a new folder named PS4. Then open the PS4 folder and recreate a new folder named UPDATE in it.

1. Click here to access the PS4 System Software Update page and download the latest version.
2. After downloading the PS4 software update file, save it to the UPDATE folder. At this time, the file should be named PUP in the folder.

Step 3. Open your PS4:
1. Hold the Power button of the PS4 console to turn it off completely and place it on a steady flat surface.
2. On the back of the console (which may slightly differ depending on the PS4 model), remove the panel carefully by sliding it rightward with your finger.
Step 4. Replace the PS4 Hard Drive:
1. The hard drive is secured to the console with a single screw. Here you need to remove the screws using the head screwdriver and keep them carefully.
2. Now, you should be able to take out the old PS4 hard drive.
3. Insert the new PS4 hard drive gently without touching the bottom. After that, you can re-secure the screws. Please make sure the metal pins are facing inward.
Step 5. Put Everything Back Together:
Now, you need to place the encased hard drive back into the console and slide the exterior cover back into the place. Plug the system back in and reconnect it to the TV.

Upgrading to a larger hard drive without data losing can be realized by using a piece of third-party software which is MiniTool Partition Wizard.
How to Setup the New PS4 Hard Drive
After you complete all the above steps, you also need to set up the new PS4 hard drive.
Step 1. Install the PS4 System Software Update:
Step 2. Restore Your Game Data:
Now, restart the application or game and check if the PS4 cannot start application still persists.
Method 4. Disable the Mods
If you are using any mods that you currently added through the Nexus Mod Manager, then disable them. This is because it has been proven by a small part of players that disabling mods can get rid of the error. This method may not work for all users, but it is worth having a try.
The End
CE-30005-8 FAQ
You can try power cycling the PS4 system with HDD, here’s how:
Position: Columnist
Ariel is an enthusiastic IT columnist focusing on partition management, data recovery, and Windows issues. She has helped users fix various problems like PS4 corrupted disk, unexpected store exception error, the green screen of death error, etc. If you are searching for methods to optimize your storage device and restore lost data from different storage devices, then Ariel can provide reliable solutions for these issues.
Источники:
https://support. microsoft. com/ru-ru/office/%D0%BA%D0%BE%D0%B4-%D0%BE%D1%88%D0%B8%D0%B1%D0%BA%D0%B8-30068-%D0%BF%D1%80%D0%B8-%D1%83%D1%81%D1%82%D0%B0%D0%BD%D0%BE%D0%B2%D0%BA%D0%B5-office-963ca3e4-217a-4c16-9c02-ff946548357b
https://www. partitionwizard. com/partitionmanager/ce-30005-8.html